Laser Cut Edge Lit Halloween Display - I Made It at TechShop!
by dr04bps in Living > Halloween
5889 Views, 37 Favorites, 0 Comments
Laser Cut Edge Lit Halloween Display - I Made It at TechShop!
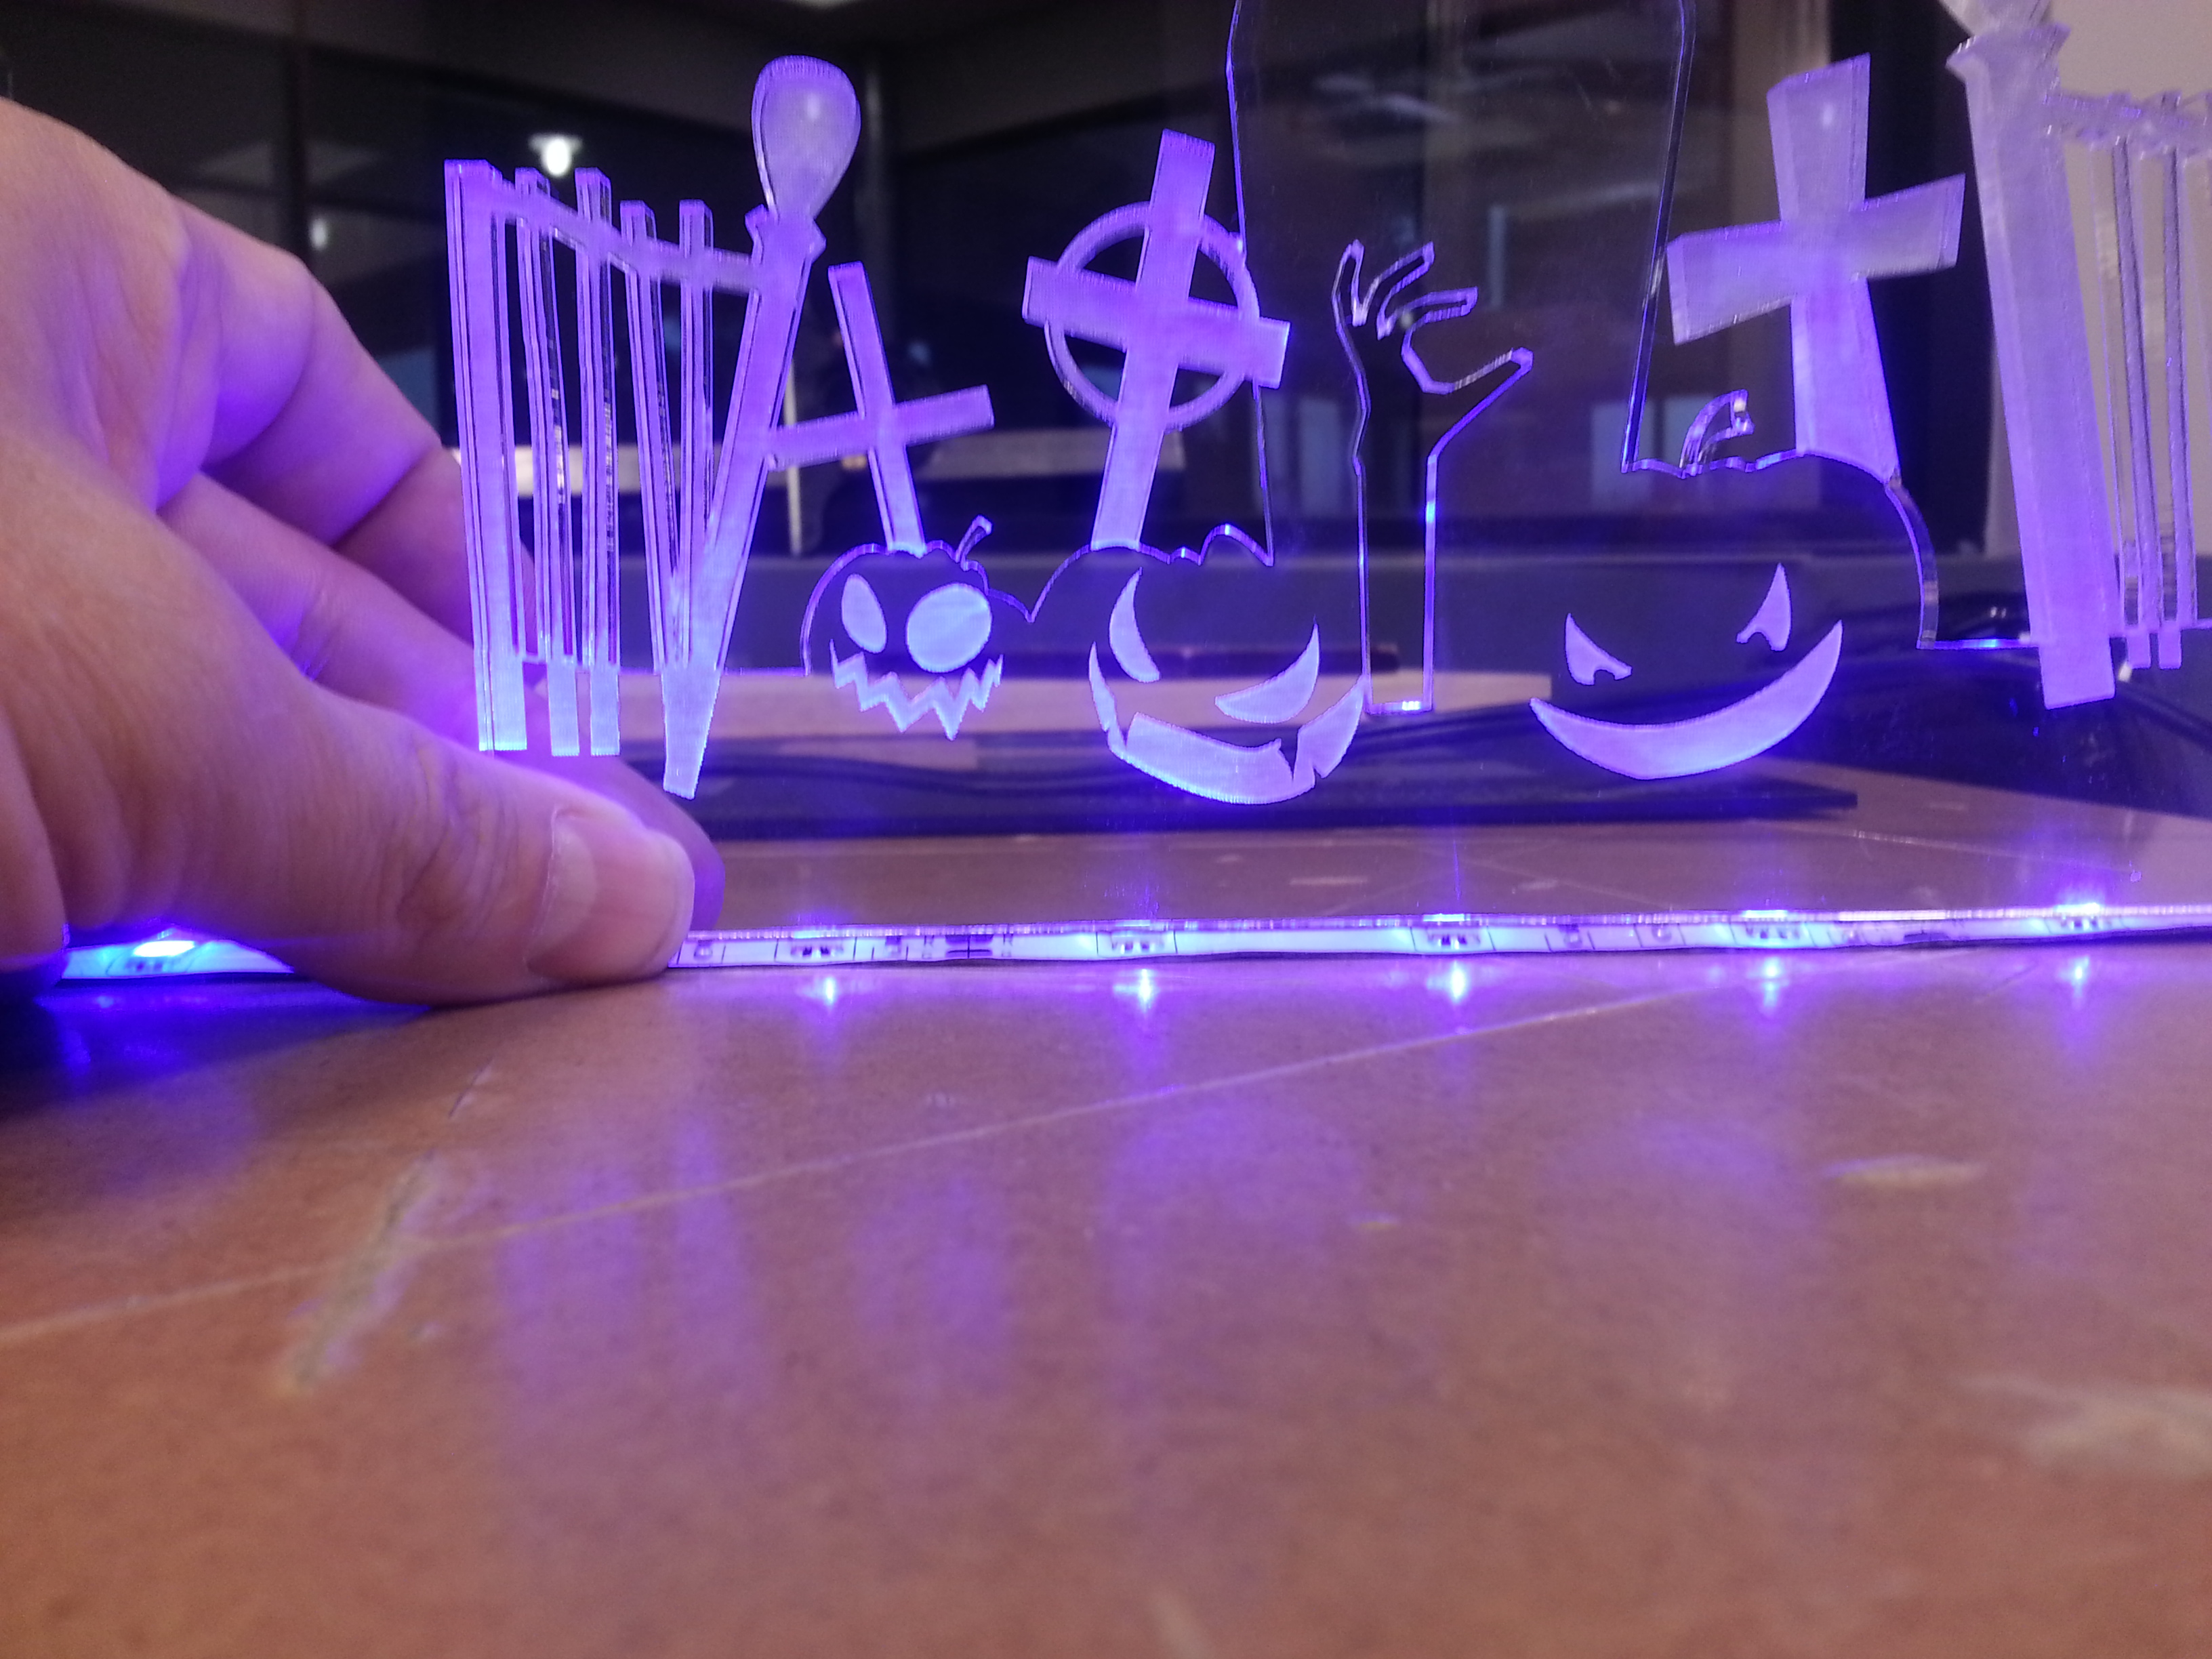
Recently I've been experimenting with the equipment at the Allen Park/Detroit TechShop. If you are unaware of TechShop, please go out and get to know them at techshop.com.
After the introduction course for laser cutting, I thought I'd throw together a quick project to hone my basic skills. This project involves finding and editing a piece of clip art into a laser cut acrylic stand up, then edge lighting it with LEDs.
After the introduction course for laser cutting, I thought I'd throw together a quick project to hone my basic skills. This project involves finding and editing a piece of clip art into a laser cut acrylic stand up, then edge lighting it with LEDs.
Find Your Artwork
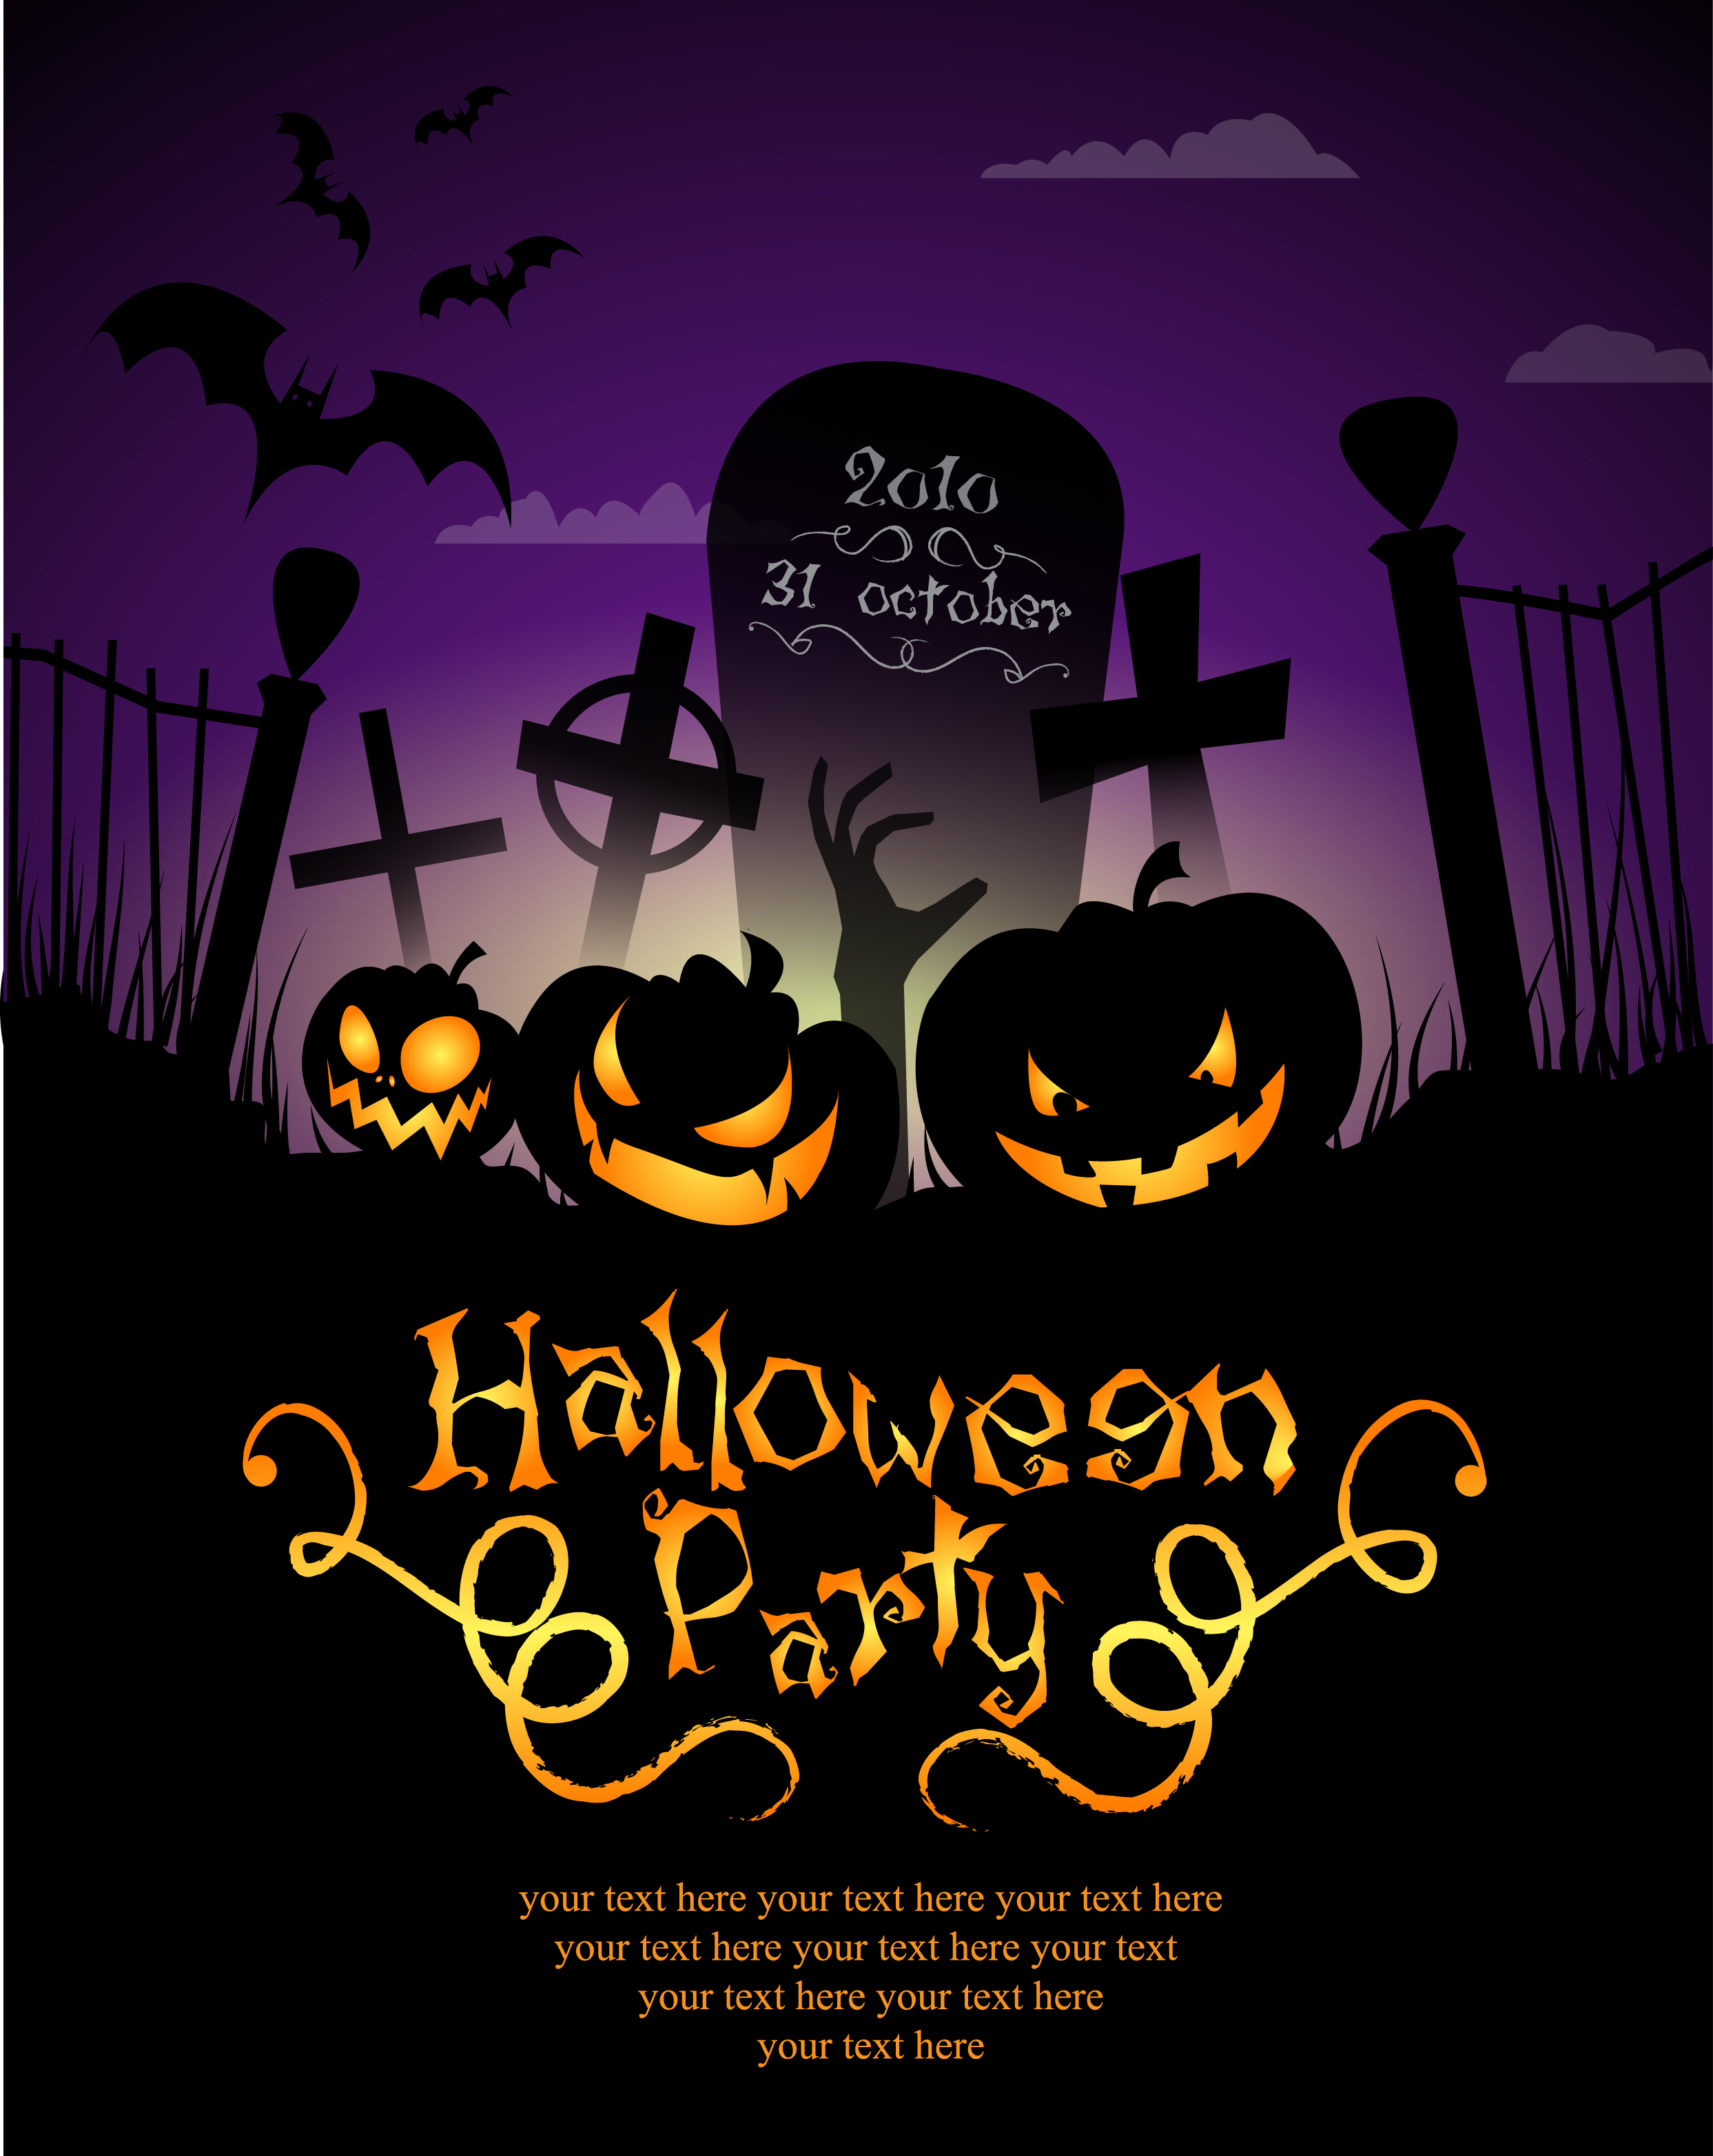
I began by simply Googling "Halloween vector art." After many suitable choices, I decided to use this as my art, with some minor alterations:
Removing the Unwanted Bits
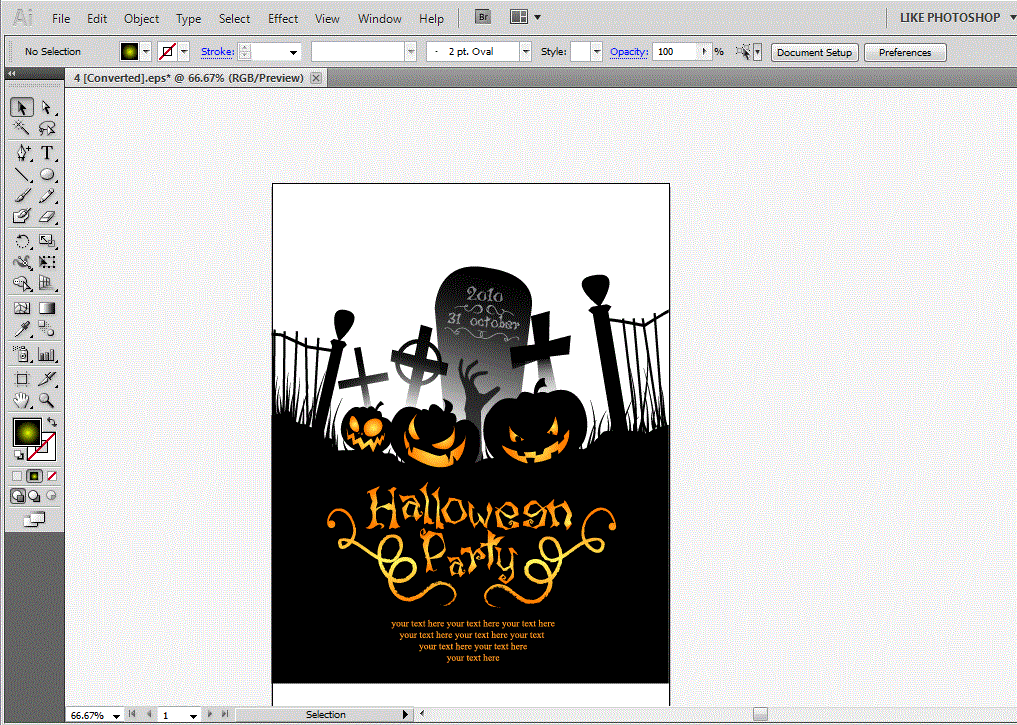
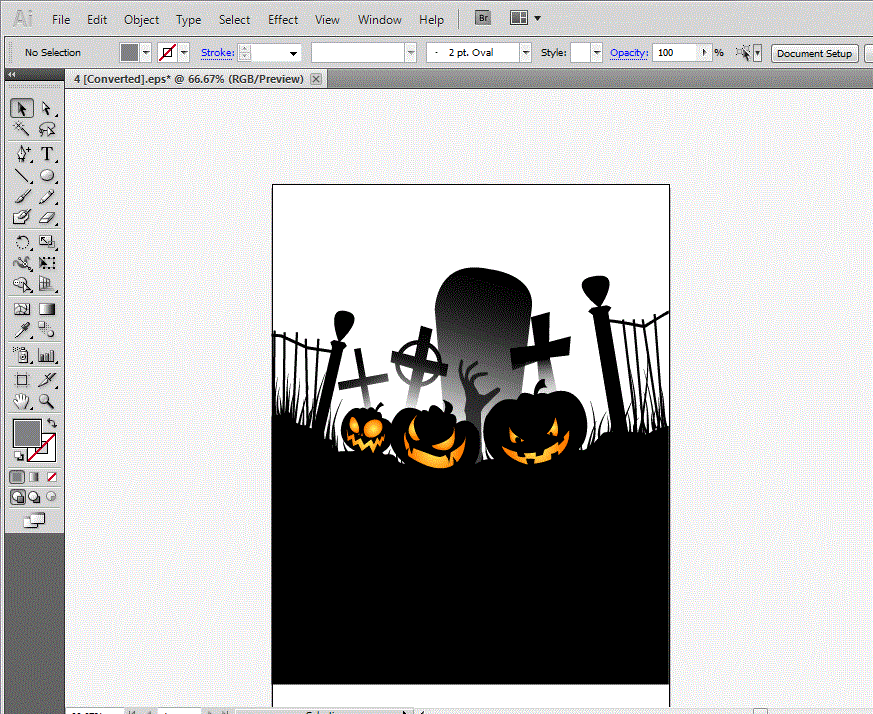
Next, based on how I'd like the final project to work, I need to make some alterations to the art. First as a cut out, I'm not looking for all the sky bits - I'm looking for a silhouette that basically includes the fences, pumpkins, crosses and ground. Everything else needs to be removed.
Open your artwork in your favorite vector based art program and begin click+deleting the bits you don't need. While the text is interesting, I’d rather it read something different, so let’s delete that as well and bring the artwork down to a simple collection of objects.
Open your artwork in your favorite vector based art program and begin click+deleting the bits you don't need. While the text is interesting, I’d rather it read something different, so let’s delete that as well and bring the artwork down to a simple collection of objects.
The Setup

I haven't worked a lot yet with the lasers or in edge lit acrylic, but common sense tells me a couple things - from an acrylic point of view, I know anything too thin is likely to get cut, but be melted in the process - the grass in this art needs to go. It probably also wouldn't hurt to beef up the thickness of the fence balustrades as well. From an LED edge lit acrylic point of view, I would also think the smaller the piece, the better the lighting effect.
I don't need all the ground in this shot, so I'm going to make the distance between the bottom of the piece and the pumpkins a shorter throw and hopefully will be rewarded with better glow throughout the piece by the LEDs.
Lastly, to retain the contrast, this piece will have sections that are glowing acrylic and parts that are not which we will accomplish by etching the sections we want to glow. Currently only the pumpkin features glow and that's not enough "pop" so let’s add the crosses, fence and zombie arm. Select them in the art work and change their colors to match the pumpkins so you can see the effect. You may also want to add text or art to the ground to beef up the amount of glow, or add a name to the tombstone. Taking this step helps you to visualize the final product and gives you something to use for guidance for the next two steps - Figuring out the cut paths and figuring out the etching.
Figuring Out the Cut Path
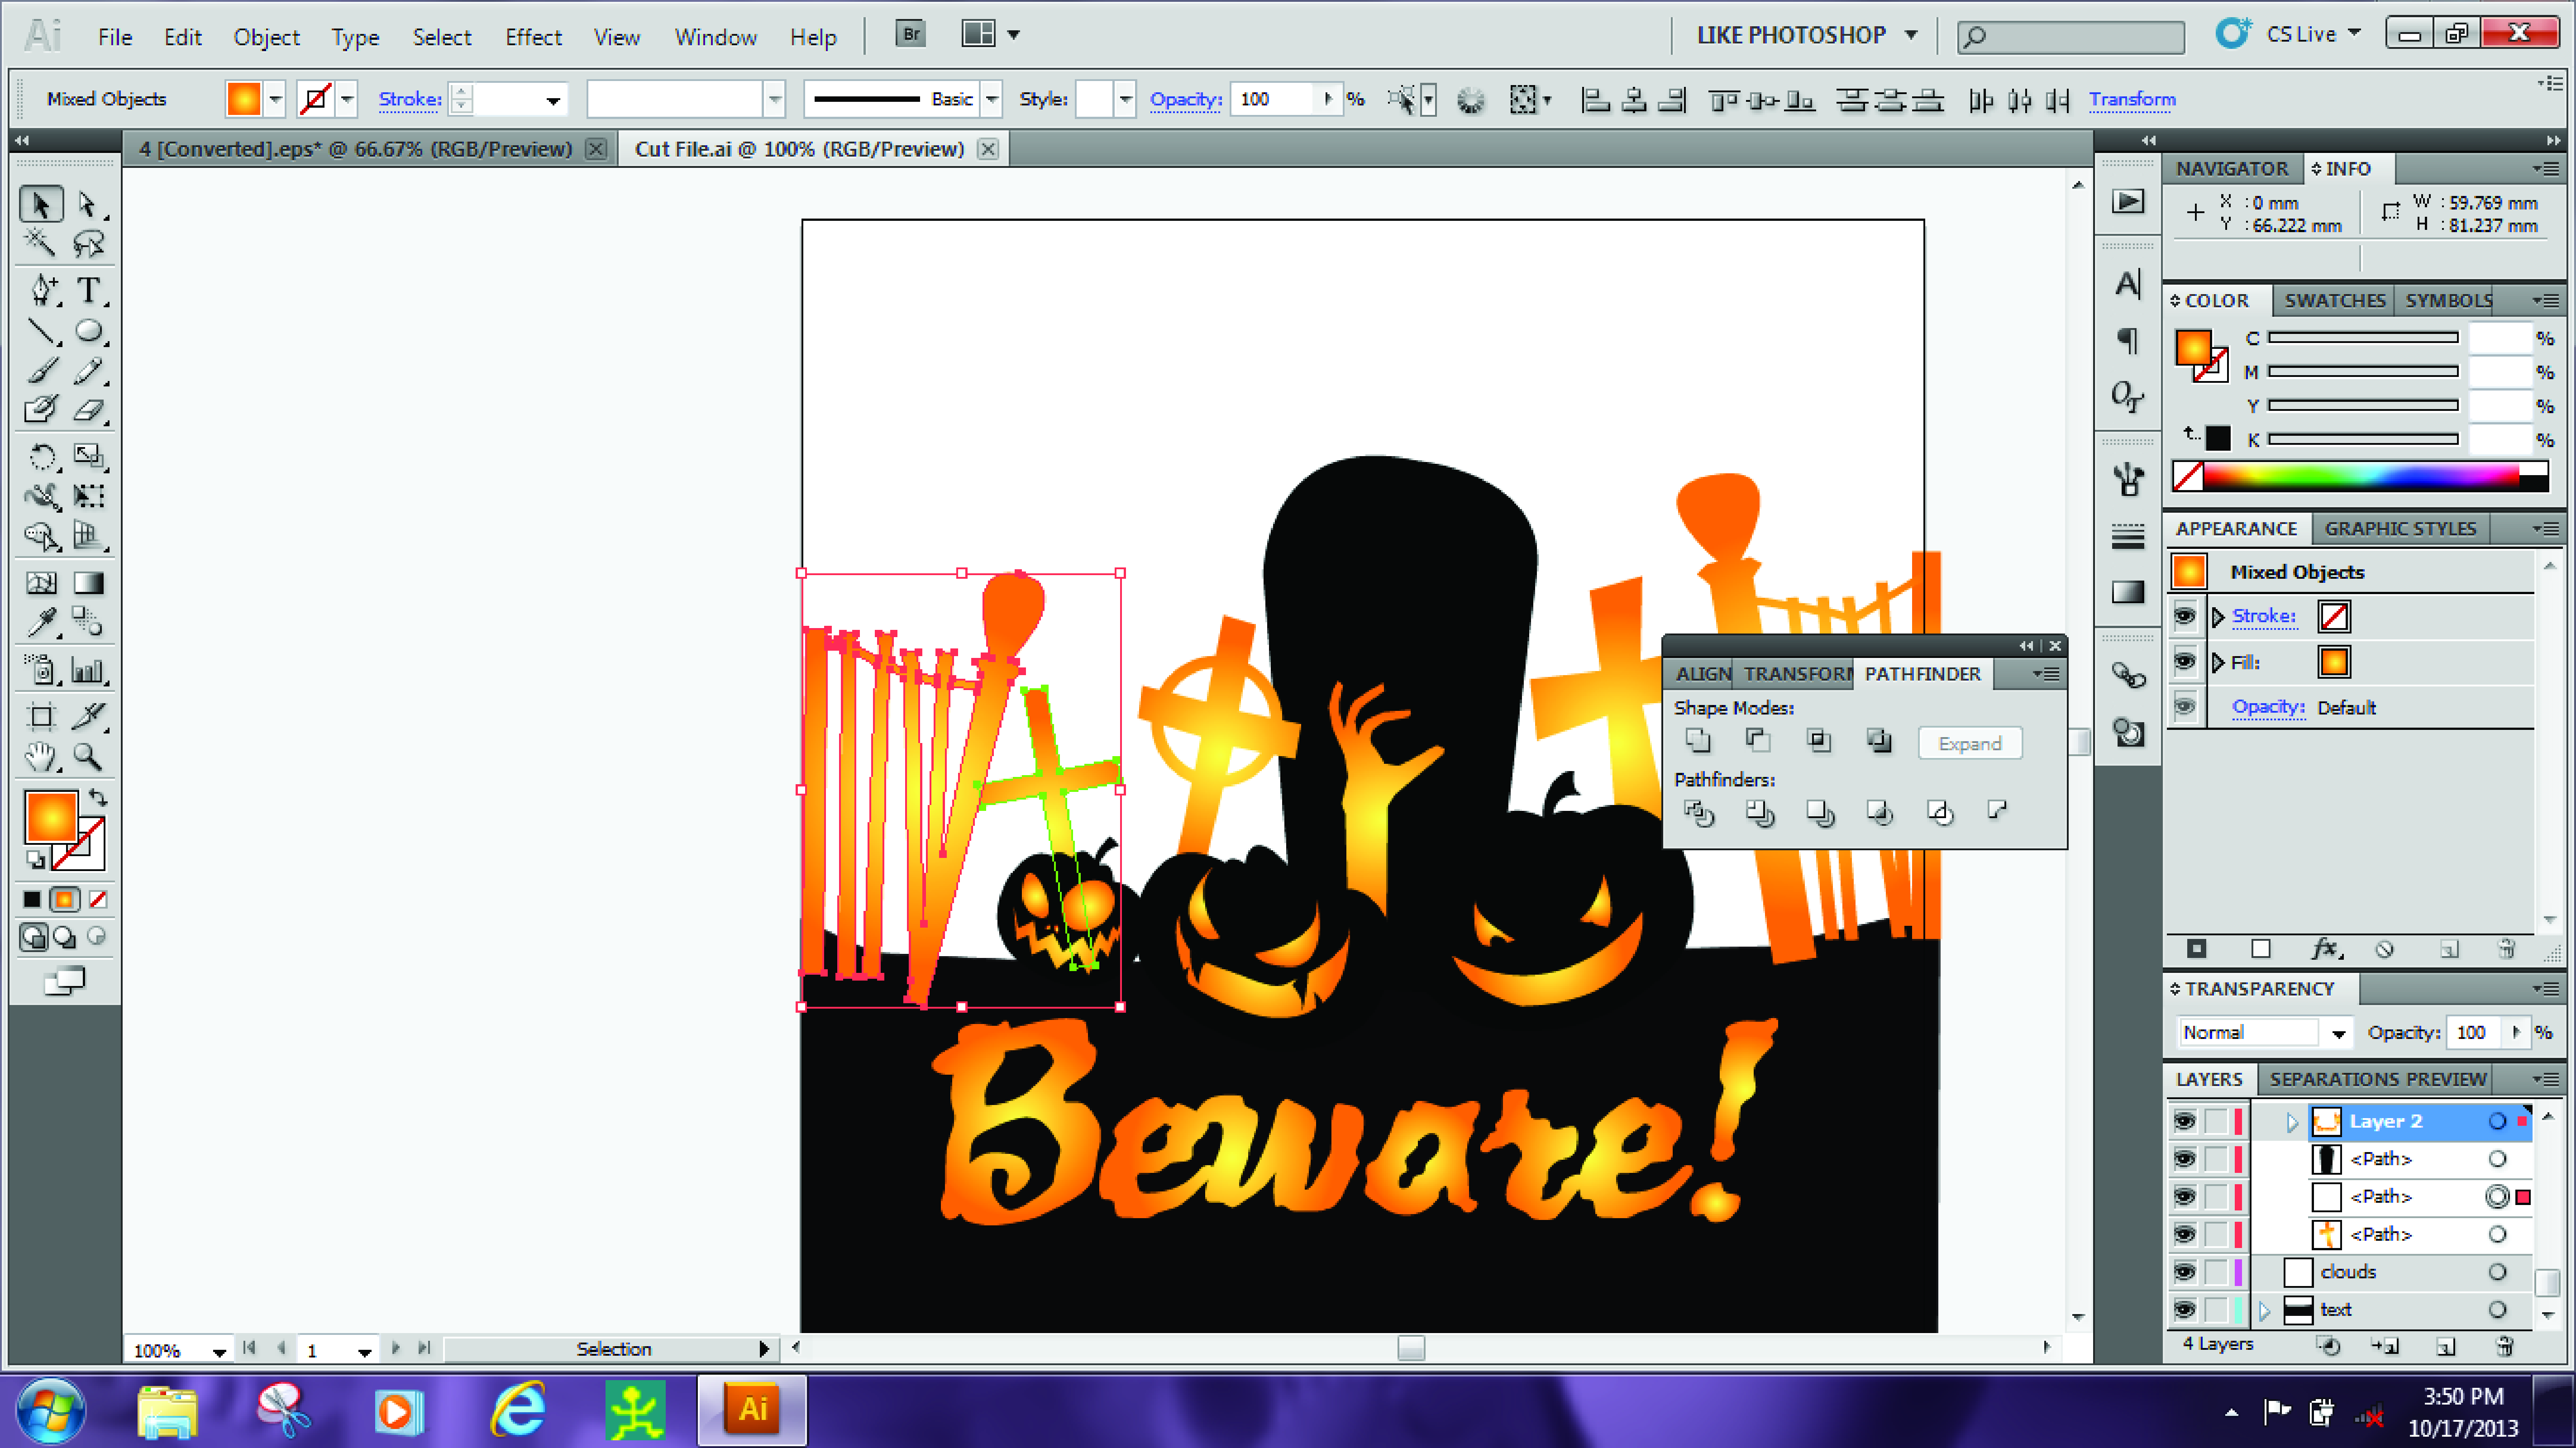
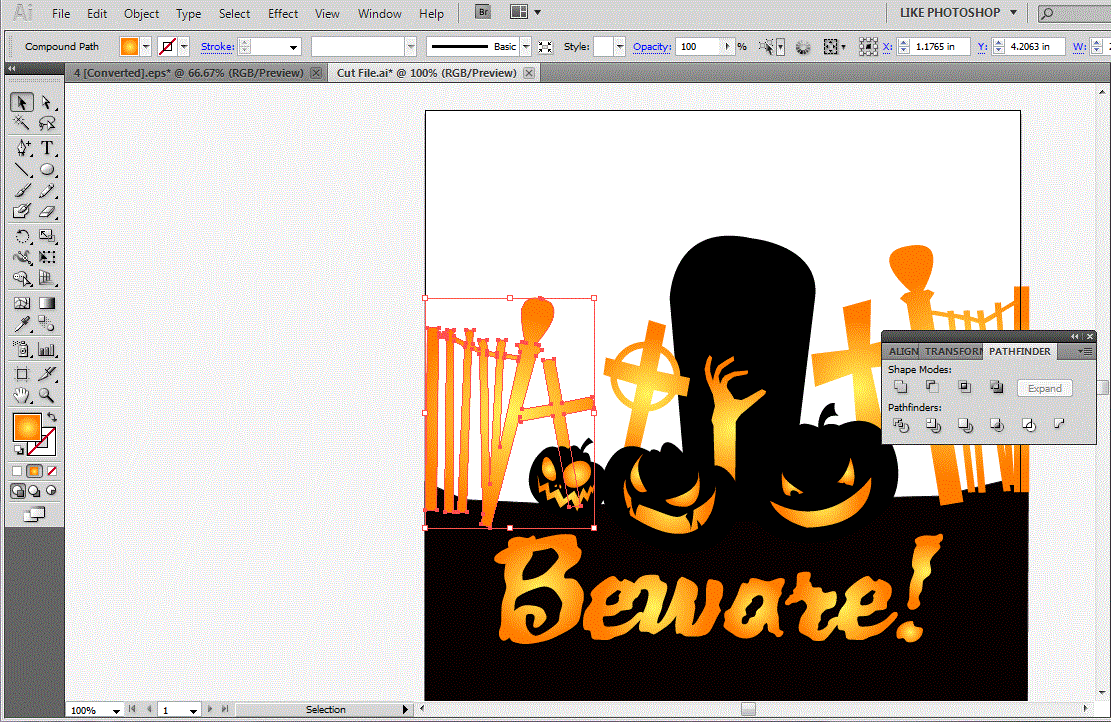
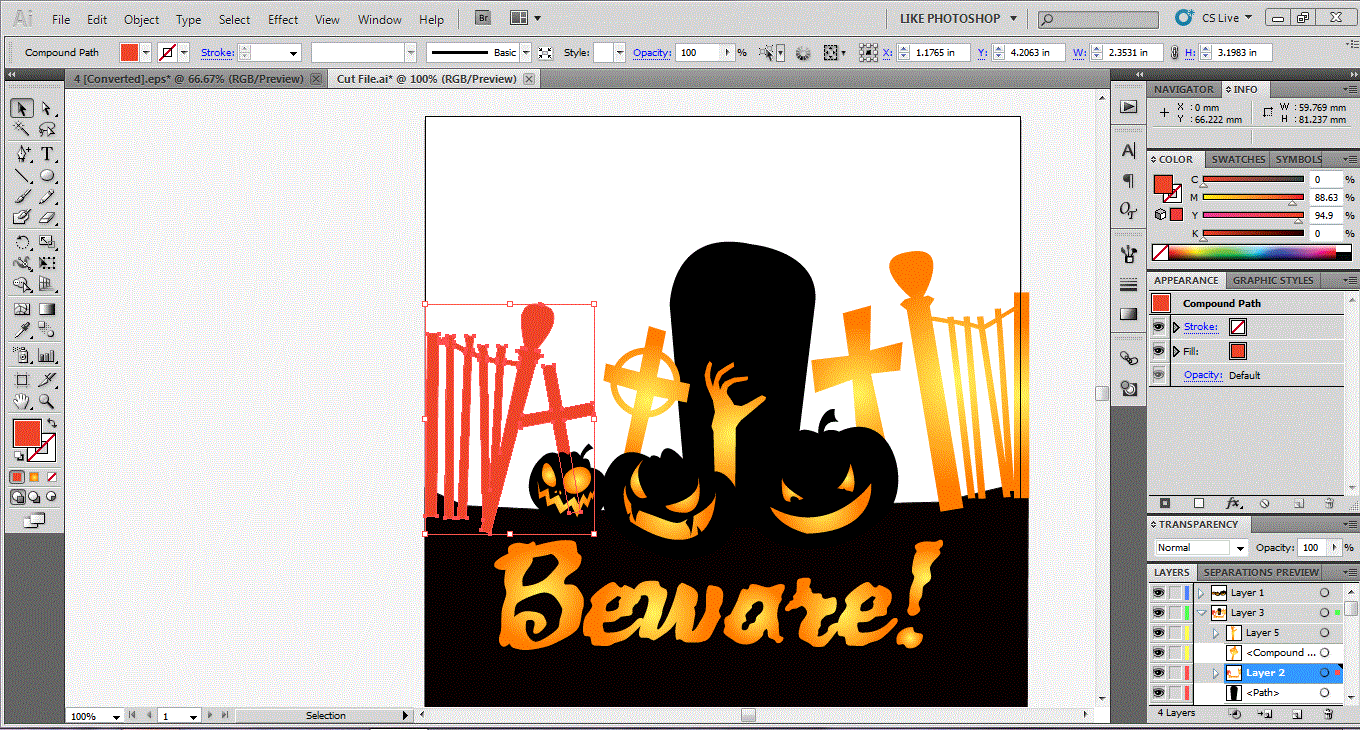
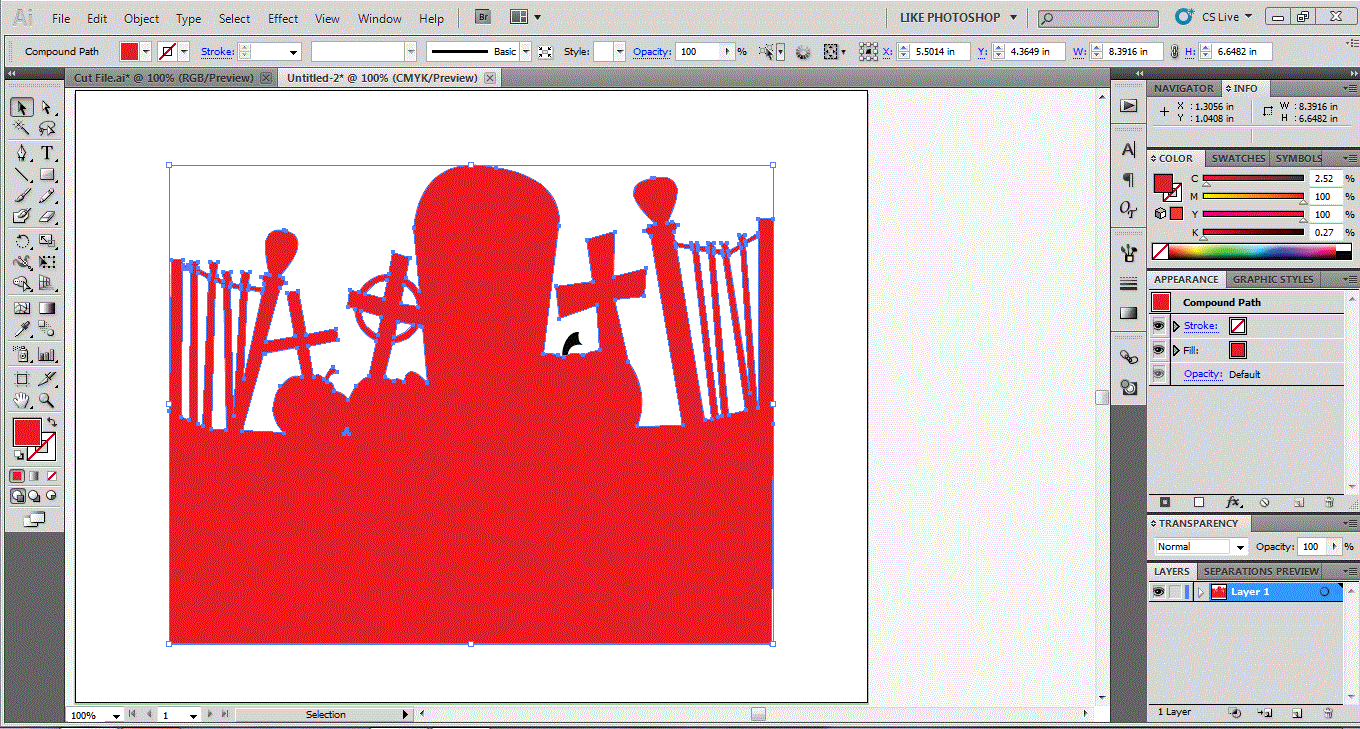
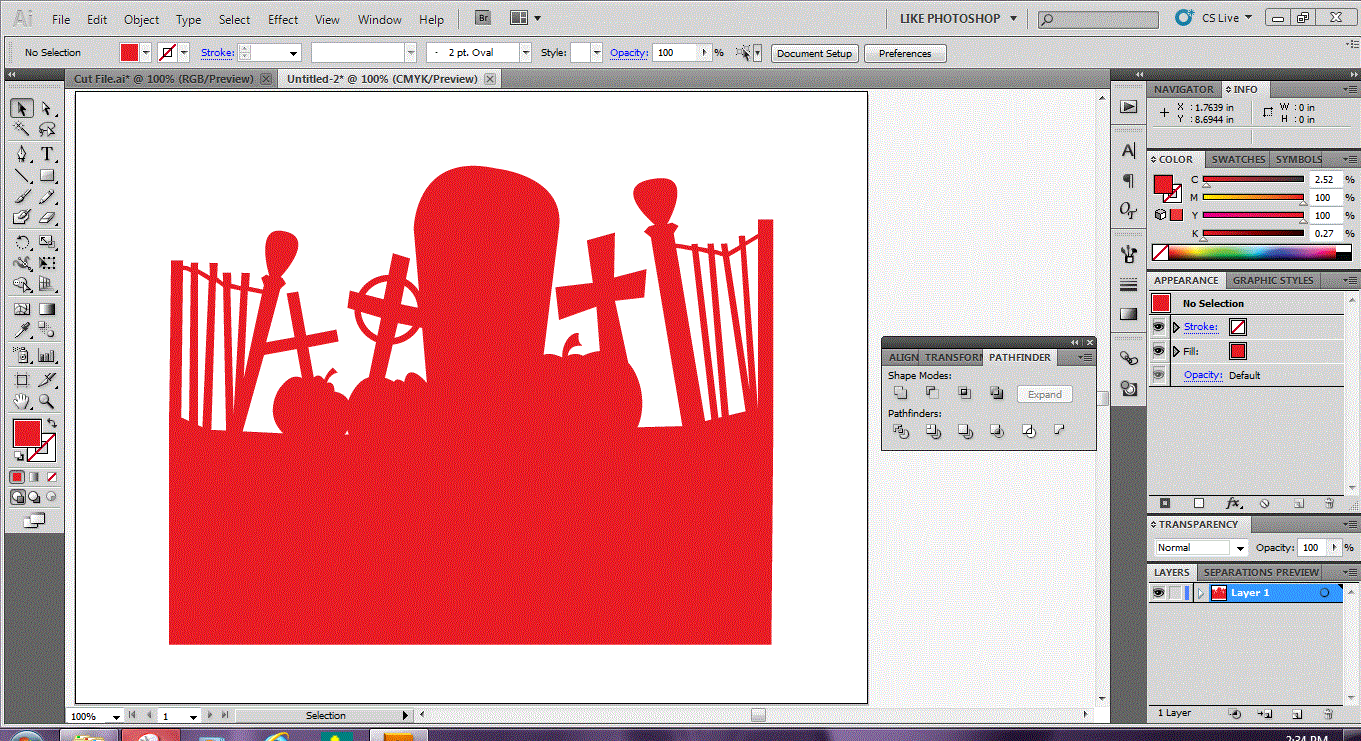
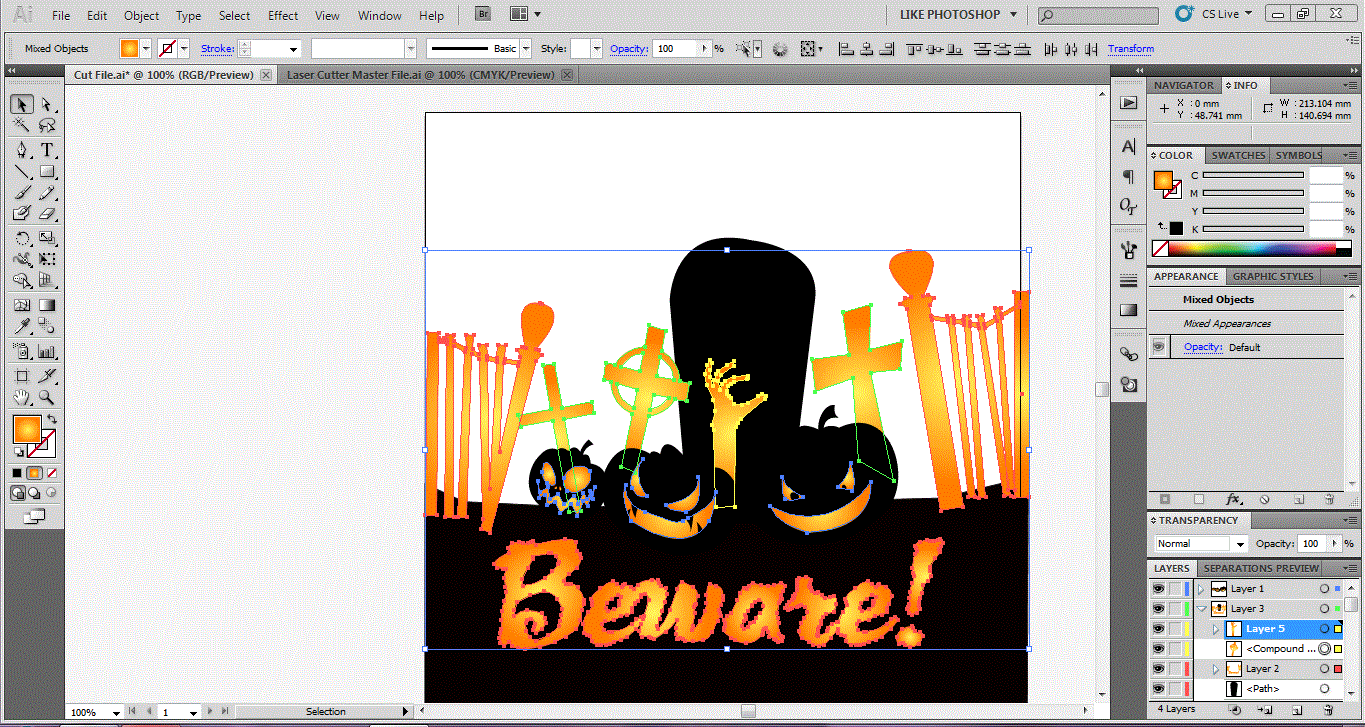
The next thing we need to do is establish the path the laser cutter will use to remove the project from your sheet of acrylic. We want all the objects that establish the silhouette or outline of the project to be cut, but as a single piece. Likewise, interior items, like the pumpkins features, the zombie arm or any text you added, are NOT to be cut out - they will remain in the piece.
To make this path you will use the combine paths feature in your software to start sticking individual objects into one single object. In this example, I'll be using Adobe Illustrator to explain the process, but all vector based art programs have an equivalent feature - consult your software manual or online forums for directions specific to your software.
Begin by selecting an object - for example the left hand fence section (shown currently with a red outline) then while holding down the shift key click on a second item like the left hand cross (shown currently with a green outline) Once both are selected, use the combine paths function (unite in Adobe Illustrator) to combine the two separate paths into one outline. To check for success, change the color of the item - if both previously separate parts both become the same color - you successfully joined their paths. Continue to add each item to the new larger main path, and rely on the color change method to check your progress (I was surprised to find one pumpkins stem was a separate piece and almost forgot it.)
Creating the Etched Parts
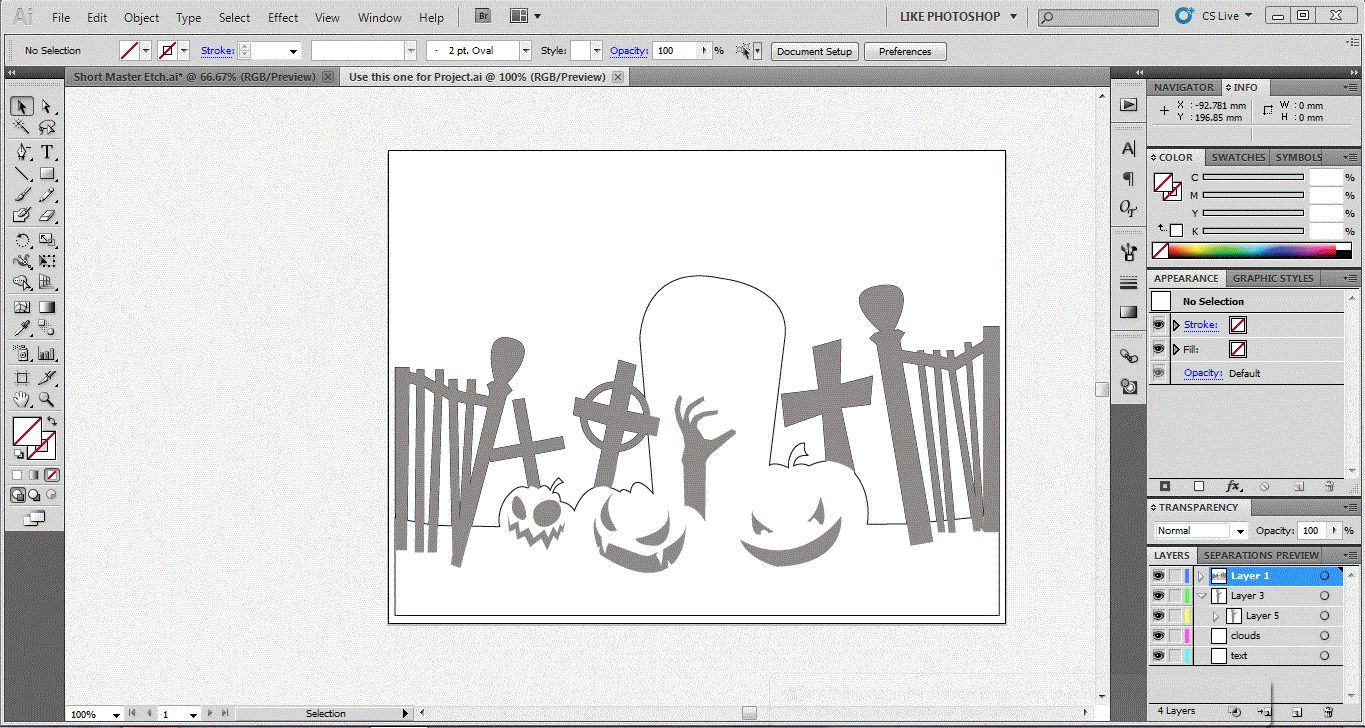
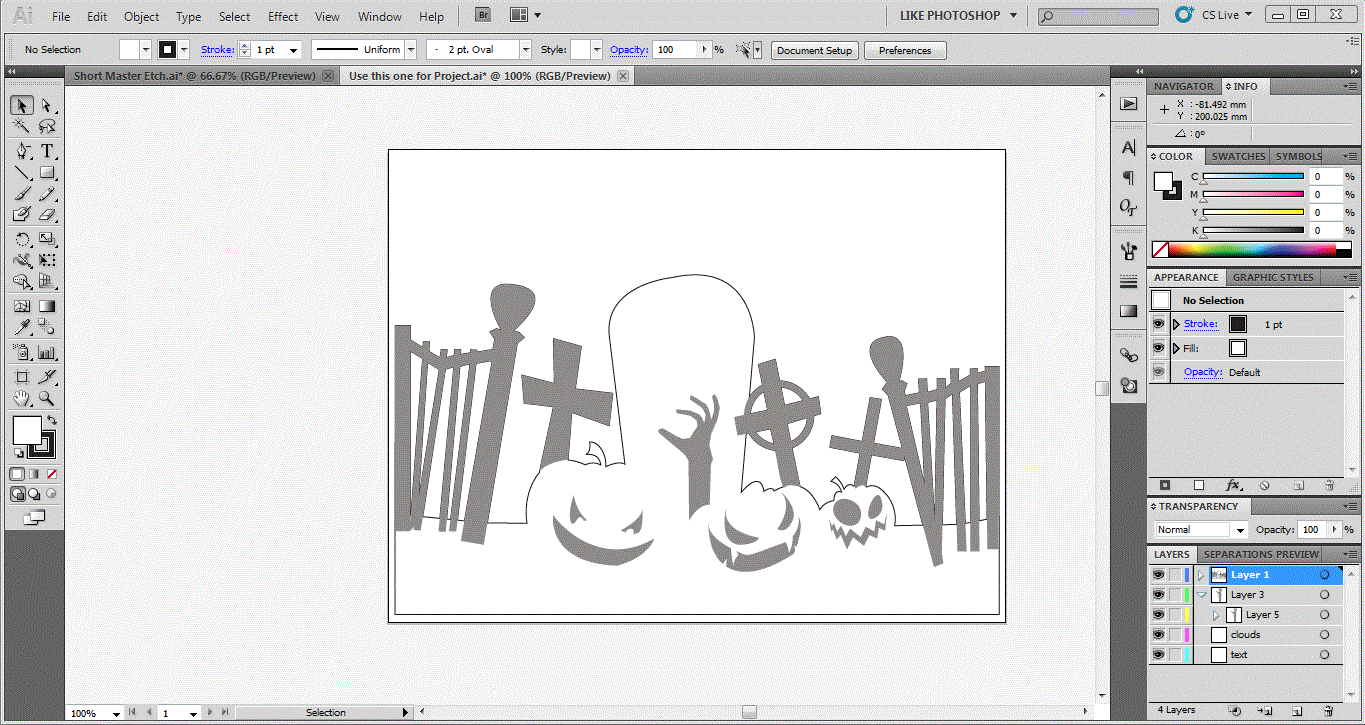
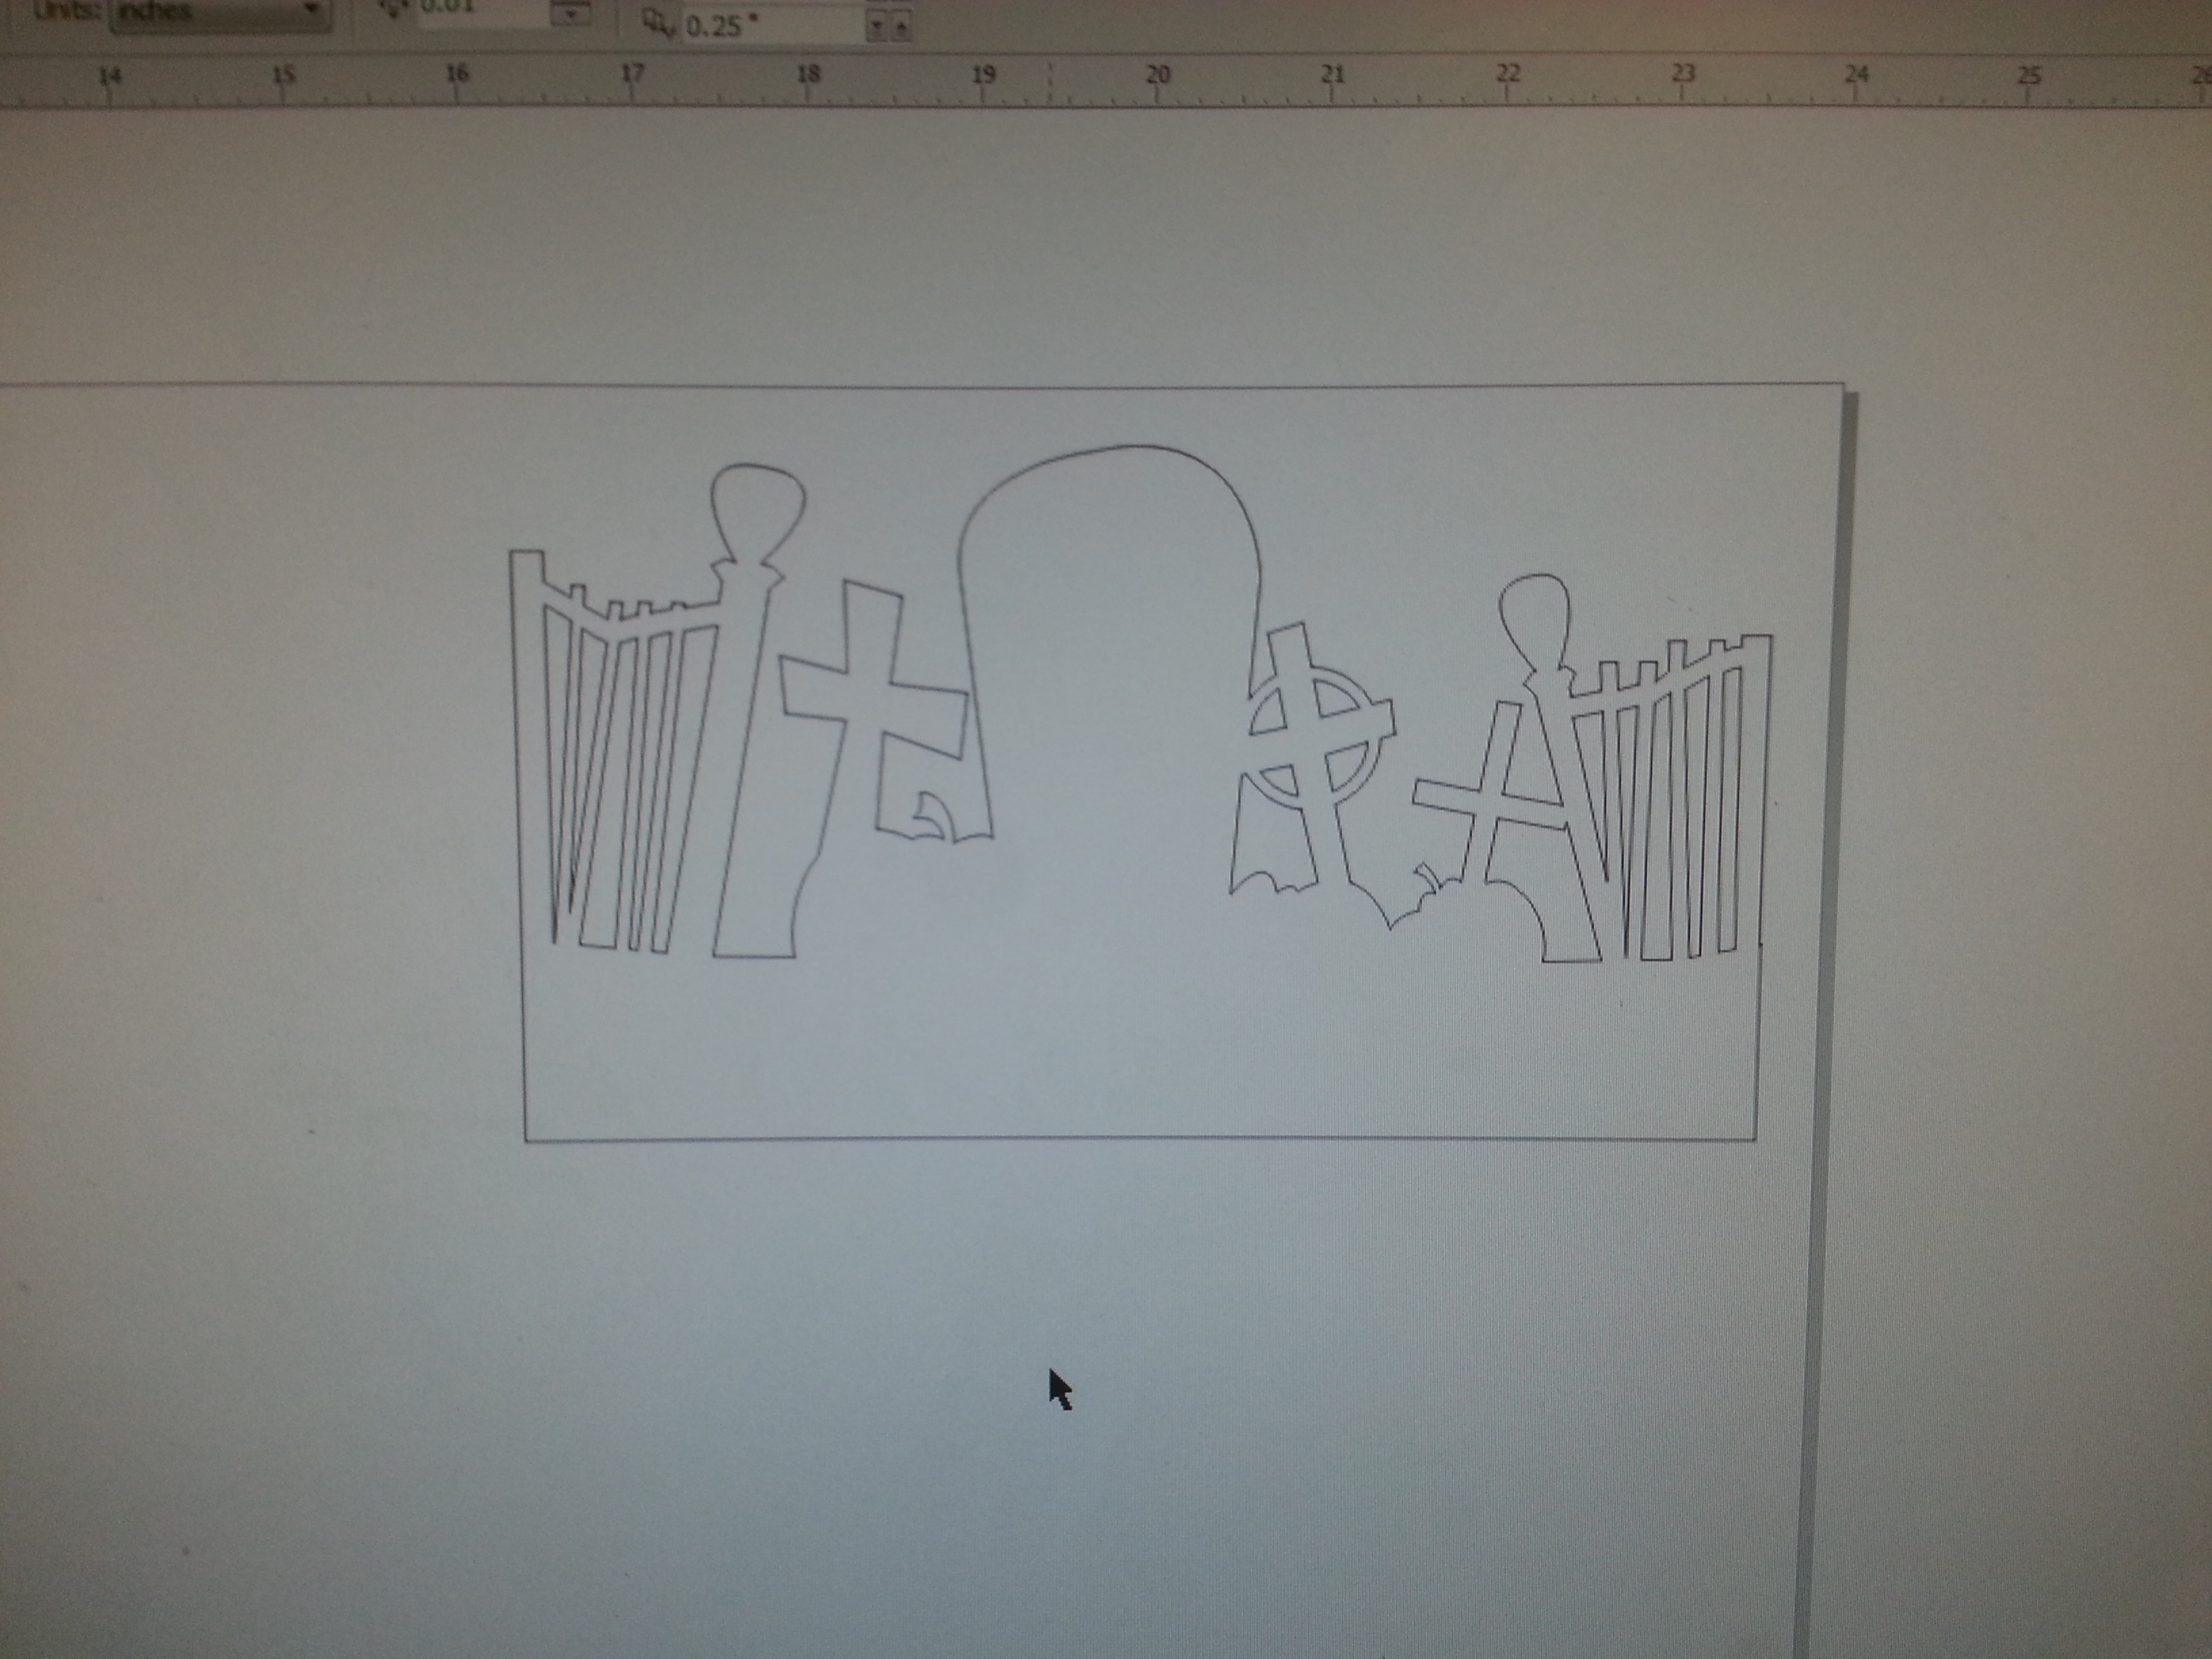
At this point, we have the wonderful outline of our project, but it doesn't look like much - we now need to concentrate on the etched areas for the parts we want to glow to create the contrast. At TechShop Allen Park we use Epilog 60-watt laser cutters whose laser control for etching is a combination of filling the artwork and selecting the rastering option in the print dialogue box. In this step, we will fill all areas to be etched with a solid gray so we get a consistently smooth raster, doing away with the gradient fill. Begin by selecting all the items that will be laser etched (Shift+Click) then select a mid-shade of gray. Deselect the bits to be etched, and click on the previously created complete outline of the project - set the fill to none and the line weight as thin as possible. You should now have a drawing that represents what your final outcome will be - a mostly clear plaque with assorted etched specialty items. You could have also reversed the look and etched most of the plaque, and left the details clear - the look is up to your personal taste. After experimenting on some smaller items, I noticed I like the look of a finished etched piece if I reversed the artwork and etched what would be the bottom of the finished piece, rather than the top. To accomplish this step, take your finalized art and use the transform/reflect vertically action to reverse the art.
To the Cutter!
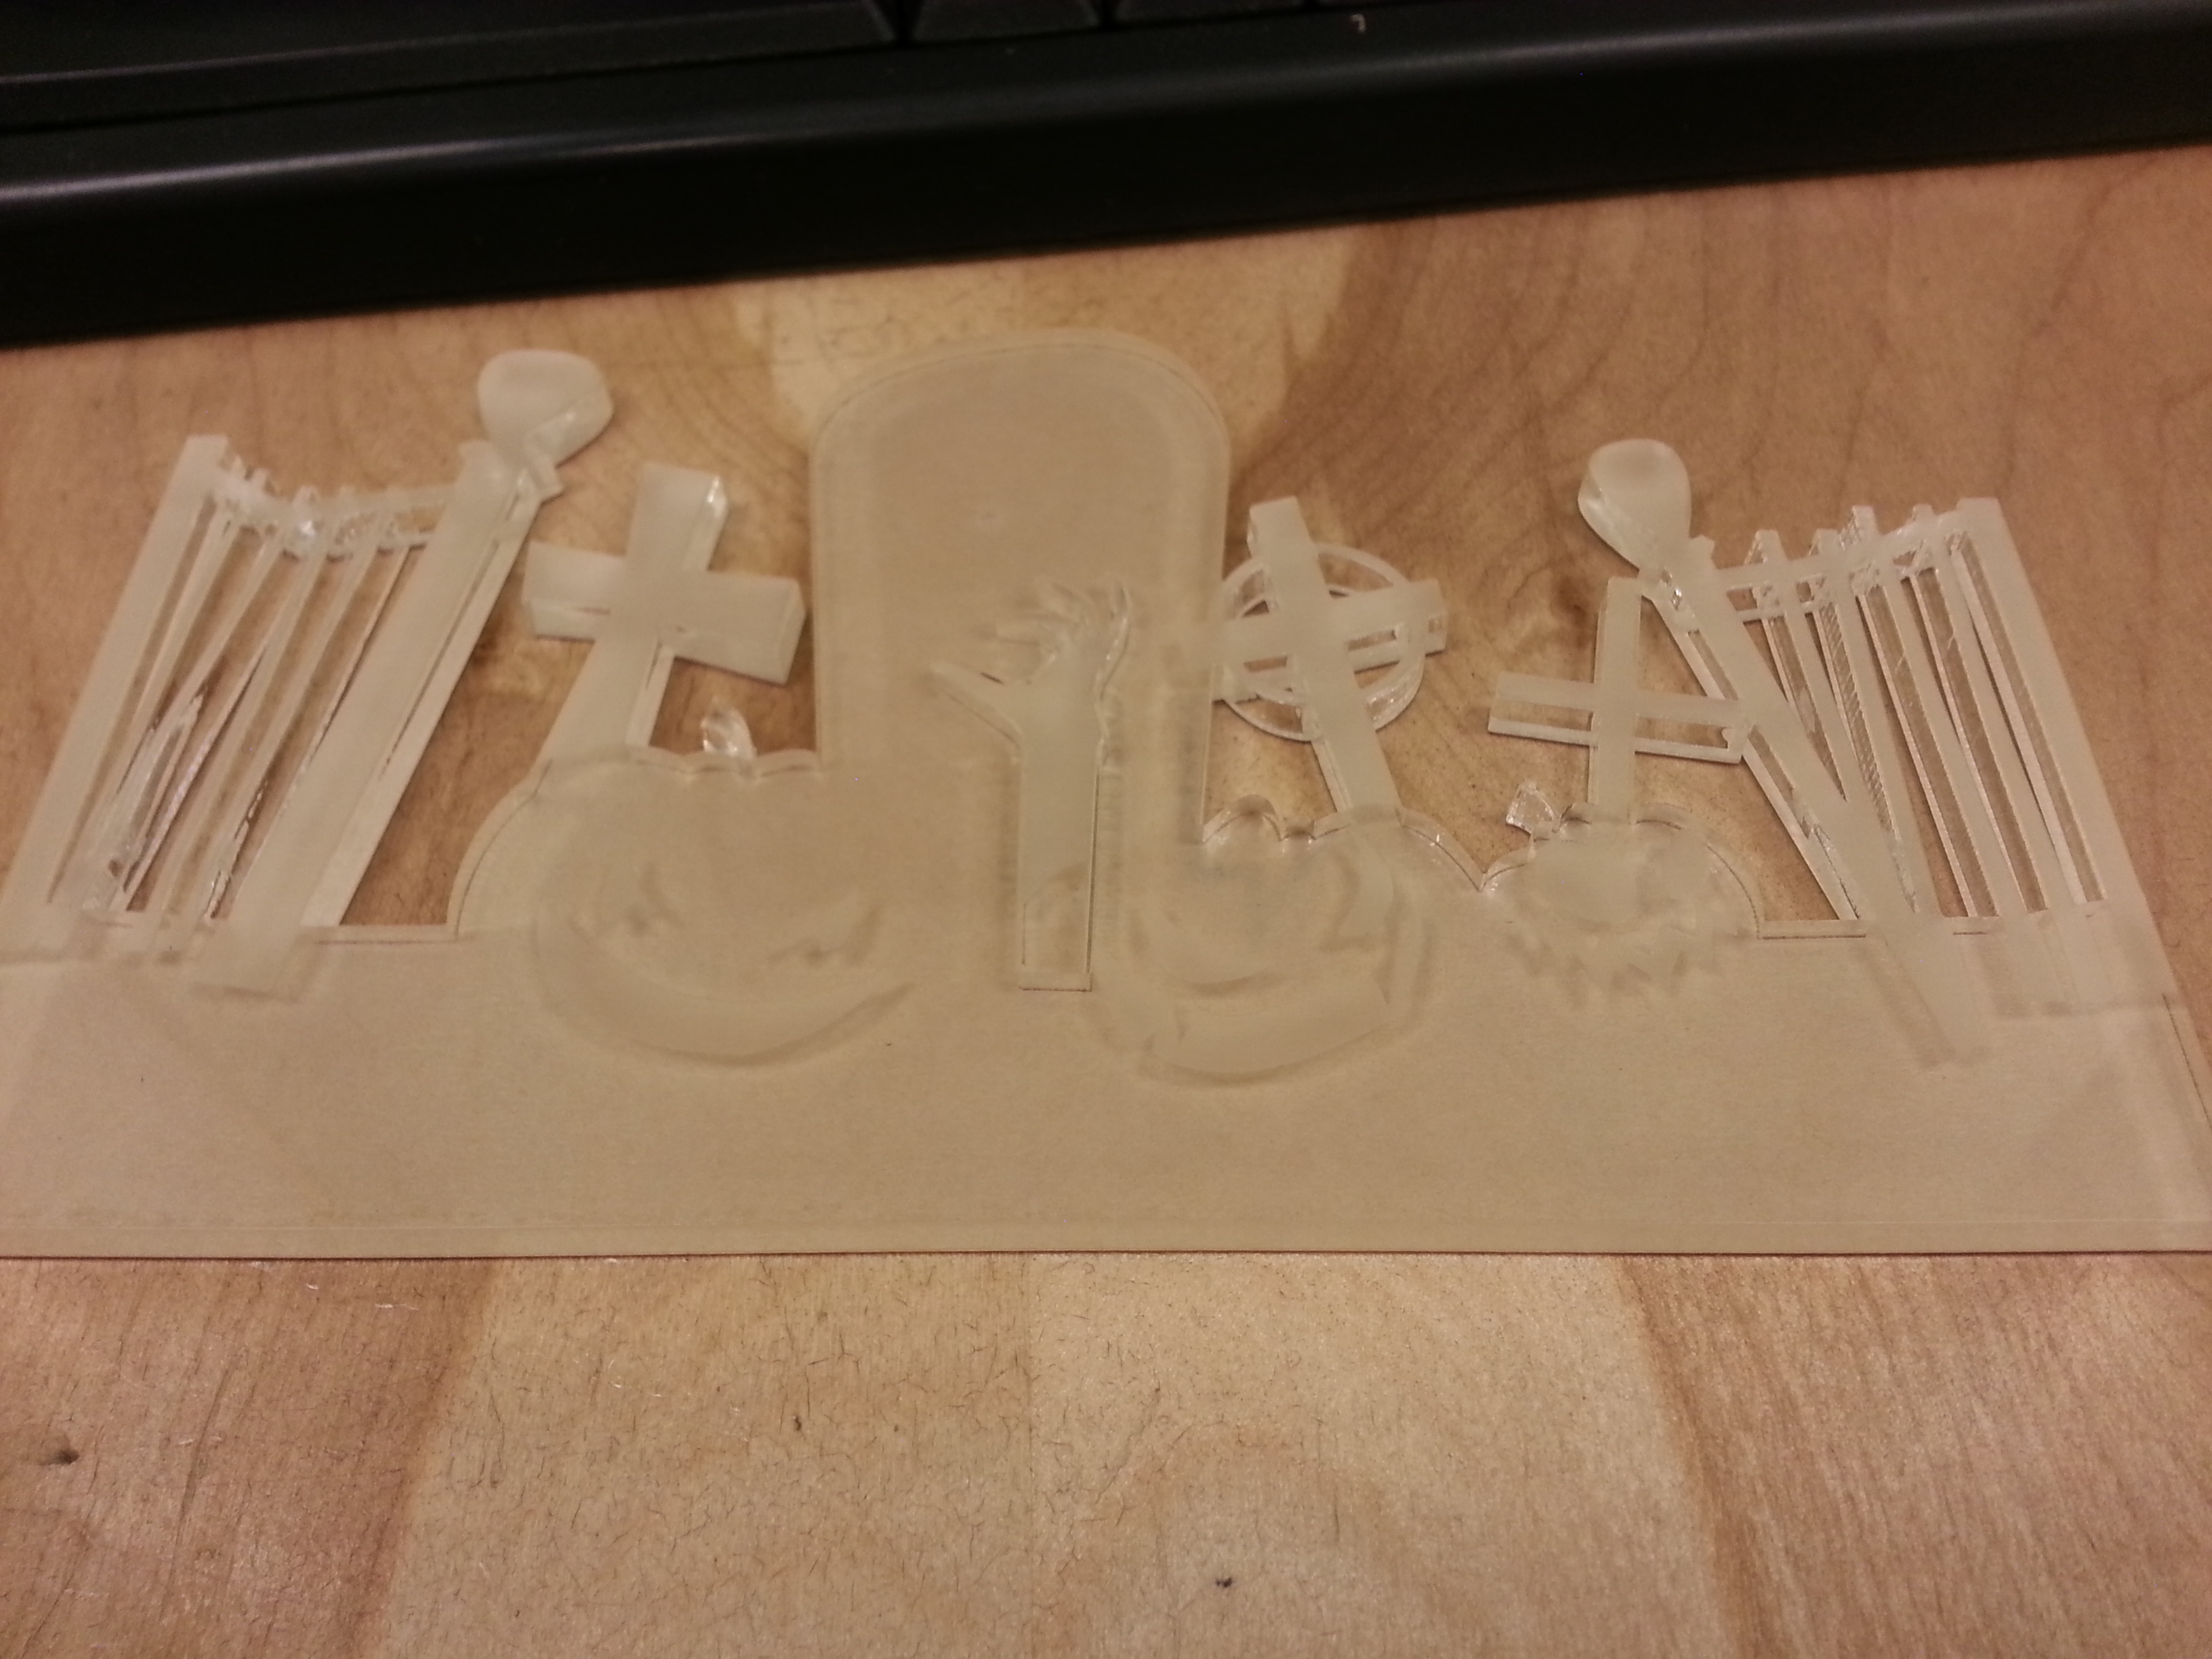
As with any piece of equipment, know your manual, follow all appropriate safety procedures, and be sure to complete all necessary precutting maintenance functions on the equipment.
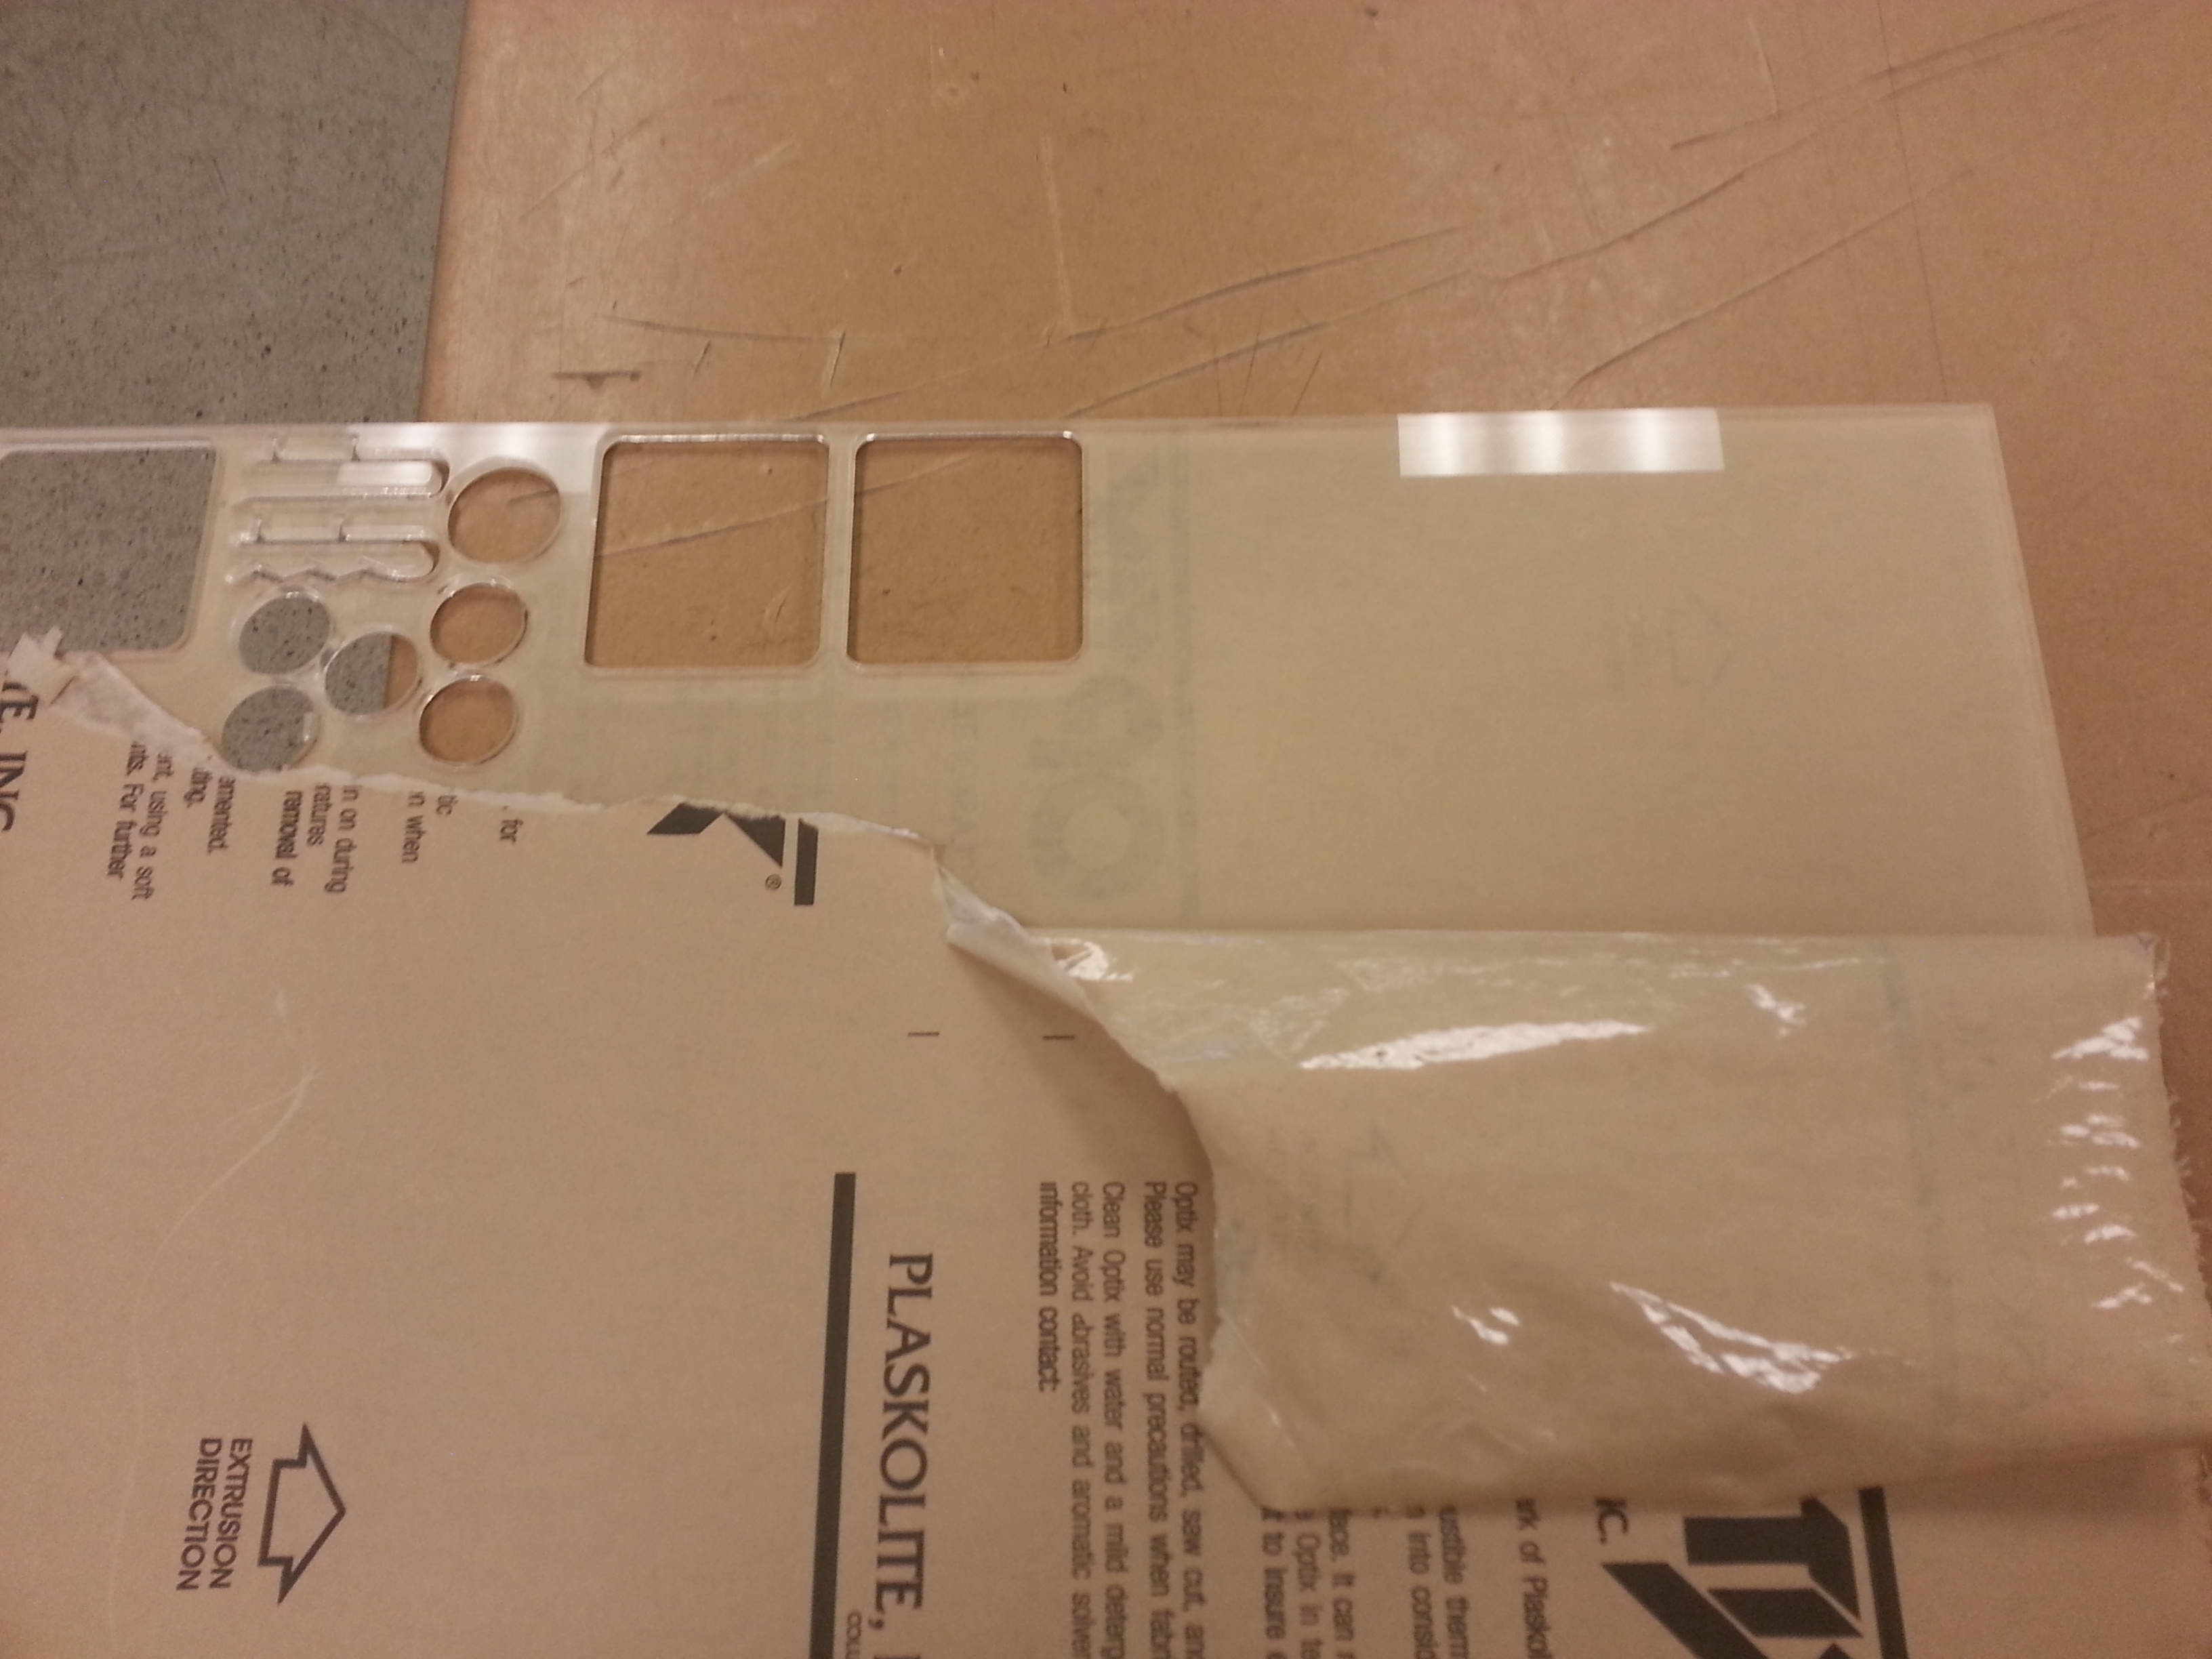
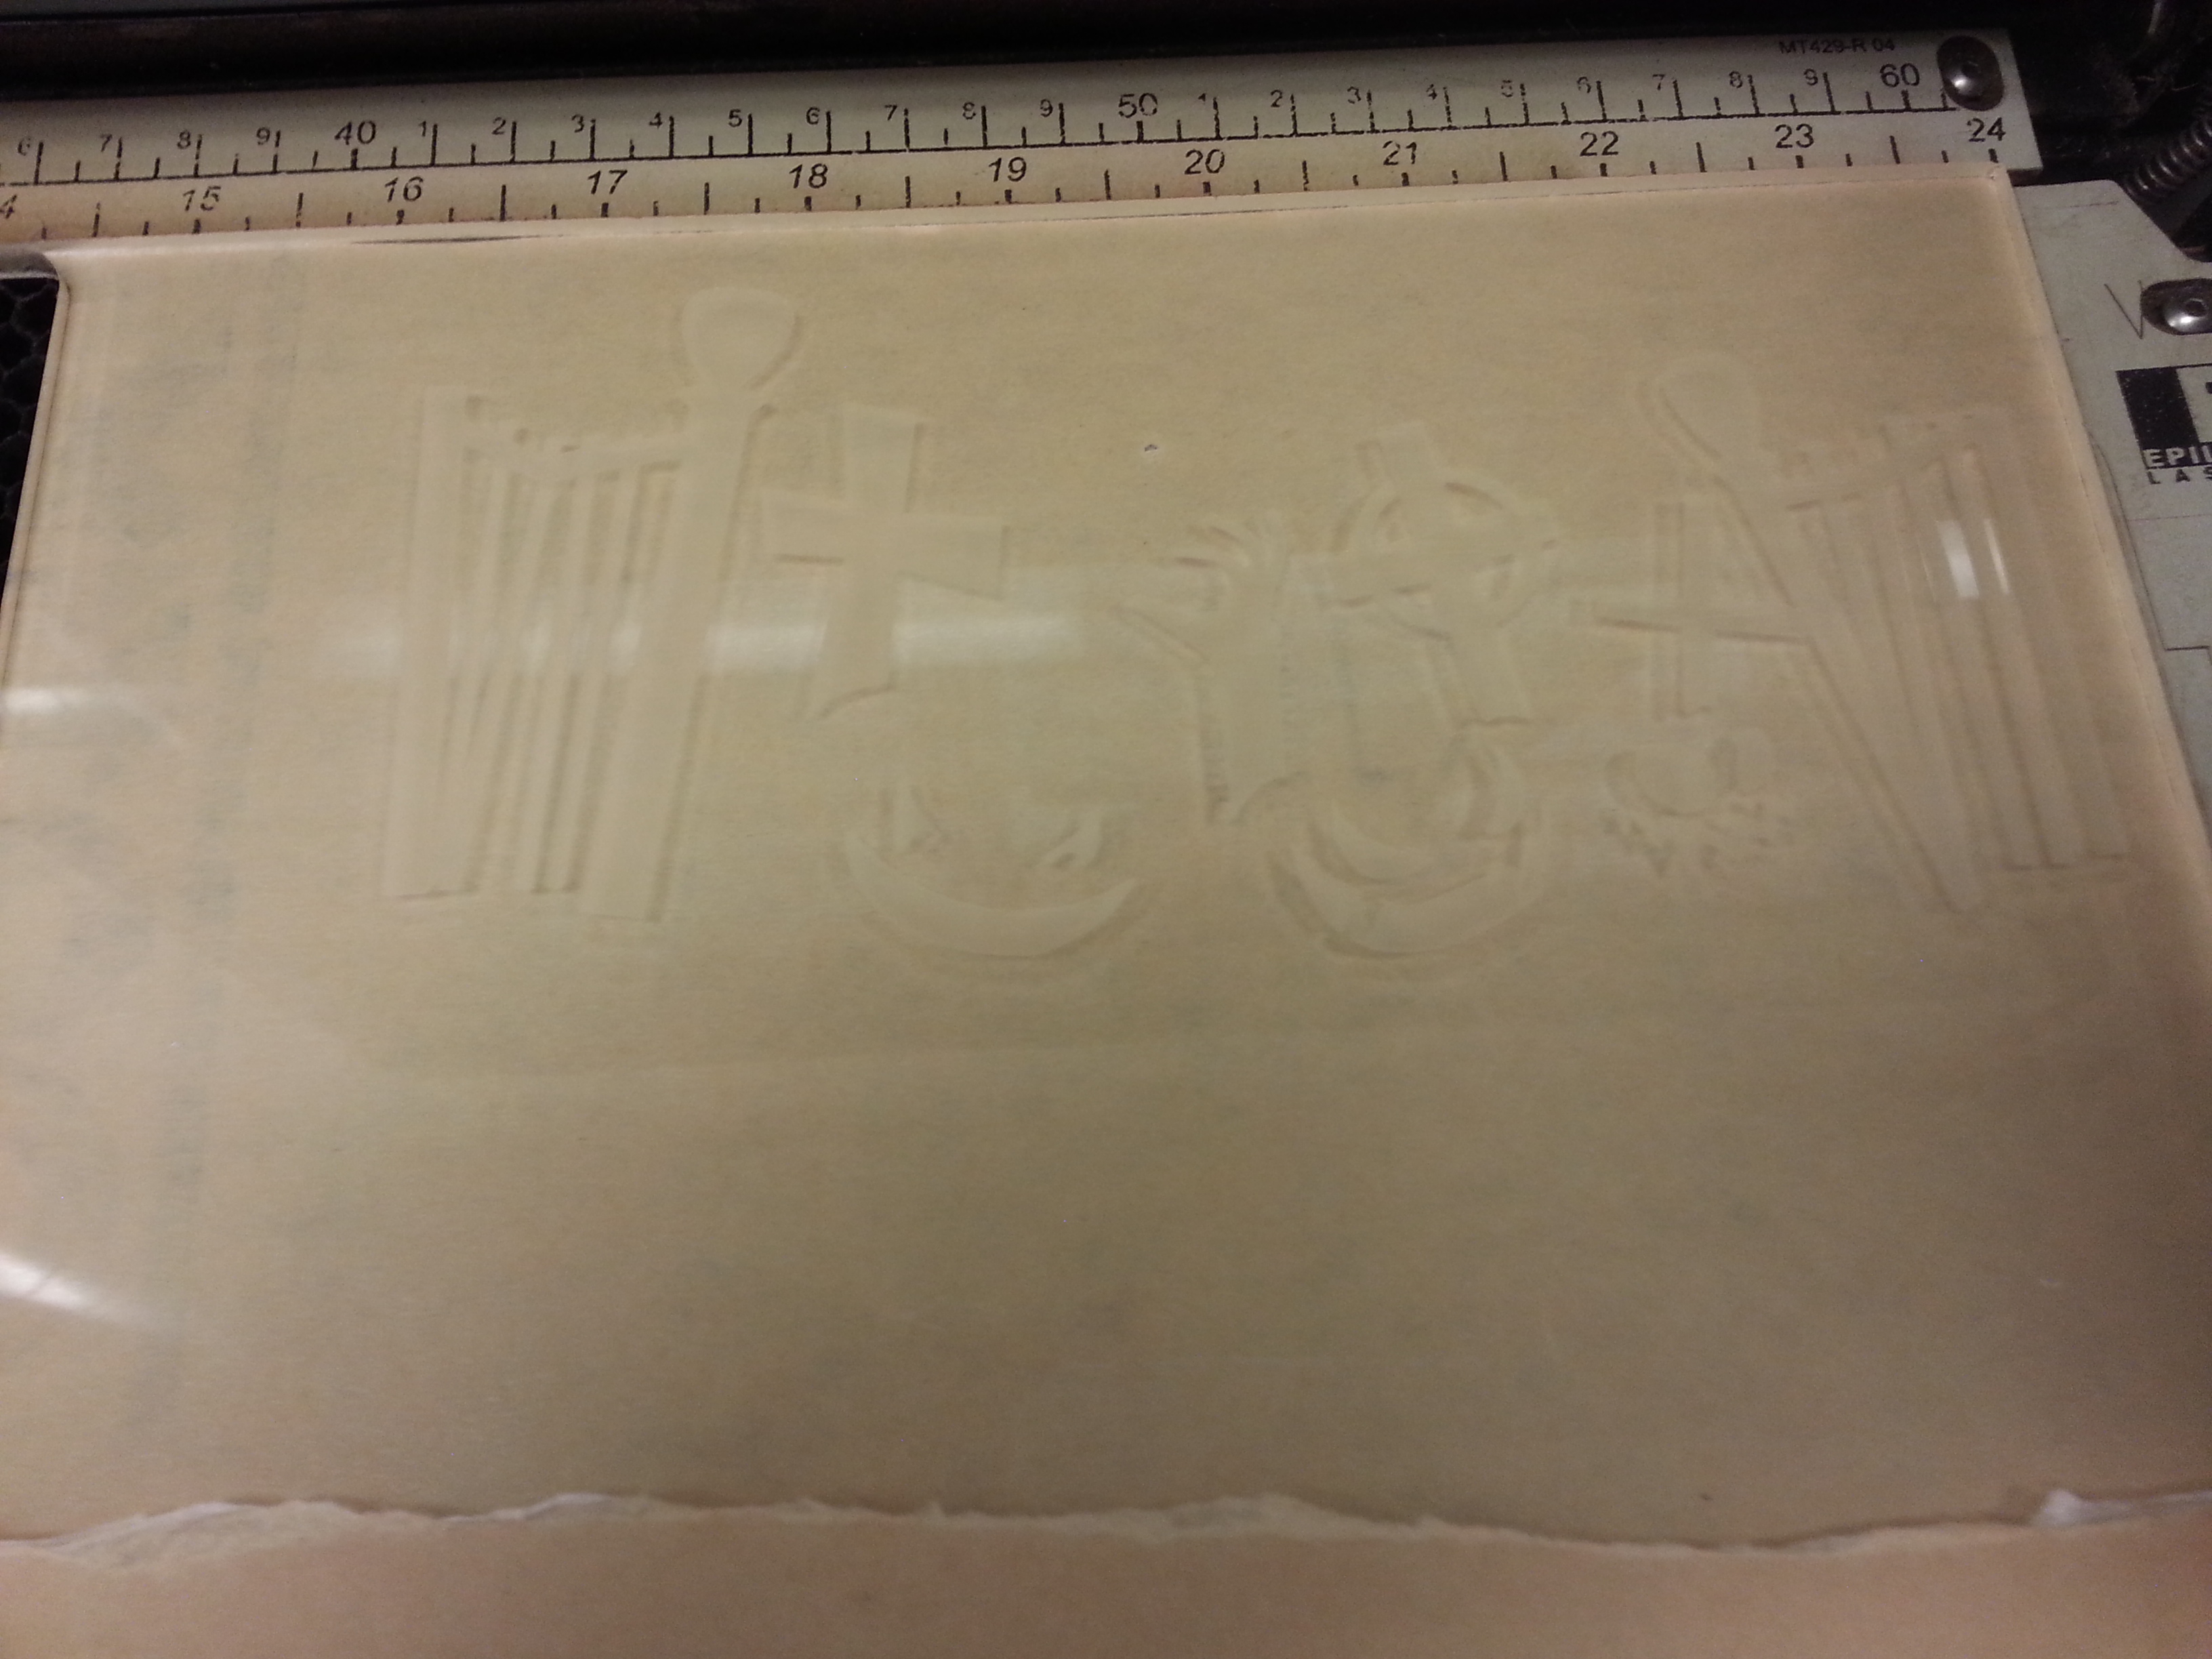
Begin by removing a section of the protective paper from your target acrylic. Insert your acrylic into the machine, zero home on the laser if necessary to bring the head to a useable area on the sheet. Load your file to the computer and open. I like to run my cutting and etching as two different passes on the cutter - in other words, I like to run just the etching portion of my job, then when I'm happy with the results, I tell the machine to cut out the final piece. This is accomplished by setting your art software to print, and selecting the correct laser settings in the Print preferences dialogue box.
Begin by selecting Raster as your print type option and set the power an percentage per the tables in your cutters manual. The computer will send the instructions to the cutter - you may need to confirm the start of the job on the control panel of the cutter. Because the outline of the complete project is a color (black) it will be etched along with the gray bits of this project - I prefer this, as I can see how everything is going to look before the final cut, and even though the laser creates a very thin kerf, it will still end up obliterating this etched outline when it cuts the final piece from the sheet. If you don't like this approach, you can click the outline in your artwork and set the line weight to none.
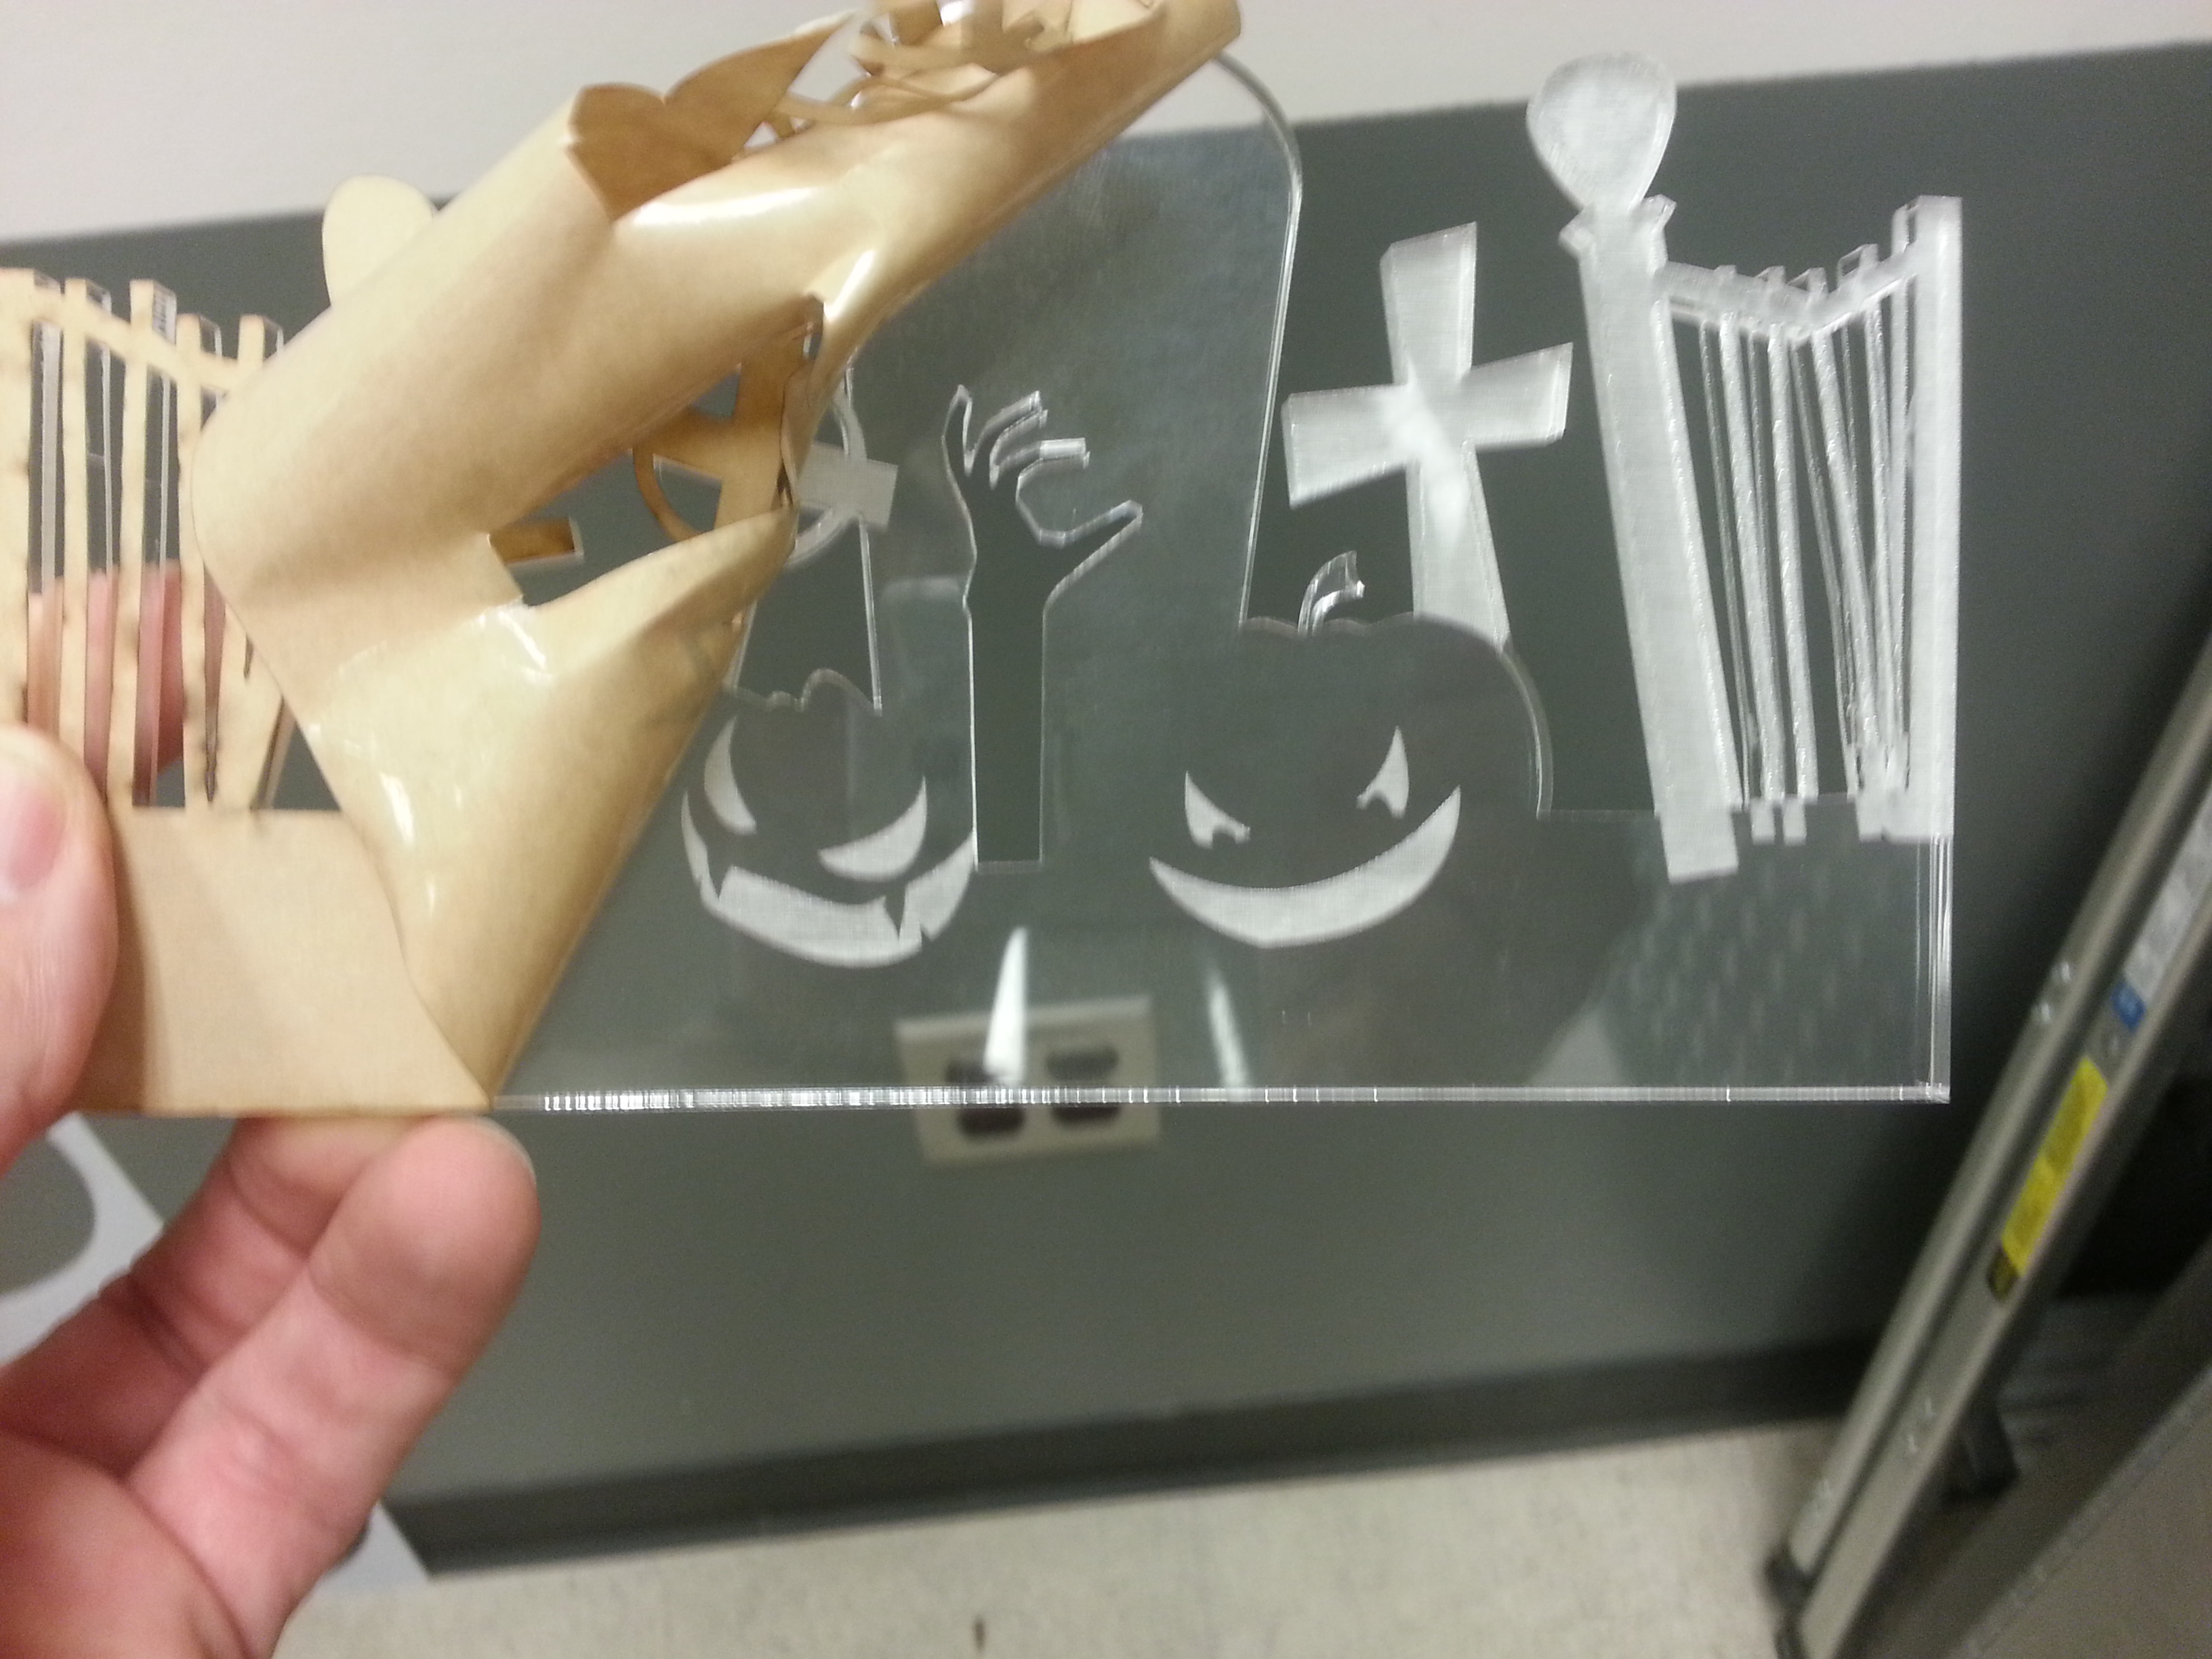
Once the etch is complete, go back into your software and select the correct settings in your print dialog box to cut the piece out of the acrylic. Once the cutting is complete, remove your item from the cutter. Peel back the protective paper and admire your work.
Lighting the Acrylic.
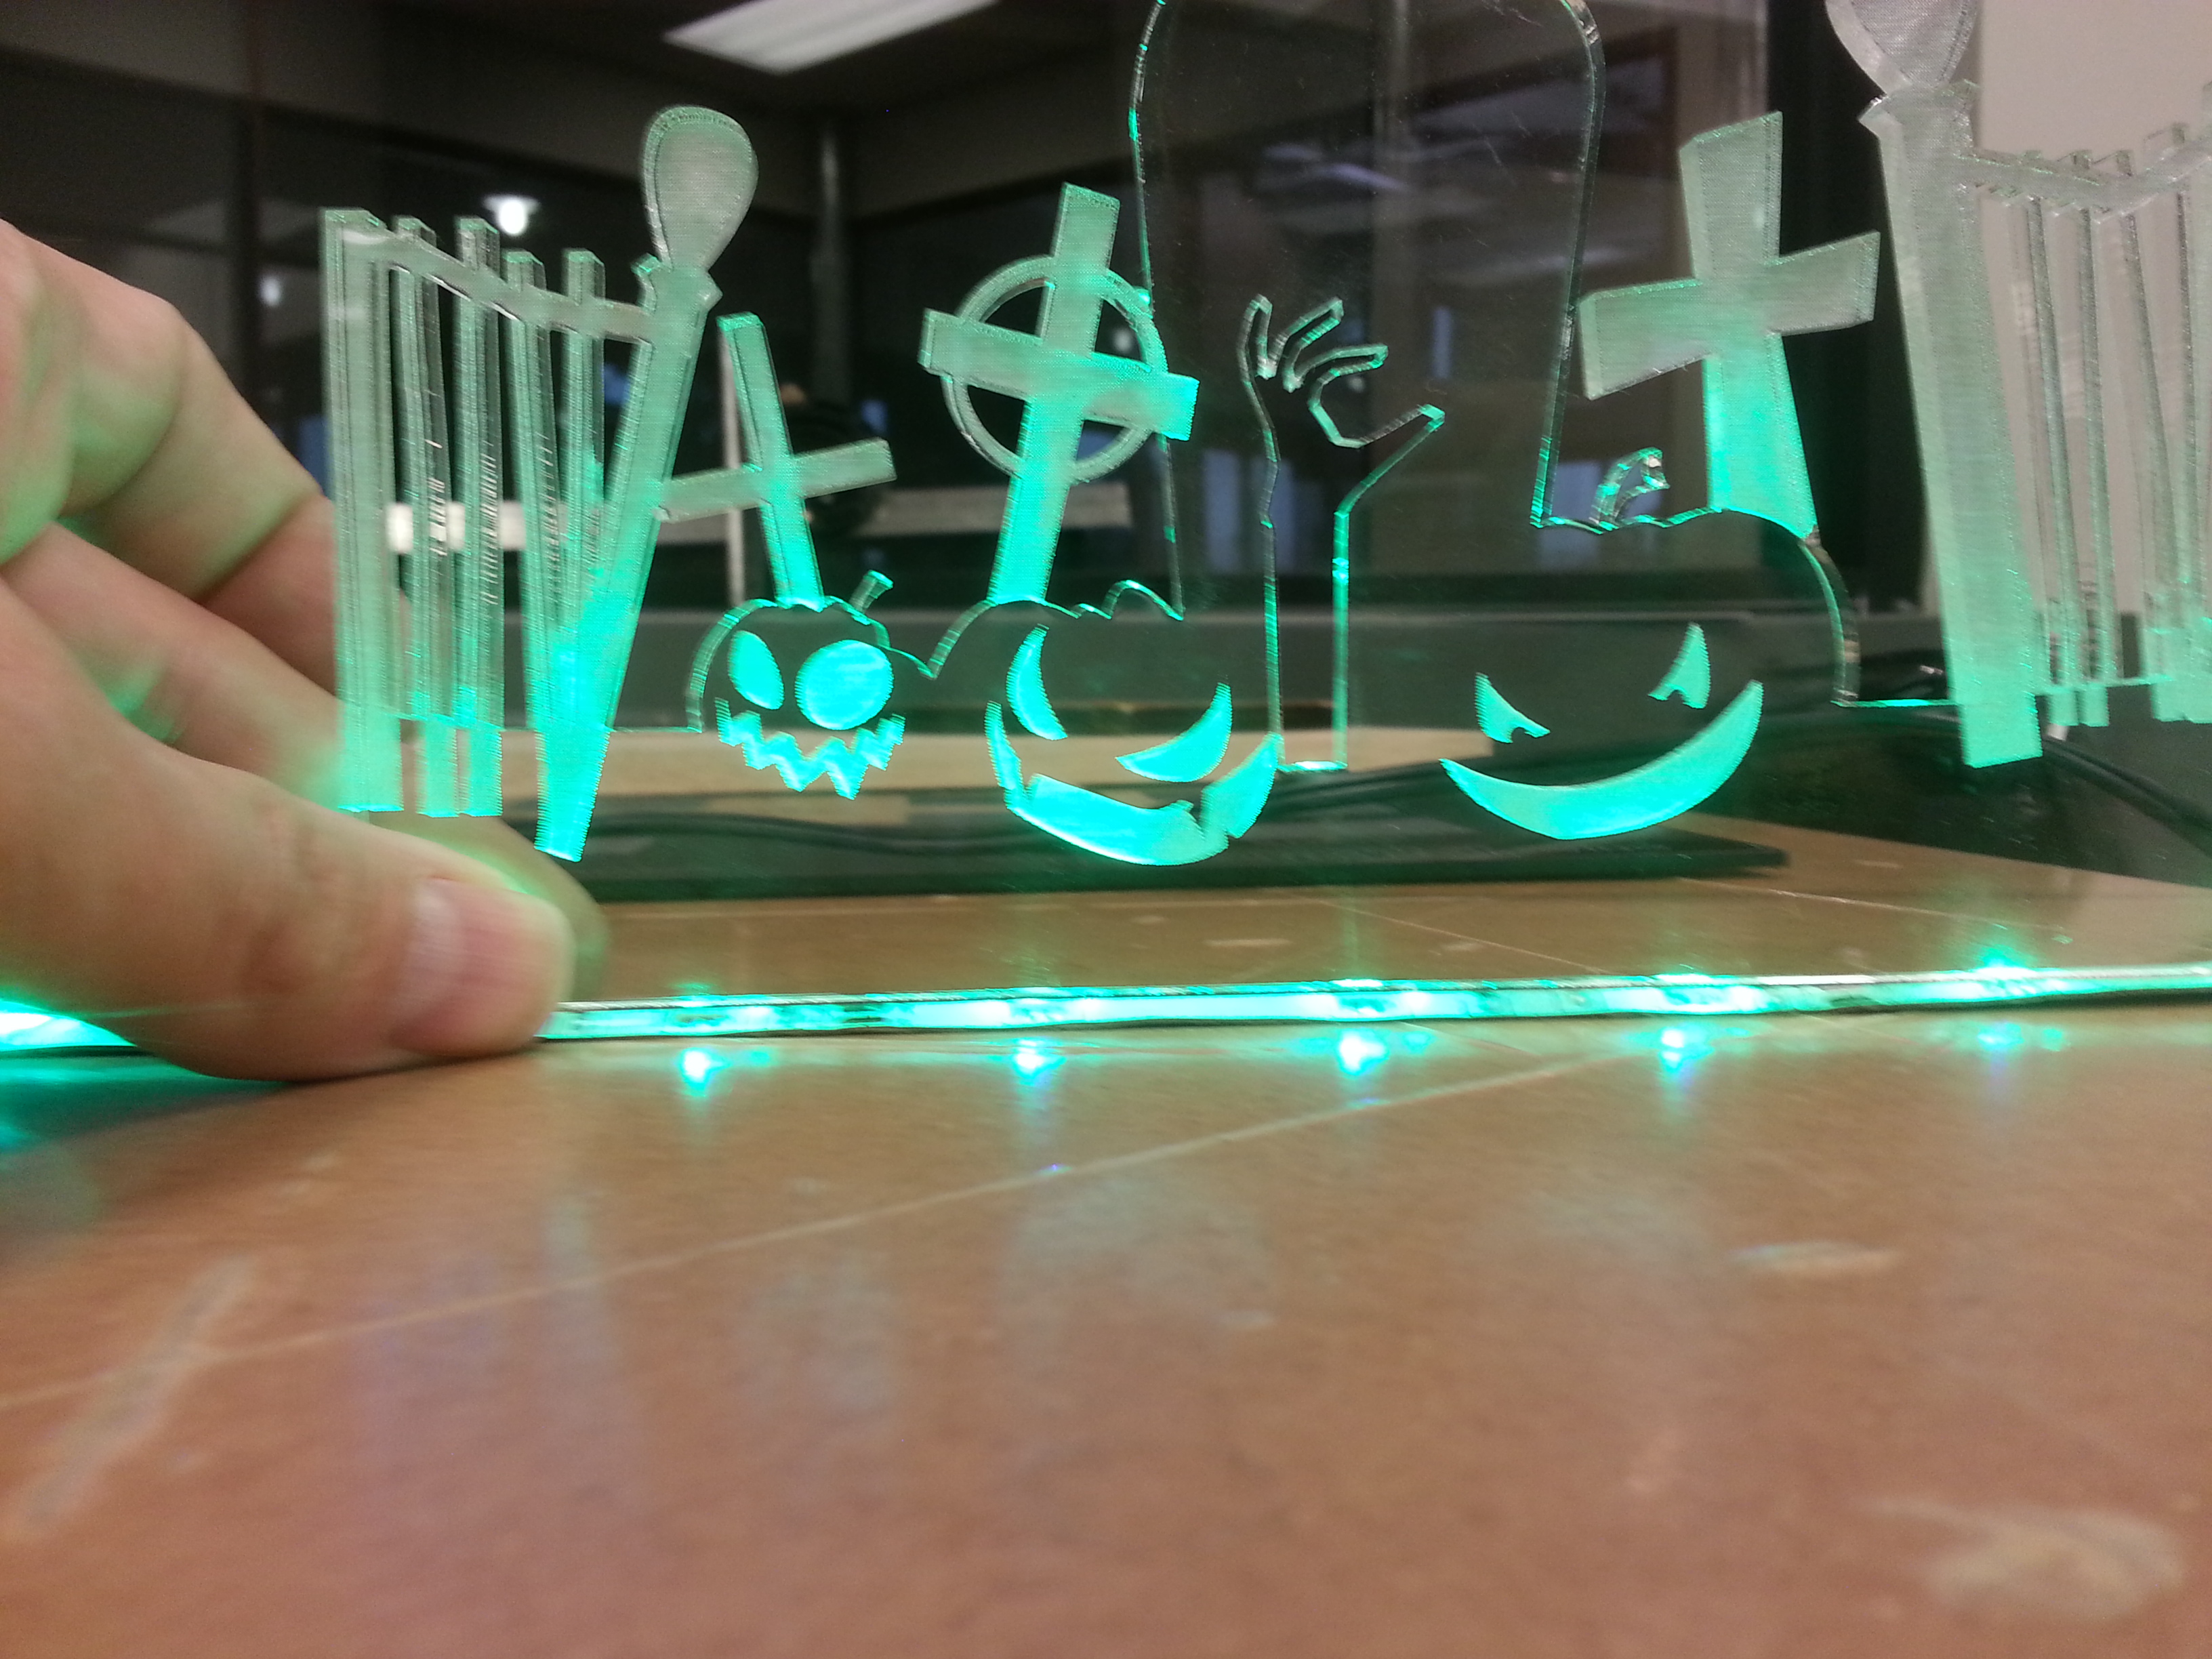
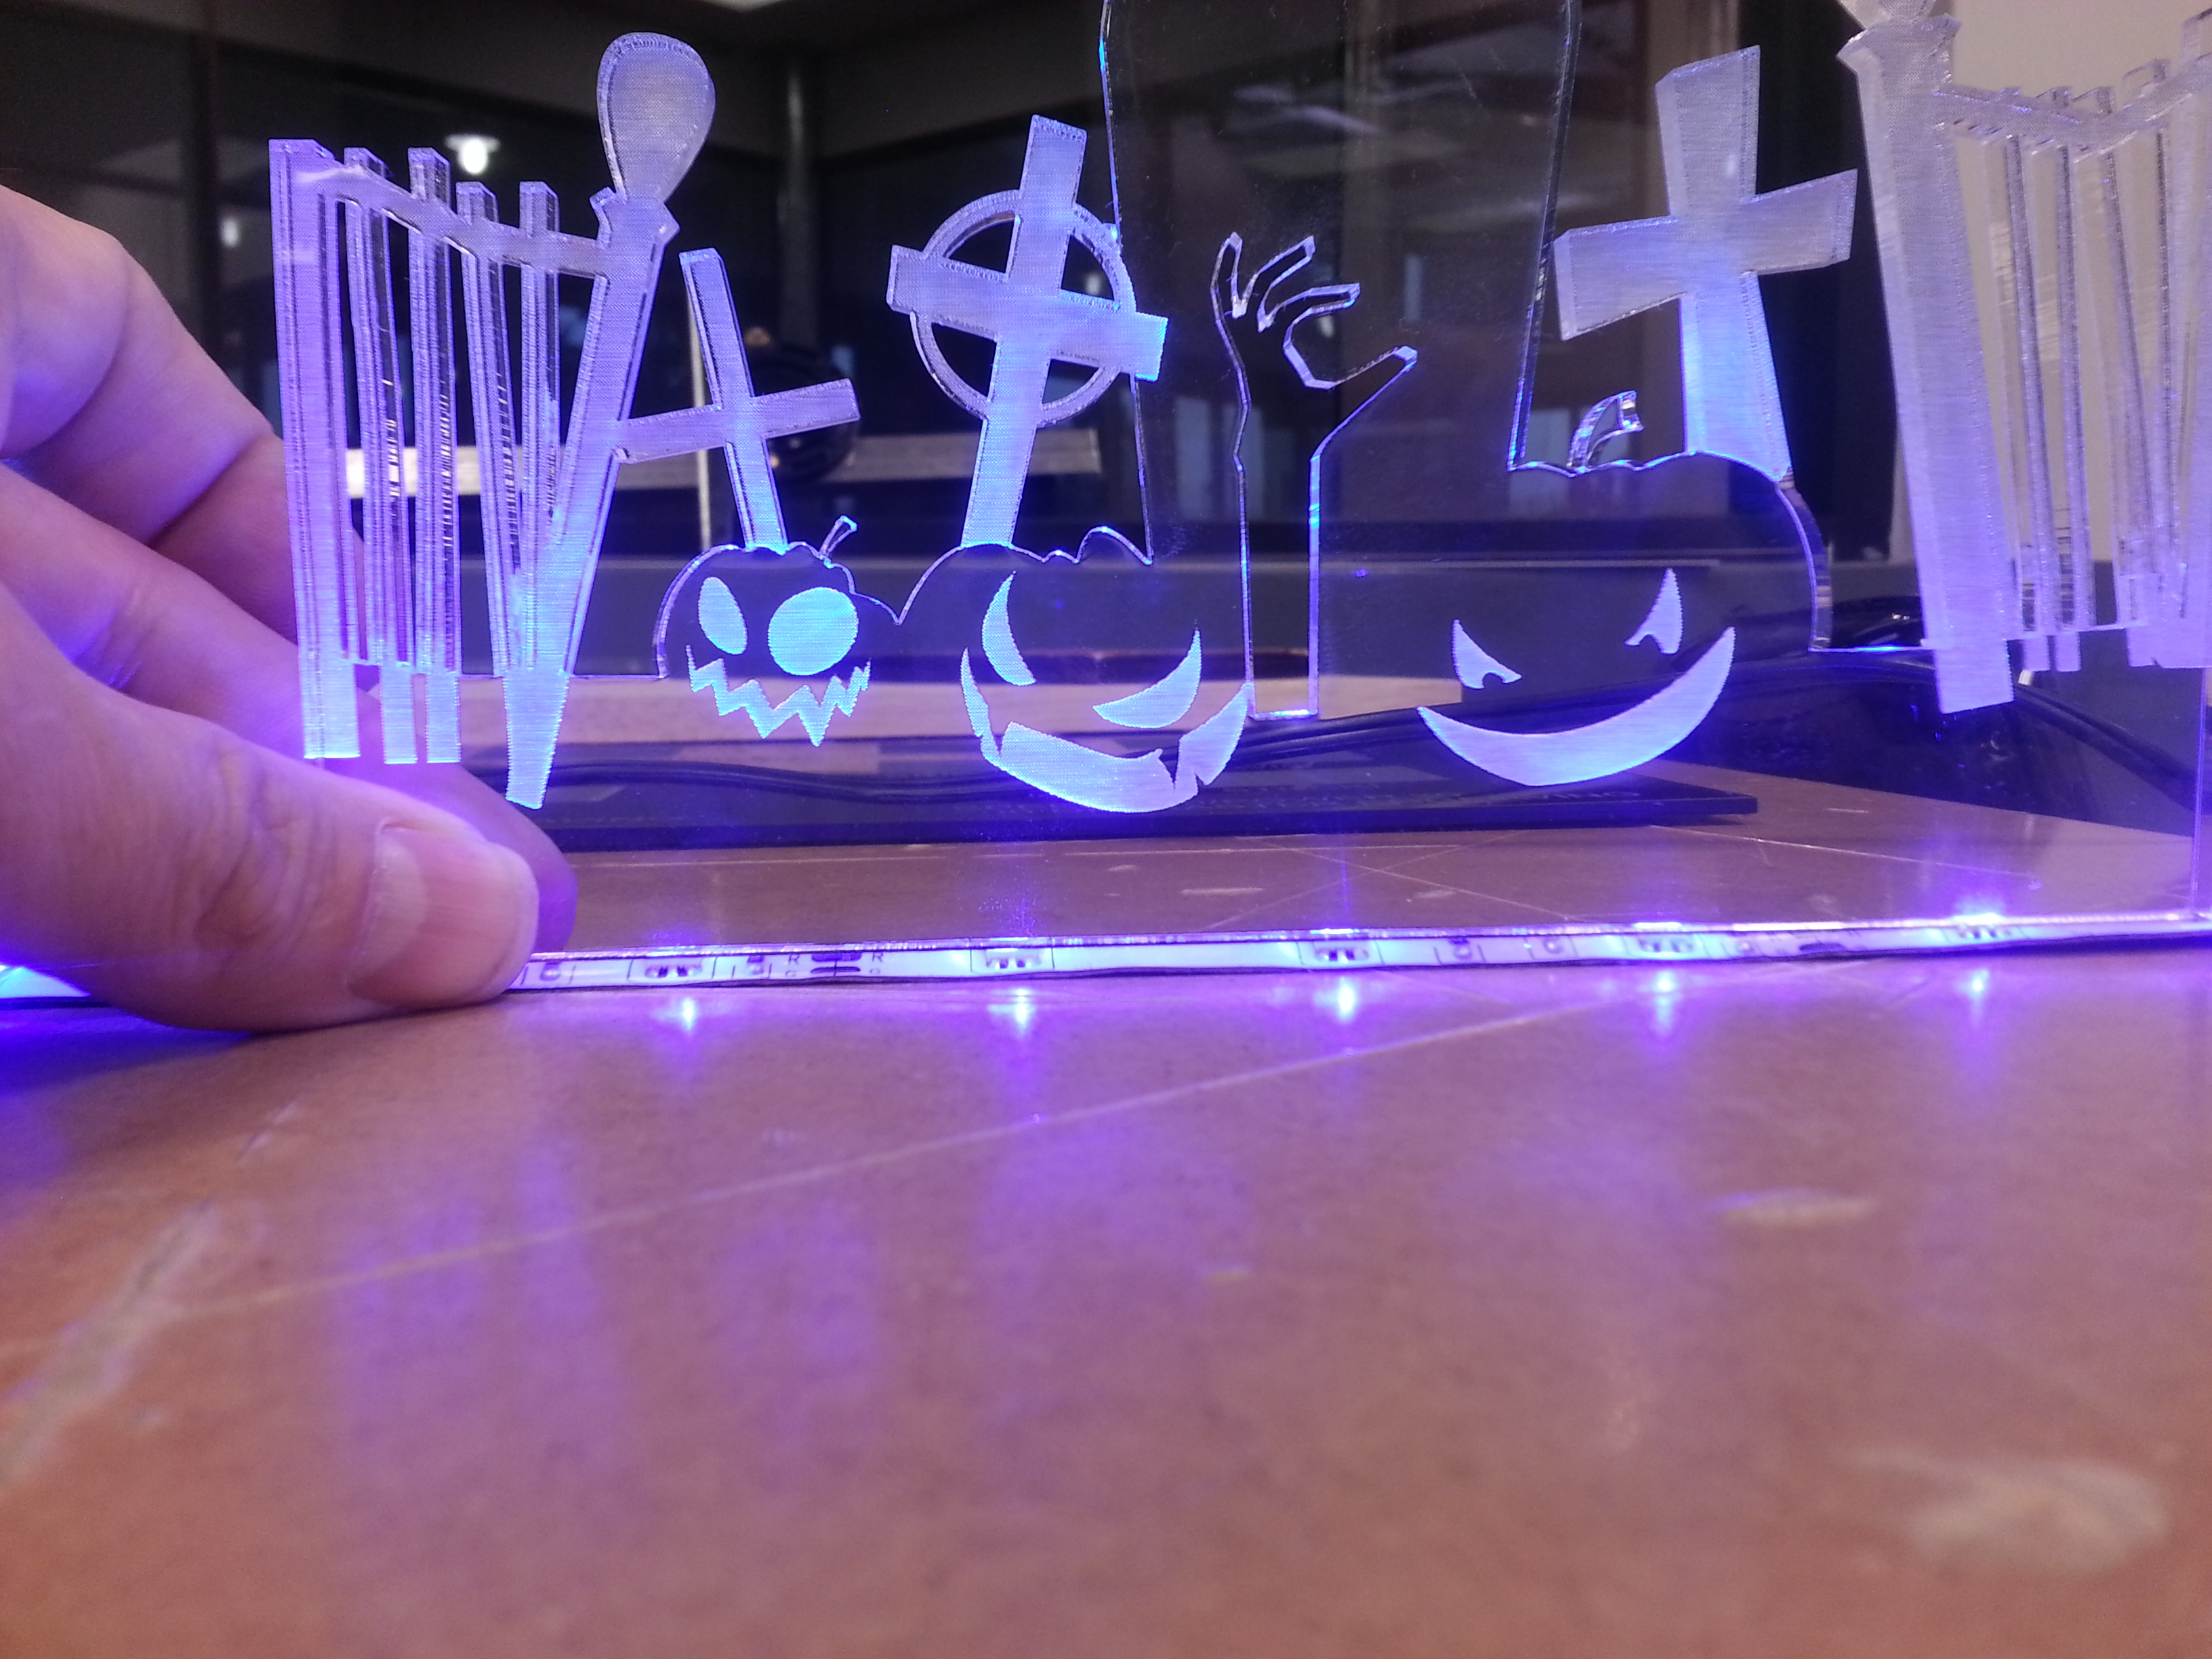
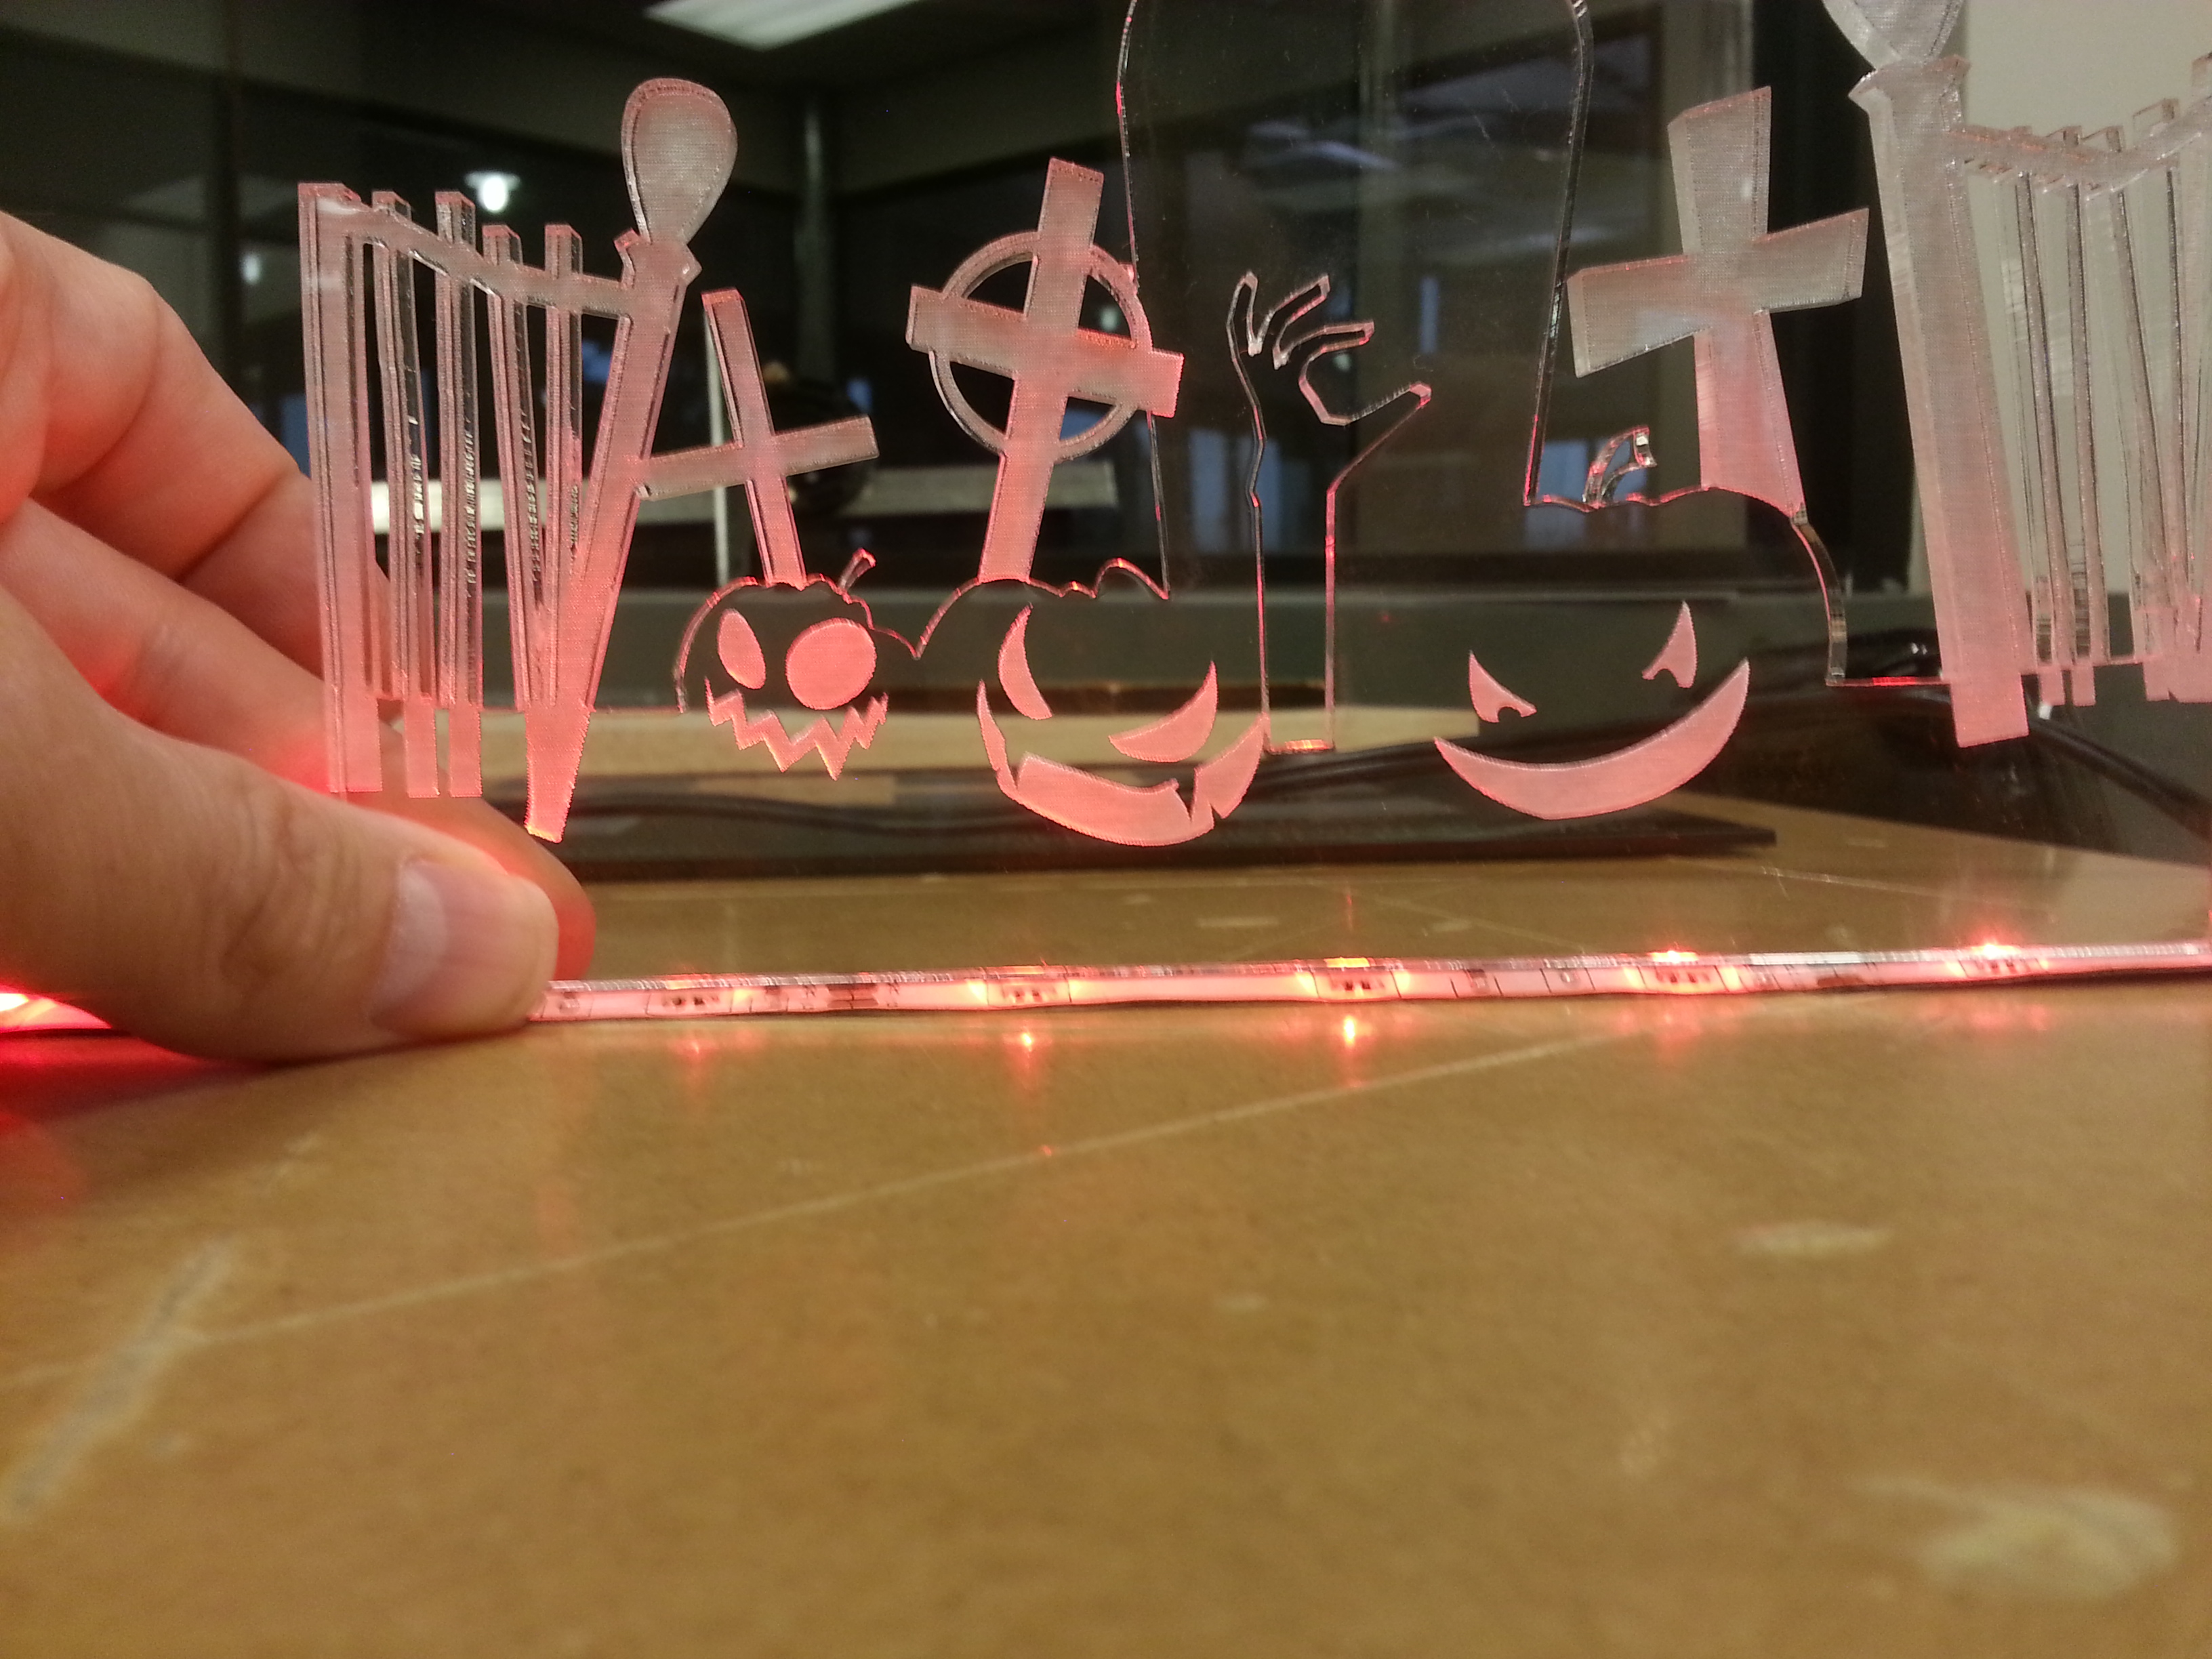
The building of the support box or mount for this item is a personal preference and will not be covered in this Instructable. Other edge lit mount examples can be found here on the Instructables website. If you need a resource for ribbon style color changing LED's check out eBay.
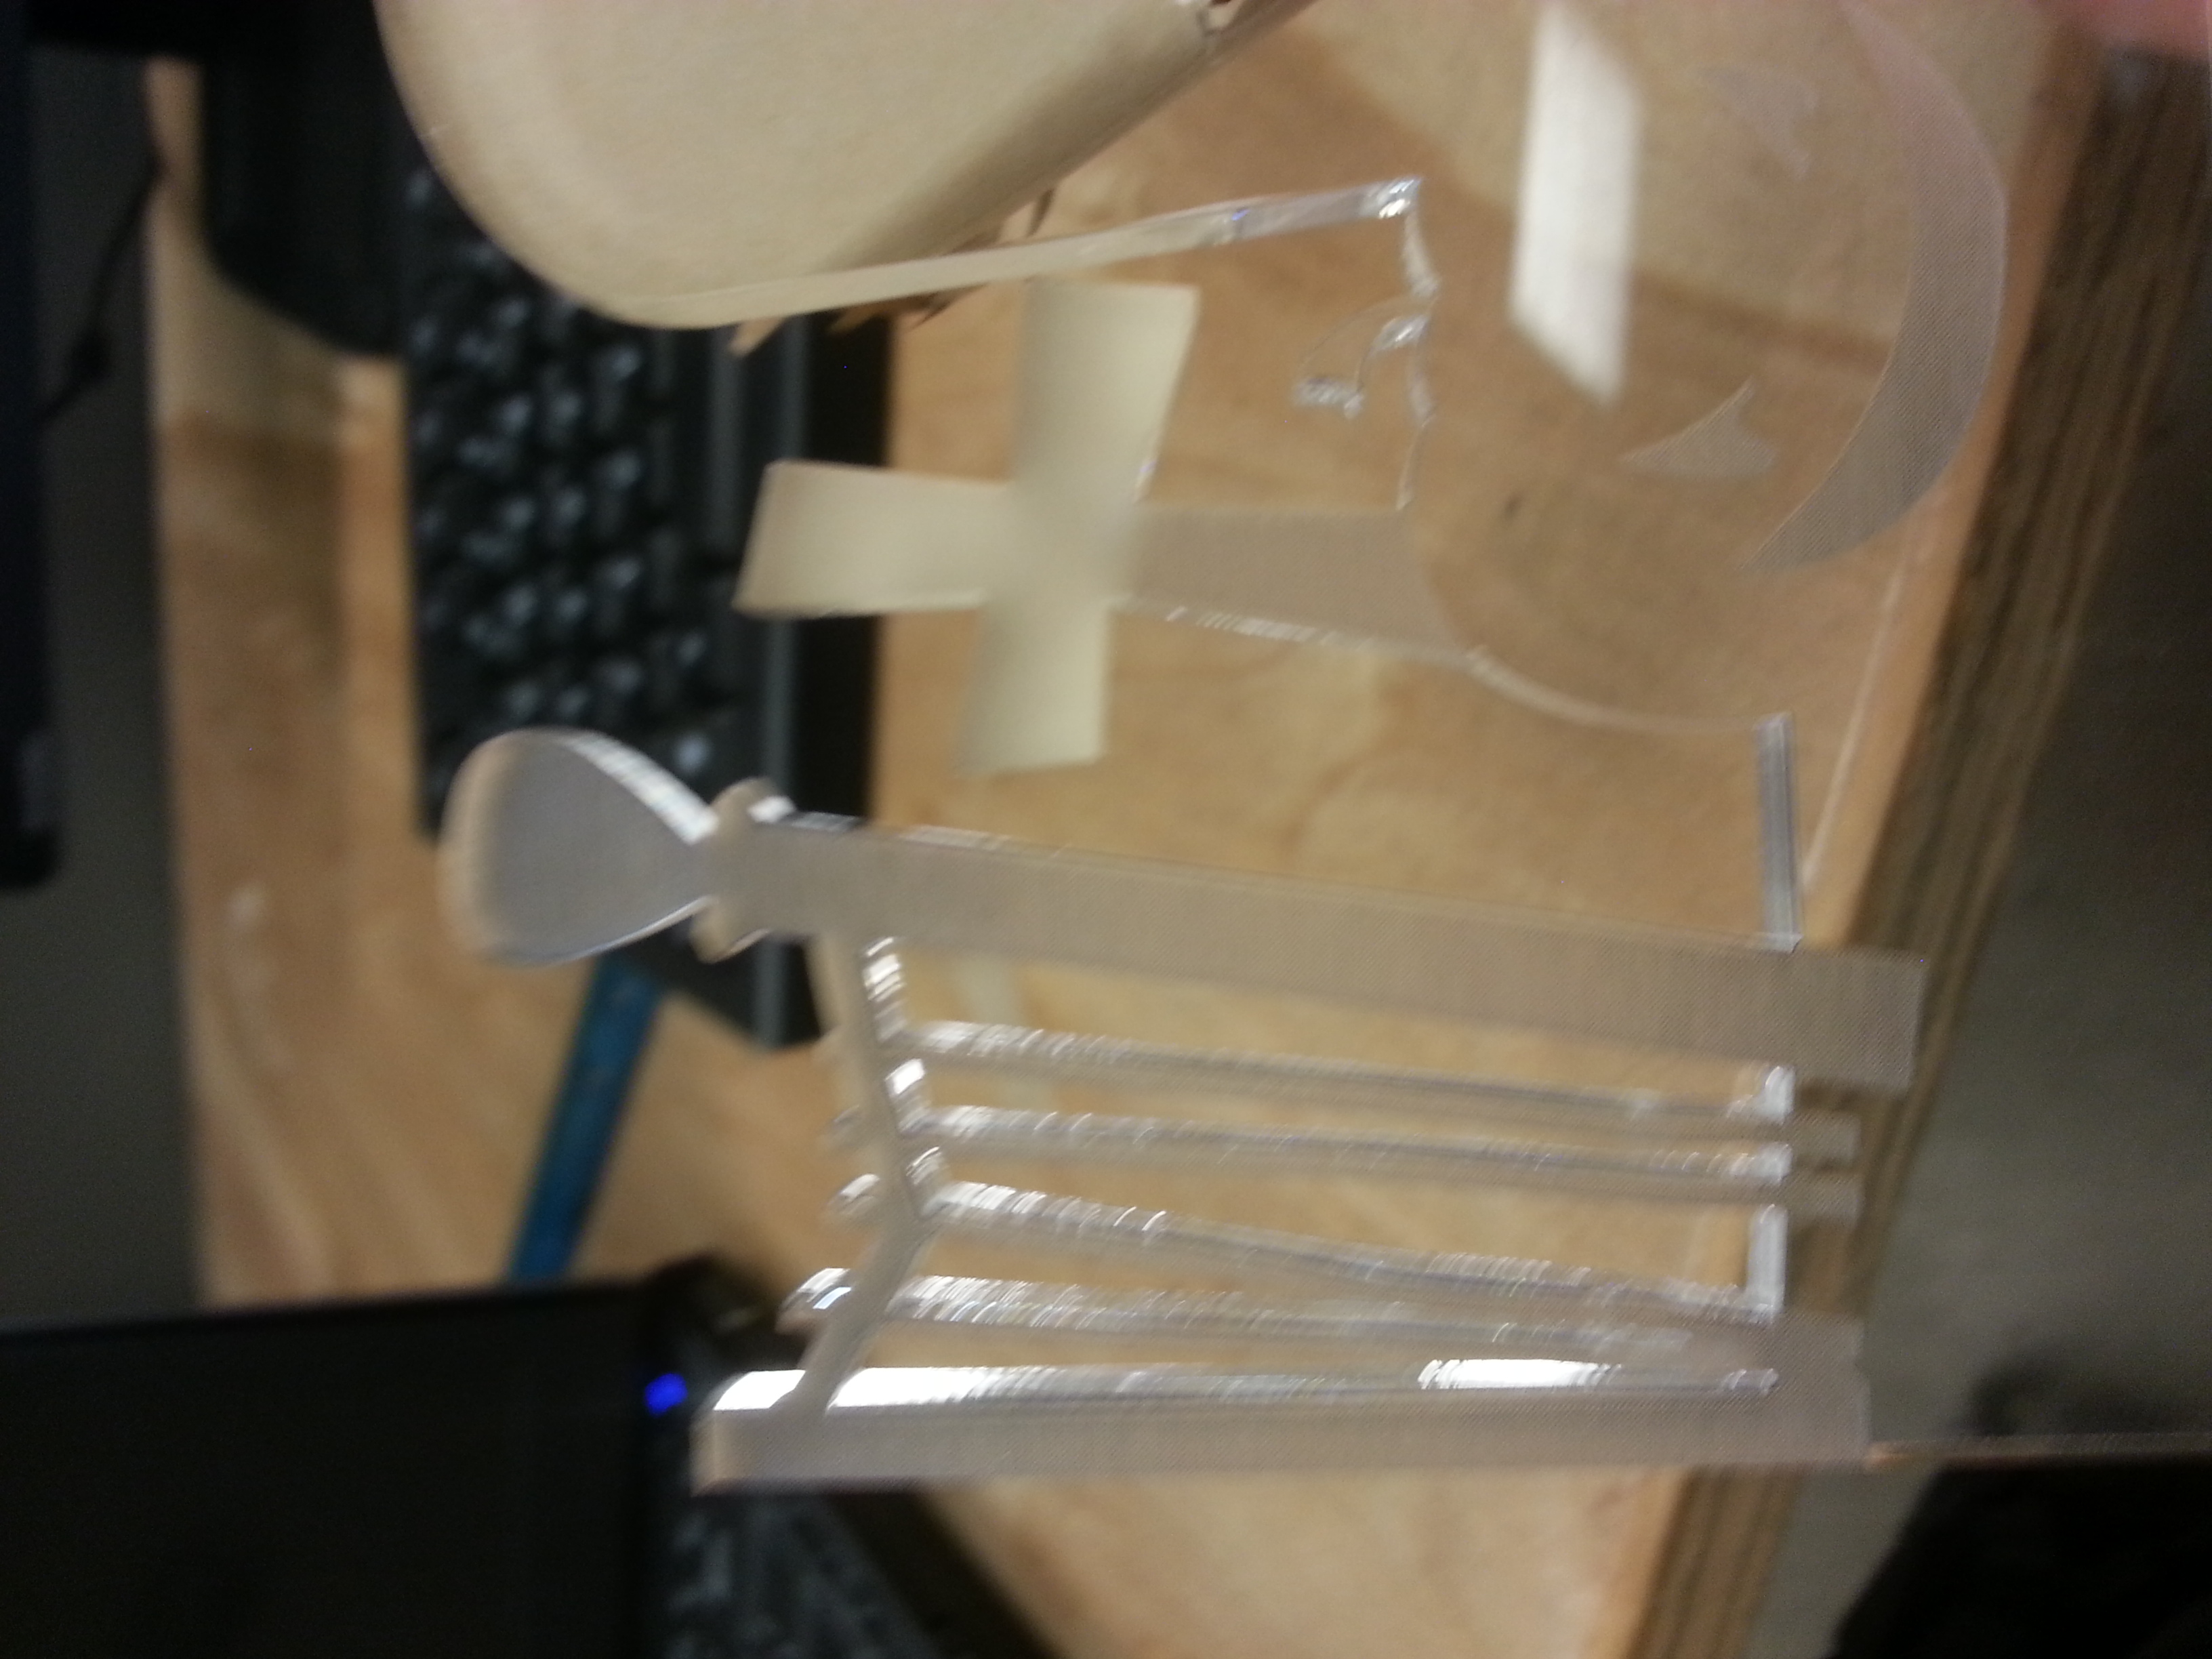
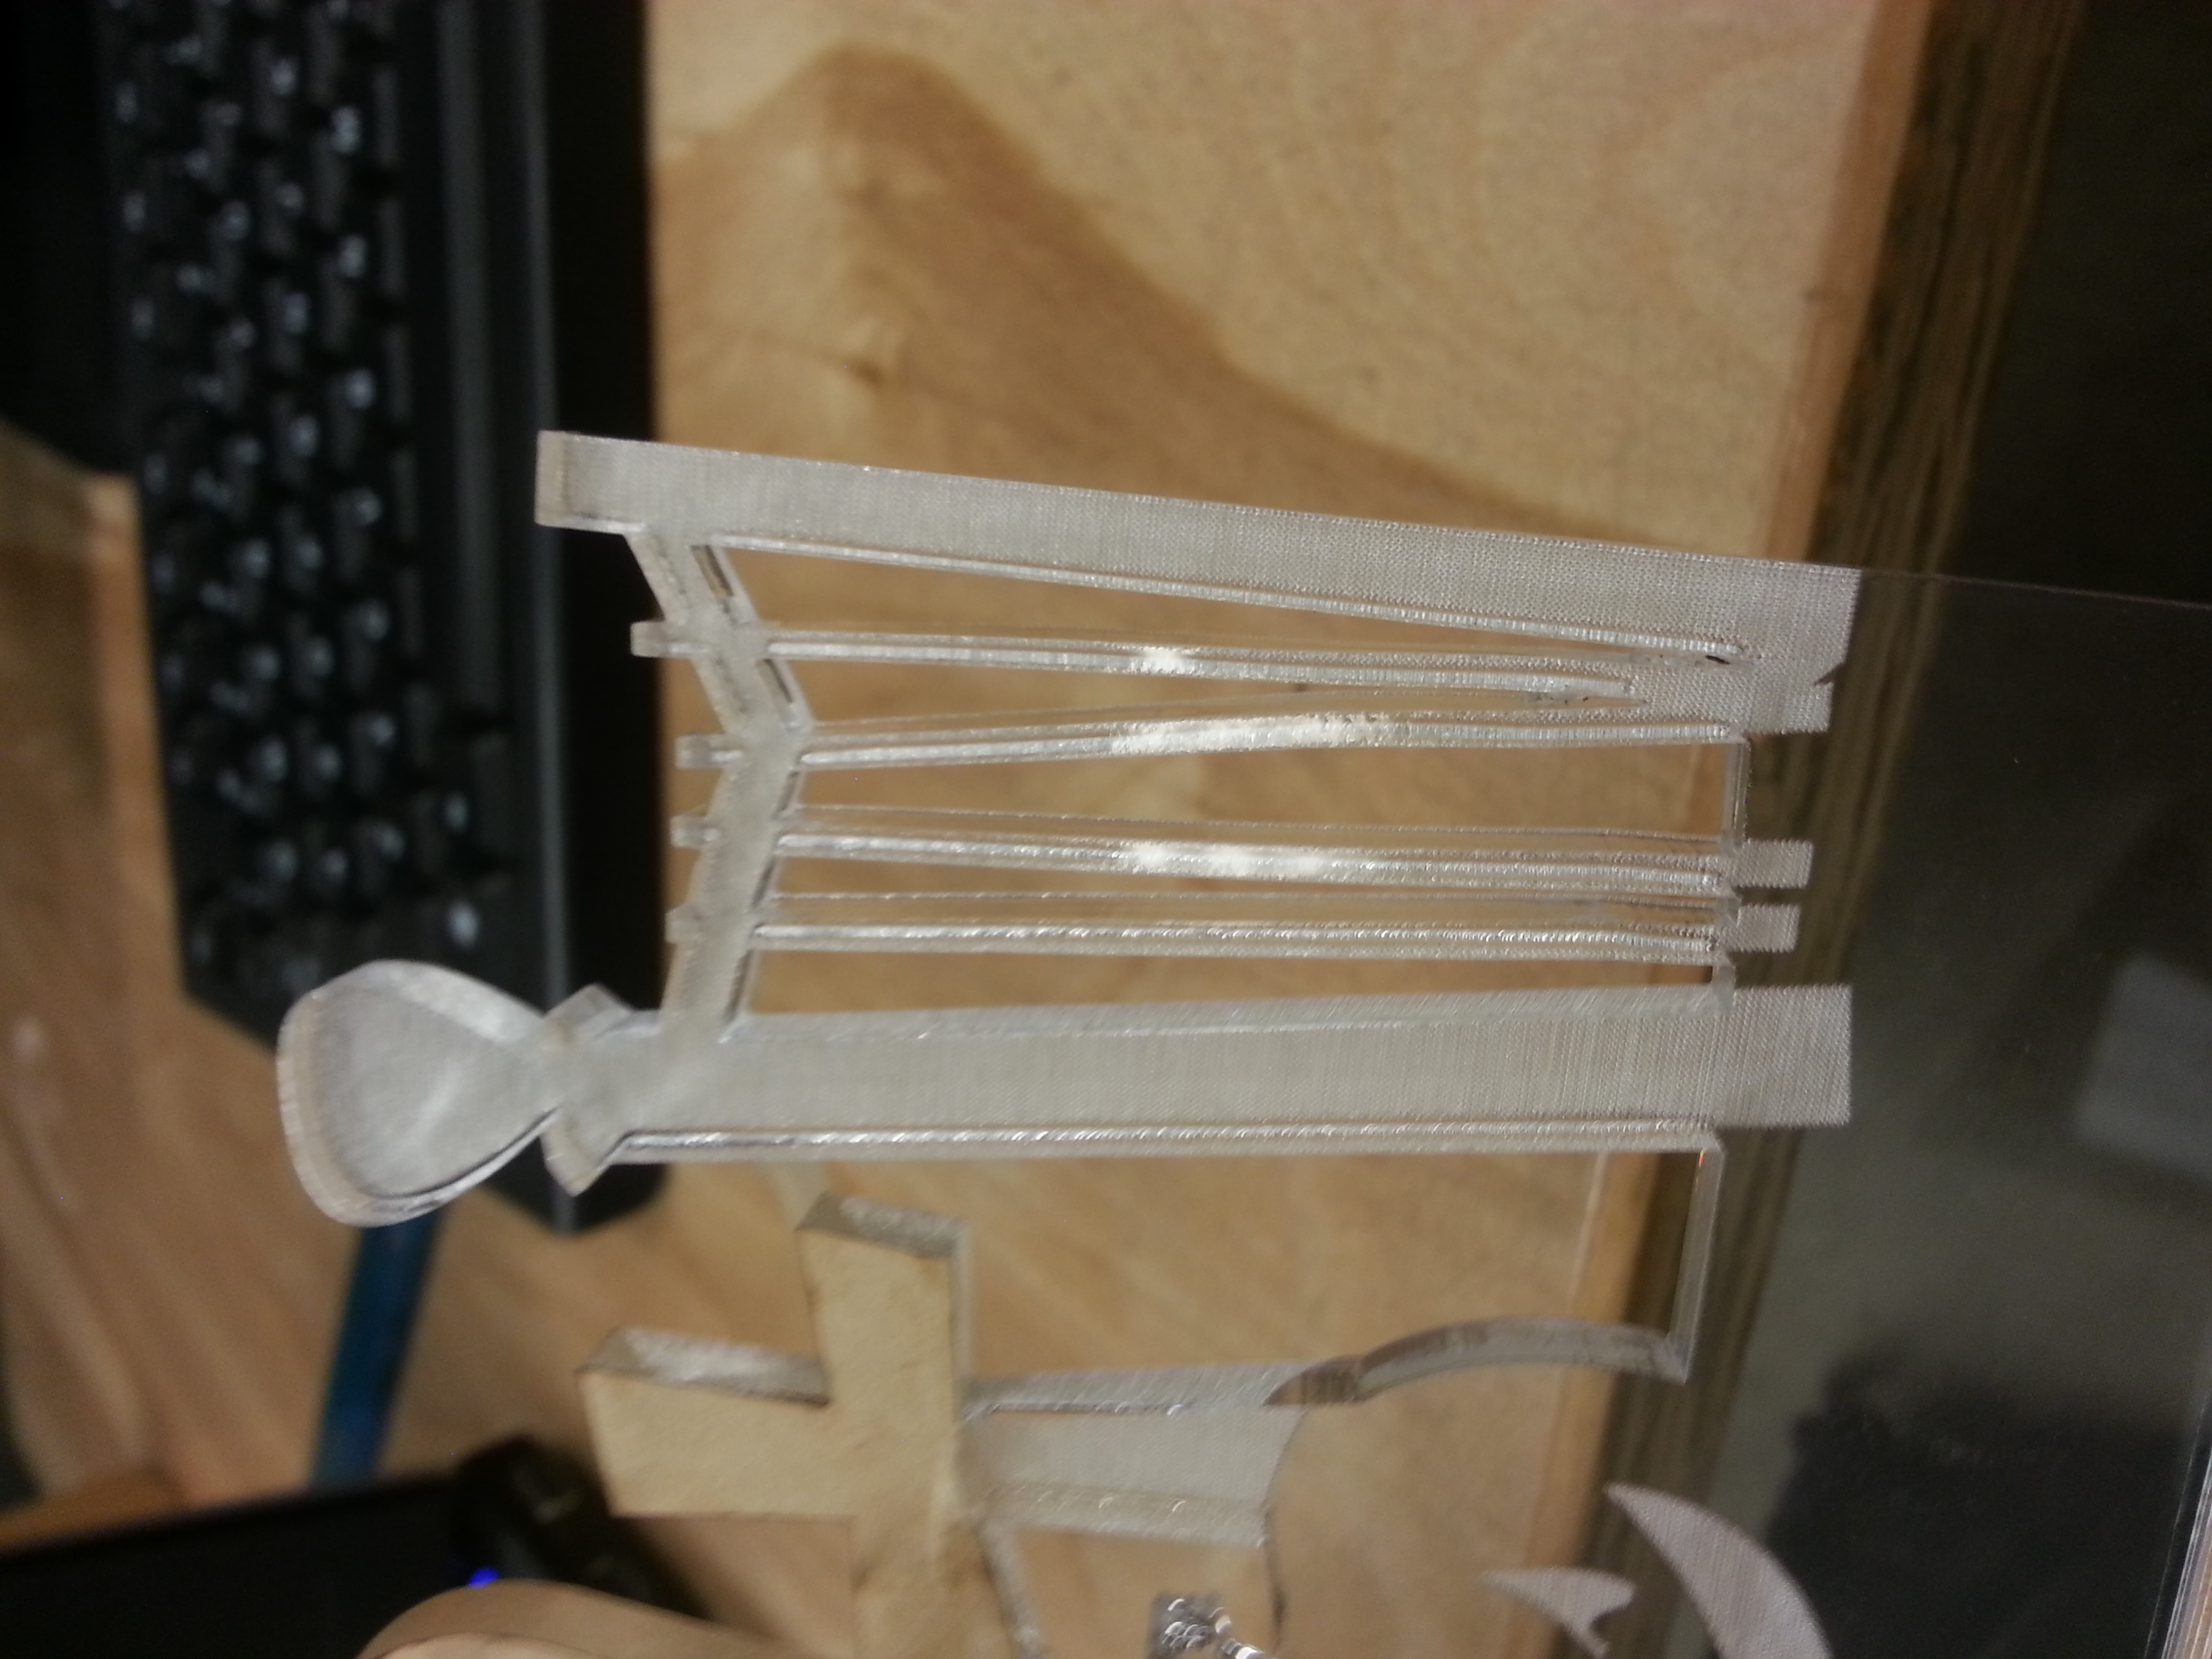
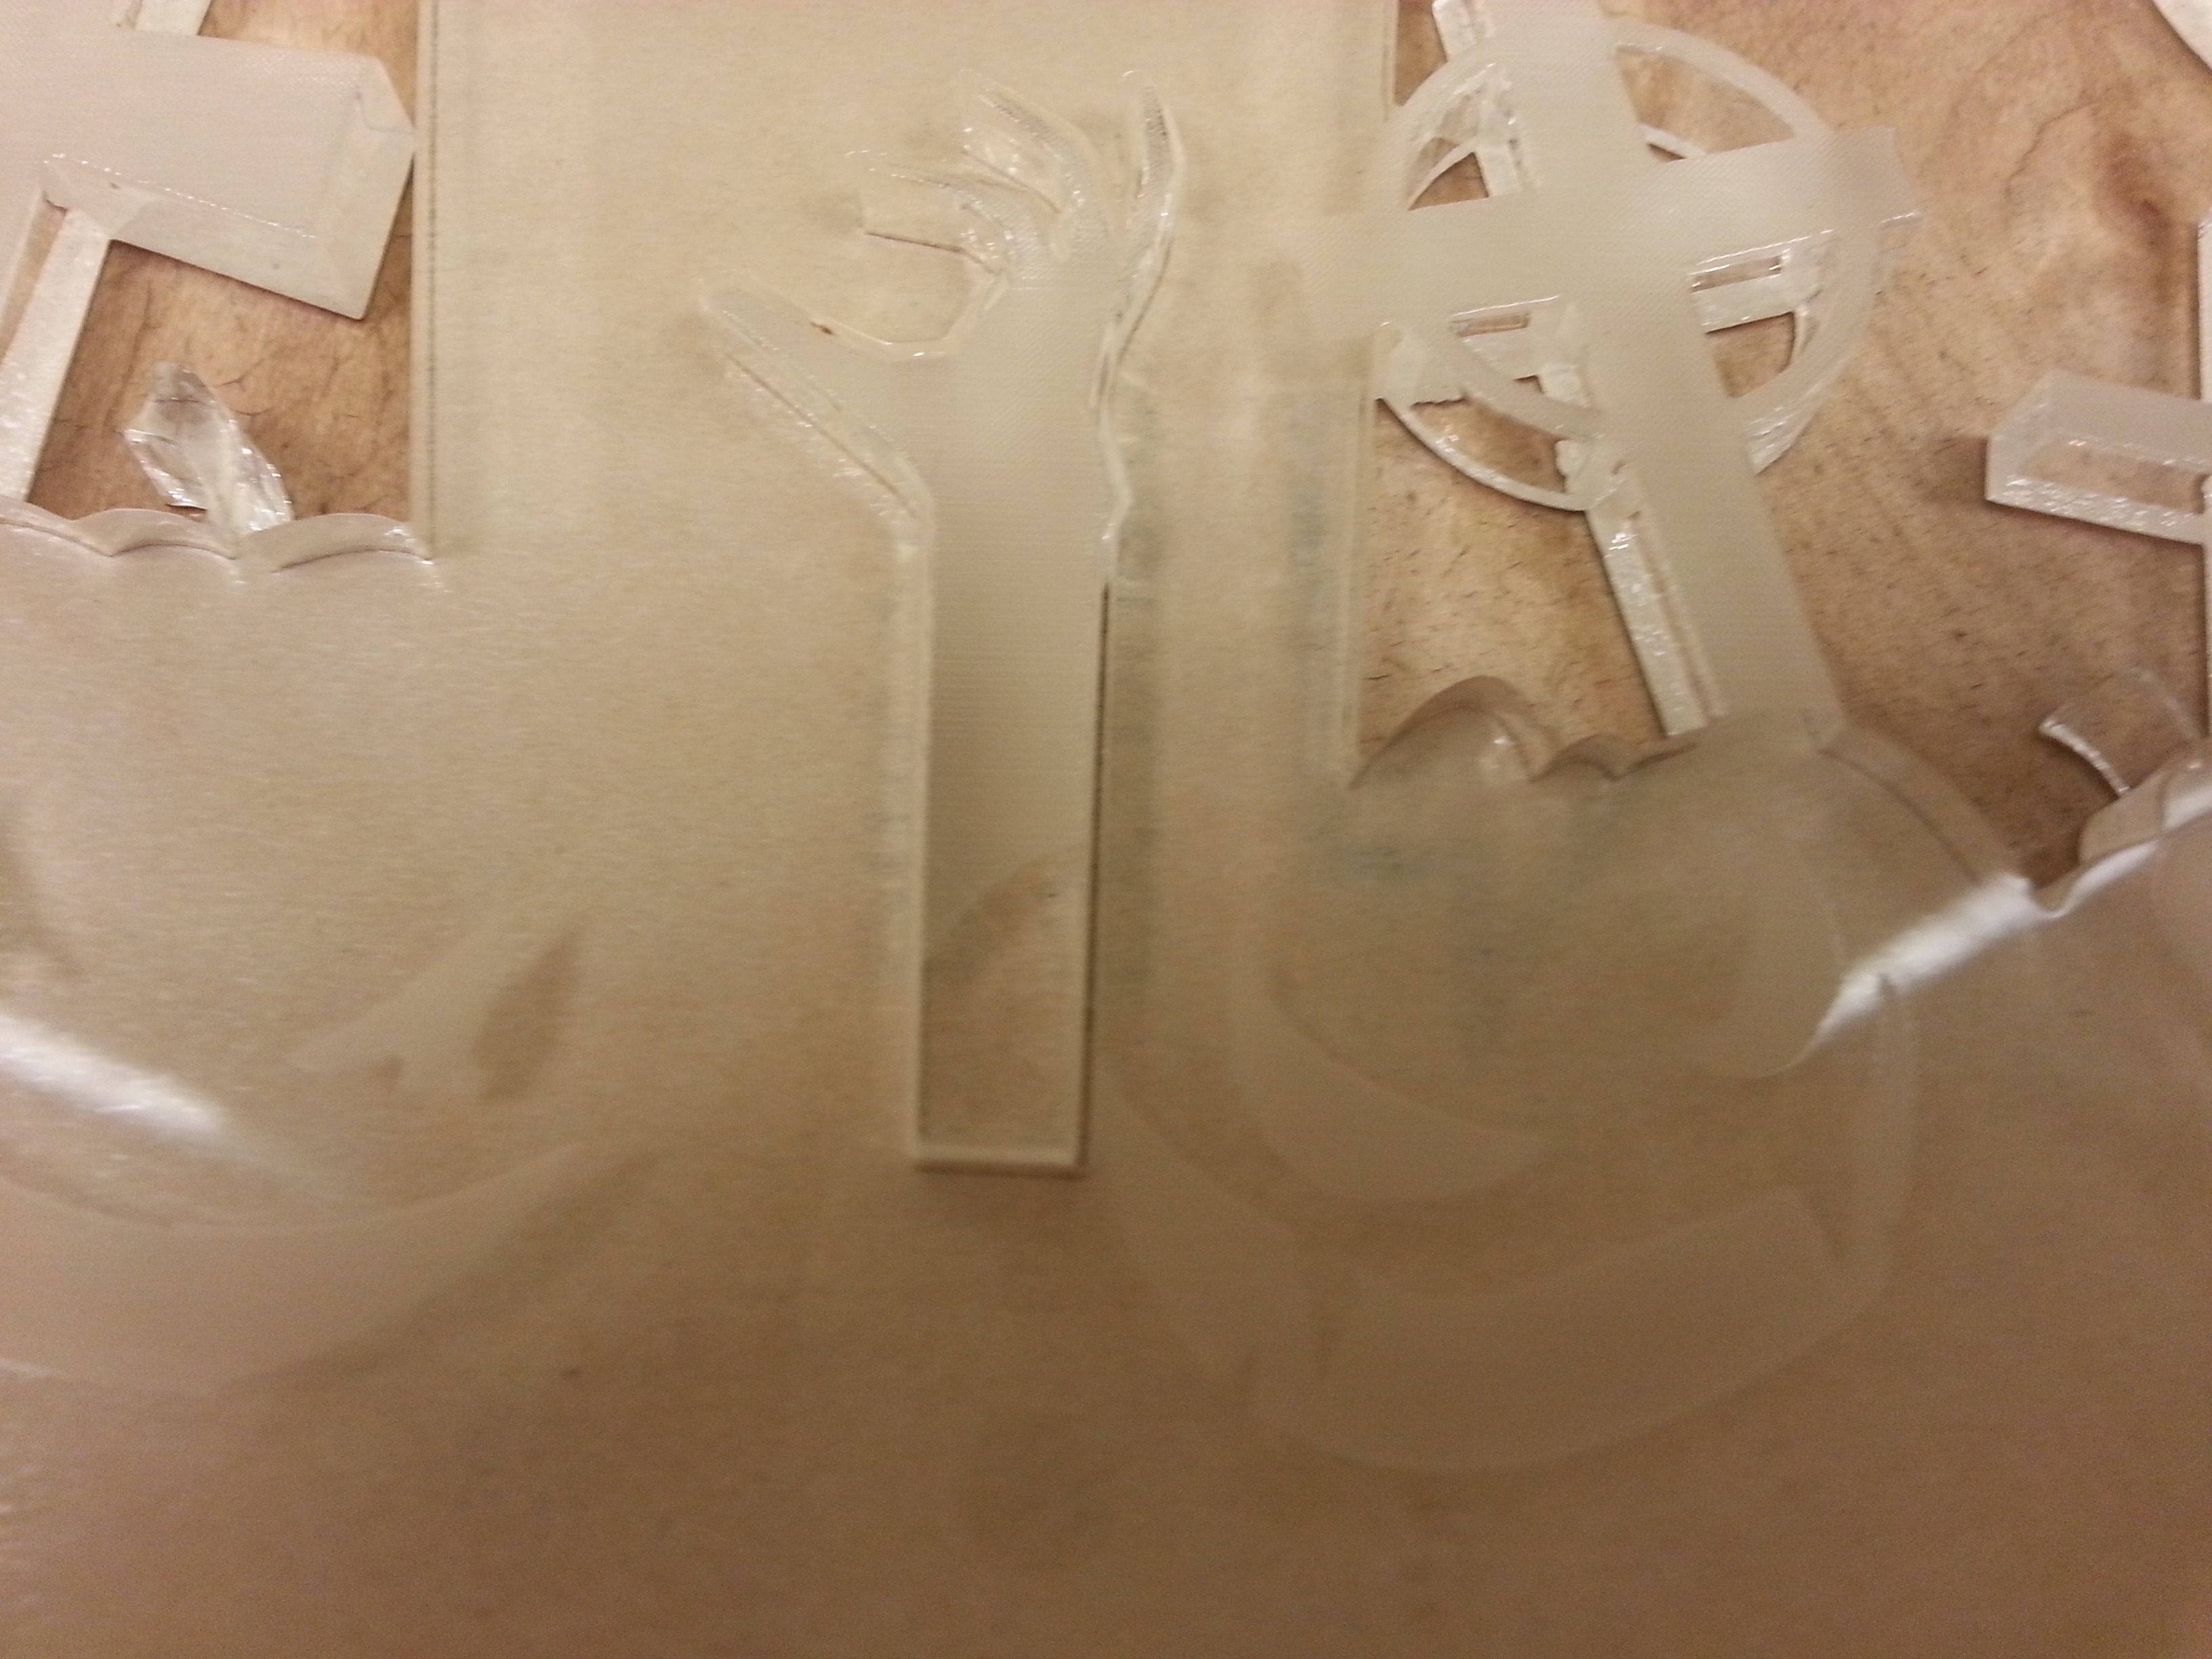
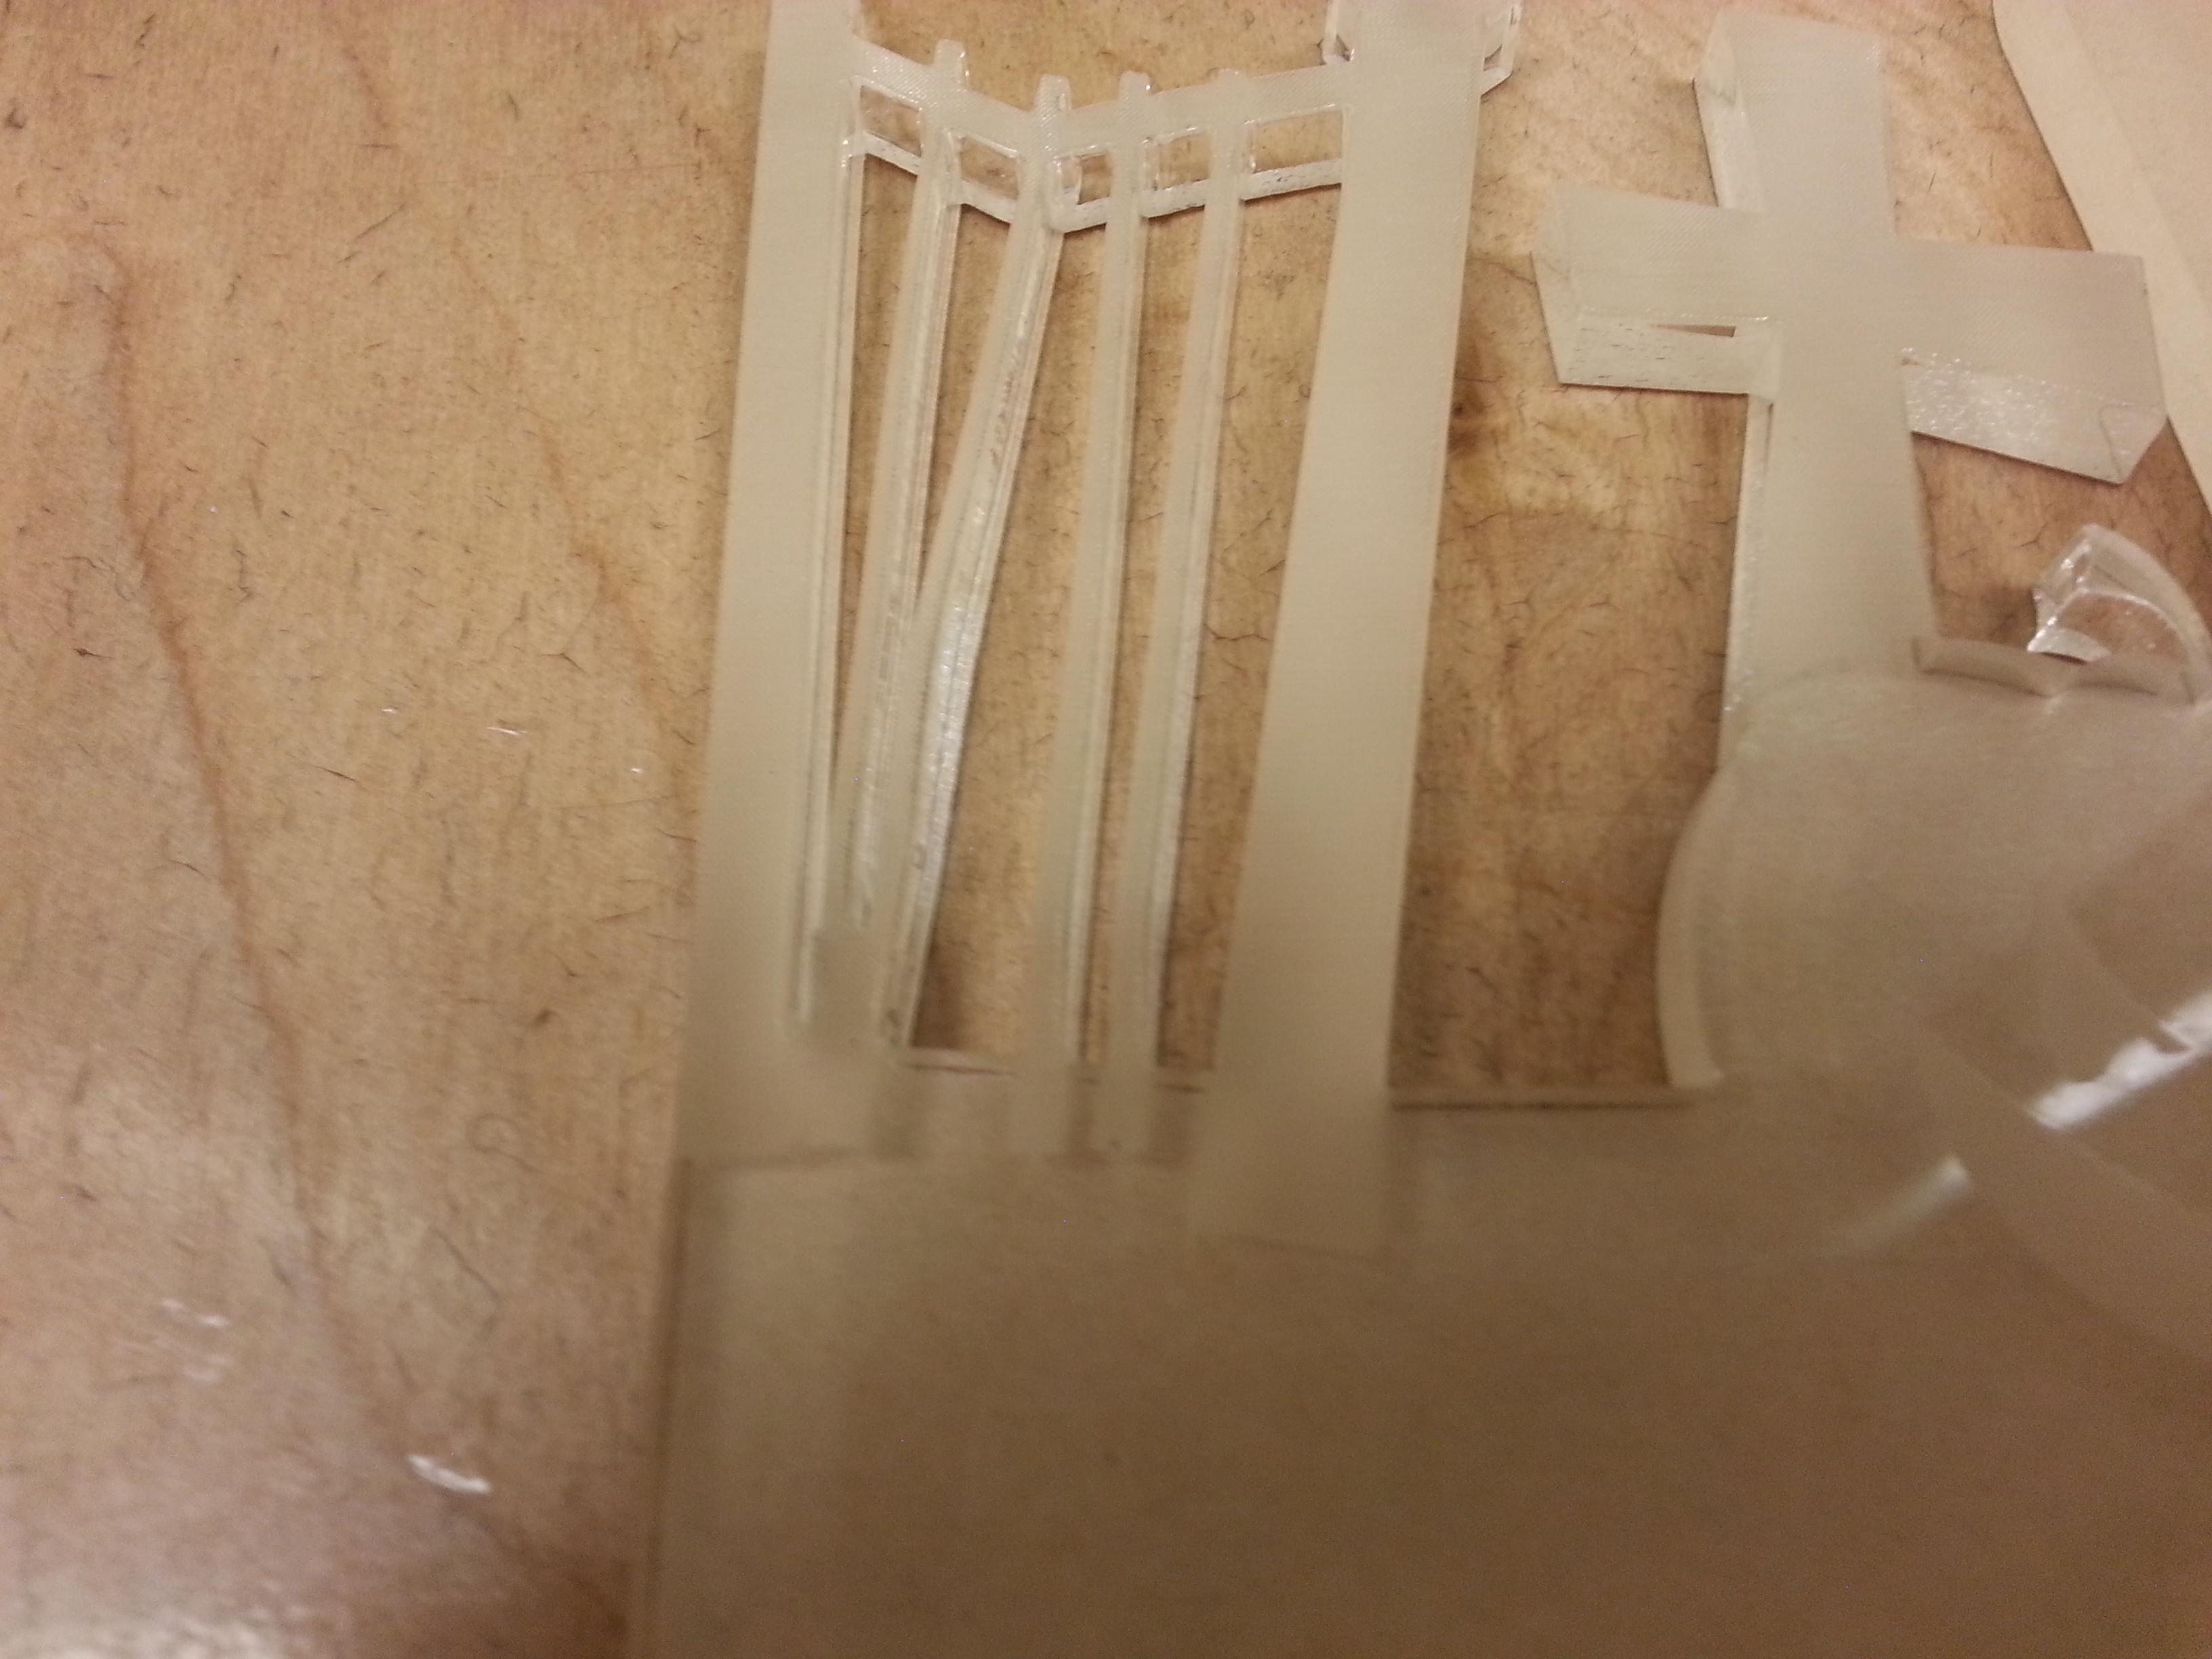
Below is a movie of the completed project edge lit. A couple of lessons learned from the project. First, when making your art, be sure there are no hidden remnants from editing your artwork - in this example; I missed a copy of the zombie hand that was buried under a layer. Because I didn’t turn the line off - instead of just getting etched by the artwork above it, it got cut out by the vector hidden underneath. Also - while I was smart enough to remove the grass from the artwork that I thought would melt, I didn't beef up the vertical rails of the fences - towards the bottom you can see where some of the rails melted and warped. Also shown in the picts above is the difference in viewing the etching form the front and from the back. I prefer the way it looks etched on the back so I always reverse my artwork. Lastly attached is a video of the acrylic lit by 3m color changing LED strips. I think it turned out pretty well :)
Below is a movie of the completed project edge lit. A couple of lessons learned from the project. First, when making your art, be sure there are no hidden remnants from editing your artwork - in this example; I missed a copy of the zombie hand that was buried under a layer. Because I didn’t turn the line off - instead of just getting etched by the artwork above it, it got cut out by the vector hidden underneath. Also - while I was smart enough to remove the grass from the artwork that I thought would melt, I didn't beef up the vertical rails of the fences - towards the bottom you can see where some of the rails melted and warped. Also shown in the picts above is the difference in viewing the etching form the front and from the back. I prefer the way it looks etched on the back so I always reverse my artwork. Lastly attached is a video of the acrylic lit by 3m color changing LED strips. I think it turned out pretty well :)