Laser Cut Coffee Stencil Using TinkerCAD
by Autodesk Gallery Workshop in Workshop > Laser Cutting
4285 Views, 26 Favorites, 0 Comments
Laser Cut Coffee Stencil Using TinkerCAD

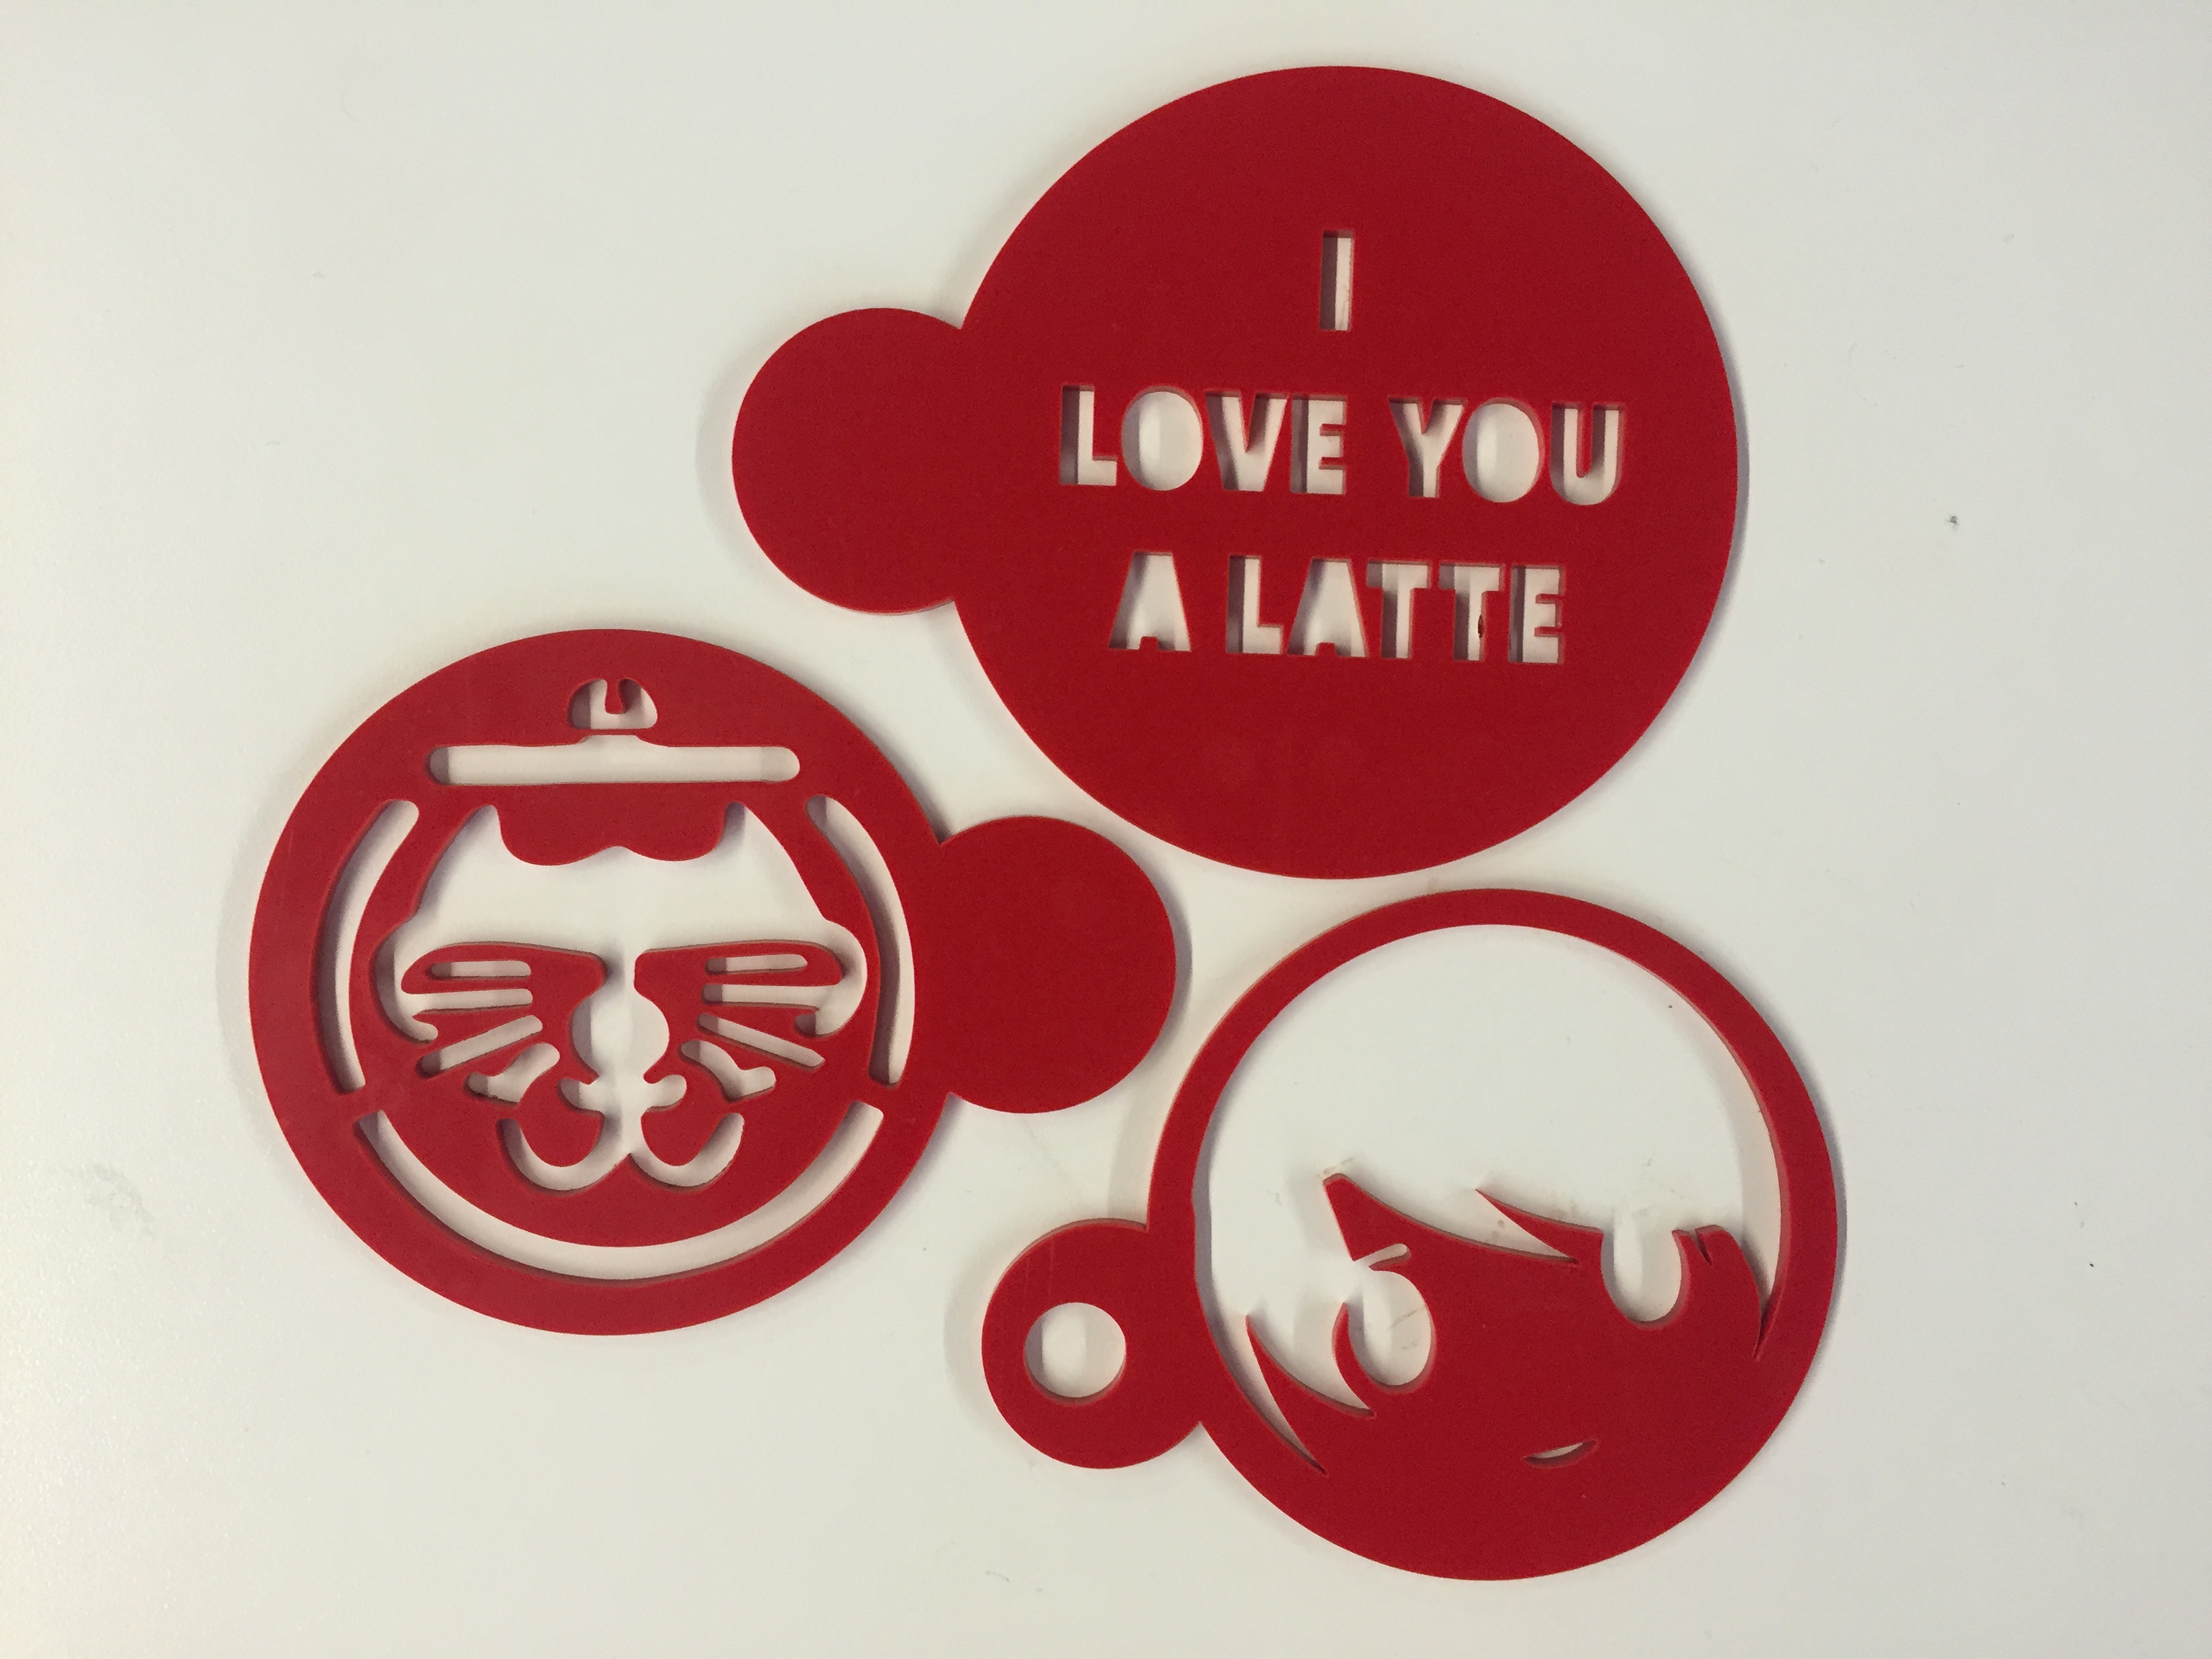
These step-by-step instructions will guide you through the basics of creating a coffee stencil using Tinkercad and preparing it for laser cutting. A coffee stencil can give a flare to your cup of joe, latte, or beverage of choice.
Tinkercad is a free web based CAD program: www.tinkercad.com
Create the Base of the Coffee Cup Stencil
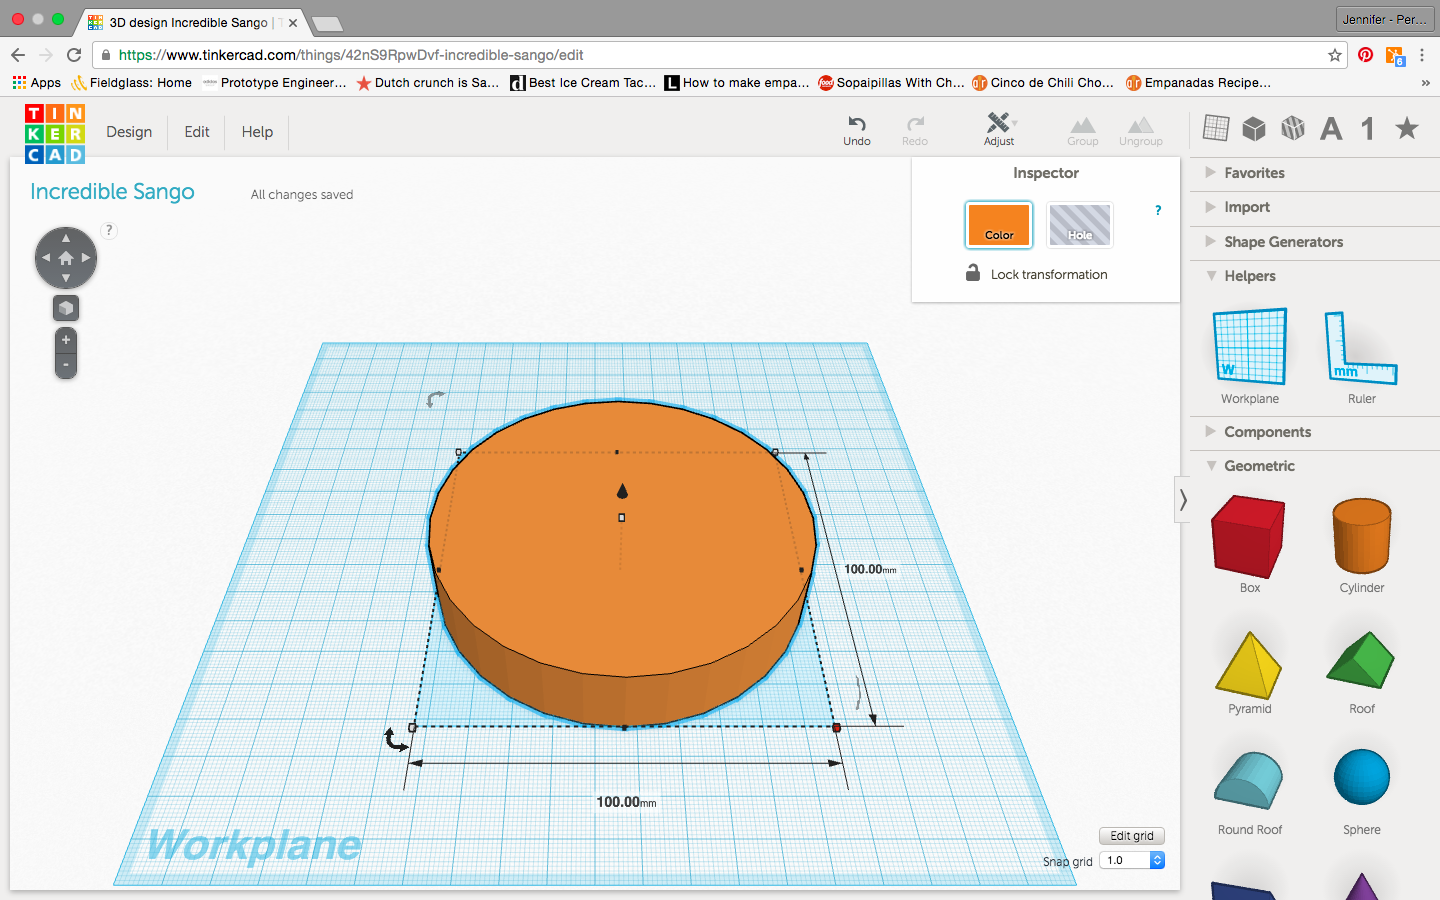
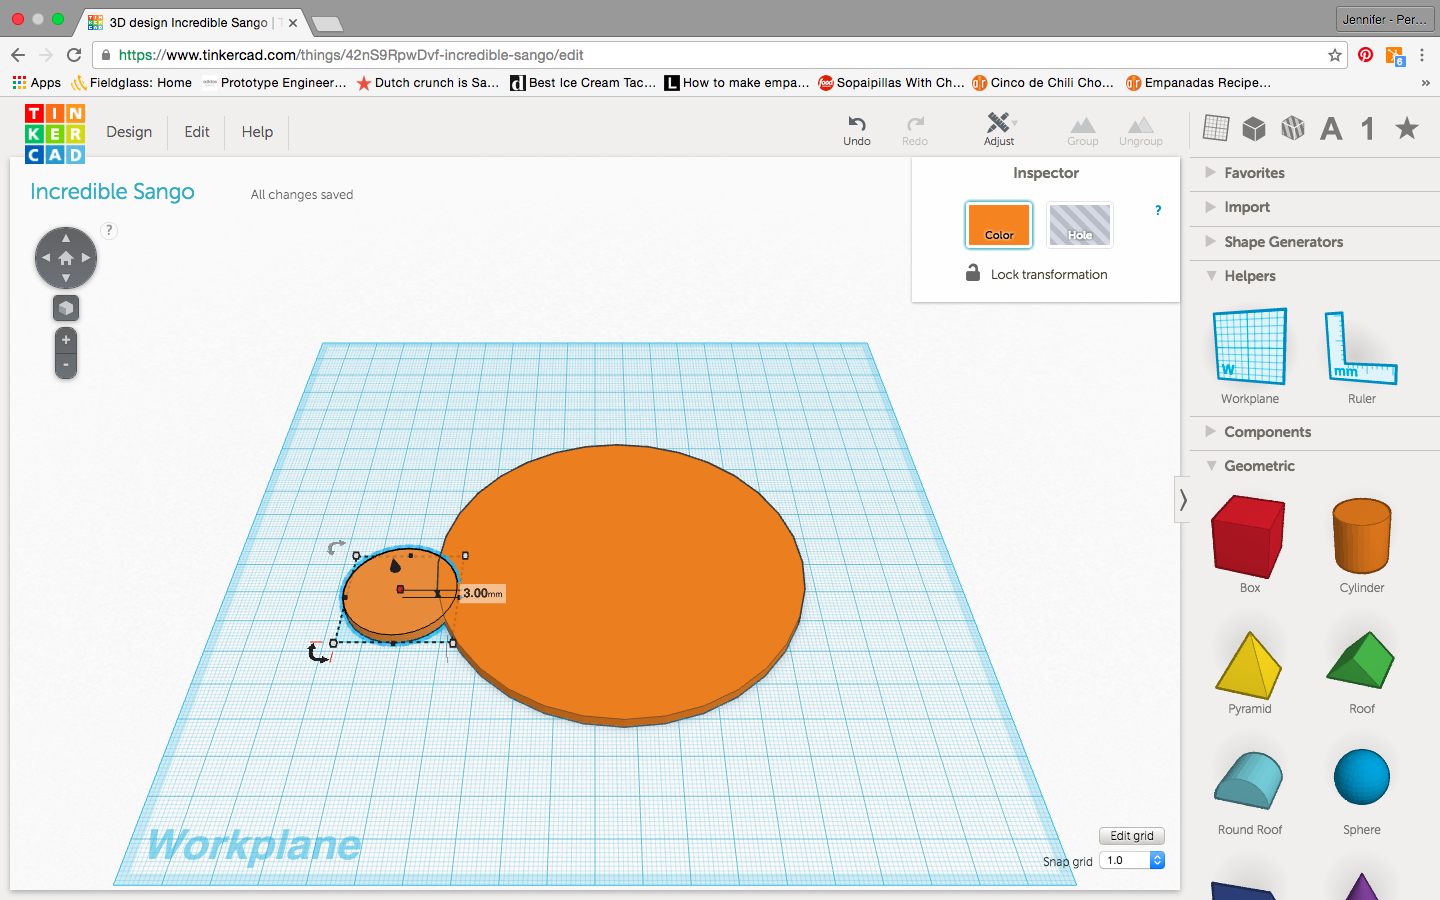
1. Under the “Geometric” tab on the right hand side, click and drag a cylinder shape onto the Workplane. Click on one of the small white boxes next to the shape to adjust the size of the cylinder so that it is 100mm x 100mm.
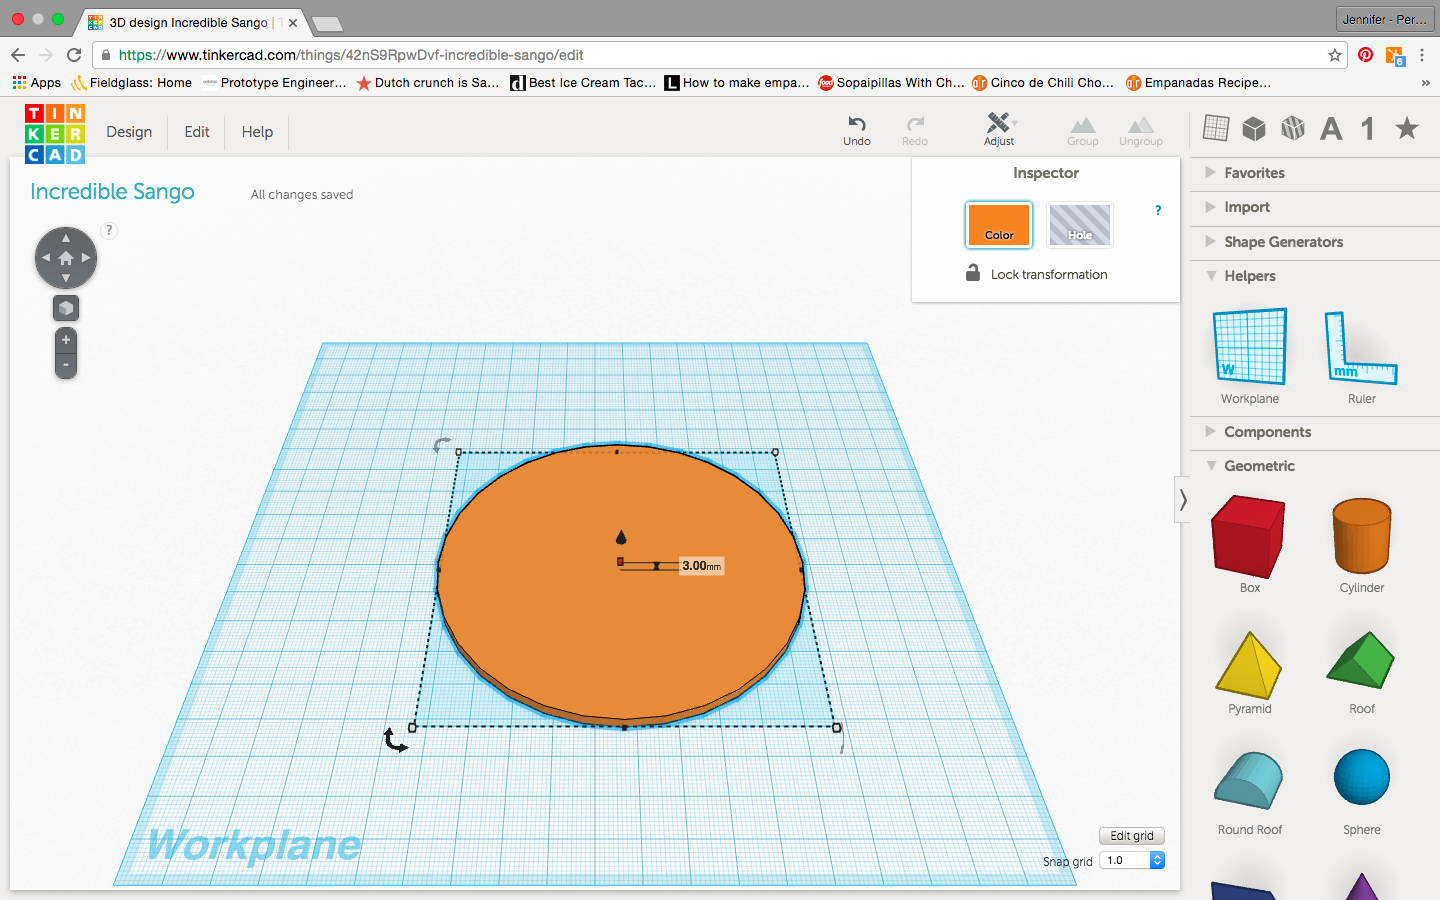
2. Click on the small white box on top of the cylinder to change the height of the cylinder to 3mm.
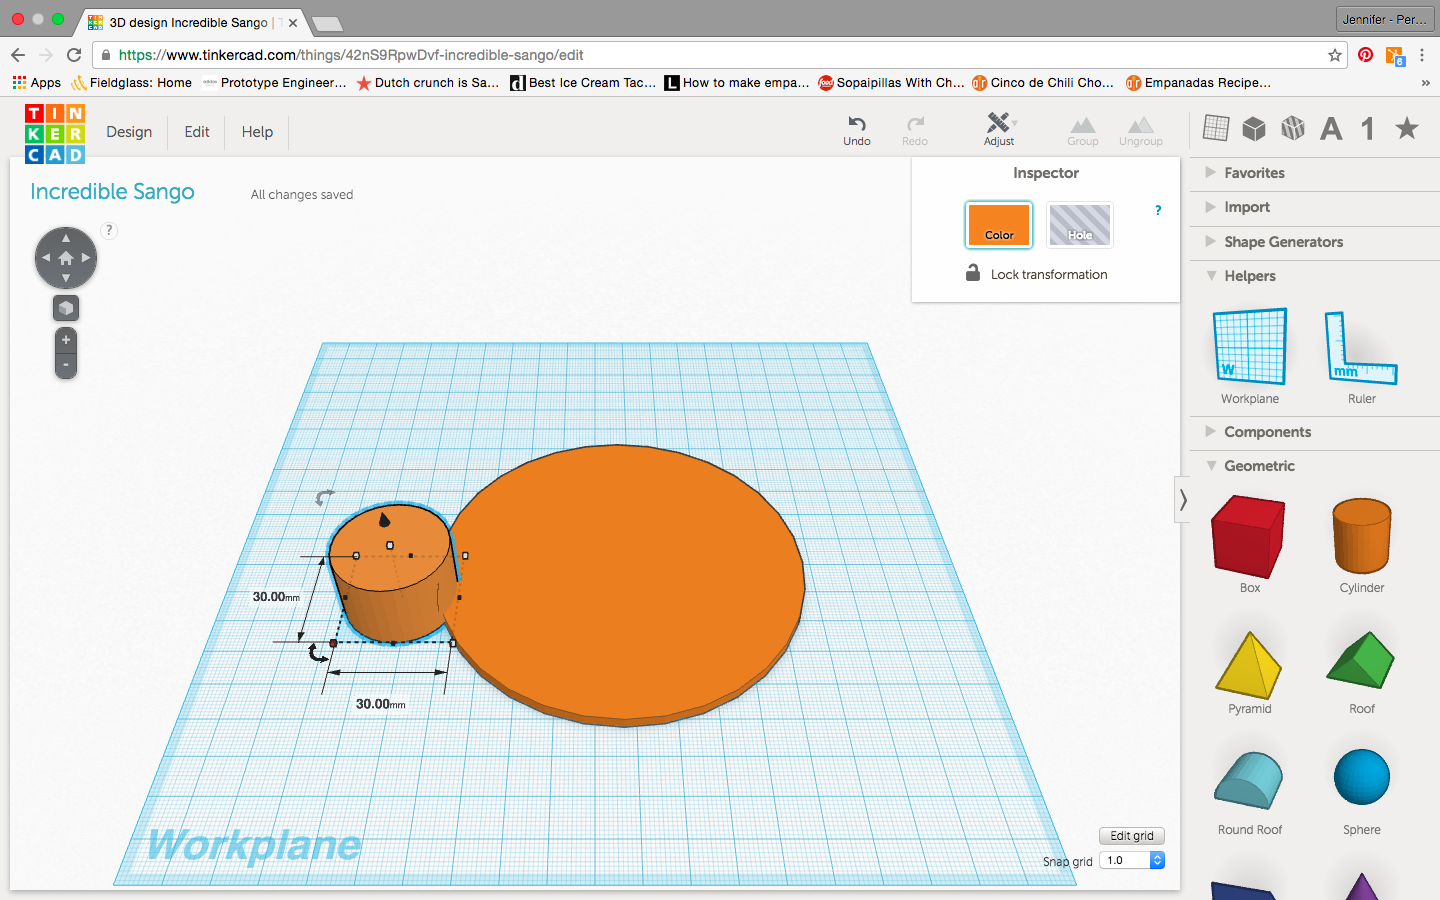
3. Drag another cylinder onto the Workplane and adjust the measurements so that the new cylinder is 30mm x 30mm. Be sure that the cylinders overlap each other!
4. Change the height of this cylinder to 3mm as well.
5. You have created the base of your coffee cup stencil! Now, it’s time to get creative and have fun with your own design. Here’s an example of using a star as the design. Remember, that any holes you create in your design are what will show up on your coffee foam.
Create the Coffee Stencil Design
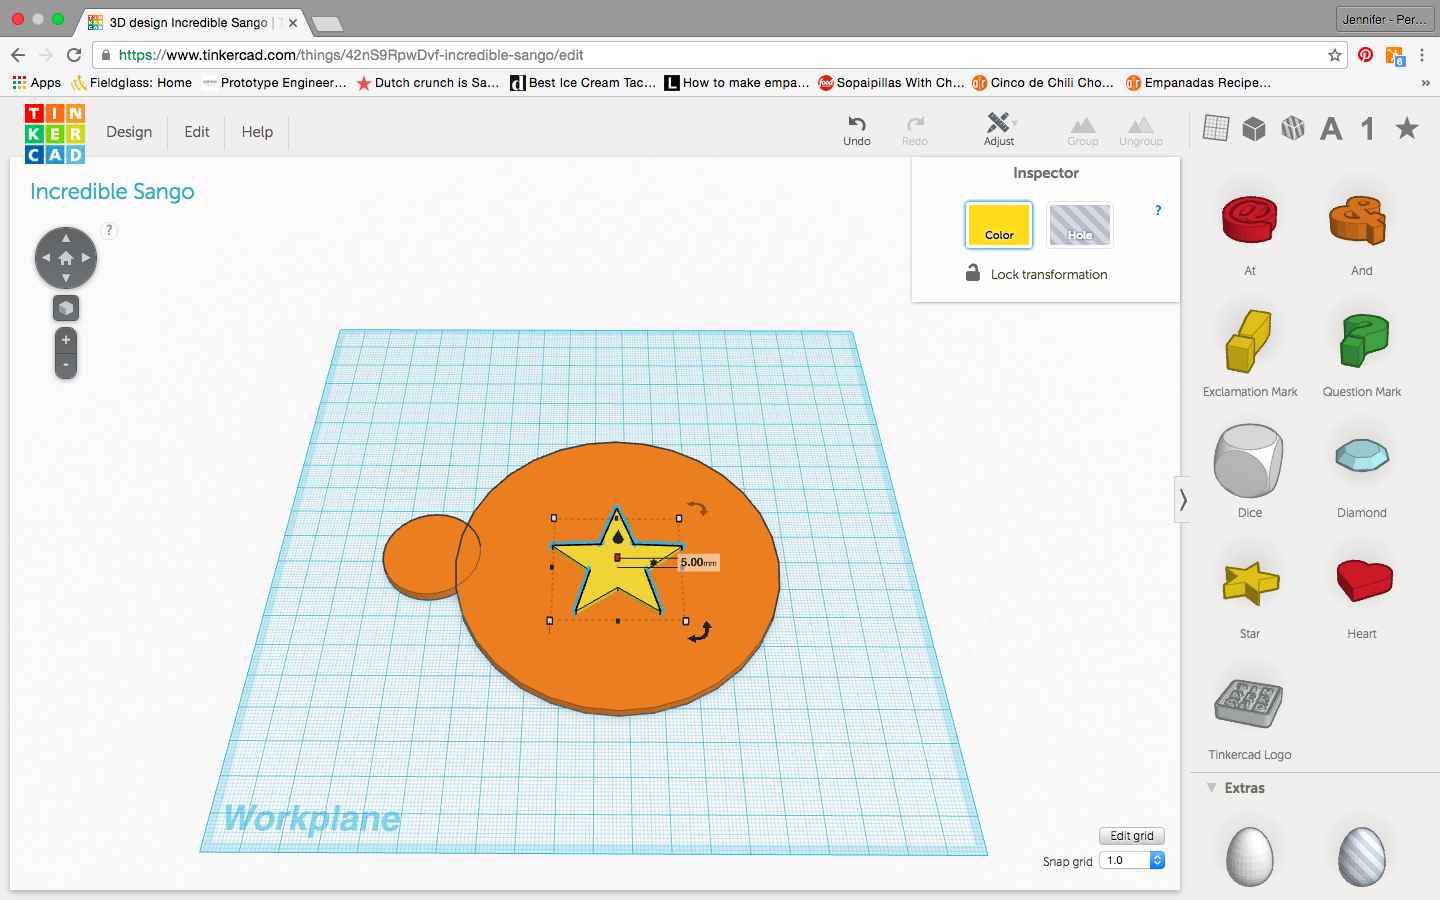
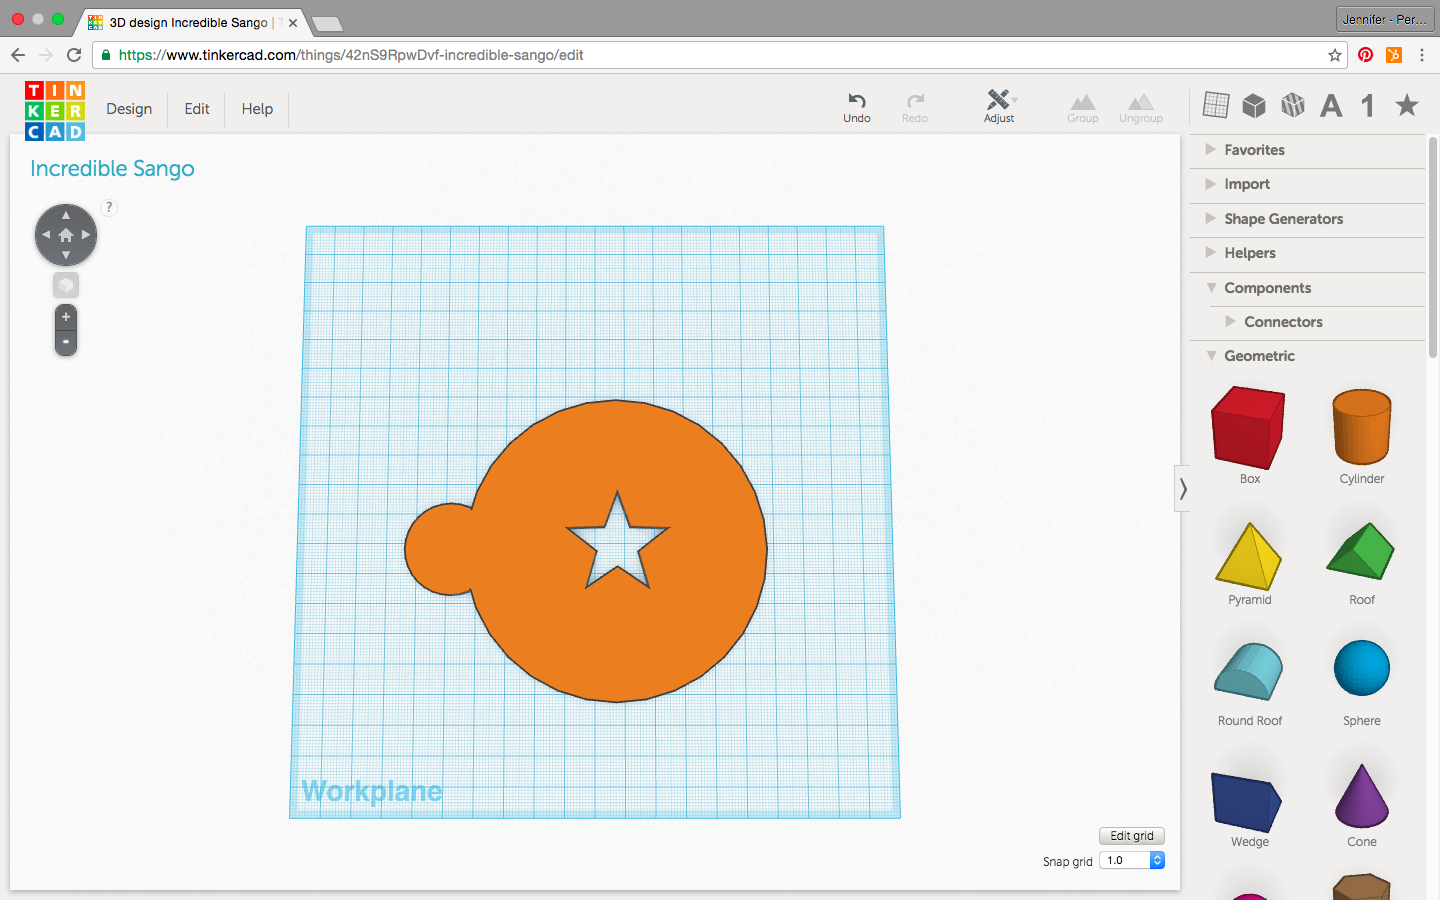
6. To create your design, drag and drop different shapes, letters, and numbers on your coffee cup stencil (orange). Be sure that the height of your new object (yellow) is greater than 3mm.
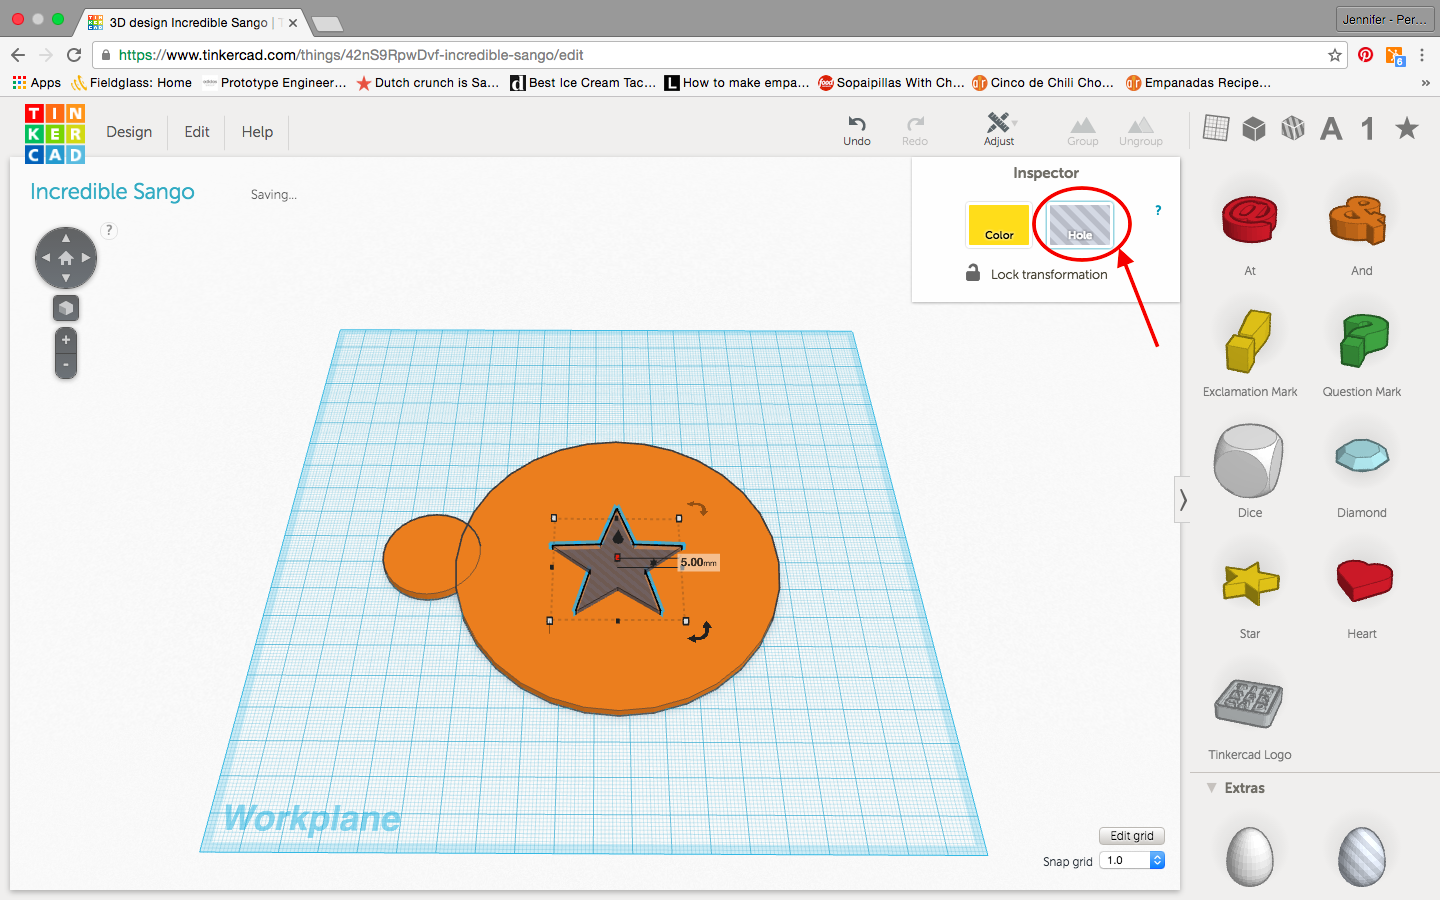
7. Once you are happy with your design, select each object (by clicking on the shape and holding down the “shift” button) and click the “hole” button under the “inspector” tab on the top right of your screen. The objects you have selected should turn to a gray color, indicating that you have created a hole!
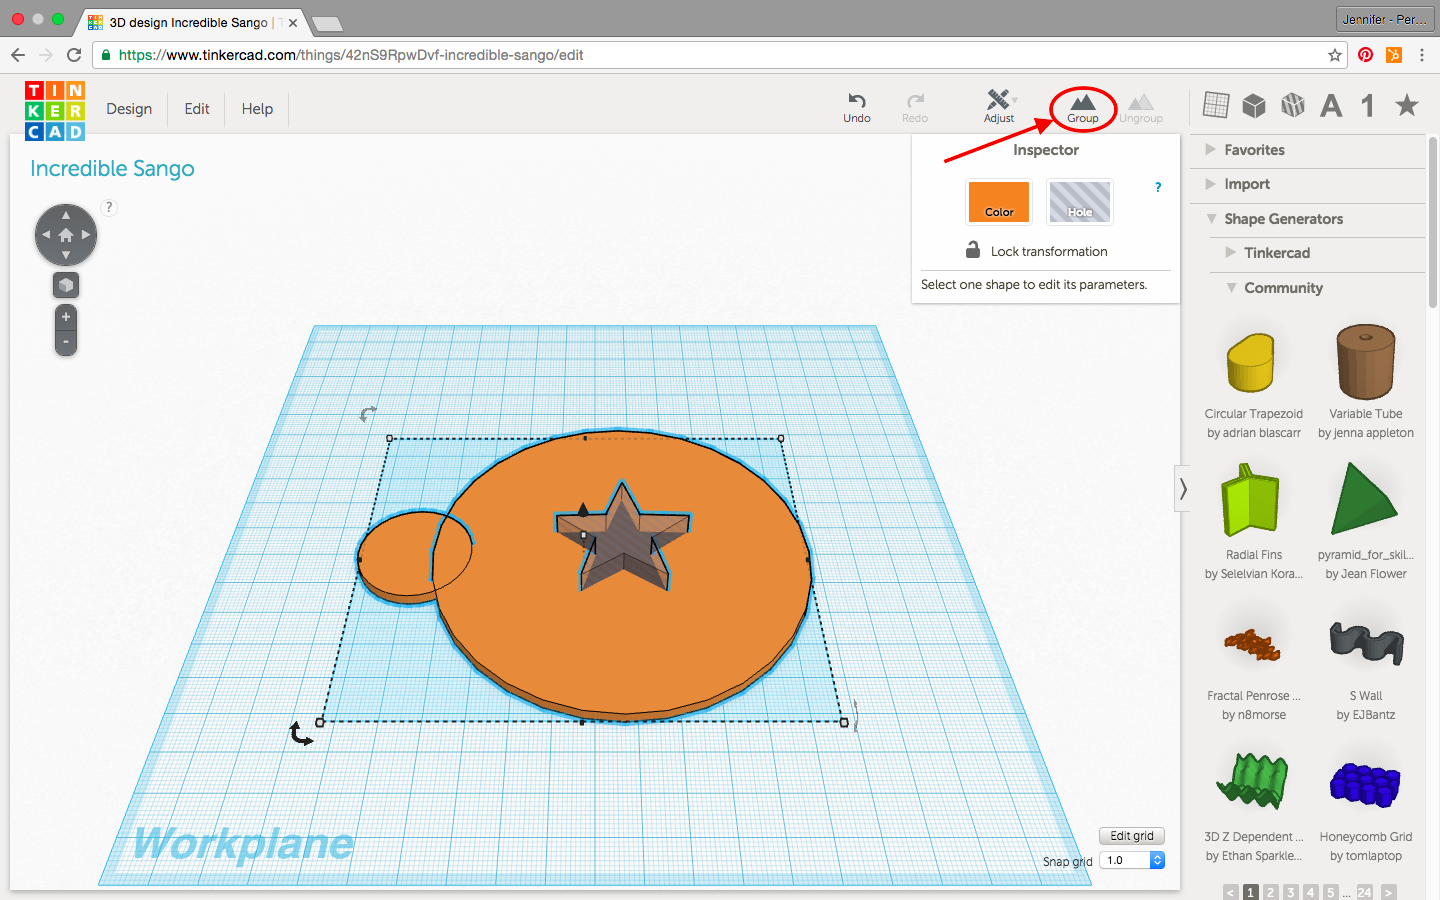
8. To double check whether or not our holes are the way we want them to be, select ALL of the shapes in your design (by pressing CTRL+A) and then clicking on the “group” button on the top right portion of your toolbar.
9. Your holes should now be gone and you should have a preview of what your stencil will look like.
Saving the File for the Laser Cutter
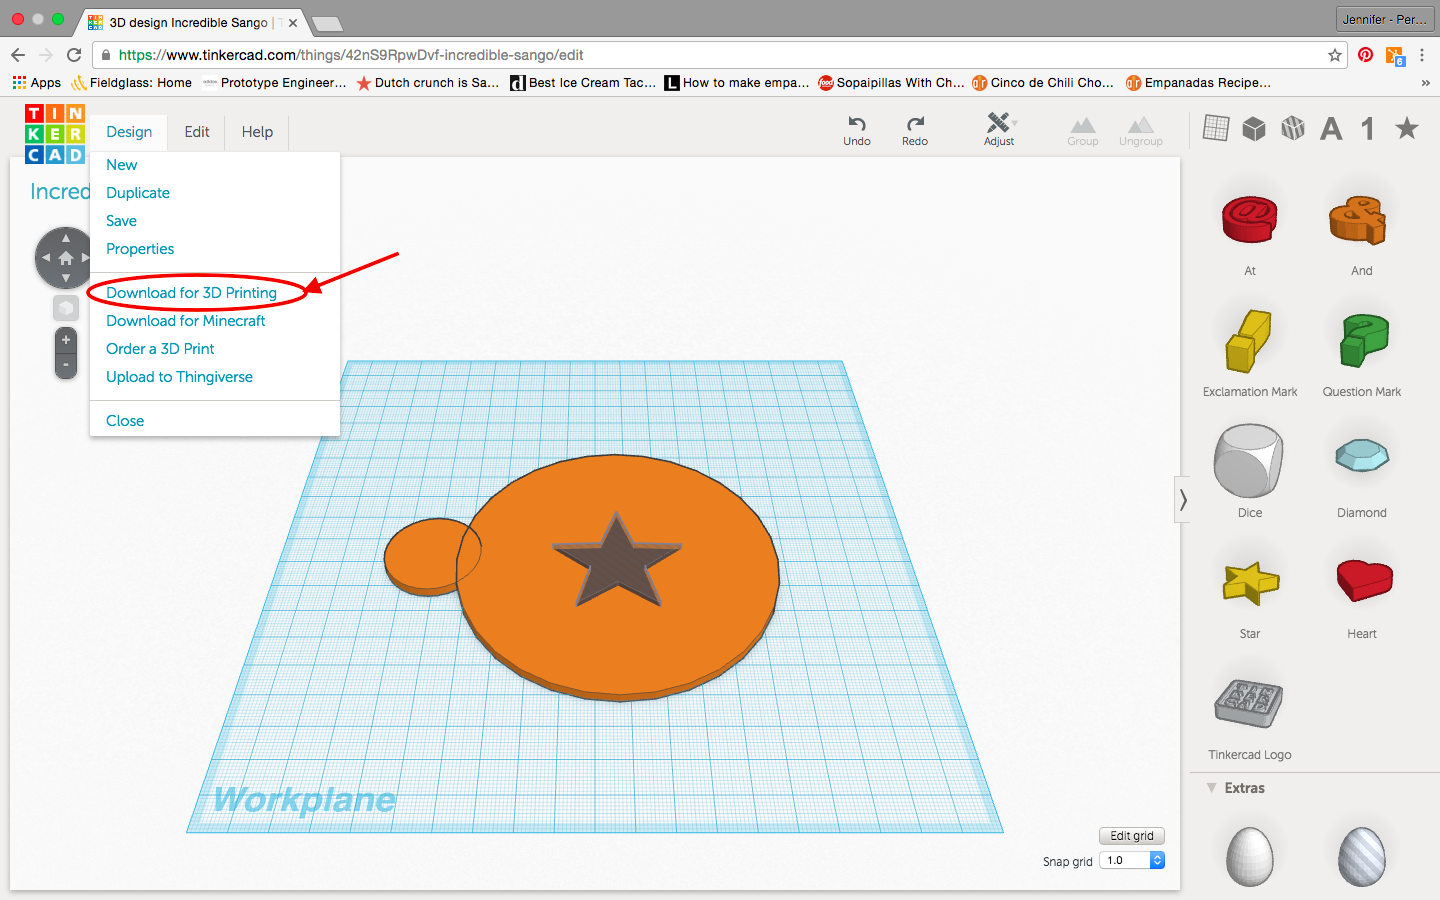
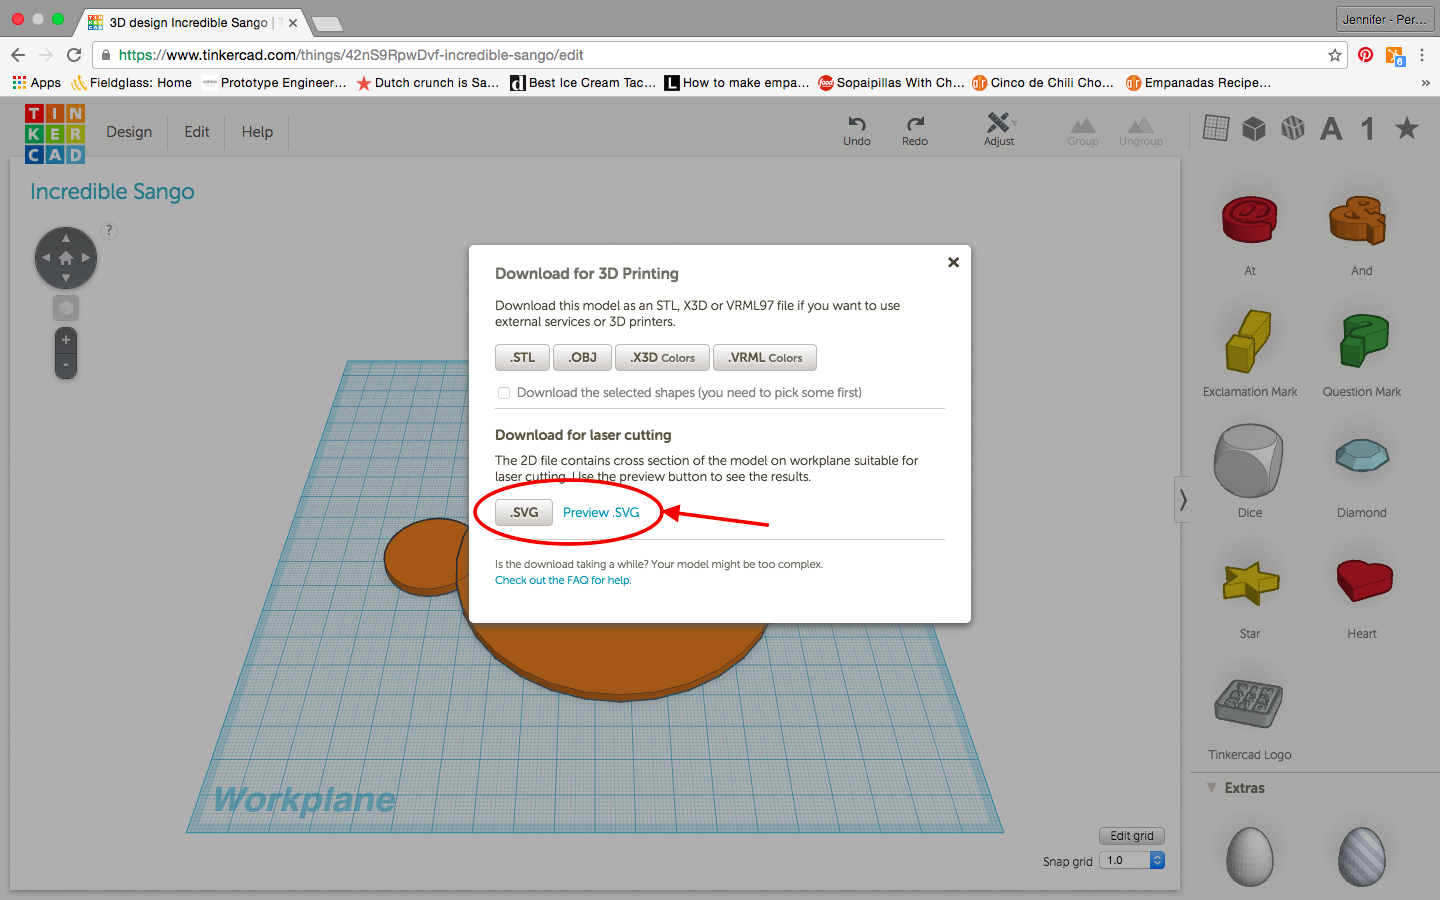
10. When you are finished with your design, go to “Design” in the toolbar and select “Download for 3D Printing.”
11. A dialog box should appear asking what type of file we want to save our design as. For the laser cutter, we want to save the file as .svg
12. Congratulations, you are now ready to send your file off to the laser cutter!