Laser Cut 3D Shark Puzzle
by _Bothy_ in Workshop > Laser Cutting
1738 Views, 3 Favorites, 0 Comments
Laser Cut 3D Shark Puzzle
Laser cut 3D shark puzzle, designed for plywood but can be adapted to any number of materials with measurement corrections
Image
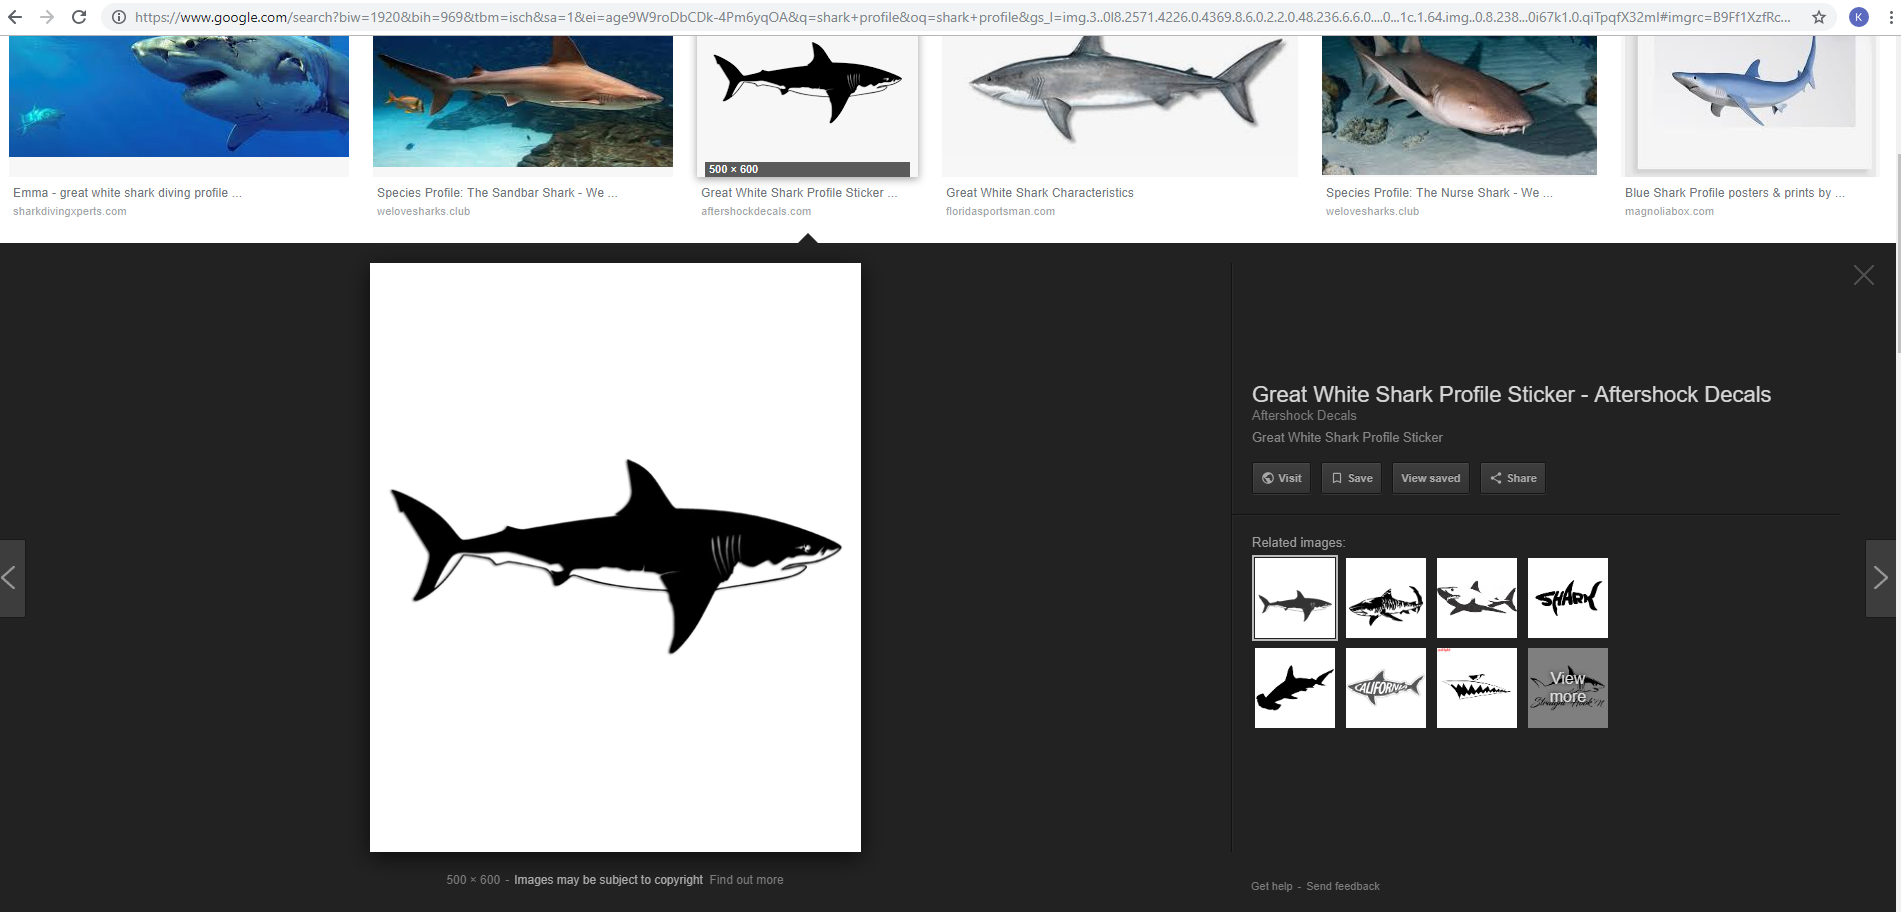
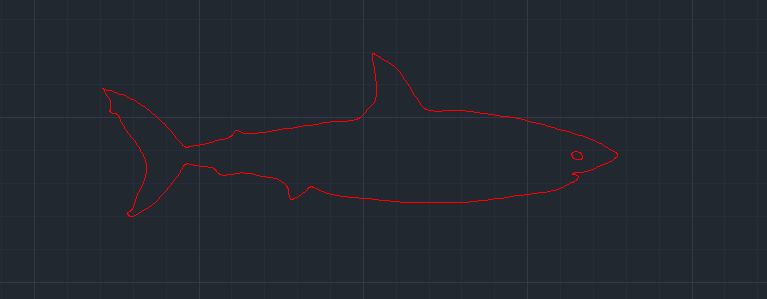
Search "shark profile" on google images, select a photo and copy it.
AutoCAD
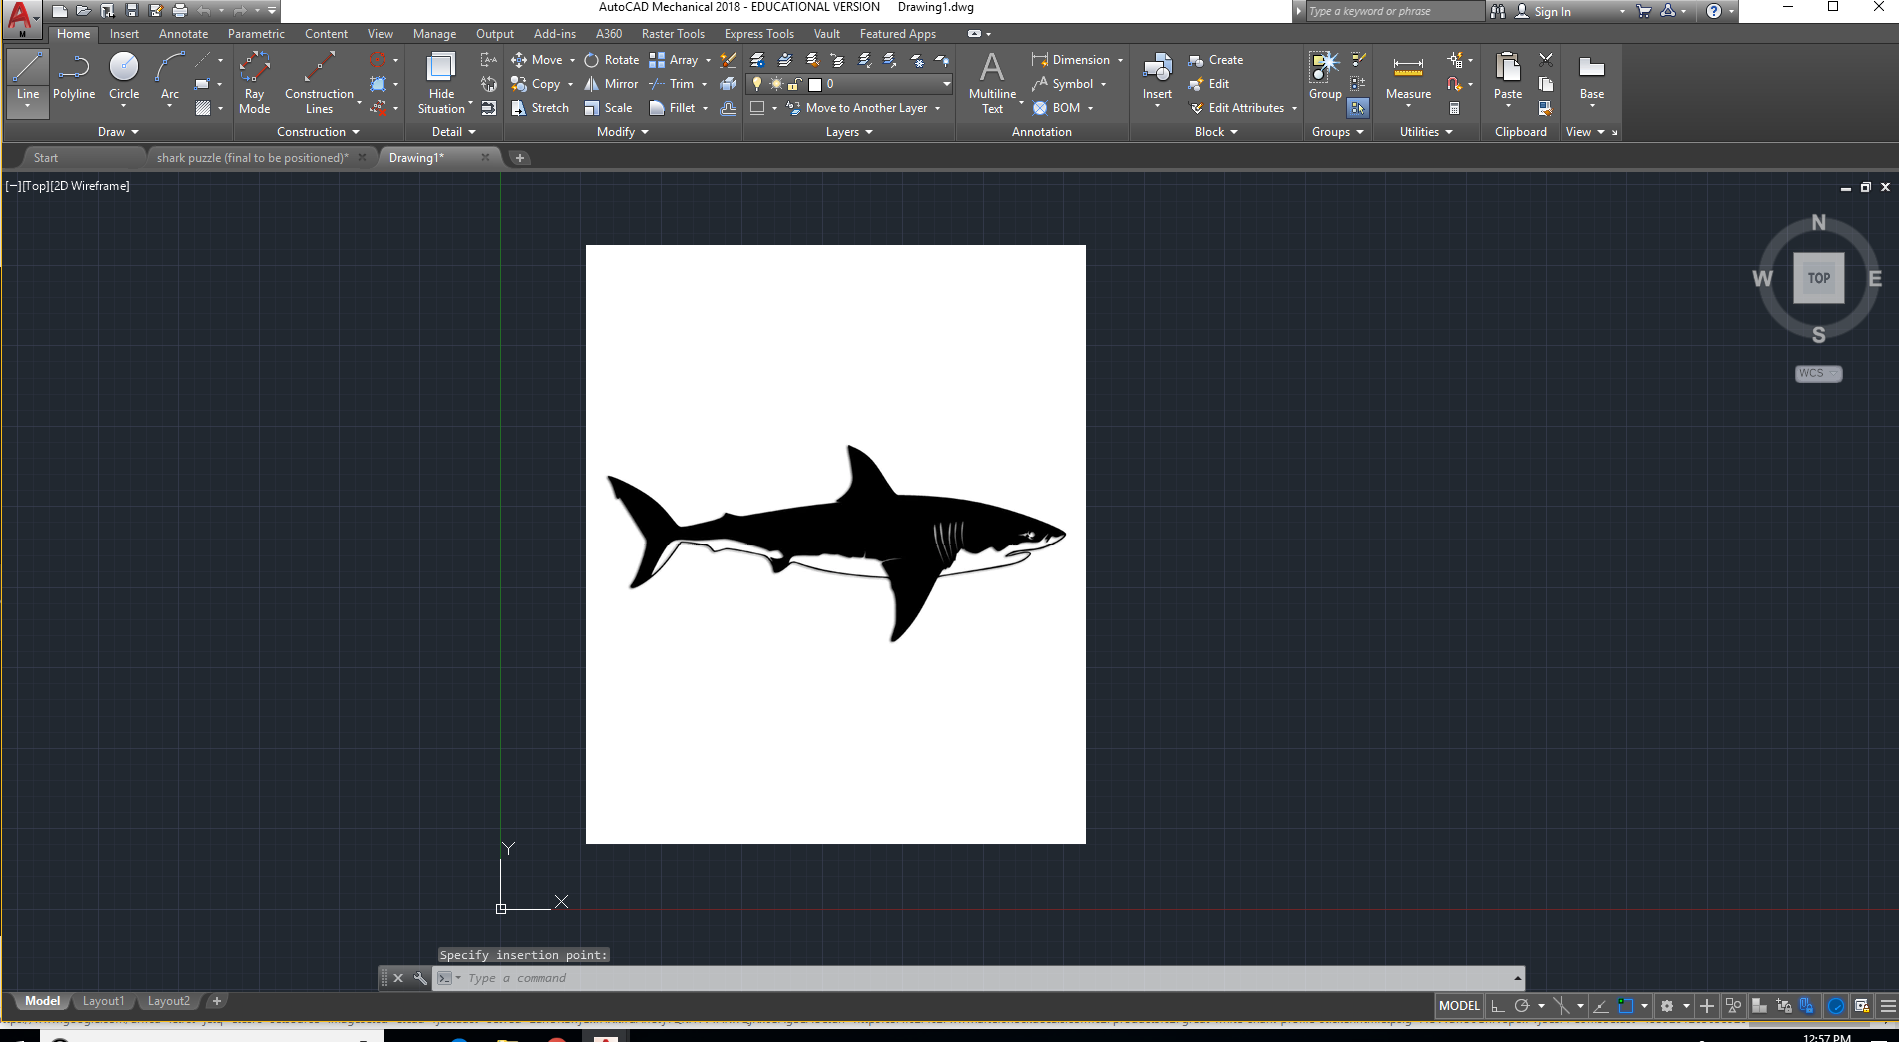
Paste your shark profile into AutoCAD with [Ctrl+V]. Then scale your drawing measuring from the tip of the sharks snout to its rear fin to your desired size (recommend 7")
Tracing
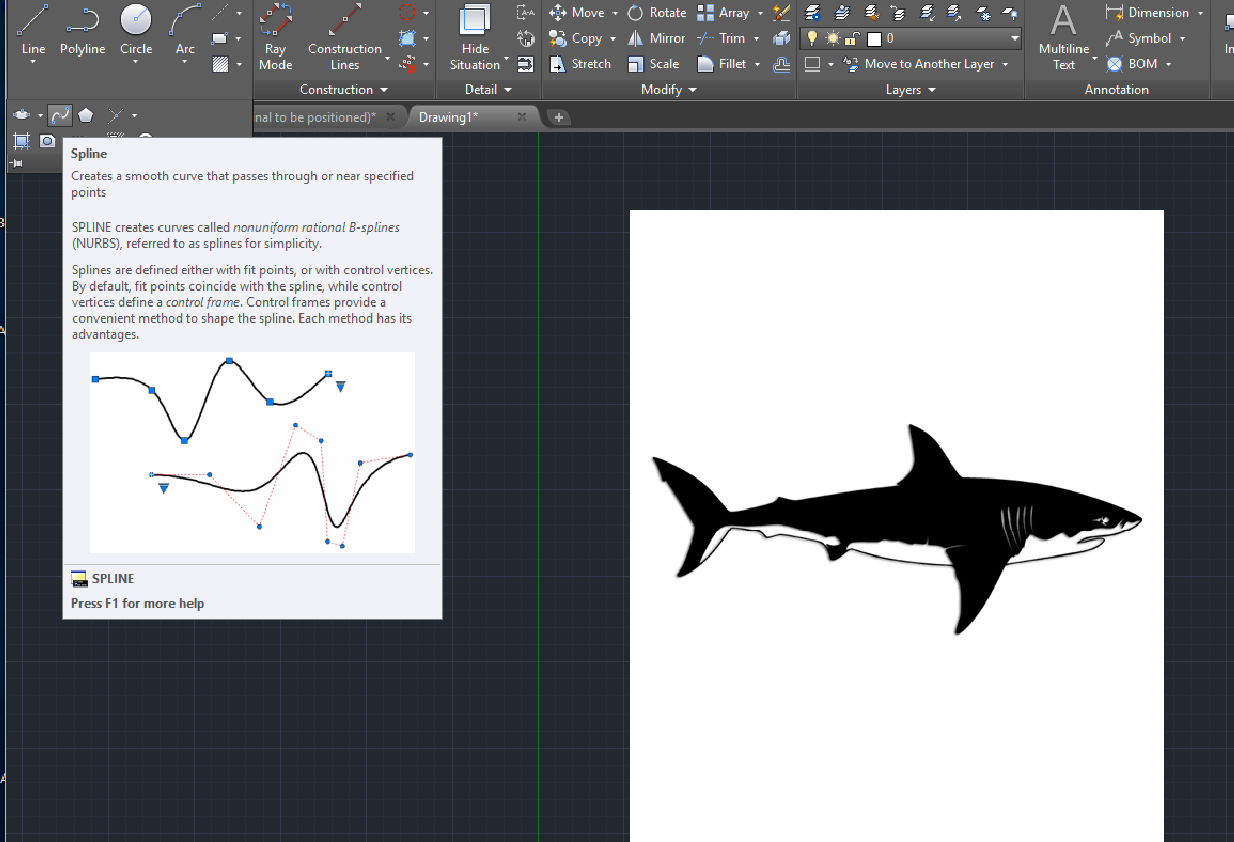
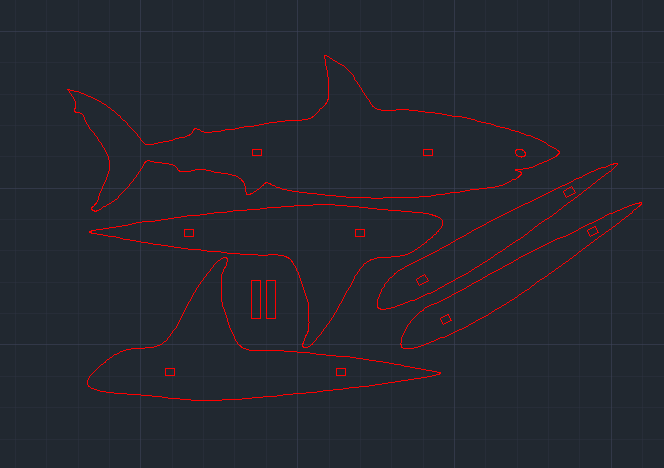
Trace first plane of your shark profile using the "Spline" tool. Do not include side fins in this trace they will be on an outer layer.
Second Trace
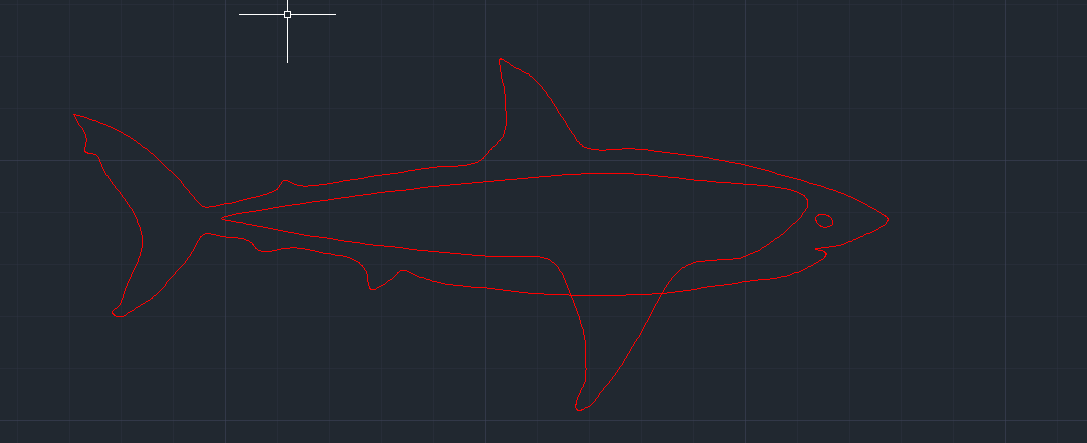
Trace the second layer of the puzzle with a slight gap just inside of your last trace. On this layer include fins.
Third and Final Trace
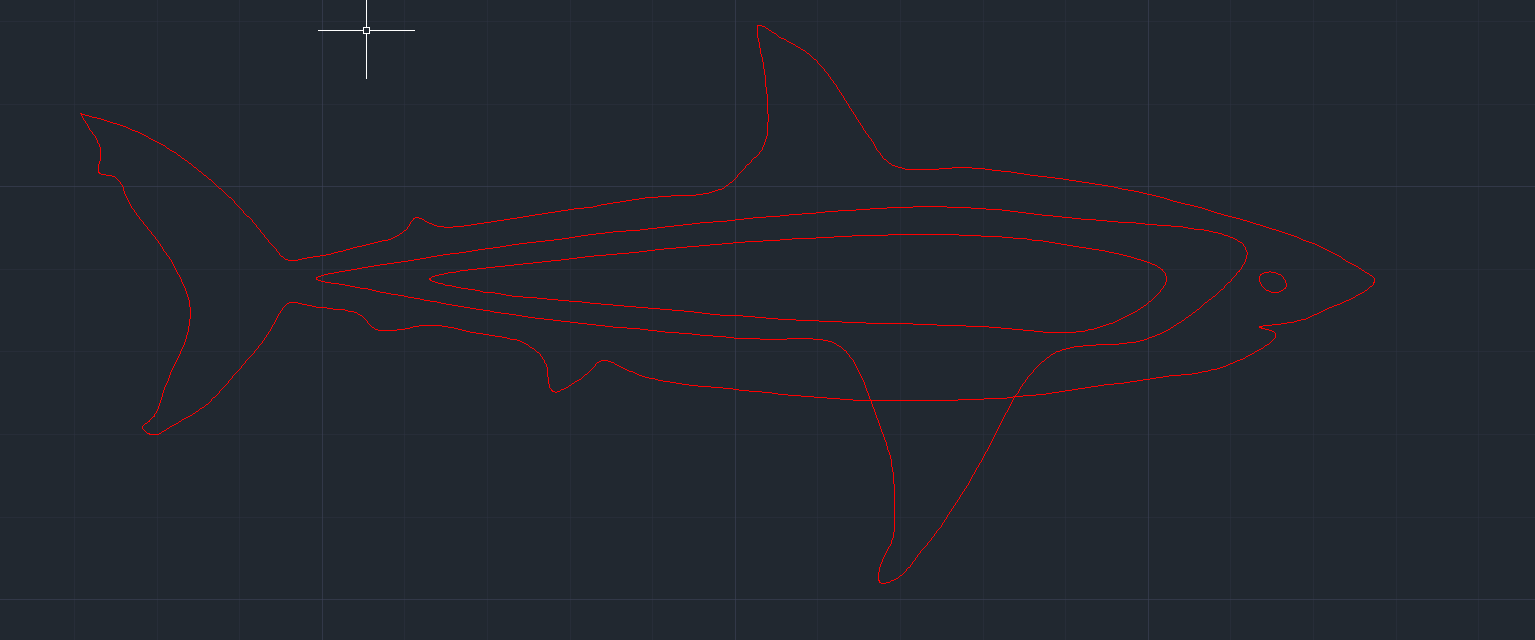
Trace your final outer layer once again just inside of the last trace.
Create Cut Outs
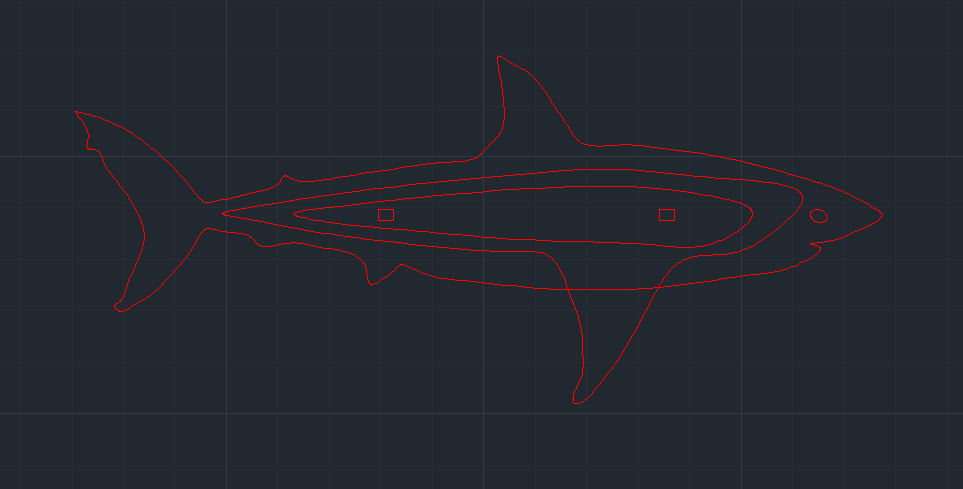
Create cut outs for the connector bars, make the height one hundredth of an inch thinner than the thickness of the material you will be using to cut (my material is .121" thick so the height of my cut out is .111") and choose a width slightly larger than the height for easier assembly (I close .15"). Copy and paste 3 cut outs all stacked on top of each other so that all cut outs are lined up for assembly. Repeat process towards front of shark so you have 2 sets of cut outs.
Connector Bars
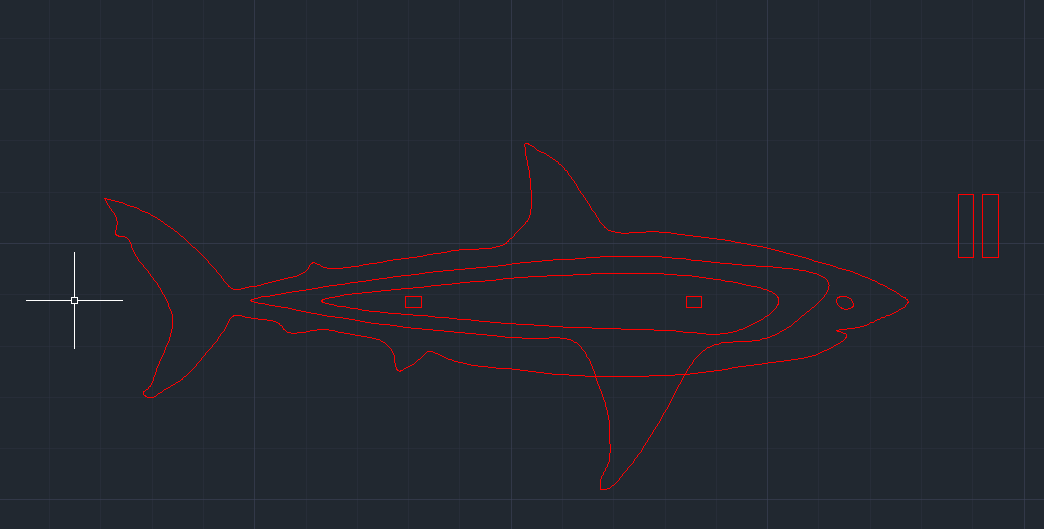
Create 2 connector bars with the same width as the width of your cut outs and your height being the thickness of your material multiplied by 5 with a little excess (my material is .121" then multiply by 5 to .605" added excess of .005" to get .61" long)
Group Cuts and Layers
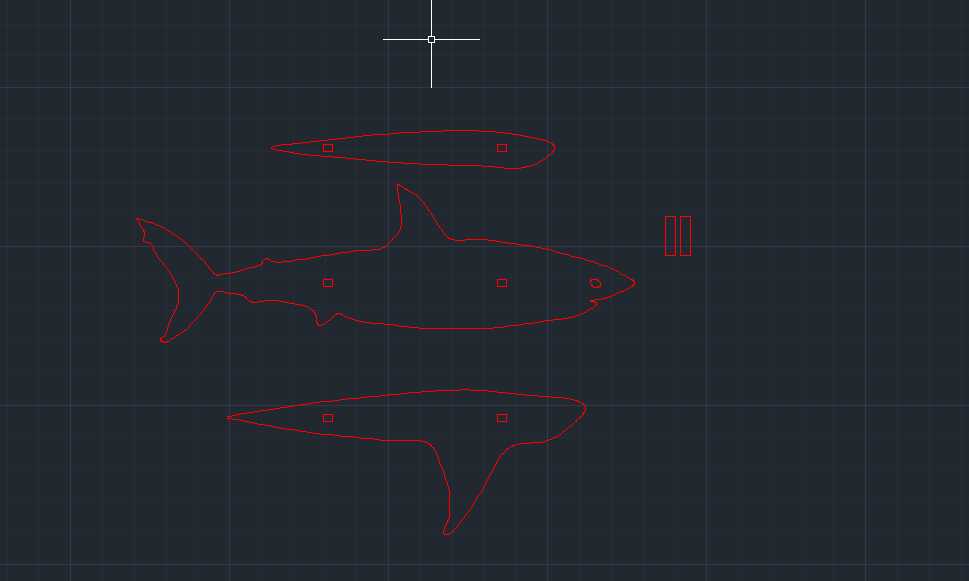
Use "Group" and select cut outs and group them to their respective layers, then move each layer off of the other to check that each layer has 2 individual cut outs.
Copy Layer
Create copy's of the two otter layers so that you have layers for each side.
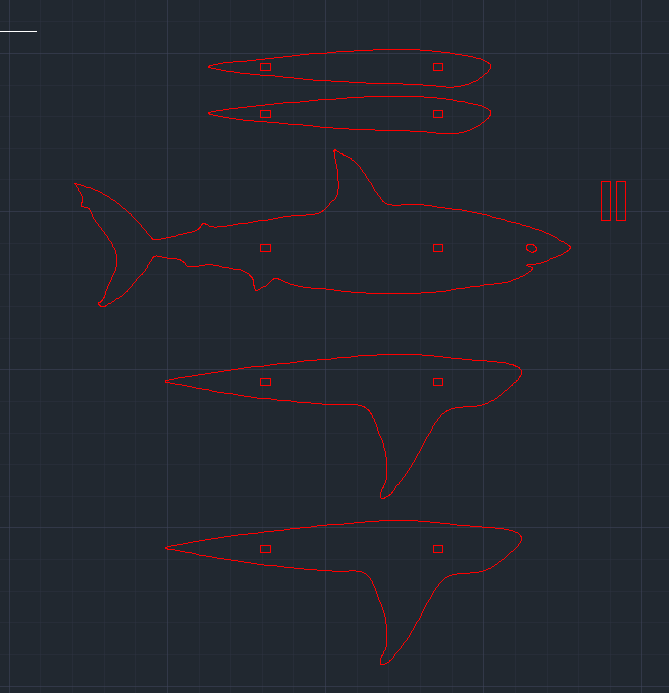
Positioning

Position all of your pieces as to use as little material as possible.
Printing
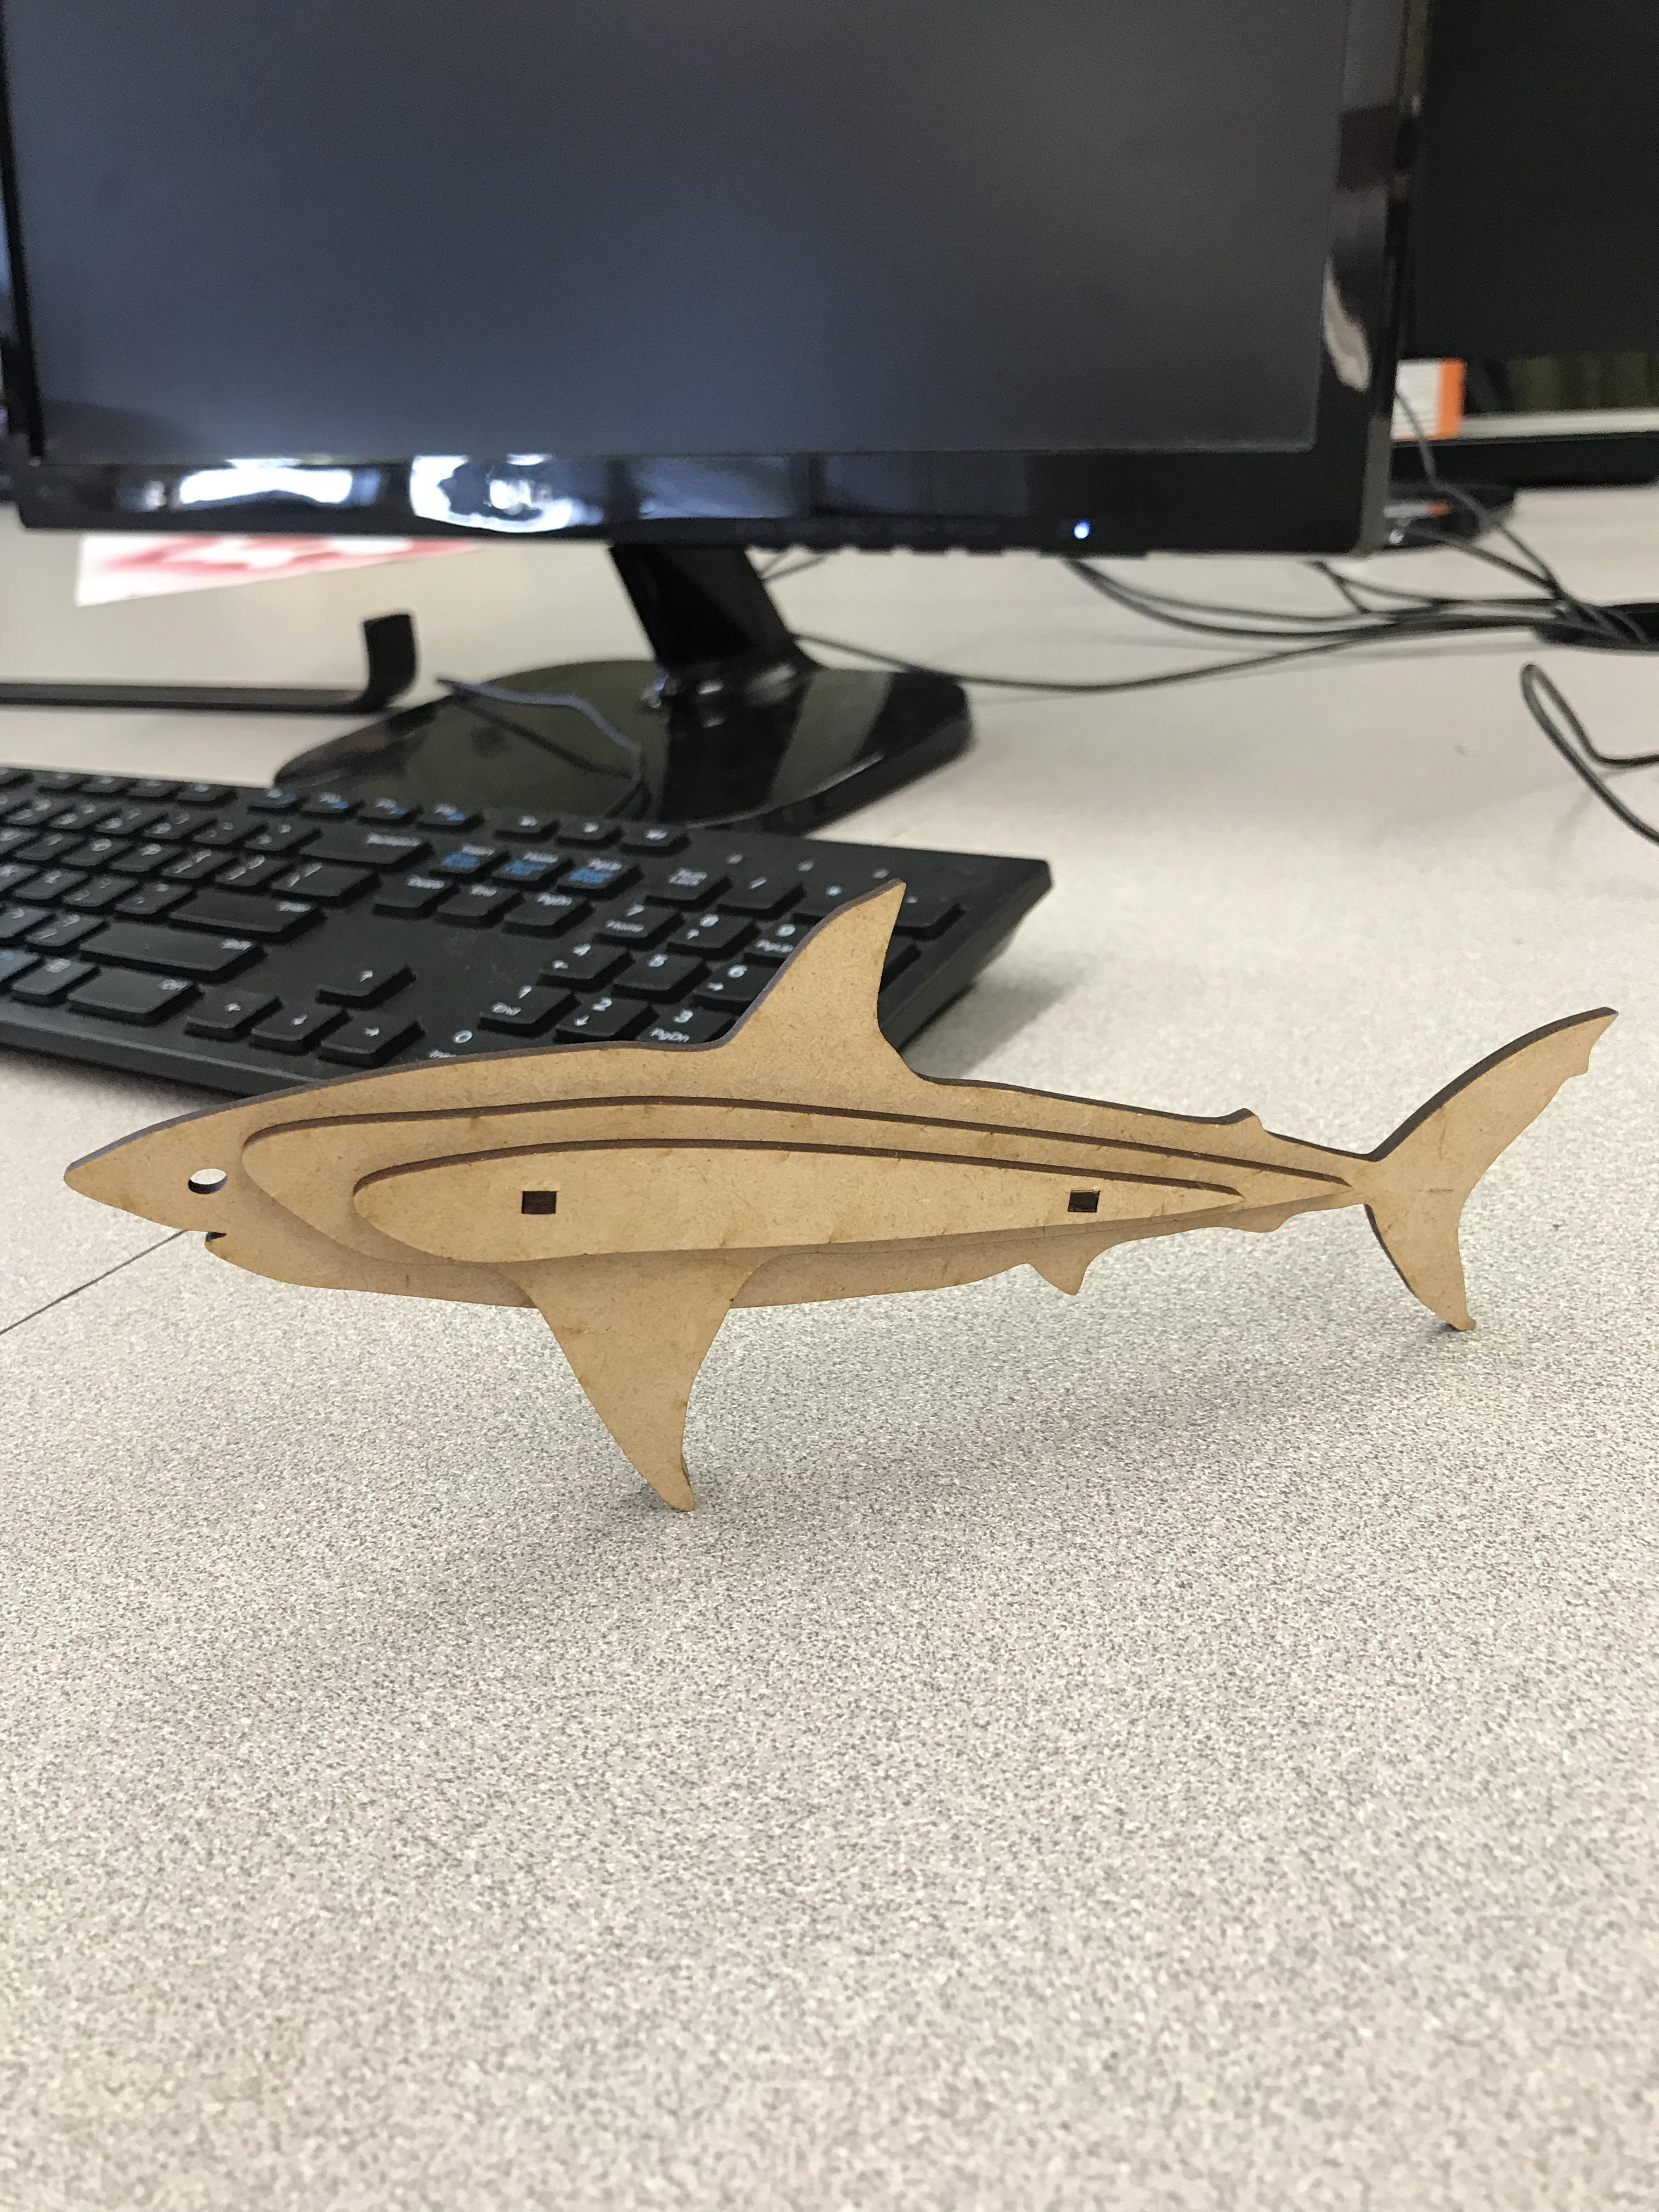
Send your CAD file over to your laser cutter, cut, and assemble by lining up all 5 layers and inserting connector bars.
Finished File
This is my finished file if you would like to jump straight to printing