Laser Controller for VCV Rack
by ArjoNagelhout in Circuits > Audio
966 Views, 4 Favorites, 0 Comments
Laser Controller for VCV Rack
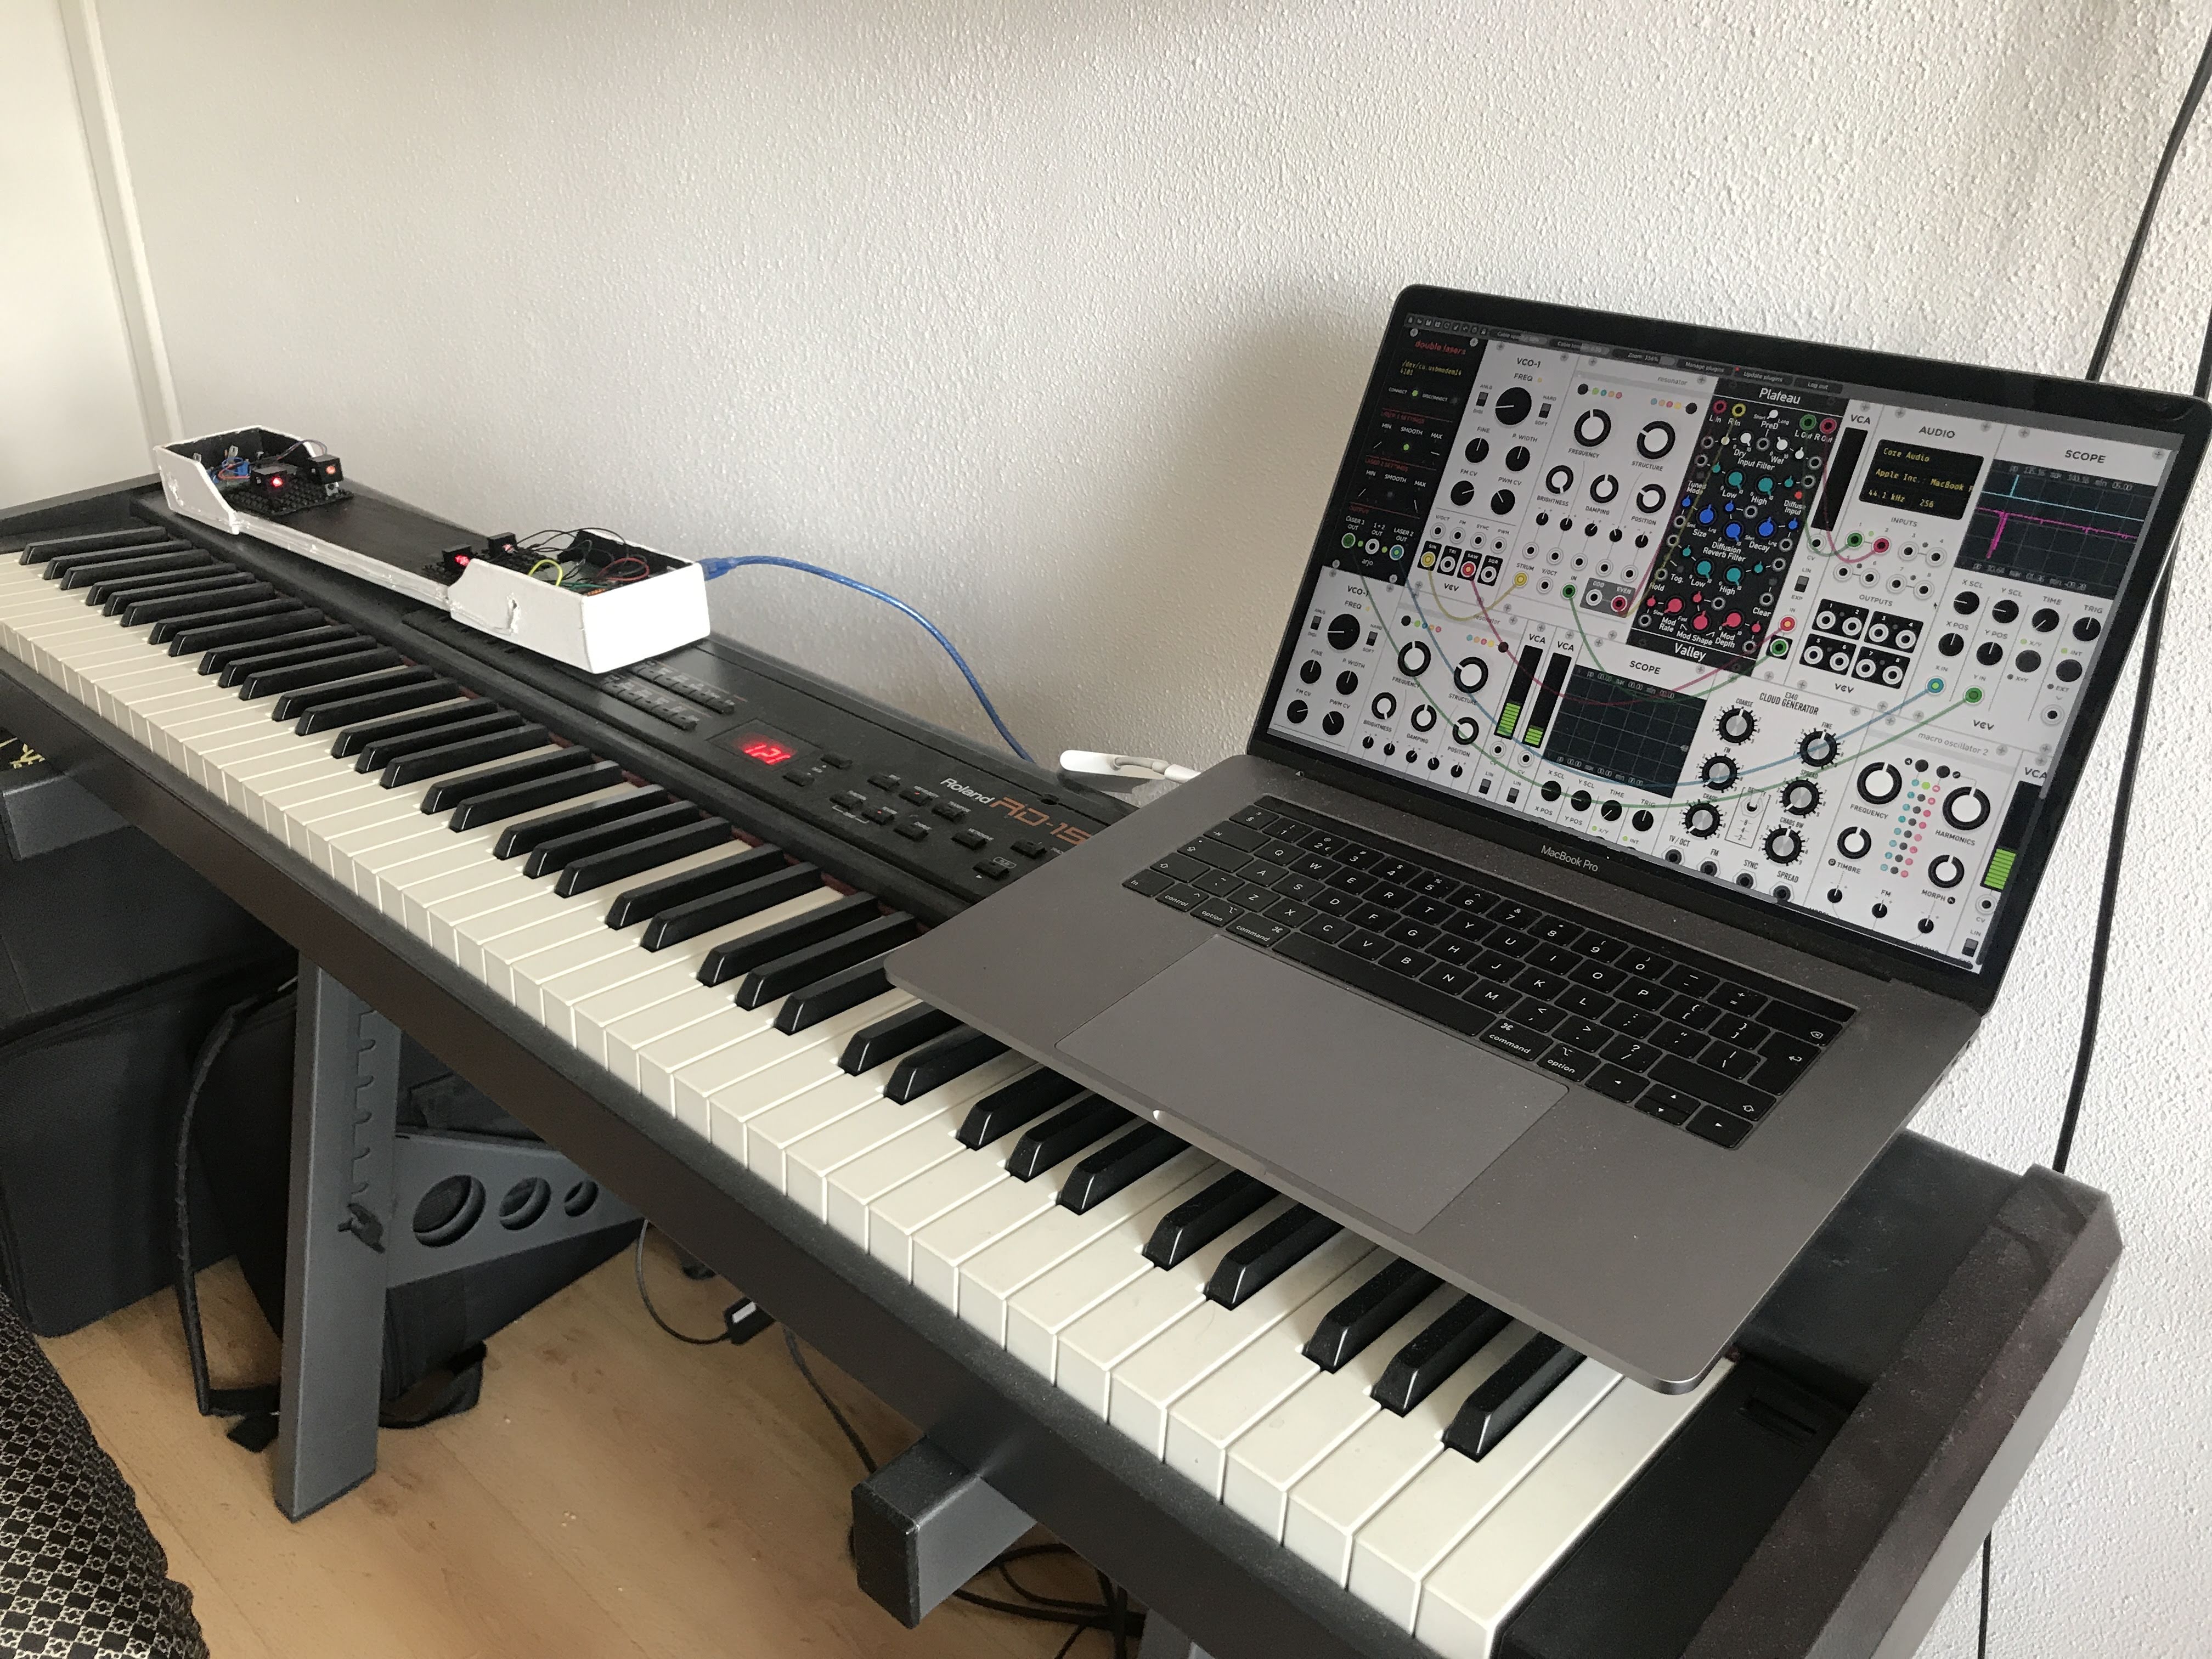
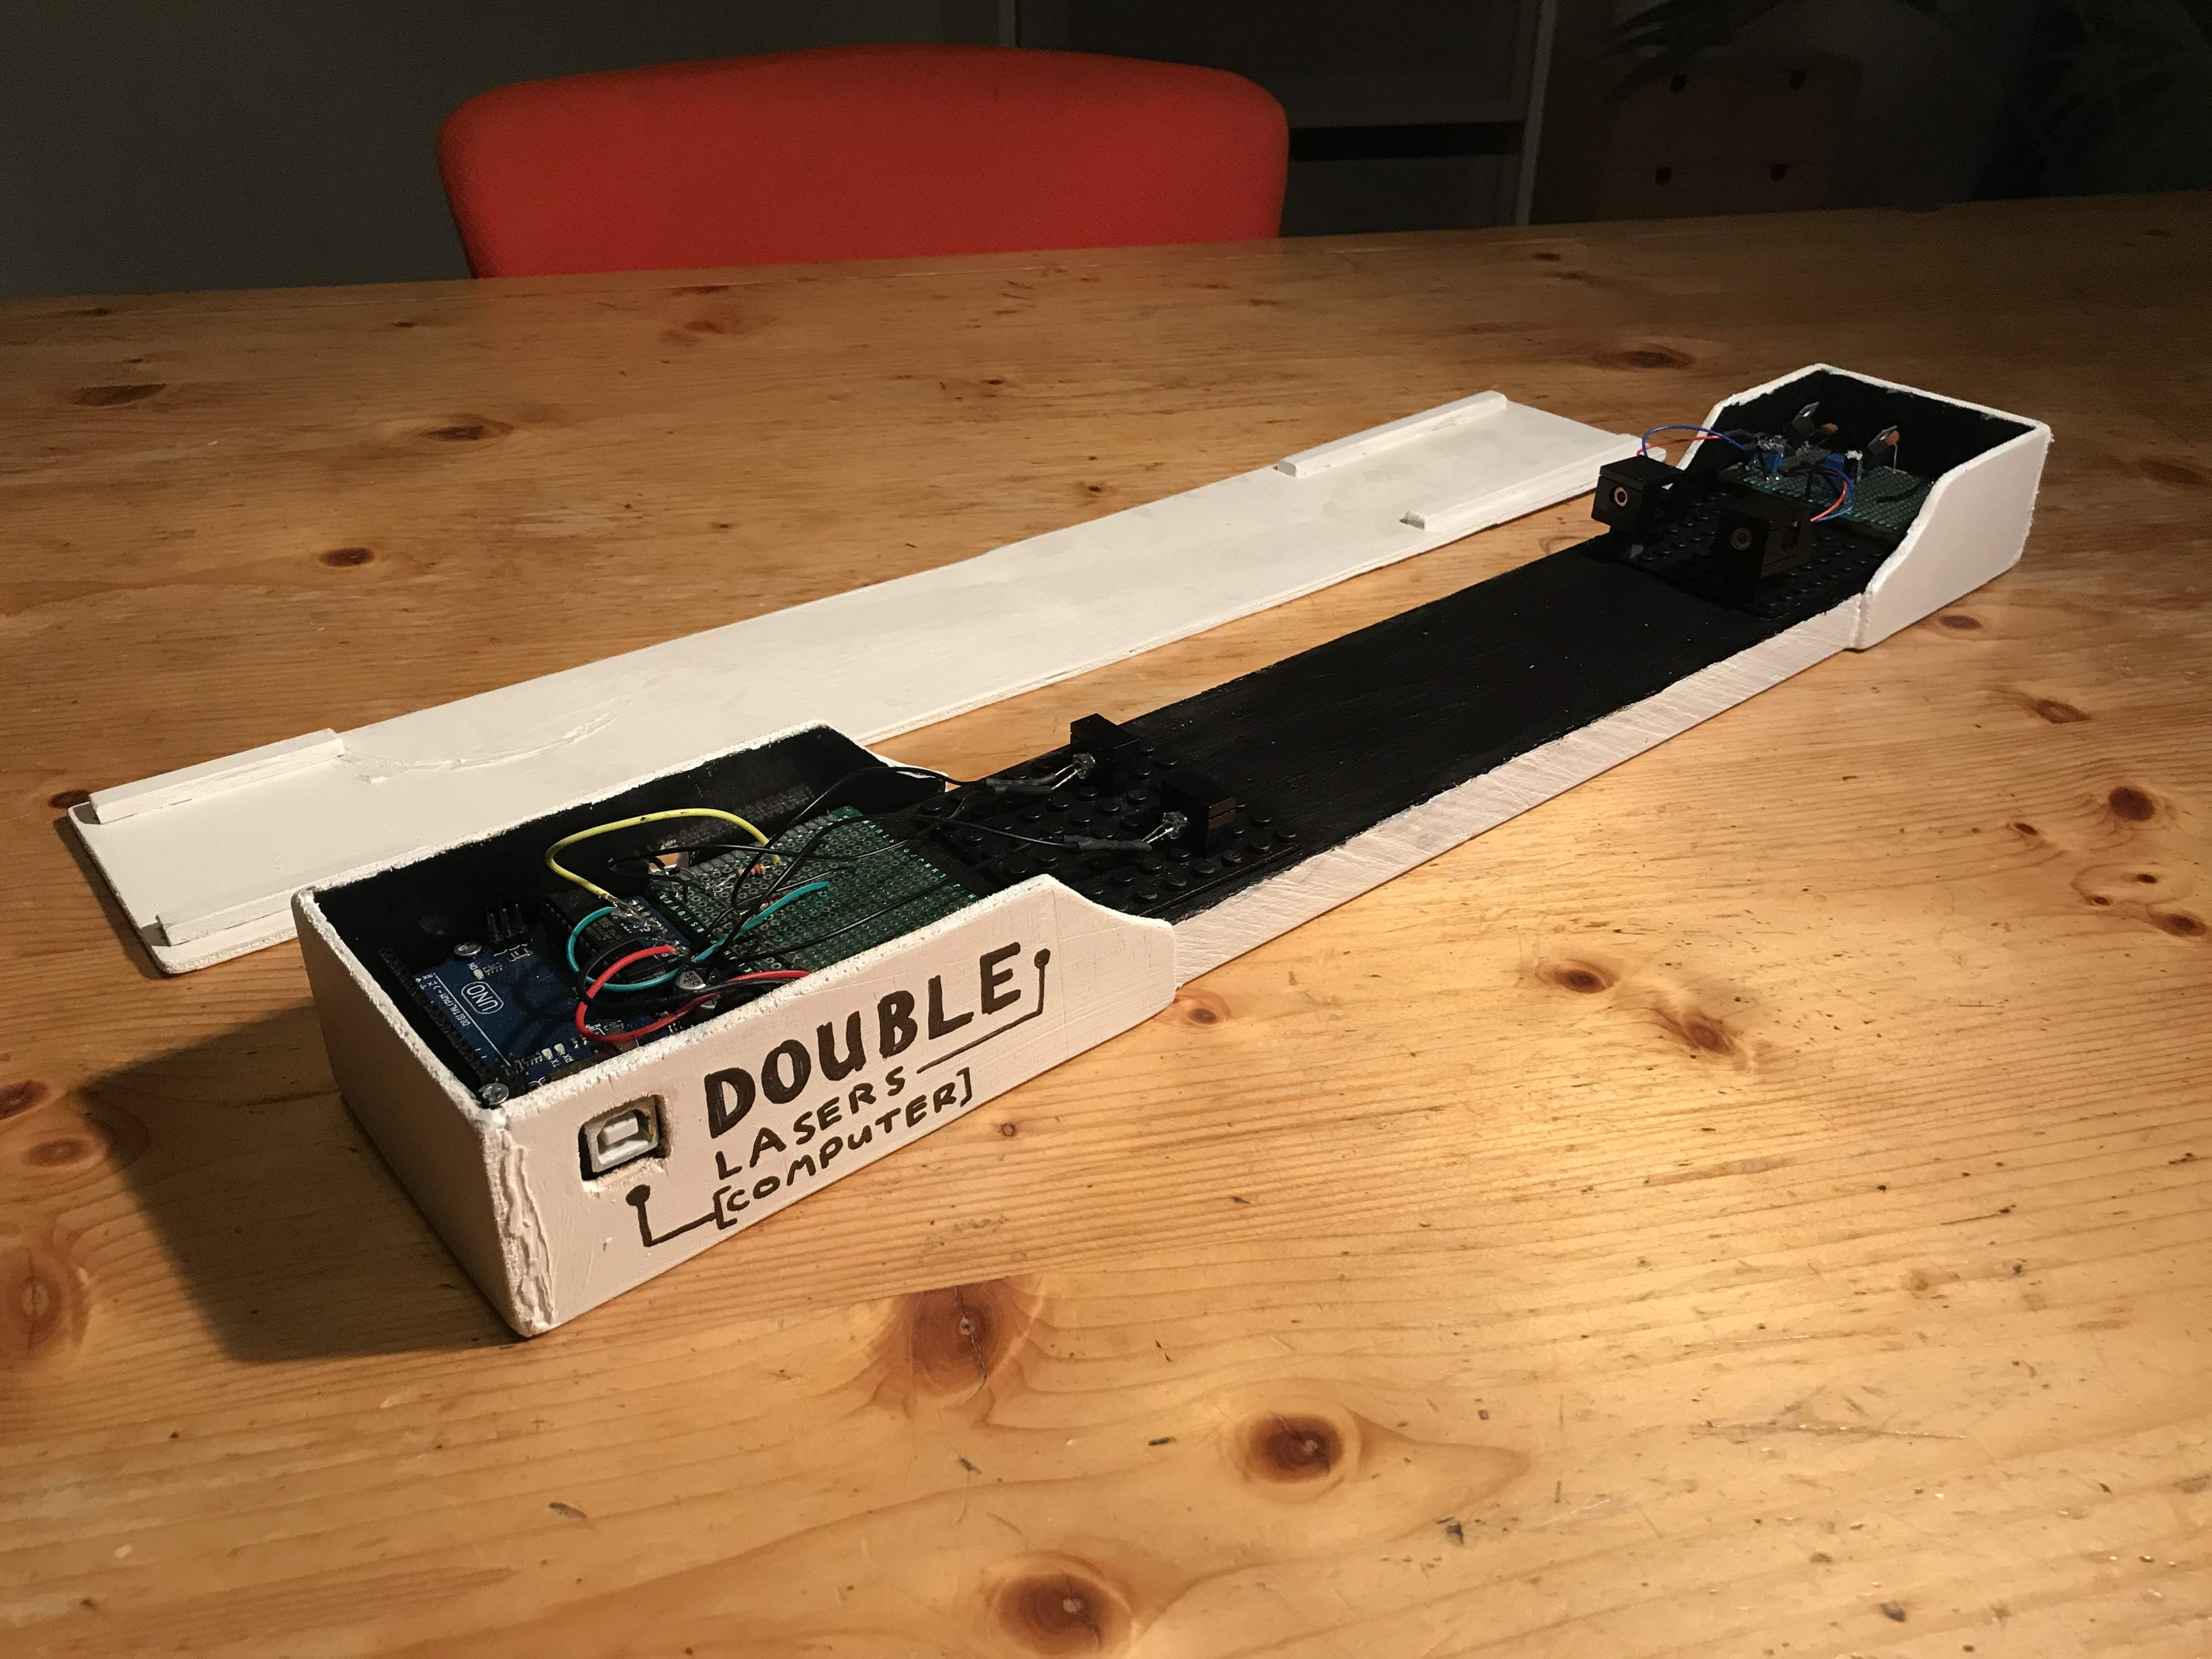

In this Instructable I'm going to show you how you can create your very own laser controller for VCV Rack. Right now this is only available for macOS but in the near future you can expect to see a Windows build as well.
Electronics
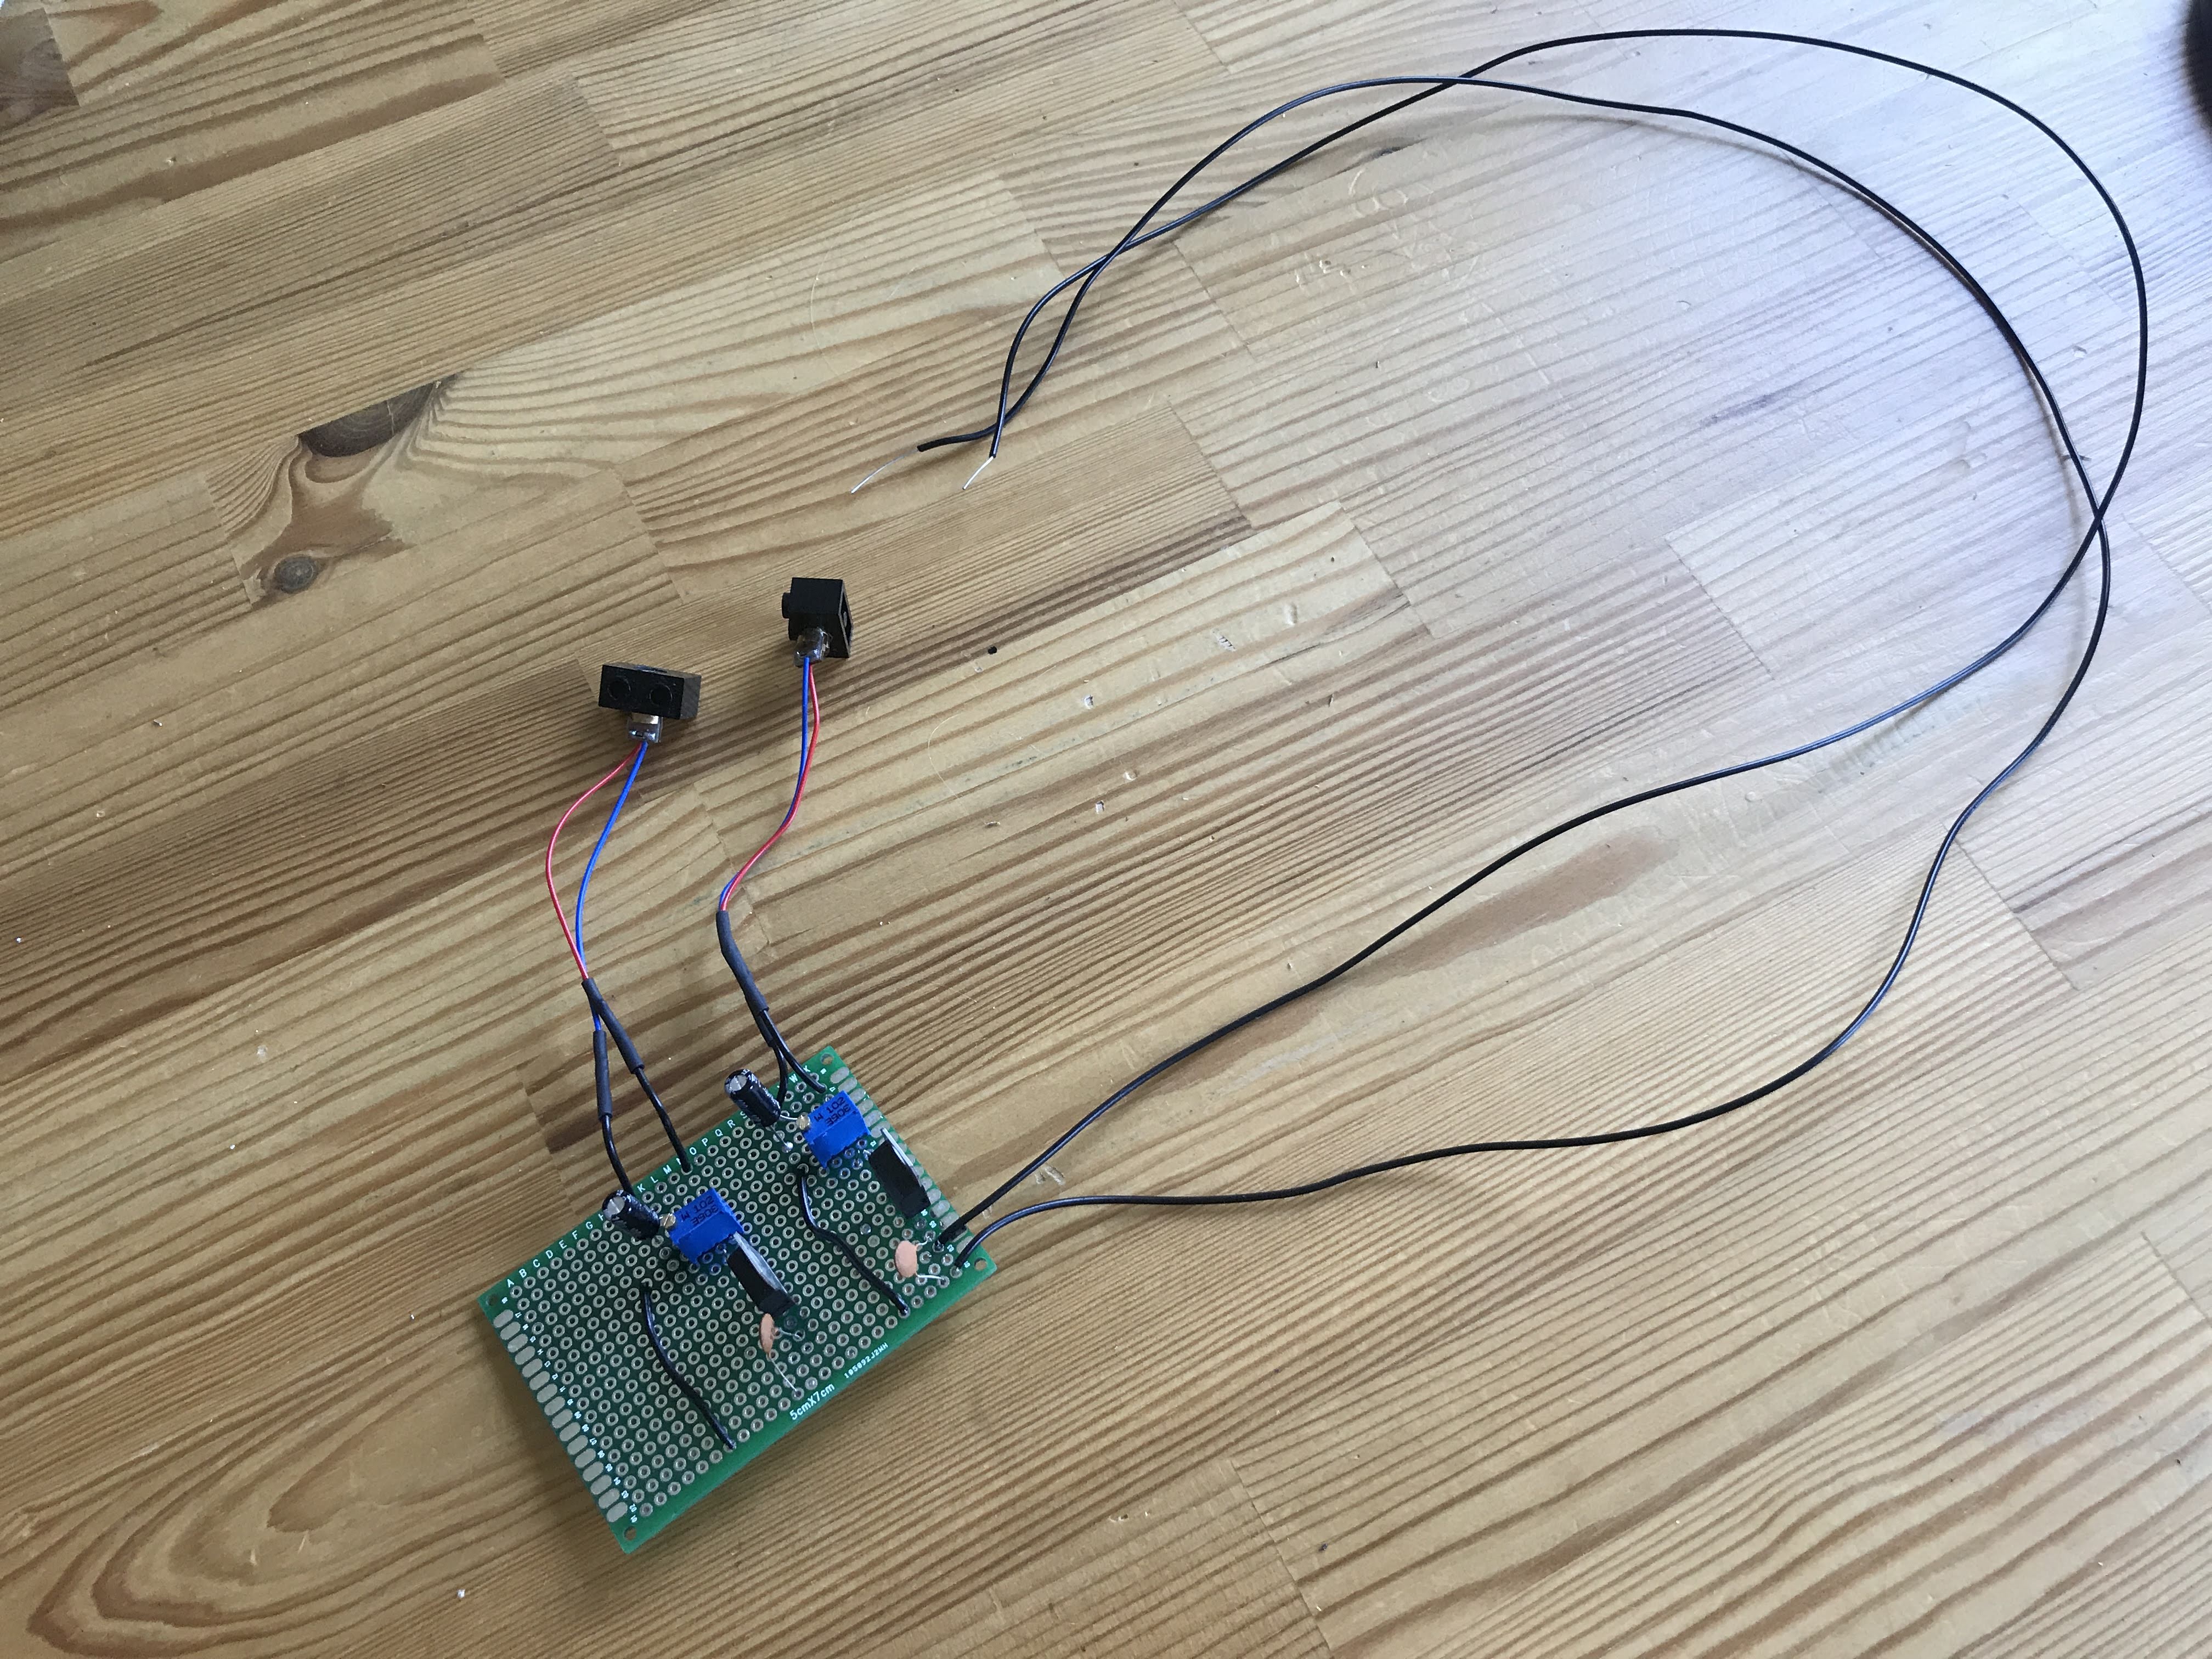
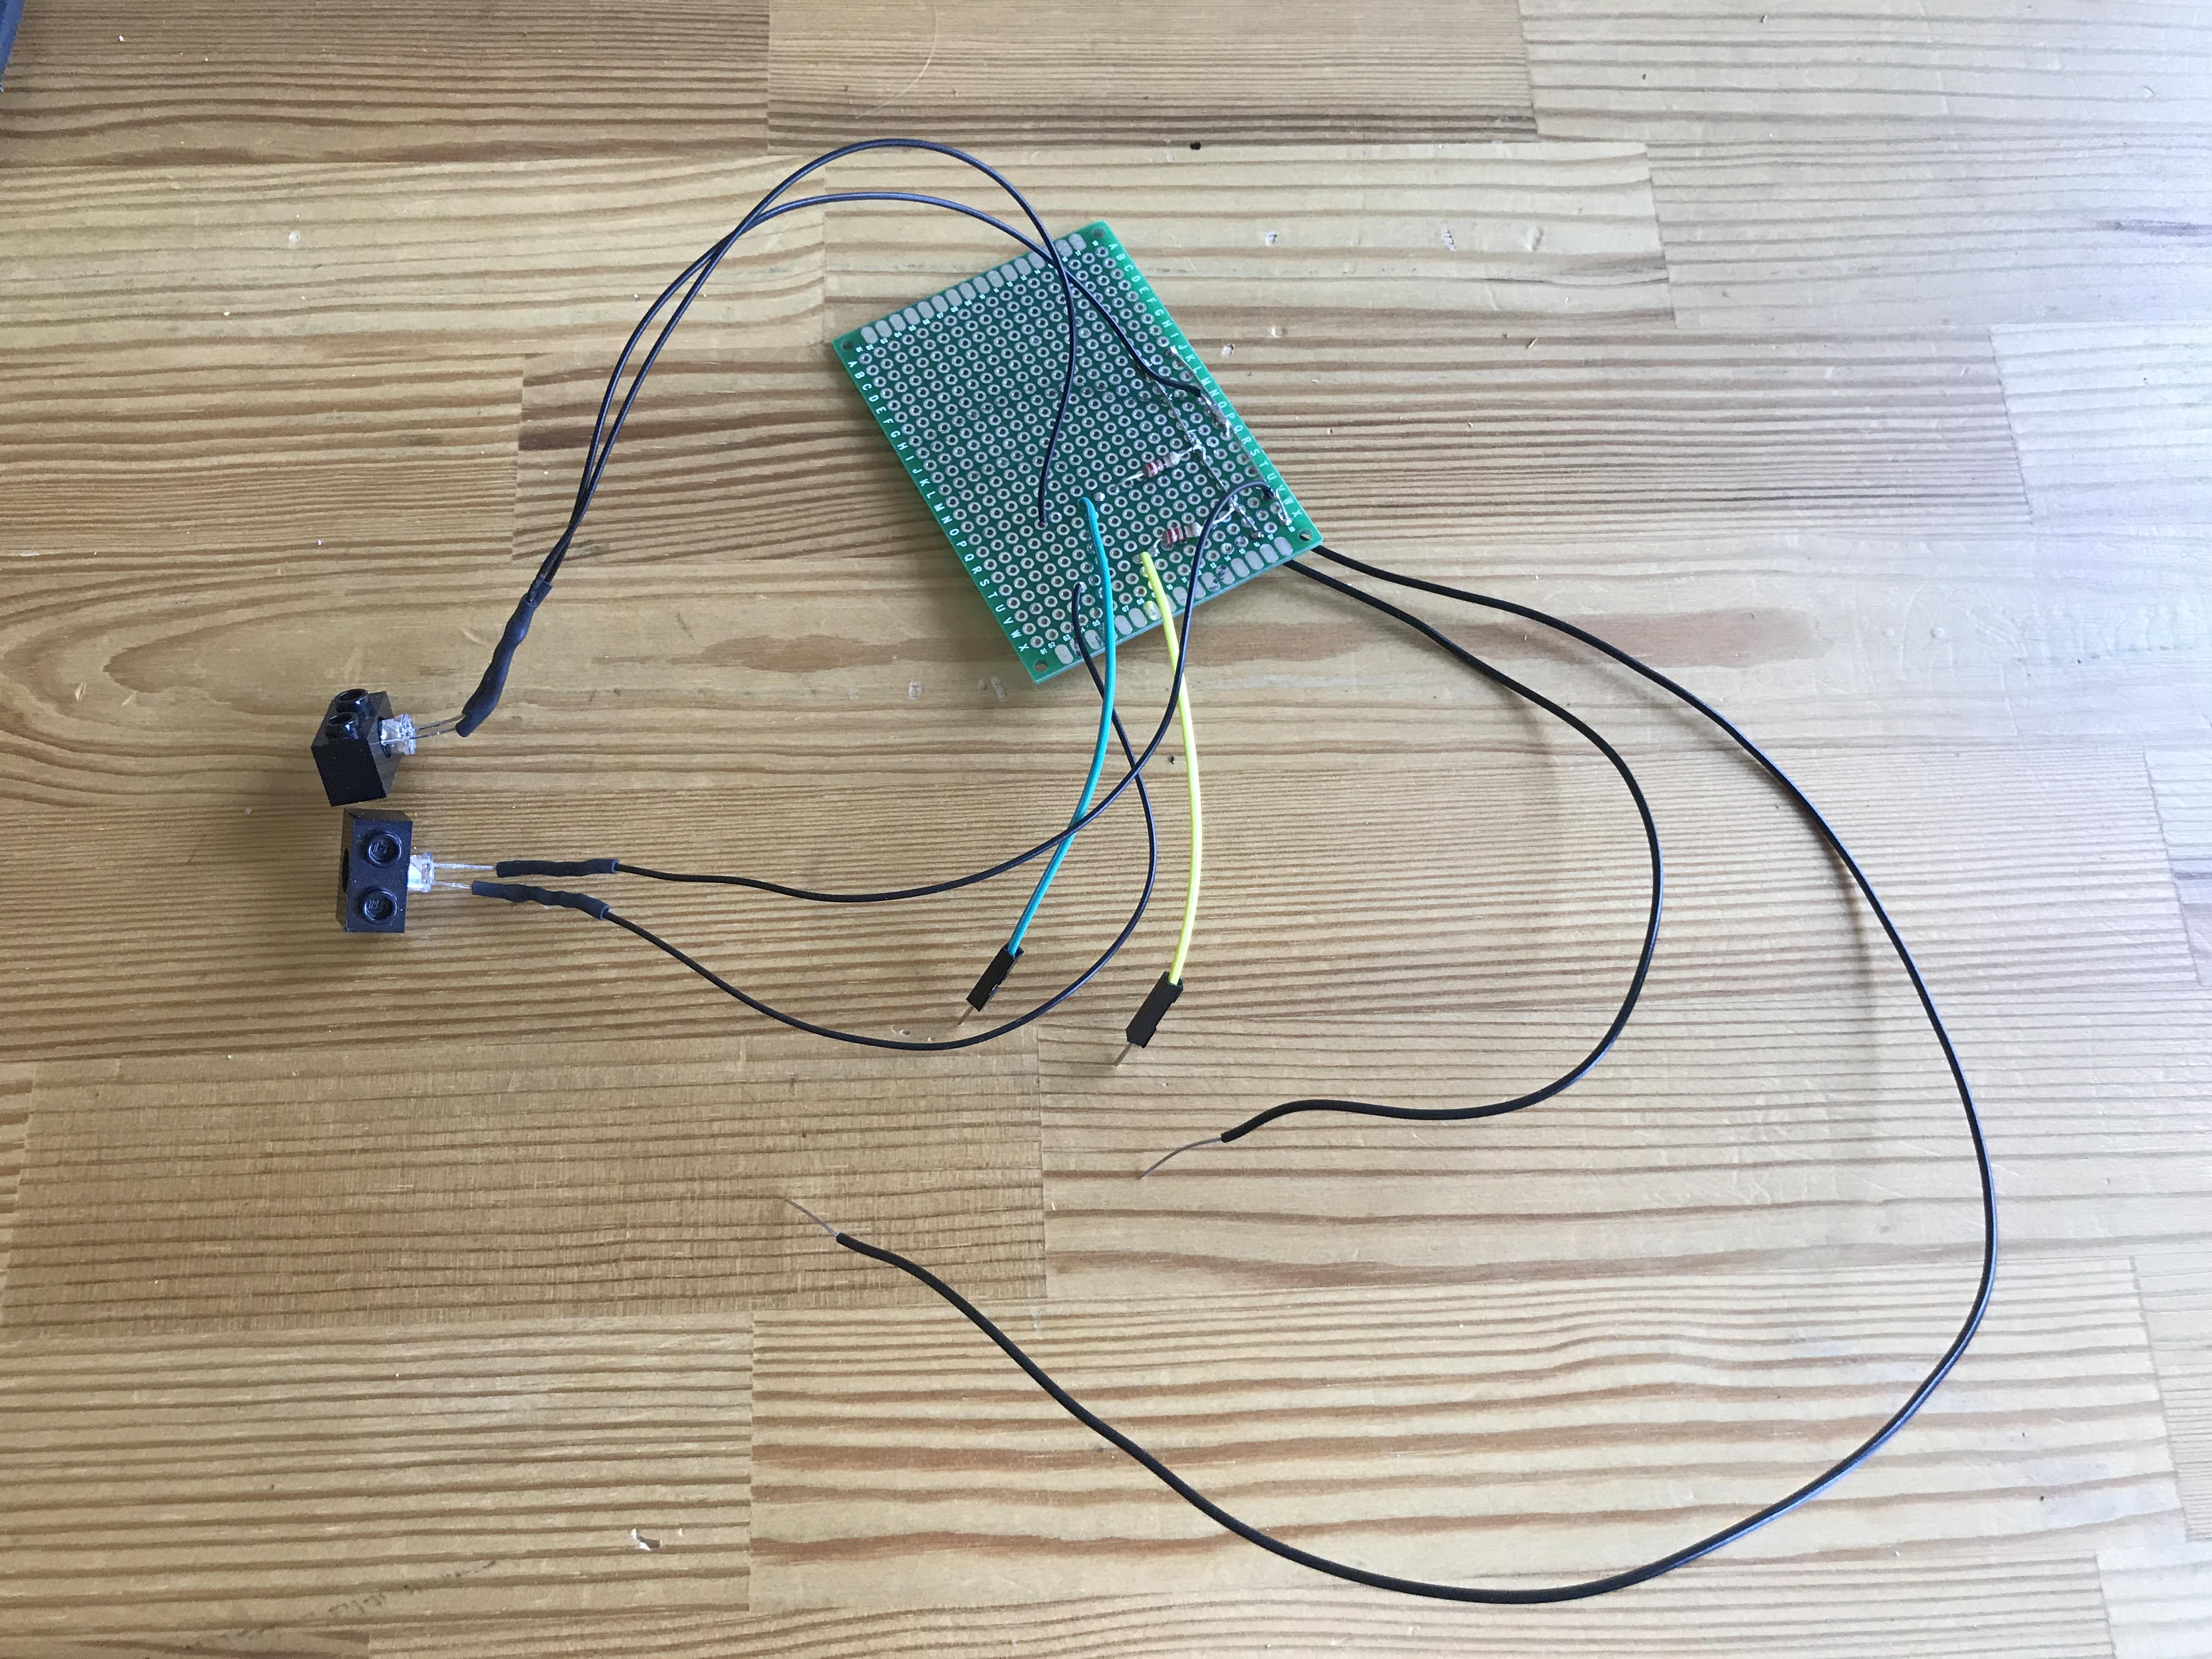
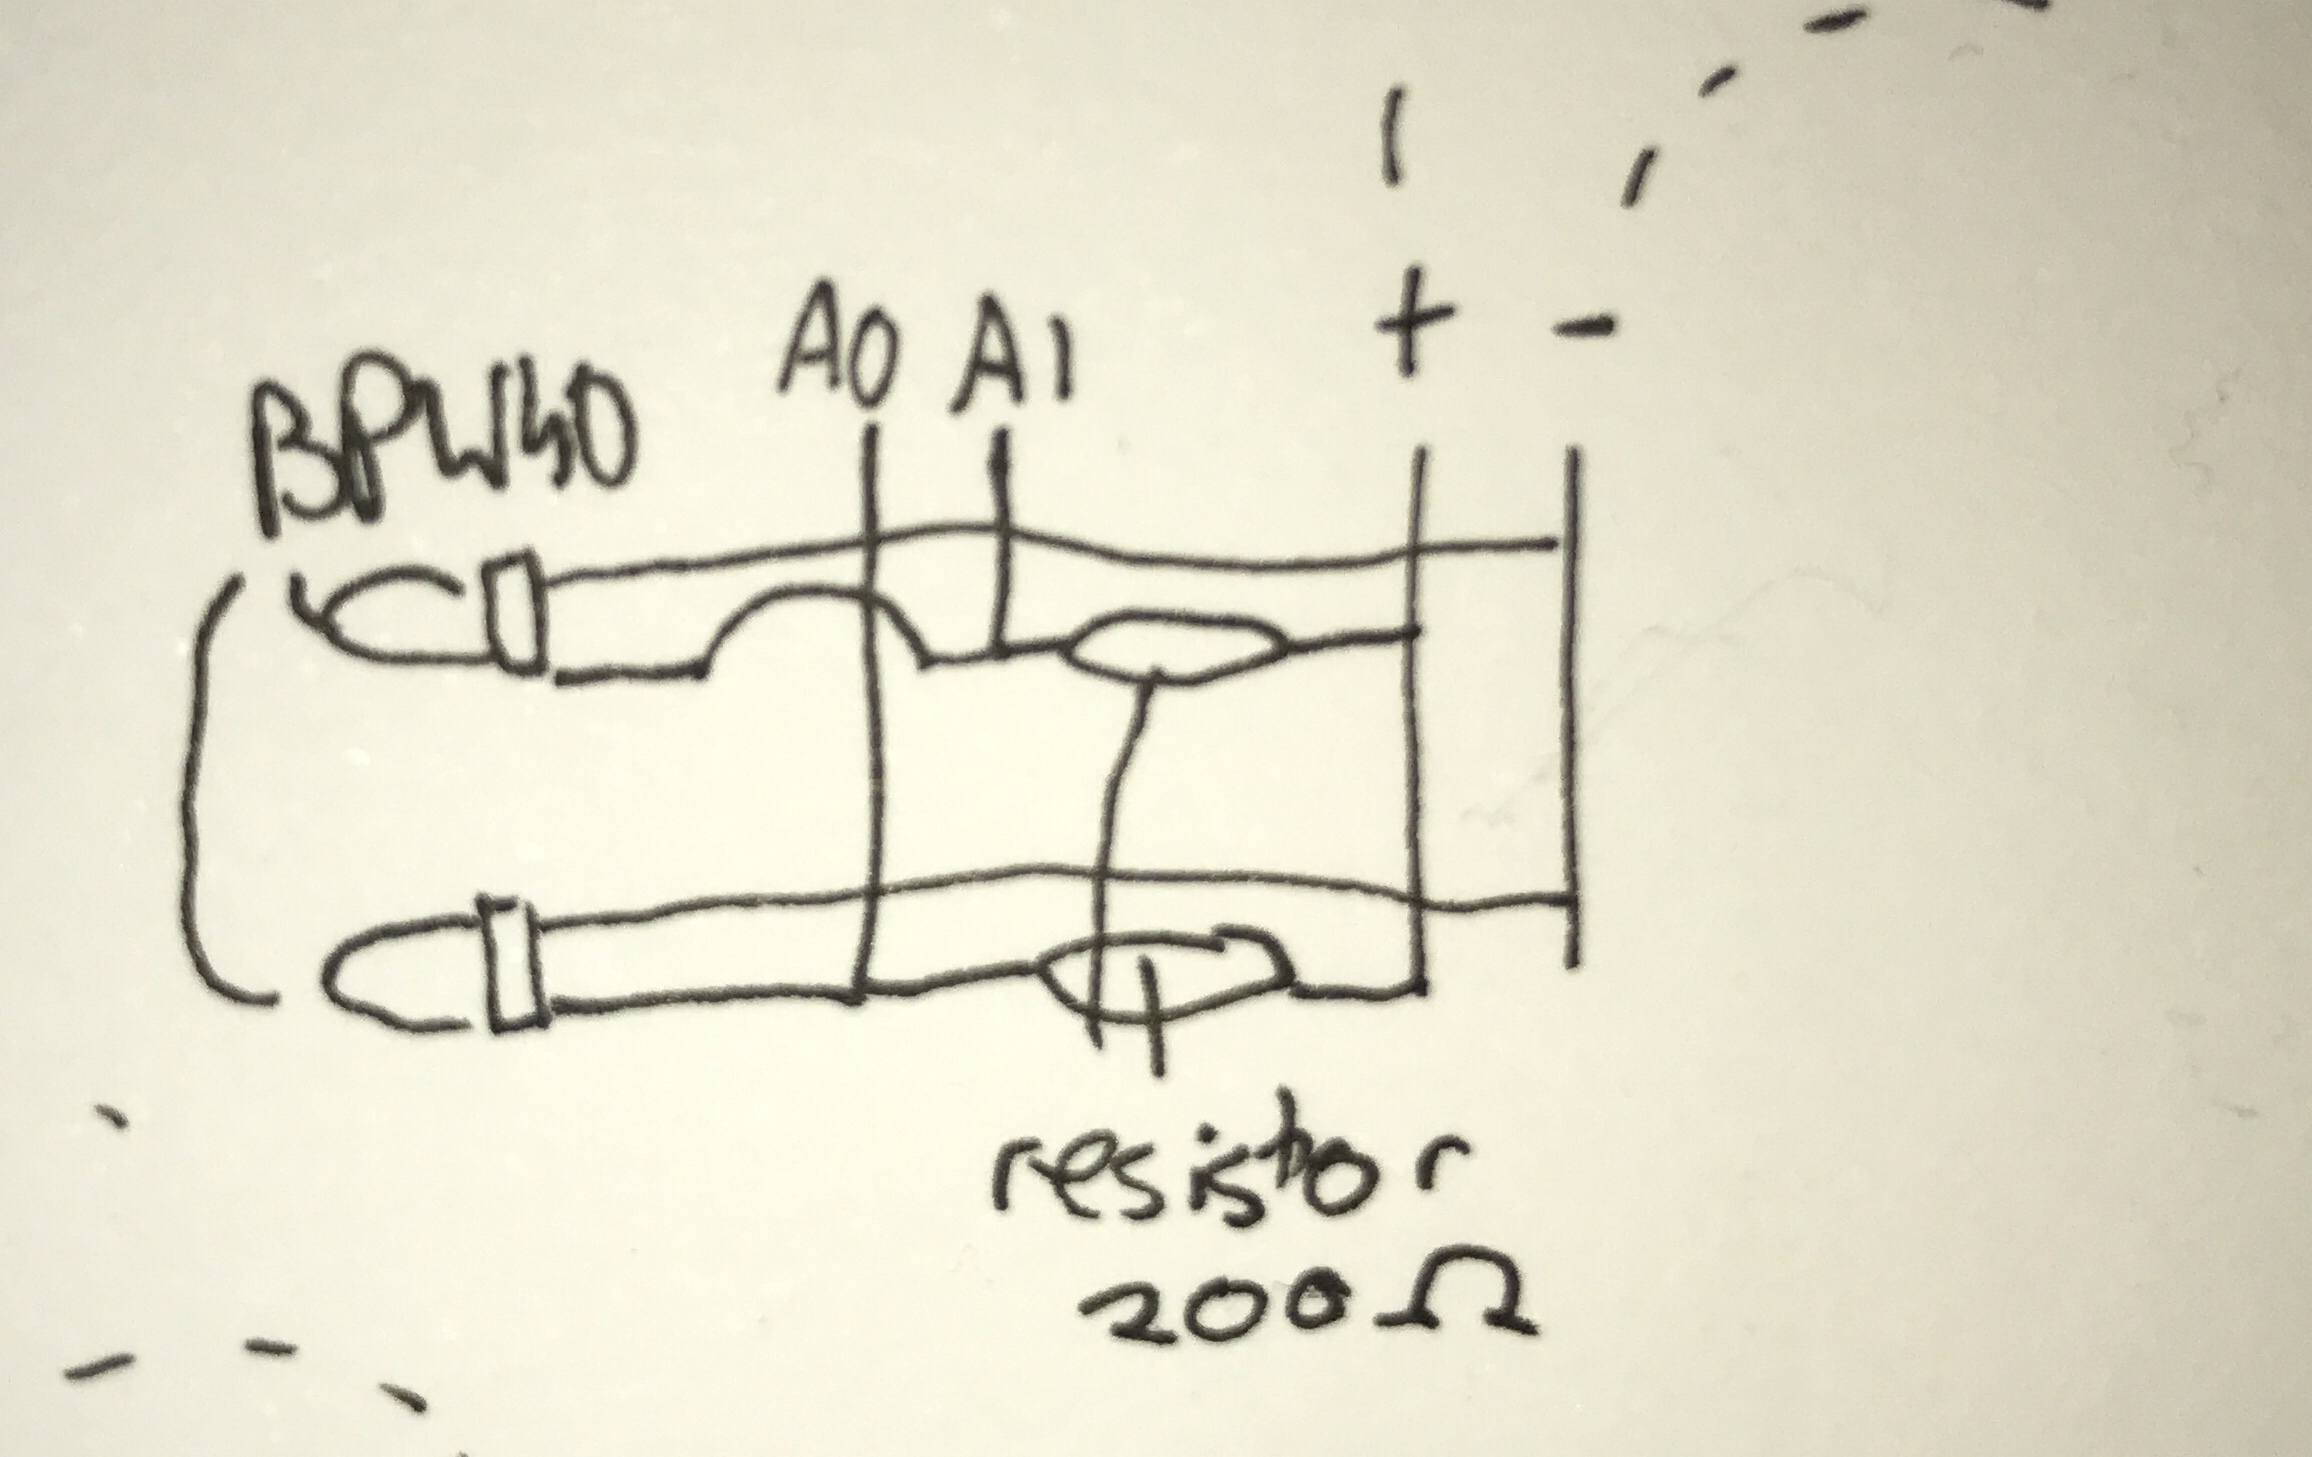
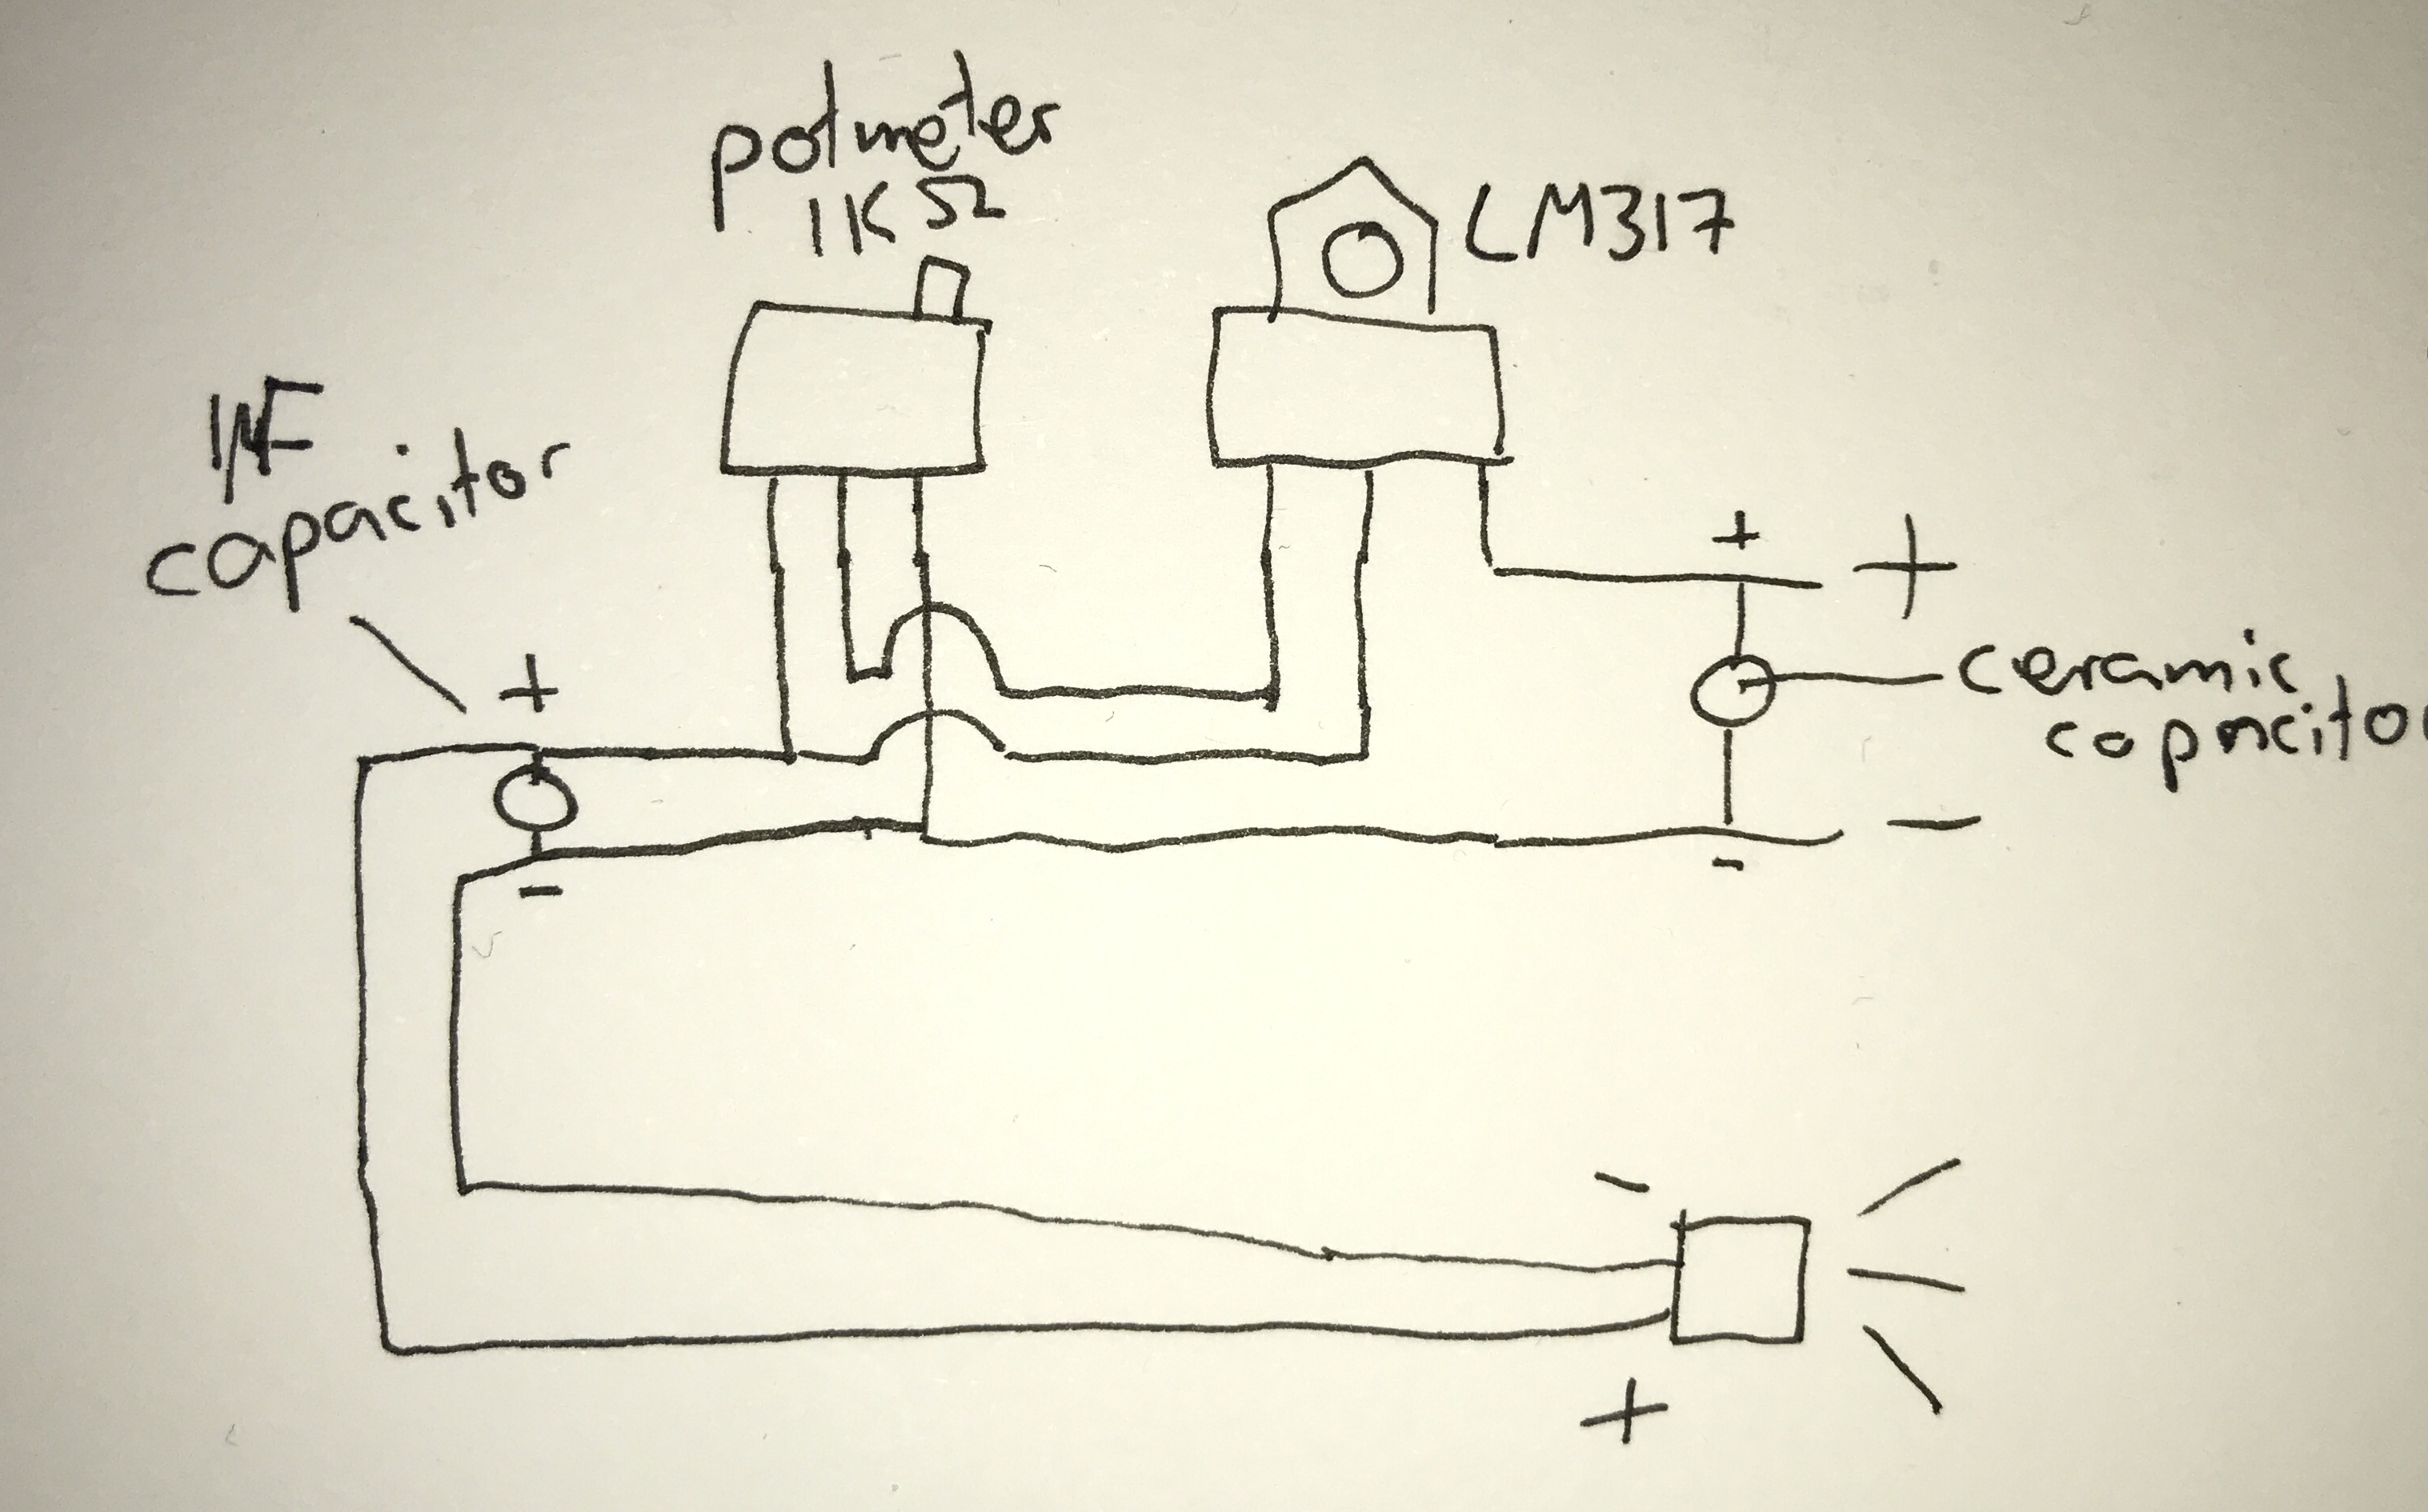
The first thing you want to do is order the following parts:
- 2x Prototyping pcb board double sided 5x7 cm
- 1x Arduino Uno (or clone)
- 2x LM317 voltage regulator
- 2x 0.1µF ceramic capacitor
- 2x 1µF electrolytic capacitor
- 2x 240Ω Resistor
- 2x 300Ω Resistor
- 2x laser (https://www.bitsandparts.eu/Lasers/Laserdiode-650nm-Rood-5V-5mW/p101304)
- 2x BPW40
- wire (solid core)
- wire (flexible core)
- precision potmeter 1k ohm
Now solder the parts on the boards as shown on the images. Please note that you should make the laser scheme two times. You should now have two boards: one for sending light and the other for receiving light.
Connect the positive and negative to the 5V and ground respectively to the Arduino. The A0 and A1 go to the A0 and A1 pins on the Arduino.
Case
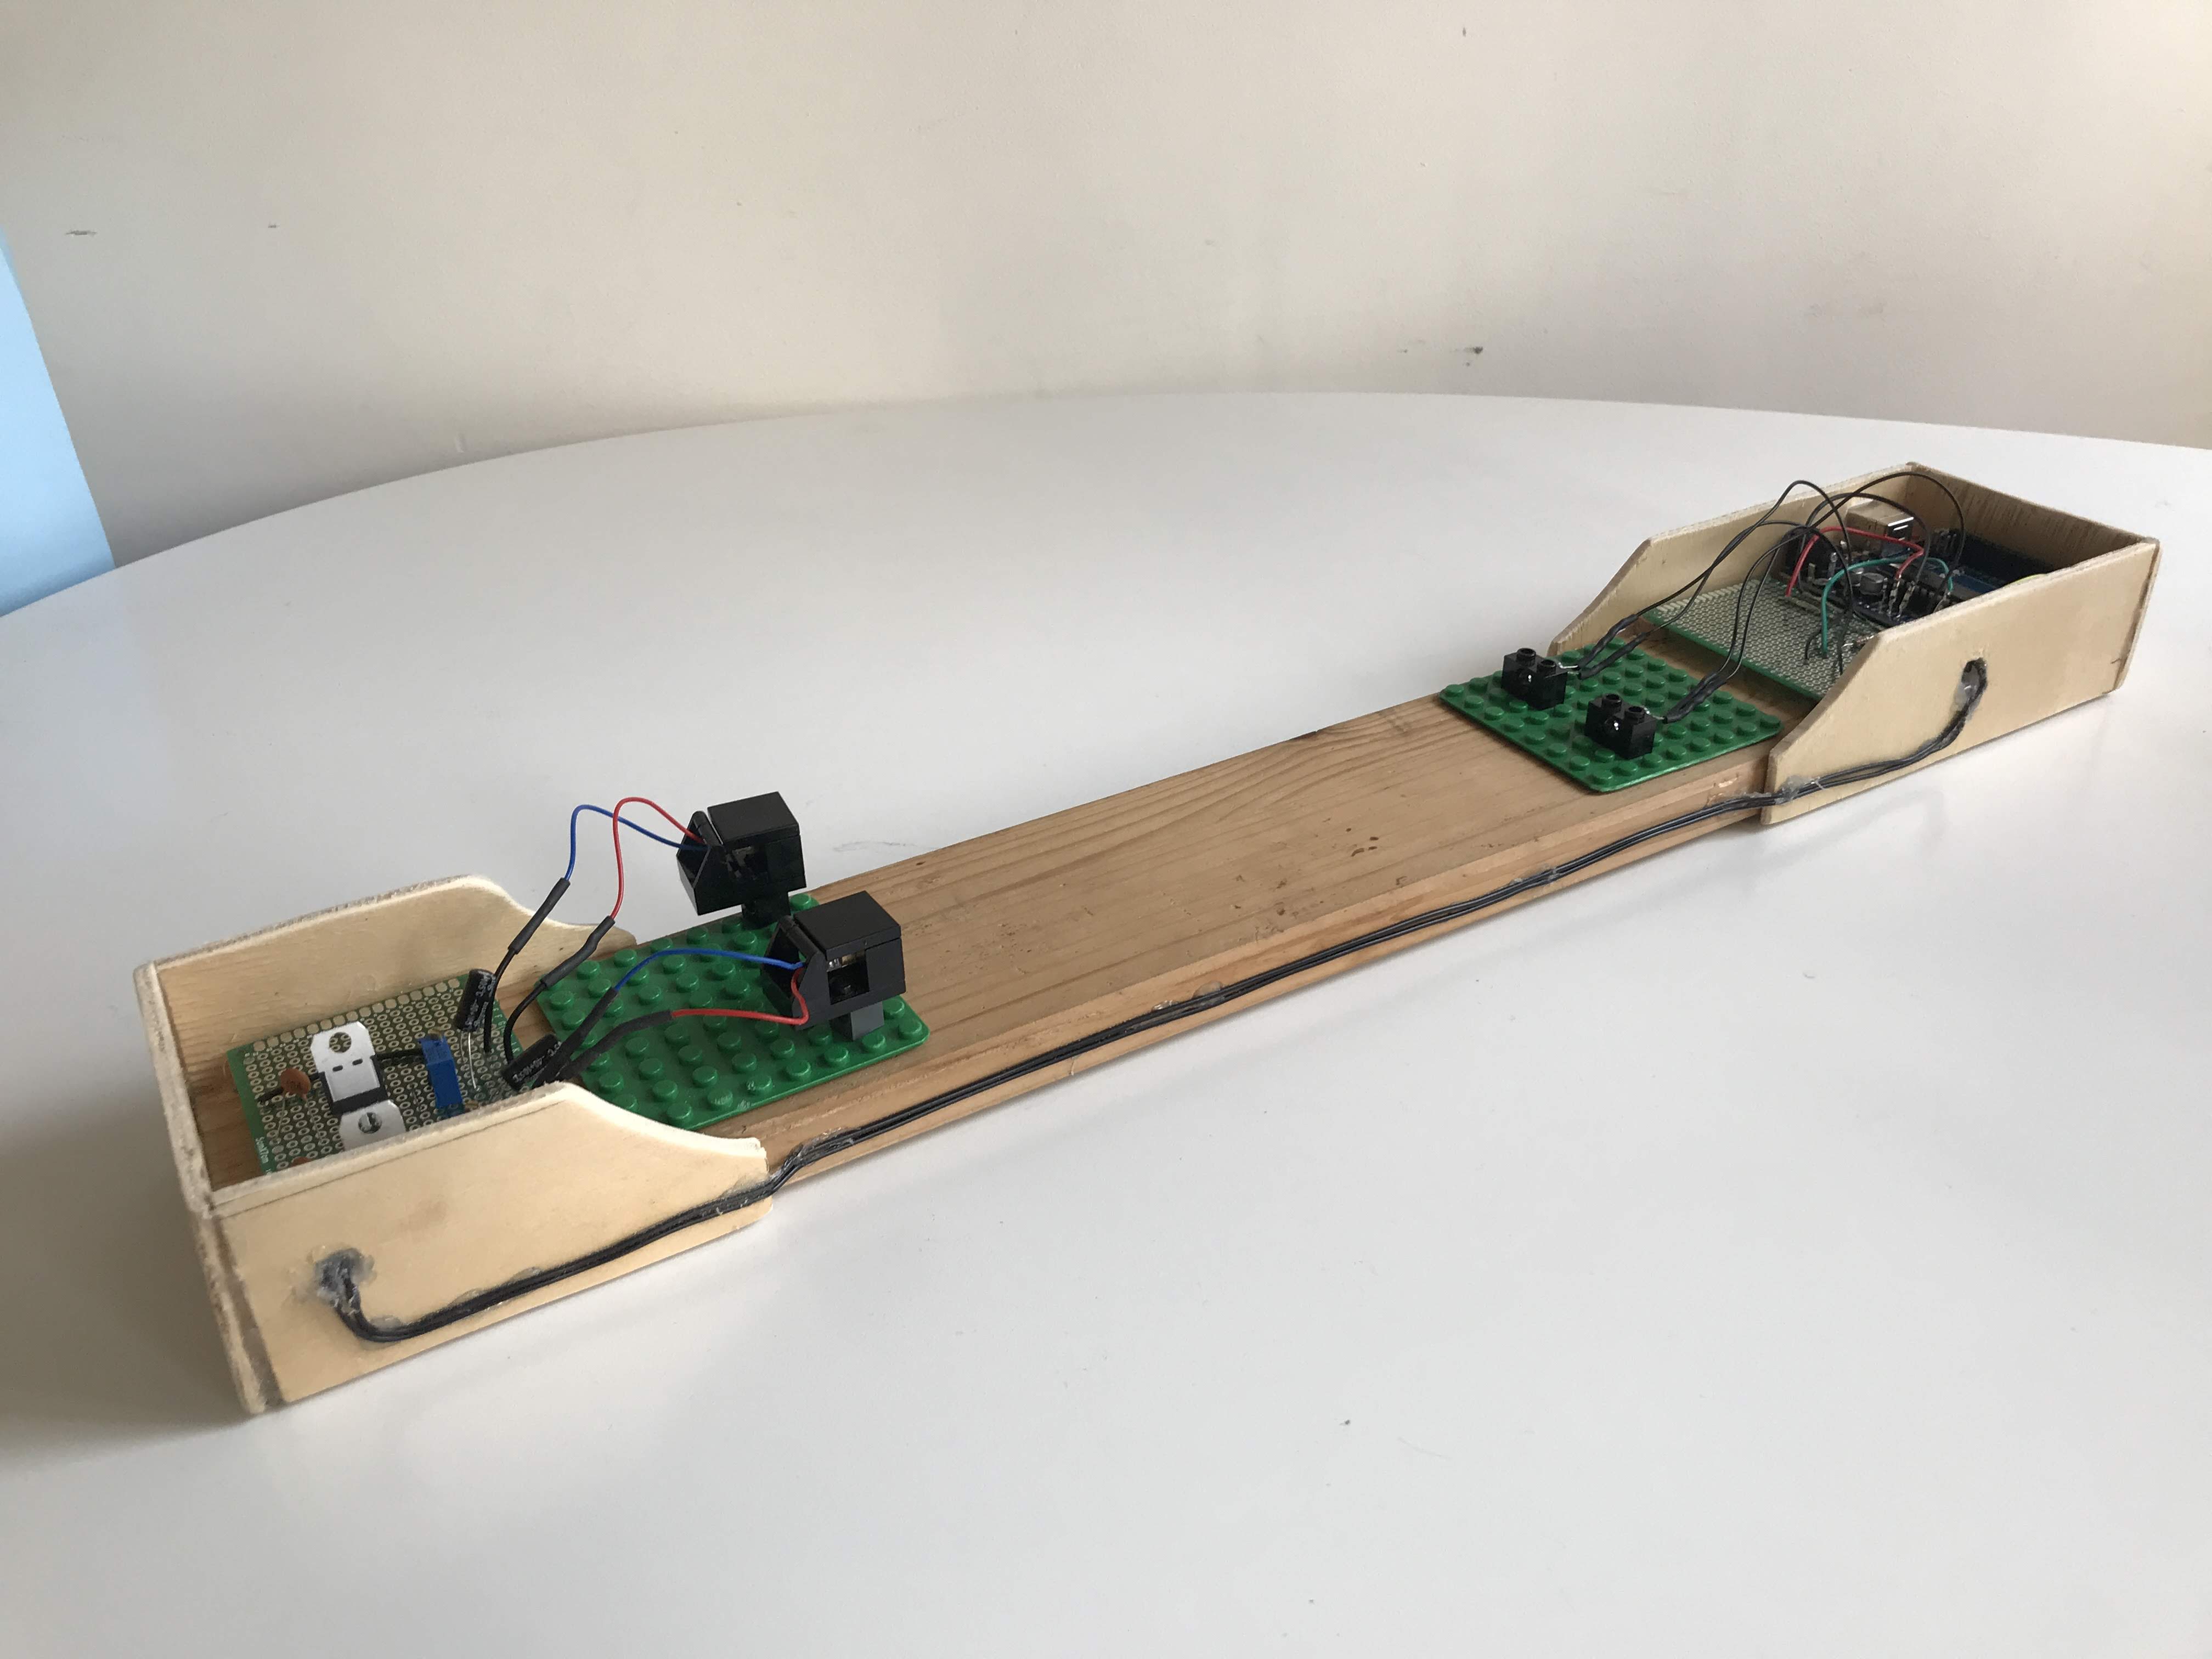
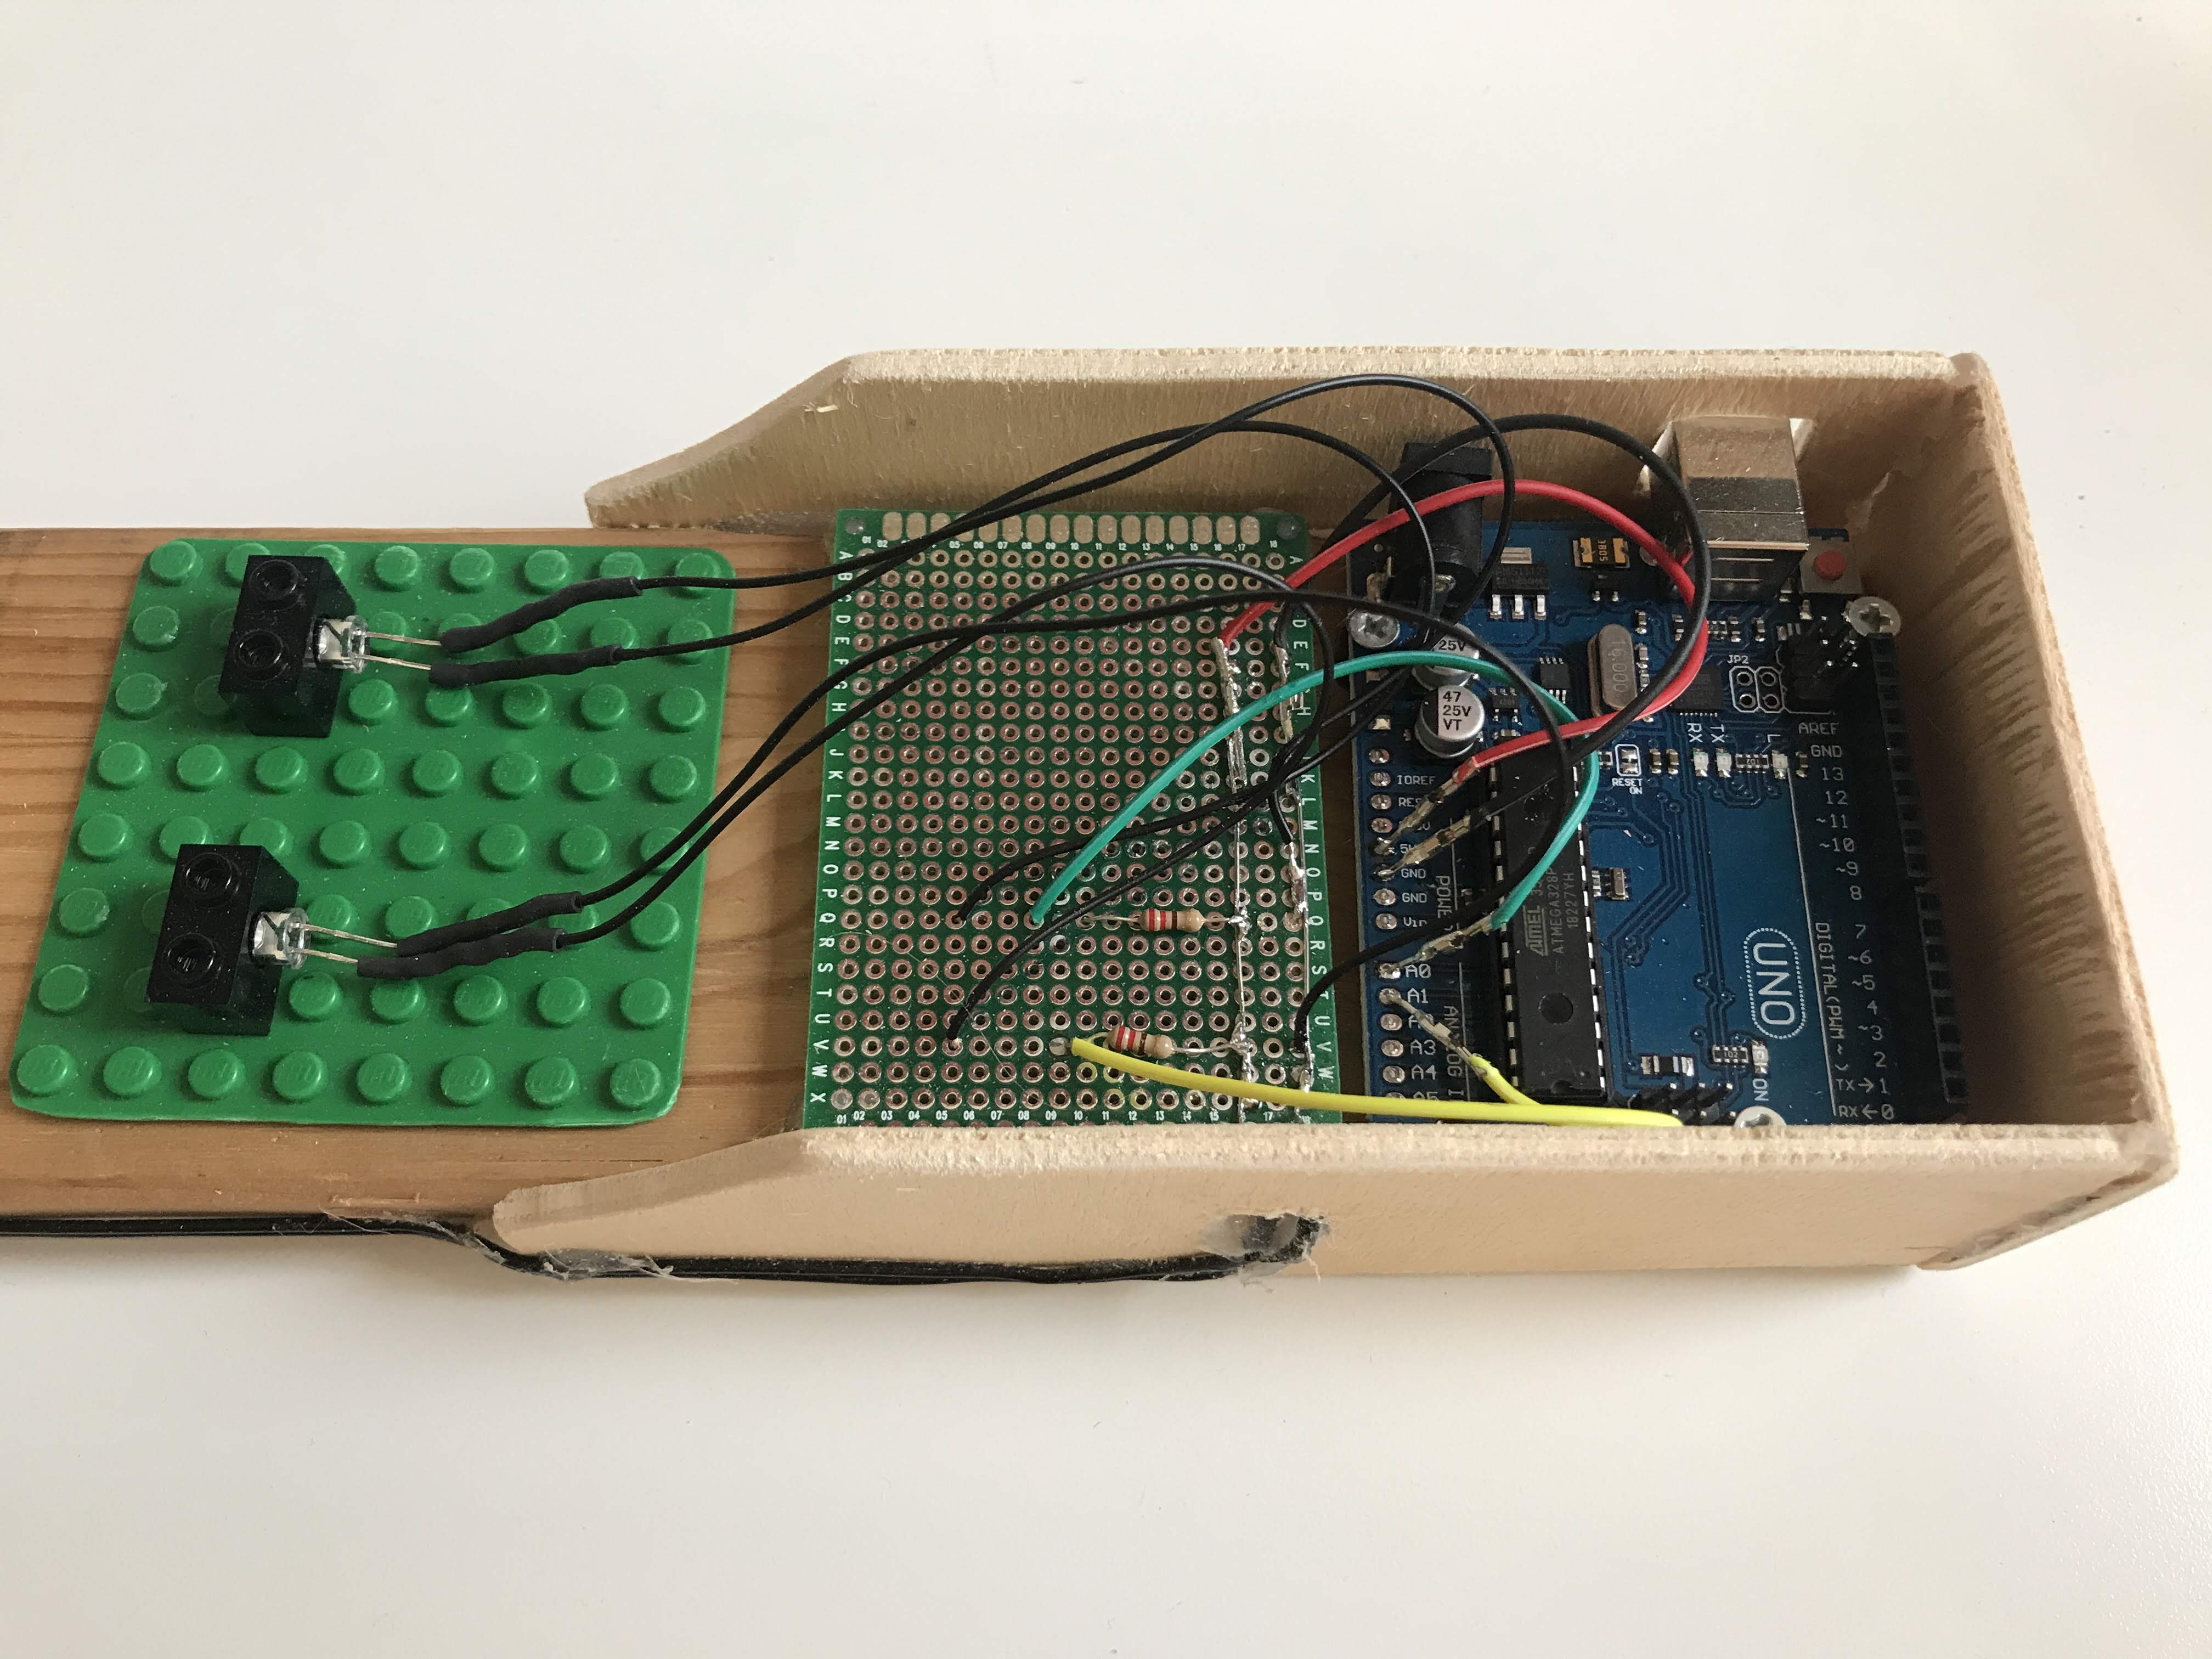
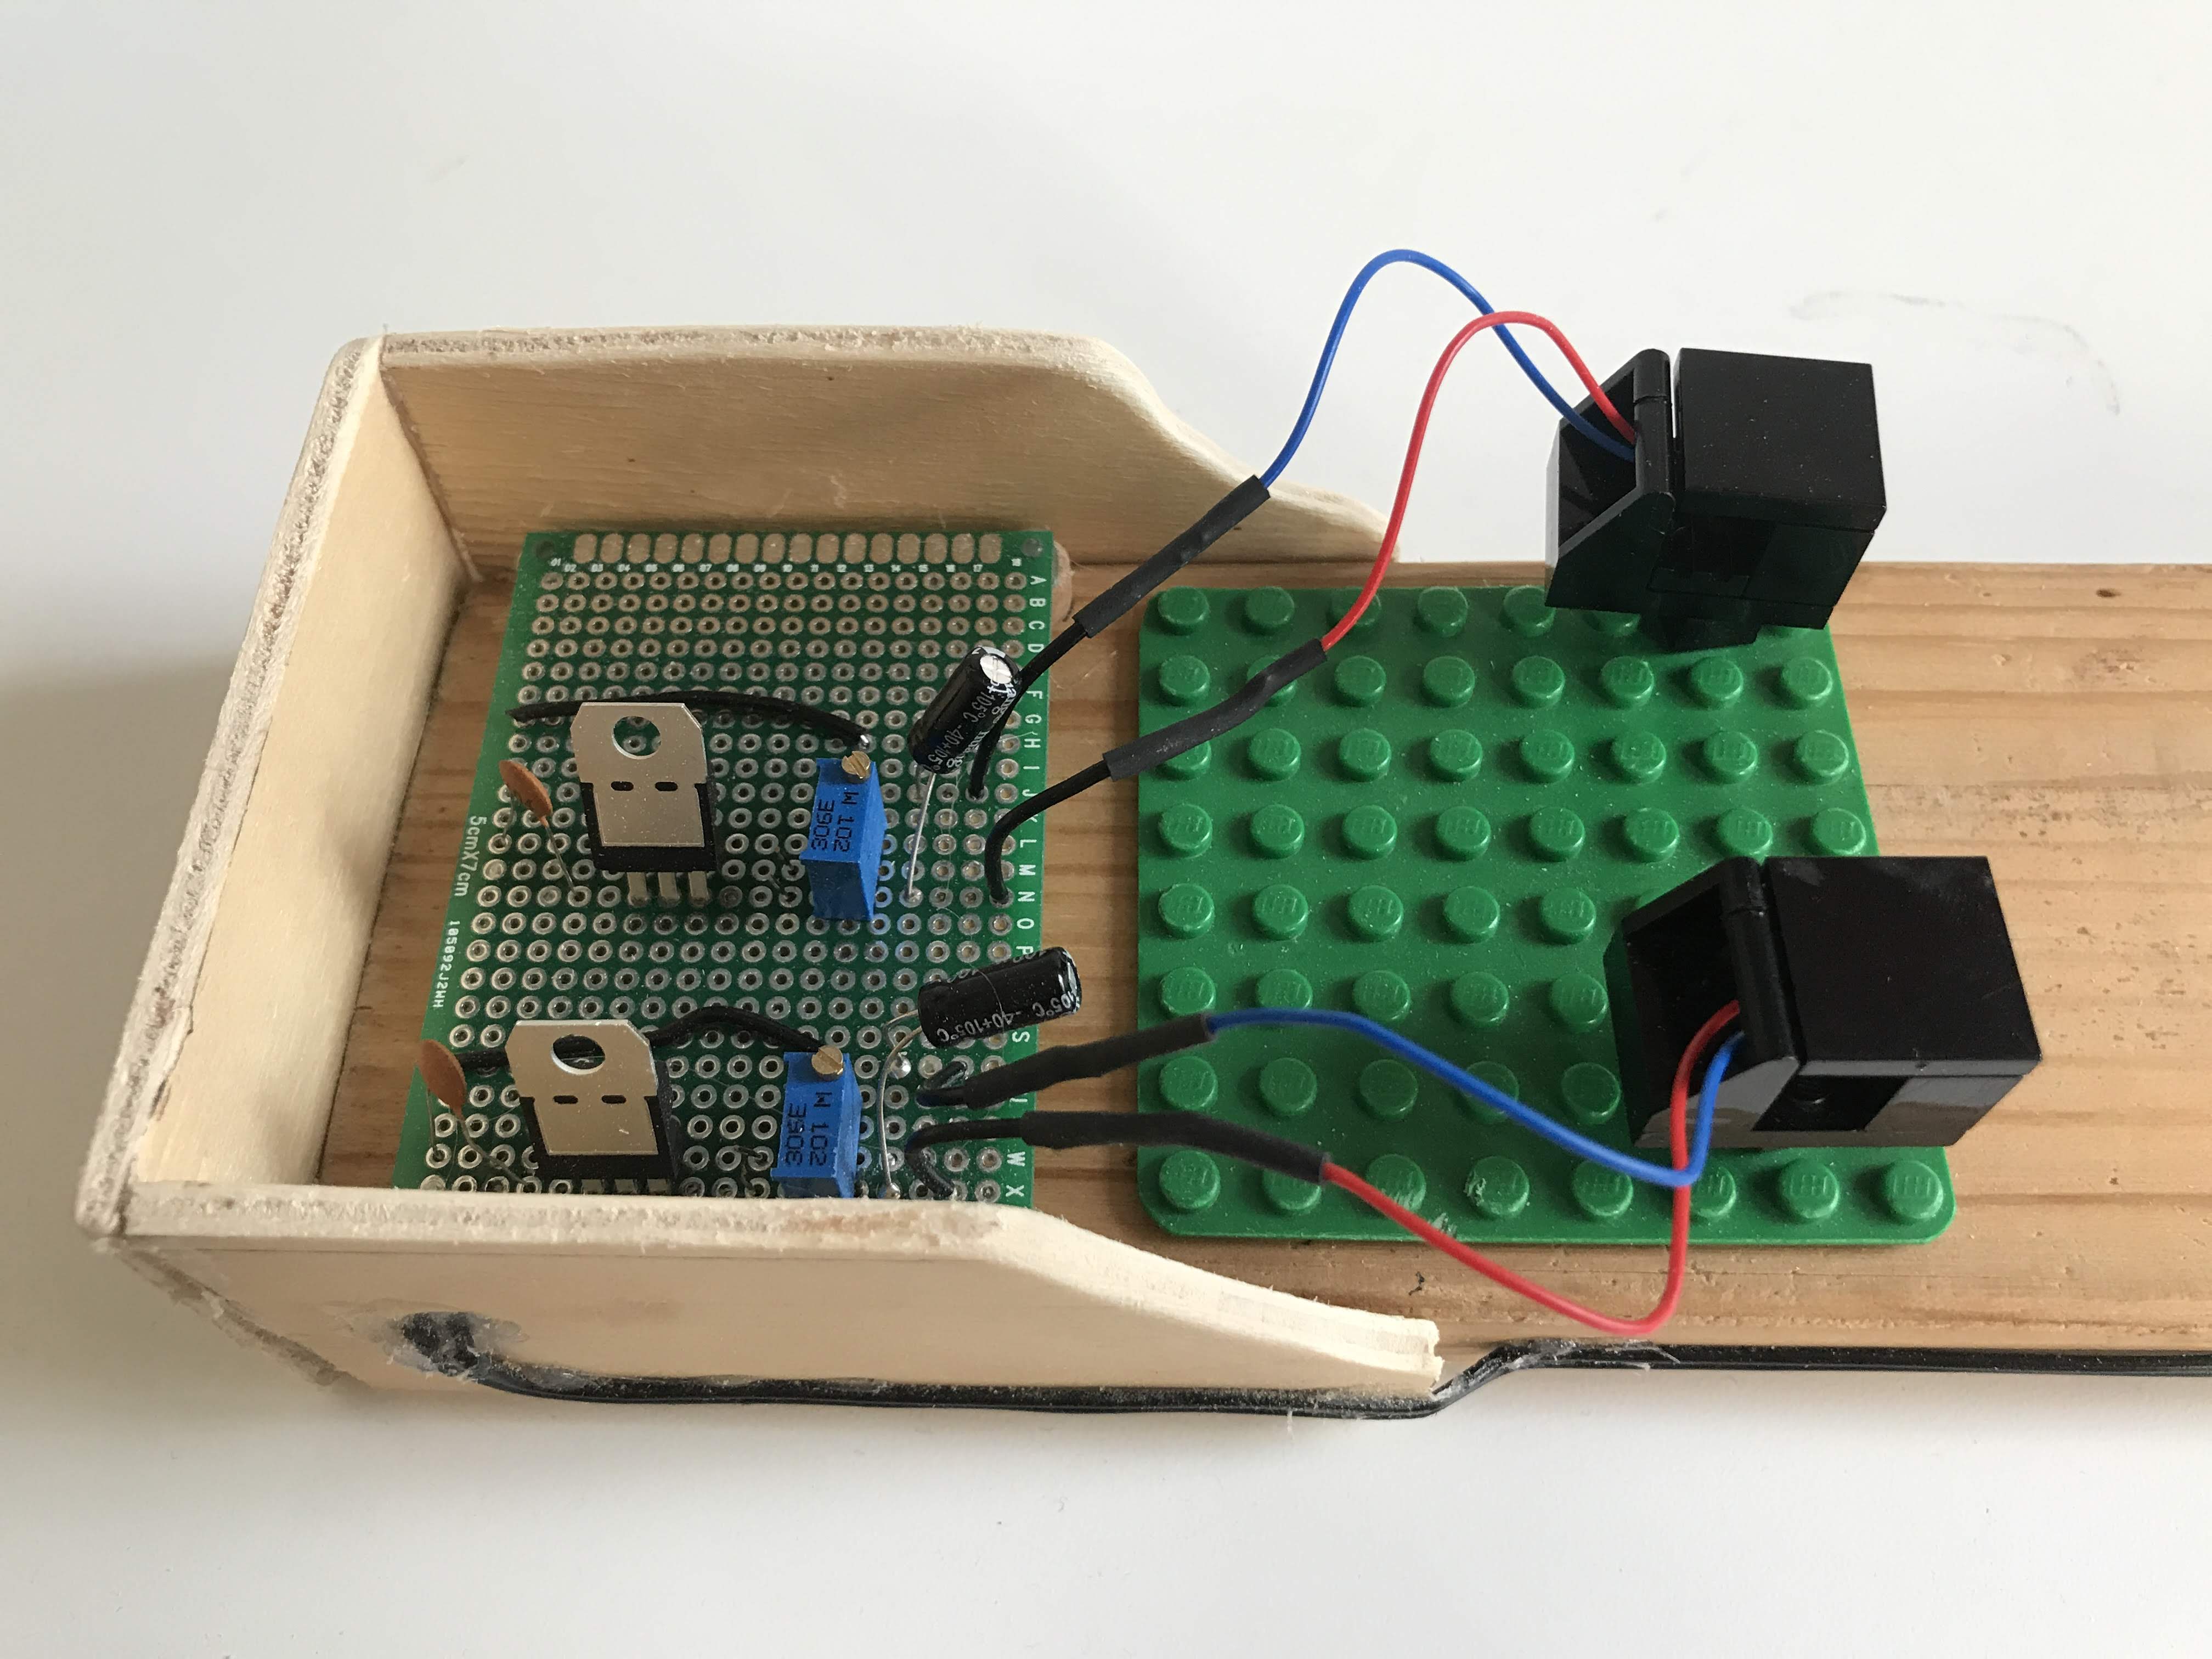
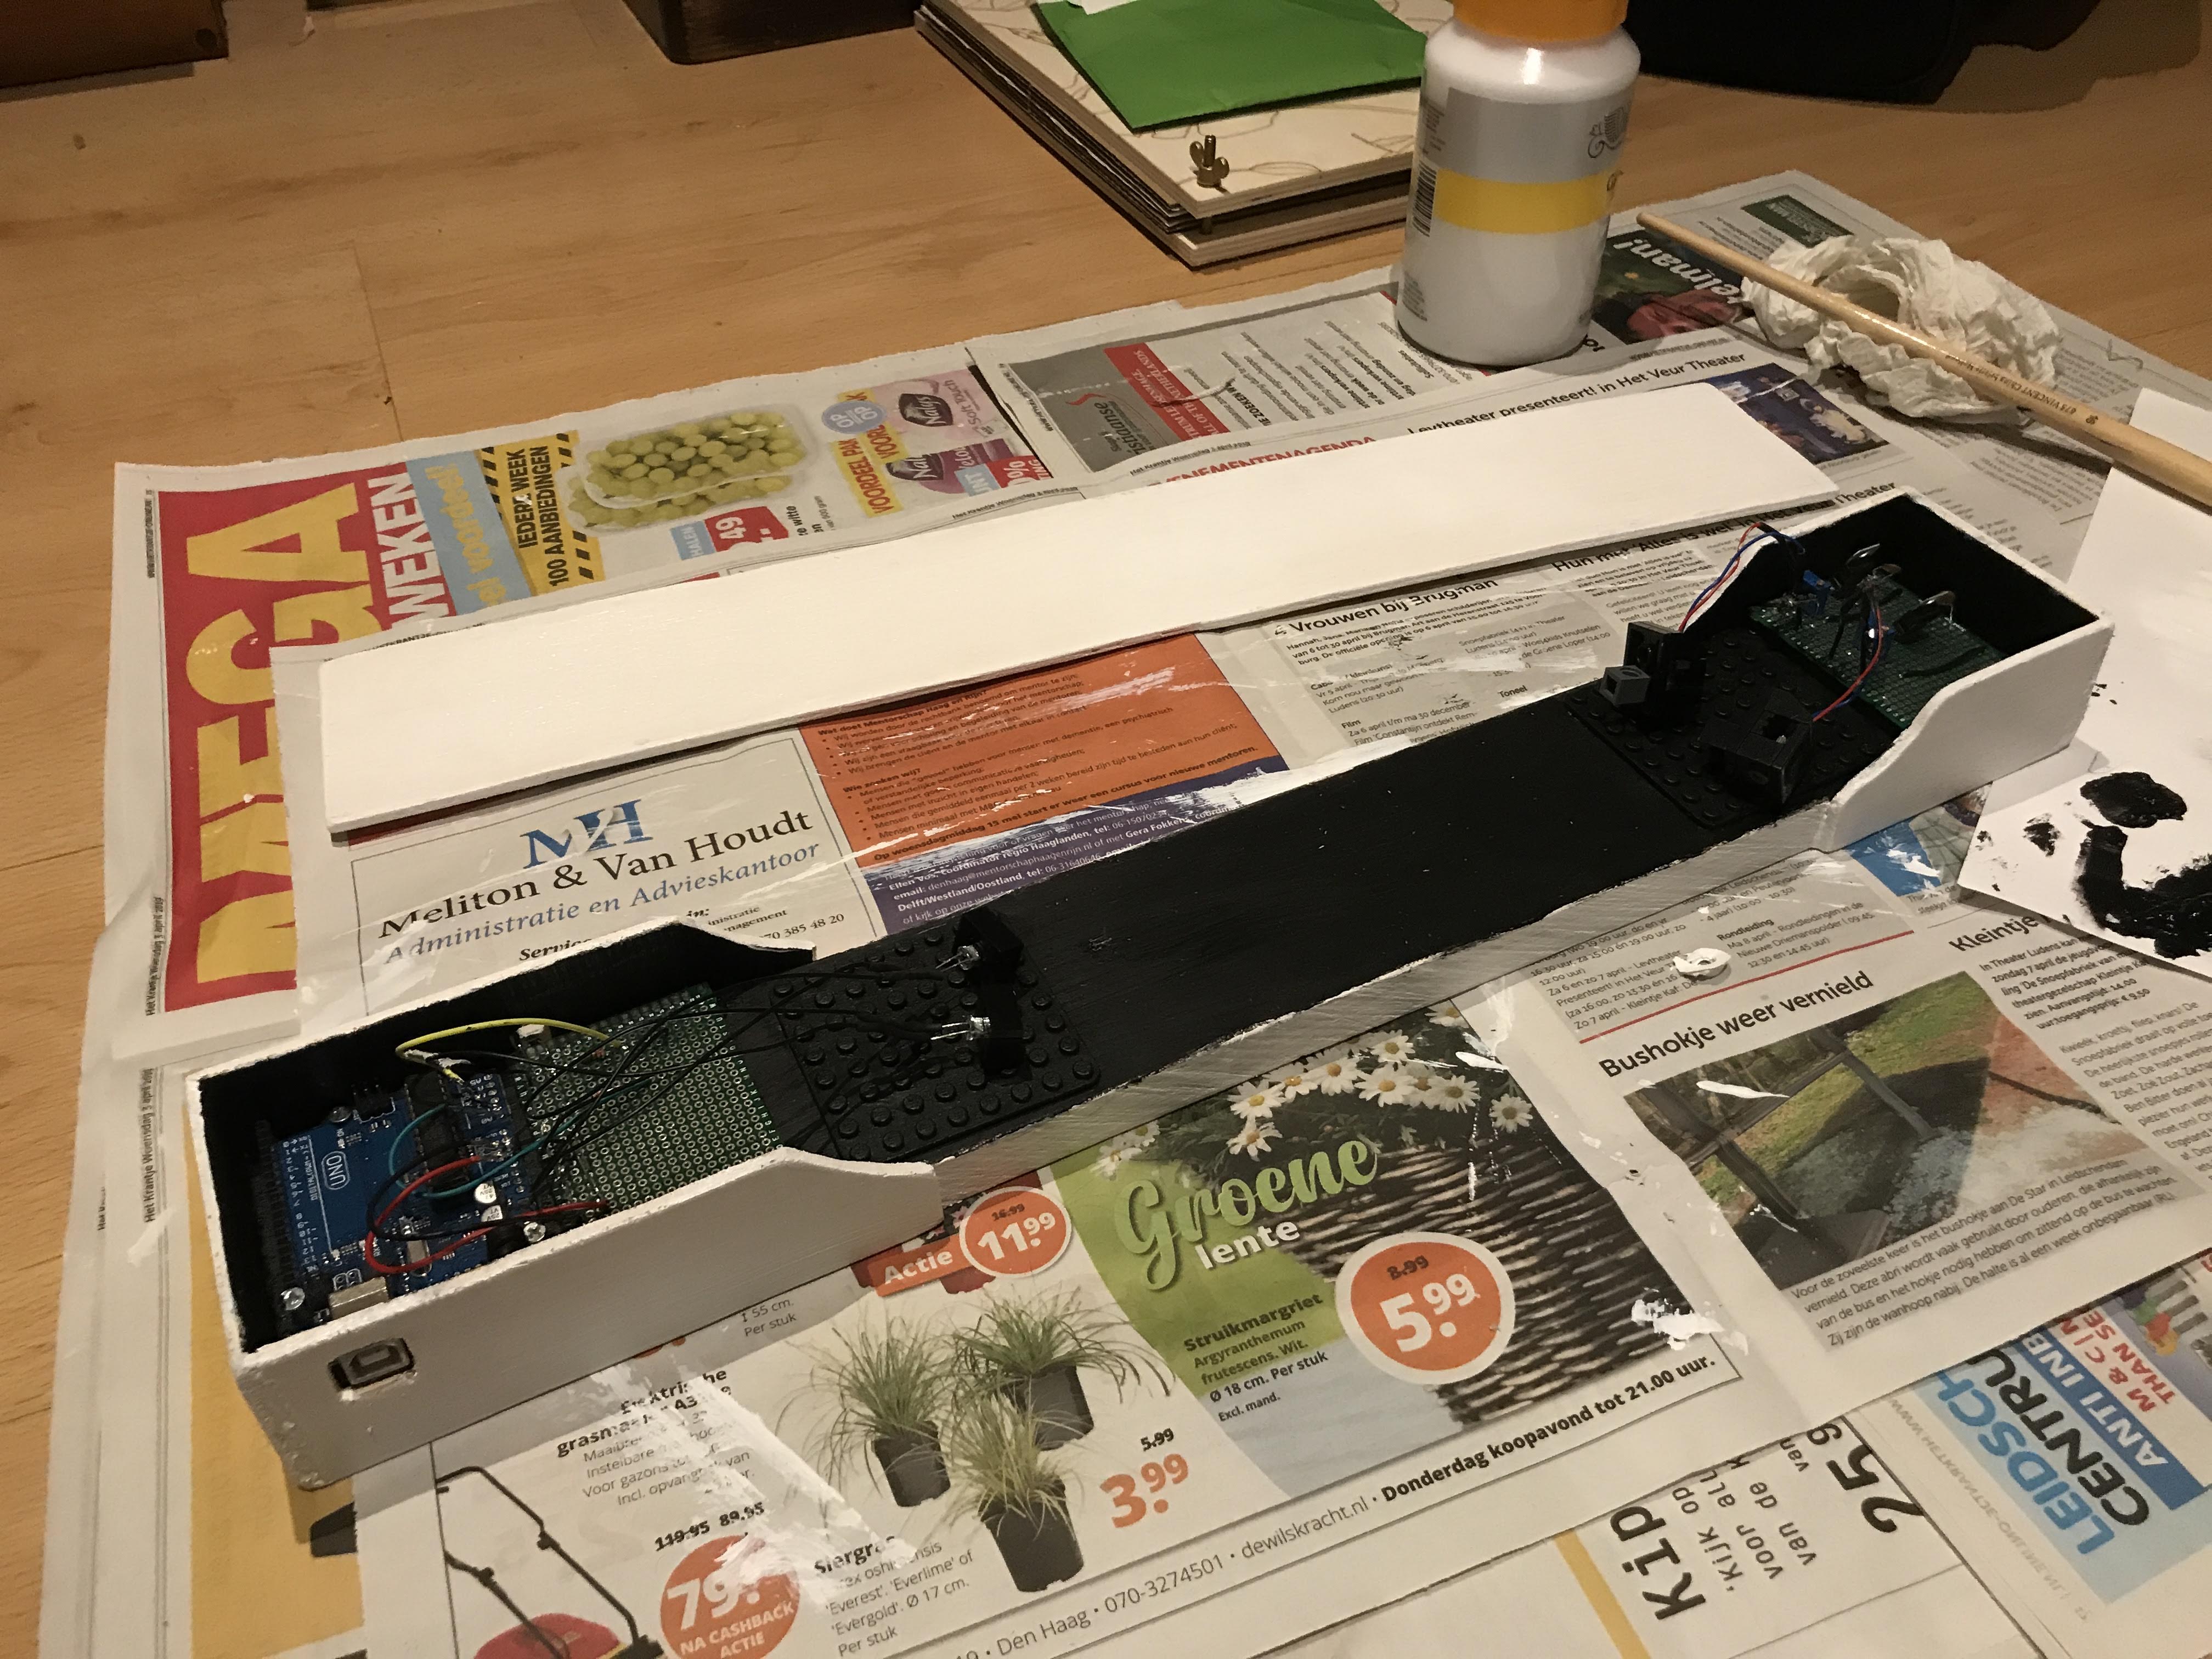
If you want to have a nice case around the electronics, try to find a plank to put everything on.
You can use LEGO to put the sensors and lasers into place.
Next up is putting the boards and Arduino on the plank. Put a spacer under the board and put them in place using glue.
The side panels can be any design you like. Try something creative!
Now give it some paint, I chose to make the inner part black and the outer white.
Code and Usage
Connect the Arduino to your computer. Upload analog_read2.ino to your board.
Now download VCV Rack (vcvrack.com)
In the plugins folder of your VCV Rack install, put the DoubleLasers zip and unpack it.
Open VCV Rack.
Right mouse click, type "Double Lasers" and press enter. Now you have the module loaded into the program.
Now open the terminal and run the command ls /dev/cu*
Copy the path of your Arduino and paste it into the text box of the module.
Now press connect on the module.
You are now up and running!