Laptop Cooling Stand
Ever had to shut your computer off because you're doing something resource-intensive during a trip? What about a gaming hobby? This is the solution to all your heat-related problems; Introducing... The Ultimate... Laptop Cooling Stand!
NOTE: Steps 8&9 are only if your printer can't fit the fully made stand. At step 7, check if you need to proceed.
Supplies
- Fusion 360
- 3d Printer
- Superglue
Init
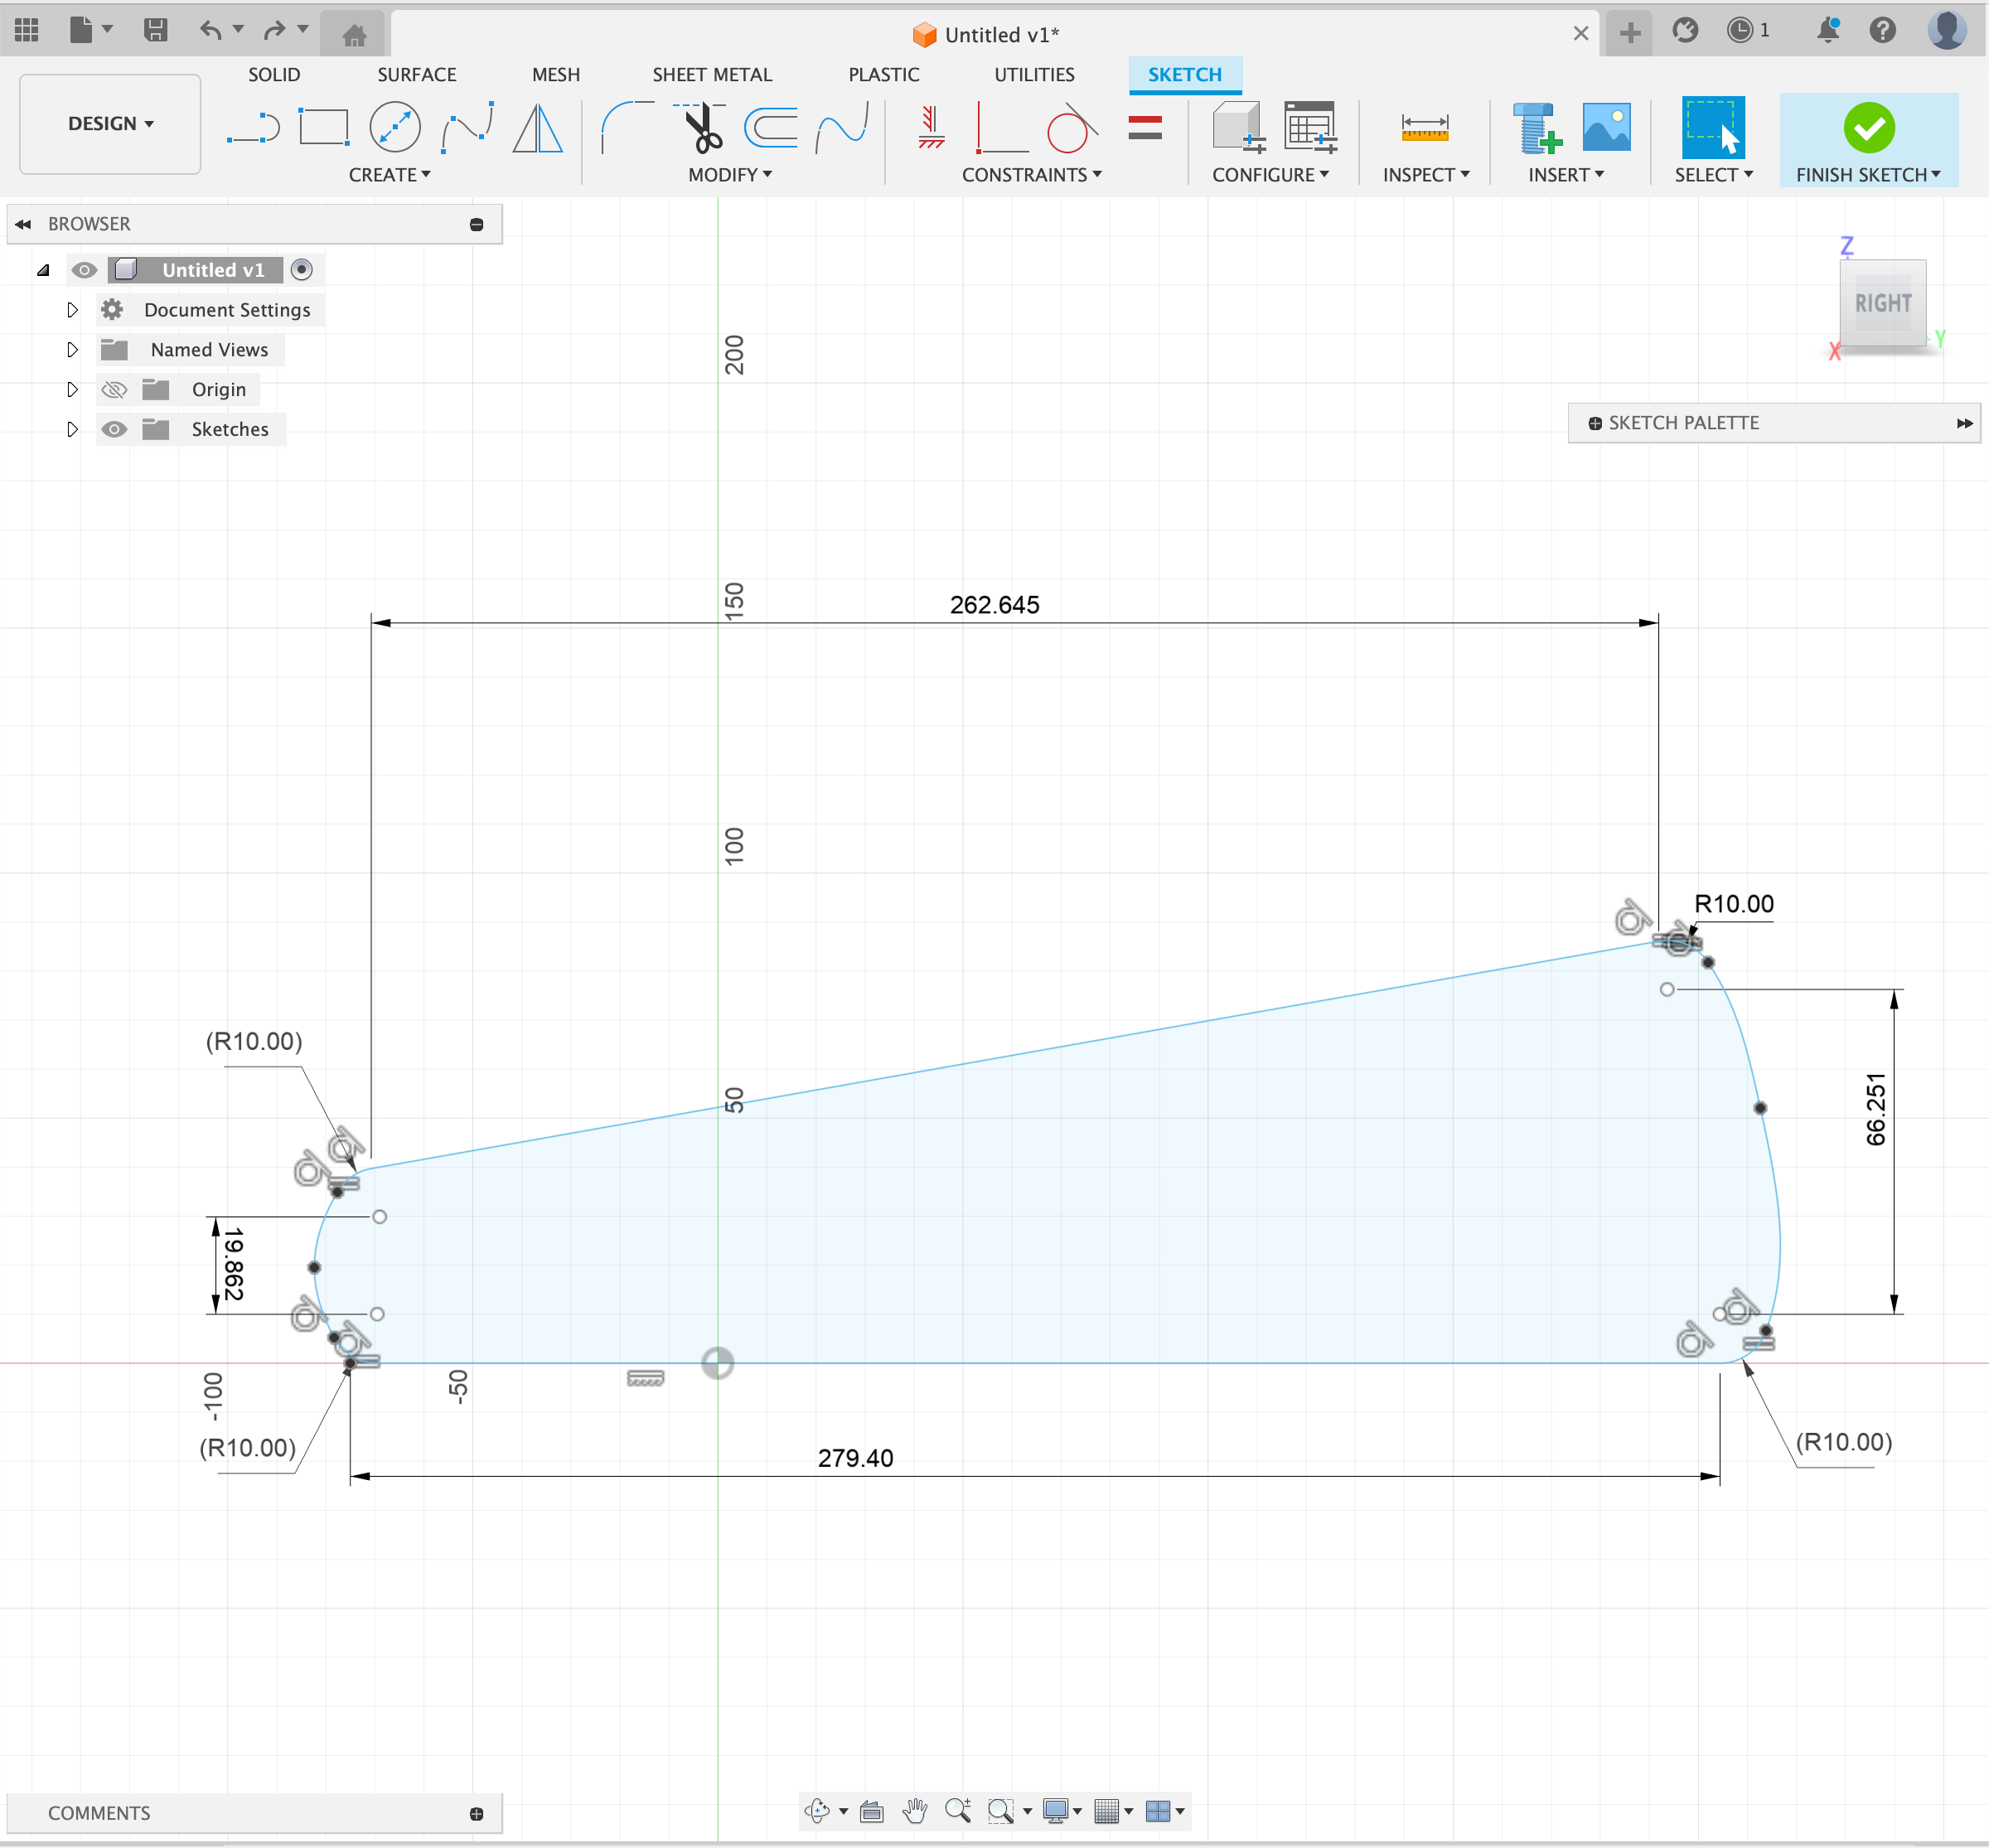
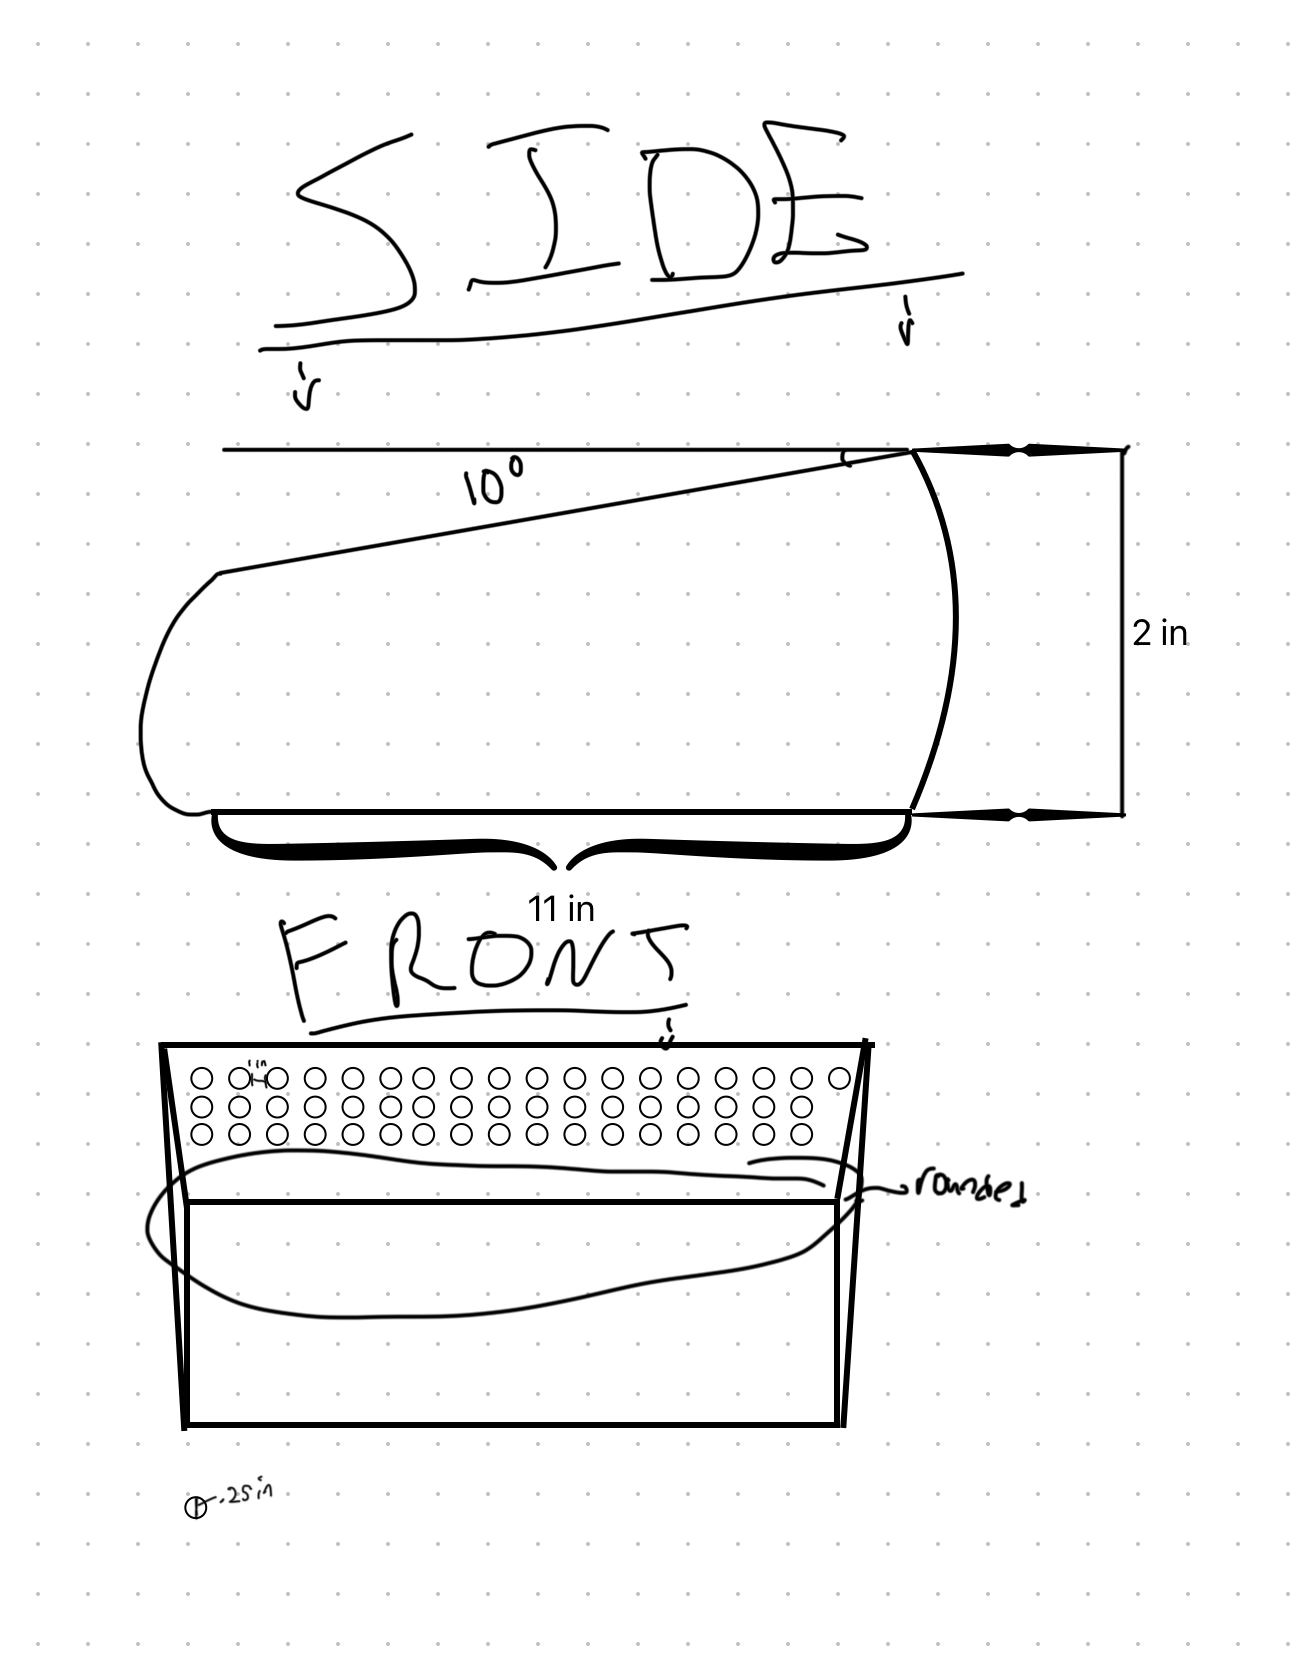
Here, we make the initial sketch. Select the right (YZ) plane and click "Create Sketch". Next, copy the image above to make it and them filet it.
Elongate
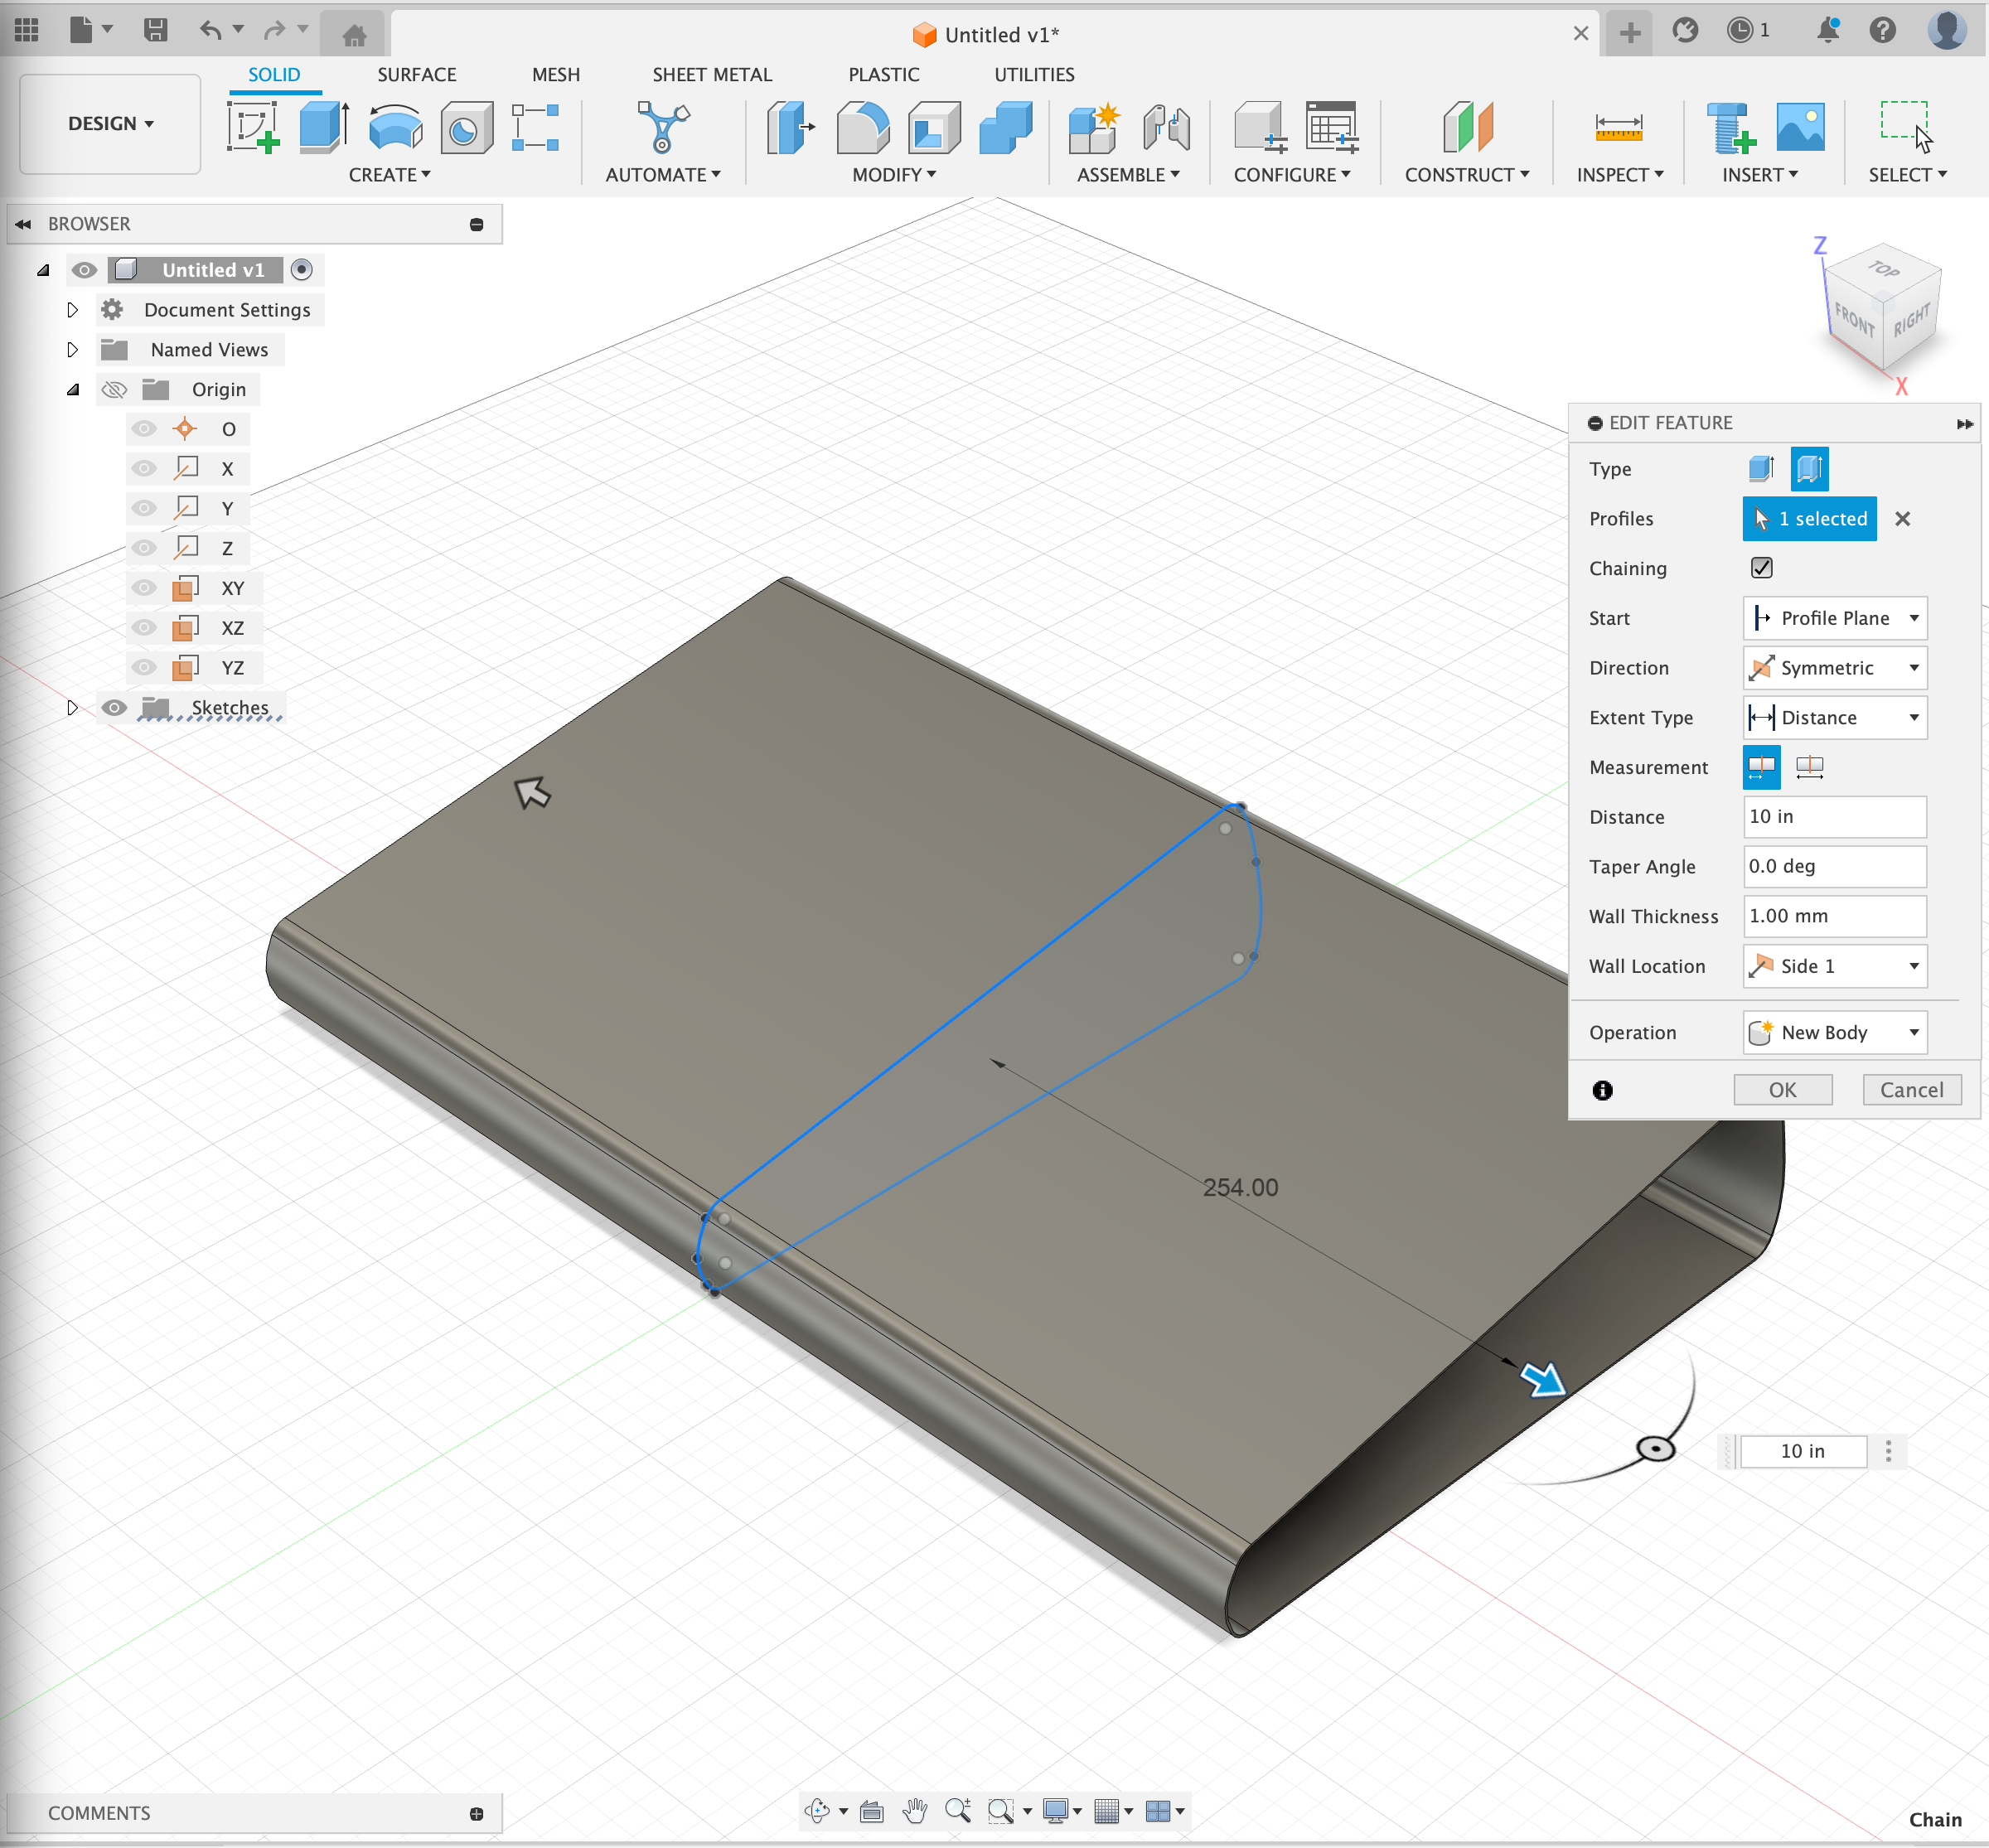
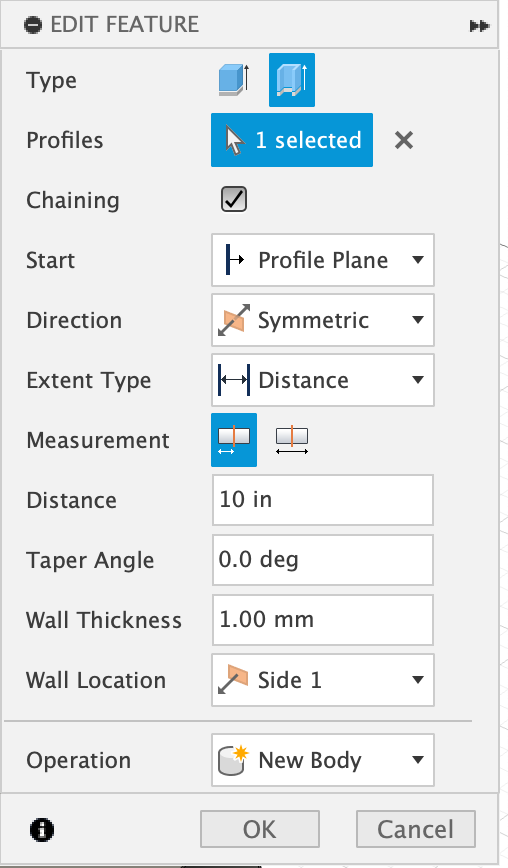
Next, extrude your sketch. Extrude it 10 inches and make sure that your selections for the "edit feature" match the two images above. Then, click "OK".
Loops
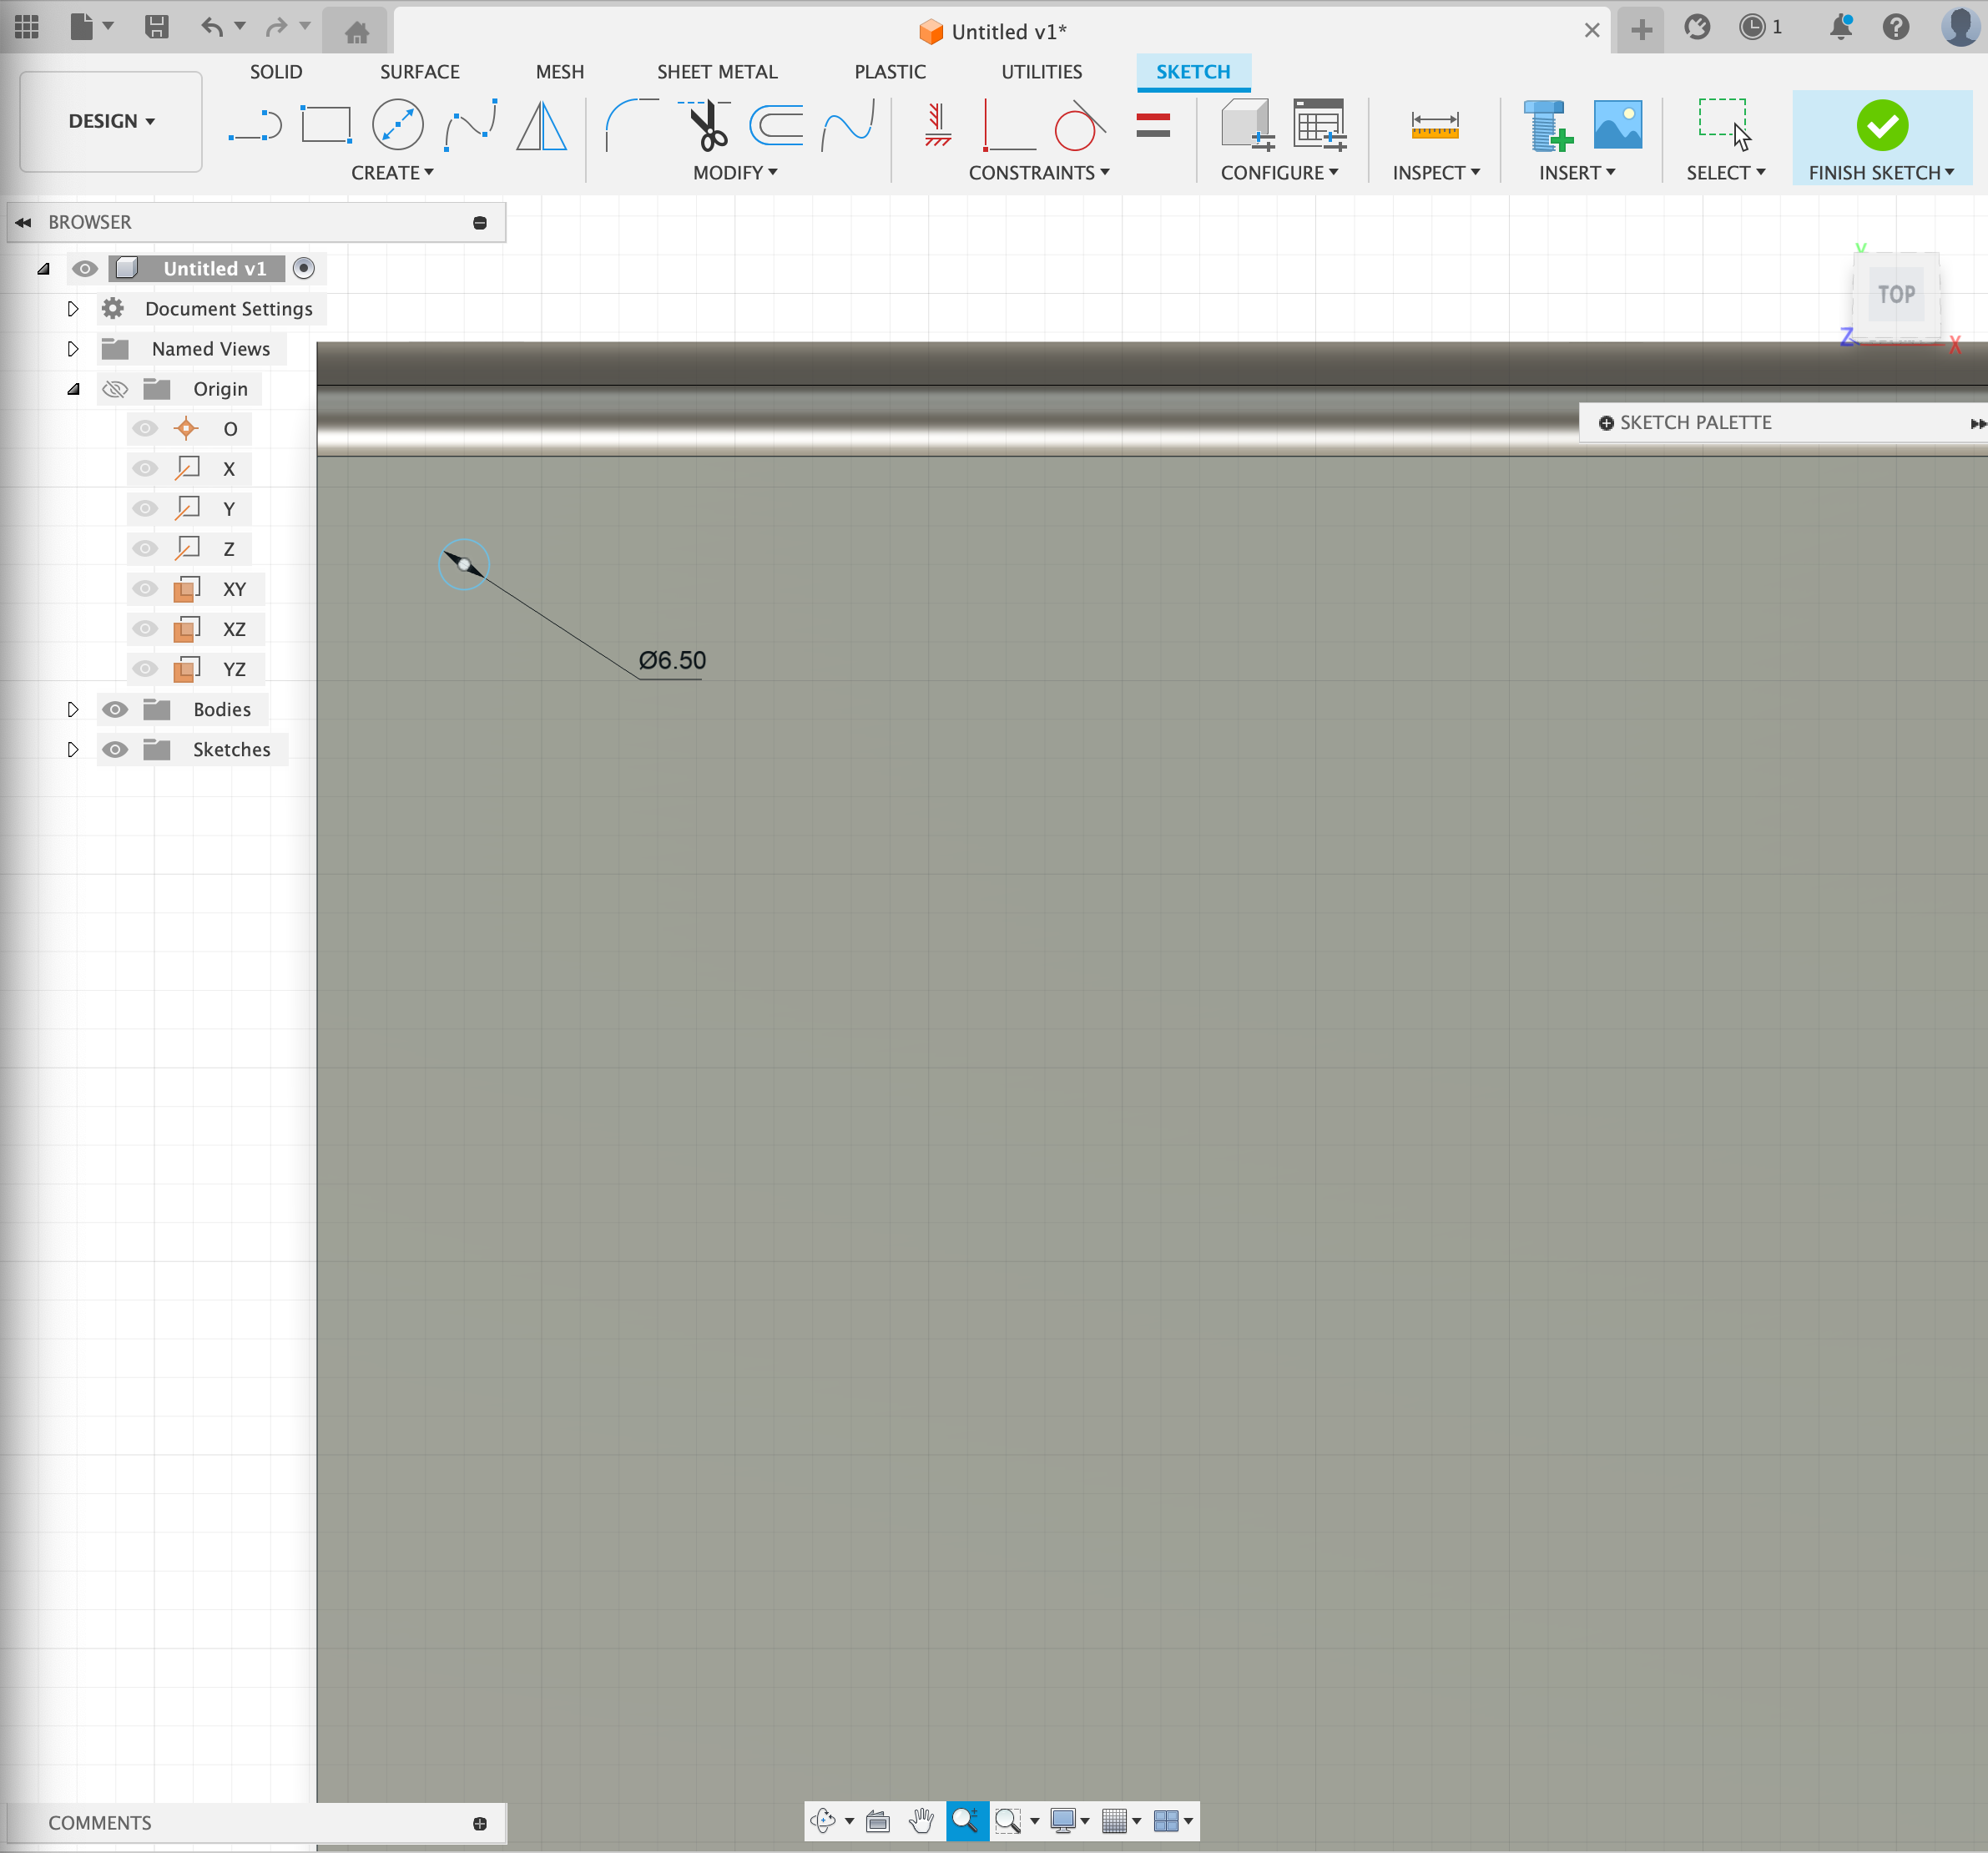
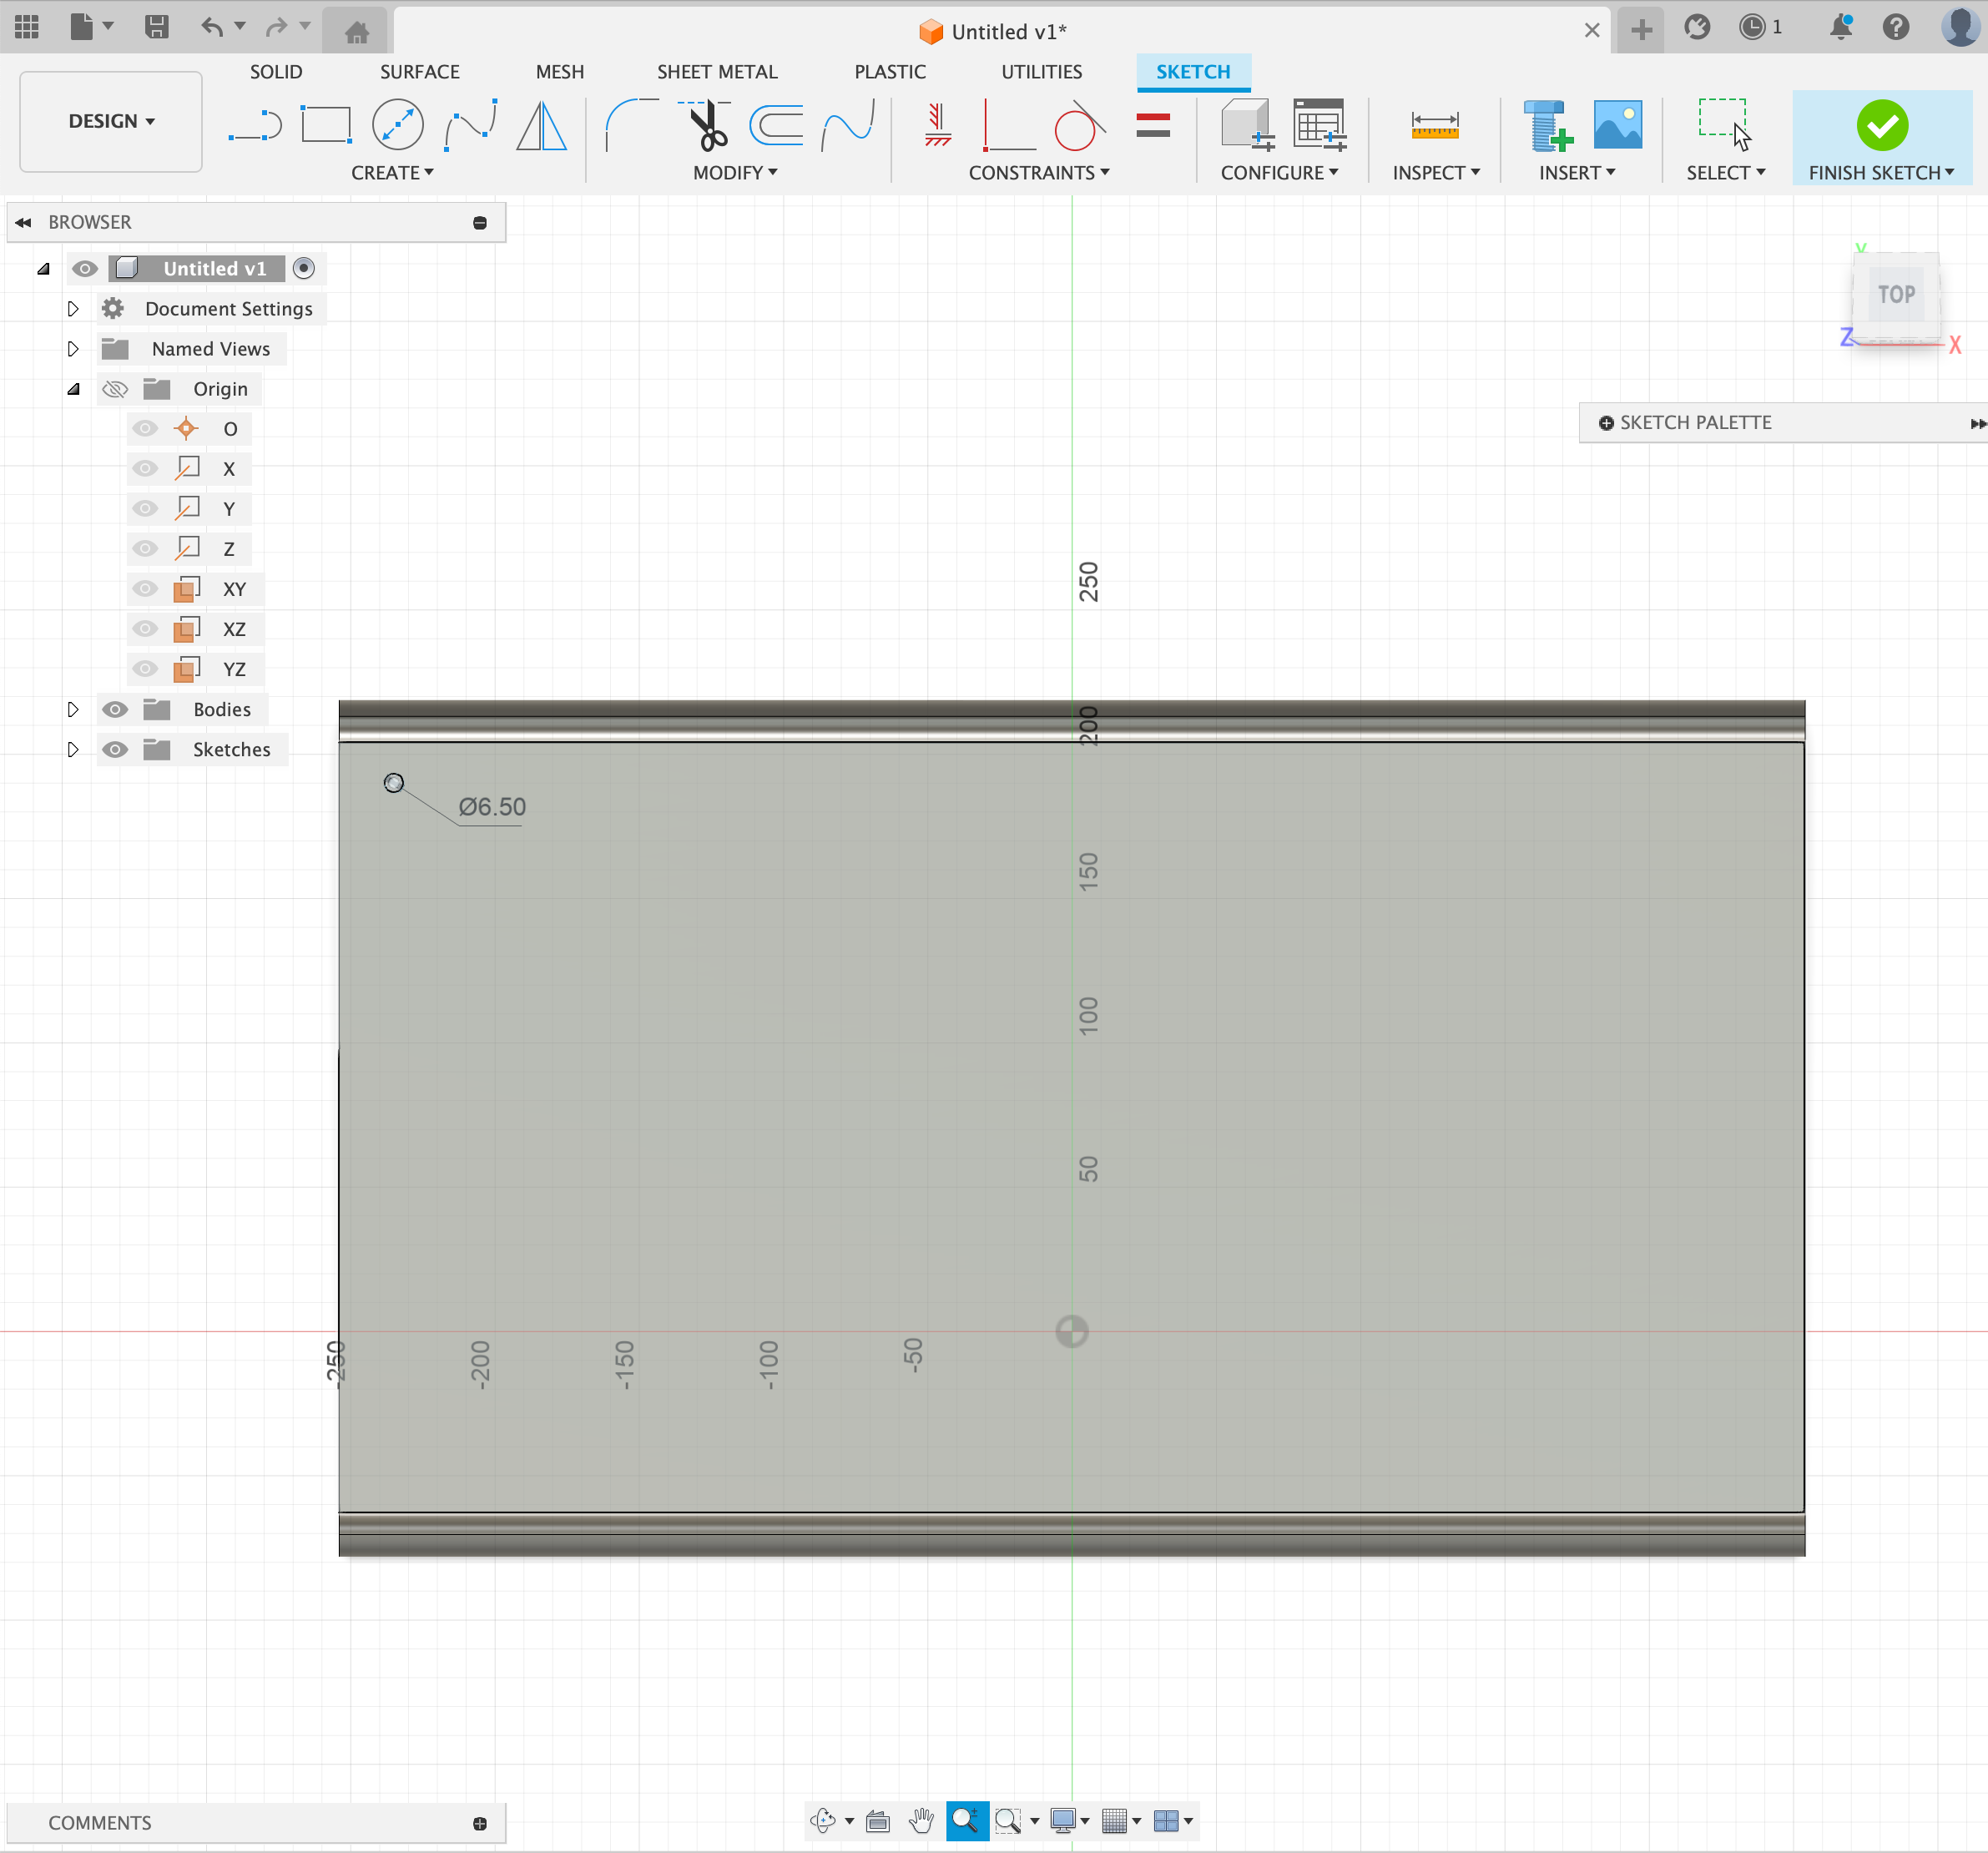
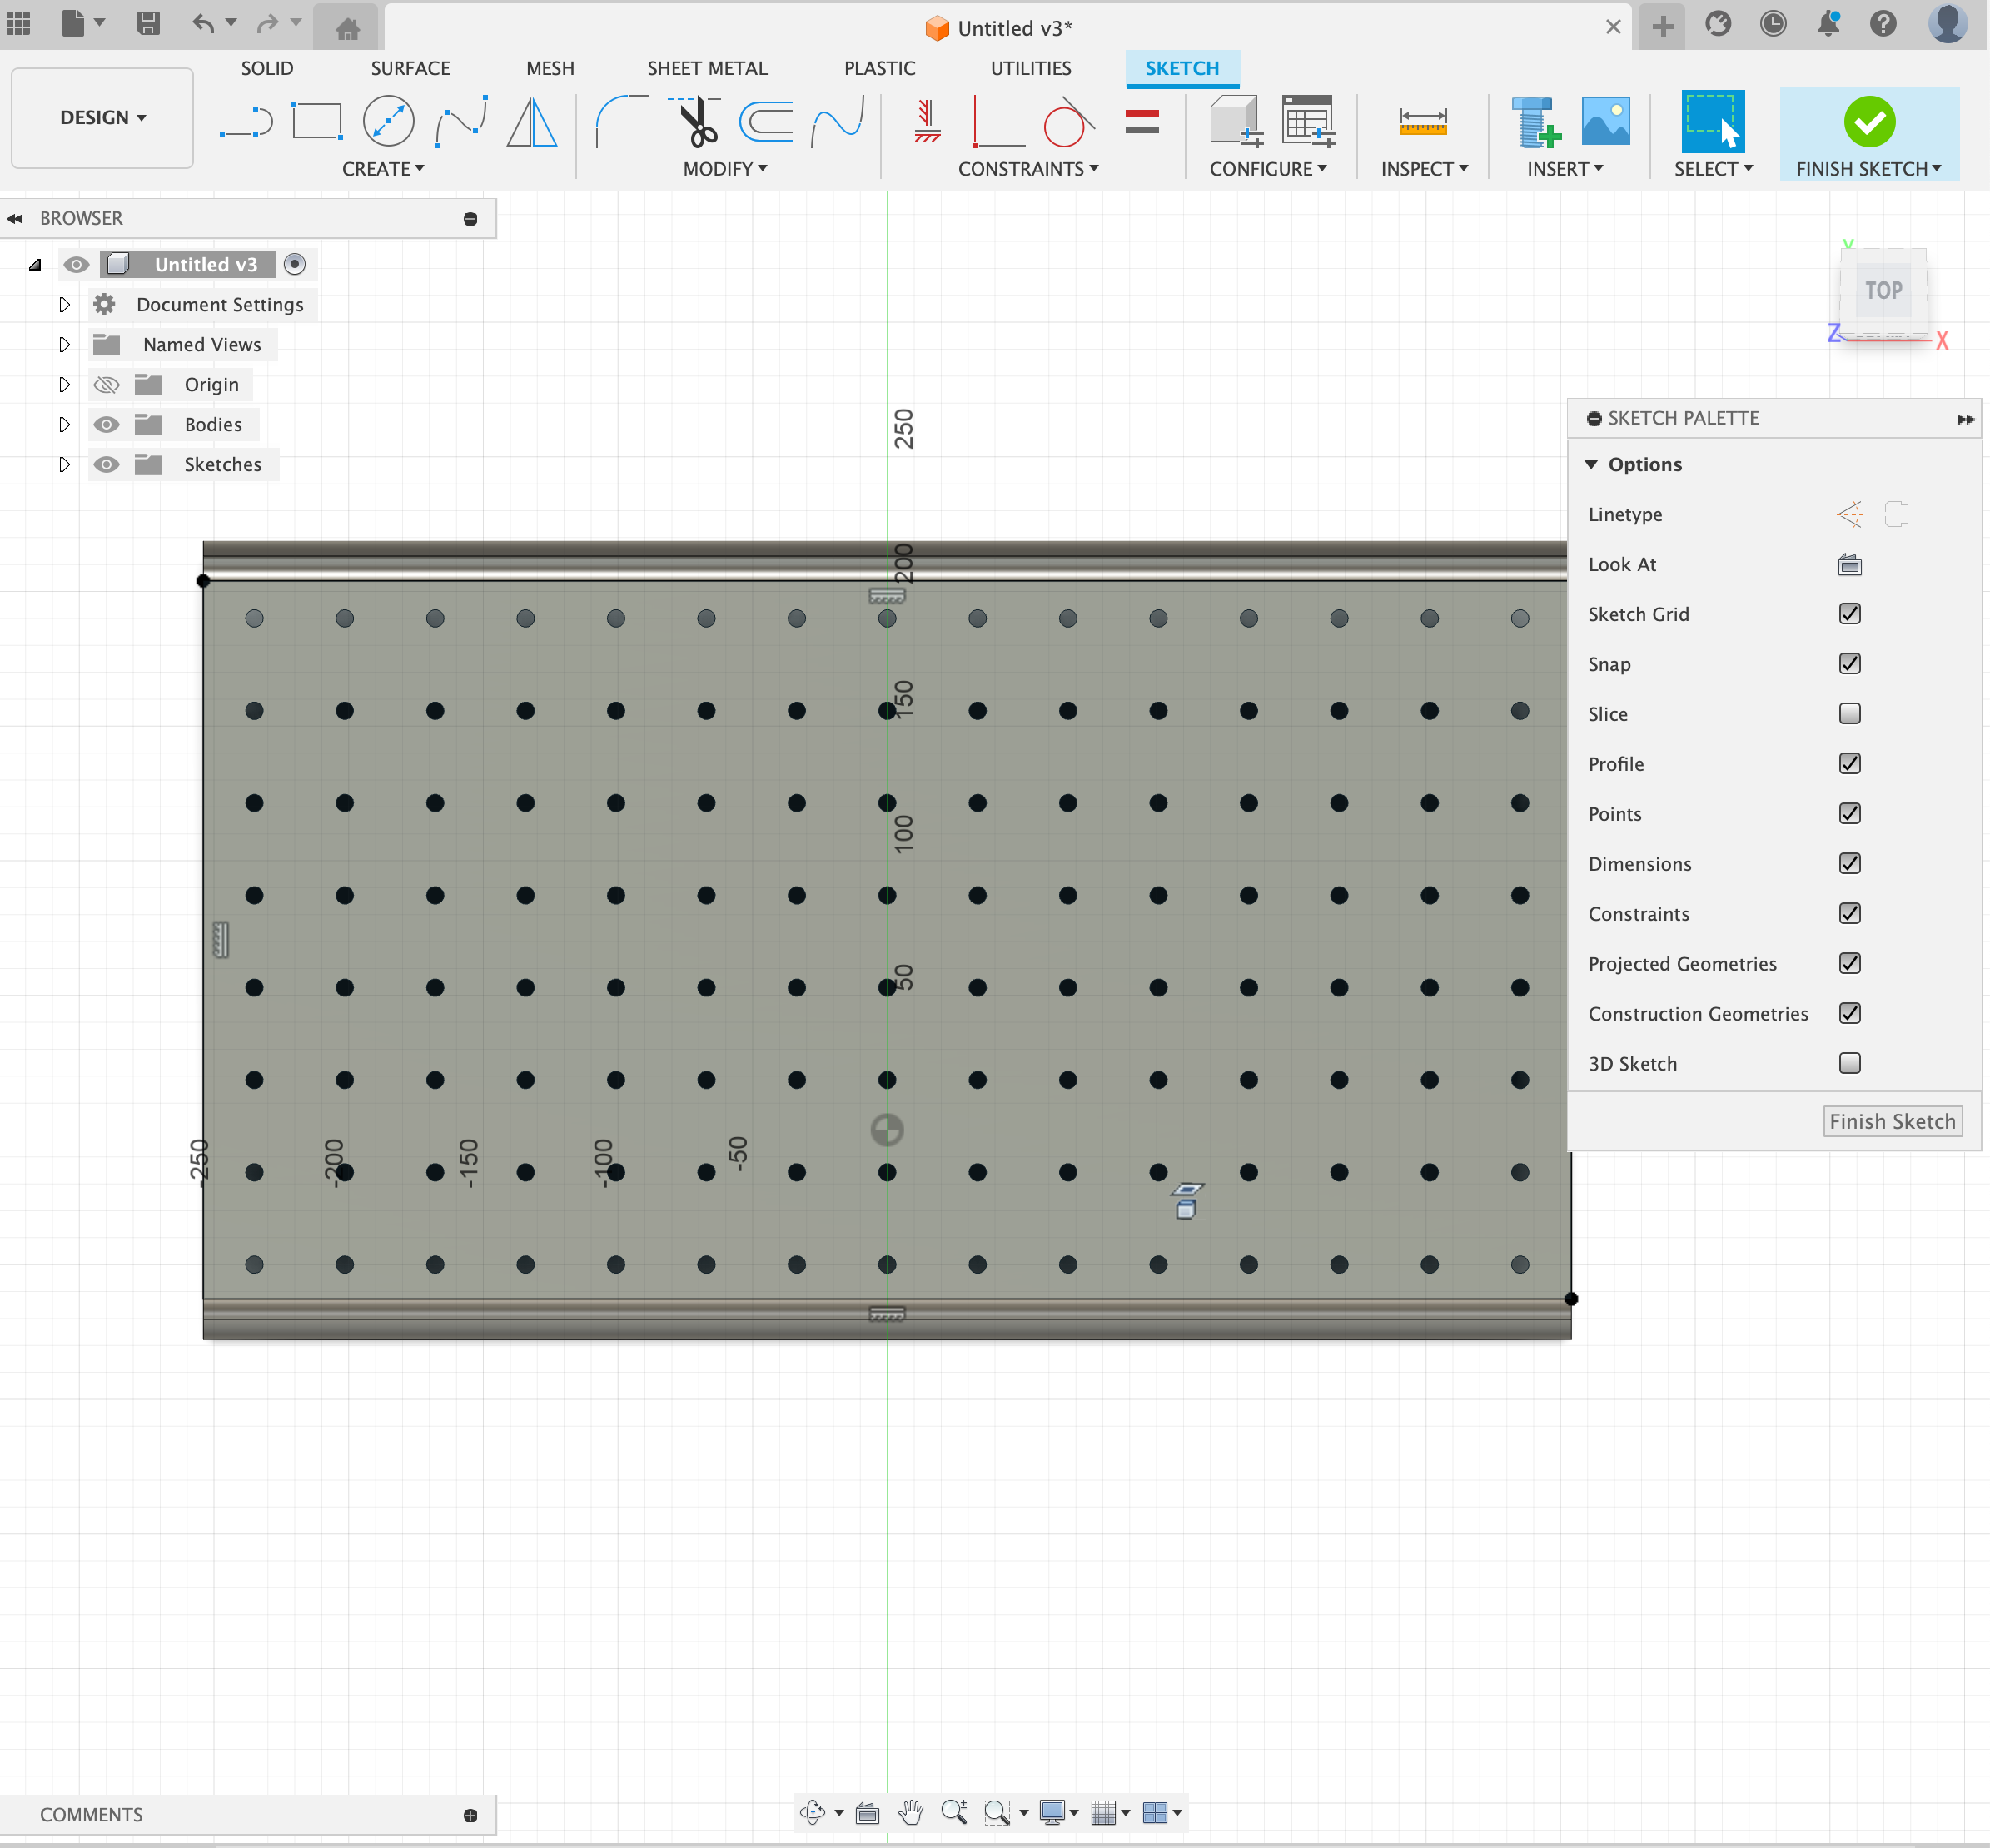
Here, create a sketch on top of your stand. Make a center point circle 6.50 mm in diameter like shown above.
Holes
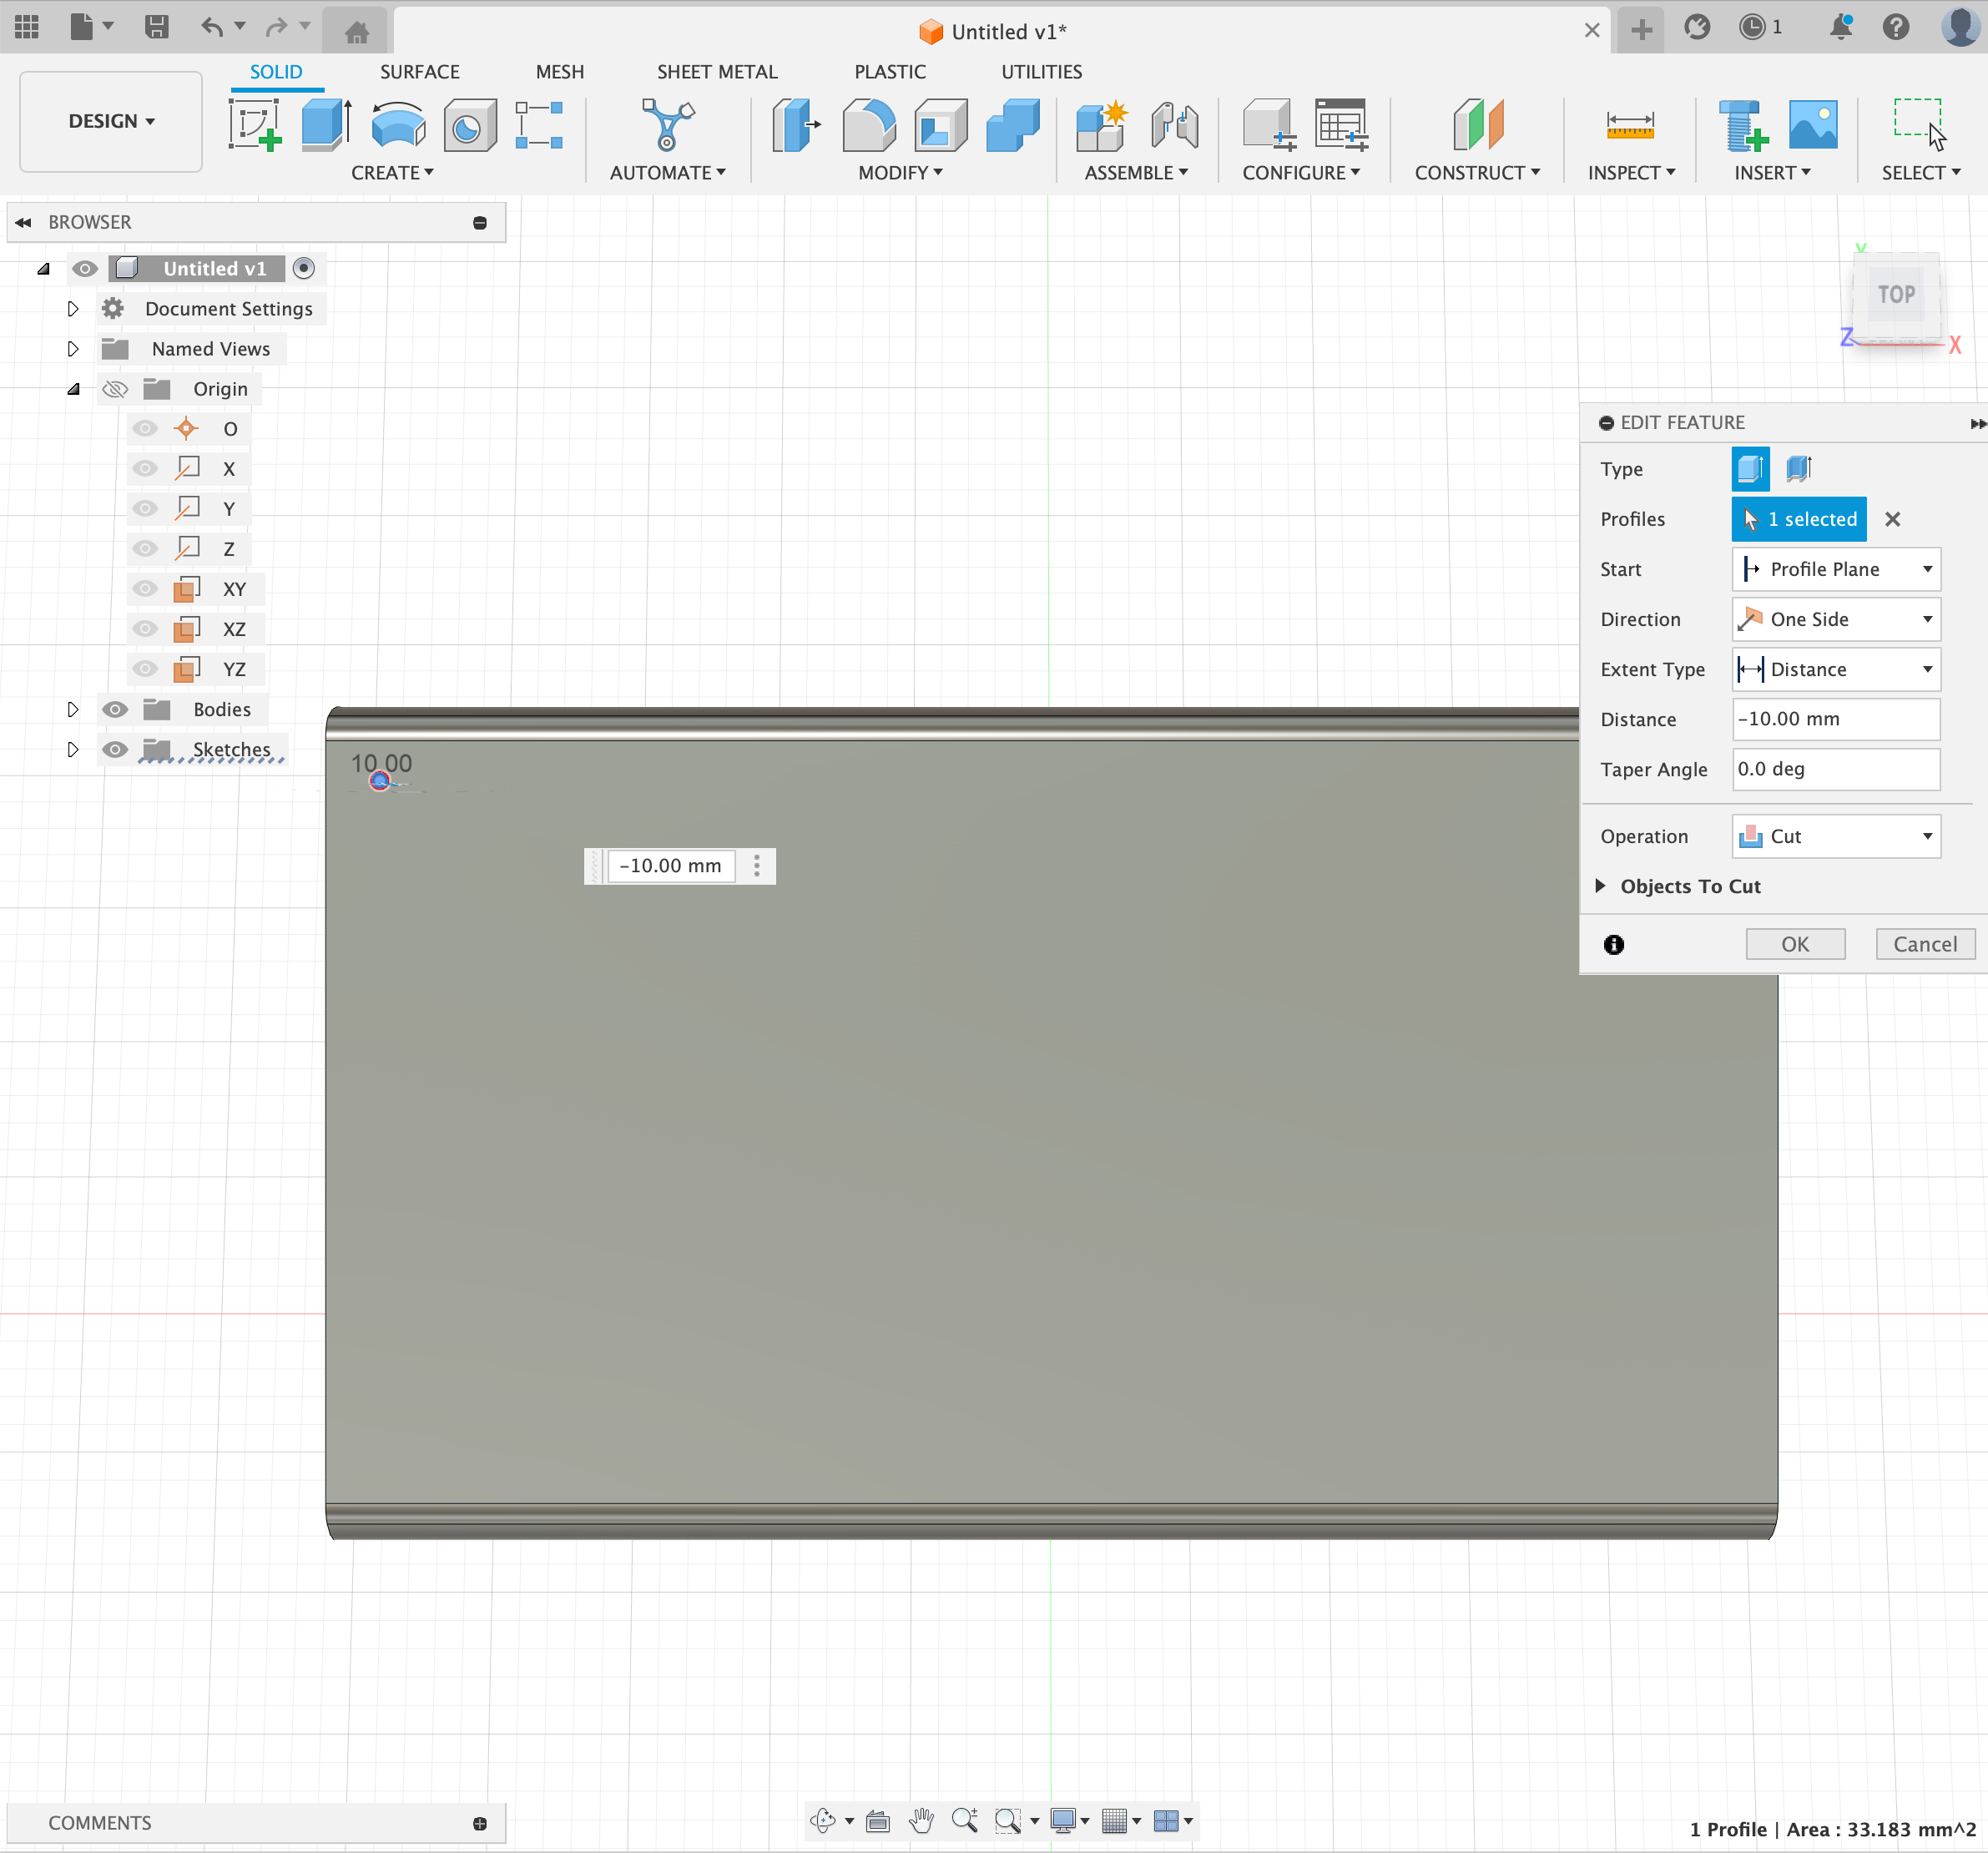
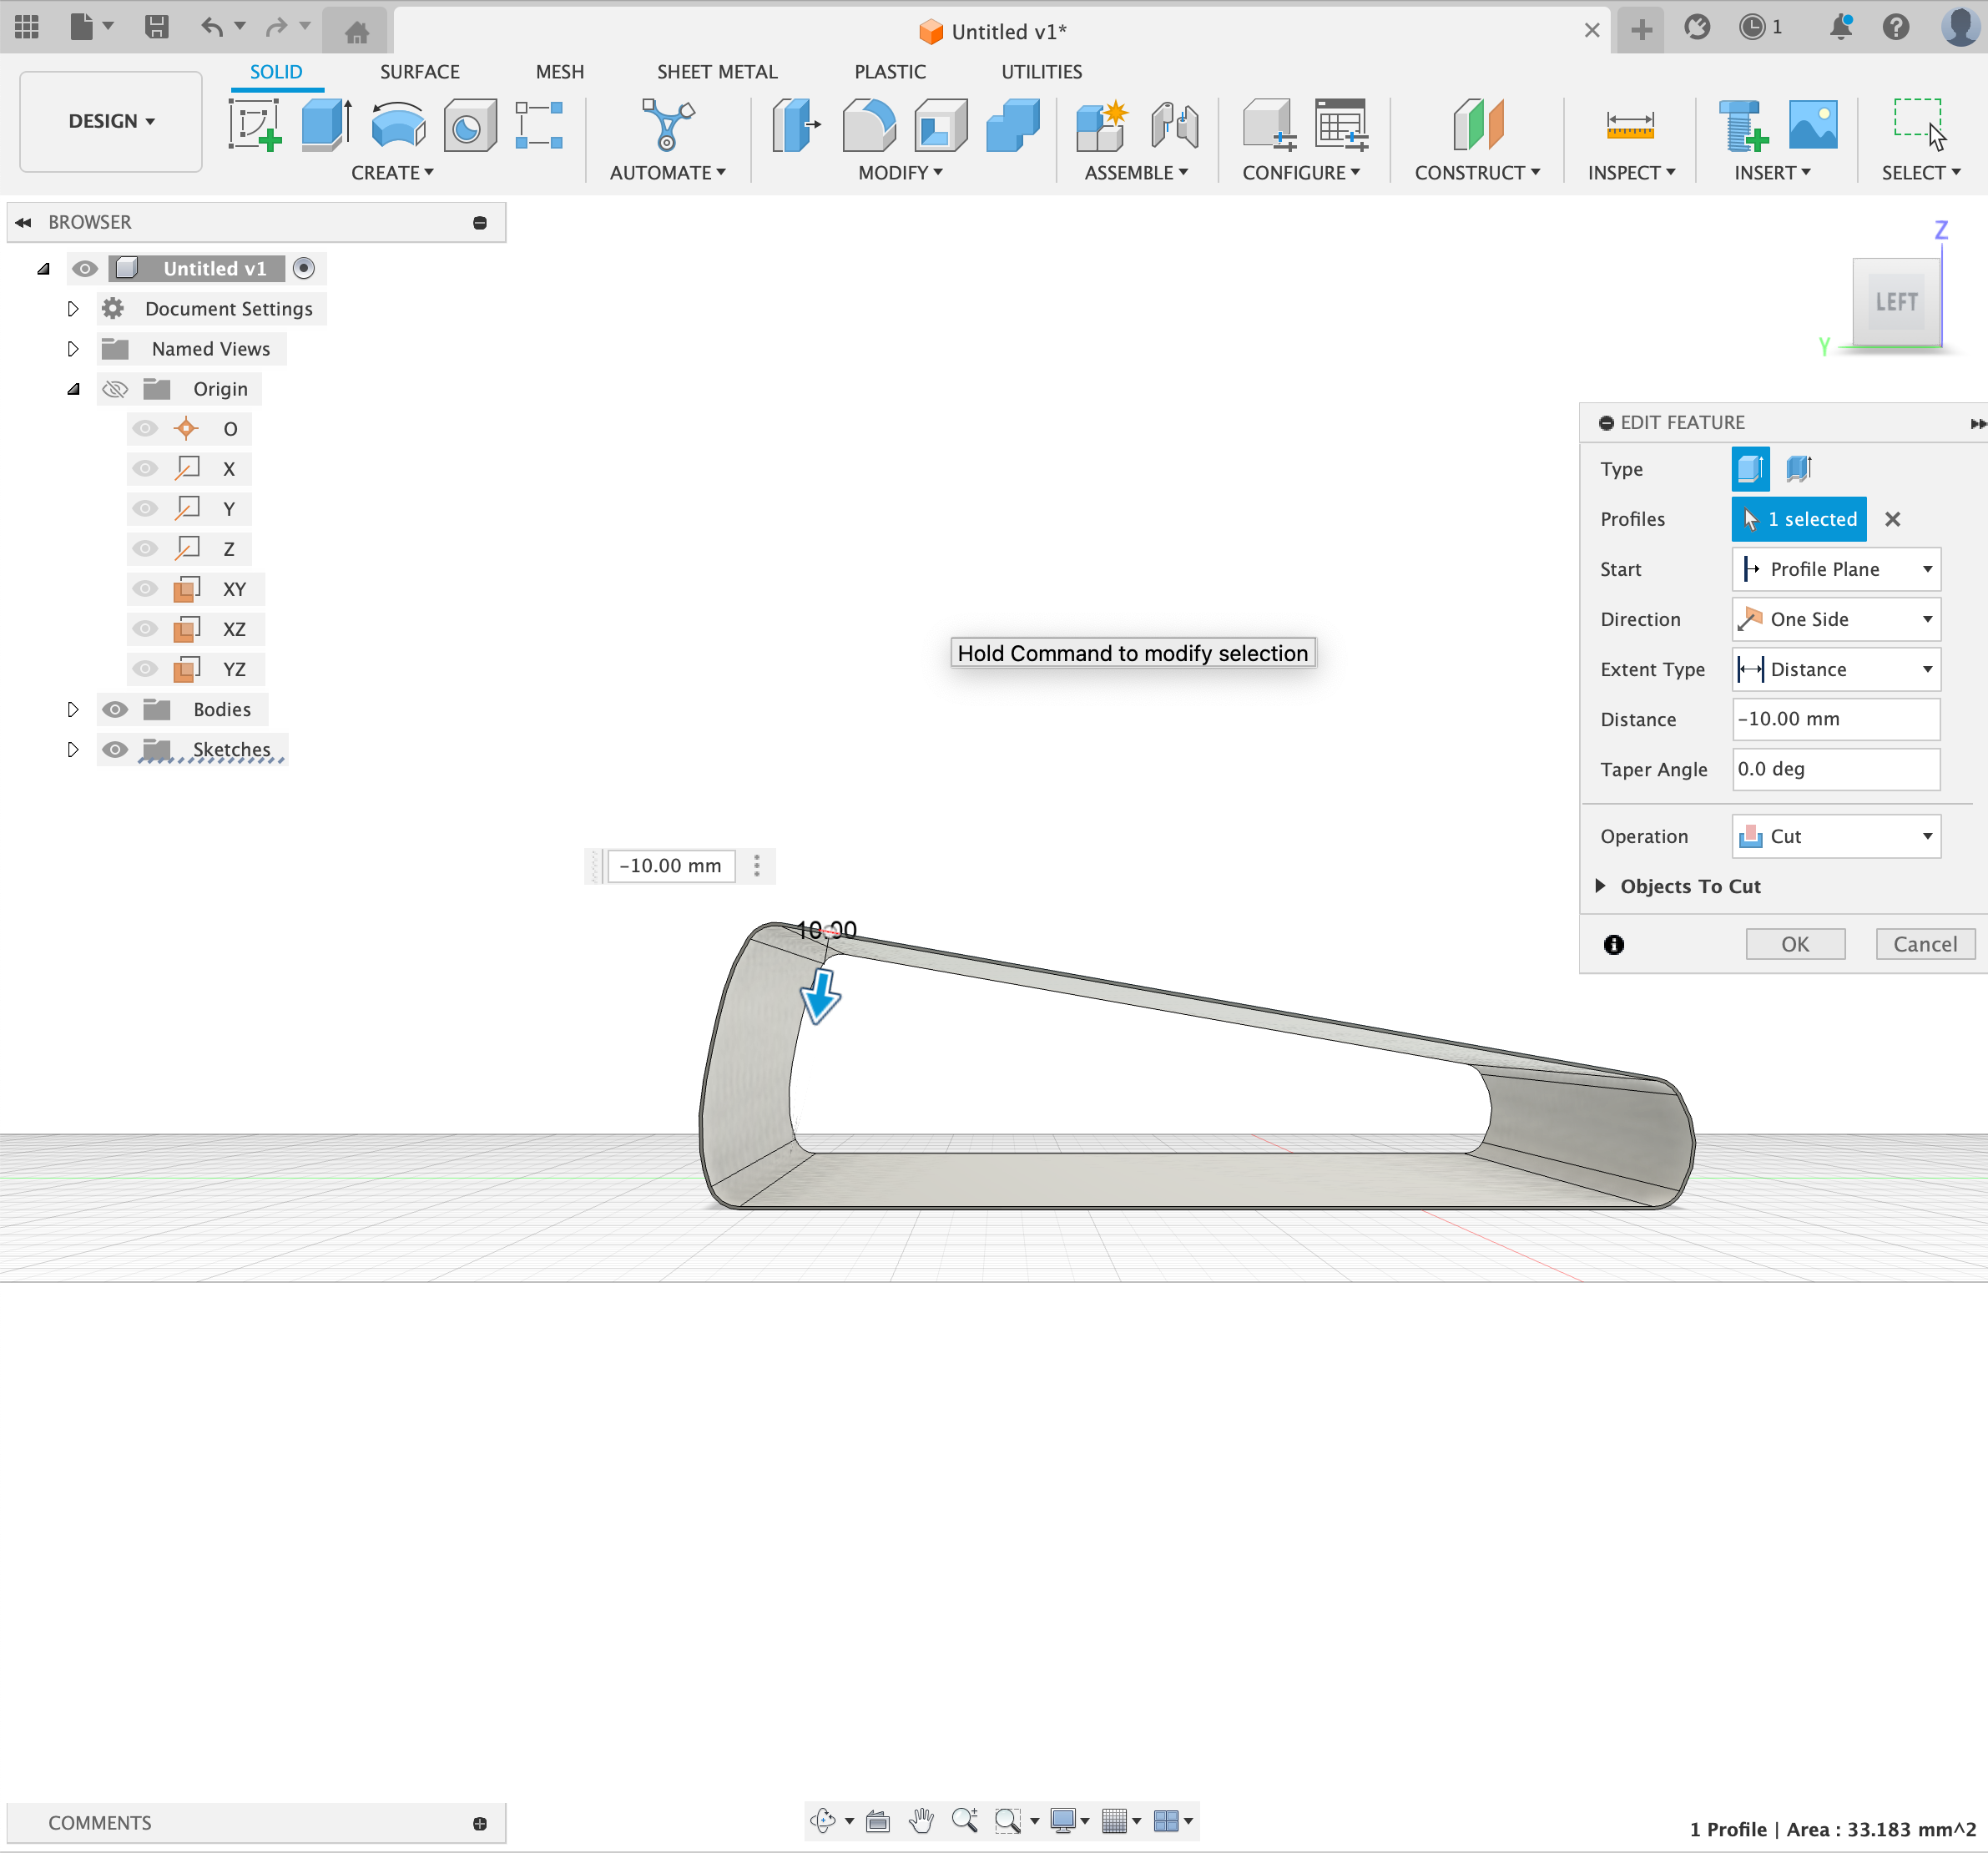
Next, extrude the circle inwards, but instead of selecting "join" on the bottom, change it to "cut". Extrude it in -10 mm, as shown above.
Dizzy
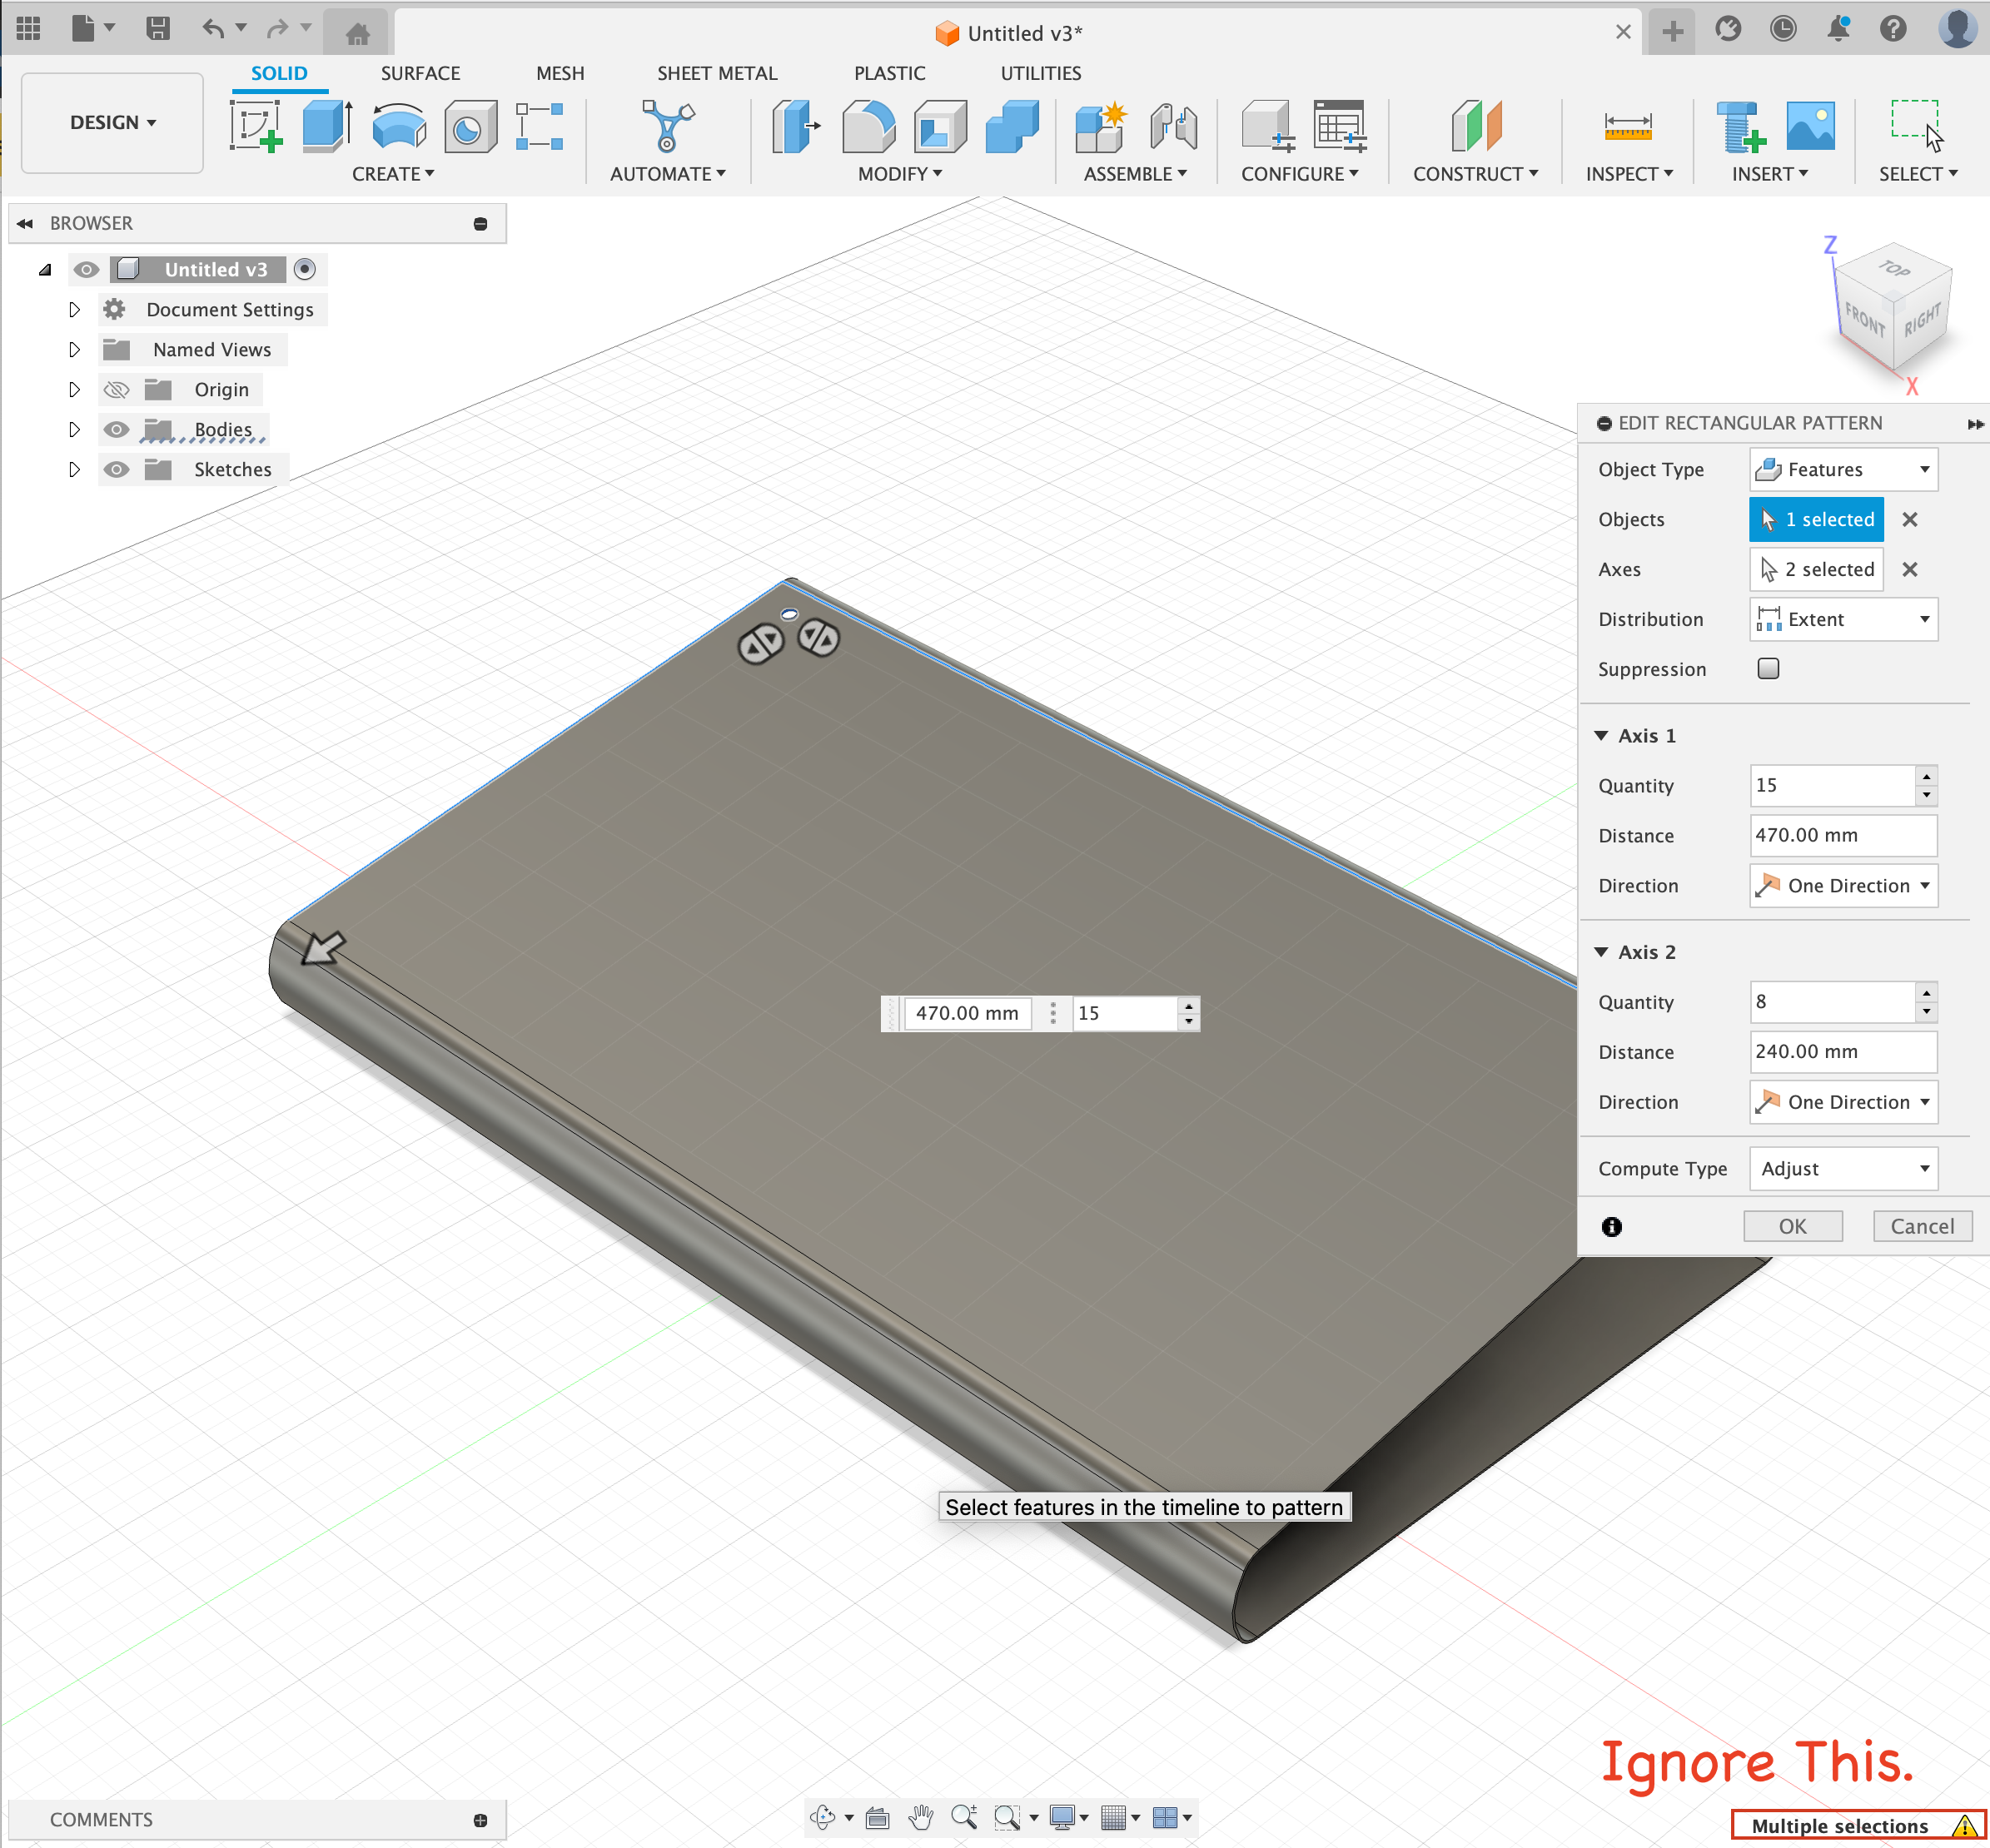
Okay, this might lag your computer a bit: select "Rectangular Pattern", change the top dropdown from "objects" to "Features", select our hole for "Objects" and two perpendicular edges for "Axes". For the longest axis:
- Quantity(text box) = 15;
- Distance(text box) = 470.00 mm;
- Direction(dropdown) = One Direction.
For the shortest Axis:
- Quantity(text box) = 8;
- Distance(text box) = 240.00 mm;
- Direction(dropdown) = One Direction.
!IMPORTANT!
Compute Type = Adjust
you may get a warning to change your compute type. IGNORE THIS!!!
Rim
Now, create a sketch and make a corner rectangle that lines the top of our stand.
RimMaker
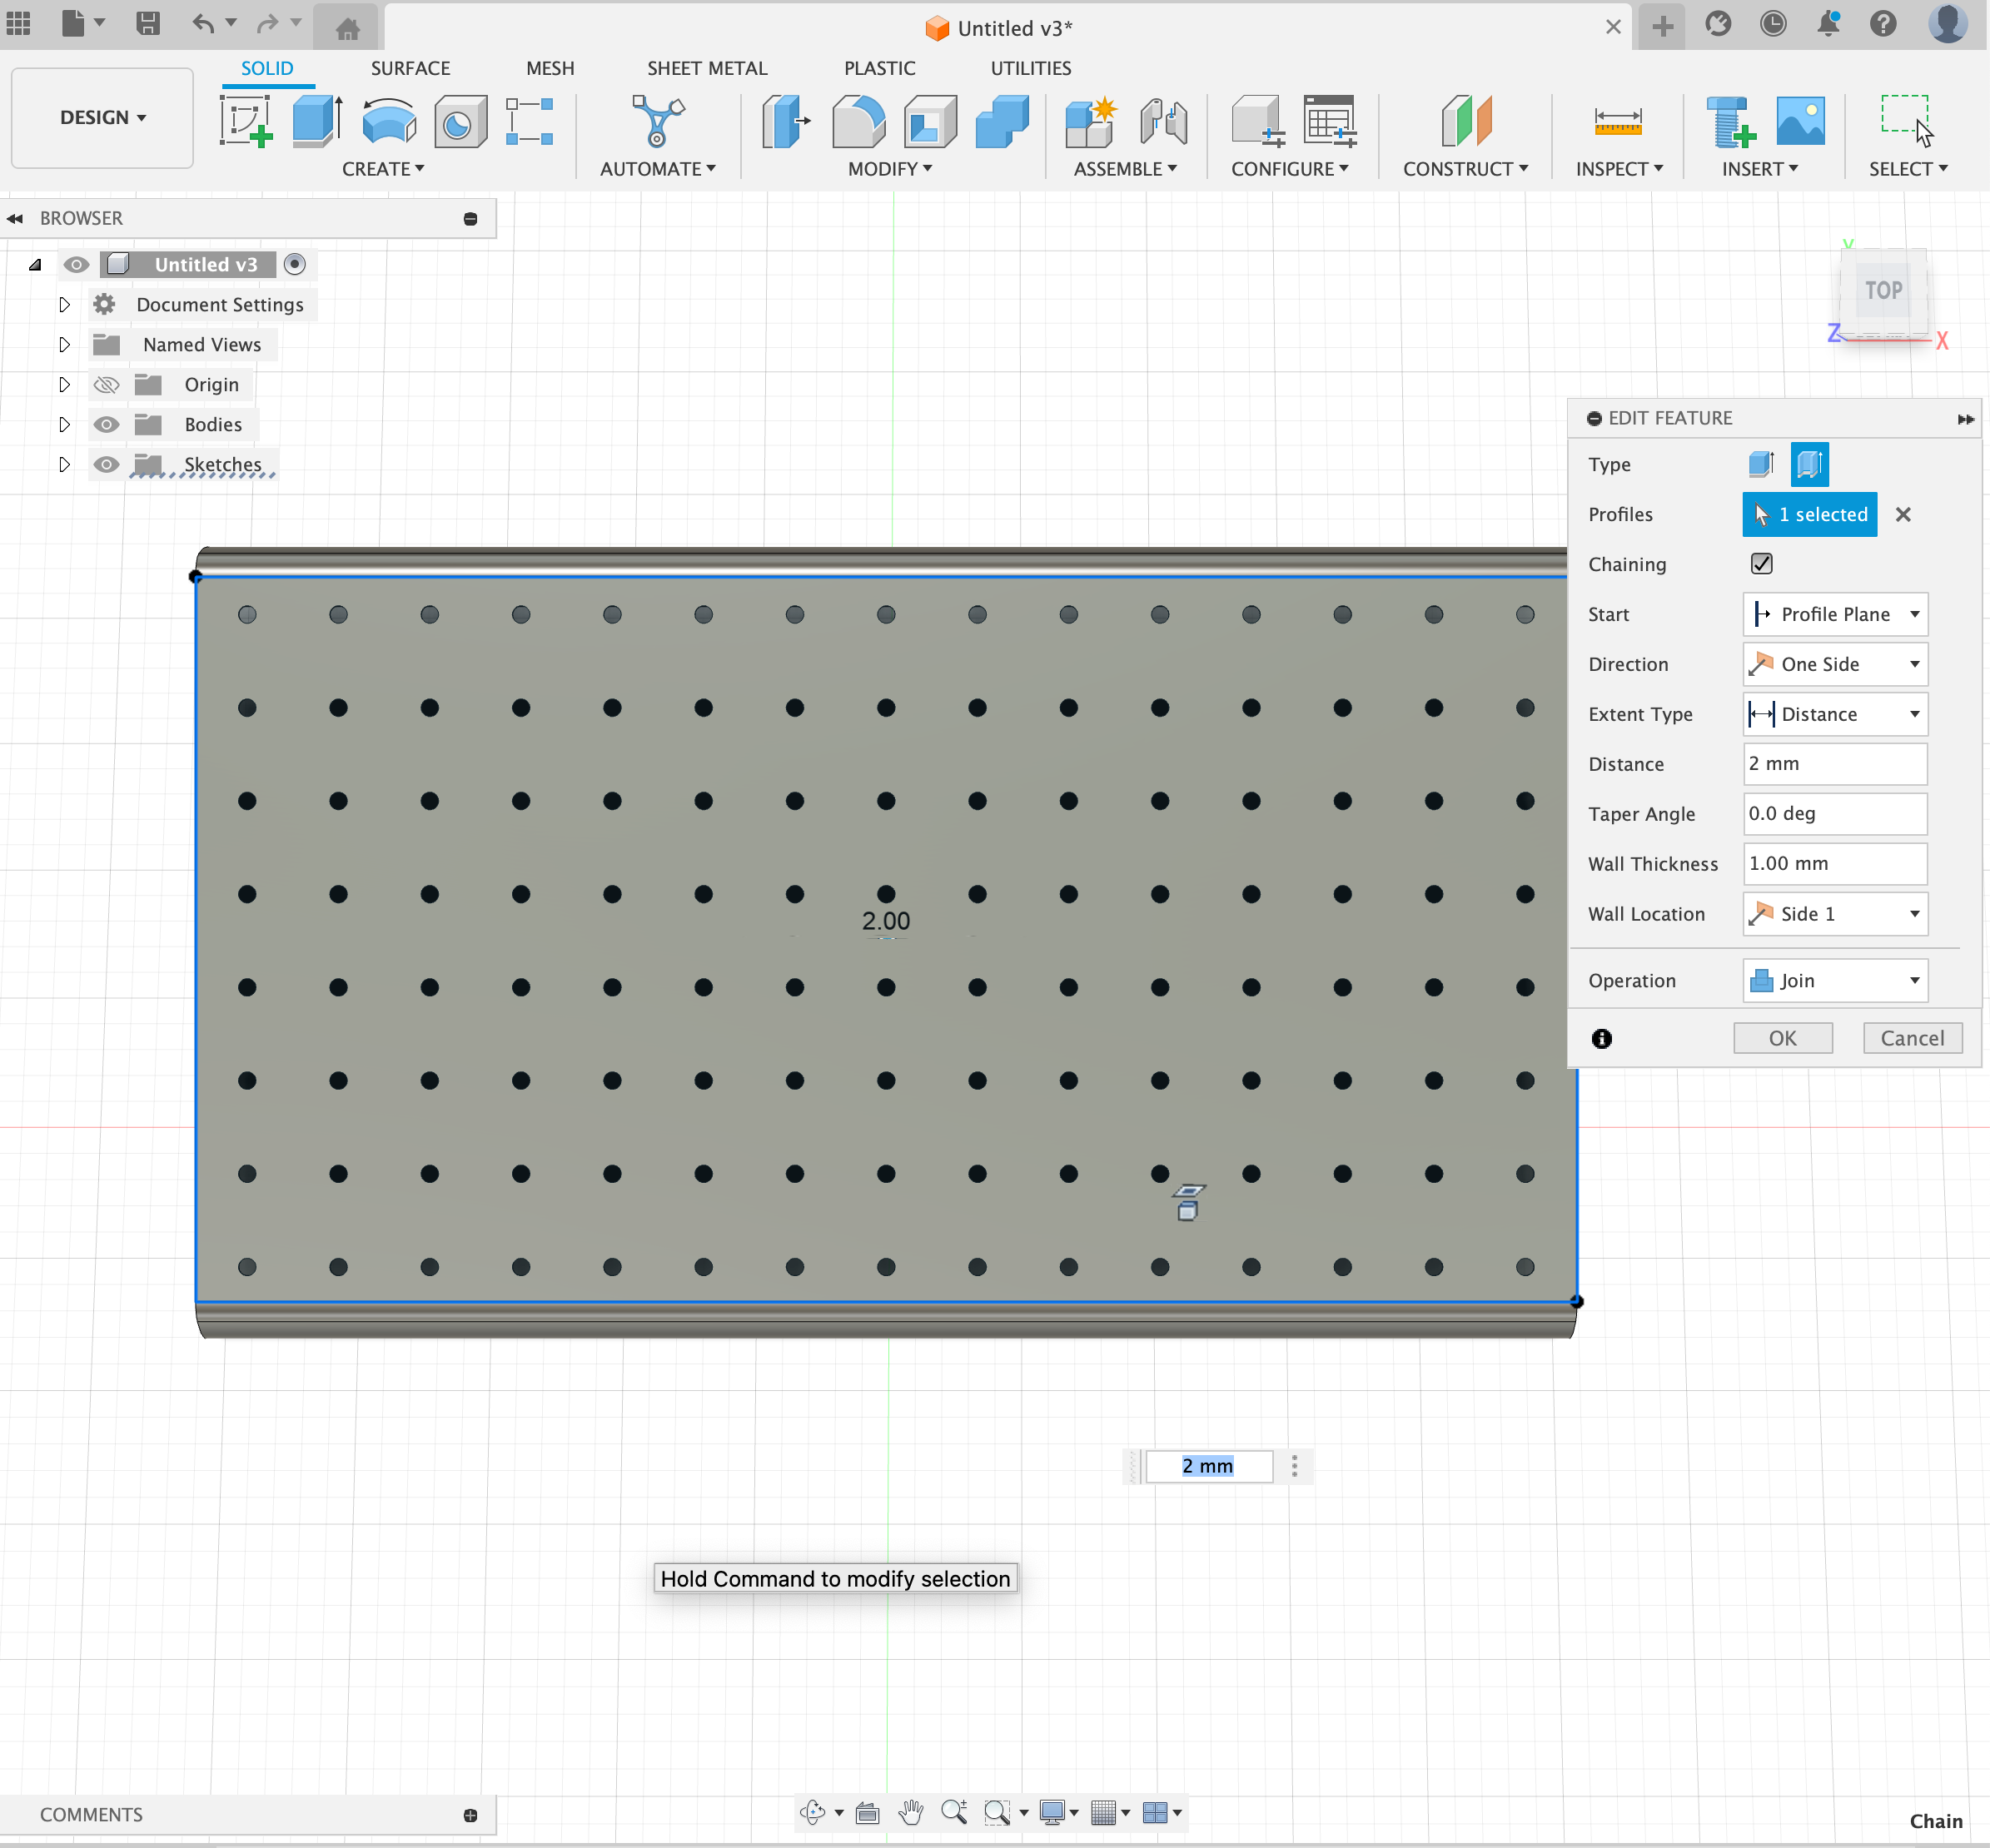
Now, we are going to extrude the rim. Select Thin Extrude for type and then select "Sketch 3". Then, change wall thickness to 1.00 mm and distance to 2 mm.
Slicer
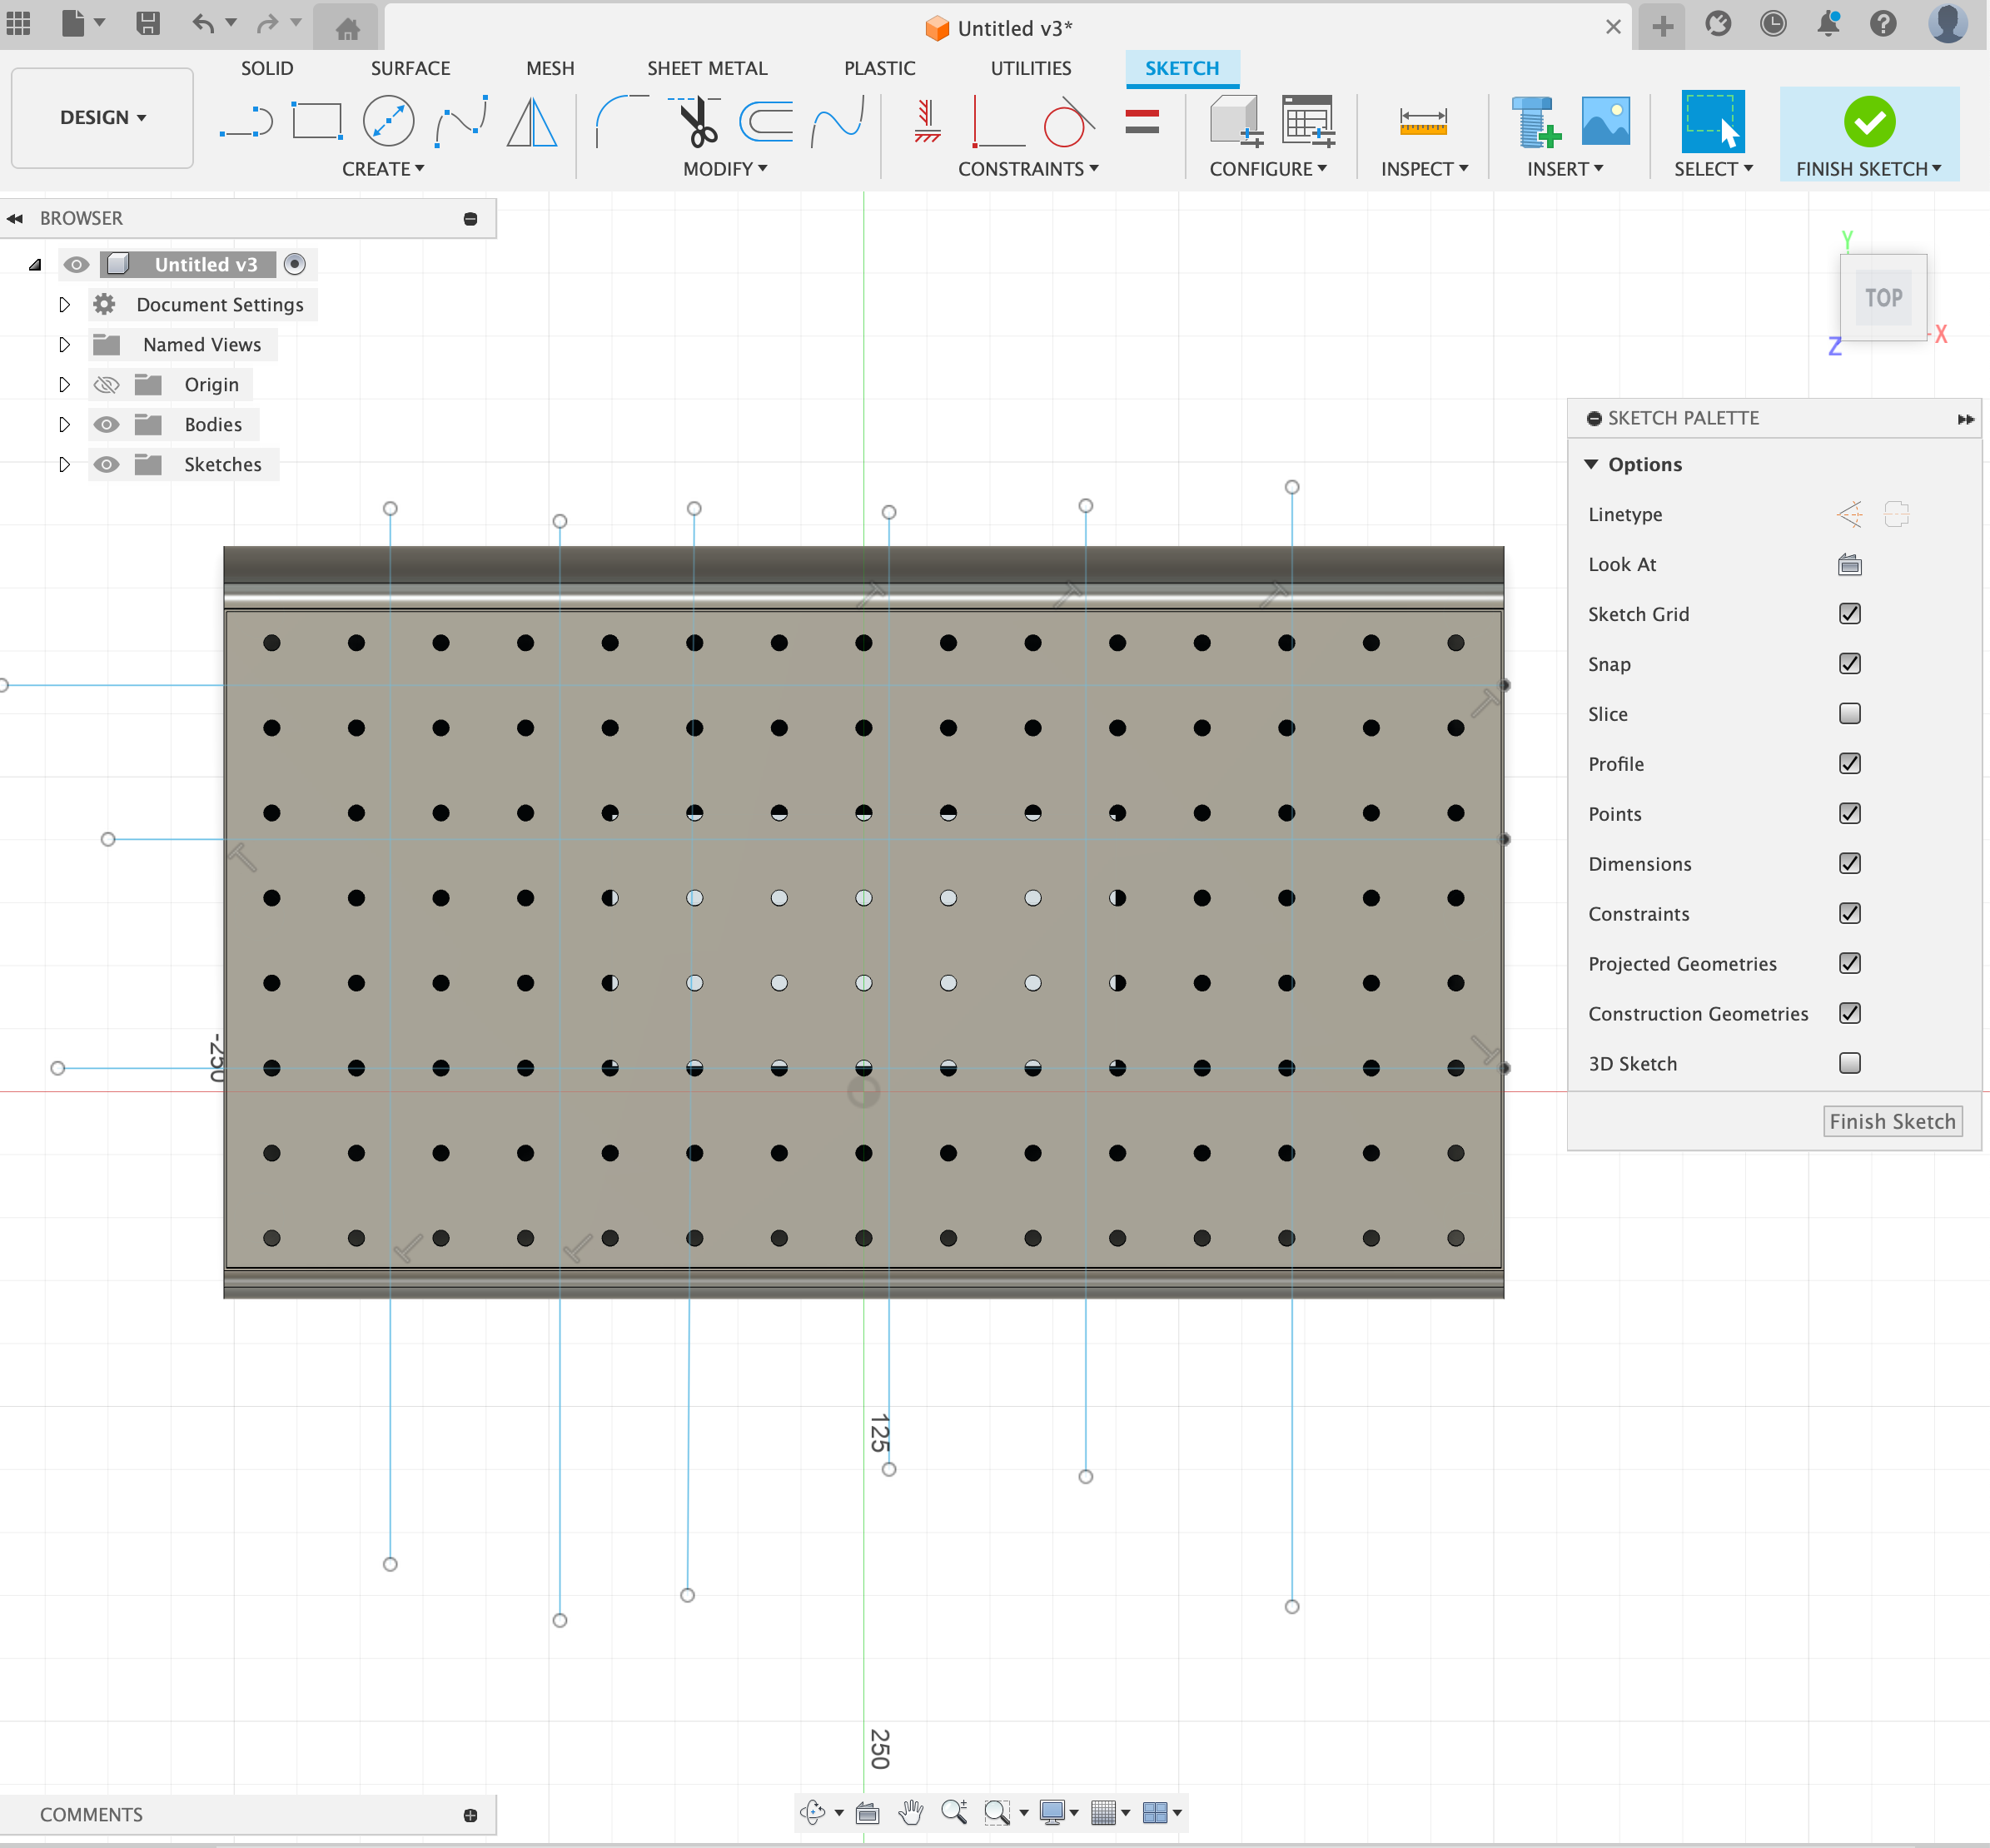
Finally, make a sketch on the top face of our stand and make a bunch of lines on the thing. The goal is to get a bunch of sections that we print seperately. I personally found this amount of cuts to work.
Cuts

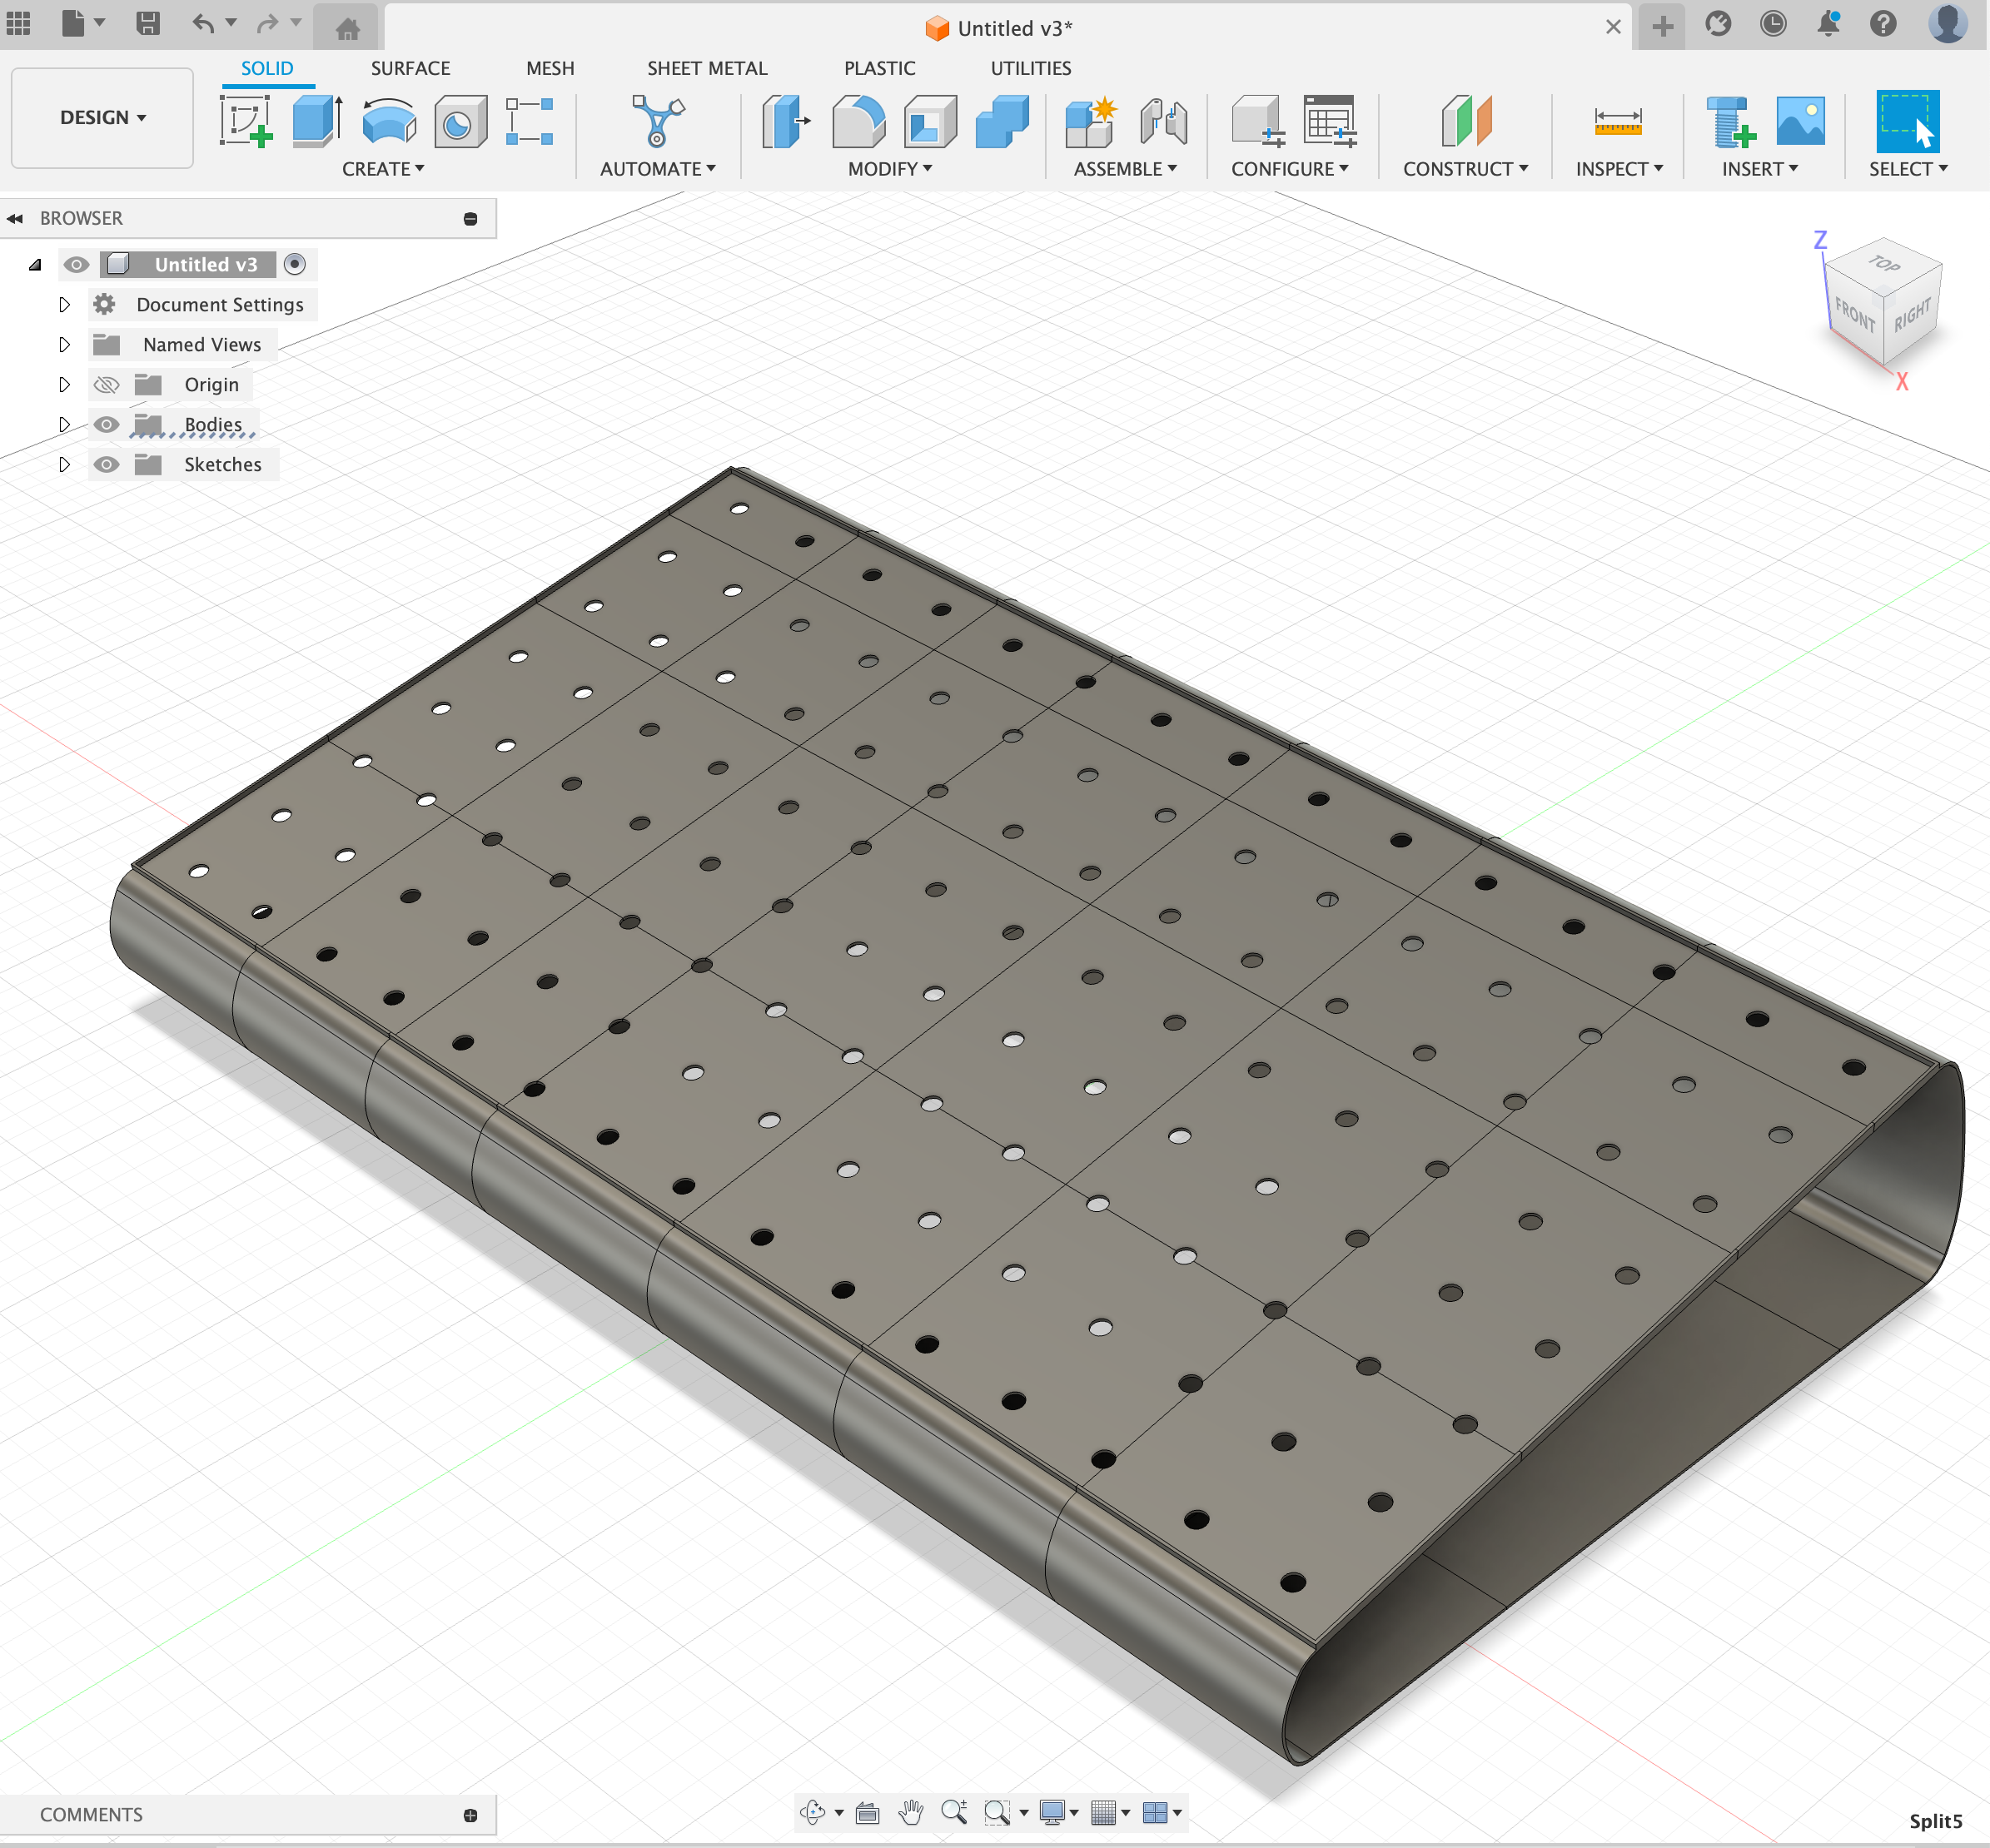
Now, use the Split Body feature and select the lines you made in Step 8 that are going in the same direction under "Splitting Tools". Select "Body 1" under "Bodies to Split". Select "Okay". Then repeat, this time selecting all of the bodies for "Bodies to Split" and the lines going the other way. Good job! You completed it!