Landscape a Dry Creek Bed in Your Backyard!
by Birdz of a Feather in Outside > Backyard
10641 Views, 58 Favorites, 0 Comments
Landscape a Dry Creek Bed in Your Backyard!


A dry creek bed can be a wonderful focal point in a garden. But the benefits don't stop there! Our dry creek bed is the first phase of our low maintenance gardening venture. And you know what low maintenance means? More time to kick back and relax in our backyard oasis!
Before we get into the Instructable, we're excited to share that we've been nominated for an Amara blog award! Please take a moment to support our nomination and vote for us here :). Voting closes September 9th, 2021
Supplies
- Landscape cloth (to prevent weeds)
- Flagstone
- River rock
- Shovel
- Hose (to mark shape)
- Plant materials: sedum, succulents, silver lace vine, day lillies
- Statuary
Dig Up That Patch of Grass!



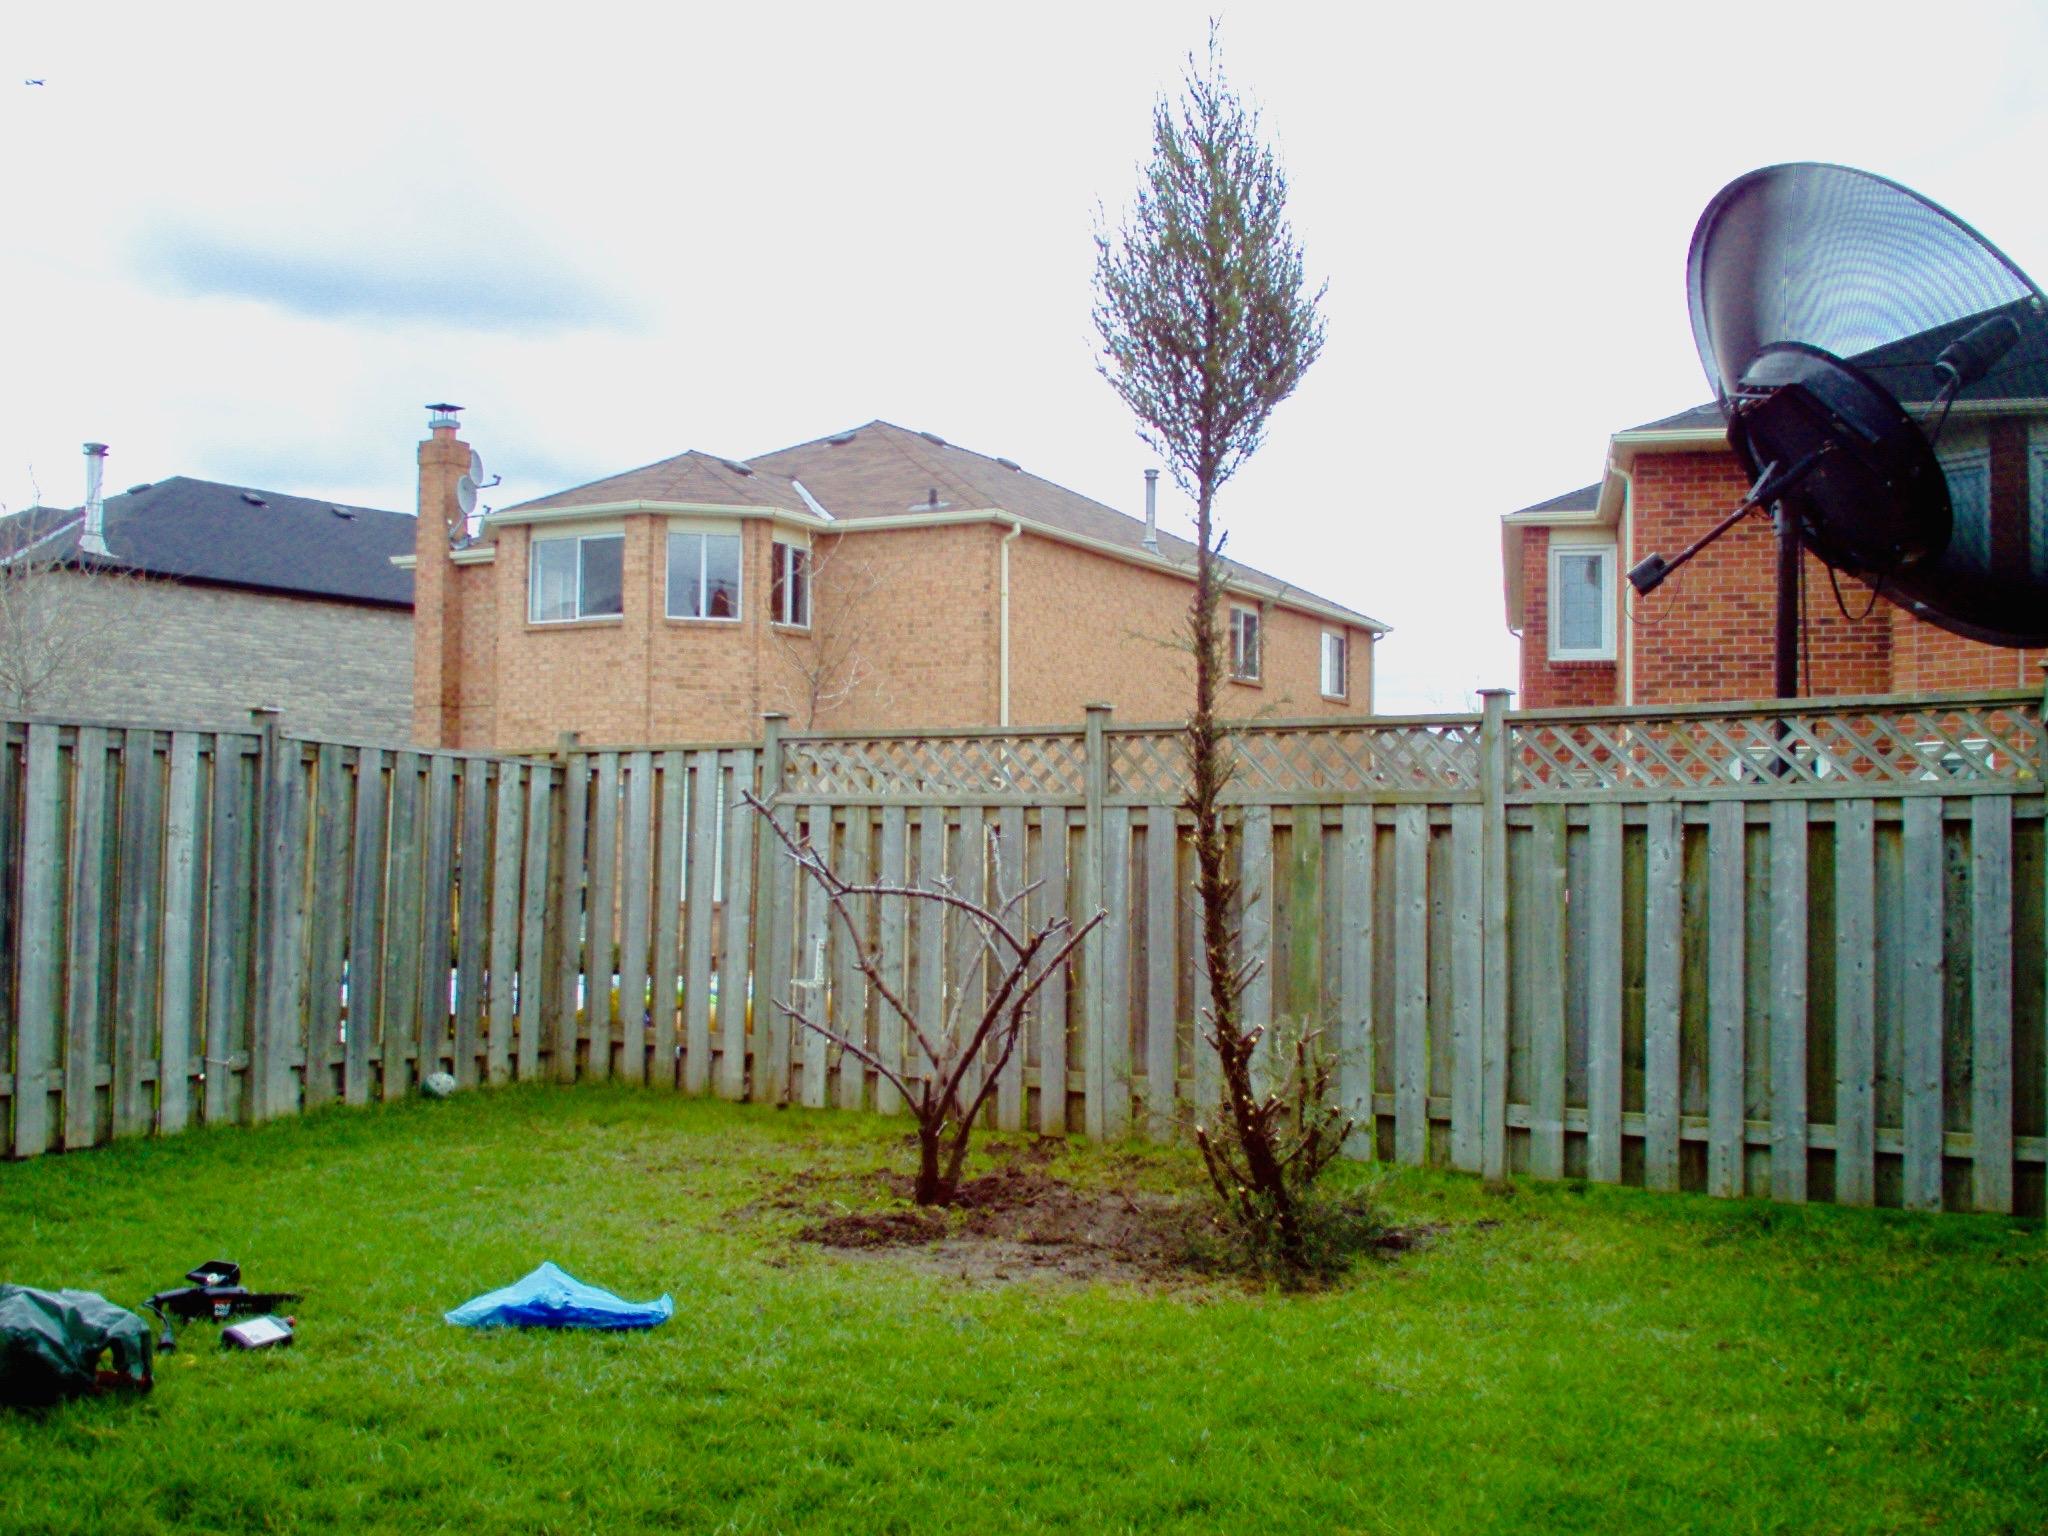
When we dug up our yard for the patio, we left a small patch of grass as you see in the 1st pic.
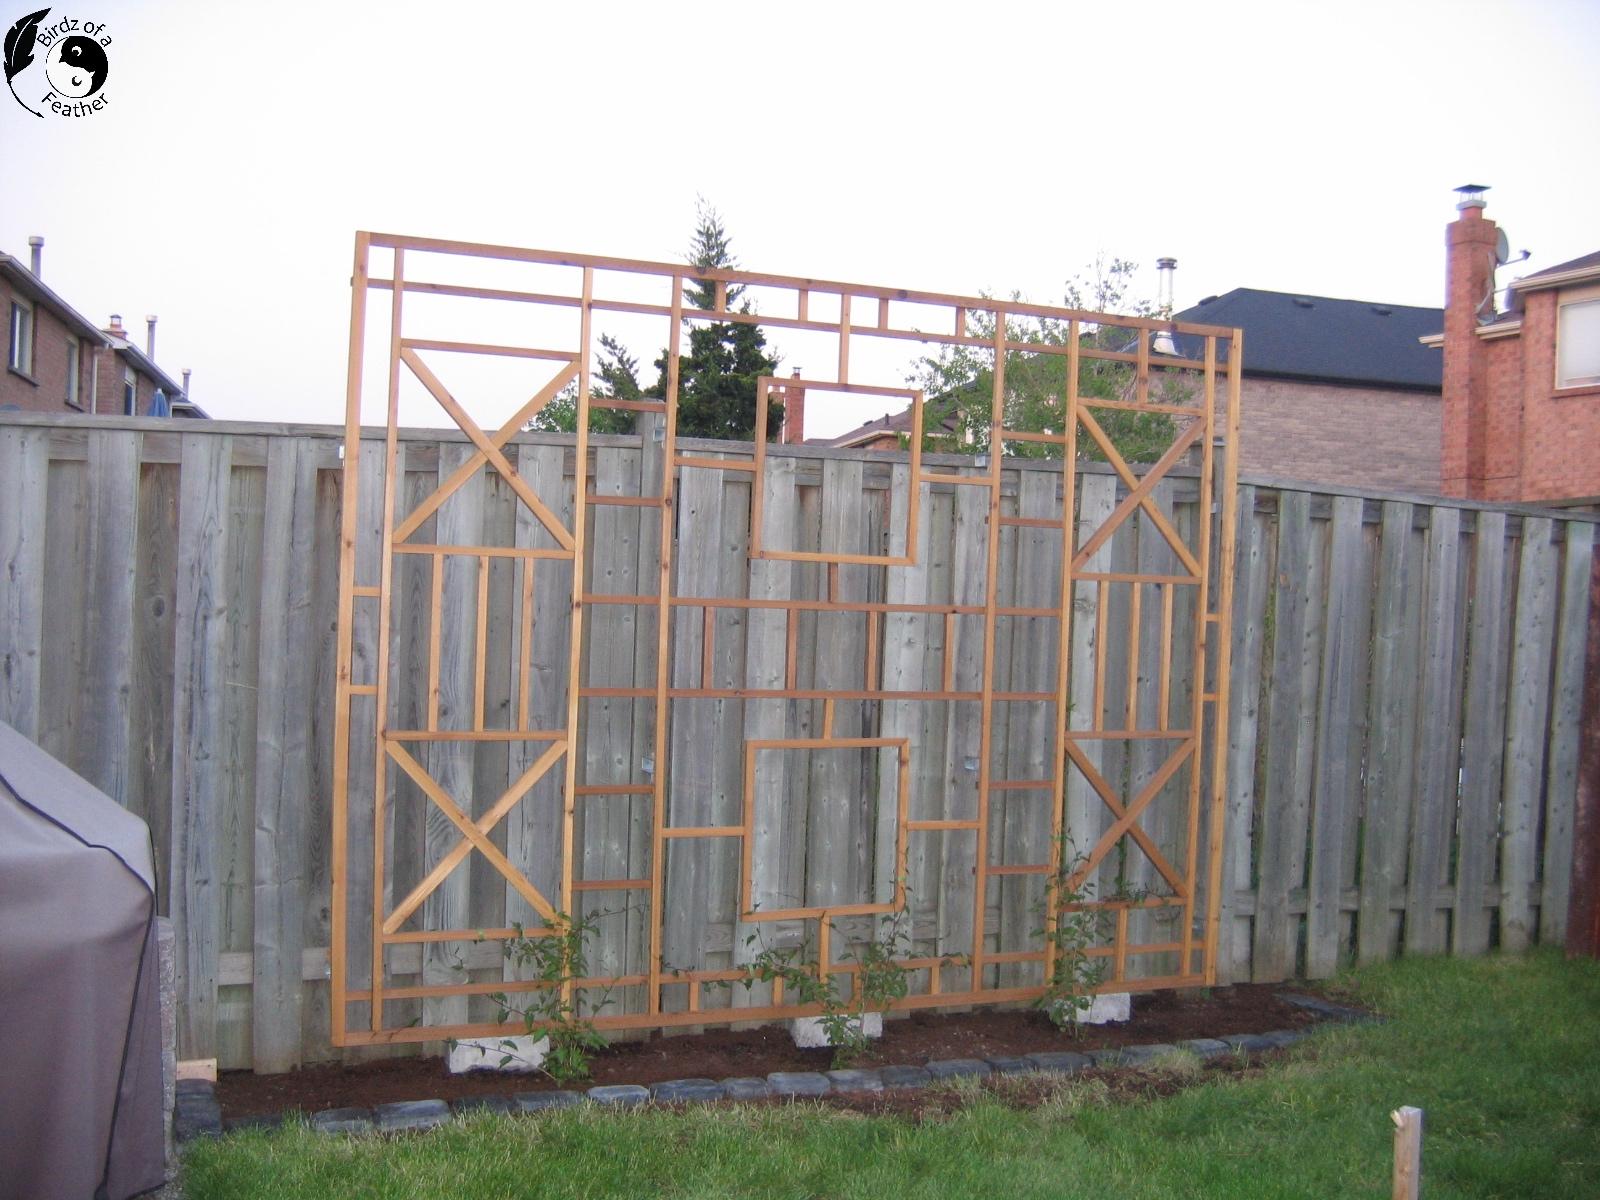
The trellis you see leaning up against the fence in the 2nd pic will eventually flank our dry creek bed.
After finishing the stone patio installation in our backyard (3rd pic), that lonely patch of grass in the back left corner stuck out like a sore thumb. It didn’t really make sense to get out a lawn mower every week to mow such a small area; not to mention how awkward it would be to maneuver it past our patio set! More importantly, not using electricity to cut the grass – or water to keep it green – is the sustainable way to go!
The best solution was to install a dry creek bed and rock garden to replace the grass (you'll see how to build a rock garden in a future Instructable). There's nothing more rewarding than putting some sweat equity into building a sustainable garden when the outcome is this gorgeous!
The pictures above show how the back corner looked before we started; to get a sense of the area we had to work with, I've included an overhead shot of the garden (last pic).
After the trellis went in, and before installing the dry creek bed, we planted silver lace vines. We'll show you the transformation of the silver lace further ahead.
The Pre Planning Work

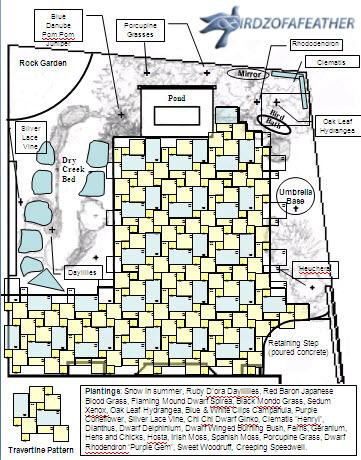


The first order of business was to remove the grass where the dry creek bed would go. But first, we used a garden hose to help us outline the shape of the dry creek bed. Then we could dig out the grass. We worked into the wee hours of the night to get that done. Because of that we don't have pictures of digging out for the actual dry creek bed, but you'll see the shape of that in the plan above (2nd pic). Note that we sloped the sides and dug out a shallow bottom. Be sure to keep it shallow so you don't have to fill it with too many stones!
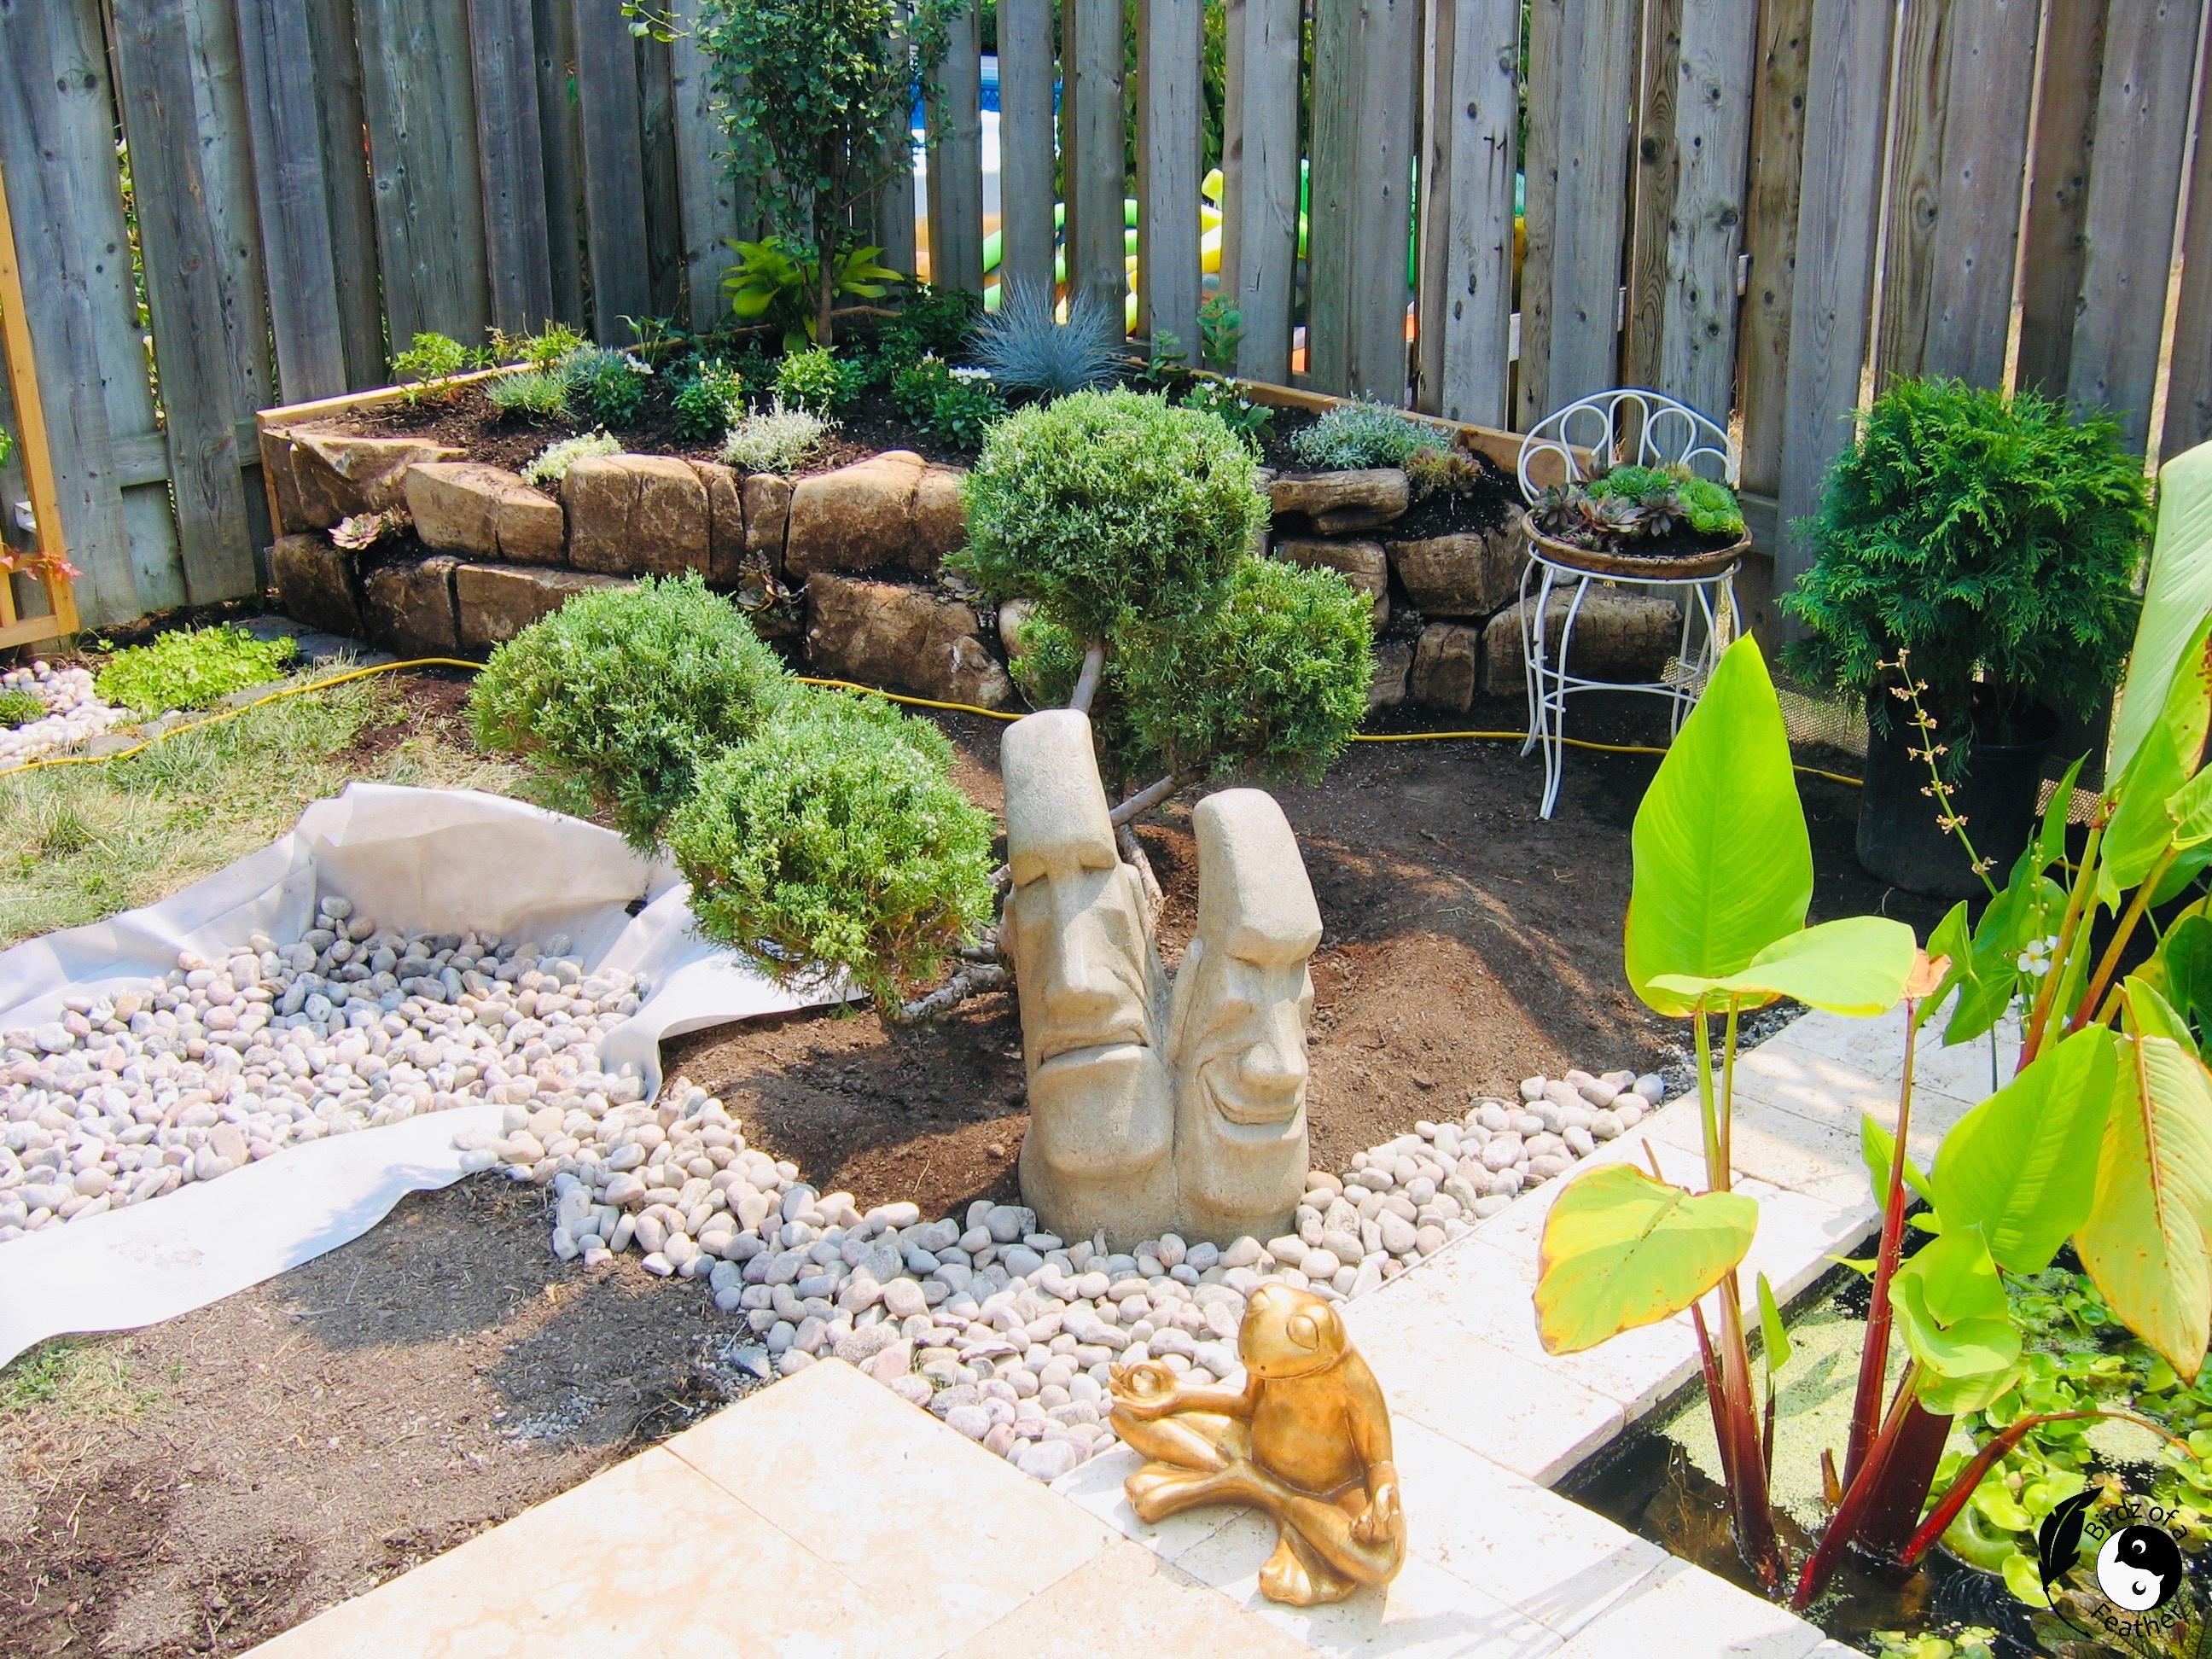
Now to dig an enormous hole. The gorgeous little Blue Danube pom pom juniper you see in the 3rd pic will grow at the south end of the dry creek bed.
By the time my husband dug this hole, we no longer had our clean fill bin to dump the soil. So he used some left over landscaping bags and filled them up. Then he placed the bags at the front of our house and the neighbours scooped them all up. Waste not want not!
The shape of the pom pom is just right to snuggle in a piece of statuary (which you'll see in the next step).
Keep the Weeds at Bay

Once the juniper was planted, we added landscape cloth along the bottom of the bed and up the sides to prevent weeds from growing. We extended the landscape cloth a few feet over the edges. That's so we could run it under some larger boulders we planned to place around the bed (which you'll see in the next step). In areas we weren't planning on putting any boulders along the sides, we simply folded the landscape cloth under and staked it into the sides of the dry creek bed to prevent it from shifting.
When the landscape cloth was secured, we started filling the bottom dry creek bed with a colourful variety of smooth river rock. We extended the rocks around the pom pom juniper and along the side of the pond too.
Lay Stepping Stones
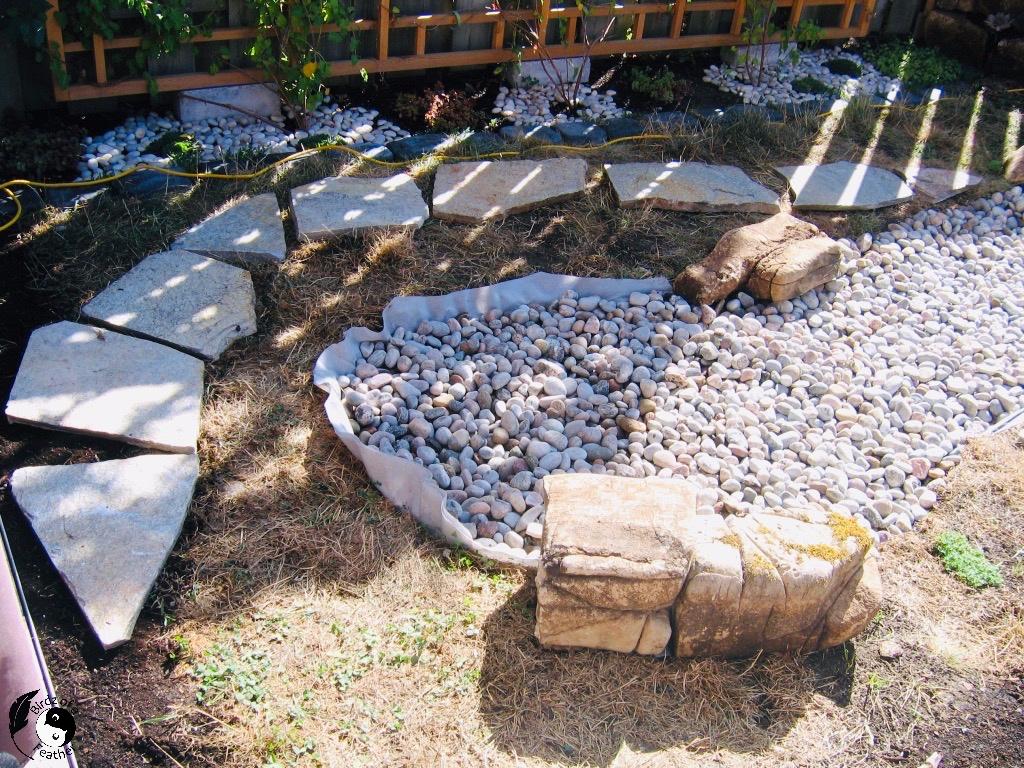


Stepping stones not only outline the shape of the dry creek bed, but they provide a practical solution to walk around and a landing pad to train our silver lace vine vine growing beside it as it gets bigger.
We handpicked the pieces at the stone yard that we thought would fit best. When shopping for flagstone, take along a sketch of your plan to help you visualize the space!
While we were at it, we also purchased some larger decorative boulders for the rock garden and a few extra boulders to sporadically place around the sides of the dry creek bed. When we got the stones home, we were excited to do a dry lay on-site to see how we did with our selection!
You can see where the landscape cloth extends over the edge of the dry creek bed and is held down by some of the flagstone pieces. We'll eventually use this 'landing pad' as a base to level one side of a wooden bridge that will span across the dry creek bed (last pic). We haven't gotten around to building that yet, but Rome wasn't built in a day :).
You can fill in the gaps with some pea gravel, but we chose to fill them in with dirt so we could plant moss in between and around the stones (as you'll also see further ahead).
Take your time with the dry lay of the stepping stones and boulders to make sure they are aesthetically pleasing as well as functional!
Once happy with the placement, we dug around each stone with an edging tool and removed the grass as well as a few inches of topsoil. The goal was to inset the stones slightly below the surface to keep them in place and prevent shifting during colder weather.
Add River Rock


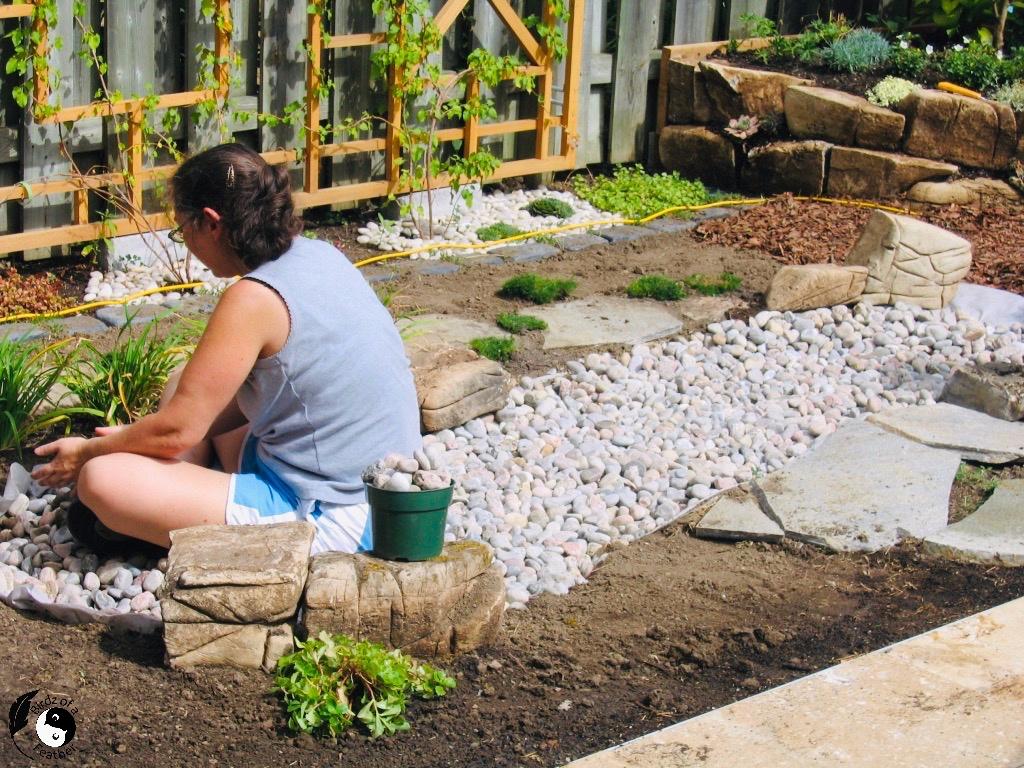
Next, it was time to get down to fine the tuning details and be one with the earth! I literally sat myself down in the dry creek bed and pushed all the river rock out and over the edge of the landscape cloth to hide it.
I kept a container of extra river rock (that Hubs kept refilling for me) in case I needed to add more. I worked my way around the entire perimeter: it was a slow process but it really transformed the dry creek bed from a hole in the ground to something that looks like it's been there for ages!
Statuary - Happy/Sad Faces


Where the dry creek bed ends, we found the PERFECT statue to accent the pom pom juniper. We trailed the river rock from the dry creek bed around the ornamental juniper and in front of the statue ending it beside a pond we installed when we constructed our stone patio installation.
The statue represents a tragedy and comedy mask; a great reminder of all the hard work - with all its setbacks, humourous moments and cold cereal for dinner. But we wouldn't trade building our garden from the ground up for anything! It's our sanctuary :).
As you can see in the last pic, the pom pom juniper has had a chance to grow around the statuary! These days we have a lot of fun with it; it's now sporting cheap sunglasses (🎶 Gotta get yourself some cheap sunglasses)!
Plantings Around Dry Creek Bed


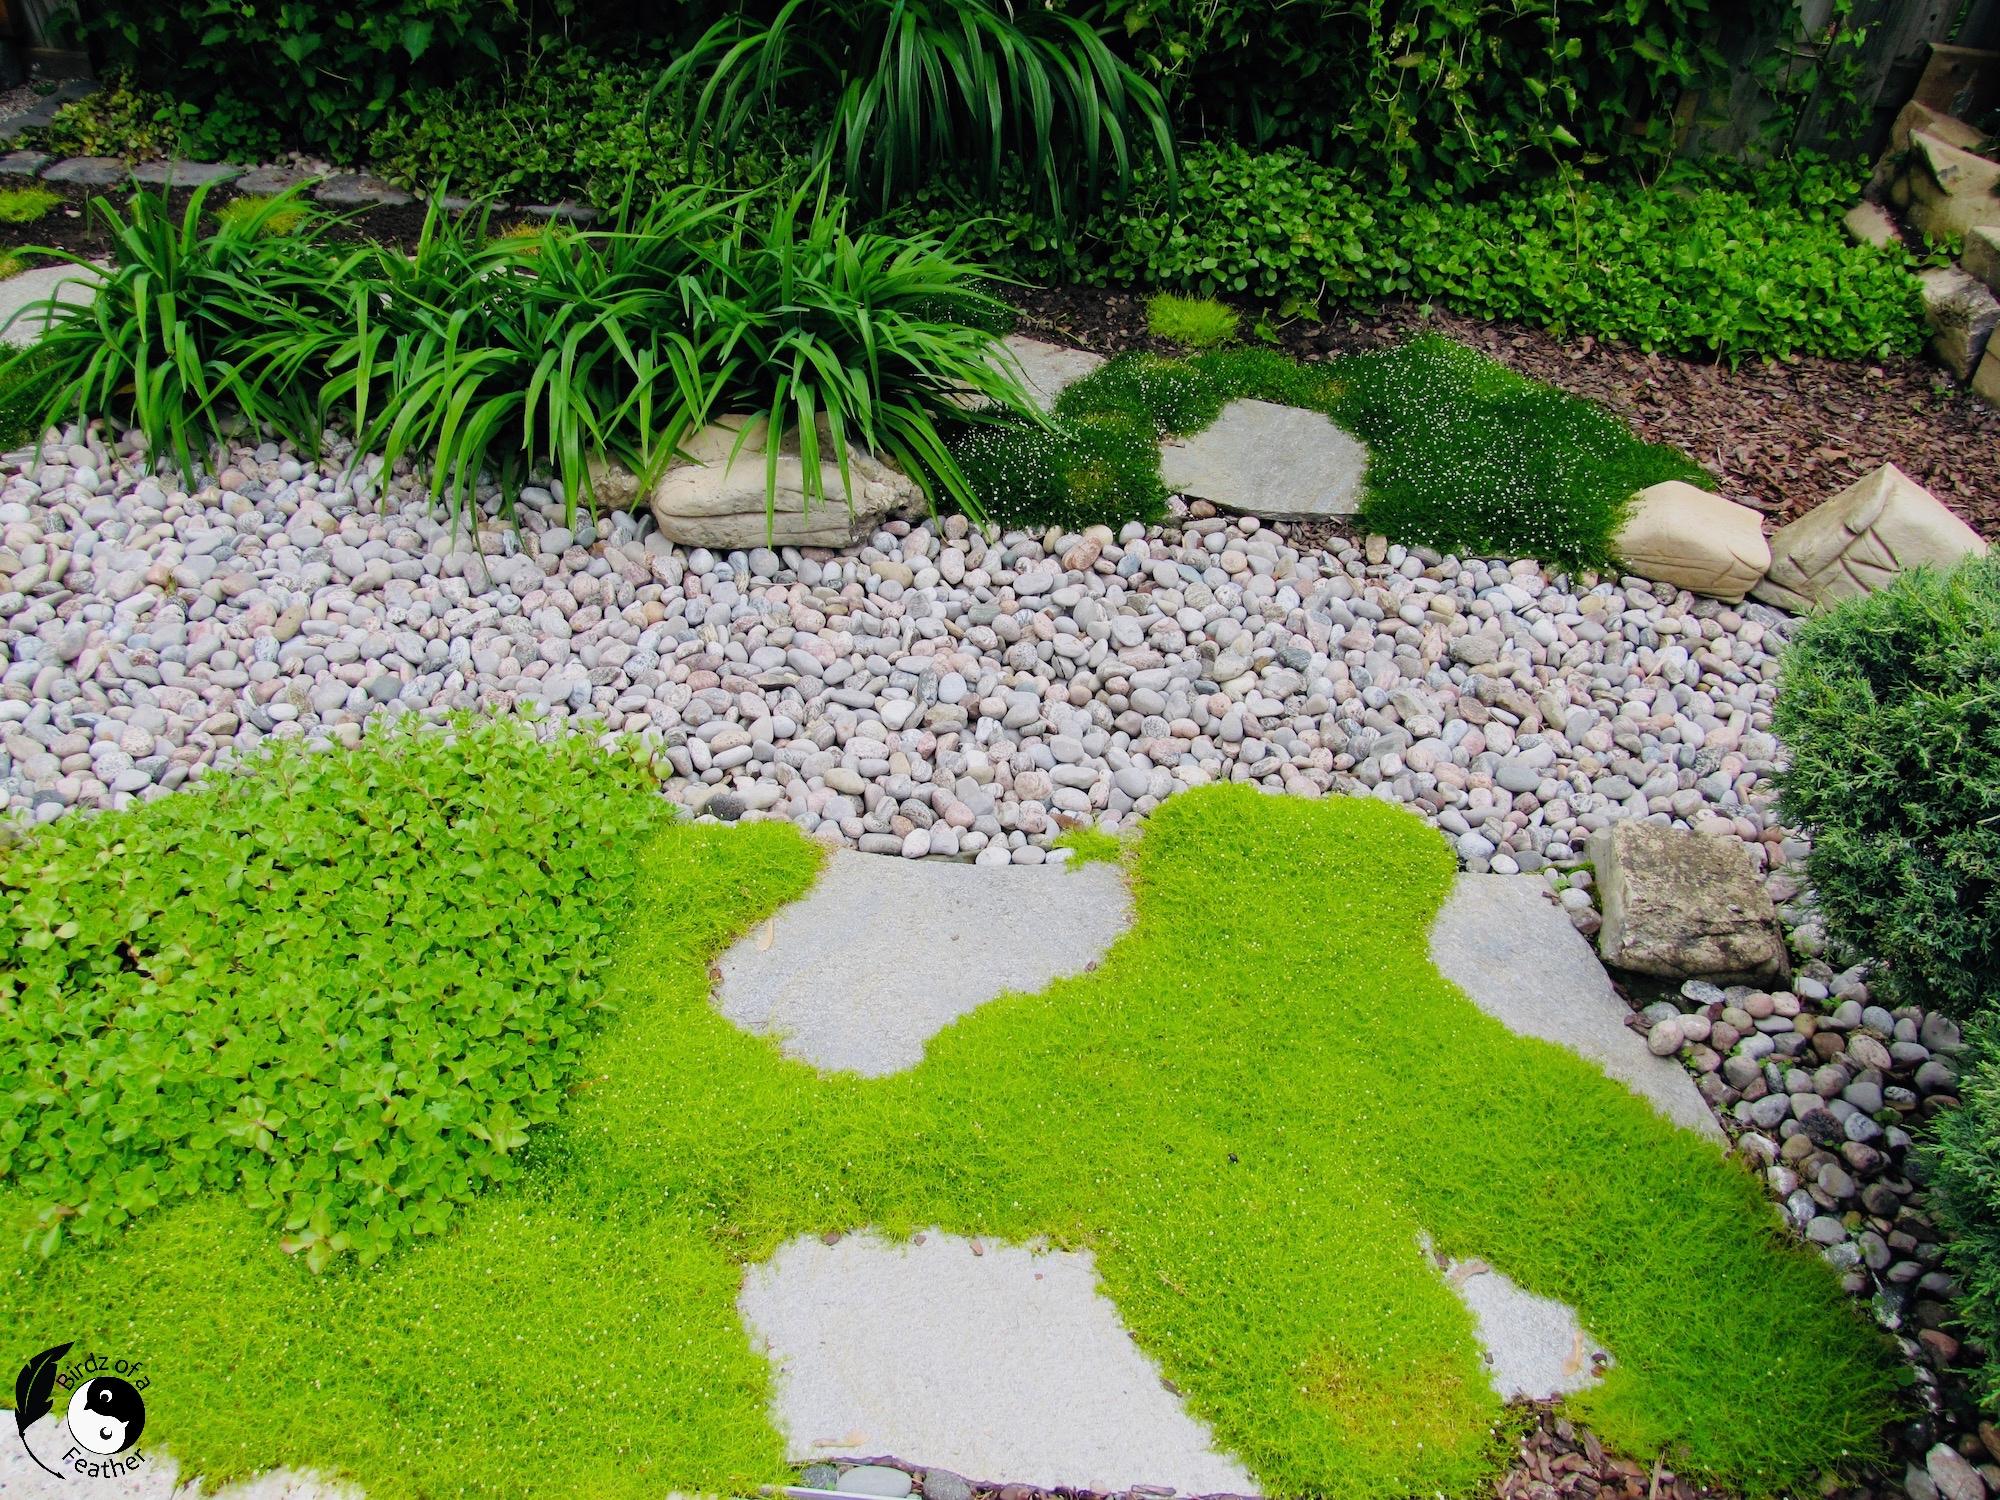

A great tip when you're planting an entire backyard is to purchase your plant materials in the Fall. It all goes on sale and you can plant for a fraction of the price it would cost if you do it earlier in the season.
Once all the fine details were taken care of in the dry creek bed, we planted around it.
The moss eventually grows to fill in the gaps between the flagstones. However, it didn't take near the silver lace vine so in the end we filled in that area with wood chips instead. Wood chips are great for helping keeping weeds to a minimum.
Around some of the boulders on the perimeter of the dry creek bed, we planted miniature Stella D'oro day lillies (so they wouldn't grow too tall). These day lillies grow to about 10 - 12" and spread as wide as two feet. We only needed four. They bloom from May to August and look gorgeous along the edge of our dry creek bed (see 5th pic). Even when the flowers aren't out, they look great (4th pic)!
Around the rocks, we planted drought resistant (aka low maintenance) ground cover (sedum). There are also some hardy succulents tucked in that come back each year; even after our harsh winters.
Remember the 'landing pad' of flagstones shown earlier? The 6th and 7th pics show the before and after of how that area filled in with moss. Isn't it pretty?
The last two pictures show the moss planting in progress and how it looks once it grows.
Plantings - Trellis Over the Seasons


It's wonderful to see the transformation of the silver lace vine flanking our dry creek bed (you can see all our outdoor privacy screen ideas here).
The silver lace starts off sparse in the spring and then fills in during the summer to a lush privacy wall. In the Fall, it blooms into a beautiful flowering vine speckled with fragrant white flowers.
Transformation


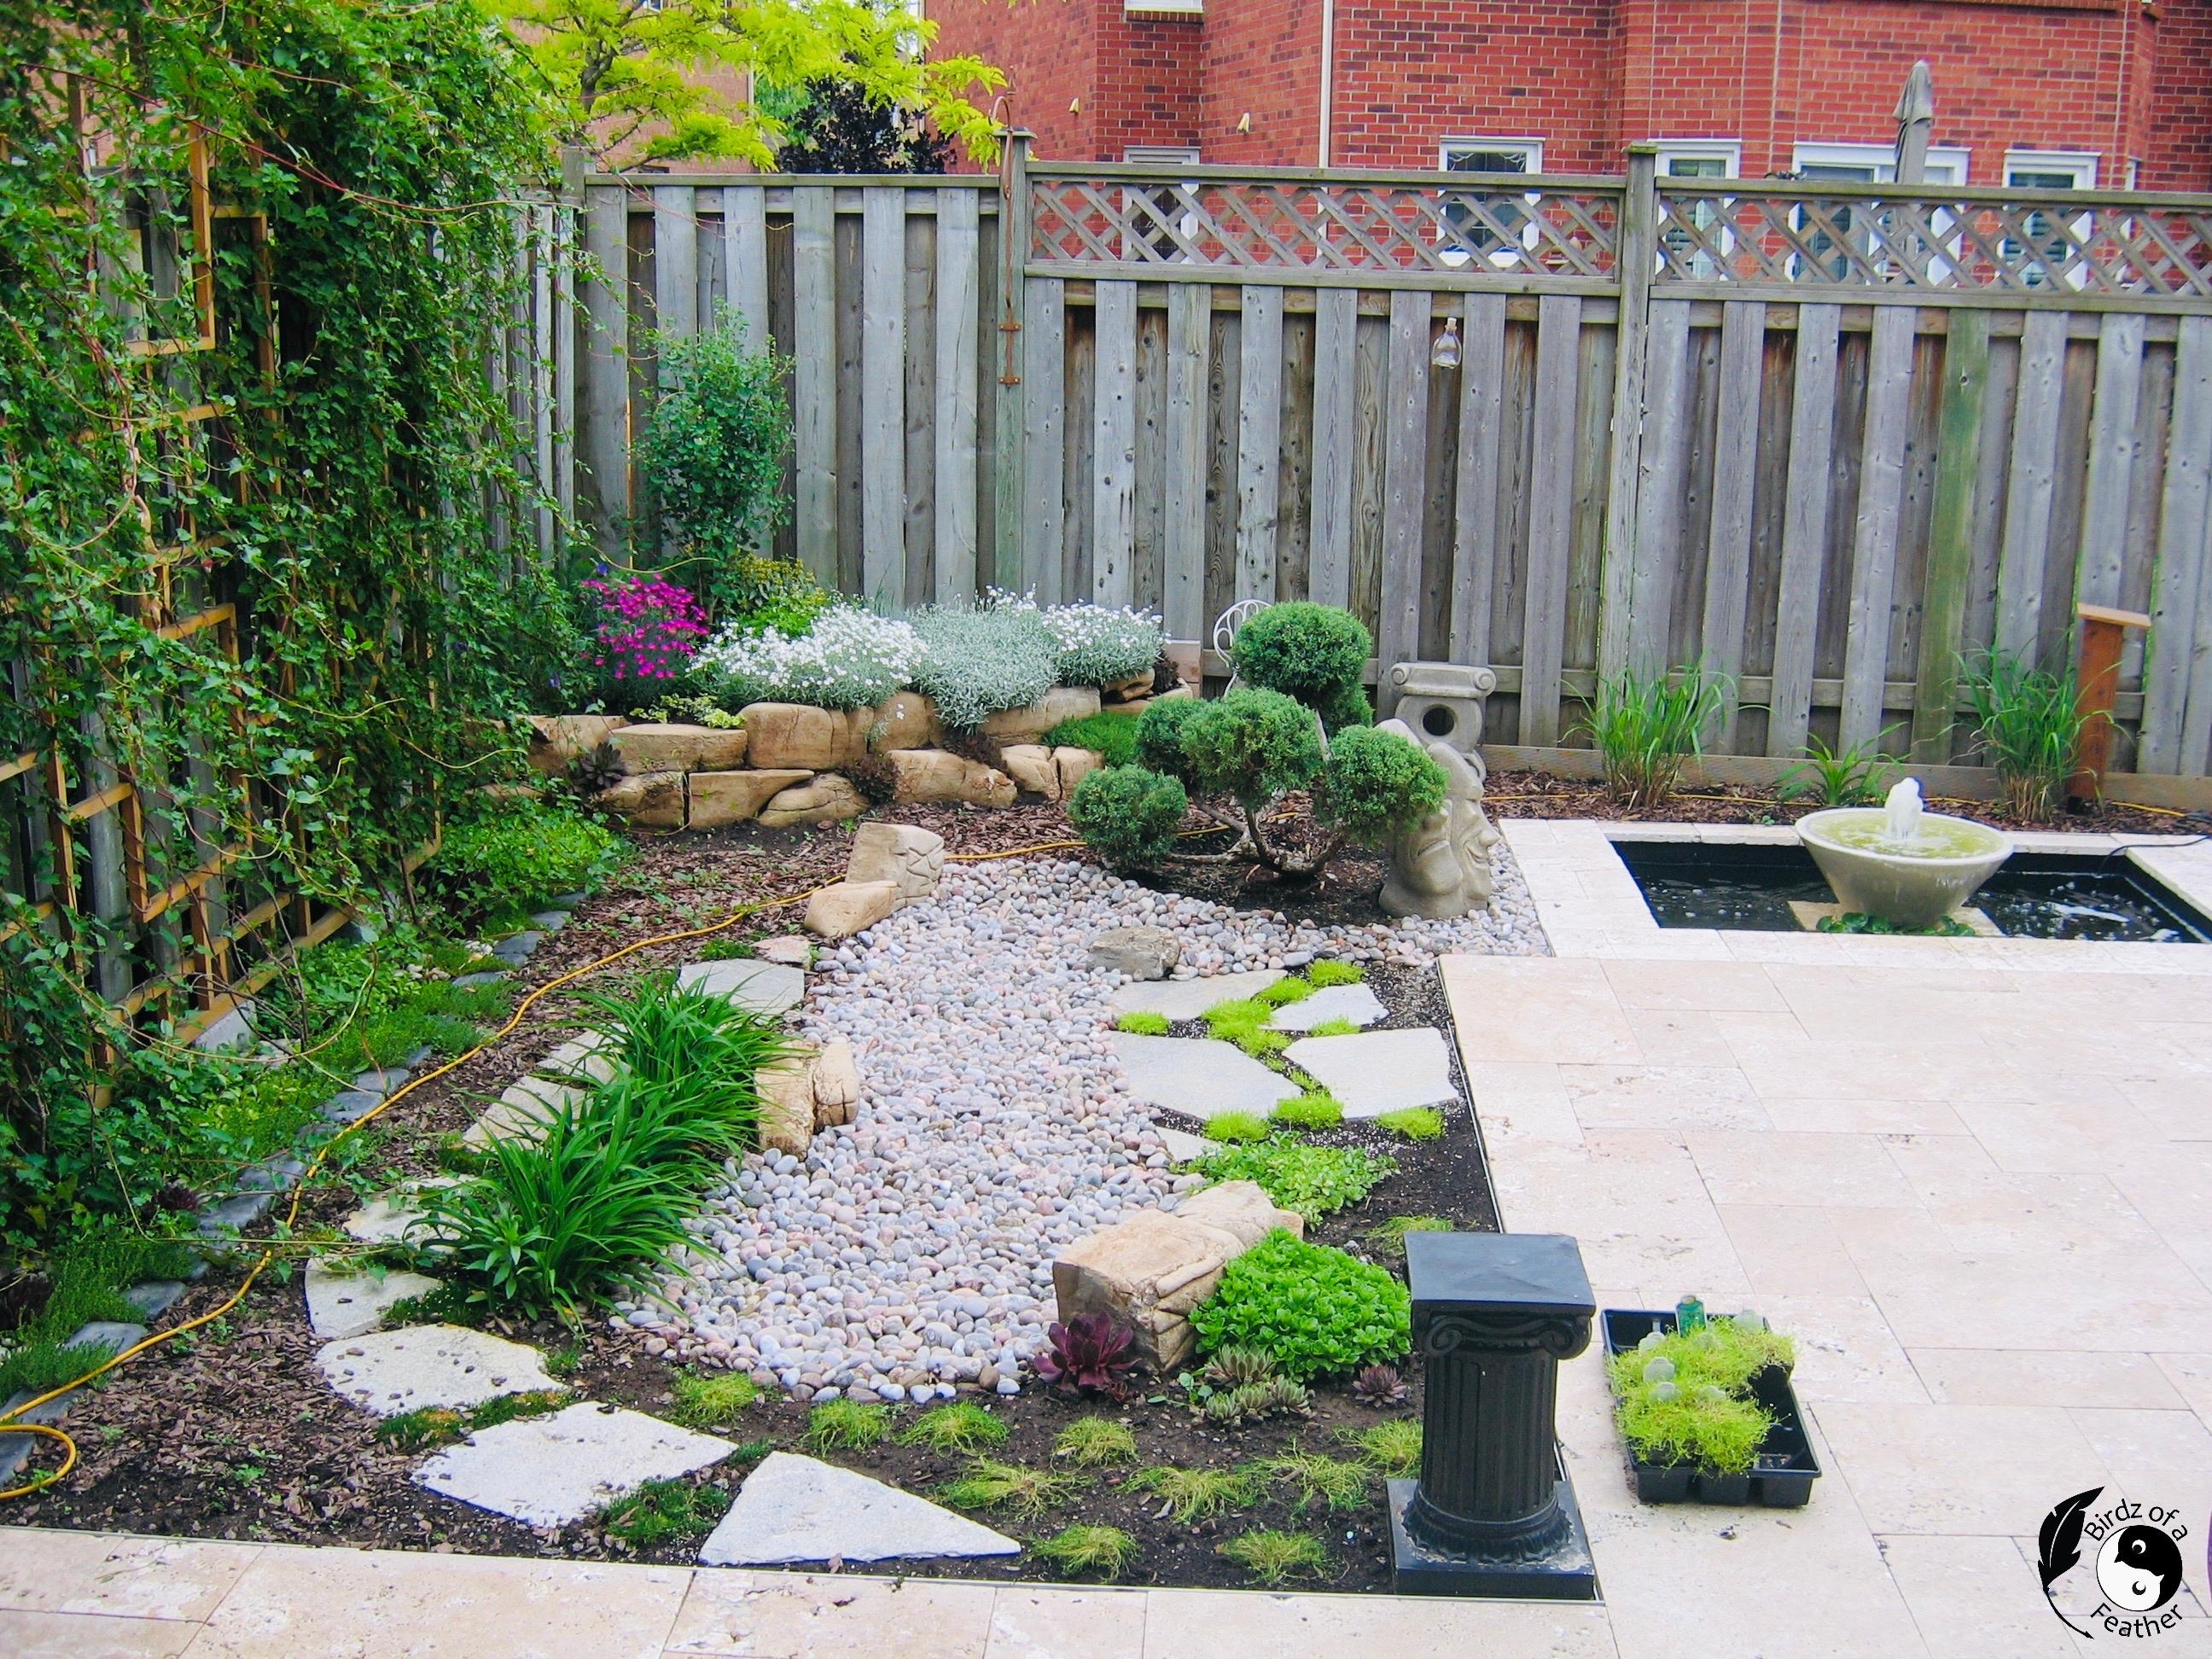
The south-east corner of our backyard went from all grass with a few dead plants, to a lonely patch of grass, and finally to a lush section of our surburban oasis.
For the time and effort we expended up front, it's certainly a big payoff in the end. It's far more interesting to look at than a patch of grass - and requires very little maintenance to maintain it!
The only care it needs is a seasonal trimming of the ornamental juniper to maintain the round shape of the pom poms. The silver lace vine also needs the occasional trim but now that it's established, it's pretty low maintenance too.
To finish the area around the dry creek bed, we covered the narrow pathway between it and the fence with mulch. Mulch keeps the mud and weeds at bay.
The Mature Garden


The moss, ground cover and day lillies (in bloom) filled in and matured over seasons of growth. The dry creek bed looks seamless once the plants around it are fully grown; everything just drapes over and softens all the edges!
Until we can build out bridge to complete our vision, our dry creek bed is a wonderful backdrop for our hypertufa chair and guitar planter!
The dry creek bed really added a special touch to the garden, but we didn't stop there! Check out part two of Low Maintenance Gardening to learn how to build a rock garden.
If you like to learn new skills, like landscaping a dry creek bed, get your DIY mojo on at Birdz of a Feather and subscribe! You can also follow us on Pinterest, Facebook, YouTube and Instagram.

Fall Into Fabulous
One of the things I love most about blogging is connecting with other makers, and this Fall we’ve created something truly inspiring together.
Grab 16 digital goodies from top creators — planners, recipes, colouring books & more — including our Beginner Crochet e-Book!
Every dollar of our commission goes straight to Alzheimer’s research — a cause close to our hearts. Your purchase through this link means you’re not just treating yourself; you’re making a real difference.
Grab it now — the bundle is only available for a limited time! Let’s make this Fall fabulous and full of hope. 💜