Ladder Christmas Tree

This non-traditional Christmas tree made from a wooden ladder and pine wood planks is the perfect way to decorate for the holidays if you, A) can't have real trees in your apartment, or, 2) you or your loved one is a big fan of hardware stores.
It simple to make and something that you can use again and again. Not to mention the fact that you can keep using the ladder all year round!
*All you music lovers out there should check out my Vinyl Record Holiday Tree!
Supplies

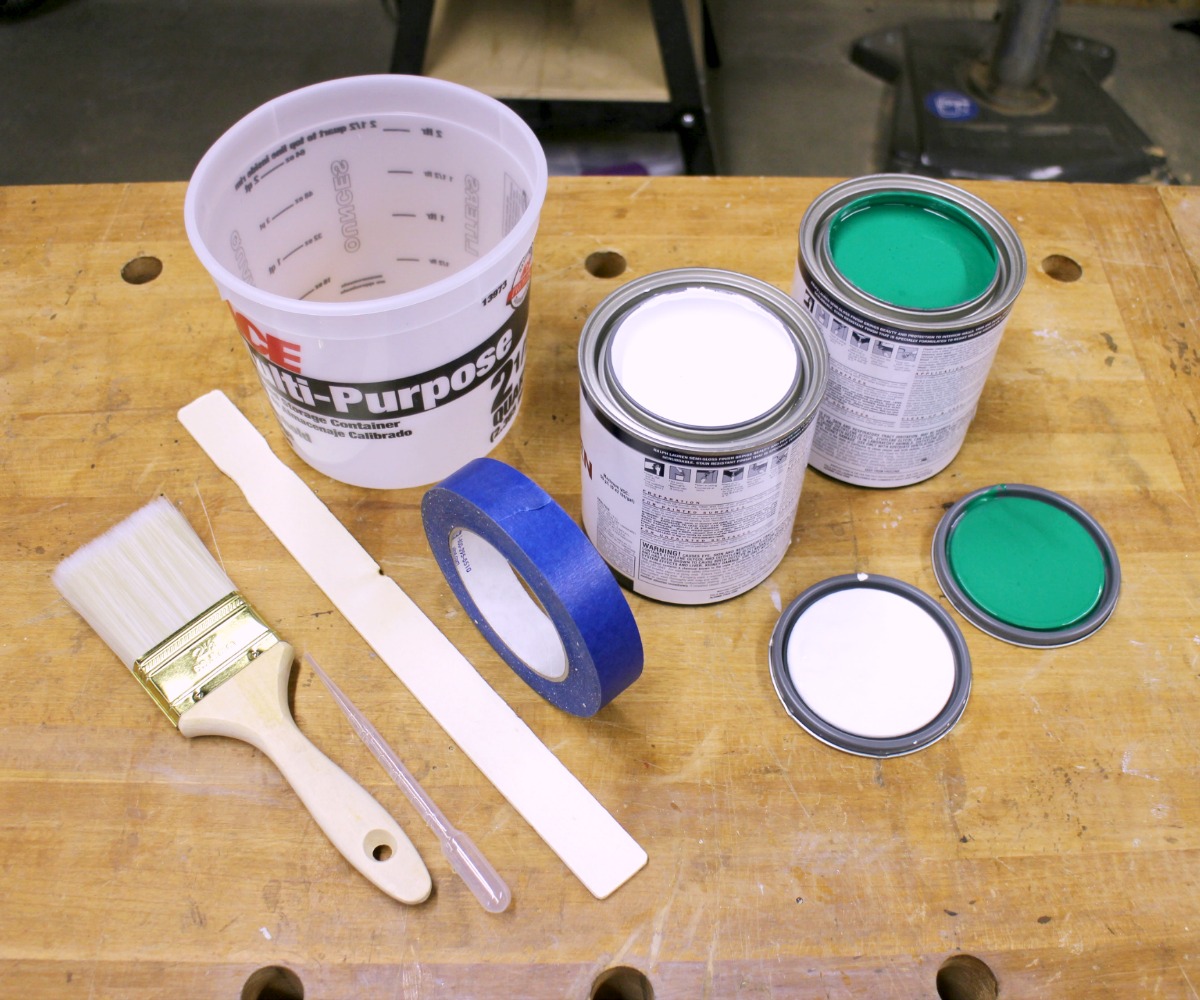
Materials:
- (1x) 6' wooden ladder
- (3x) 1" x 12" x 6' pine boards
- (1 or 2x) 1" x 12" x 4' or one more 6' board*
- an assortment of different thickness wood scraps (from 1/8" - 3/4")**
- 1 quart of white water-based latex paint
- 1 quart of green water-based latex paint
- 1 mixing bucket
- blue painter's tape
- 320 grit sand paper
- stir stick
- measuring spoon or dropper
- paint brush
- craft paper to paint boards on
- wood glue
- string or twine
*This is extra wood just in case a cutting error is made. It's always better to have extra.
**These are for Step 5
Tools:
- hand saw
- chop saw
- table saw
- measuring tape
- sanding block
- carpenter's square
- level
- pencil
Ladder Prep


Open the wooden ladder up and remove all the stickers and such.
Pull down the paint bucket 'shelf' and using a hand saw, cut off the shelf so that there is approx. 3" of each arm sticking out past each upright. (as pictured)
Calculating Shelf Lengths: Part 1


Unless you're free styling and using your own taller ladder, I would start with a 5' shelf on the bottom rung. We can use this as a starting off point to figure out the rest of the shelf lengths for creating maximum tree-ness.
Cut the 5' shelf using the 1" x 12" pine board and place it on the bottom step of the open ladder.
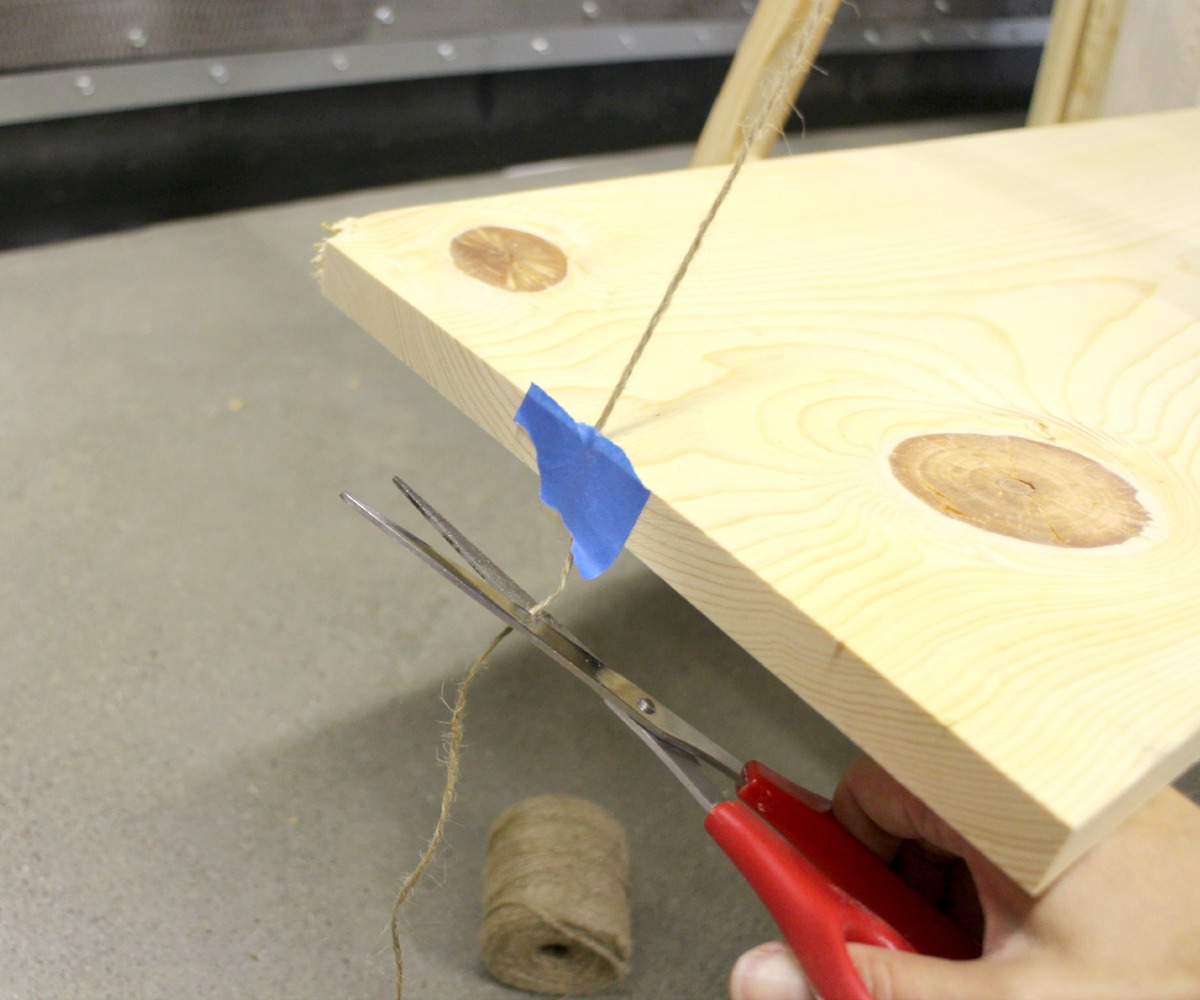
Then take some string or twine and tape a length from the top of the ladder to the middle of the bottom shelf on both sides of the ladder.
Next tape the end of the twine ball to the front end of the top of the ladder and unwind the twine until the ball is JUST touching the ground. This will give you the rough center line of your 'tree'.
By doing this I discovered that my ladder wasn't quite symmetrical, so I moved the bottom shelf a little to the left so that it would be slightly more even to the center line from the front.
Calculating Shelf Lengths: Part 2


Next, take your measuring tape and measure the distance between the two pieces of twine at each rung height.
Draw a quick diagram to record your findings. The lengths I ended up needing were:
Top - 1' 4"
2 - 2' 3"
3 - 3' 2"
4 - 4' 1"
bottom - 5'
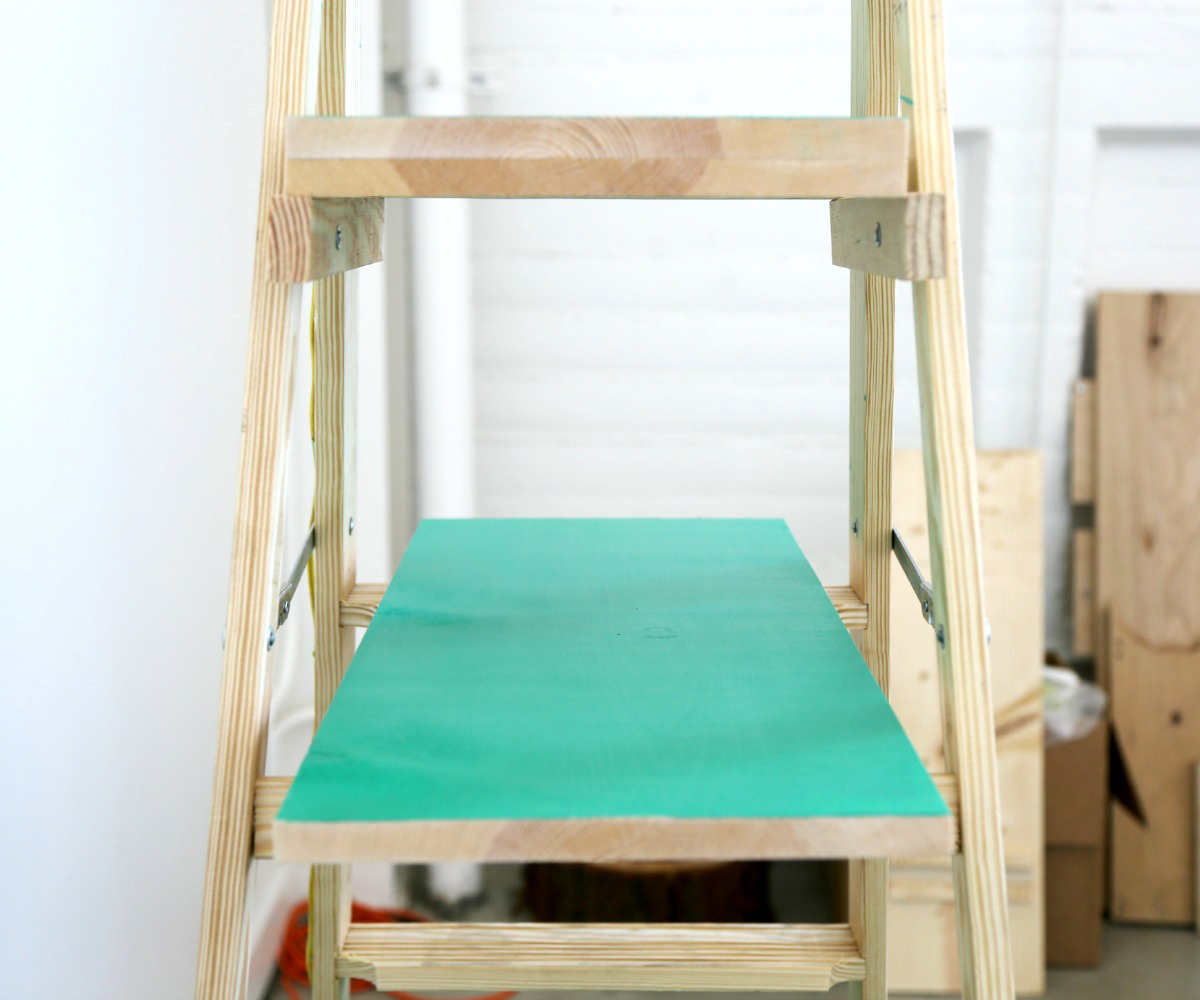
Cut the shelves to length and place them on their respective rungs to make sure they line up correctly, creating the tree 'line'.
You'll notice that not all the shelves are level. We're going to fix that in the upcoming steps.
On the Level


Now it's time to level out those shelves.
Have your bits of assorted wood handy, as we'll be using them to shim the shelves level.
I also wanted to level out the whole ladder a bit so that the verticals were more symmetrical, so I found two pieces of scrap that raised the left upright enough to also, shim free, level out the bottom shelf.
Next, place a level on the top shelf and lift up the left end of the shelf until the level reads, level. Eyeball the gap between the rung and the underside of the shelf and try inserting different combos of the scrap wood pieces until you find the winning piece or combo that = level.
Repeat this for shelves 2 - 4.
Number the shims with a pencil so that you'll know which shims are for which shelf when you pull them out to cut down to size.
Mark 'em

Once you've removed all the shims, use a pencil to mark where the shims will go on the underside of the middle three shelves. (like pictured) The shim for the top shelf will go right on the end so there's no need to mark that one.
Left Side Ladder Lifts

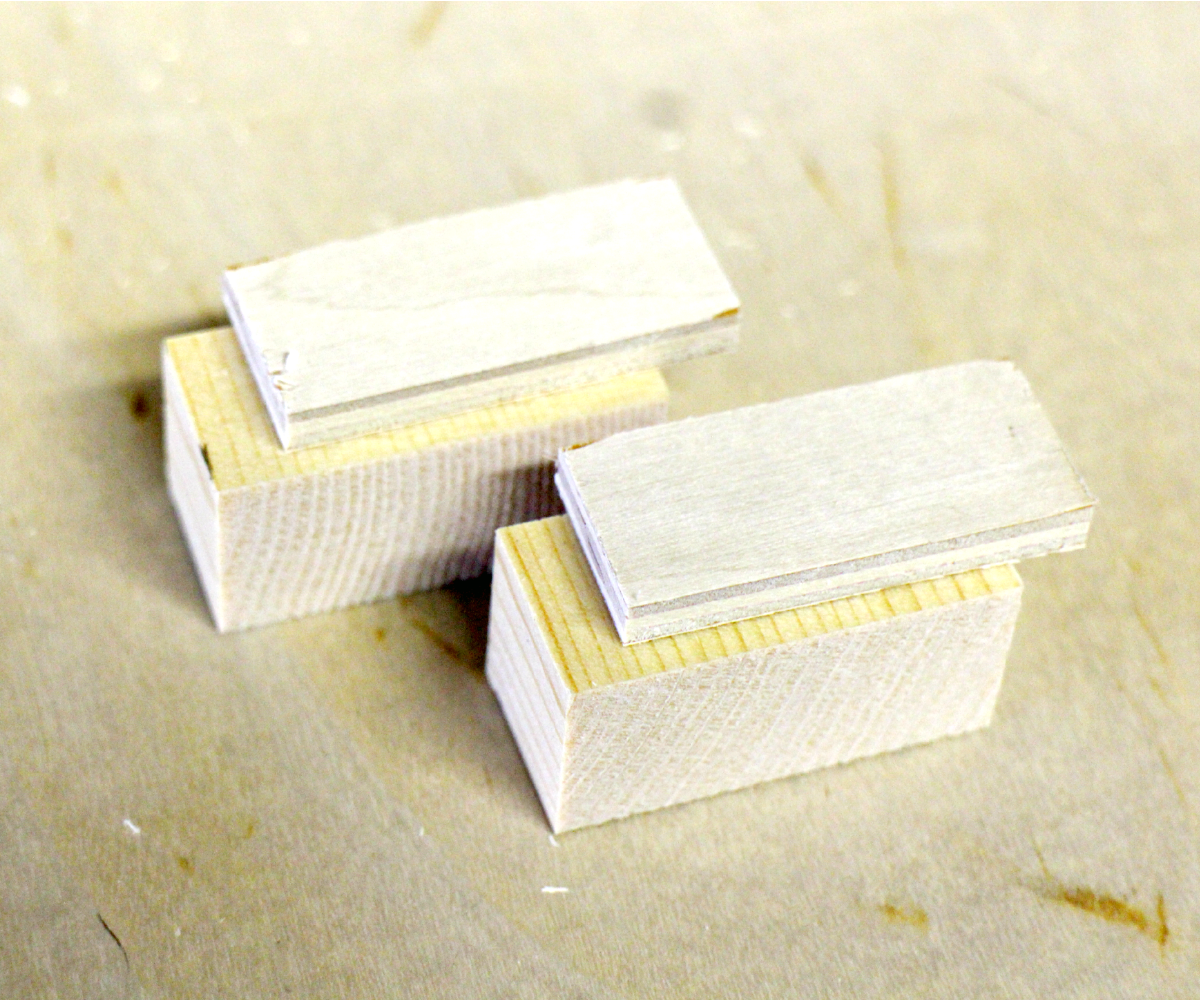


If you've decided to shim up the left side feet of the ladder itself like I did, measure the footprint of the feet and cut the shim(s) to size.
Glue the layers together (if there's more than one) with wood glue and then glue the shims to the bottom of the intended feet.
Let dry for at least an hour while you prepare and attach the shelf shims.
OPTIONAL: Grooves for Hanging Ornaments
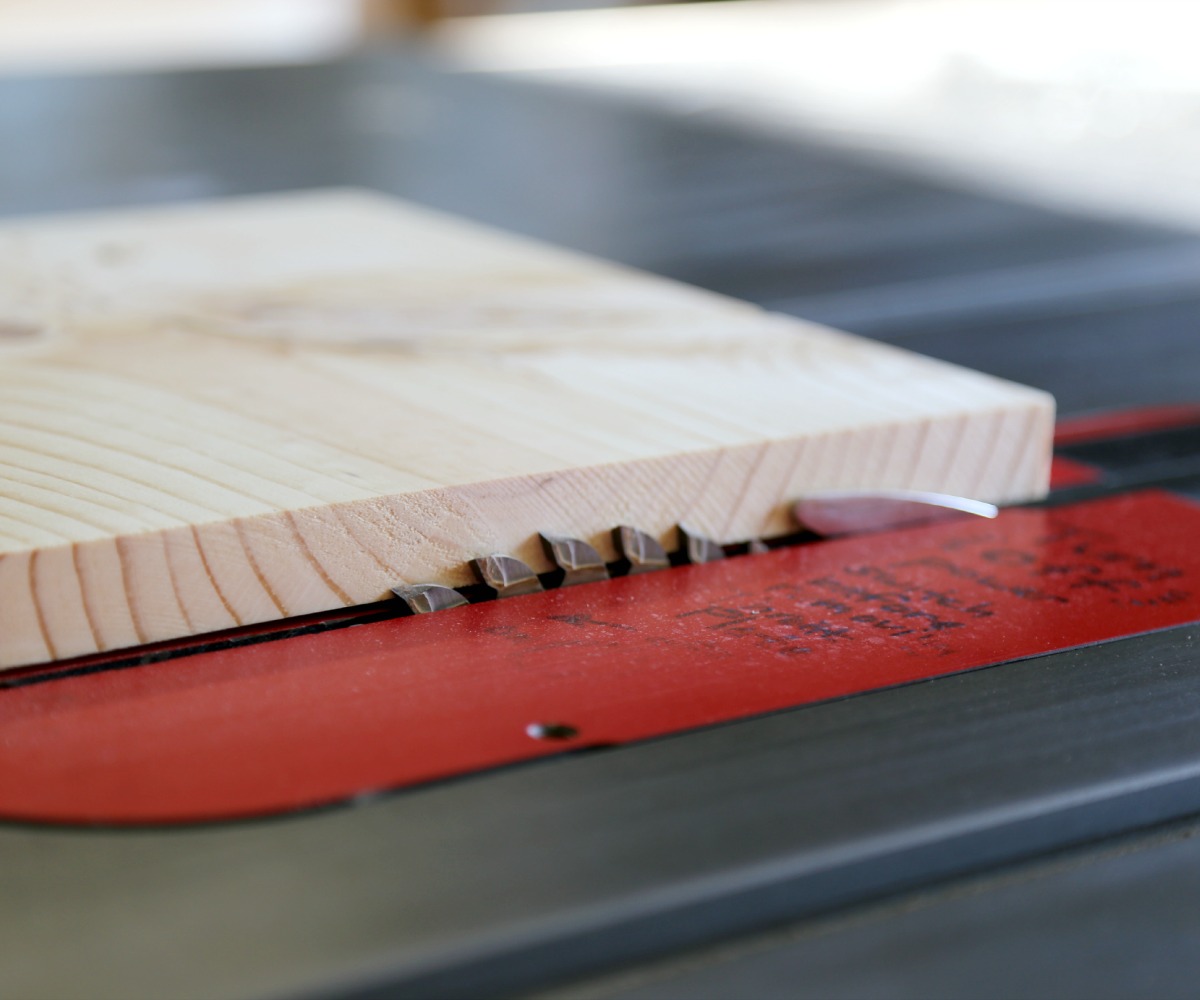


I chose not to add these on my shelves because I knew I wouldn't be putting hanging ornaments on my tree, but if you'd like the option to do so, here are the steps:
1. Lower the blade on the table saw to less than half the thickness of your shelves.
2. Set the guide to 1/4".
3. Run all four edges of your shelves over the lowered blade making sure to keep them snug up against the guide.
And that's it! Now back to our regularly scheduled steps...
Soften by Sanding


Using a sanding block and 320 grit sand paper, gently sand all the edges of the shelves.
Do the Shimmy


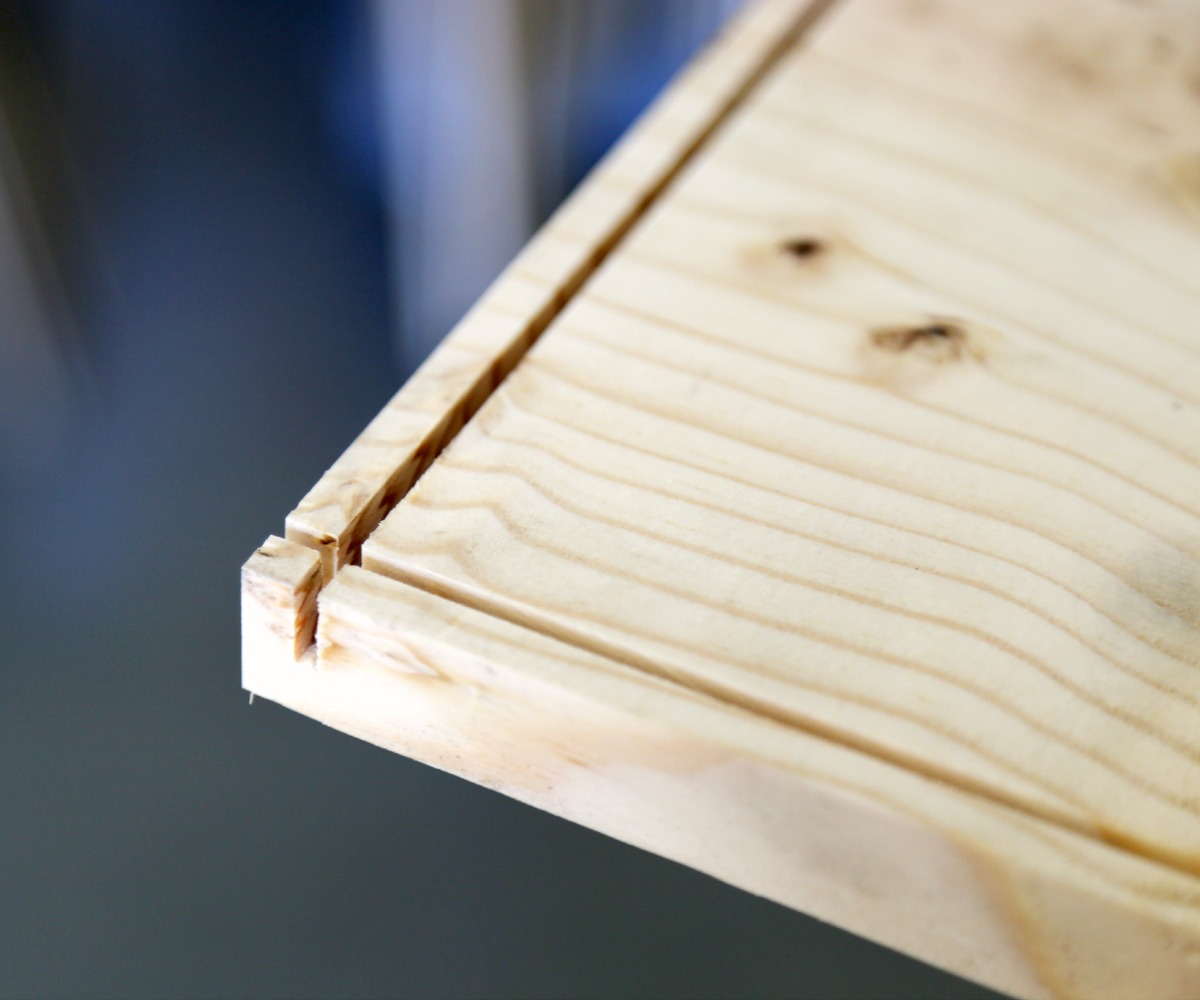
Using a carpenter's square, draw lines on the underside of the shelves that line up with the pencil marks you made earlier. The space in between the two lines is how wide your shim should be (approx. 1 1/4")
Using the cut off pieces of pine board, cut (6x) 1" wide x 10" long pieces. Glue them on the outsides of the lines on shelves 2-4.
Measure and cut each shelve's shim piece(s) and glue them in between the already glued outer pieces.
For the top shelf (no. 1), cut a 1" wide piece of pine board to the exact width of the top shelf. Glue it on the underside edge of one of the shelf ends.
Paint Prep


I chose to paint just the tops of my shelves, not the sides or the bottoms. So I carefully taped the edges of all 5 shelves with painter's masking tape.
If you'd like your entire shelves to be painted, skip this step.
It's Pretty Easy Being Green


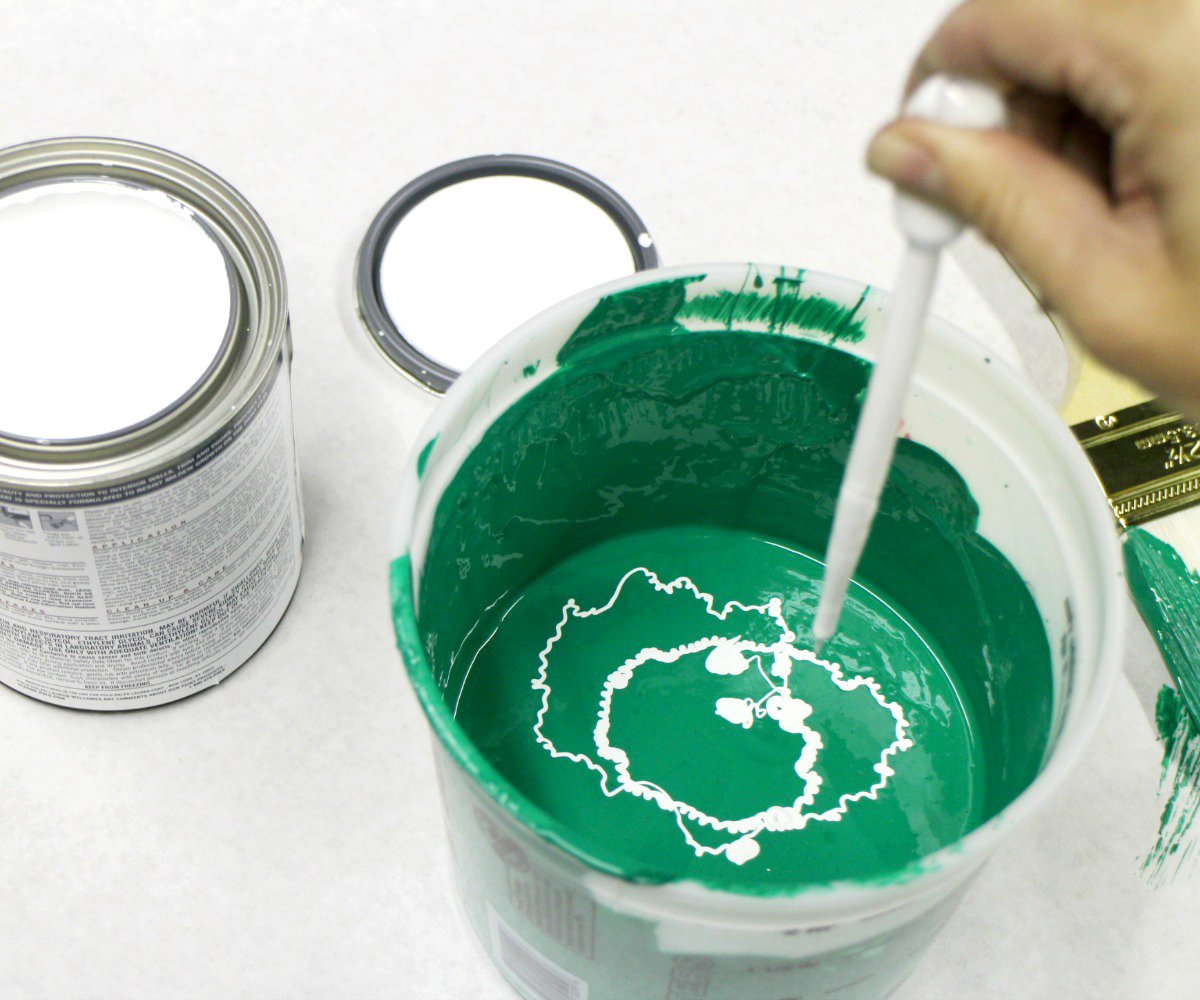


I wanted the green paint on my tree shelves to gradually lighten as they went up (see last image above). To do this, I started with the full strength green on the bottom shelf and then added about 3 tbsp of white paint and stirred well for every subsequent shelf. Feel free to add more or less white paint or to skip the graduating greens altogether.
Paint each shelf carefully with a brush.
Let dry for at least two hours.
Cleaning Up the Edges


When the paint is dry, remove the tape. If any paint has soaked through or run down the edge of the board, use a sharp razor blade to scrape it away.
You're now ready to set up your tree!
Optional Star Light Tree Topper
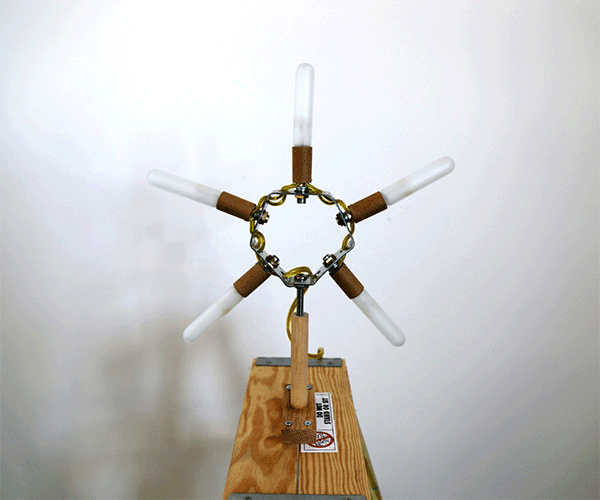


If you'd like to make and add the Star Light Tree Topper that I made for my ladder tree, visit the instructable here.
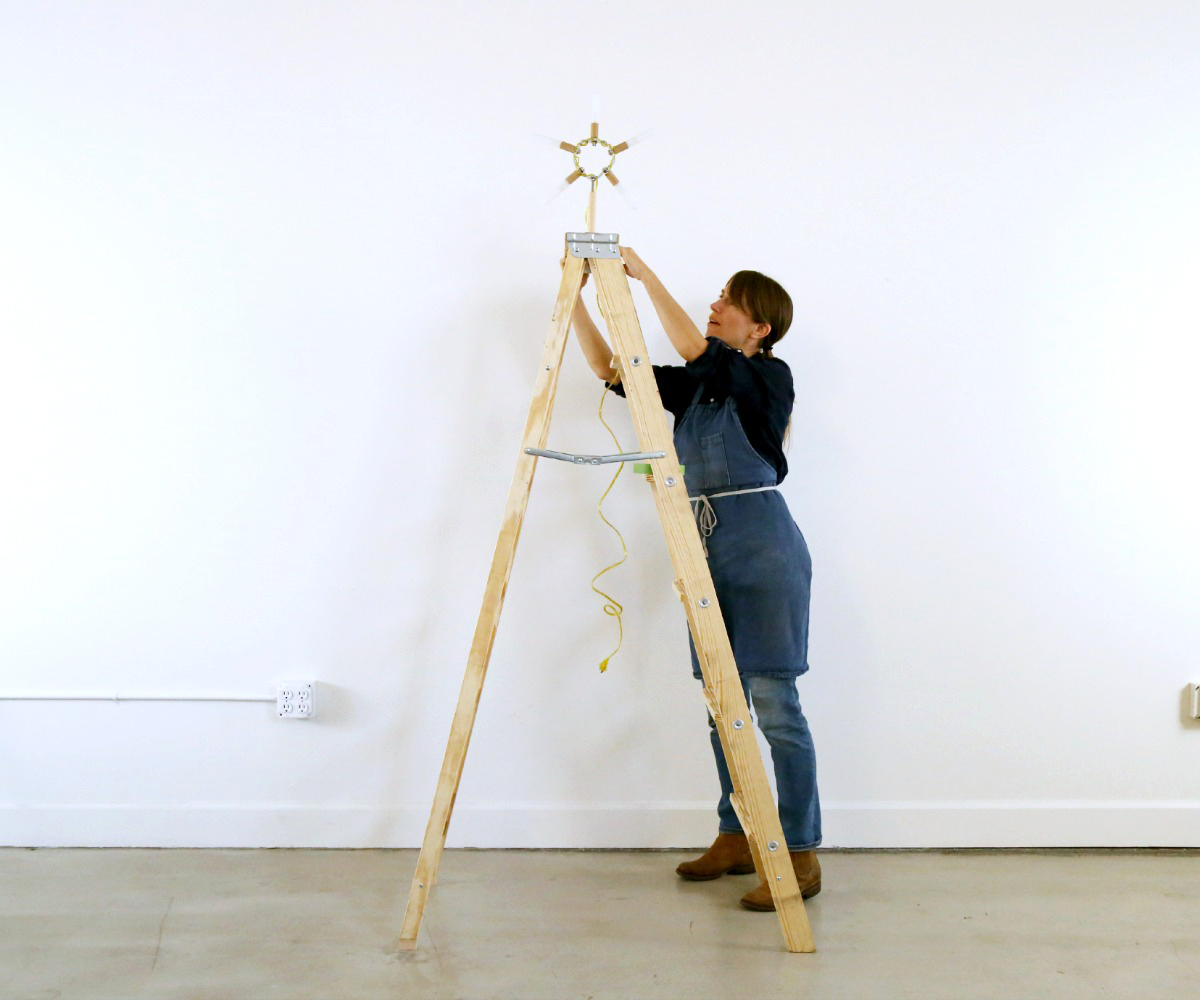
Shelf-Help


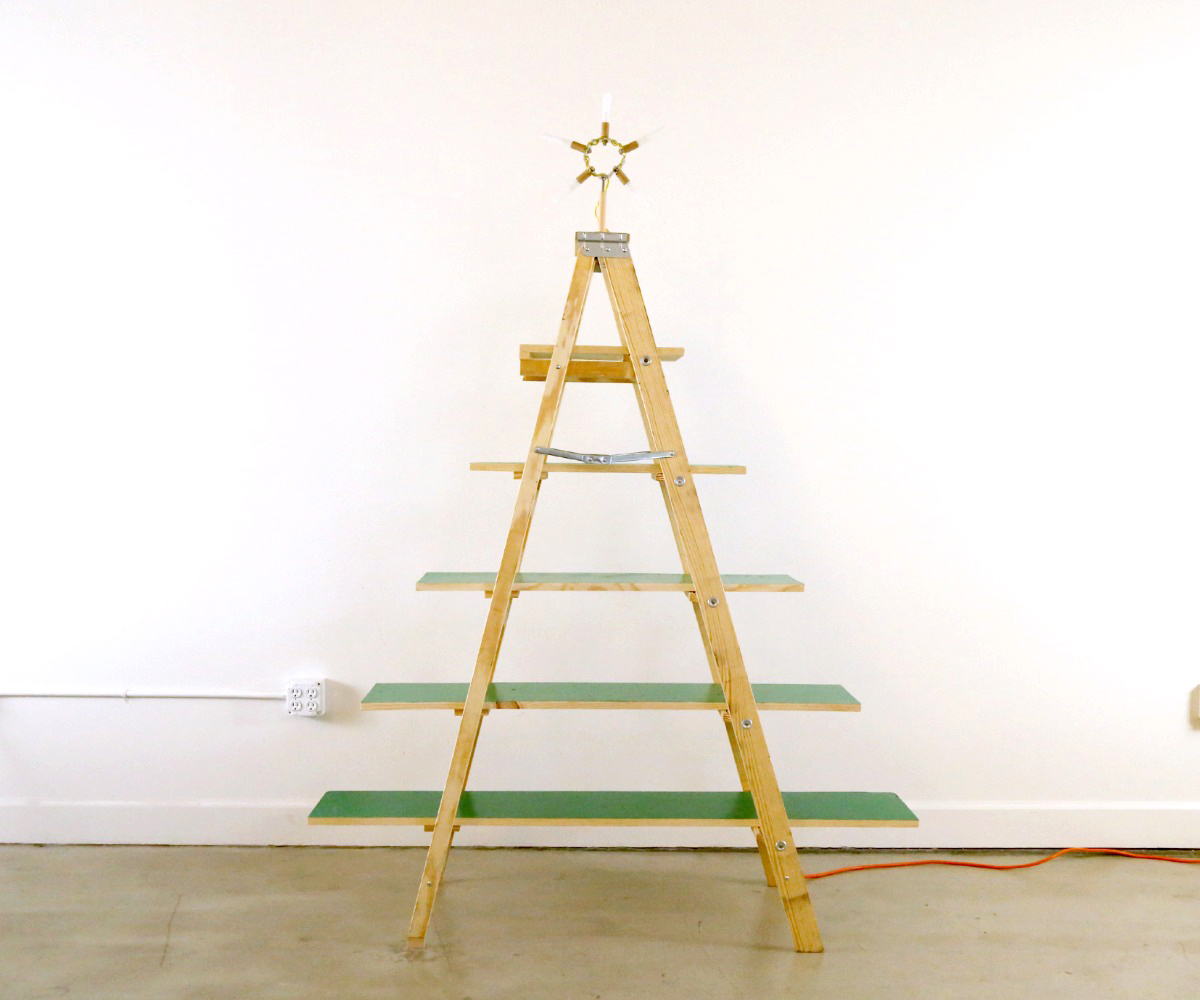
Once you've found a good spot for your tree, have opened up the ladder and installed the Star Light Tree Topper if you chose to do so, it's now time to add the shelves. Place them all on their respective rungs/steps, making sure the shelves are centered between the uprights.
Time to Decorate!

Your tree is now ready to decorate!
If you try making this, I'd love to see pictures of how you decorated yours!!
Have fun and Happy Holidays!