LEGO WALL-E With Micro:bit
by BrownDogGadgets in Circuits > Electronics
9802 Views, 34 Favorites, 0 Comments
LEGO WALL-E With Micro:bit

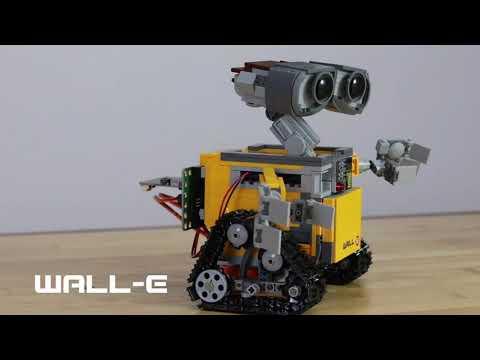

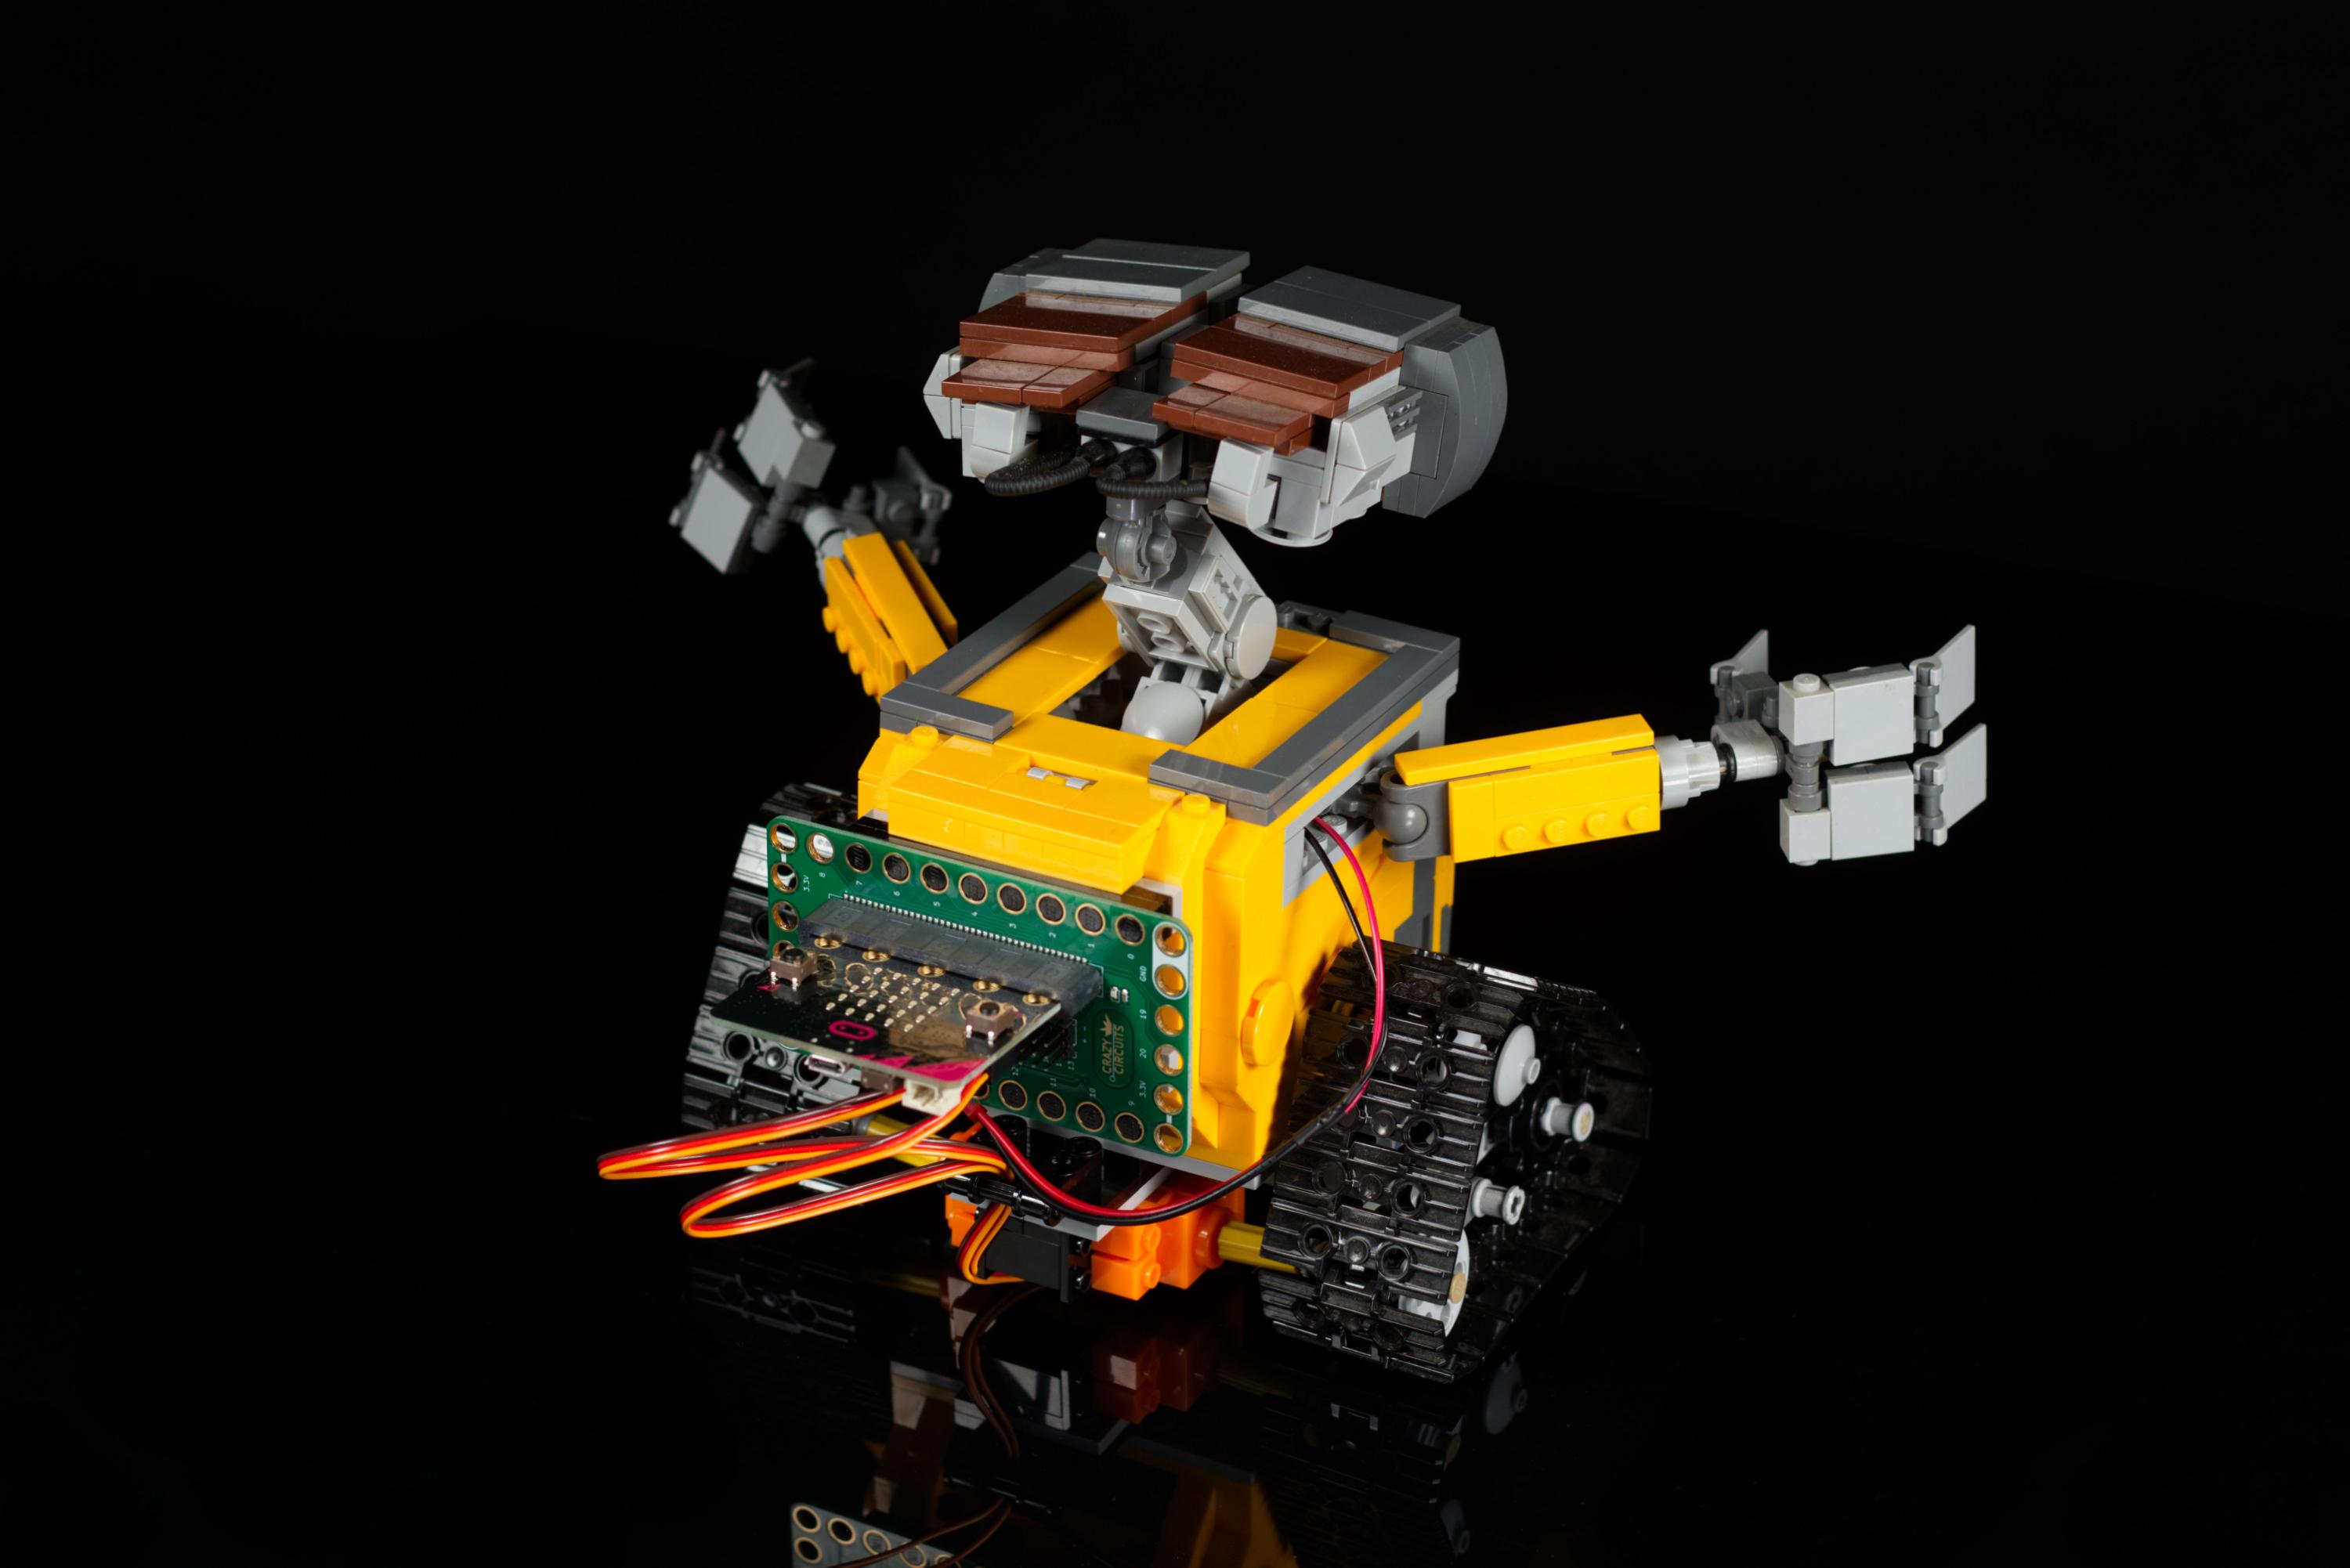
We're using a micro:bit along with a LEGO-friendly Bit Board to control the two servo motors that will allow WALL-E to be able to traverse the dangerous terrain of your living room floor.
For the code we'll be using Microsoft MakeCode, which is a block-based code editor that is easy to use. You'll be able to load our code and use it, as well as edit it and customized it to make it your own. This is a great way to experiment by making adjustments and seeing how they change how WALL-E moves.
The Bit Board is a new (as of 2020) part of the Crazy Circuits system just for the micro:bit that consists of a large number of components that are LEGO compatible and allow you to build circuits on top of LEGO baseplates and parts. The Bit Board is compatible with V2 and previous versions of the micro:bit as well as the Adafruit Clue development board.
If you like our projects and want to see more of what we get up to each week please follow us on Instagram, Twitter, Facebook, and YouTube.
Downloads
Supplies
Brown Dog Gadgets does in fact sell kits and supplies, but you don't need to buy anything from us to make this project. Though if you do it does help support us in creating new projects and teacher resources.
Electronic Parts:
- 1 x Crazy Circuits Bit Board Kit
- 1 x micro:bit
- 2 x LEGO Compatible Continuous Rotation 360 Degree Servo
LEGO Parts:
We used a variety of parts but the world of LEGO is vast, and you may find other parts that work just as well. The important things you’ll need to do is have a way to mount the servos on the bottom and connect to the tracks. We have provided links to each part on BrickOwl but you can find them anywhere LEGO or LEGO-compatible parts are sold.
Acquire / Assemble WALL-E
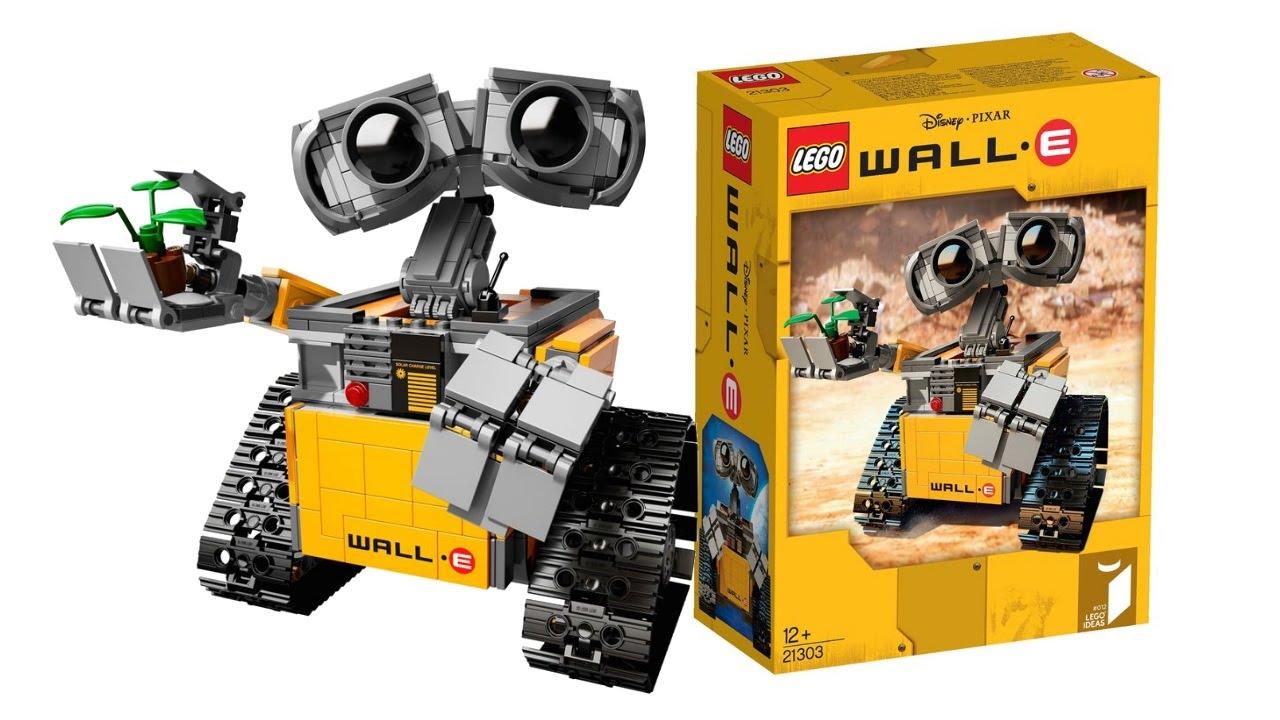
If you don't already have a LEGO WALL-E kit, they can be found, but they often sell for collector level prices. If you have one though, this guide will show you how to make it a programmable WALL-E that can move on its own!
We found a WALL-E kit for a reasonable price and it was already assembled, so we saved a bit of time. With that in mind, this guide will assume you are starting with an already built WALL-E and you are just adding in the Crazy Circuits parts.
Add LEGO Parts
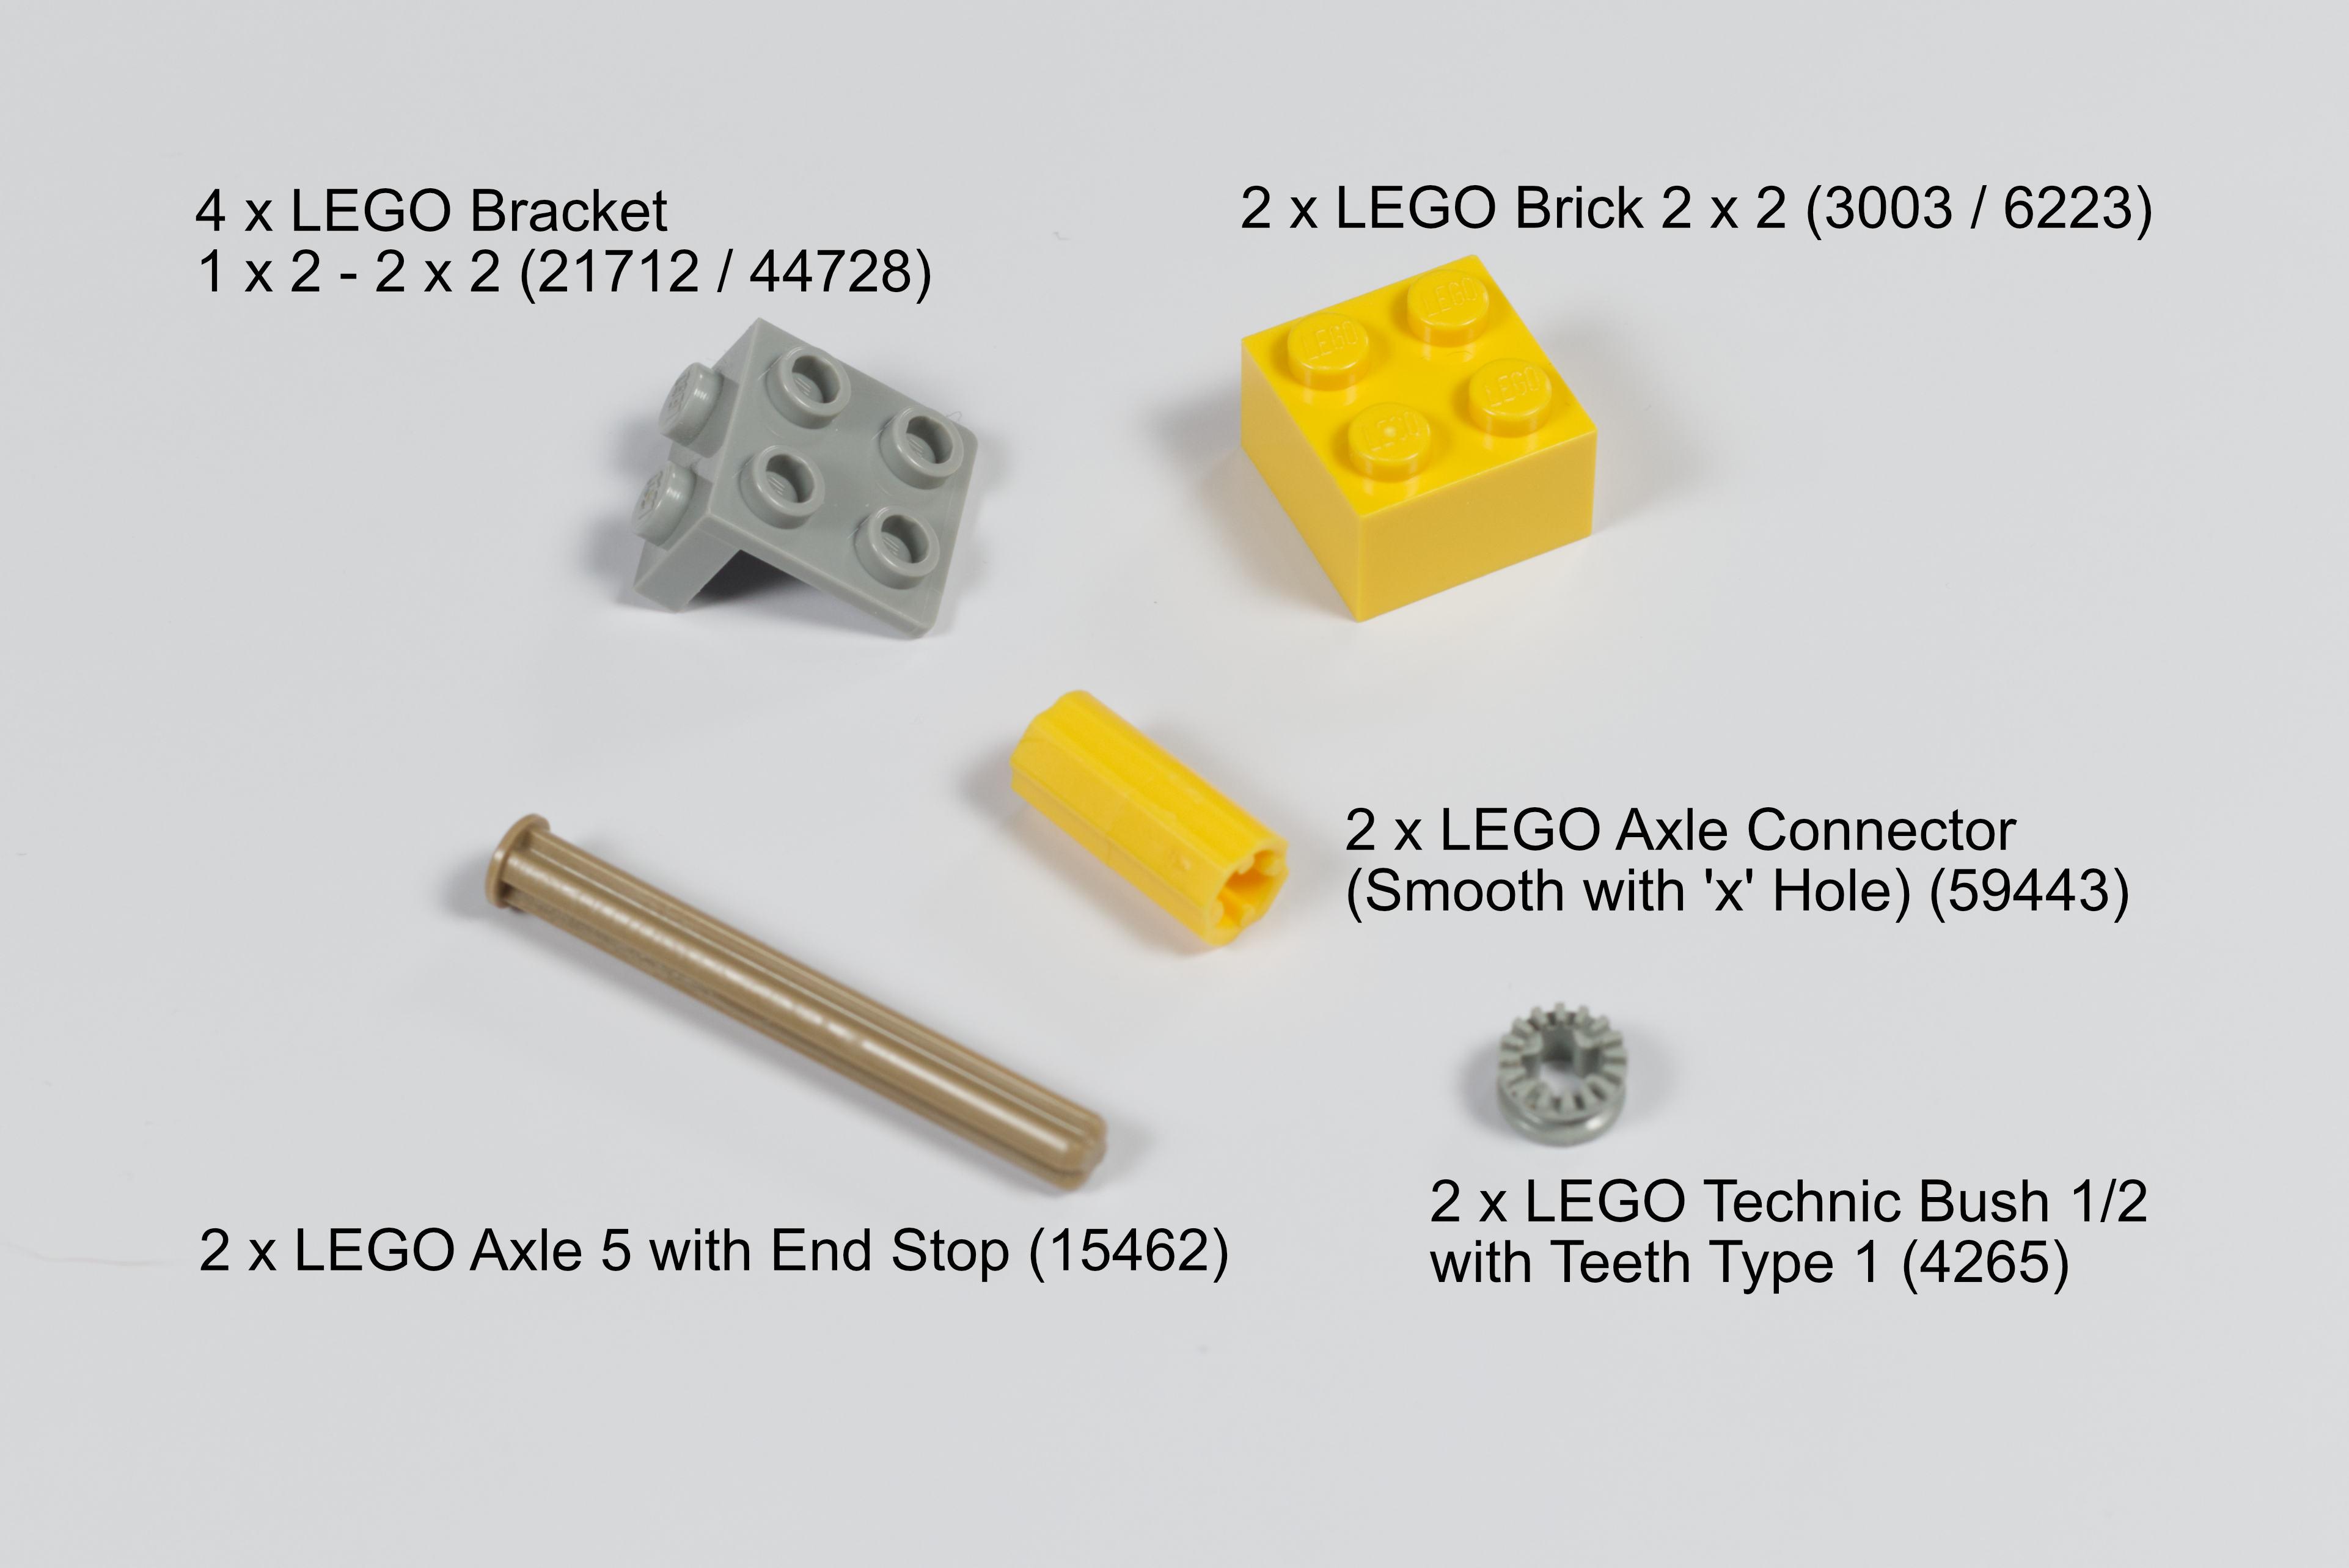
We had to add a few special LEGO parts to our build in order to get our servo motors mounted and connected to the tracks that allow WALL-E to move. The image shows the parts we used.
(Links to each part on BrickOwl.com are provided in the intro above.)
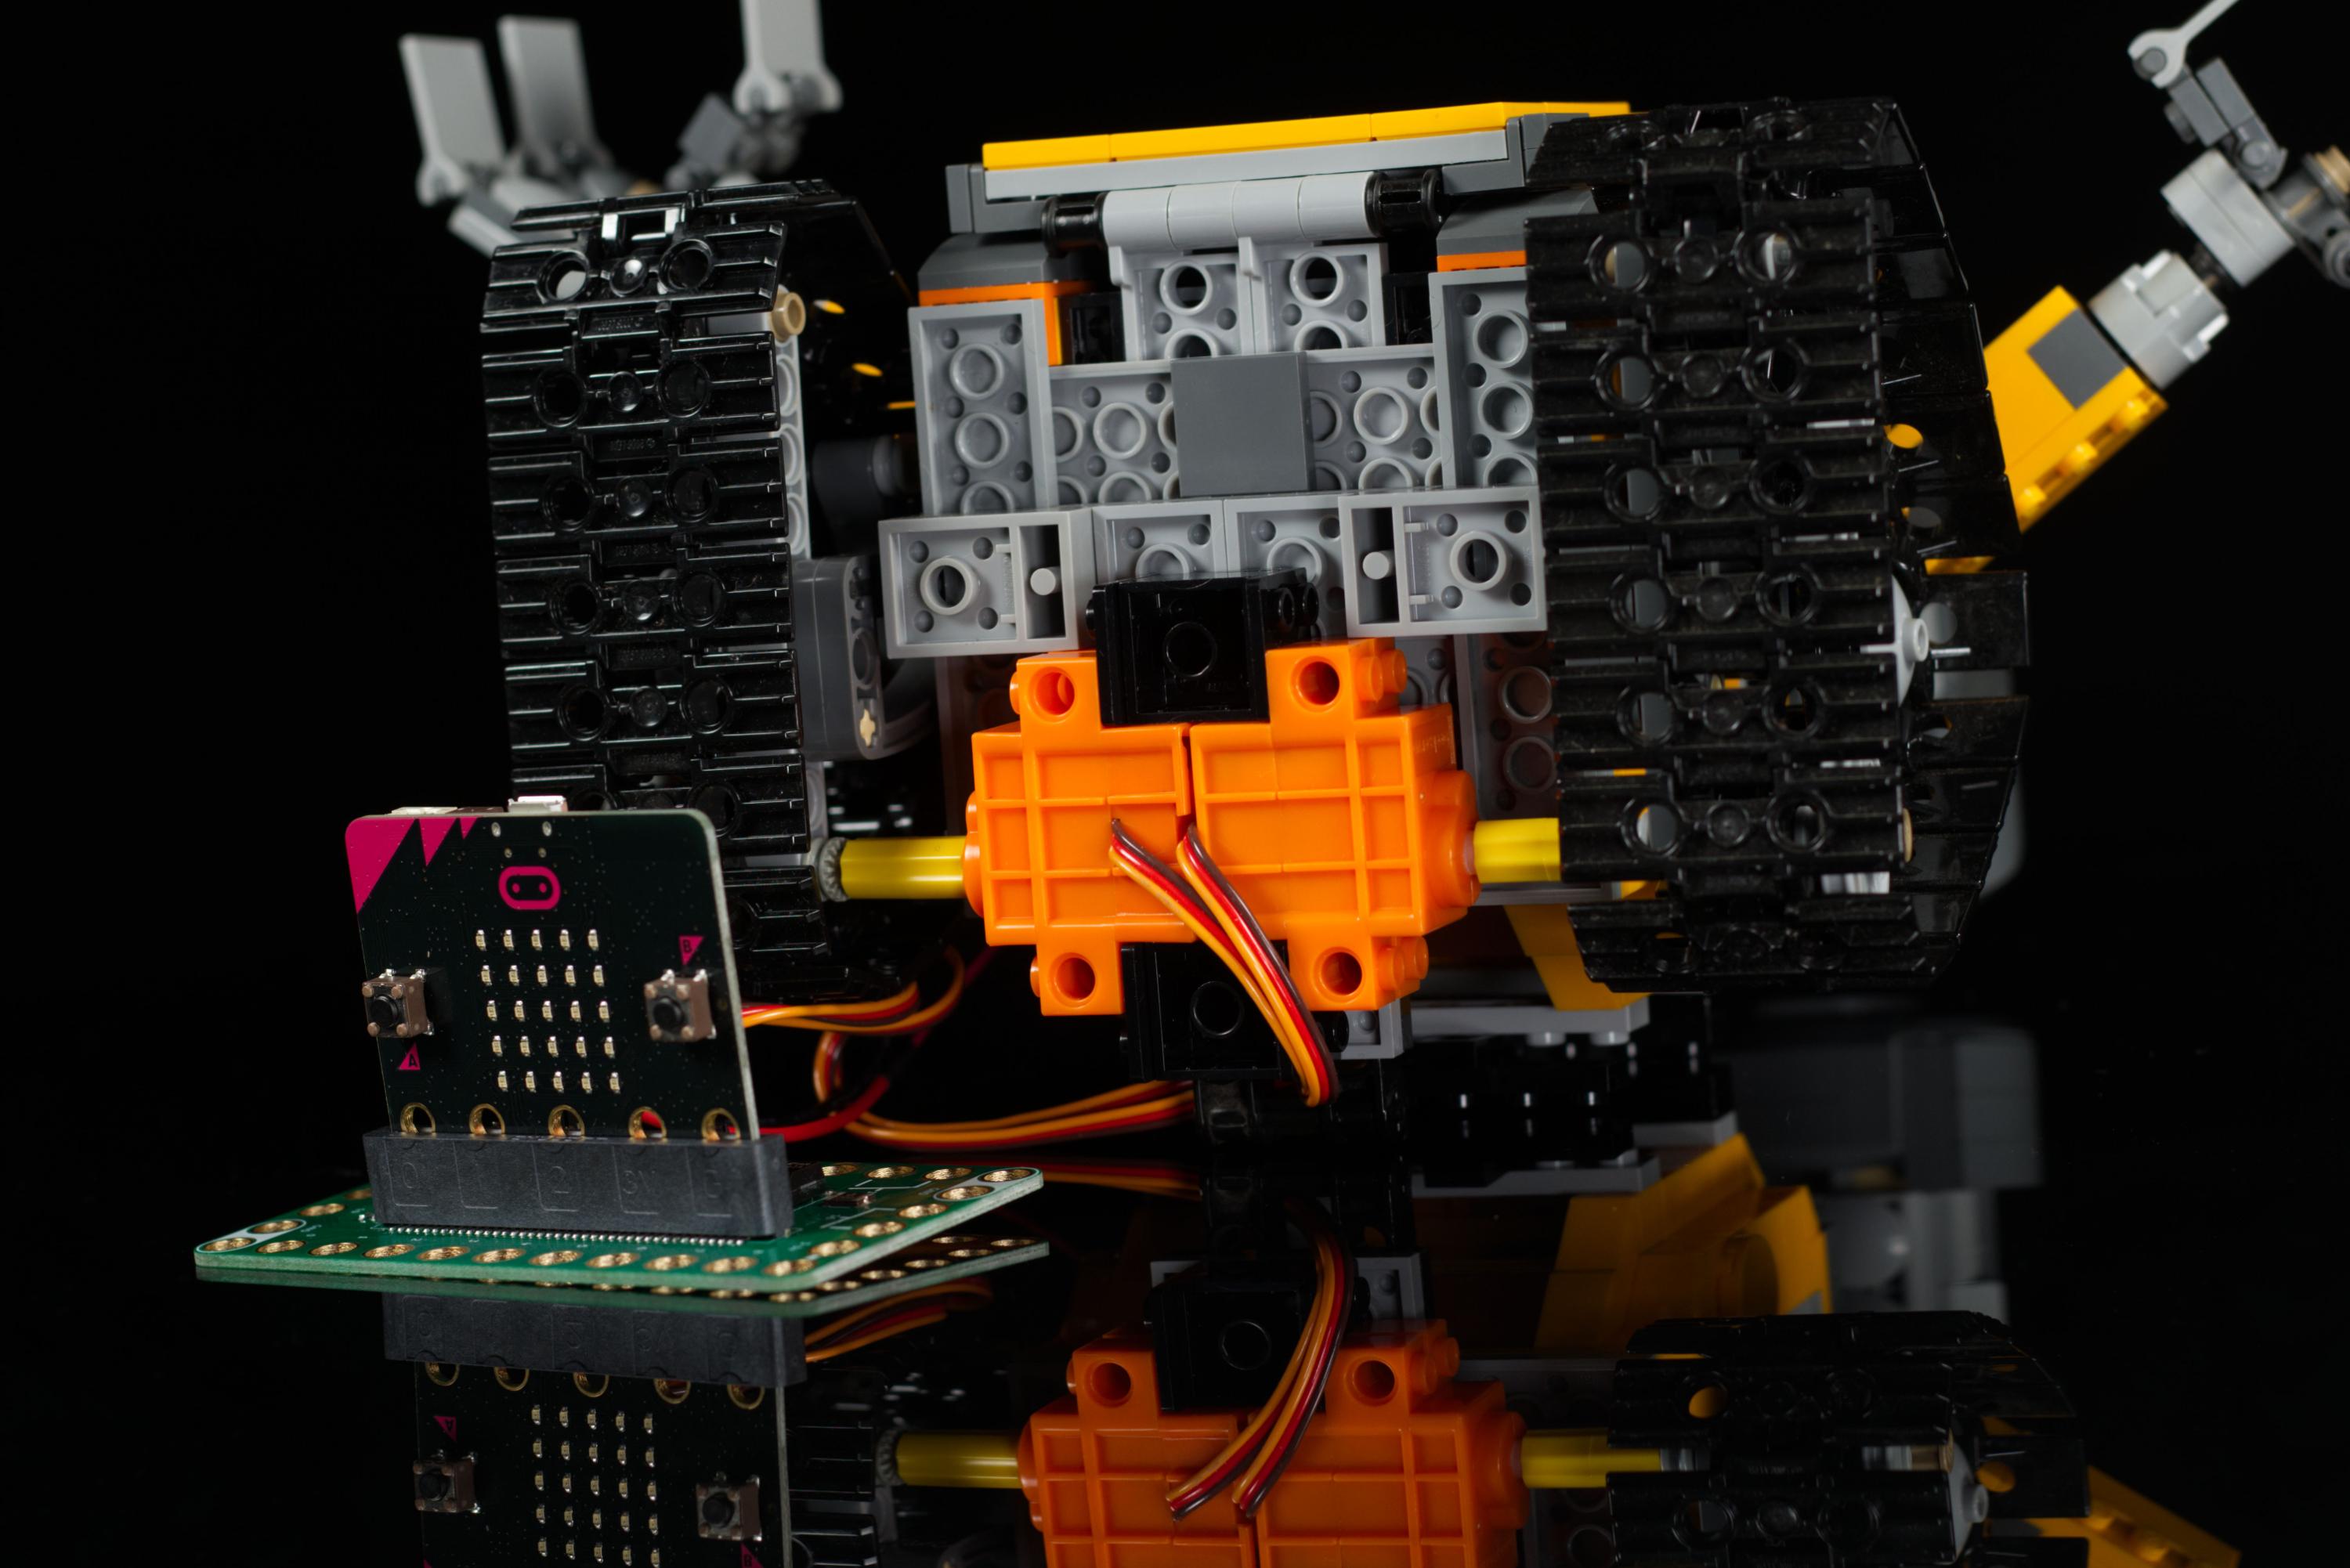
Add Servos
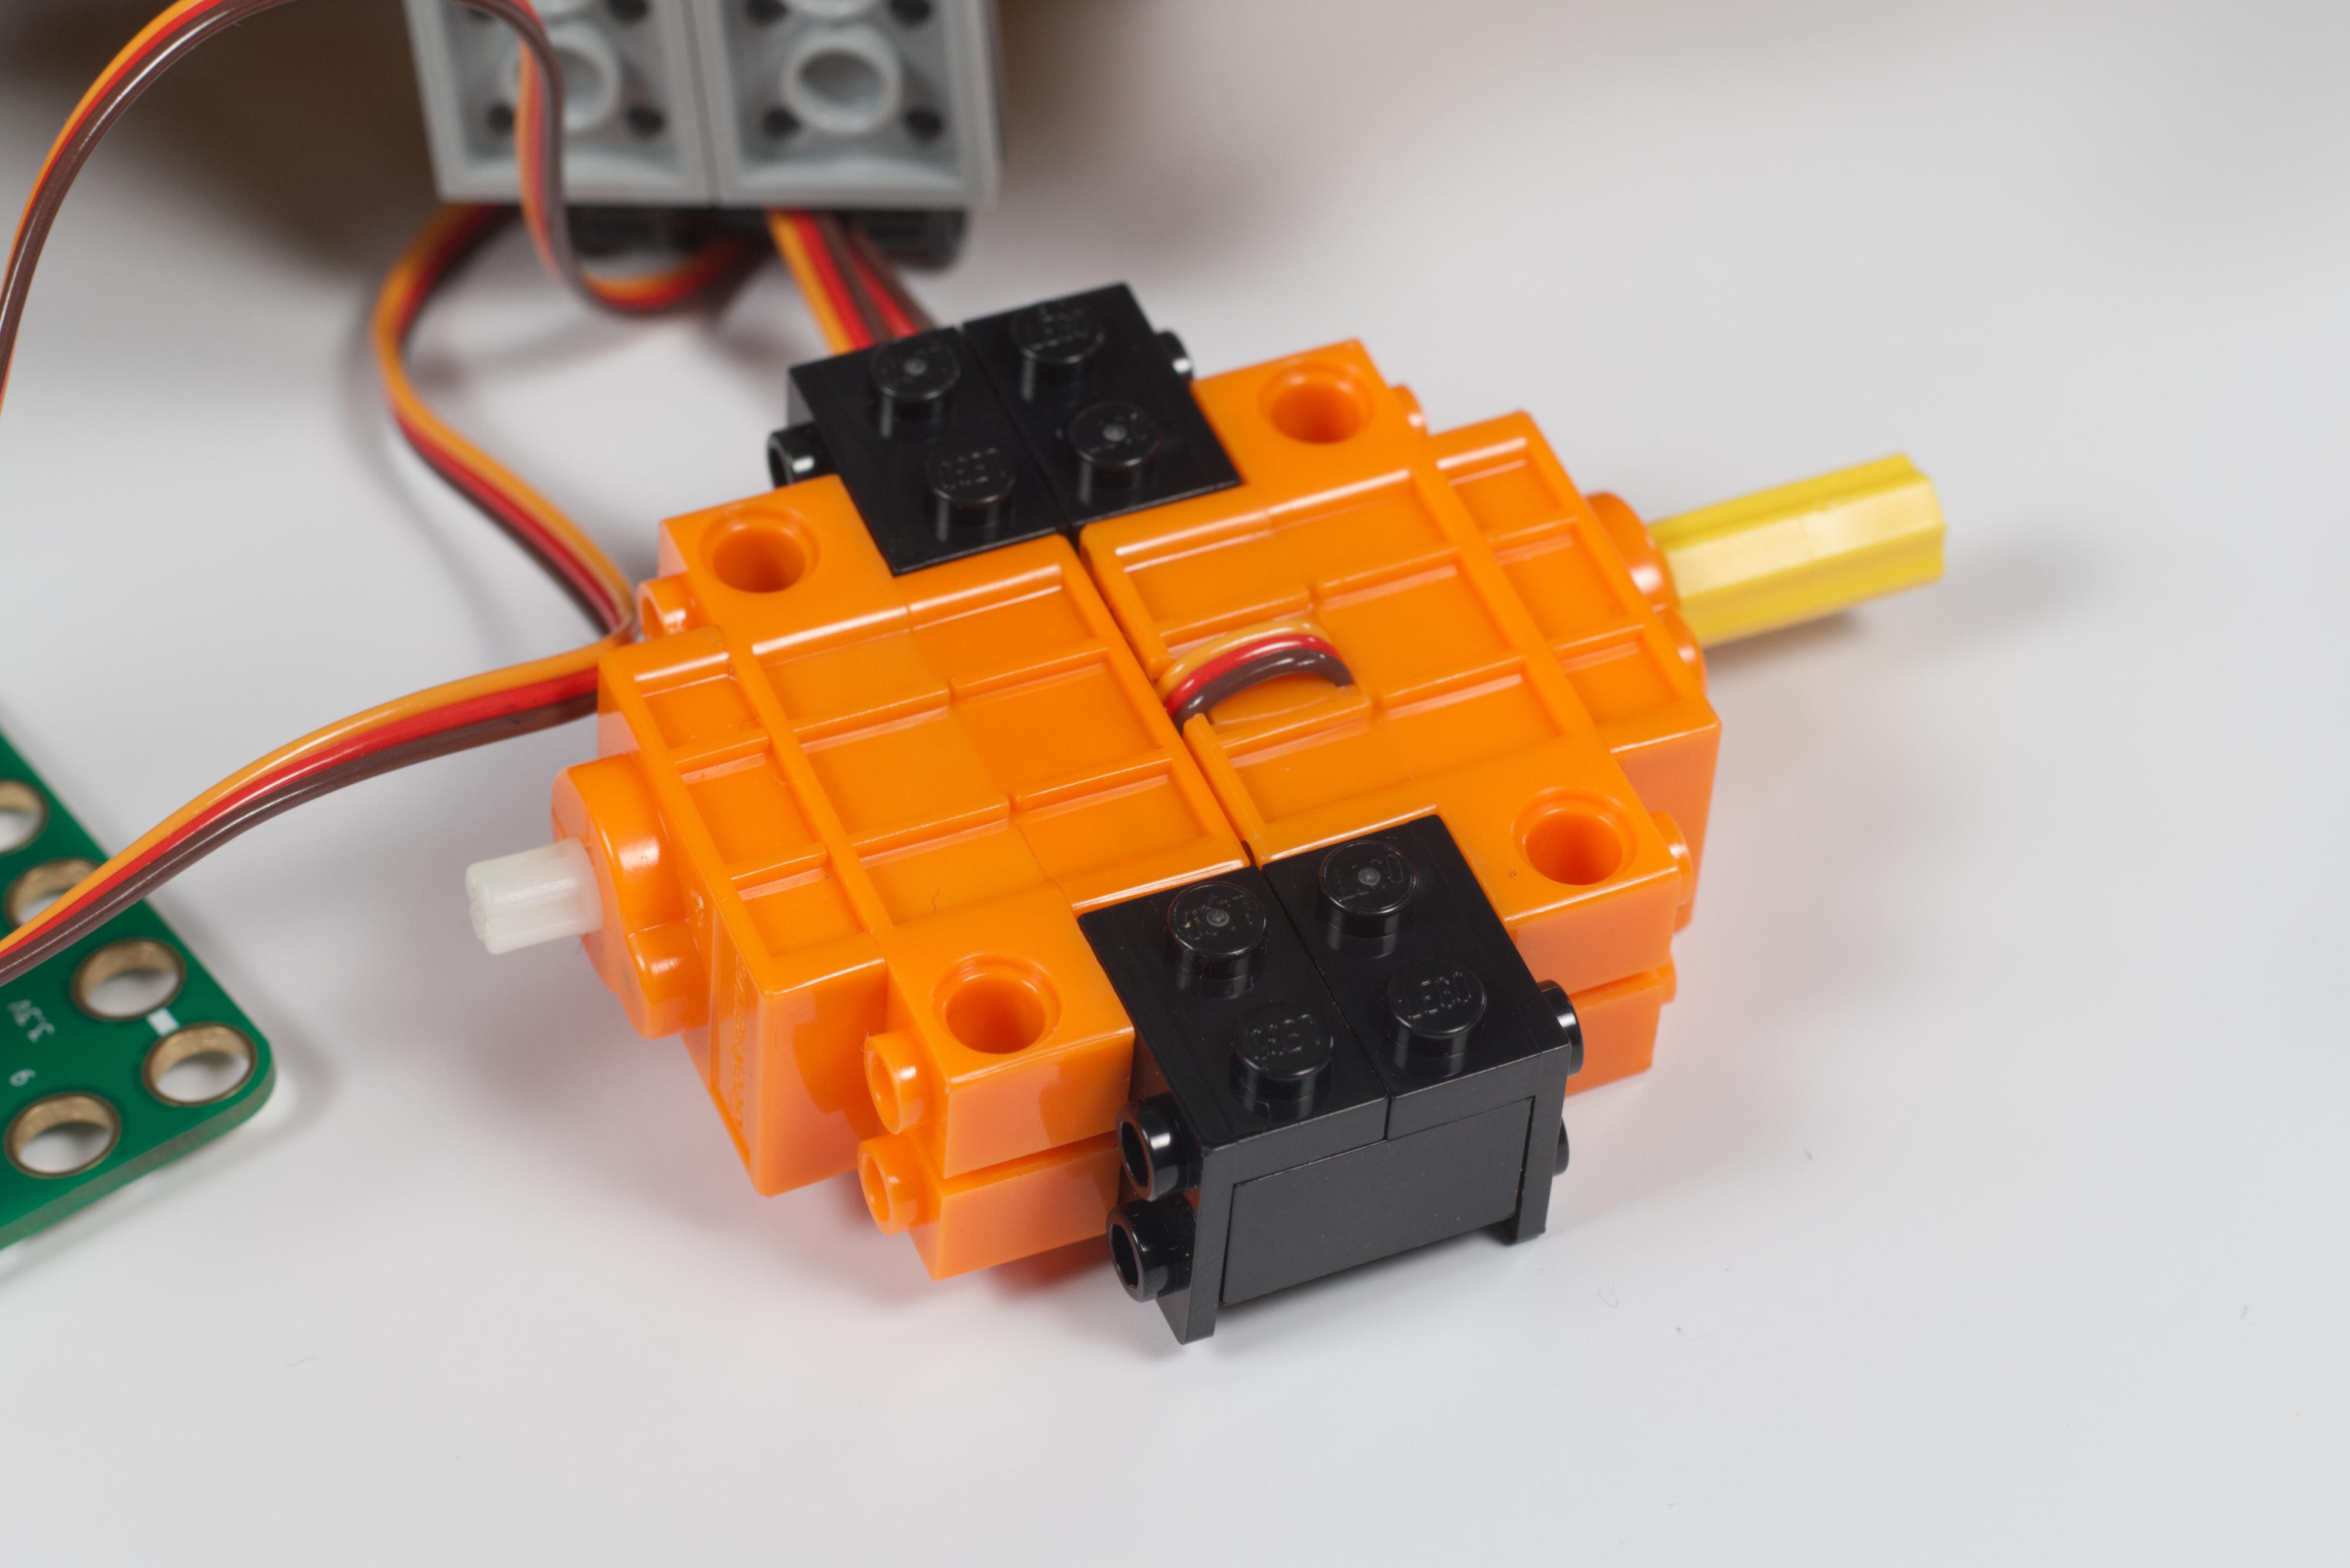
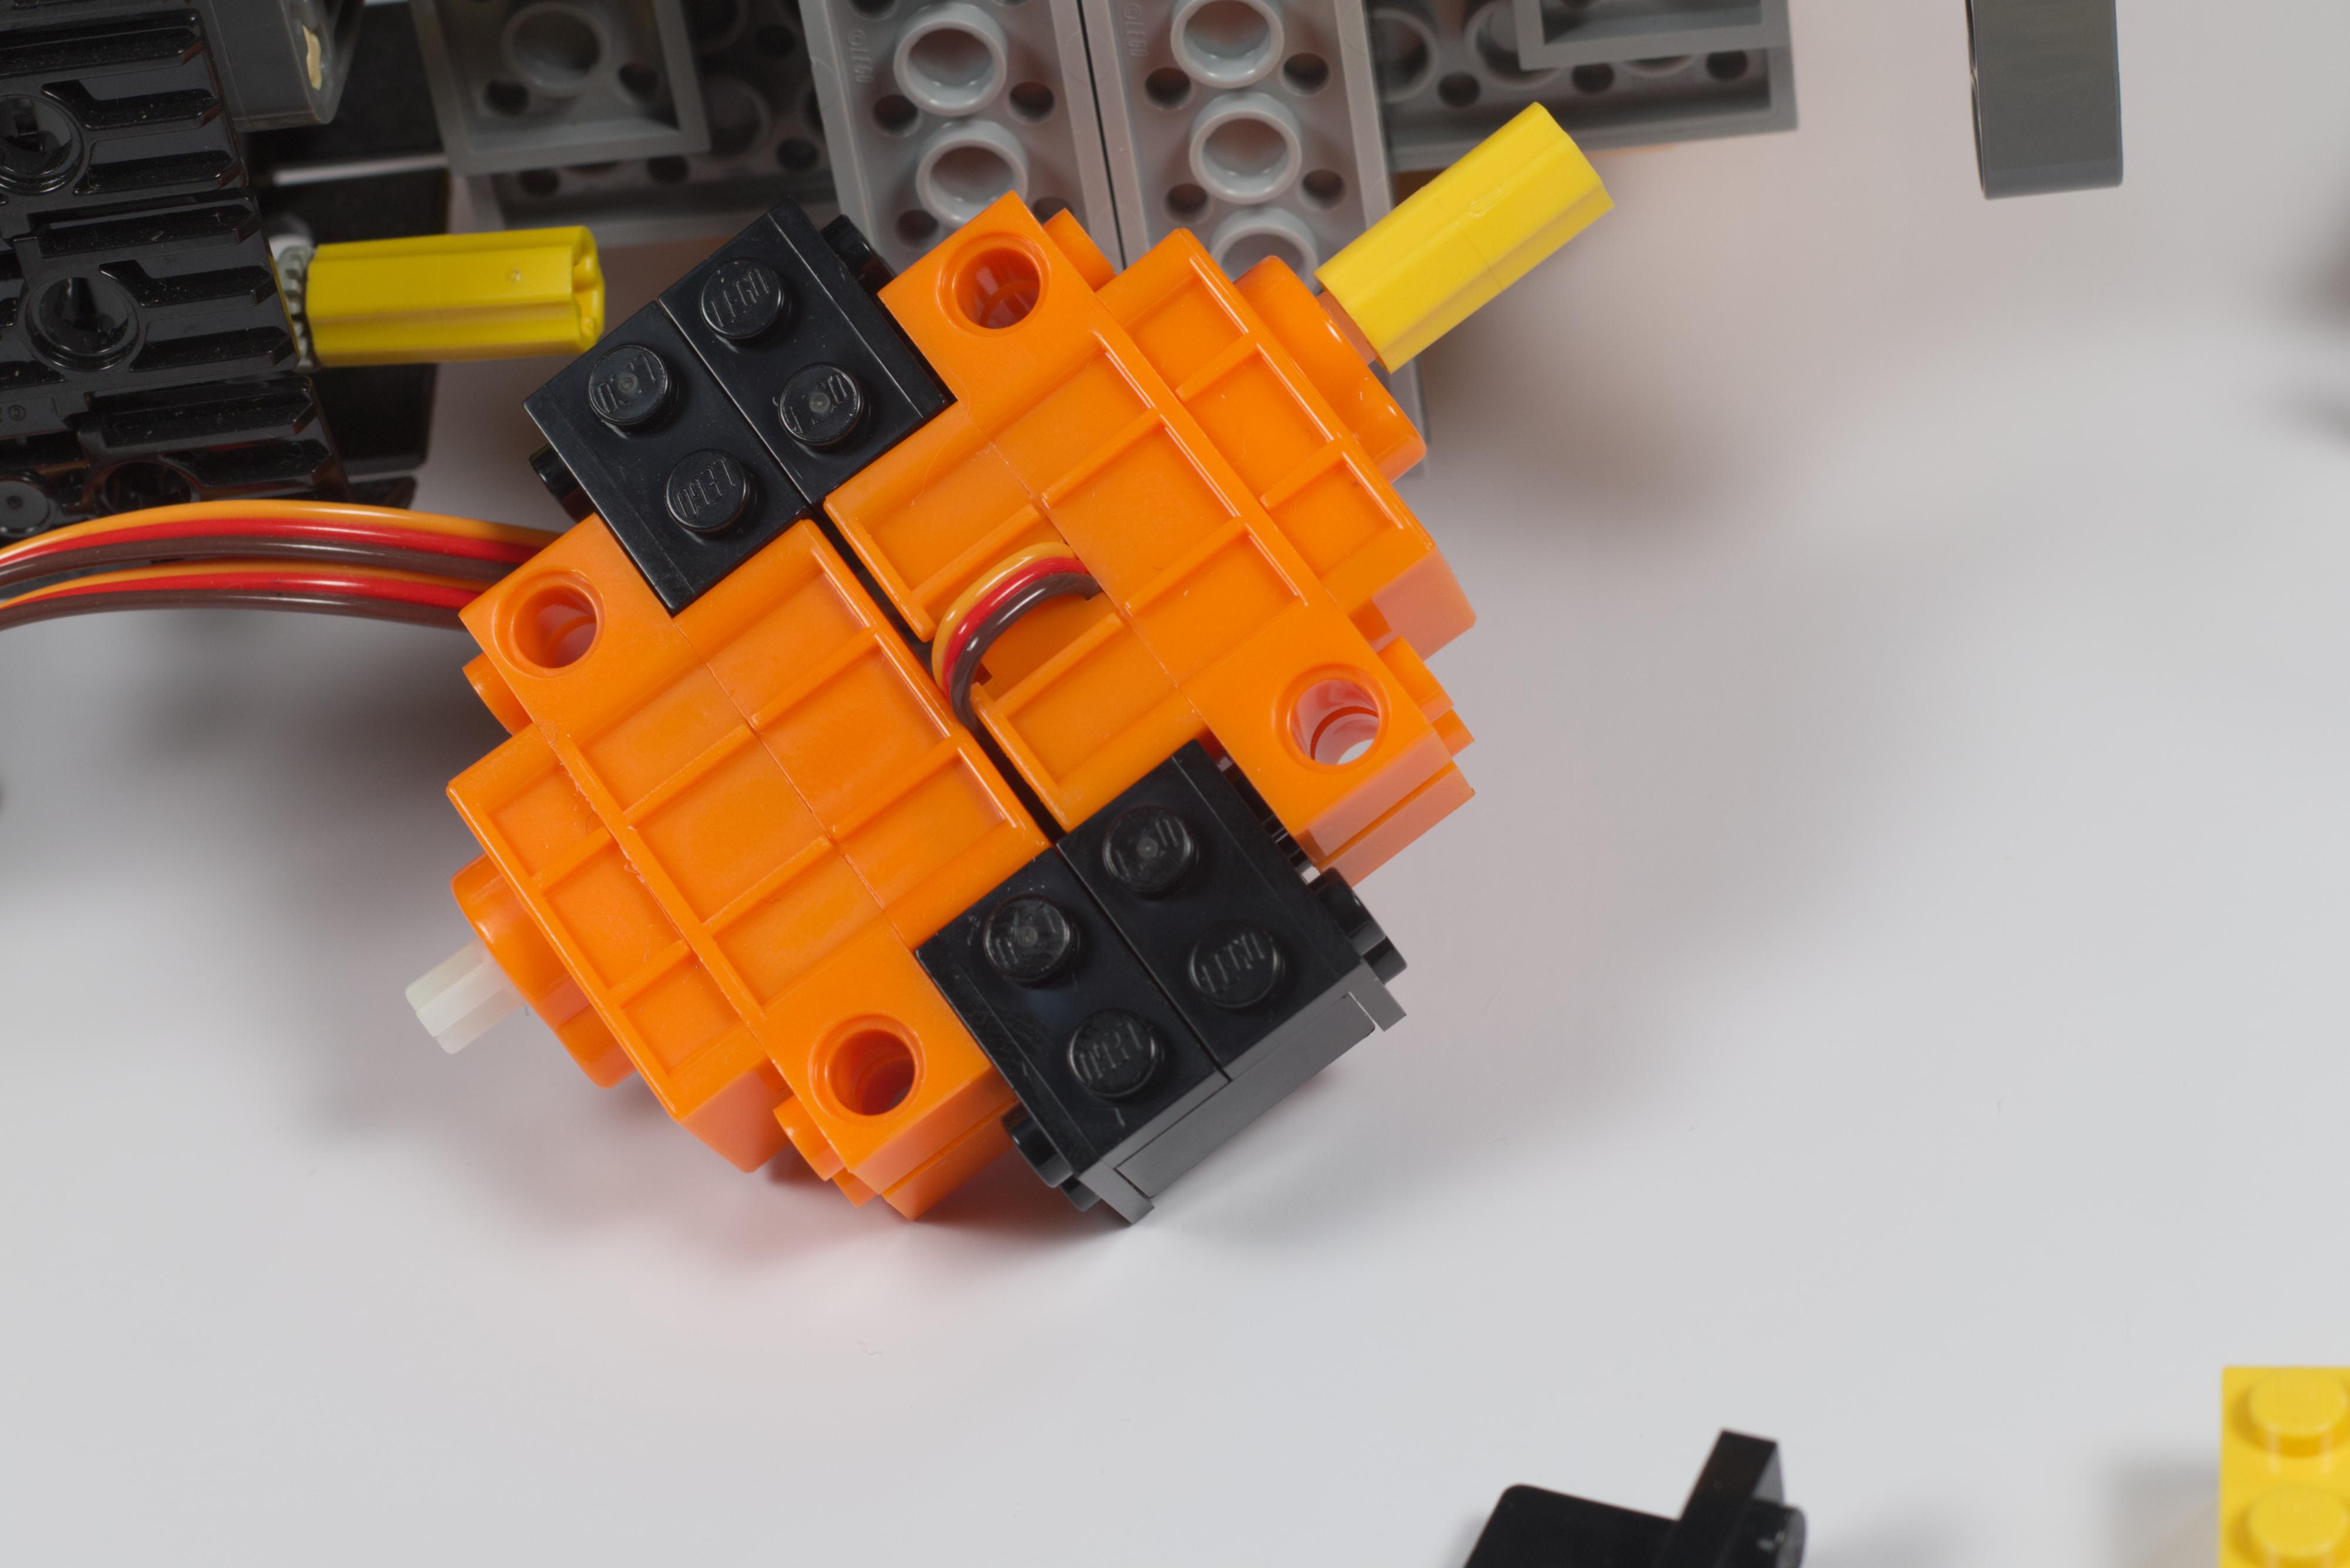
Connect two of the brackets to a 2x2 LEGO brick as shown. Make two of these assemblies and use them to connect the servo motors back to back.
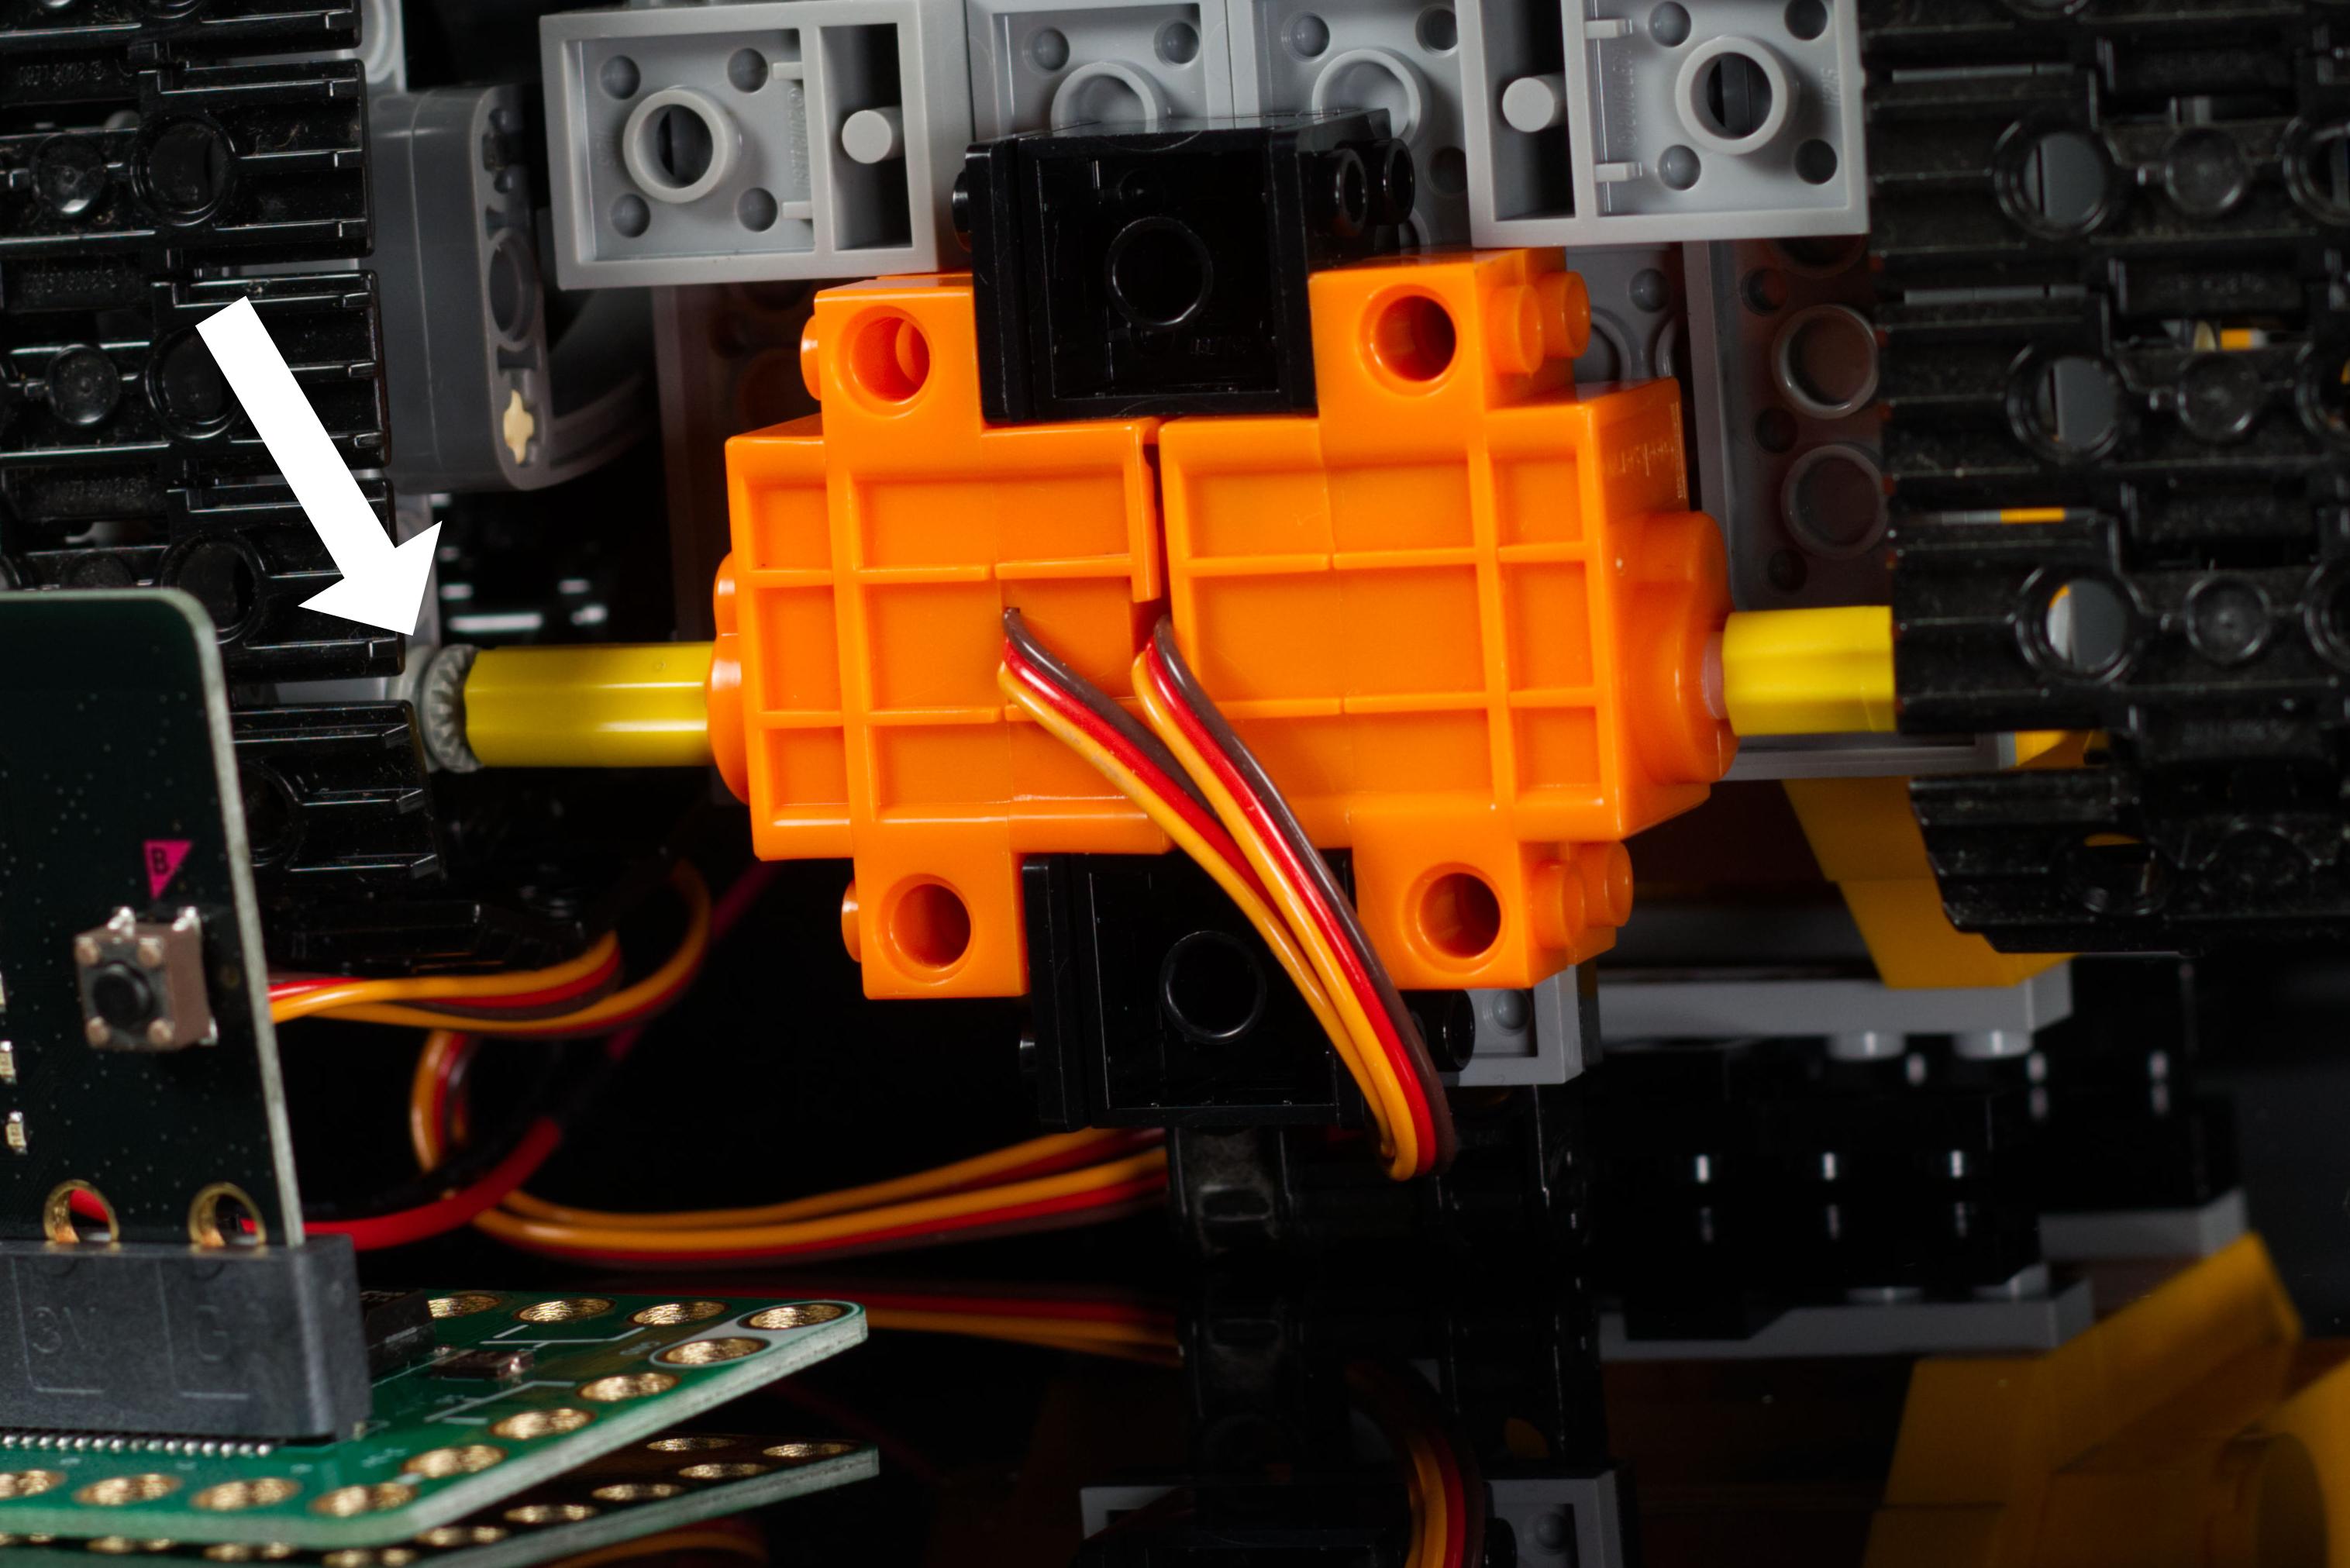
With the two servo motors connected you can attach the entire assembly to the bottom of WALL-E.
The LEGO Axle Connectors will go onto the shaft of the servo motors and connect to the LEGO Axle. (The LEGO Technic Bush is used to hold the axle in place laterally.)
Add Battery
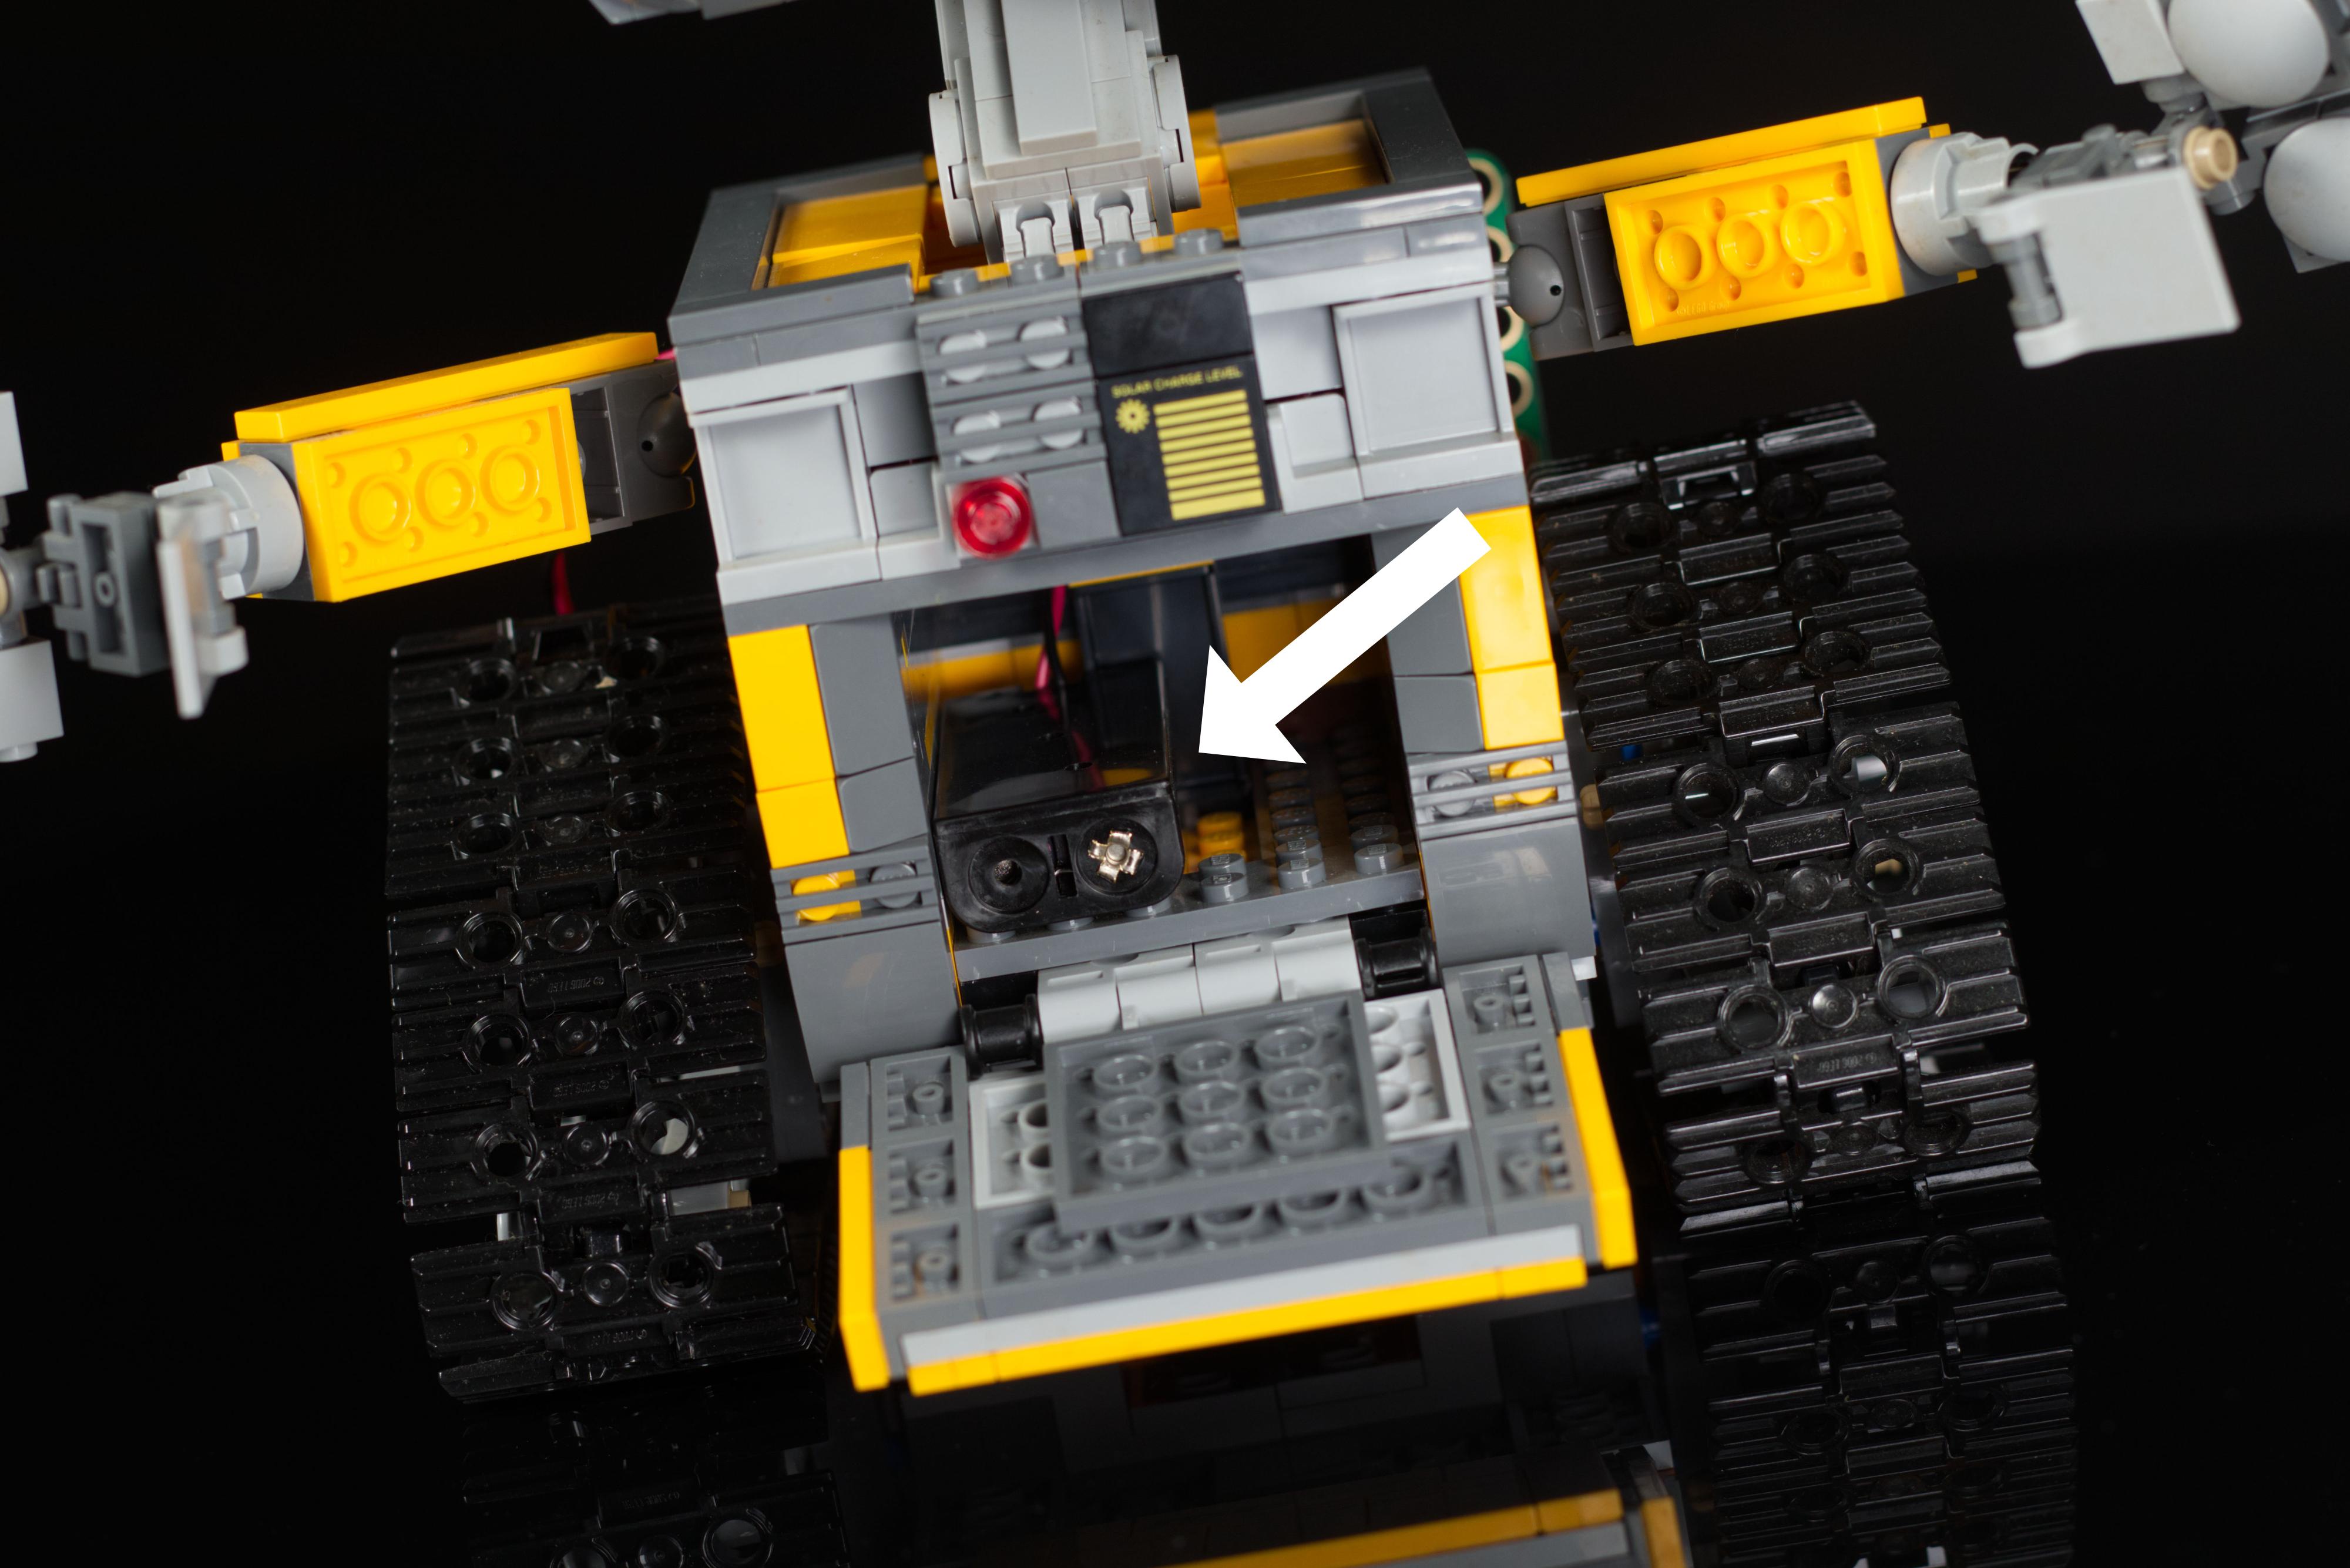
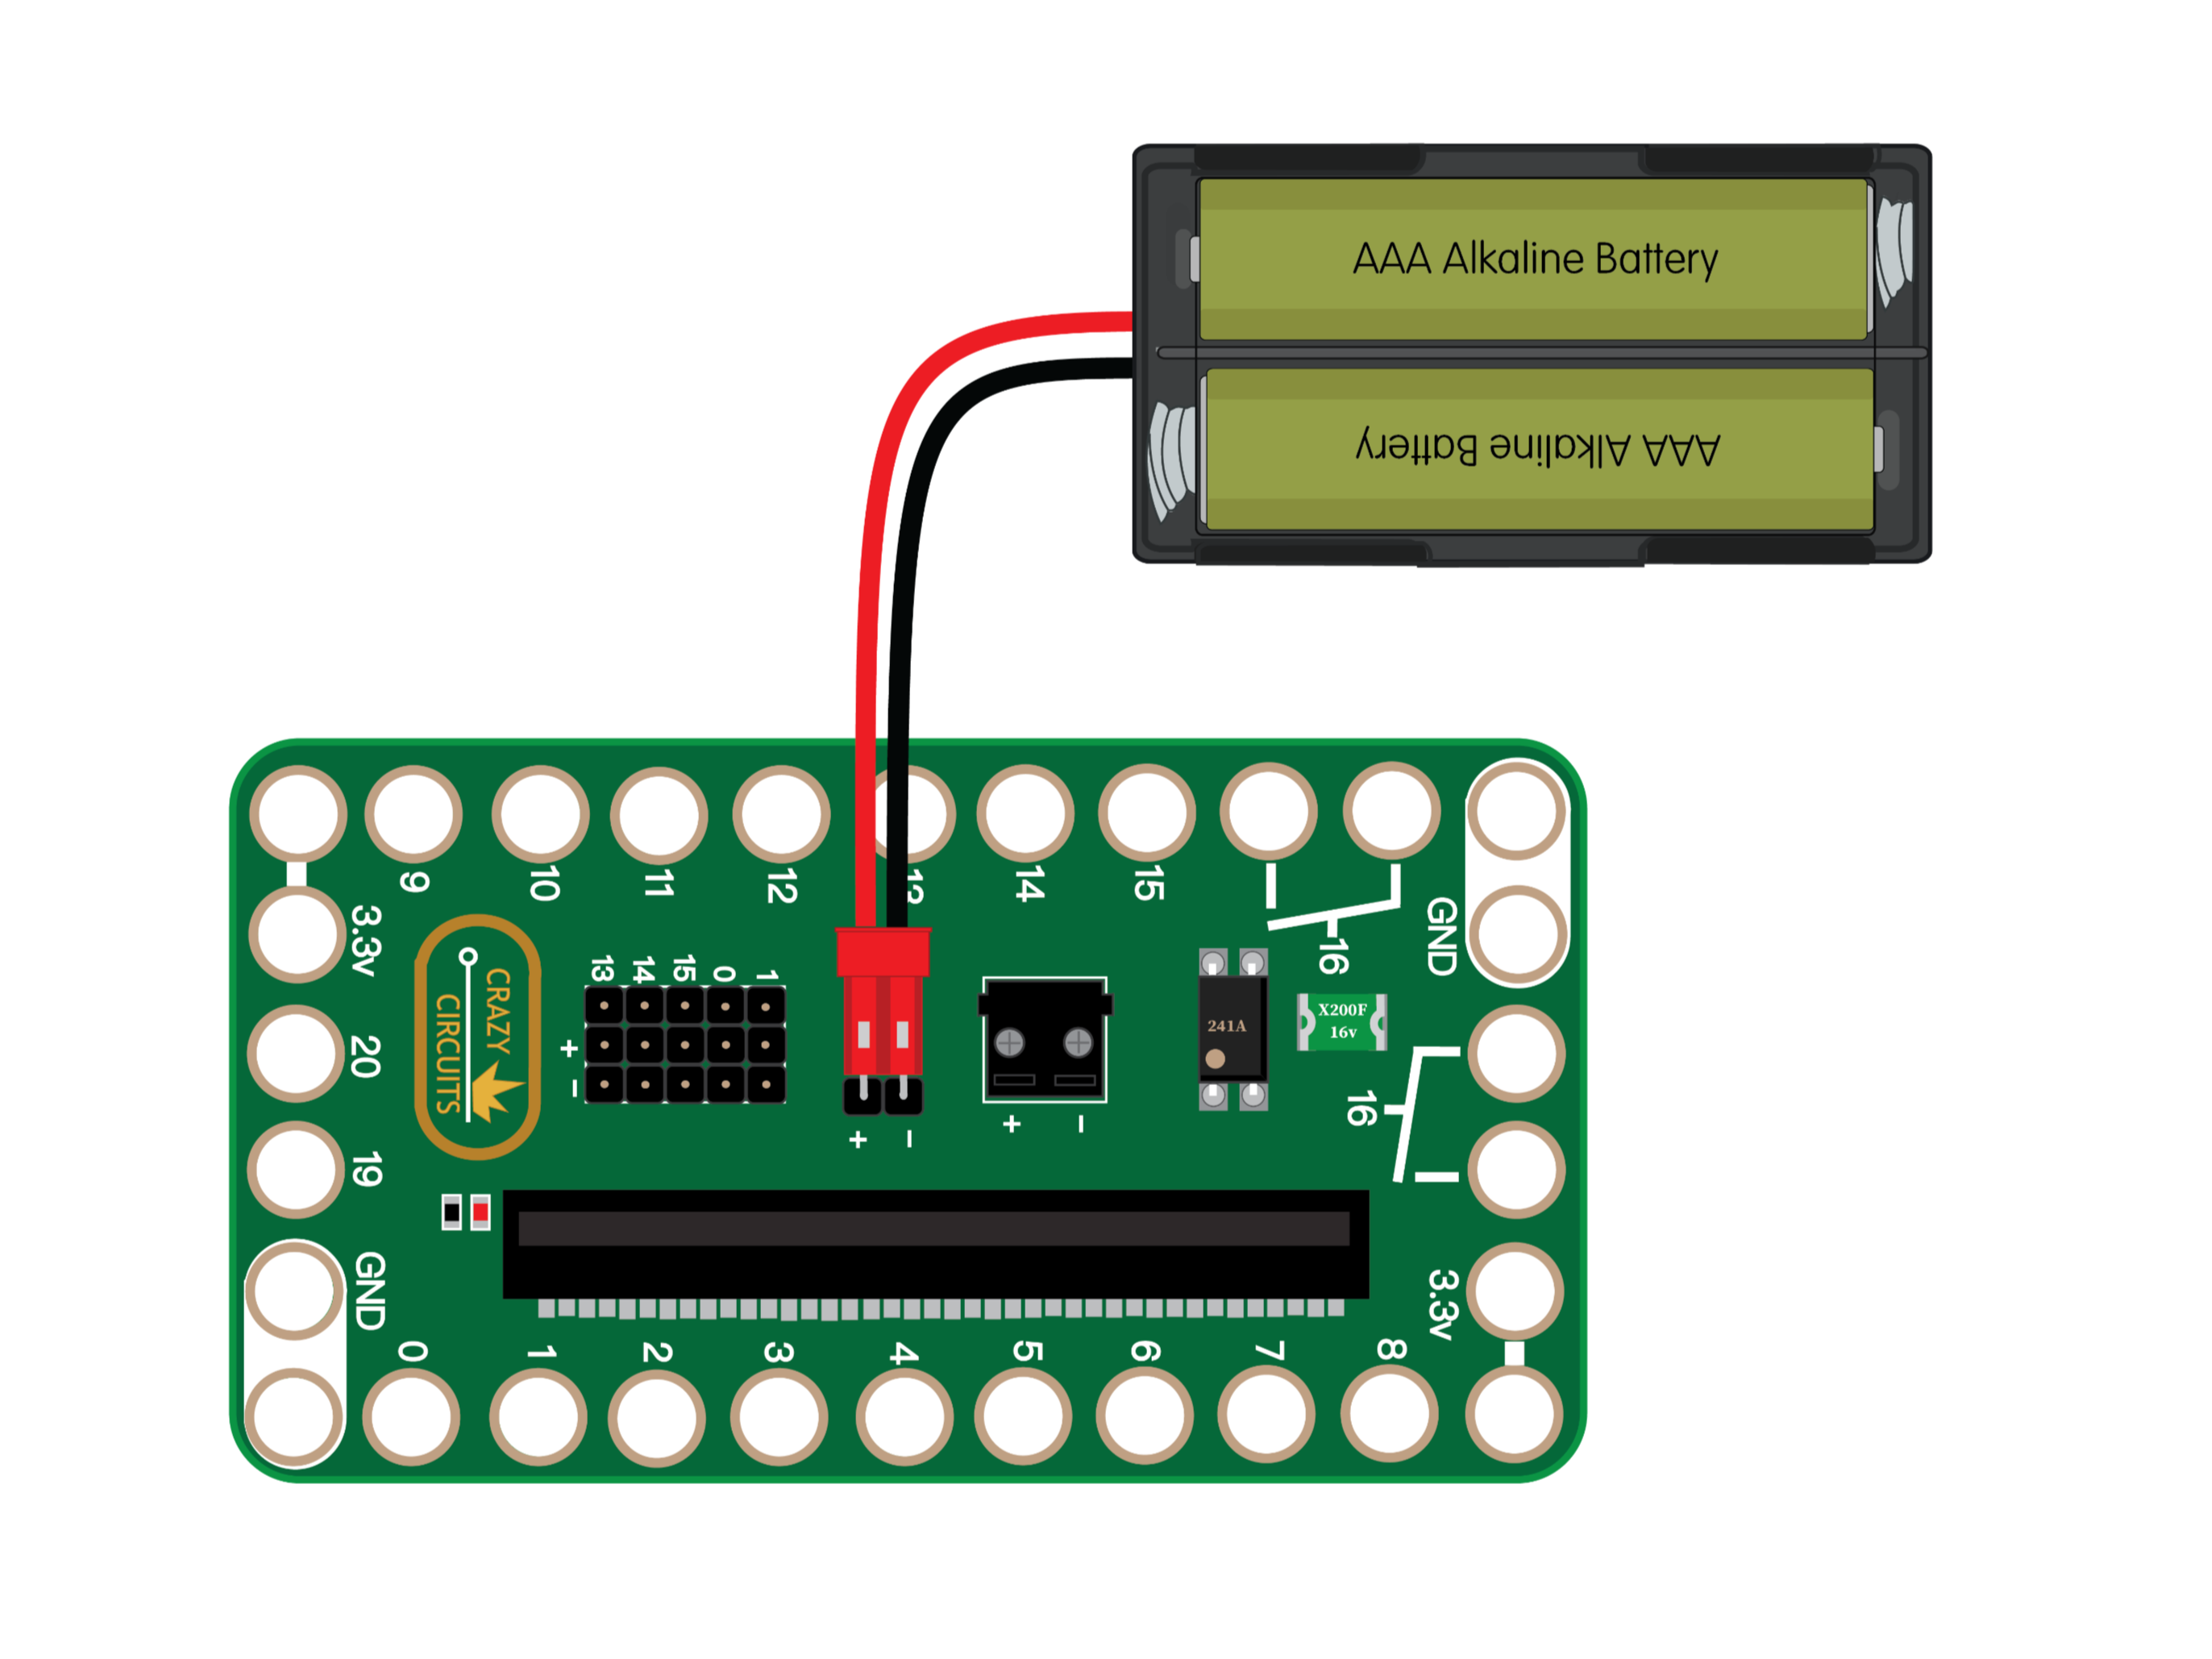
There is enough room in WALL-E's compartment to store a 2 AAA battery pack.
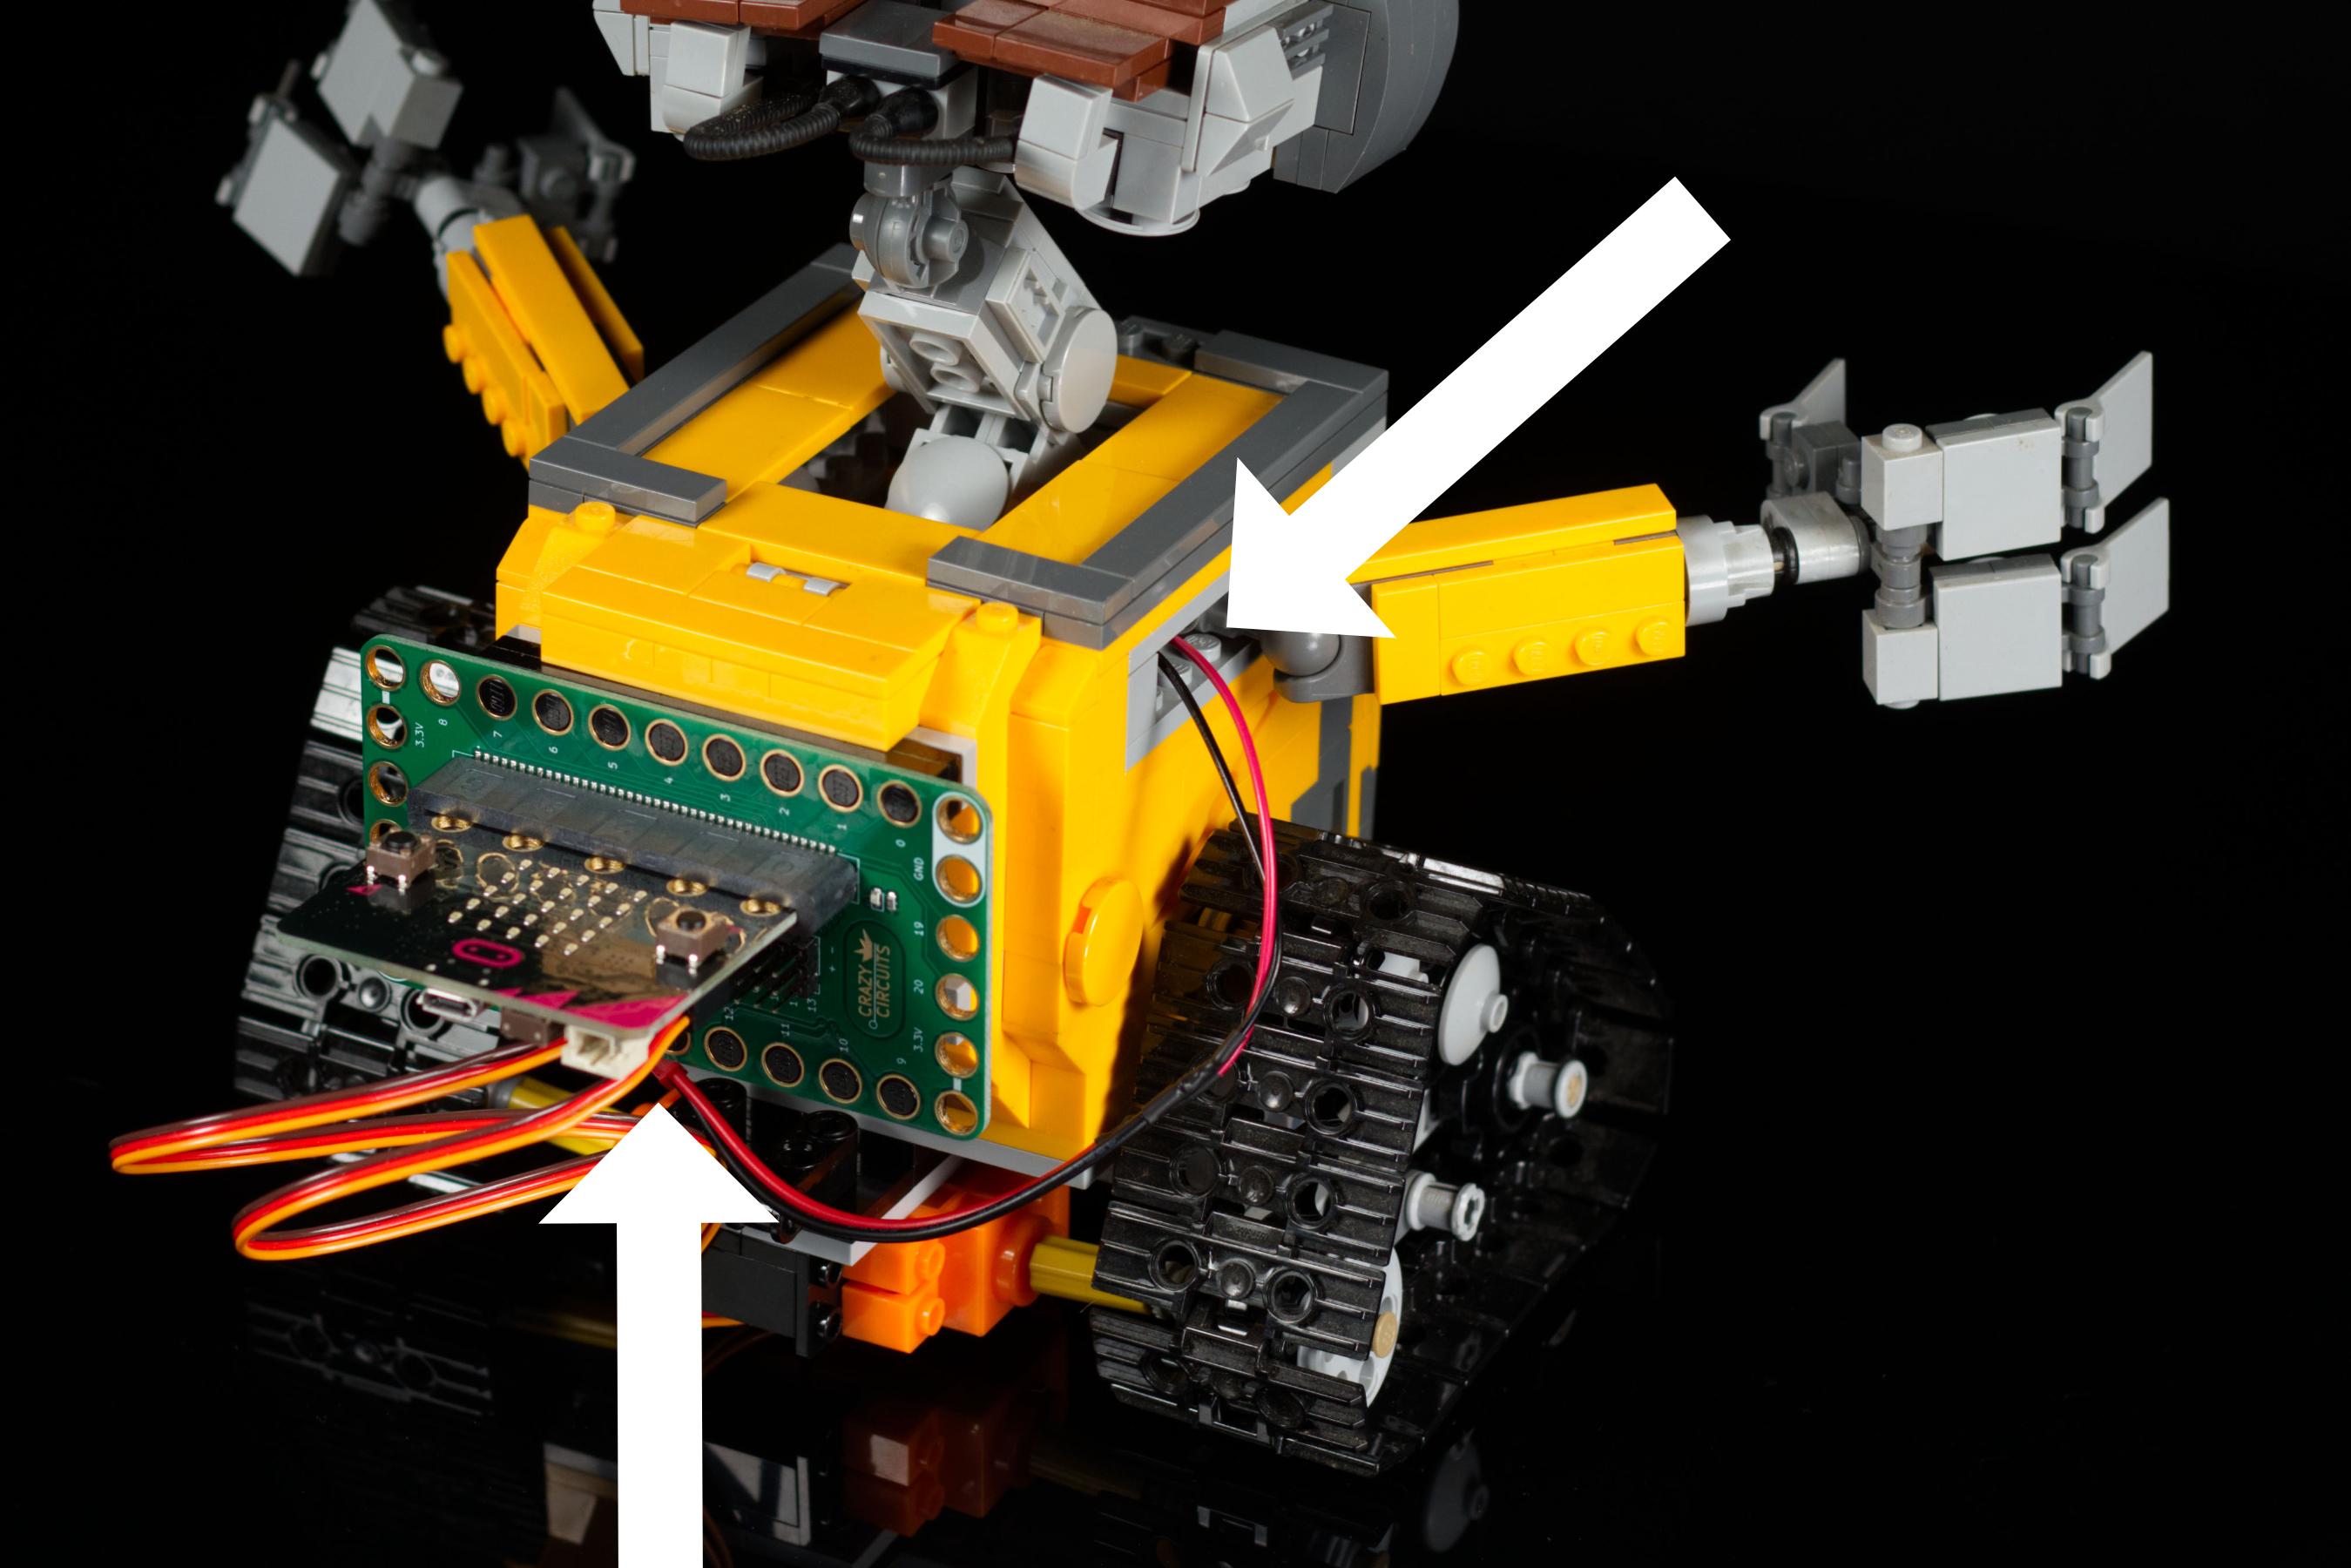
We were able to thread the battery pack wires through one of the gaps in WALL-E so we could run the connector to the Bit Board.
Without a power switch we just plug and unplug the battery pack to turn on and off WALL-E.
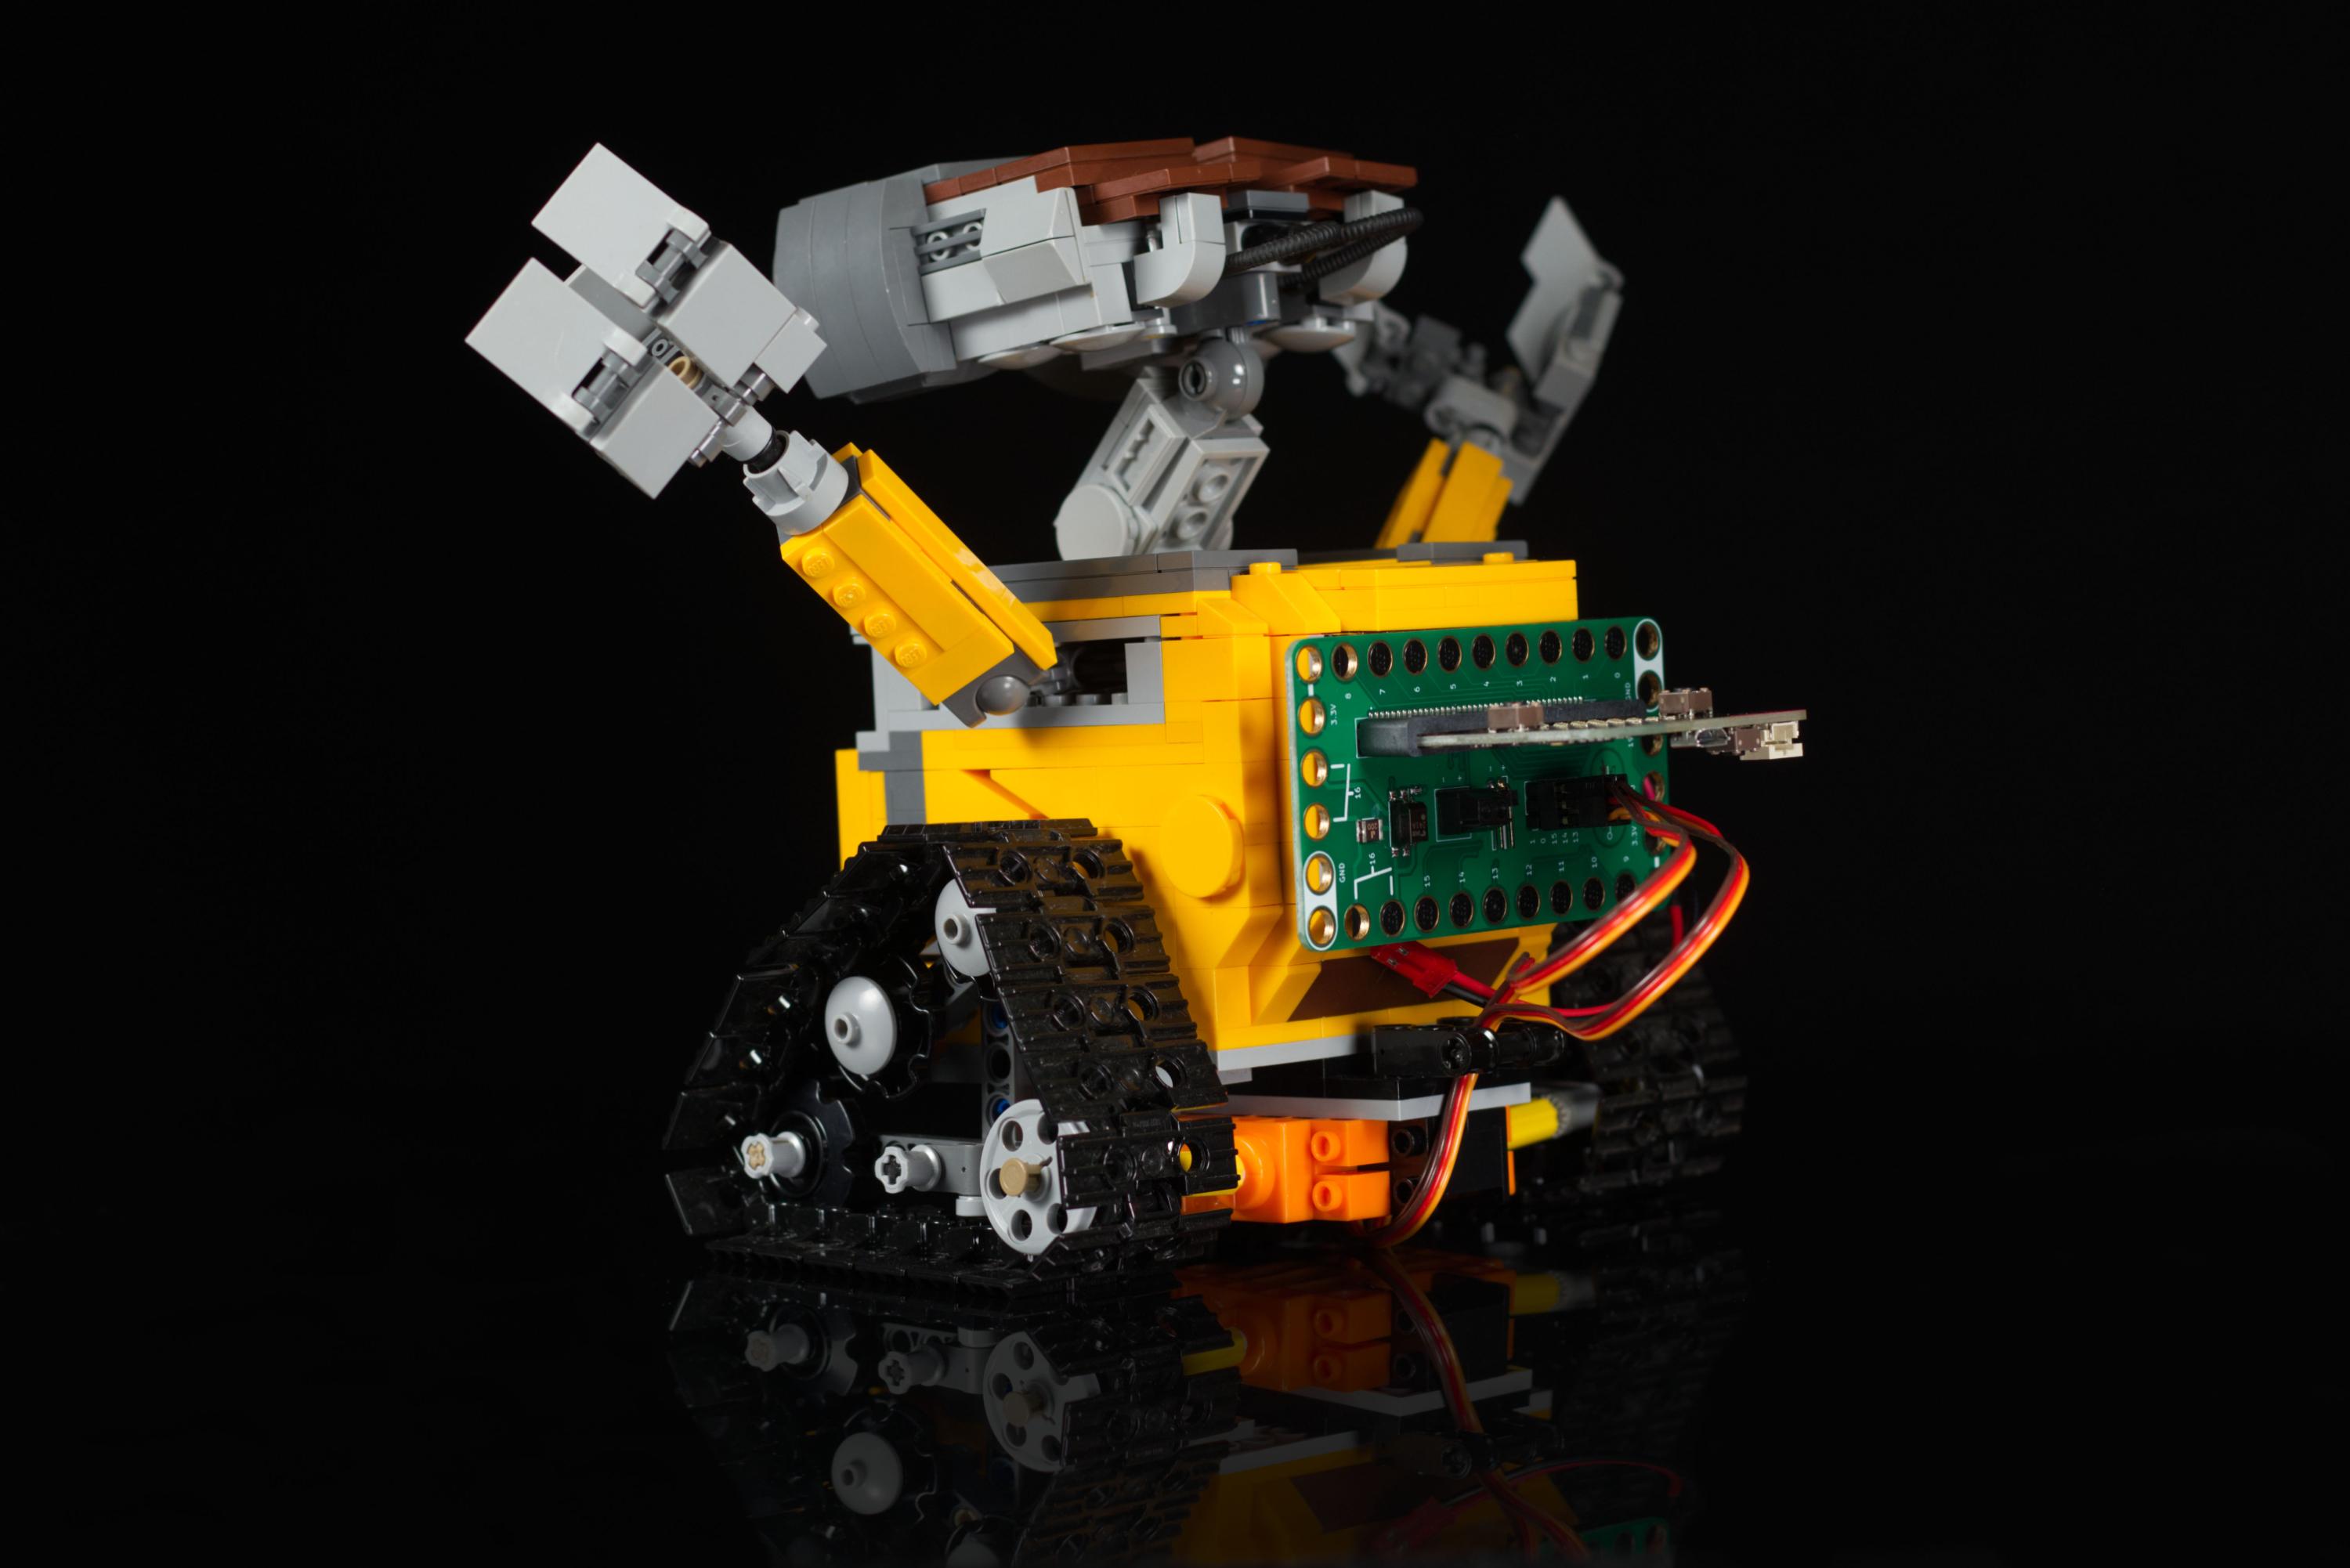
Add Bit Board
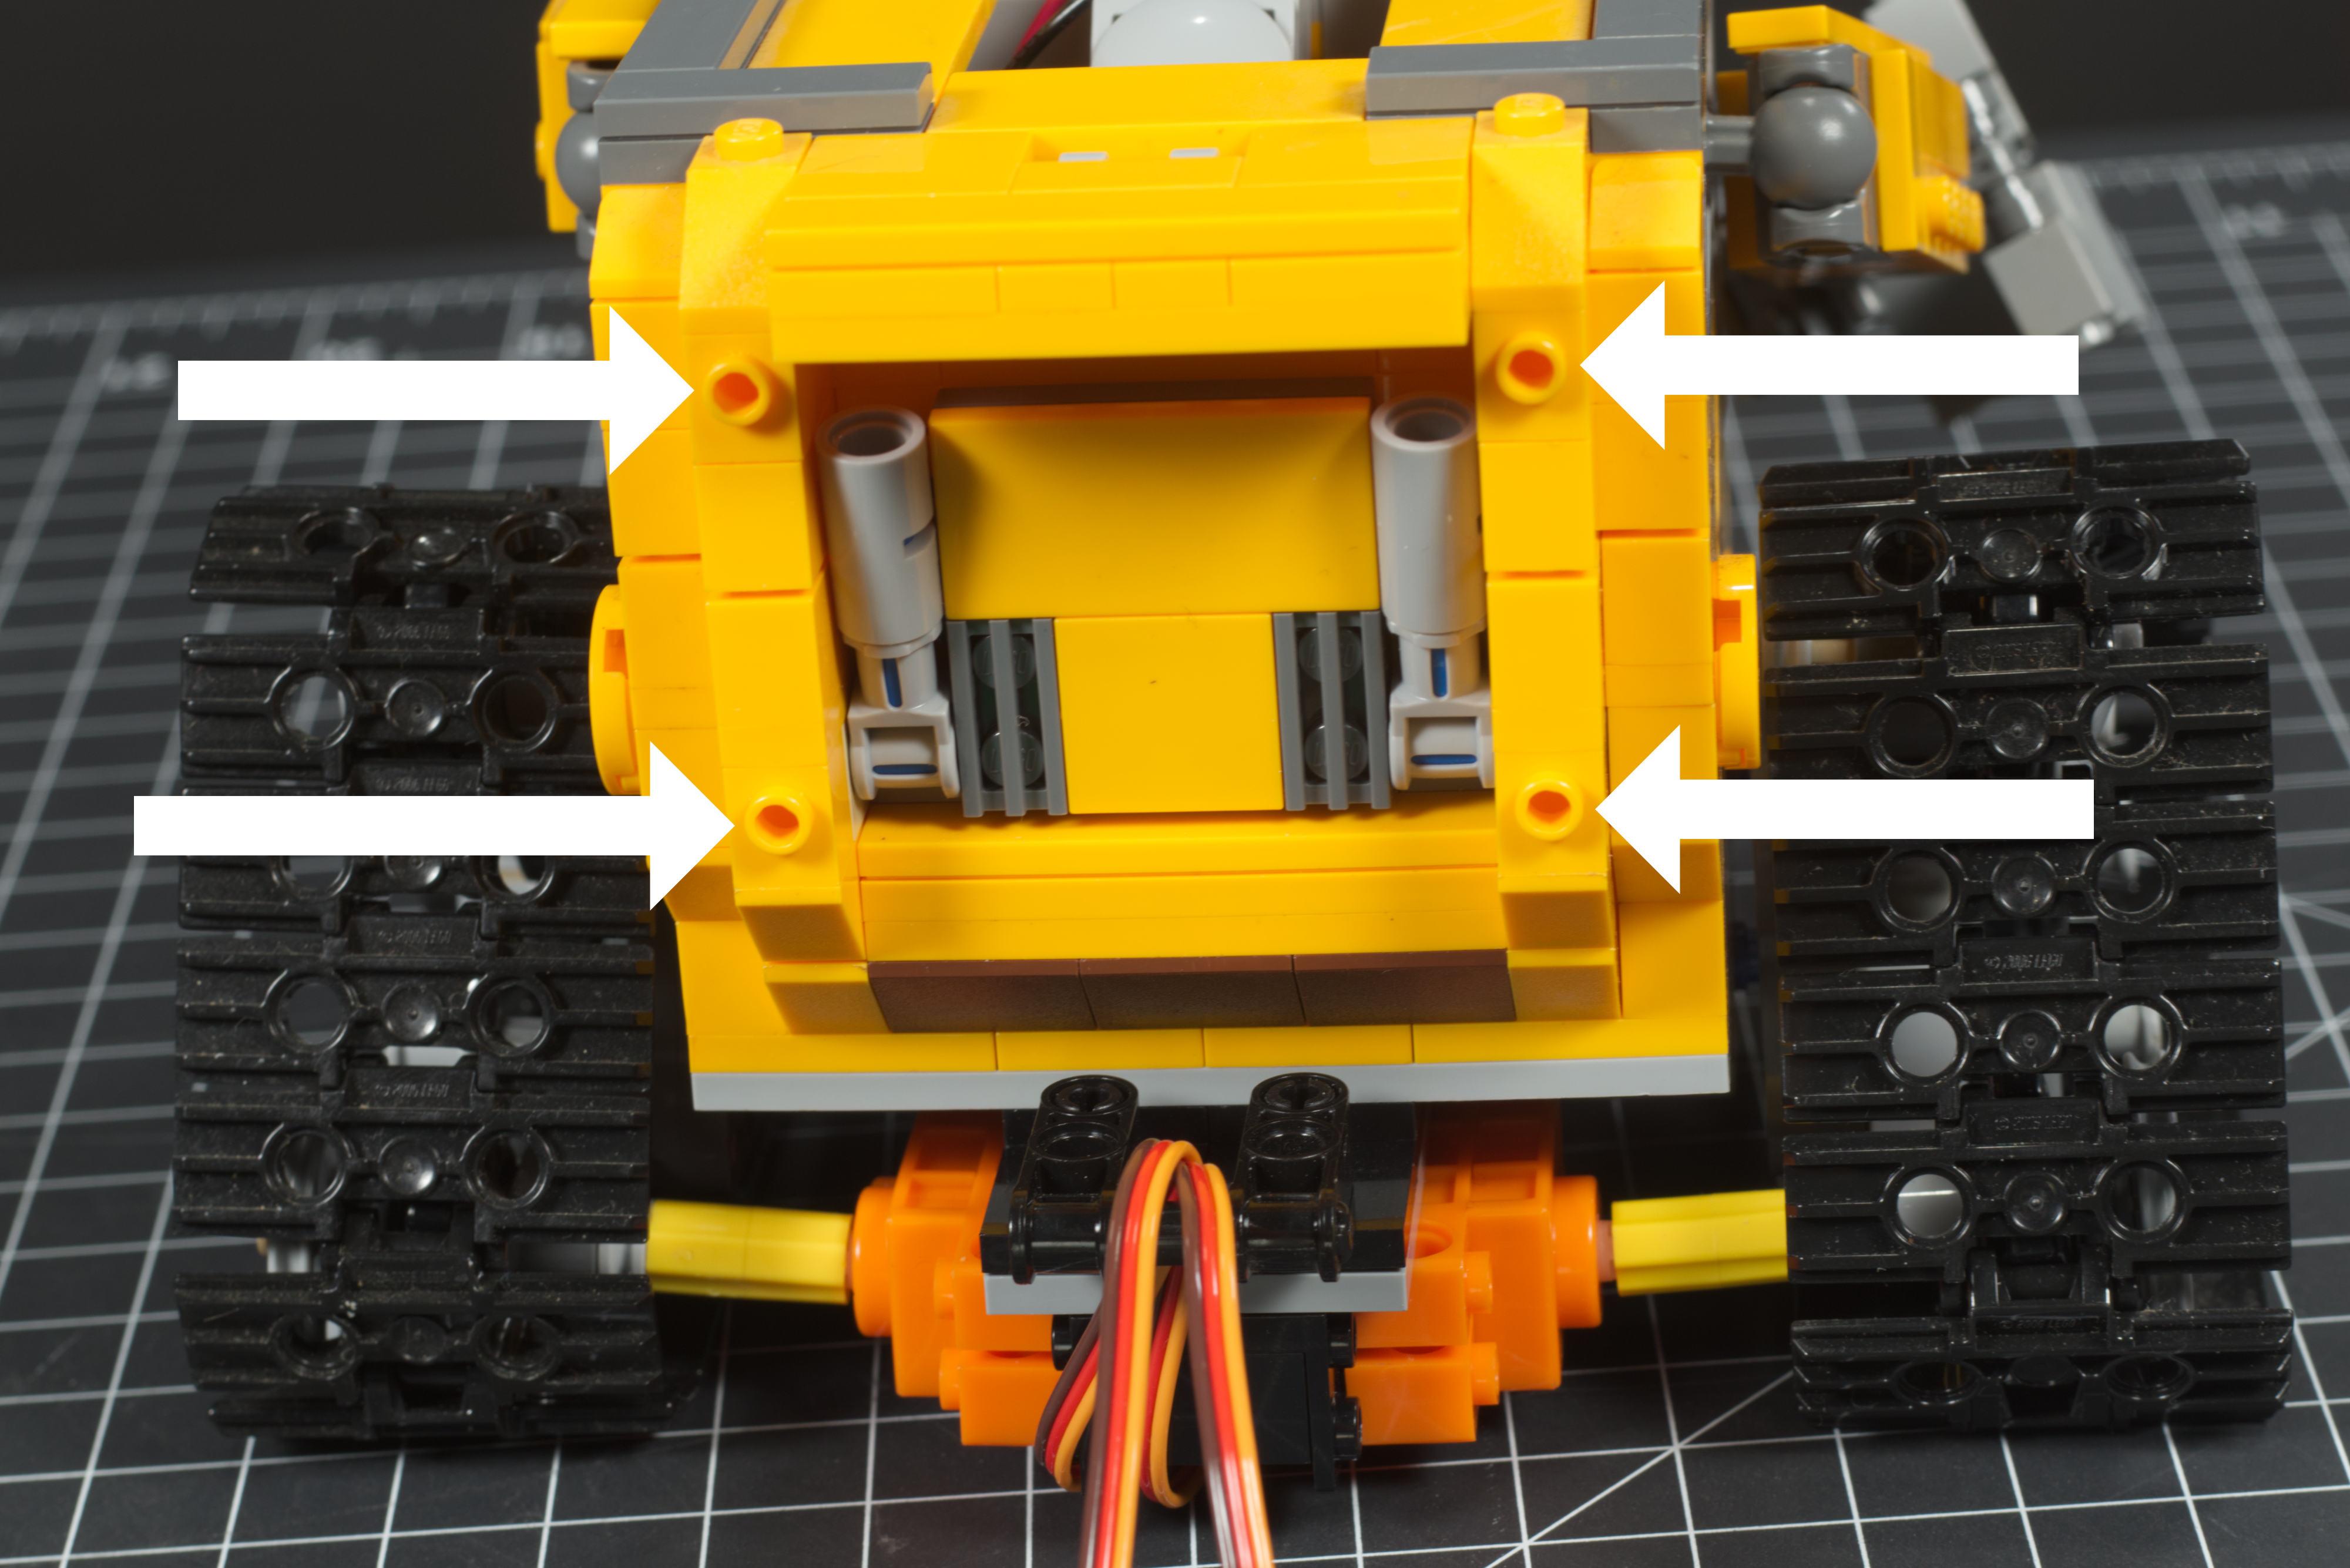
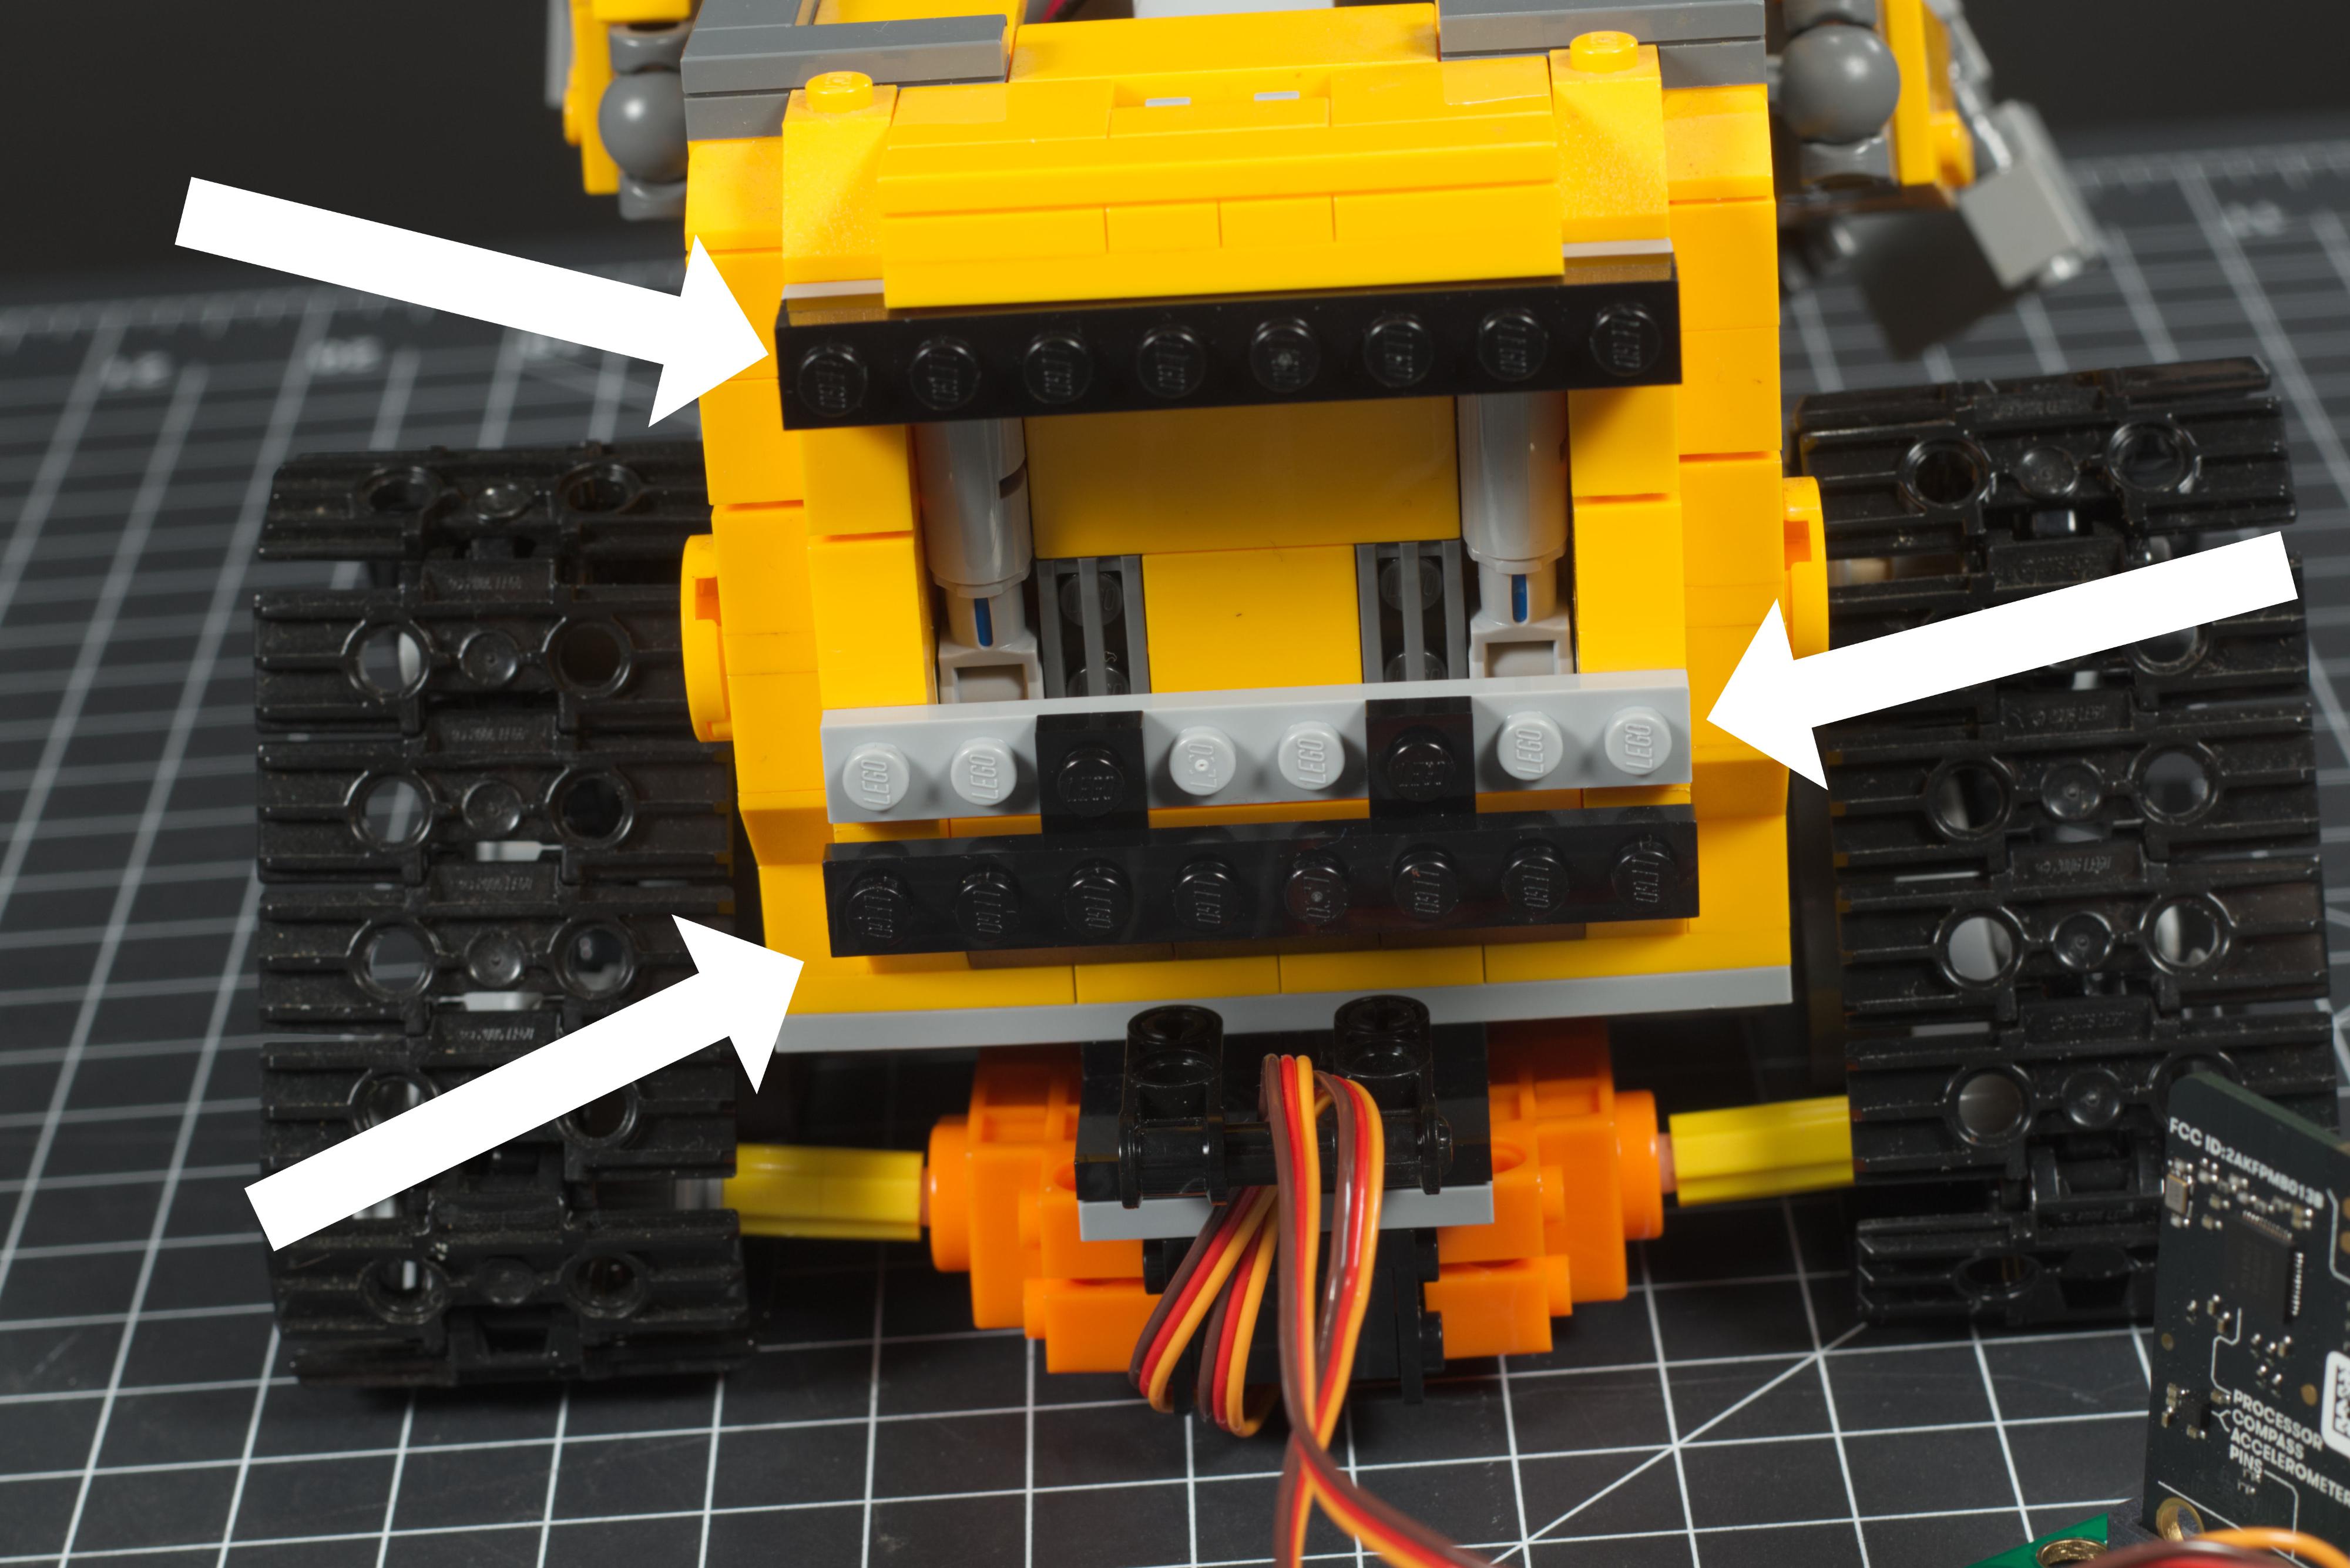
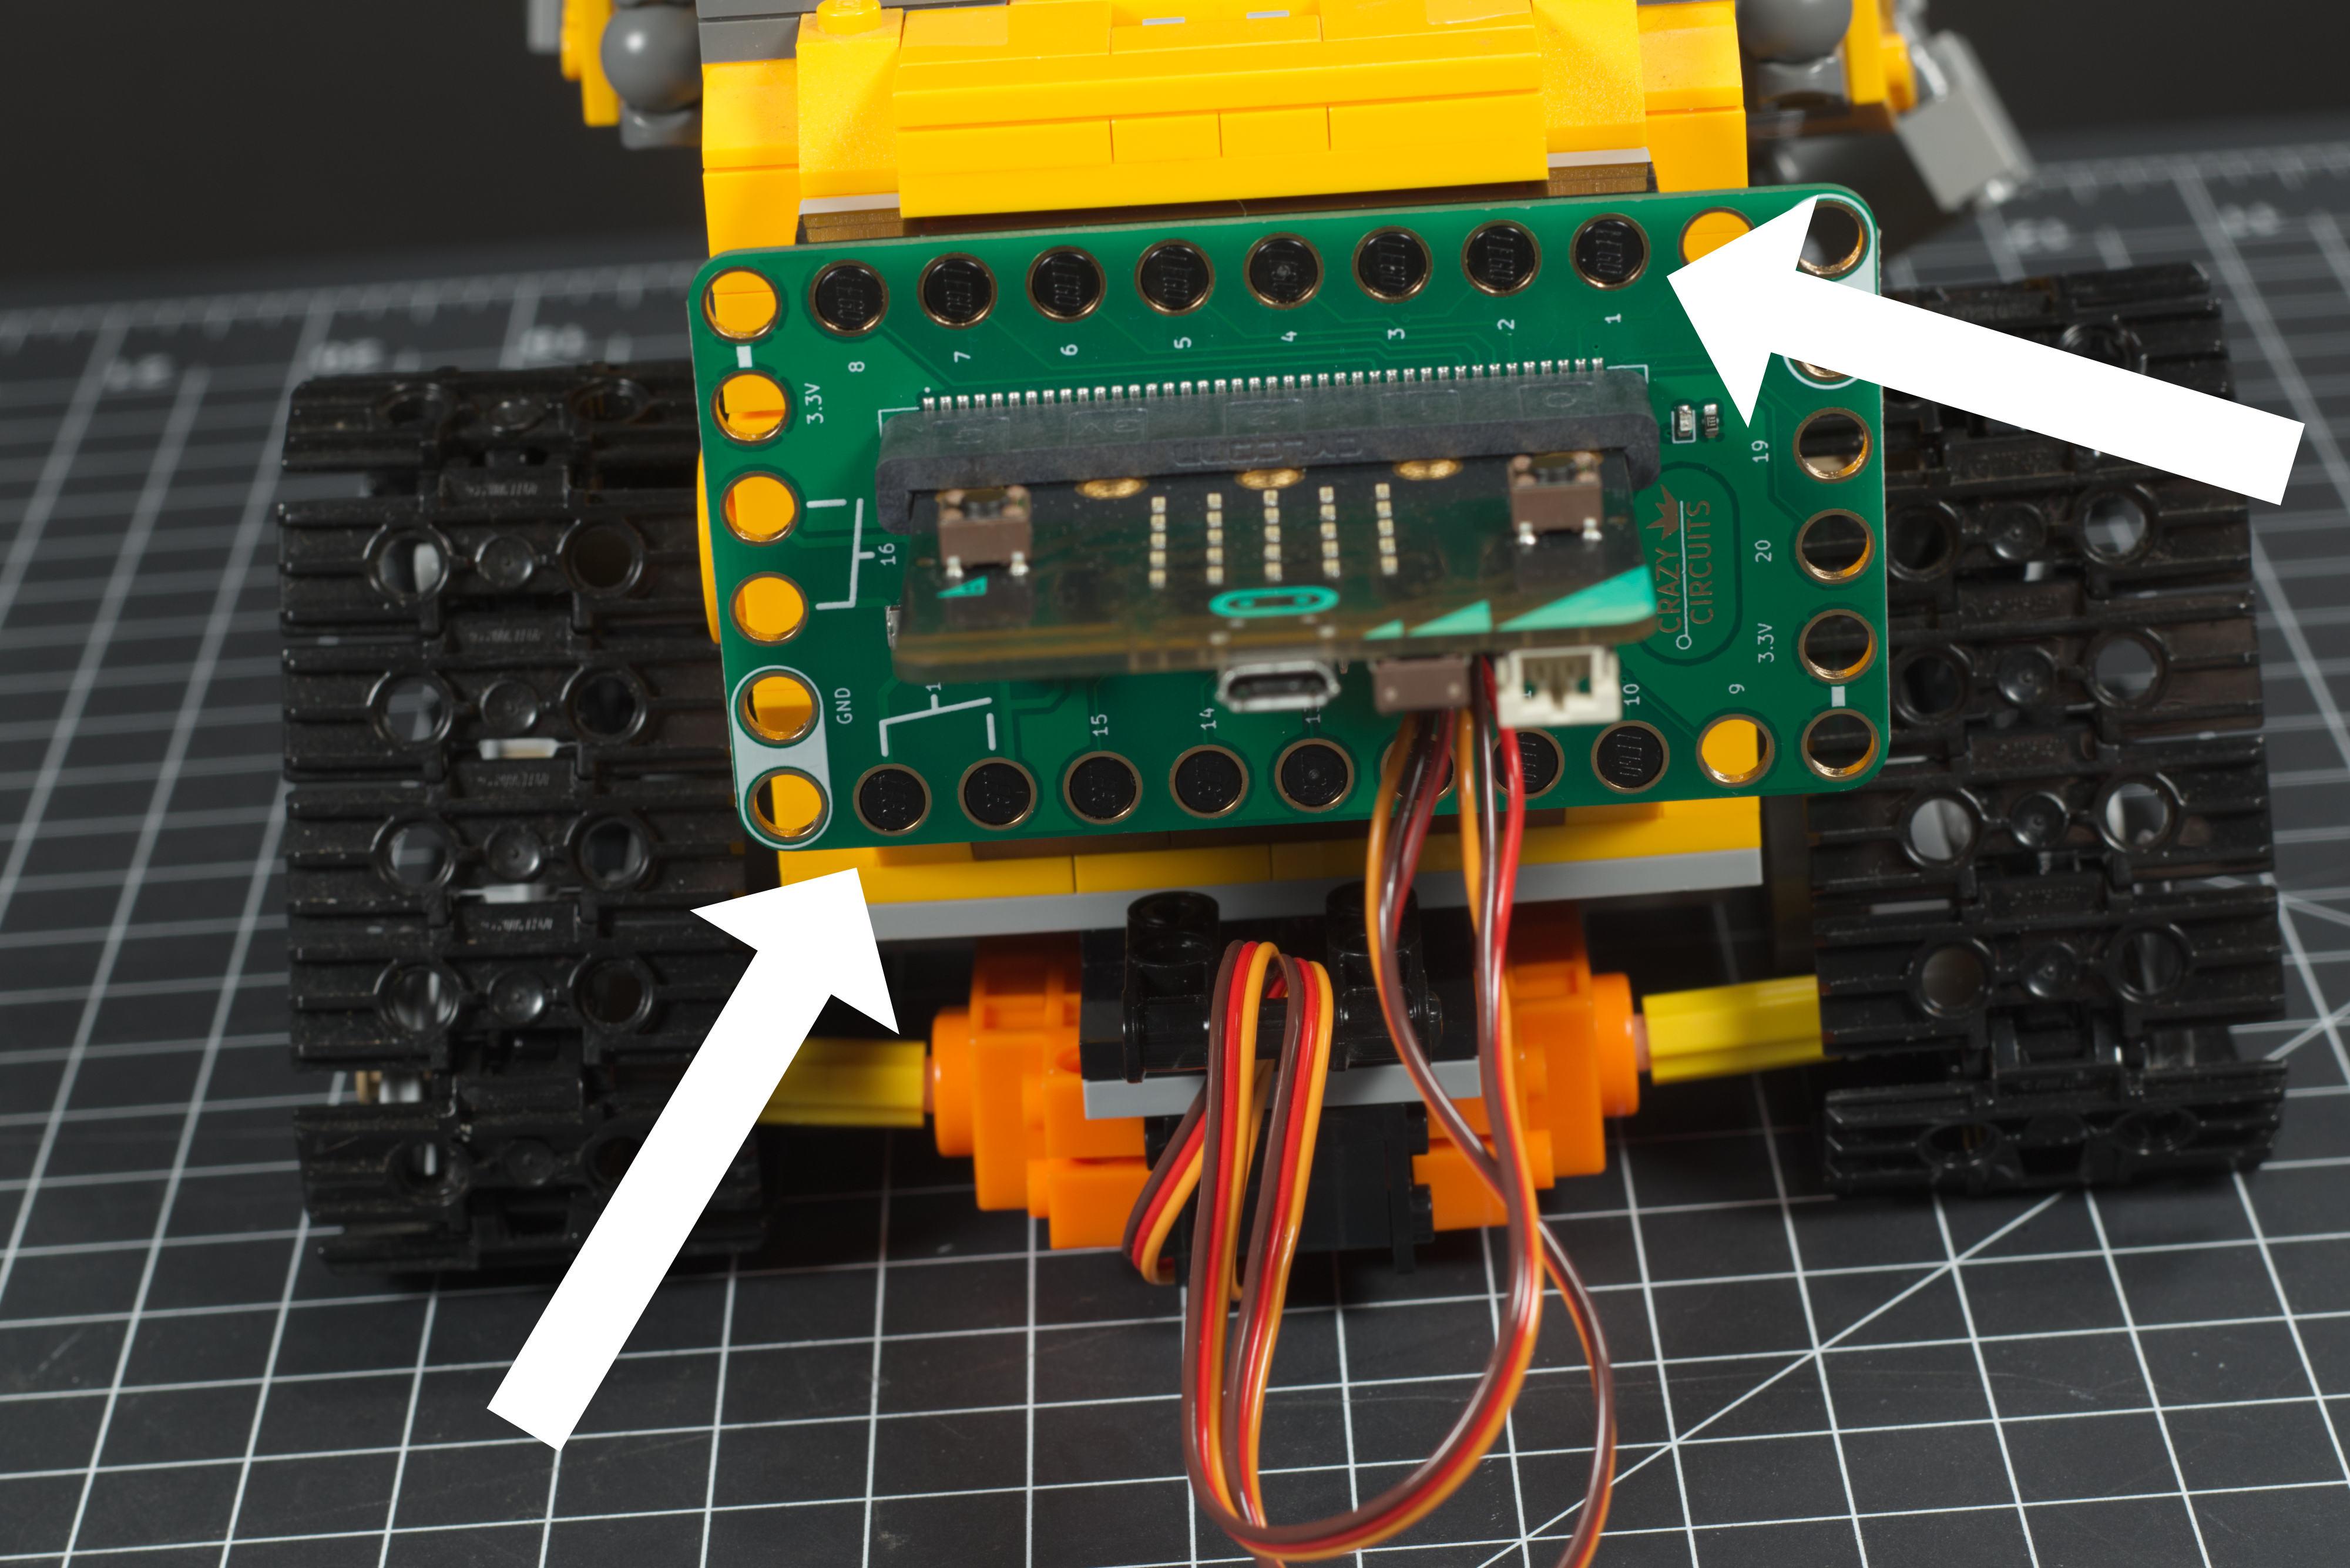
To attach the Bit Board to the back of WALL-E we used a few 1 x 8 LEGO plates and some 1 x 2 LEGO plates to offset the bottom to match the holes on the Bit Board.
You may find other options for mounting the Bit Board but this worked for us and allowed us to easily plug in the battery pack and the servos.
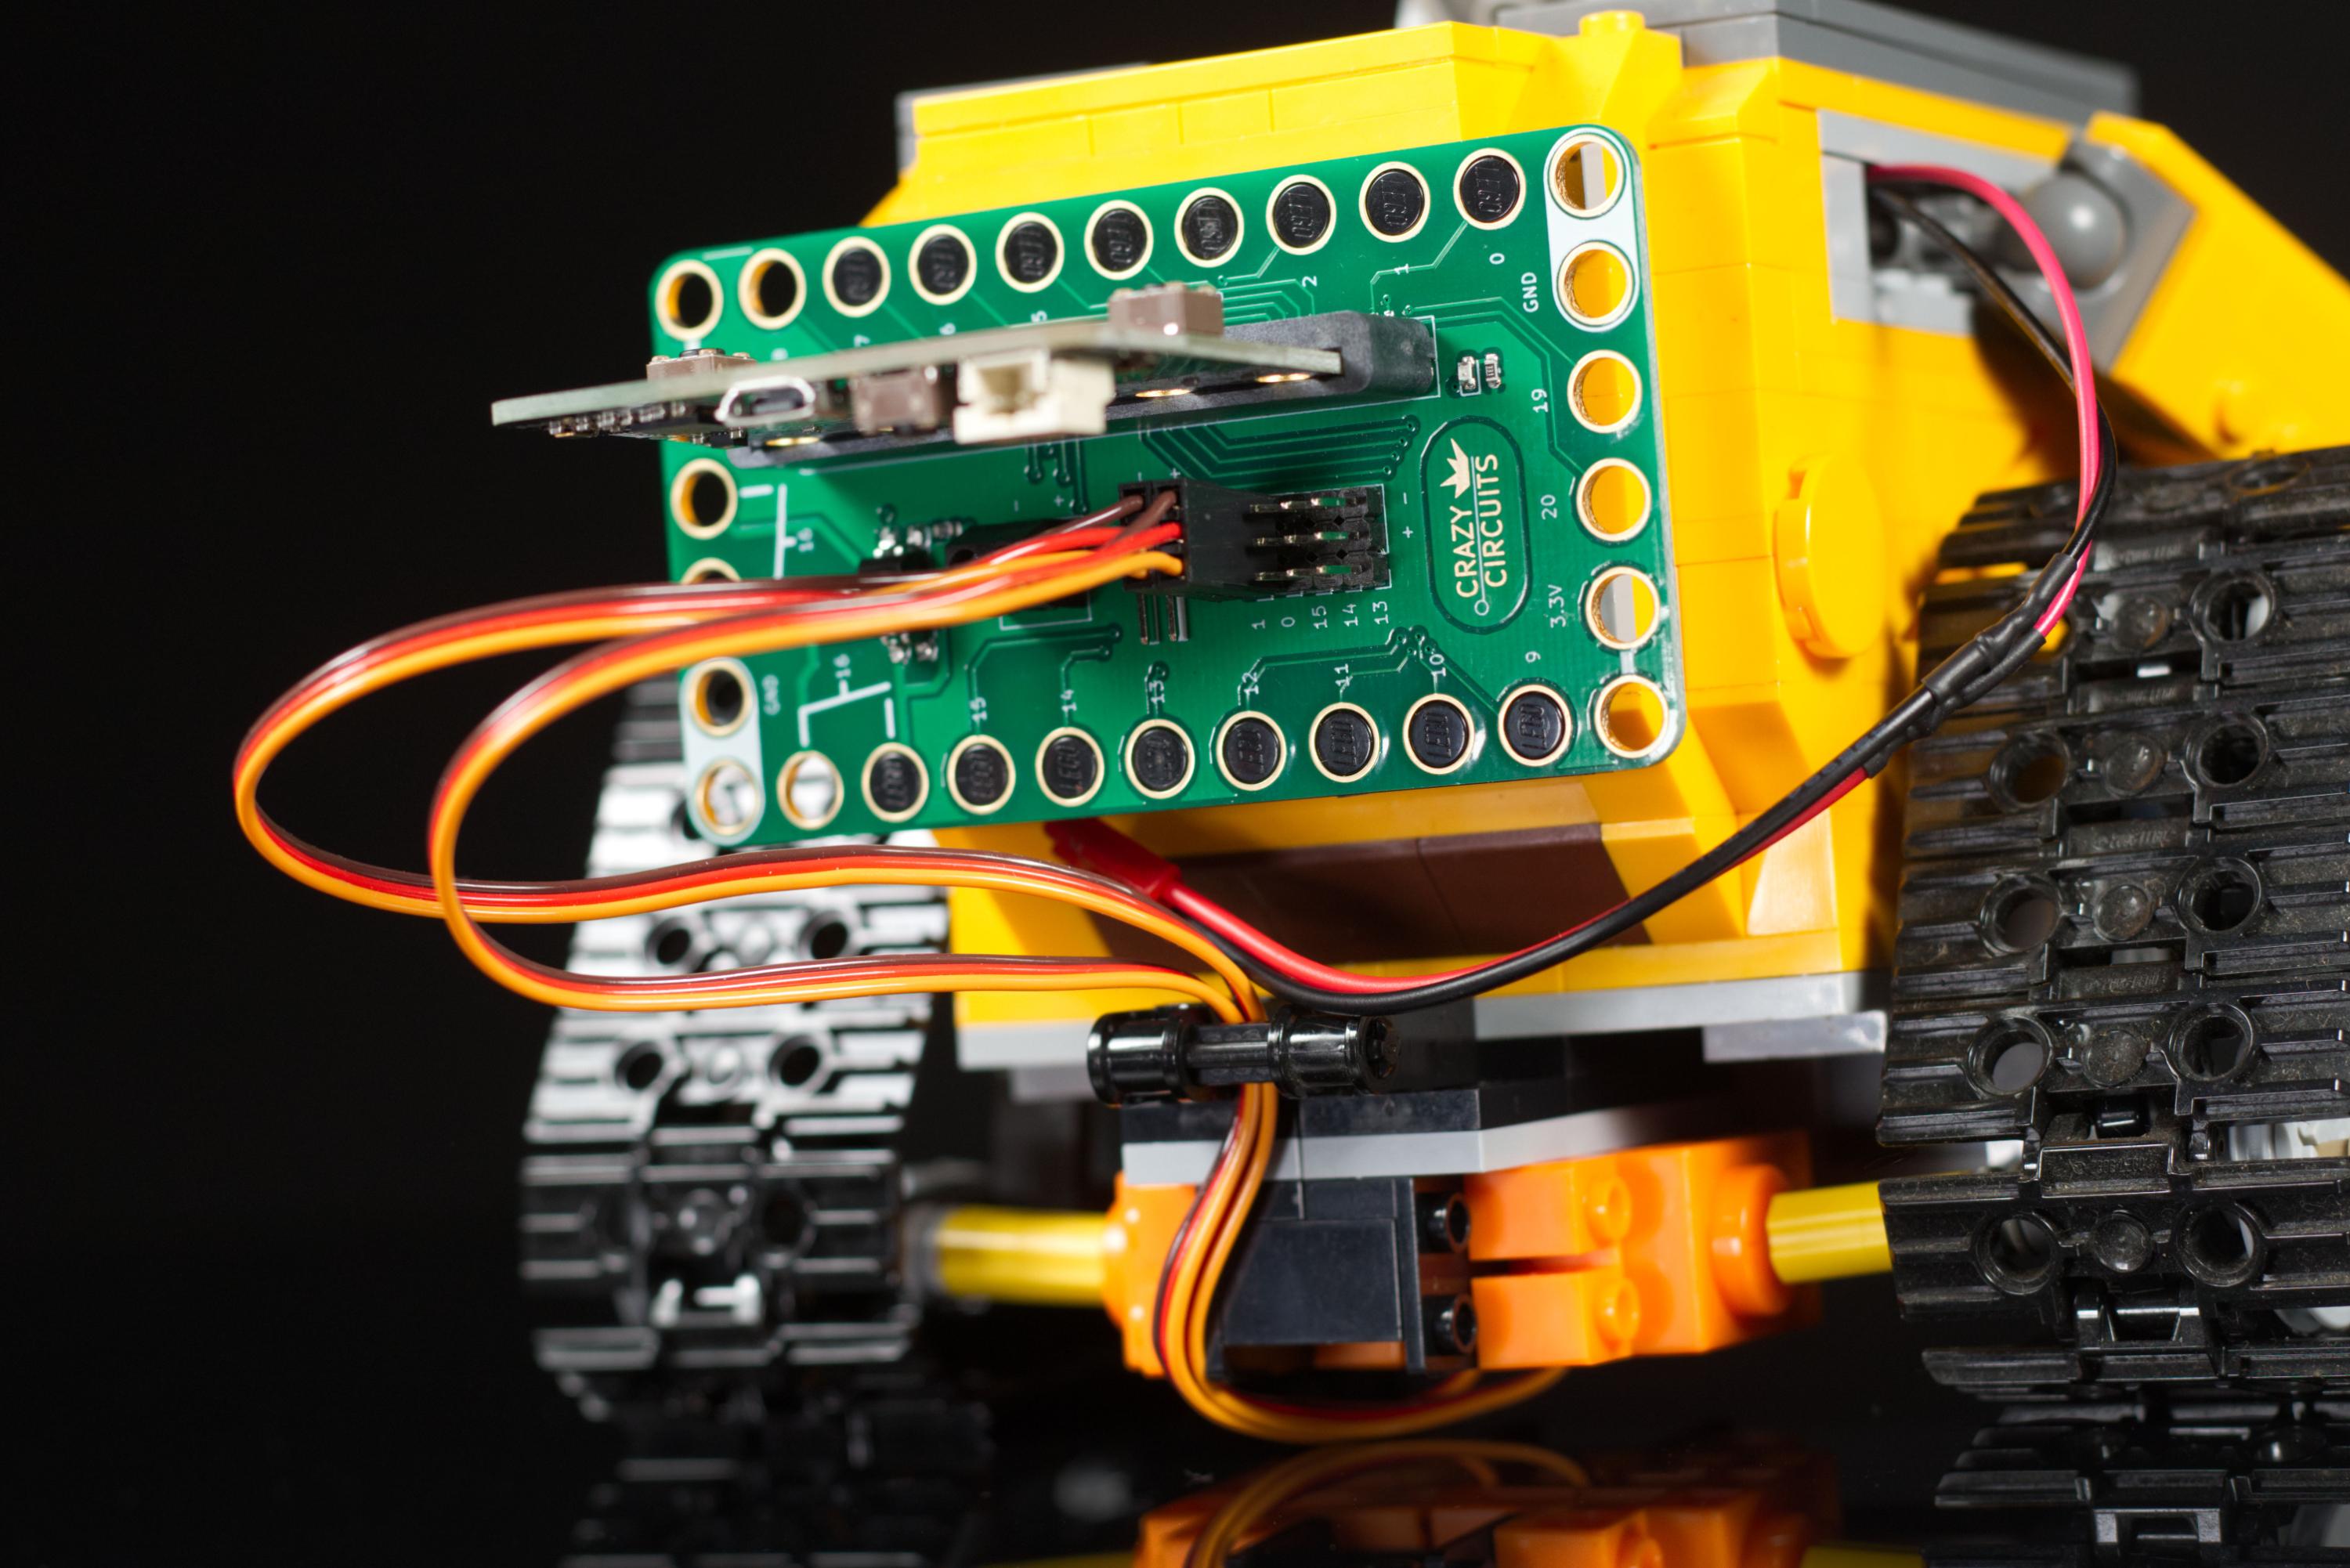
Connect Servos
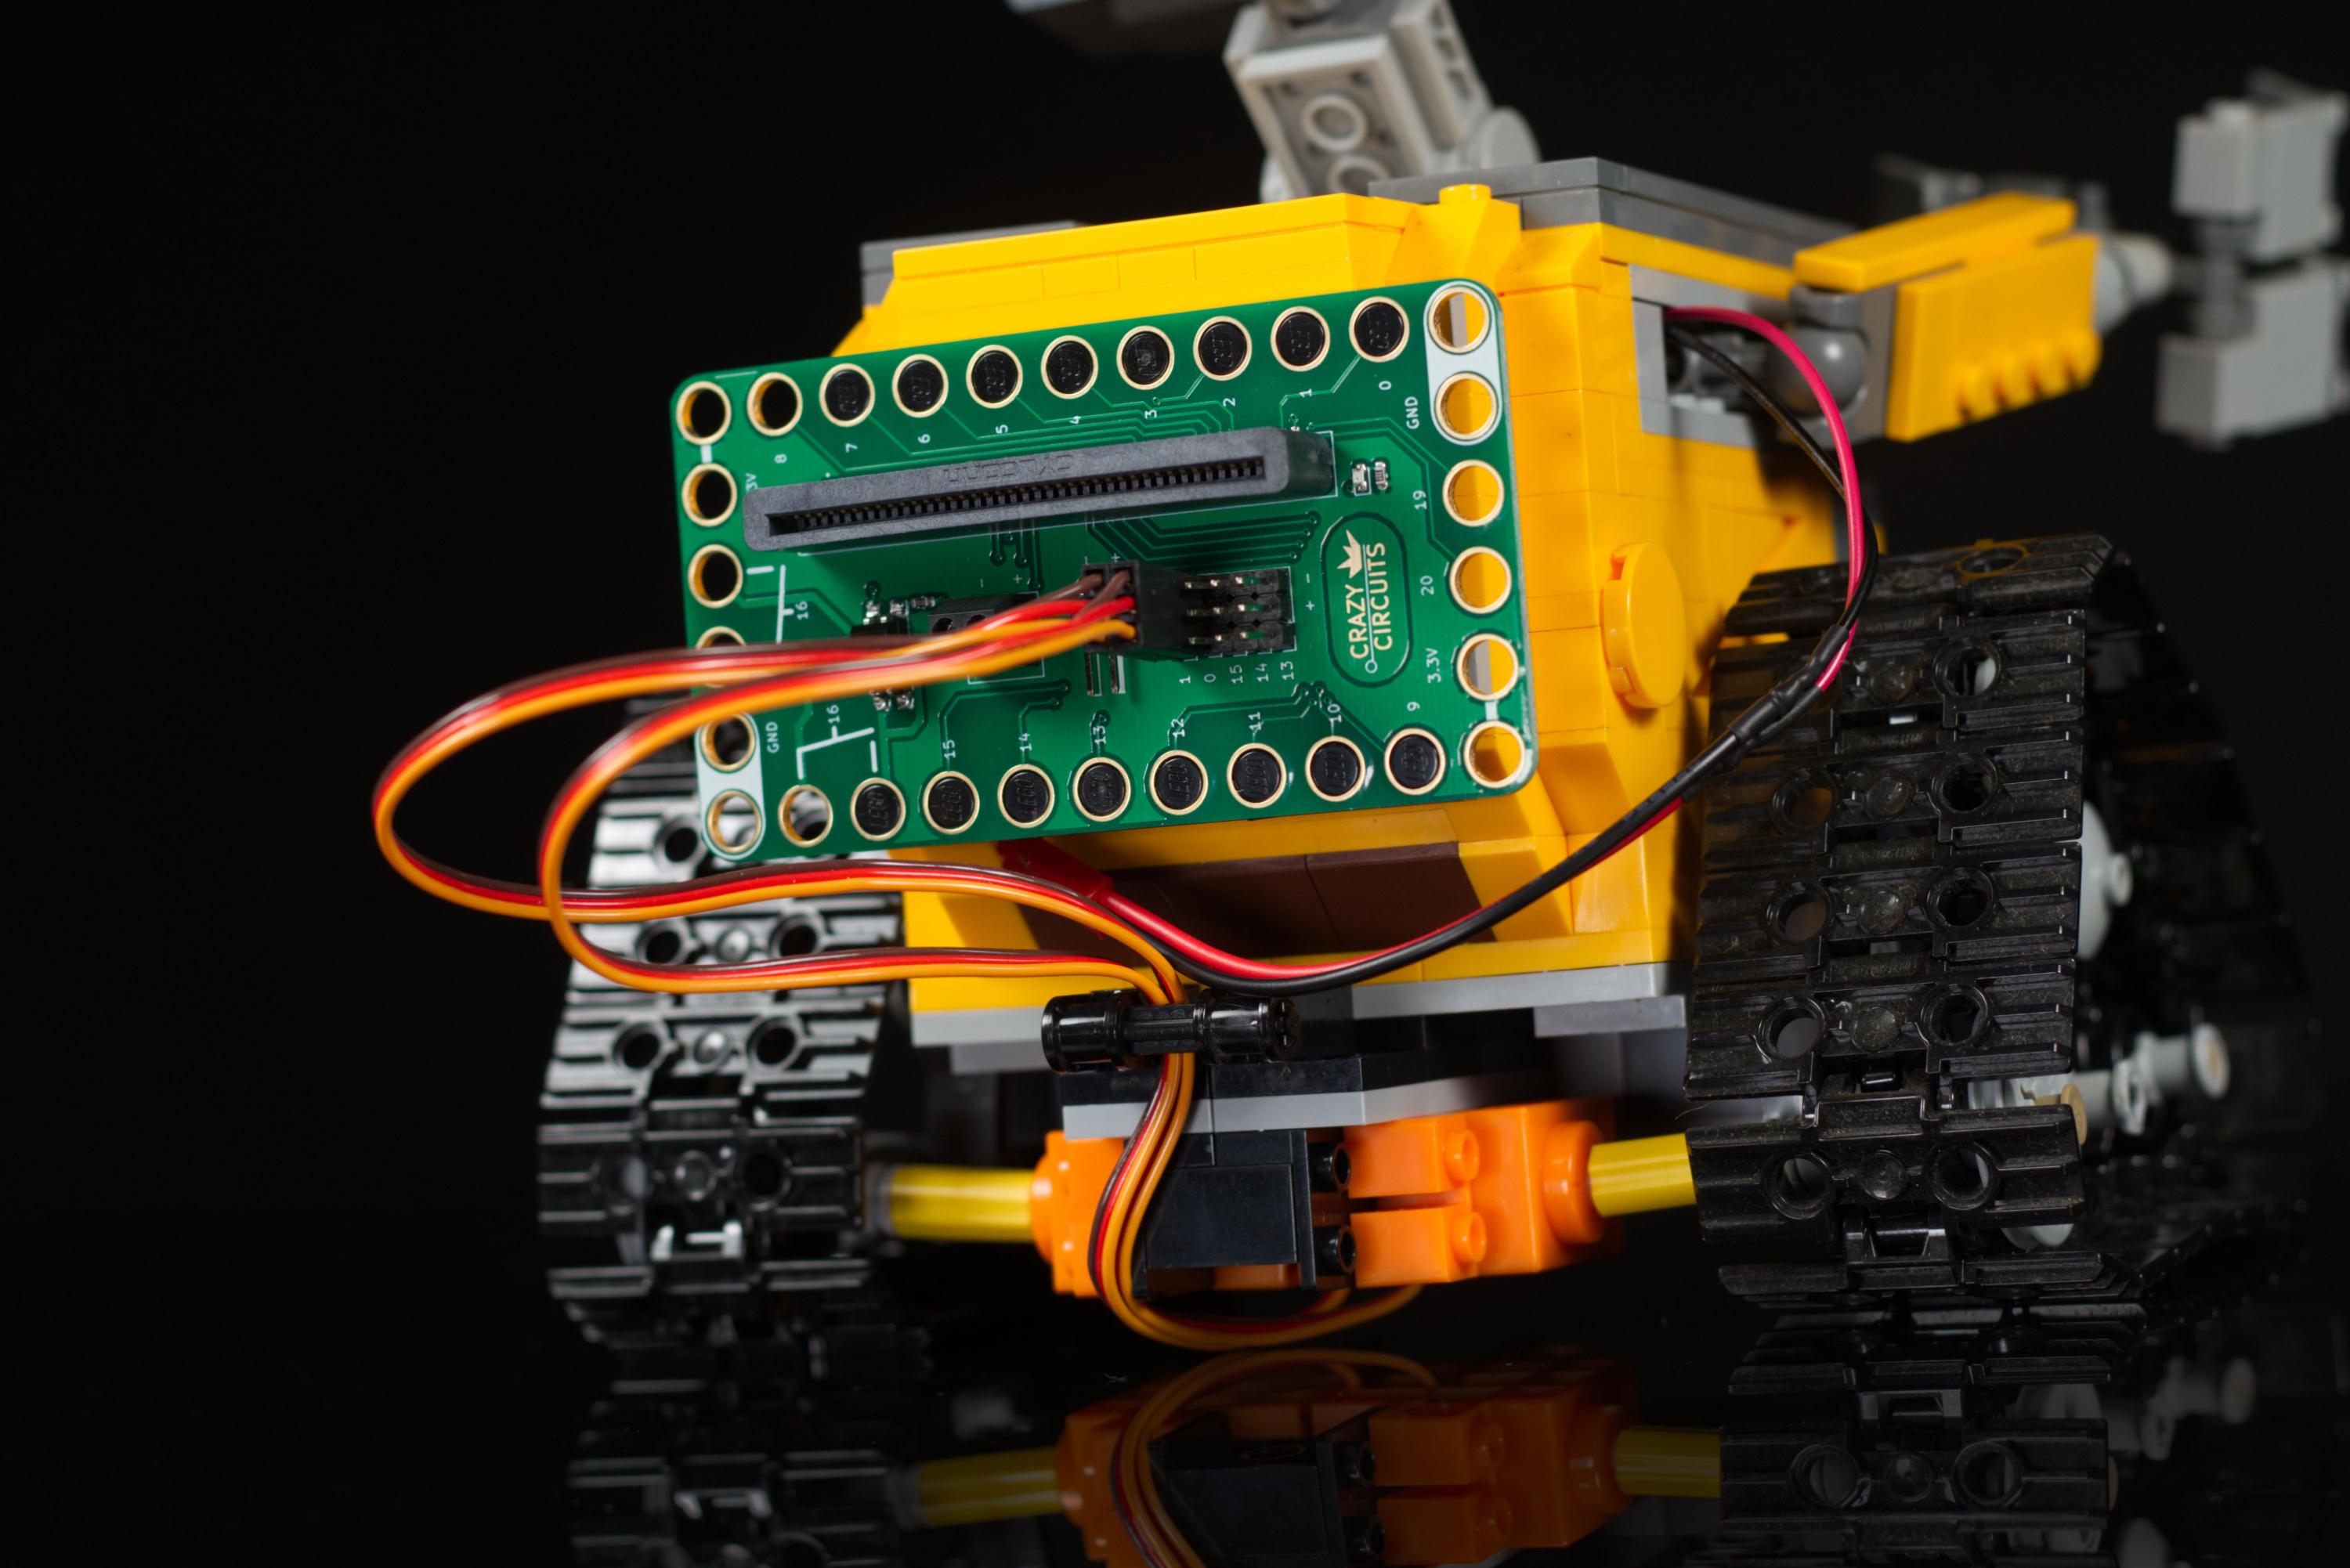
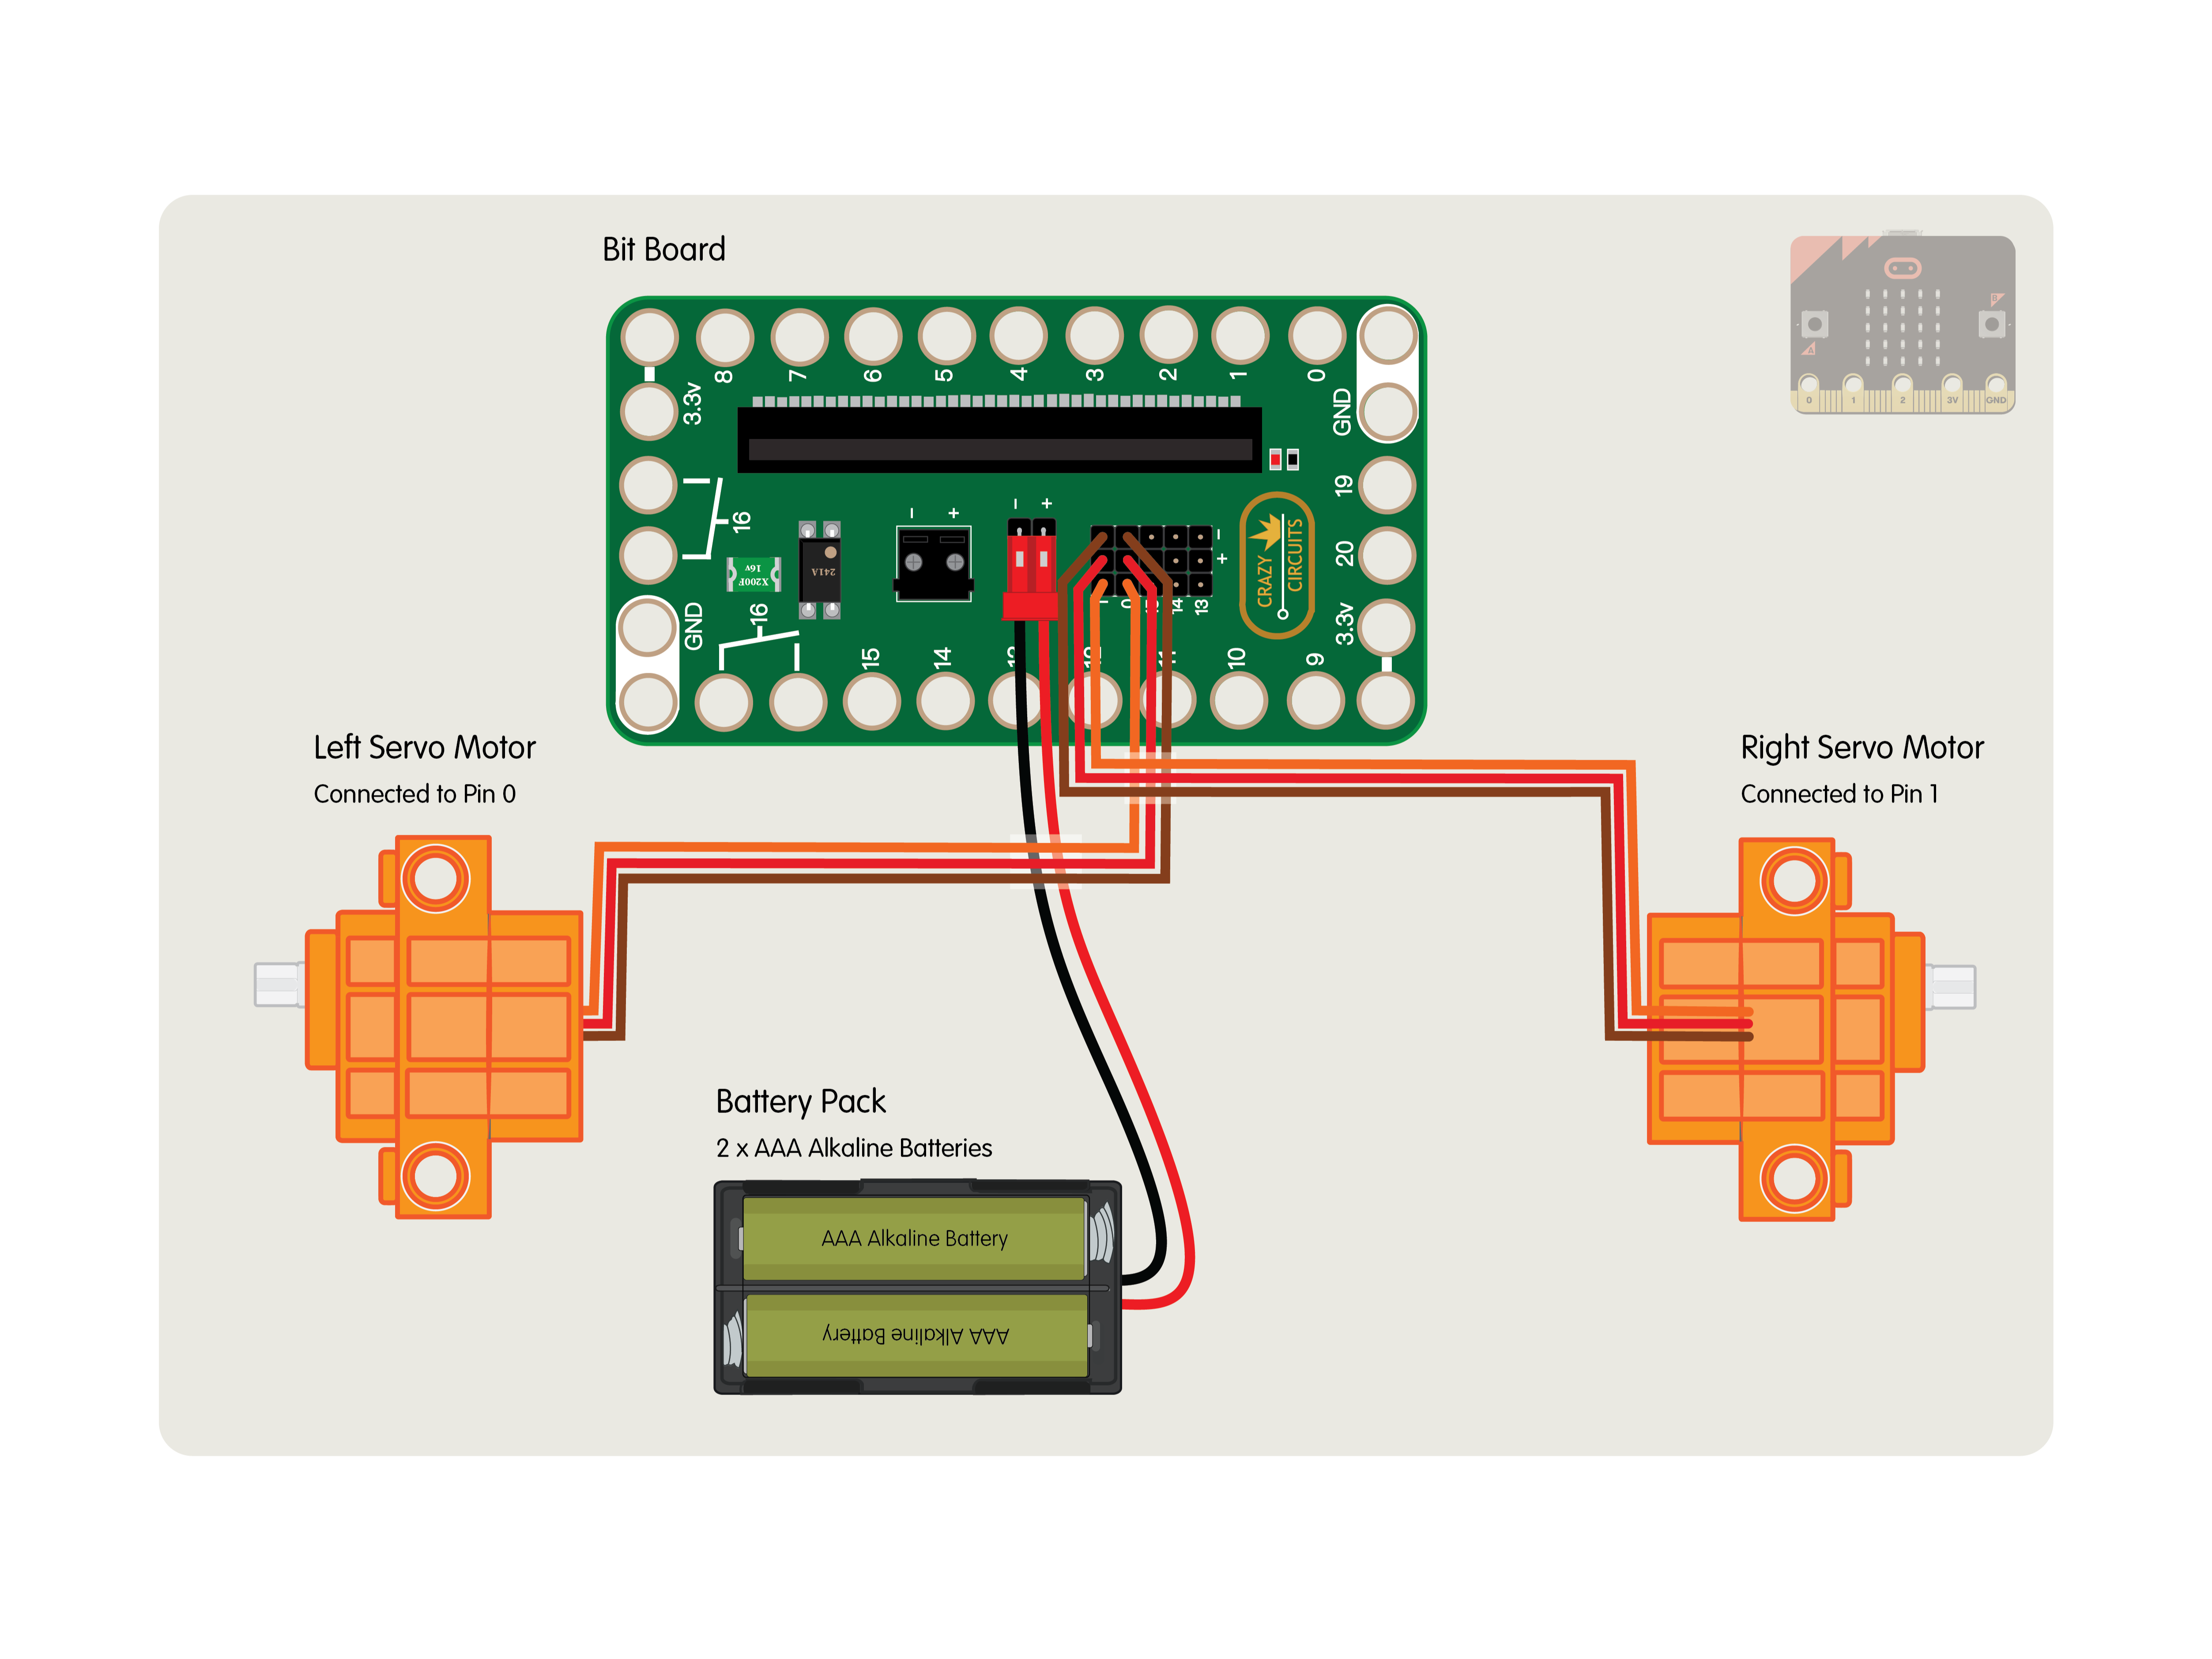

Connect the left servo to Pin 0 on the Bit Board, and connect the right servo to Pin 1 on the Bit Board.
NOTE! Make sure the brown wire of the servo connector is connected to the - (negative) row and the red wire of the servo is connected to the + (positive) row. The orange wire will be closest to the 0 or 1 numbering on the board.
If you find that WALL-E moves forwards instead of backwards (or backwards instead of forwards) you can choose to swap how the servos are plugged in, or make changes in the code.
Load the Code
Connect a USB cable to the micro:bit and then plug it into your computer.
We'll be using makecode.microbit.org to program our board. It uses a simple drag and drop block interface.
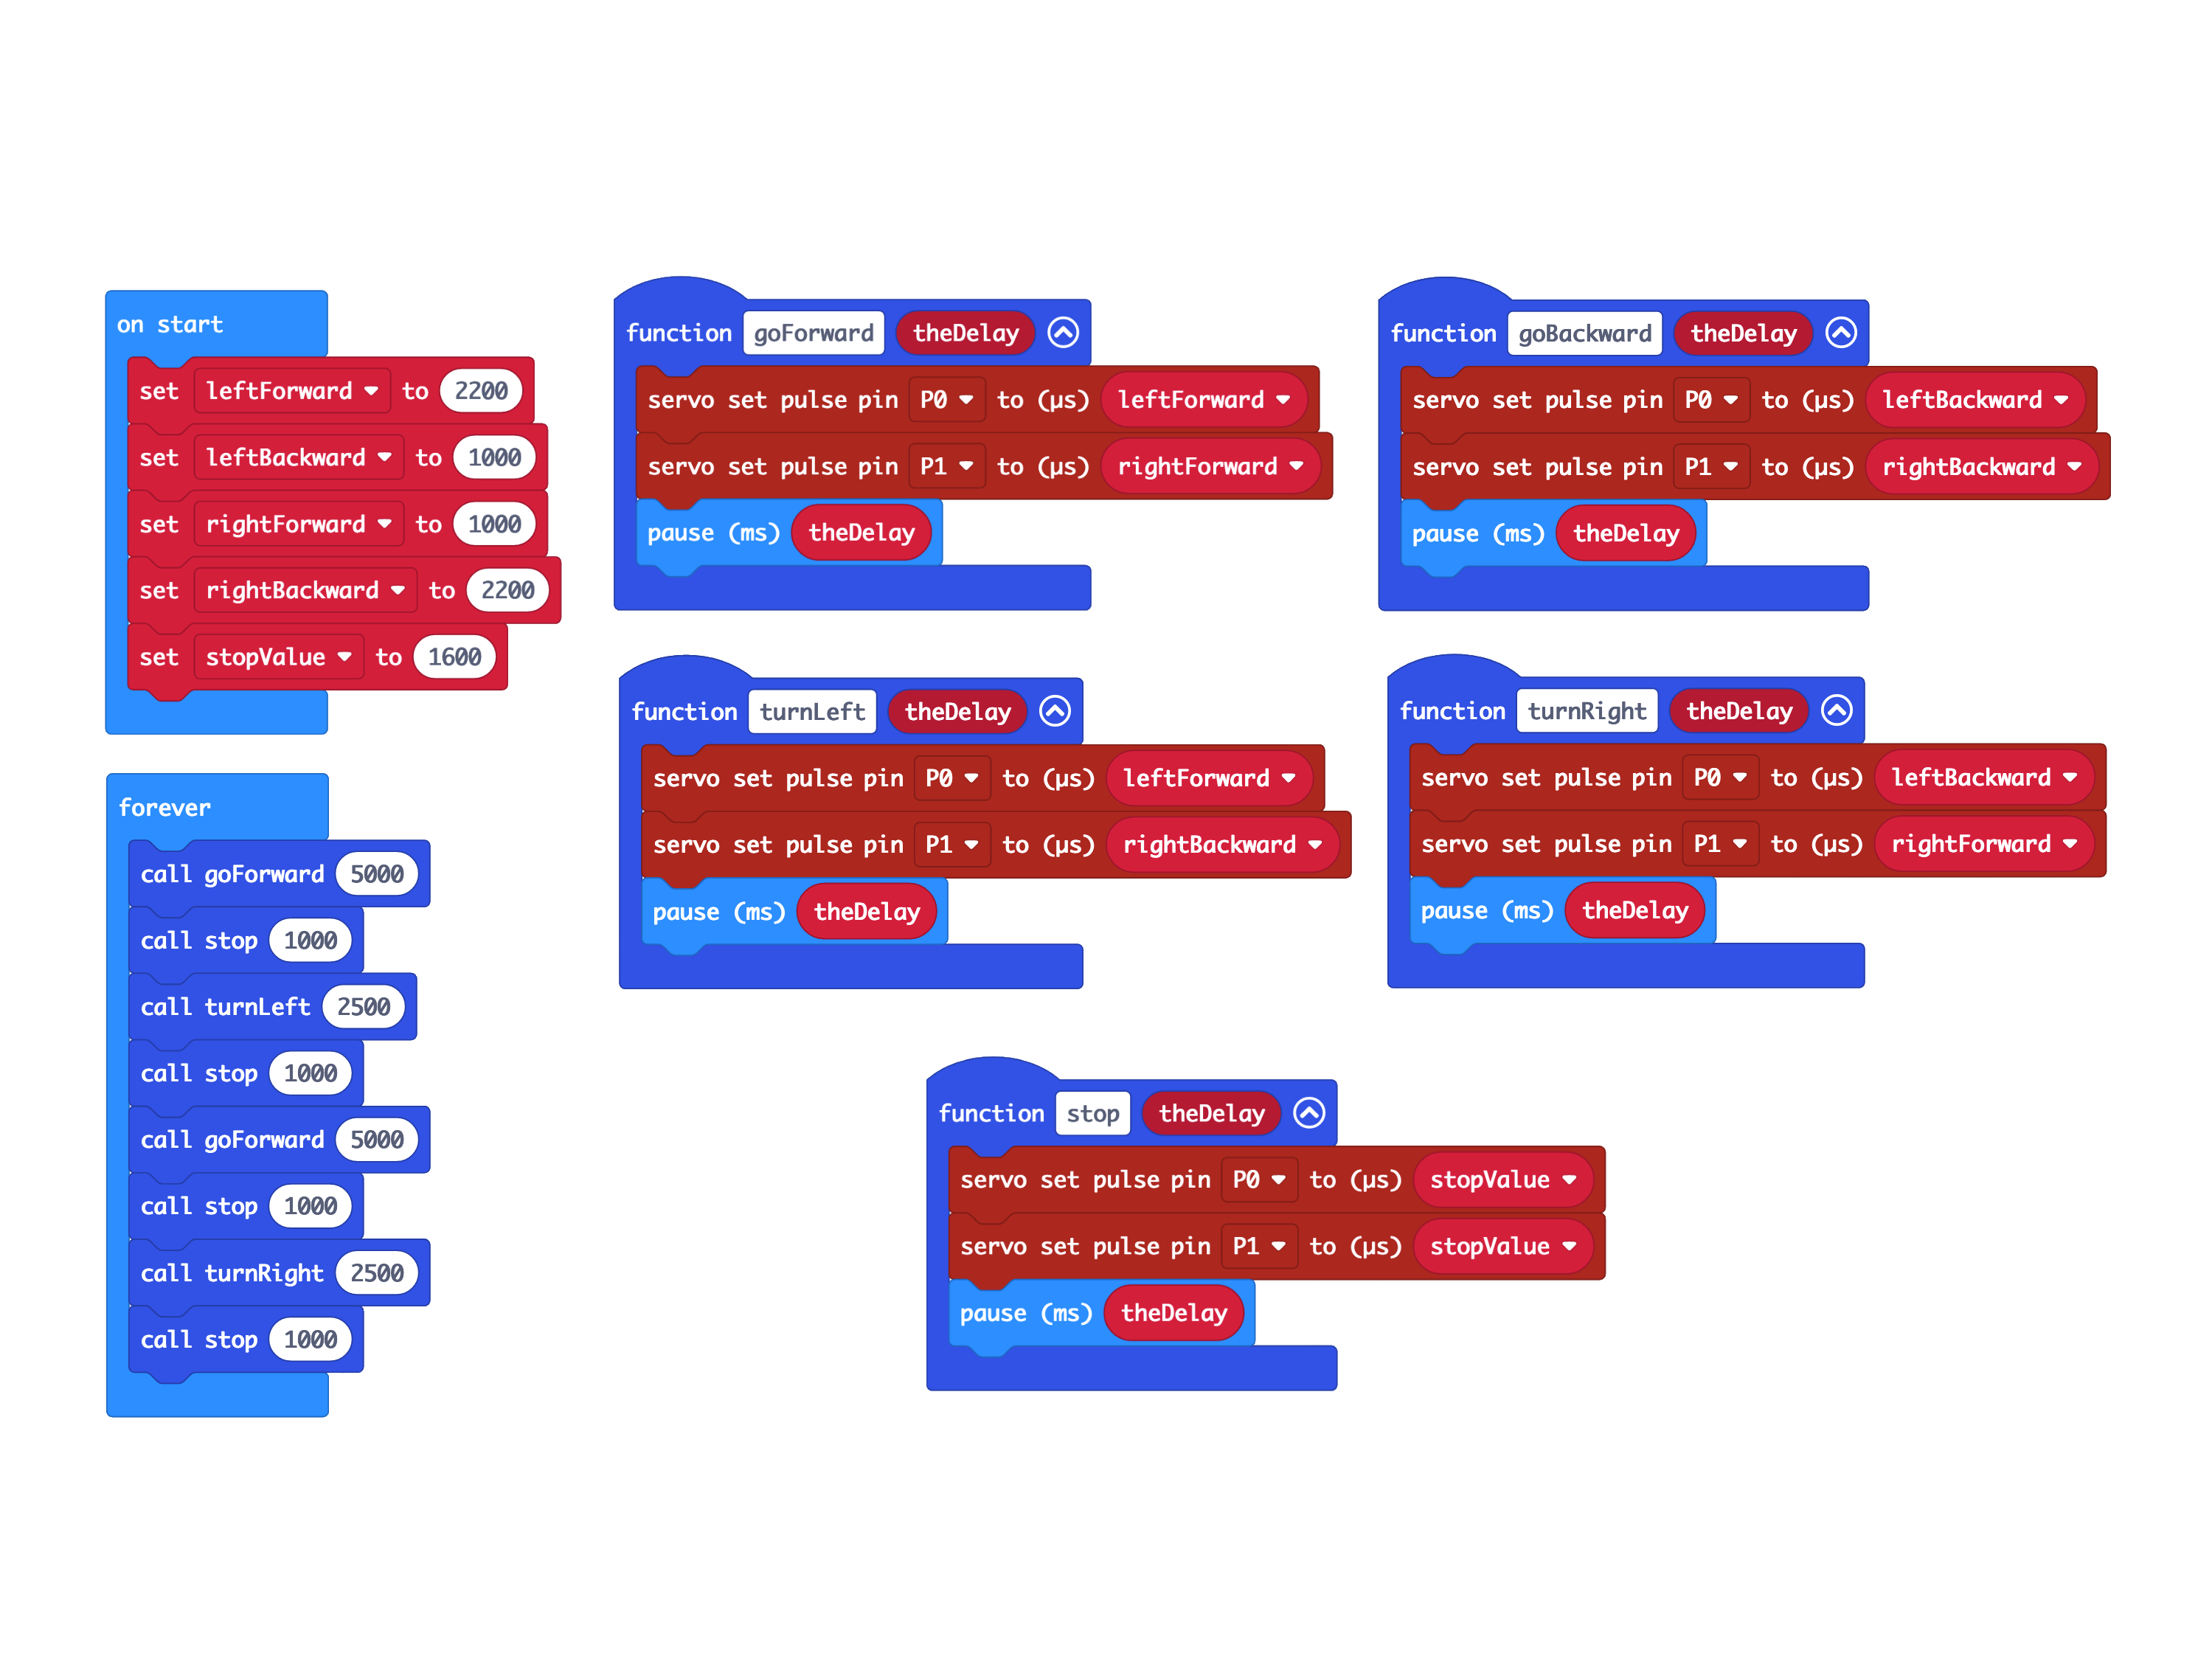
We're going to load the following code for our WALL-E program: https://makecode.microbit.org/_JVjU4EAuFgsa
You can change the code to affect how WALL-E moves. There are five "functions" in the code, goForward, goBackward, turnLeft, turnRight, and stop.
The five functions can be placed in the forever section of the code in any order. For each function, it is called with a parameter specifying how long it should run like so: goForward(5000)
Remember, 1000 milliseconds is equal to 1 second, 5000 milliseconds is equal to 5 seconds, etc.
Once the code is loaded you can disconnect the USB cable and insert the micro:bit into the Bit Board so it can control the servos.
Test It Out!
After you've got the code loaded, the servos plugged in, and connect the battery pack to the Bit Board WALL-E should start moving!
If WALL-E doesn't move at all, make sure you've got the servos and battery pack connected properly, and make sure you've got the code loaded onto the micro:bit.
WALL-E is awesome, but if you don't have one you can use this same circuit featuring two 360 degree continuous rotation servos in other robots.