LED Strip Safari Sunset Silhouette
by Azedwards in Workshop > Lighting
1972 Views, 36 Favorites, 0 Comments
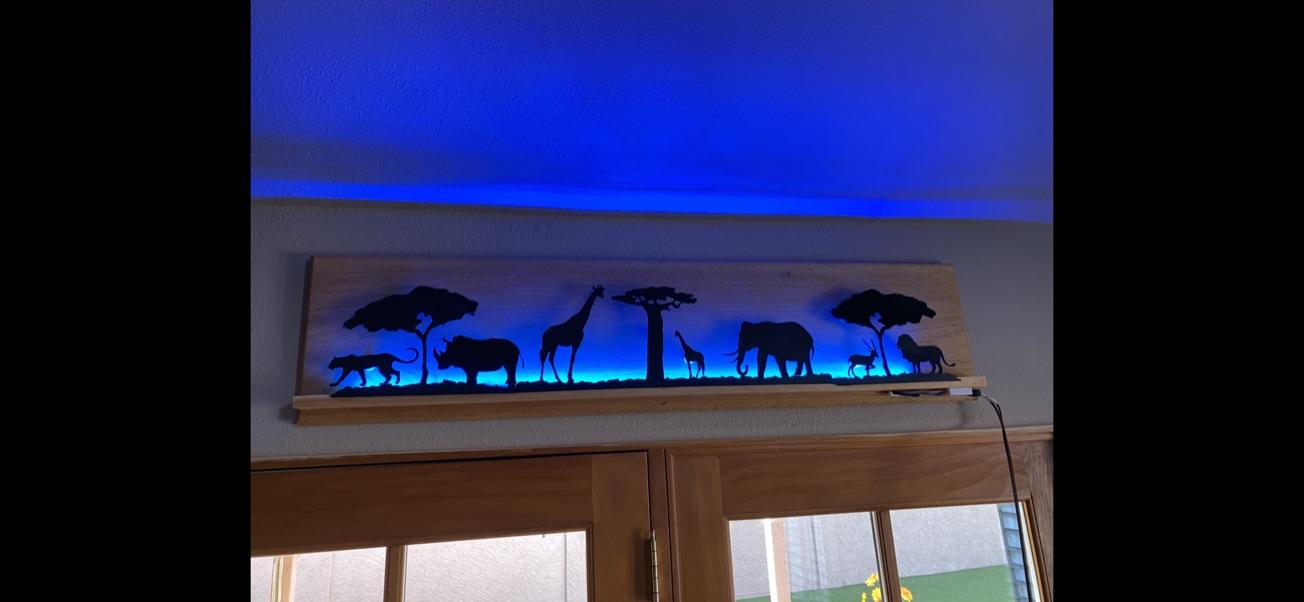
LED Strip Safari Sunset Silhouette
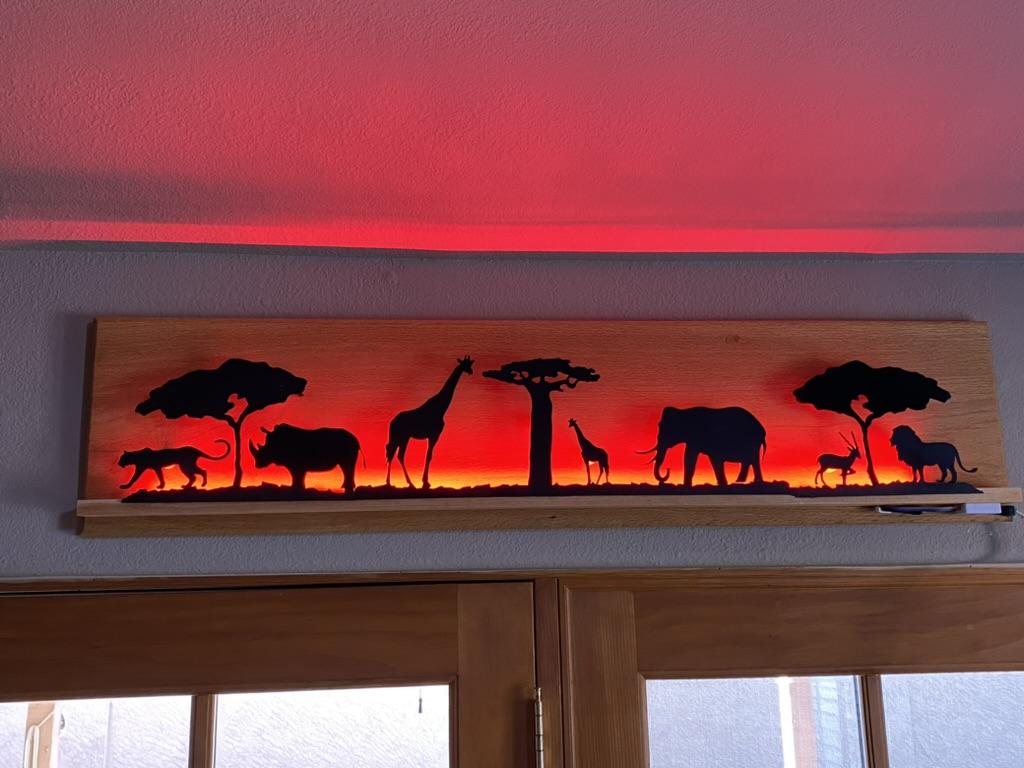
This project used 3D printed animal and tree silhouettes with a programable LED strip to re-create an image of a safari sunset. The concepts can be used to create different silhouette art. The silhouetted shapes can be made of any stiff material. They are mounted on a panel so that they are in front of an LED strip that allows for back lighting and a pretty cool effect.
There are a couple design decisions you can use to modify this design. My back panel was plywood and I chose to laminate the edges, however this might not be necessary if you want to paint it or use other material for the back panel.
Also, I chose to use an AC/DC converter and plug my project into an outlet. You can use a rechargeable battery for infrequent use but need to figure out how you will attach the battery and remove or recharge in place. As the connection to my converter did not reach as high as I needed, I used 18G solid paired wire with a male and female barrel plugs to make a connection long enough to hide the converter.
Supplies
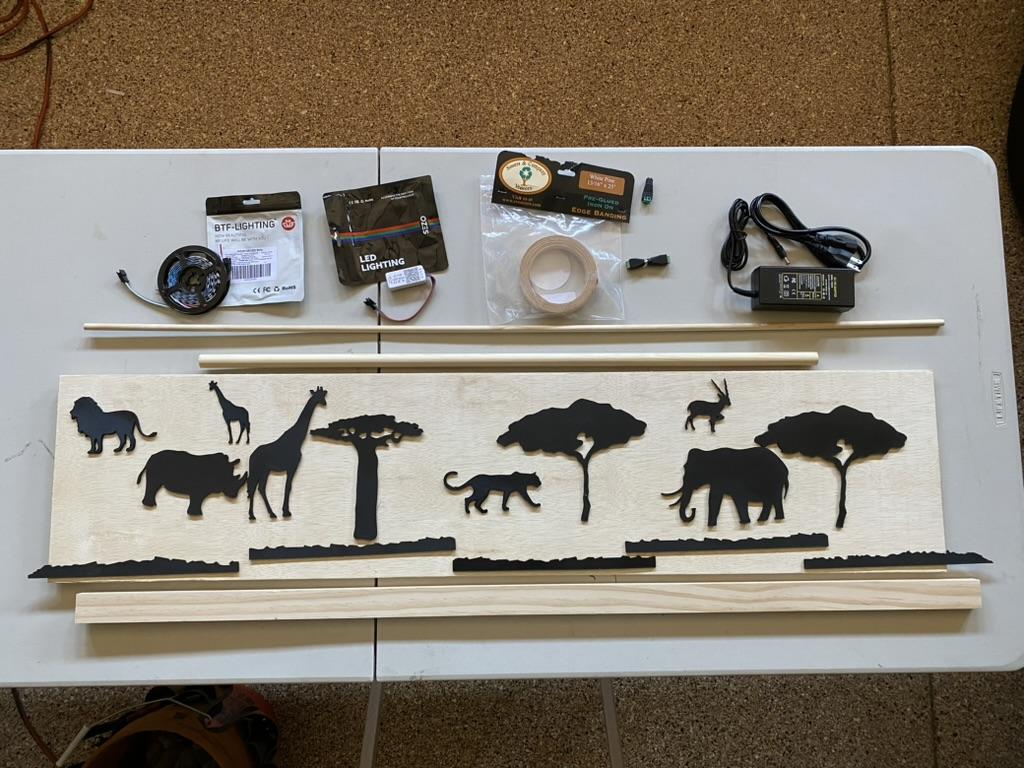
· Silhouettes of animals and trees- I downloaded them and printed on my 3D printer. https://cults3d.com/en/3d-model/home/savanna-wall-deco
· Back panel- 48”x12” 1/2” pine faced plywood
· ¾” pine laminate
· Support- 48” 1x2 clear pine
· Golden Pecan wood stain
· 3/4” Dowel- 3 feet
· 3/8” Dowel- 3 feet
· Superglue
· Wood glue and 1” screws
· WS2818B Programable LED strip - https://www.amazon.com/dp/B07BTTY4FL?th=1
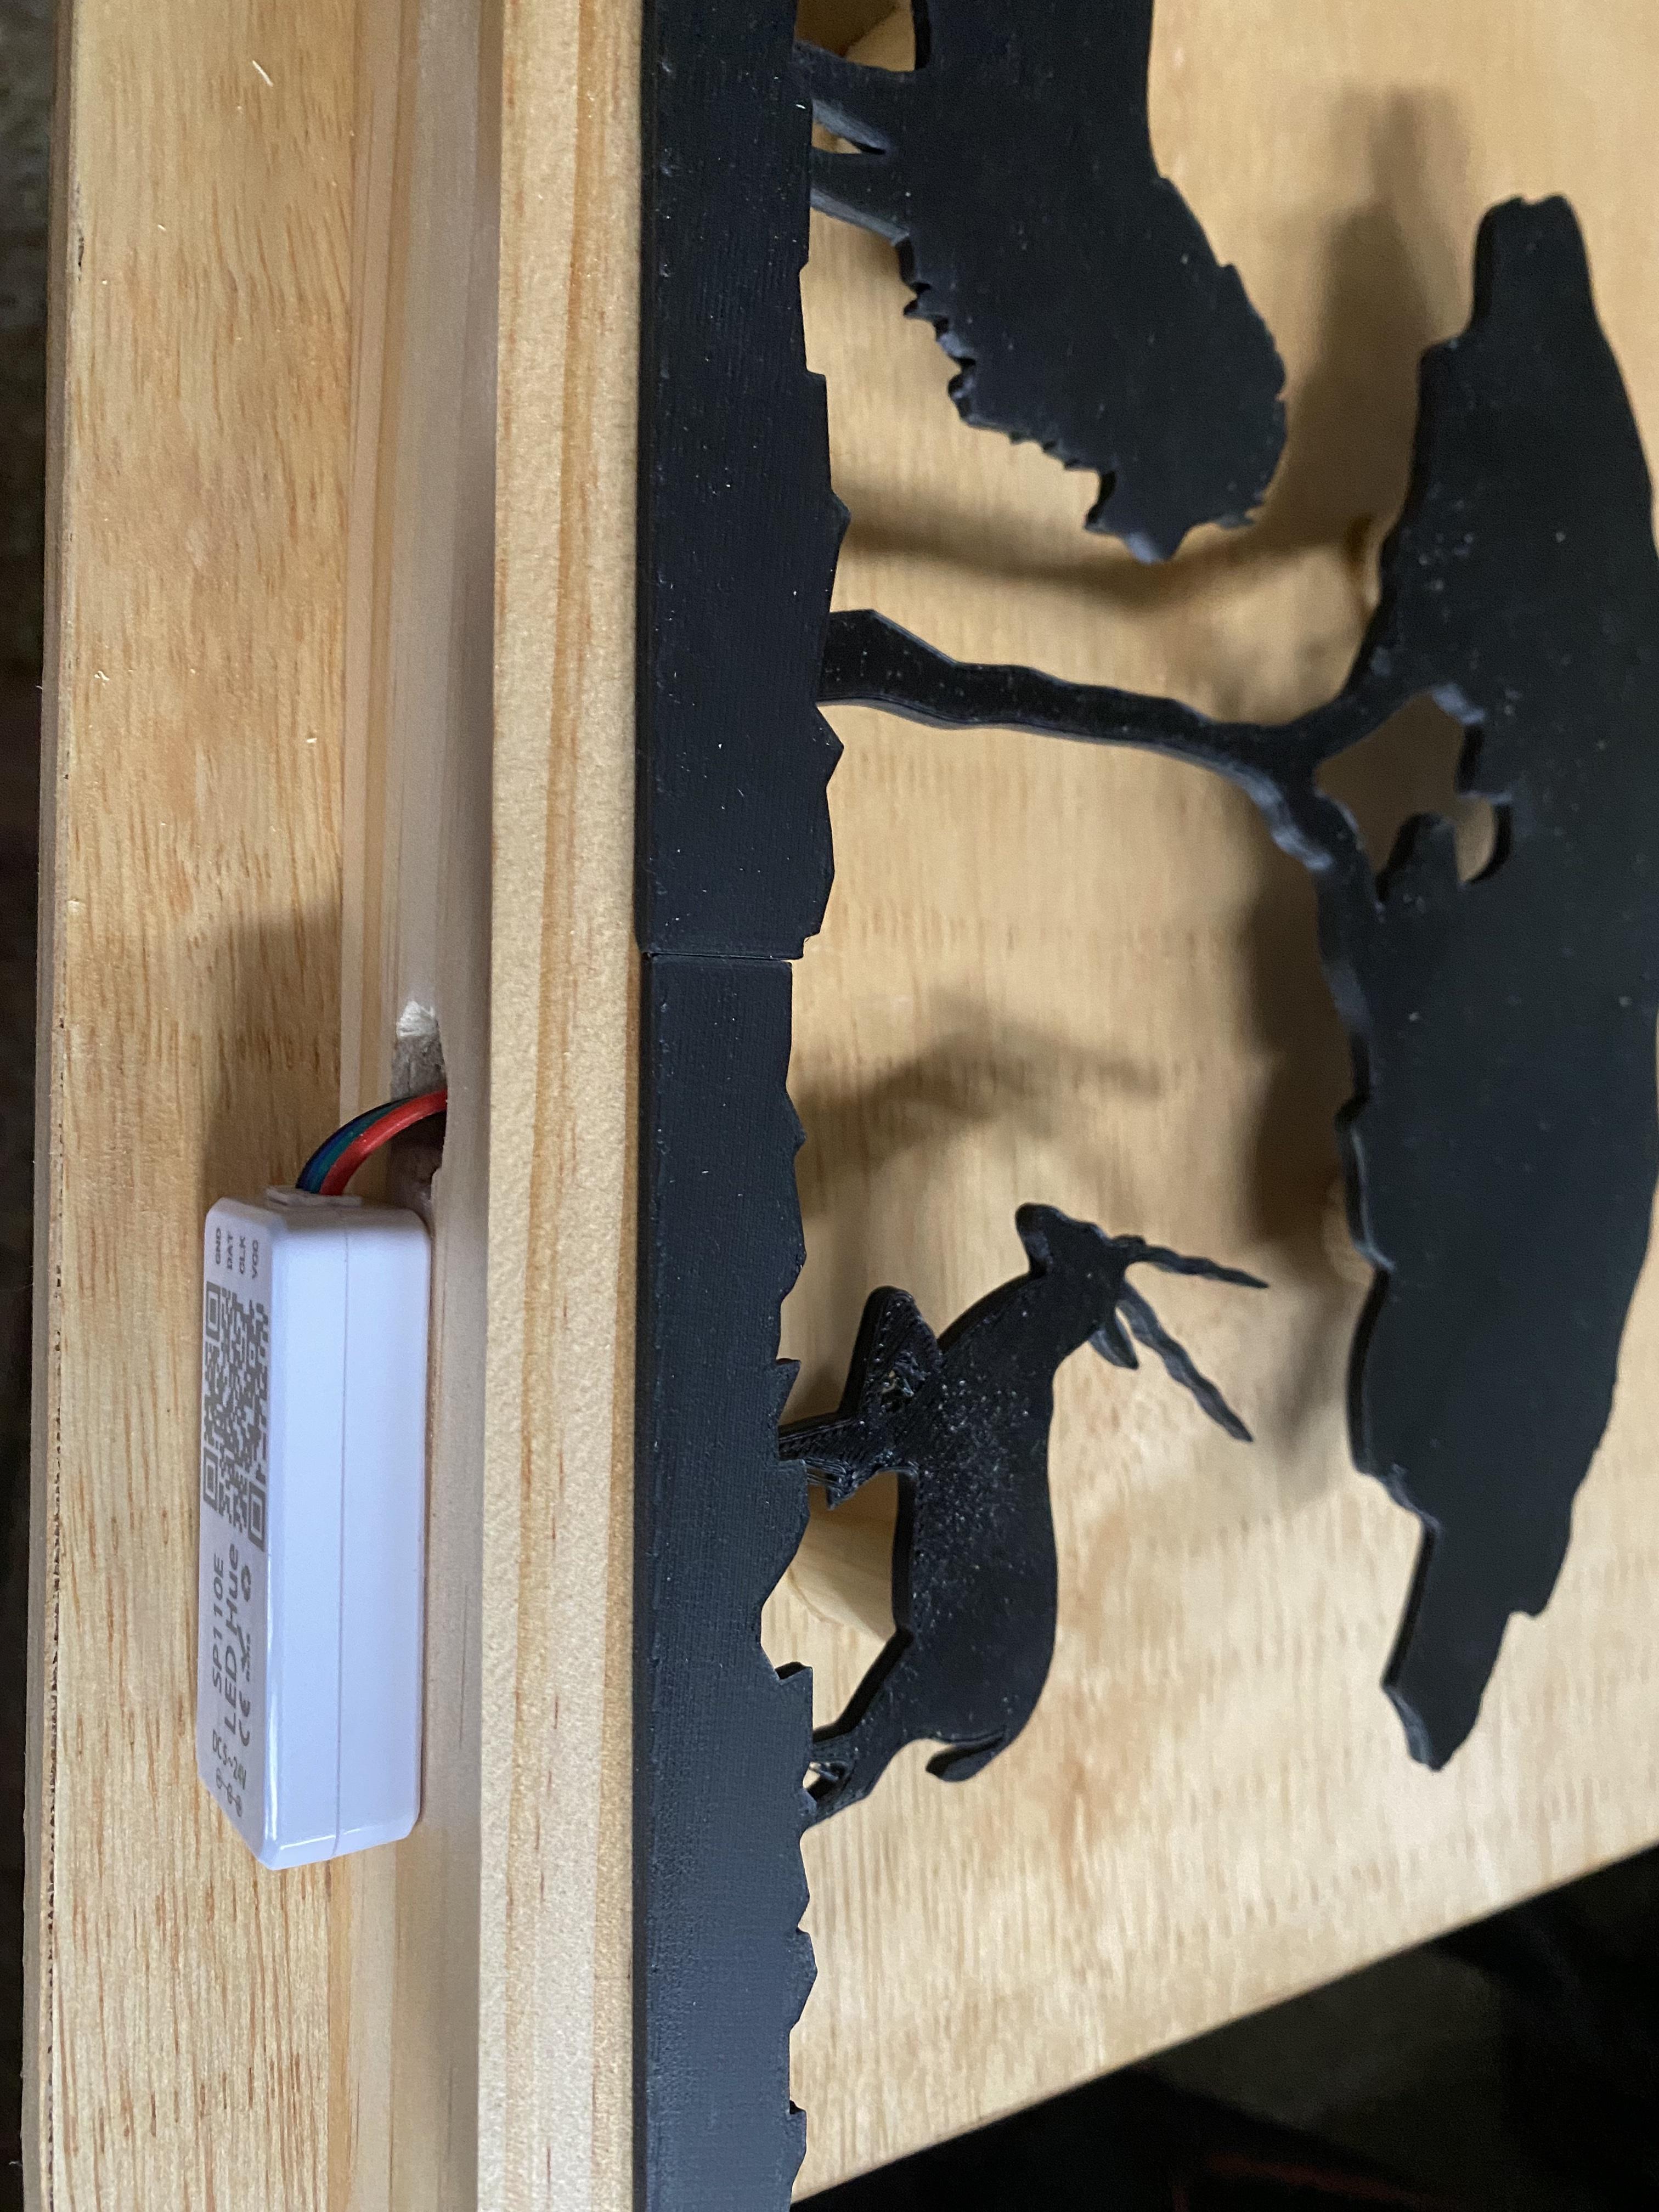
· SP110E LED Hue controller- https://www.amazon.com/RGBZONE-SP110E-Bluetooth-Controller-WS2812B/dp/B075SYJ2B3?th=1
· 120AC to 5V DC 10A converter-https://www.amazon.com/dp/B01D8FM71S
· LED Hue app (you can use the QR code on the SP110E controlled printed on the controller body) or find in the app store.
· 18G paired wire- for extending attachment to converter
· Male female barrel plugs- https://www.amazon.com/dp/B07C61434H?th=1
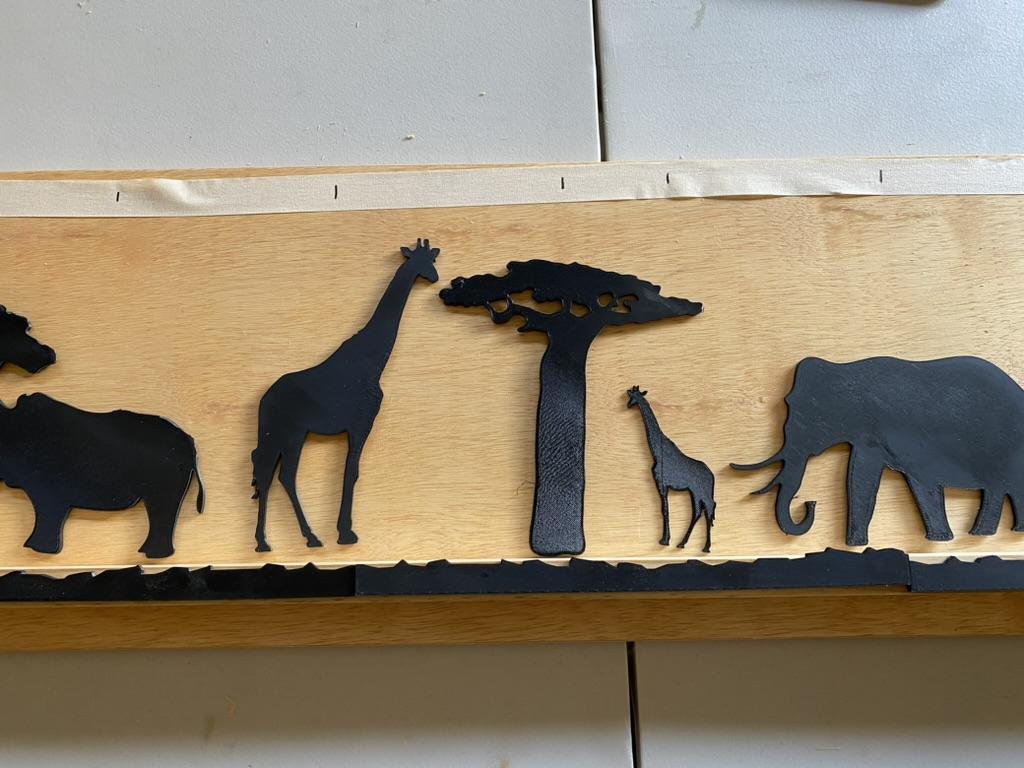
Layout and Silhouettes
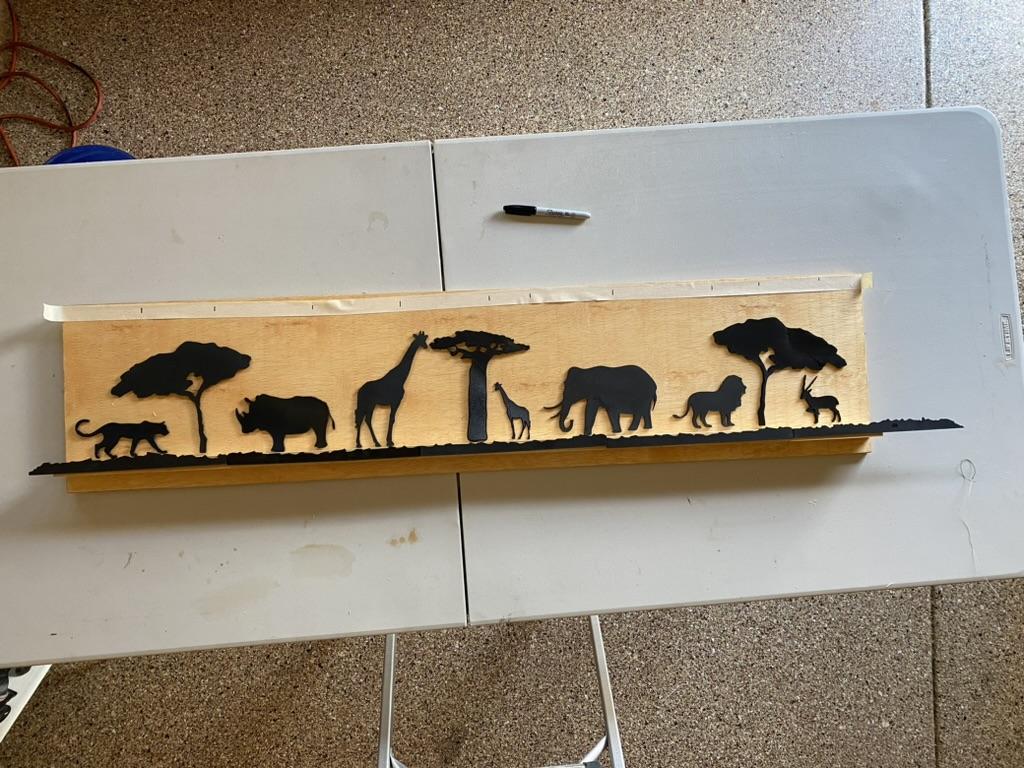
Figure out your layout. This will determine the number and size of the prints you choose to make. Mine had one of the following- elephant, rhino, antelope, leopard, lion, baobab tree. I wanted two giraffes and two acacia trees. 3D print your silhouettes or create them from other stiff material. The original sizes from the site didn’t seem correct so I changed the sizing and found increasing the lion to 130%, shrinking the antelope to 65% and making one of the giraffes 50% (a baby) worked well with the space I had. Finally, I printed several ground patterns provided (needed 5 total to cover the 48”).
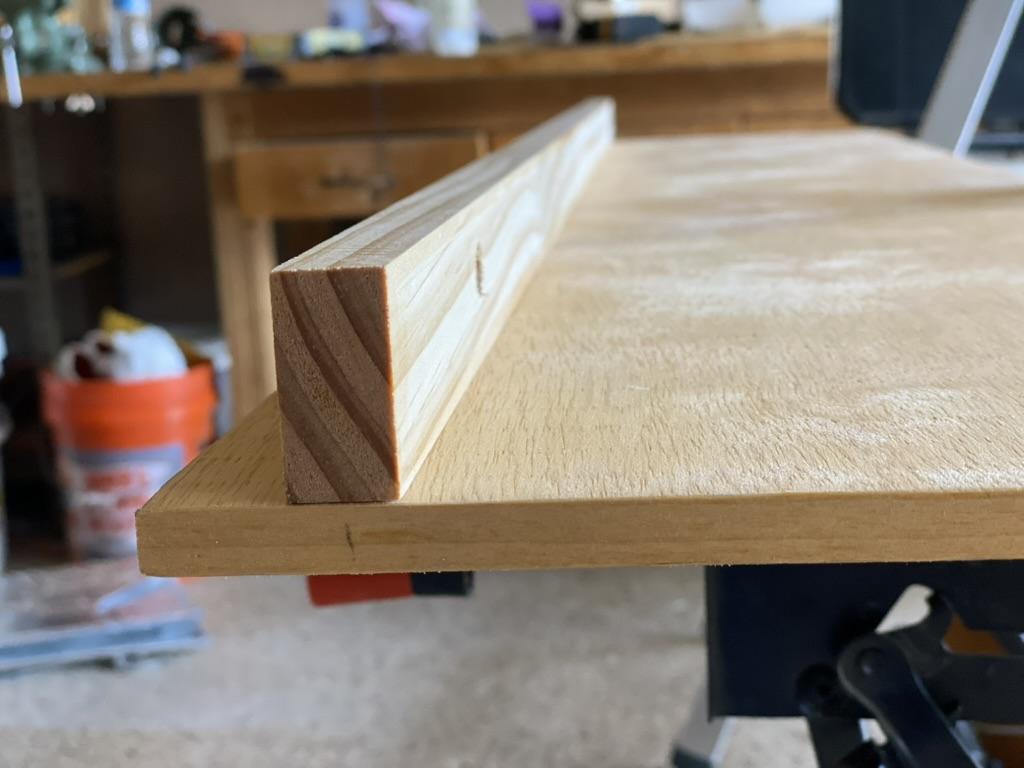
Prepare the Wood Panel and Support
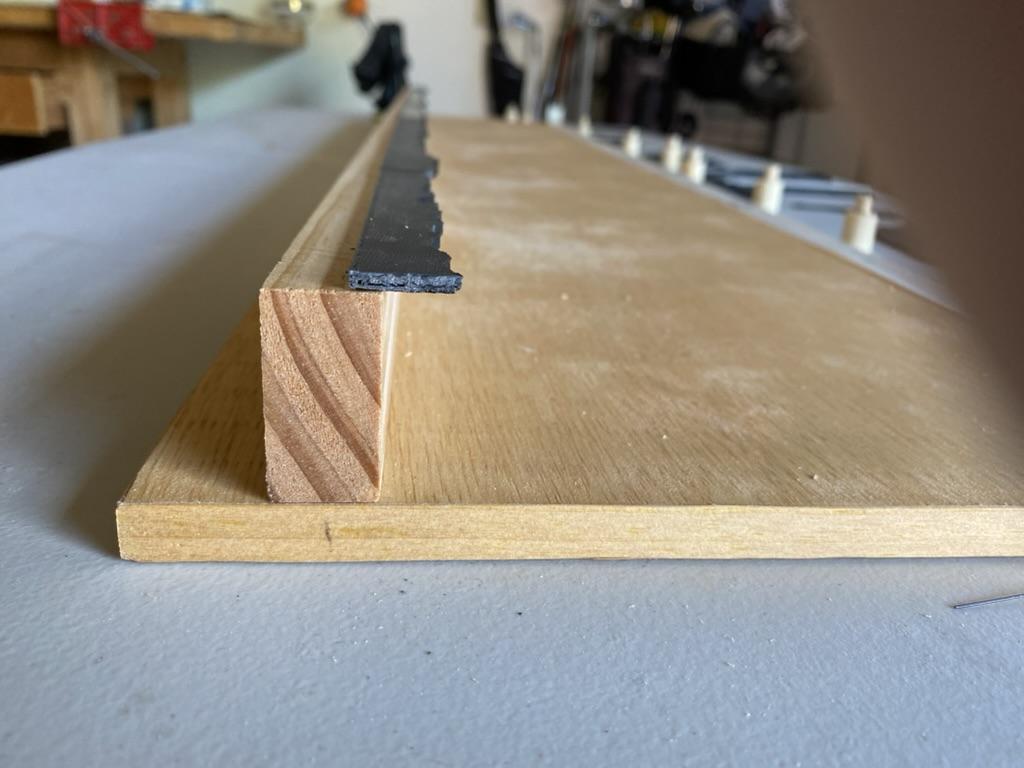
Apply the laminate to each edge of the plywood.
Sand and stain the plywood panel, laminate and support. I like the color of the golden pecan and how it brought out the colors when the LED strip was on.
Attach the 48” 1x2 pine wood support to the larger panel by the 1” side. The bottom of the 1x2 should be at least 3/4” from the bottom of the panel. Use wood glue and wood screws from the back of the panel.
Layout
Confirm your layout.
I applied masking tape to the top and marked the center of where each silhouette would be on the horizonal axis.
Prepping Dowels
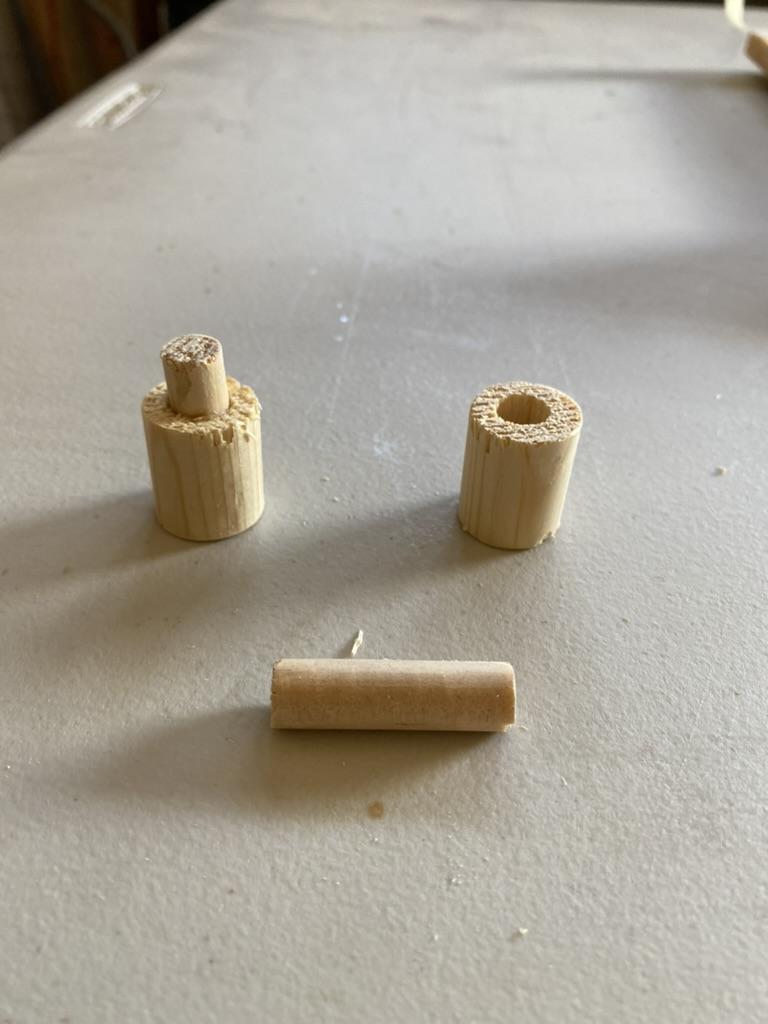
Cut the 3/4” dowel to 1” lengths and the 3/8” dowel to 1 1/2” lengths. Drill a 3/8” hole vertically through the center of the 3/4” cut dowels. Wood glue the 3/8” flush with one end so that 1/2” is protruding from the other end.
Attaching Dowels to Silhouettes
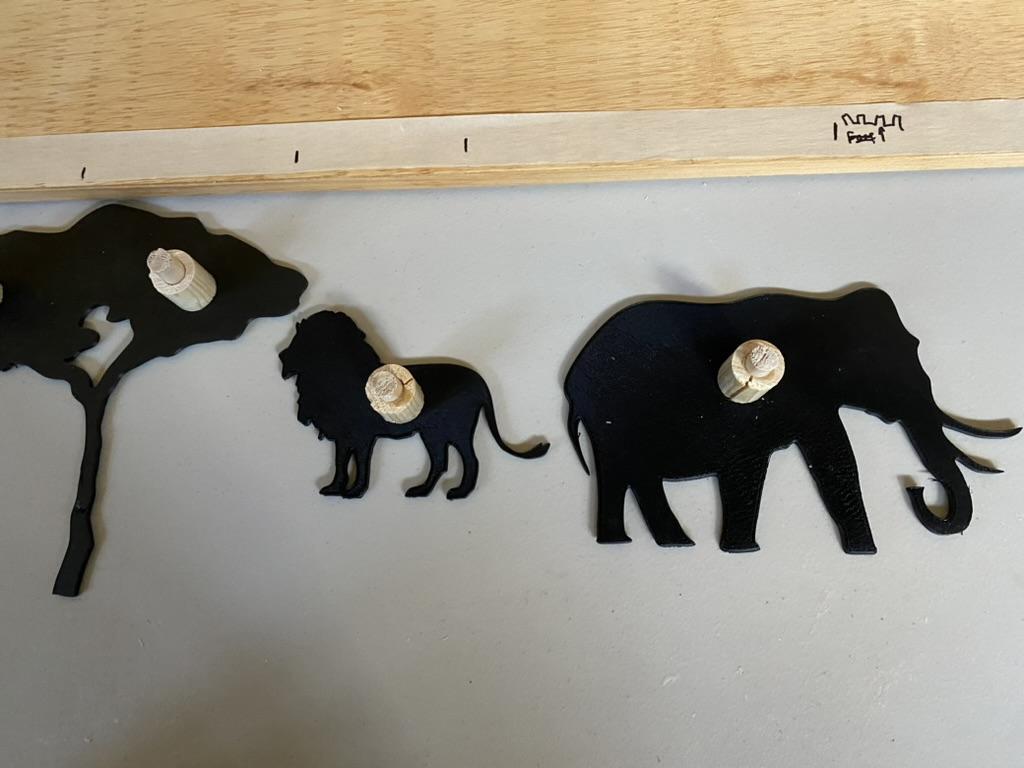
Attach the flush end of the 3/4” dowel to the center of the printed animal with Super Glue.
Attach Ground to Support
Cut the printed ground to the correct length. 5 pieces were excessive for my piece so I trimmed one of them for the correct total length. Super Glue the ground silhouette to the front of the support. Make sure the ground overlaps the front of the support.
Drill Mounting Holes
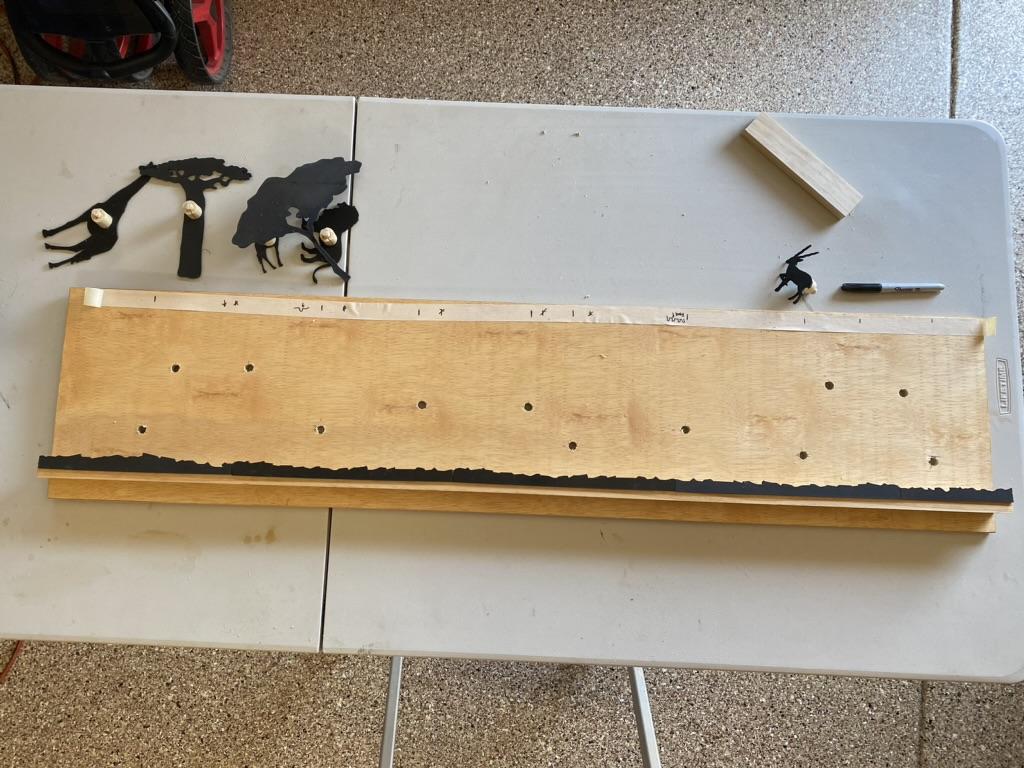
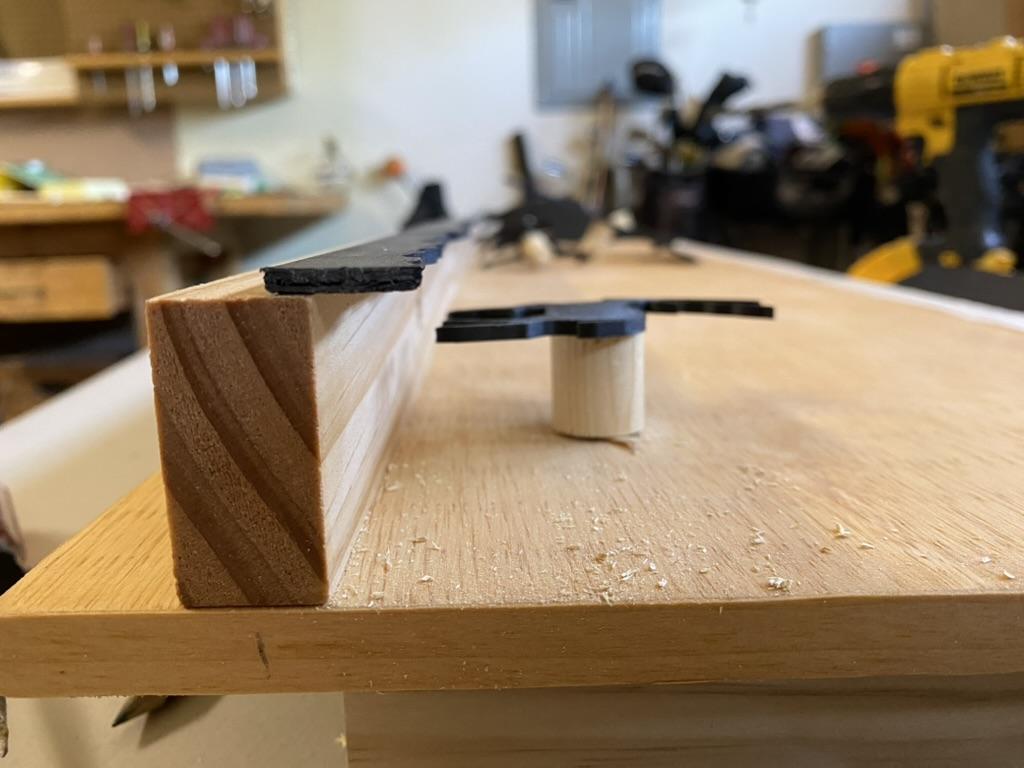
Reconfirm the locations for each of the animals. Drill 3/8” holes into the mounting board at the correct location making sure the height is correct.
Check the height carefully so the animal will fit behind the ground and the bottom won’t be seen when viewed. You don’t want them to be floating above the ground.
Prep and Attaching LED

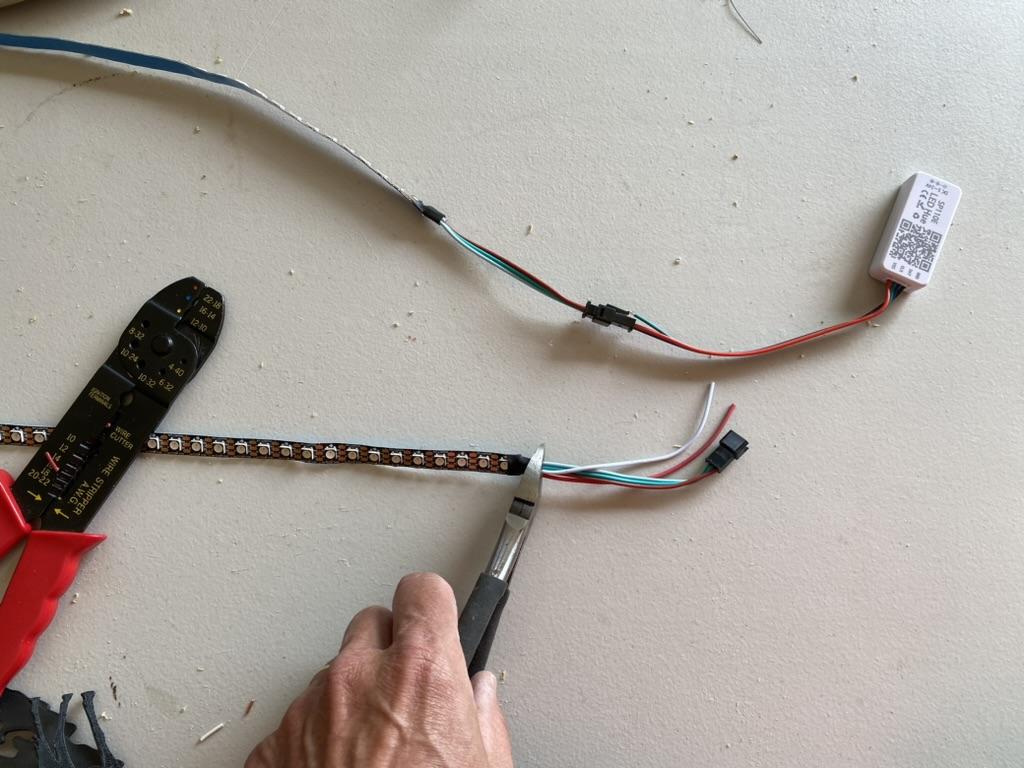
Attach the SP110E controller to the LED strip so that you don’t cut any important connections to the LED. On the side connected to the controller, cut the two loose wires.
On the unattached side, cut all the wires.
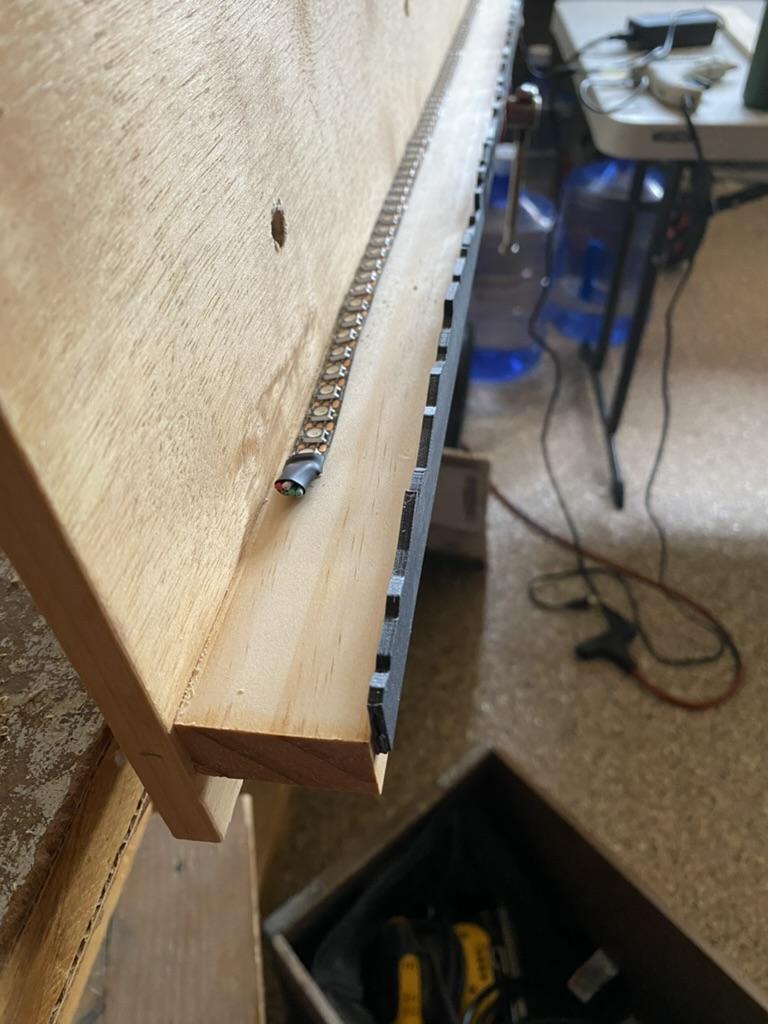
I put the LED connectors on the right as this was closest to the outlet I was going to use. Attach the LED strip to the top on the support by removing tape covering adhesive tape. Make sure it is as close to the back panel as possible with the correct orientation (for the connection to the controller).
If you are creating a longer or shorter project, you may need to modify the LED strip and there are multiple sites that can show you how to do that.
Test LED Strip
Test the LED strip
Download LED hue app to your smart phone with the QR code on the controller or at the app store. Connect the LED strip to the SP110E controller, the controller to the AC/DC converter and plug in the converter. You can use the QR code printed on the SP110E controlled to get the app or look for it at an app store.
Open the app.
Look for SP110E on the list of connectable items. Toggle the SP110E “On”
Make sure the second window down is set for:
· GRB
· WS2811
Hit enter at the bottom.
The colors should light up and you can choose the color you want with the slider bar or have a light show by show by moving around the circle.
Wiring

Drill a 1/2“ hole on the correct side of the support for the wires to go through.
I wanted to minimize the exposure of the wires connecting the LED strip to the controller. I attached the controller with super glue to the bottom of the support, close to the drilled hole. Make sure the printing on the controller with the QR code is visible.
Then I looped the wires on the top of the support with a screw and carefully tacked it down with a staple. Don’t staple through the wires of course
Mount Animals
Mount animals with wood glue into the drilled holes.
Mounting on Wall
Mount the panel on the wall. I found an easy picture hanging hardware and will be using it in the future (PicGenie123- https://www.amazon.com/PicGenie-Picture-Hanger-50lbs-Pack/dp/B09FDTVVM7 )
To get a cord long enough to reach my project and minimize its visibility, I attached 18G solid paired wire to male female plugs to extend to the AC/DC converter. Cut and strip the wire to the correct length and attach as appropriate.
Enjoy

Plug everything in, open the LED Hue and make sure you have the correct settings. Play and enjoy.