LED Basic / Pengenalan Kepada Pengkomputeran Fizikal Dengan Menggunakan Micro:bit Menggunakan Tinkercad Asas LED
by azrul8work in Circuits > Microcontrollers
964 Views, 0 Favorites, 0 Comments
LED Basic / Pengenalan Kepada Pengkomputeran Fizikal Dengan Menggunakan Micro:bit Menggunakan Tinkercad Asas LED
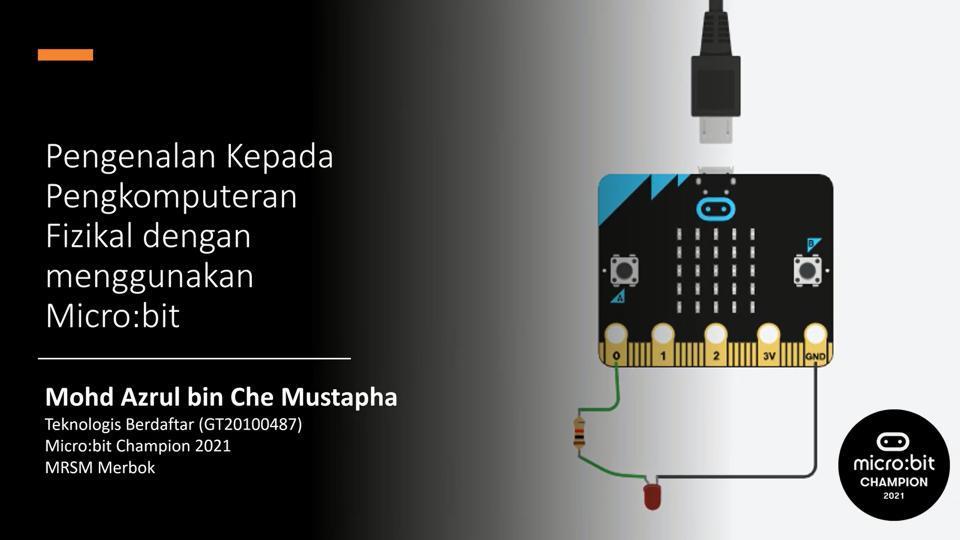
.jpg)
this instructions is using Bahasa Melayu and English. How use non physicals Microbit using Tinkercad
How to use Tinkercad Inner Circuit to produce a simple LED project using microbits virtually.
(Bagaimana menggunakan Litar dalam Tinkercad untuk menghasilkan satu projek LED mudah dengan menggunakan micropengawal microbit secara maya).
Supplies
go to web (Laman web) https://www.tinkercad.com
Enter to Tinkercad/ Masuk Ke Tinkercad
.jpg)
Buka laman tinkercad
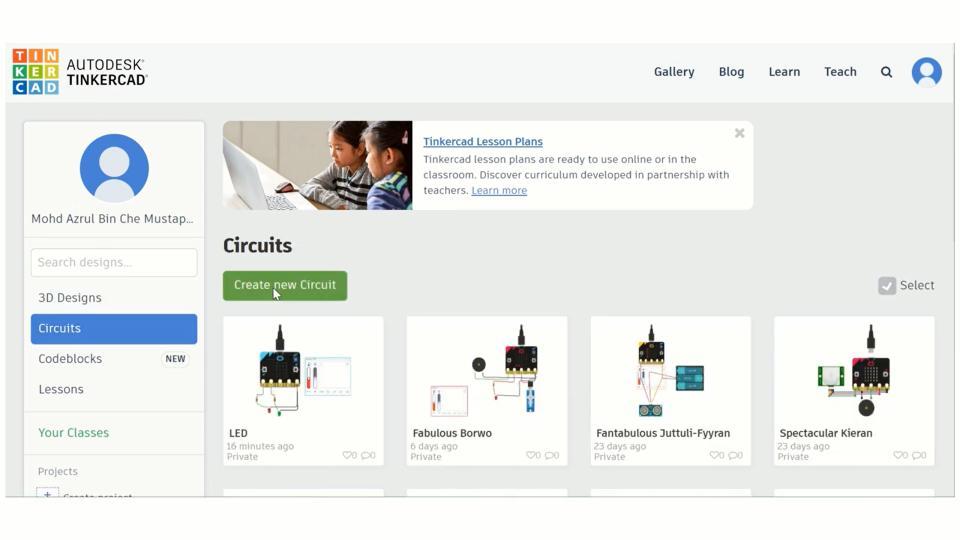
Enter to Circuit / Masuk Ke Litar
.jpg)
- Enter Circuit / Klik Circuit
- Enter Create New Circuit / Klik Create New Circuit
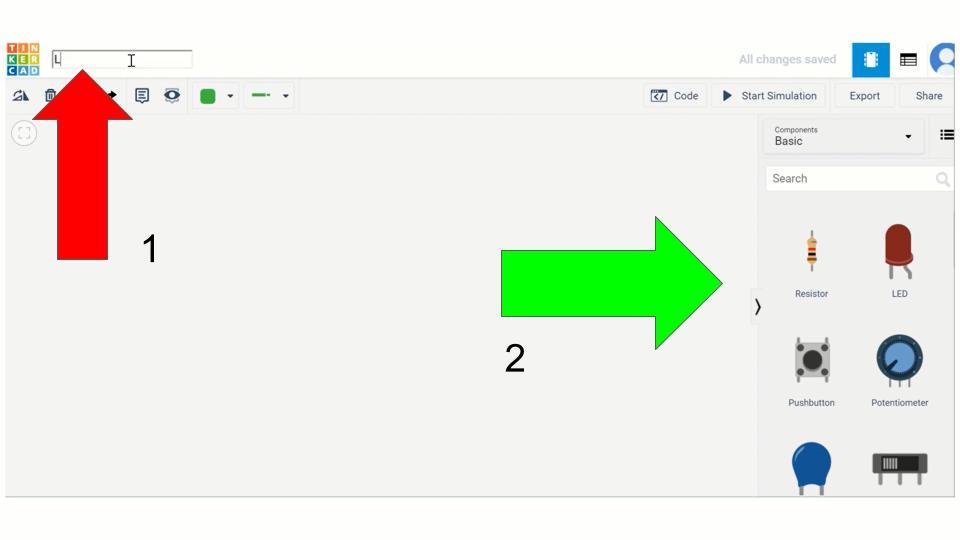
Circuit Interface / Antaramuka Litar
.jpg)
No 1 :
Enter to Change File Name / Klik untuk ubah nama fail
No 2
Component / Komponen
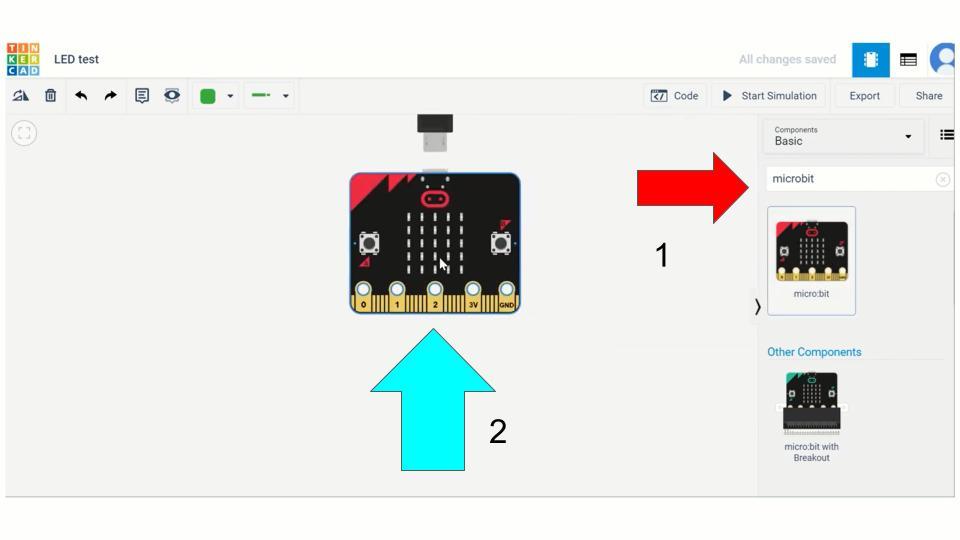
Add Microbit / Masukkan Microbit
.jpg)
No 1 :
- Type microbit in box or search on component / Taipkan microbit di ruangan carian atau cari dalam komponen
- Drag Microbit to stage (2) / Seret microbit ke pentas (2)
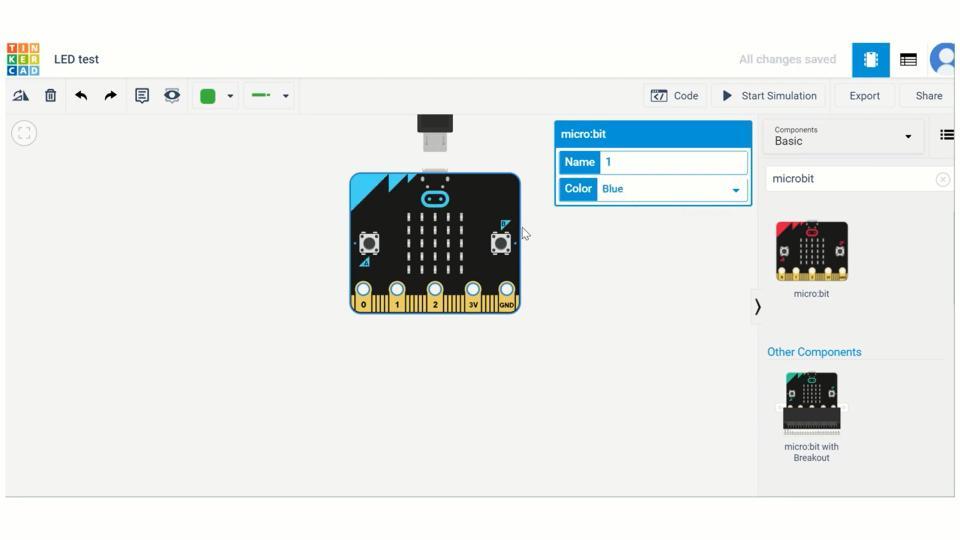
Edit Microbit/Ubahsuai Microbit
.jpg)
You can change name & color of Microbit. / Anda boleh mengubah nama dan warna microbit.
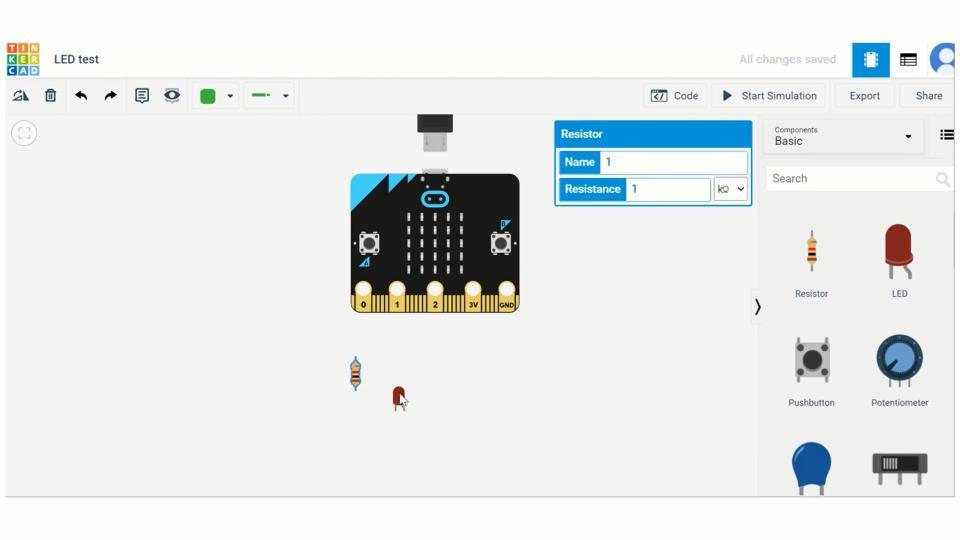
Insert LED & Resistor / Masukkan LED Dan Perintang
.jpg)
Add LED and resistor into stage / Masukkan LED dan perintang ke pentas.
LED and Resistor on component / LED dan perintang diambil dari Komponen
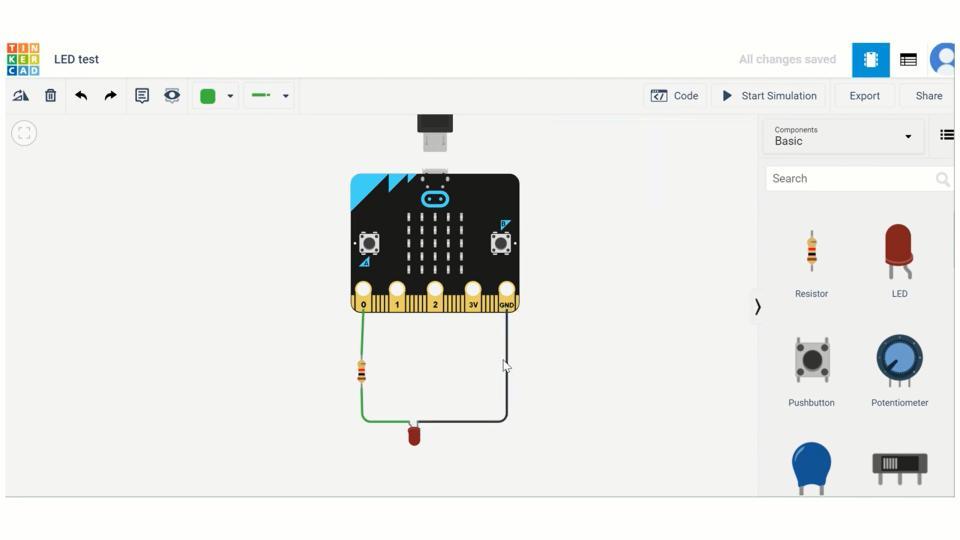
Link / Sambungan
.jpg)
Link all the component to Microbit. You can change wire color also. Please use different wire color for different component to make it different and easy to connect.
Sambungkan semua komponen ke Microbit. Anda juga boleh menukar warna wayar. Sila gunakan warna berbeza untuk setiap komponen untuk memudakan anda.
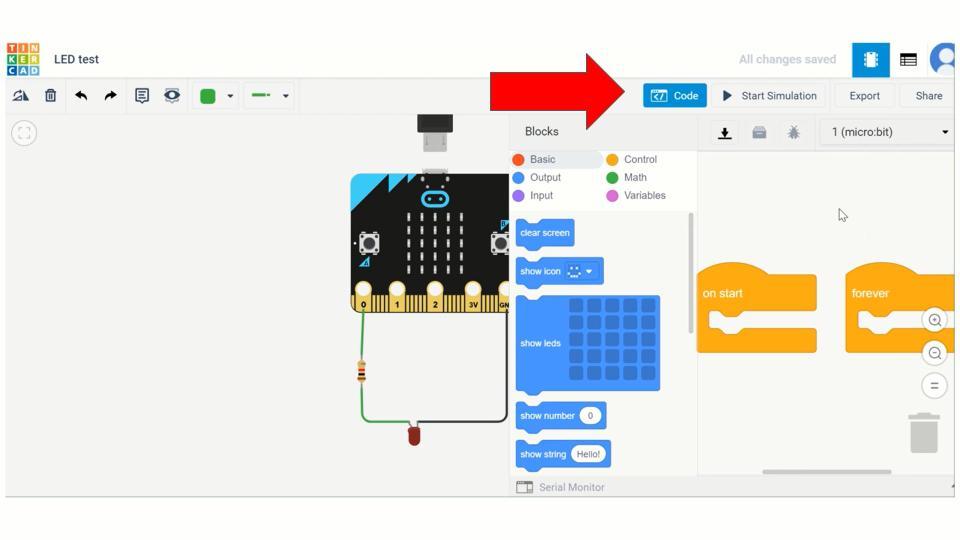
Coding / Koding
.jpg)
Click code to start coding / tekan Code untuk memulakan koding
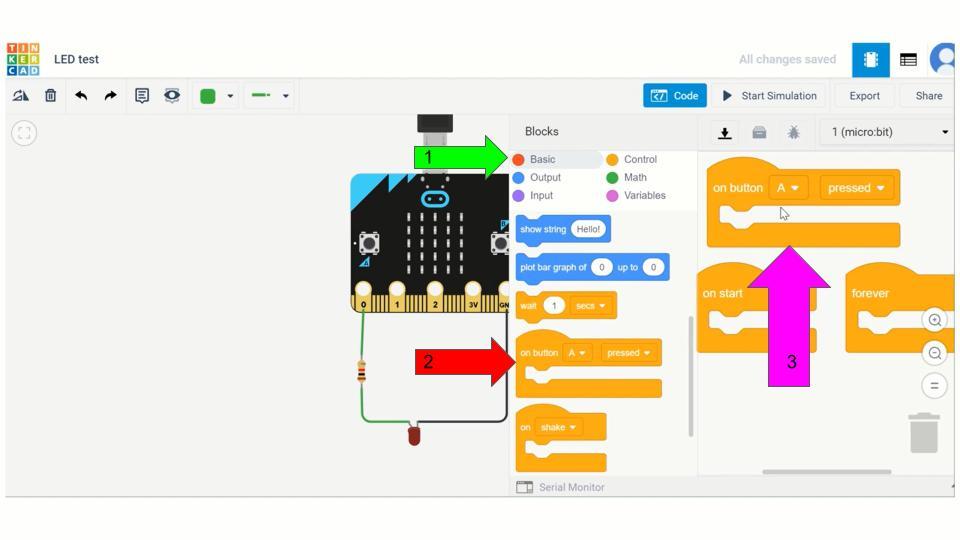
Enter Button / Masukkan Butang
.jpg)
- Click on basic / Tekan di Basic
- Search on Button A press / Cari Button A press
- Drag to stage / Seret masuk ke pentas
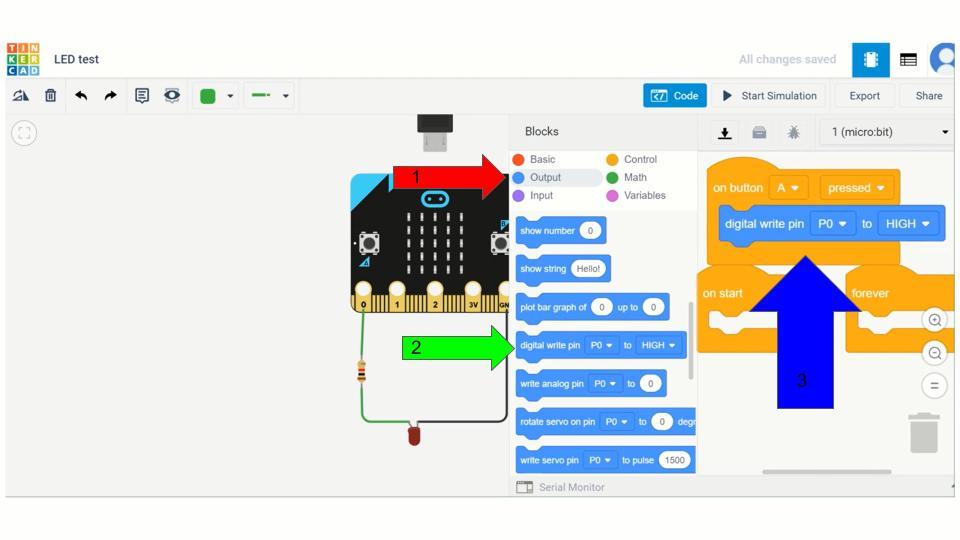
Output LED
.jpg)
- Click Output / Tekan Output
- Search digital write pin / Cari digital write pin
- Drag into Button A / Seret masuk ke Button A
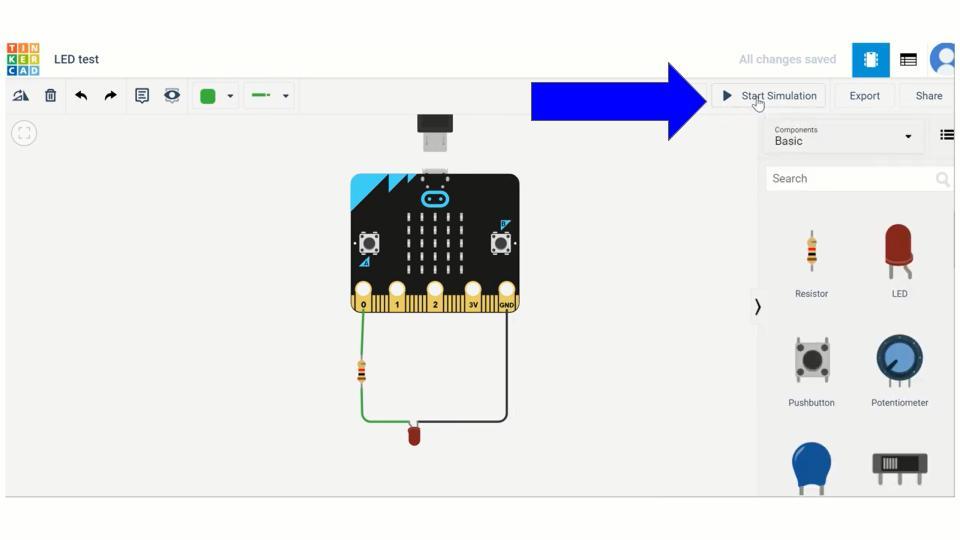
Testing / Ujilari
.jpg)
Click Start simulation to start and Stop simulation to stop / Tekan Start simulation to mula and Stop simulation to berhenti
Try
- Add another new button / Masukkan butang baharu
- Make LED off / jadikan LED tutup
Full / Penuh
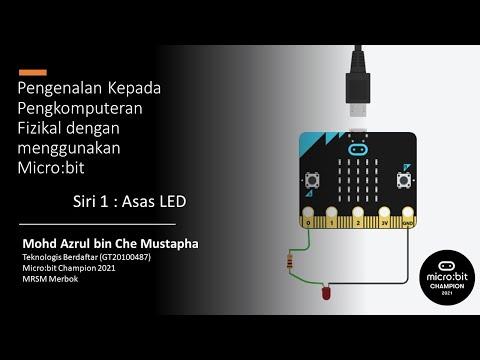
Full how video to use Tinkercad (in Malay)
Panduan video penuh