Kinetic Spinners & Rigid Transformations
3640 Views, 30 Favorites, 0 Comments
Kinetic Spinners & Rigid Transformations
The goal of this activity is to combine mathematics, art, culture, and fabrication such as in the example of the Kinetic Spinner Forest, a public art installation by US-based artist Nick Cave. Cave is famous for his “Soundsuits”, a series of wearable sculptures that blend fashion and sculpture, which originated as metaphorical suits of armor in response to violence against and within marginalized communities. The Kinetic Spinner Forest specifically addresses gun violence.
Have students watch this video introduction:
https://www.youtube.com/embed/GrOnXvNH_UQ
For this project, students will create their own 2D kinetic spinners while exploring illustrative mathematics, a problem-based learning activity that is designed to address content and practice standards to foster learning for all, preparing students to solve problems, reason, communicate, and think critically in the classroom and beyond.
Supplies
Note: You can also use traditional materials such as
- pencils
- cardboard
- cutters
- rulers
Learn About Nick Cave and His Kinetic Spinner Forest

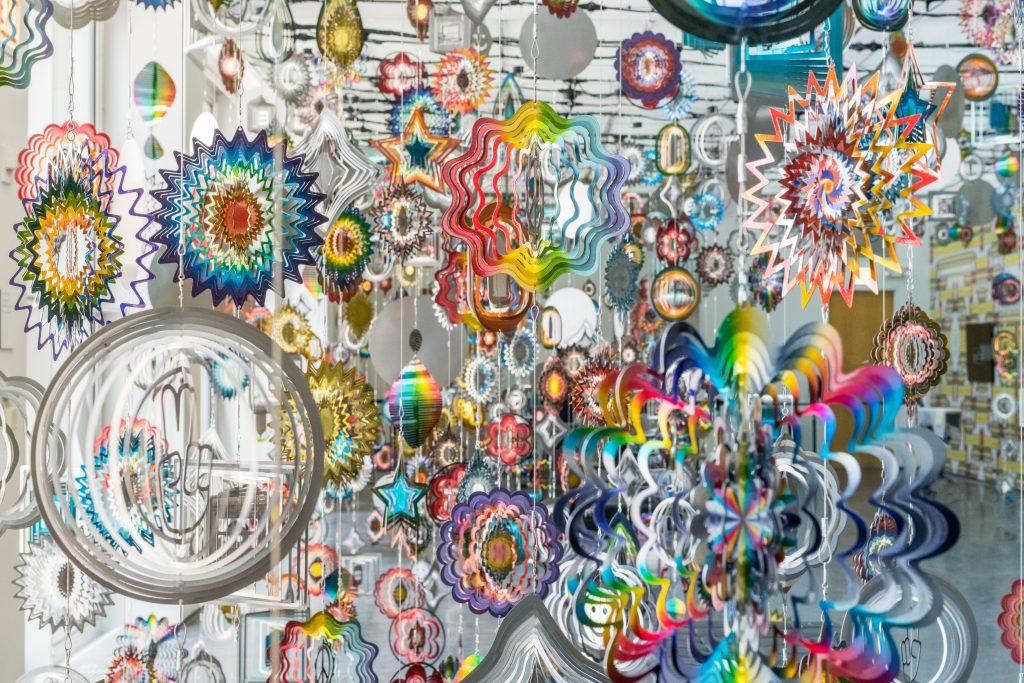
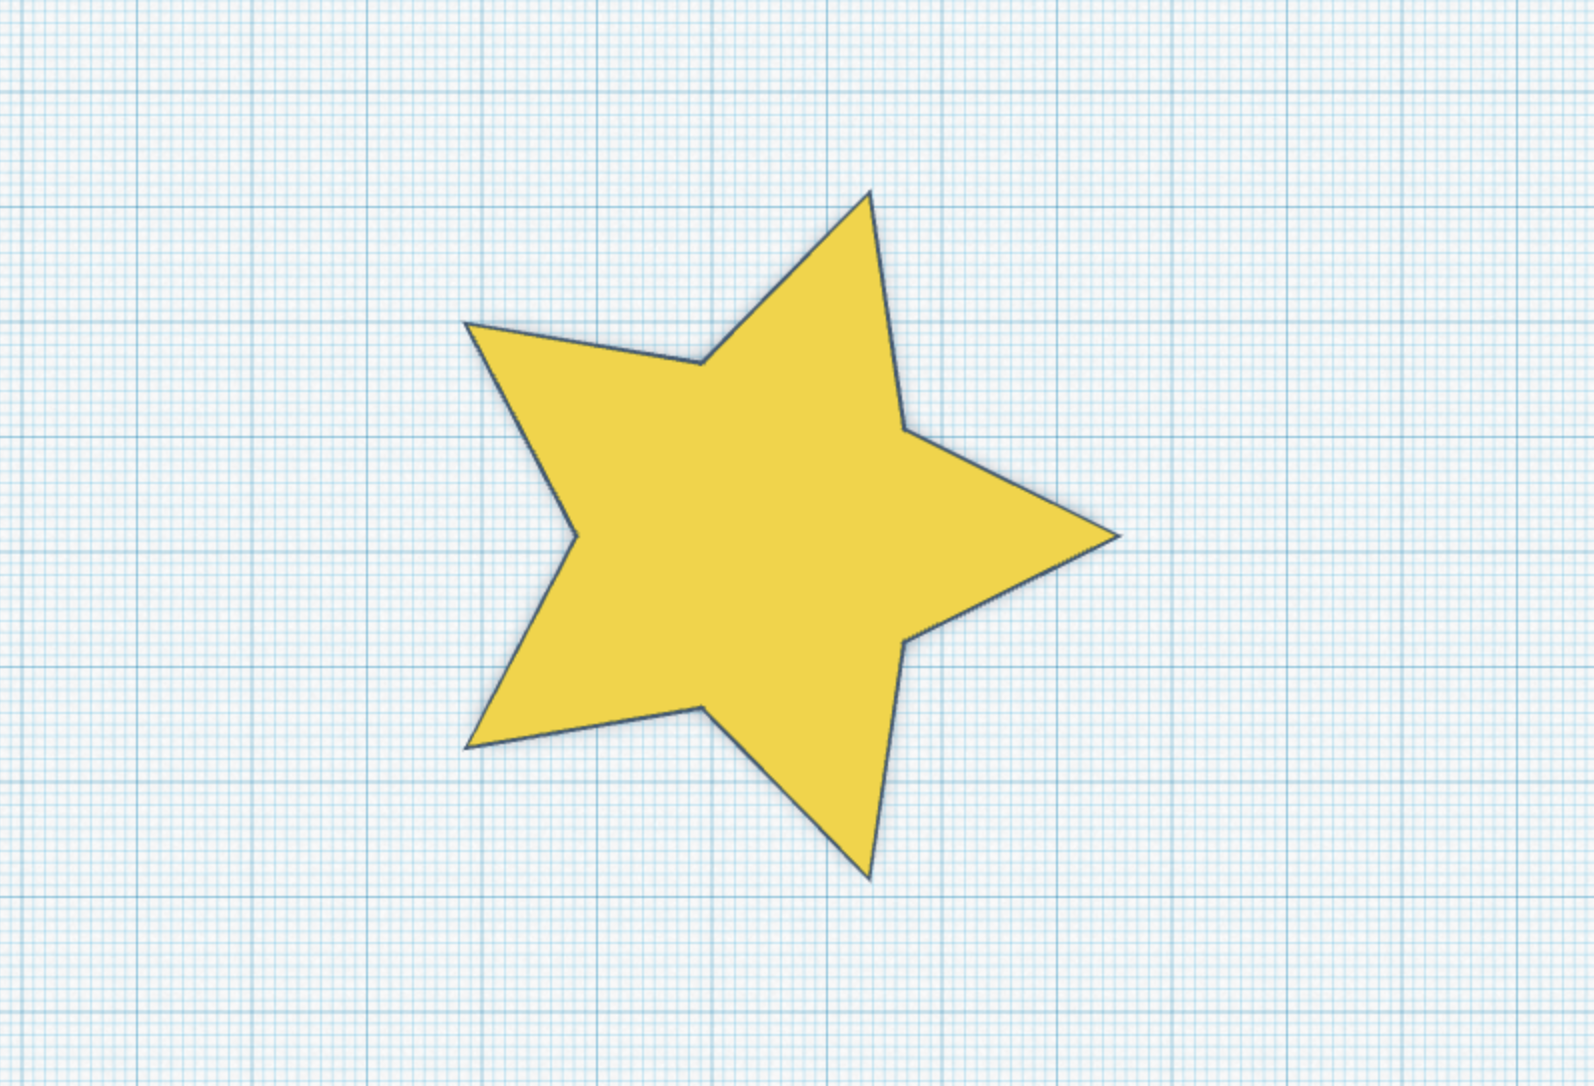
US artist Nick Cave's Kinetic Spinner Forest consists of 16,000 multi-hued mobiles that shimmer, sparkle and dance, given life by the rising and falling eddies of air in public spaces. Many of the spinners feature motifs of simple 2D shapes such as stars, sunbursts, and clouds. Other shapes include handguns, bullets and teardrops, reflecting Cave's deep concern about gun violence in the United States, particularly violence directed at African-Americans.
The shapes in Cave's work demonstrate geometric concepts such as translation, reflection, and rotation.
Explore Rigid Transformations in Tinkercad
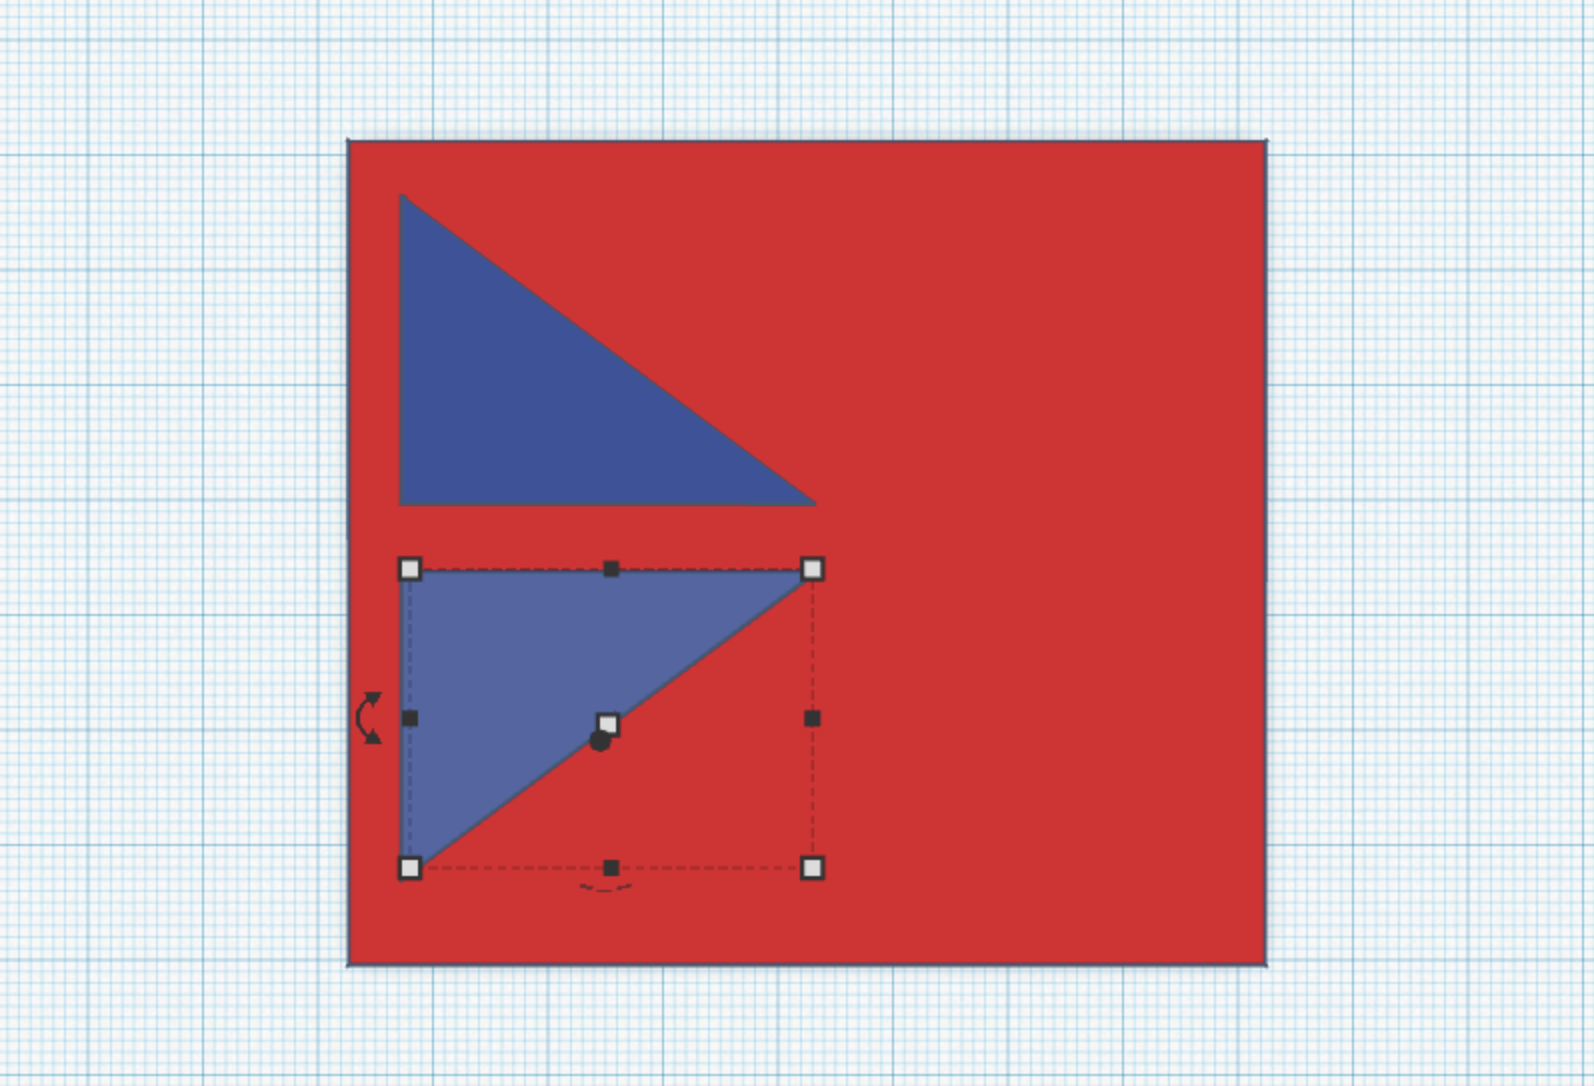
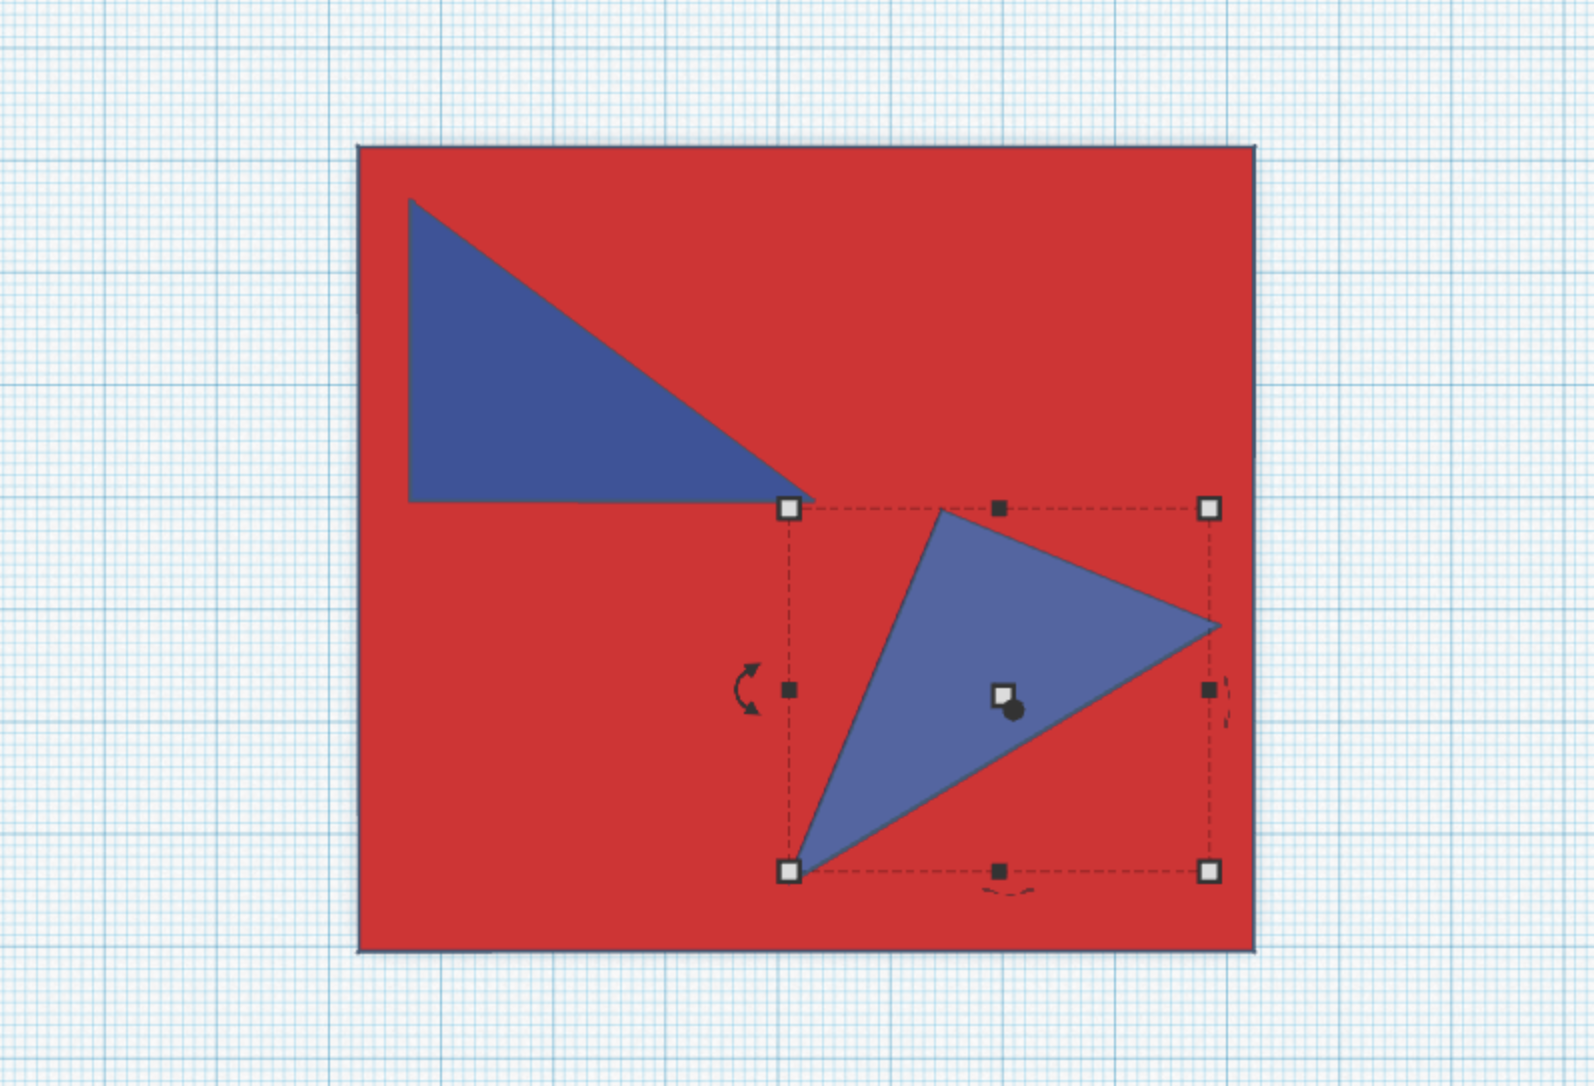
8th grade students work with rigid transformations of figures on a 2D plane, which draws on earlier work with geometry and geometric measurement. This includes translation, rotation, and reflection.
A translation is a type of transformation that takes each point in a figure and slides it the same distance in the same direction.
A rotation is a type of transformation that takes each point in a figure and rotates it a certain number of degrees around a given point.
A reflection is a mirror image of the shape.
Students can perform these transformation sequences in Tinkercad; each sequence is called a rigid transformation.
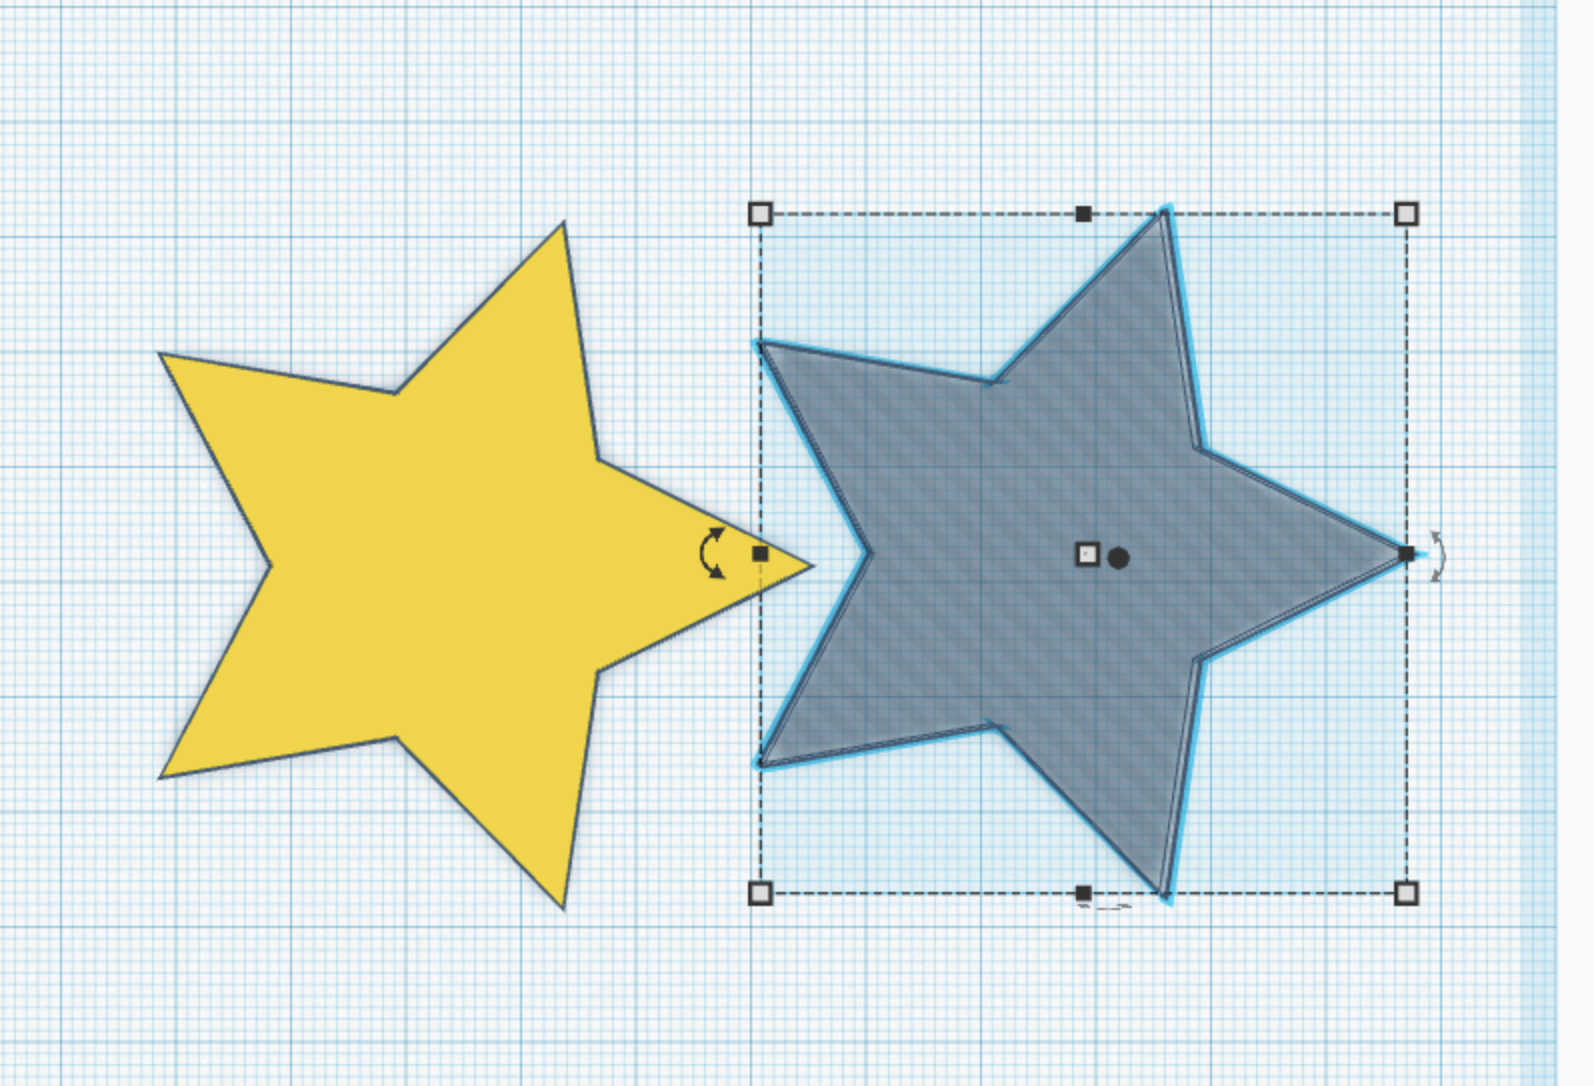
Make a Seed Object
A seed object refers to a basic 3D object or shape upon which students will perform their rigid transformations.
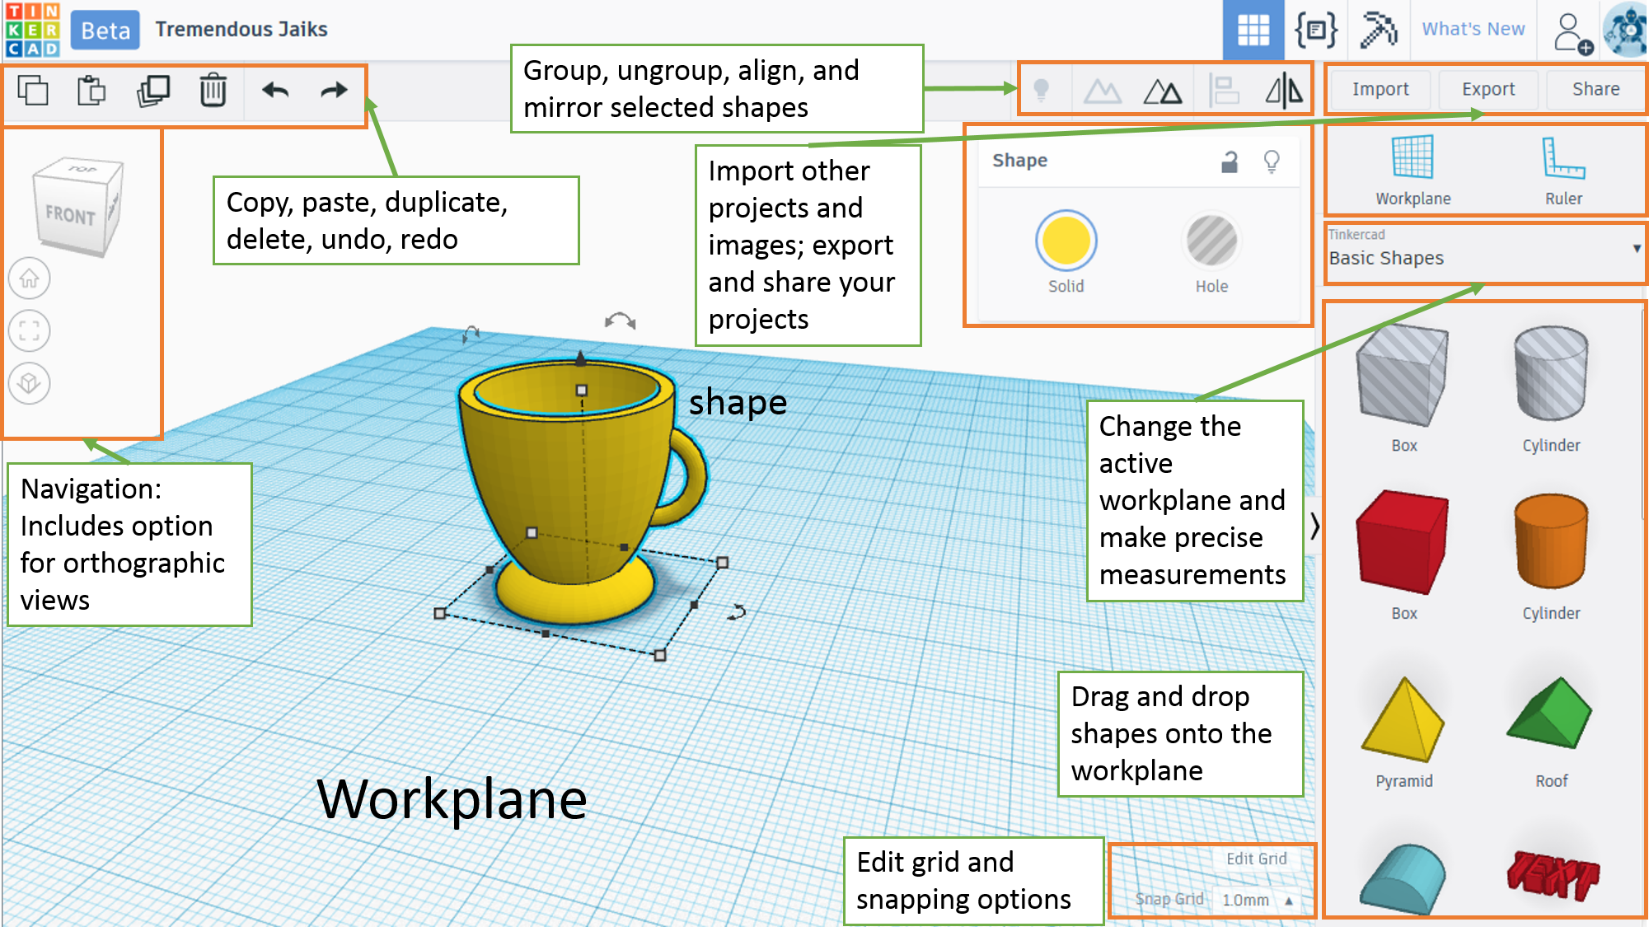
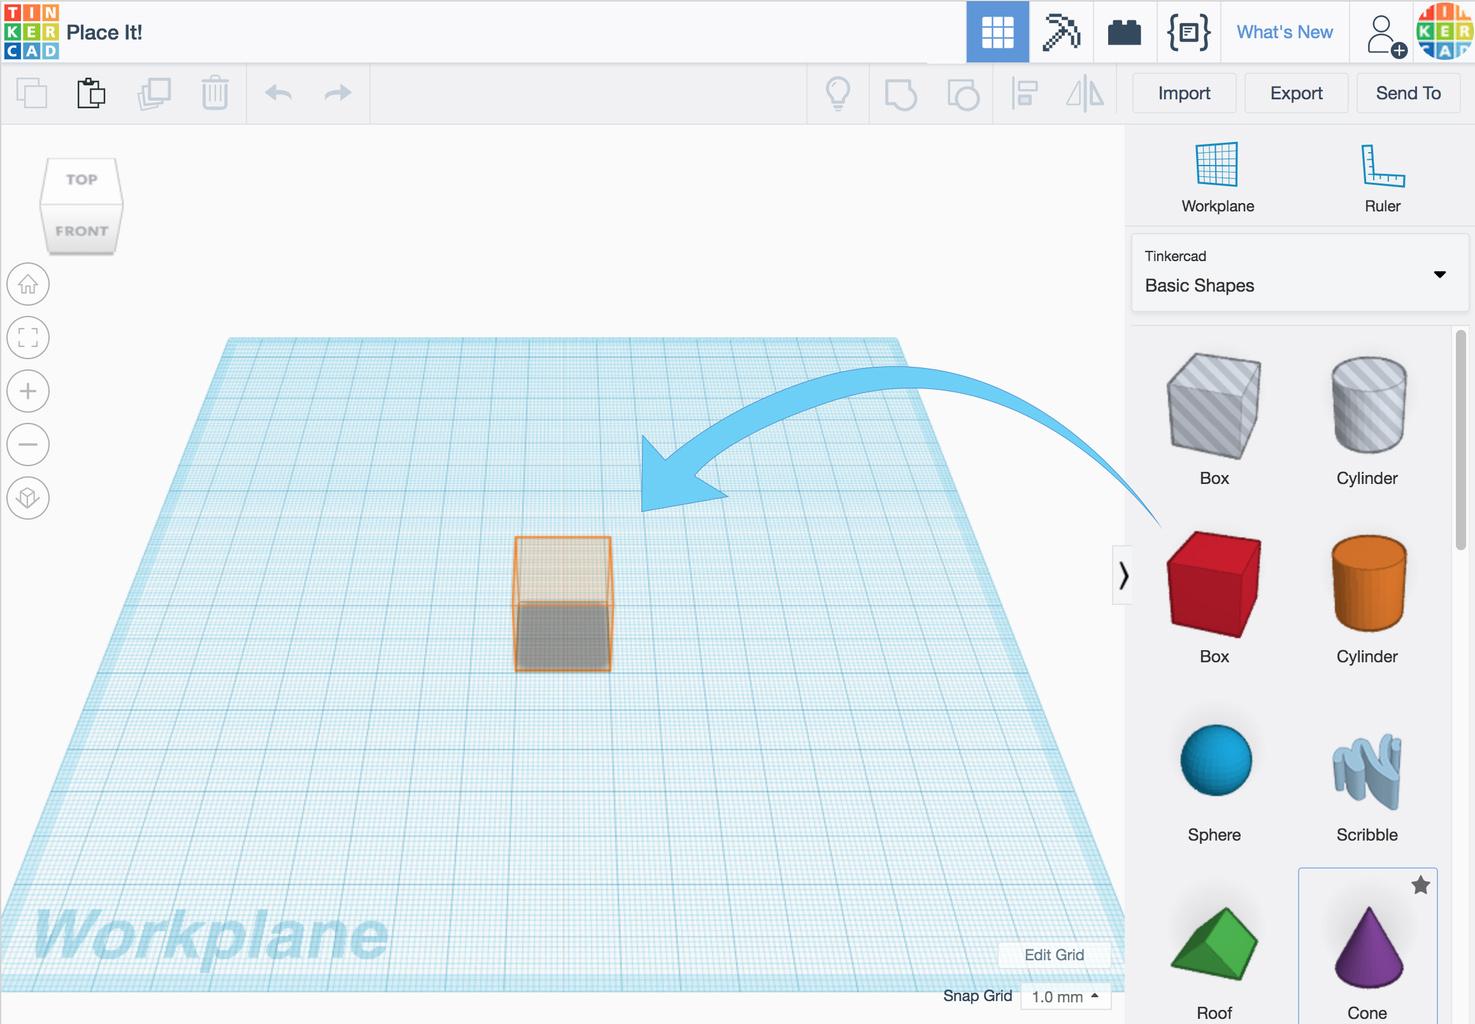
Students can drag and drop 3D objects onto the Workplane or use the Scribble shape tool to make their own. Objects can be copied and pasted, moved, scaled and rotated.
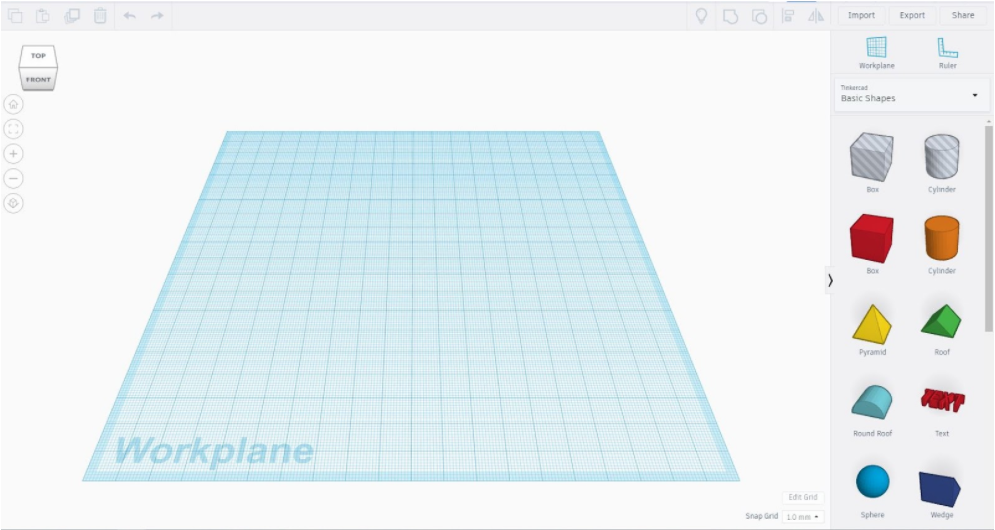
Launch Tinkercad 3D Design, click on "+ New" or New Design. Then, click on a basic (solid) shape and drag it over to the Workplane. Once in place, this object can be repositioned, re-sized, and flattened. Give students time to practice manipulating the object and becoming familiar with Tinkercad's interface.
Measuring Objects in Tinkercad
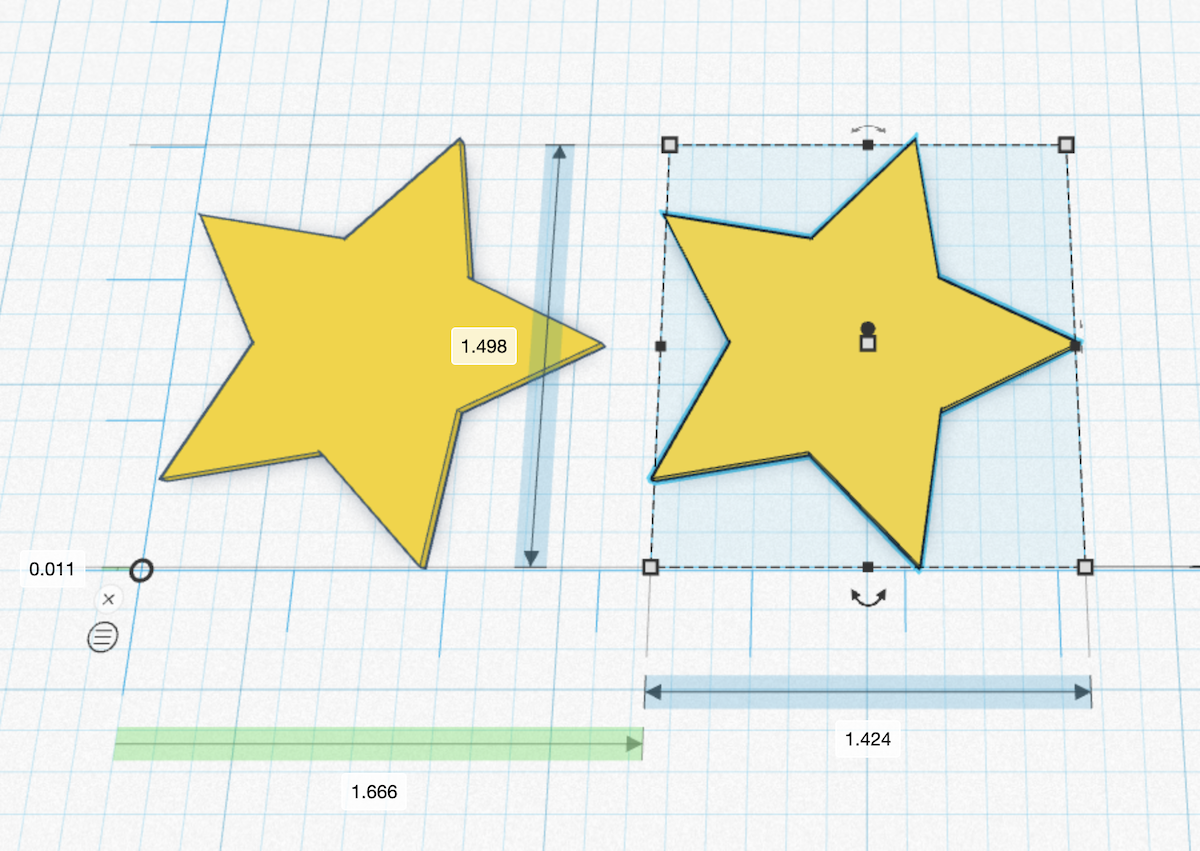
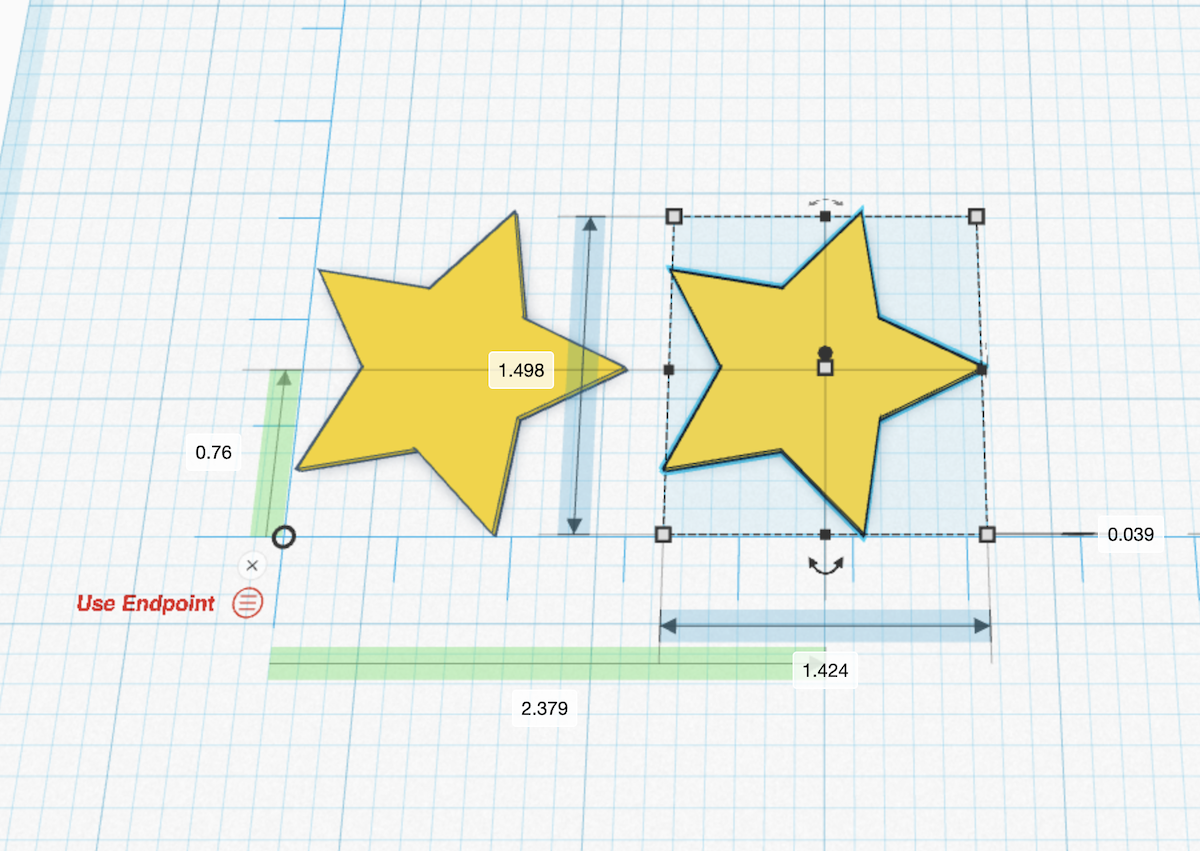
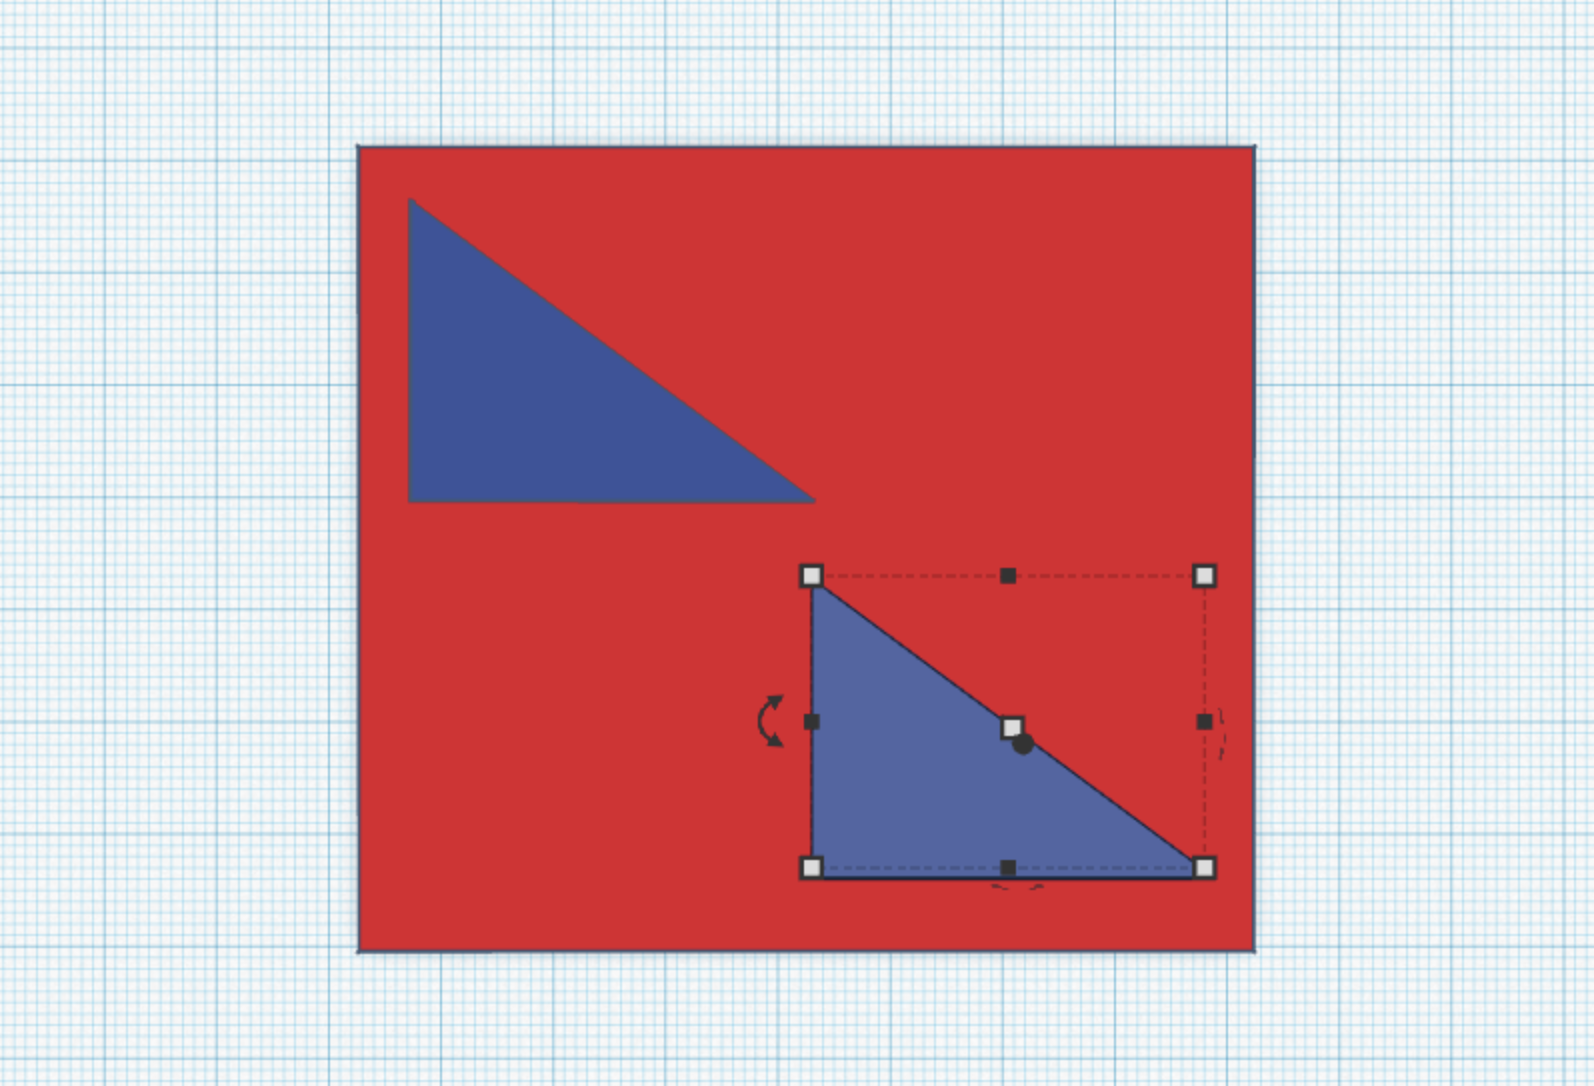
In Tinkercad students can use the Ruler tool to find out the location of objects in relation to each other, or other points on the workplane. Click the “Ruler” button in the top right corner above the Basic Shapes window, and then click again anywhere in the Workplane to place a ruler down on it.
Select an object to show its dimensions, as well as a distance from the point of the ruler. The distance from the object to the ruler is either the distance to one of the endpoints on the object, or the midpoint. This can be toggled by clicking the circle with three lines next to the point of the ruler.
To determine the distance of objects relative to each other, move the point of the ruler to a corner of an object. Then, select another object to get a distance from the corner of object 1 to the midpoint/endpoint of object 2, which is much more useful if you need them to be a certain distance apart.
Students can use this method to perform a translation on their seed object with its copy.
Note: The default system of measurement is millimeters (mm) but this can be changed to inches by clicking on the Edit Grid button on the lower right corner of main window.
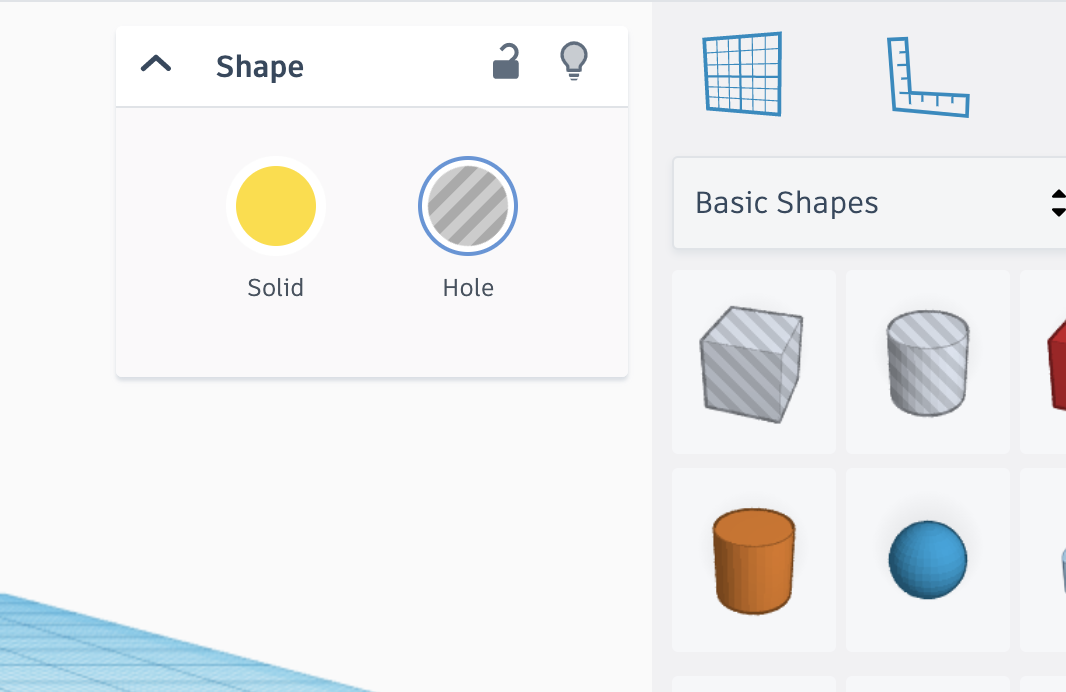
Copy, Change a Solid Object to a Hole
Students can use Tinkercad to reinforce their understanding of rigid transformations and congruence using 3D models (CCSS.MATH.CONTENT.8.G.A).
First, perform a translation using object 1 by copying it, then slide or move object 2 over the same distance and direction as the first one. Then make object 2 a hole by selecting it and clicking the “Hole” button near the top right. Object 2 will then change from a solid color to a semi-transparent gray color.
Make a Hole in the Solid Object
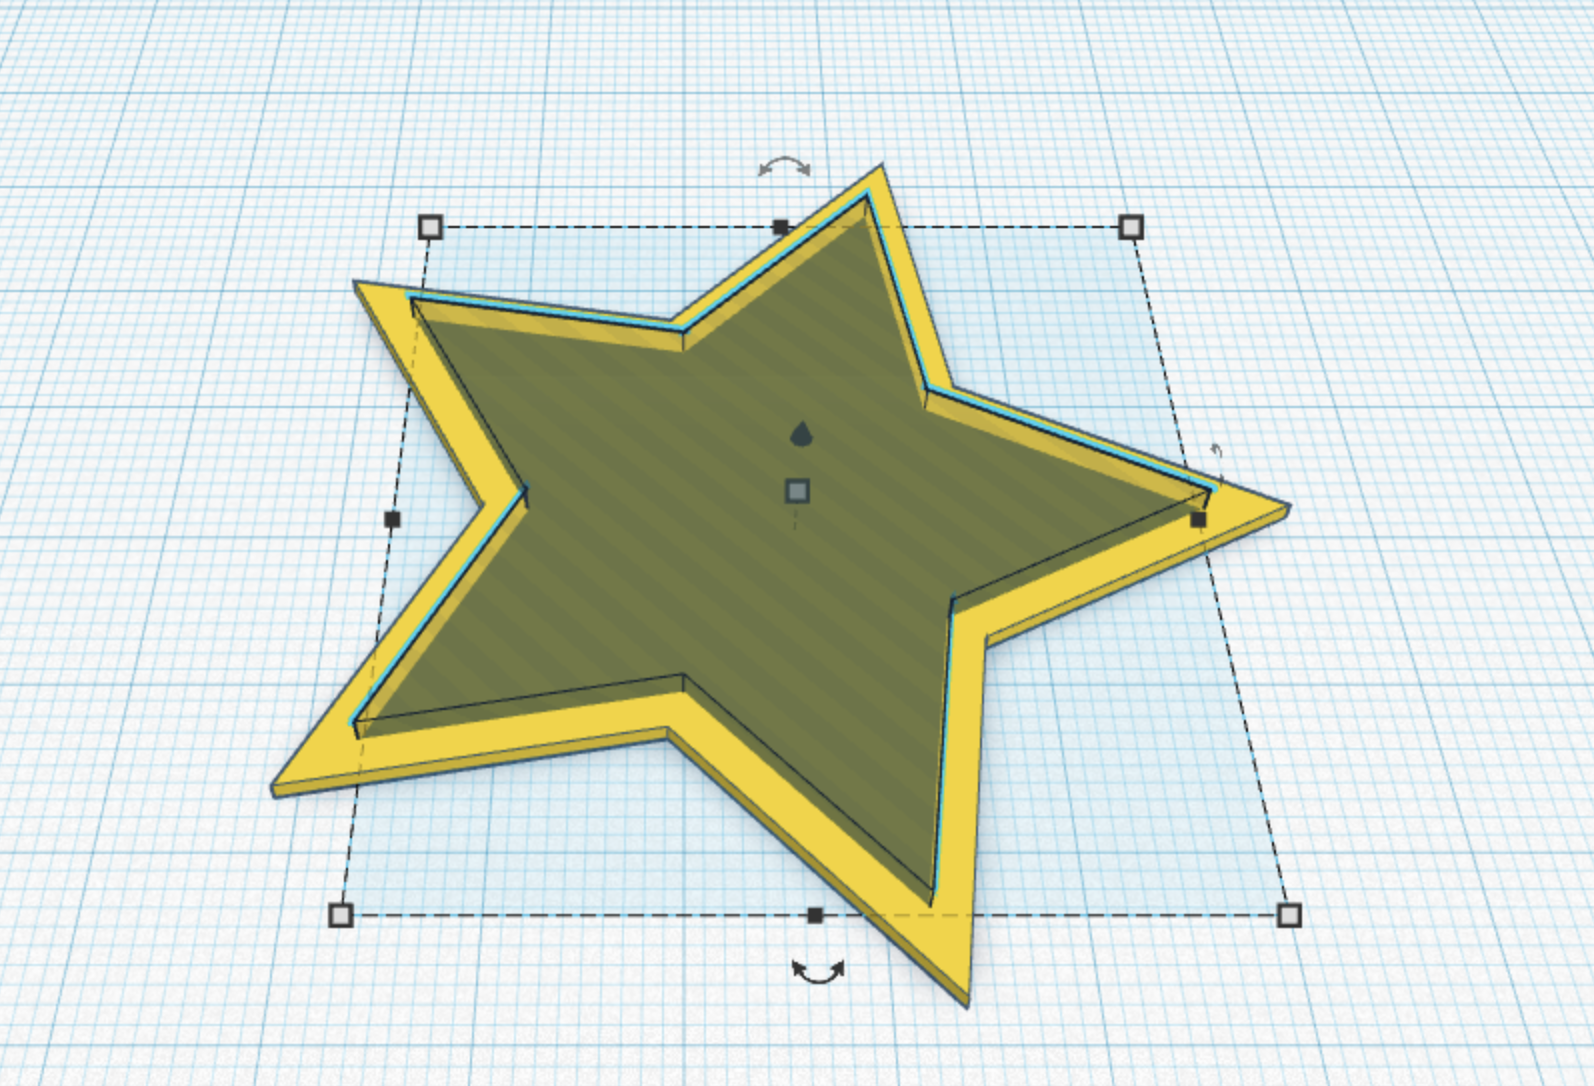
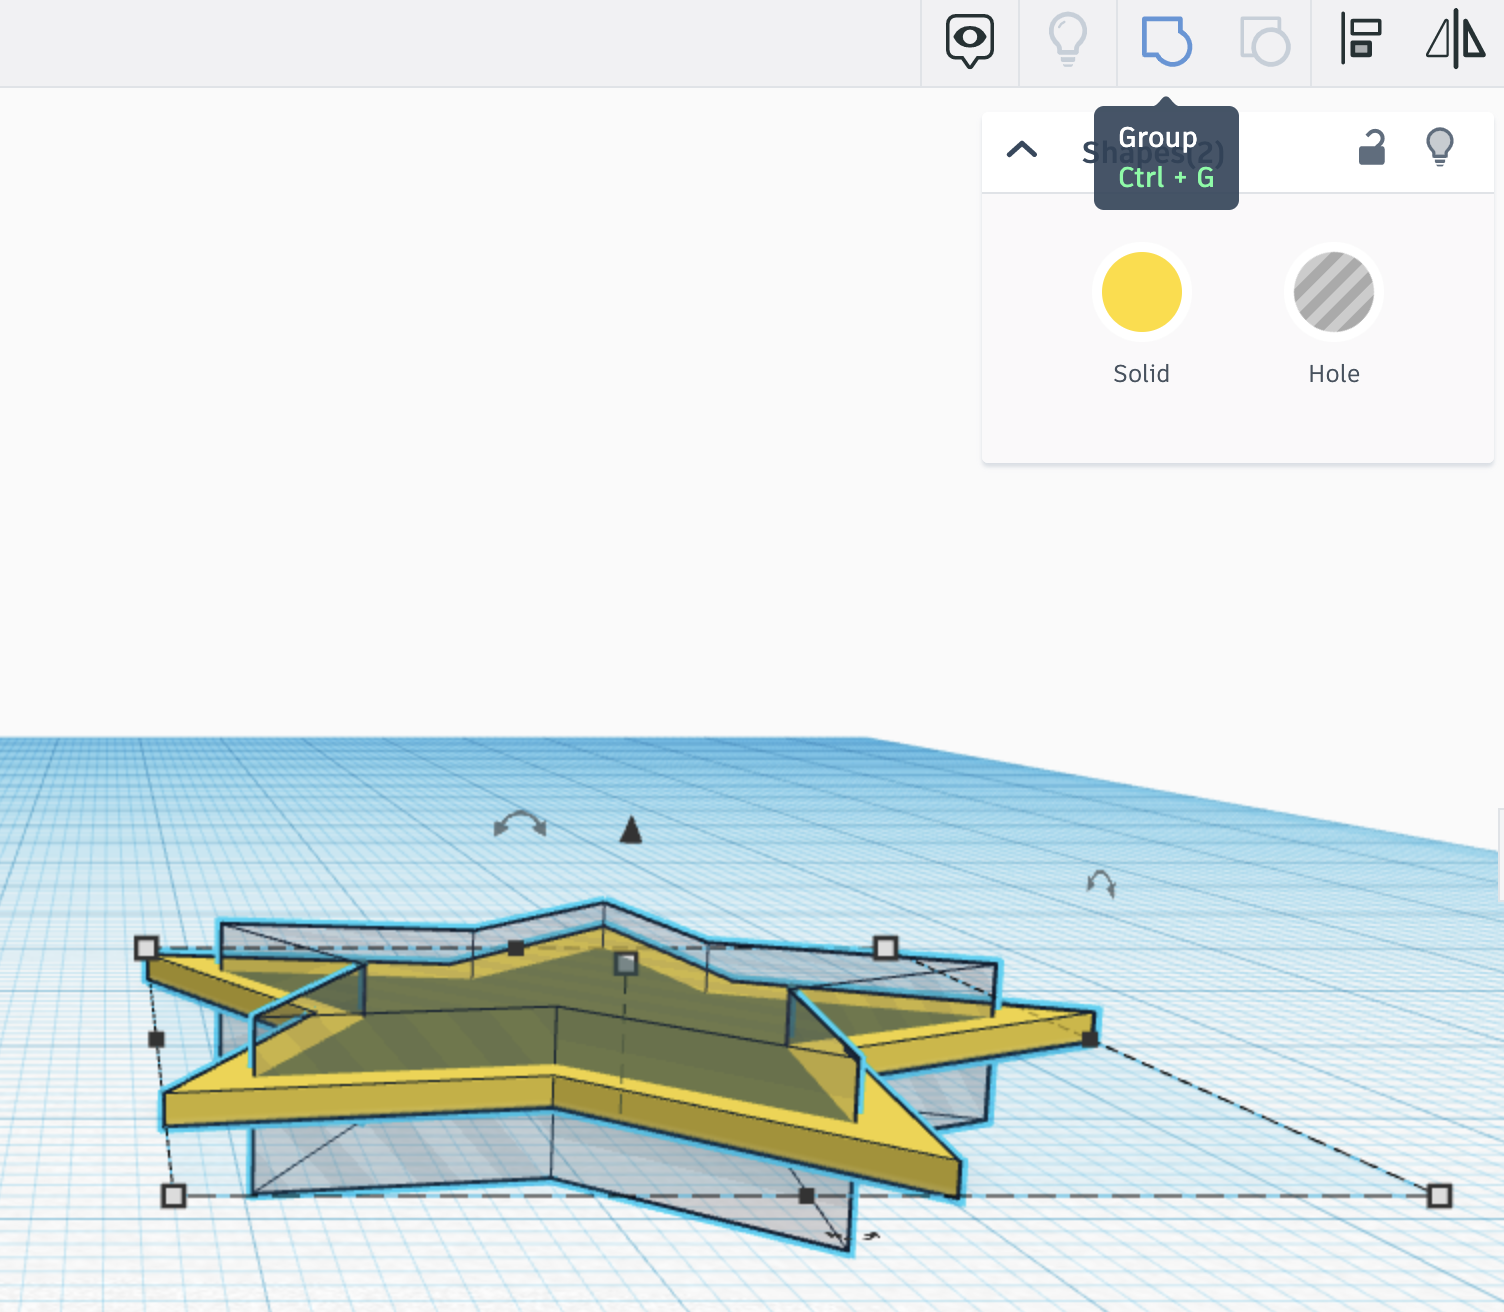
A hole in Tinkercad is a shape that when grouped with another object, will remove material instead of joining together. This is kind of like a hole punch. Everything in the path of the hole bunch will be removed.
Make the hole object slightly smaller and taller than the solid one. Then align the objects, so the hole (object 1) is nested inside of object 2.
To align two objects together, select them both, press the align icon (or use the L key) and you'll be able to choose the nodes the two objects can mutually align to.
Move the hole down until it goes all the way through the solid object.
Click the Group icon (Control-G). The hole object should disappear, leaving behind the solid one with a hole.
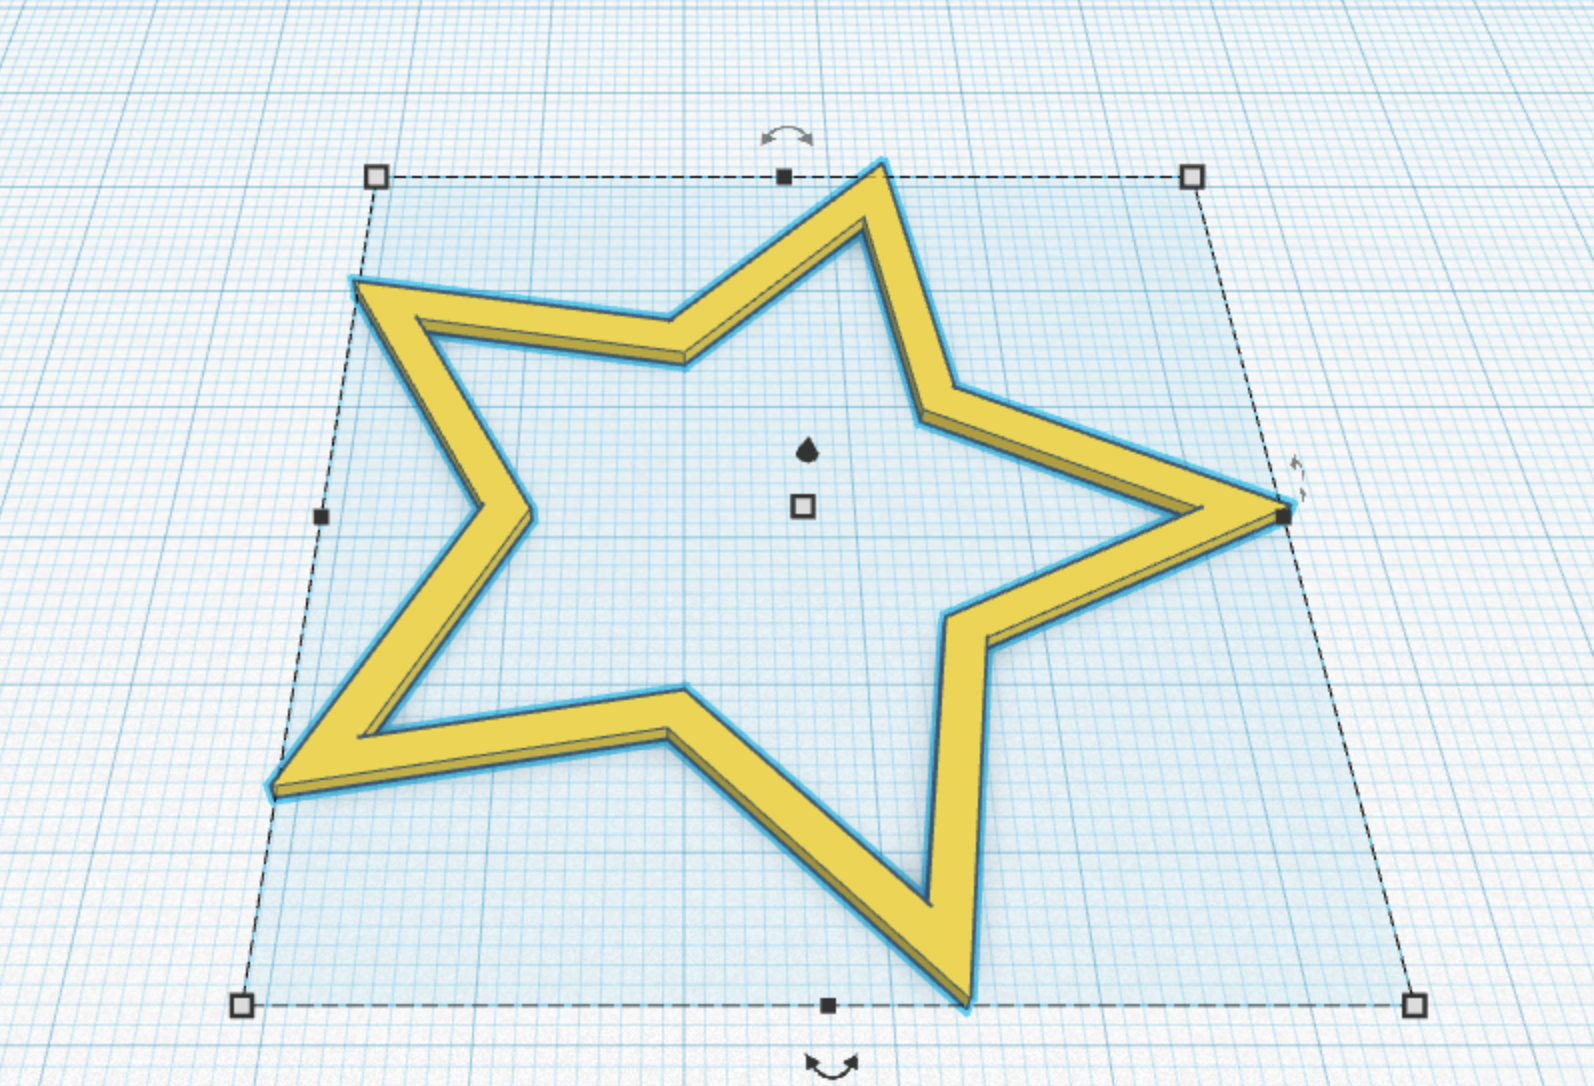
Copy, Paste and Repeat

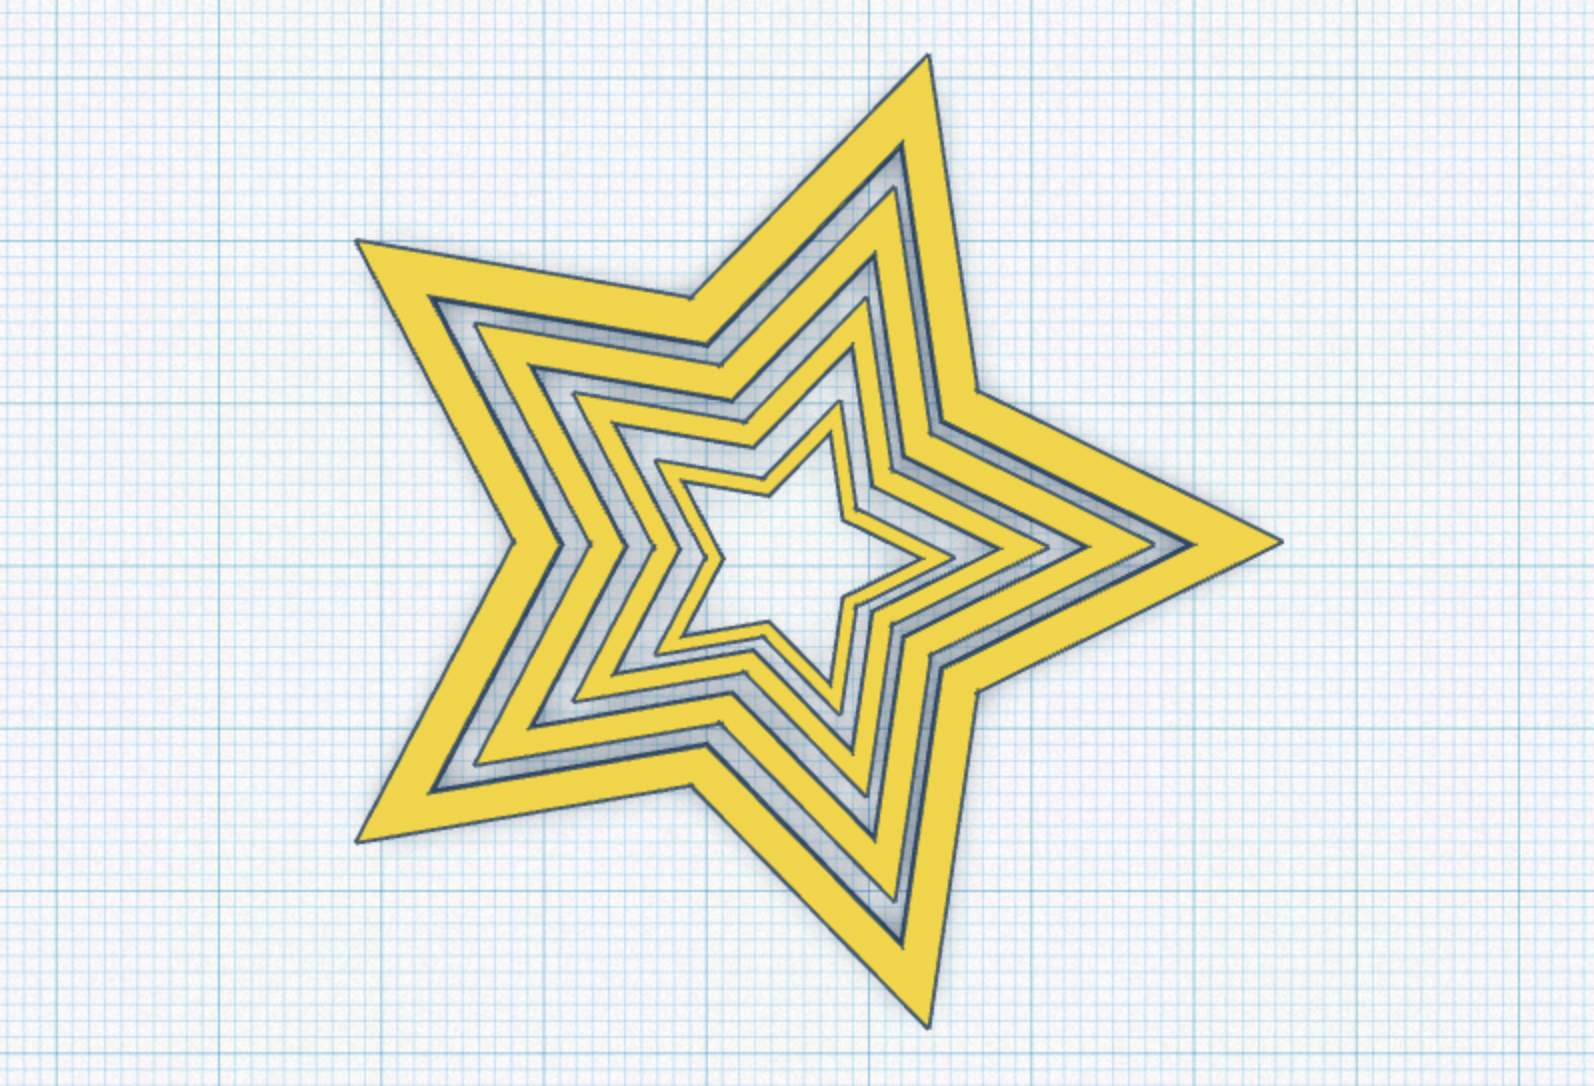
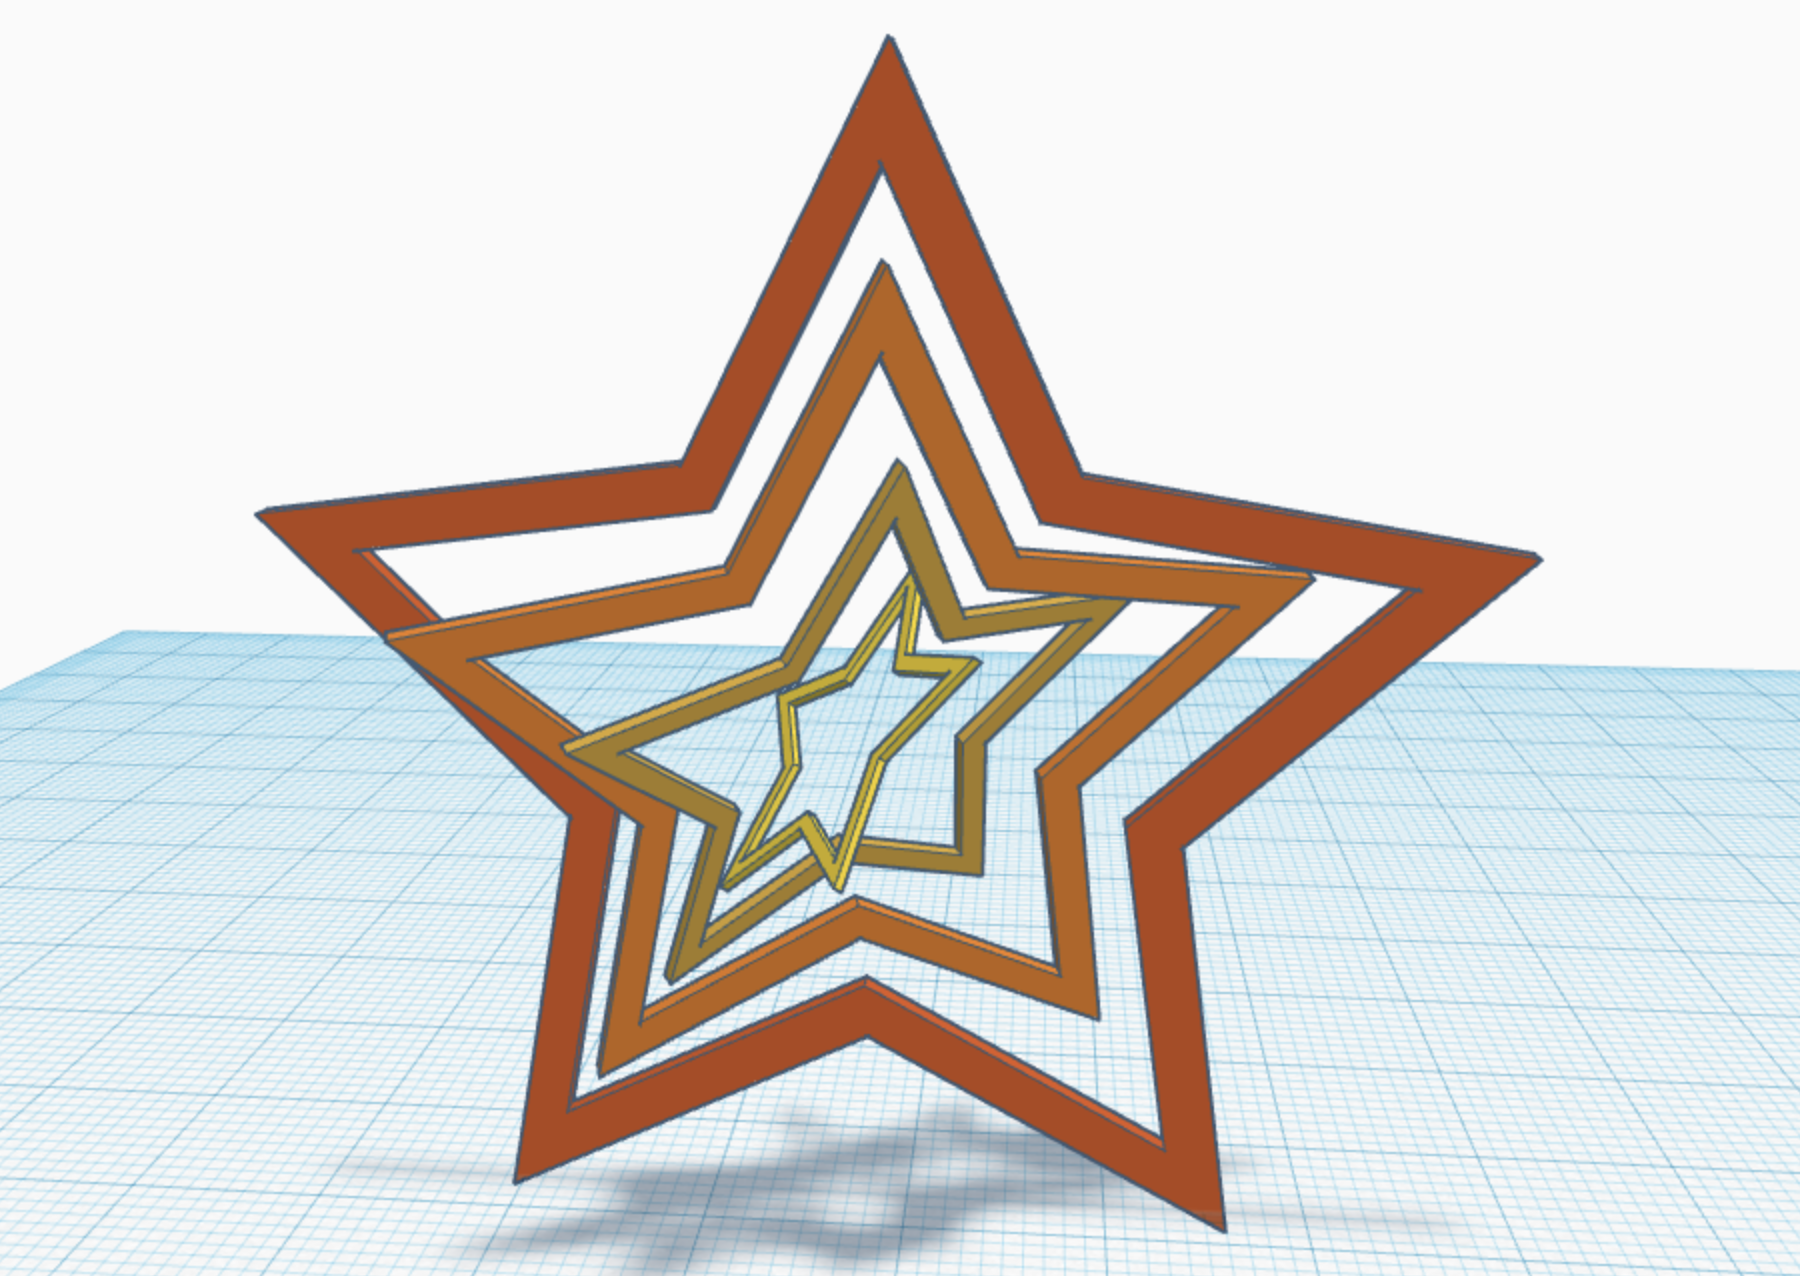
In geometry, two or more objects are said to be concentric, coaxal, or coaxial when they share the same center or axis. Taking inspiration from Nick Cave, students can copy and paste their new shapes to create their own kinetic spinners.
First, make a copy of the solid object (with the hole), make it slightly smaller, then paste and reposition the copied object inside the first one. Tip: click "Top" on the Navigation Cube (top left) to copy, paste, and reposition the shapes.
Repeat these steps until there are at least three smaller versions of the main object nested inside of it.
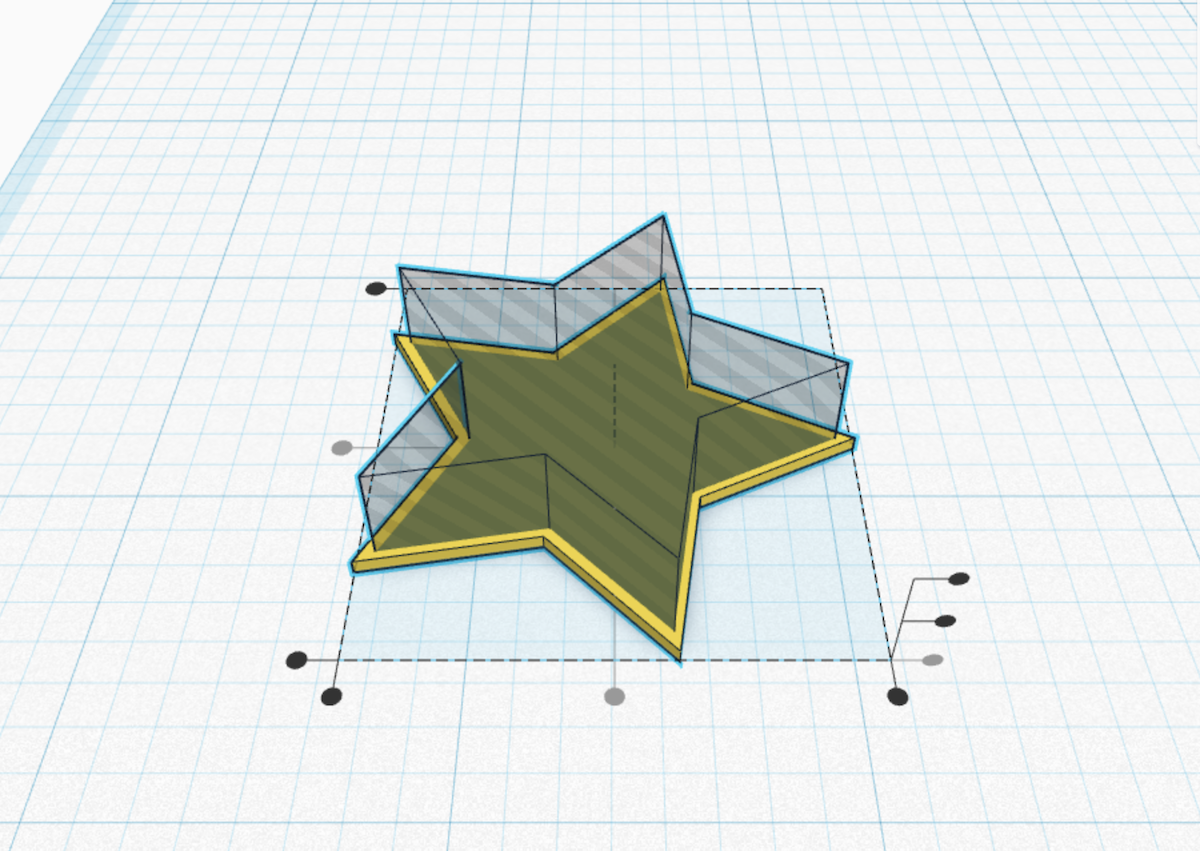
Reposition the Objects and Rotate Them
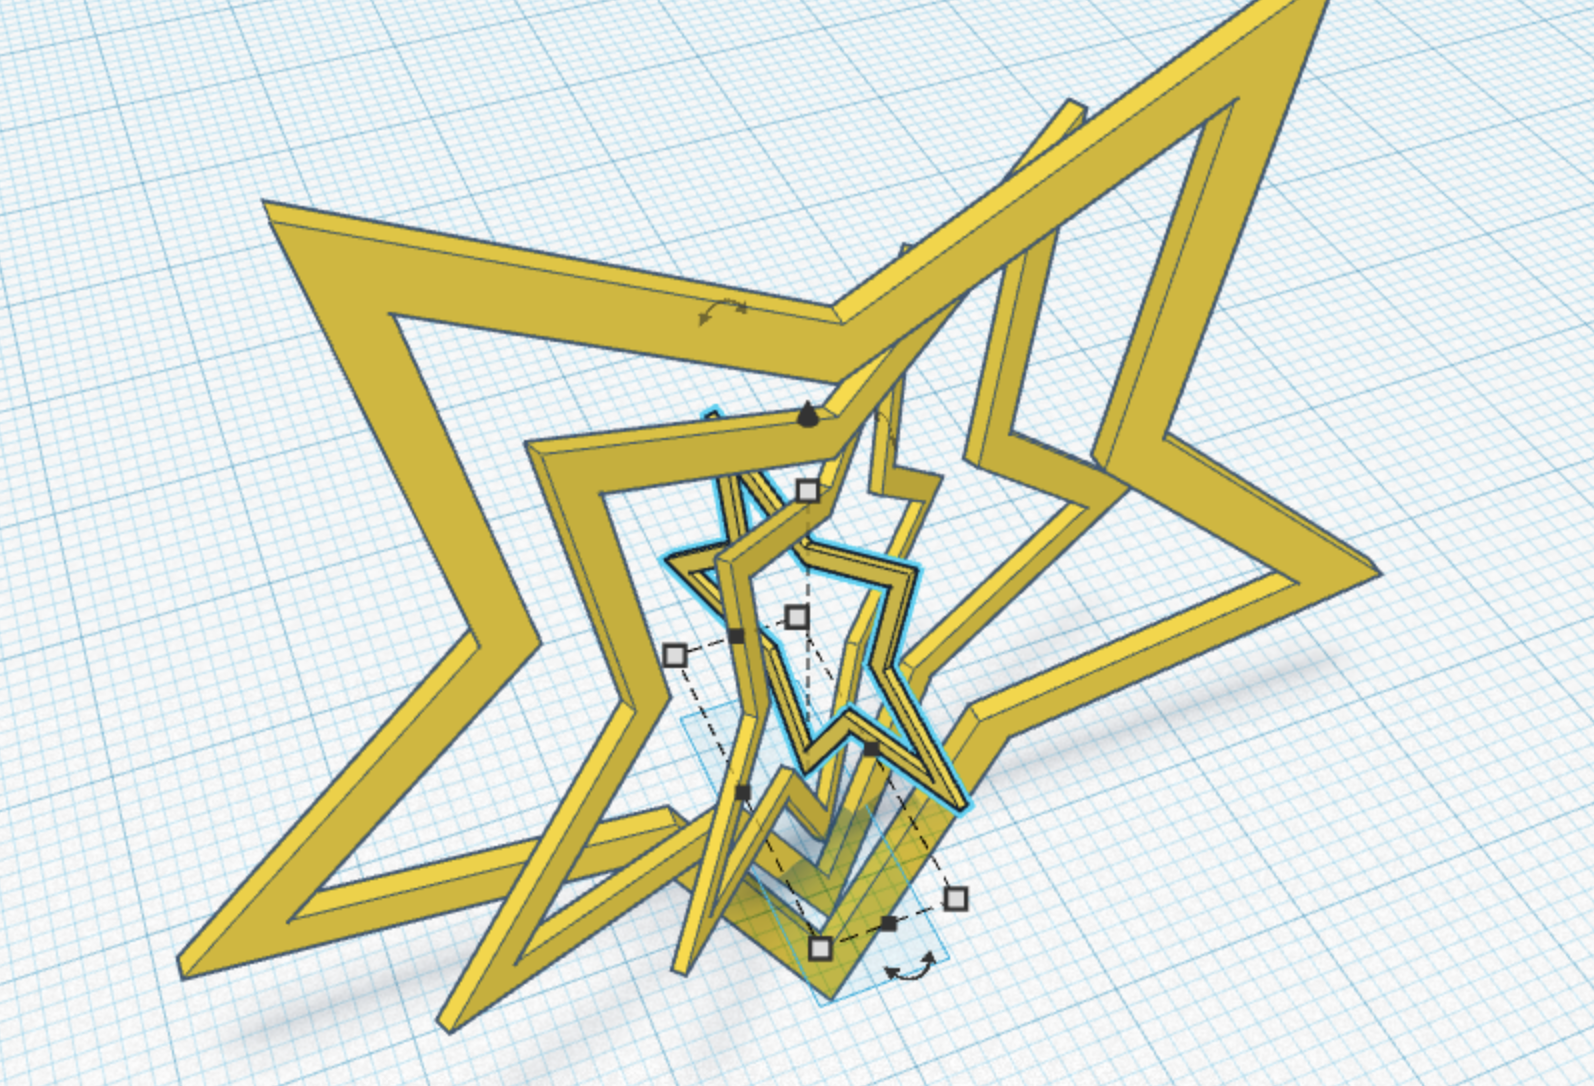
As a final step, students can select all of their objects at once and position them so their "spinners" are standing upright. Then, they can rotate each nested shape to create the 3D spinner effect.
These shapes can also be exported as STL files for 3D printing.
If every student 3D printed their spinners the classroom or other designated space can become a kinetic spinner forest.
More info on other culturally relevant resources for rigid transformations: https://hailstonesequence.com/index.php/2021/09/18/rigid-transformations-in-art-fabric-architecture-design-and-more
More info on teaching math using Tinkercad: https://www.instructables.com/So-You-Want-to-Teach-Math-Using-3D-Design