Keysorter
I'm currently studying NMCT at Howest. For our final semester we had to make a project. So I made a Keysorter.
What does it do?
We have alot of car keys at home and they all look alike. So I made a Keysorter to resolve this issue.
It has to scan in a key via RFID and give it a place in the box. If I scan the same key again it will show his previously assigned place. There is also a button to show the last washed car.
This will al run on a Raspberry Pi which also has a the option to add a webpage via Flask.
On the page I should be able to look at all the keys, add a name to a key and remove a key.
Step 1: What Will I Need?
I started by making a list of components that I'll need to make this thing work.
Components:
- Raspberry pi
- 2 x Shift register (74hc595)
- 3 x button
- 9 x green led
- RFID scanner (MFRC522)
- 12 x resistor 220 ohm
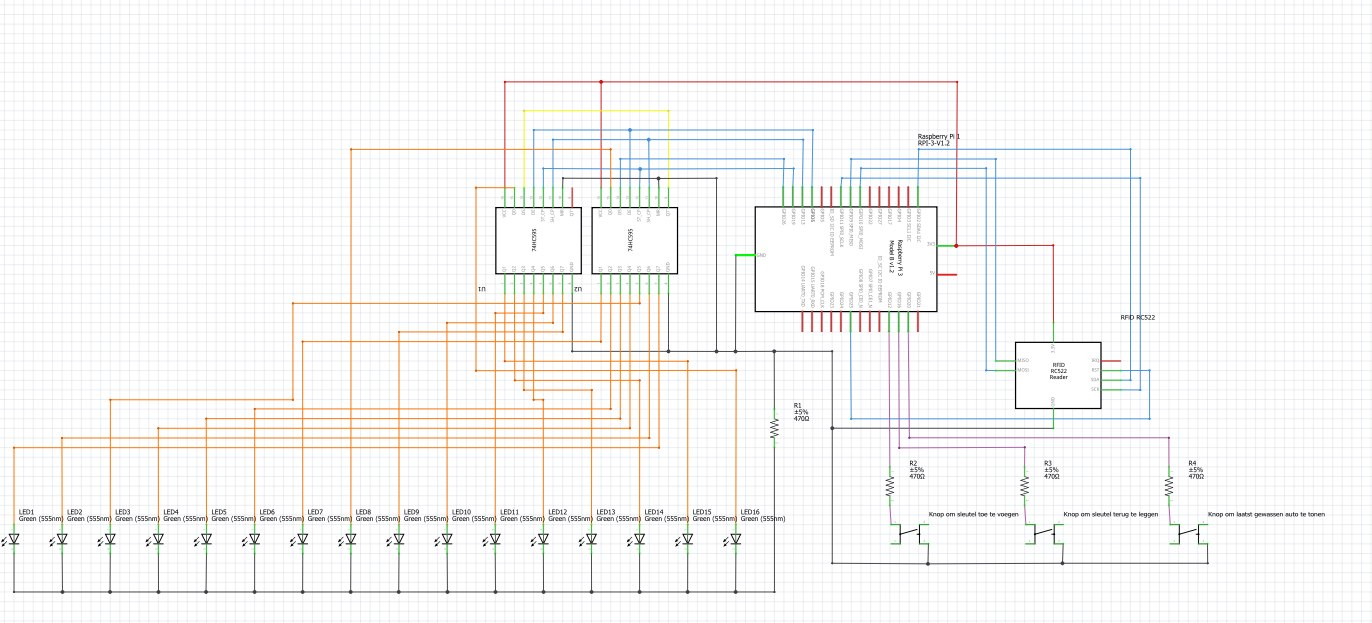
Then I put all this into my fritzing schematic.
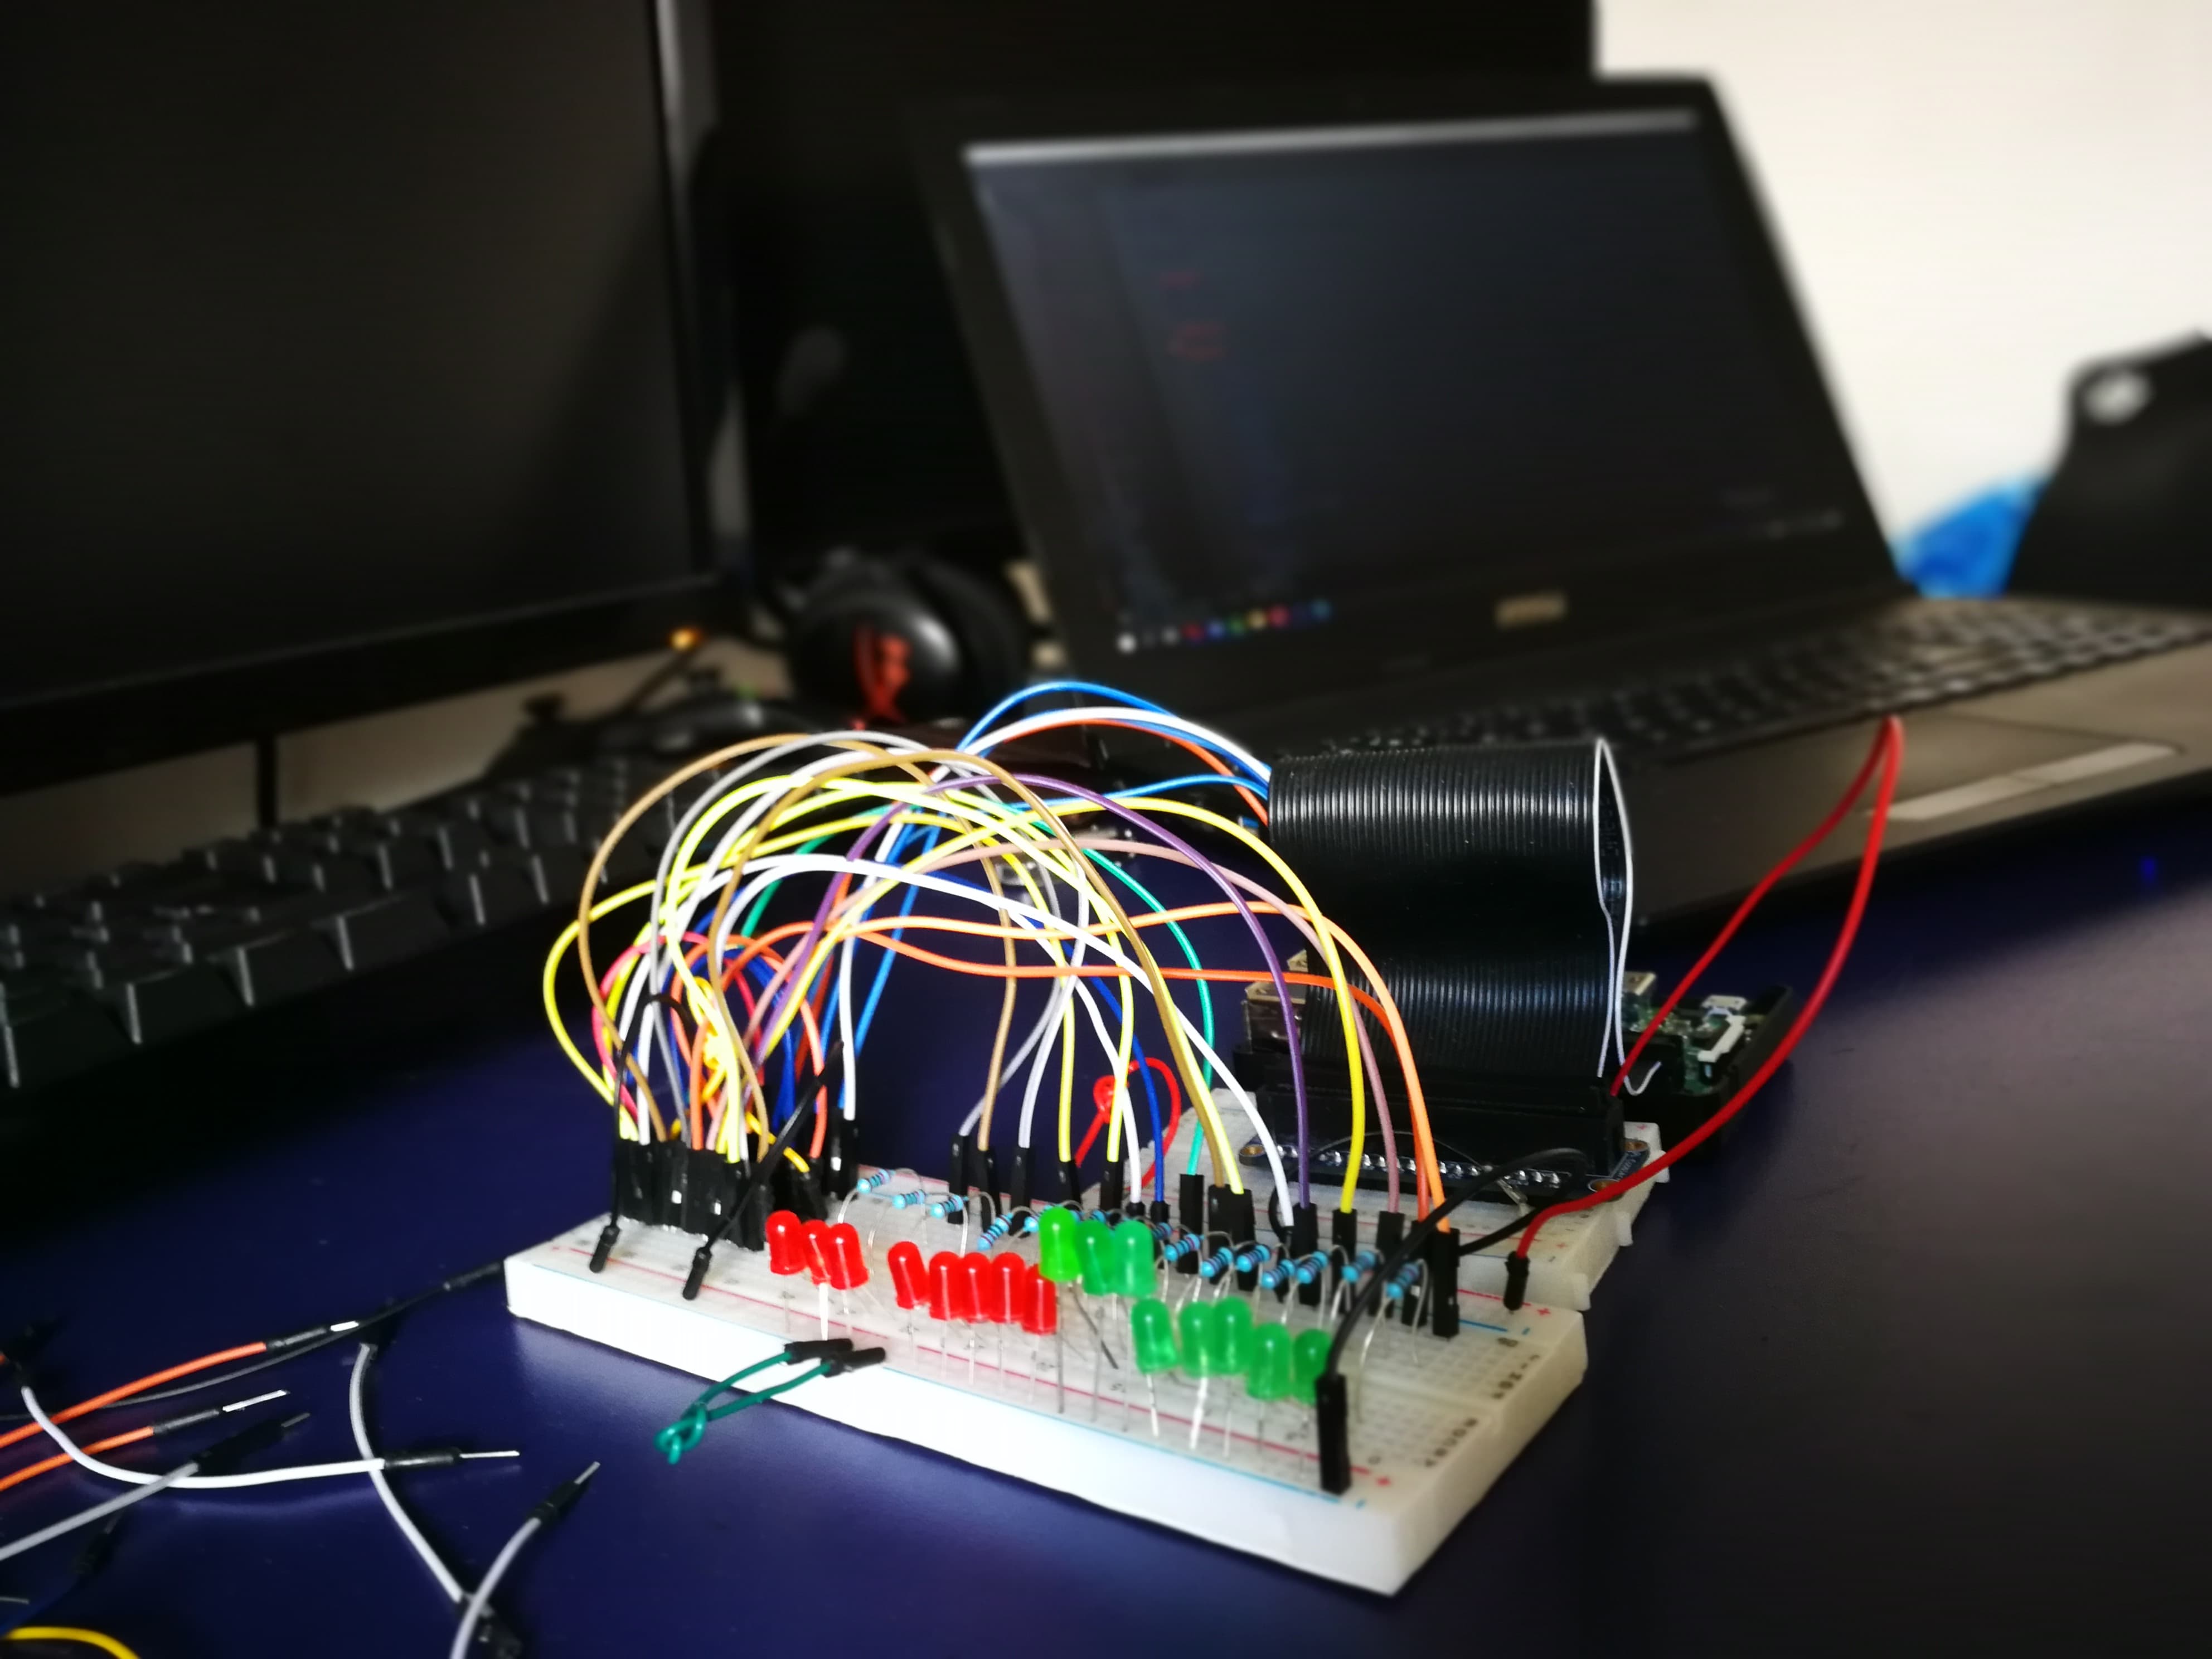
Once I this was done I made it in real life.
Step 2: Making a Database Schematic
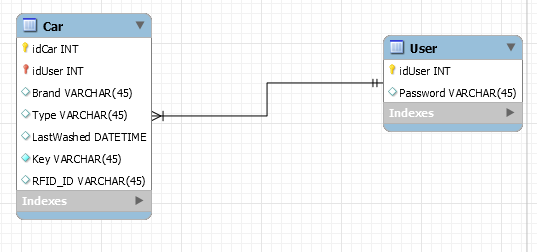
To save al my data I had to create a database that could run on my Pi.
I made it in Mysql.
Table car:
- Car ID
- User ID
- Brand (car brand)
- Type
- Last washed
- Key
- RFID_ID
Step 3: Coding
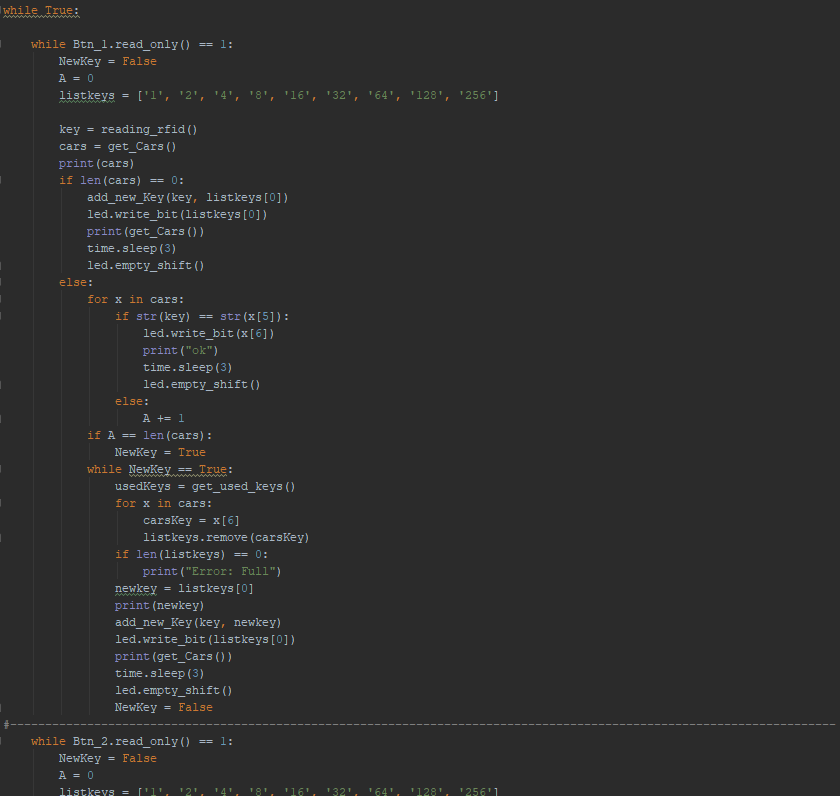
When all this was ready I could start coding.
I started by making the code for my sensor in Python 3.5.
To download the code click here.
Use the link to clone the project.
Step 4: Putting Al the Code on My Raspberry Pi
Installing packages
First I installed al the packages I needed to make this work.
me@my-rpi:~ $ sudo apt update
me@my-rpi:~ $ sudo apt install -y python3-venv python3-pip python3-mysqldb mysql-server uwsgi nginx uwsgi-plugin-python3
Virtual environment
me@my-rpi:~ $ python3 -m pip install --upgrade pip setuptools wheel virtualenv
me@my-rpi:~ $ mkdir project1 && cd project1
me@my-rpi:~/project1 $ python3 -m venv --system-site-packages env
me@my-rpi:~/project1 $ source env/bin/activate
(env)me@my-rpi:~/project1 $ python -m pip install mysql-connector-python argon2-cffi Flask Flask-HTTPAuth Flask-MySQL mysql-connector-python passlib
Upload the project onto your Pi using pycharm
Open Pycharm and go to VCS > Import from Version Control > Github and clone my github file.
Put the deployment config to the directory you just made. (/home/me/project1). Press apply!
Go to the interpreter settings and choose the virtual environment you just made. (/home/me/project1/env/bin/pyhon)
Check if path mapping is correct.
Now you can upload the code to your directory using Pycharm.
Database
Check if the database is running.
You should get something like this:
me@my-rpi:~ $ sudo systemctl status mysql
● mariadb.service - MariaDB database server
   Loaded: loaded (/lib/systemd/system/mariadb.service; enabled; vendor preset: enabled)
   Active: active (running) since Sun 2018-06-03 09:41:18 CEST; 1 day 4h ago
 Main PID: 781 (mysqld)
   Status: "Taking your SQL requests now..."
    Tasks: 28 (limit: 4915)
   CGroup: /system.slice/mariadb.service
           └─781 /usr/sbin/mysqld
Jun 03 09:41:13 my-rpi systemd[1]: Starting MariaDB database server...
Jun 03 09:41:15 my-rpi mysqld[781]: 2018-06-03  9:41:15 4144859136 [Note] /usr/sbin/mysqld (mysqld 10.1.26-MariaDB-0+deb9u1)
Jun 03 09:41:18 my-rpi systemd[1]: Started MariaDB database server.
me@my-rpi:~ $ ss -lt | grep mysql
LISTEN     0      80     127.0.0.1:mysql                    *:*
Create users and adding the database
me@my-rpi:~ $ sudo mariadb
once you're in the database do this.
CREATE USER 'project1-admin'@'localhost' IDENTIFIED BY 'adminpassword';
CREATE USER 'project1-web'@'localhost' IDENTIFIED BY 'webpassword';
CREATE USER 'project1-sensor'@'localhost' IDENTIFIED BY 'sensorpassword';
CREATE DATABASE project1;
GRANT ALL PRIVILEGES ON project1.* to 'project1-admin'@'localhost' WITH GRANT OPTION;
GRANT SELECT, INSERT, UPDATE, DELETE ON project1.* TO 'project1-web'@'localhost';
GRANT SELECT, INSERT, UPDATE, DELETE ON project1.* TO 'project1-sensor'@'localhost';
FLUSH PRIVILEGES;
CREATE TABLE `user` (
  `idUser` int(11) NOT NULL,
  `Password` varchar(45) DEFAULT NULL,
  PRIMARY KEY (`idUser`)
) ENGINE=InnoDB DEFAULT CHARSET=utf8
CREATE TABLE `car` (
  `idCar` int(11) NOT NULL AUTO_INCREMENT,
  `idUser` int(11) NOT NULL,
  `Brand` varchar(45) DEFAULT NULL,
  `Type` varchar(45) DEFAULT NULL,
  `LastWashed` datetime DEFAULT NULL,
  `RFID_Number` varchar(15) DEFAULT NULL,
  `Key` varchar(5) DEFAULT NULL,
  PRIMARY KEY (`idCar`,`idUser`),
  KEY `fk_Car_User1_idx` (`idUser`),
  CONSTRAINT `fk_Car_User1` FOREIGN KEY (`idUser`) REFERENCES `user` (`idUser`) ON DELETE NO ACTION ON UPDATE NO ACTION
) ENGINE=InnoDB AUTO_INCREMENT=4 DEFAULT CHARSET=utf8
Connect your database to Pycharm
Click on the database tab on the right side. If you don't have a the tab open do this: View > Tool Windows > Database.
Click add connection. Choose Data Source > MySQL (If there is a button download driver press it.)
Go to SSH/SSL en check SSH. Fill in the your Raspberry pi credentials (host/user/password). Port should be 22 and don't forget to check remember password.
Go back to General. Host should be localhost and database should be project1. Fill in the credentials from project1-admin en test the connection.
If the connection is OK then go to the tab Schemas and make sure project1 is checked.
Check if the database is correct
me@my-rpi:~ $ echo 'show tables;' | mysql project1 -t -u project1-admin -p
Enter password:
+---------------------------+
| Tables_in_project1 |
+---------------------------+
| sensor                     |
| users                       |
+---------------------------+
Configuration Files
In the directory conf you'll find 4 files. You should change the usernames to your username.
Systemd
To start everything you should execute these commands.
me@my-rpi:~/project1 $ sudo cp conf/project1-*.service /etc/systemd/system/
me@my-rpi:~/project1 $ sudo systemctl daemon-reload
me@my-rpi:~/project1 $ sudo systemctl start project1-*
me@my-rpi:~/project1 $ sudo systemctl status project1-*
● project1-flask.service - uWSGI instance to serve project1 web interface
   Loaded: loaded (/etc/systemd/system/project1-flask.service; disabled; vendor preset: enabled)
   Active: active (running) since Mon 2018-06-04 13:14:56 CEST; 1s ago
 Main PID: 6618 (uwsgi)
    Tasks: 6 (limit: 4915)
   CGroup: /system.slice/project1-flask.service
           ├─6618 /usr/bin/uwsgi --ini /home/me/project1/conf/uwsgi-flask.ini
           ├─6620 /usr/bin/uwsgi --ini /home/me/project1/conf/uwsgi-flask.ini
           ├─6621 /usr/bin/uwsgi --ini /home/me/project1/conf/uwsgi-flask.ini
           ├─6622 /usr/bin/uwsgi --ini /home/me/project1/conf/uwsgi-flask.ini
           ├─6623 /usr/bin/uwsgi --ini /home/me/project1/conf/uwsgi-flask.ini
           └─6624 /usr/bin/uwsgi --ini /home/me/project1/conf/uwsgi-flask.ini
Jun 04 13:14:56 my-rpi uwsgi[6618]: mapped 383928 bytes (374 KB) for 5 cores Jun 04 13:14:56 my-rpi uwsgi[6618]: *** Operational MODE: preforking ***
● project1-sensor.service - Project 1 sensor service
   Loaded: loaded (/etc/systemd/system/project1-sensor.service; disabled; vendor preset: enabled)
   Active: active (running) since Mon 2018-06-04 13:16:49 CEST; 5s ago
 Main PID: 6826 (python)
    Tasks: 1 (limit: 4915)
   CGroup: /system.slice/project1-sensor.service
           └─6826 /home/me/project1/env/bin/python /home/me/project1/sensor/sensor.py
Jun 04 13:16:49 my-rpi systemd[1]: Started Project 1 sensor service. Jun 04 13:16:49 my-rpi python[6826]: DEBUG:__main__:Saved sensor process_count=b'217\n' to database Jun 04 13:16:55 my-rpi python[6826]: DEBUG:__main__:Saved sensor process_count=b'218\n' to database
nginx
me@my-rpi:~/project1 $ ls -l /etc/nginx/sites-*
/etc/nginx/sites-available:
total 4
-rw-r--r-- 1 root root 2416 Jul 12  2017 default
/etc/nginx/sites-enabled:
total 0
lrwxrwxrwx 1 root root 34 Jan 18 13:25 default -> /etc/nginx/sites-available/default
To make everything default execute these commands.
me@my-rpi:~/project1 $ sudo cp conf/nginx /etc/nginx/sites-available/project1
me@my-rpi:~/project1 $ sudo rm /etc/nginx/sites-enabled/default
me@my-rpi:~/project1 $ sudo ln -s /etc/nginx/sites-available/project1 /etc/nginx/sites-enabled/project1
me@my-rpi:~/project1 $ sudo systemctl restart nginx.service
Autostart
Let's make sure everything start's automatically.
Go to the conf directory and execute these final commands and you're done!
me@my-rpi:~/project1 $ sudo systemctl enable project1-*
If you reboot your Pi it should start automatically.
Step 5: Making a Housing.


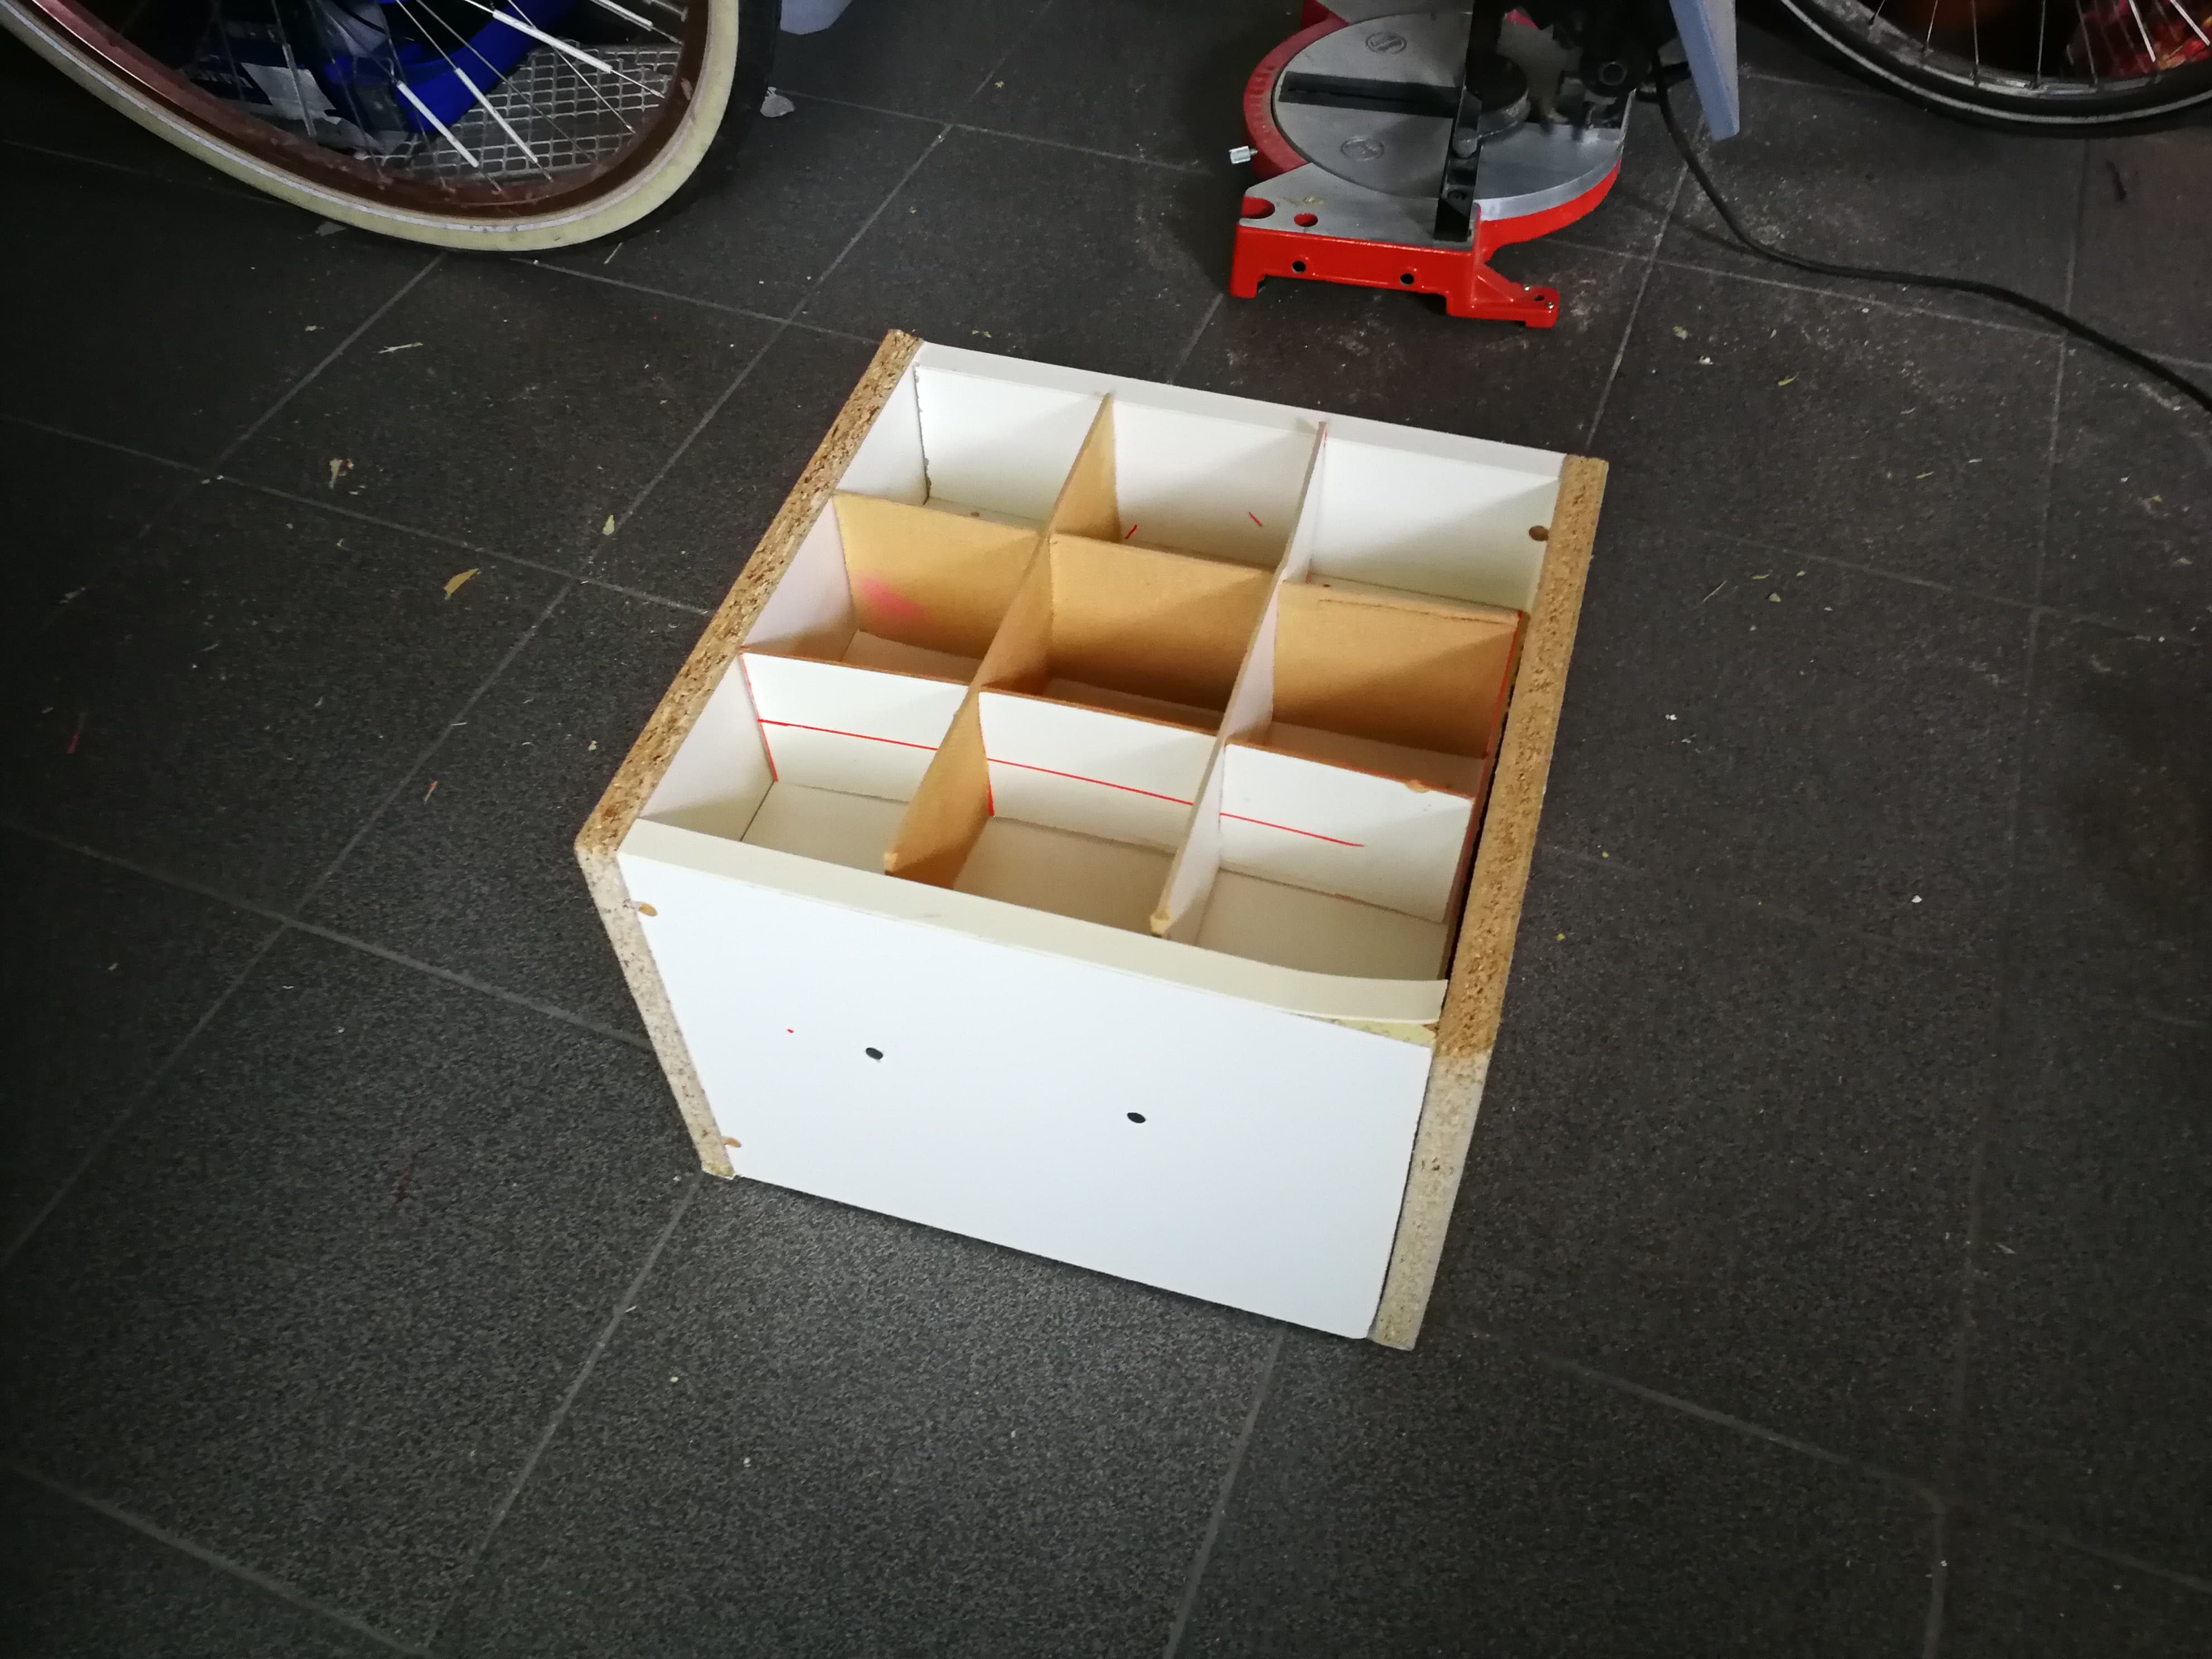

Recycling
To make my housing I used an old closet my mom would trow away.
base
I sawed 4 planks (34 cm x 26 cm). (so it's a cube from 34 x 34 x 26).
On the bottom I added a thin piece of wood as bottom.
Board with led's
In the middle I've put 2 small pieces of wood on each side both at 9 cm from the top. This holds the board where the led's will be sitting.
The board with the led's is a small board (32 cm x 32 cm).
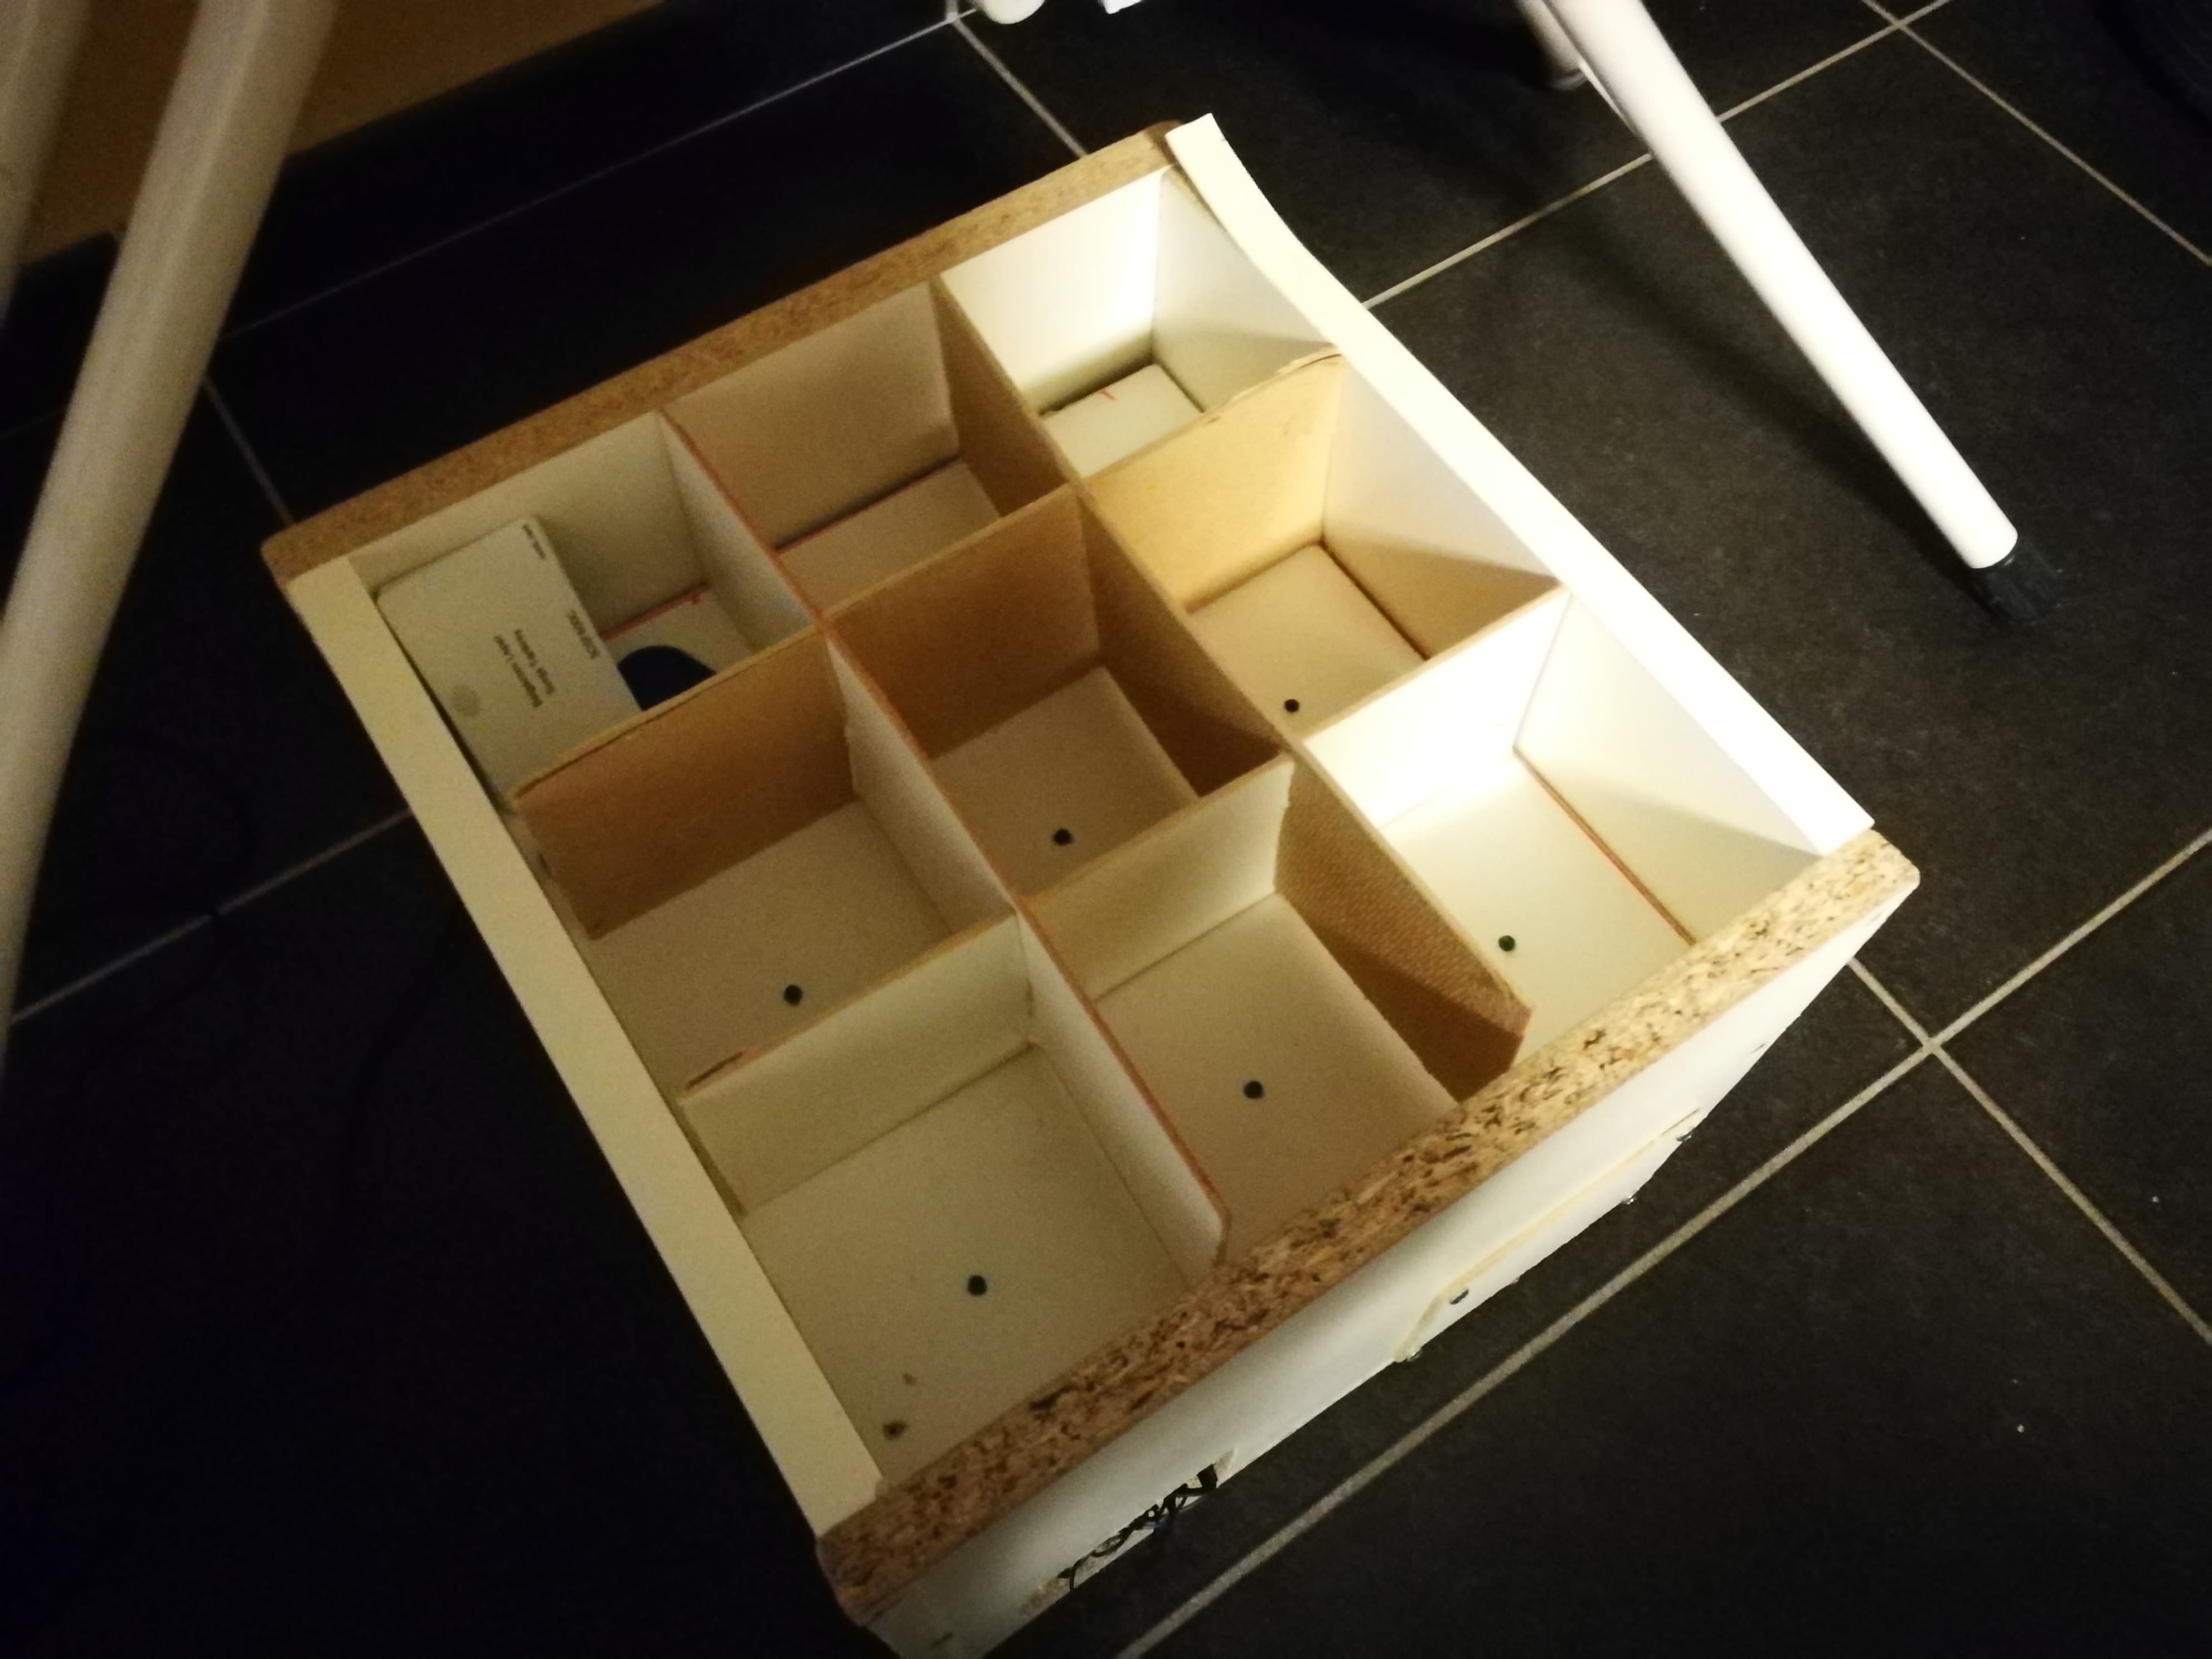
I drilled 9 holes for the led's to come out of.
division
I made the division with the same material as the bottom and the board with led's.
4 pieces each with a incision at 10.3 cm (9 cm x 31 cm). Now I'm able to put them together.
Buttons and RFID reader
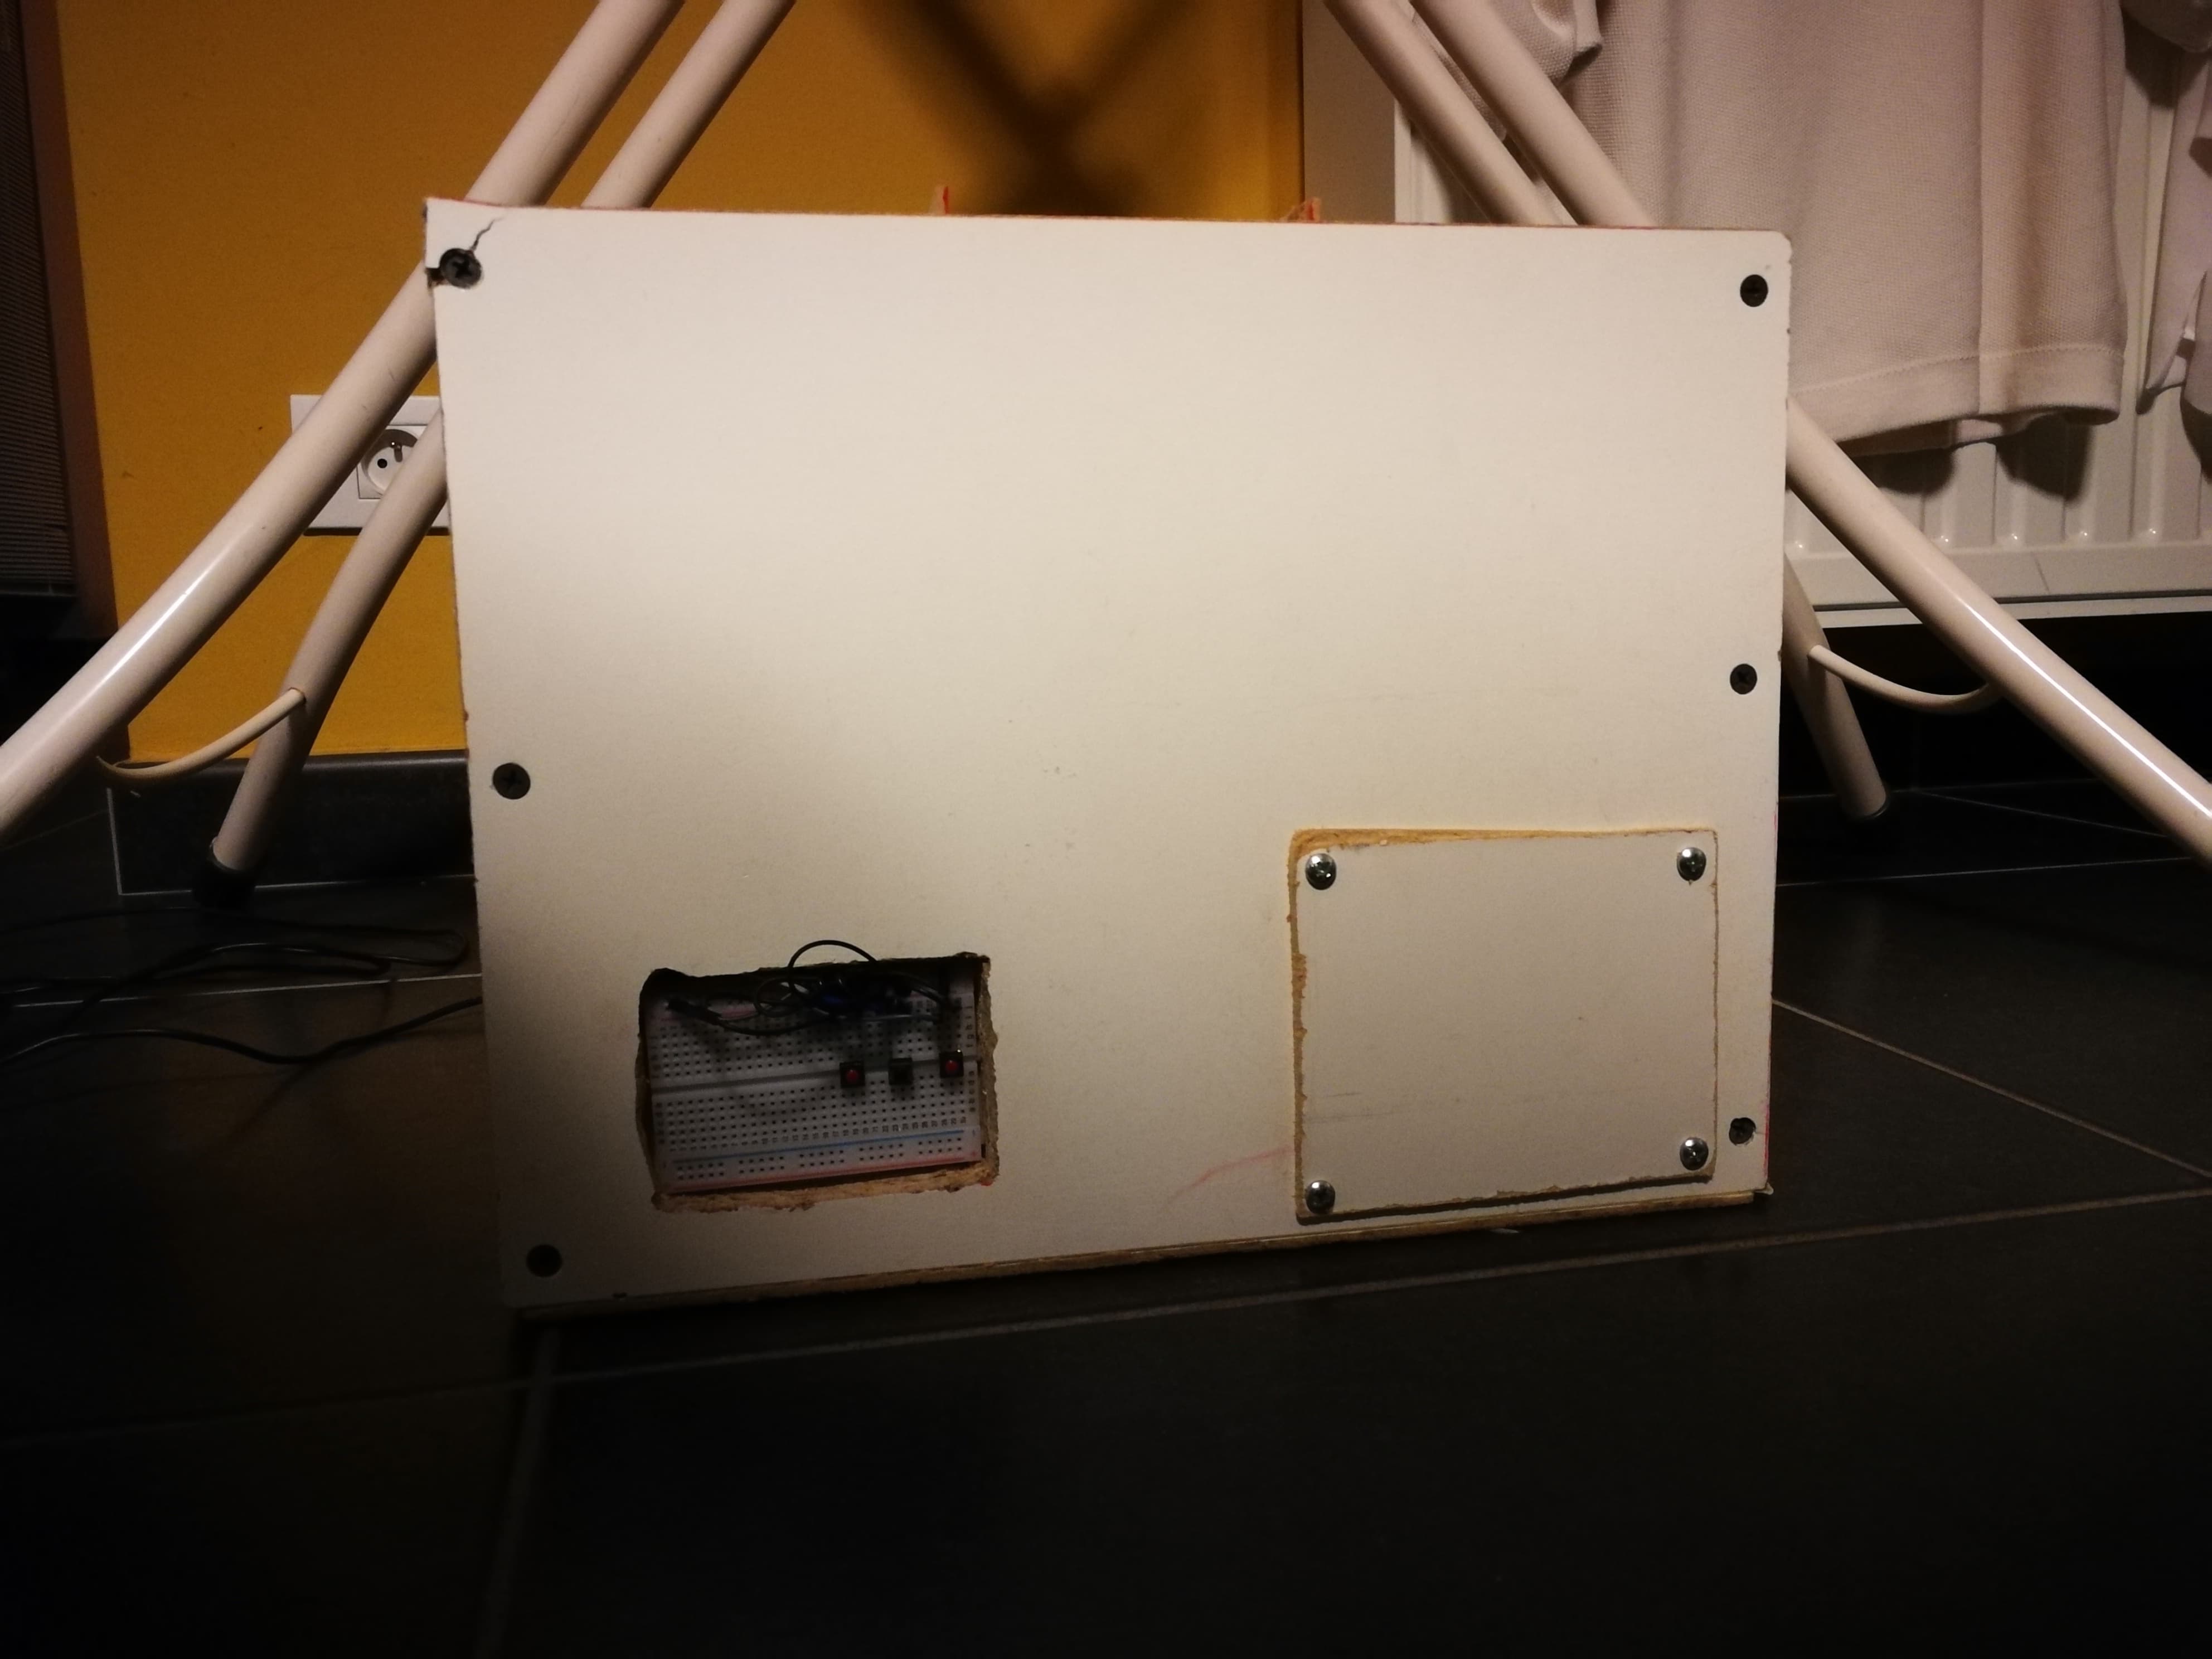
I made a hole in the base to put my RFID reader and buttons in. For the RFID I put a thin piece of board in front of it to make it look cleaner.
Step 6: Putting Everything in the Housing.
This depends on how you want to do it. I personally used a lot of cables without soldering because I want to be able to reuse my Raspberry Pi.
I glued the led's in place and taped the RFID reader and breadboards to the case.
And that's how you make a Keysorter!