Key Block + Block
This project shows you how to complete a circuit through two boxes.
Step 1: Cut and Glue Cardboard
Gather cardboard from boxes and cut them into these measurements:
4 7" 1/2 by 7" 1/2 of cardboard for box
4 9" by 9" for key box
both widths 3 inches
You will be making two boxes, one for the key and the other for a regular block.
Once you have everything cut up into the correct measurements, glue them together to create a square shape.
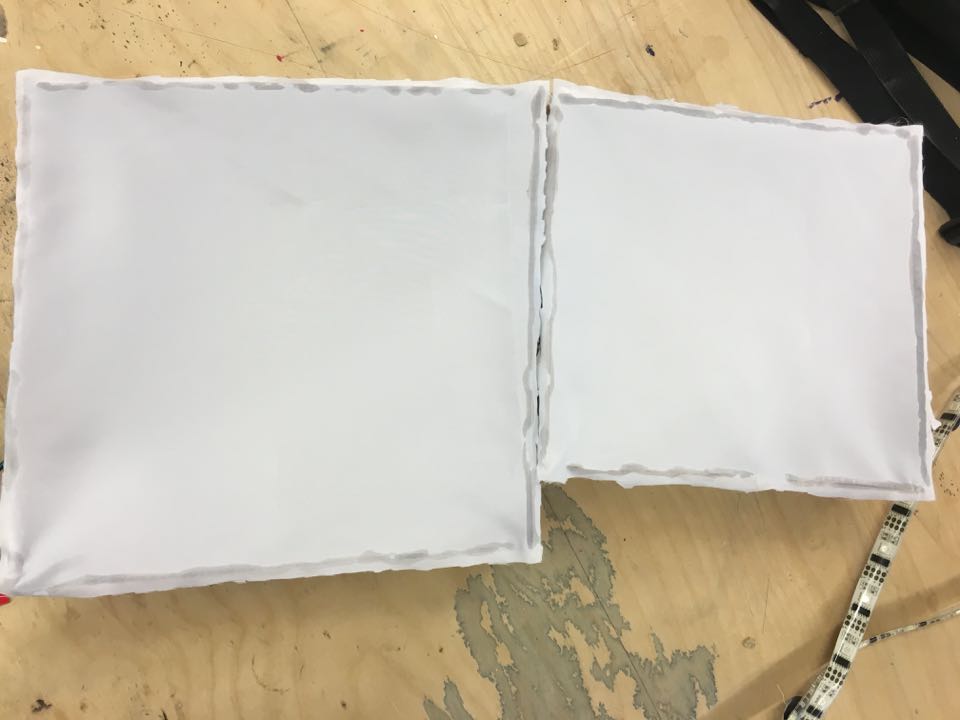
Step 2: Cut and Glue Diffusion Cloth
Gather Diffusion Cloth and cut it into a 7 1/2" by 7 1/2" and 9" by 9" square. After you finish cutting it, glue it only to the cardboard box with the corresponding measurements.
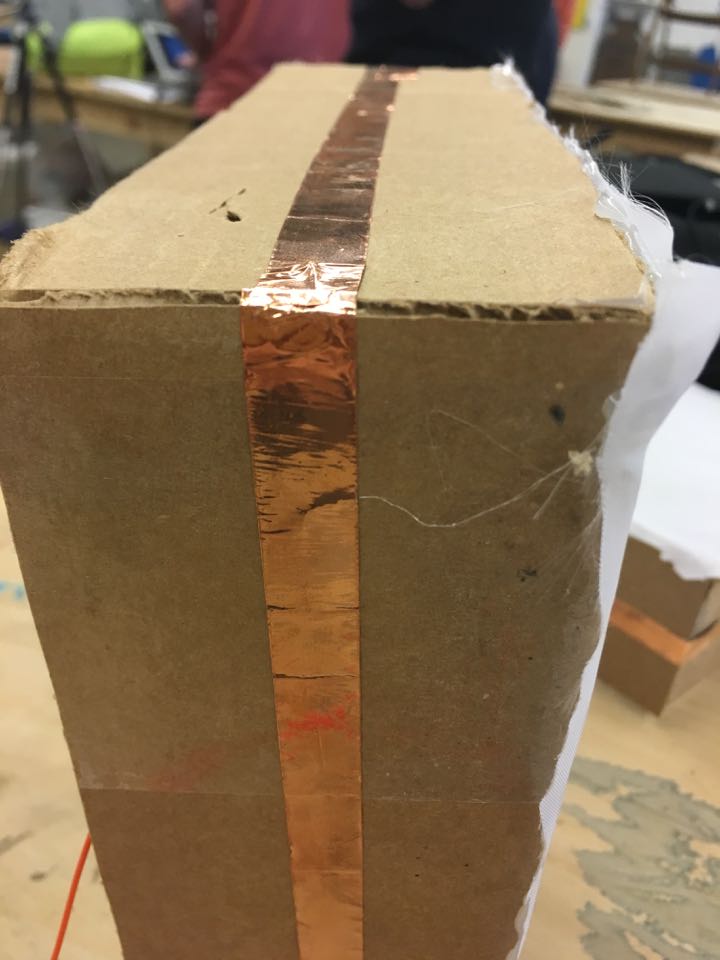
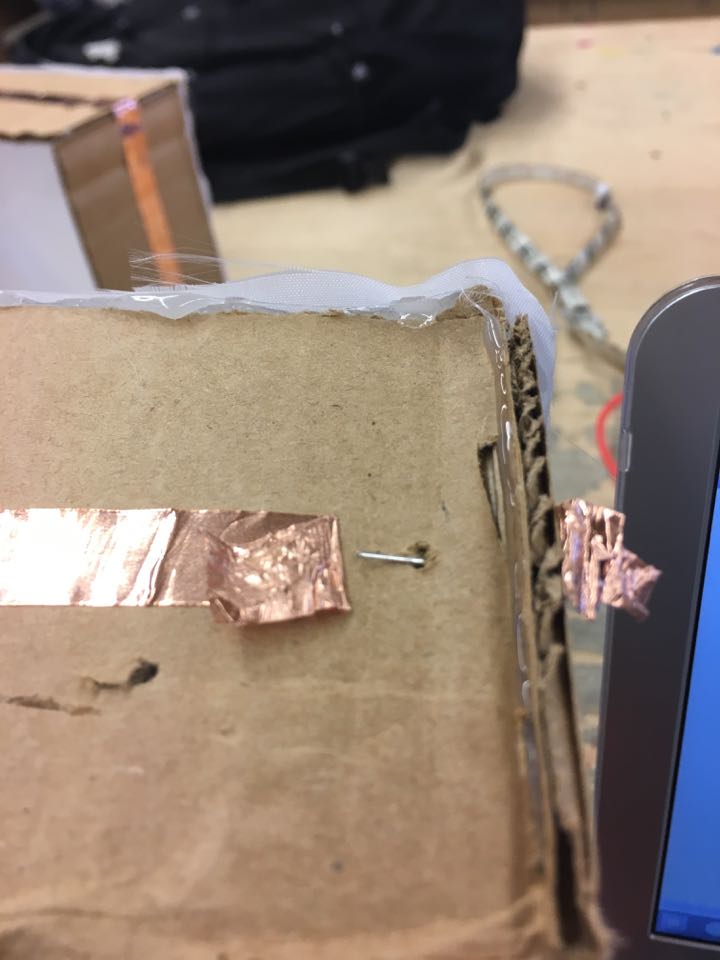
Step 3: Copper Tape
Once your block is made, place copper tape around the perimeter of the box.
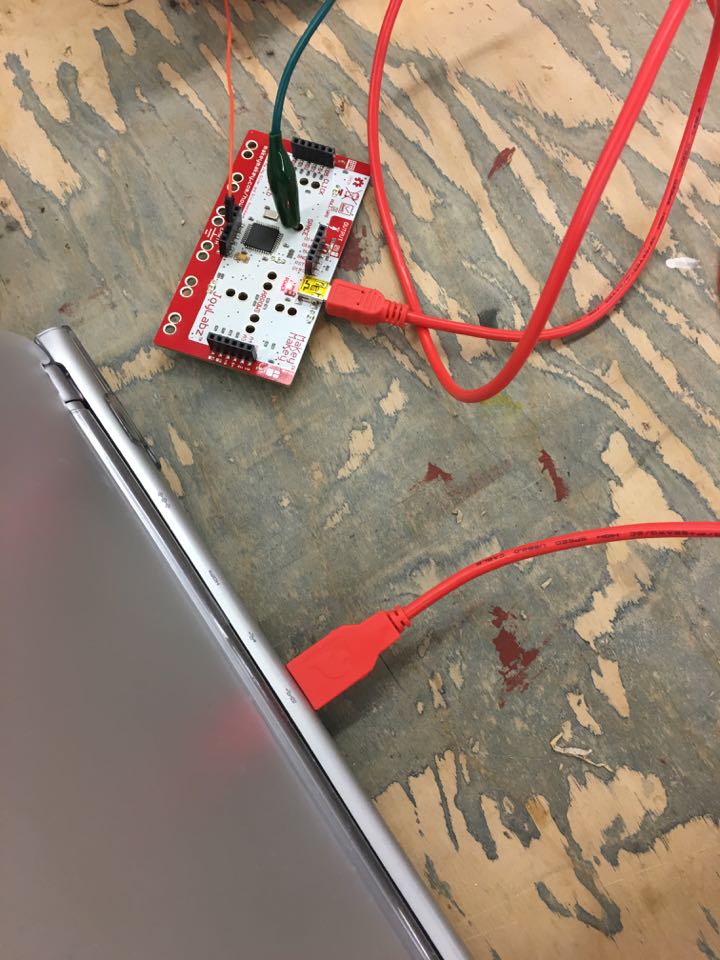
Step 4: Makey Makey and Scratch
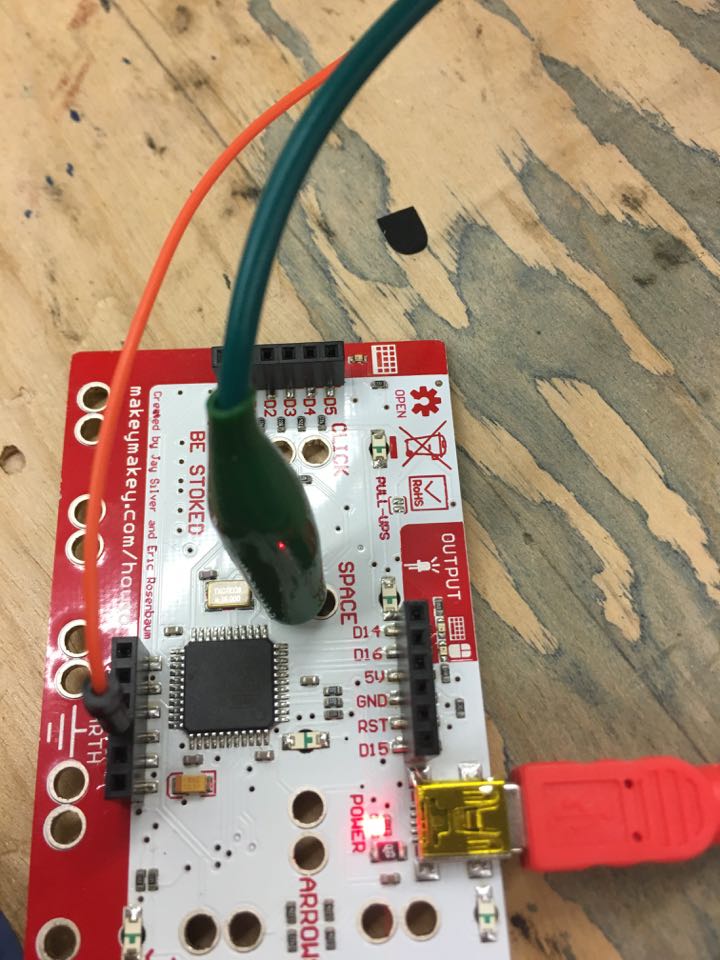
- Connect Makey Makey to the computer
- Open up Scratch on the computer
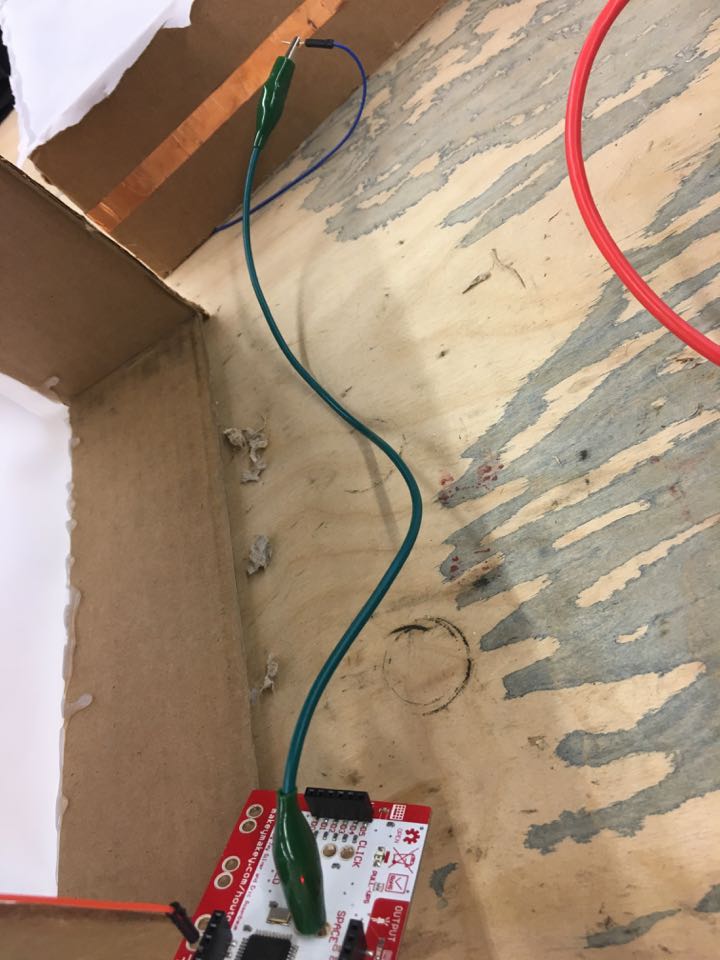
- Connect a wire to the ground on the Makey Makey
- An alligator clip will be connected to your desired key (spacebar)
- The other end will be connect to another wire that will be connected to the box (step 6 shows you how it will be connected)
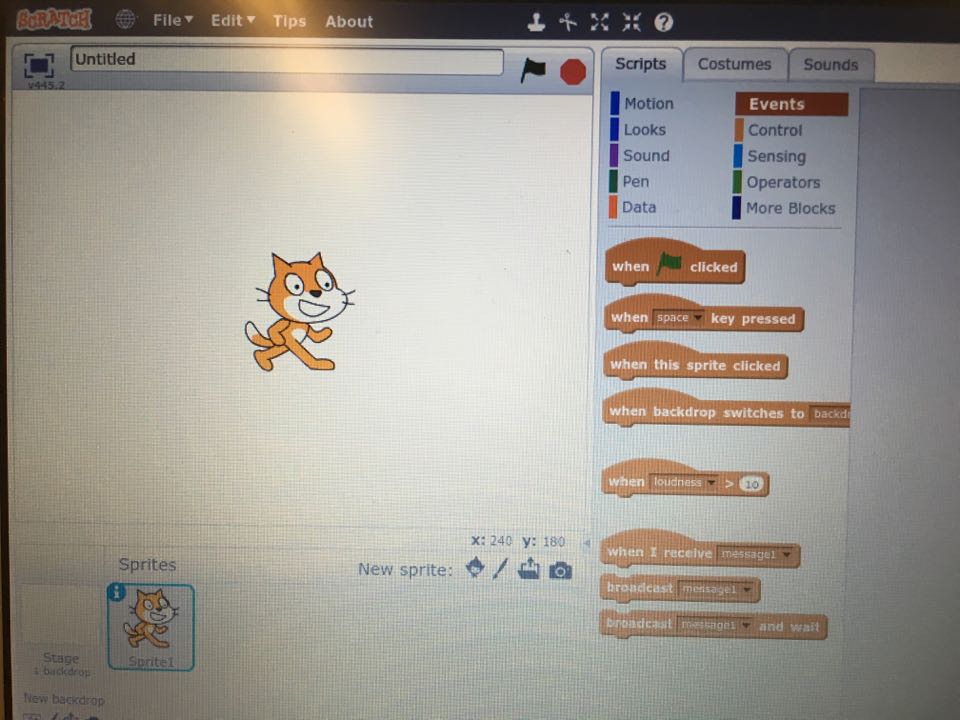
Step 5: Scratch Instruction
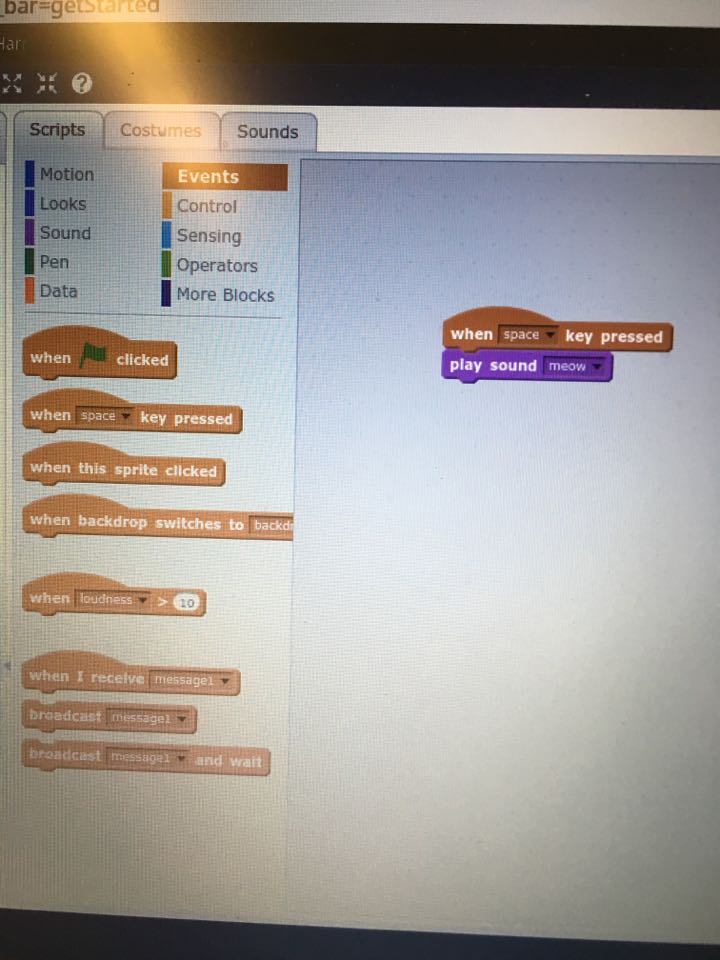
This step will show you what to program scratch so that a sound will be made when the copper tape is touched.
- Click "Events"
- Drag "when _____ key pressed" onto the space on the right
- The little black arrow pointing down will allow you to change which key you want to press to make an outcome. In this case, it will be space bar.
- Next click "Sounds"
- Drag "play sound _______" and drop it right under the "when _____ key pressed" you dragged out earlier
Step 6: Connecting Program to Block

- Once you have the program up with all the wires and your desired action in place, you will now connect the wires to the box.
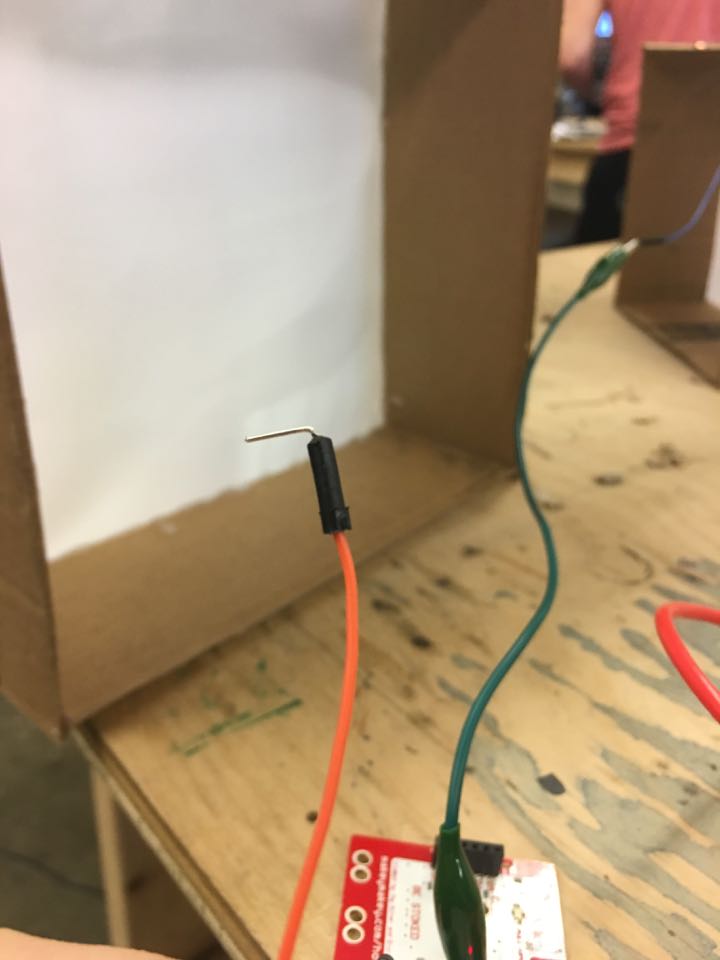
- With your wire, bend the metal so it will be horizontal when you hold it up.
- Lift the copper tape
- Make a tine hole in the box where the copper tape once was
- Insert the bent wire through the hole and place the horizontally.
- Put the tape down to where it was before, but this time with the wire underneath it.
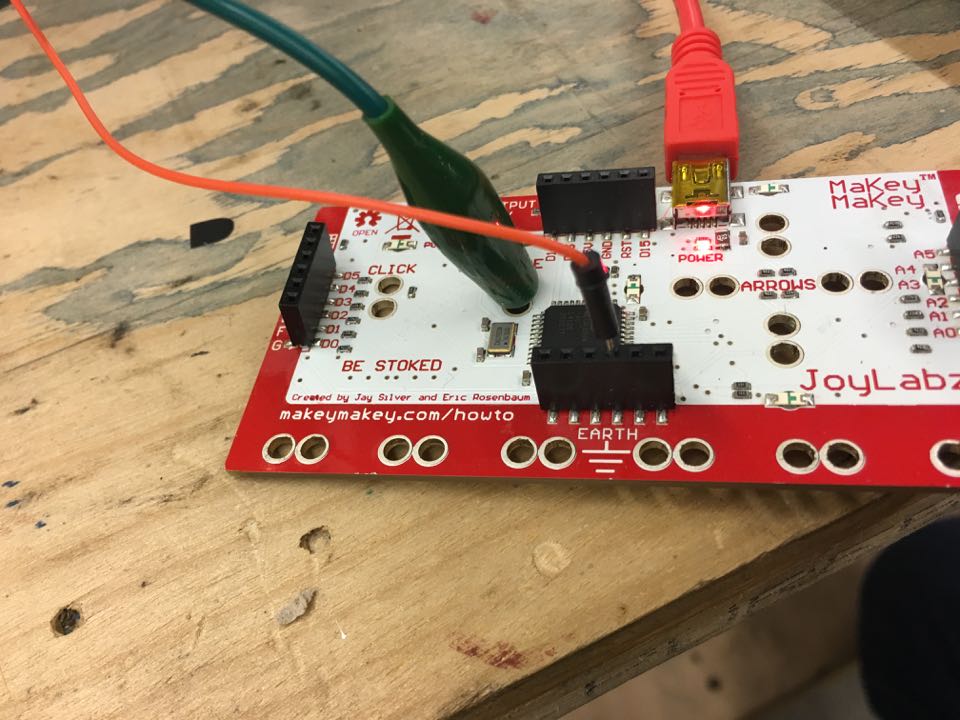
Step 7: Connecting to Key Block

The Key block is connected directly to the Makey Makey through a wire that is connected to the ground.
Step 8: Enjoy Your Boxes!
Now when you hold the key block and tap the other box, it will make the effect that you chose through Scratch.