KILLER Bit - Portable Bluetooth Speaker
by JohnSmith-Workshop in Circuits > Wireless
2388 Views, 18 Favorites, 0 Comments
KILLER Bit - Portable Bluetooth Speaker


Hey guys, how are you felling today?
This Portable Bluetooth Speaker was a present for my close and dear friend, Kostya. He is a great artist and creates awesome figures from clay and has various exhibitions across the country.
But he always wanted to have some kind of portable audio system to travel with him and inspire him in his creations.
So, due to his great acoustic & audio performances I called it KILLER Bit.
It can establish a connection over 50m of distance and can last around 3-4 hours of playing.
Tools & Materials


Tools:
- Electric Jig saw
- Battery drill
- Soldering iron & solder
- Dremel
- Hot-glue gun
- Wood-glue & super-glue
- Double-sided duct tape & masking tape
- Jig saw blade for metal
- Drawing compass, ruler, marker & scalpel
- Round file for wood
- Drill bits : 1,2,3,5 & 8mm
- 80P & 180P sandpaper
Materials:
- Plywood - 18mm & 5mm thick
- Tiny wood screws
- Couple of wires
- DC switch
- M3 nuts & screws
- TO220 heat sink
- Felt pads
- microUSB port
- miniUSB port (optional)
- Li-ion Polymer battery
- Bluetooth module
- 3w Speakers - 3pcs
Sides of KILLER Bit


I'm going to take a little bit of exception here, because what I made first was the sides of the speaker. Previously, I've searched around the net which types of wood is used in speaker boxes, where plywood and MDF wooden plates, give a great sound with very low distortion, where MDF is at the top.
Great thing is that I had a couple of plywood plate, collecting dust and this is the chance to use them.Now, from sketches I made, I decided that the thickness of the speaker would be around 6cm.
I have included a 3D model of it , if you want to 3D print it , as if you don't want to deal with any woodwork. Also there a templates, of both bottom & top plates, as well as the side plates, which are in pdf for easier printing.
Now, lets get back to work.
Using this pdf template of the sides, I transferred it to plywood and drew where I need to cut it.


Of course, the plywood plate are only 20mm thick, so made 3 pieces out of it. Combined together will give 54mm high wall/structure, + the thickness of Bottom & Upper plate which is ~10mm.


After that you should drill a hole inside of the frame, where you can insert your Electric Jig Saw & cut the inner part.
A little tip is that for this job, as for cutting the plywood, I used a jig saw blade for metal. With him, it's lot more easier to cut around curves and you wont cause so much damage to plywood.
Hole was drilled with 8mm drill bit, close enough to mark points.
Carefully cut inner & outer part. This process can be really tough & don't put a lot of pressure on the blade & let it do its work. Instead it'll just heat up and will burn wood around it. Trust me, I know it on my examples.


Sides of KILLER Bit 2


Finish cutting all, three parts, I've aligned them together, so they form nice shape with flat faces in plane. Also marked them with a number, so that I can know, where each one sits correctly. Then, sanded the surfaces where they rest on each other, to increase the roughness of area. This will help, when comes gluing them together with wood-glue. For this mini-part I used 180P sand-paper.


I used regular wood-glue mixed up with little bit of warm tap water. Evenly, apply it onto the each face of the sides & start putting them together; according to the numbers marked. And afterwards let it cure for a night.
What I noticed is that, plywood is excellent at absorbing wood-glue and requires over the average amount of glue to get to all places. .


Bottom Plate


While the sides are curing, I started making a Bottom plate for the Bluetooth speaker. Template for it, you can find in pdf file, attached in previous steps. What I did is, that, I used previous template from sides, and drew an outer dimensions of it , like shown in pics.


Once that is done, carefully cut it.
But before doing so, I spotted that, jig saw blade for metal, cuts great through the plywood, leaving nice clean cut, with very little sprinkles left. Not to mention that, it behaves great when dealing with curved structures like this one.


Upper Plate


Upper plate of Bluetooth speaker is a little bit tricky, because of its openings for the speakers. It's basically made the same, like the Bottom part, except for those holes. Like the previous step, draw the outer dimension & afterwards use drawing compass to make 3 circle of 37mm each, in diameter.
When cutting those circles, the jig saw blade will take 1mm of the cut, thus making them, 38mm in diameter; which is just the right diameter we need.


All set, cut it with jig saw.


Don't forget where your center point is, 'cause that'll be our entrance hole for jig saw. Use 8mm drill bit to make such.
Now comes the hard part, which is cutting them. Due to its low diameter, be very precise when doing so and don't rush. Just let the jig saw do its work.


This next mini-step is up to you; which is where you want to be your bluetooth module & switch.
What I did is, I returned the template and draw a little micro-USB port and place where the switch would be. Afterwards, using drawing compass, mark the edges on each point, so that you can easily transfer it onto plywood.


If you managed to do all of these steps, then I got to admit, you'r amazing.
Sanding the Sides


Night passed, so the sides are ready to be sanded.
Before I go any further , I just want to say that, reason I added so many pics, is that you can get some kind of an impression of processing the part.
First, due to my low precision of the jig saw, my part isn't prefect and doesn't have does smooth curves. But, nothing that good sandpaper and little bit of effort can't fix.
I started with 80P sandpaper and in areas where I couldn't get with it, I used a round file for wood. Finished with rough edges and contours, I started with smoothing the whole part with 180P sandpaper. This process gave it nice texture and neat finishing look.


Combining Them Together


Just to say that this part isn't about putting the whole thing together, but instead it's combining the Bottom plate & the Sides of Bluetooth speaker in one piece.
Off course, once again the wood-glue is required. Apply it onto the surface of the Sides, followed by the Bottom plate, placed on top. There goes a little trick - bottom on top. :D
While still liquid, try to align both parts evenly & let them dry for a while. After some period of time, when both parts, hardens down; sand them with 80P & 180P sandpaper. Try to make as smooth as possible; round edges around Bottom plate, so it looks like an imitation of a fillet.


Adding Components


We begin this adventure with creating openings for microUSB port & switch. In this situation, having a dremel comes really handy. I mounted the 1mm drill bit & started drilling tinie mini holes, thus making microUSB port. Switch I used is a regular one, found in toys or RC cars.


Apparently, with my amazing skills, I drilled more than I need to and microUSB turned into miniUSB port. So be very patient & precise with it and don't end up like me, in this part. This is an excellent example of HOW NOT TO make microUSb port. Measure twice, drill once.
Turns out I need a miniUSB port, which; thank God; I had laying around in PCB boxes.
Got over my mistake, I continue drilling an opening for the switch. This time I knew what to do & how much I need to be precise about it.


I think it's much more better than in the scenario with the port. Another tip is when working with such small drill bit, try not to brake them, cause you can hurt yourself. Just to add, this didn't happen to me. The process went pretty well, and afterwards I placed the switch to see how does it fit in place. As well, I used the chance to mark the holes of the switch, so that, I can screw it down with tiny wood screws.


Once the points are marked, use 2mm drill bit & make your way through. Finished that, use 5mm drill bit to enlarge the holes, so the head of the screw gets almost flat with the surface.
.
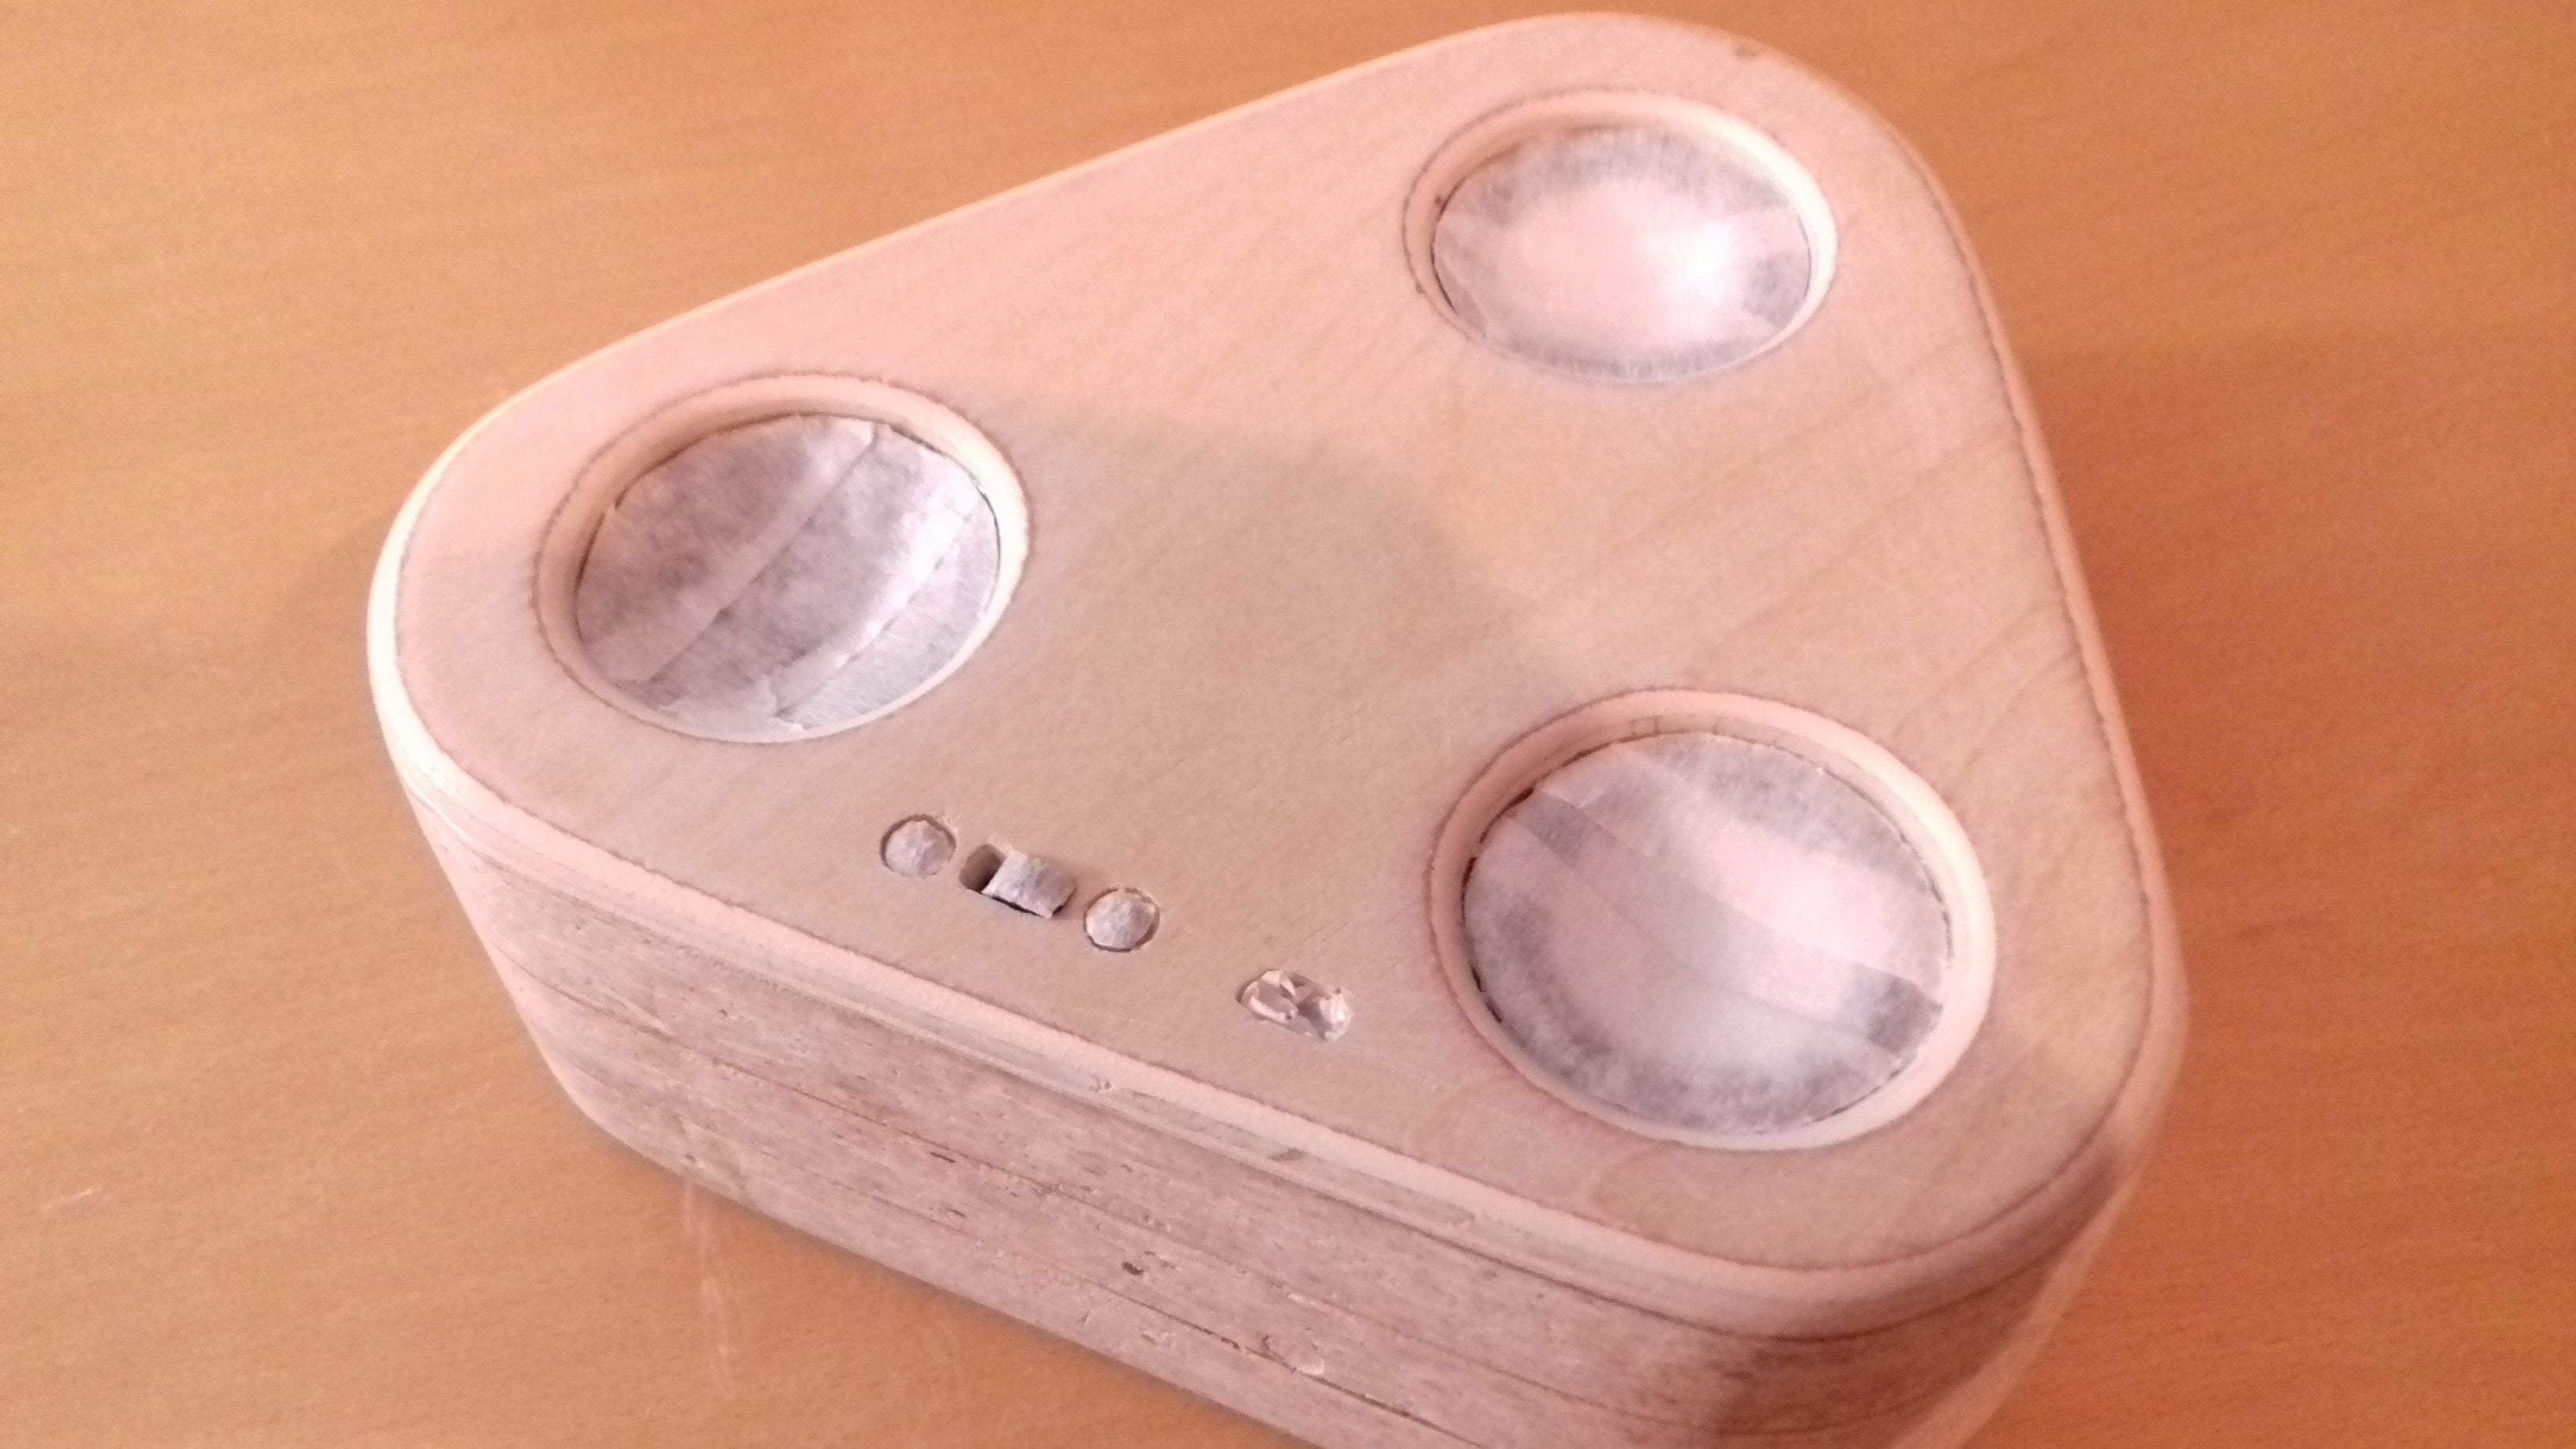
Setting the Speakers


What I intend to do, is to make this wooden version, slightly the same as possible, to the 3D model of the Bluetooth speaker; which means creating a fillet onto the outer side of the speaker hole. This is done, again with 80P & 180P sandpaper and a little bit of patients. The curve of the fillet is determined with the approached angle of the sandpaper.


For fixing down the speakers, regular glue a.k.a. the super glue works wonderful. Apply it, a little onto a speaker, as well as onto the plywood. And don't try to save it; put as much as you can.
As for every other glue, let it drys for a while.


MicroUSb to MiniUsb (Optional)


If you want to, you can skip this step.
Because of my genius mistake with the microUsb port, I've founded a miniUSB connector, which fits correctly into the hole. One additional thing is to make a converter cable from microUSB to miniUSB connector. Overall, I only need to make sure that Bluetooth module is under power, as well as, the battery is charging; which means only + & - pins are included, without any data transfer pins. I checked it out on the web, which pin is for what purpose, for both mini & microUSB connectors. And accordingly to the wire diagram of both, soldered them carefully together; where on microUSB, pin5 is GND & pin1 is POSITIVE, which is the same for miniUSB.


Forgot to say that, I used 10cm of regular DC cable which was left out from my Pentagon Power Supply.
When I finished with micro, it's time for miniUSB. Also I little detail I've put is a heat-shrink tube on both connectors; for protection.


Off course, after all I checked out, if it charges or powers on. And amazingly, IT WORKS. yeyeyyyyy :D


Heart of KILLER Bit


We finally got to the part for electronics & what makes Bluetooth speaker so KILLER...And it's going to be a little bit longer than usual. Because of that, I thank you for still having patients & reading this article.
Never the less; I wanted to put my Bluetooth module where I wanted it to be, which is by marking the hole made on the PCB board.


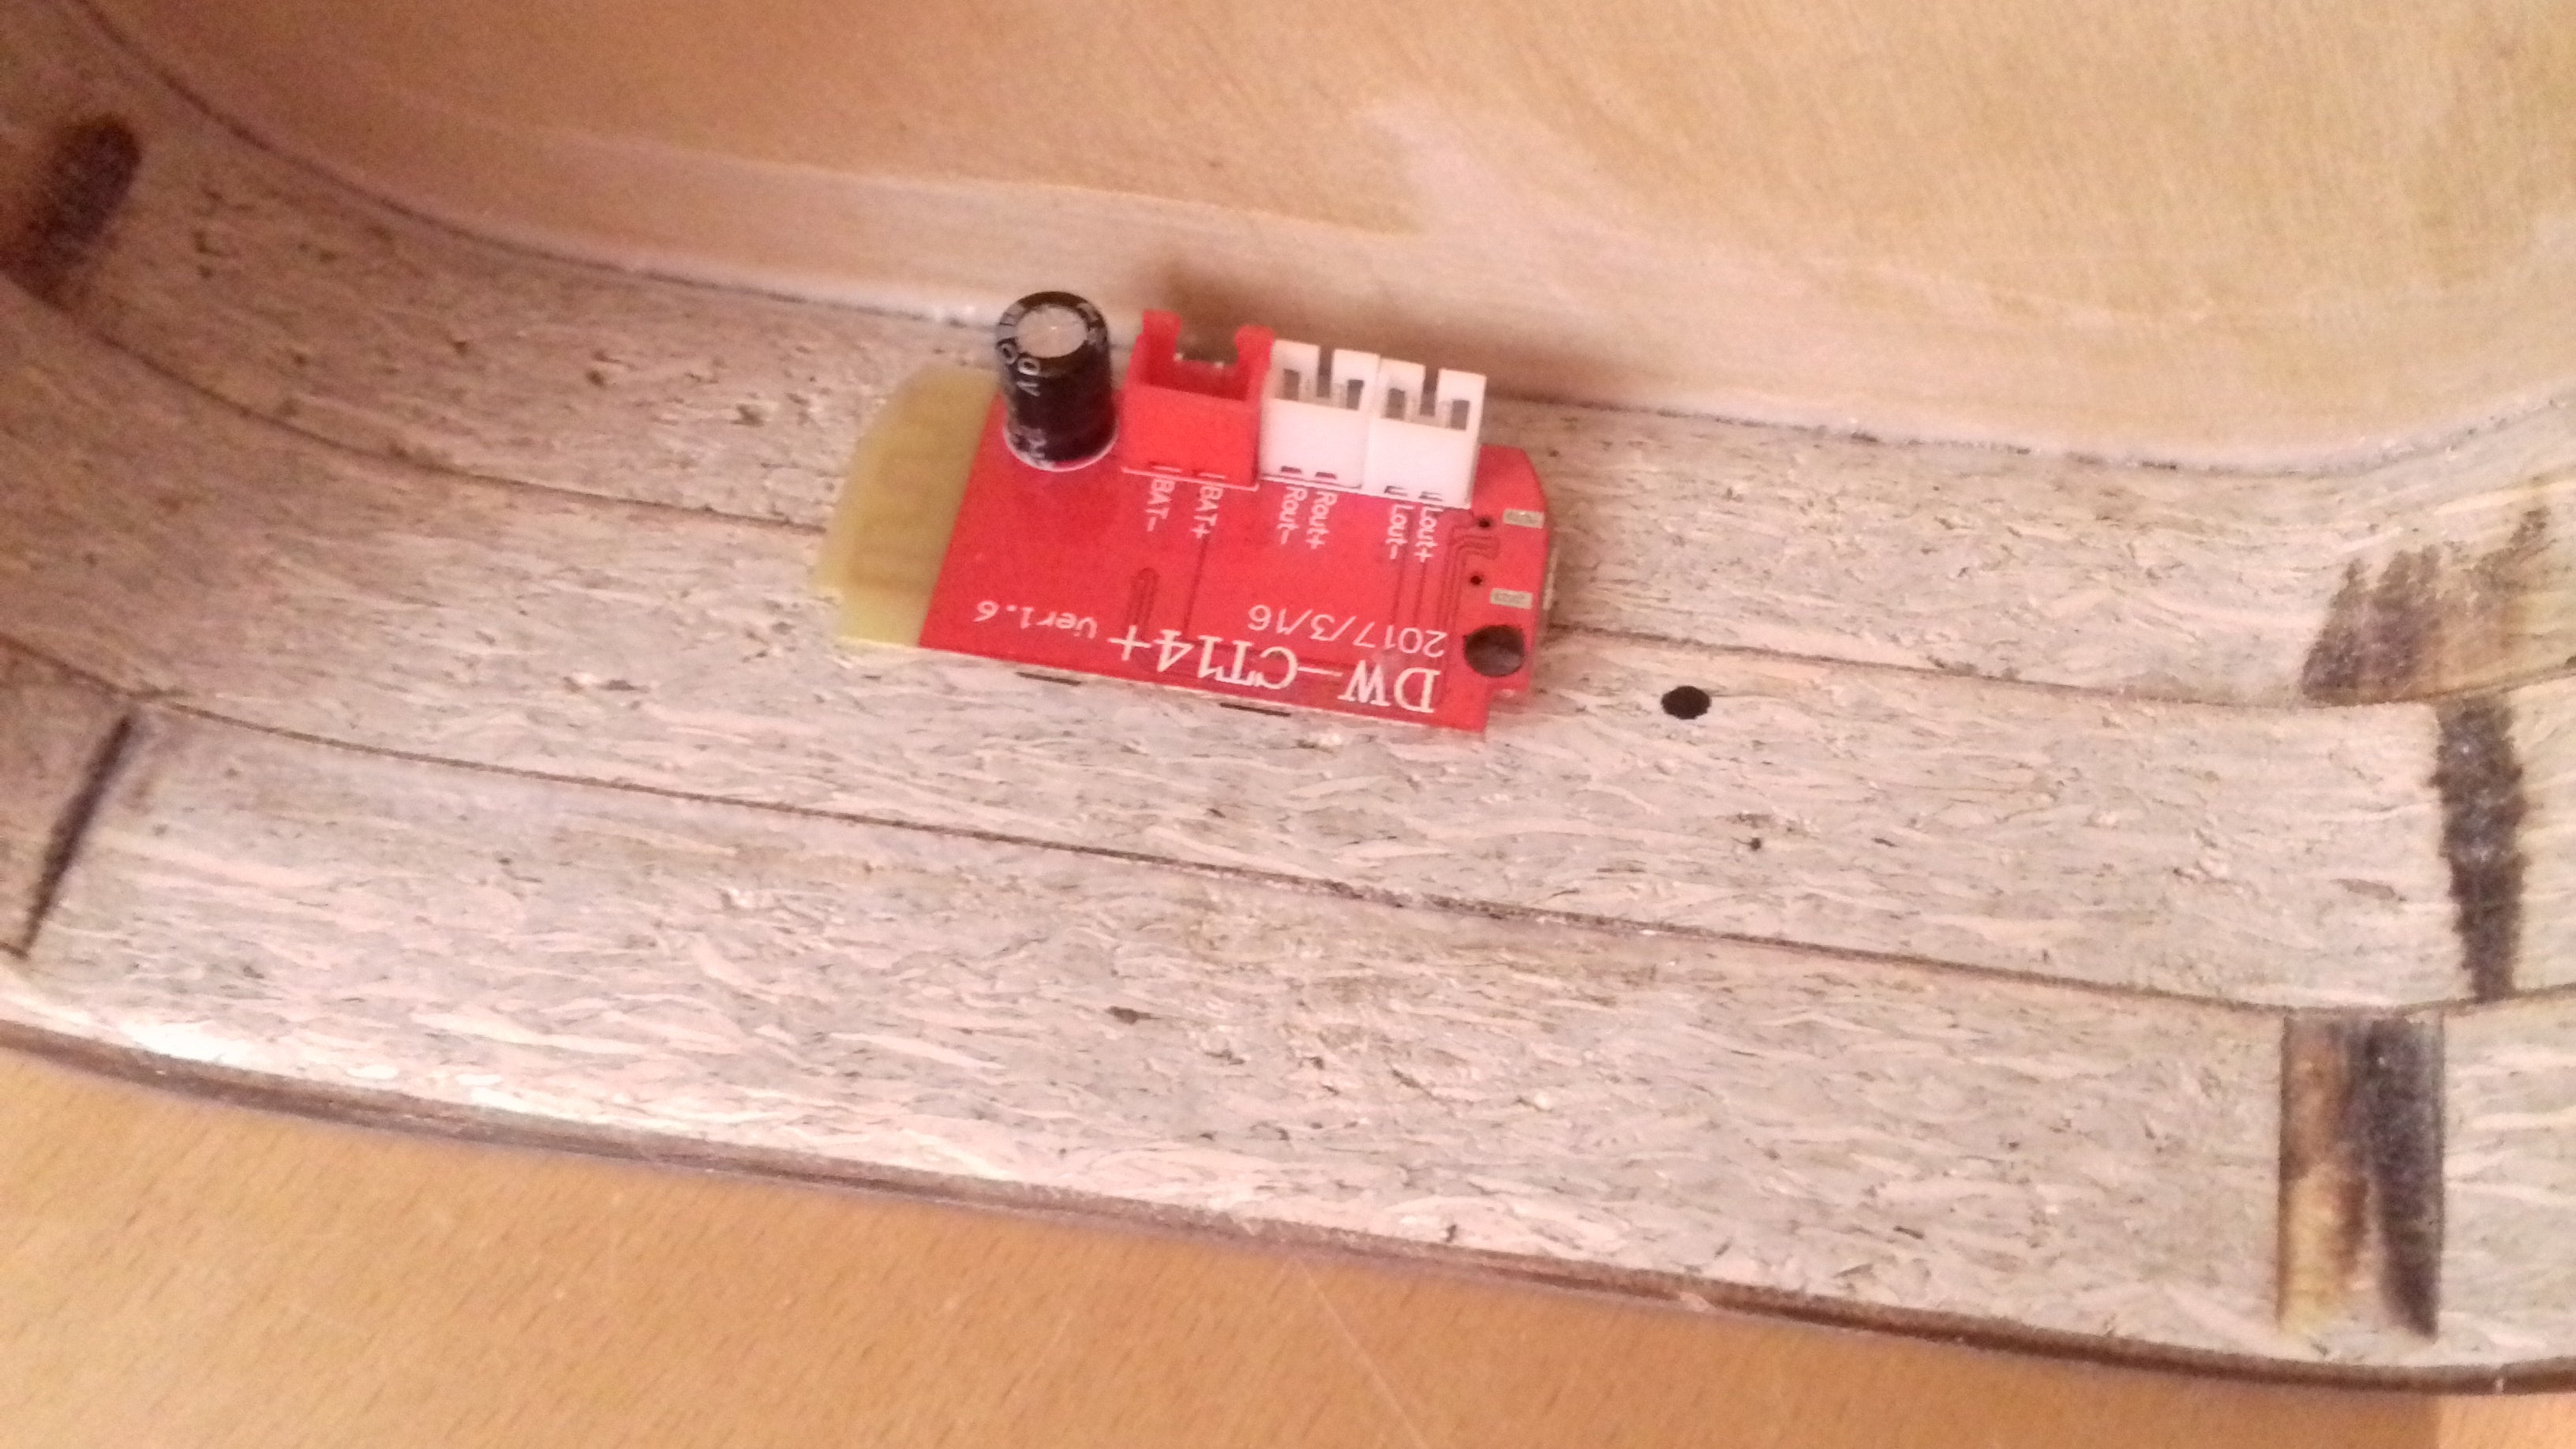
Couldn't drill it from the inside, so I've put a line, which will be a construction one, thus giving me the right track of superficies; from which I can drill with 3mm & 5mm drill bit, to enlarge it. Also, measured the distance between the center of the hole and the Bottom plate, which is 2cm. Afterwards, I've put a M3 nut & couple of screws, for testing how it goes.


Previously I ordered a couple of 3w speakers, while I had one strong 3w bass speaker laying around. Now, I want to connect that stronger one on one channel, and the other two; connected in parallel; on the second channel. In addition of soldering these connections, I've mounted & screwed down the switch, as well as, glued the miniUSb port. For doing such, first; I used super glue, where he didn't prove so well; which resulted in the assistance of hot glue, a lot of hot glue...


You can notice that, conversion connector is slightly shorter than 10cm, which is due to its first version of it. The right length was made on third version. So, basically it took me a lot of nerves to solder & desolder, all over again, till I got it right.
That my friends, is called persistence. And you'r brilliant, if you'r like that & motivated.
The whole bluetooth speaker wouldn't work, if there isn't a power supply, right? For that purpose, I've used Li-ion Polymer battery, of 500mAh of capacity. Important thing to say is: be very careful when soldering around battery, cause having a heat source near it, isn't really recommended.

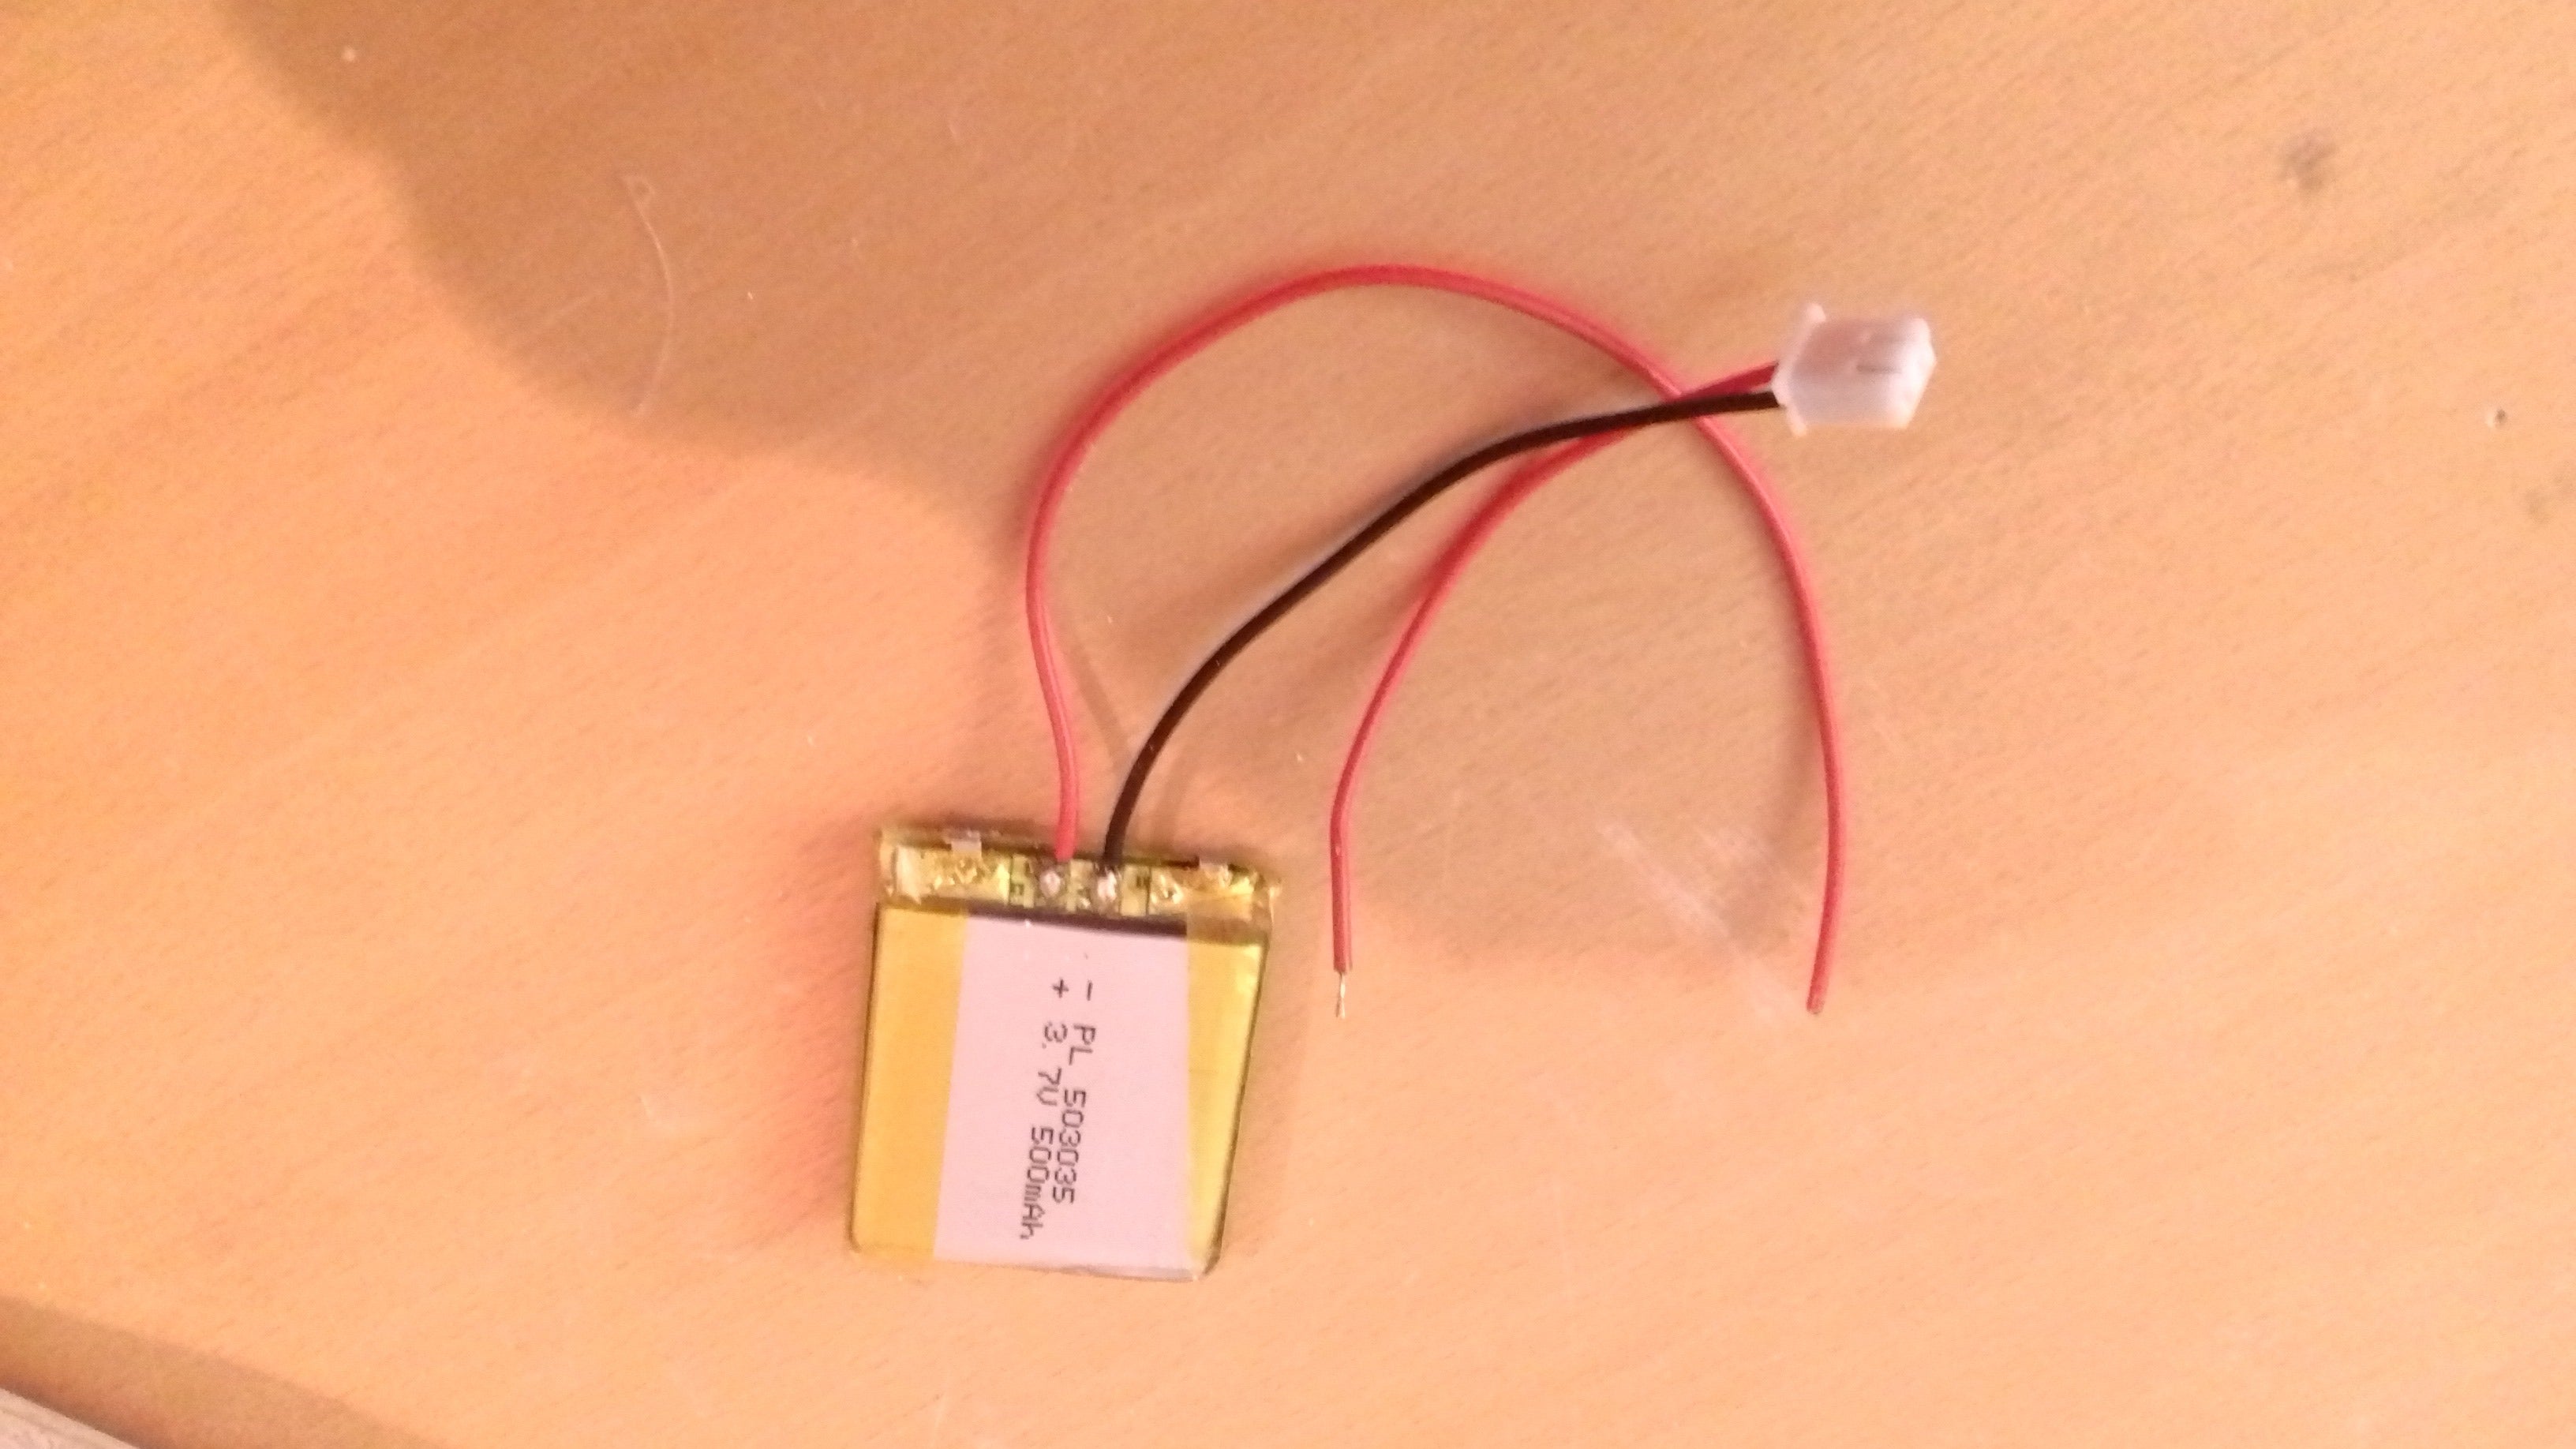
When we are already there, solder the + or - wire, ( depends on which one you want to connect & disconnect ) to one pin of the switch & the output wire to another one.


Use the double-sided duct tape to ensure, that the battery won't move around when put onto the Bottom plate.


All that is left to do is to put it all in one piece, hopefully. Please have patients while doing this, cause your working with very gentle electronics and relatively short cables & very little space left.
*Important to say is; the version 1 connector was still soldered onto the ports, where I noticed I needed to make a longer kind, which is the third version. Don't ask what happened with second.


If your sure enough, that you don't have any loose connection or unsoldered wires, feel free to plug it in & test how it works. While testing it, I noticed that the bluetooth module heats up a little, when playing really loudly. In that case, I added an aluminium heatsink for TO220 transistors, which turns out, fits great onto the M3 screw.
If it gives a great sound & recognizes your device, then your mind-blowing, awesome.
Sanding & Painting-Final


Satisfied with the results; close it, by gluing the Upper part with wood-glue. While setting it to cure, enjoy in how much successeful you really are & that you made an awesome thing.
When cured, I advise you to test it once again, just to make sure that it all works like it should be. Then sand it with already mentioned sandpapers; from previous steps; thus, also providing it with an imitation of finishing fillet. When doing this process; try not to damage the speakers.


Therefore, clean the Bluetooth speaker with cleaning cloth, removing all of the dust. Then use crepe/masking tape to protect all the components from the paint. Be very precise when doing so; yes, it'll took so much time to do it; but it'll be very rewarding; trust me. Not to mention, cut the rest of the tape with the scalpel & also be very detailed when cutting around the switch & screws.


From my Screw Bit Box project, I had a good amount of blue paint left, which I used for painting. Depending from your taste, you can clear coat it or maybe apply some coating for wood.


Finishing Touch


A little detail which I added; when the process of painting & drying was over; is that I've put 3 little felt pads. It gives it soo neat & excellent look & it's the final touch of the KILLER Bit.


I want to take this opportunity to thank you guys for taking your time, reading & checking out this instractable; which means a lot to me. And also I would love to hear your impressions, as well as suggestions.
If you have any questions please let me know or send me a message.
Take a look at my other Instractables.