Joystick Controlled Surveillance Camera
by Nava-Juarez in Circuits > Microcontrollers
3241 Views, 49 Favorites, 0 Comments
Joystick Controlled Surveillance Camera
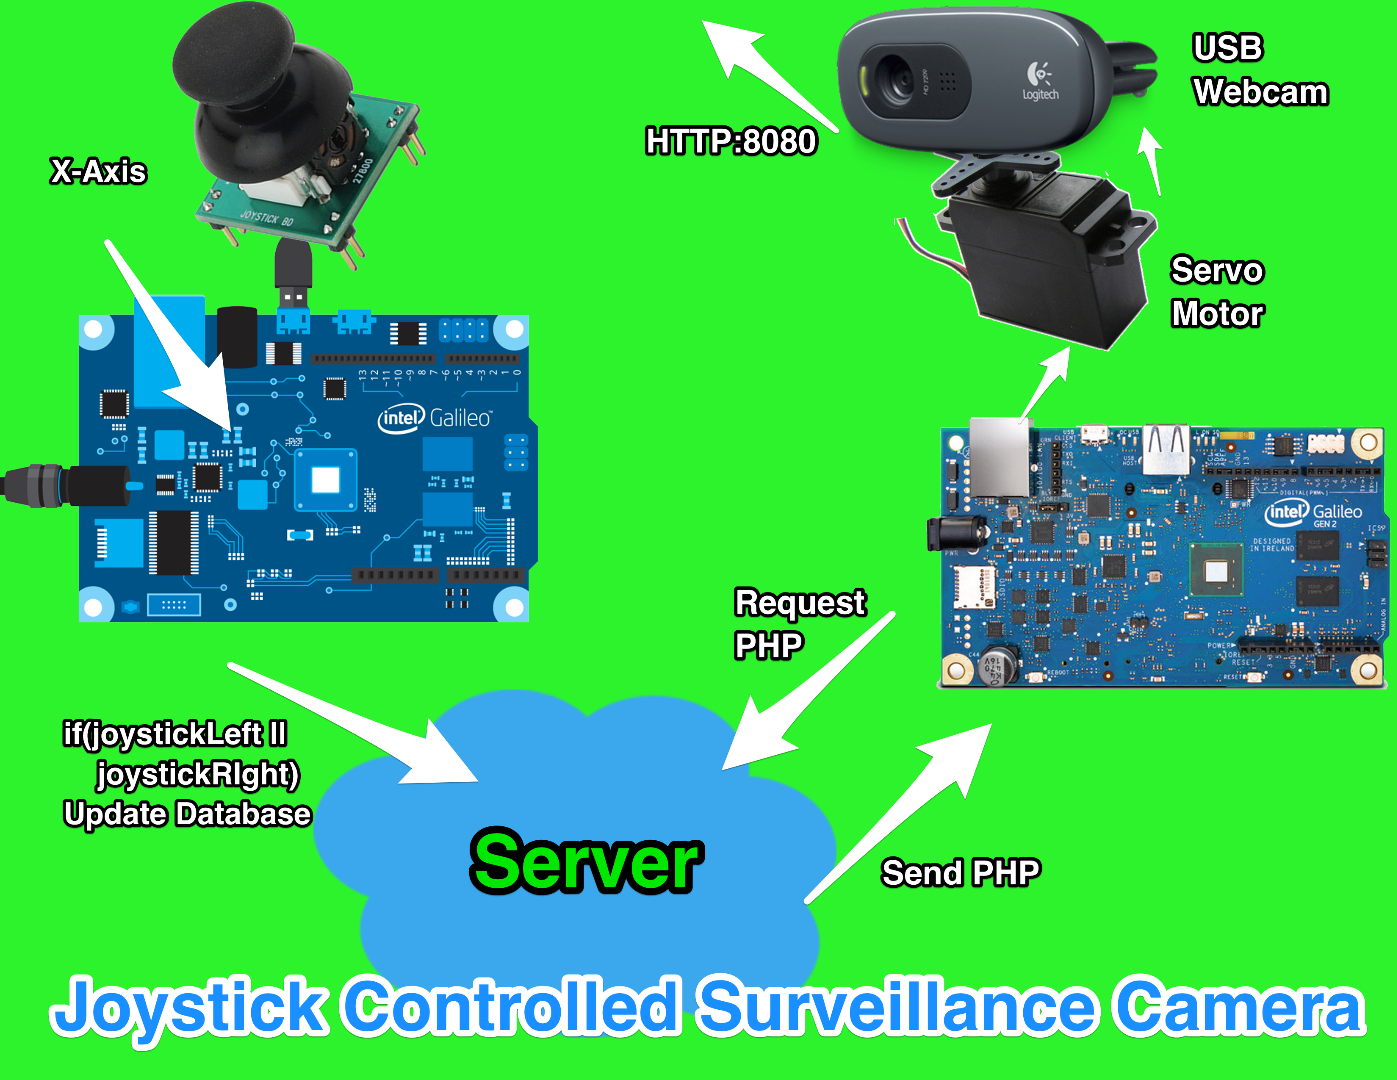
Hello everybody!
I would like to start off by sharing the Youtube Video Demonstration for this Instructable!
Project Overview:
What we will be doing is turning an Intel Galileo into a web server. This server will act as the Host and will store the data that is being processed from a Joystick. The client (Intel Galileo Gen 2) will then request that data and act according to it through the Servo Motor. During this process, live video is streamed from the Intel Galileo Gen 2's server to the local network viewable by your local computers and smart phones.
Motivation:
What drove me to start and complete this project was the fact that I would be learning so much of the true potential the Intel Galileo has to offer. Installing a Debian Linux Distribution and using UVC drivers and mjpg_streamer's library was not so straight forward in the community and because of that, I was motivated to share everything I learned.
Shopping List:
1) Intel Galileo
2) Intel Galileo Gen 2
3) 2 microSD Cards
4) UVC Compatible USB Camera (List)
6) Standard Servo Motor
7) Hot Glue Gun/Velcro
Installing Debian Linux on Galileos
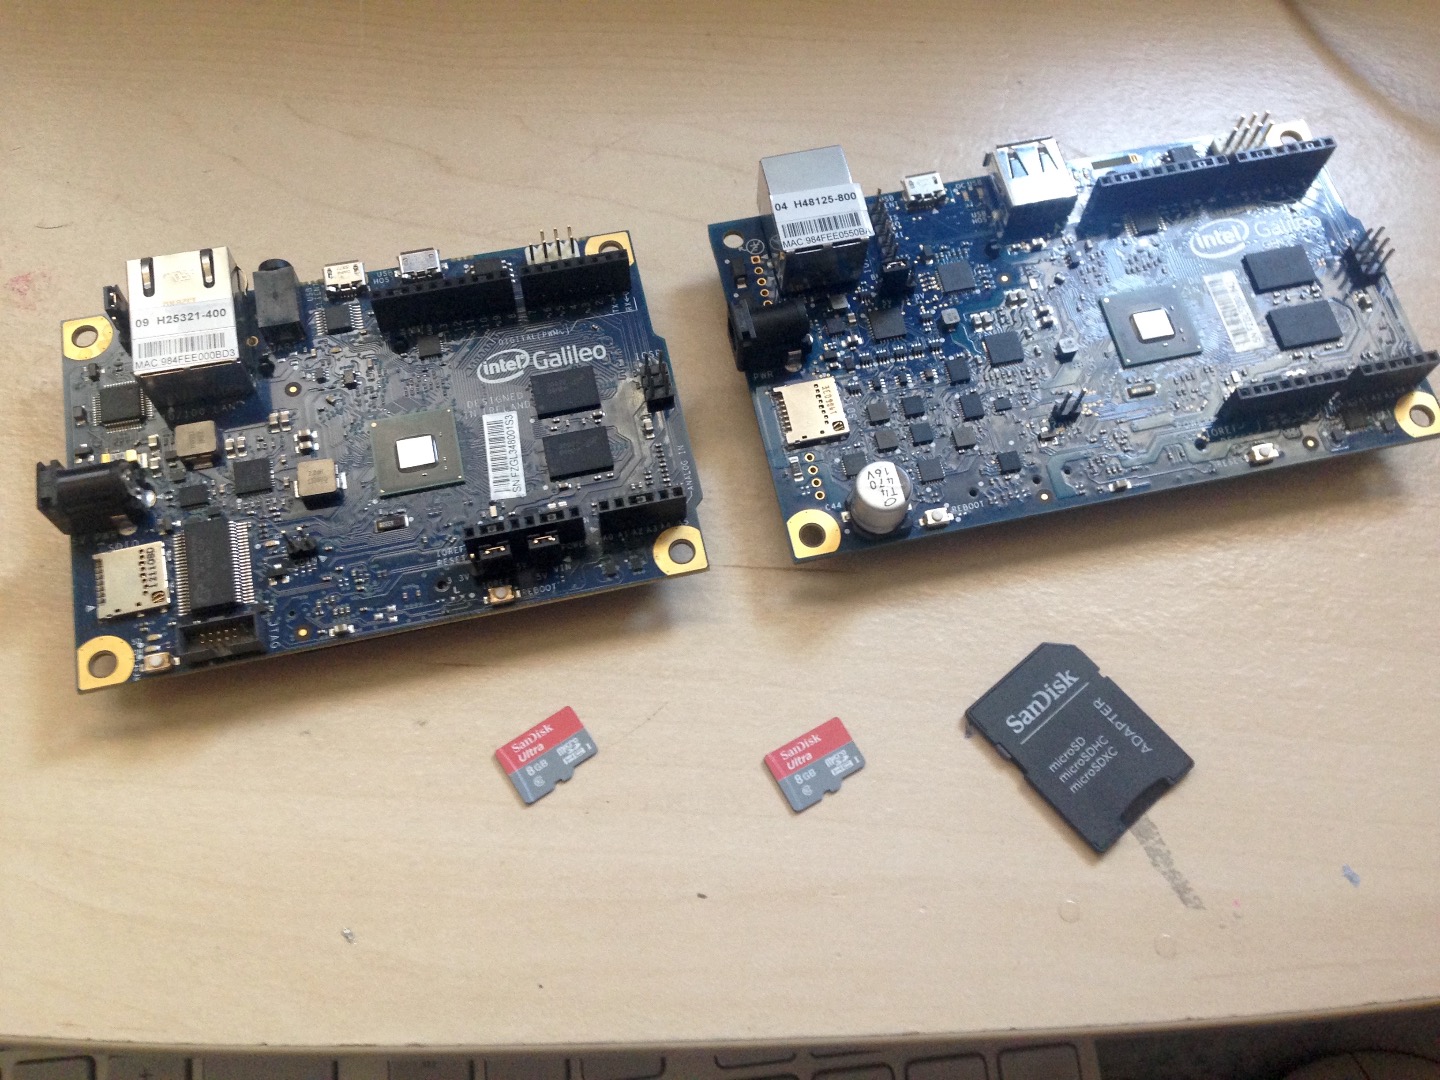
The good news is, you only have to build it once and it can be deployed to both SD cards.
That's right this process is fairly lengthy but well worth the investment once it is completed.
Because this information is not only useful for this project but for tons of other projects and necessities, I have decided to make a separate instructable on this step.
void buildDebian(){
Building a Debian Linux Distribution for the Intel Galileo
return;
}
USB Webcam Stream
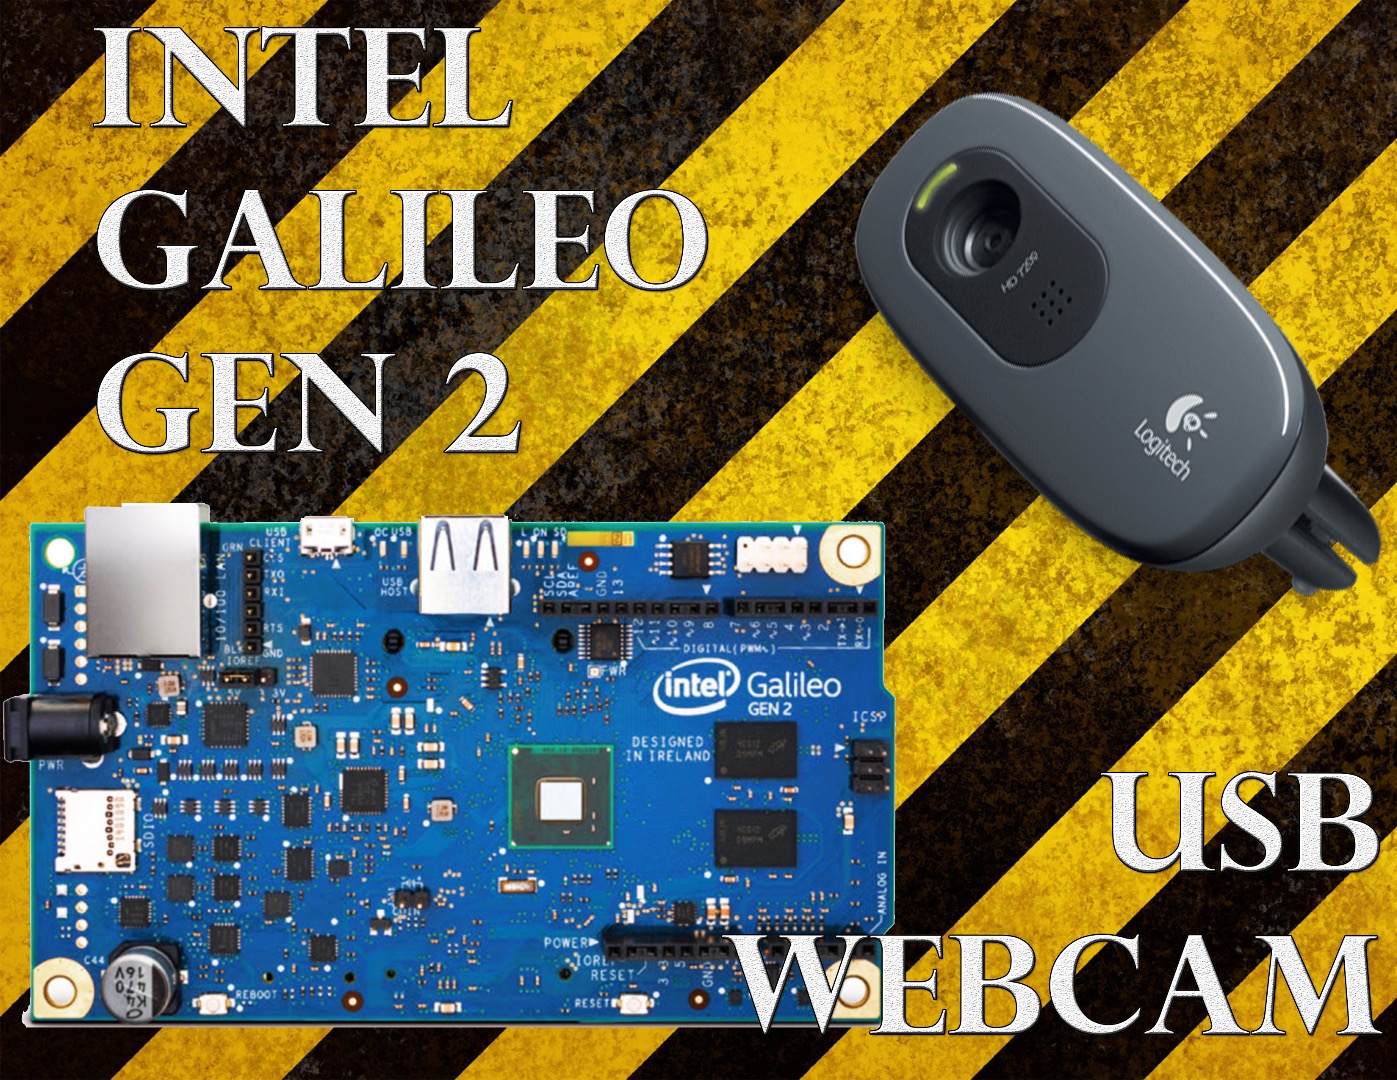
Let's get our Intel Galileo Gen 2's Webcam up and running!
Yet again, I felt that this segment of the tutorial could definitely benefit lots of programmers, engineers, DIYers, hobbyists, and especially you who generally want to stream webcam footage on the Galileo.
So I have decided to make a separate Instructable for it as well.
void initializeUSBWebcam(){
Streaming USB Webcam with the Intel Galileo Gen 2
return;
}
Joystick Control
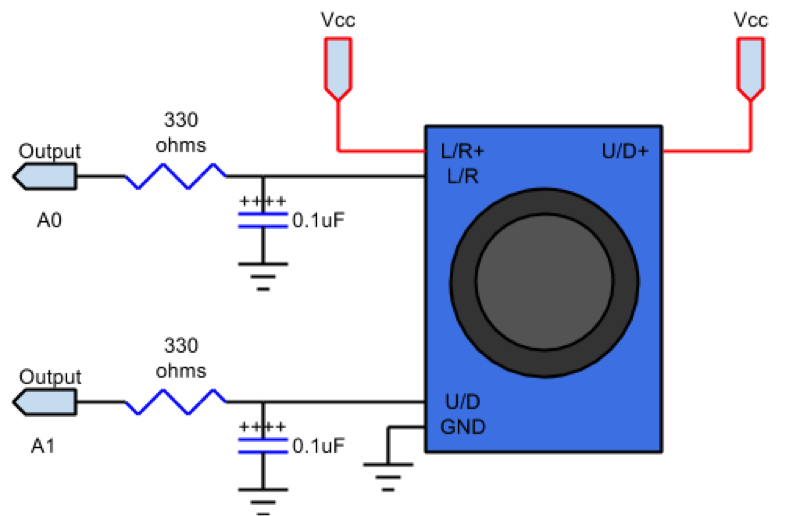
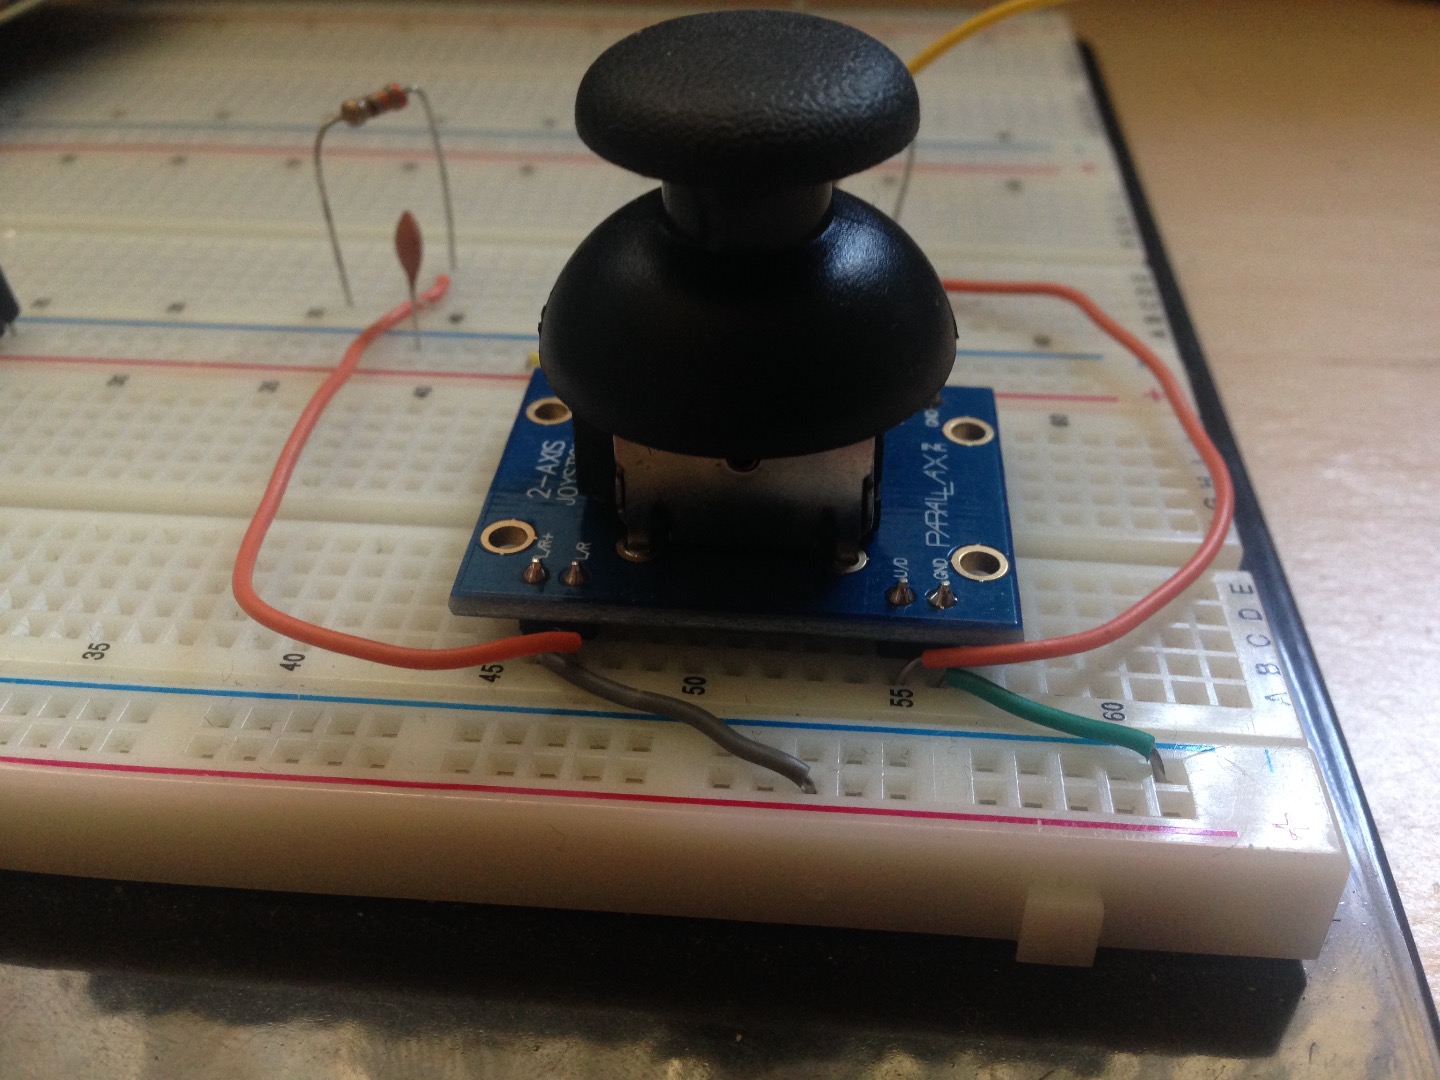
Let's get retro and setup/test our joystick!
Start by wiring the the joystick using the schematic above.
Note: We will only be using one of the outputs whichever you determine to be the x-axis. In my case, A1 was my x-axis output.
The Arduino sketch provided below will simply analogRead the joystick value and print it to the Serial Monitor every 1 second. Feel free to use it to test your circuit.
Once you're sure the joystick is reading values correctly, we can move on to the next step!
Downloads
Setting Up and Mounting the Servo Motor
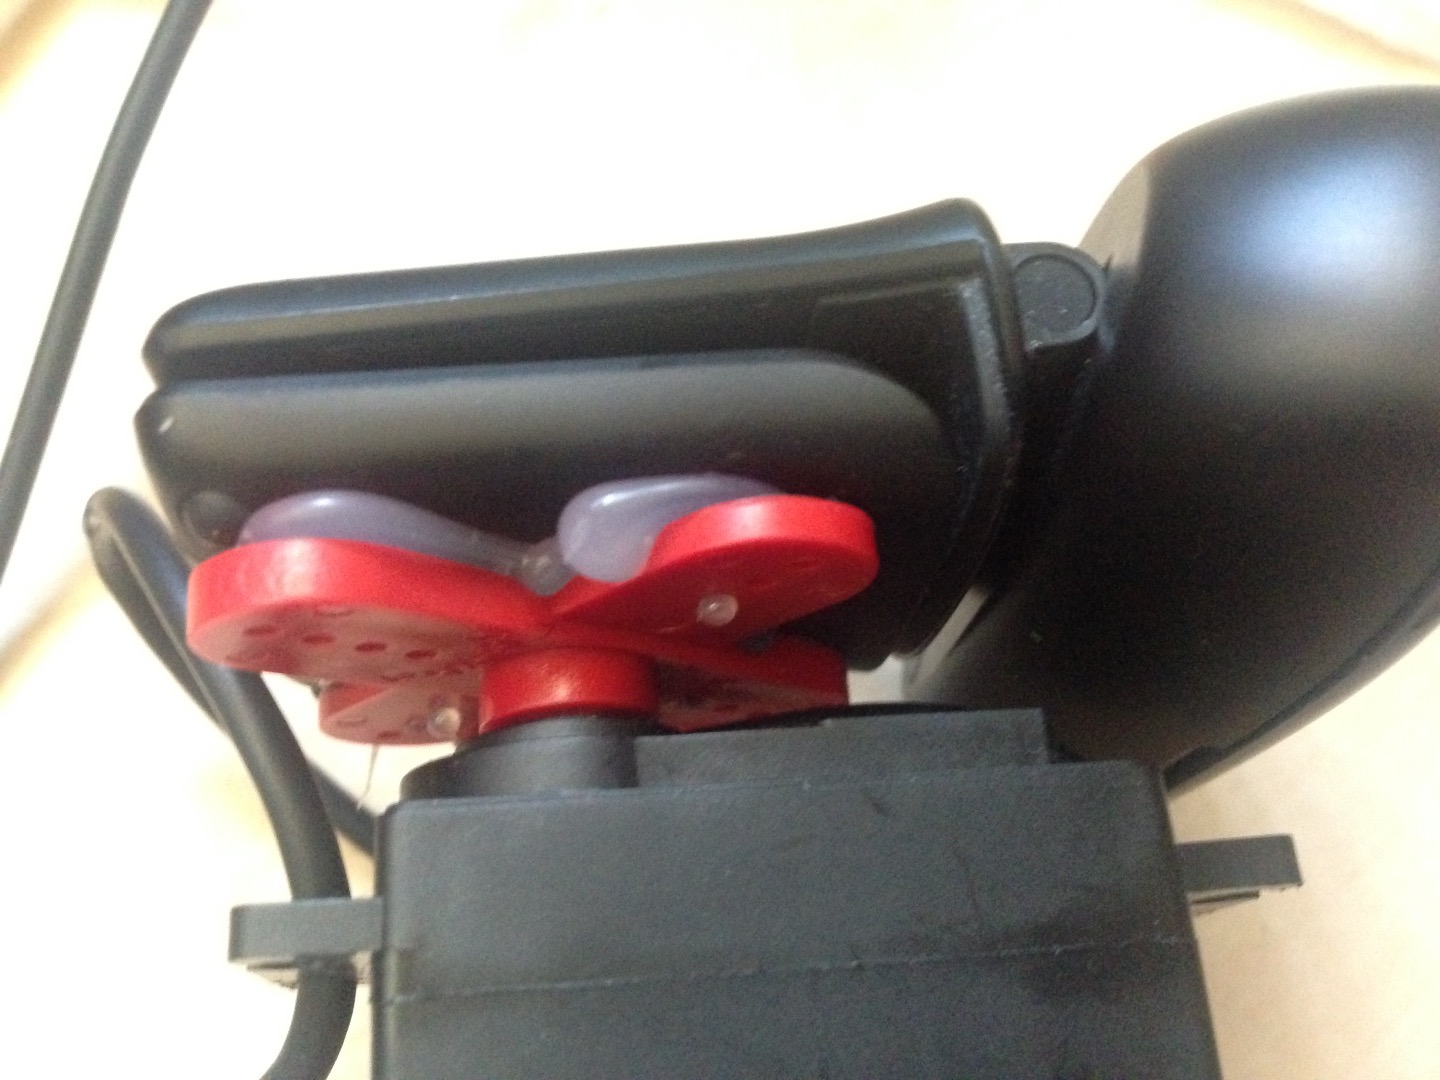
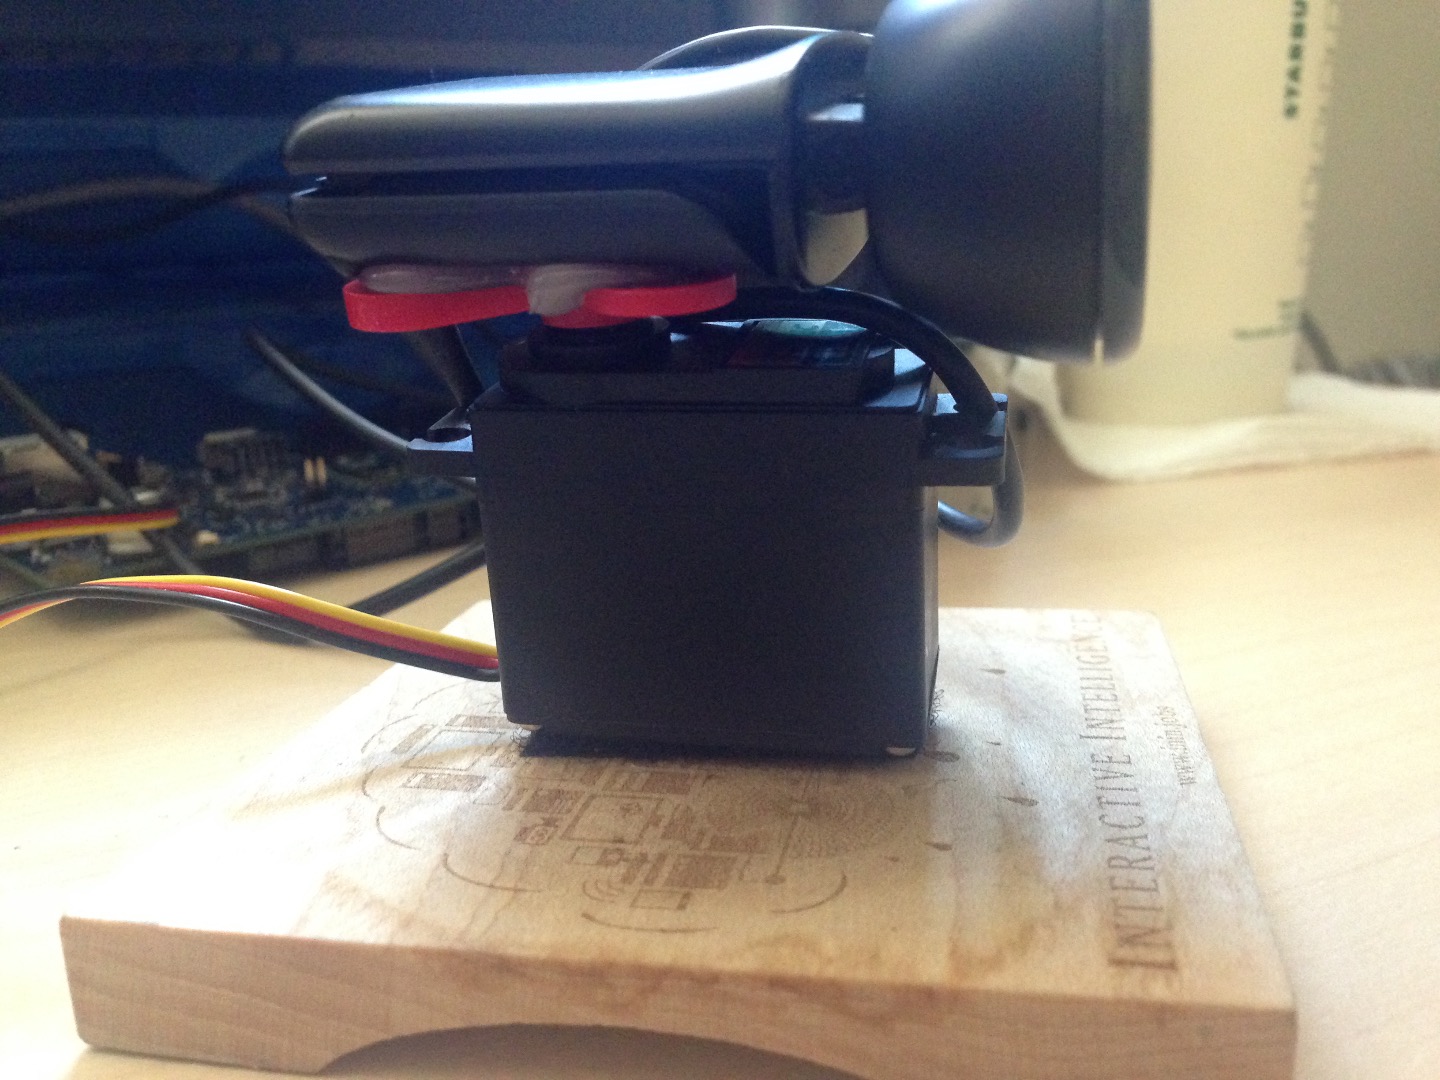
Warm up your glue gun and find a creative way to mount your USB Camera!
This step will be fairly unique for everyone depending on how your camera is shaped so that you can stick it onto the servo motor.
My servo motor came with lots of propellers and yours should've too. Find one that best suits your camera. With my Logitech C270, the camera fit well using the biggest propeller I could find.
Next you will also need to mount the base of the Servo motor onto a flat piece of wood, plastic, 3D printed object of your choice that will help keep the system still while the motor is rotating. For this step I initially glued the motor and base with hot glue and it didn't hold well after turning it upside down so I resorted to using Velcro instead.
Wiring the Servo Motor
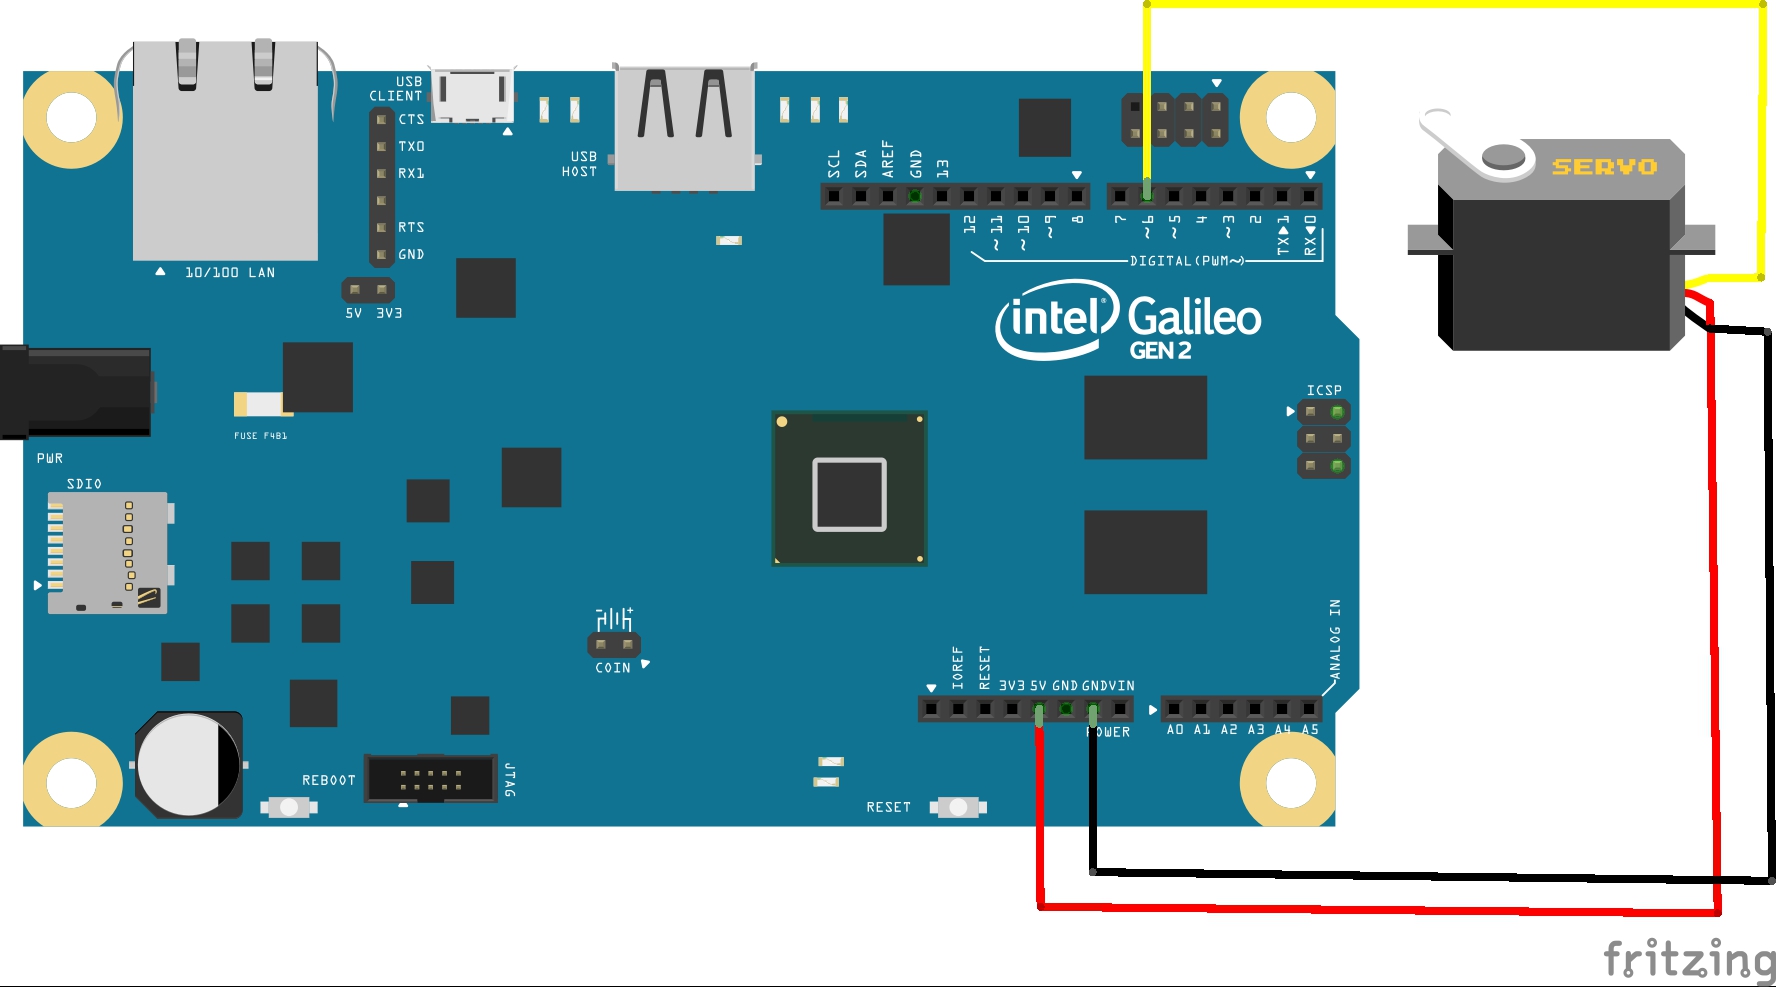
The Servo Motor's pinout:
VCC -> 5V
GND -> GND
Pulse -> Digital Pin 6
Follow the schematic image attached above and wire the Servo Motor to the Intel Galileo Gen 2.
Test your Servo motor with the Arduino Schematic attached that simply rotates the camera every 2 seconds.
Downloads
Setting Up the Host Server
Start by connecting to your Intel Galileo via SSH
You can either check your router's DHCP reservation/attached devices OR run the ethernetTest.ino Arduino sketch to determine your Galileo's IP Address if you're not sure what it is.
Run ssh through terminal or putty and connect to your Galileo using
# sudo ssh root@(IpAddress)
The password will be whatever you set it as when you built your Debian Linux Distro.
Change your hostname
Run the following commands as they will change and set your hostname visible on your Network
# nano /etc/hostname
Edit hostname to GalileoGen1 (Or something distinctive keeping in mind we will be working with two Galileos)
# /etc/init.d/hostname.sh
Setting up a local server
If you haven't already, set up a local server on the Intel Galileo
# apt-get install apache2 php5 libapache2-mod-php5
This will enable us to host webpages and data given the IP address of the Galileo.
Test your server by typing (IpAddress)/index.html in your browser
For Example: 192.168.1.2/index.html And you should see a page with a header "It Works!
Navigate to /var/www
#cd /var/www
We are going to create two files here:
# touch request.txt
# nano position.php
Edit position.php using the attached "position.php" contents.
What this php file does is it receives data provided in the URL parameter and saves it in the txt file request.txt.
Test it!
In your browser, have two tabs:
(IPAddress)/position.php?position=300
and
(IPAddress)/request.txt
Play around with the parameter and reload the request.txt and observe the value change.
Host Arduino Sketch
Provided is an attachment to Host.ino which is the sketch we'll be uploading to the Intel Galileo.
The sketch updates the request.txt file using system commands if the joystick is changing position with a delay rate of half a second.
Test it again!
Navigate to (IPAddress)/request.txt, move your joystick left/right while reloading the page and watch as the data changes!
You'll see in the txt file I use 'Joystick', the data itself, and E(for end of file) so that later on the Client is able to parse the HTML document.
Setting Up the Client - Intel Galileo Gen 2
The first step will be similar to setting up the Host
Start by changing the host name.
Name it "IntelGalileoGen2"
# sudo ssh root@(IpAddress)
# nano /etc/hostname
# /etc/init.d/hostname.sh
Arduino Client Sketch
The arduino sketch attached does the following:
-Connects to Host Server with given IP Address
-Reads "request.txt" and depending on the value given it will either rotate counterclockwise fast/slow, clockwise fast/slow, or just standby.
The speed depends on how far the joystick is tilted.
In order for this sketch to work
You must change lines 25, and 53 to your Host IP Address.
Congrats!!
You should have control over the servo motor from the Host Galileo!
Downloads
Live Video Stream
Almost done!
Make sure you have an established SSH connection to your Intel Galileo Gen 2
Run mjpg_streamer using the following code:
export LD_LIBRARY_PATH=/usr/local/lib
mjpg_streamer -i "input_uvc.so -f 25 -r 640x480" -o "output_http.so -w /usr/local/www"
OR
If you wrote a script(from my instructable), you can just run it
/home/runWebcam.sh
(runWebcam.sh should contain the following):
#! /bin/bash
fswebcam -d /dev/video0 -r 640x480 -S 20 test.jpeg
rm test.jpeg
export LD_LIBRARY_PATH=/usr/local/lib
usr/local/bin/mjpg_streamer -i "input_uvc.so -f 25 -r 640x480" -o "output_http.so -w /usr/local/www" &
Your video stream should be viewable from
(IPAddress):8080/stream_simple.html
on mobile or PC!
Great! Now lets make a startup script(Optional but Recommended)
Run the Following commands:
# nano /etc/init.d/webcamStartupScript.sh
Fill with the following:
#!/bin/sh
sleep 10s
/home/runWebcam.sh
Make it executable
chmod ugo+x /etc/init.d/webcamStartupScript.sh
Configure the init system to run this script at startup.
update-rc.d webcamStartupScript.sh defaults
Wrap It Up
Congratulations! You should now have a Joystick Controlled Surveillance Camera for fits your needs!
Turning off and on both Galileos should take around 2 minutes to boot.
Because of the SD cards and your startup script, everything should be plug and play ready to go once the system initiates.
I would recommend reserving your IP addresses for both Galileos in your router settings so that you don't have to worry about editing your Client Arduino Sketch.
I'd love to see the purpose of your finished system in the comments below and as always feedback is always a plus.
Thank you for reading my Instructable and Goodluck!