Job Aid: Connecting a Device to Your Network Via Cat-6 Ethernet Cable
by michael_olson_0606 in Circuits > Electronics
300 Views, 0 Favorites, 0 Comments
Job Aid: Connecting a Device to Your Network Via Cat-6 Ethernet Cable

Many employees now have the option of working from home, and may be setting up a home network for the first time. While wireless connectivity is available now on many routers, you may prefer the relative security and reliability of a hardwired connection to your home network. This job aid will help users with no prior experience setting up a home network to establish a hard wired connection for their devices. This aid works for any device that has a LAN port, and both in homes that have network conduits installed and homes that do not. This aid can also be used to set up devices in your office building, assuming you have the permission of your IT department, or if your business is small enough that you are the IT department.
DISCLAIMERS: Please do not attempt this in an office setting where computer equipment is overseen by IT specialists or an IT department unless given explicit permission by those specialists/that department. We are not responsible for violations of your company's network security policies. Also, be aware that cables left stretched across floors present a tripping hazard, and may potentially damage your equipment or the cable itself if caught underfoot.
Supplies
You will need the following items for your setup. You may need to follow through step 2 if you don't already have these items.
- Your device(s) to be connected to the network, which should have a Local Area Network (LAN) port. This could be a desktop computer, a printer, anything with the LAN port.
- An internet modem and a router. These may be the same device depending on your service provider's provided equipment, or your preference when purchasing your own. Either way, as long as they are both present, they should function the same. Unless you employ a switch, ensure there is at least one free LAN port on the router for each device to be connected. A separate modem and router can start around $70 and $120 respectively, while a combination modem/router can start around $160.
- Cat-6 Ethernet cable, to reach between the router and the device, or from the router to the conduit, then from the wall port to the device. At the time of writing, a 10 foot Cat-6 ethernet cable costs $6.99 at Best Buy. If you have Cat-5 cables, those should work as well, but are slightly outdated.
- Available power supply for all devices.
- Just in case: compressed air electronics duster, a vacuum cleaner with an appropriately sized attachment, or a pair of tweezers, in case there is debris in the port. A can of compressed air can be purchased for less than $10 at Walmart. With the exception of the vacuum cleaner power cord, DO NOT insert any of these into two or three prong power outlets, unless power has been cut to the area at the circuit breaker, to avoid injury from electrical shock.
- Optional: tape or zip ties for cable management.
Locate Equipment to Be Connected
Determine the physical location of your devices to be connected, and note how far they are either from where the router is or will be located, or from the wall port if you have conduits throughout the building. This will determine the length of the ethernet cable you will need. Try to get the shortest length possible to cover your needs, to prevent large amounts of excess.
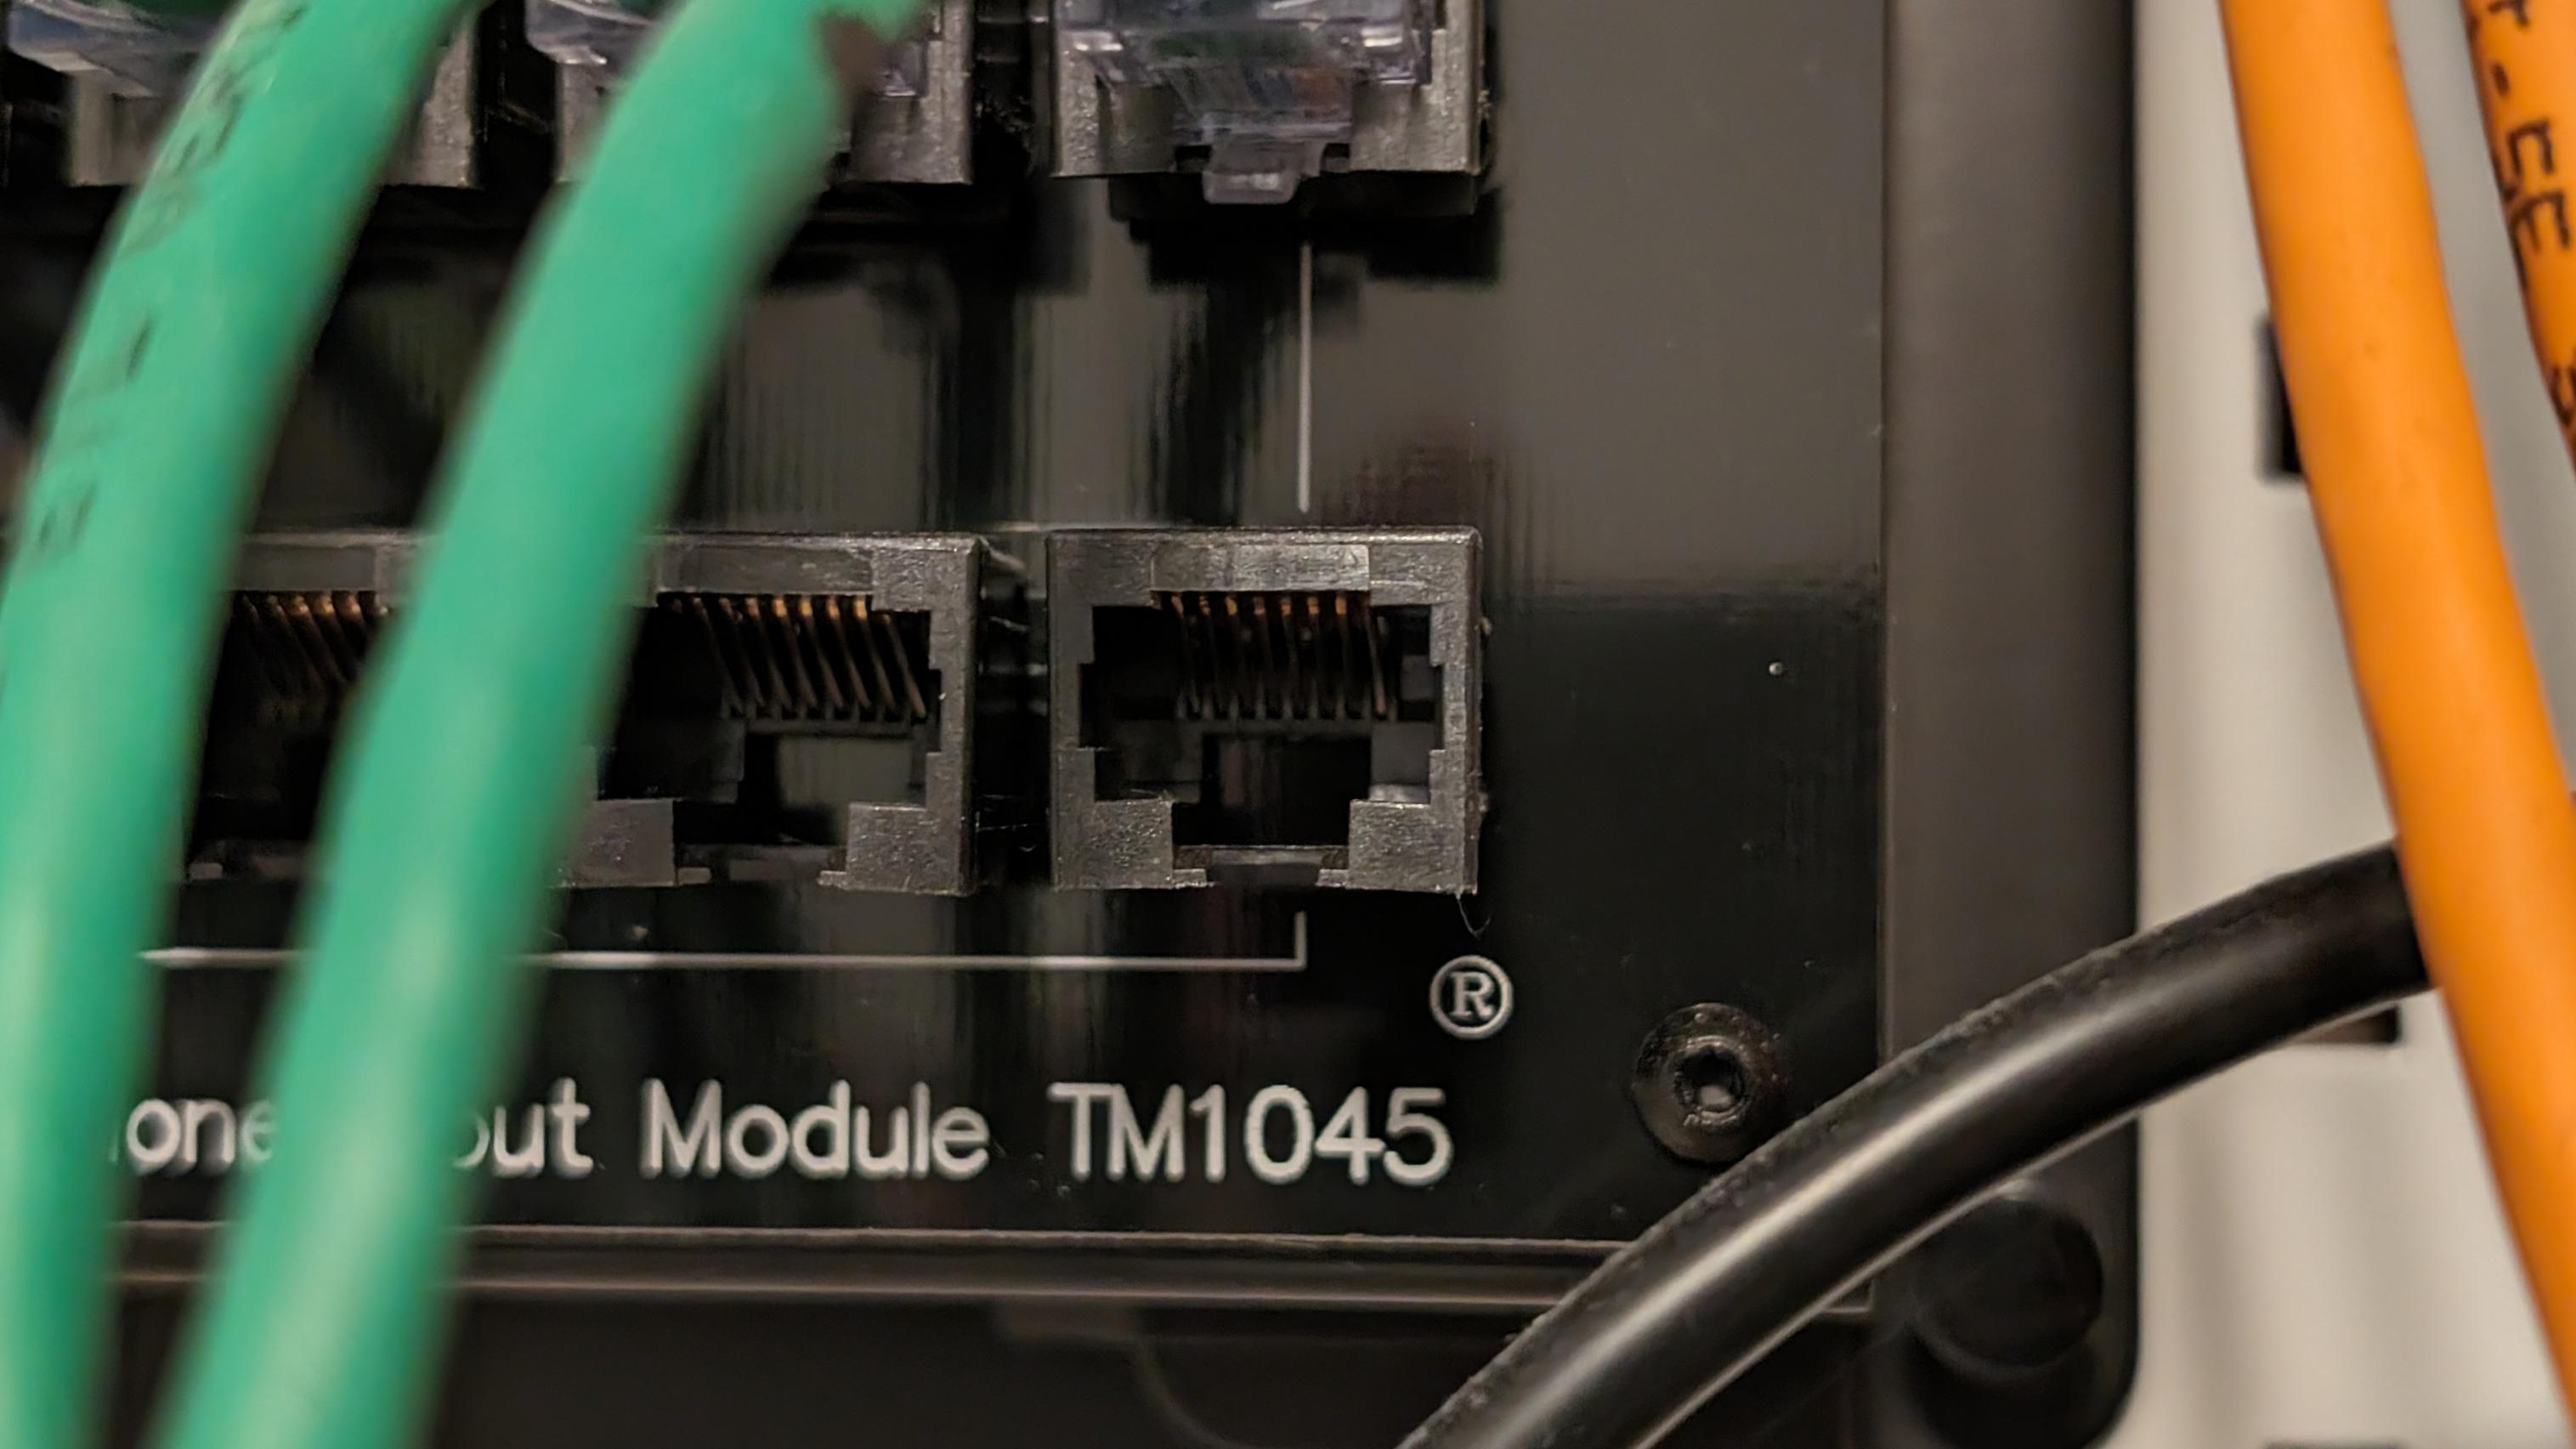
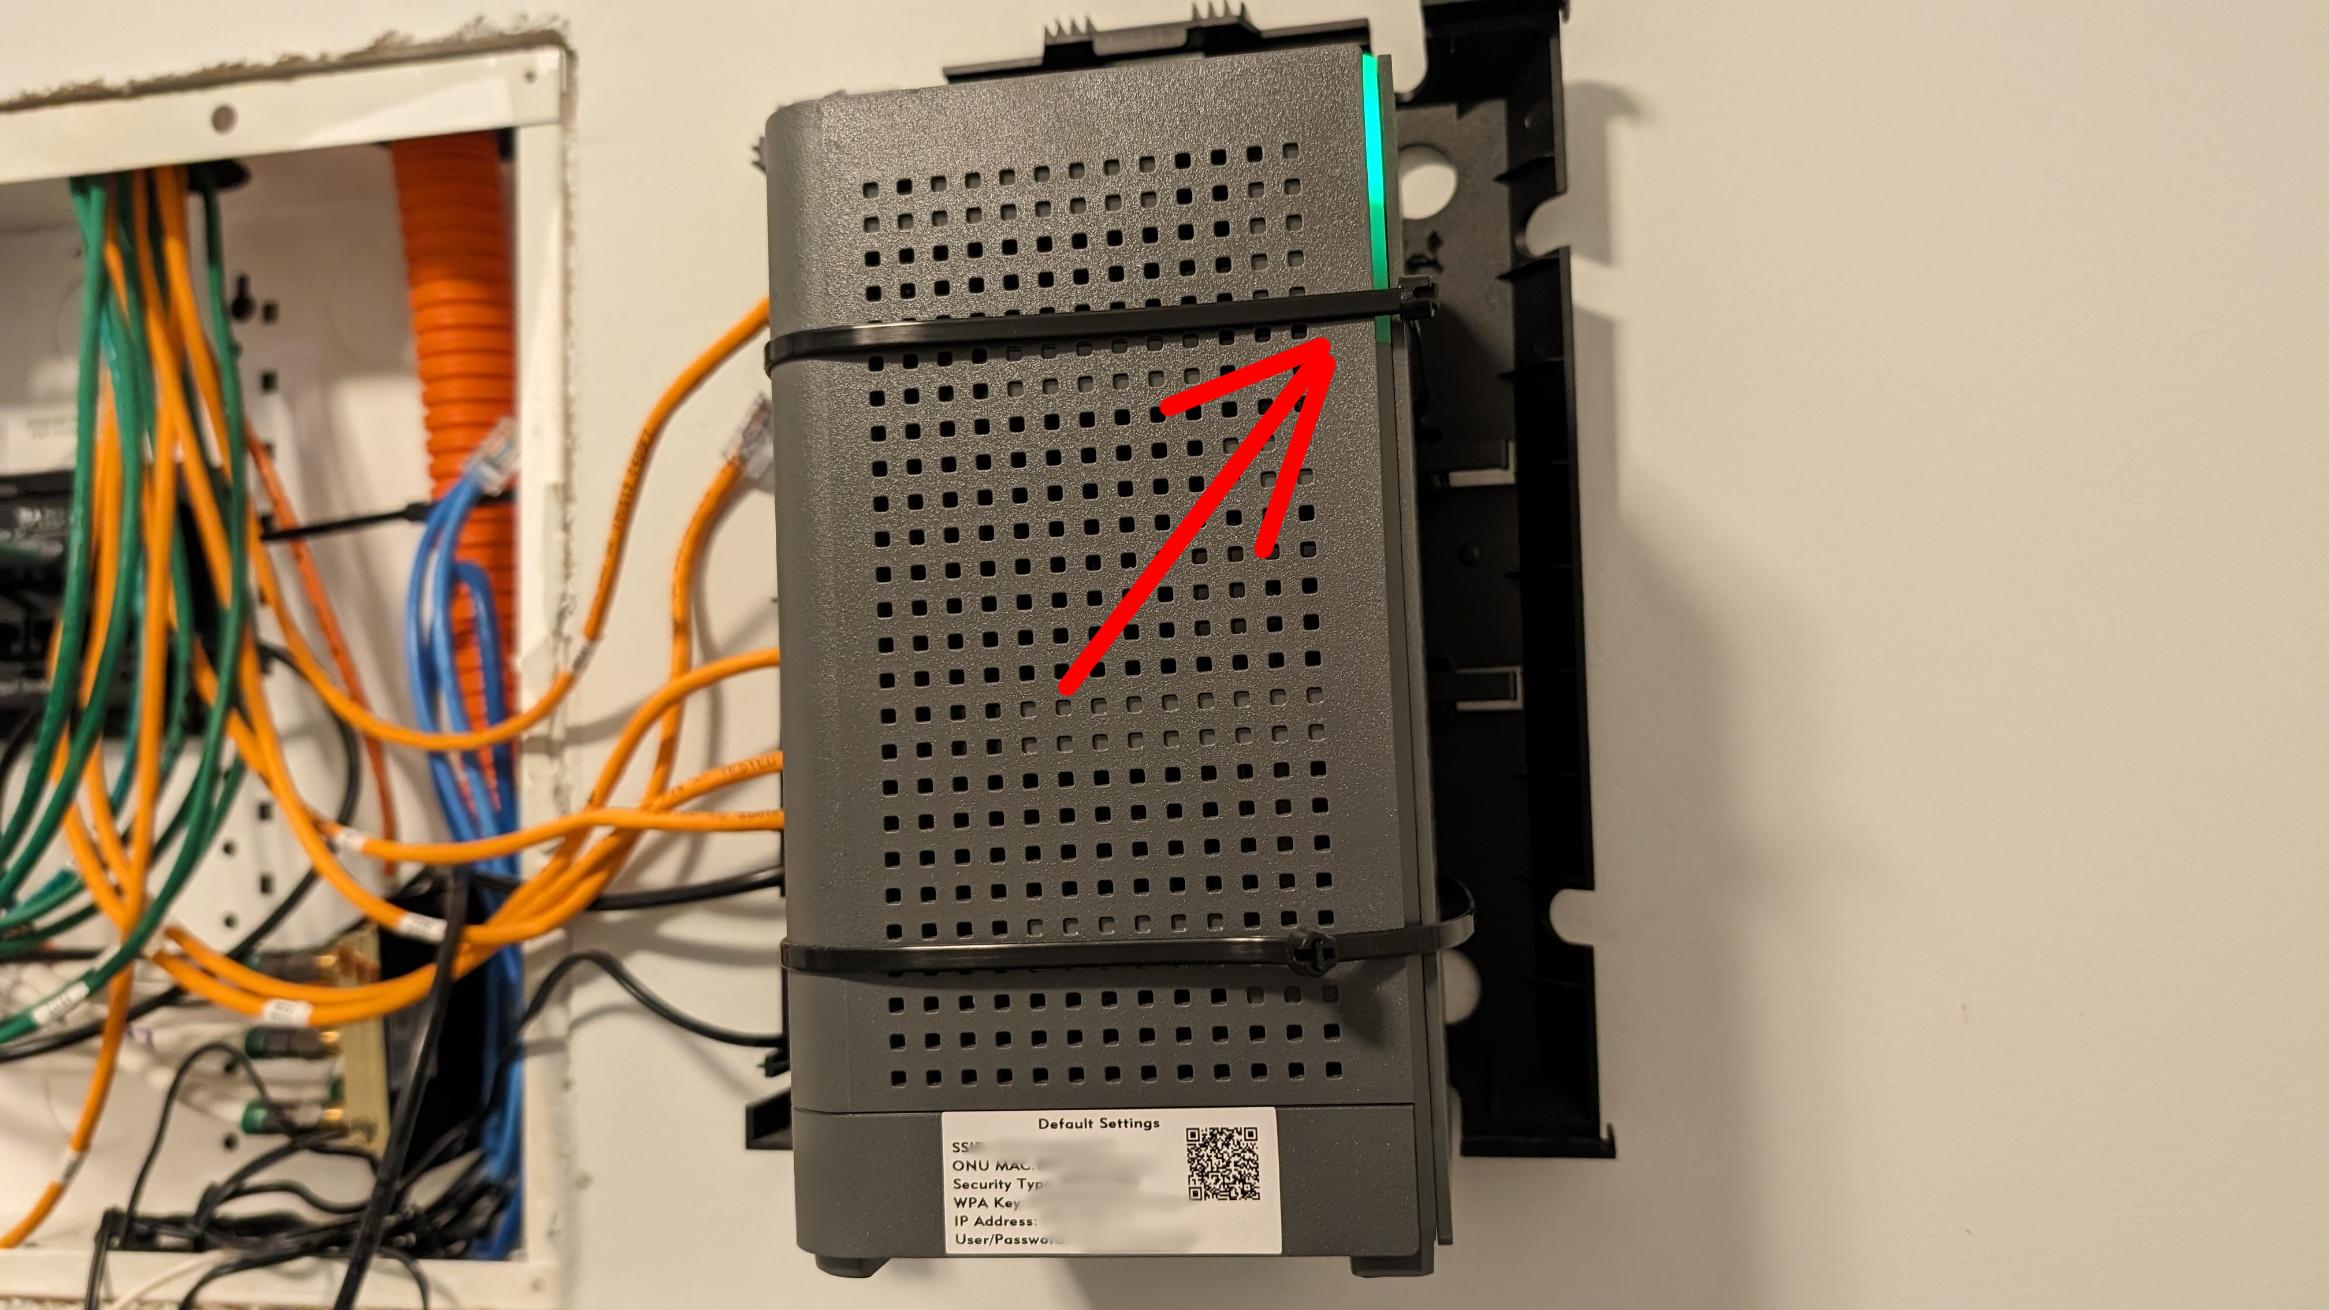
Locate LAN Ports on Router, Conduits, and Device
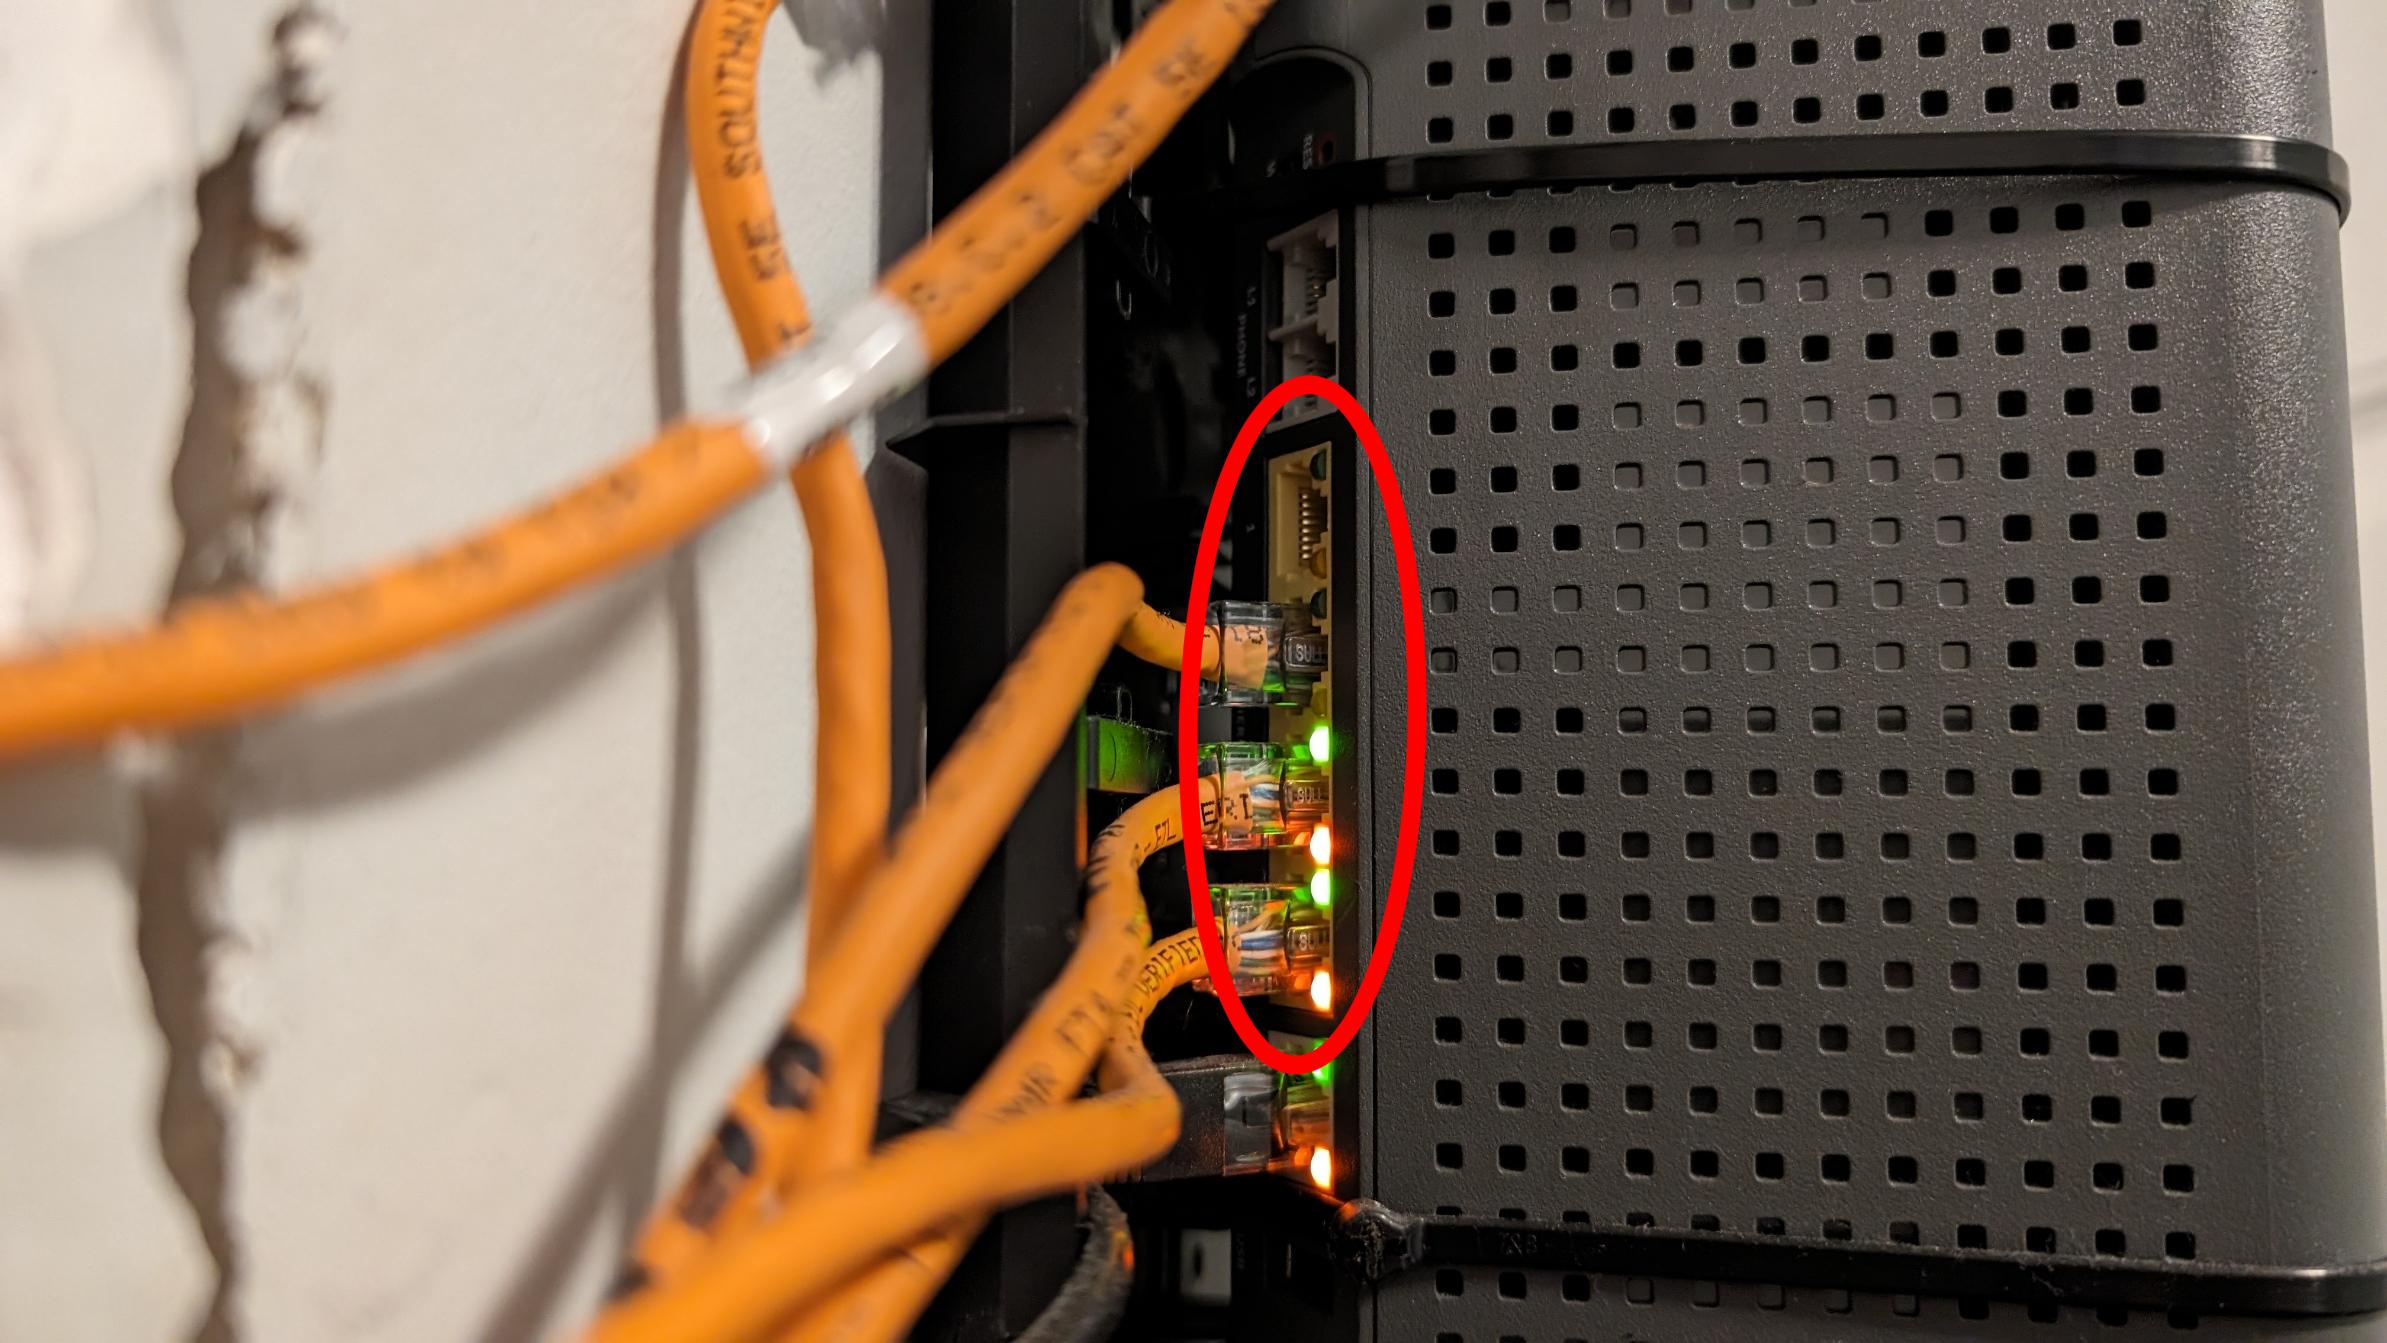
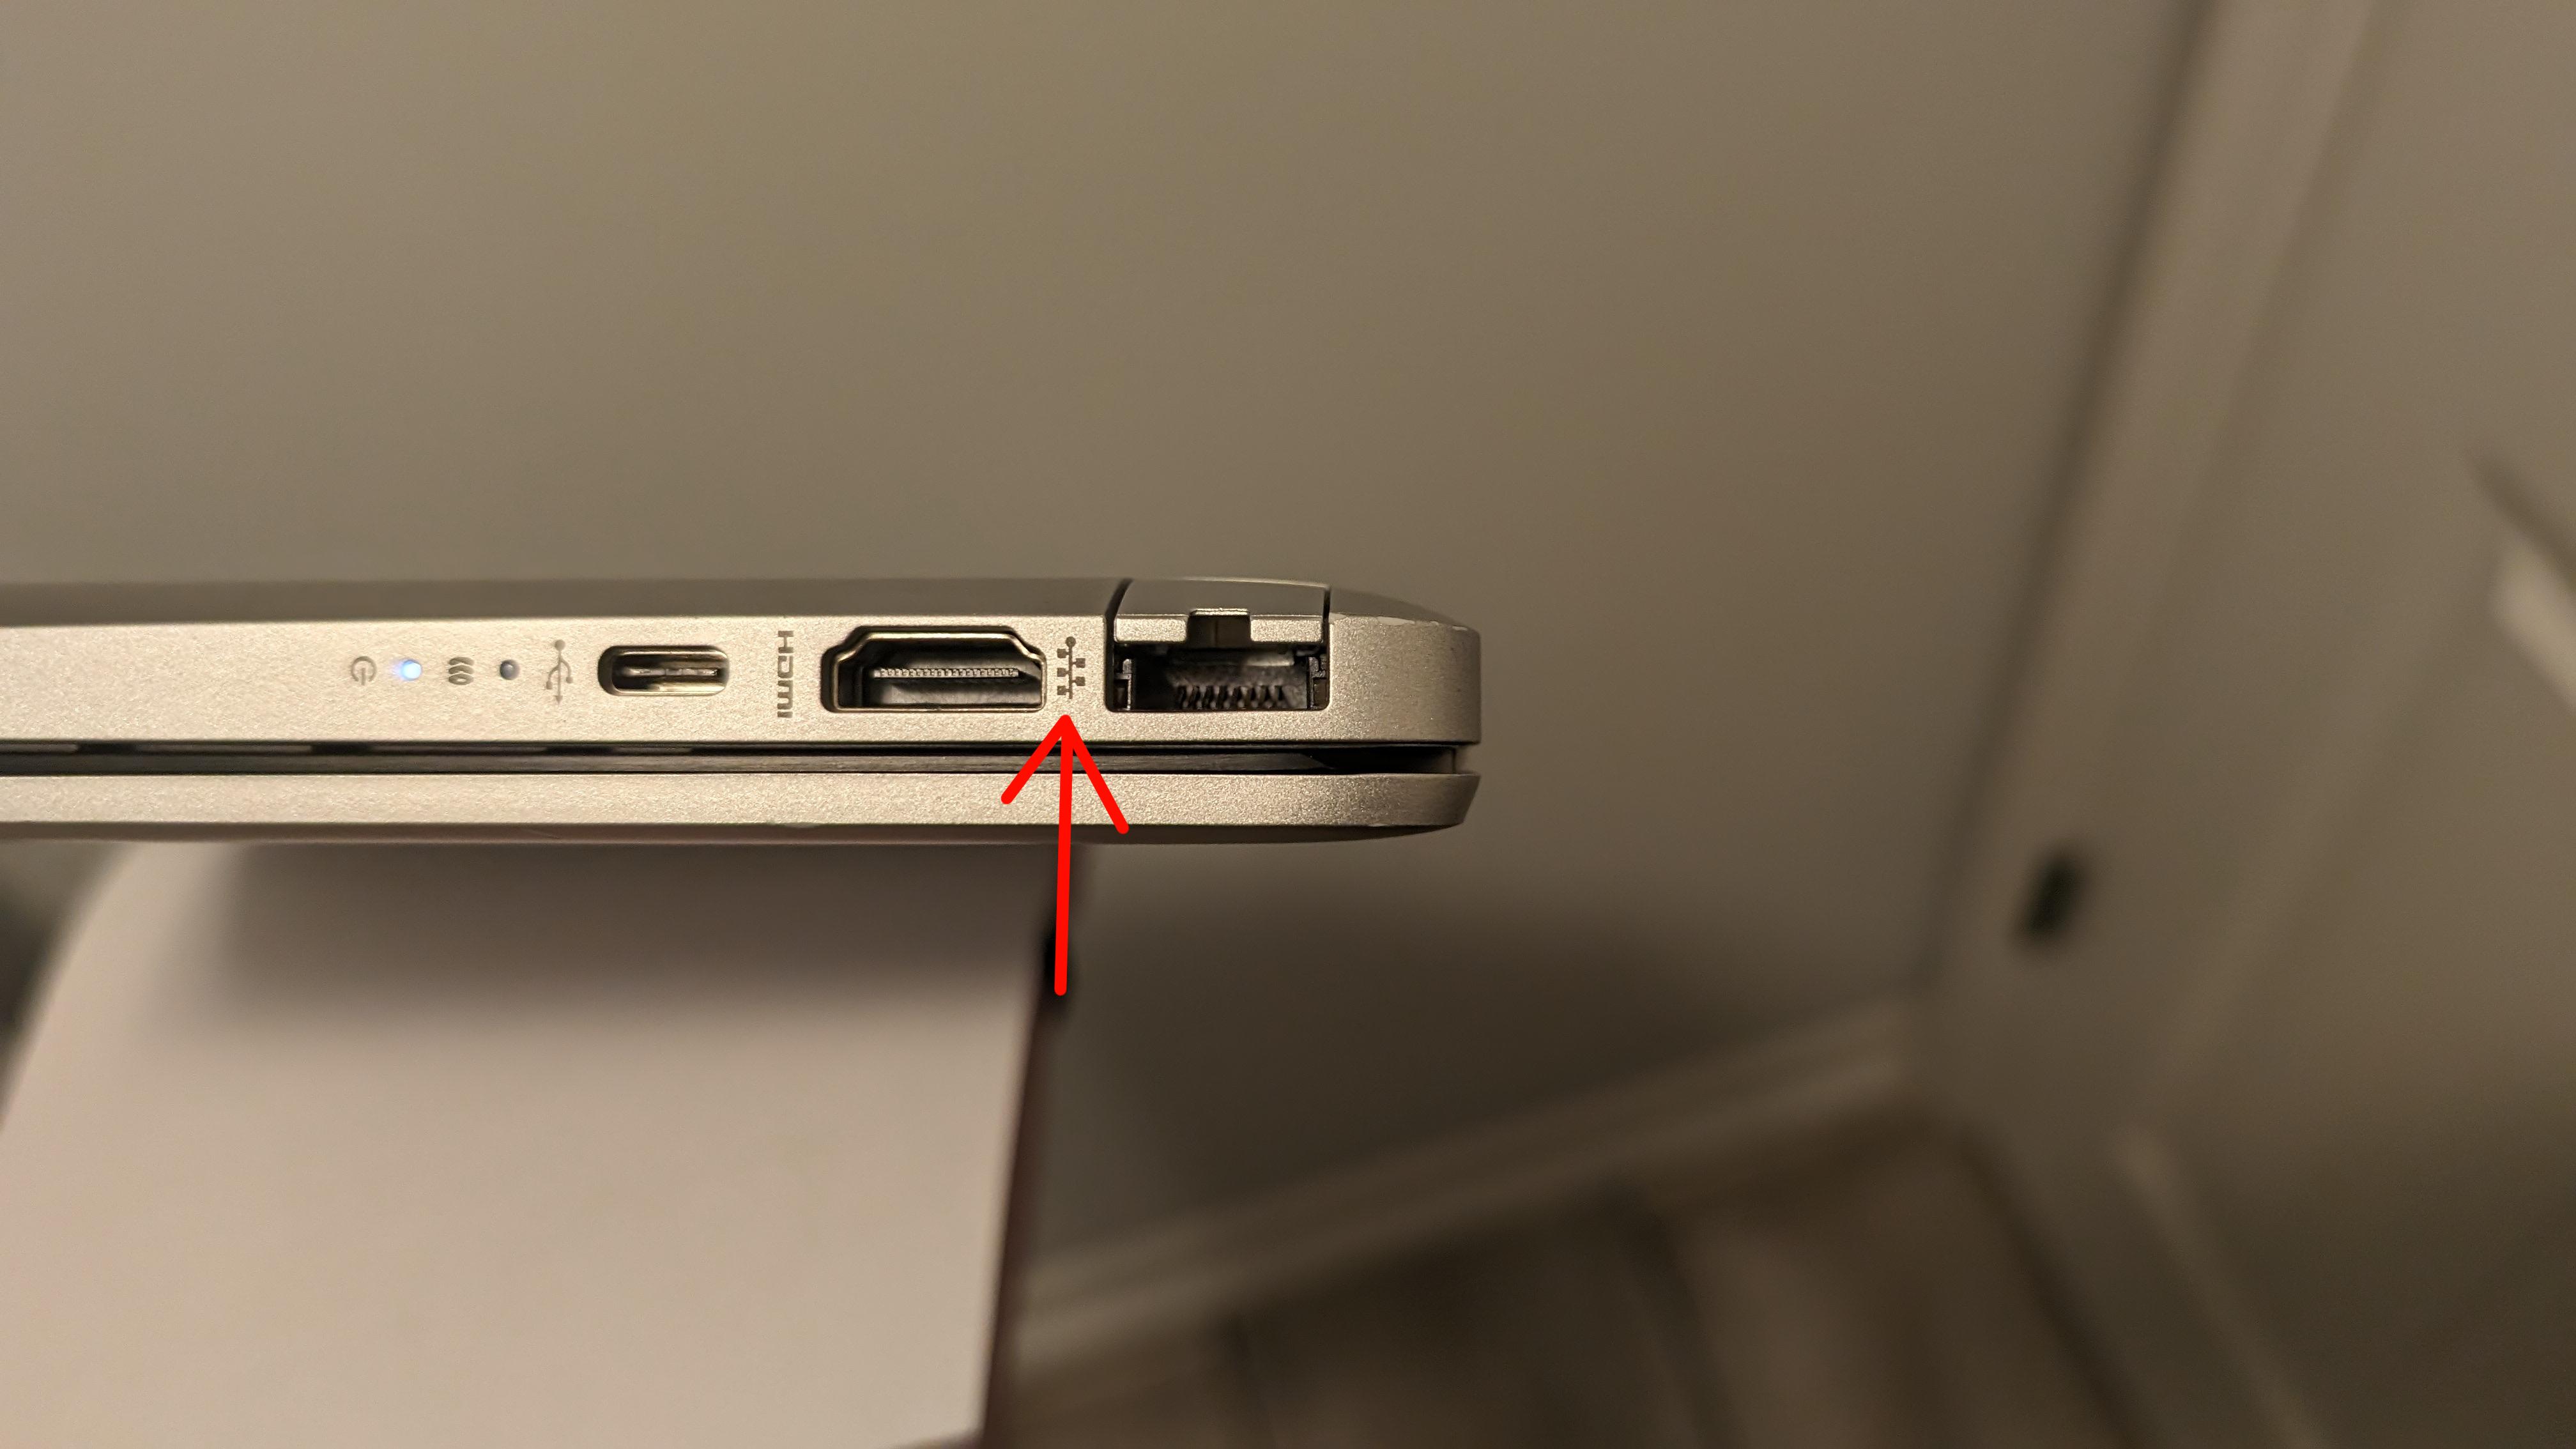
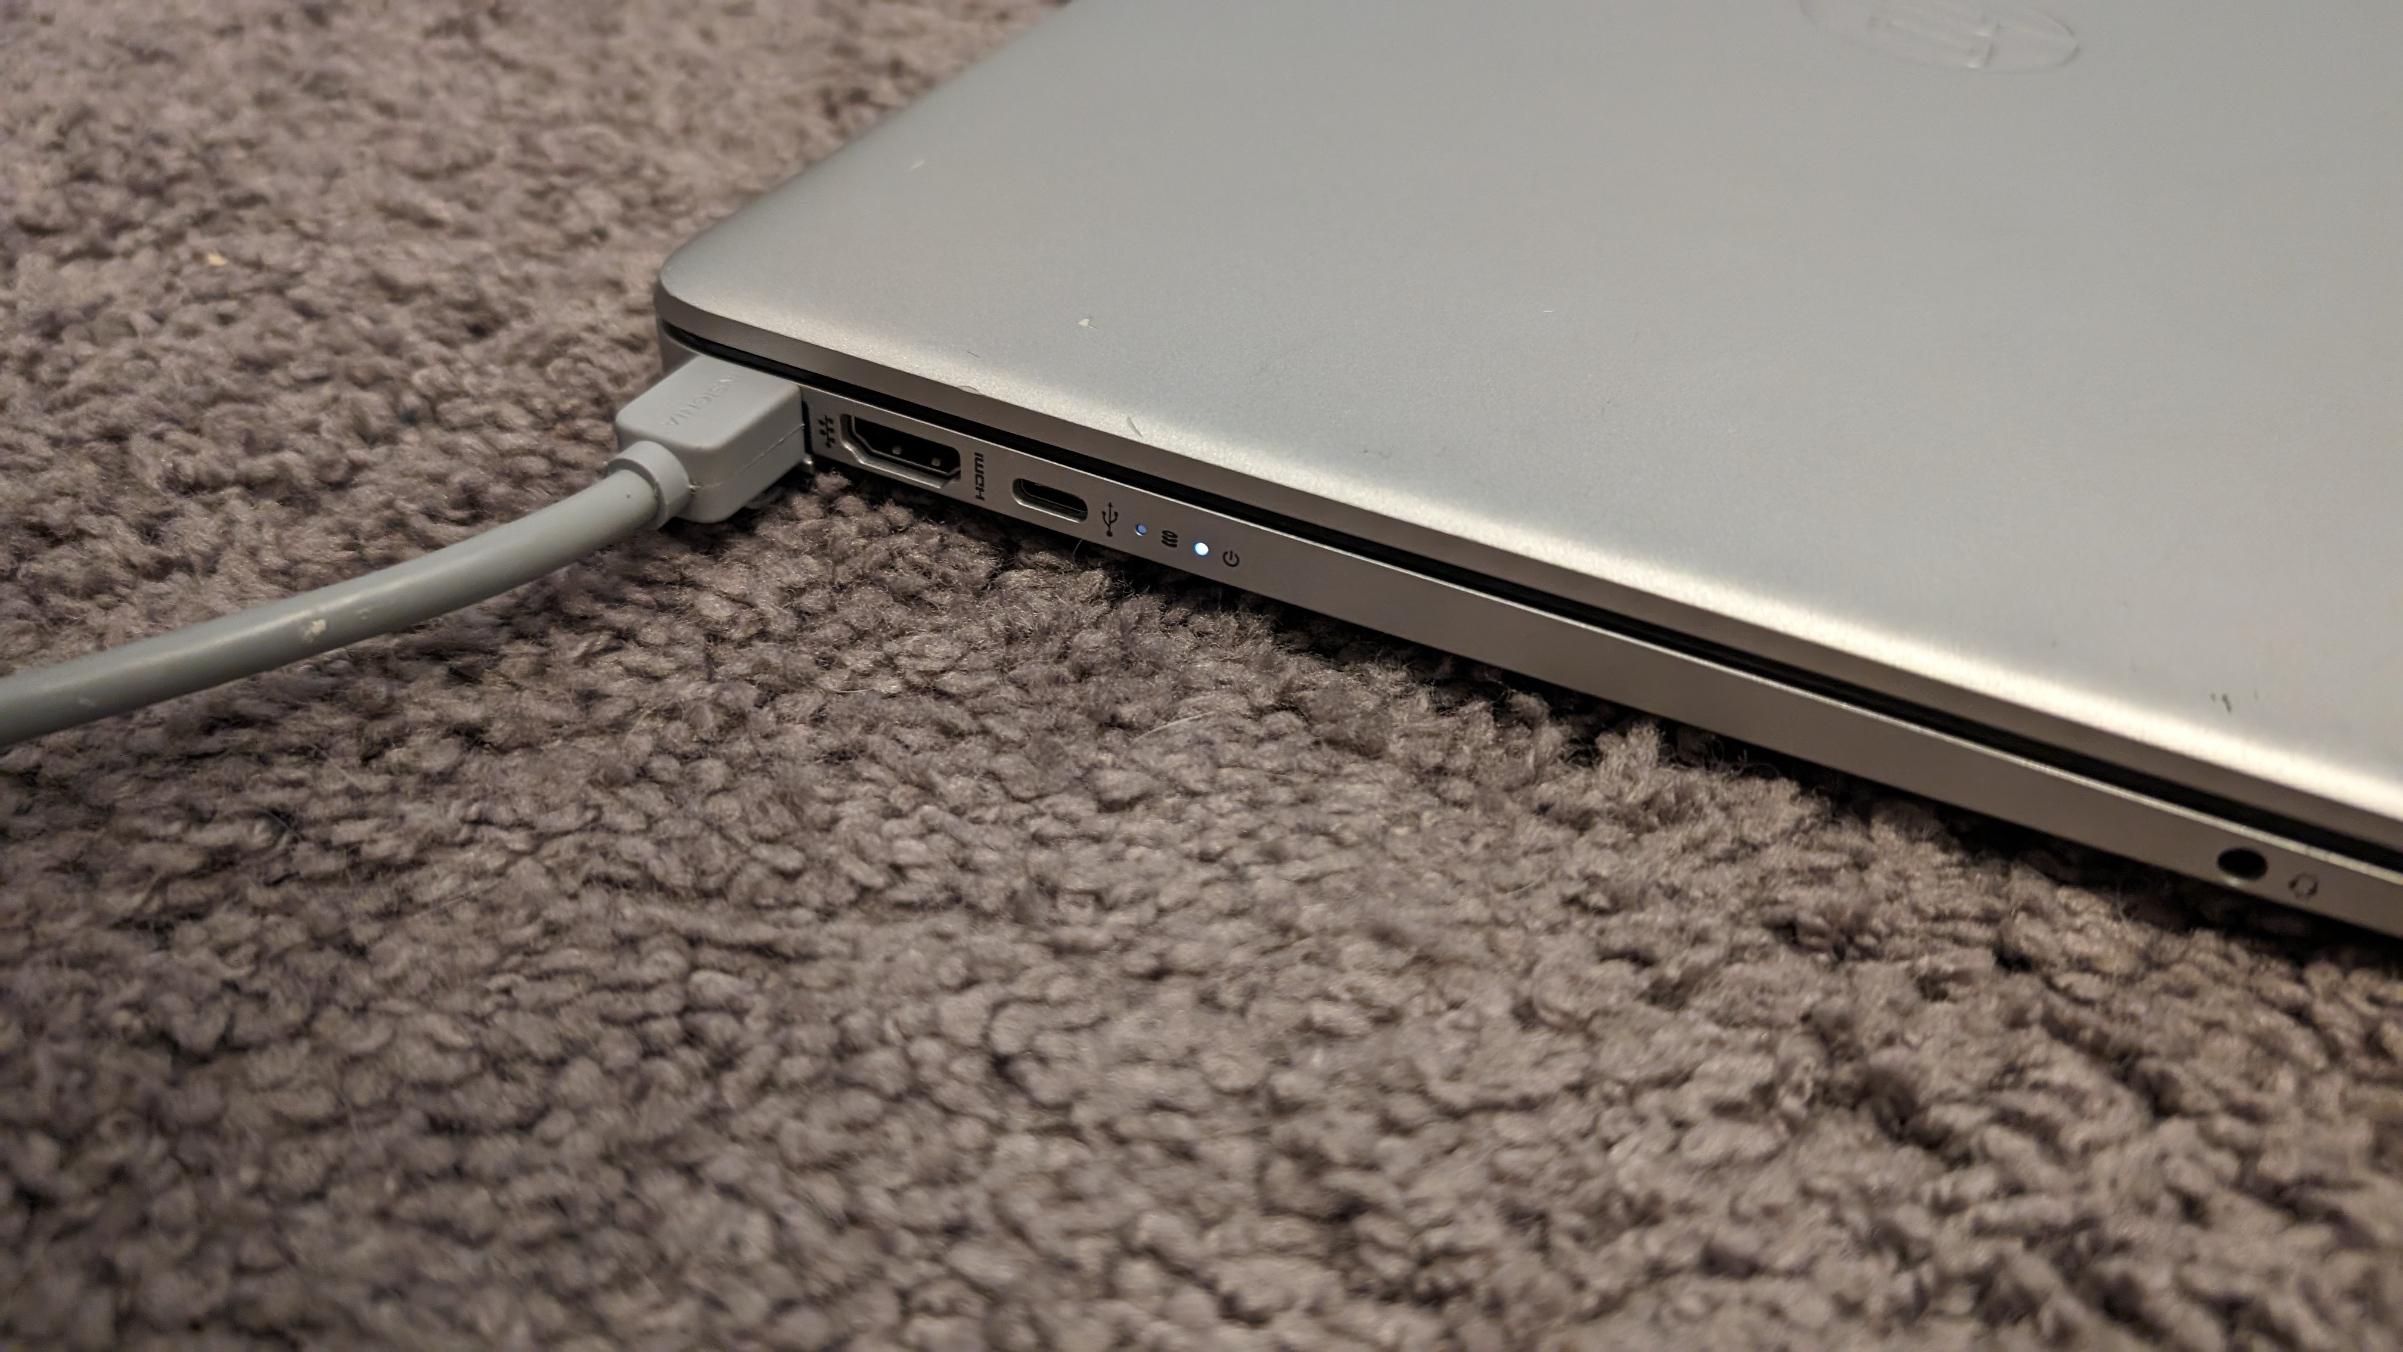
Determine which LAN ports to use on your router. The router's ports to connect to your device will often be in a yellow housing, and labeled with a number dependent on how many devices may be hardwire connected to the router. The ethernet port on your device will often be labeled with a symbol that looks like a dot connected to a line and several branching boxes. I've seen the symbol with as few as three boxes, or as many as five.
If you are connecting the router to a wall conduit, your conduits near the router location should be labeled for ease of determining which conduit you wish to connect to. The conduit may also terminate at the router end with a male end to simply insert straight to the router, without having to add a second cable, as seen in the video in step 9.
Visually Inspect LAN Ports
Ensure the LAN ports on the router, device, and possibly the conduit do not have any debris in them. If there is dust or debris in the router LAN ports or the end device, ensure the router or device is powered off and disconnected from power, then remove debris as necessary, either with compressed air, vacuum, or tweezers. Use tweezers as a last resort, and use with caution, as this could damage the pin connectors of the port.
For conduits, no power cut is necessary, as these are not carrying current until they are connected to a device. However, ensure it is in fact a LAN port, and not a live two or three prong power outlet.
Power Up Modem and Router
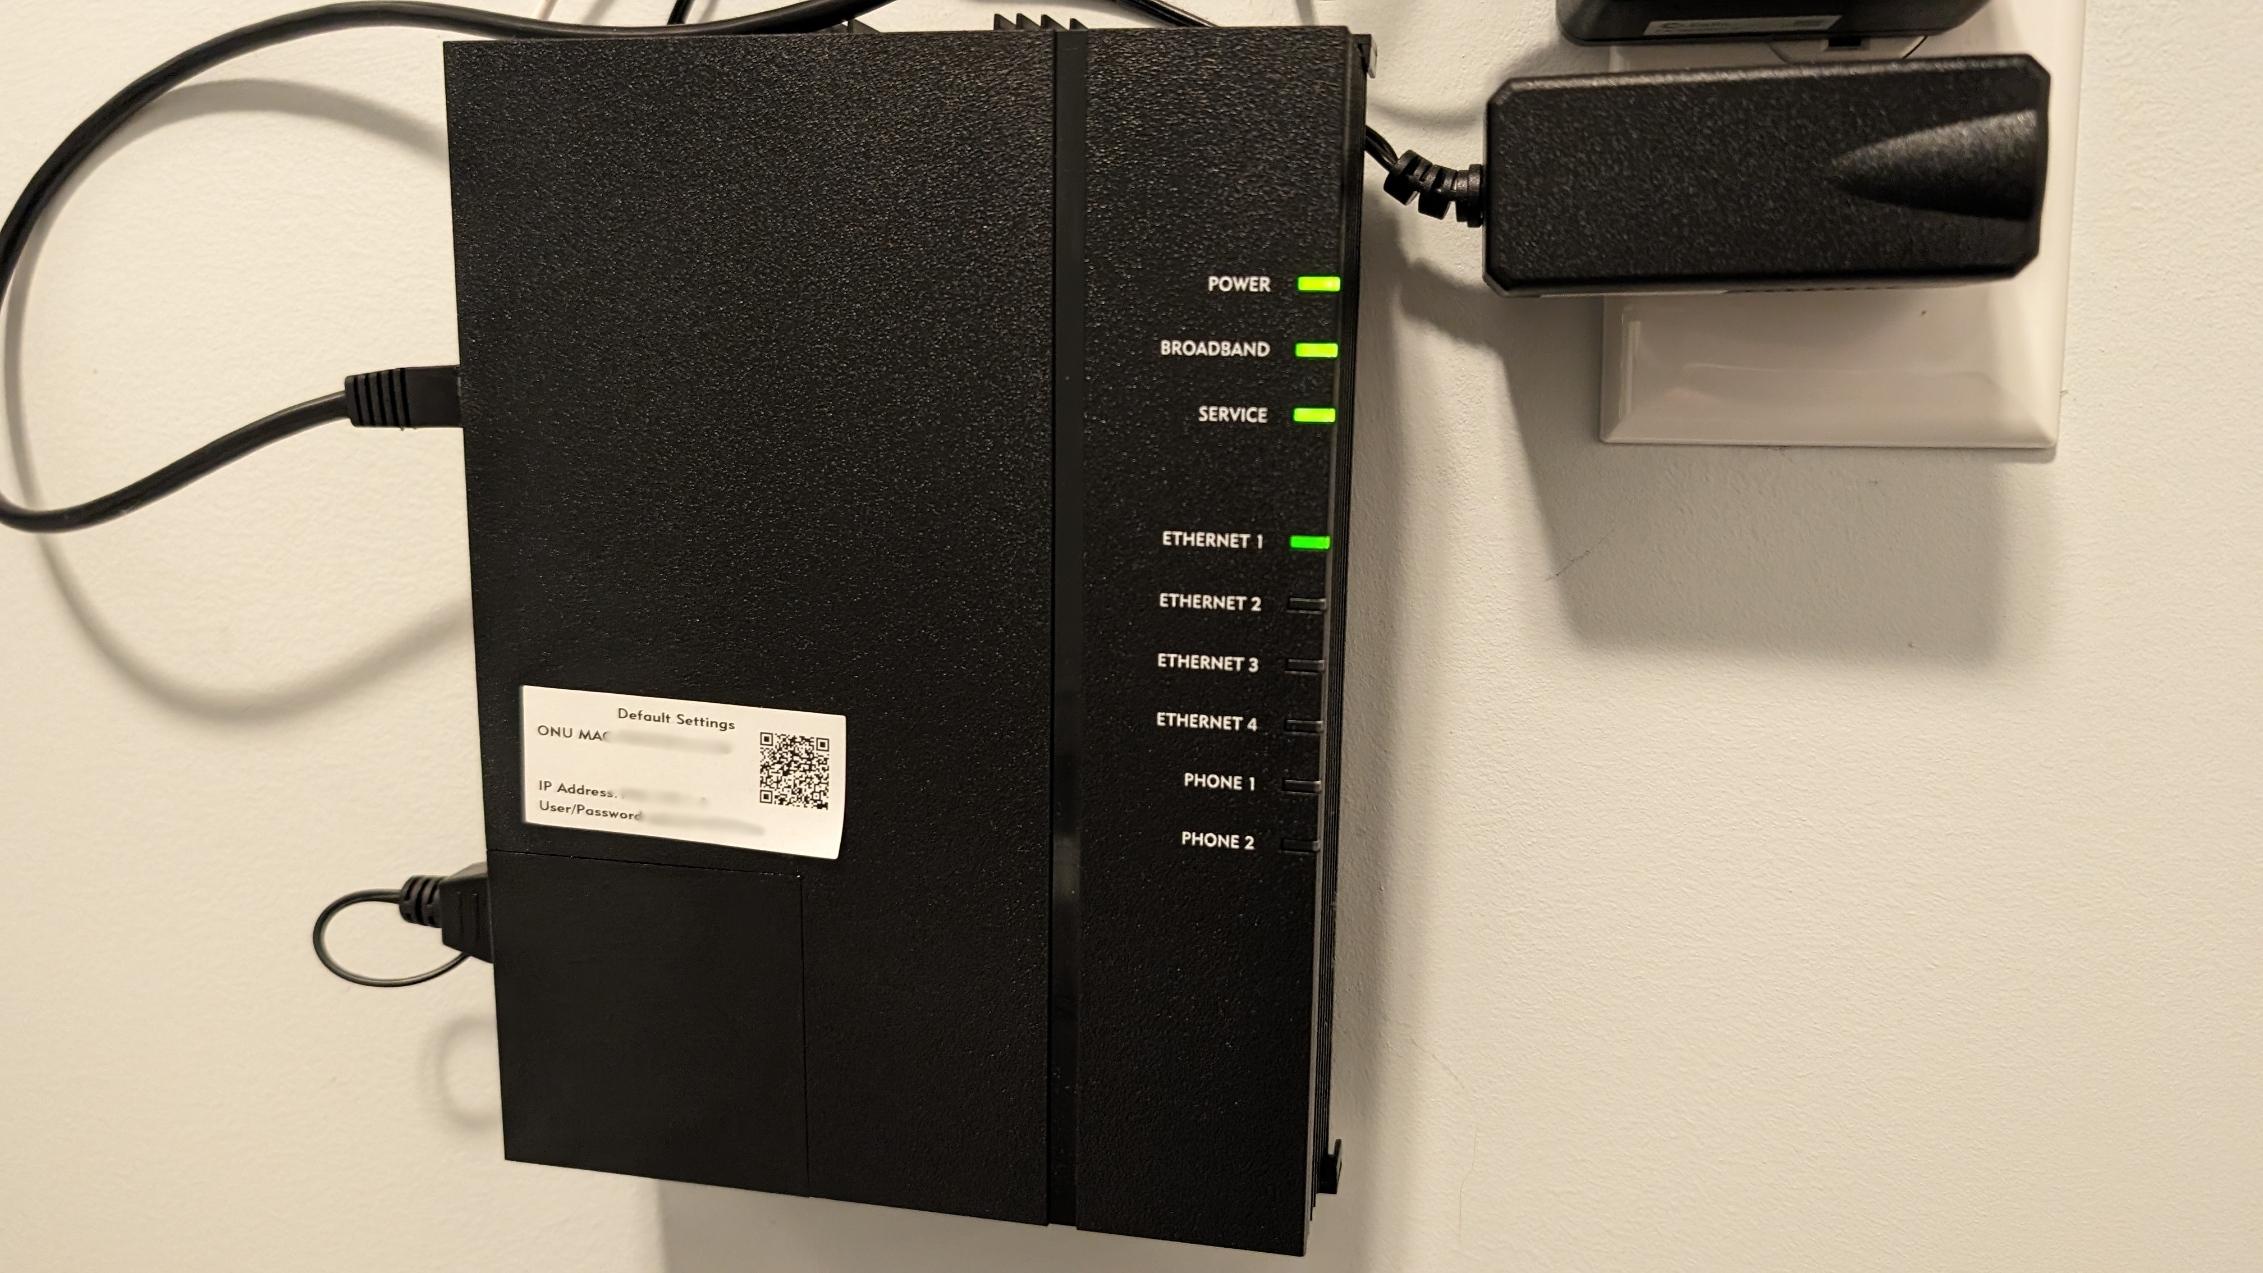
Ensure modem and router are powered on and that all indicators show the modem has an internet connection. If you have a separate router, make sure the router is connected to the modem and indicates as such. If the indicators on your modem and/or router are not obvious, consult your manual for the device in question.
Connect Cable to Router
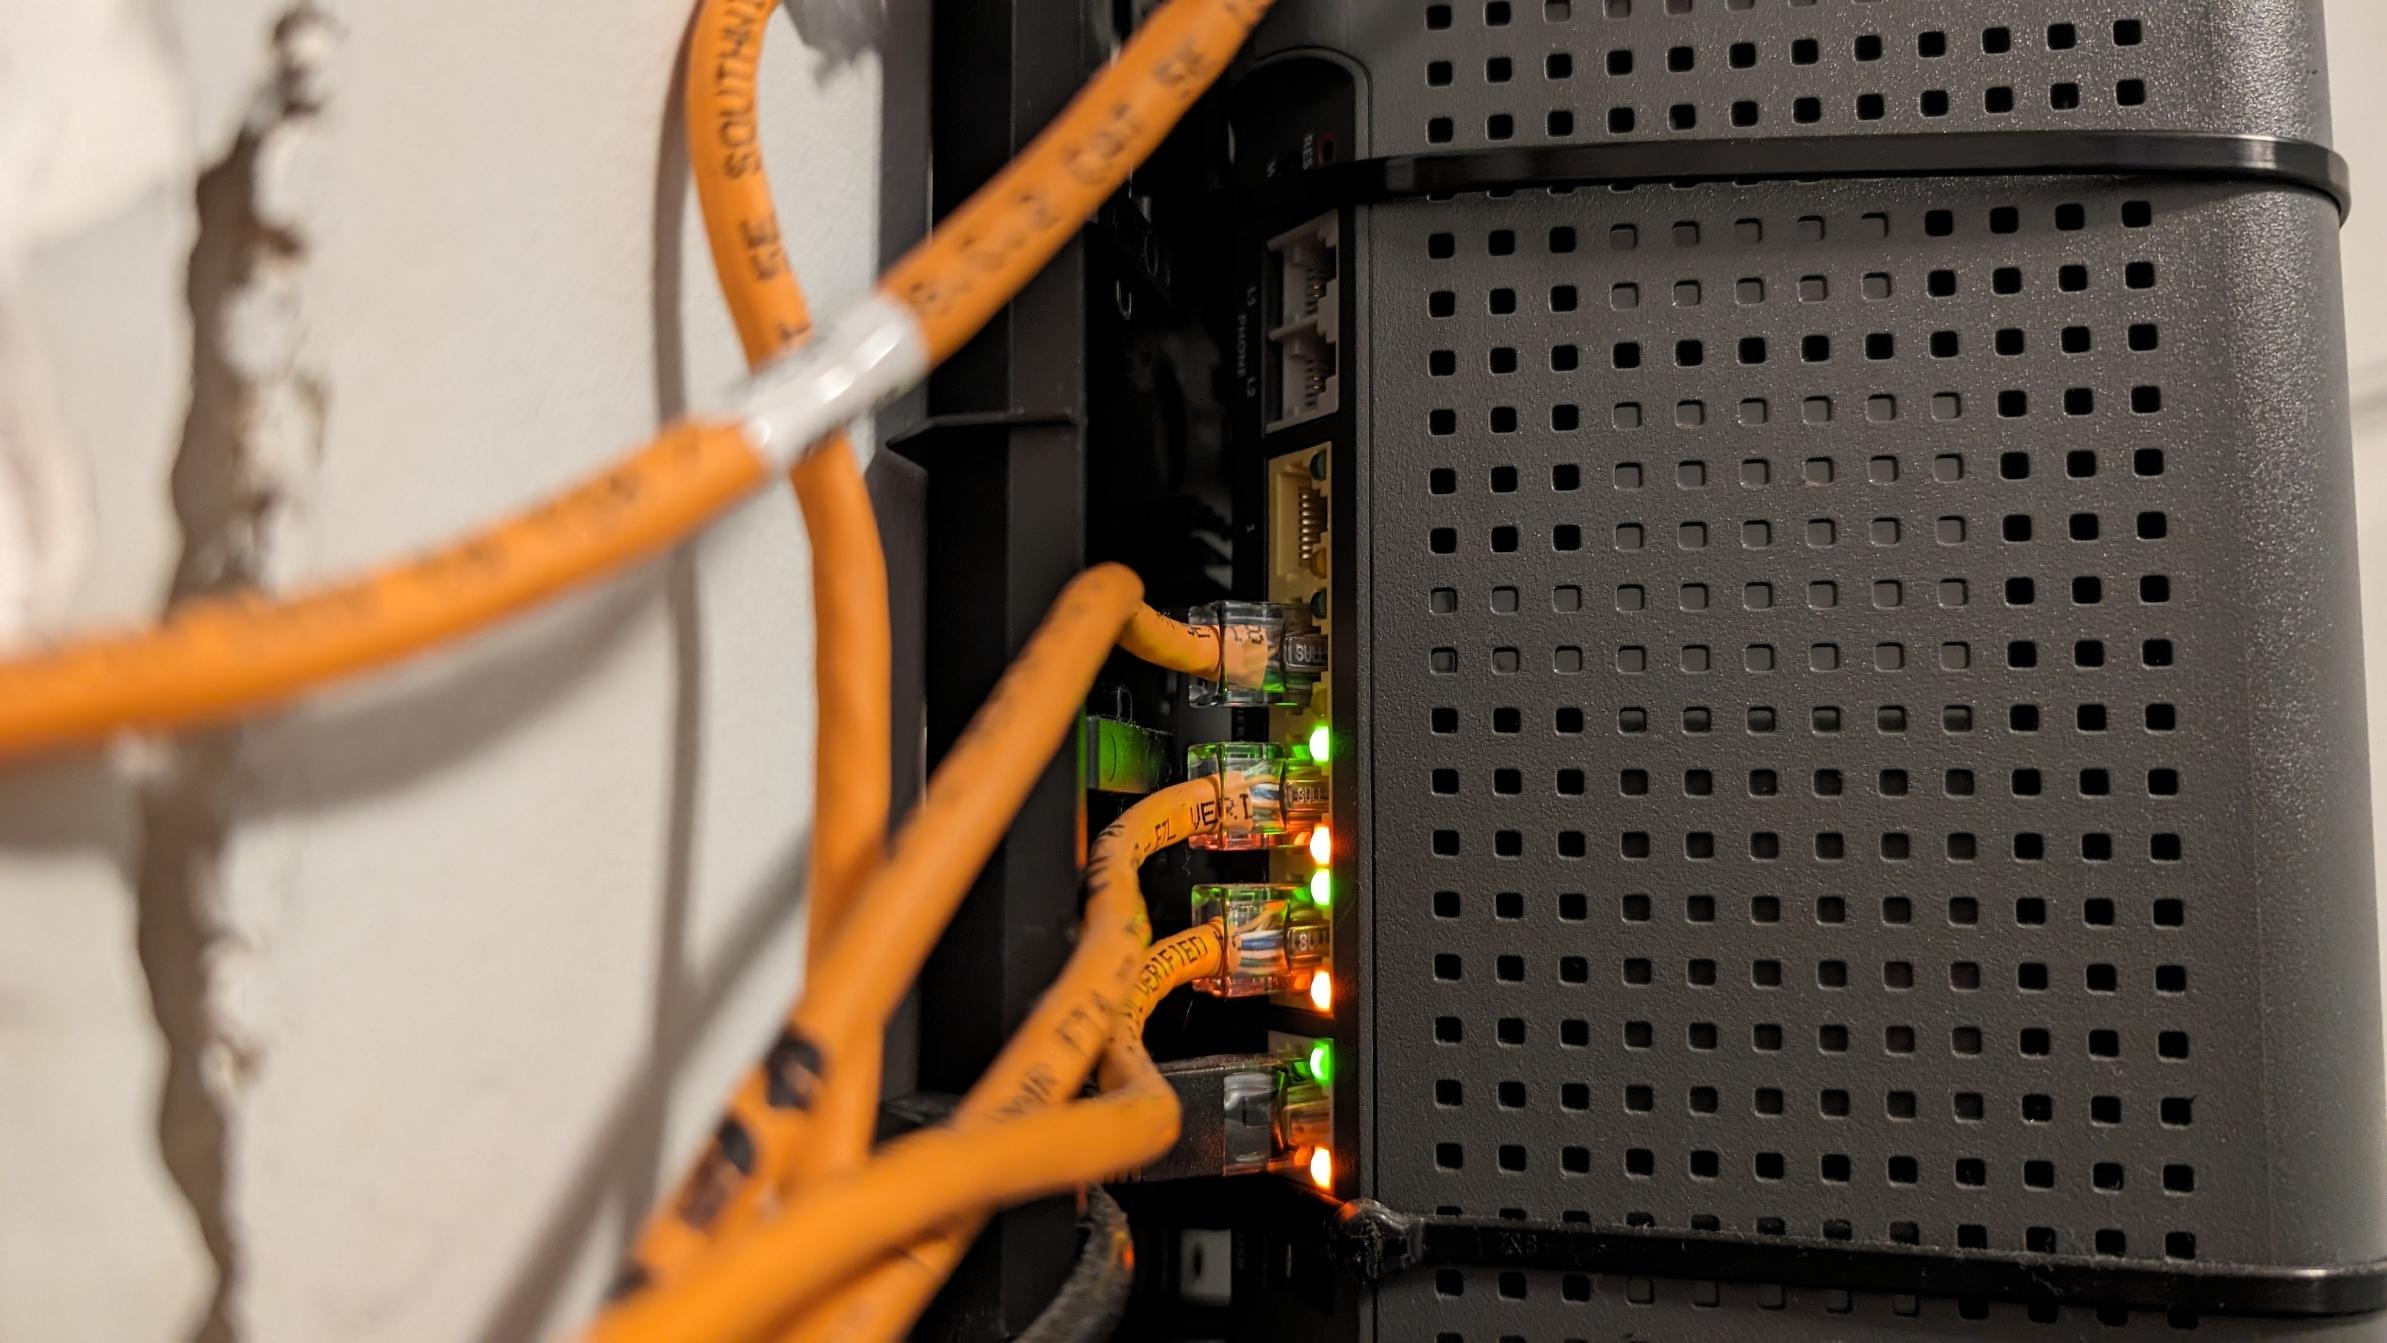

Take your Cat6 cable and insert it into the LAN port of the router. If the cable does not smoothly click into place, do not force it. Visually inspect the connector on the cable, and re-inspect the port to ensure they are properly aligned and free of debris. If there is debris, return to step 3.
There is usually a tab on the top of the cable to help with alignment and with keeping the cable secure once in place. If you have conduits through the building, this would also be the time to connect this cable to the conduit.
Connect Cable to Device or Devices
The device may be more likely to have debris, so visually inspect the device LAN port for debris. See step 4 if there is obstruction. Once the port is confirmed clear, then insert the cable into the LAN port. Again, if you have conduits, insert the other end of this cable to the port on the wall.
Power Up Your Device, Check for Network Connection

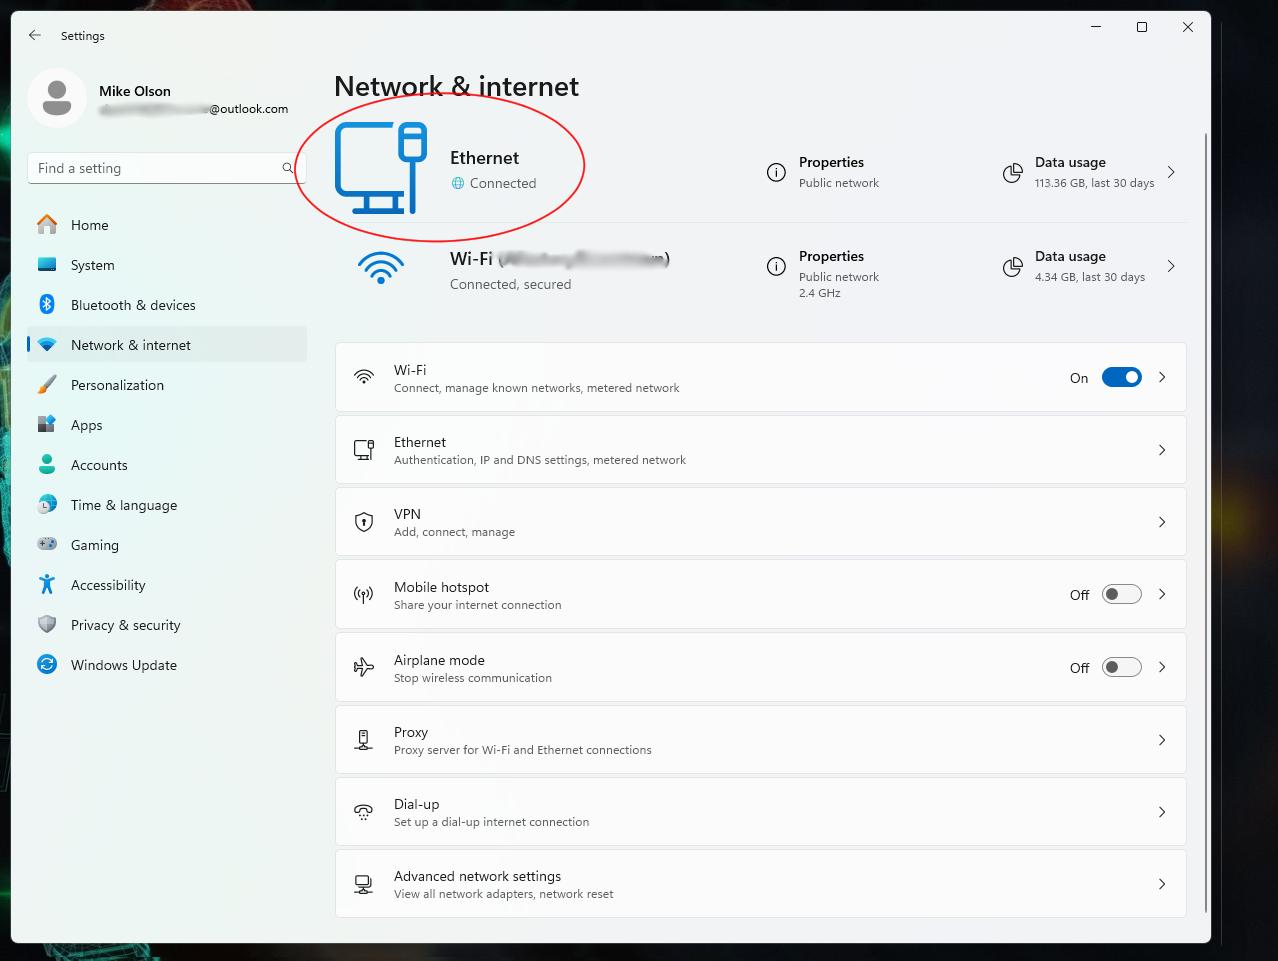
Once the device is back in its place, power it up. Your device should now show that it is connected to the internet. This will vary by device, but for desktop and laptop computers, you should be able to find this in the Network settings.
Tidy Your Cables (Optional)
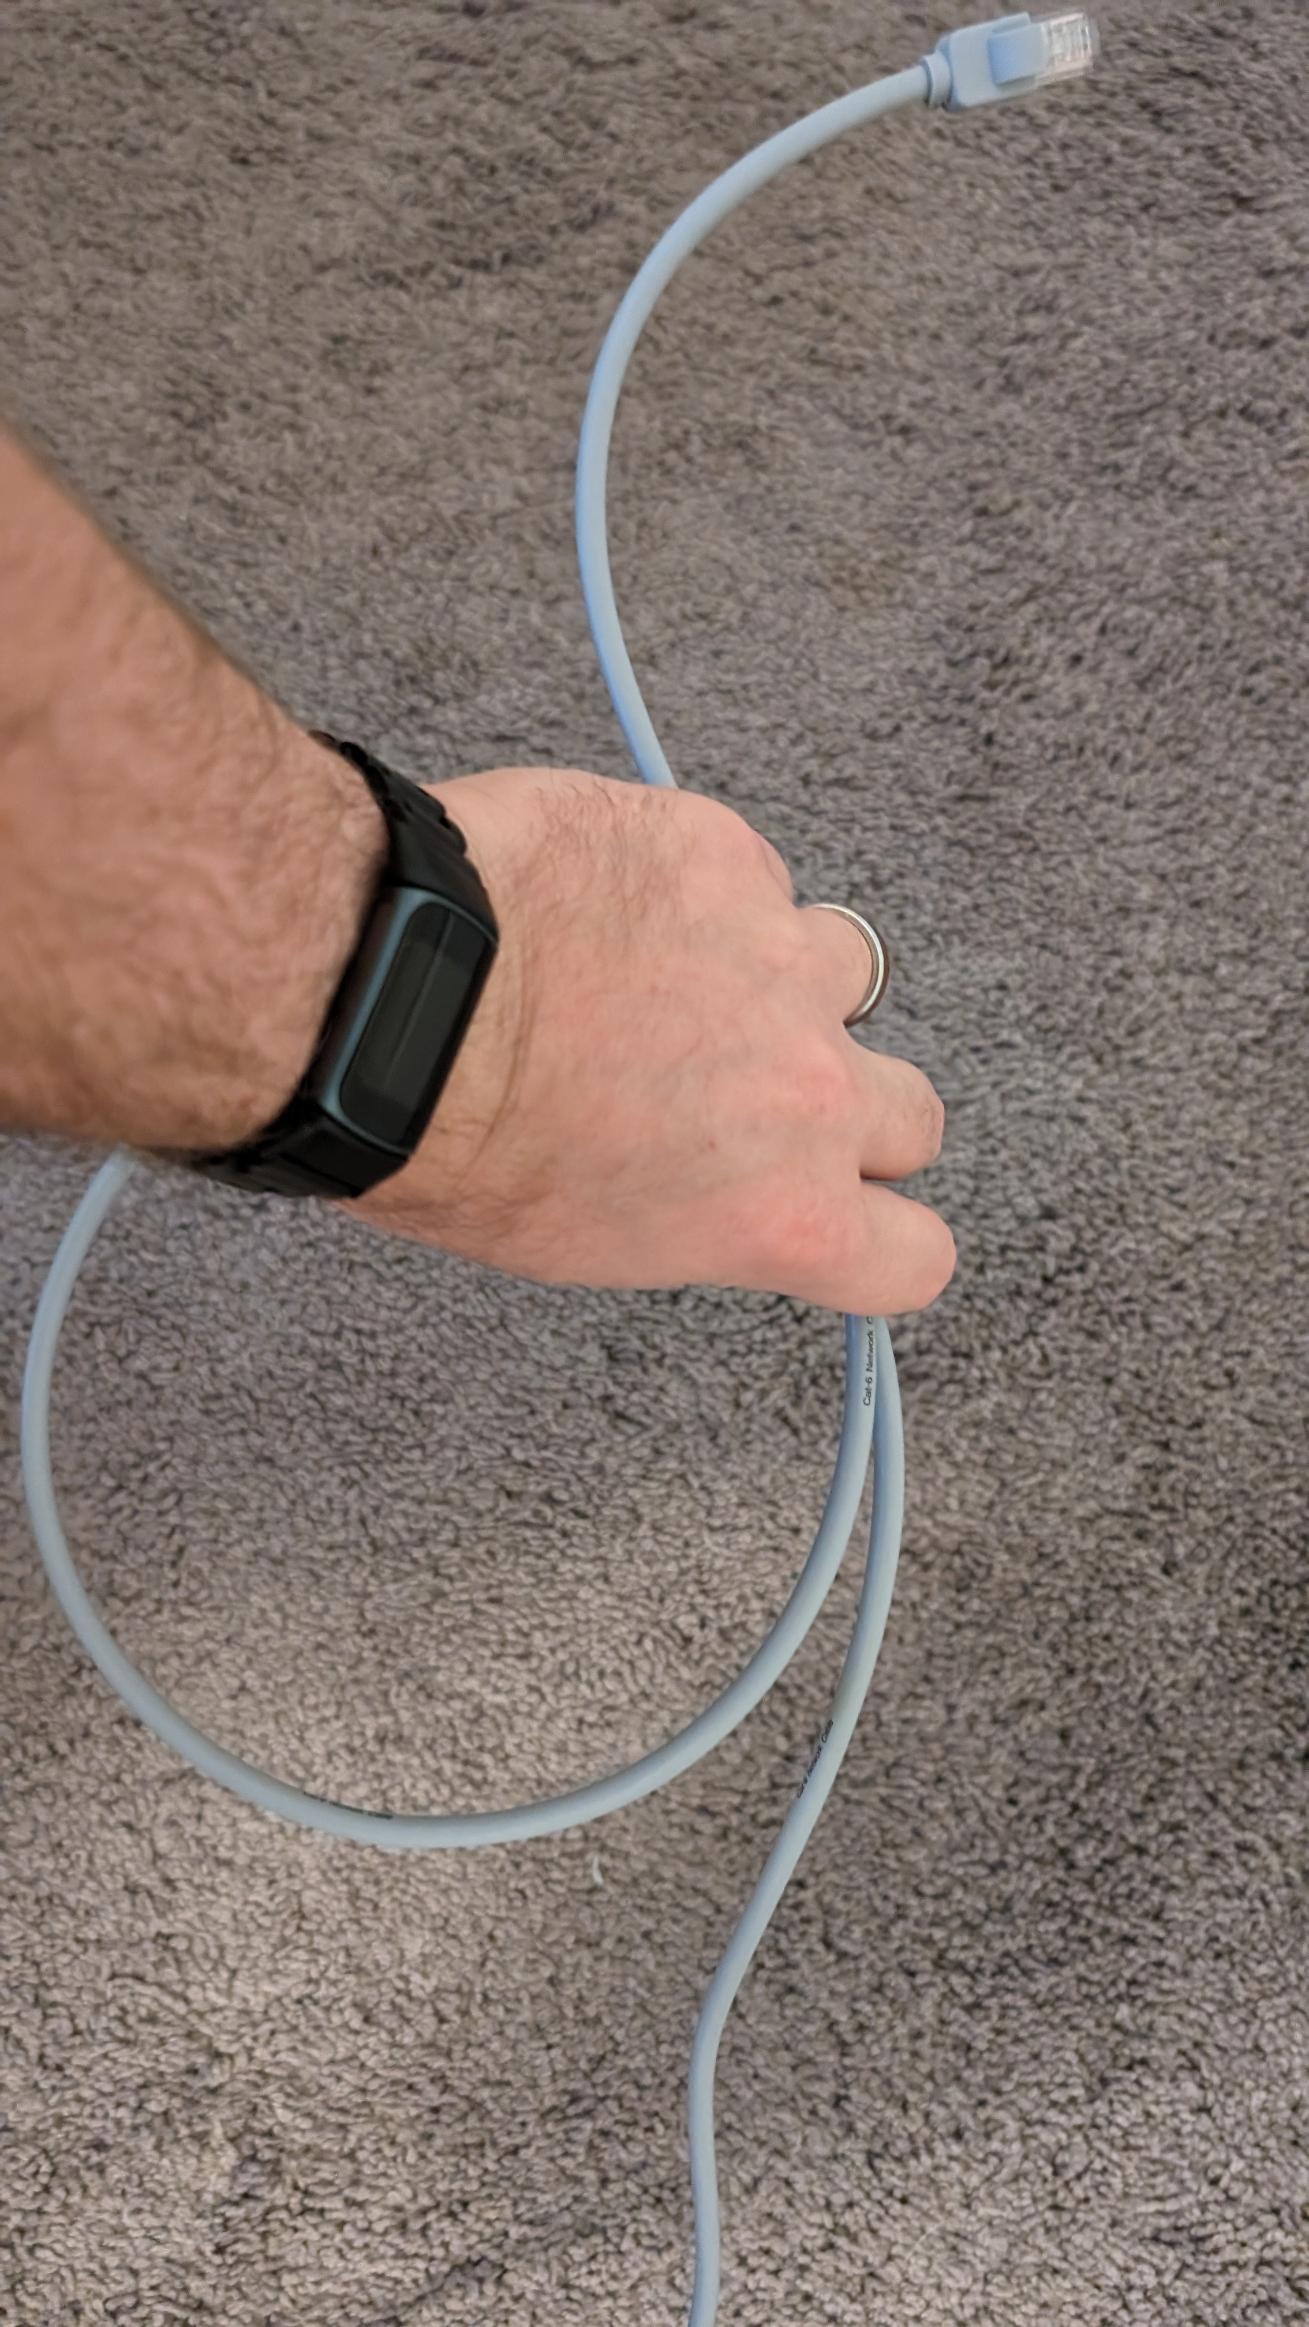
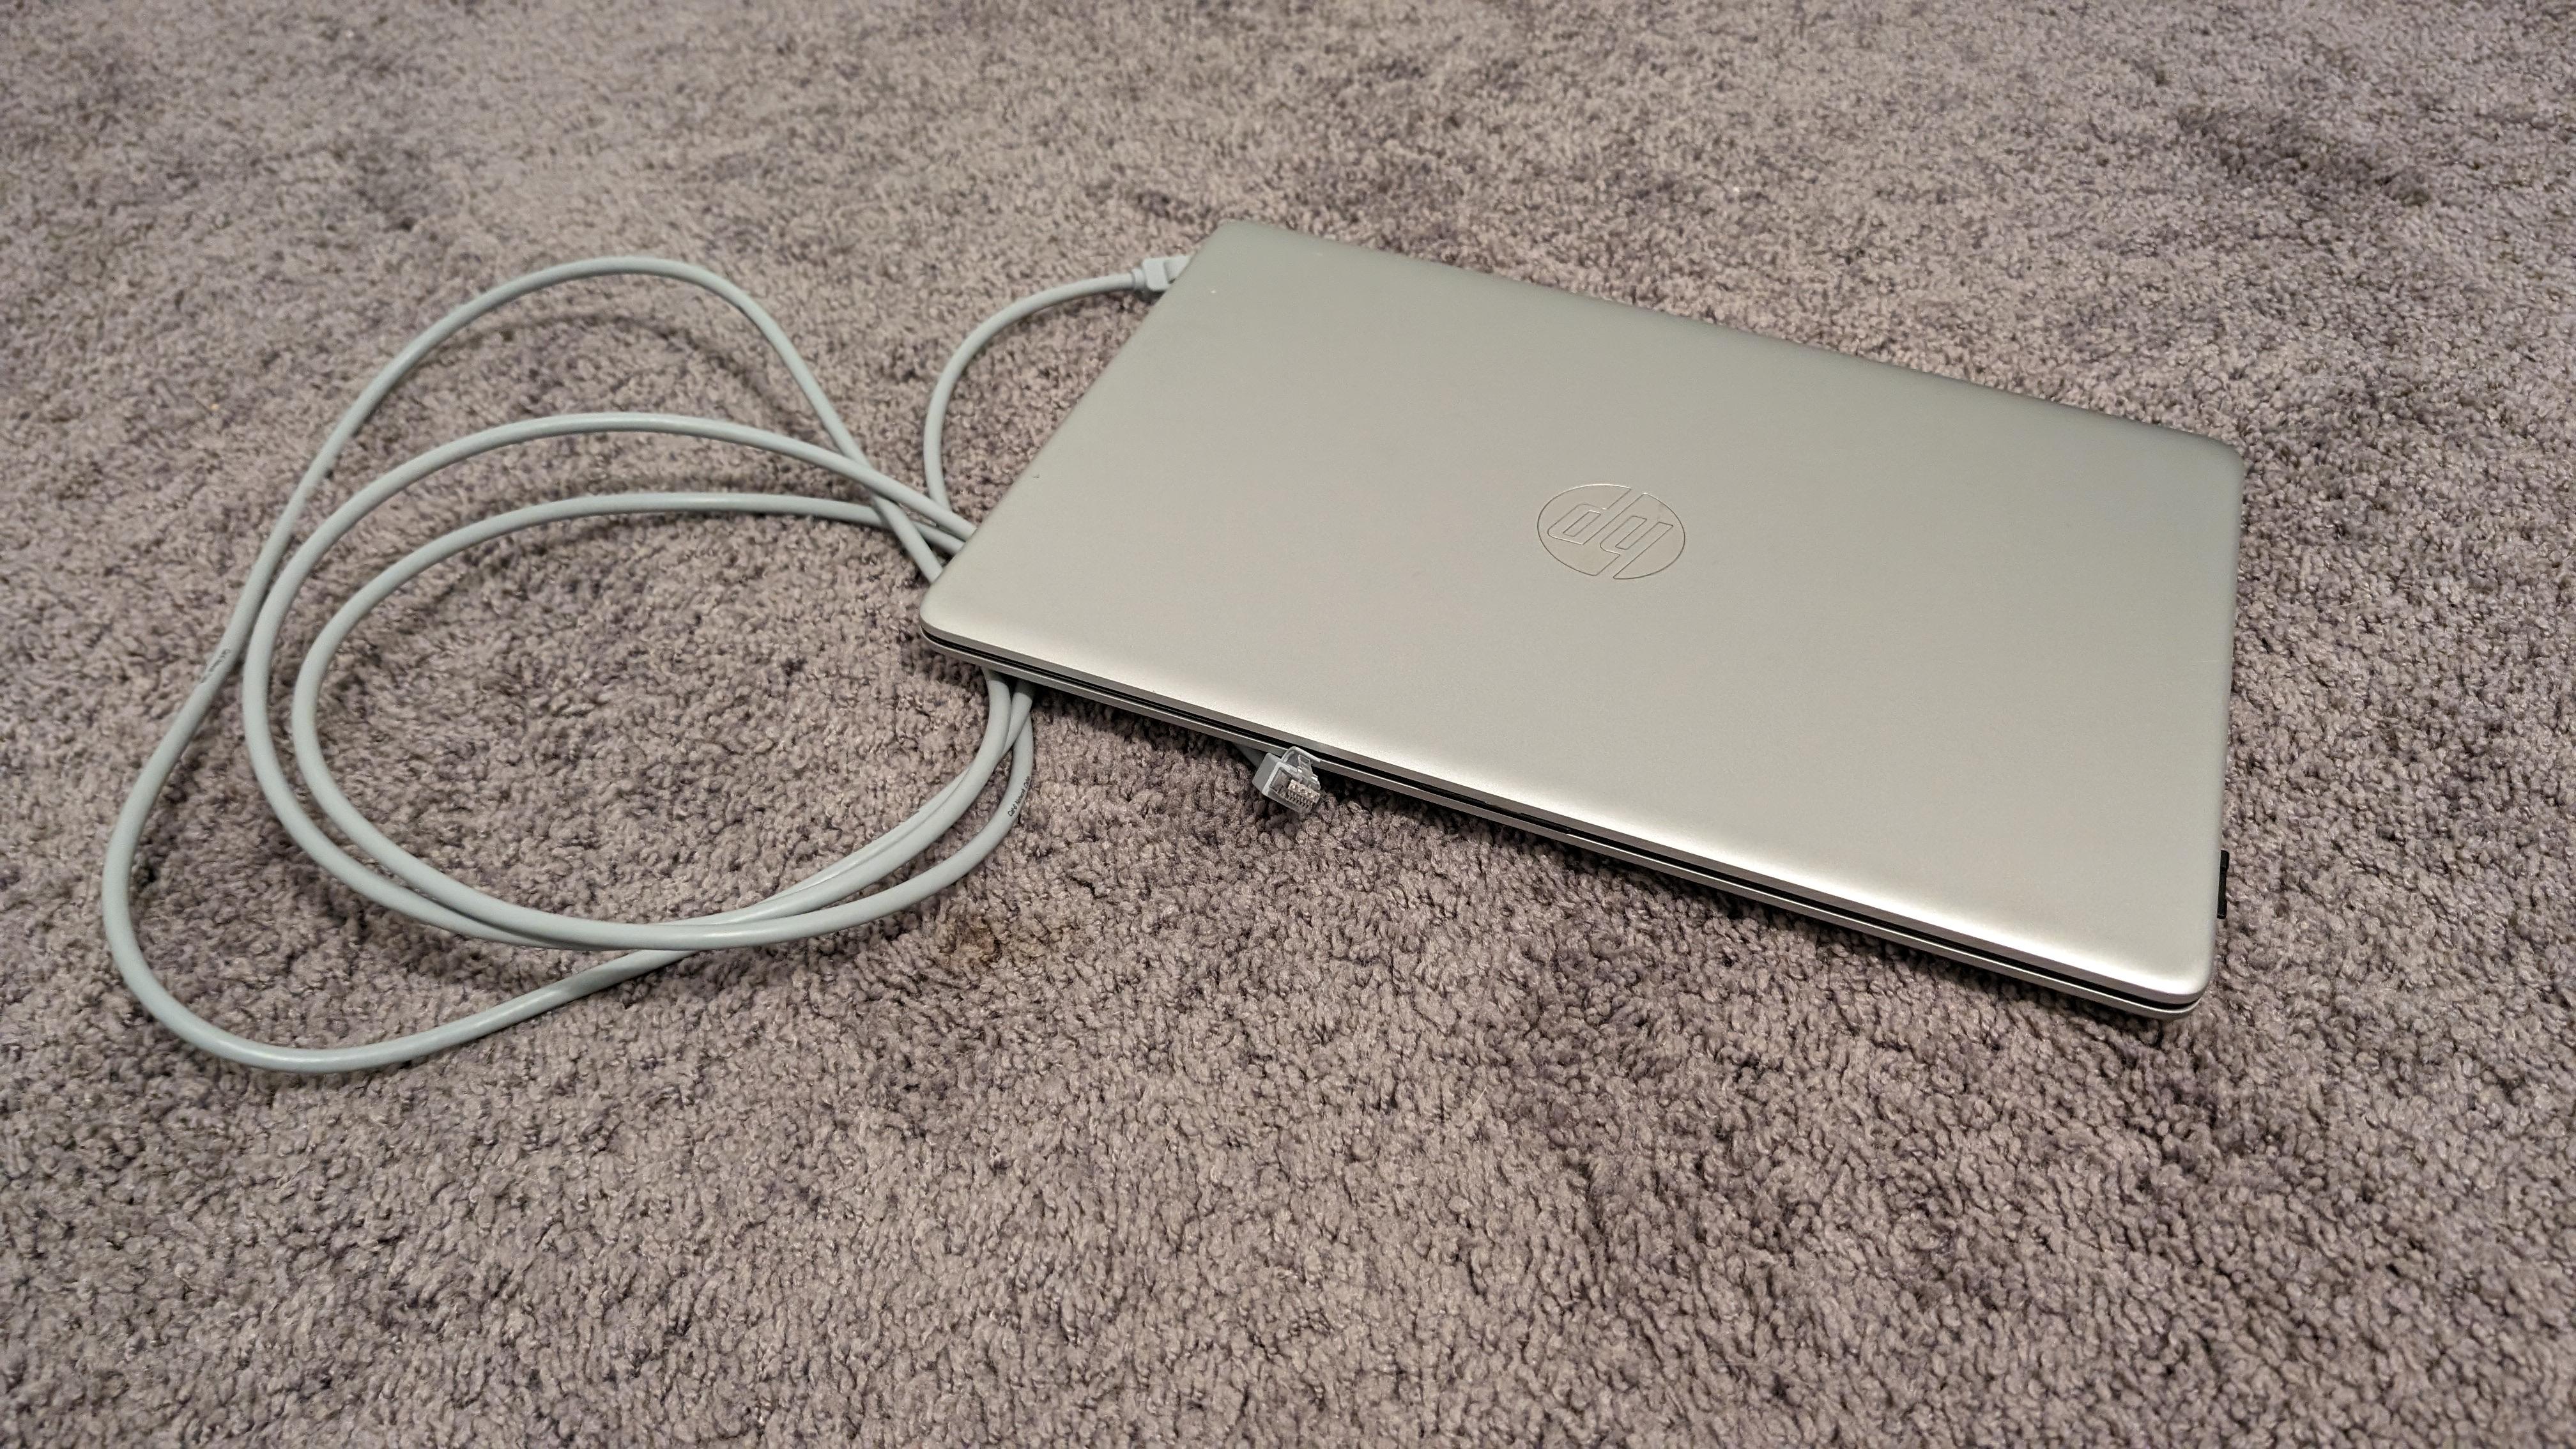
If the cable you bought has excess slack, you can loosely coil the cable and put the coil in an inconspicuous area. Don't kink the cable or coil too tightly, as you may damage the fibers. Try not to coil more tightly than the image shown. You can also secure the cable to walls or under a desk as desired. This step is not entirely necessary, but it is more appealing visually. If the cable runs across a thoroughfare, also consider a floor cable management cover, which costs around $15 for 10 feet. This will protect your cable from damage, prevent a tripping hazard, and damage to any devices.
Demonstration of the Process
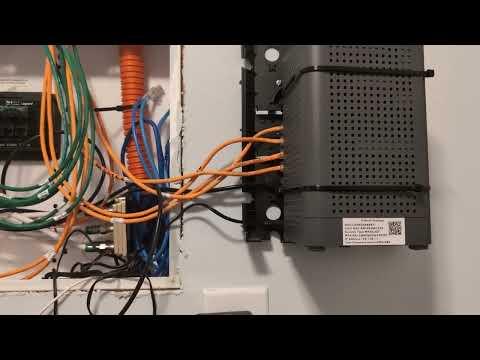
This video will show some key elements of the process.