Iron on Pixelated Patches
by TinkeringProductions in Craft > Embroidery
16994 Views, 47 Favorites, 0 Comments
Iron on Pixelated Patches
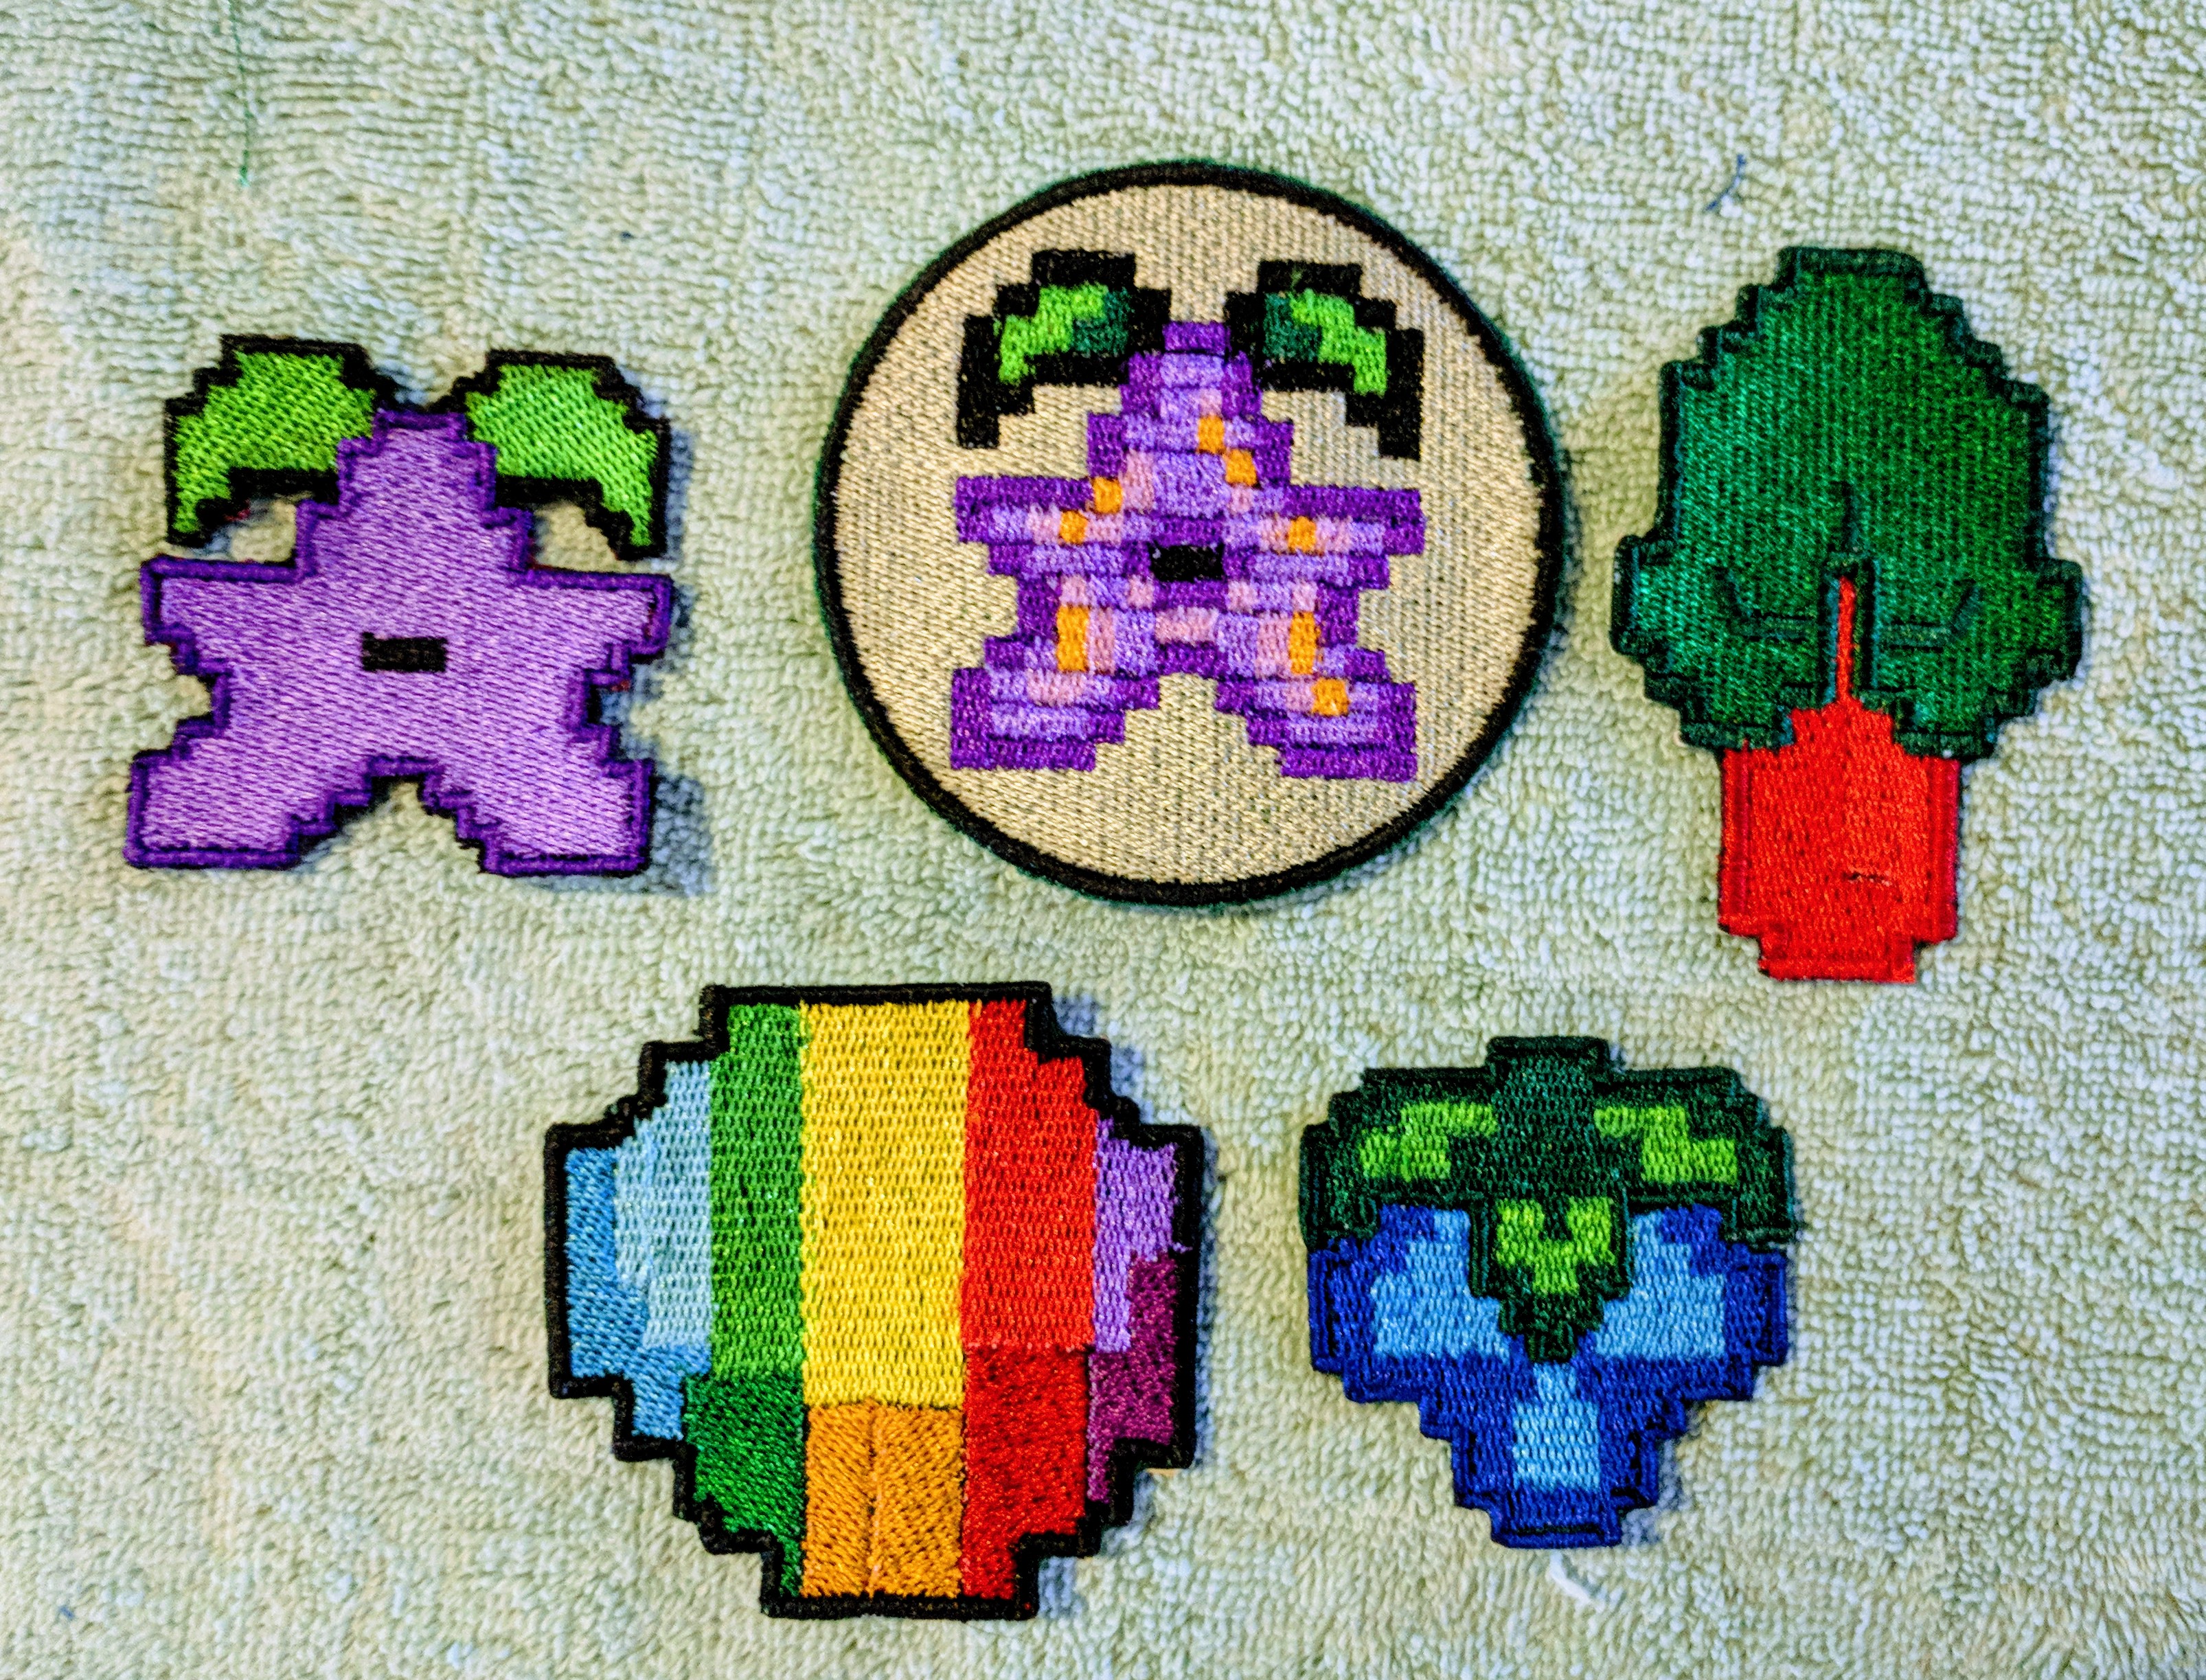
Do you love video games? Do you wish you could have a reminder of your favorite game while wandering the meat space away from all those entertaining pixels? Maybe you just want be easily identified as a super fan. If any of these things sounds like you then come along. This Instructable will cover digitizing your pixelated image using open source software, using a cnc embroidery machine to make your patch, and finally making your patch iron on. So join me if you wish on a journey to Patchdom!
Hardware and Software
To replicate this project you'll need the following.
Hardware
- CNC Embroidery machine (I have a Brother SE 400)
- A computer with a 64bit version of Linux, Windows, Mac Os
- Embroidery Thread(whatever colors you need for your design)
- Fabric(I use synthetic felt)
- Tear away stabilizer
- HeatnBond Ultra hold
- Fray Check
- A butane lighter or other smokeless flame source
- Iron
- an Ironing board or towel
- Scissors
Software
- Inkscape 0.92 or later (Download)
- Inkstitch (a plugin for Inkscape Download & Installation instructions)
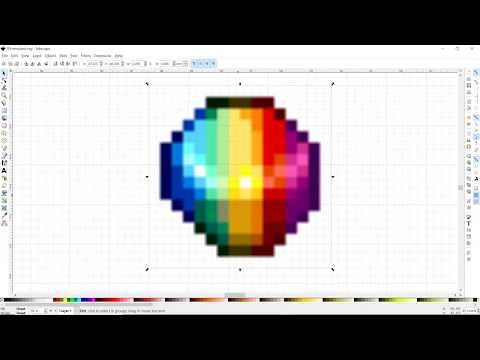
- An image you want to make a patch. I grabbed mine from the Stardew Valley Wiki
Digitizing Your Image: Setting Up Your Document
For those of you who would rather watch a video of the Digitizing process I made this video. If you watch it you can skip to the embroidering step of this Instructable. Otherwise here we go!
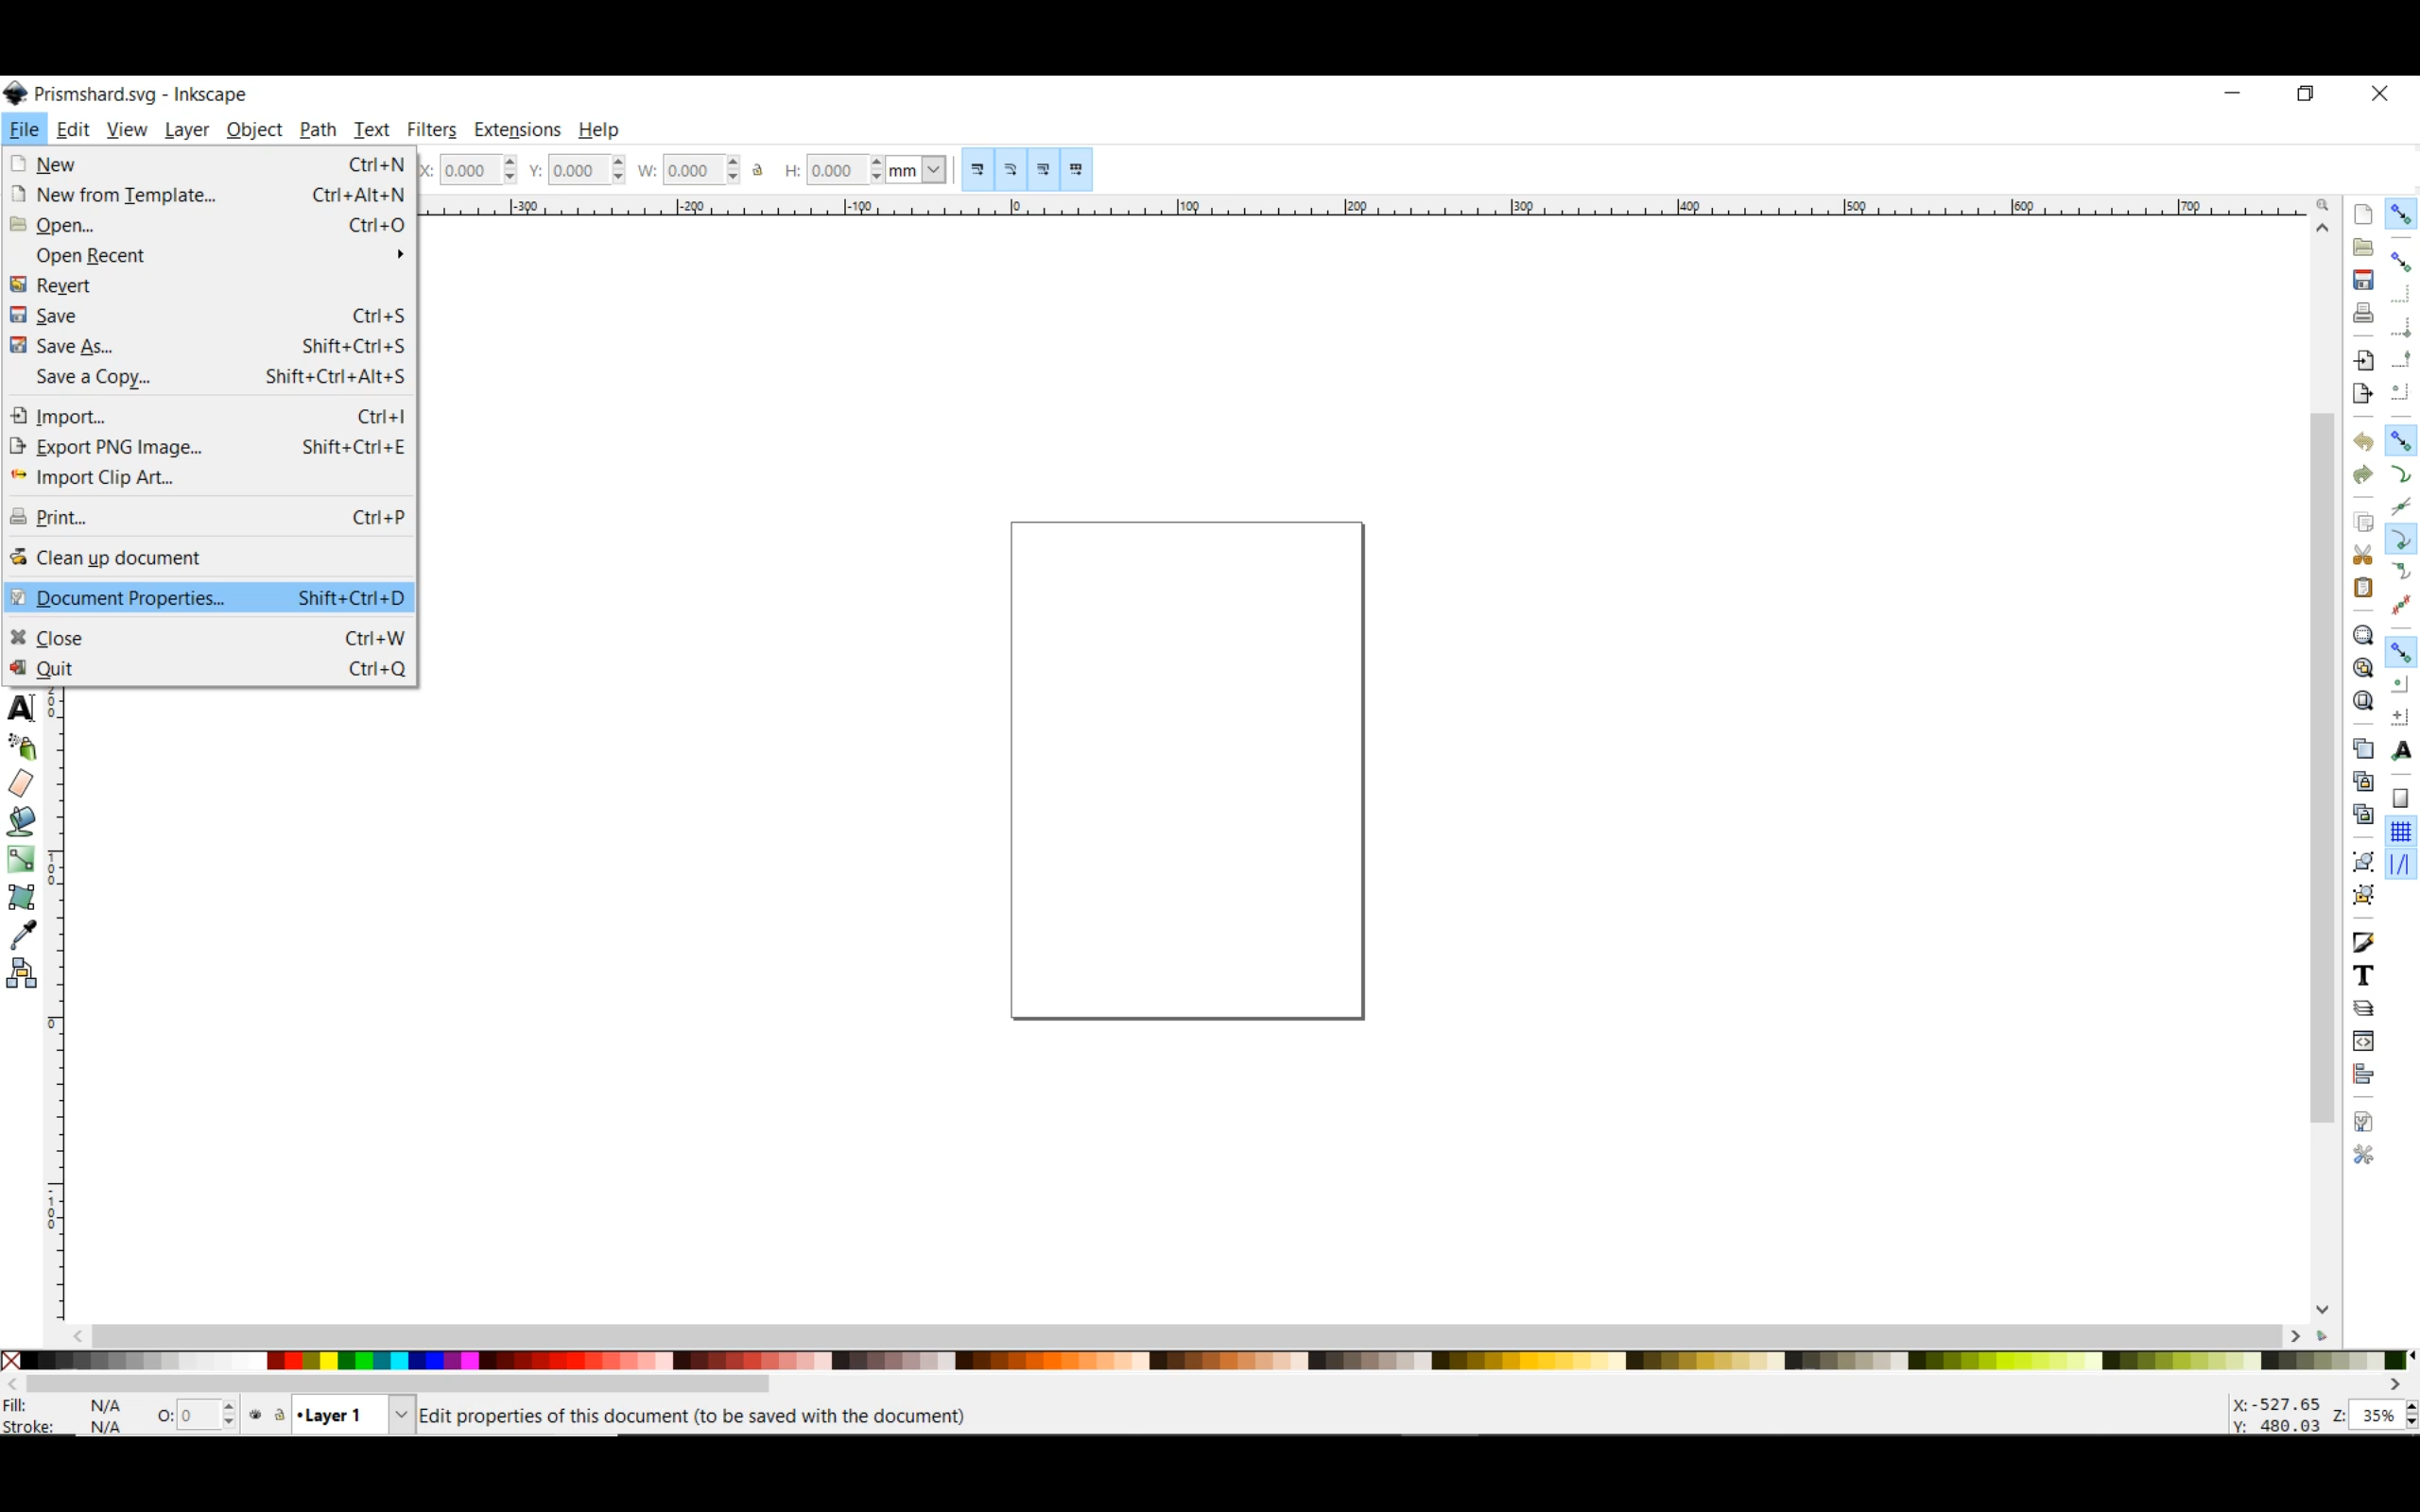
The first step is to set up your document. To do this
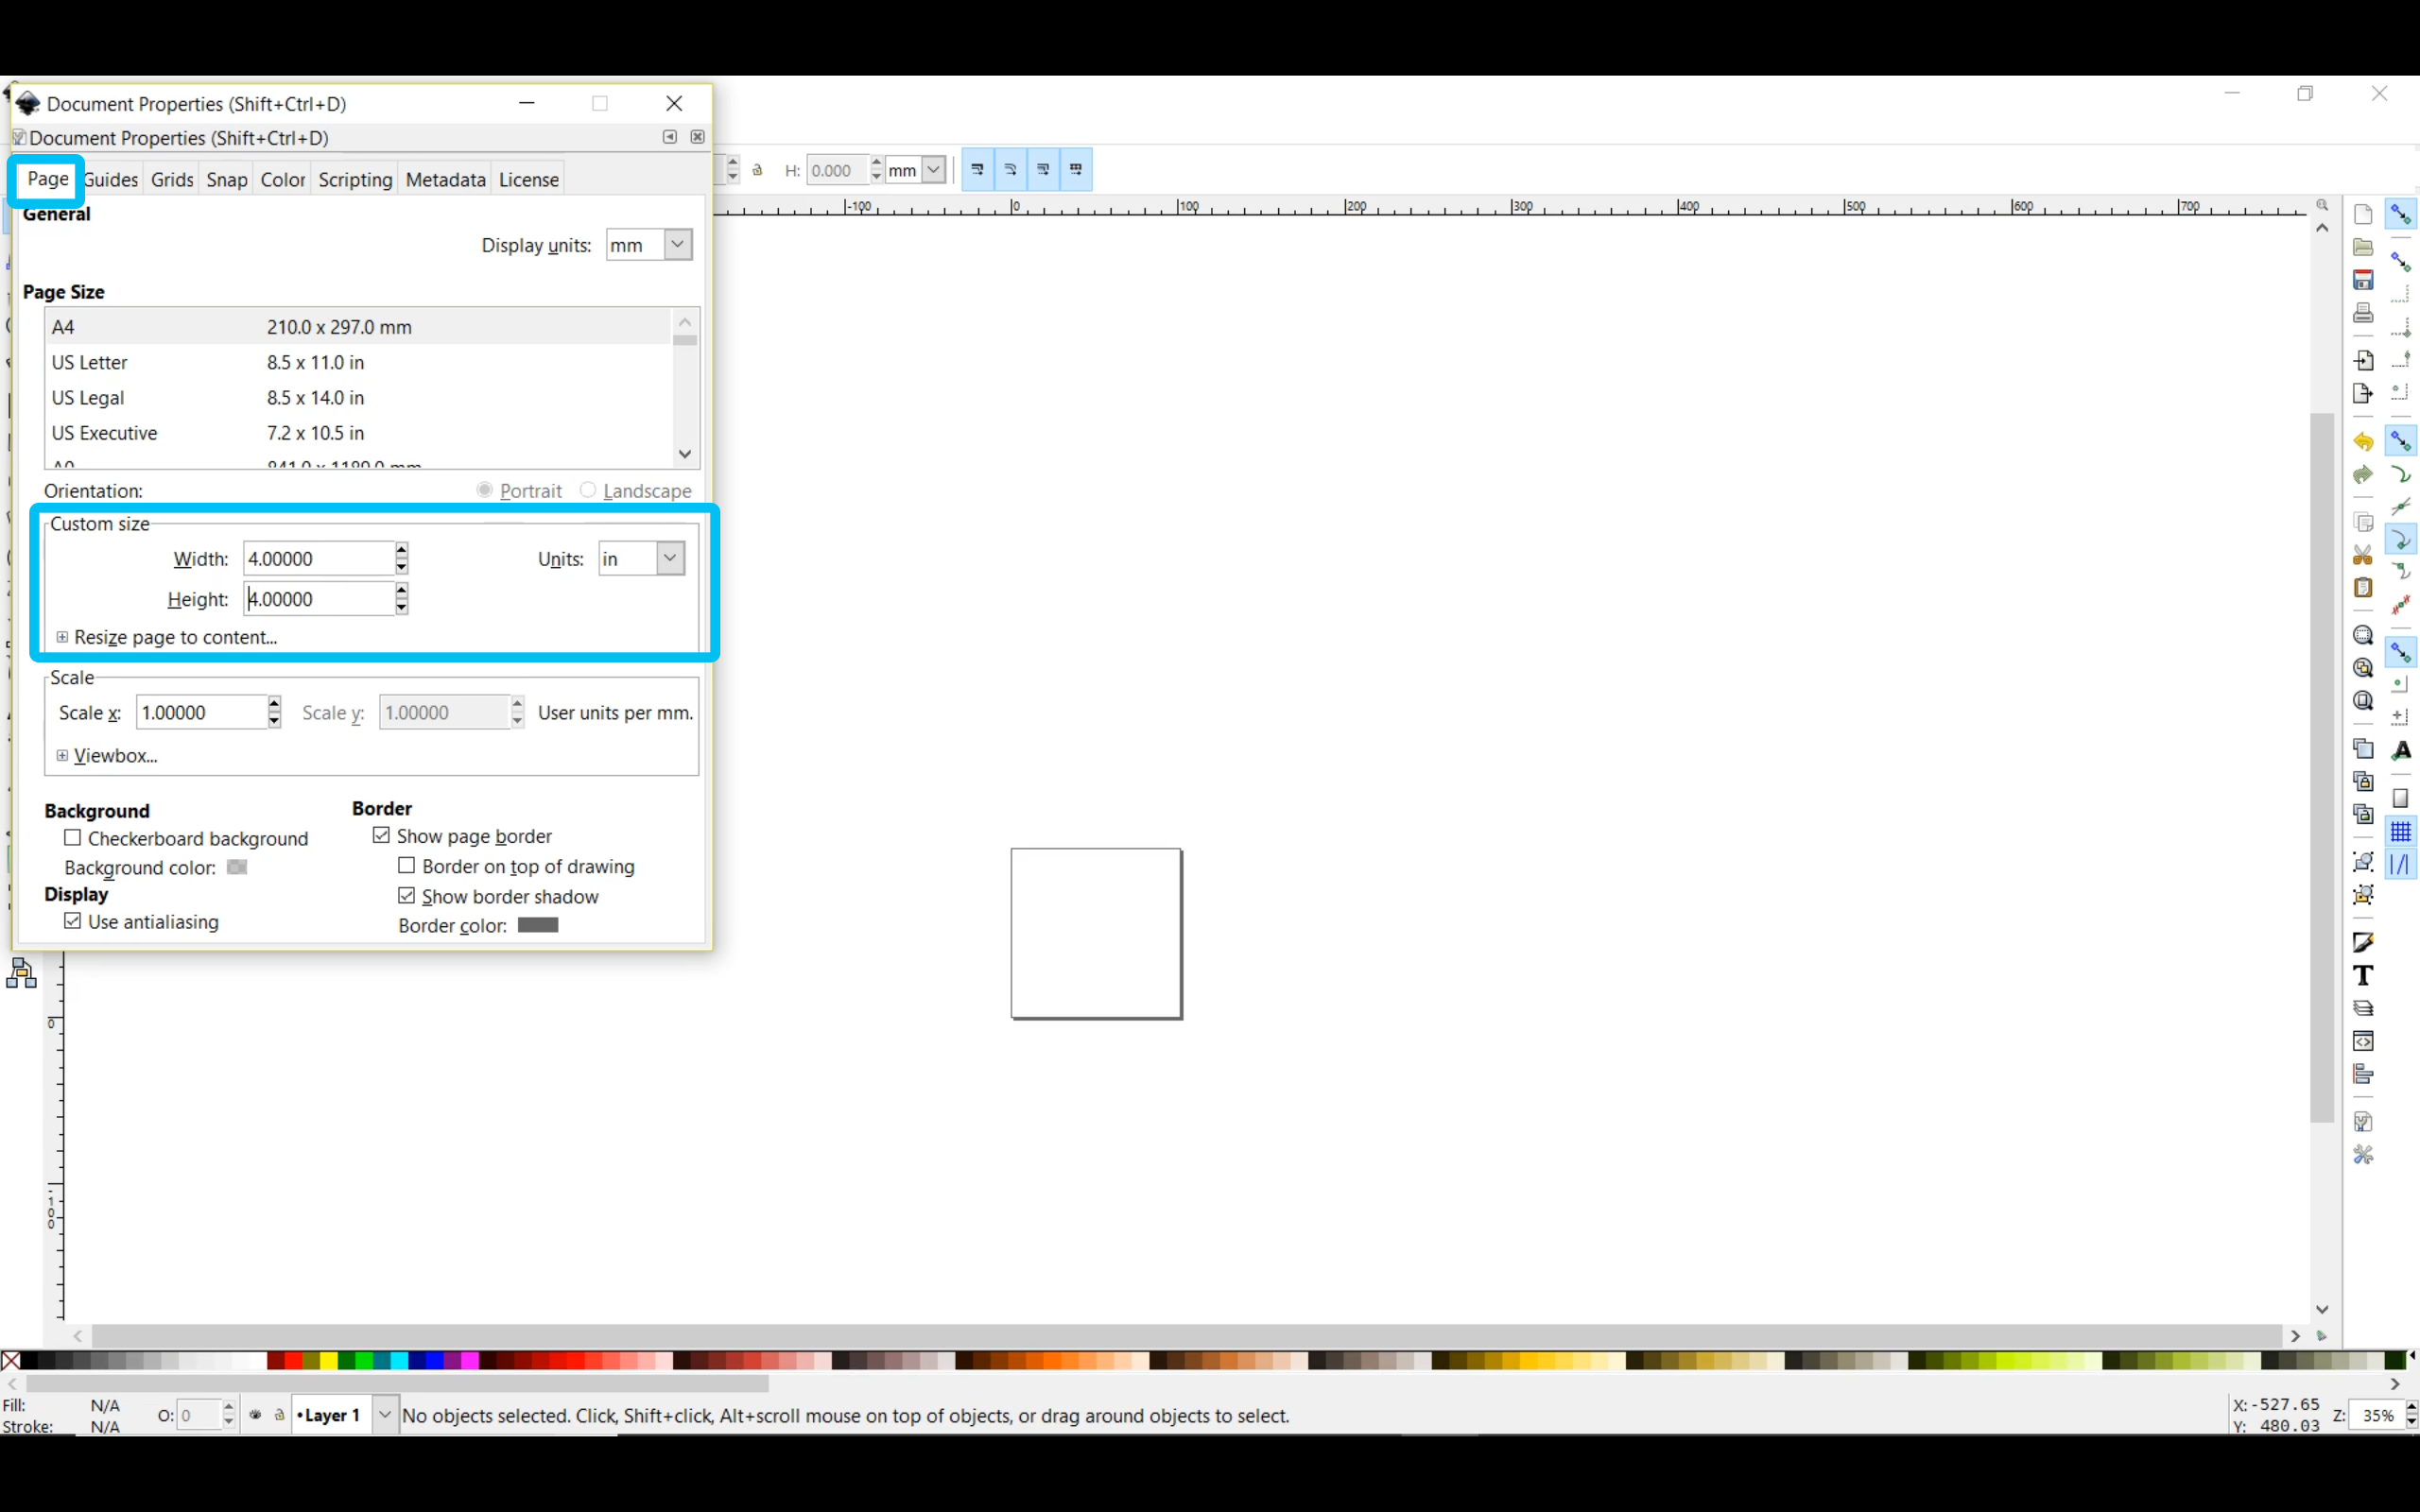
- Click the File menu and select document properties. In here we are going to do two things.
- Change the document size to match that of your embroidery hoop. For me this is 4 inches by 4 inches. I find reminding myself of this limitation helps keep my designs in check.
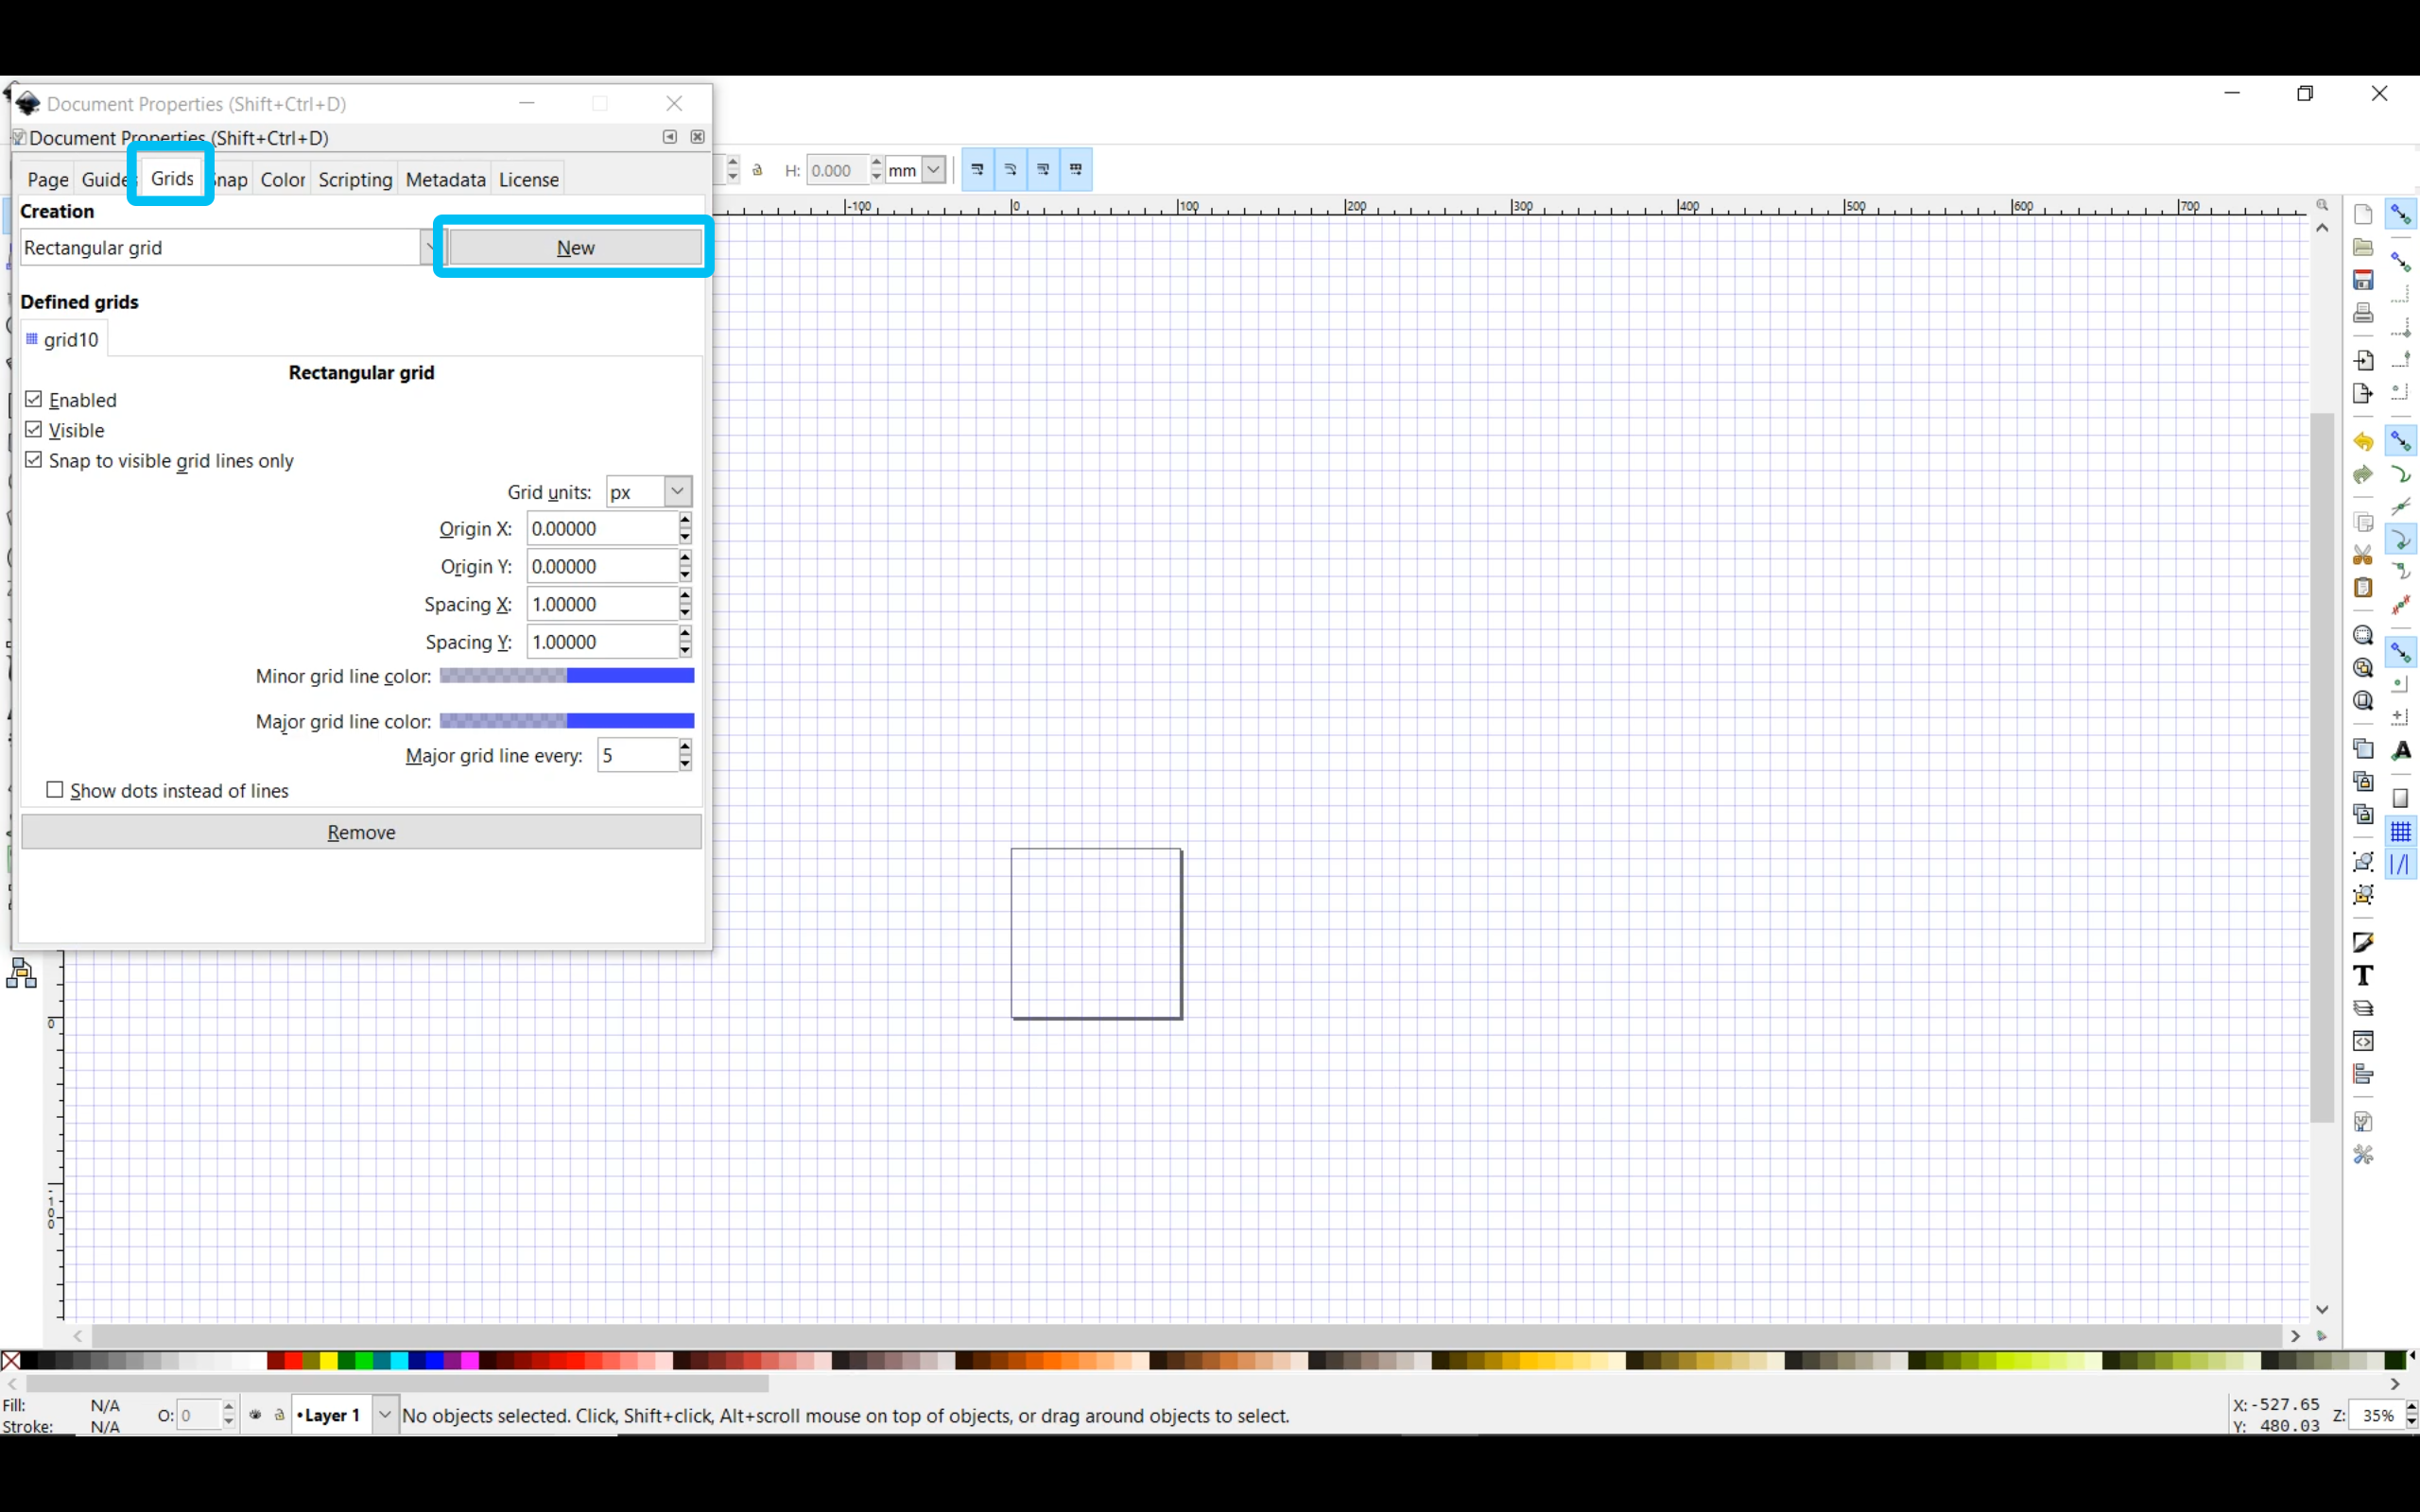
- Set up a grid. To do this select the "Grids" tab and leaving it set to Rectangular grid and click "New". At this point I leave all the settings the default but feel free to play and find setting that work best for you. We are setting up a pixel based grid because we are doing a pixelated patch. If you are doing a normal patch you can skip the grid.
Digitizing Your Image: Importing and Roughing
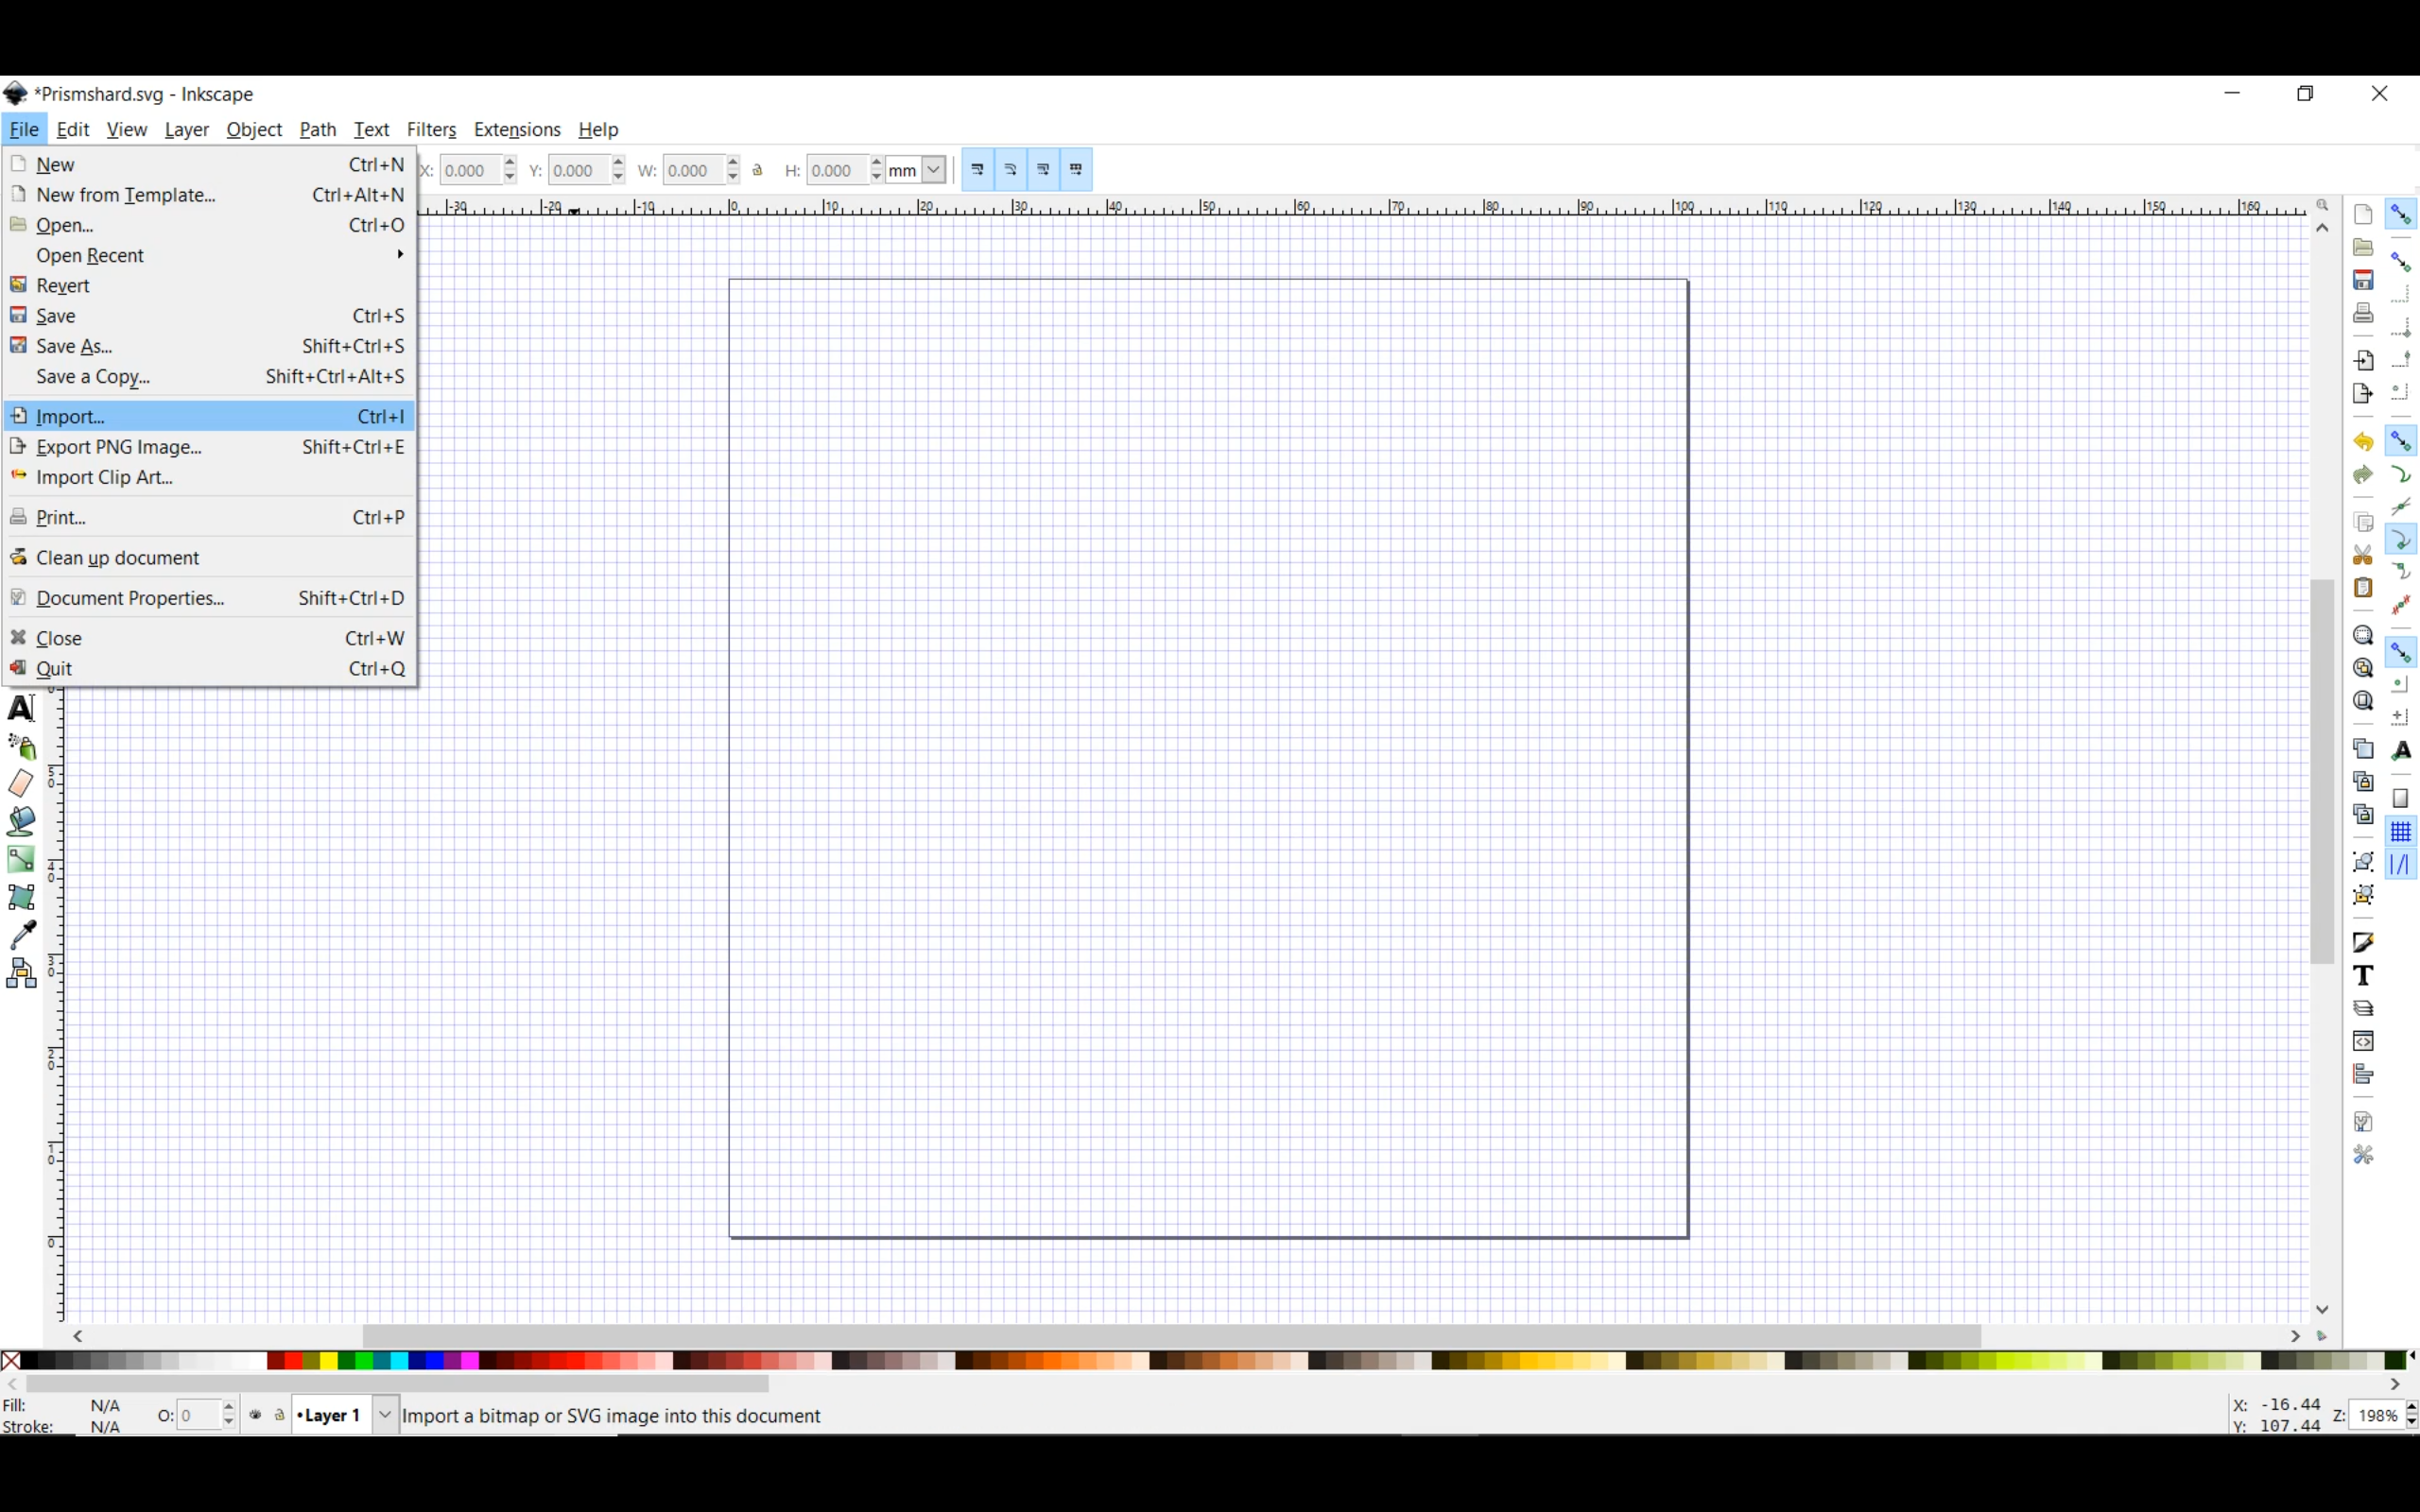
Now that we have the document all set up we are going to import our image.
- To do this select Import from the file menu.
- Then locate your inspiration image and import it.
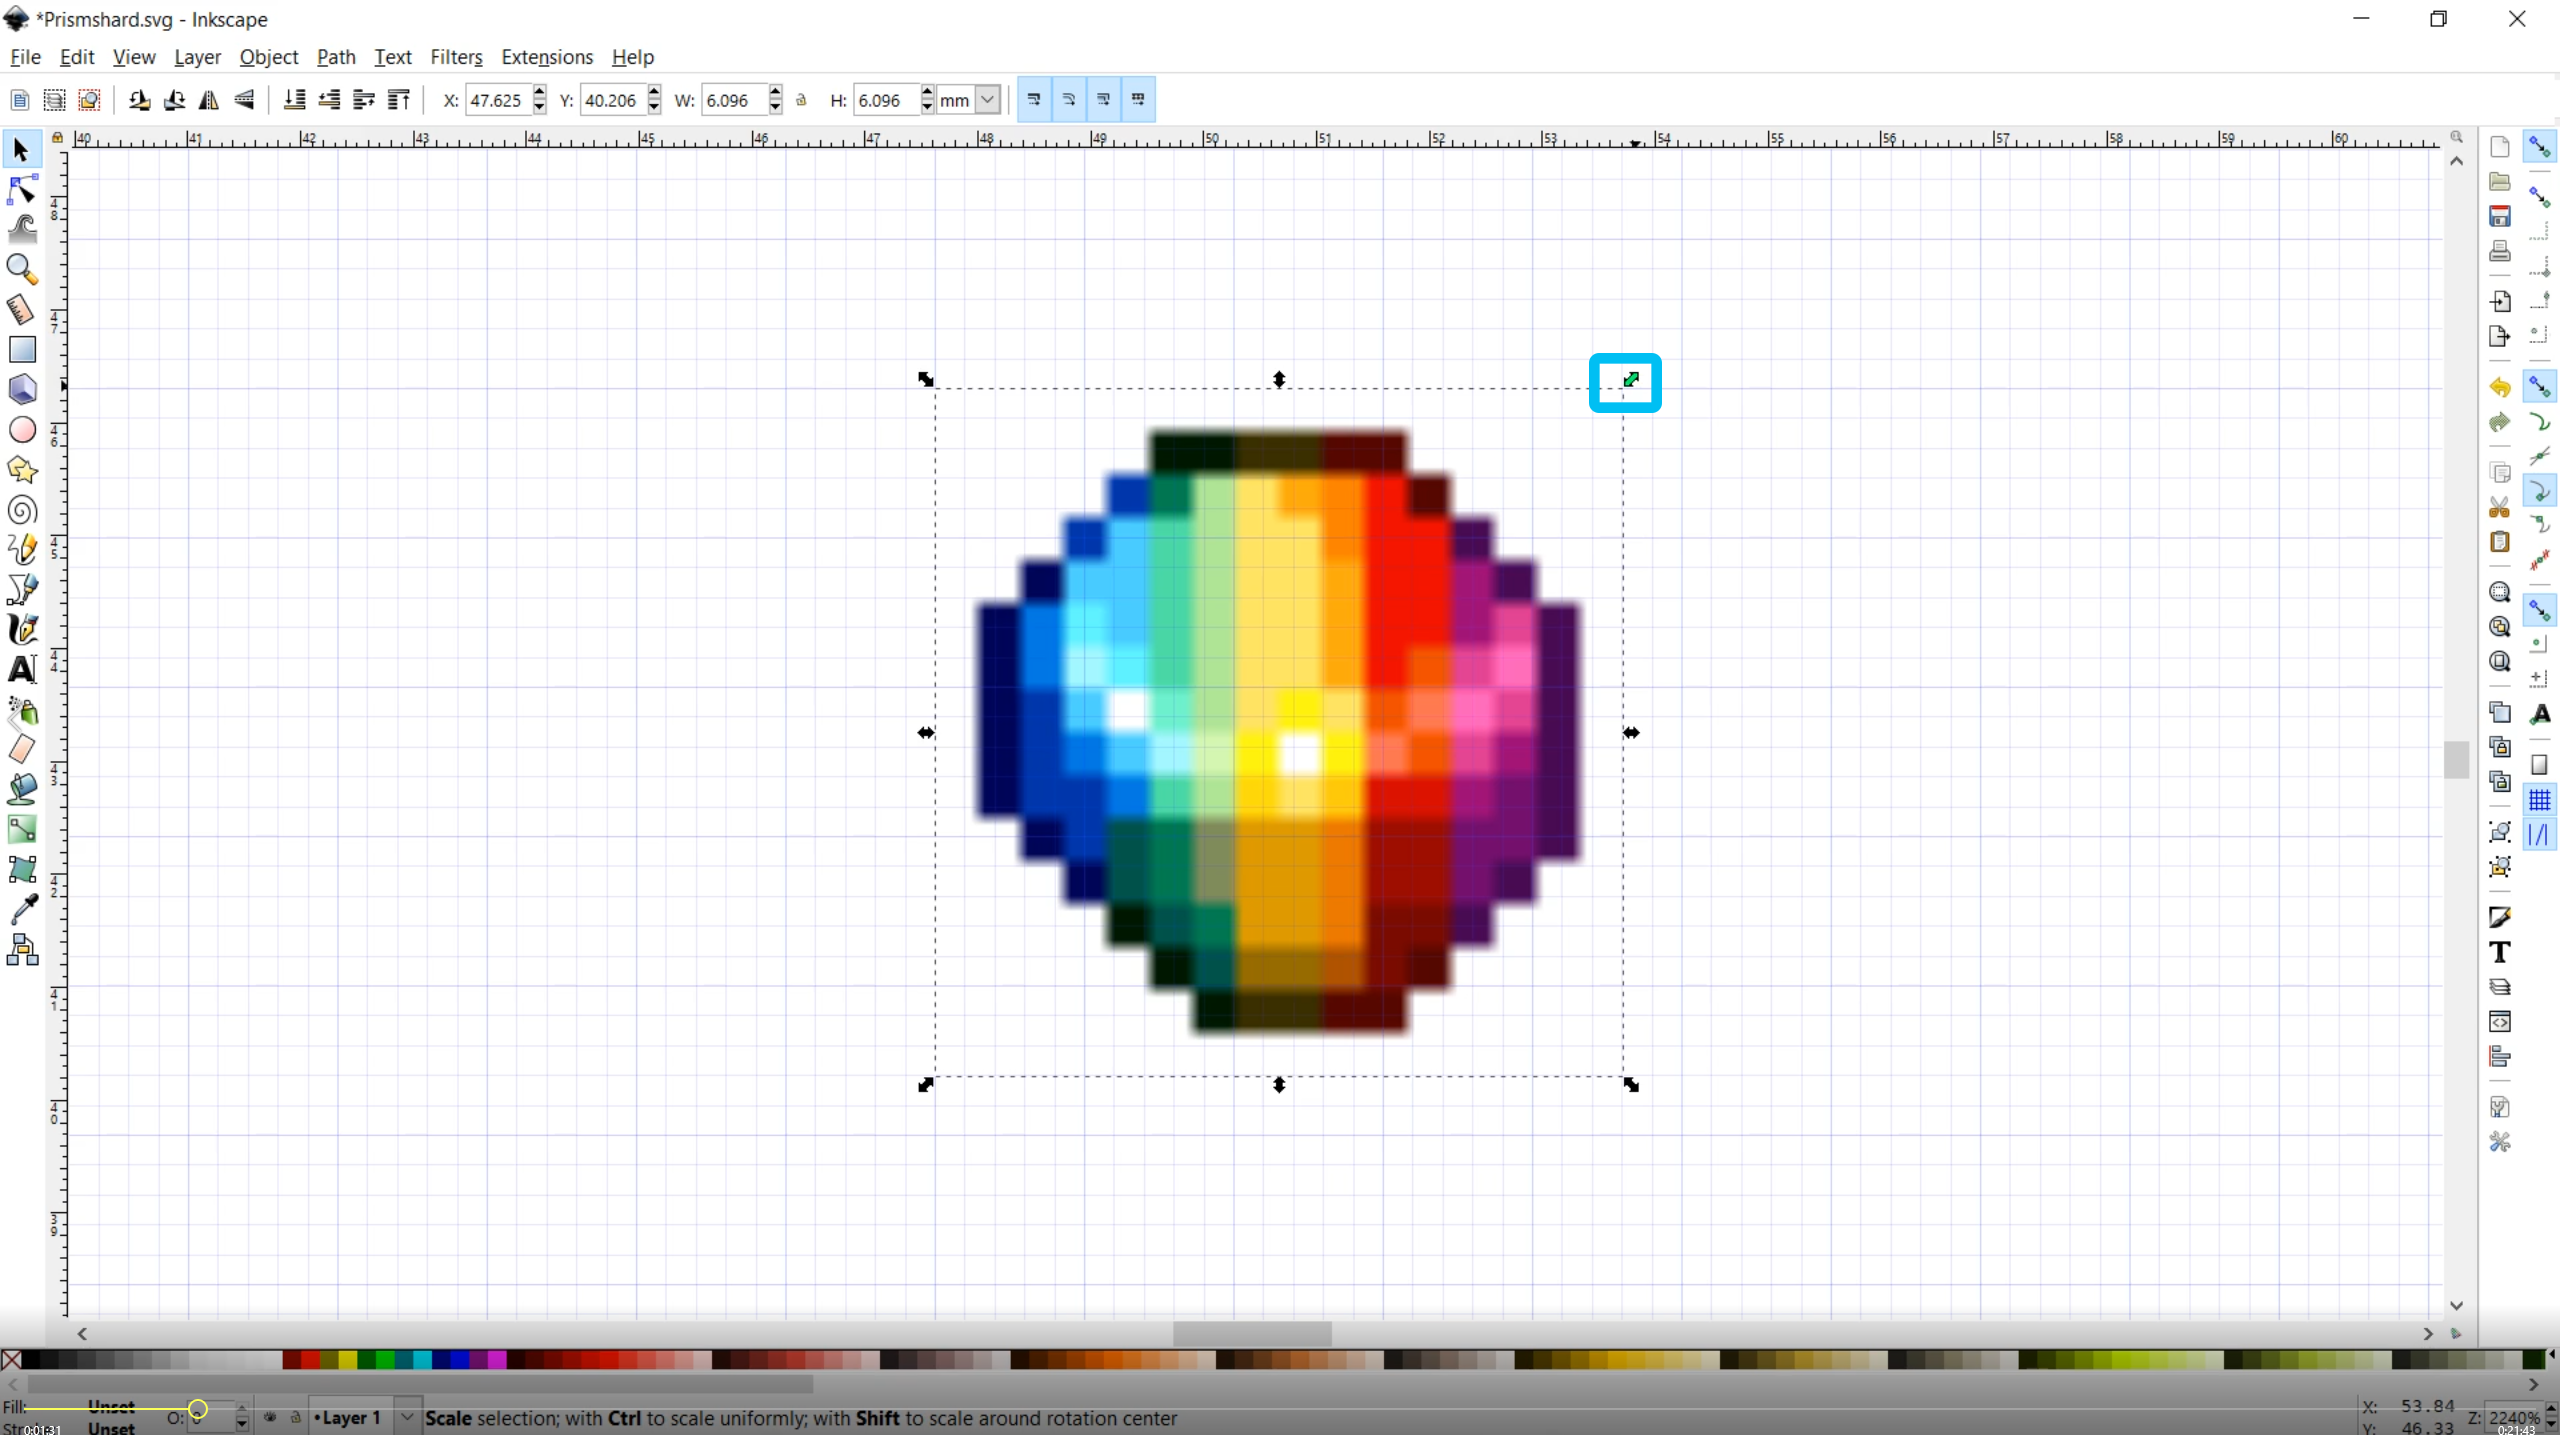
- Once your image is imported select it and using the arrows scale it until the pixels of your image are close to the pixel size of your grid. This doesn't need to be exact just close enough for government work.
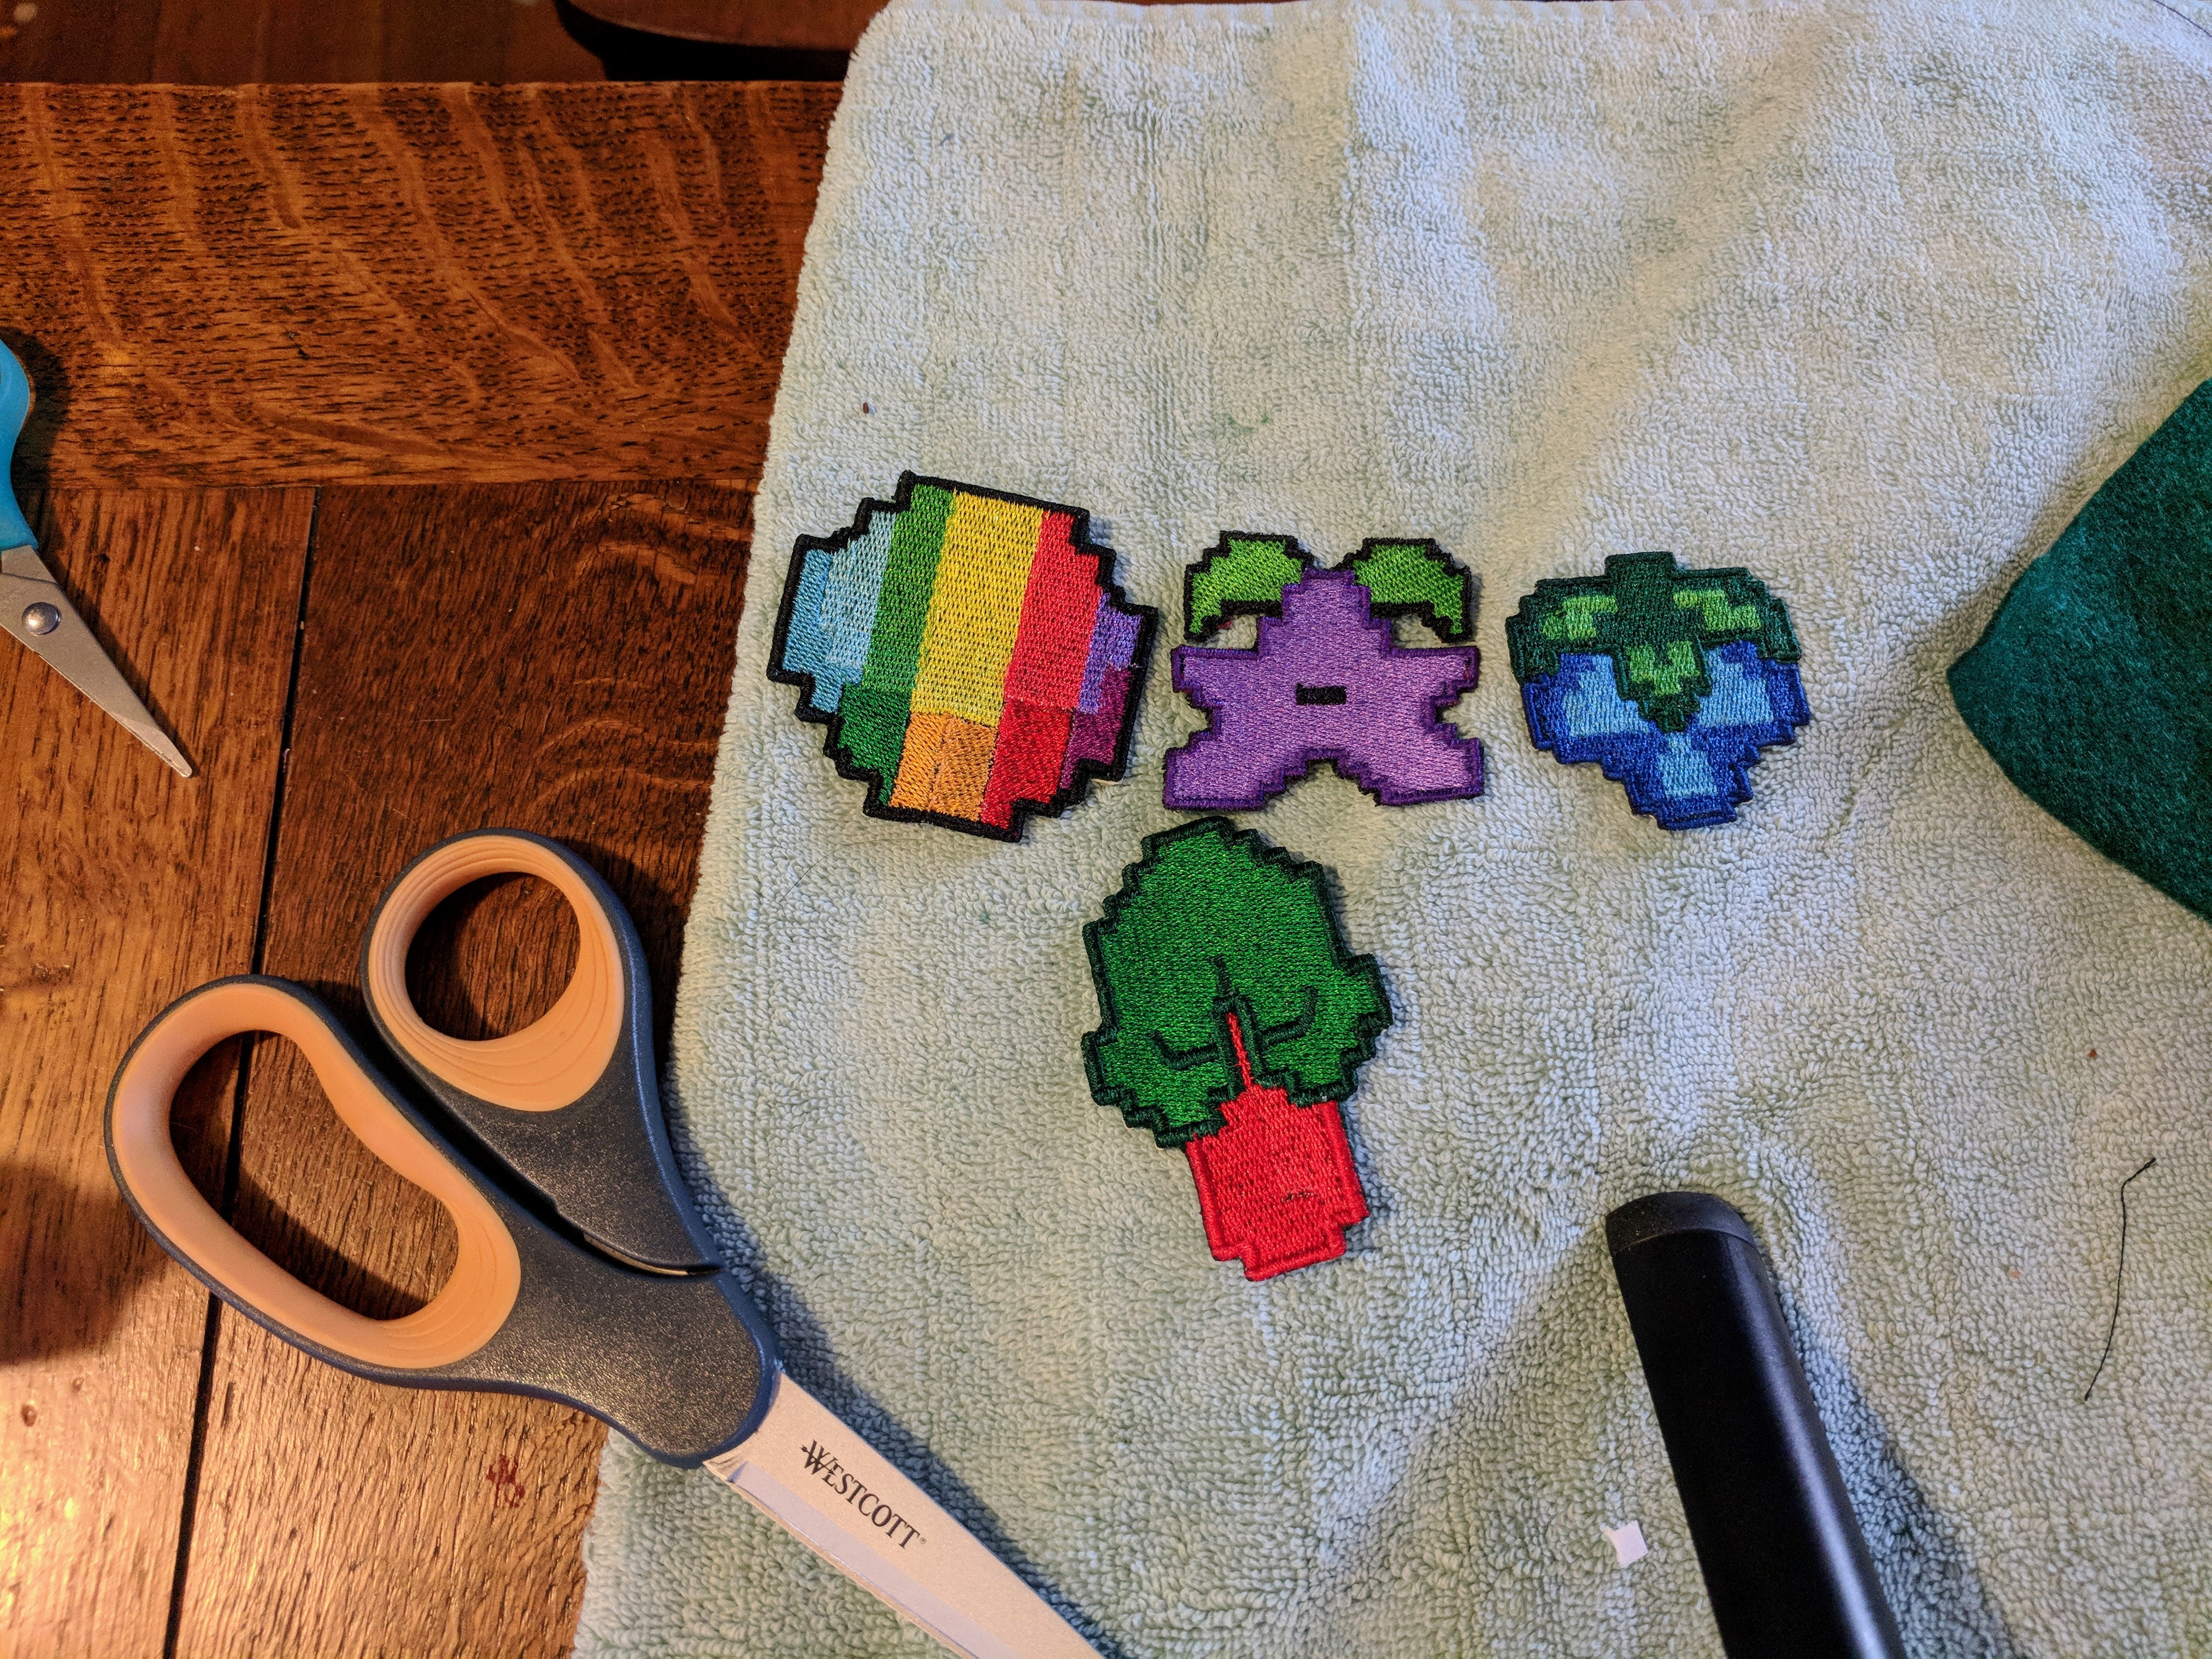
- Now you have to start making some tough artistic choices. My machine is a single color machine which means every time I use a color I have to change the thread and can make this very time consuming. If you are designing your patch for mass production most vendors charge extra after 8 colors. So with this in mind take a look at your image and think about how you could simplify it and still get the point across. For me I'm going to try and use different thread stitches to give the feeling of the shading in the prizmatic shard from Stardew Valley.(This didn't work out well I ended up going with 11 colors *Sigh*)
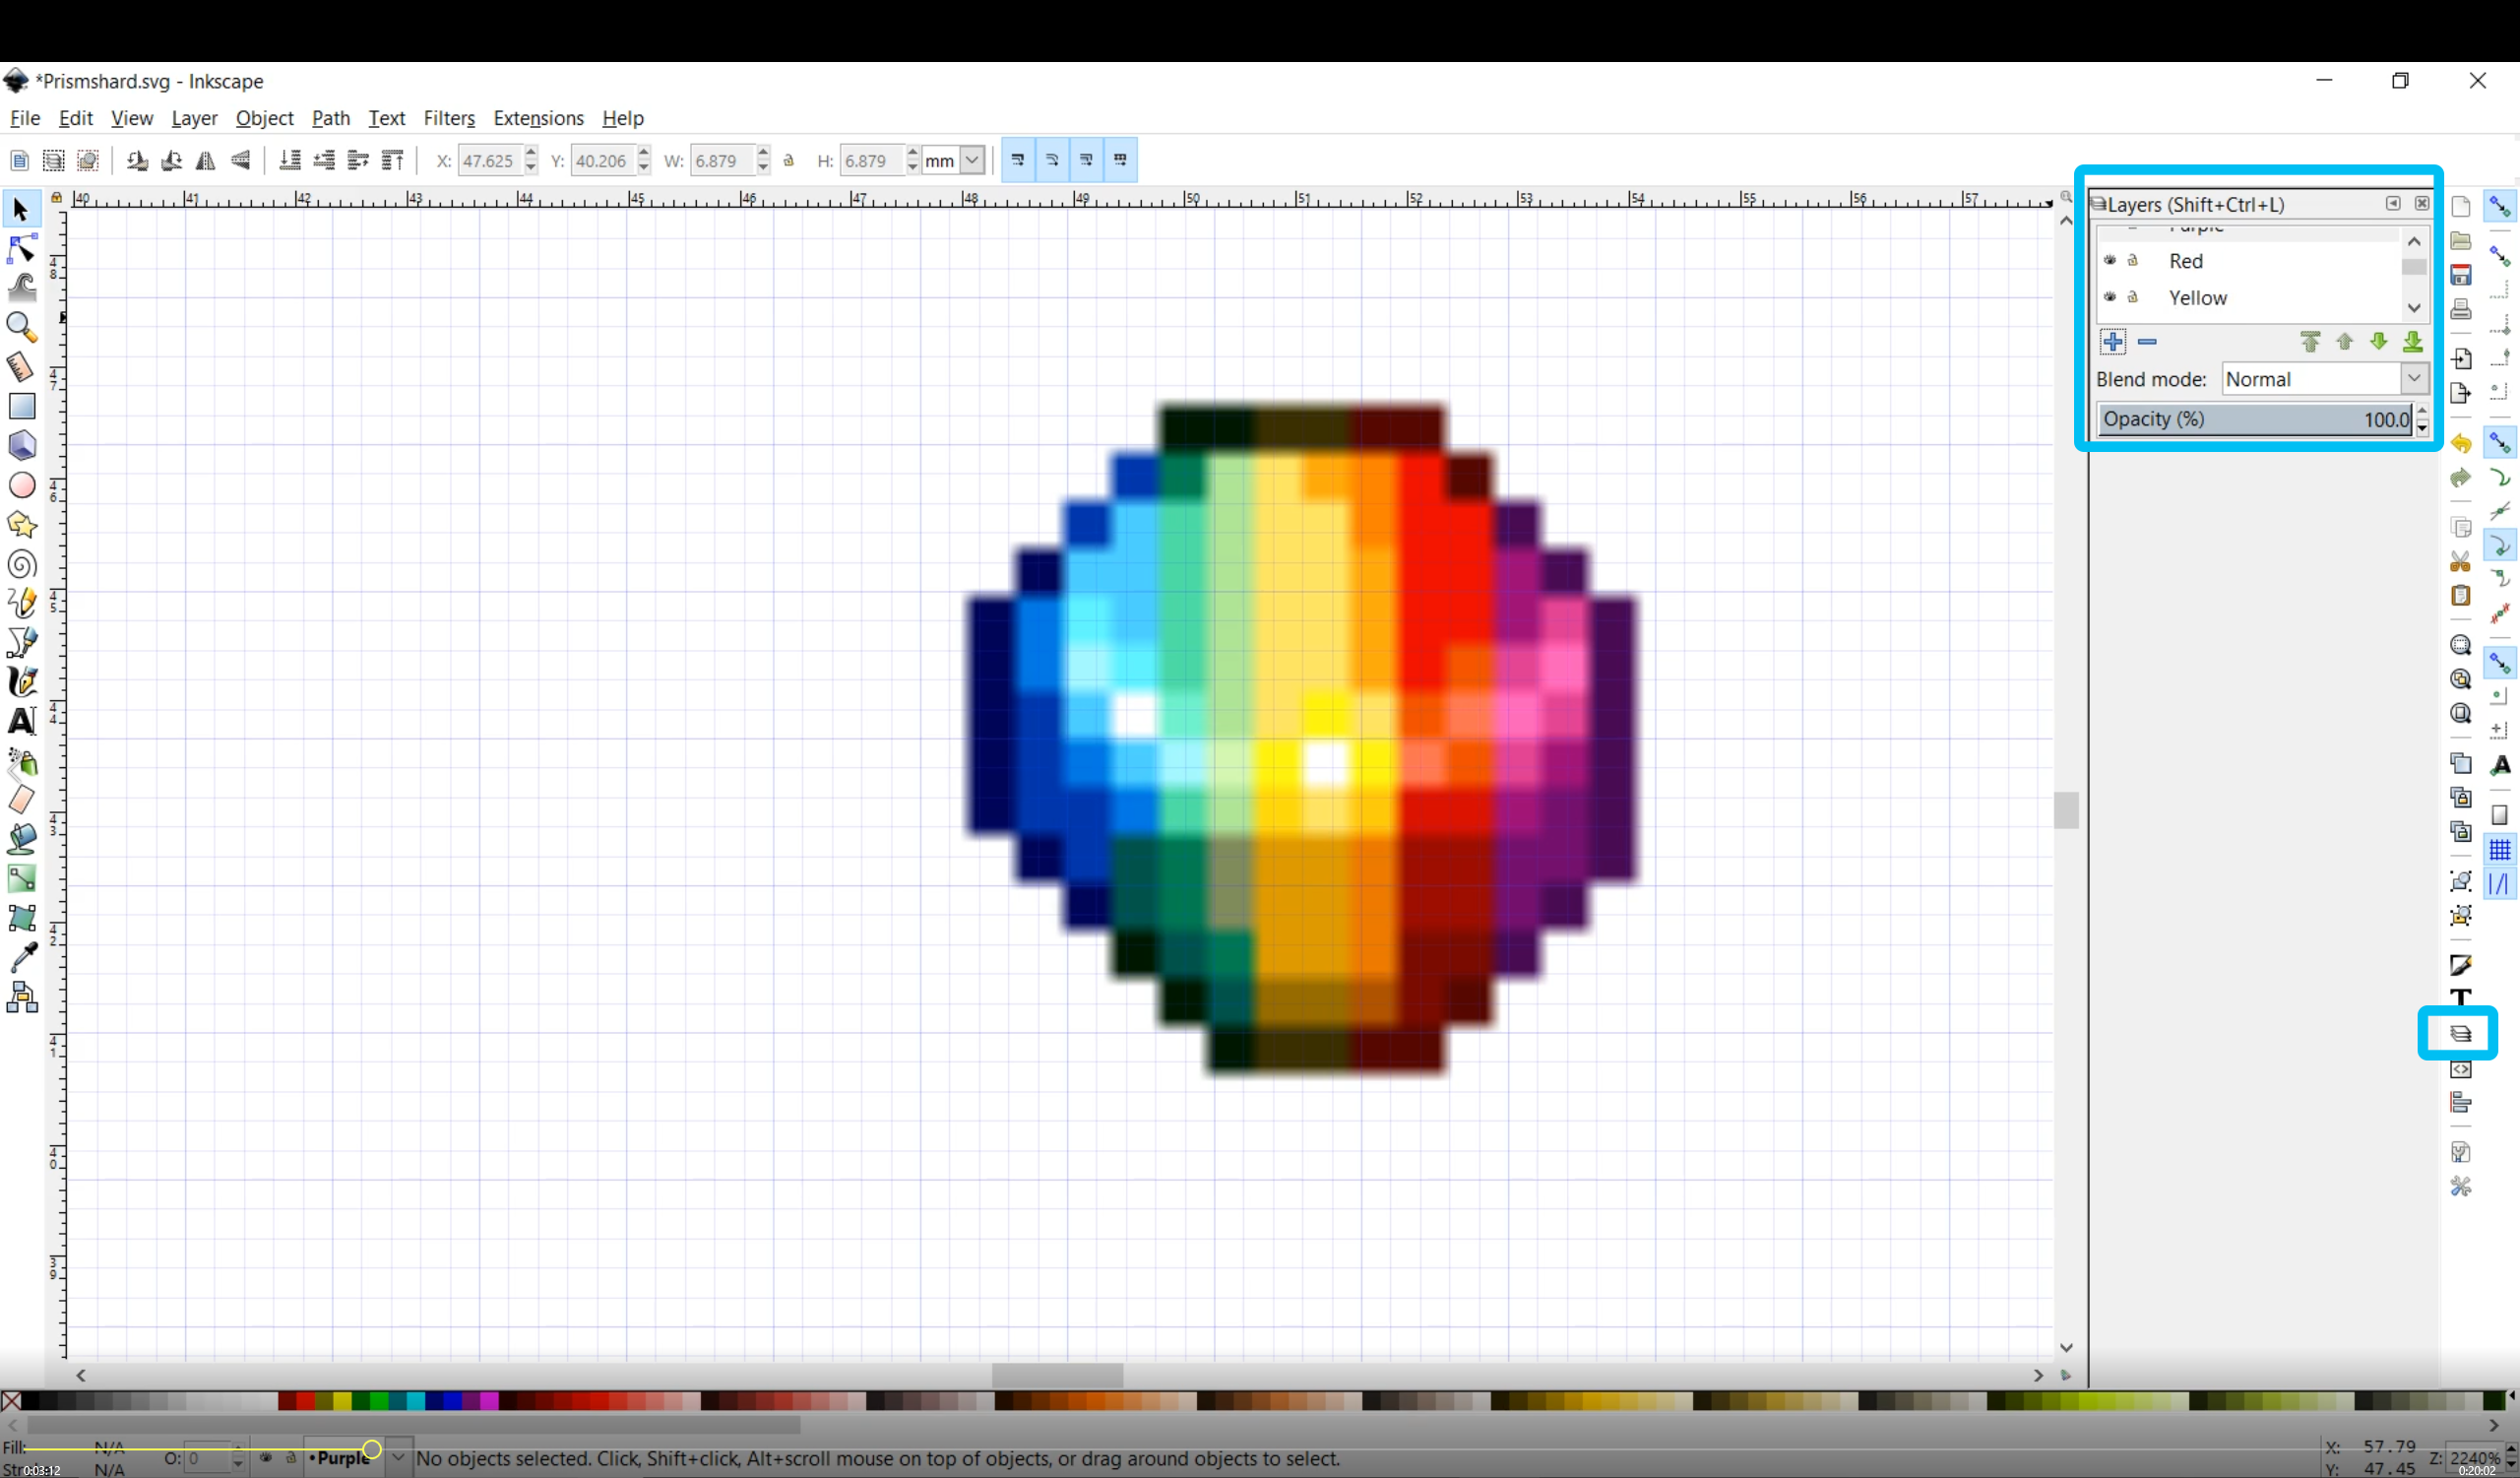
- Now is a good time to set up a layer for each color you decided to use. You can do this later as well so if you don't want to do it now don't worry about it.
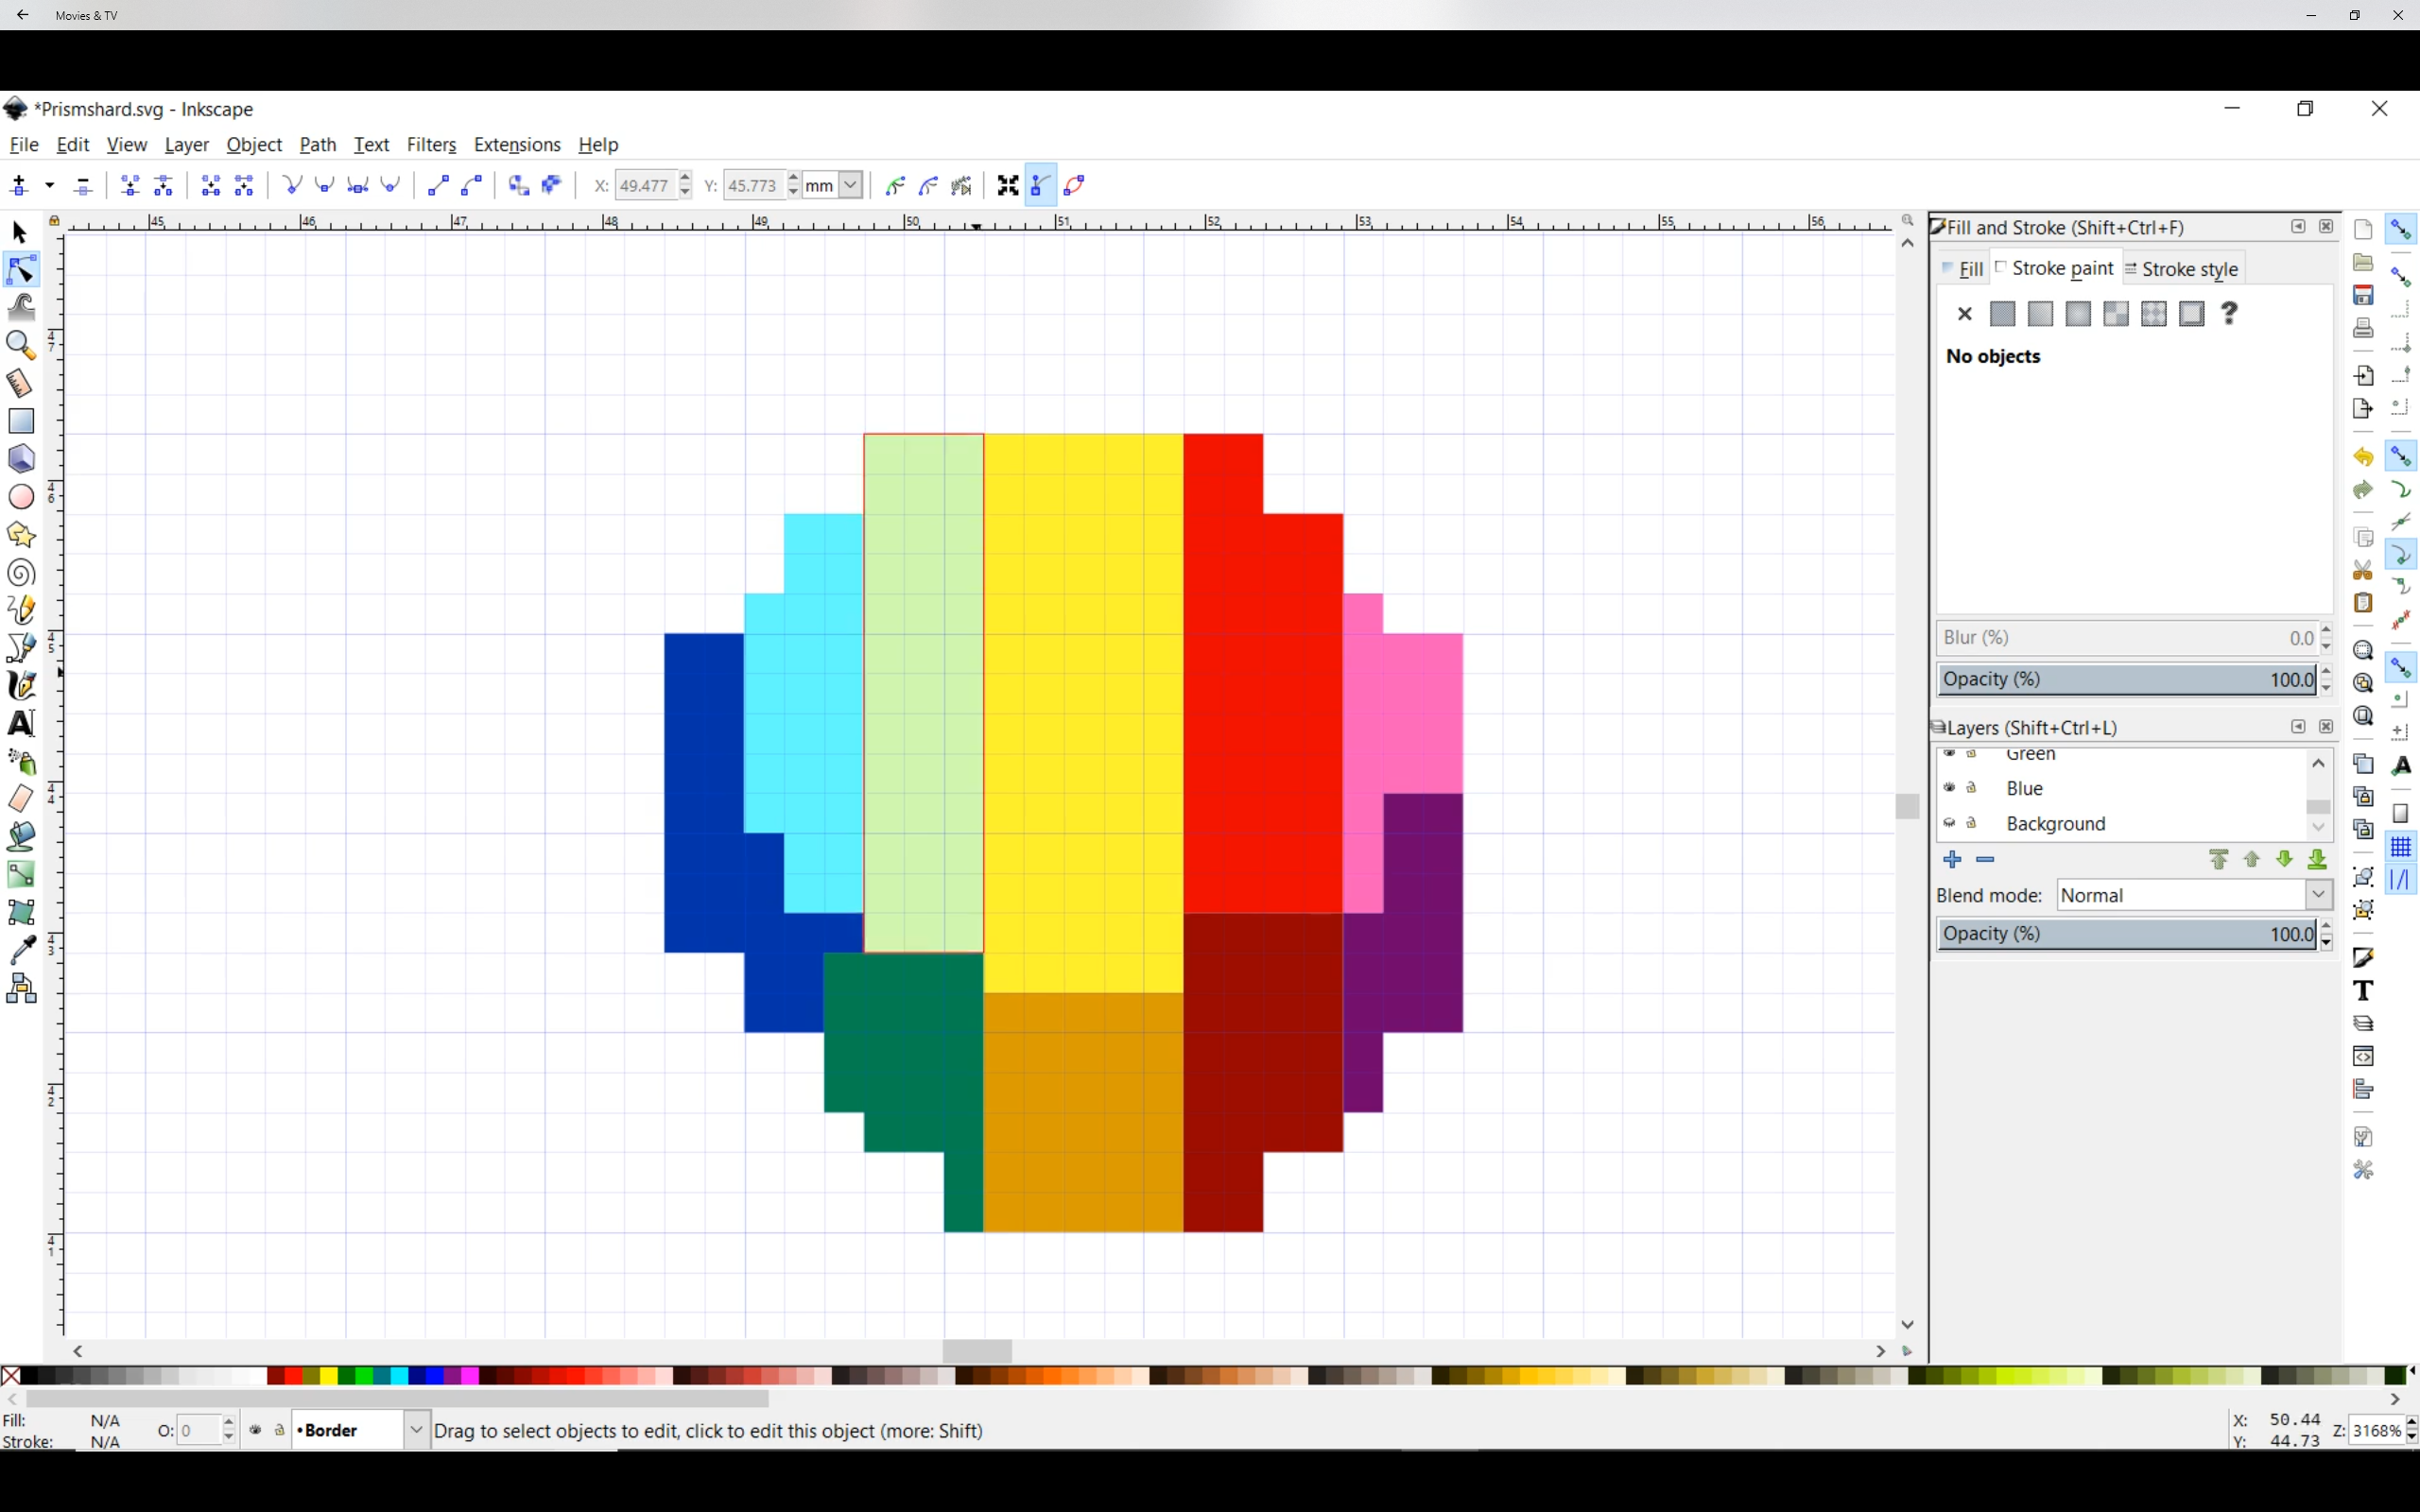
- Using the pen tool trace around the edges of each of the colors you plan on using. The order in which you draw things is going to be the default order they get sewn in so you can either think about that now as you are drawing or adjust that later with the XML editor. As you make a shape select the fill color and turn off the Stroke Paint. (I use the pen tool to make all my shapes if you want to use any of the other tools the important thing to note is the Inkstitch plugin only recognizes paths so you will need to convert any objects to paths before using the plug in.)
Once you are done you should have a nice blocky image.
Up next sizing and borders.
Digitizing Your Image: Sizing and Borders
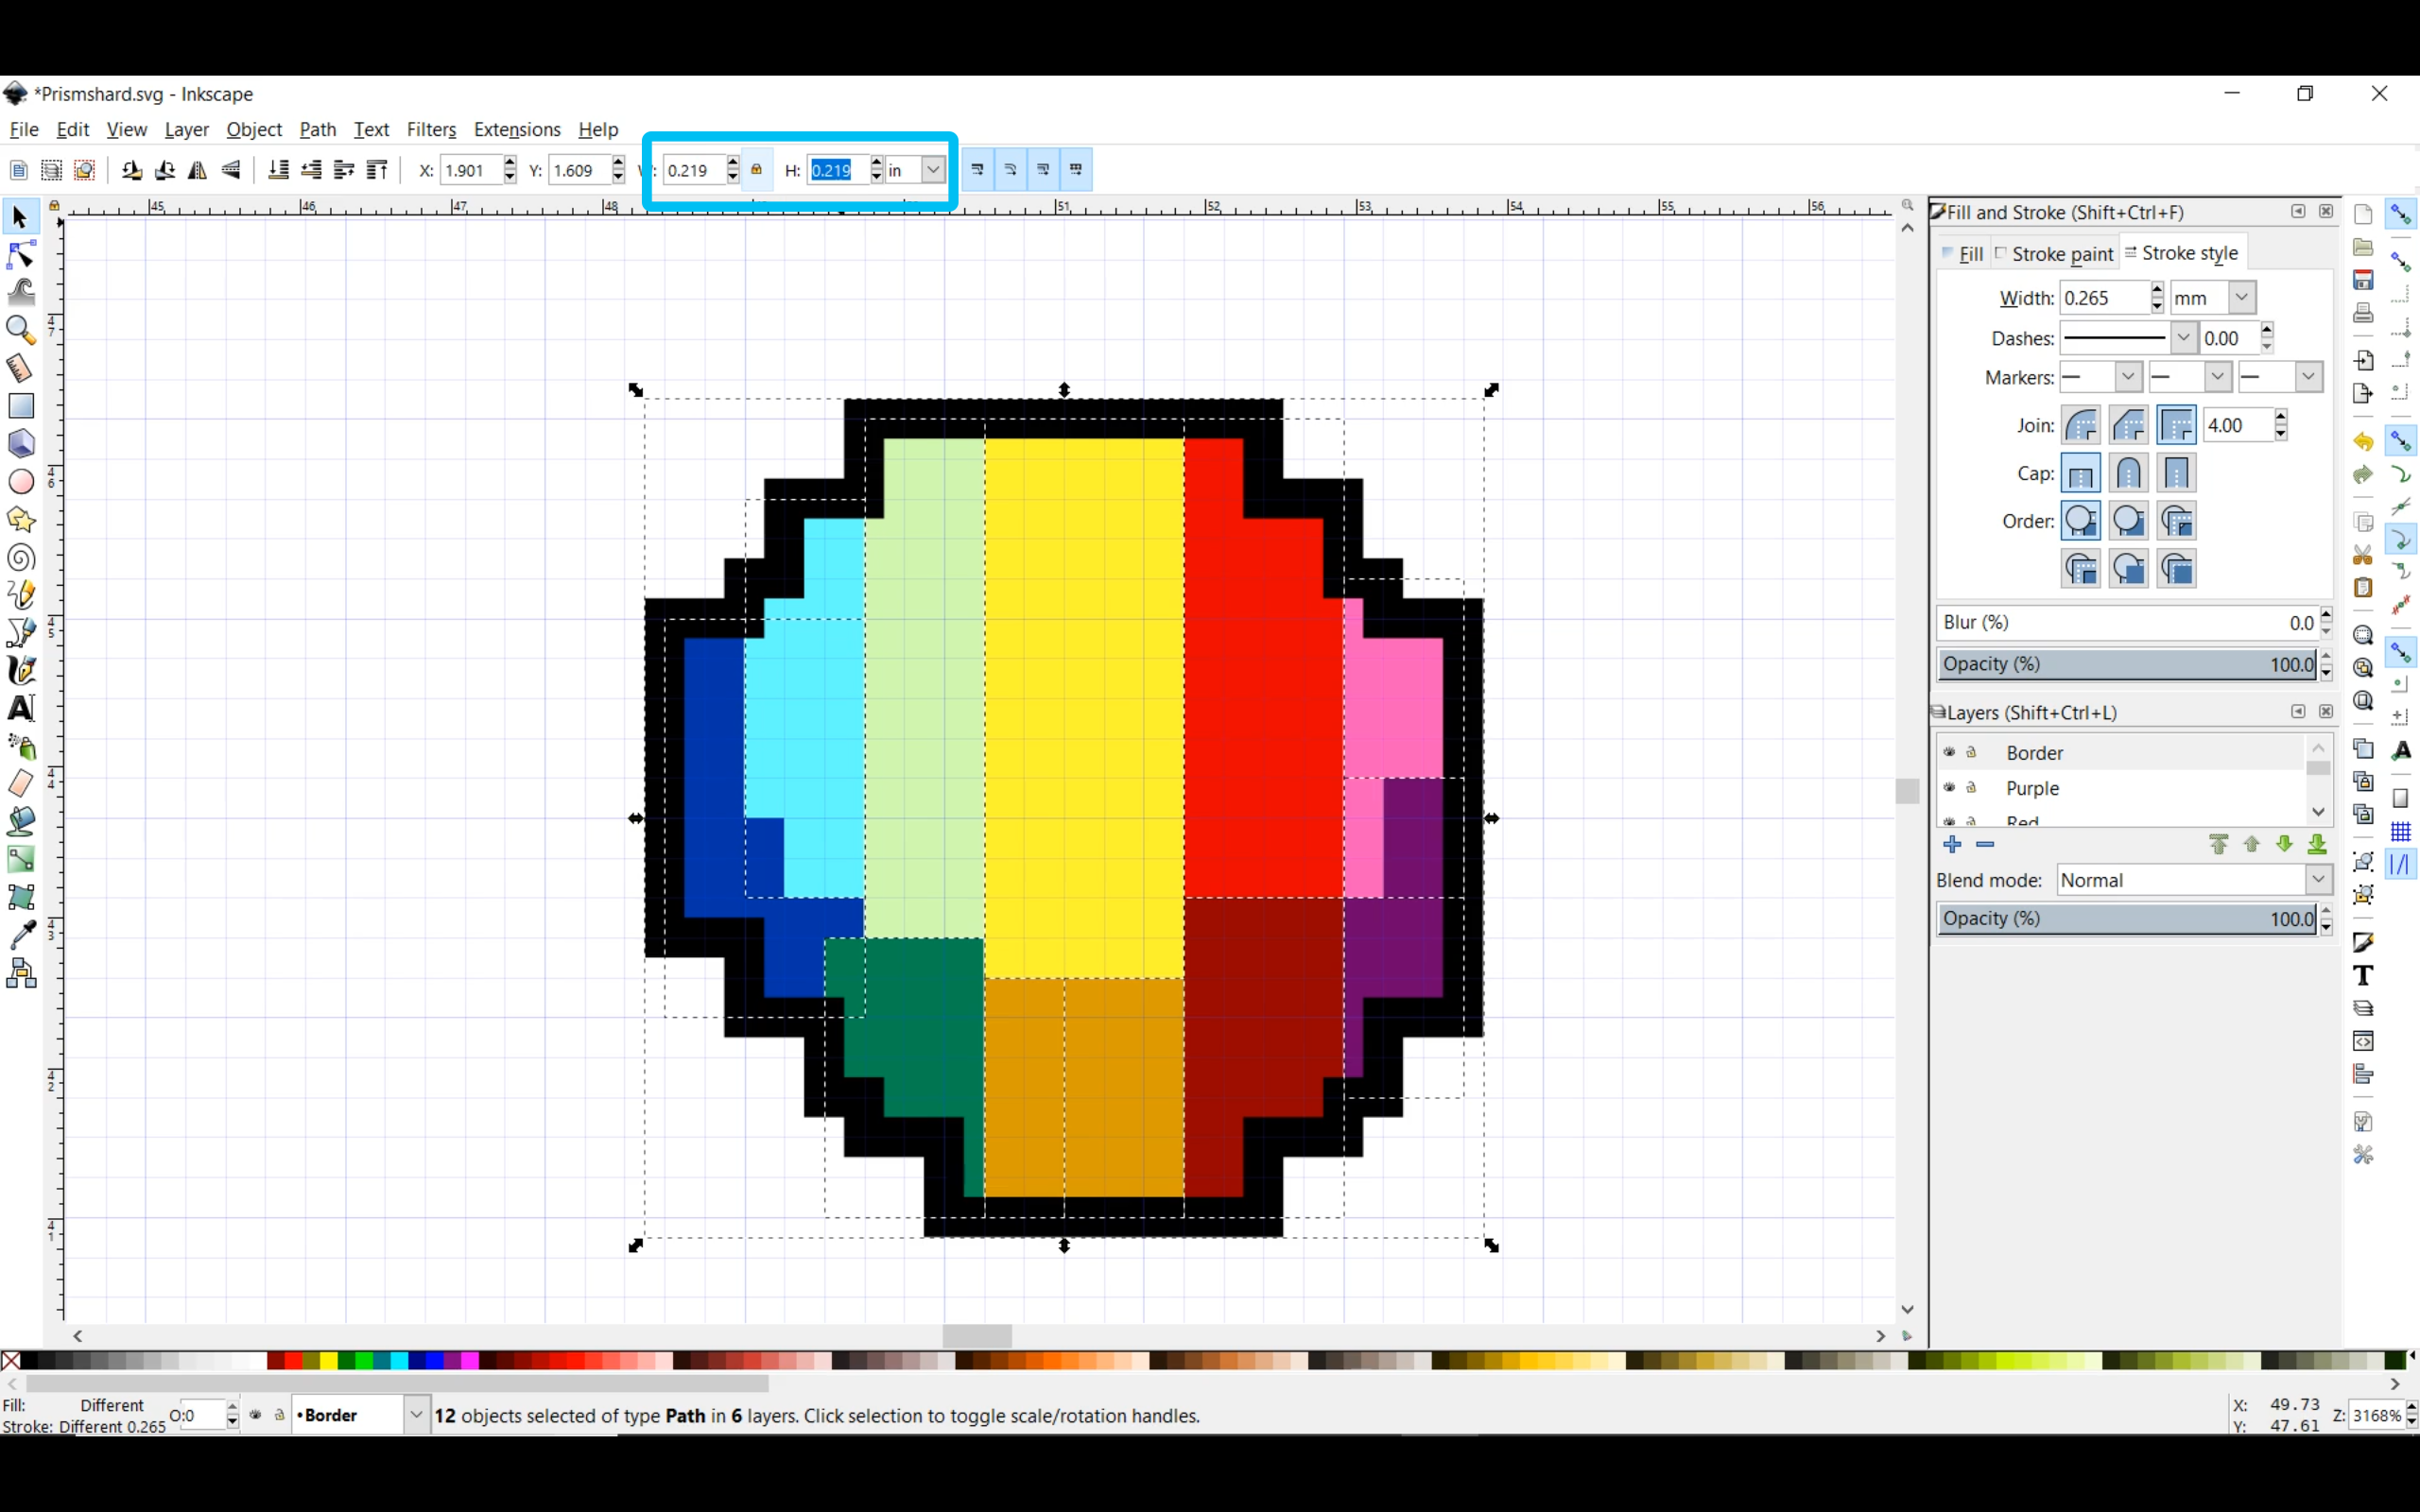
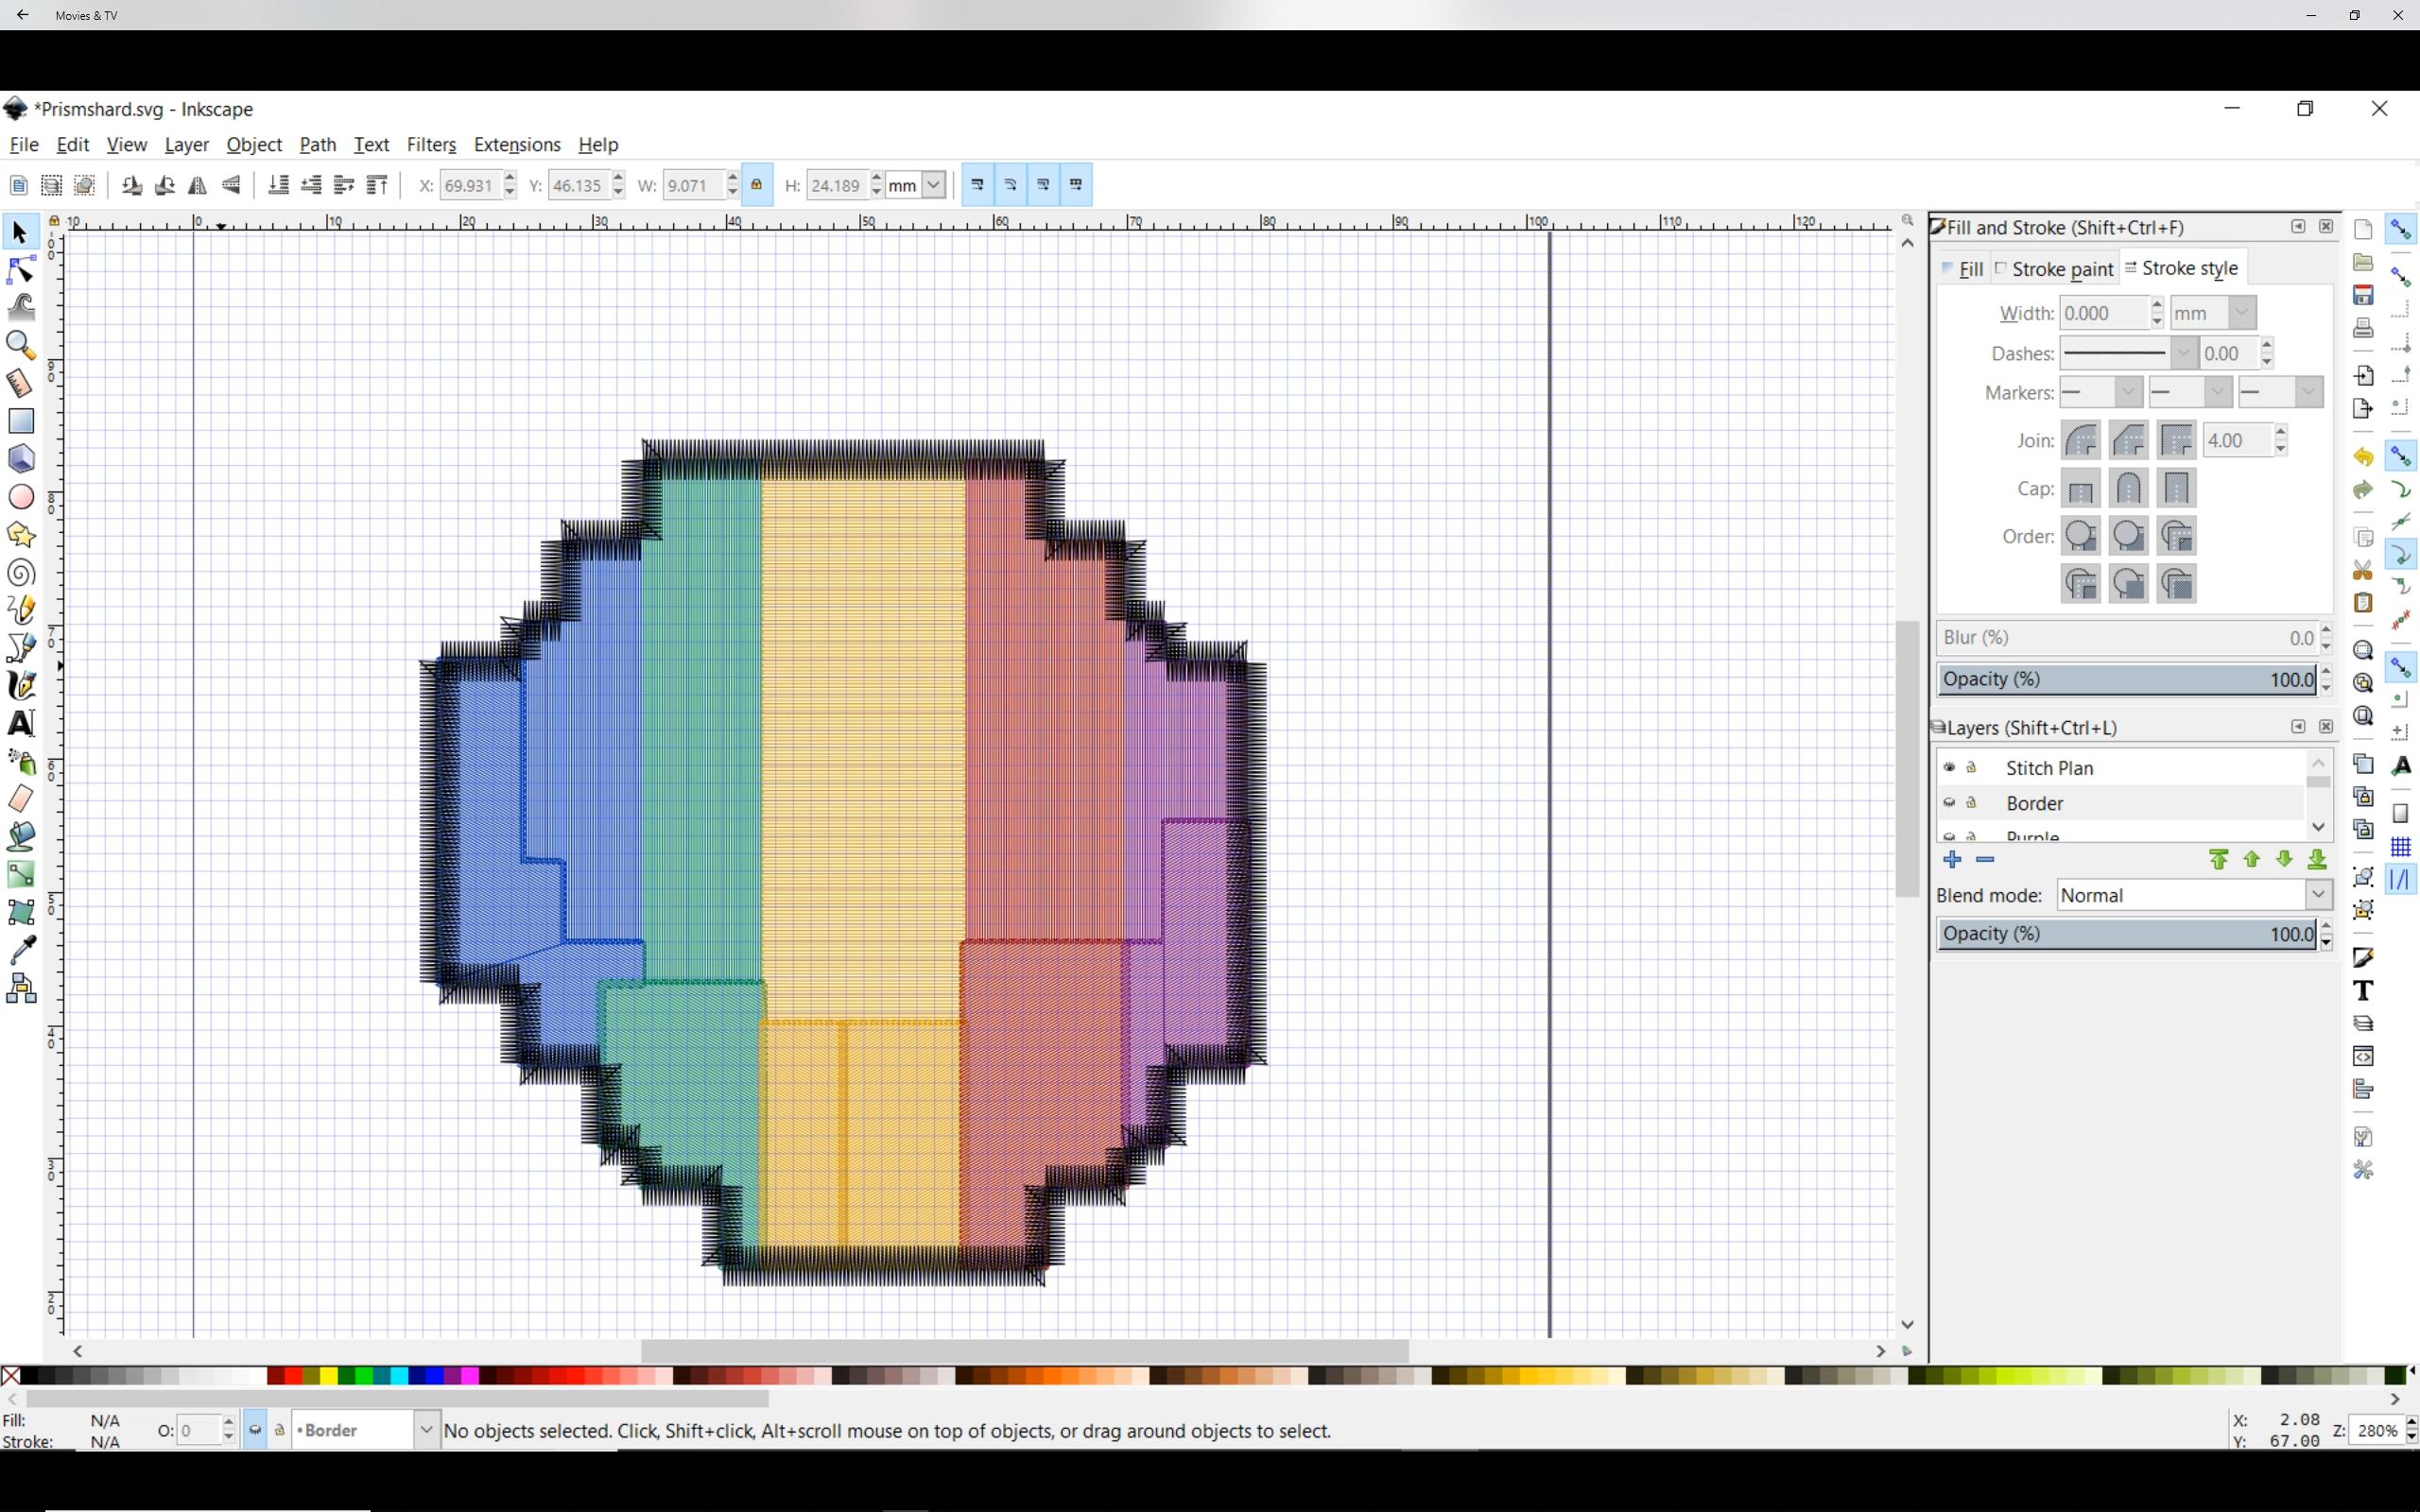
At this point I like to scale my image up to the size it is going to be. I have been making my patches about 2.5 inches by 2.5. So without further ado
- Scale it up to size.
- After that is done click on the little grid to turn off snapping to the grid. Where we are going we don't need a grid anymore!
One of the hallmarks of embroidered patches for me is the tightly sewn borders. So lets tackle them next. The reason we turned off the stroke paint in the previous step is that Inkstitch will try and make a border along any strokes.
- Now we are going to use the Pen tool again to trace out our borders by default the pen will snap to nodes so this should be easy.
- Once you have your borders traced set the line color to match the color you want for your border.
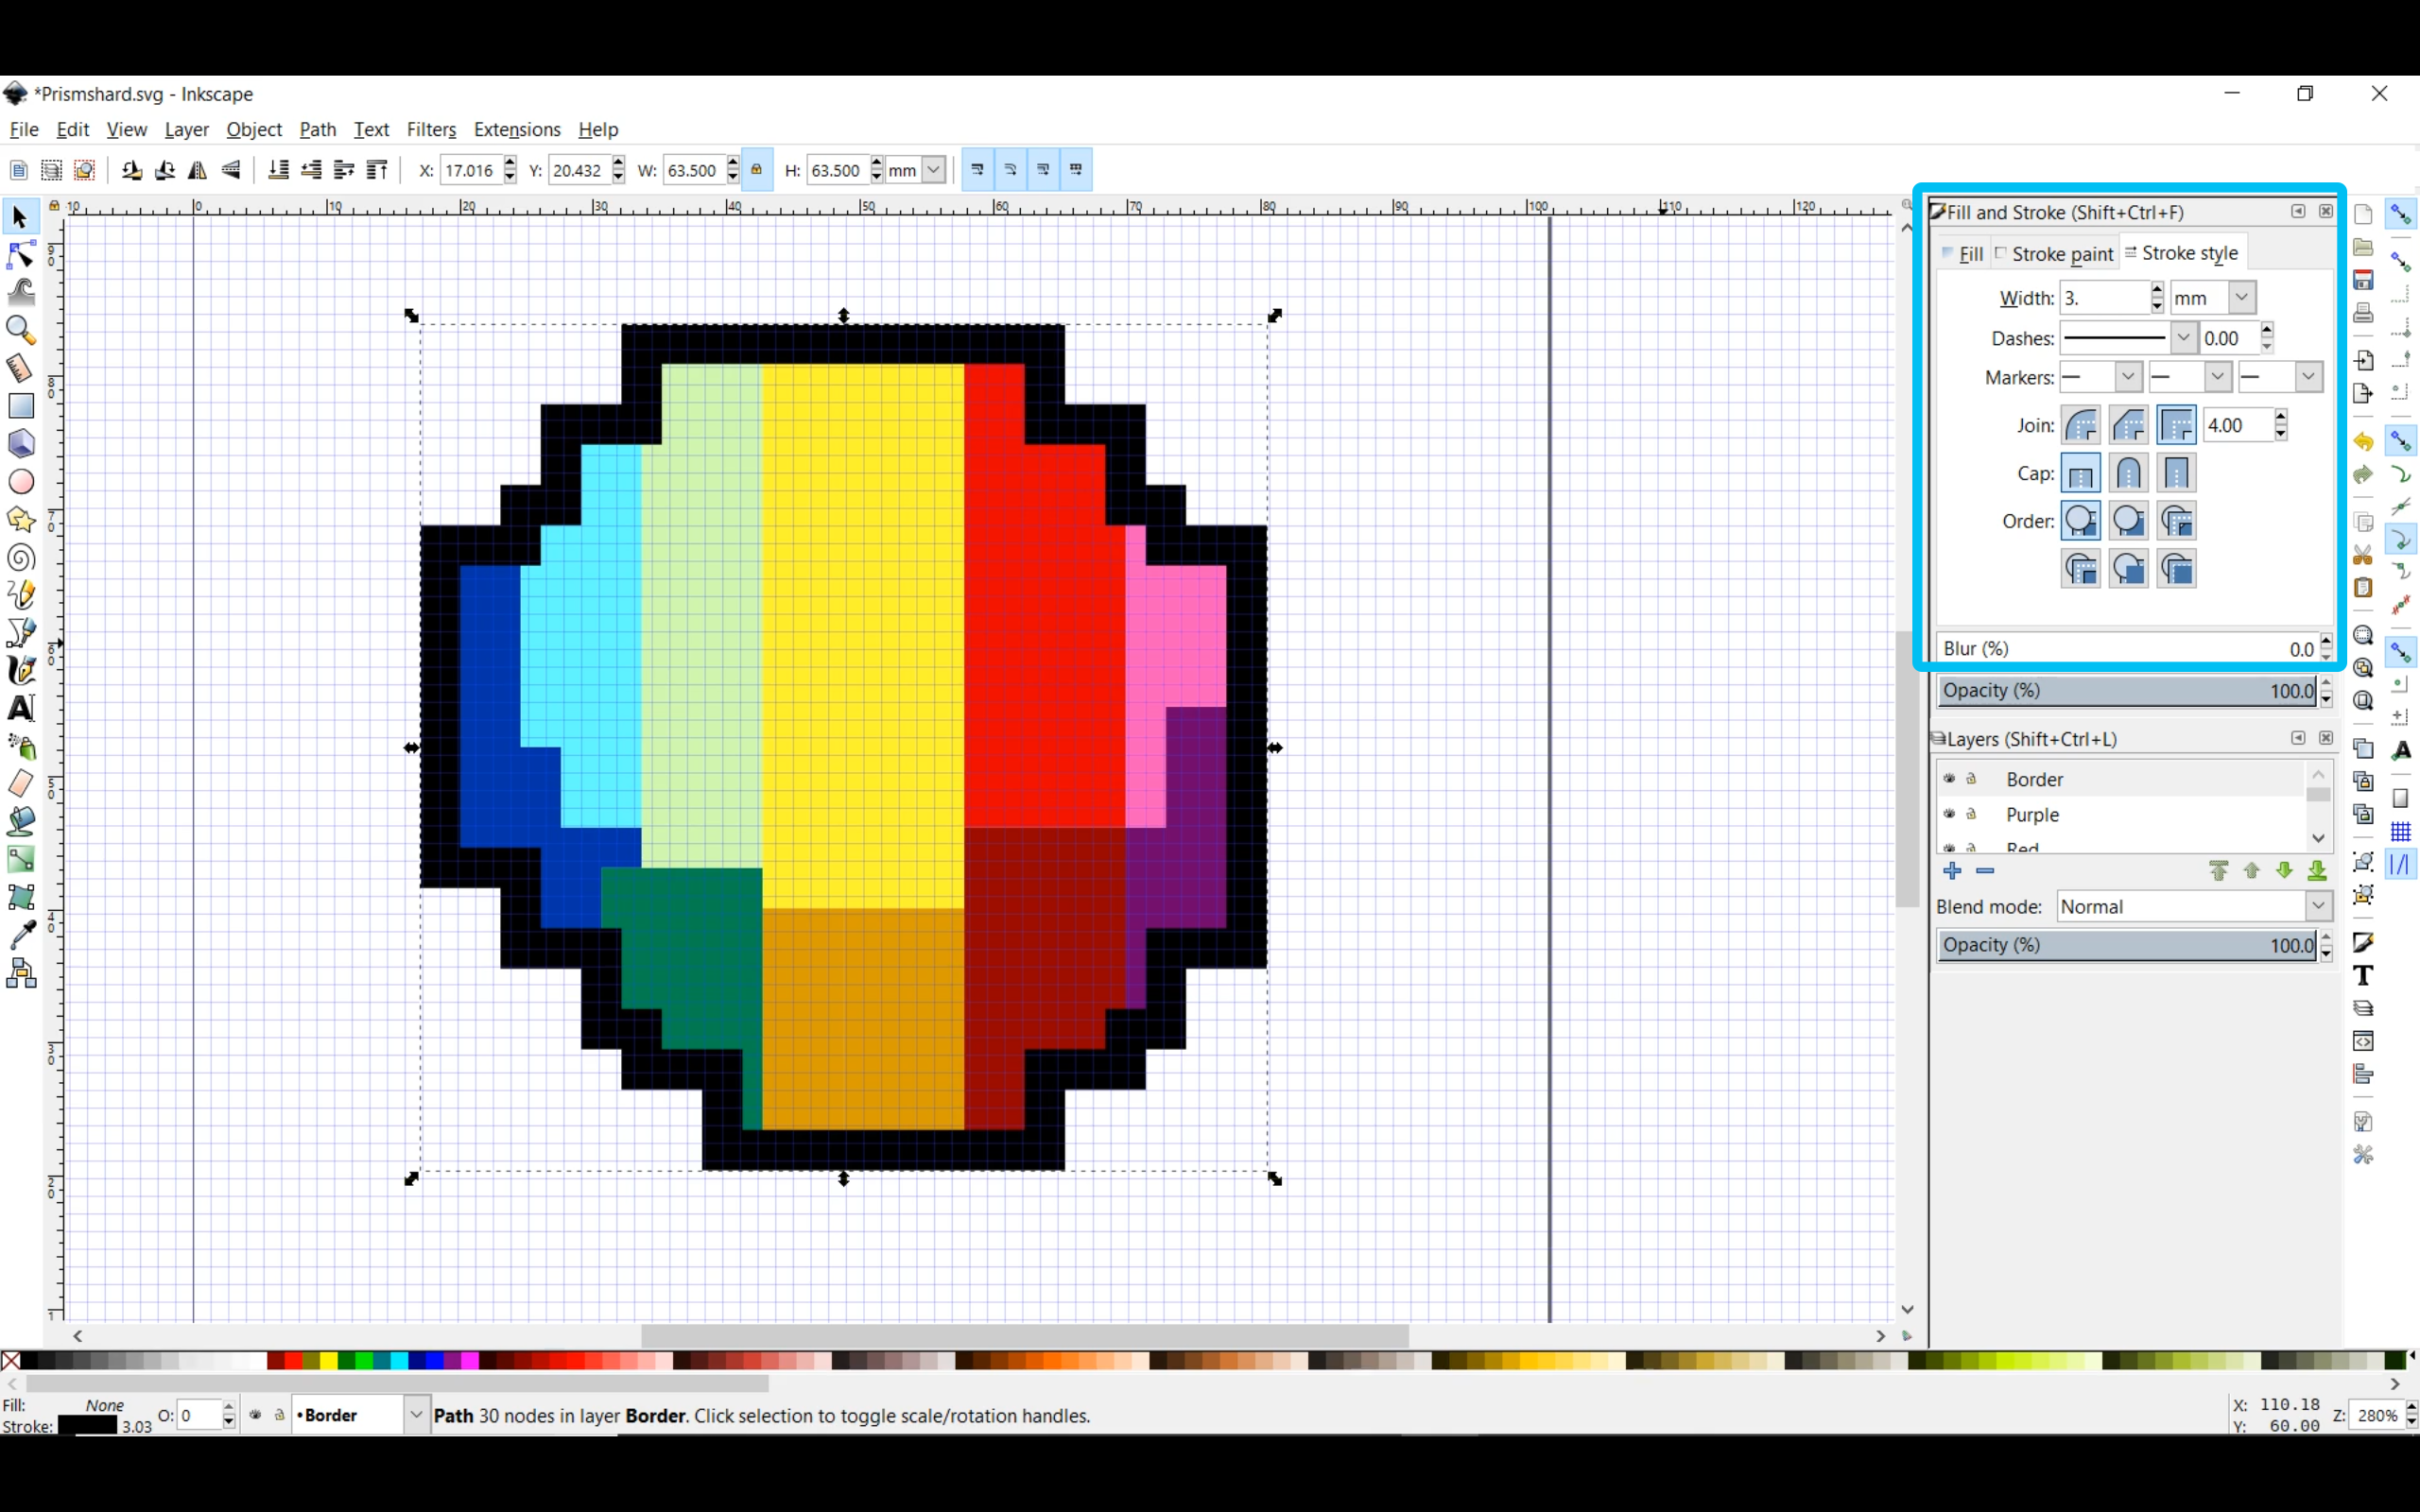
- In the stroke style area we will set the thickness of the border. This thickness will ultimately be how thick the sewn borders will be on your patch so plan accordingly. I have been using 3mm for my borders and been quite happy.(I know I am mixing metric and imperial measurements but I'm just crazy like that.)
Now that we have our image prepped it is finally time to turn it into machine controlled stitches!
Digitizing Your Image: Setting the Stitches
Up to this point we have just been using the features of Inkscape. Now we transcend the capabilities of Inkscape and use Inkstitch.
*A side note about why I think Inkstitch is so awesome. It is a super active opensource project in a world where every other Digitizing software I could find out there cost a lot of money. Inkstitch manages to get the job done. Which I think is great because tools should be accessible.*
Now on with the Instructable. We are going to start with the fill stitching.
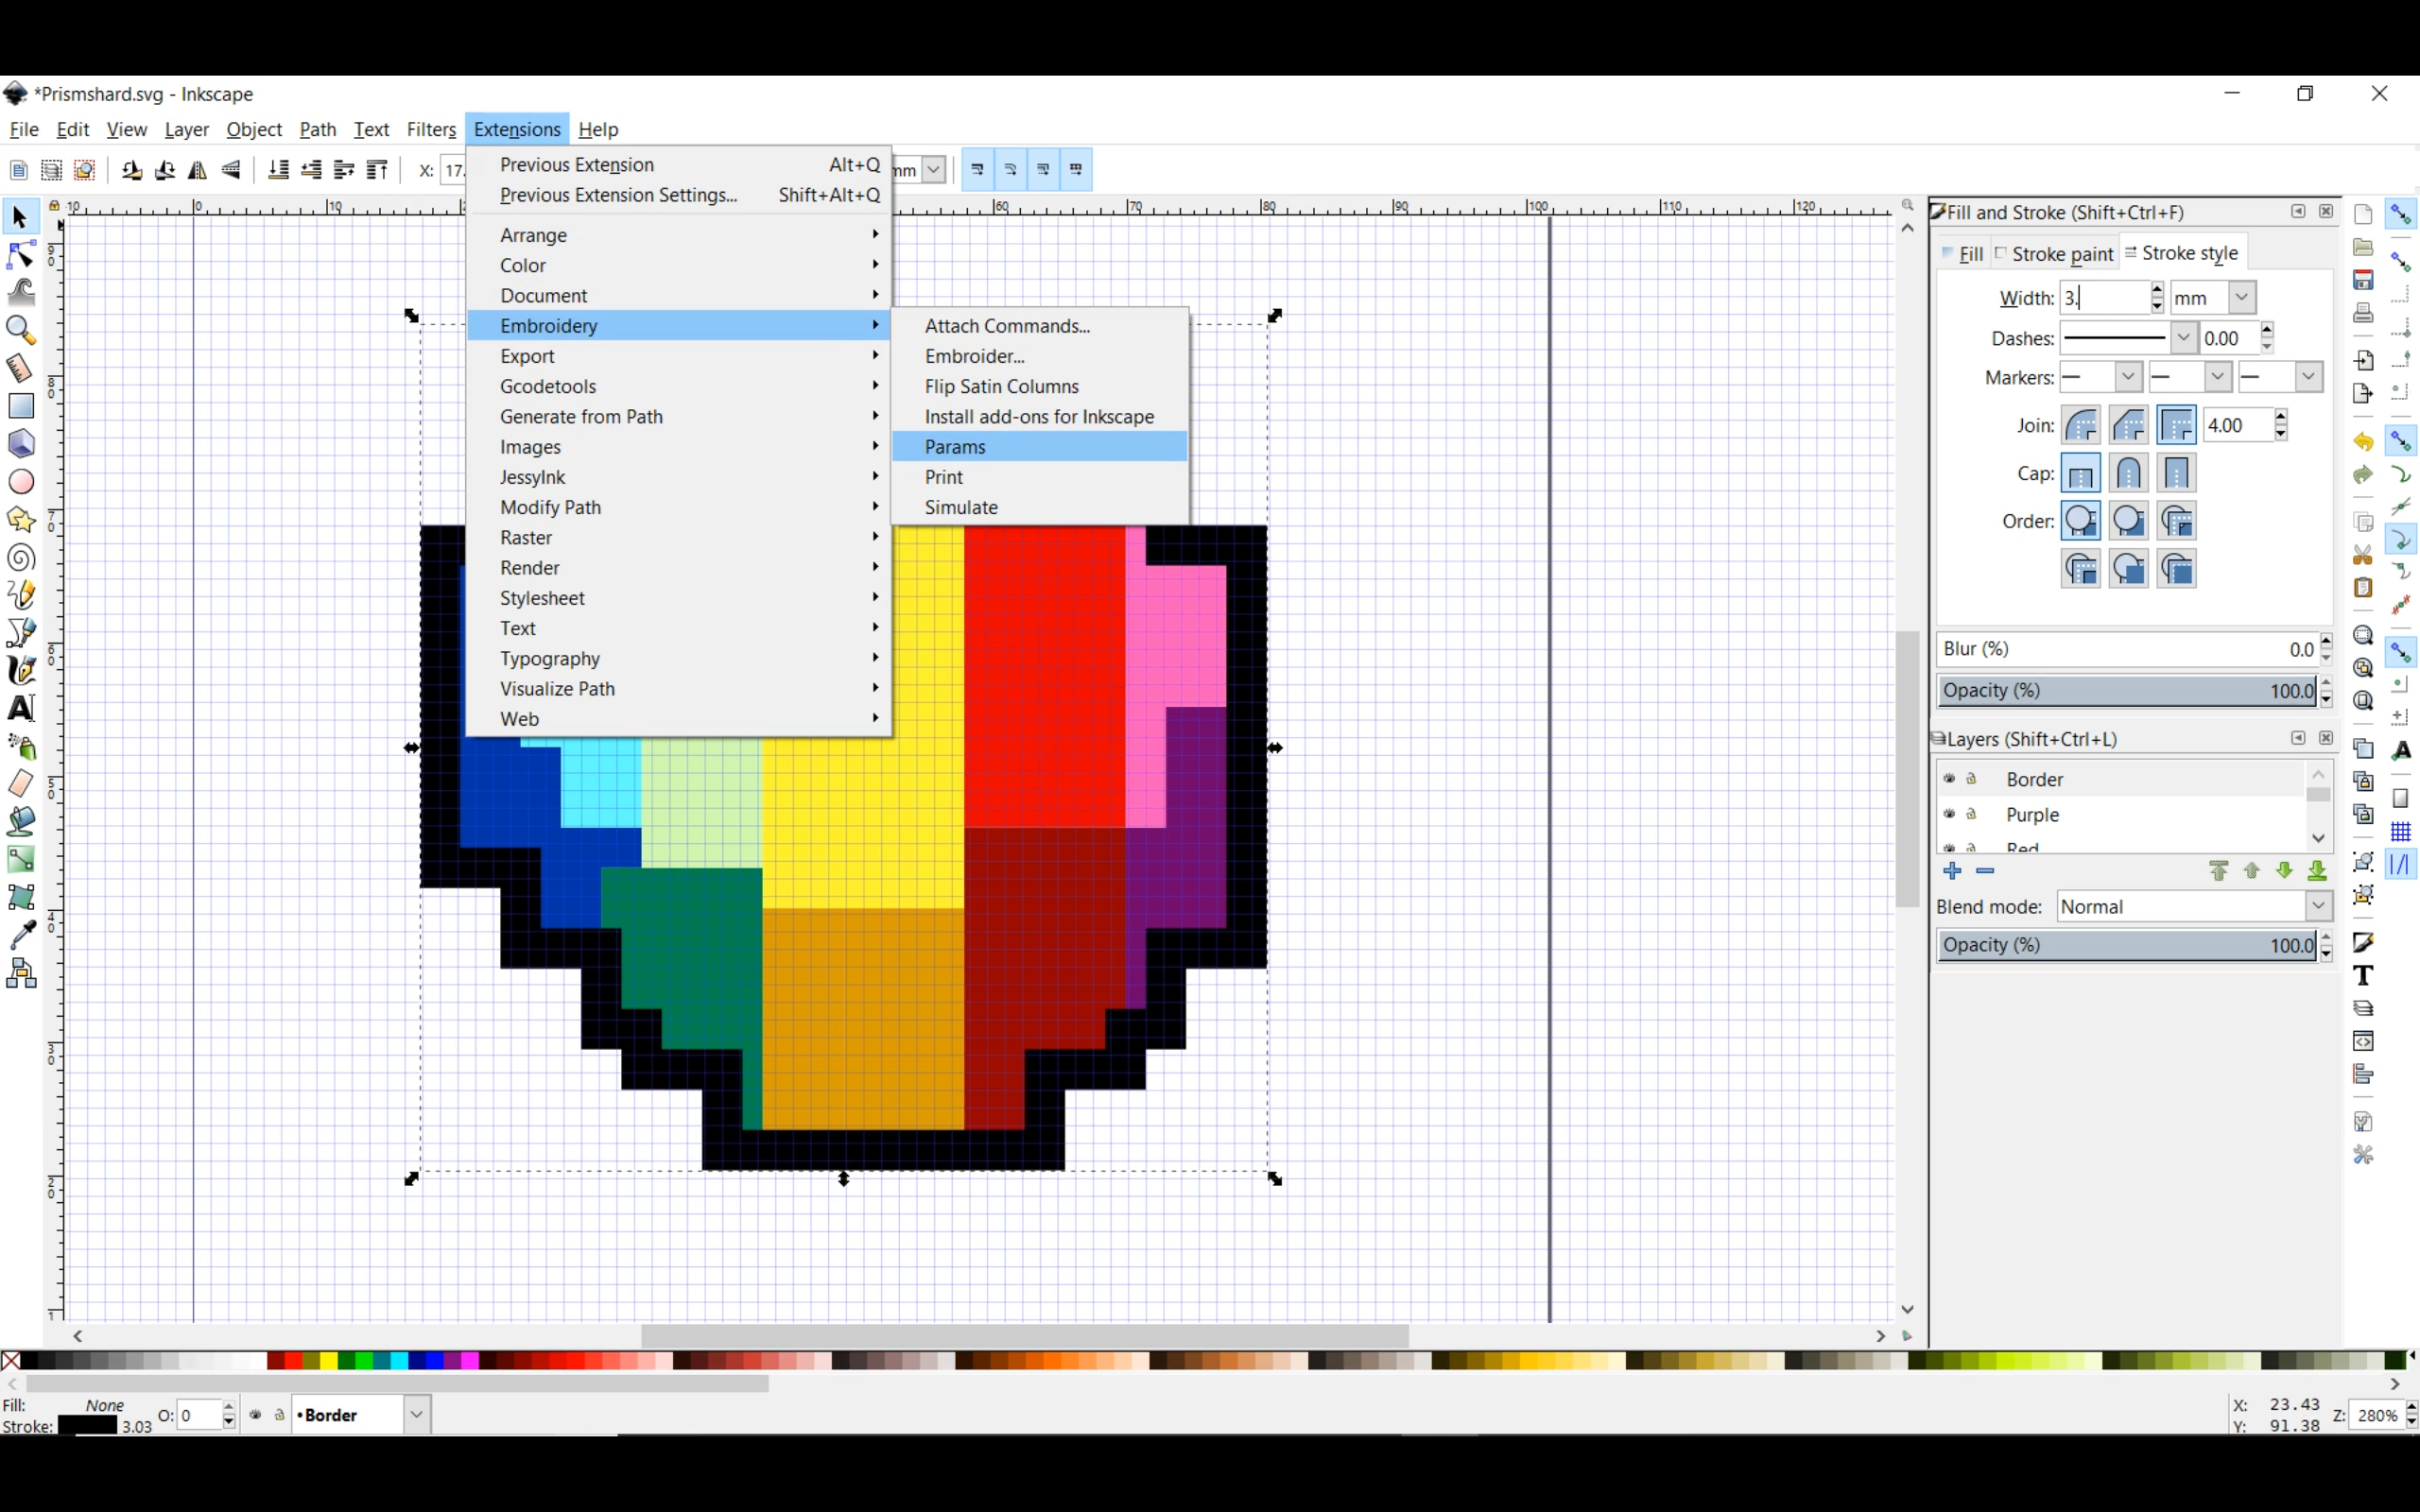
- Select the first color block
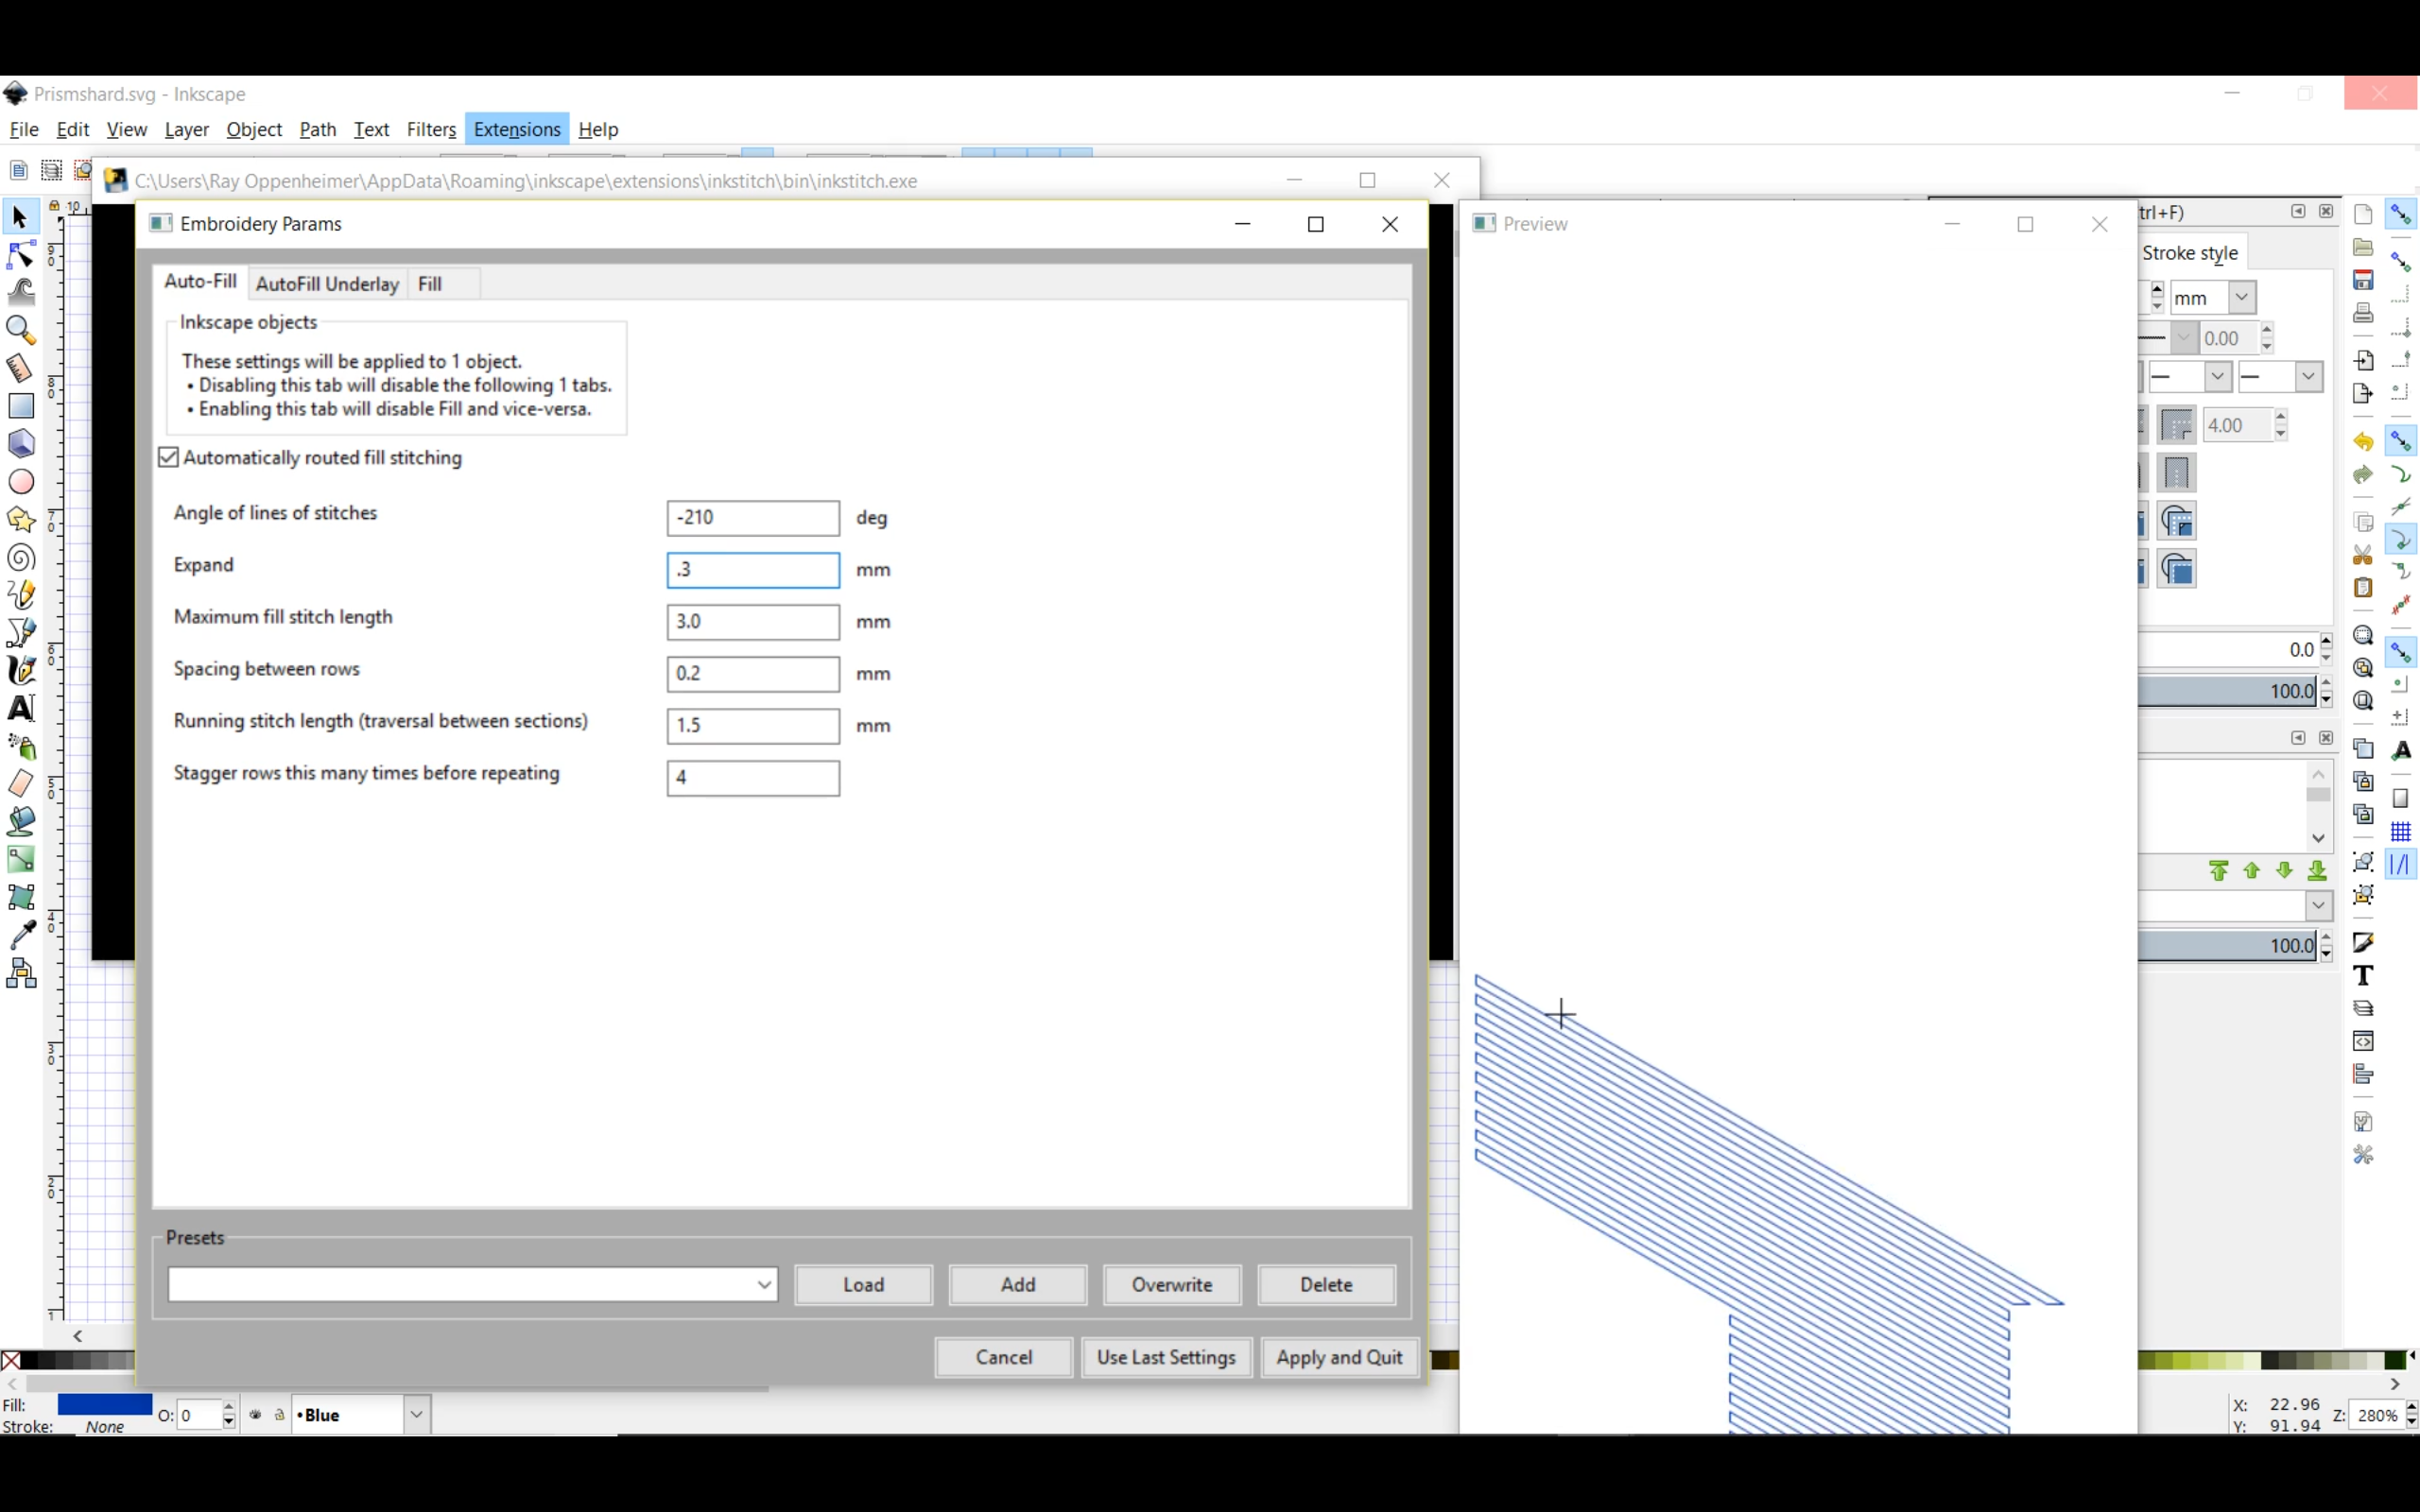
- click on the extensions menu find the Embroidery section and click on Params. At this point the Python scripts will start chugging away and if it was able to figure out your shape a preview will pop up and show you what the default stitches will look like along with another window that will let you change the Auto-Fill settings.
The here are what the settings do
"Angle of lines of stitches" changes the angle of the stitches that are filling your shape. Play around and find one that matches your vision.
"Expand" will make your stitches a set amount bigger than your shape. This is important because as your embroidering machine puts all those stitches in the fabric it is going to get stretched and pulled in various directions. My first few attempts I couldn't figure out why I was having gaps between shapes. I found that a .3mm expand setting works well for my machine. Your machine might vary so expect to have to dial this in.
"Maximum Fill Stitch Length" I have just always left it at 3mm feel free to play around.
"Spacing between rows" I was seeing bits of my fabric through my fill so I made this space smaller the setting that worked for me is .2 mm.
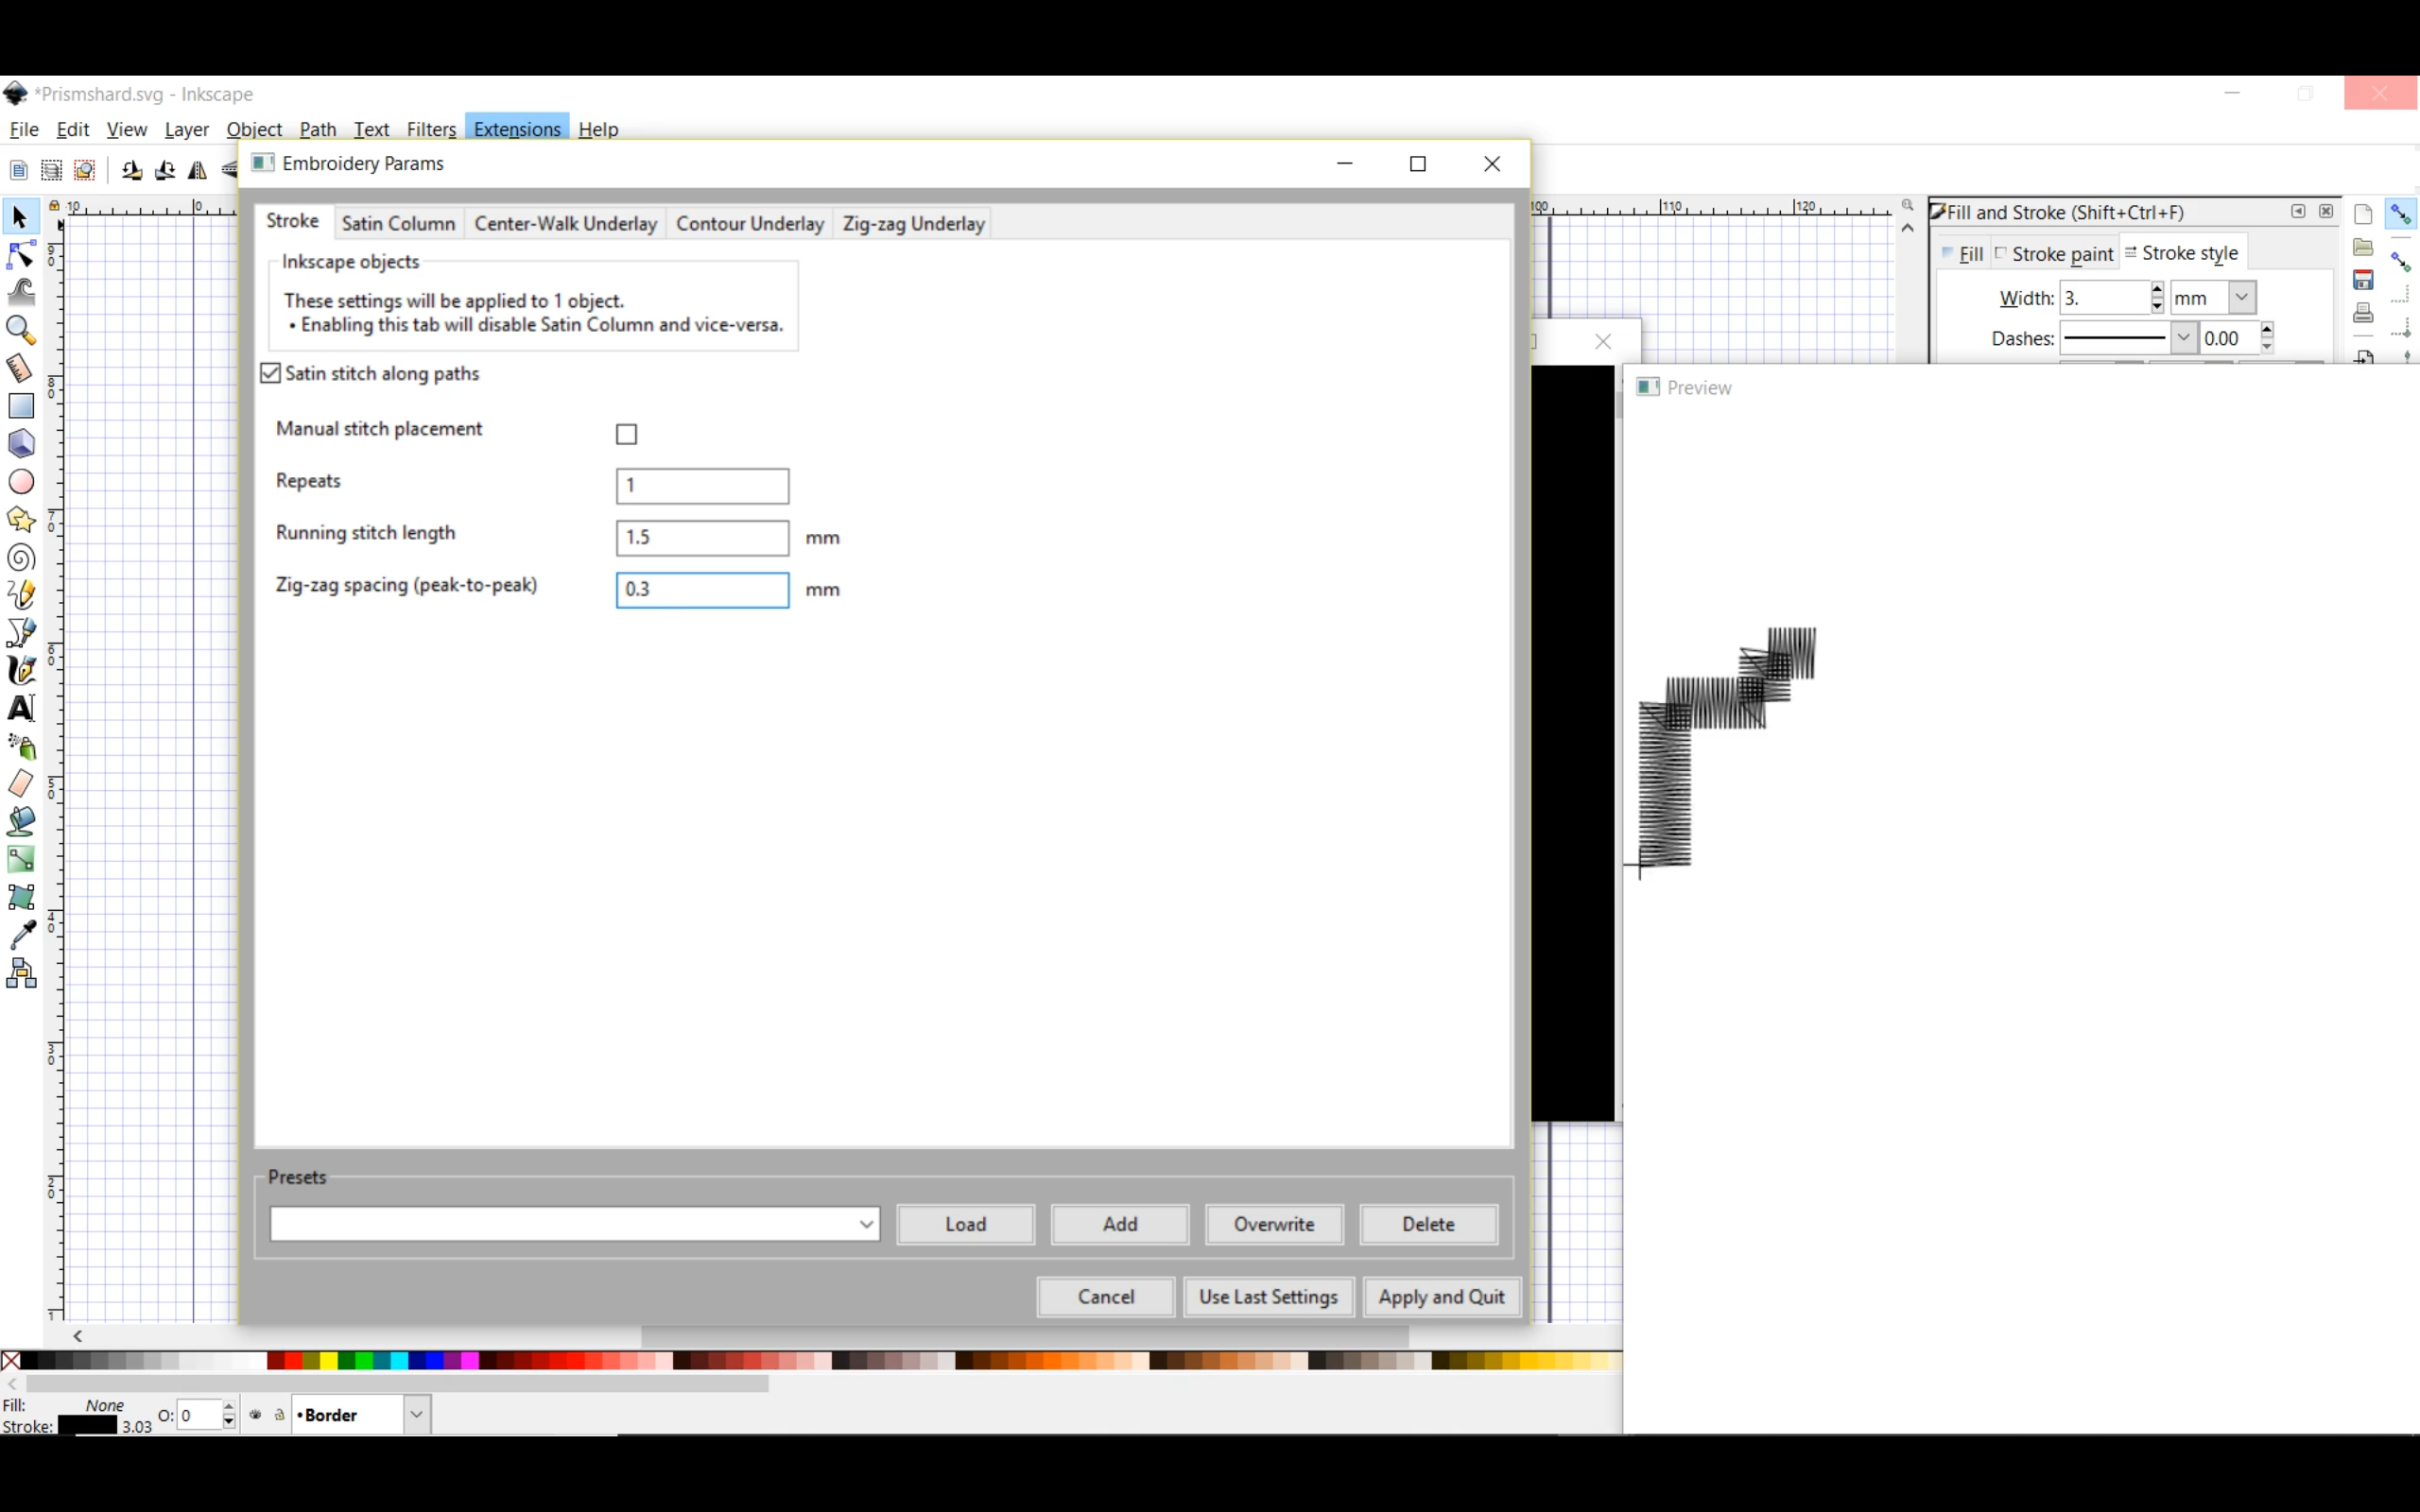
I left the next two settings at their defaults and have been happy with the results. You may have to play around to find the settings that work best for your embroidery machine. Once you find settings you like you can just select "use last settings" and to get the rest of your color blocks ready for stitching once you are done with that we can select the borders and configure their "Params" in the same place. Only this time because we have lines there will be a Stroke tab. The only setting I changed for the borders is the "zig zag spacing" I changed it to .3mm from .4mm which just gives it a tighter stitch for the border.
Now that we have that done we are ready to create the file for our CNC machine.
Digitizing Your Image: Exporting Your Stitches
.png)
.png)
.png)
.png)
We are almost to the point where we can start having our machine do our bidding. All that is left is to export all our hard work in a format the machine can understand. This varies based on manufacturer so look up your machines file format.
Let's get going.
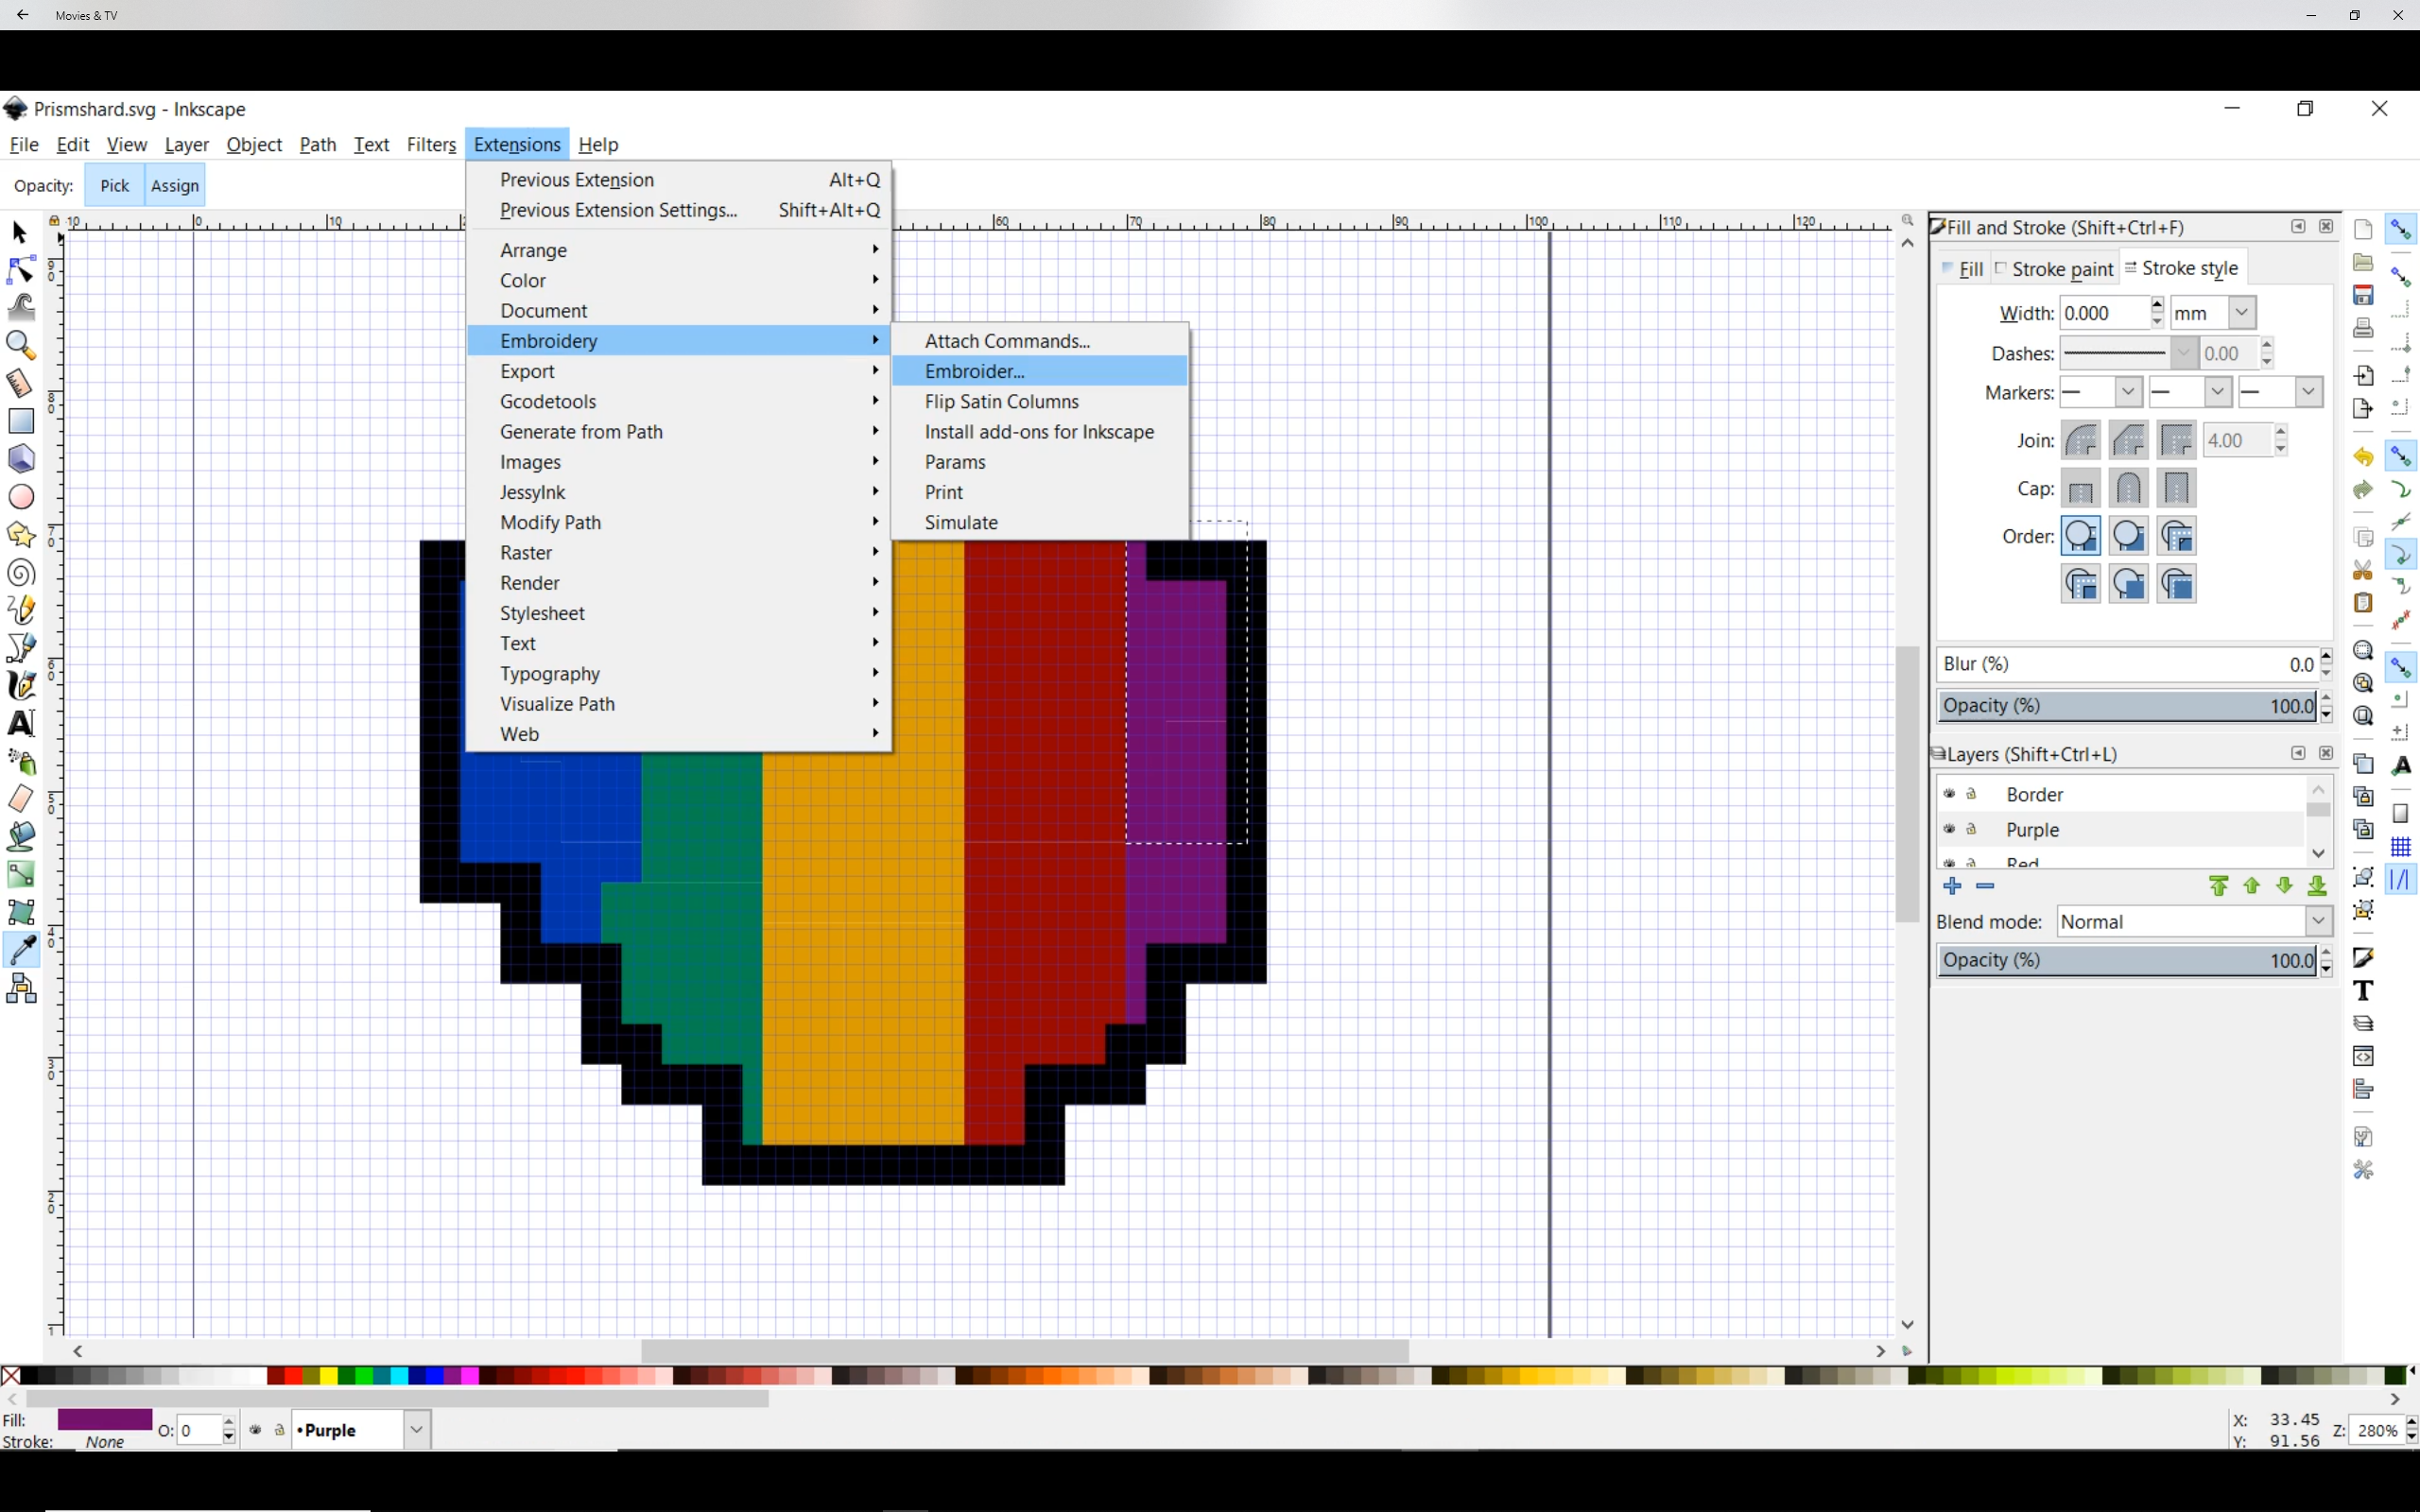
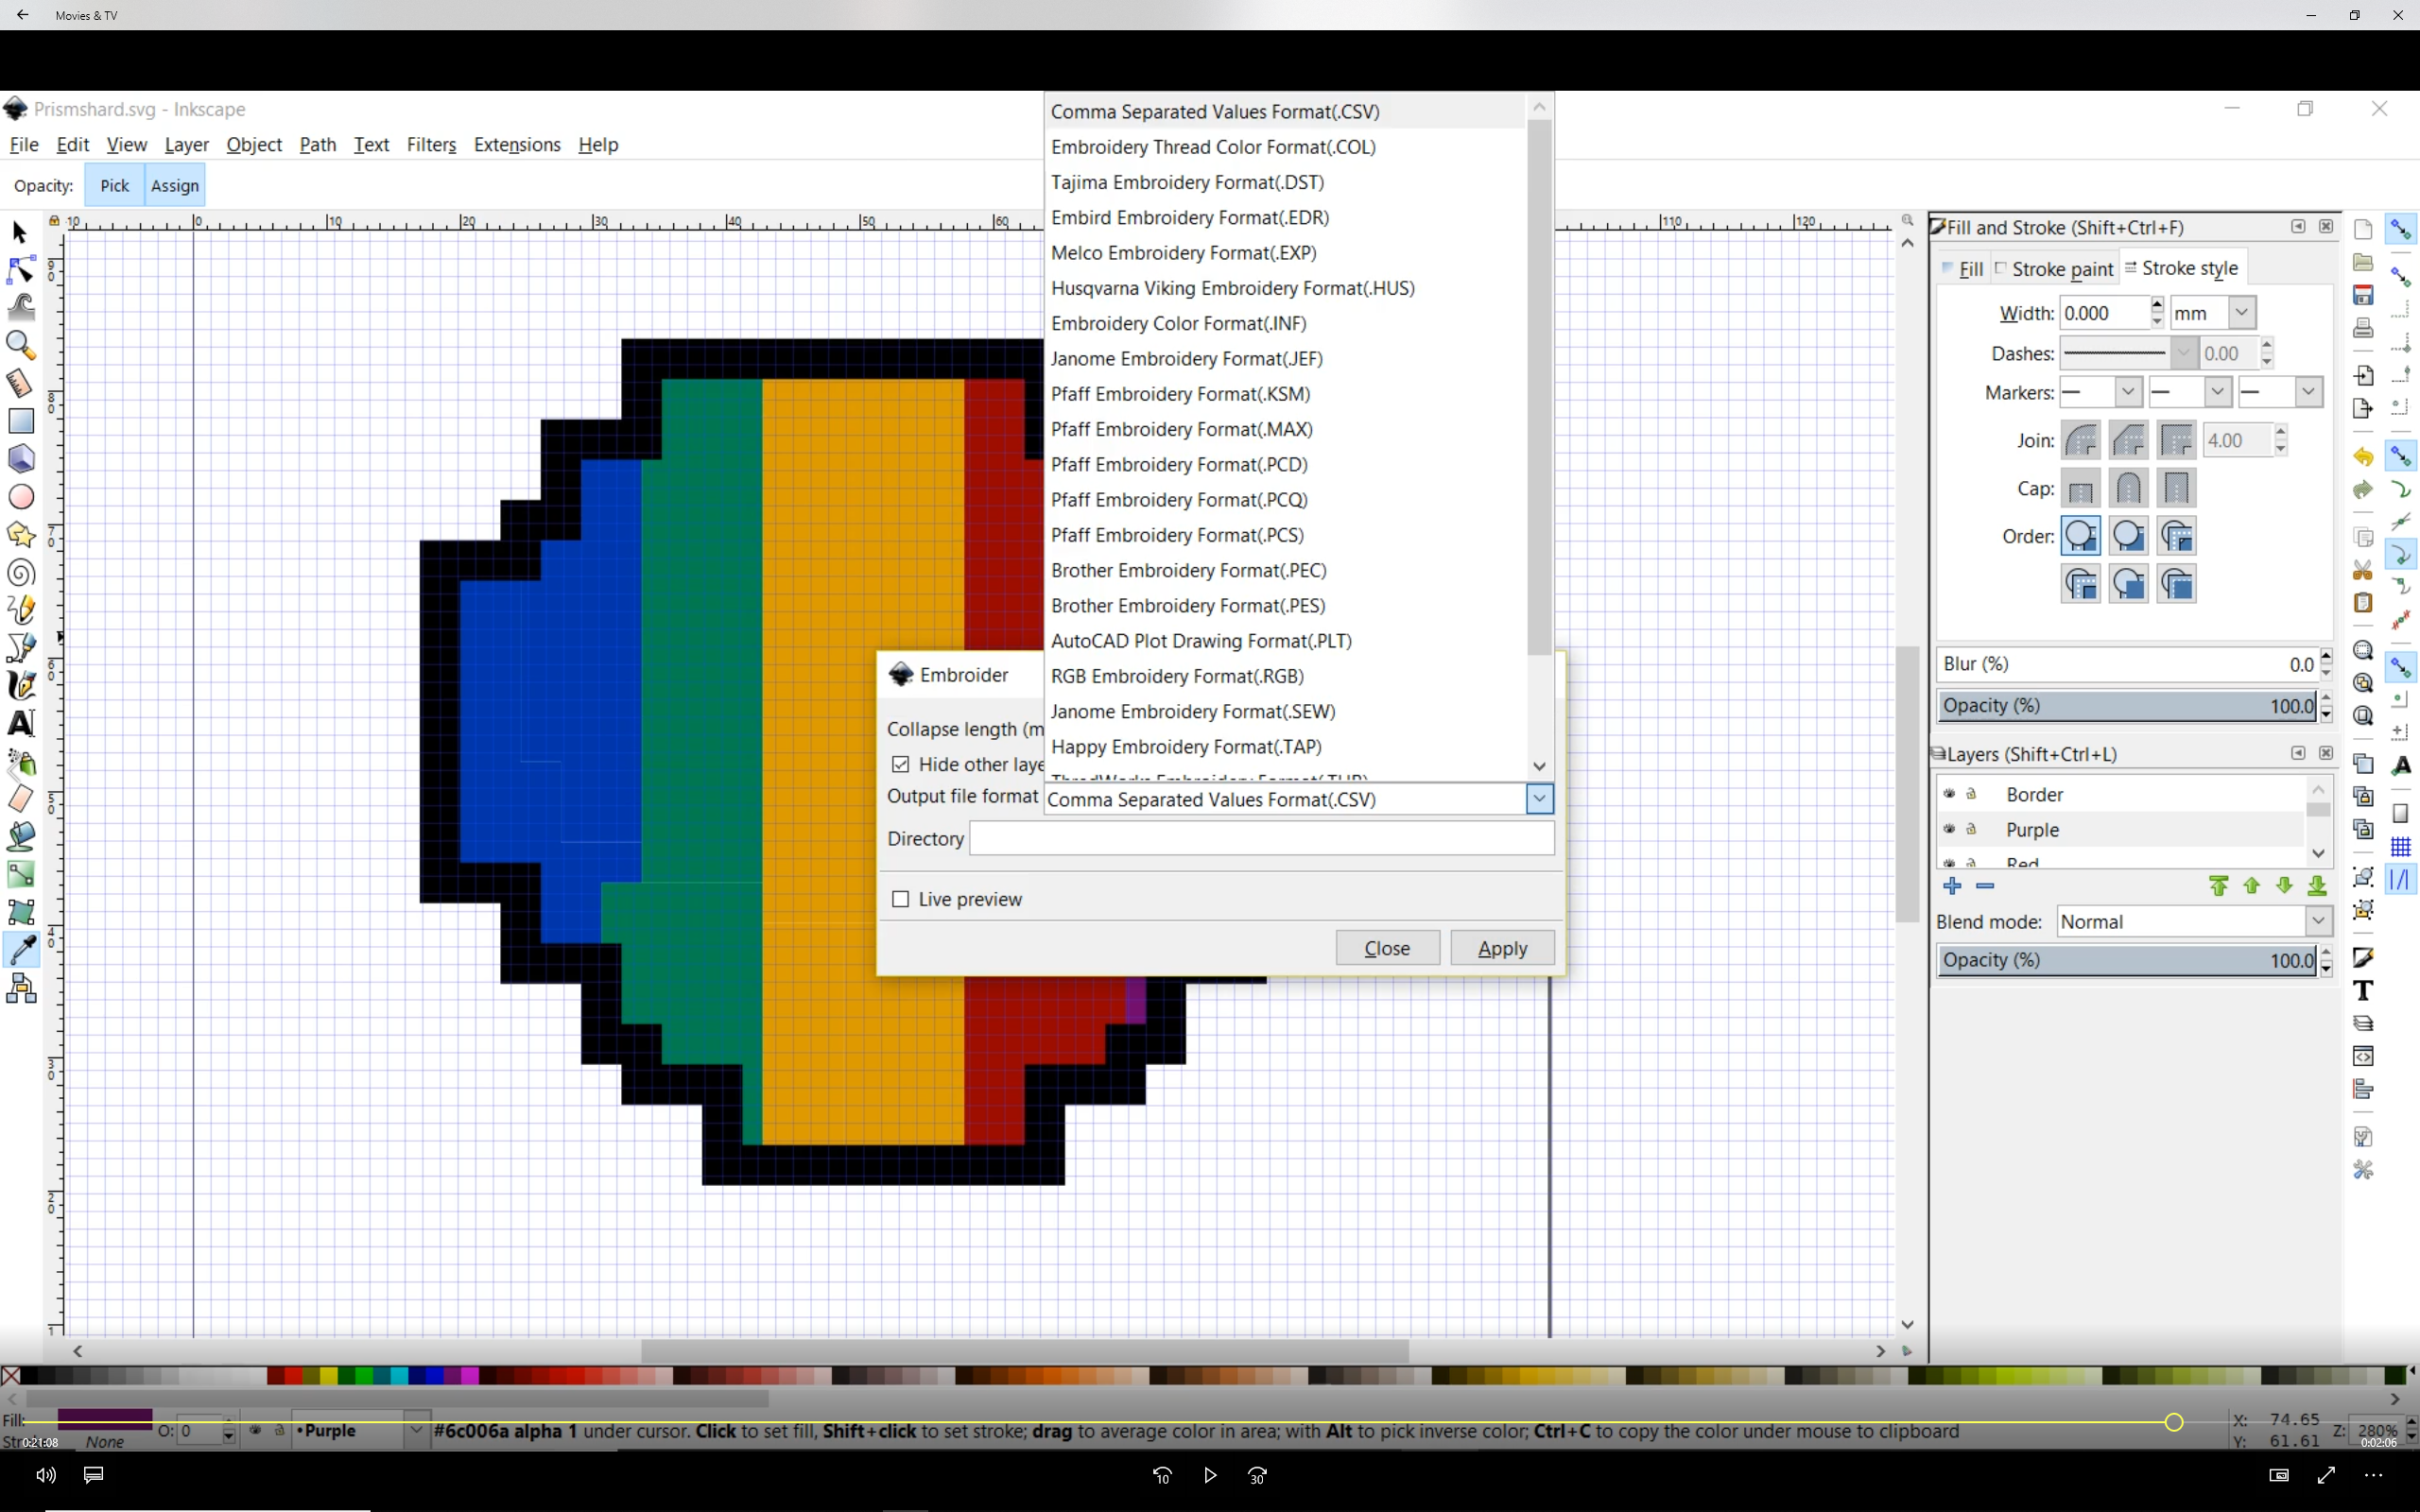
- Click on extensions, embroidery, embroider
- A window will pop open select the type of file you need for your machine. I use a Brother so I am .pes
- Once you have your file type selected you need to type in what directory you want your file to end up in. Unfortunately there is no built in browser so I just copy and paste from windows explorer.
- Finally Click "Apply".
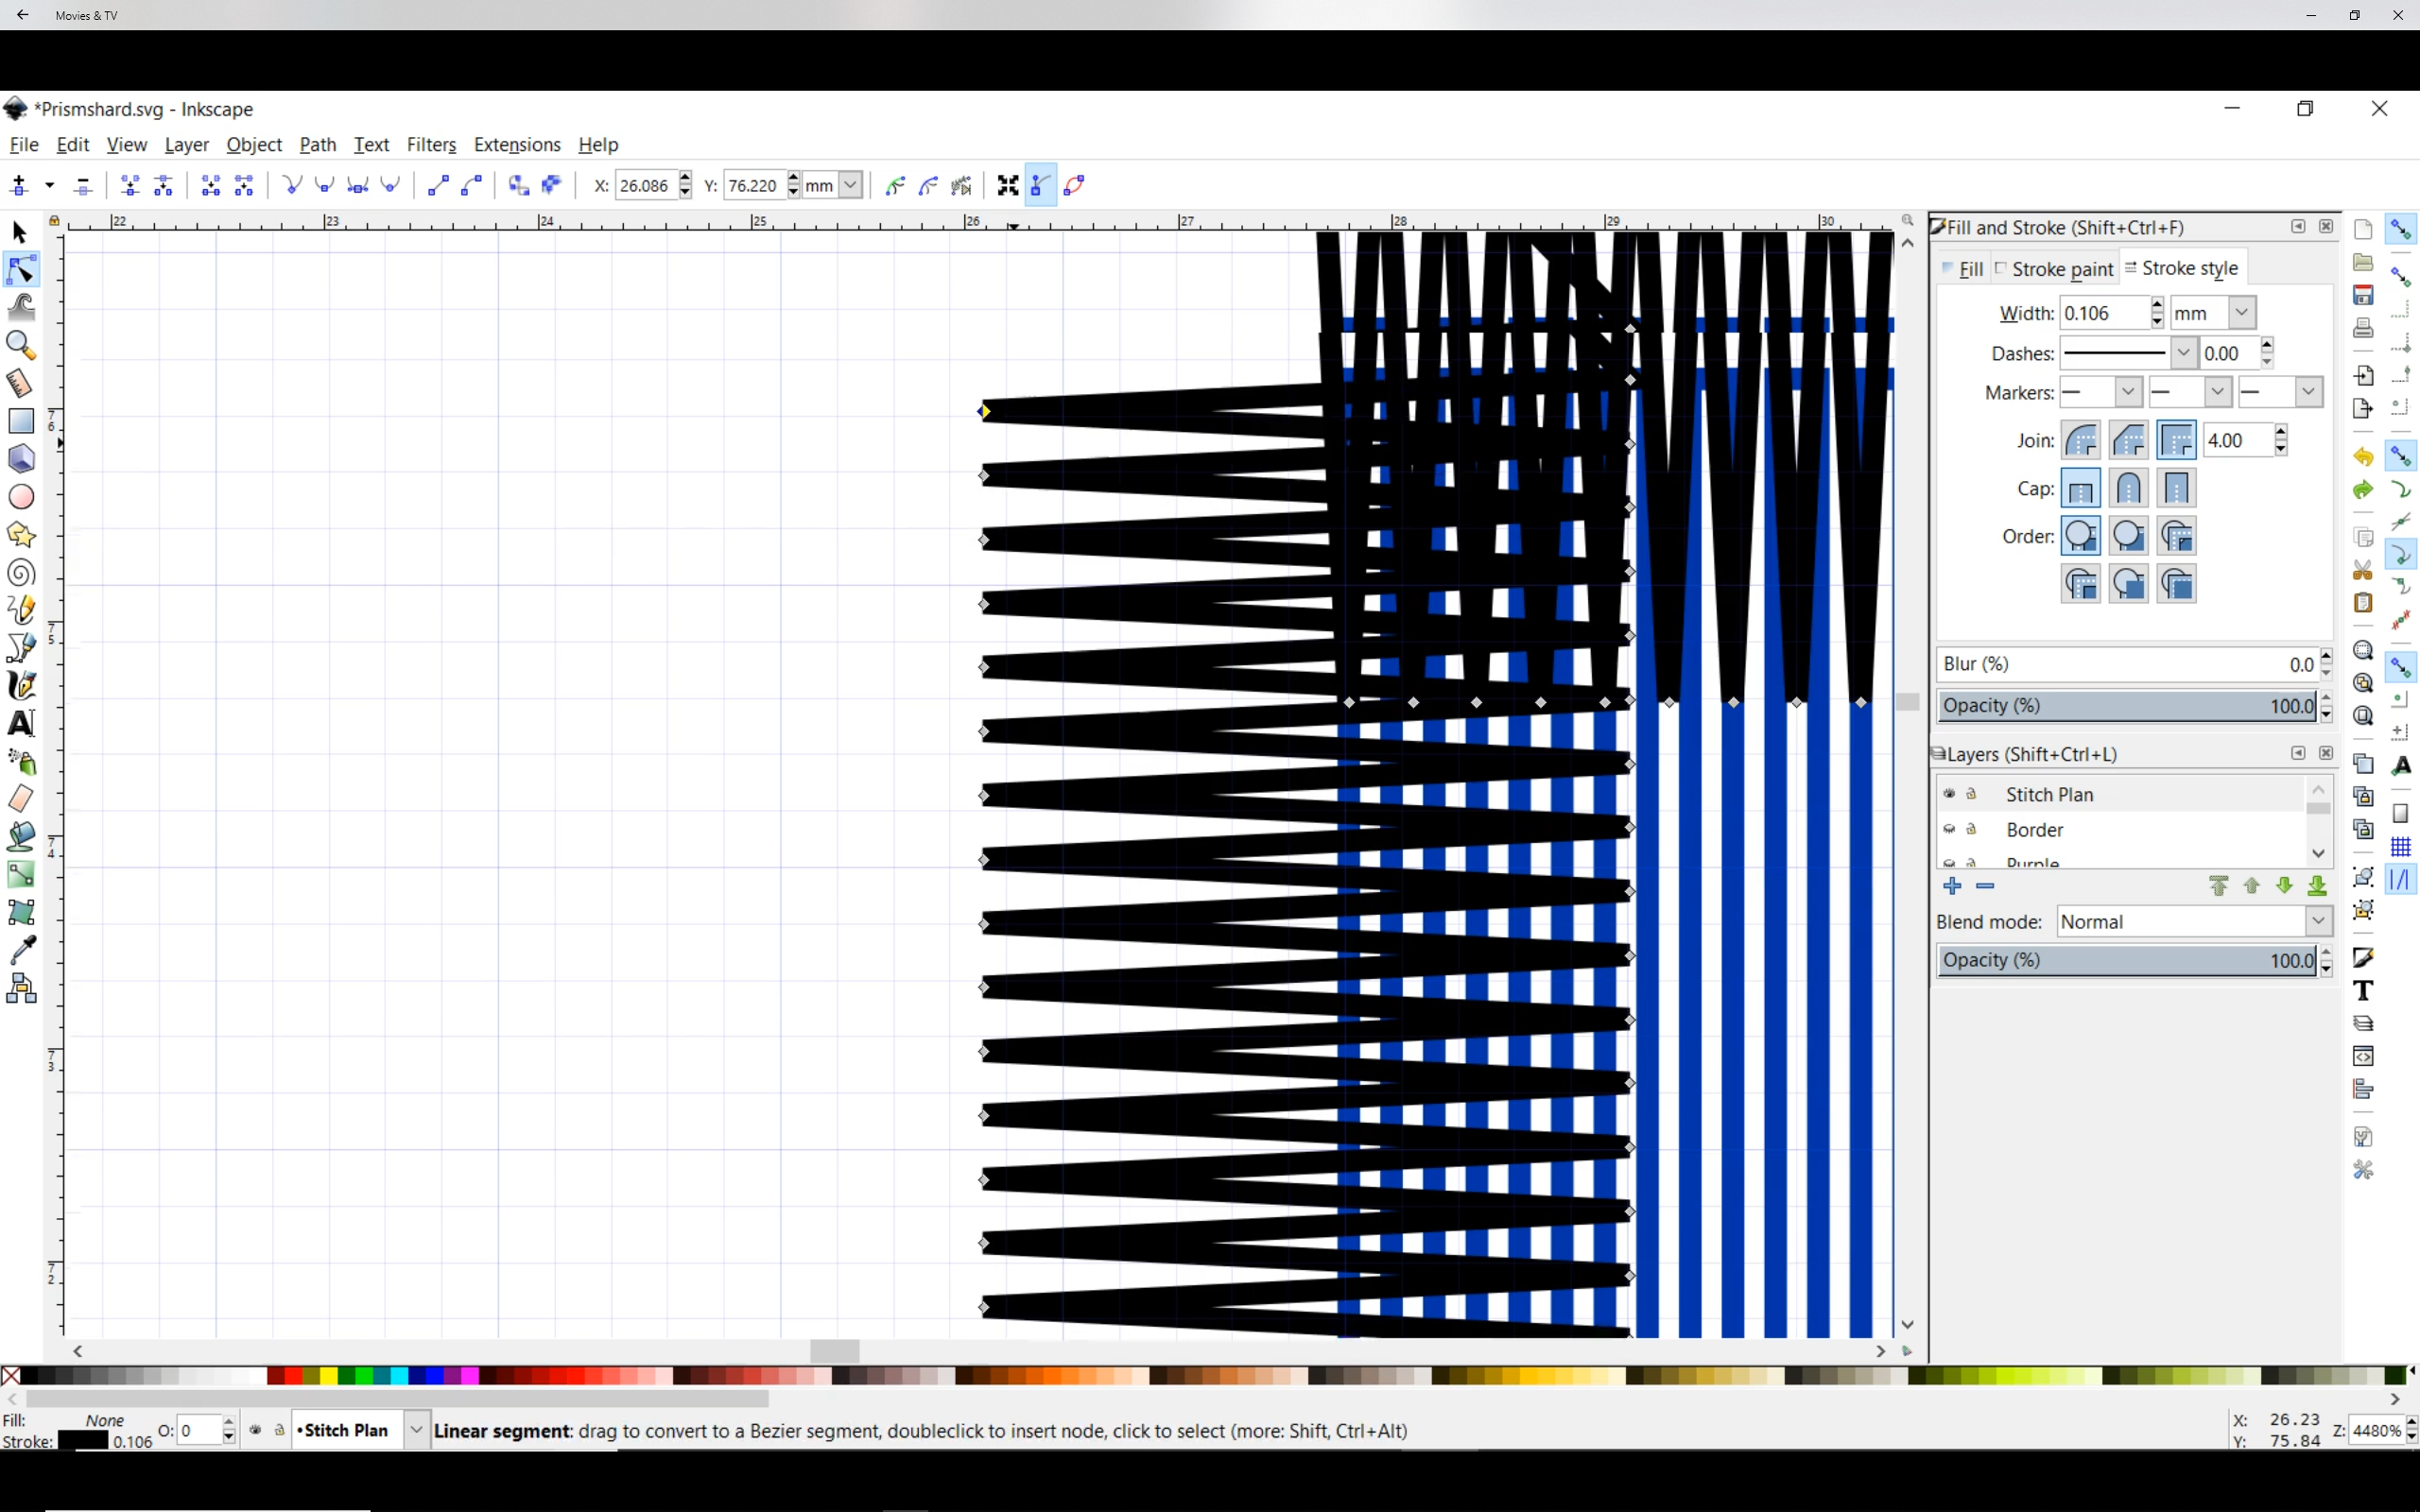
After you Click apply two things happen you now have a file with the same name as your inkscape svg with your chosen extension. The second is you will notice you have a new layer in your inkscape file. The new layer is your stitch plan. All your other layers are now made invisible but can be toggled in the layer area of inkscape. Using the Node select tool you can tweak your design from here if you feel adventurous. Well at this point you should have a file and be ready to go to your machine. So next step embroidering.
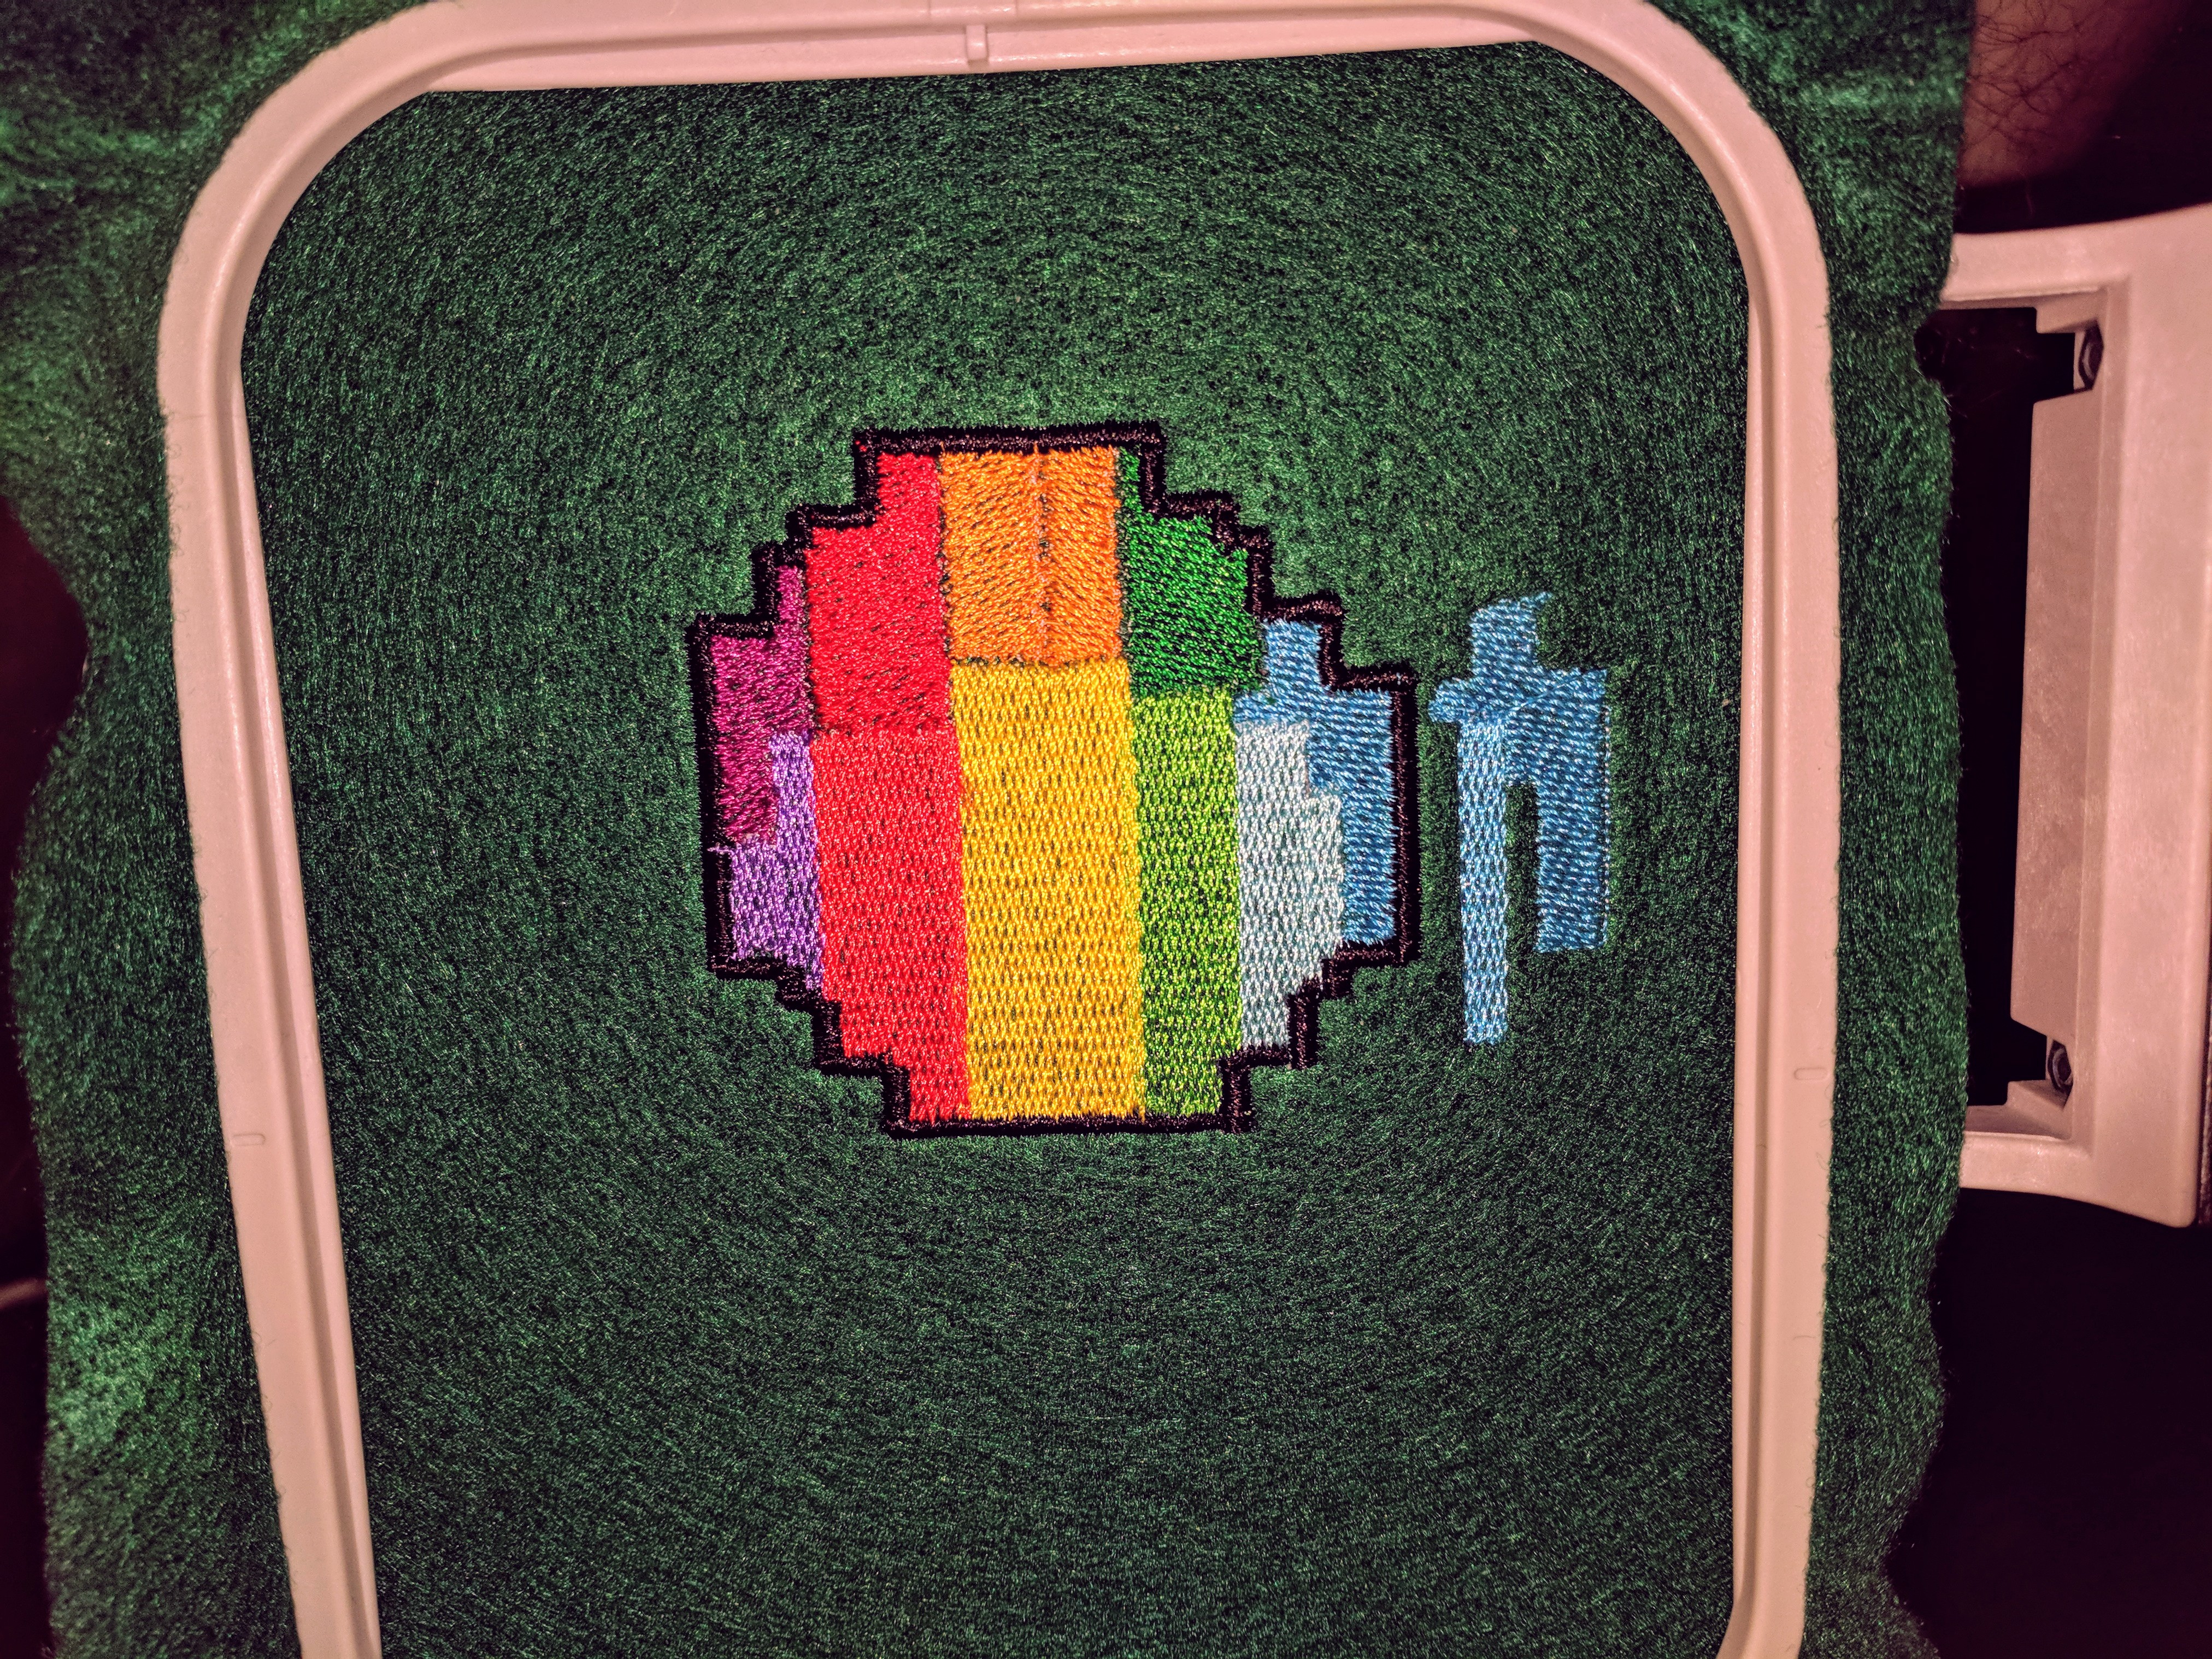
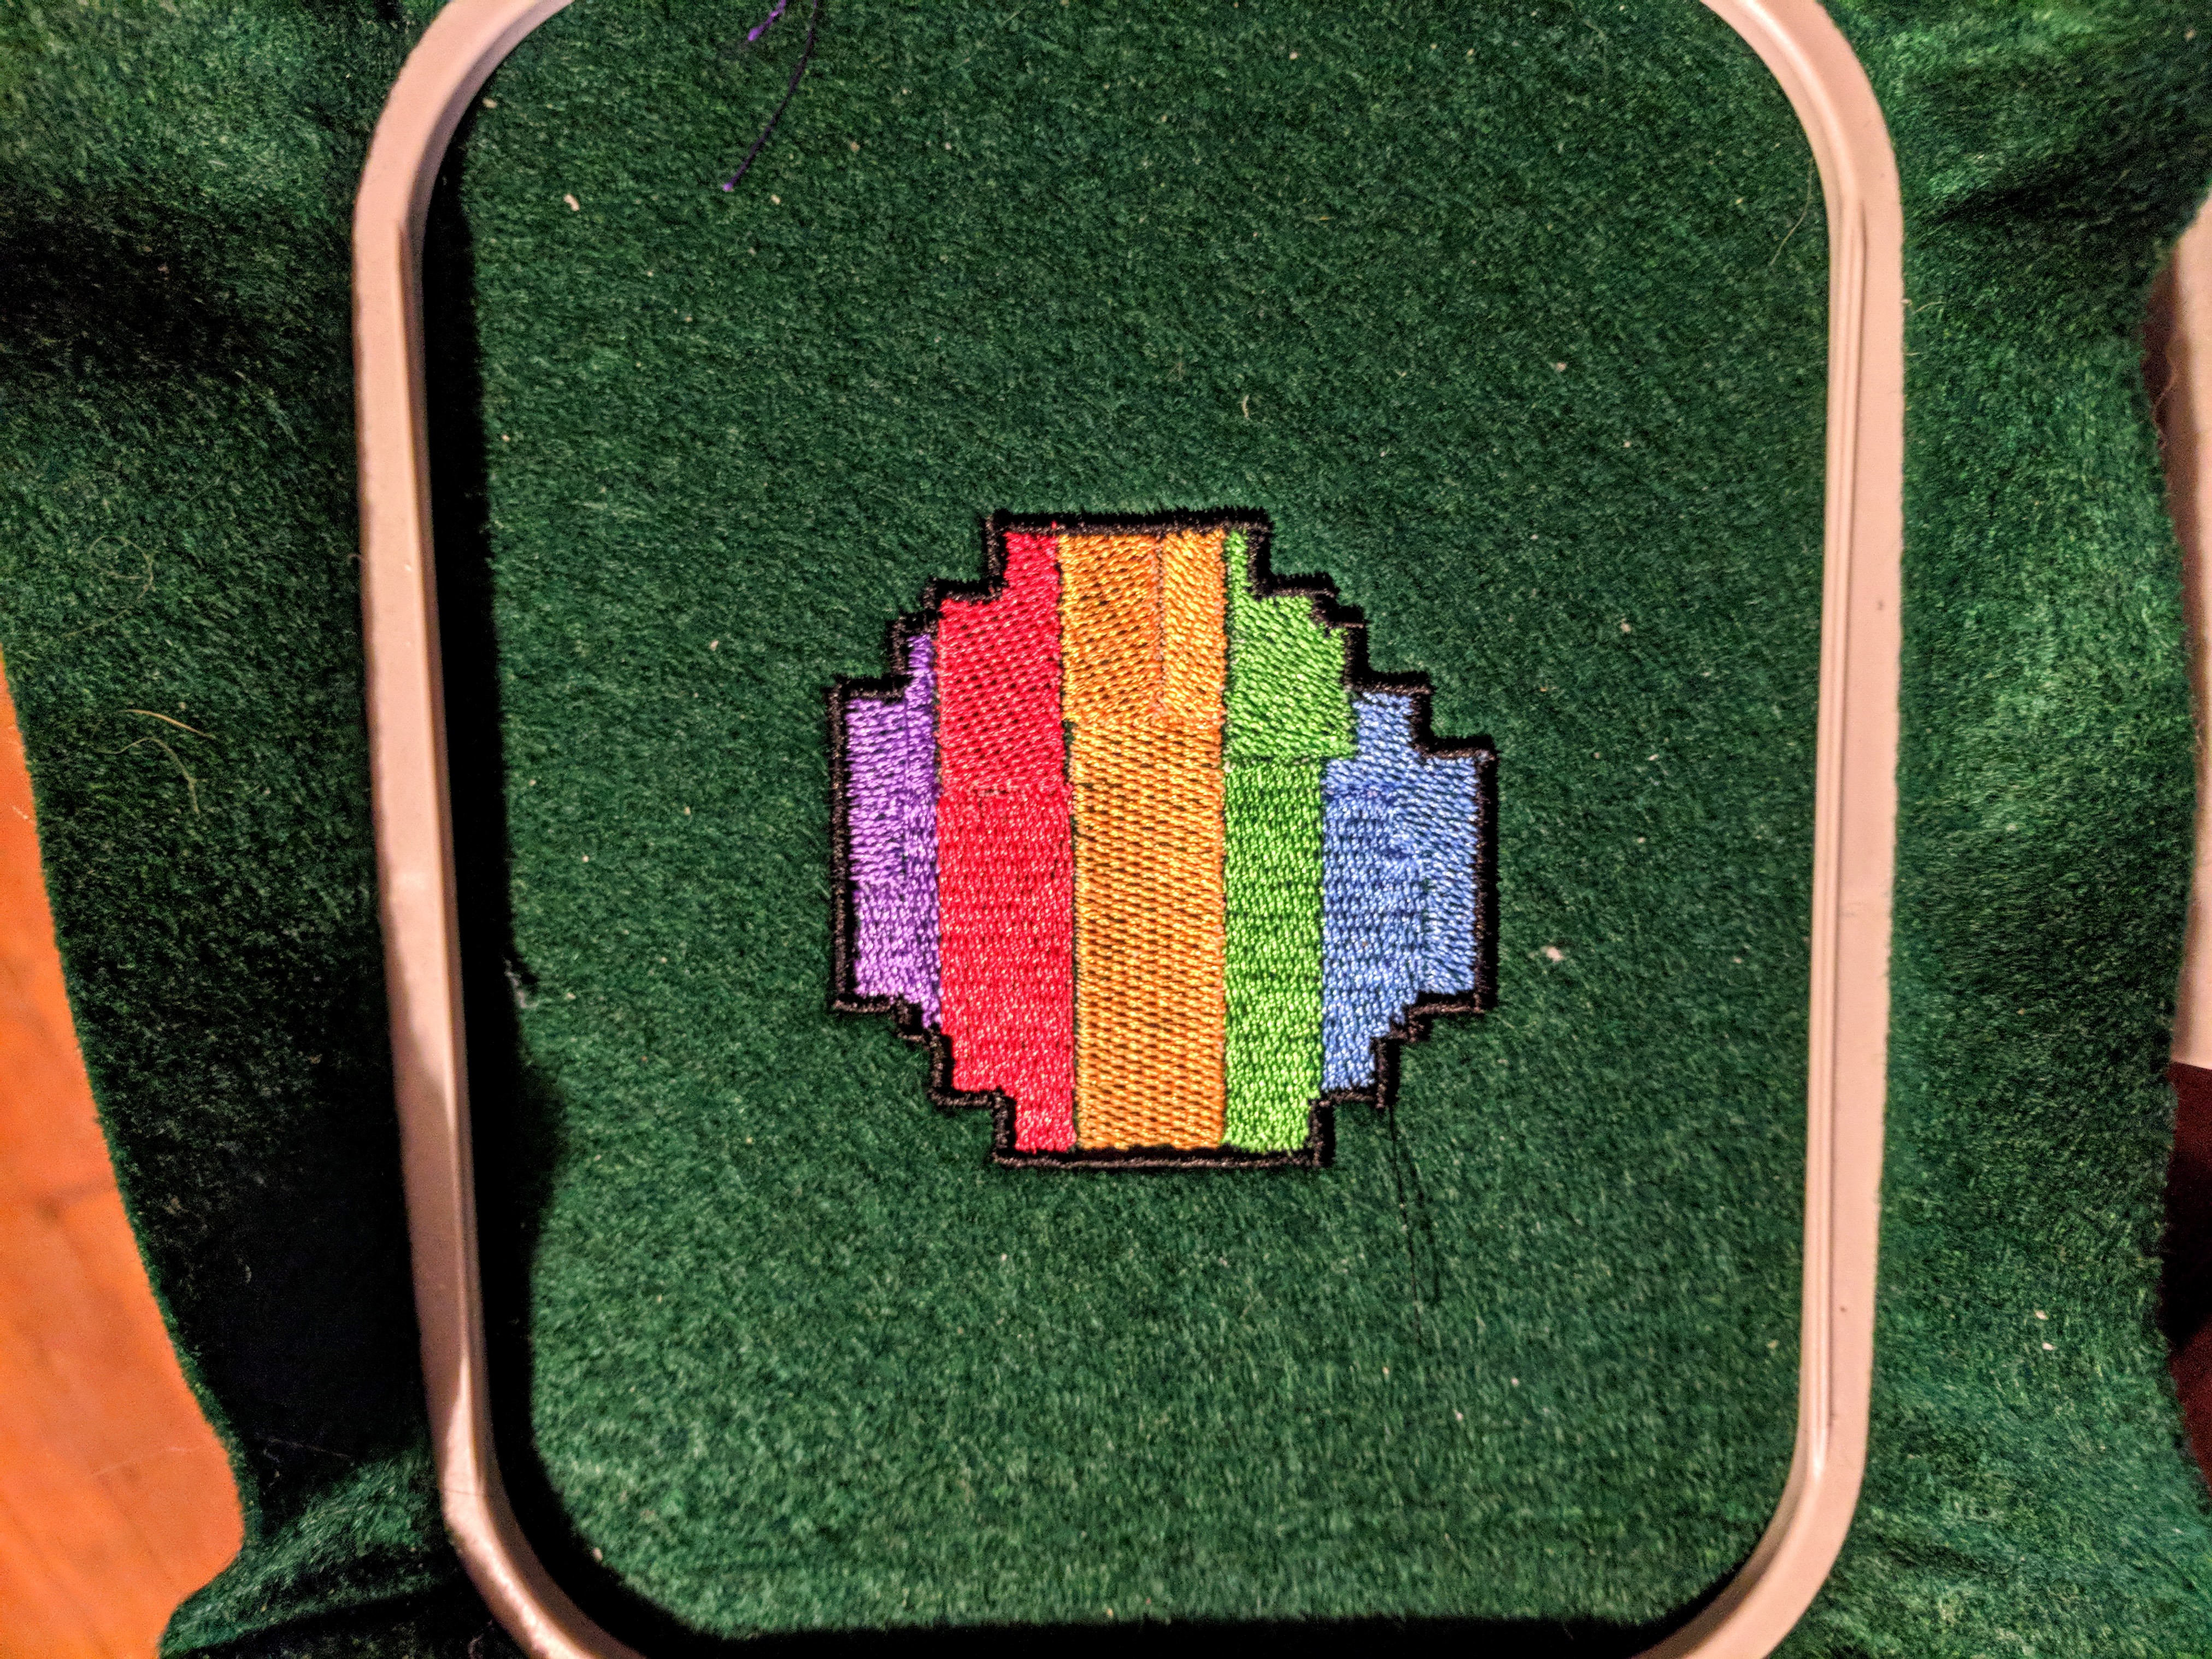
Embroidering
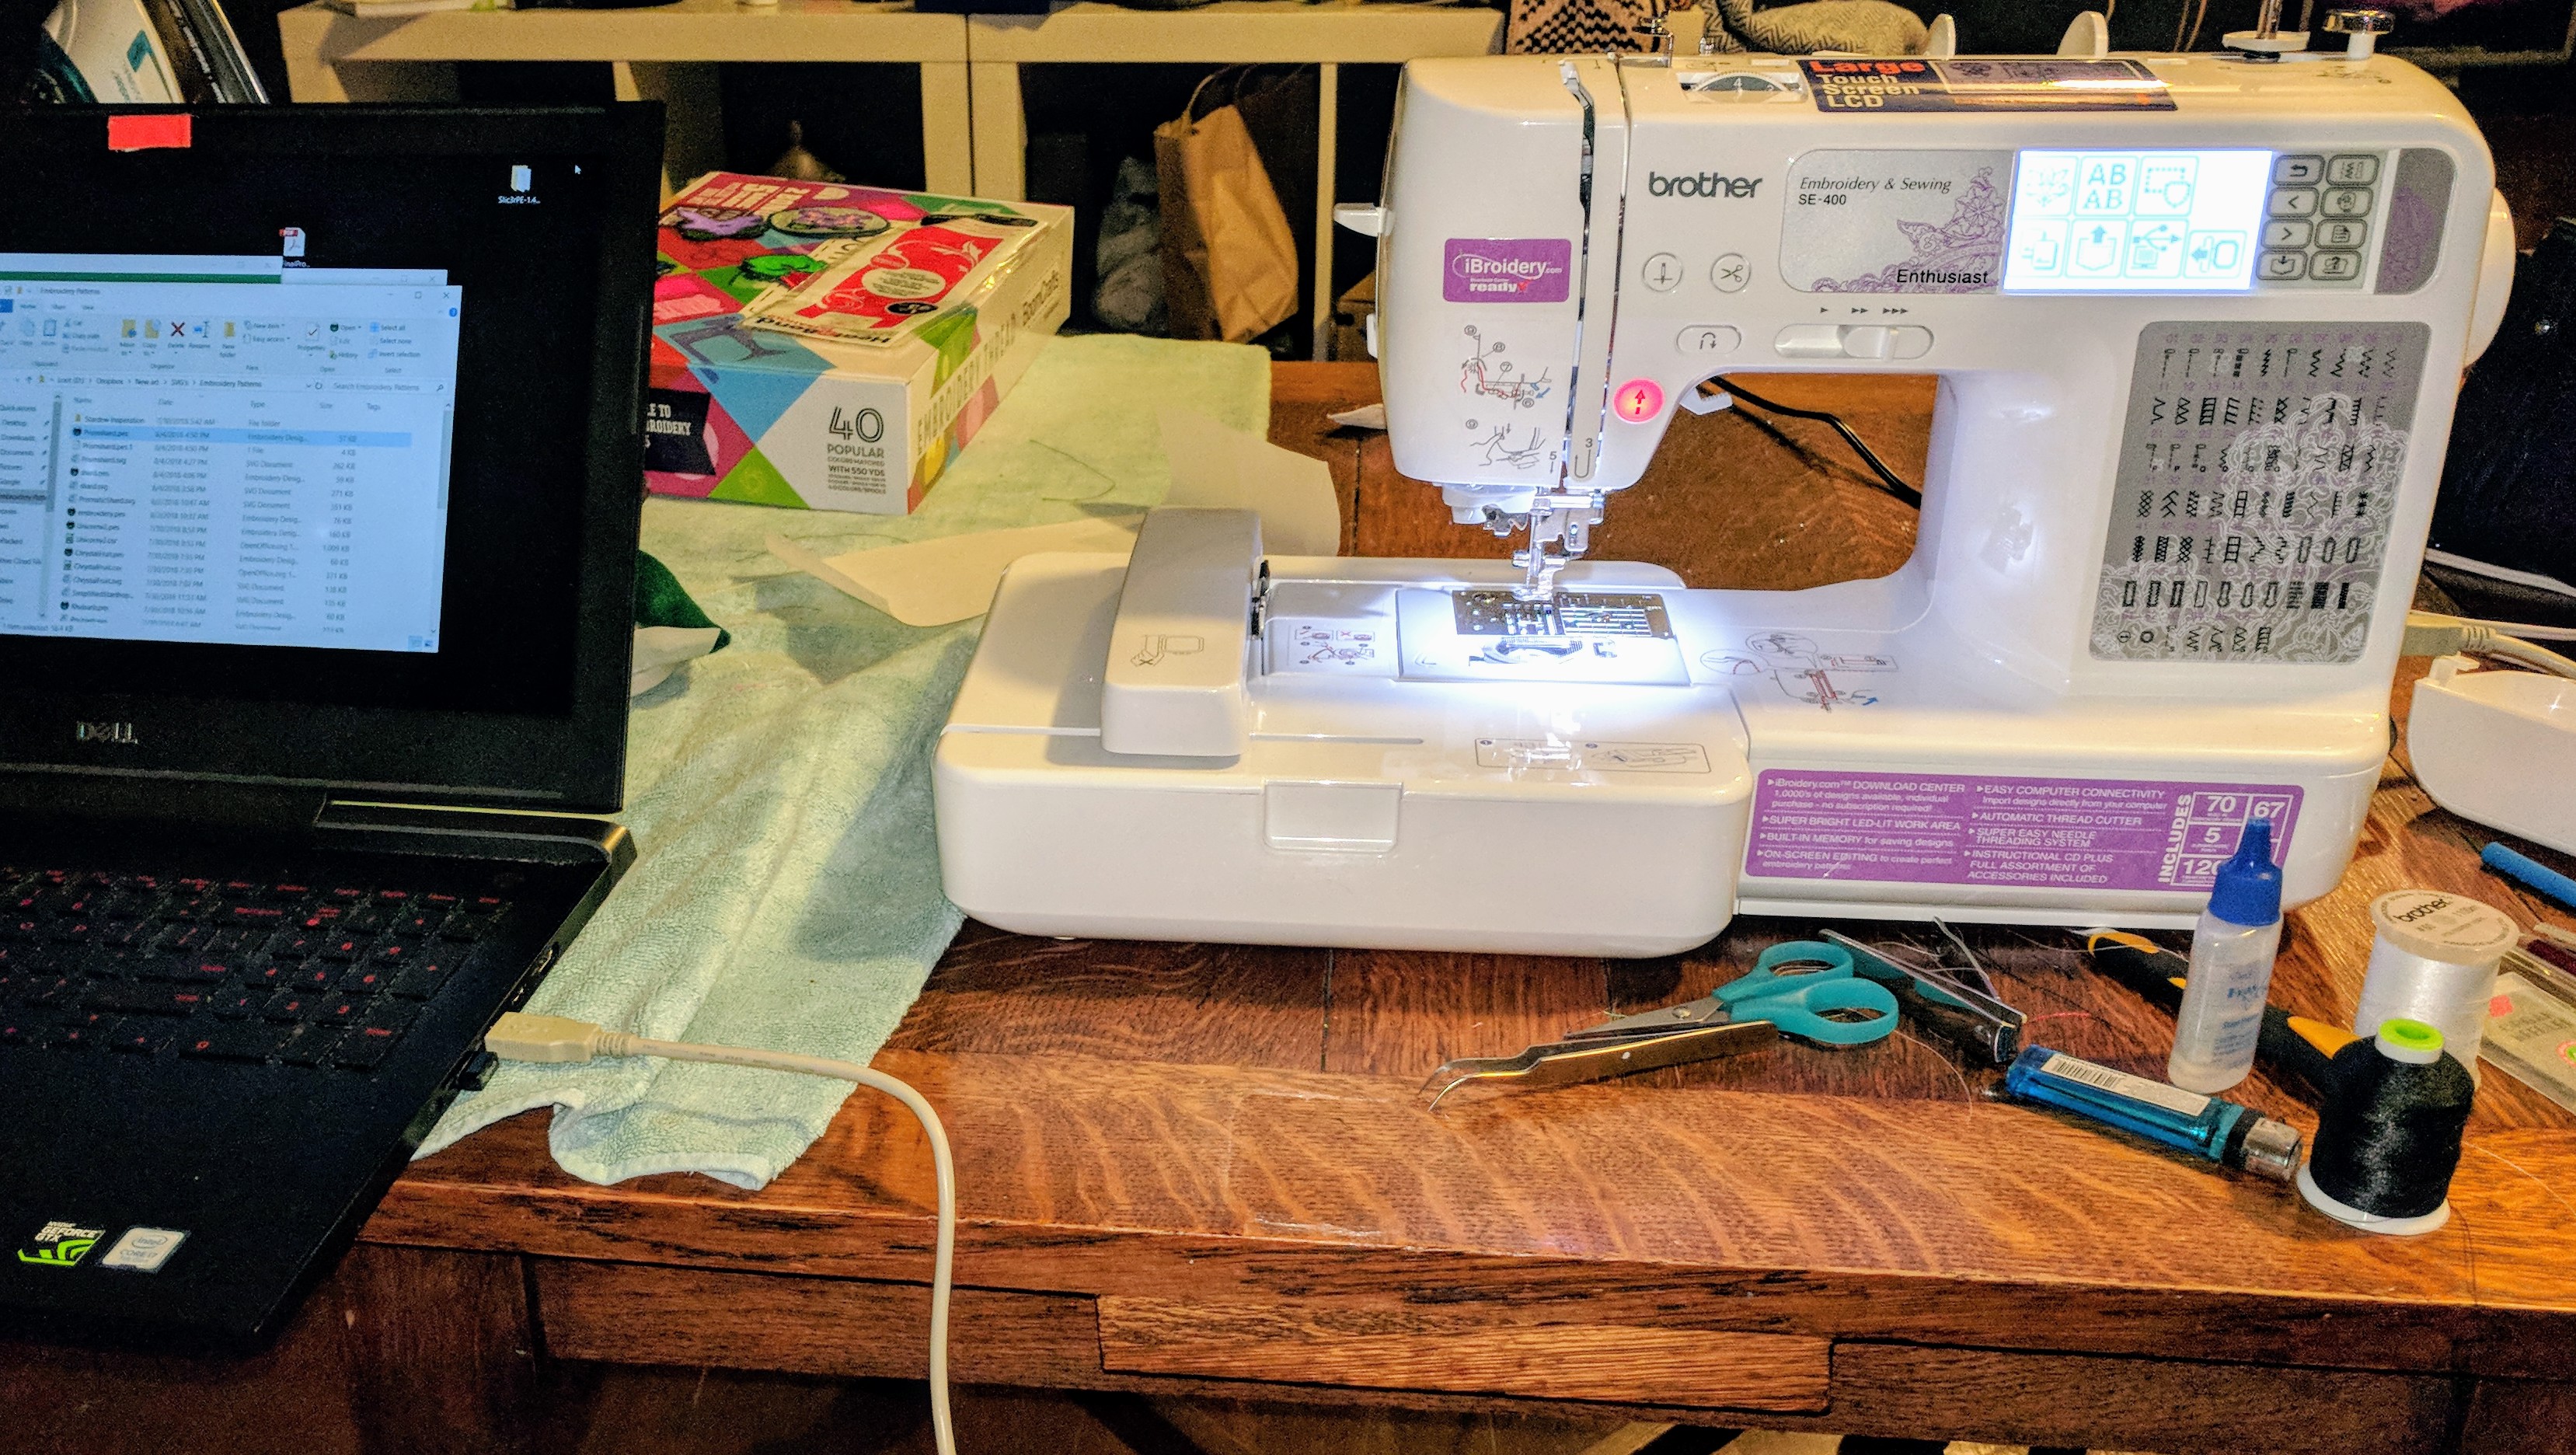
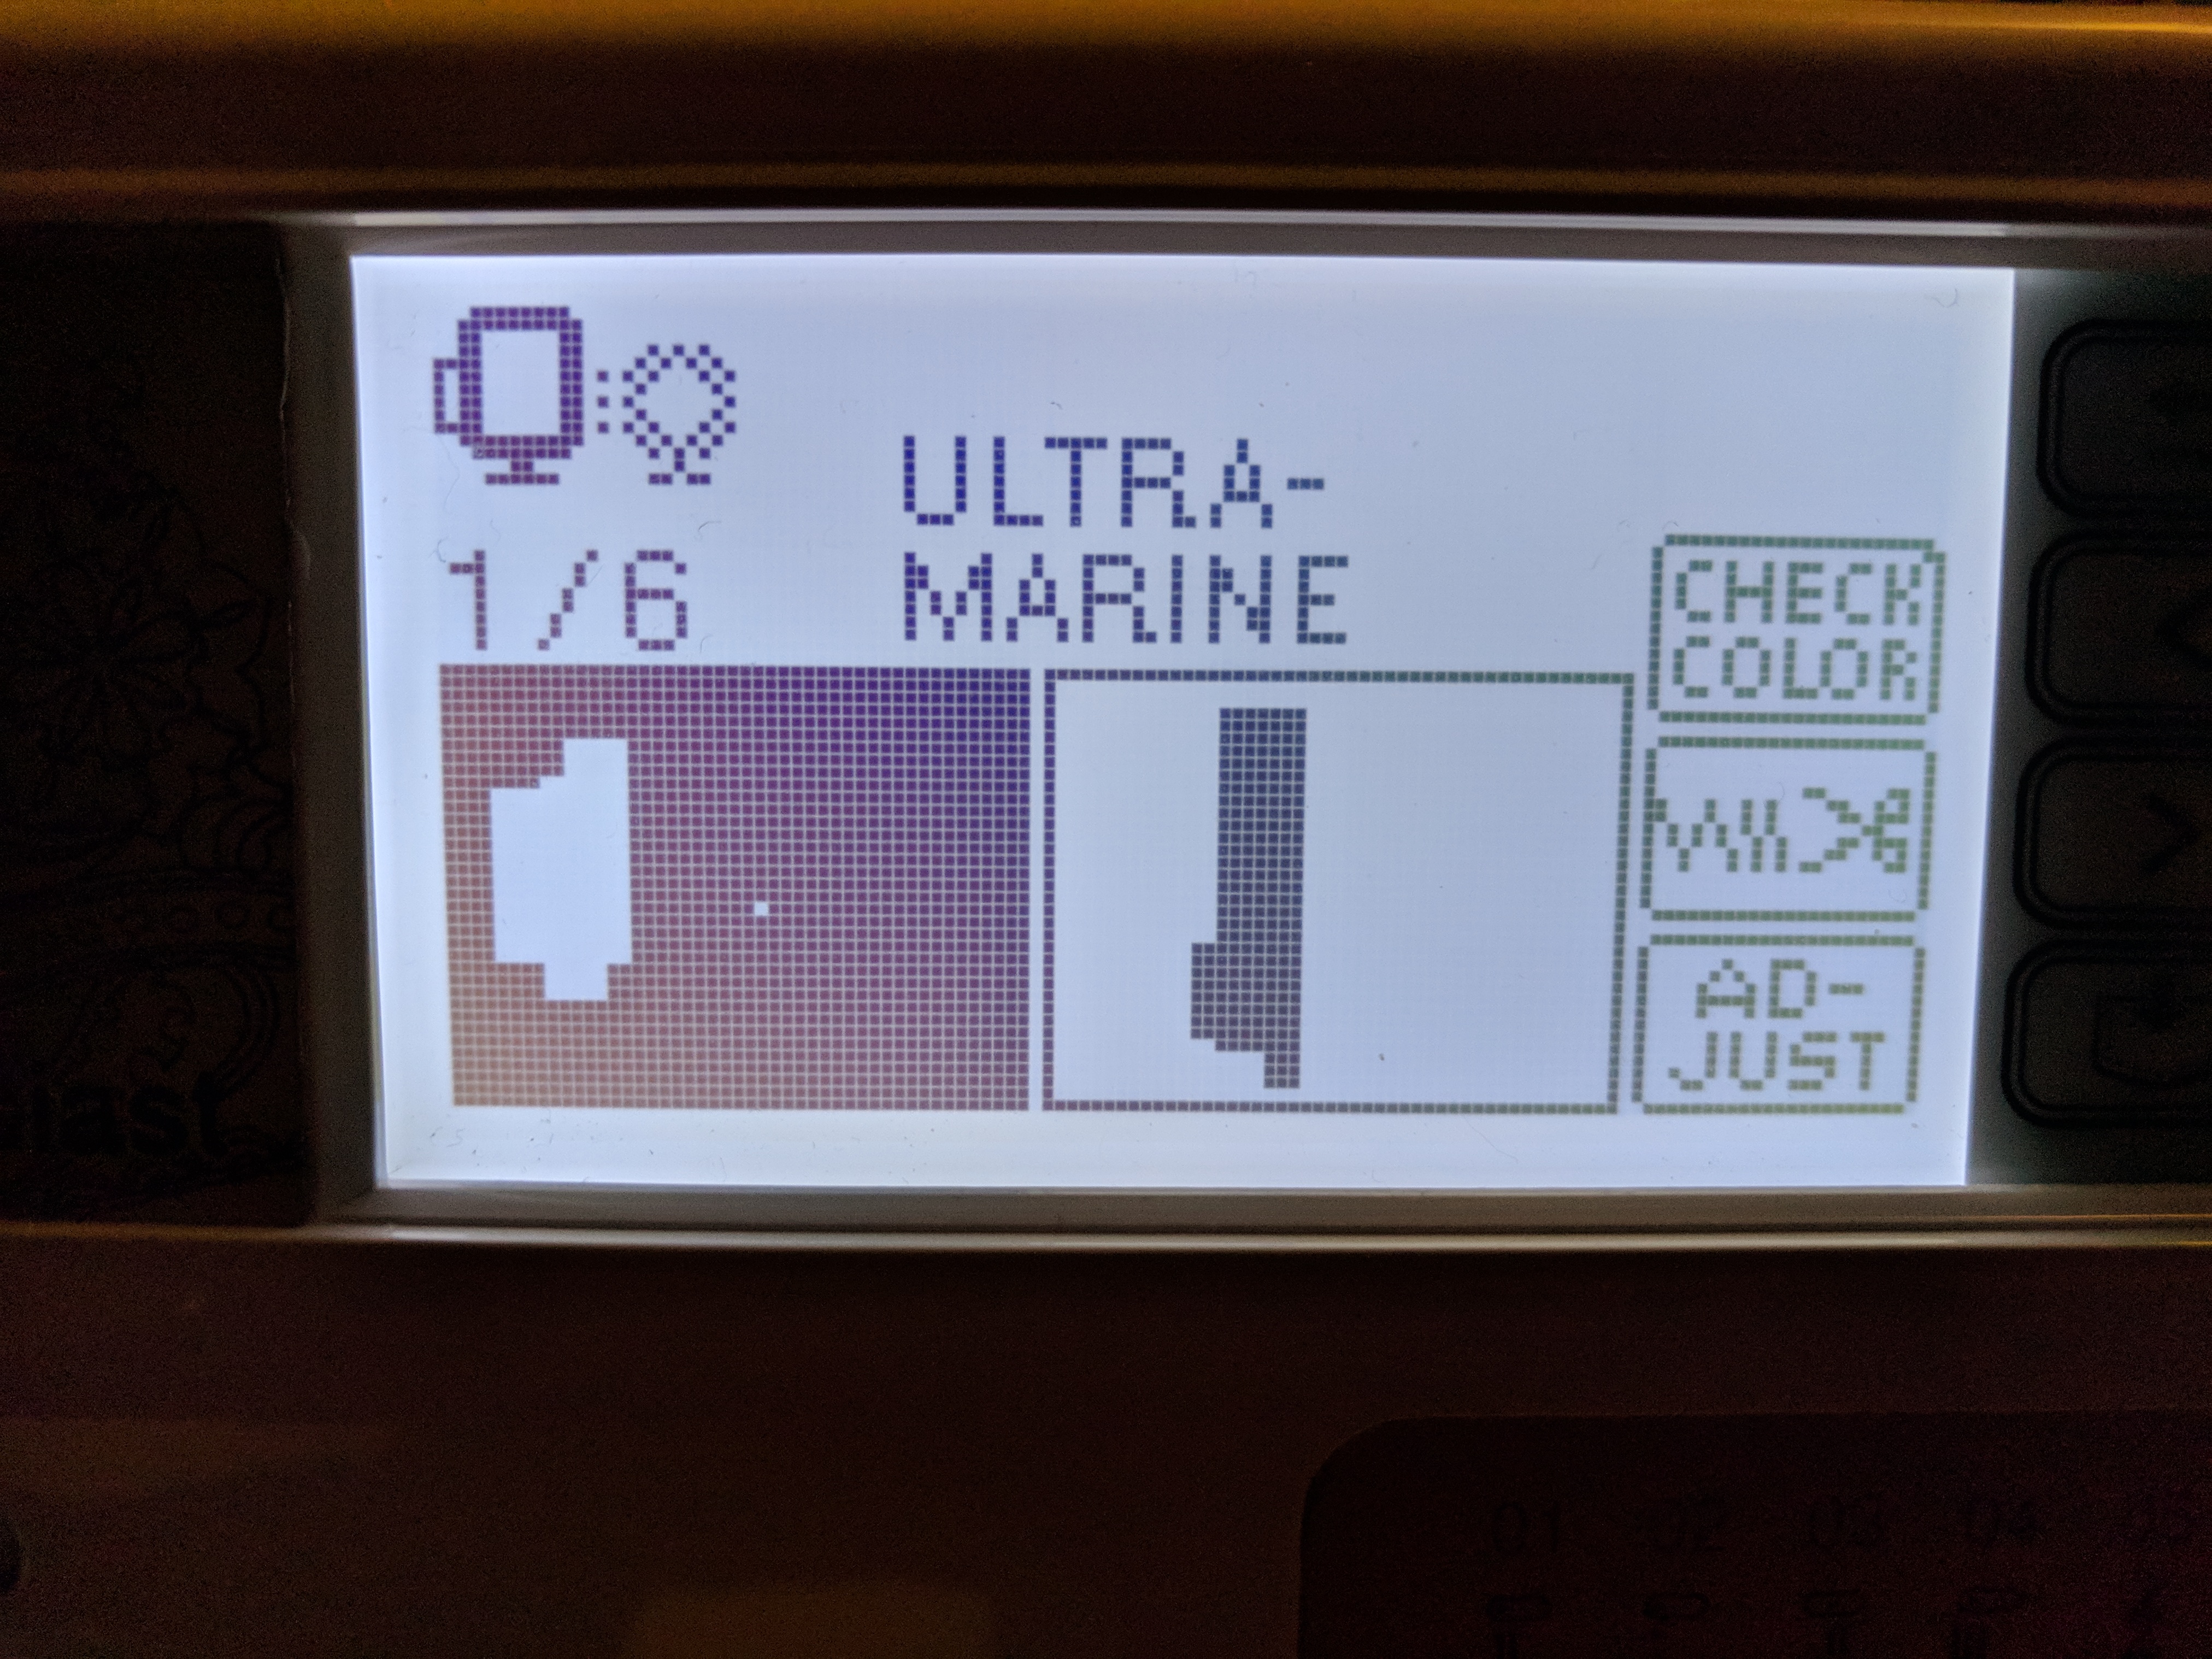
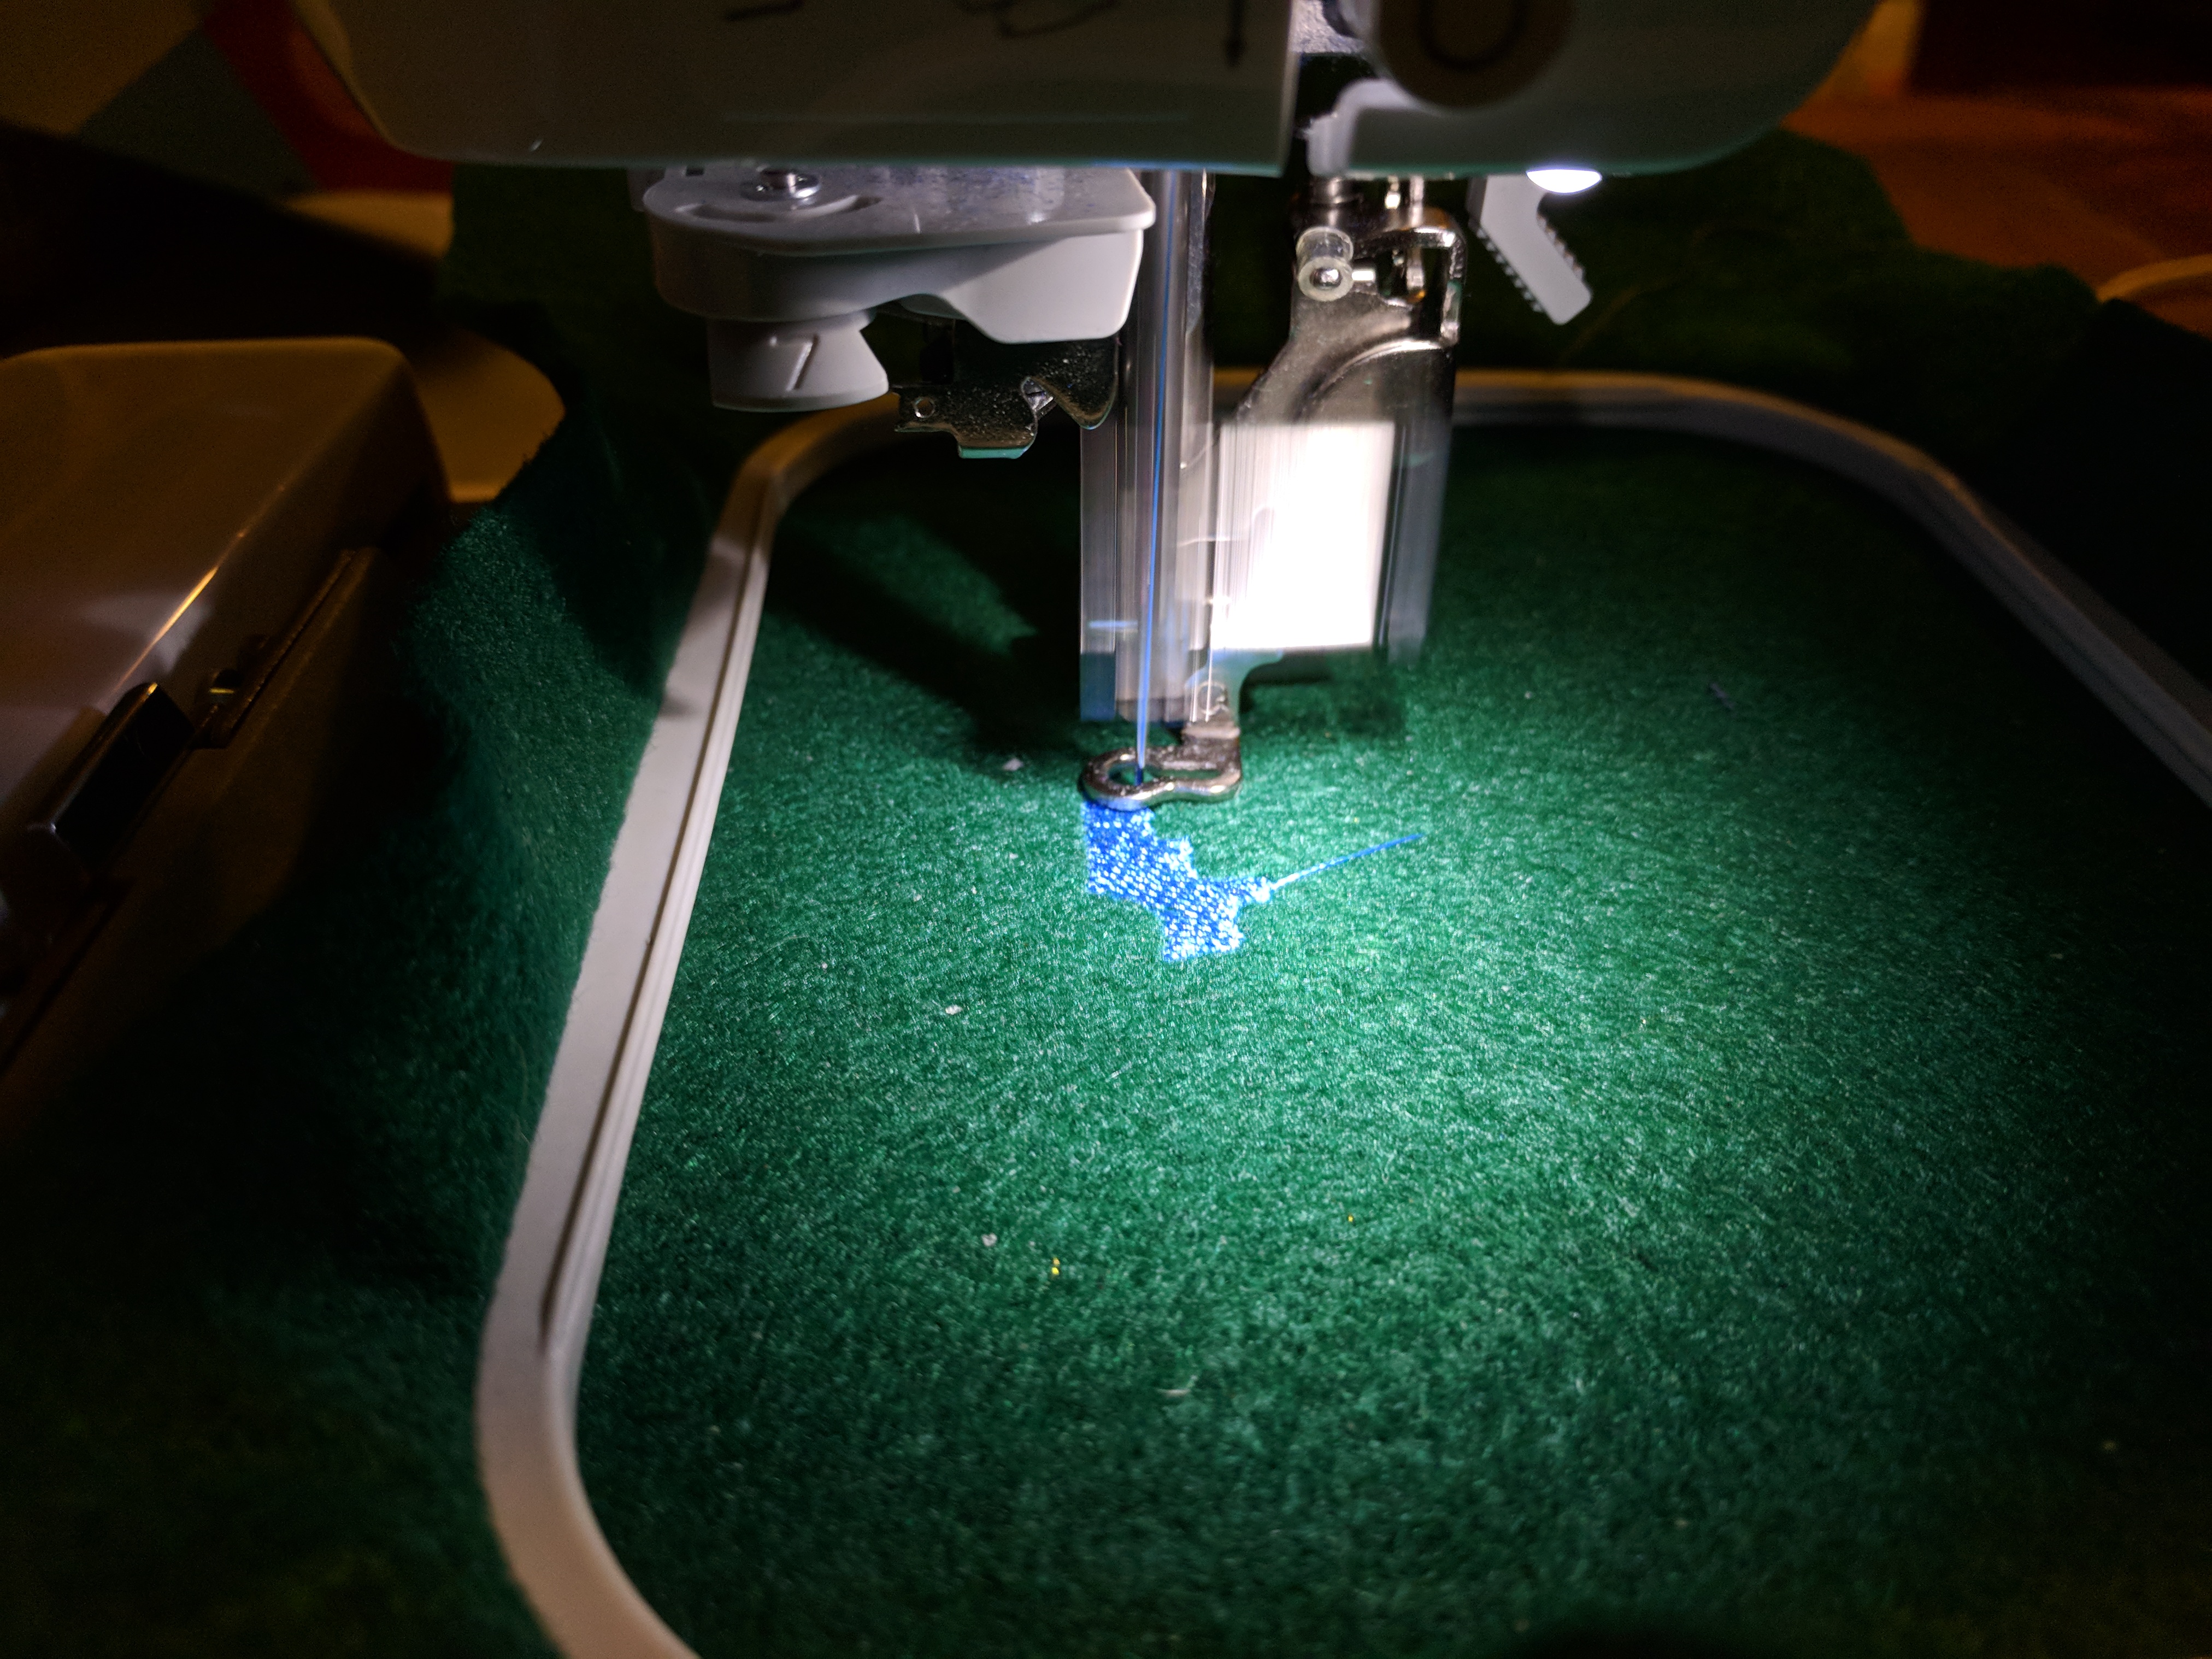
Go ahead and load your file to your machine. Then hoop up your fabric and stabilizer. Now here is the biggest problem I have run into with Inkstitch. I have not been able to get the color swatches that come with Inkstitch to install the colors called for on the machine are not always accurate so it is important to remember the order you planed in the previous steps or just double check your file. Once you have your thread and hoop loaded start you machine going and watch that needle fly.
Next up is finishing/Bringing the heat
Finishing/Bringing the Heat
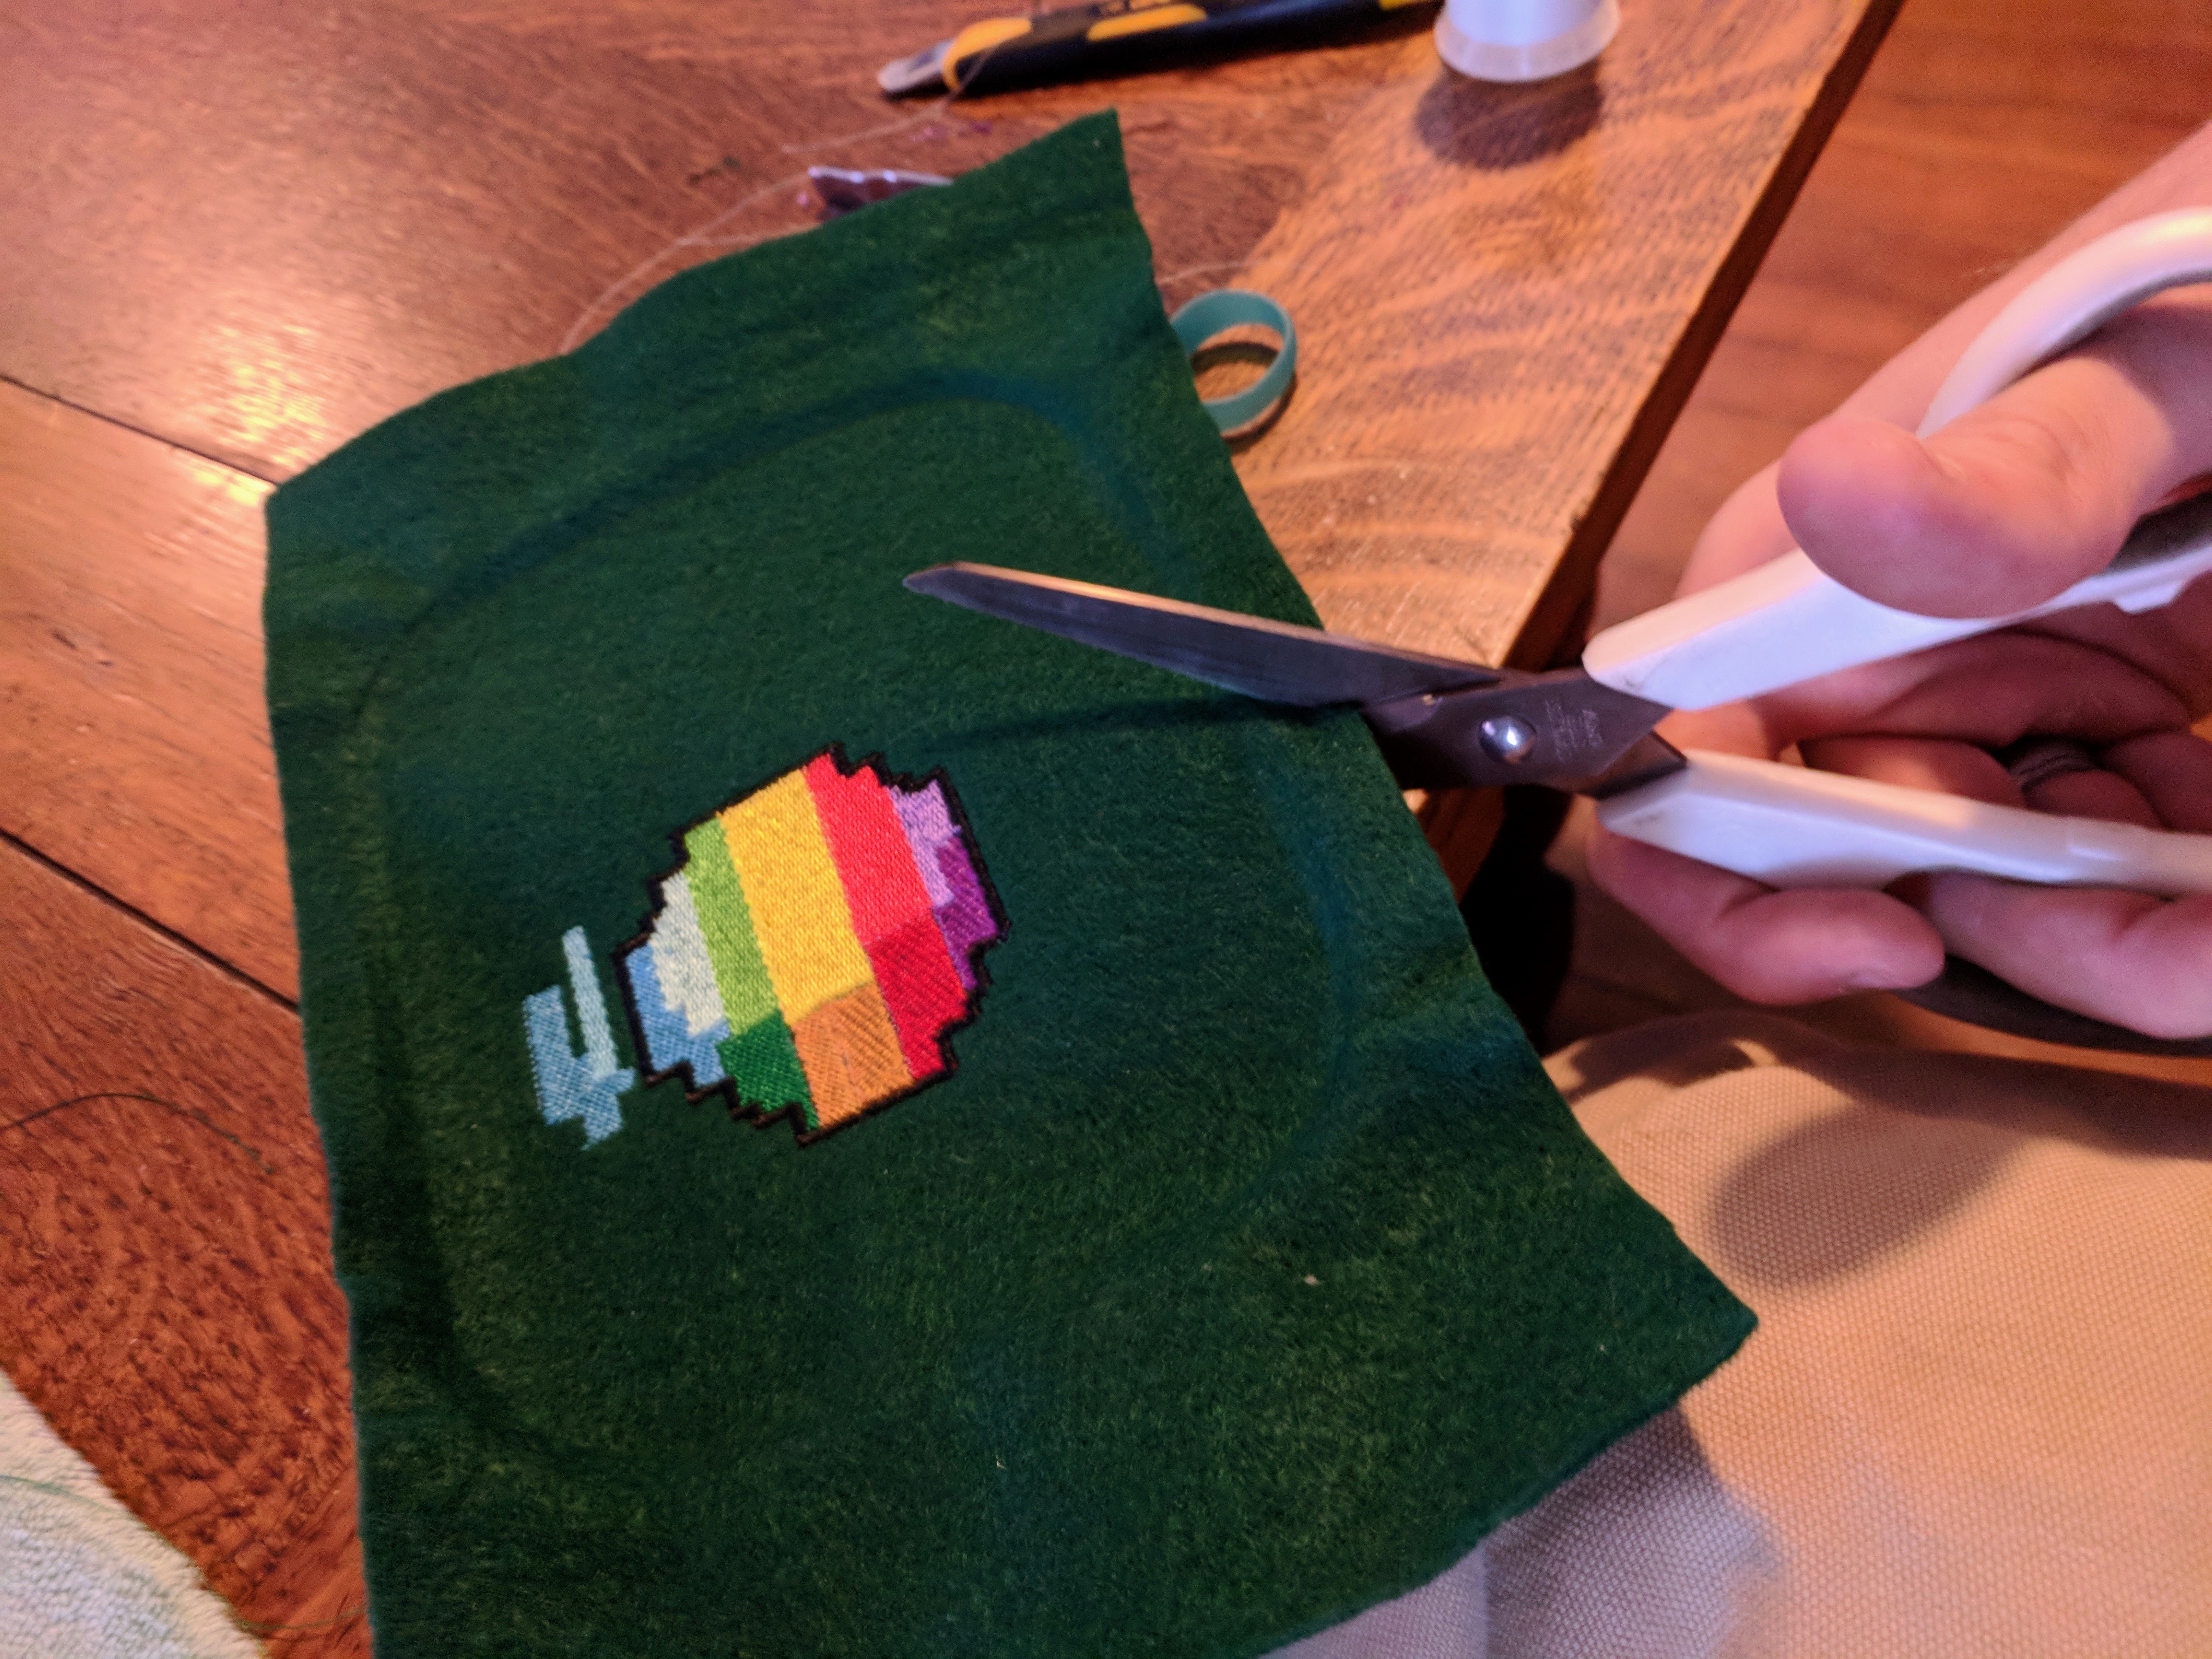
We are so close to patch based glory I can almost smell it. Let us get to the sharp things and the hot things.
- Do a rough square cut around your patch.
- Using your rough cut patch figure out how much Heatn'Bond you will need.
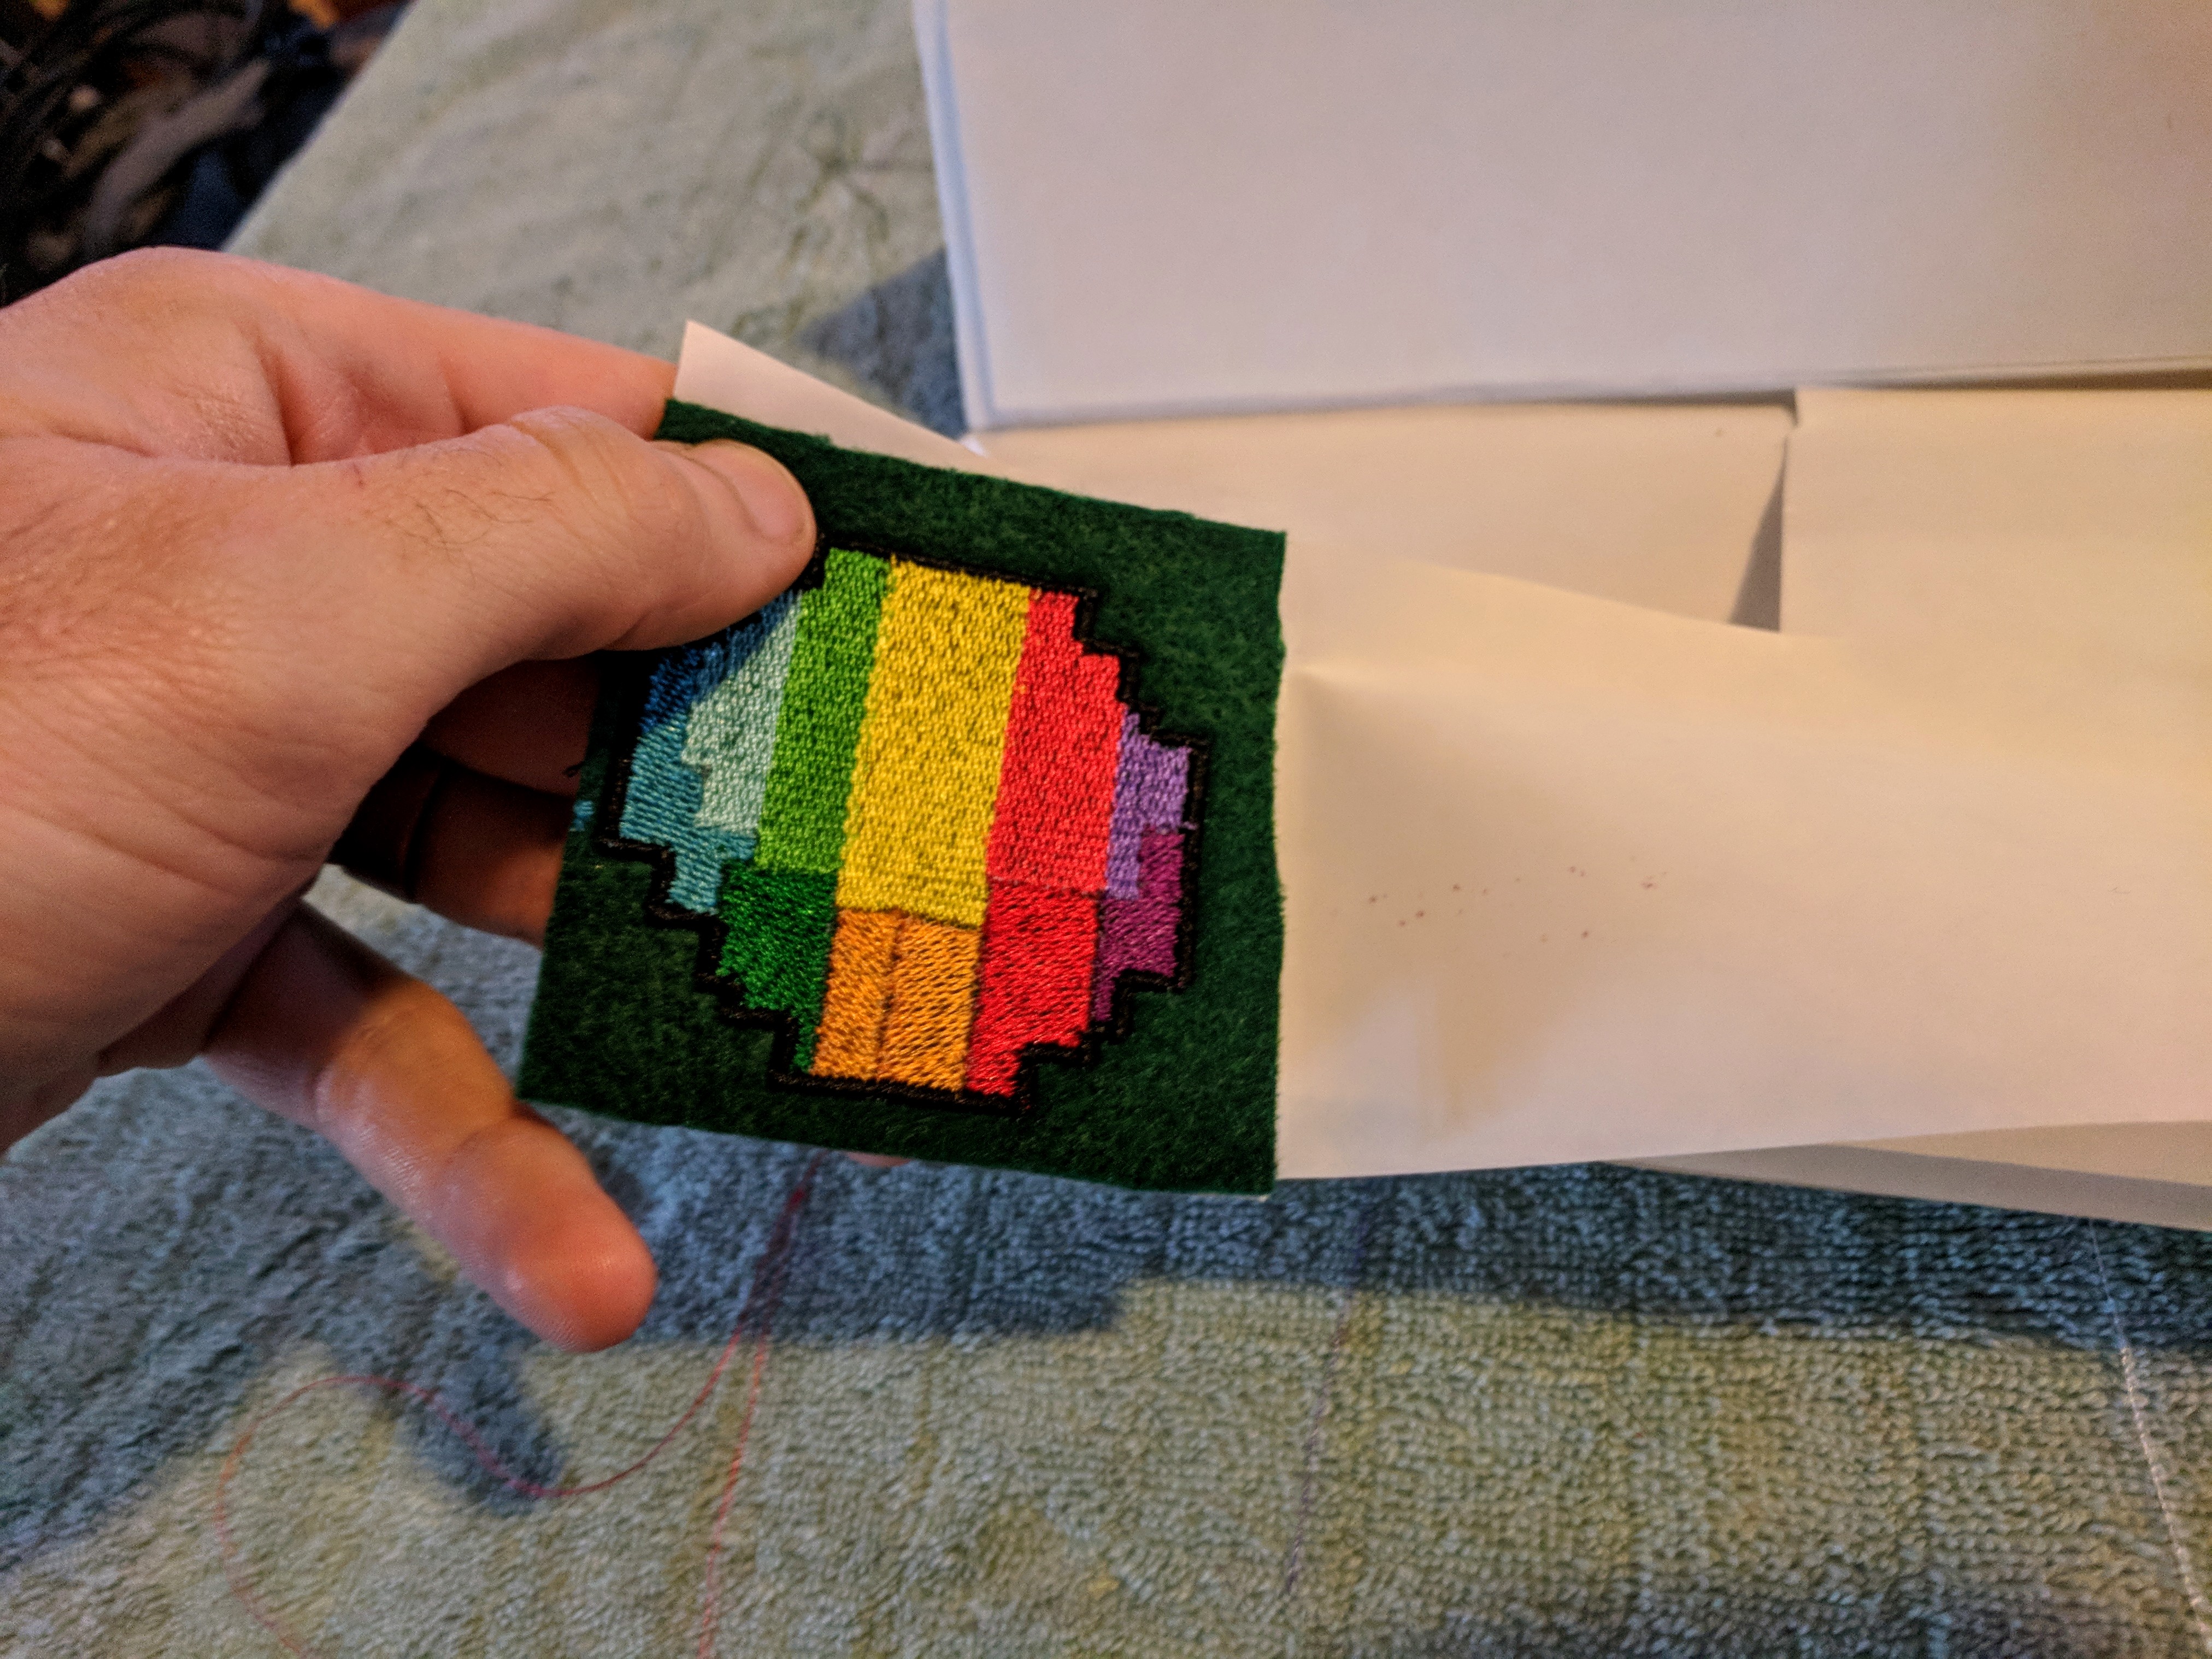
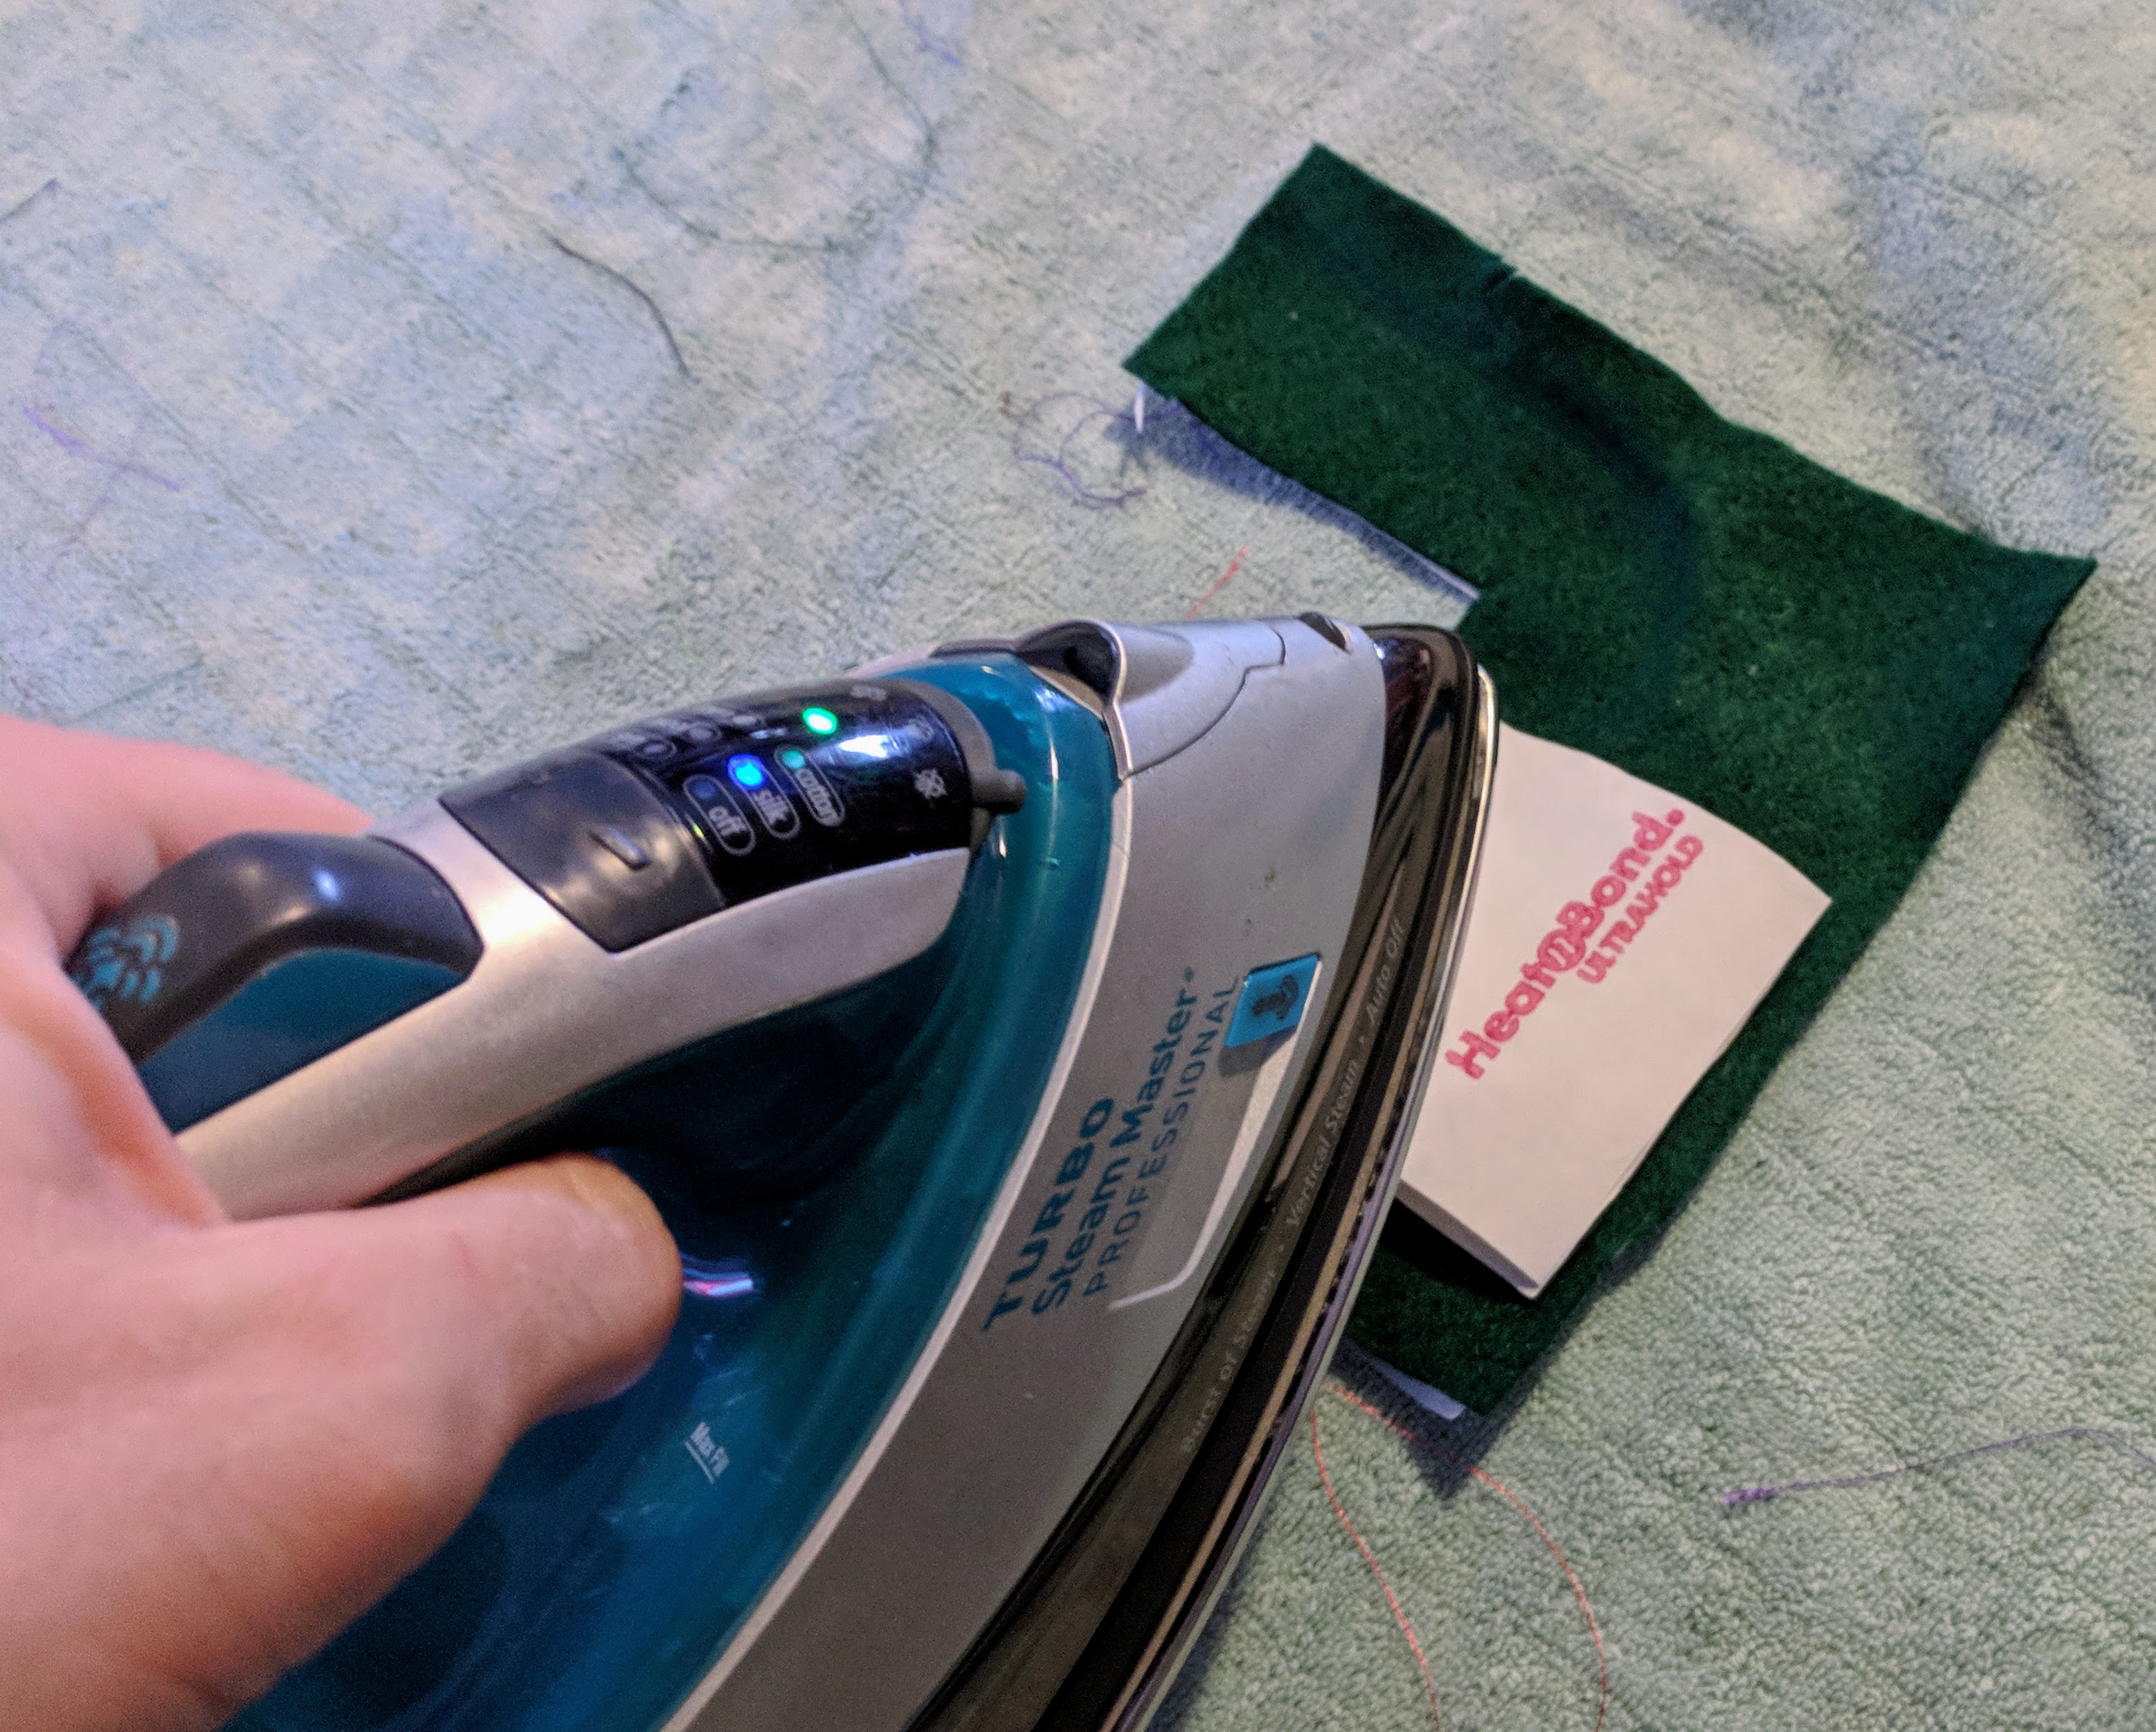
- Place the plastic side of the Heatn'Bond on the back of your patch.
- Now using your Iron on a medium heat apply pressure to the paper side of the Heatn'Bond for about 2-4 seconds. You want it to bond to your patch but not melt too much.
- Let your patch cool and then peel the paper off of your patch
- Because I can be clumsy (or over zealous depending on who you ask) with the trimming I like to apply fray check to the border before trimming it. To do this I let gravity slowly draw the fray check into the border while moving the tip around the edges of the patch. This stuff drys in 30 seconds so it doesn't add a lot of time and it keeps your borders strong even if you give them an accidental trim.
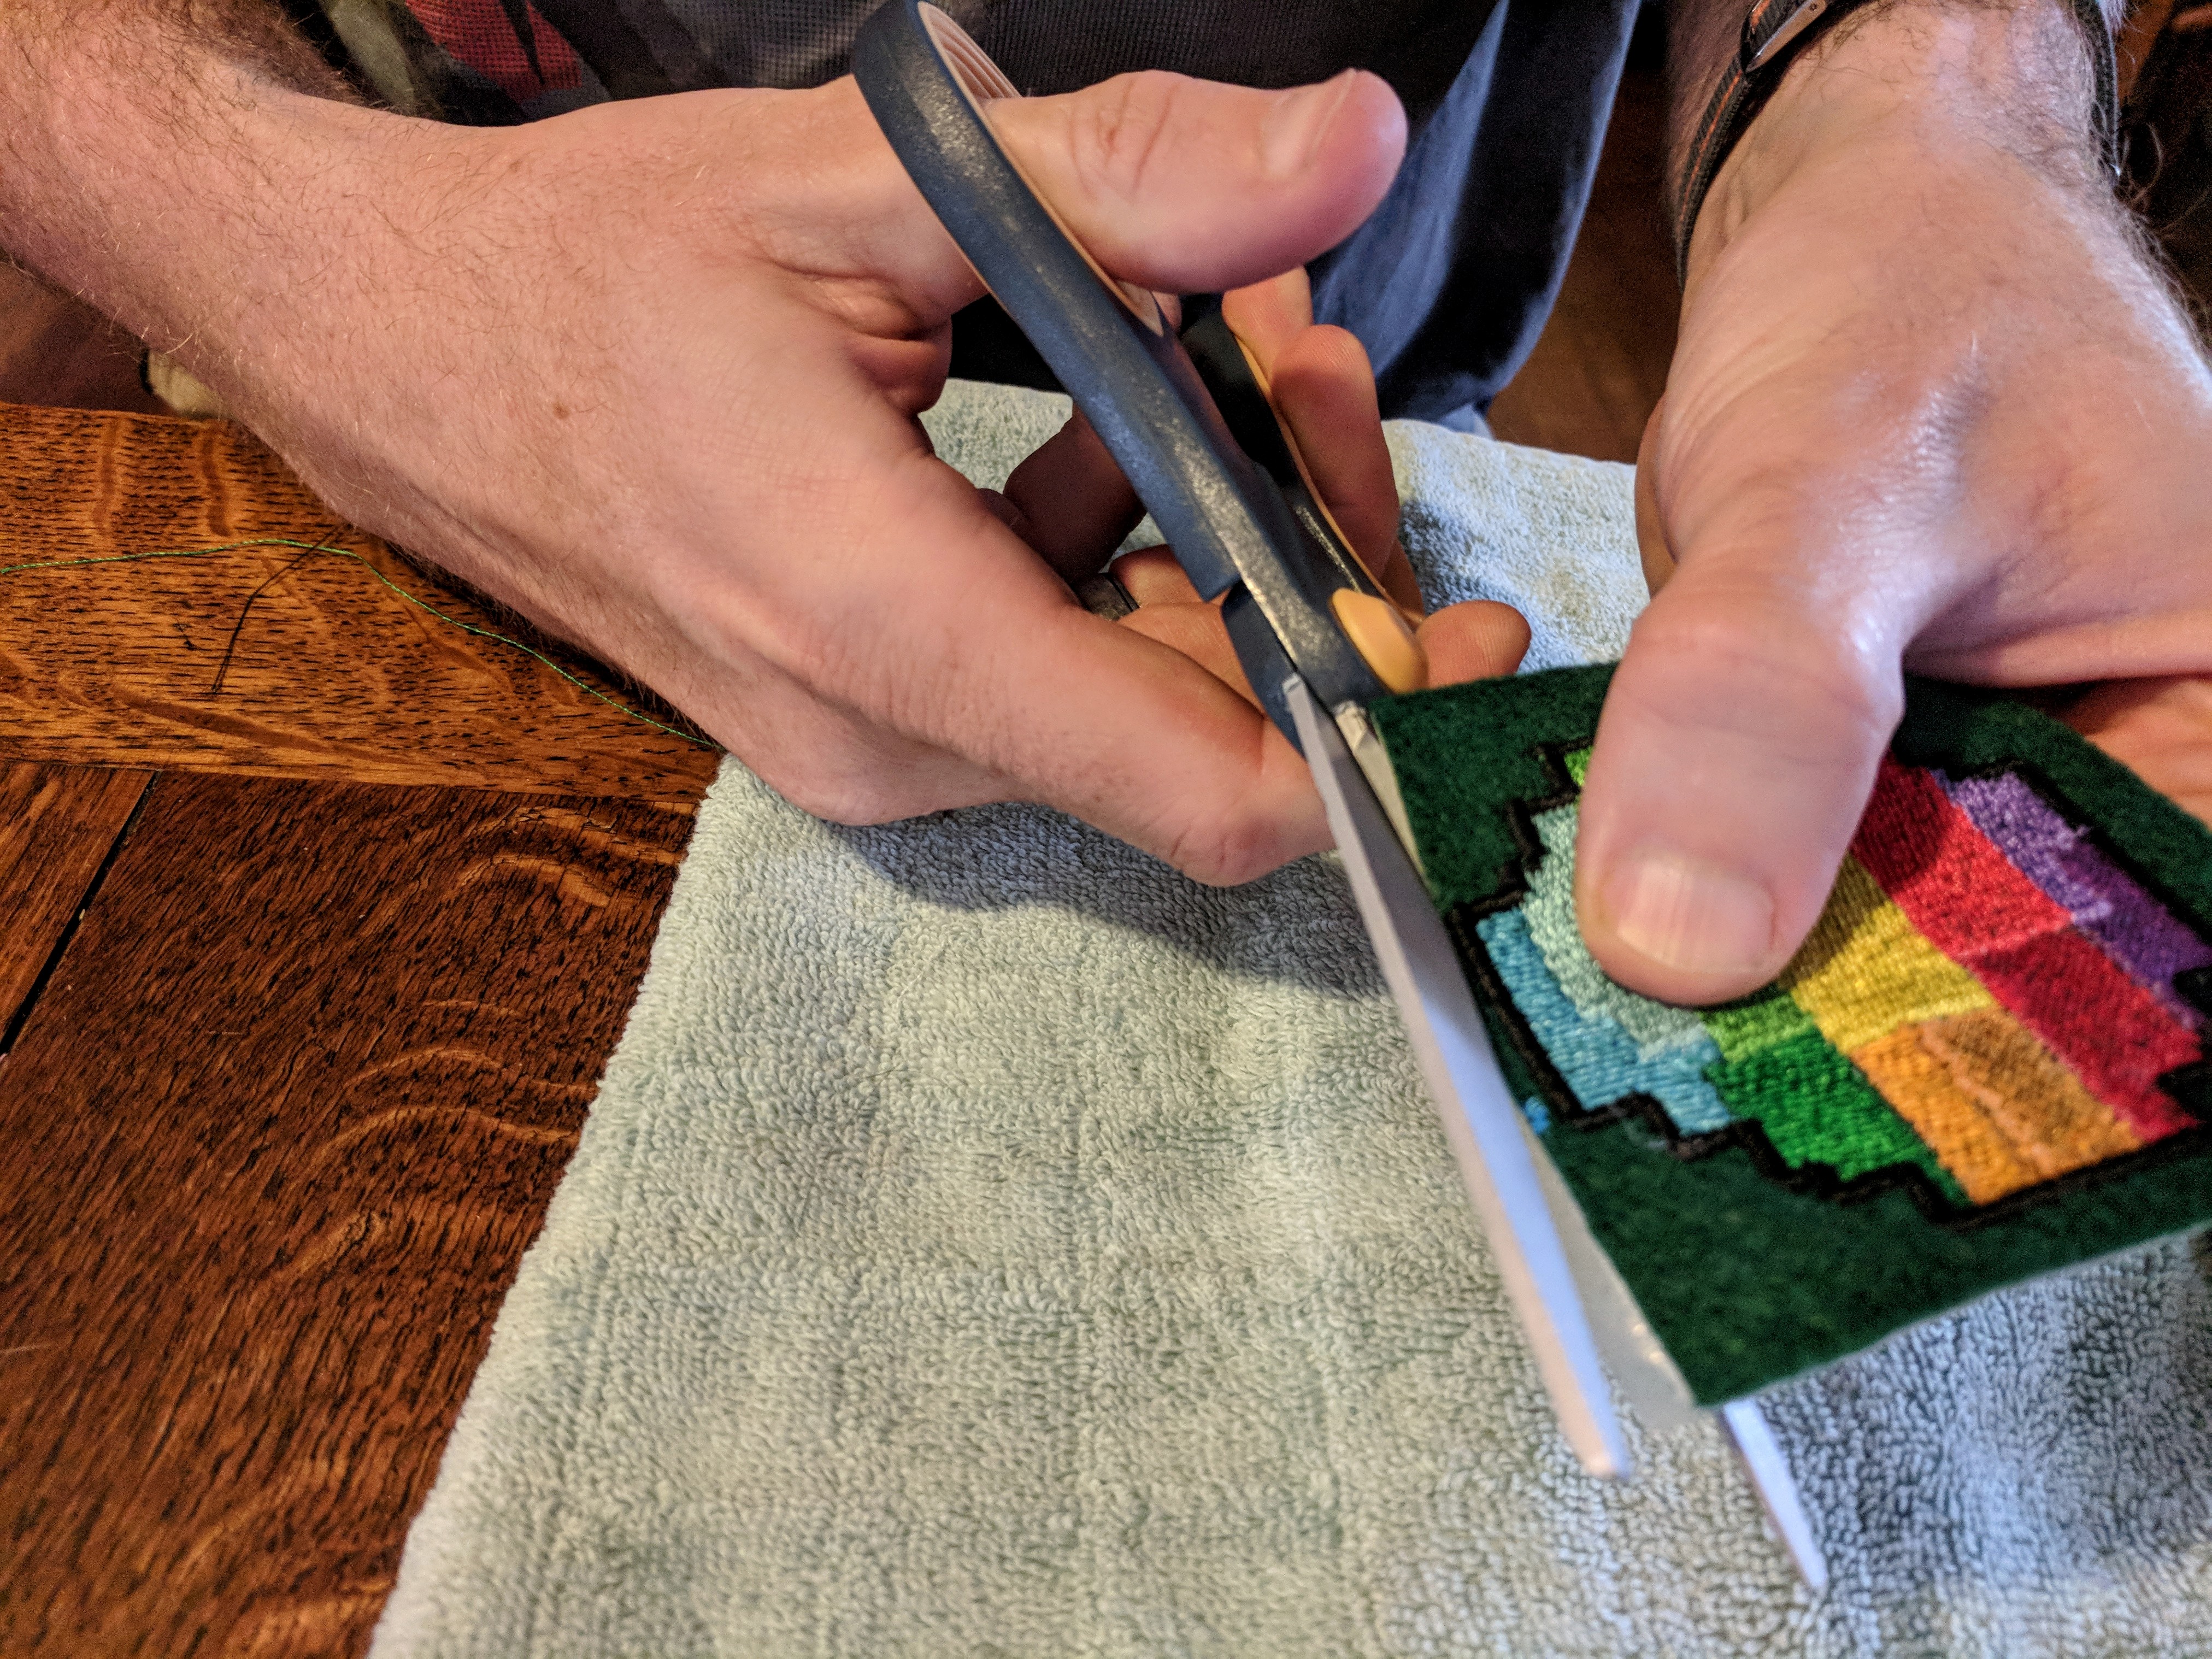
- Once your fray check has dried go ahead and cut out around your border.
- Play with fire...actually on second thought use fire as a tool and treat it with respect. With the patch cut out if you used synthetic felt like me as your base fabric you might notice some fuzzy spots or small areas you couldn't get your scissors in without damaging your patch. That is where fire comes in! Make sure your fray check is dry as it is quite flammable when wet. Then moving your lighter quickly around the edge of your patch burn off those offending fuzzy spots.
That's it you now have a pixelated iron on patch. All that is left is for you to decide what you want to iron it on to. I hope you found this Instructable helpful or at least entertaining. If you did please vote for me in the Video Game Contest. Also if you make some patches or figure out how to get the color palettes to install please share in the comments.