Iron on Hand Prints - T Shirt for Mom
by Carol at Natures Sol in Living > Kids
4344 Views, 6 Favorites, 0 Comments
Iron on Hand Prints - T Shirt for Mom
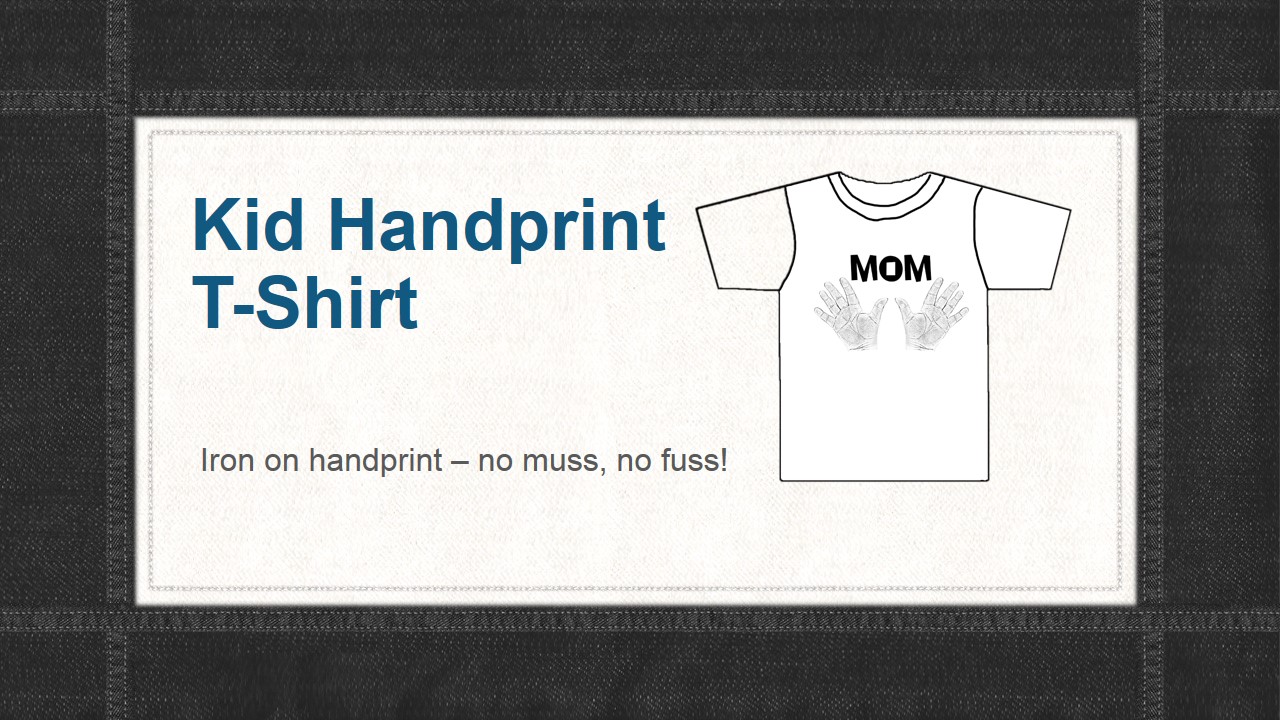
Those t-shirts with the little one's hand prints on them are so cute - but the mess in making them.
Well, let's use all this technology to our advantage. Moms, teachers, day care people - use your camera and computer to do the same thing without the muss and fuss!
You can take the image of the children's hands with either a camera or a scanner - which ever is easily accessible. Upload them to your photo editor software. I used Photoshop Elements 7.0.
Materials Needed
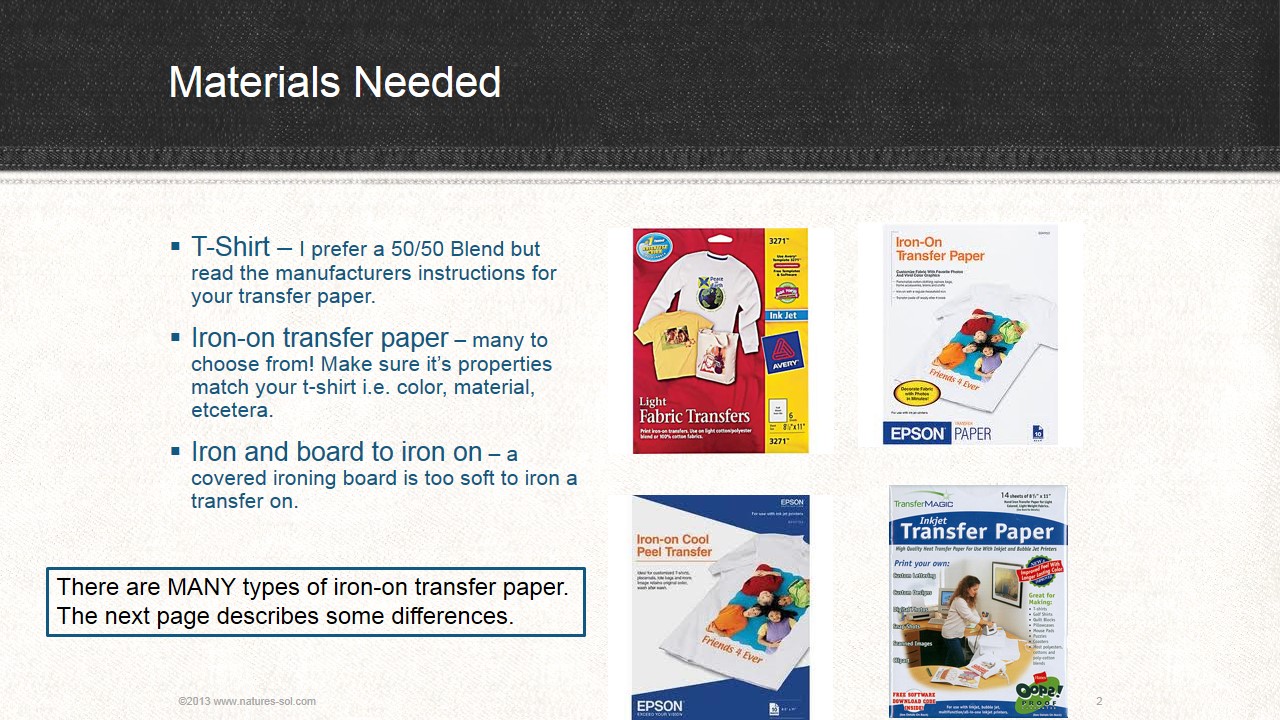
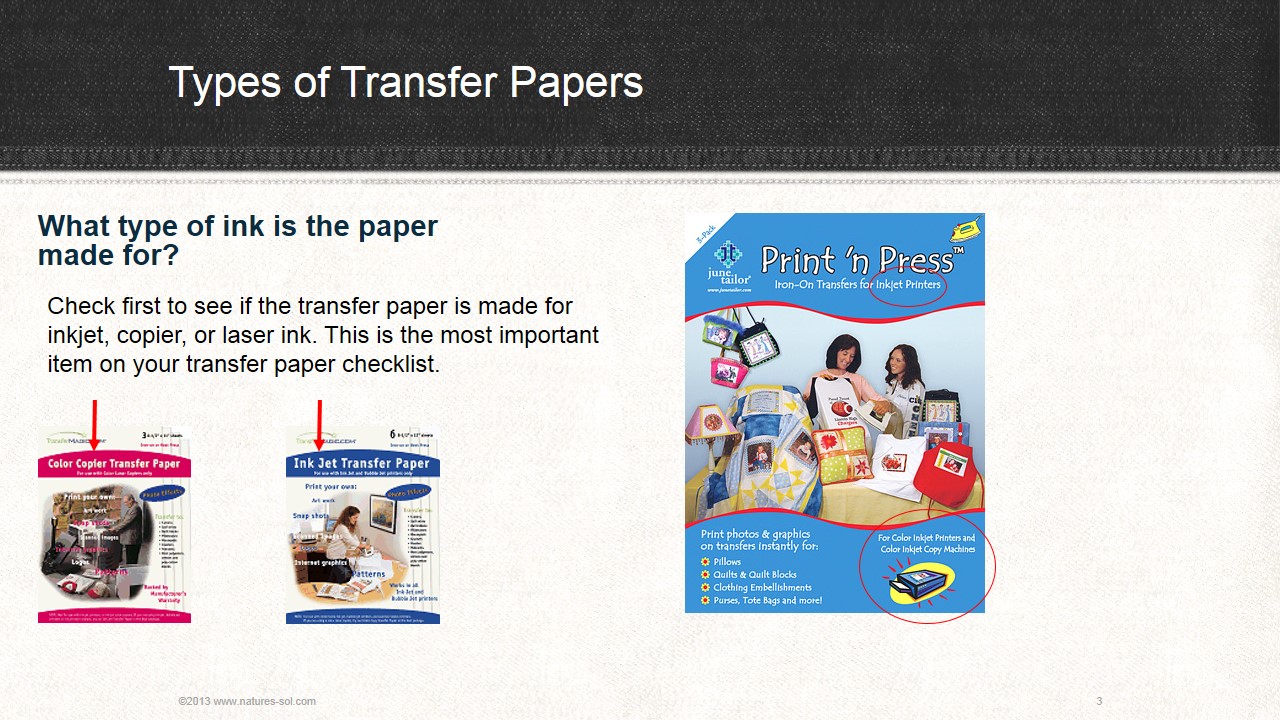
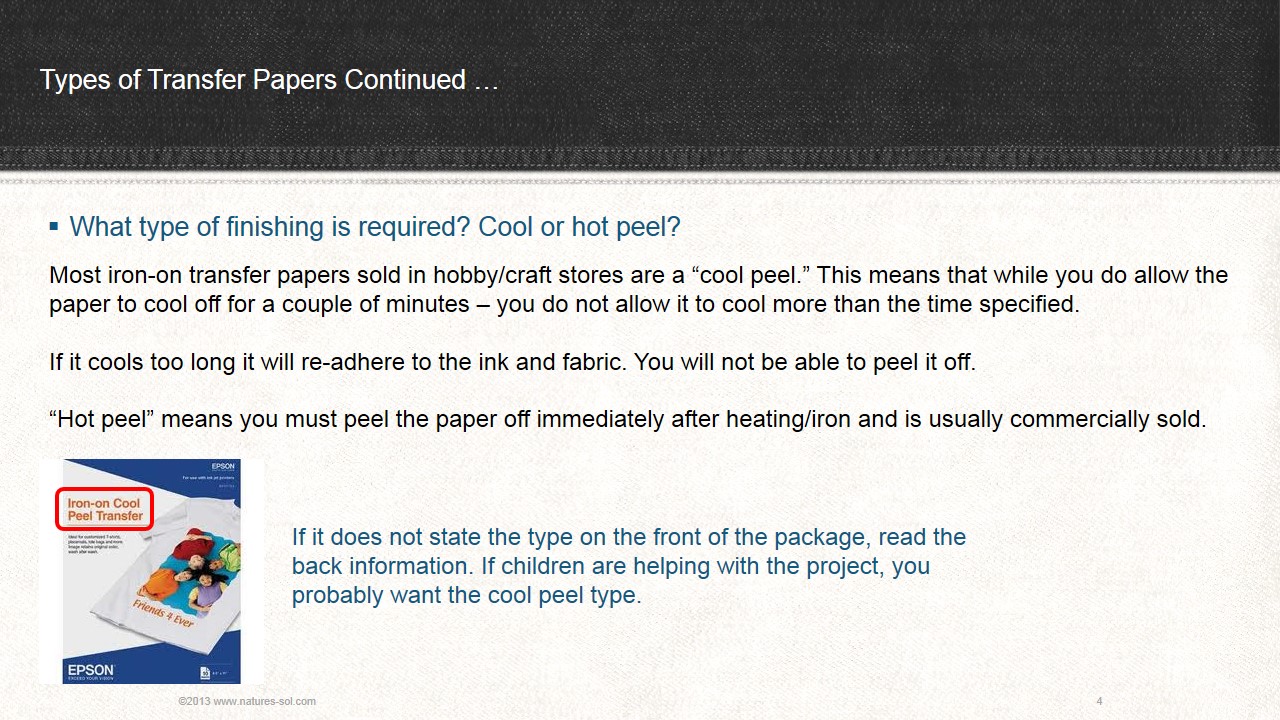
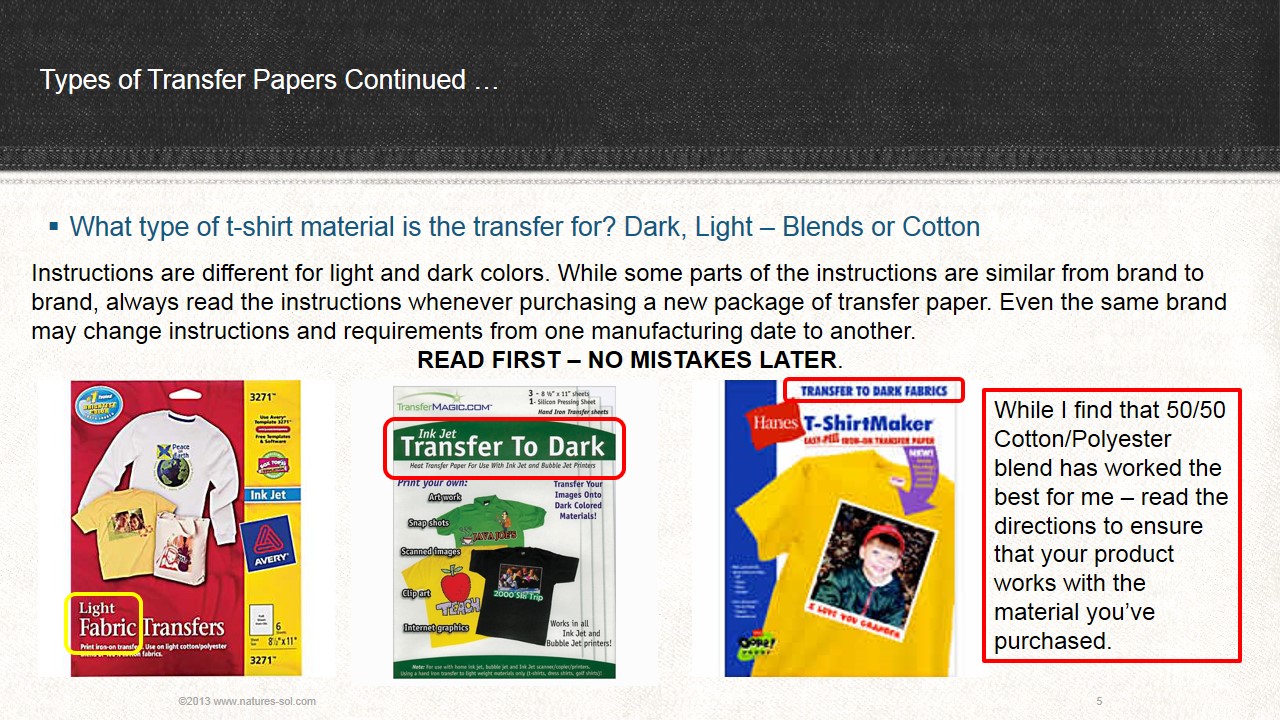
The basics that you need are a t-shirt, an iron-on transfer, and an iron. My picture goes into great detail about choosing your iron-on transfer. There are all kinds of different brands and specialties.
Scan the Hand.
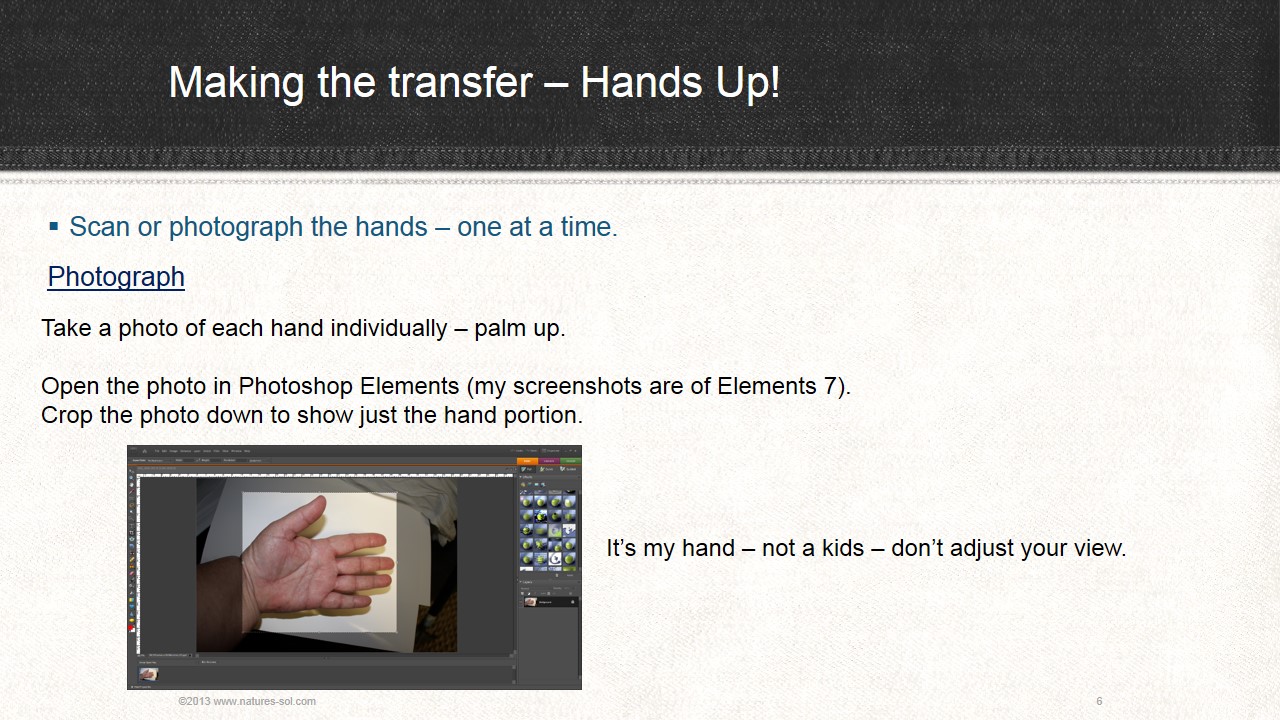
Scan or photograph the palms of each hand. (And that image is my chubby hand - not a kid's. Do not adjust your picture.)
If you do take a photograph, make sure you use a white piece of paper as a background. This will make it much easier to remove the background from the hand in later steps.
Bring the photo into a photo editing software. Crop the photo/scan so that there is little background in the document.
All my instructions apply to Photoshop Elements 7.0. But I did also do this on Pixlr - an online free photo editing program.
Get Rid of the Background and Stylize the Hand.
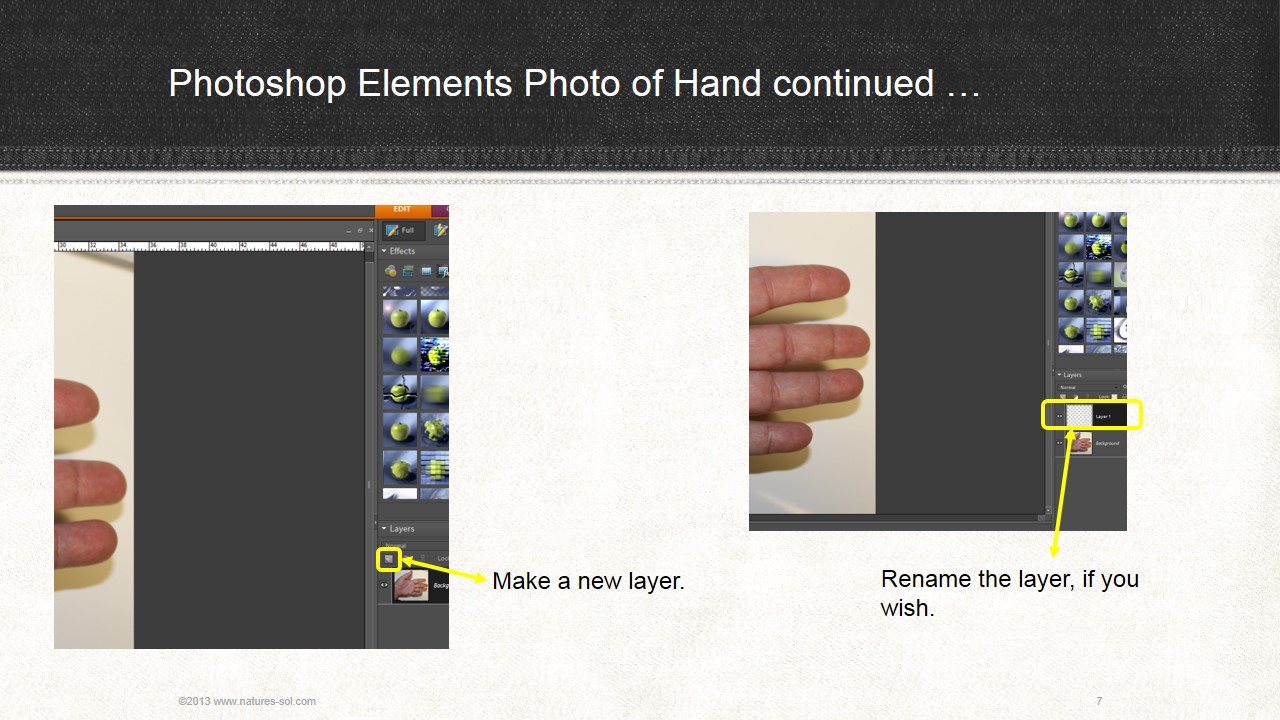
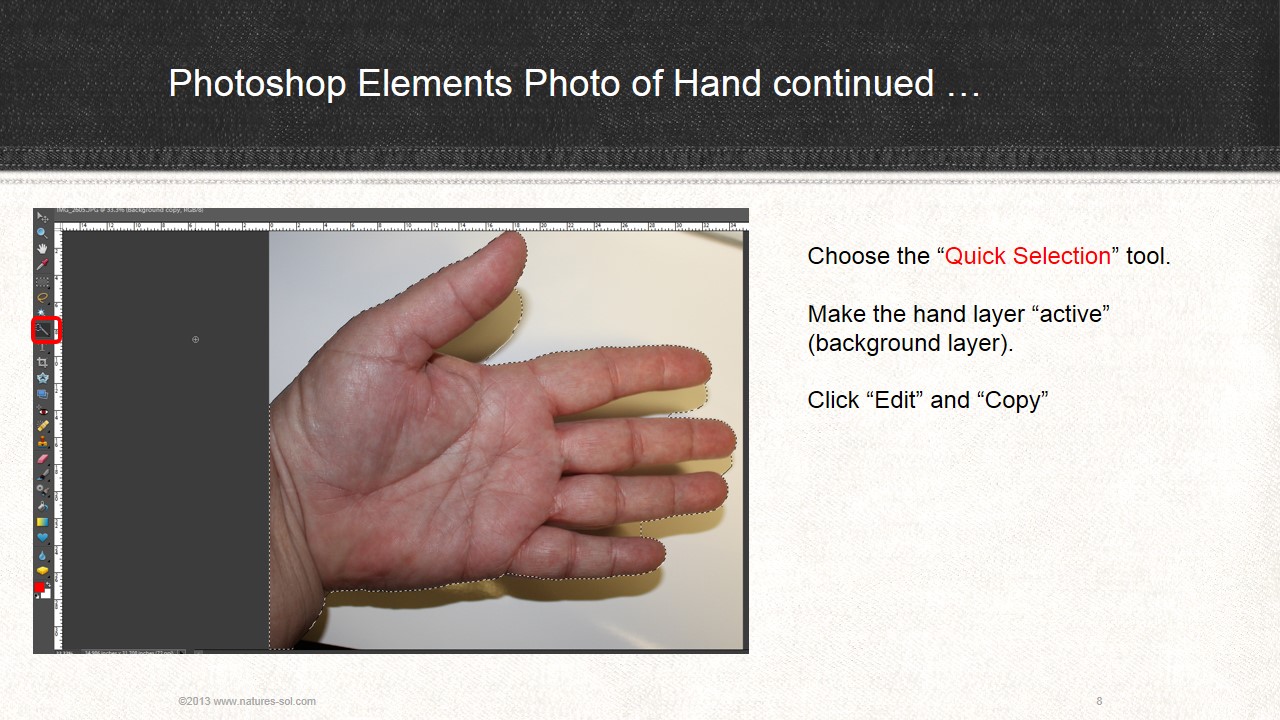
First you're going to get rid of whatever background you have around the hand.
Make a new layer. If you wish, you may rename the layer. Go back to the original layer to make it the "active" layer.
On Photoshop Elements 7.0 the quick selection tool is the easiest way to designate the area you want to clear. Drag the wand around the hand. Make sure you have the entire hand chosen. There will be parts along the edge that you will have to "clean up." Just make sure you have ALL of the hand in the dotted outline.
Choose EDIT, COPY from the upper tool bar.
Click on the new layer to make it active and choose EDIT, PASTE from the upper tool bar. You should now have the hand on this layer.
Clean Up the Edge of the Hand.
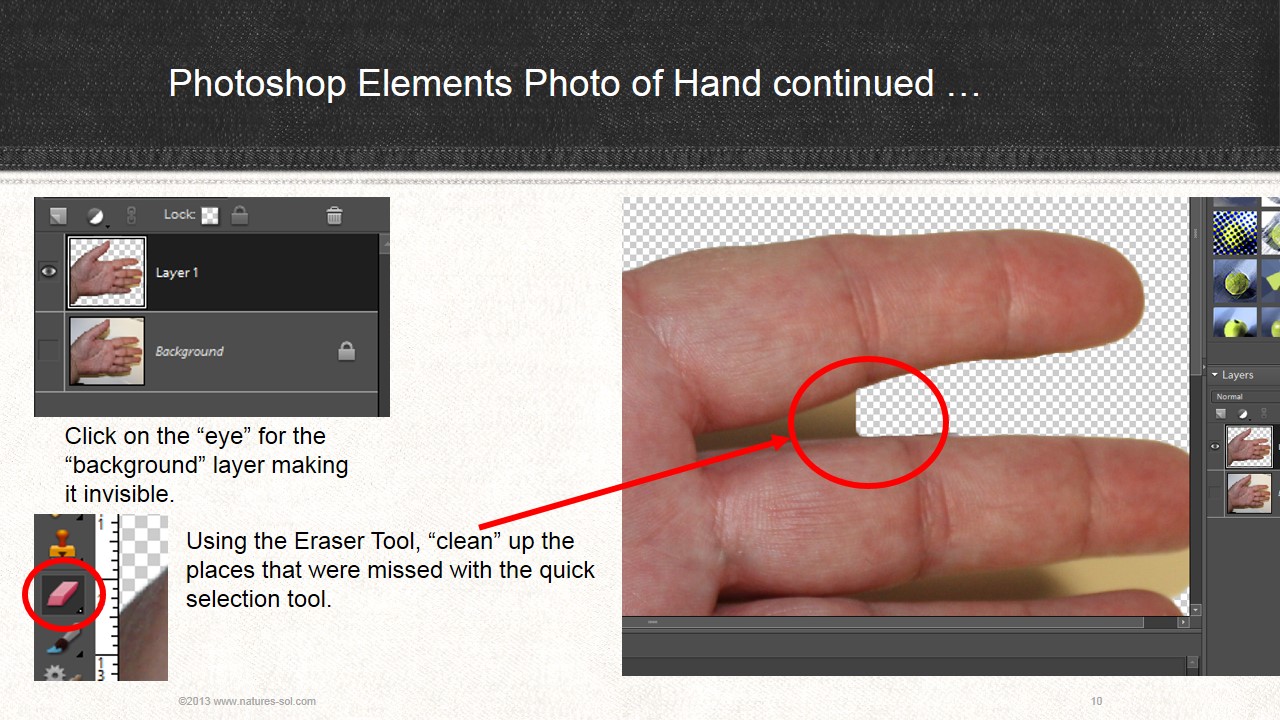
Click on the EYE ICON for the original layer. This will make the layer hidden. You will no longer be able to see the original photo/scanned image.
Make sure the layer with the hand image is chosen. Now take the eraser from the Tool Box and clean up the rough edges around the hand.
Ensure that ALL stray parts are erased. Whatever is left is what will be on the t-shirt.
Make sure the layer with the hand image is chosen. Now take the eraser from the Tool Box and clean up the rough edges around the hand.
Ensure that ALL stray parts are erased. Whatever is left is what will be on the t-shirt.
Make It Look Like a Hand Print.
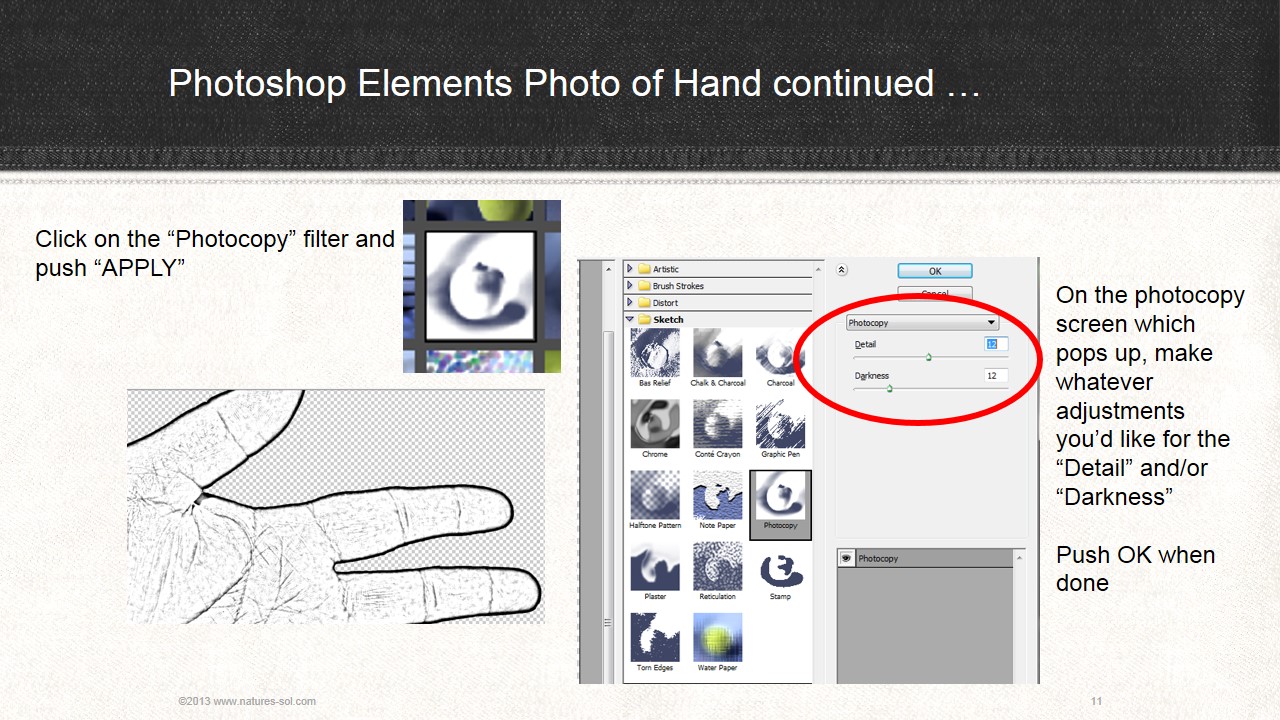
Now is the fun and play part. We're going to make this image appear as a hand print would look.
To do this we're going to use a "filter." You'll notice that in Photoshop Elements 7.0 there are numerous filters. You can play around with them and use different looks if you wish.
But for this project, we're going to use the PHOTOCOPY filter. Click the APPLY button. A pop up screen will appear with editing slides. You can make adjustments for detail and darkness. Change the sliders until the image is to your liking.
Go to the original background layer (which you cannot see) and drag it to the little trash can icon. You should have only the hand image layer now.
Get Ready to Color.
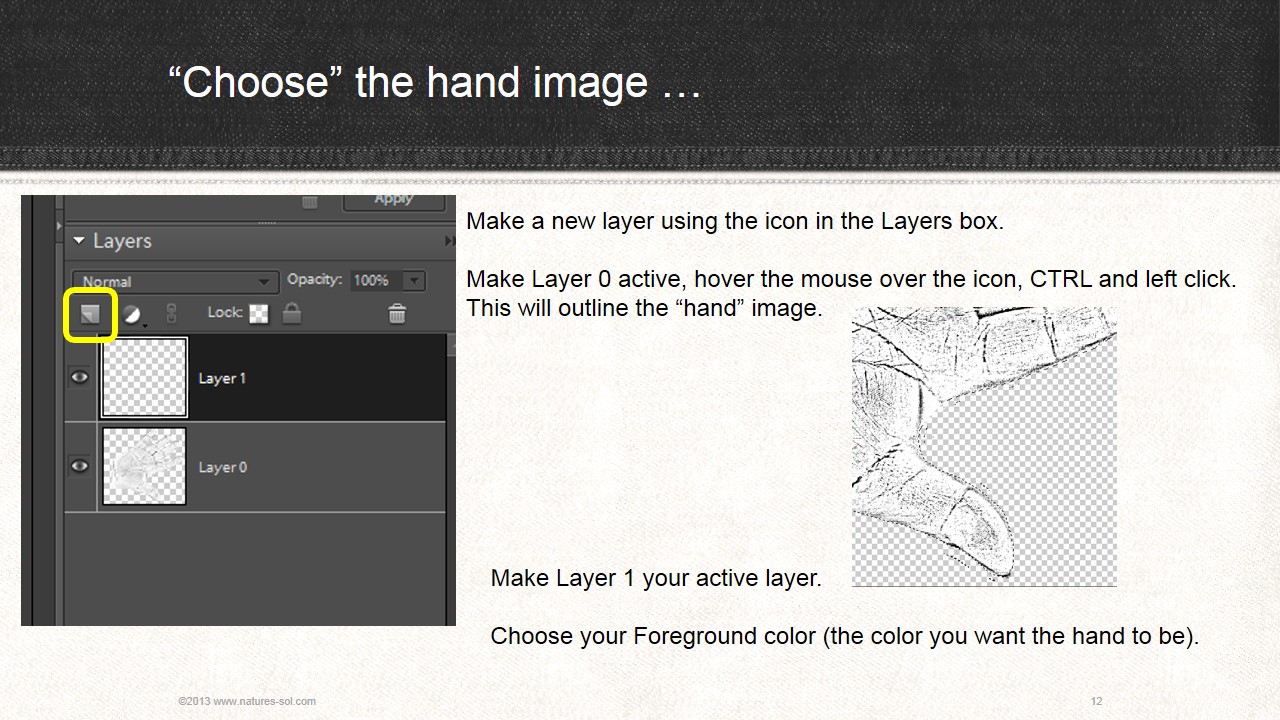
Make another new layer by choosing the new layer icon.
Go back to the layer with just the hand. Left click on the little icon (picture) for that layer. It should "choose" the hand. There should be a dotted line all around the hand image.
Click back on your new layer - the layer with nothing on it - the top most layer in the "list" of layers. The layer will "darken" meaning it is the "active" layer.
Make sure your foreground color (at the bottom of the tool box) is the color that you want your hand to be.
So Many Colors to Choose From.
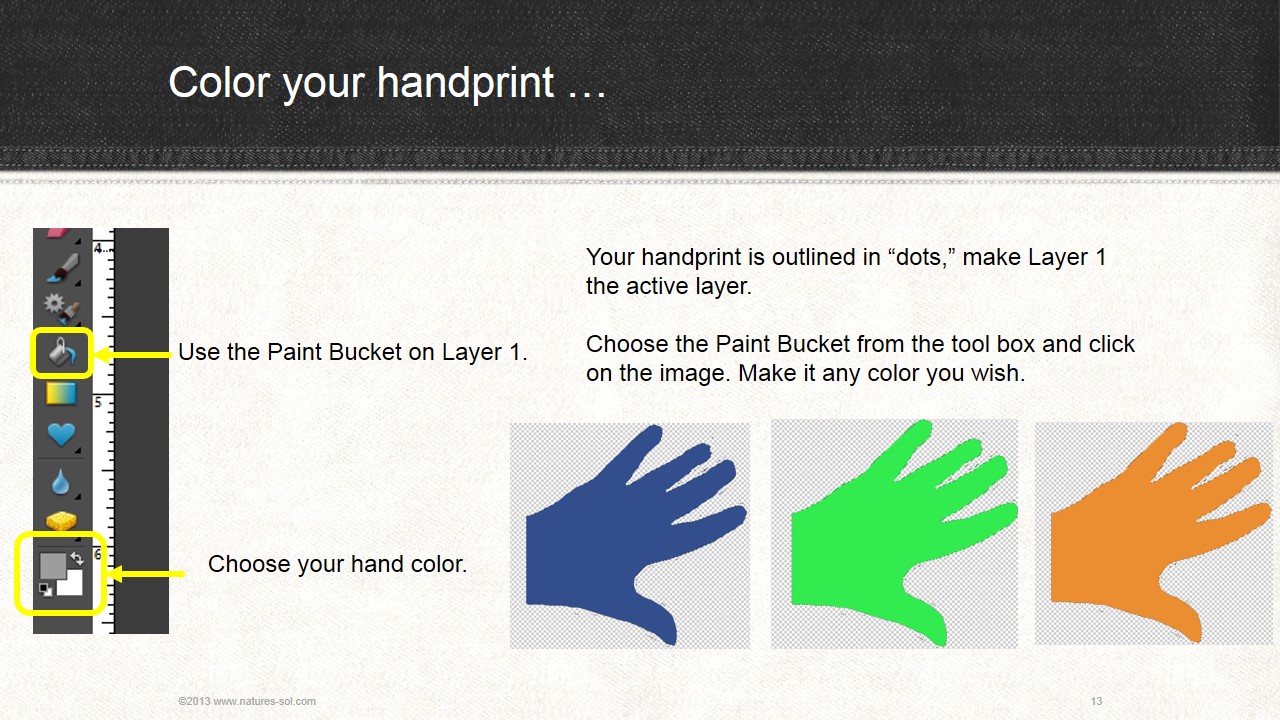
You are on your newest layer. You have a dotted outline showing your hand - but the hand is not on this layer.
Click the PAINT BUCKET from the Tool Box and click on the document/hand. This will make a hand image in the color of your choice.
Click the PAINT BUCKET from the Tool Box and click on the document/hand. This will make a hand image in the color of your choice.
How Light Do You Want It?
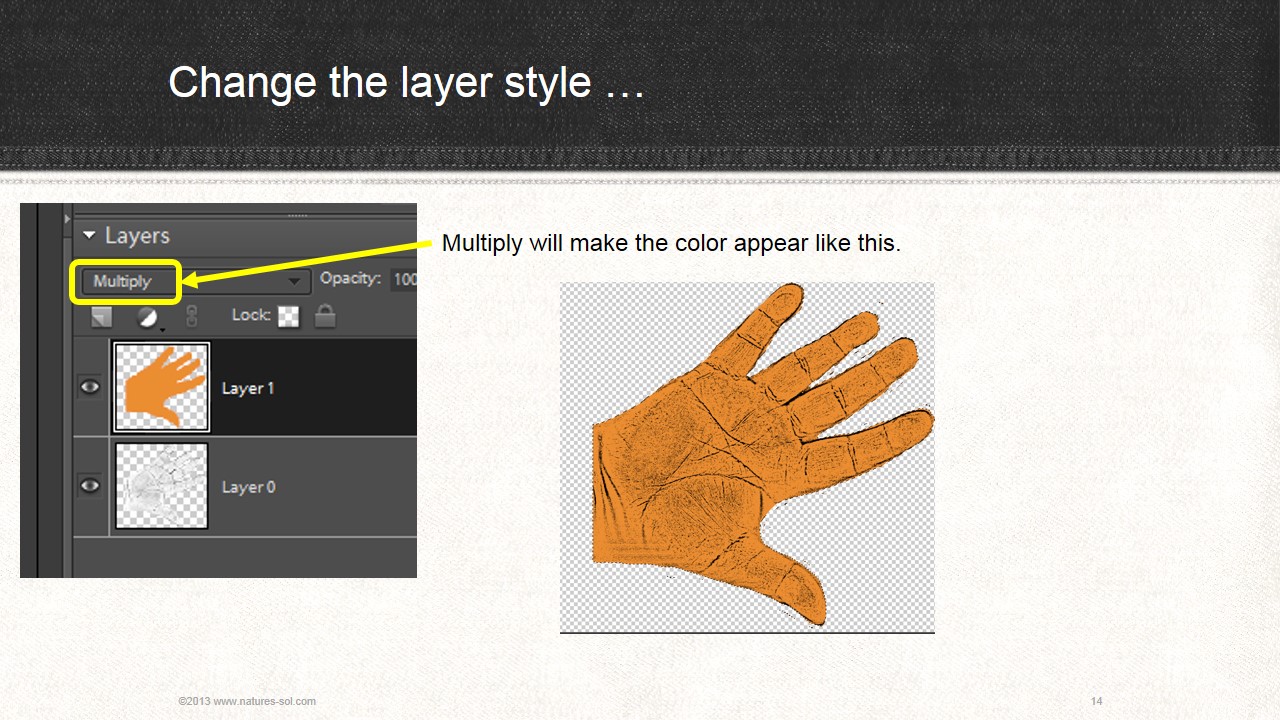
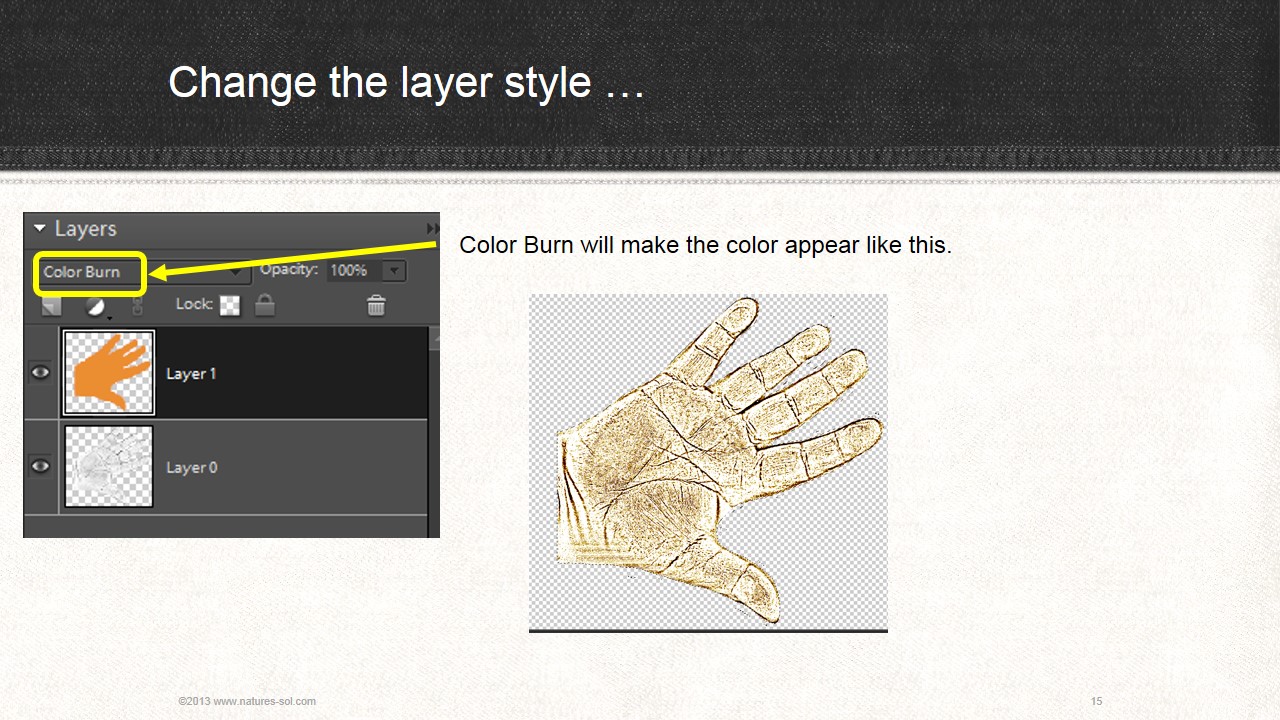
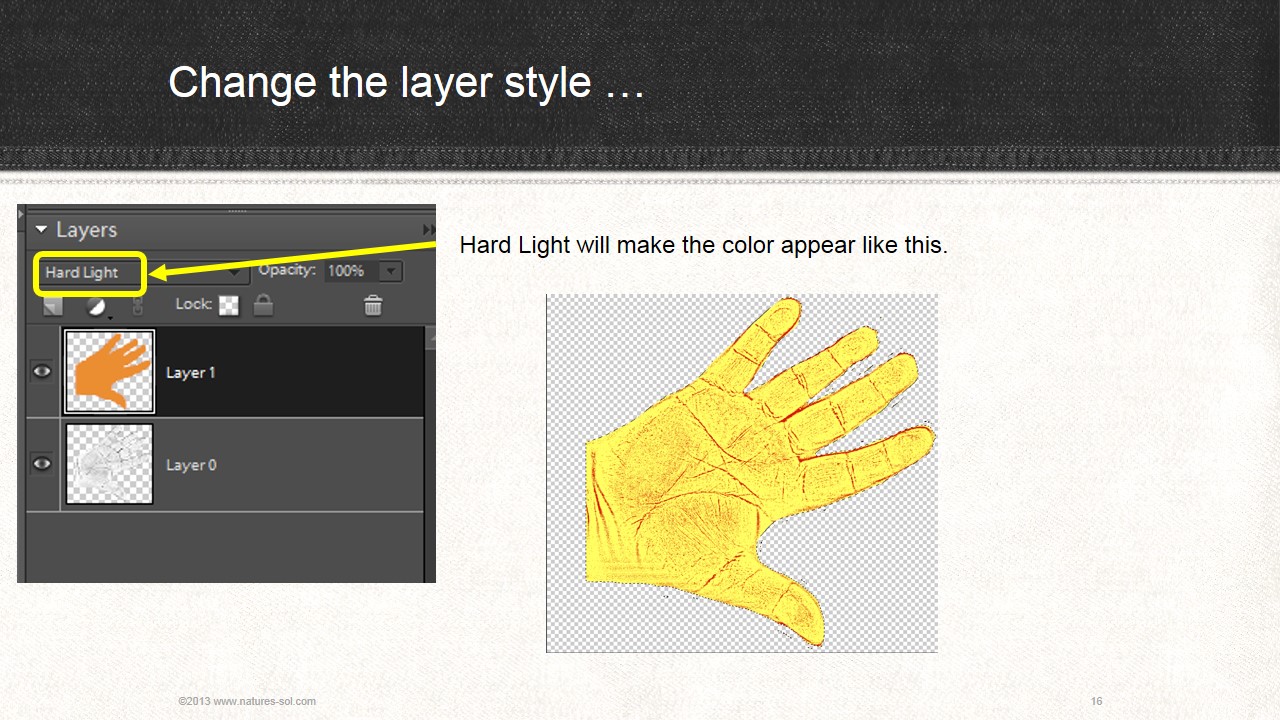
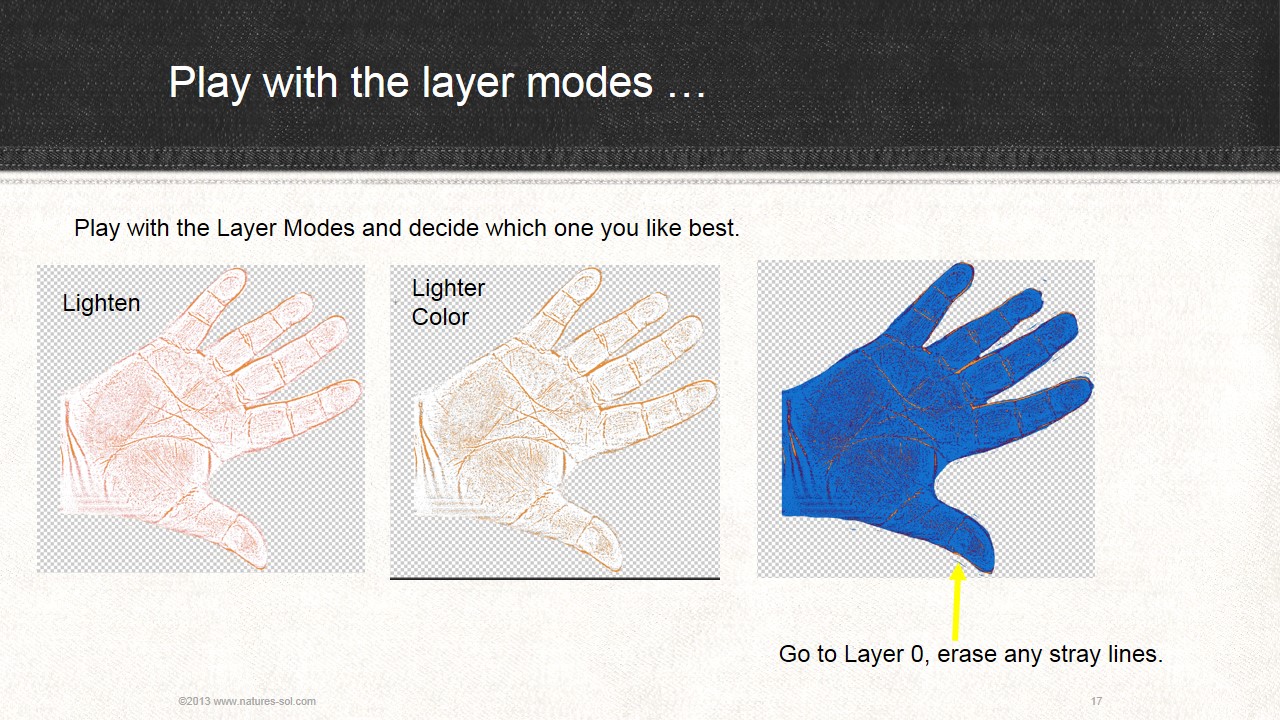
You now have a hand print that is completely colored.
To make this appear as a hand print - change the layer mode to MULTIPLY. This will make the colored hand appear see through and you will see the lines from the hand print in the layer below.
You can change the layer mode to many different styles. I have attached some of the ways the same color will appear under the different styles.
Choose the style you like. This project uses the MULTIPLY style.
When you are happy with your style, right click on the top layer and merge down. You will now have one layer with a transparent background and the finished hand print.
Save this file as your right hand or left hand print.
Start the Transfer Paper.
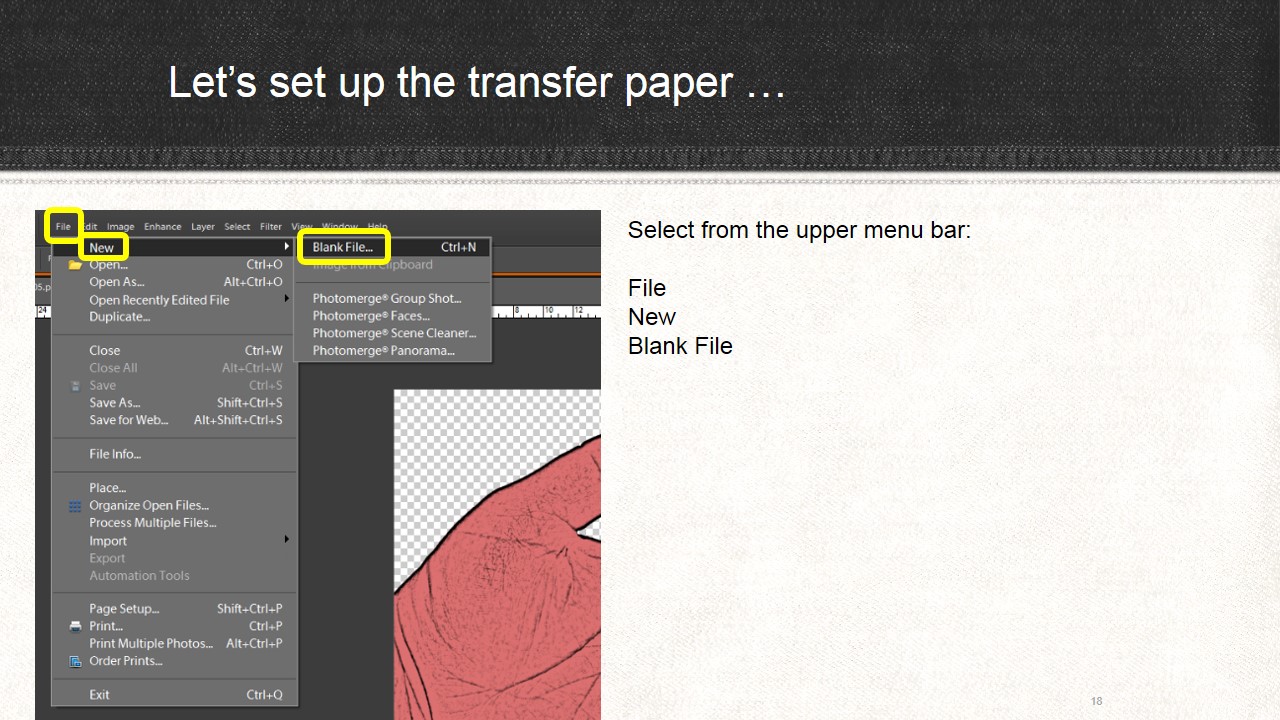
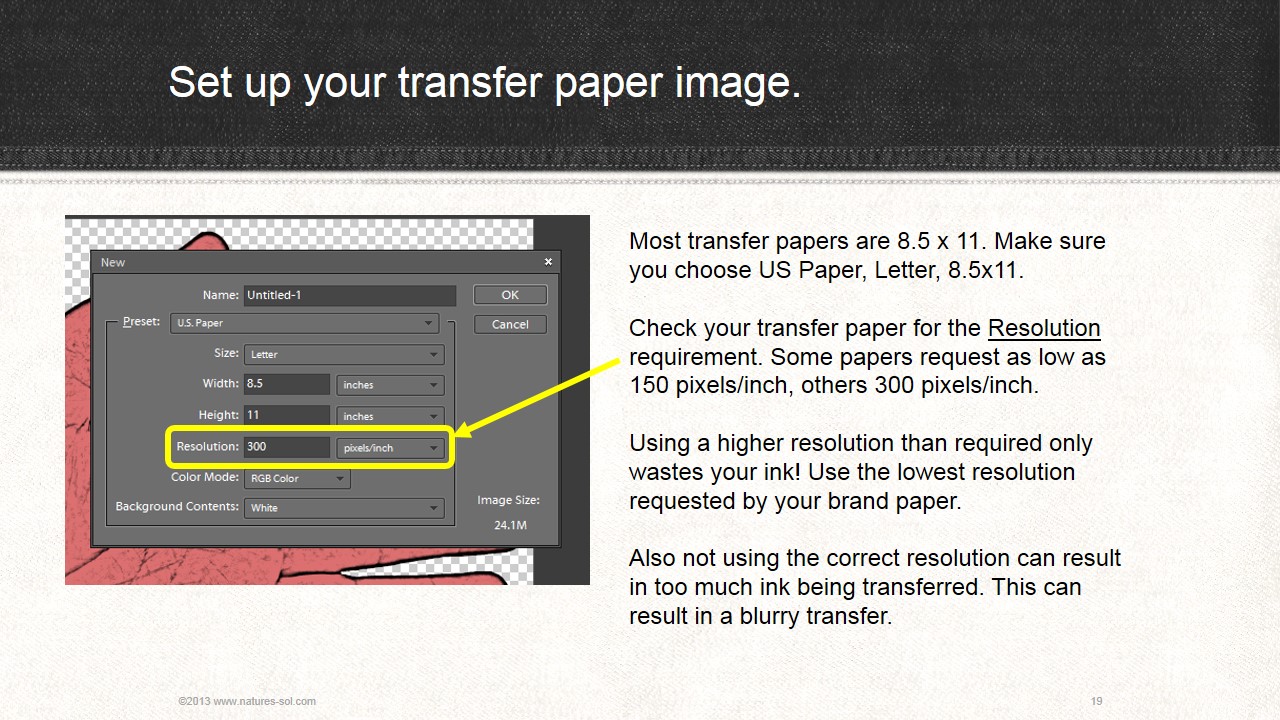
Now you will make a complete new file. Make the new file the size of paper - 8.5 x 11 - which is the usual size of the iron-on transfer papers.
Check your transfer paper directions for what resolution your image should have. Do not use a higher resolution thinking it will give you a better image. This is not photo paper. You do not normally need a high resolution to make an image on fabric sharp and bright. As a matter of fact if your resolution is too high your fabric image will be murky and blurred AND you would have wasted ink.
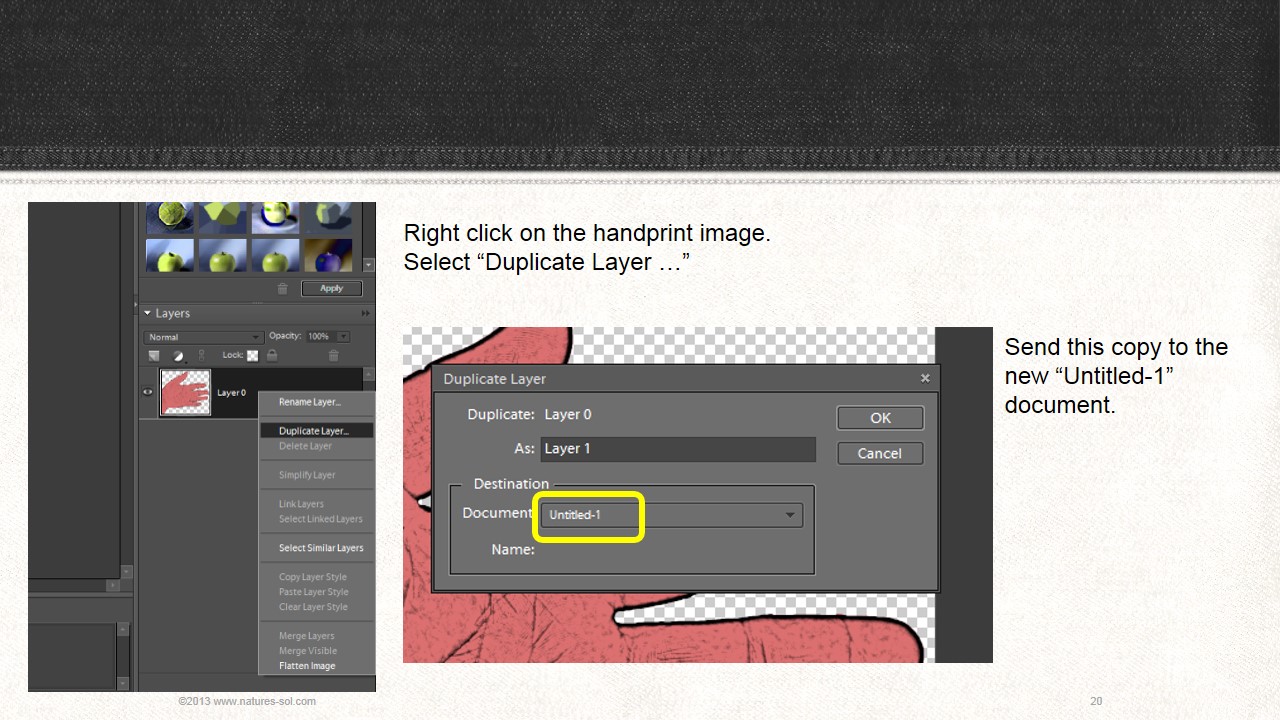
Go back to your hand file. Right-click on the hand layer and choose DUPLICATE LAYER. From the drop down choice list choose UNTITLED 1 which is the new document you just made.
Make the T-Shirt Image.
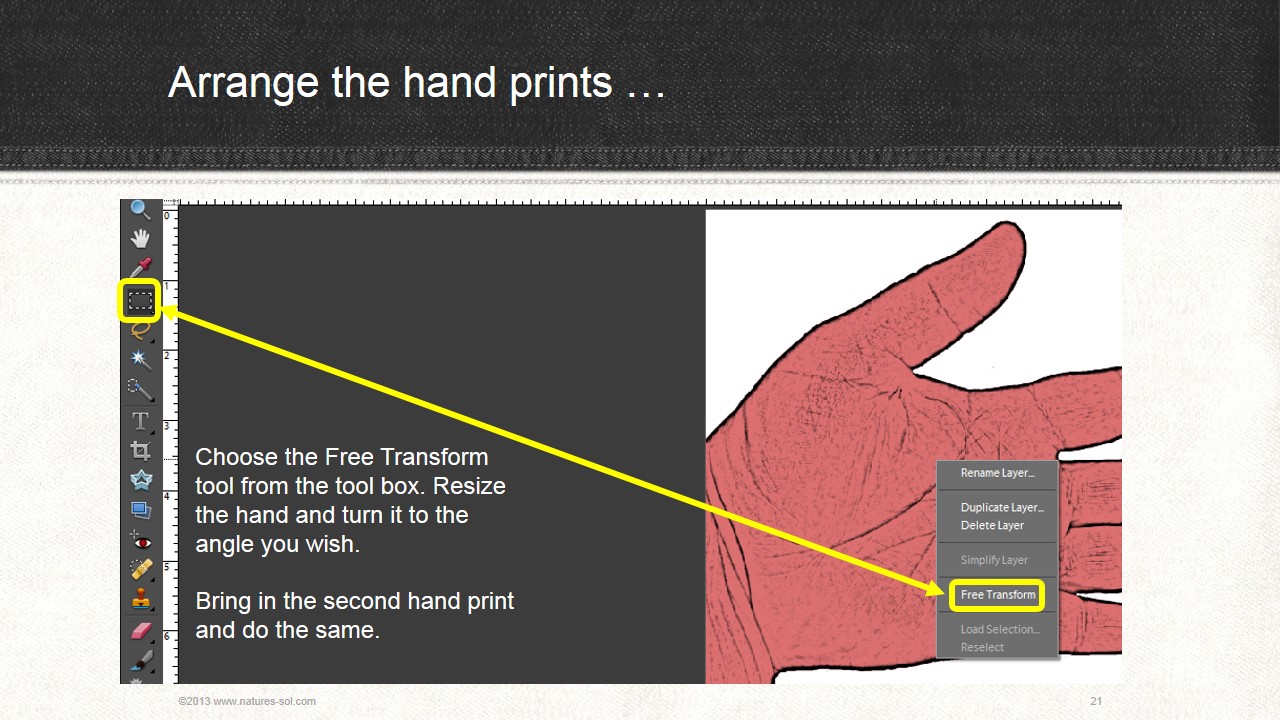
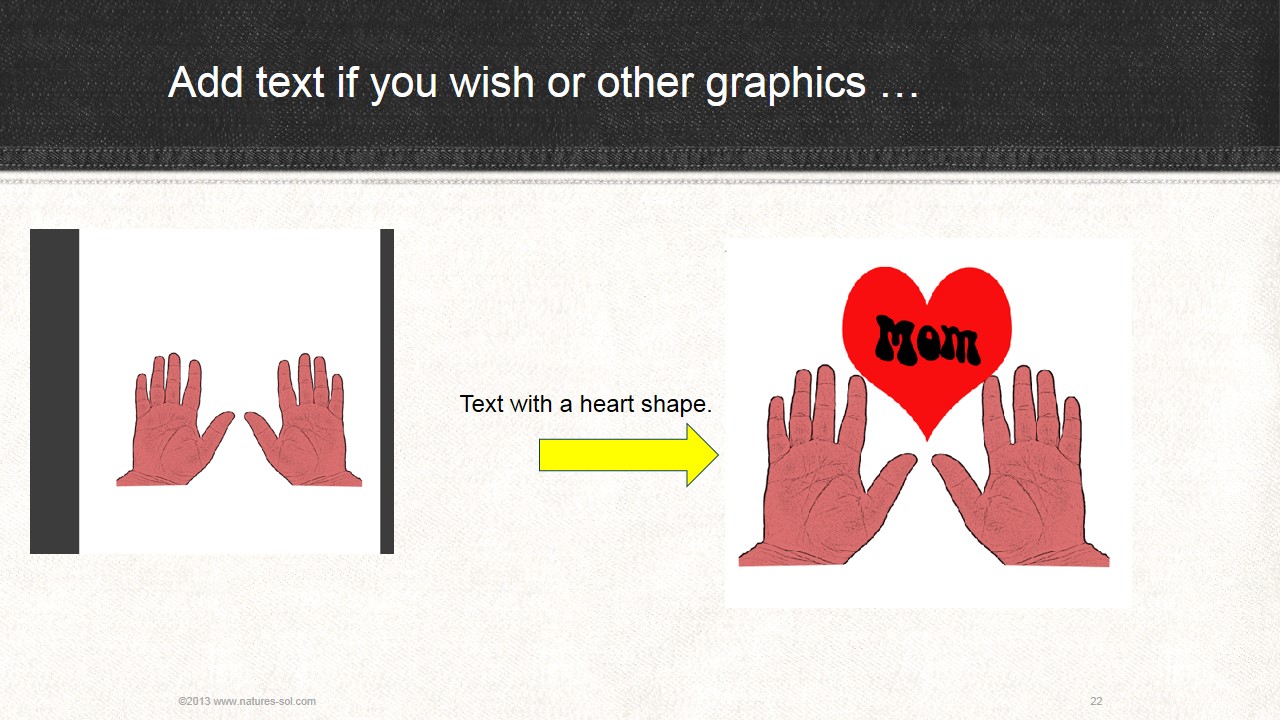
Choose the FREE TRANSFORM tool from the Tool Box and move the hand around, resize, and whatever else you need to do to it on the t-shirt document.
Do all these steps again for the other hand. Bring this hand image also into the t-shirt document. Again, FREE TRANSFORM this hand image to the position and size you want it.
You can decorate the rest of the iron-on with anything you wish. You can put the child's photo, hearts, all kinds of decorations. You are only limited by your imagination.
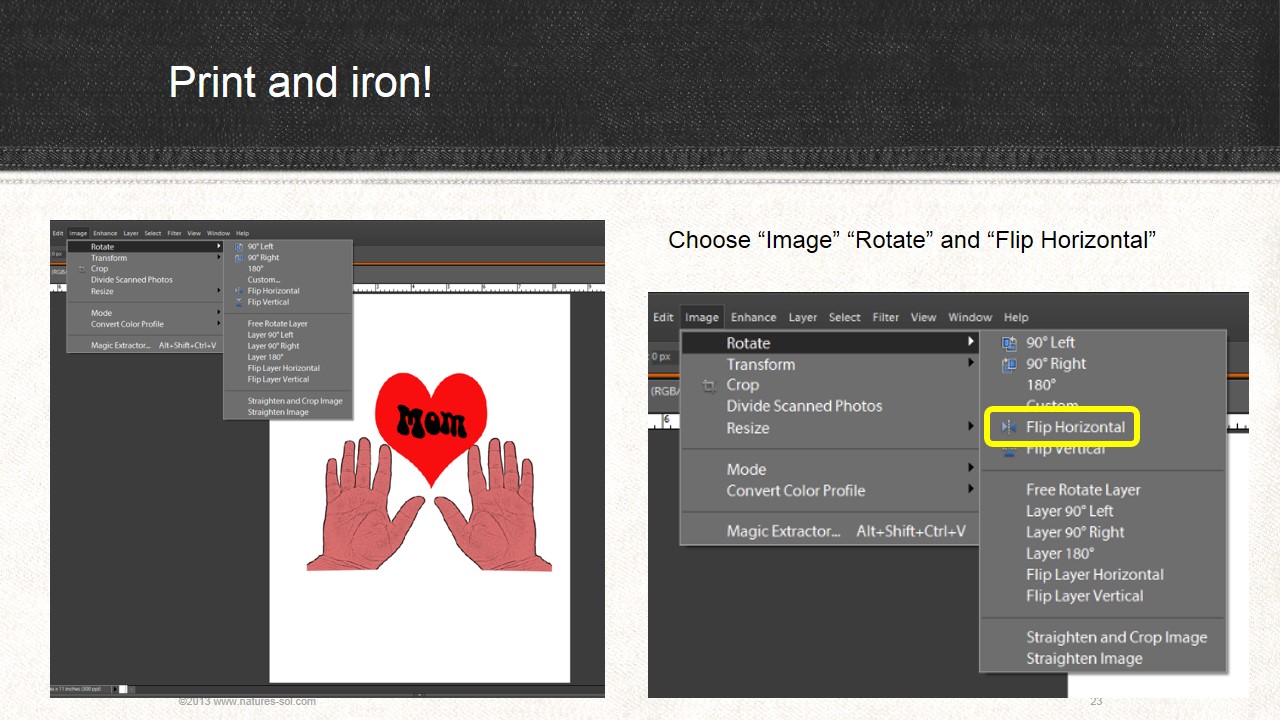
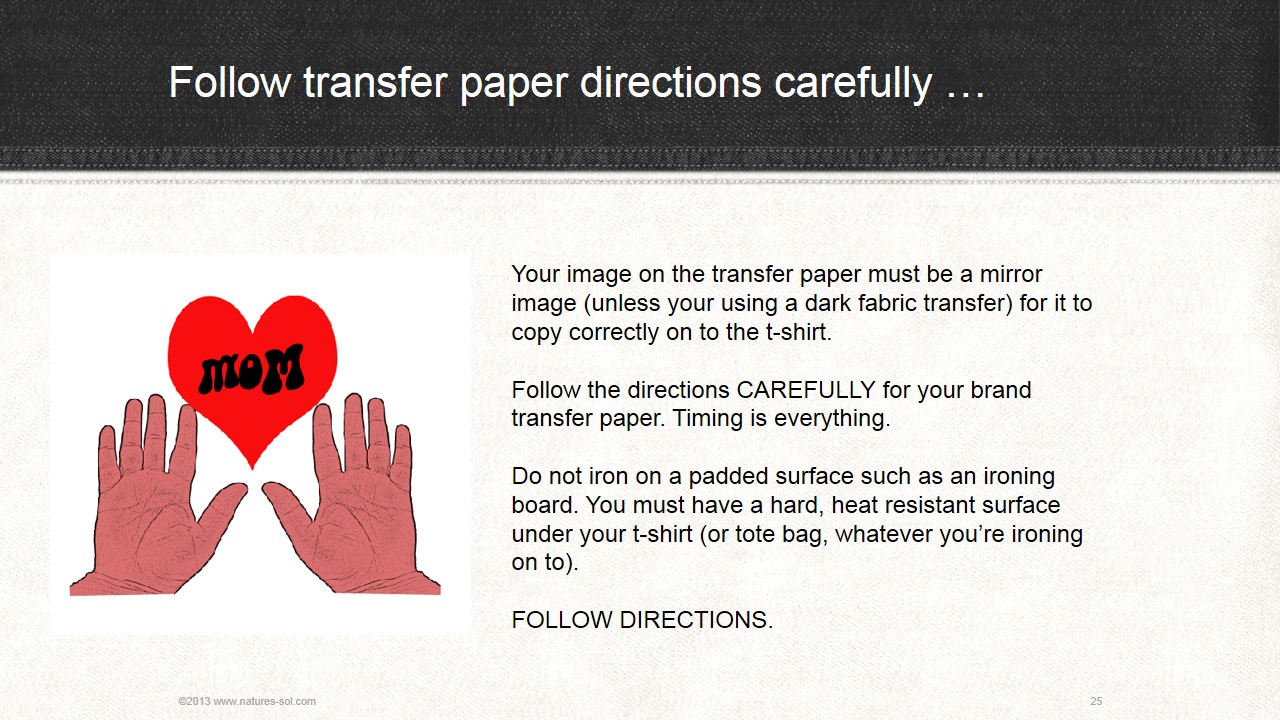
REMEMBER before you print - you must MIRROR IMAGE the image. If you do not do this, the image will be reversed and unreadable on the t-shirt.
Let Your Imagination Go!
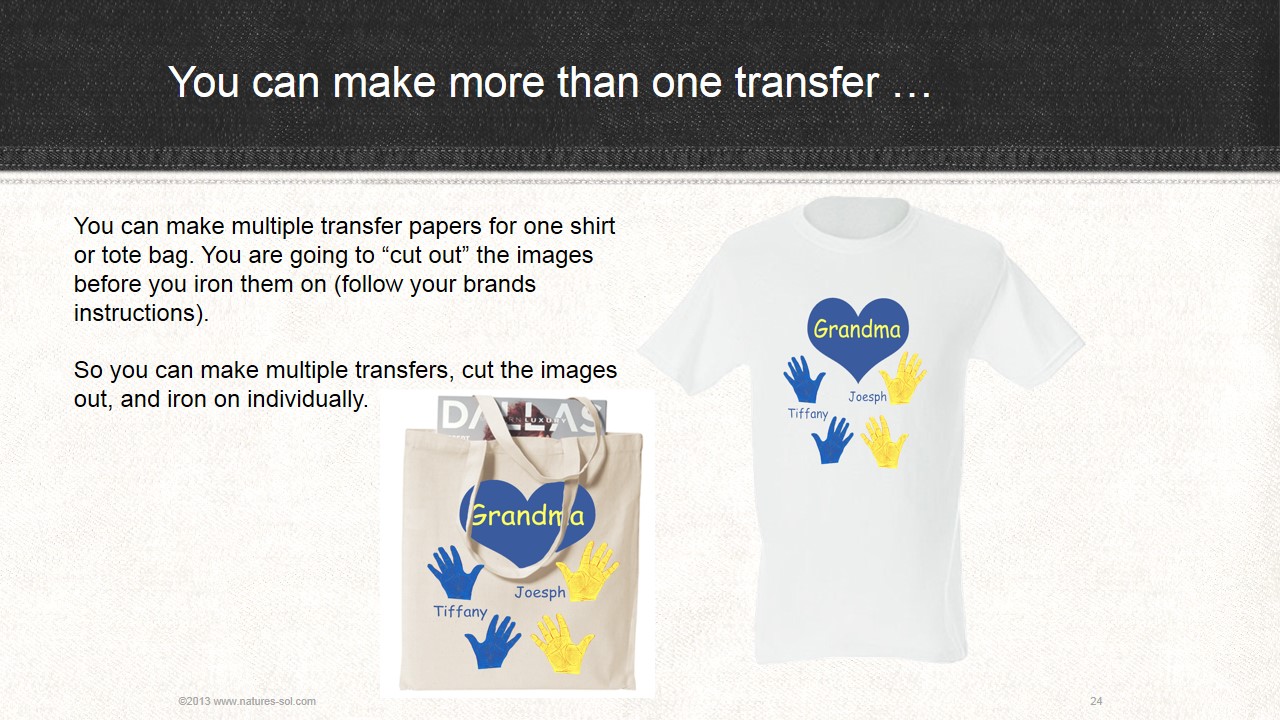
When you iron on the transfer (per your manufacturer's instructions) you will cut away excess "white background." This will enable you to reposition the hand prints, designs, and text.
DO NOT (sorry for yelling but this is important) iron the transfer on a padded ironing board. You cannot transfer the image with the t-shirt on a soft surface. You must be pressing the iron down on a solid, heat proof surface.
Check the timing for the peel off on your manufacturer's instructions. Timing is important.
Use the iron on on tote bags and t-shirts. Use the image you made on the POD sites. Make Grandma anything from a jewelry box to a mug on sites such as Zazzle.
Thank You for Using My Instructable.
Thanks for using my instructable. I usually make instructables concerning graphics and/or jewelry.
Visit my Facebook and like me for notification of new projects and free graphic downloads.
https://www.facebook.com/CarolNaturesSol
Visit my Facebook and like me for notification of new projects and free graphic downloads.
https://www.facebook.com/CarolNaturesSol