IpDTL Setup (Mac)
ipDTL Guest Setup for Mac
Entering Name
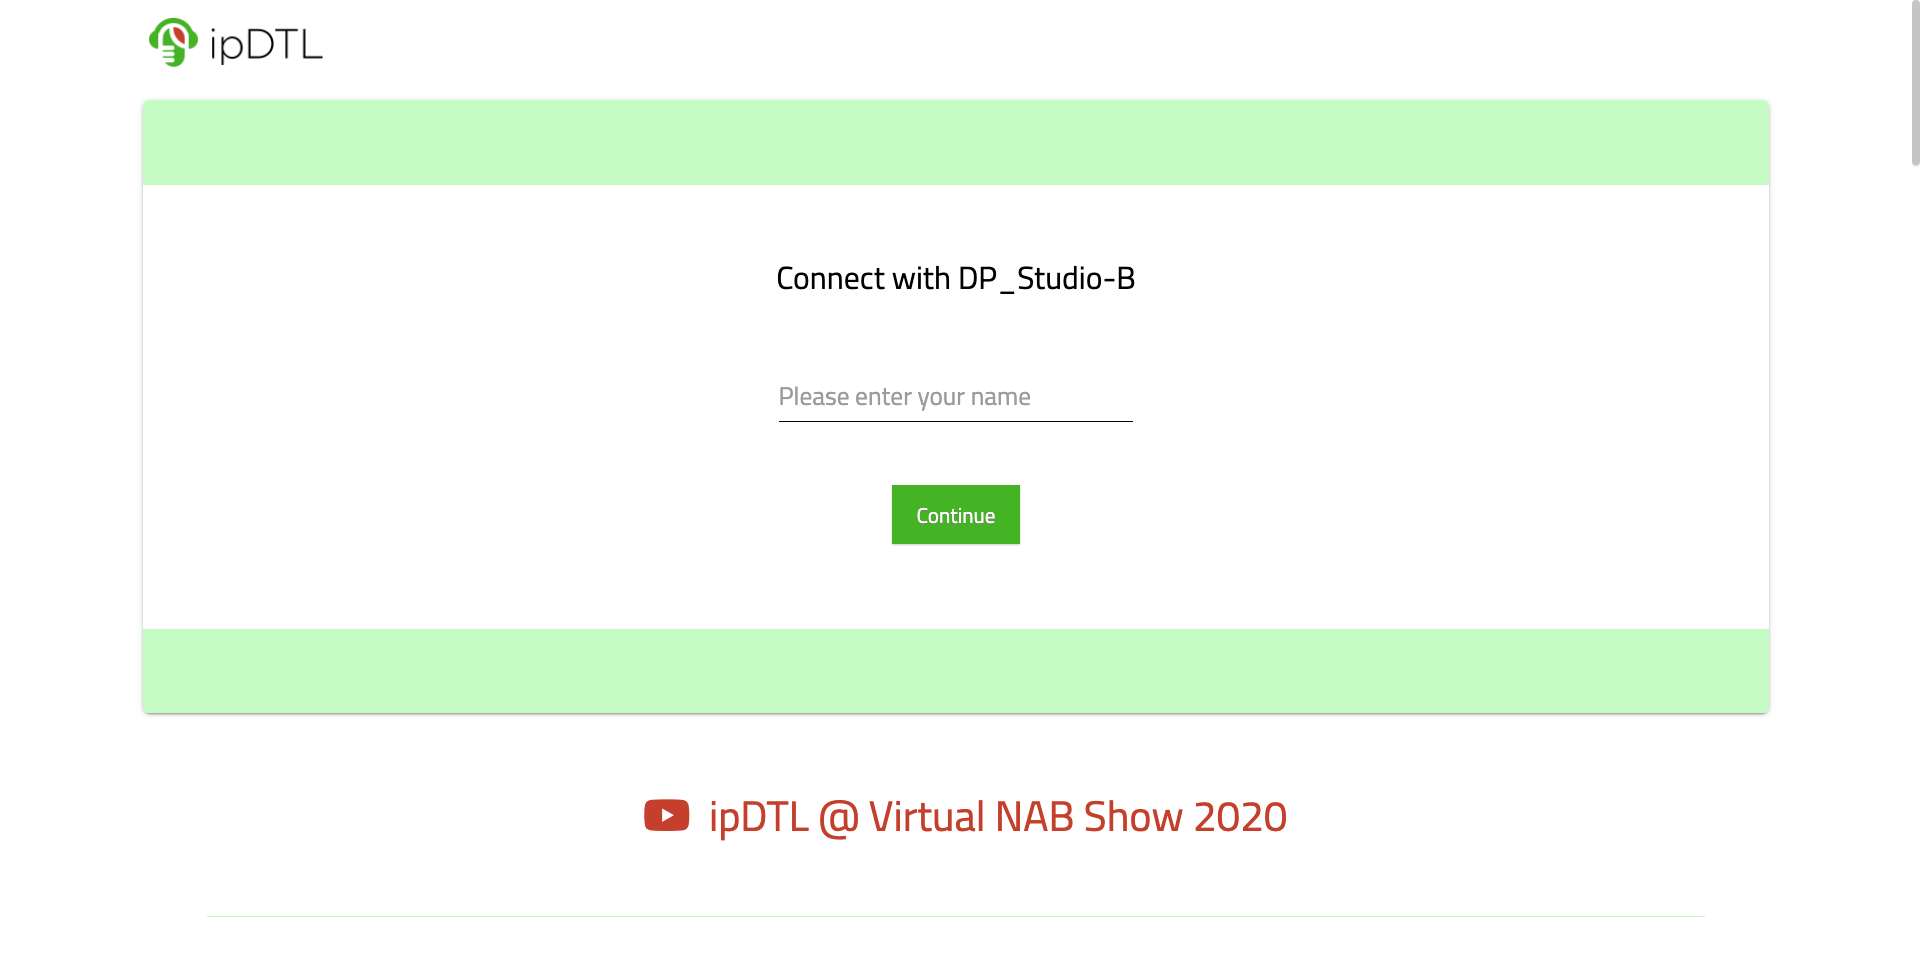
- Have the guest/host enter their name then click continue.
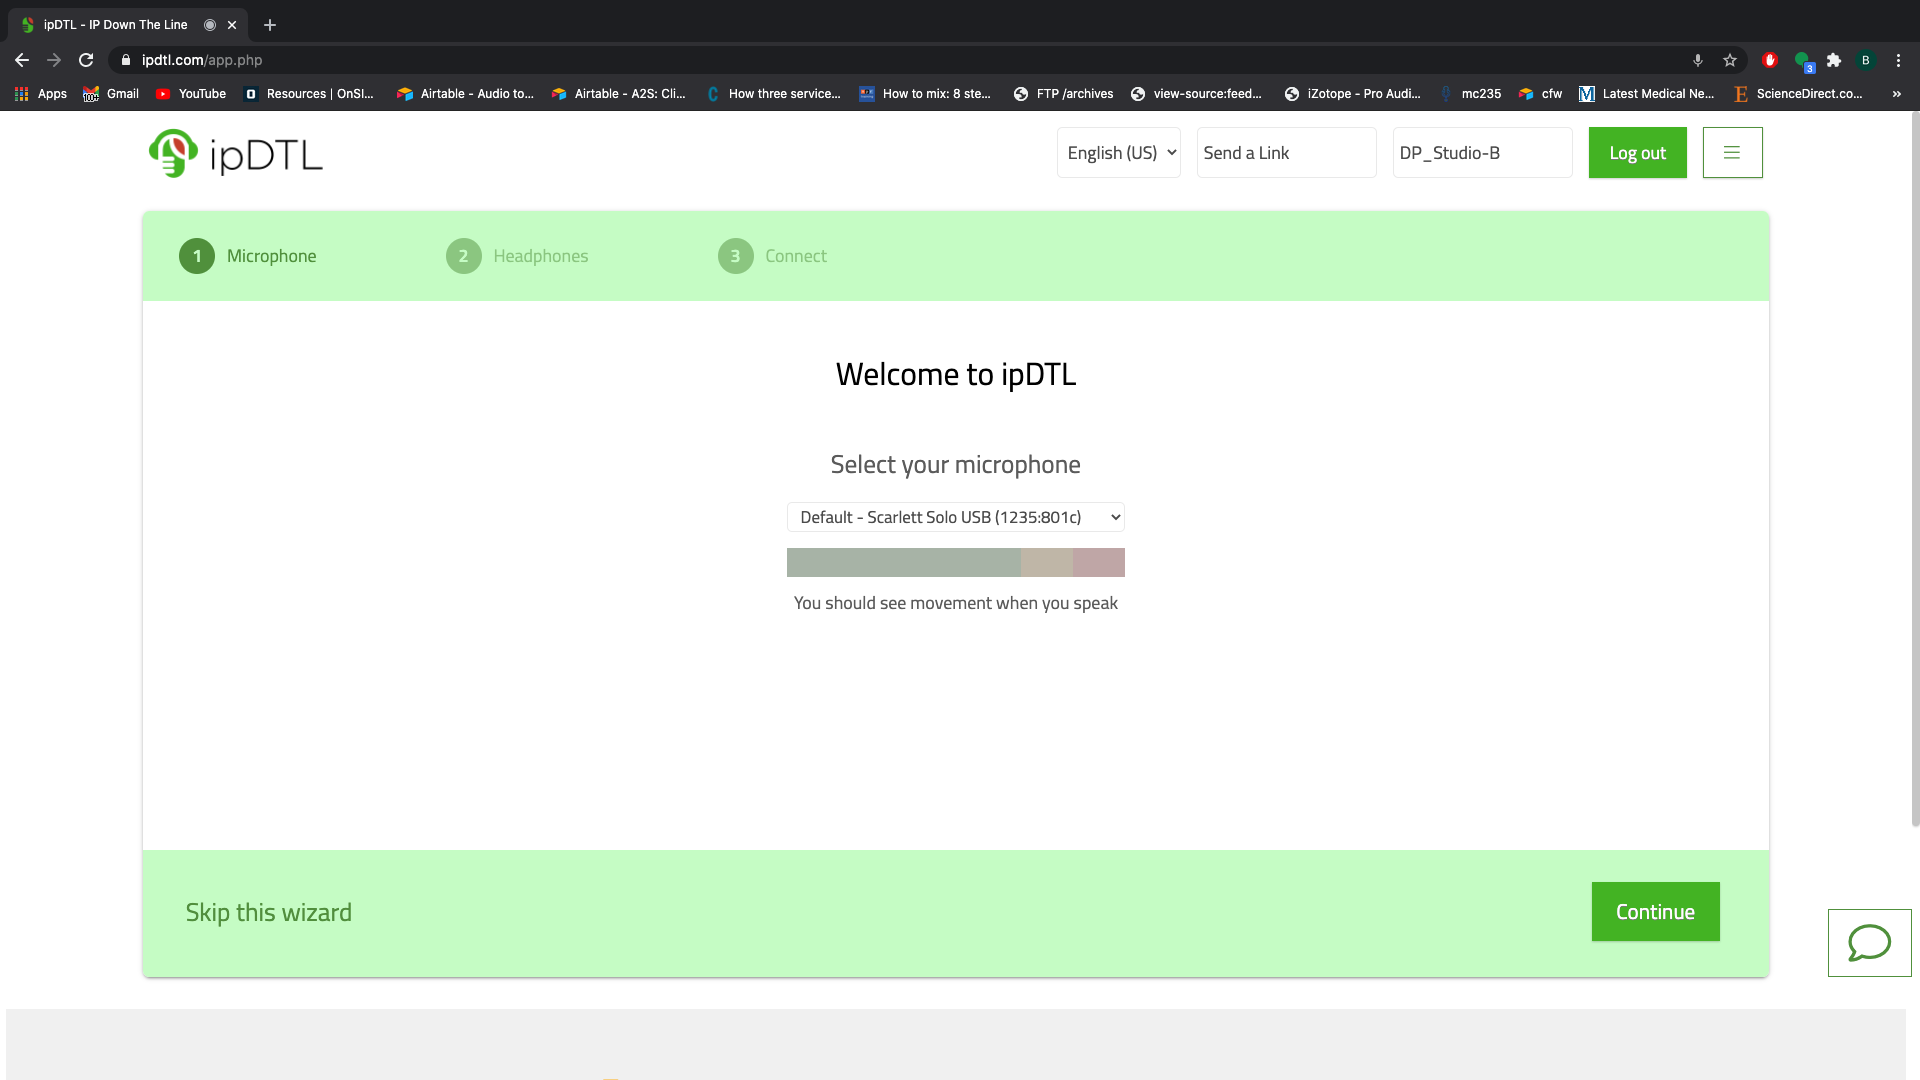
Selecting the Microphone (Input Device)
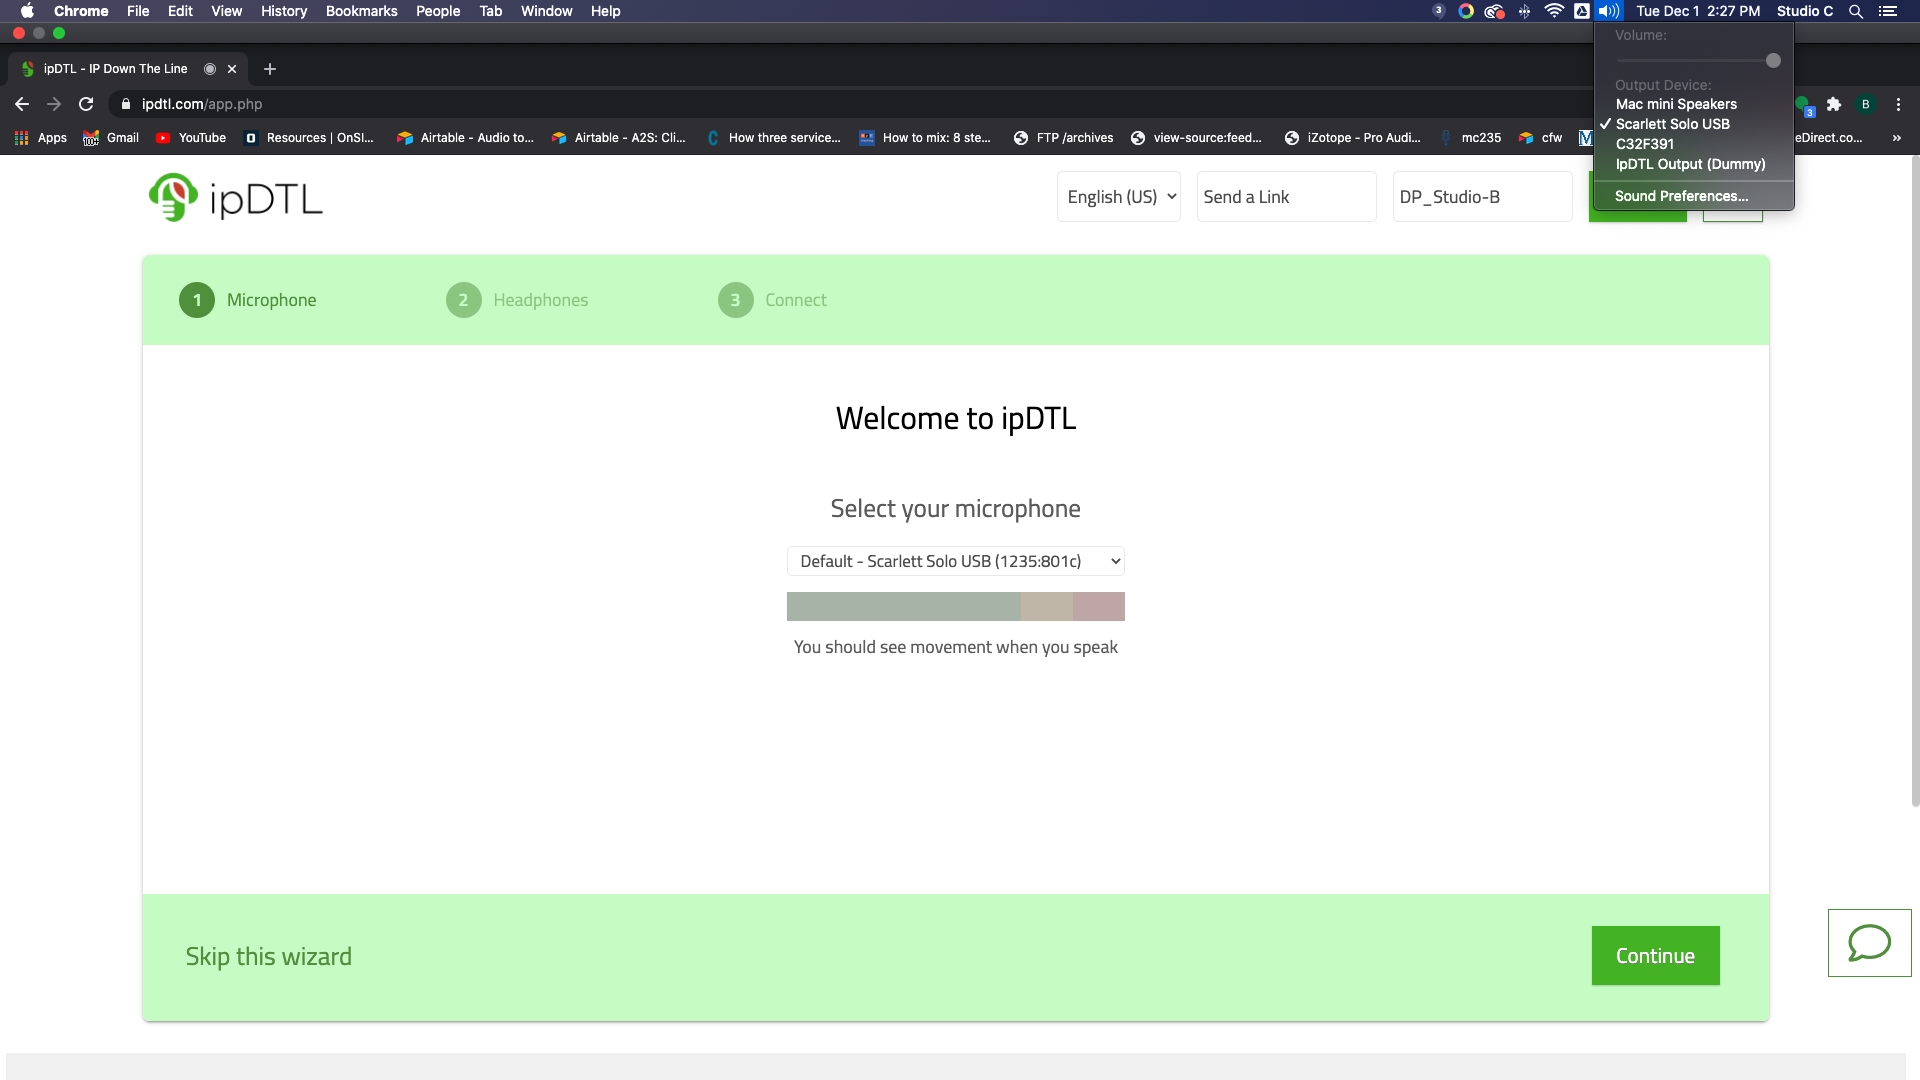
-
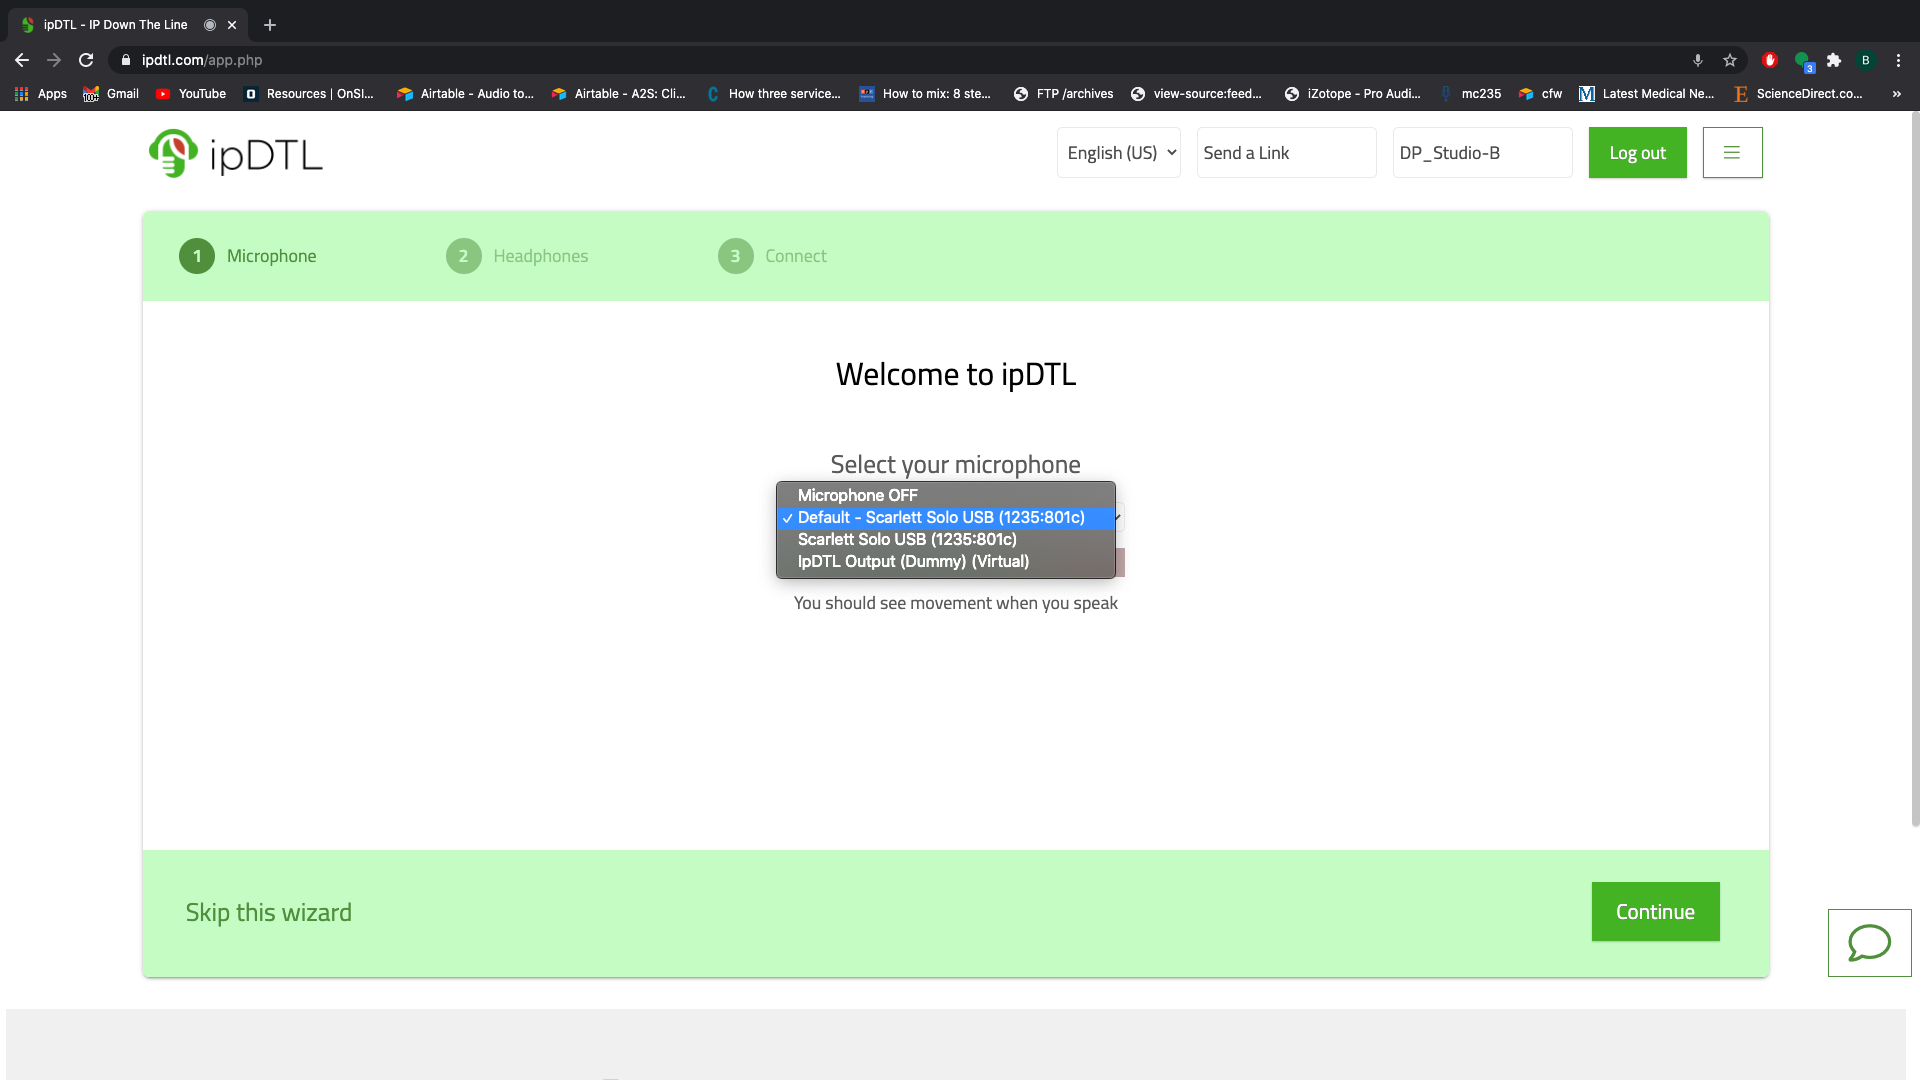
Have them select their microphone, headset, mixer or input device from the drop-down menu.
- NOTE: Sometimes the guest may need to choose their device in the top menu bar before it shows up in the drop-down menu.
Testing the Microphone
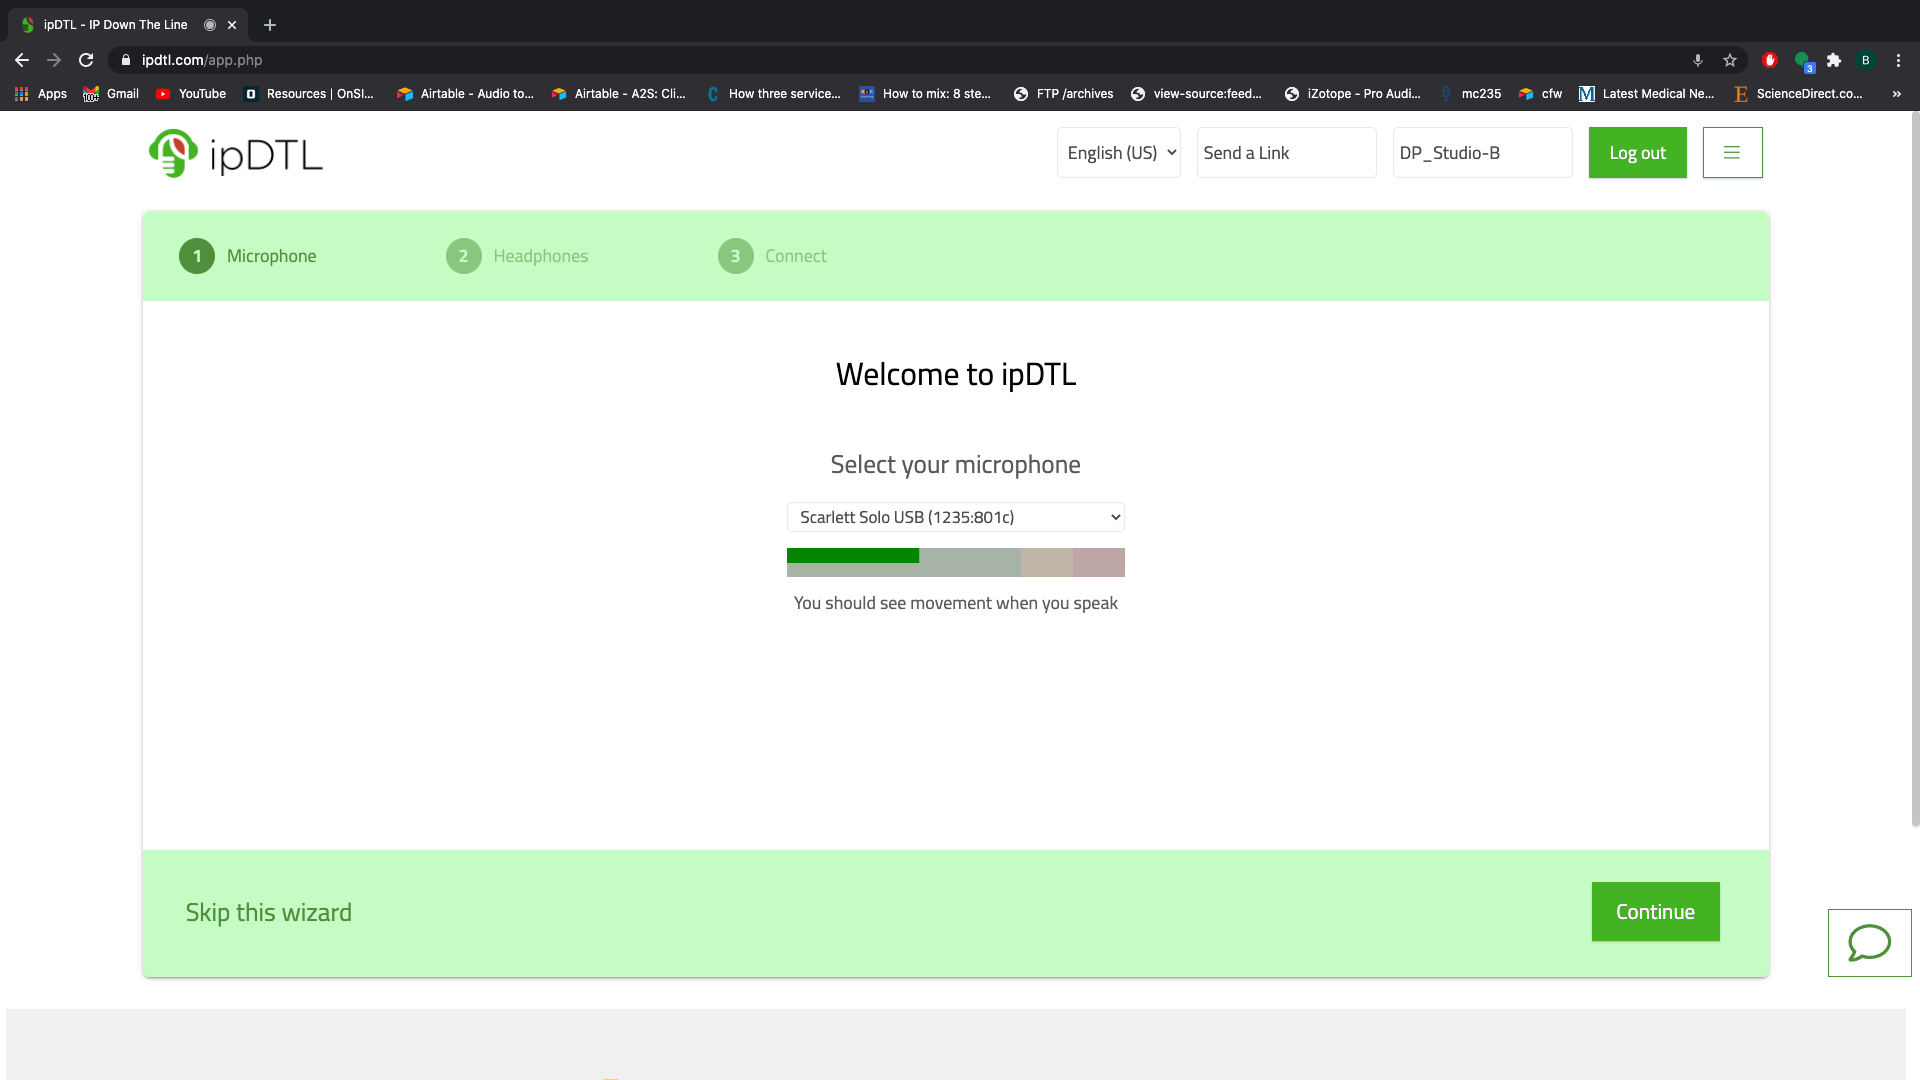
-
Have them lightly TAP THE MIC to ensure they are getting level from the correct microphone.
-
Press continue.
TROUBLESHOOTING TIPS
-
NOTE: If the meter doesn’t respond to the taps, the wrong input device is selected or it isn’t recognized by the computer. Troubleshoot by having them select another mic/input device or unplugging the mic/mixer/interface USB and plugging it back in. If this doesn’t work, the mic may not work or may not be compatible. Consider an alternative.
Tapping the mic ensures the source of the audio ipDTL is picking up. Guests likely will not know the difference between the default computer microphone and the microphone connected via USB or interface.
Selecting Headphones (Output Device)
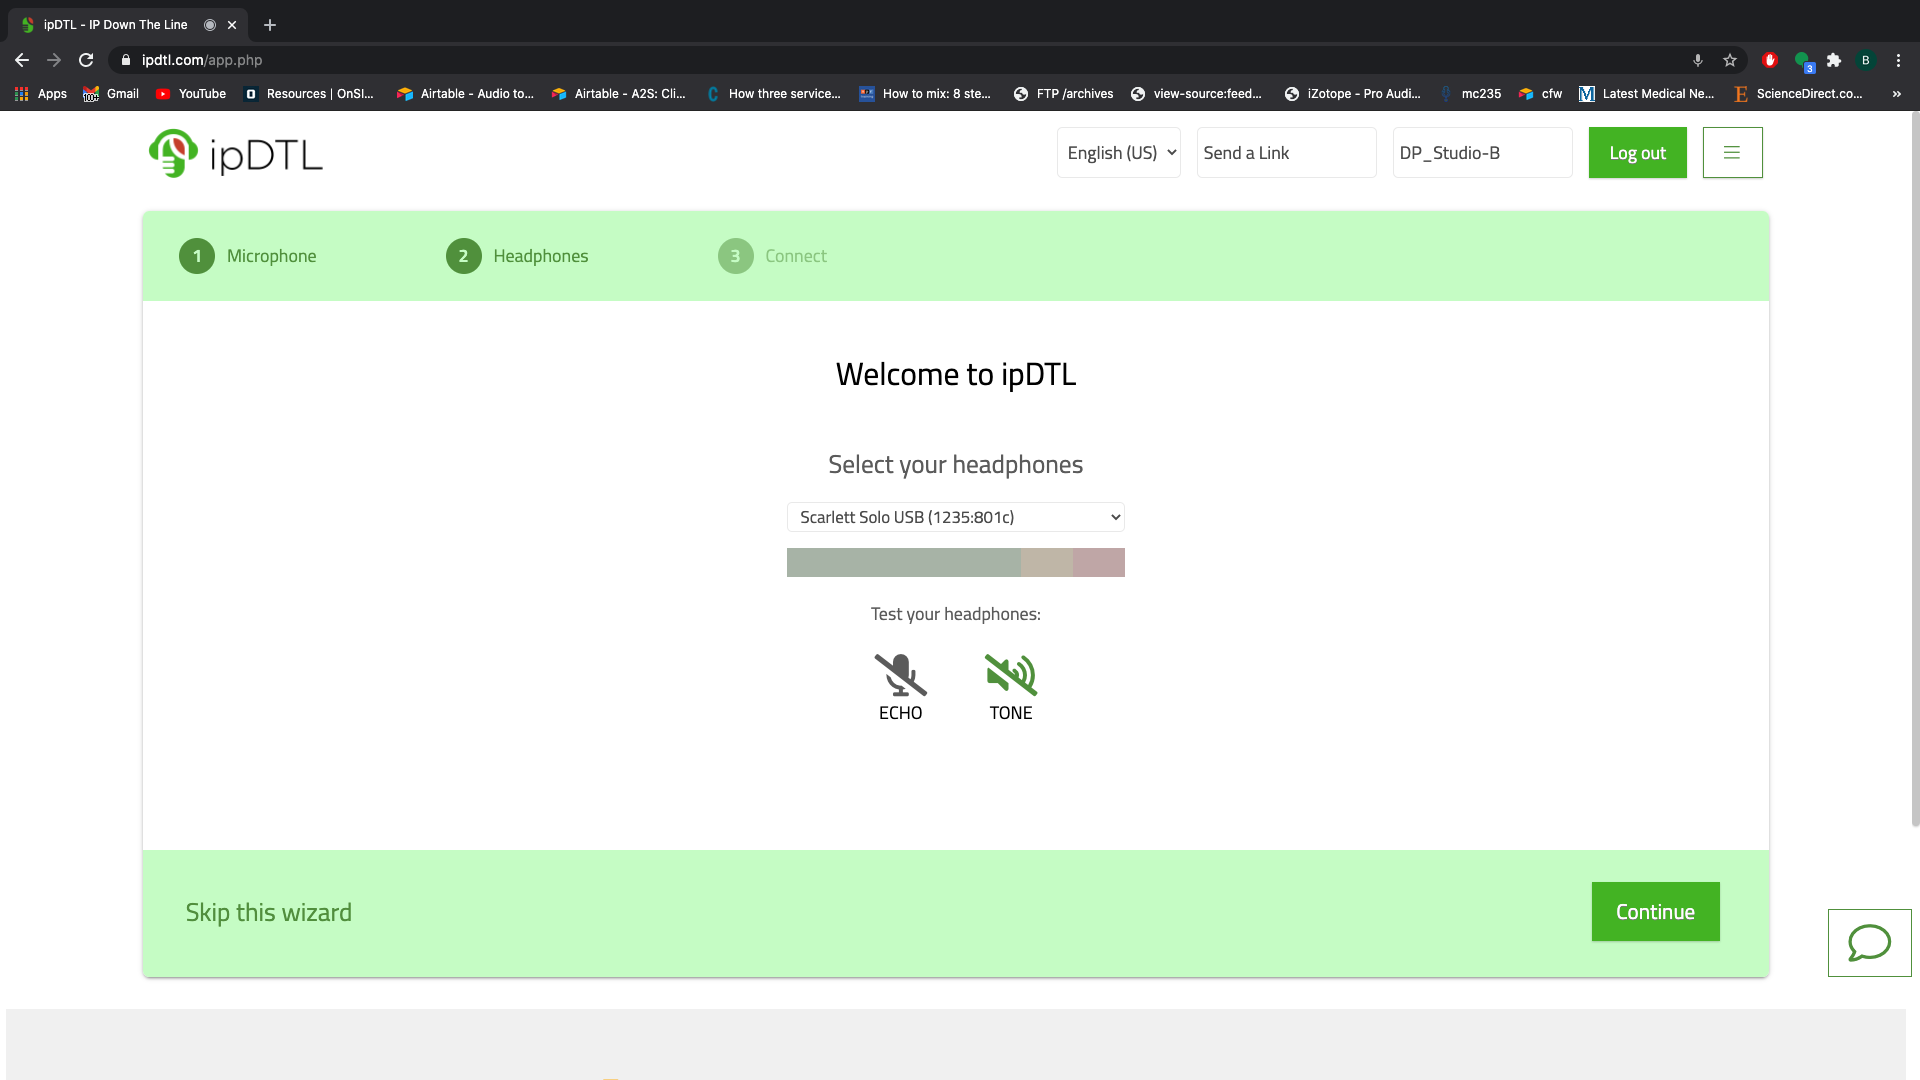
- Have them select their headphones/mixer/output device. It should be the same device chosen for the microphone.
- NOTE: The only time the output device should be different from the input device is if the guest is using the internal computer microphone and headphones using the headphone jack (not recommended)
Testing the Headphones
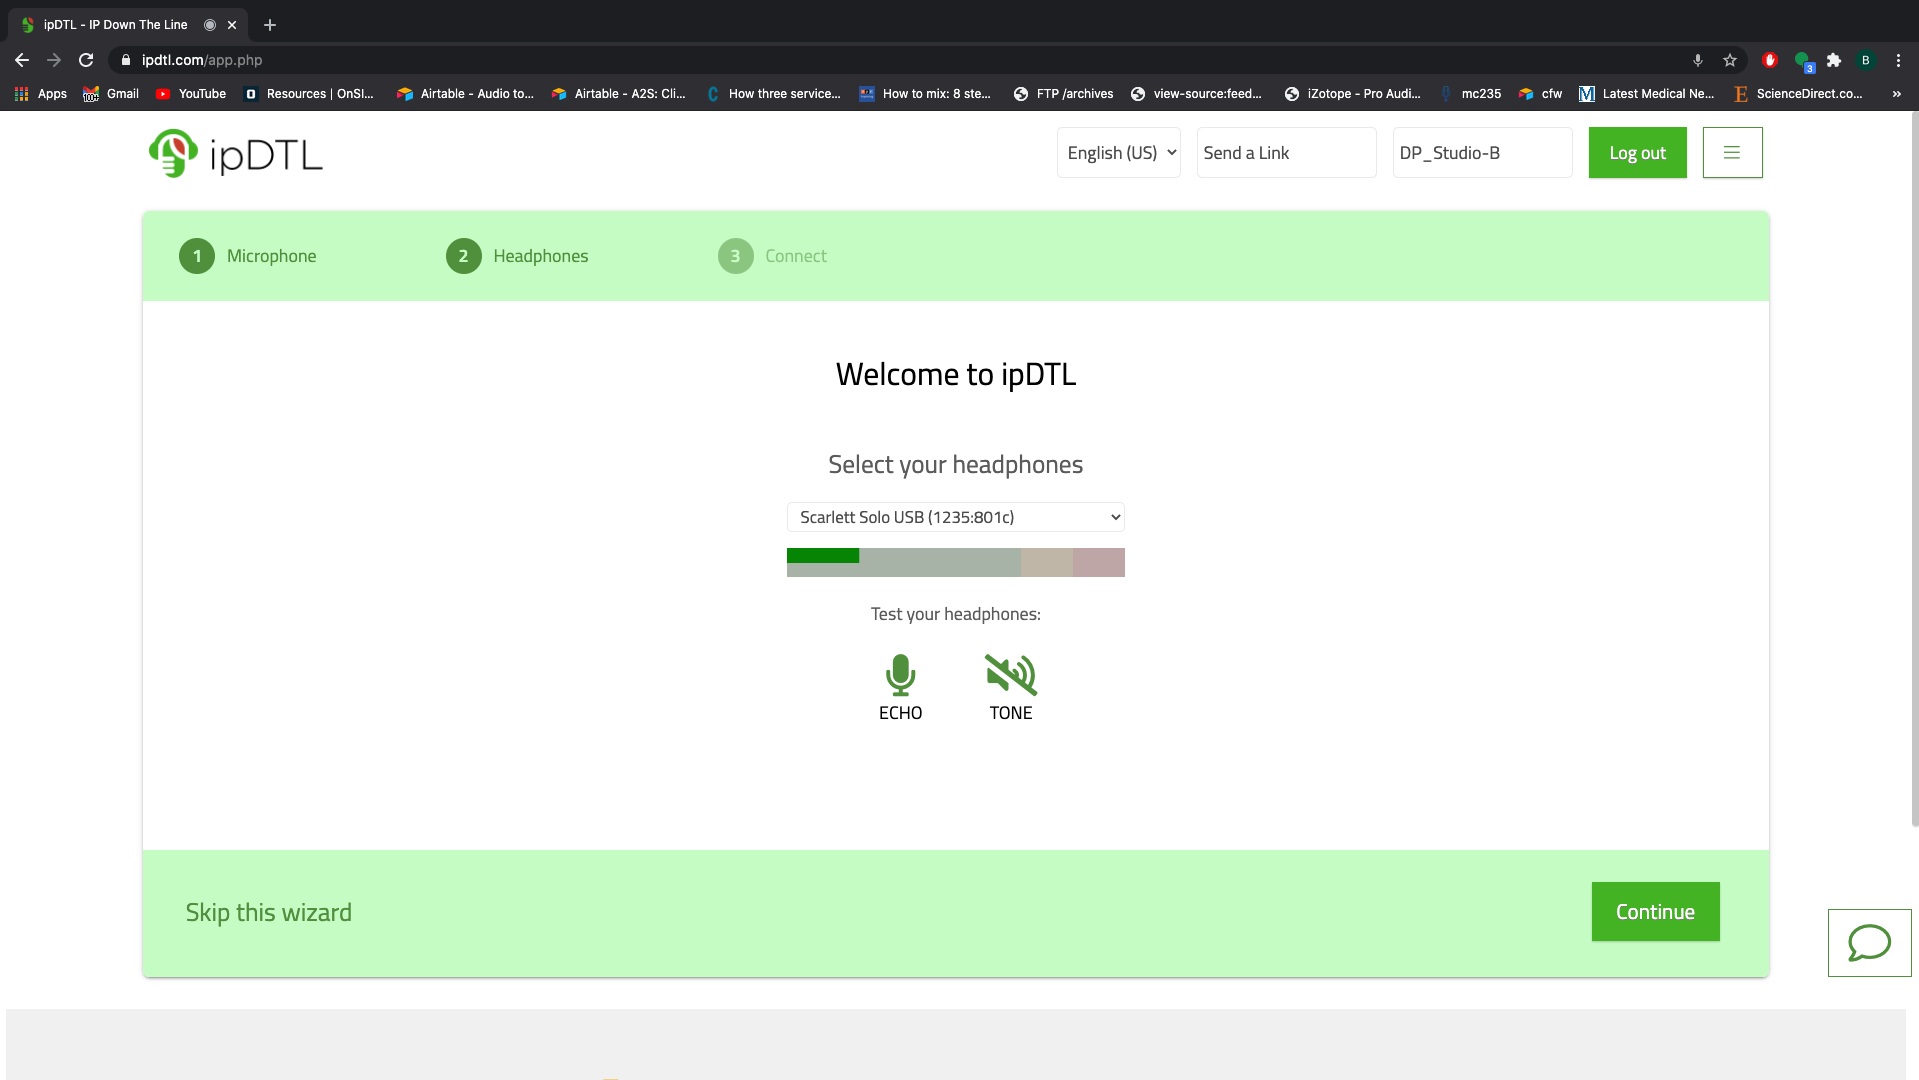
- Have them put on their headphones/headset.
- Instruct them to first select ECHO then speak into the microphone.
- They should hear a fairly high quality version of their voice back, ask them.
- If so, press continue.
TROUBLESHOOTING TIPS
- NOTE: If they say hear themselves, but it doesn't sound high quality, you may need to troubleshoot the microphone/mixer/input device again by going to the previous screen...or the headset/mic is just subpar.
- If they don't hear anything at all, you will need to troubleshoot the headphones/mixer/output device.
- In the case of hearing nothing, try the other headphone options from the drop-down menu until they hear themselves through their headphones/headset.
Connection Screen (Option 1)
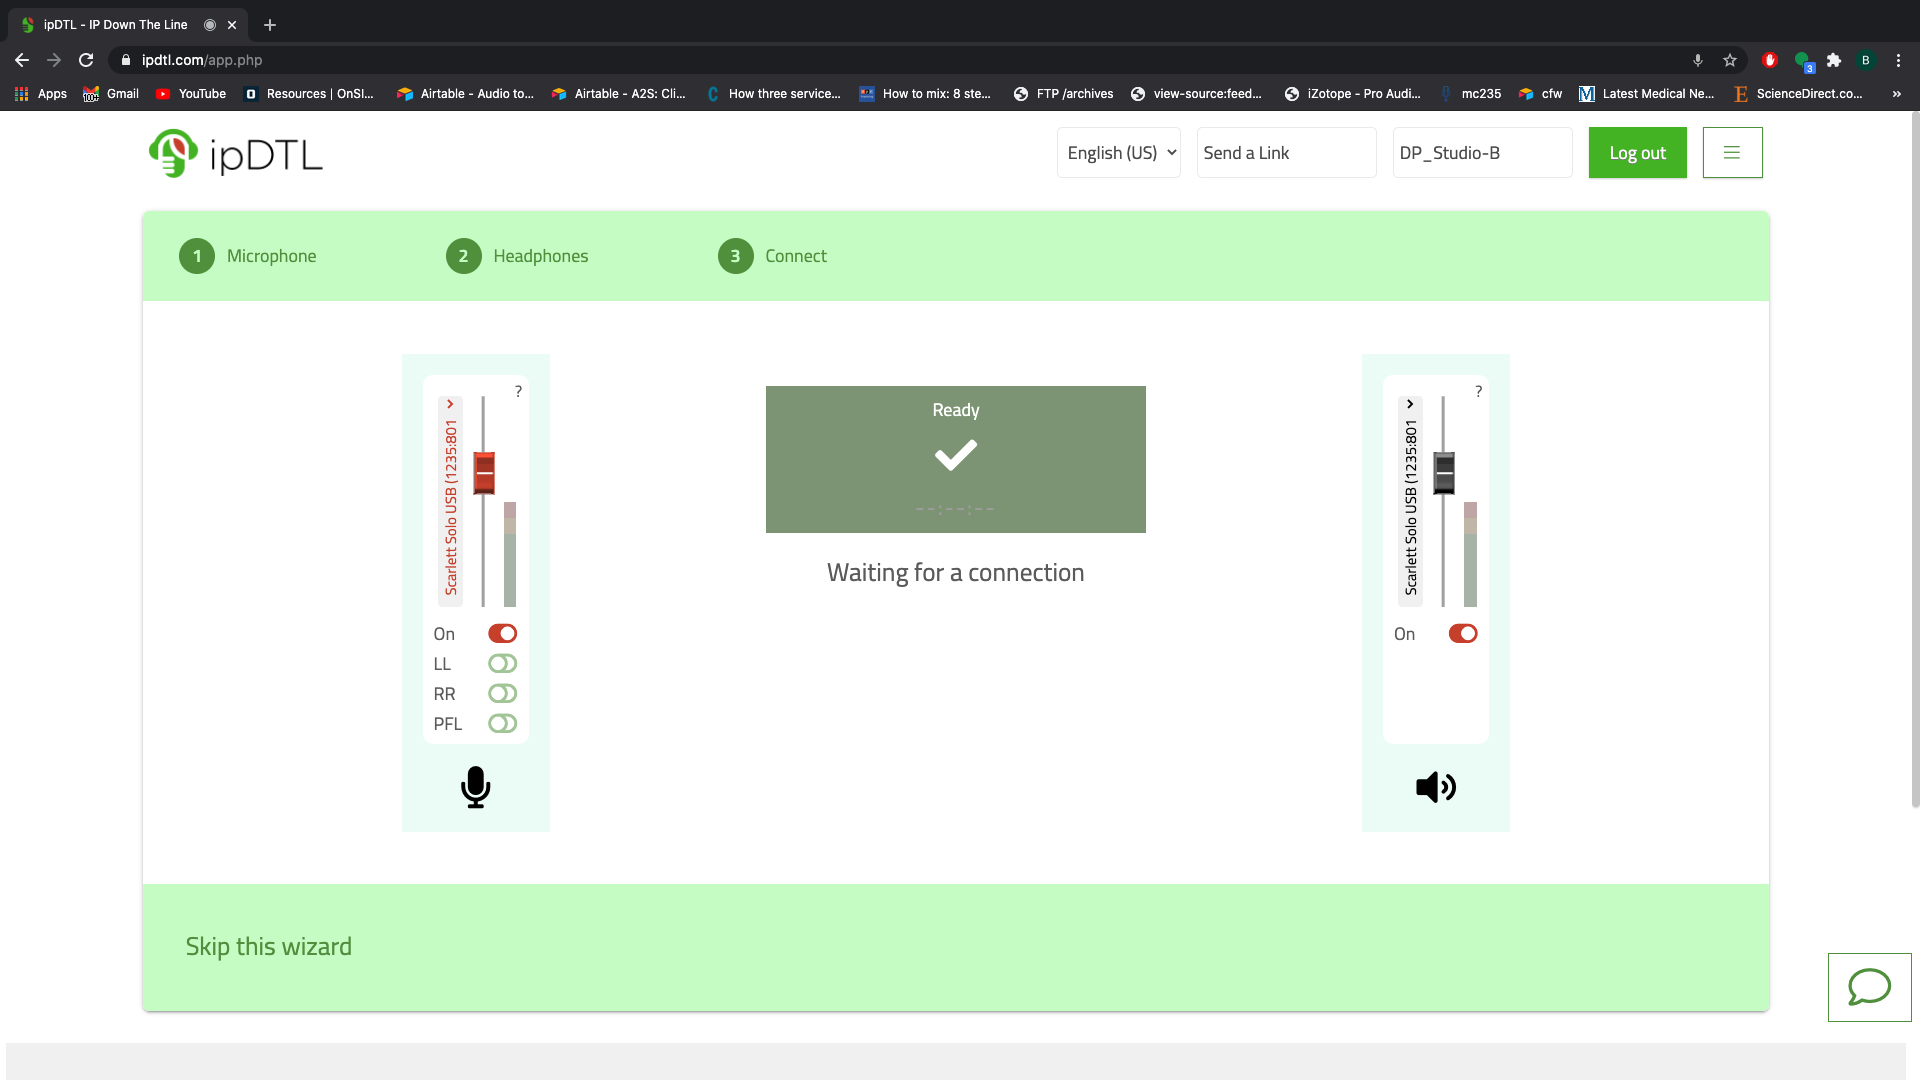
- Once the guest has completed the technical setup, they will reach a screen that says "Waiting for Connection".
- Click their name on your end of ipDTL. You should both be able to hear one another through the app using the devices in the setup
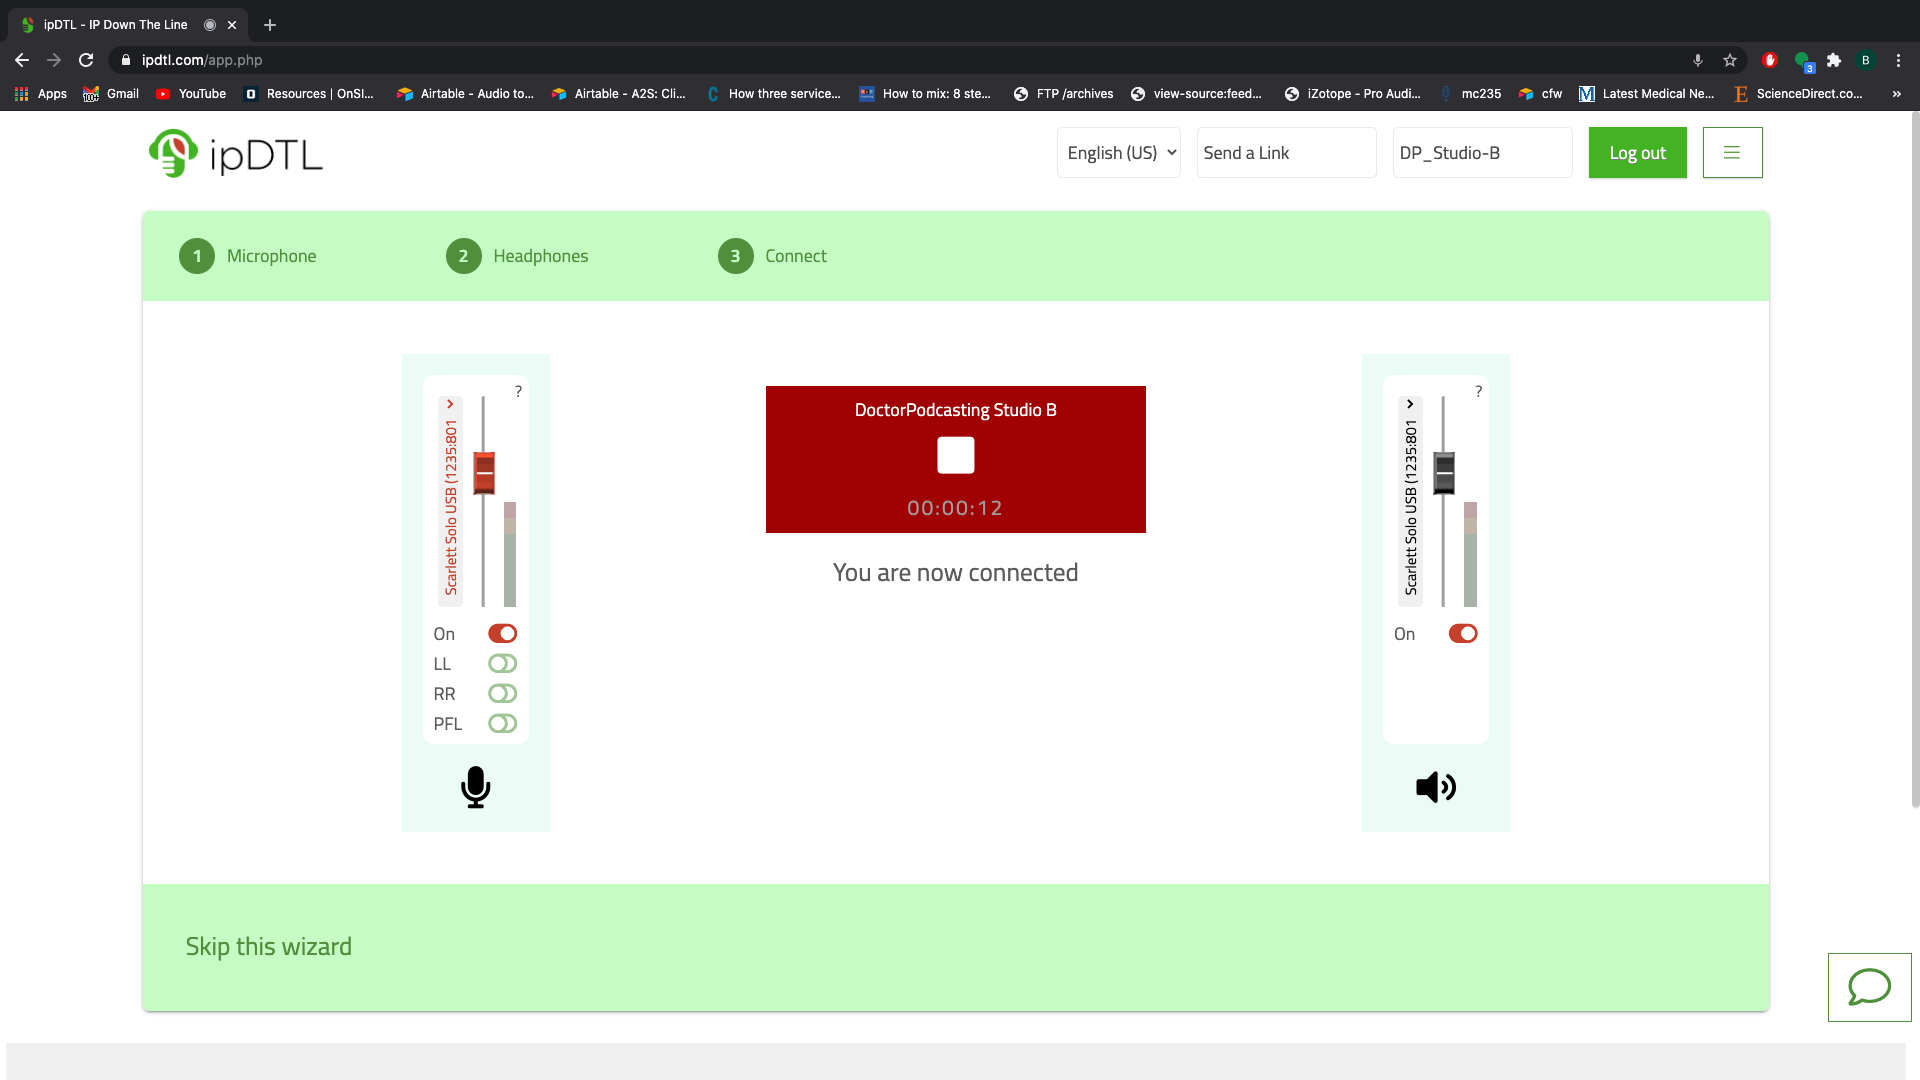
- Once you pull them in, the green box on their screen will turn red. This means they are live and streaming their audio.
- Check their levels and sound quality by having them count to five, tell about the weather or tell what they ate for breakfast that morning.
- If levels and sound are good, begin recording or bring on the next guest following the same steps.
- RECOMMENDED (optional): Have the guest click skip this wizard in the bottom left corner of the screen.
- Proceed with the next steps for Skipping the Wizard (Option 2)
- Warning: This will kick them out of the room and bring them back. You will need to click on their name again to hear each other again. Make sure you have them on the phone or have a working direct line in case something goes wrong.
NOTE: If everything was set up properly, the setup could technically be complete by this step. However, this screen does not offer the same flexibility of troubleshooting further issues that "Skipping the Wizard" does. Generally, best practice is to have them skip the wizard every time they reach this screen.
TROUBLESHOOTING TIPS
- If levels are too low, turn up the guest's fader on your screen until it is at the appropriate level.
-
If levels are still low, have them turn up the red fader on their screen until it reaches an appropriate level for recording.
-
If levels are still low, ask them if there is a way to turn up the input on the headset/microphone/mixer itself.
- If they don't know, ask them what the headset/microphone/mixer is then Google it to find information/pictures of it. Troubleshoot based on your findings.
- If there are no additional options to turn up the guest's volume, accommodate the volume of the lower guest by turning down the guest and the host to match then turn up your OUTPUT FADER.
-
Skipping the Wizard (Option 2)
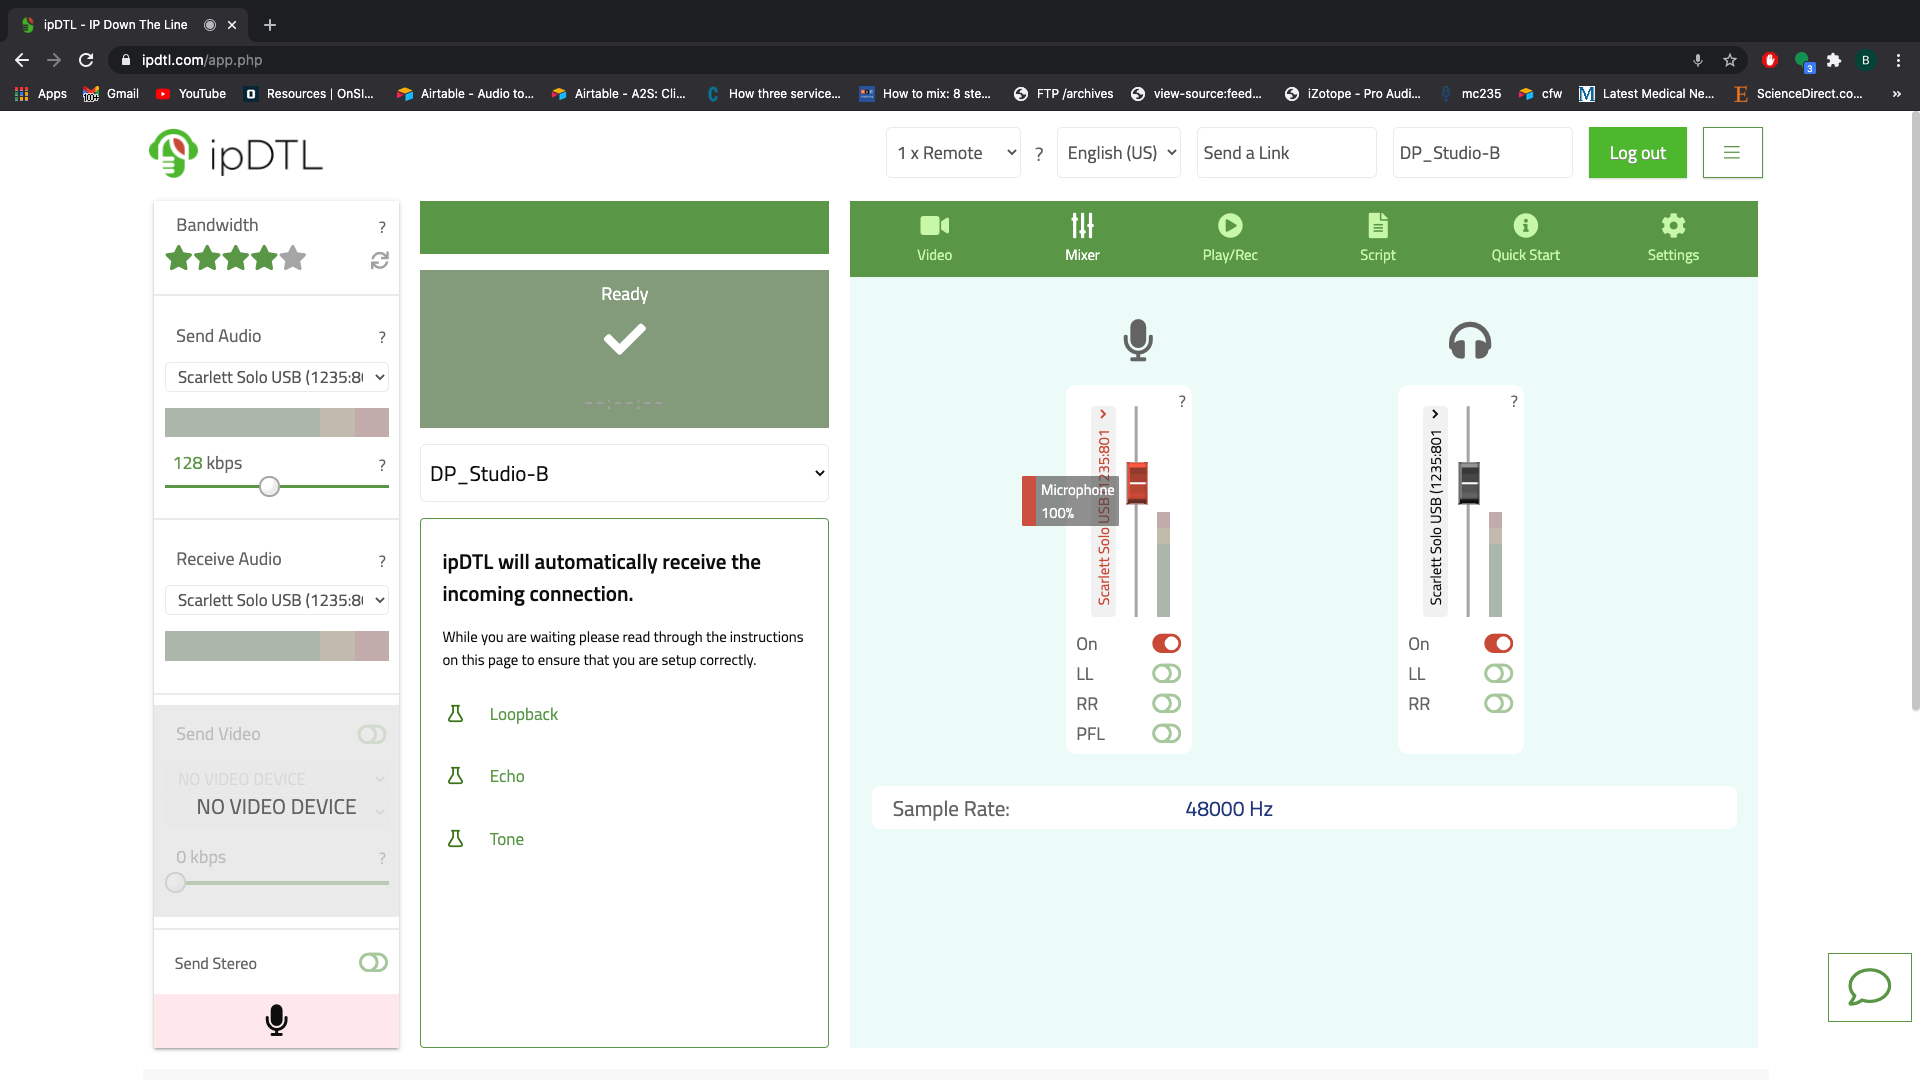
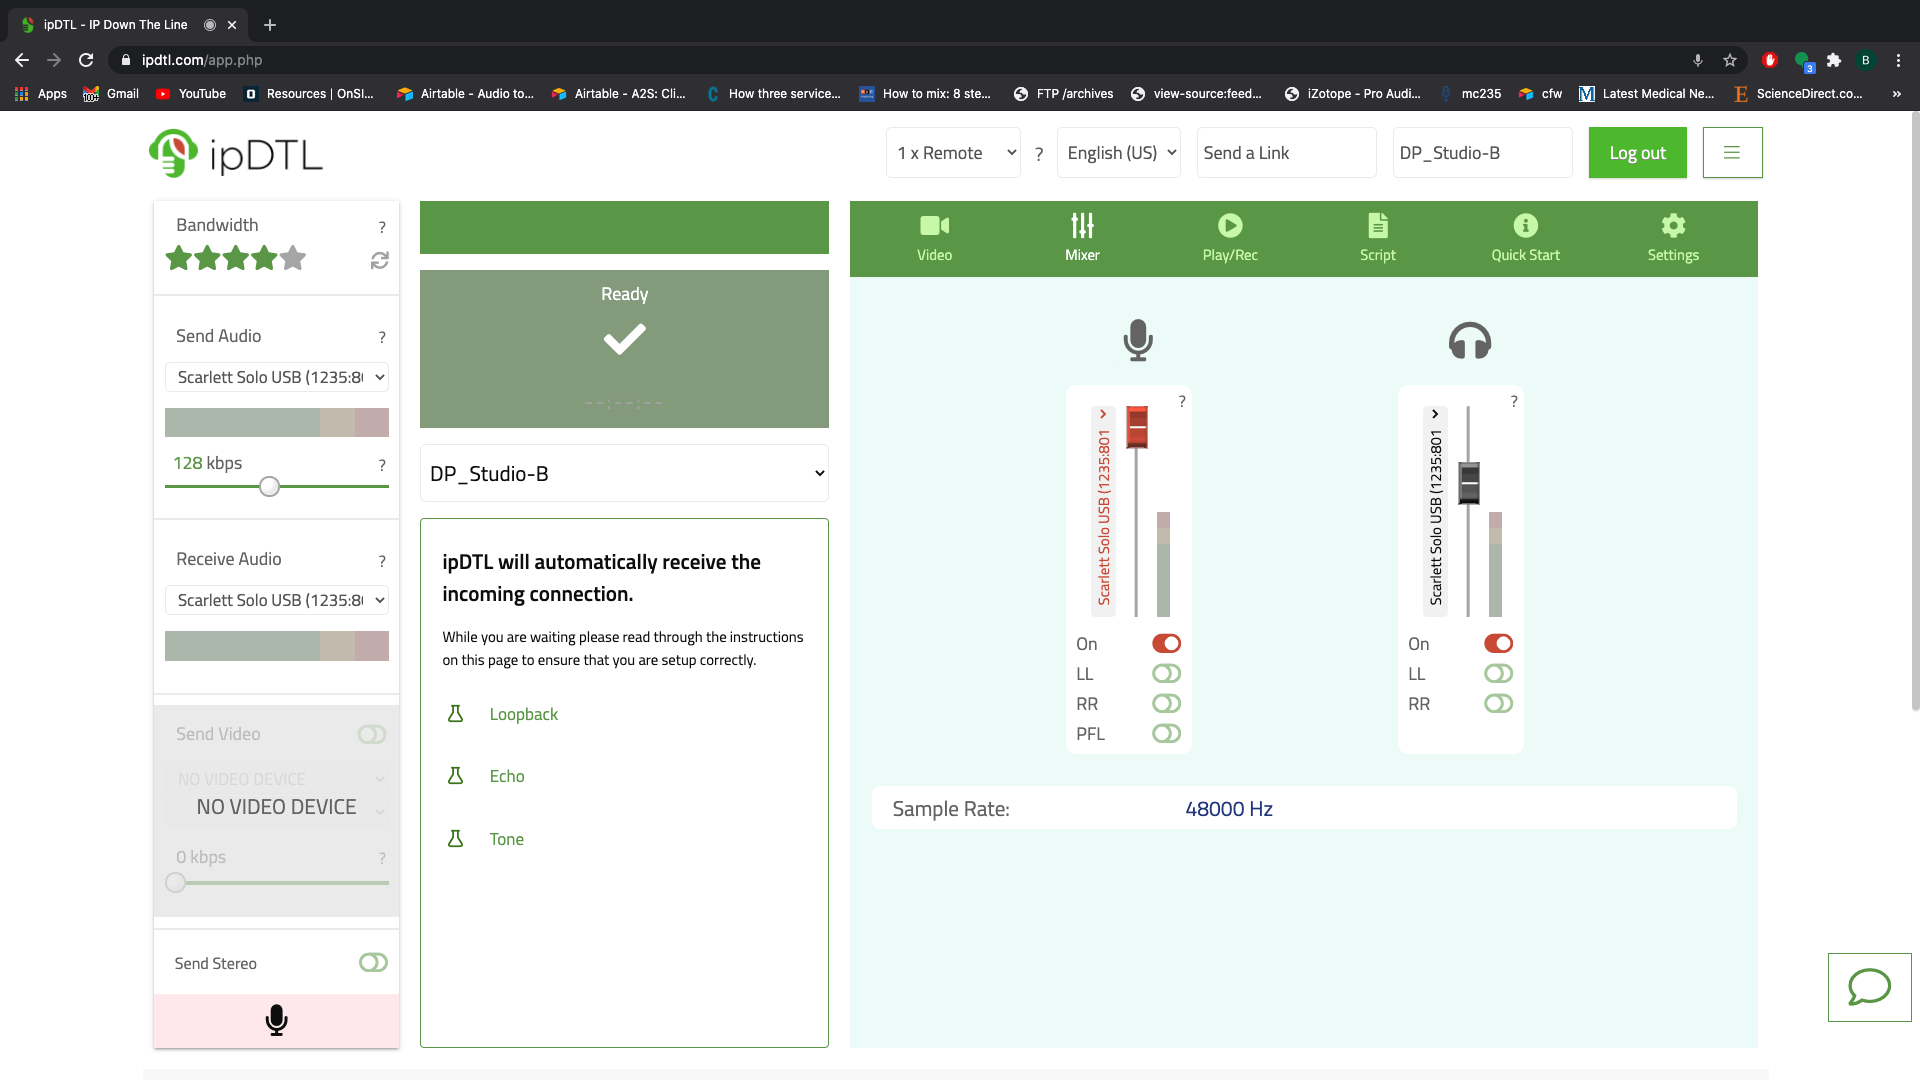
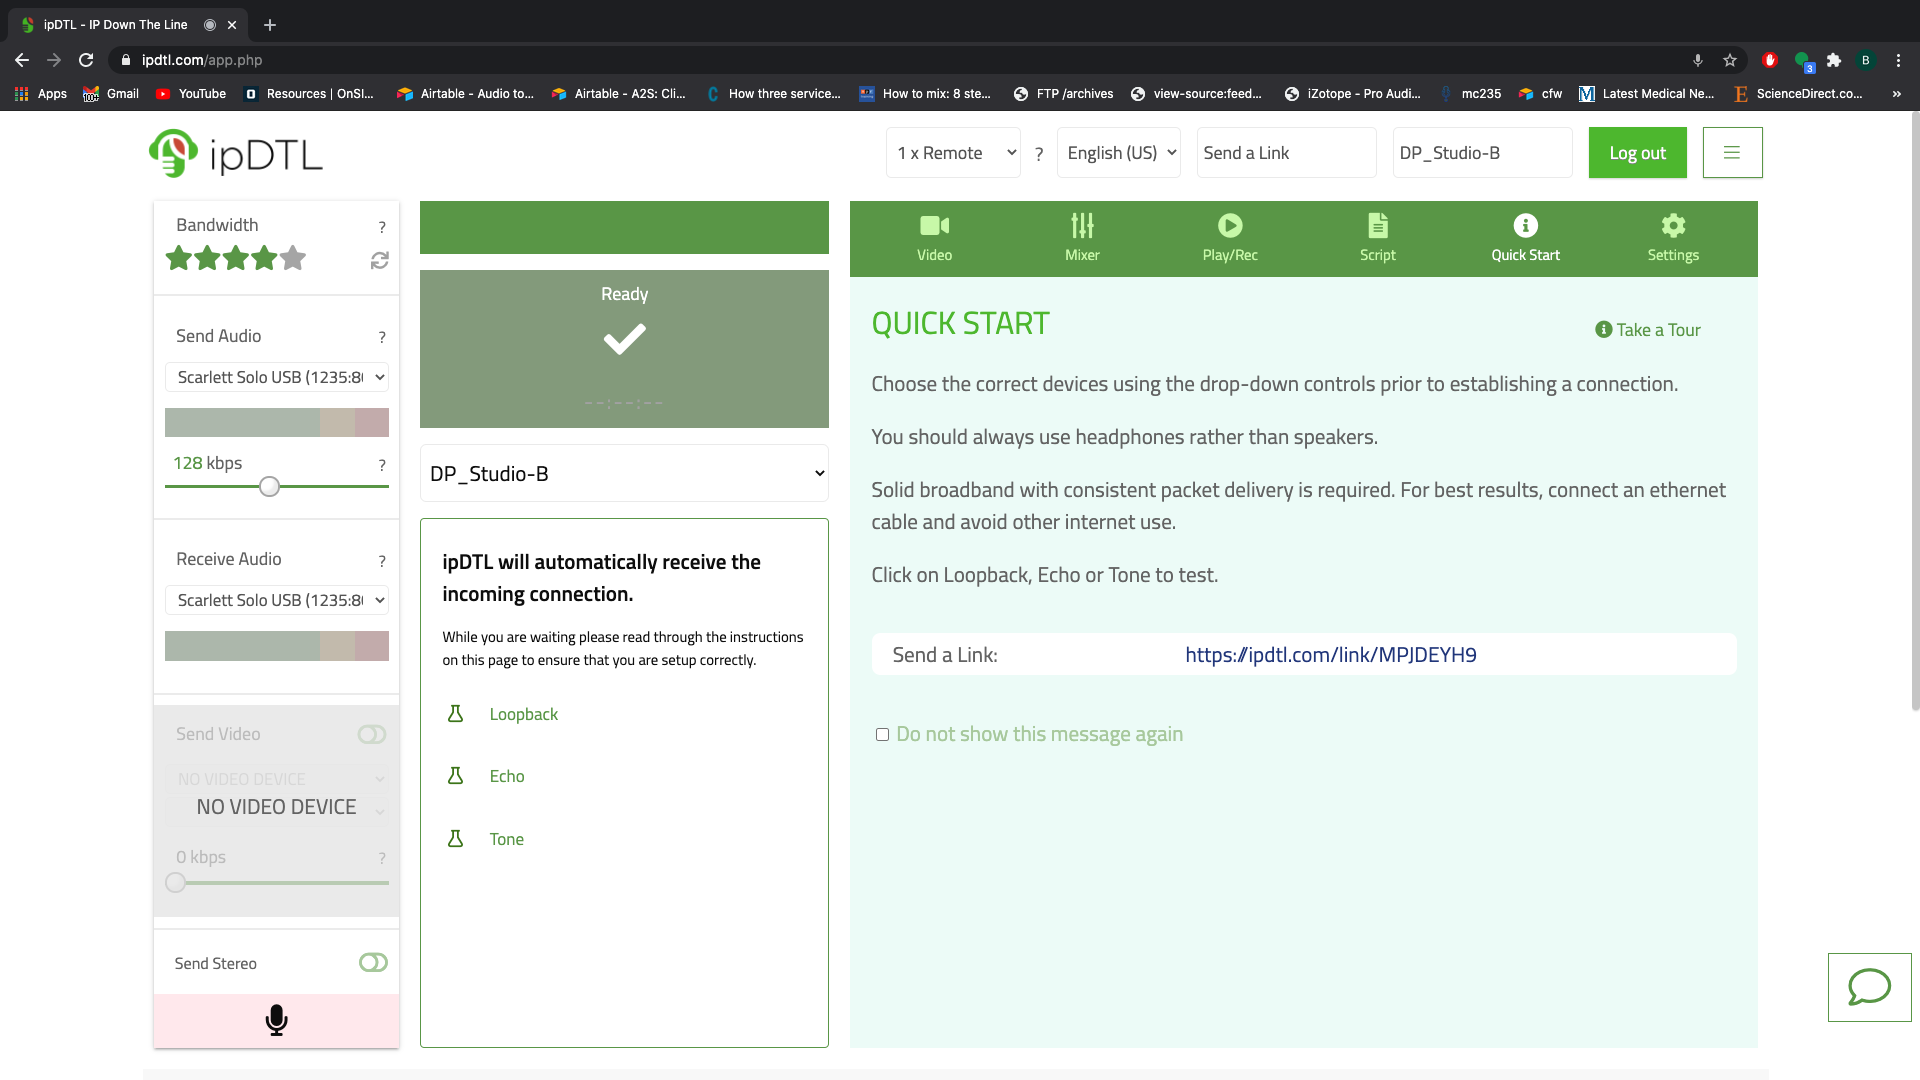
- Once the guest has completed the technical setup, they will reach a screen that says "Waiting for Connection". After having them click "Skip this Wizard", they will drop out and reach this screen.
- NOTES:
- Their browser will ask if they want to allow their camera. Warn them of this ahead of time, and ensure them that they won't be on camera. Sometimes ipDTL won't work properly without allowing this.
- If they've never used the app before, a window will appear on the screen. If they see the window, have them click "Start Using ipDTL"
- NOTES:
- Click their name on your end of ipDTL.
- You should both be able to hear one another through the app using the devices in the setup.
- Once you pull them in, the green box on their screen will turn red. This means they are live and streaming their audio.
- Check their levels and sound quality by having them count to five, tell about the weather or tell what they ate for breakfast that morning.
- If levels and sound are good, begin recording or bring on the next guest following the same steps.
TROUBLESHOOTING TIPS
Levels
- If levels are too low, turn up the guest's fader on your screen until it is at the appropriate level.
- If levels are still low, have them click on MIXER then turn up the red fader on their screen until it reaches an appropriate level for recording.
- If levels are still low, ask them if there is a way to turn up the input on the headset/microphone/mixer itself.
- If they don't know, ask them what the headset/microphone/mixer is then Google it to find information/pictures of it. Troubleshoot based on your findings.
- If there are no additional options to turn up the guest's volume, accommodate the volume of the lower guest by turning down the guest and the host to match then turn up your OUTPUT FADER.
Additional Troubleshooting
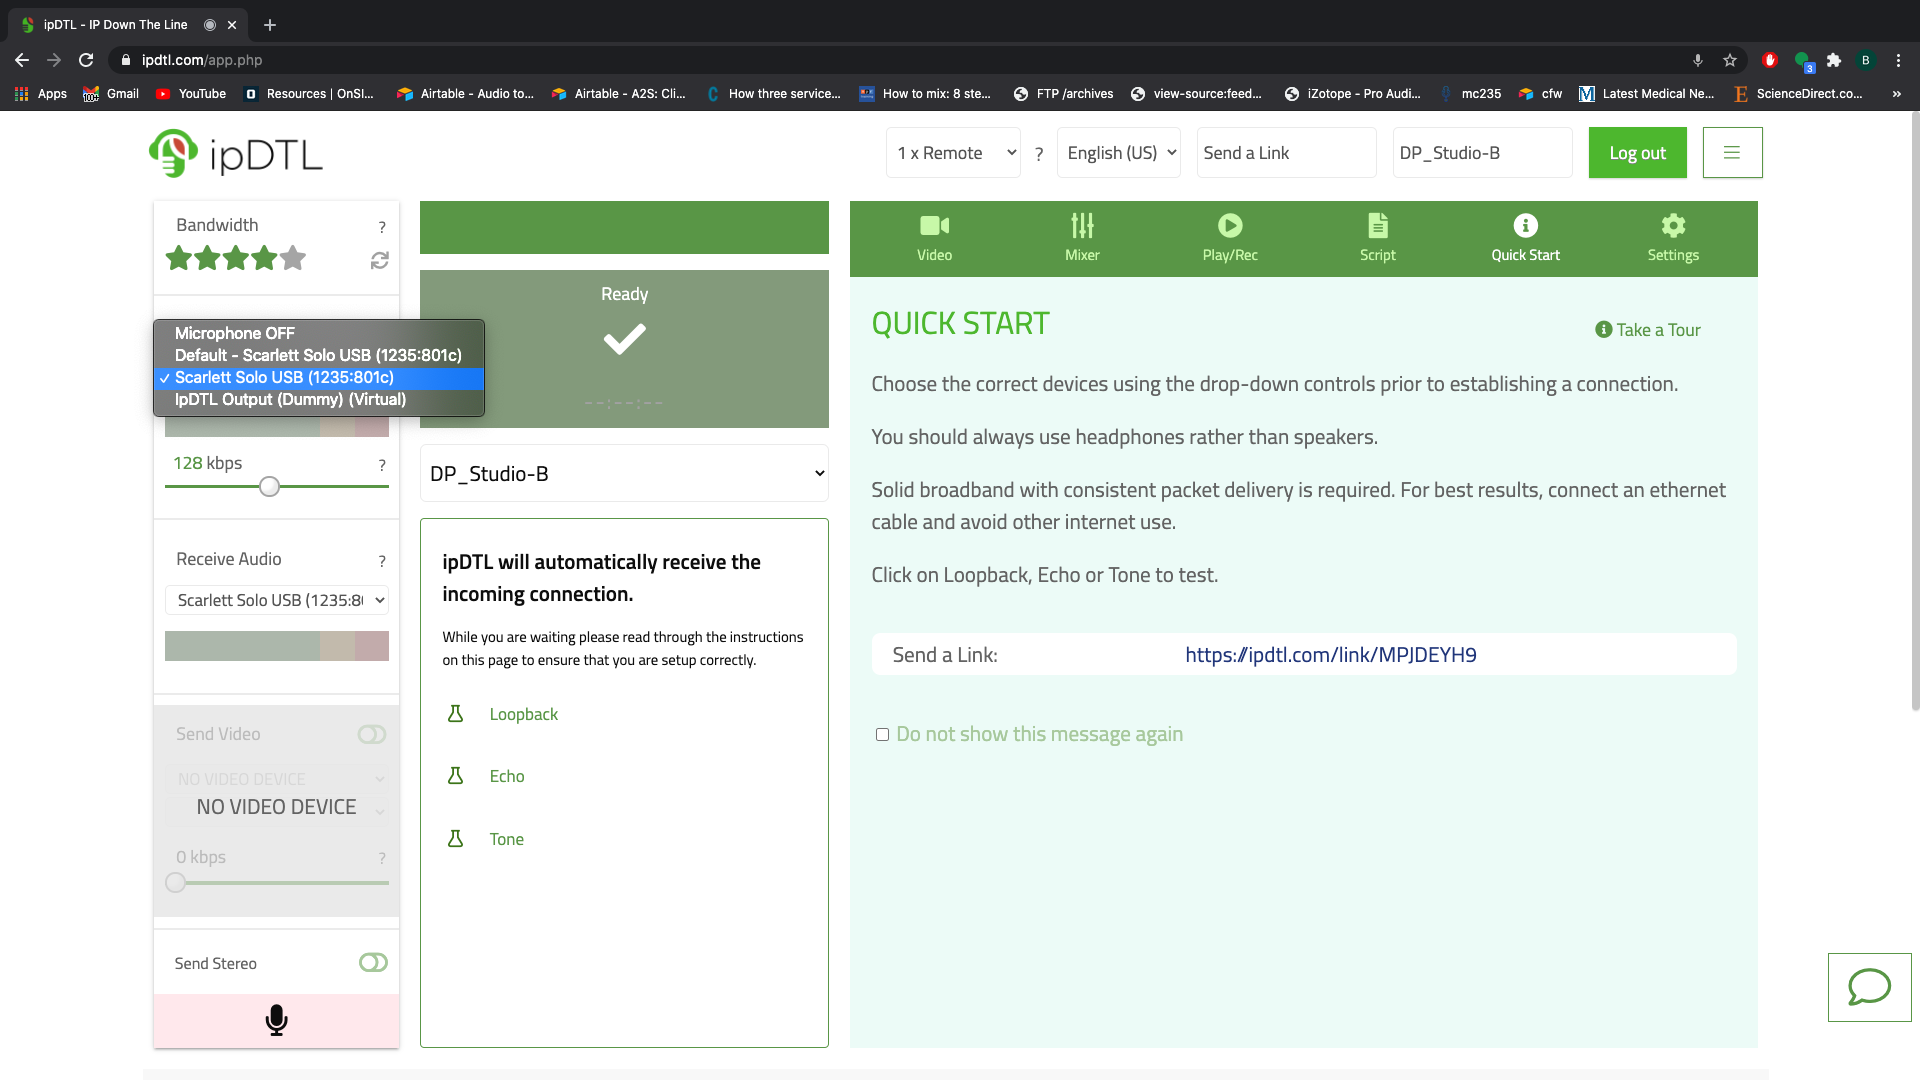
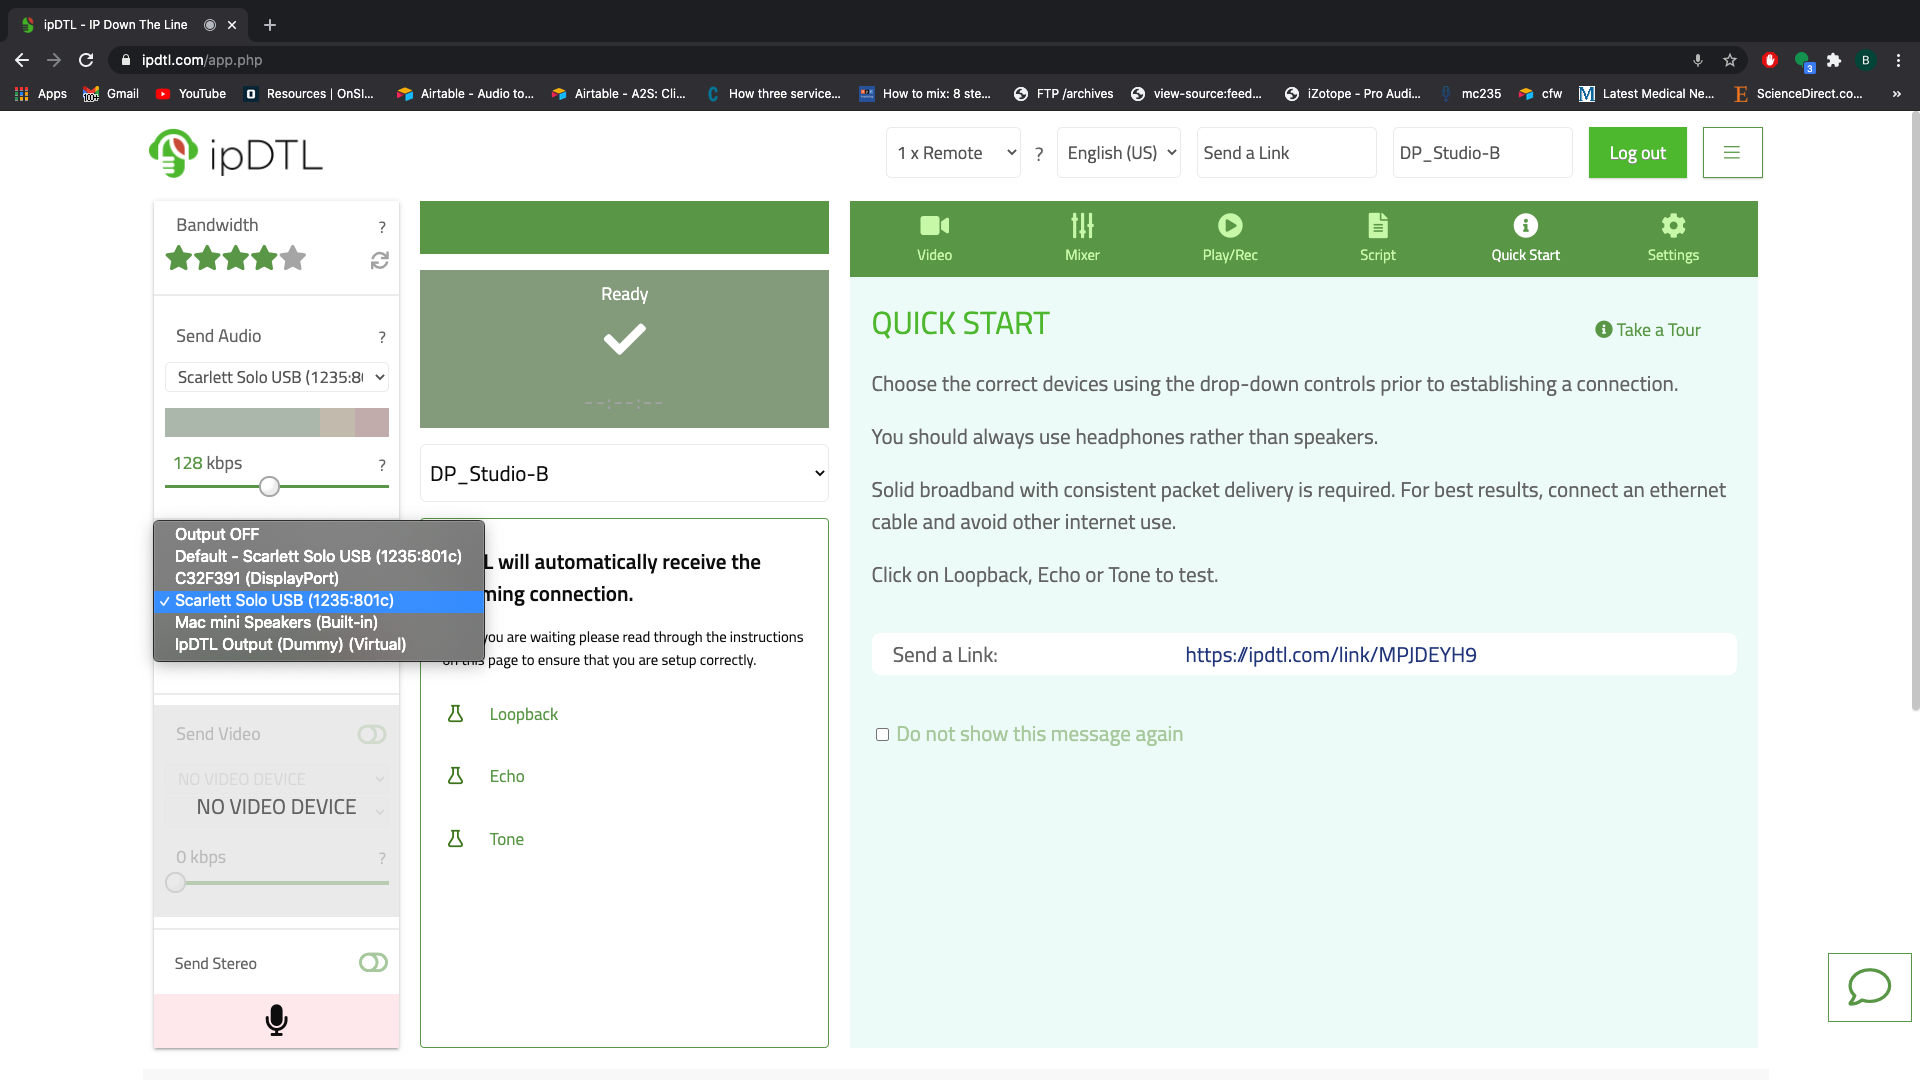
- If there's any additional issue with audio, you can troubleshoot the input and output with the Send Audio and Receive Audio drop-down menu on their screen.
- Send Audio is the same as the microphone/input menu in the setup
- Receive Audio is the same as the headphones/output menu in the setup
- If their audio does not sound "high quality", follow the same steps used to select and test the microphone/input with Send Audio on this screen.
- If they cannot hear audio through their headset, follow the same steps used to select the headphones/headset/output with Receive Audio on this screen.
- NOTE: There is no need to use ECHO to test the audio on this screen because the engineer's microphone should be used to test it instead.