IoT Smart Scale
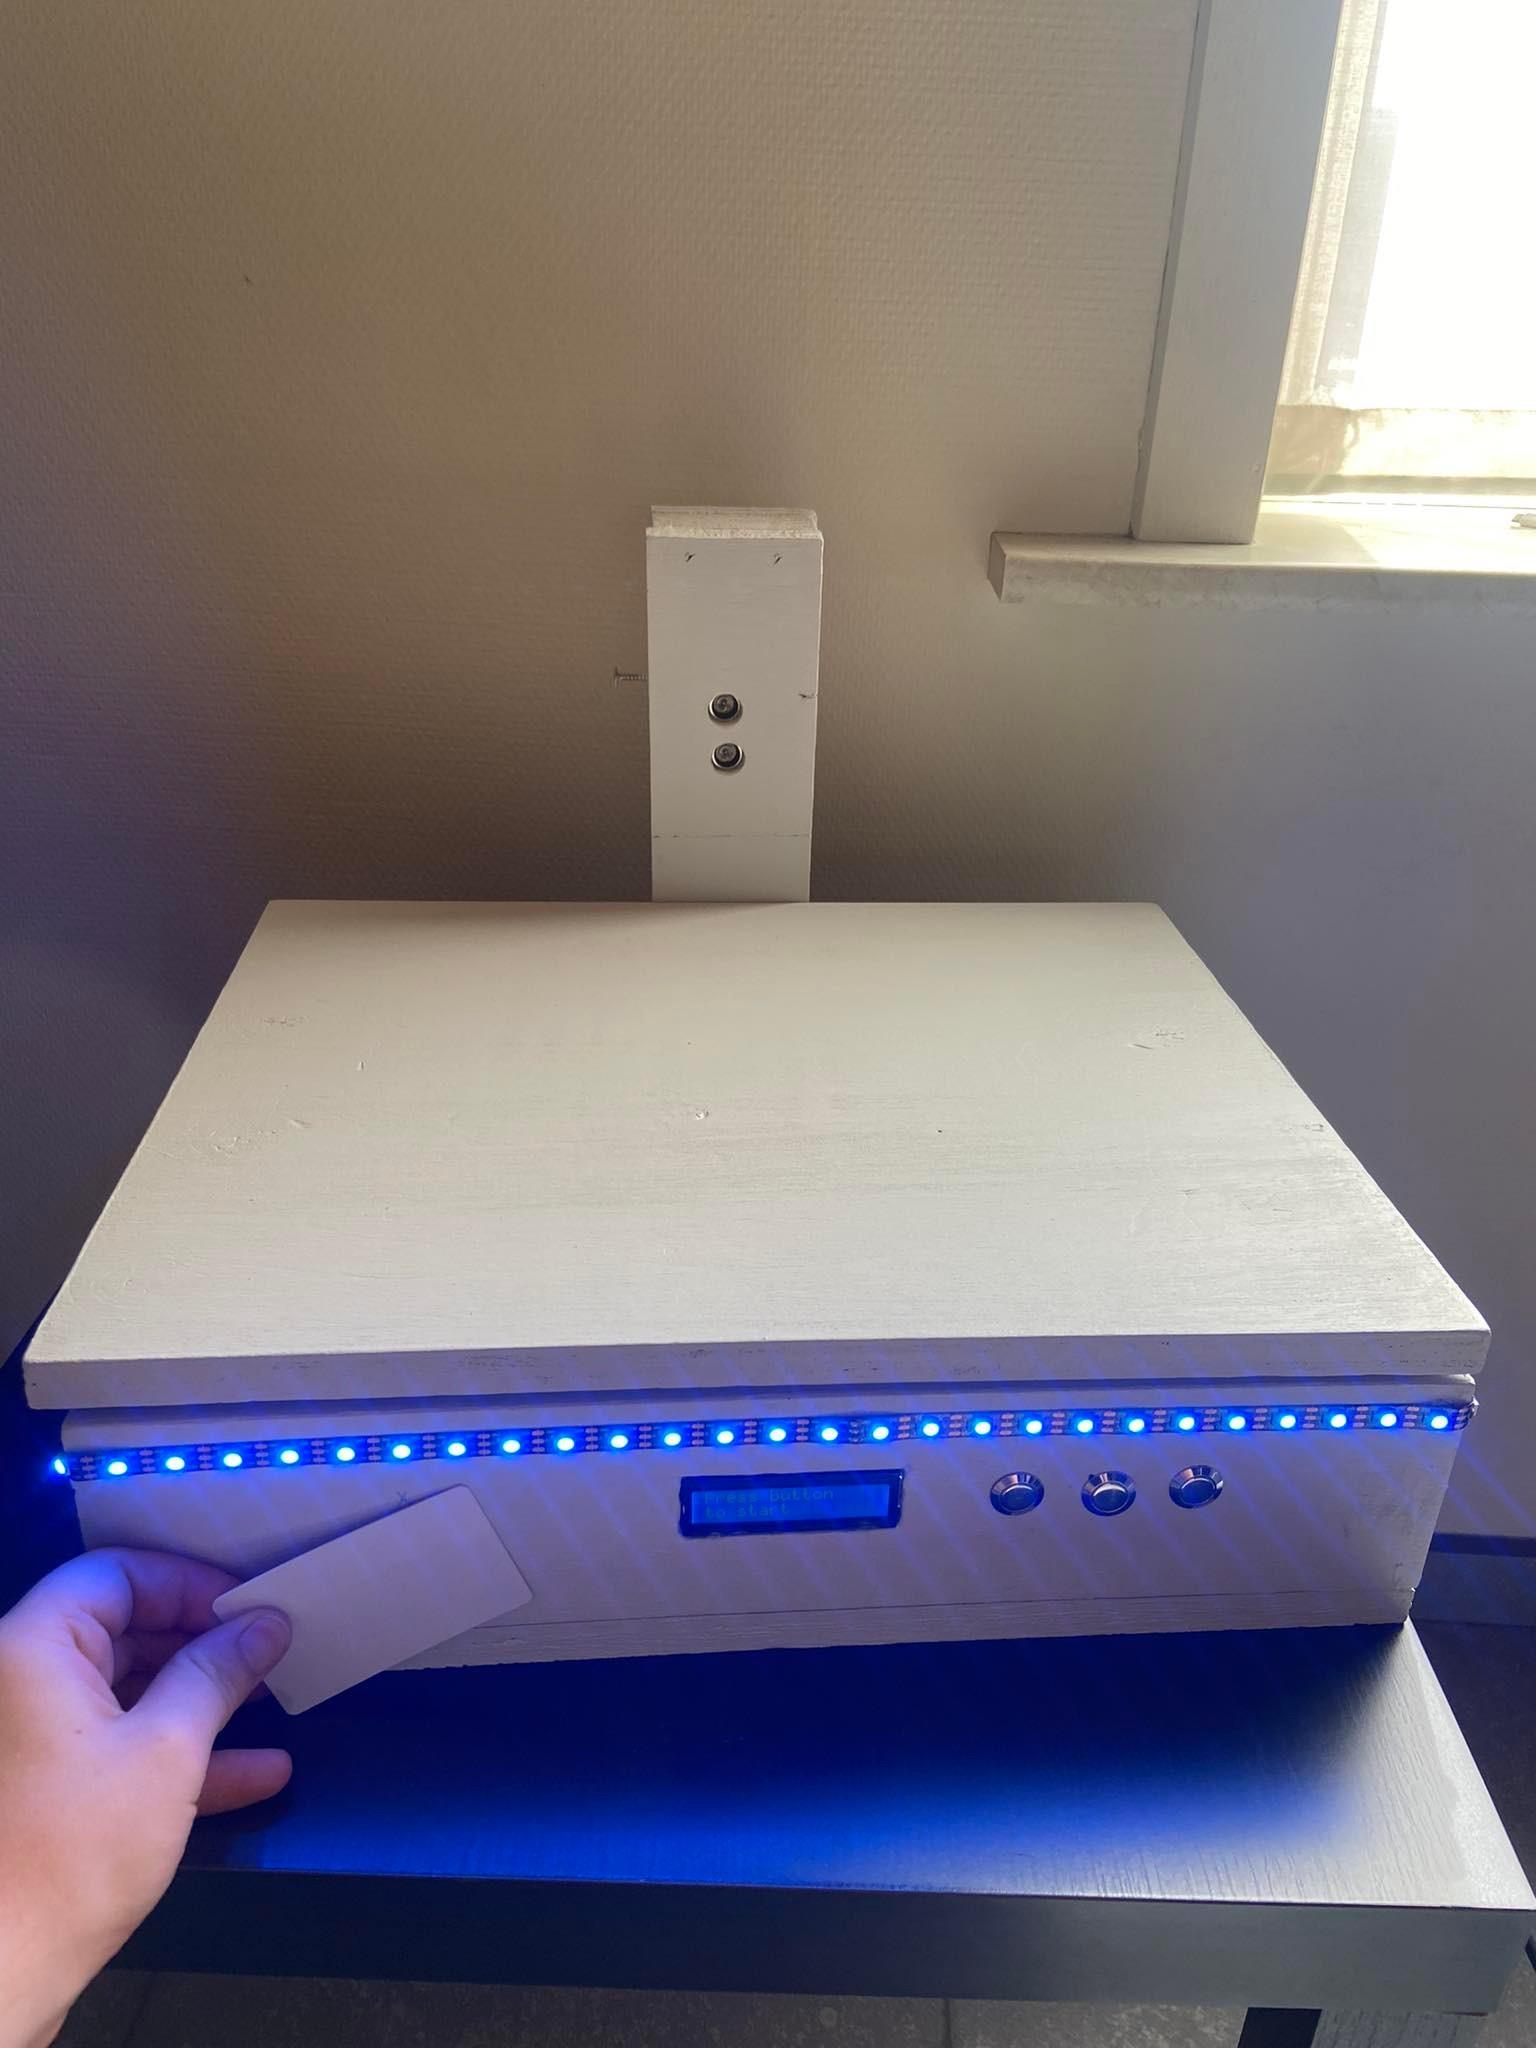
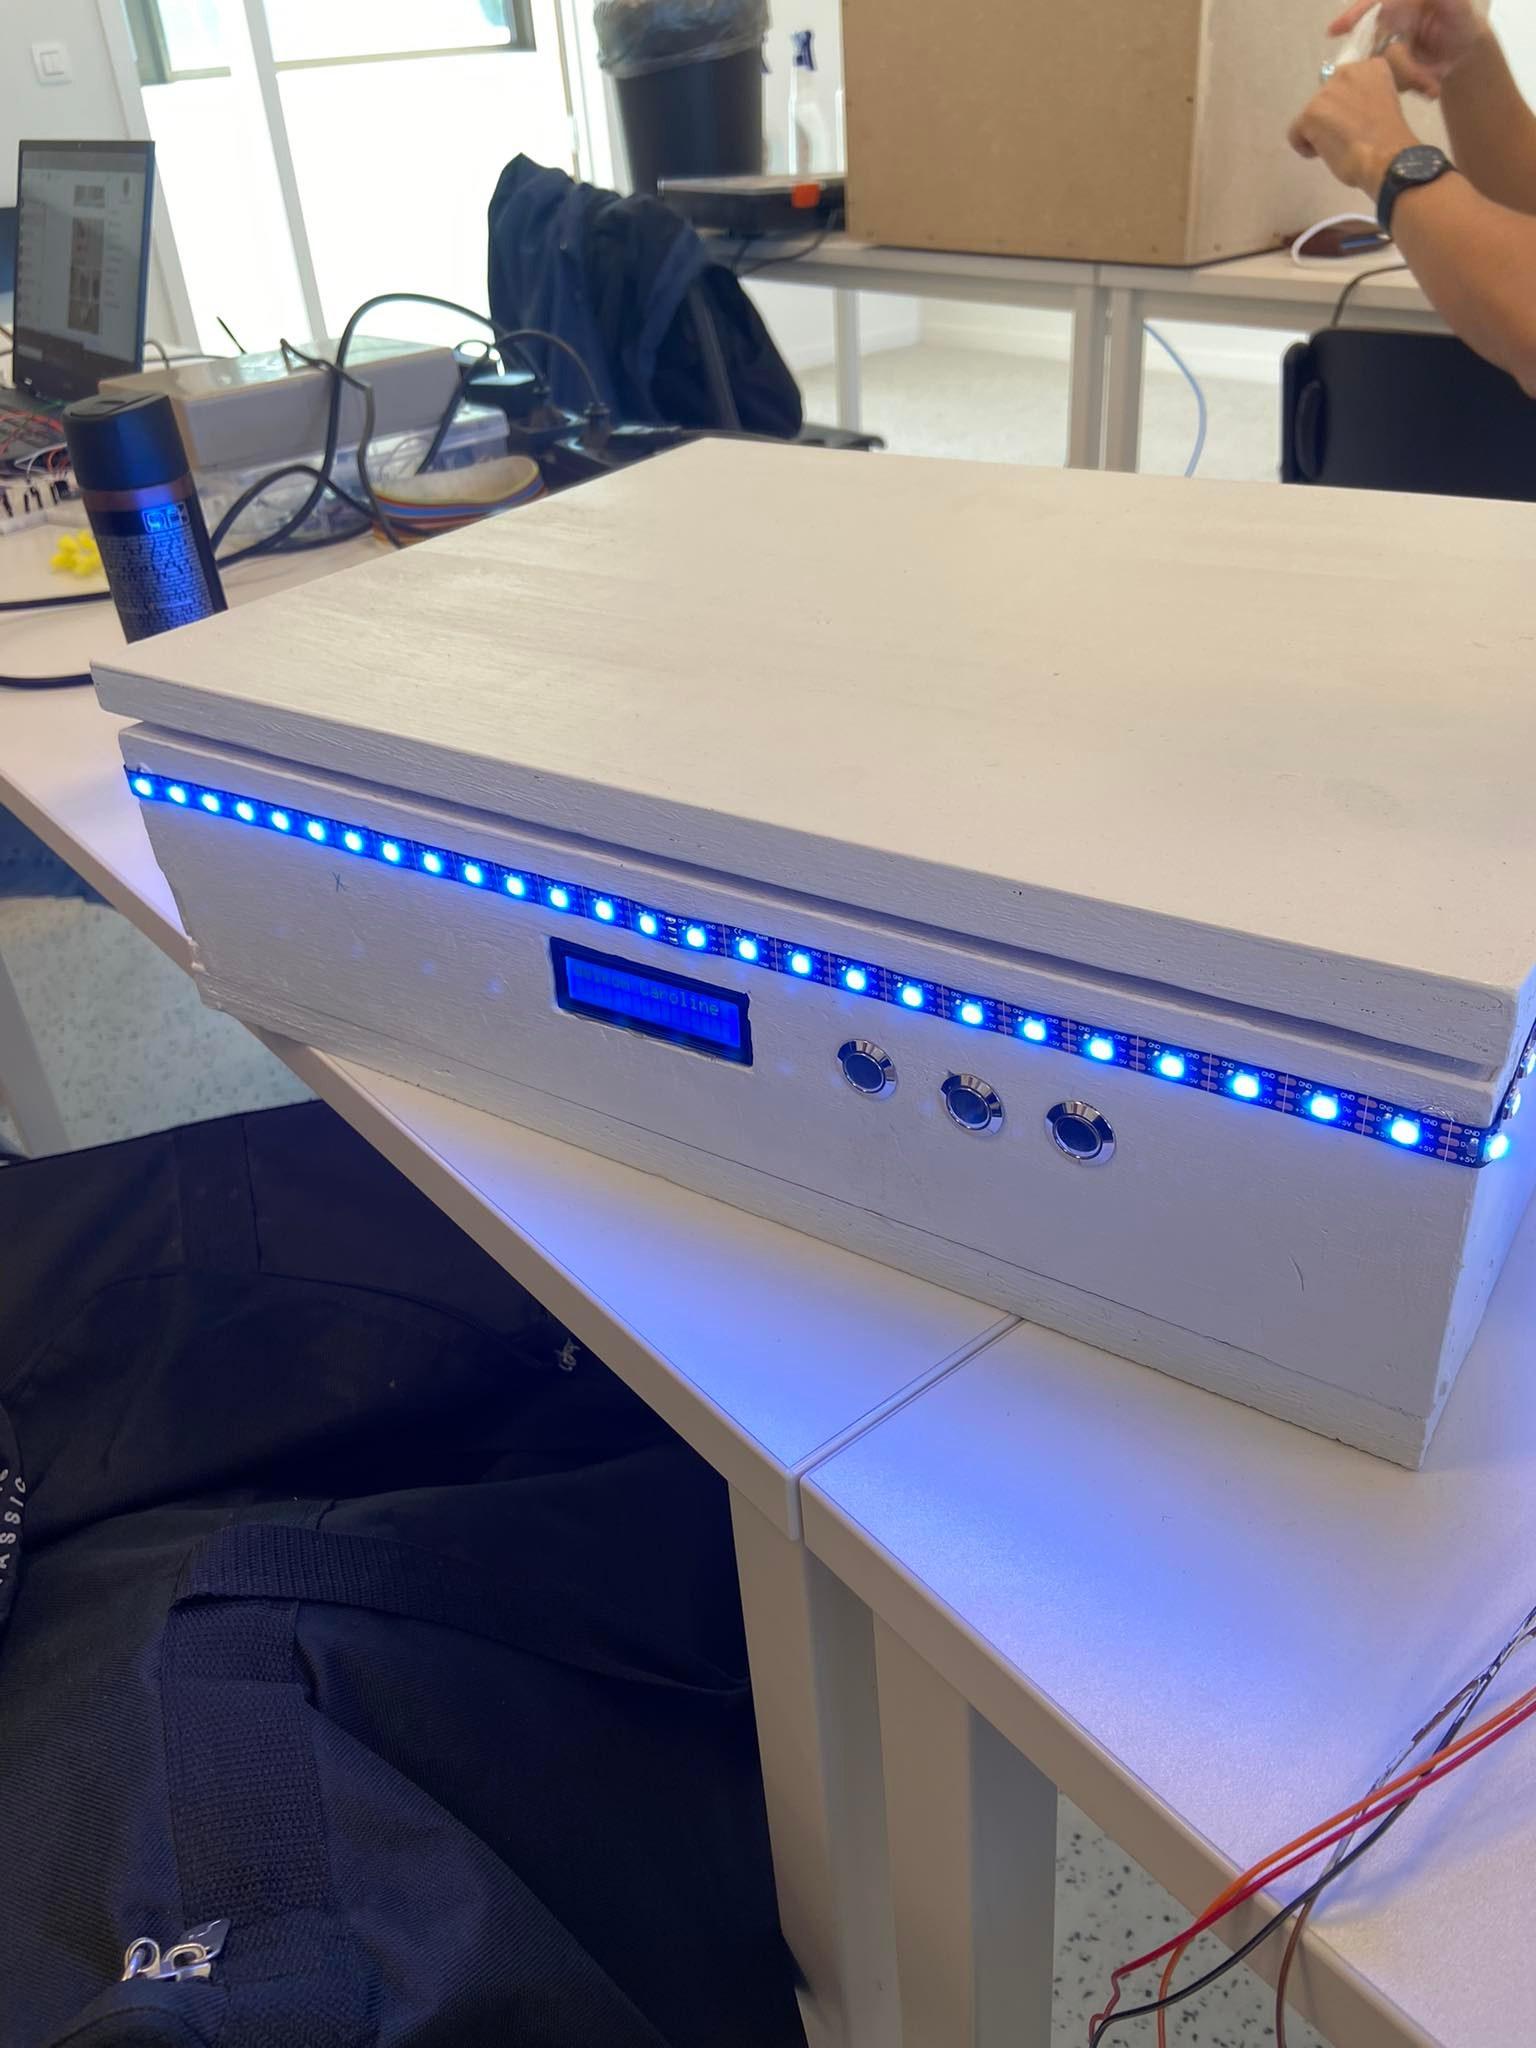
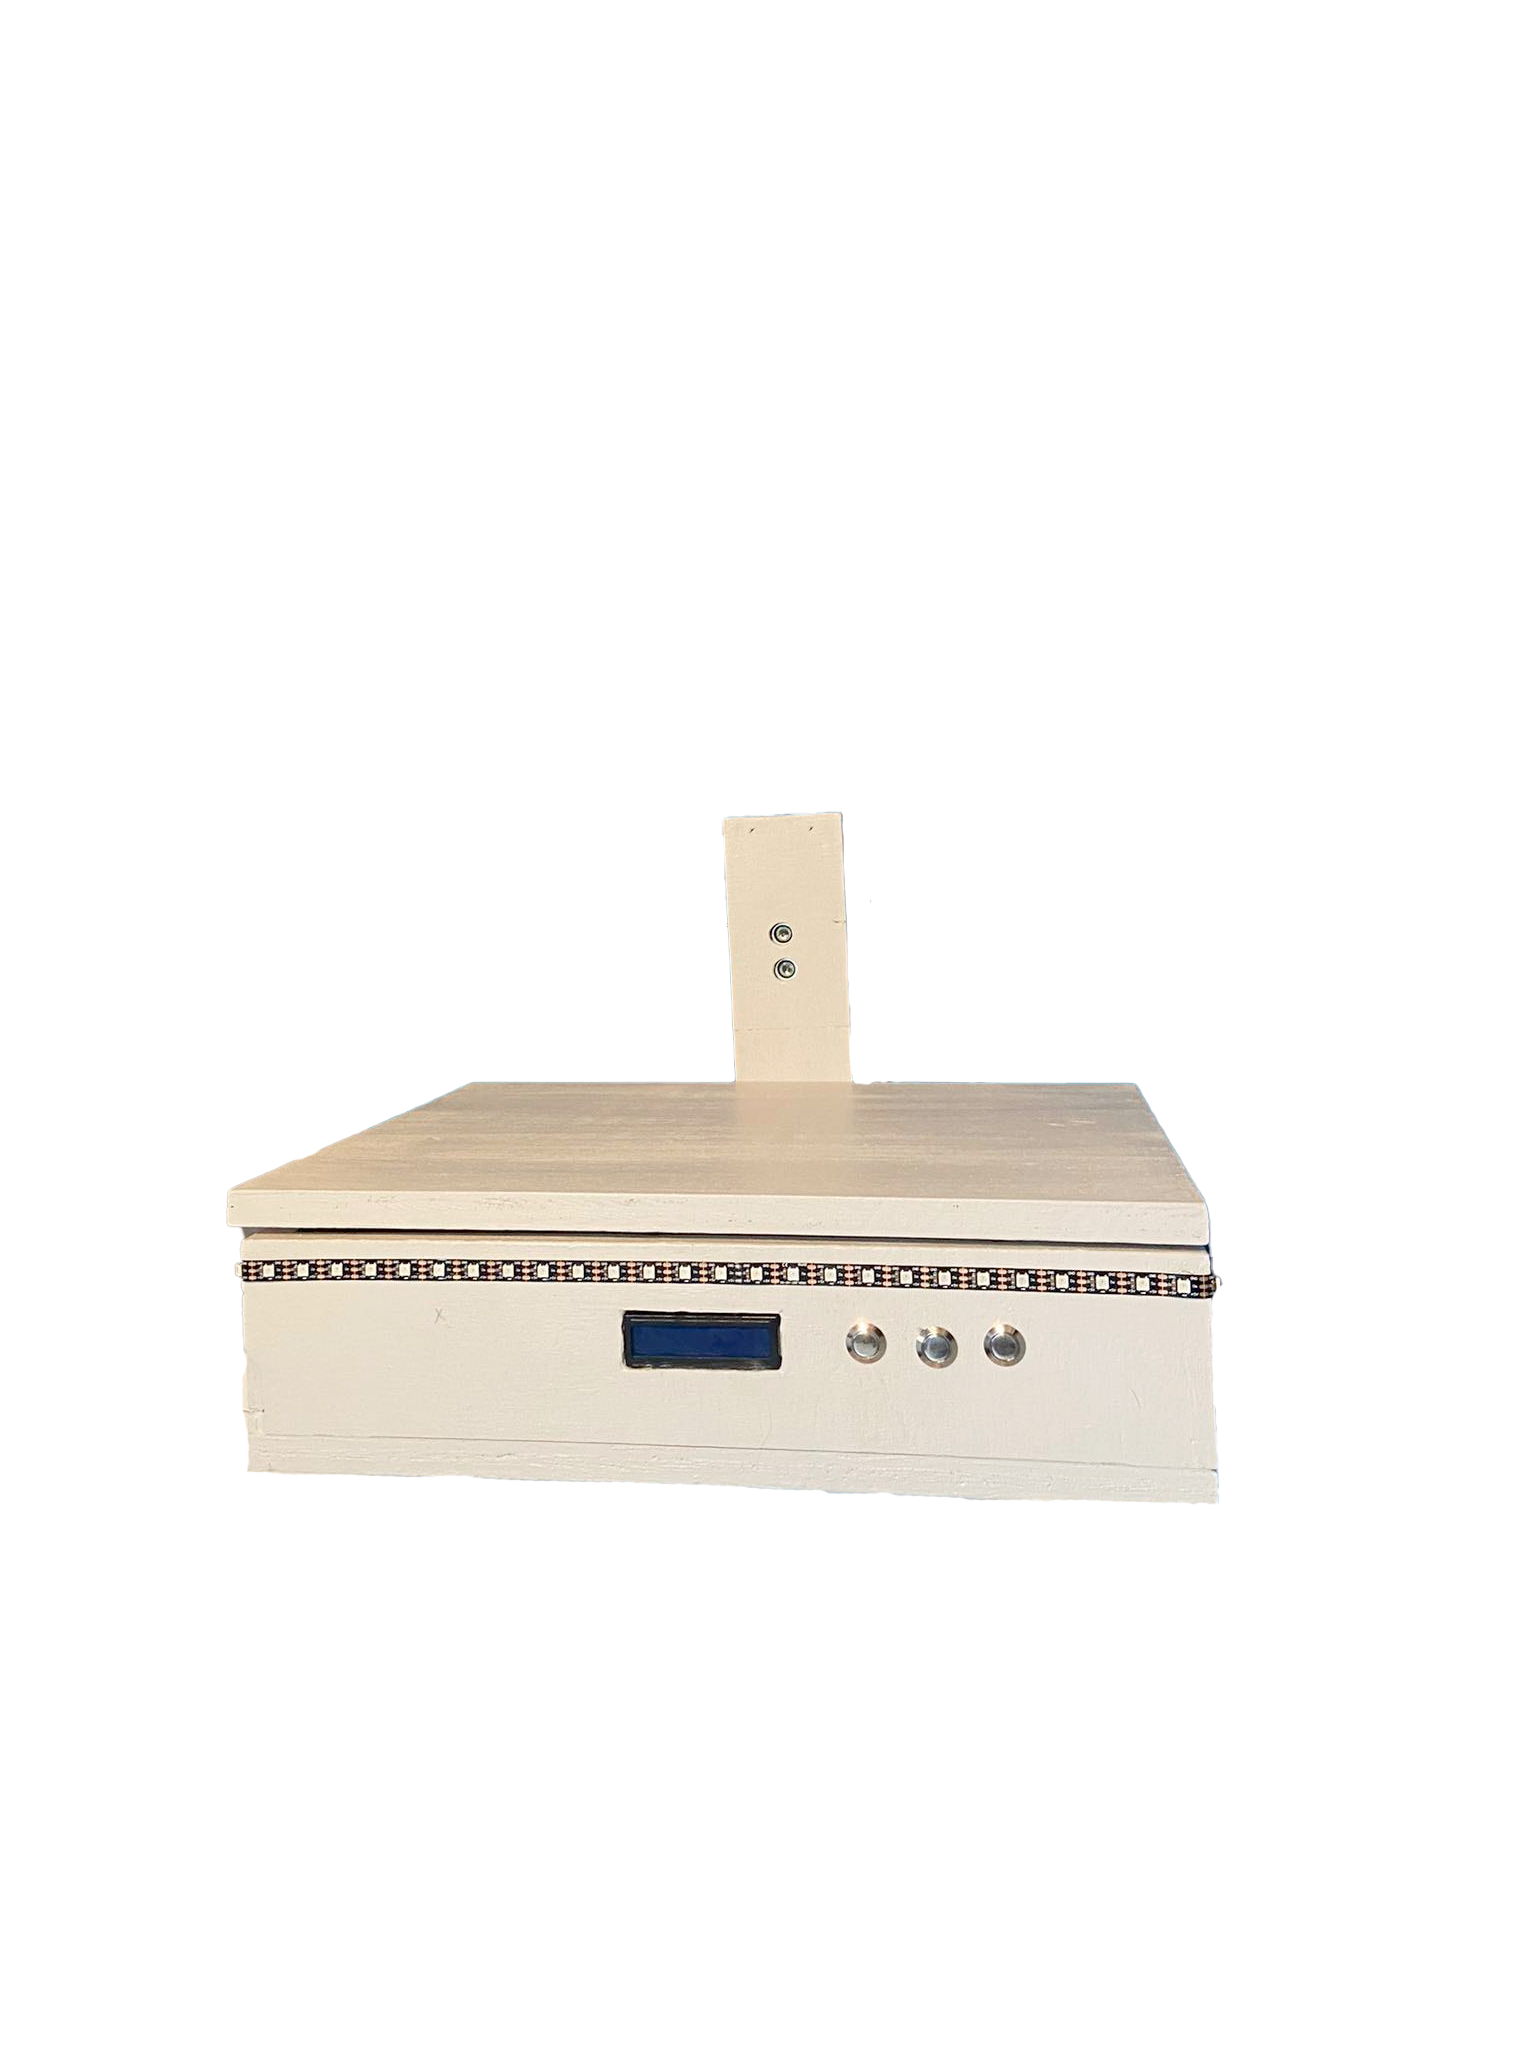
I am a student at Howest Kortrijk Academy in Belgium. I made a smart scale for propane bottles. Furthermore, I am a pilot in training myself, and that is how I came across the following problem.
At many balloon meetings, it is very difficult to see how much gas you have used after a flight. To calculate the consumption, you must weigh a gas bottle before and after refueling. Based on this difference, you can calculate how much gas has been refueled, and you can calculate the price for a refueling. This is currently being used with pen and paper, which means that gas tanks at balloon meetings do not run smoothly. That's why I came up with the idea of making a smart scale!
I made it with a Raspberry Pi and some equipment. All the data is saved on a database. I also made a website, so you can set up your device.
Note: It is recommended that you have knowledge of electronics and networking for this project! We are not responsible for any damages!
Supplies
Below you will find a list of all components. It does not matter where you order these components. A tip, don't always buy the cheapest components you find. I have encountered many problems in my project due to too cheap components.
Raspberry Pi:
- The main controller of the system (Raspberry Pi 4 Model B 2GB RAM - € 54.95)
- SD Card (Samsung microSDHC PRO Endurance 32GB - €21.99)
- Raspberry Power Supply (Okdo Raspberry Pi Power Supply - 7.91)
Electronics:
- Breadboard with jumper wires (optional - around €3)
- GPIO Breakout (optional - around €3)
- Set of resistors (around €3)
- Potentiometer (around €3)
- Buzzer (around €5)
- AC/DC adaptor 5v 2.25A (around €30)
Sensors and modules:
- Load cell - 10 kg straight bar (SEN-13329 - TAL220 Straight Bar Load Cell 10kg - €10)
- RFID RC522 (RFID-RC522 NFC Kit MFRC522 - €4)
- Liquid-crystal display (LCD) (around €10)
- HX711 Load cell amplifier (around €2)
- Ledstrip WS2812B (around €25)
Tools:
- Hand Drill
- Saw
- Soldering iron
- file
Materials:
- Wood planks
Downloads
Setting Up the Raspberry Pi
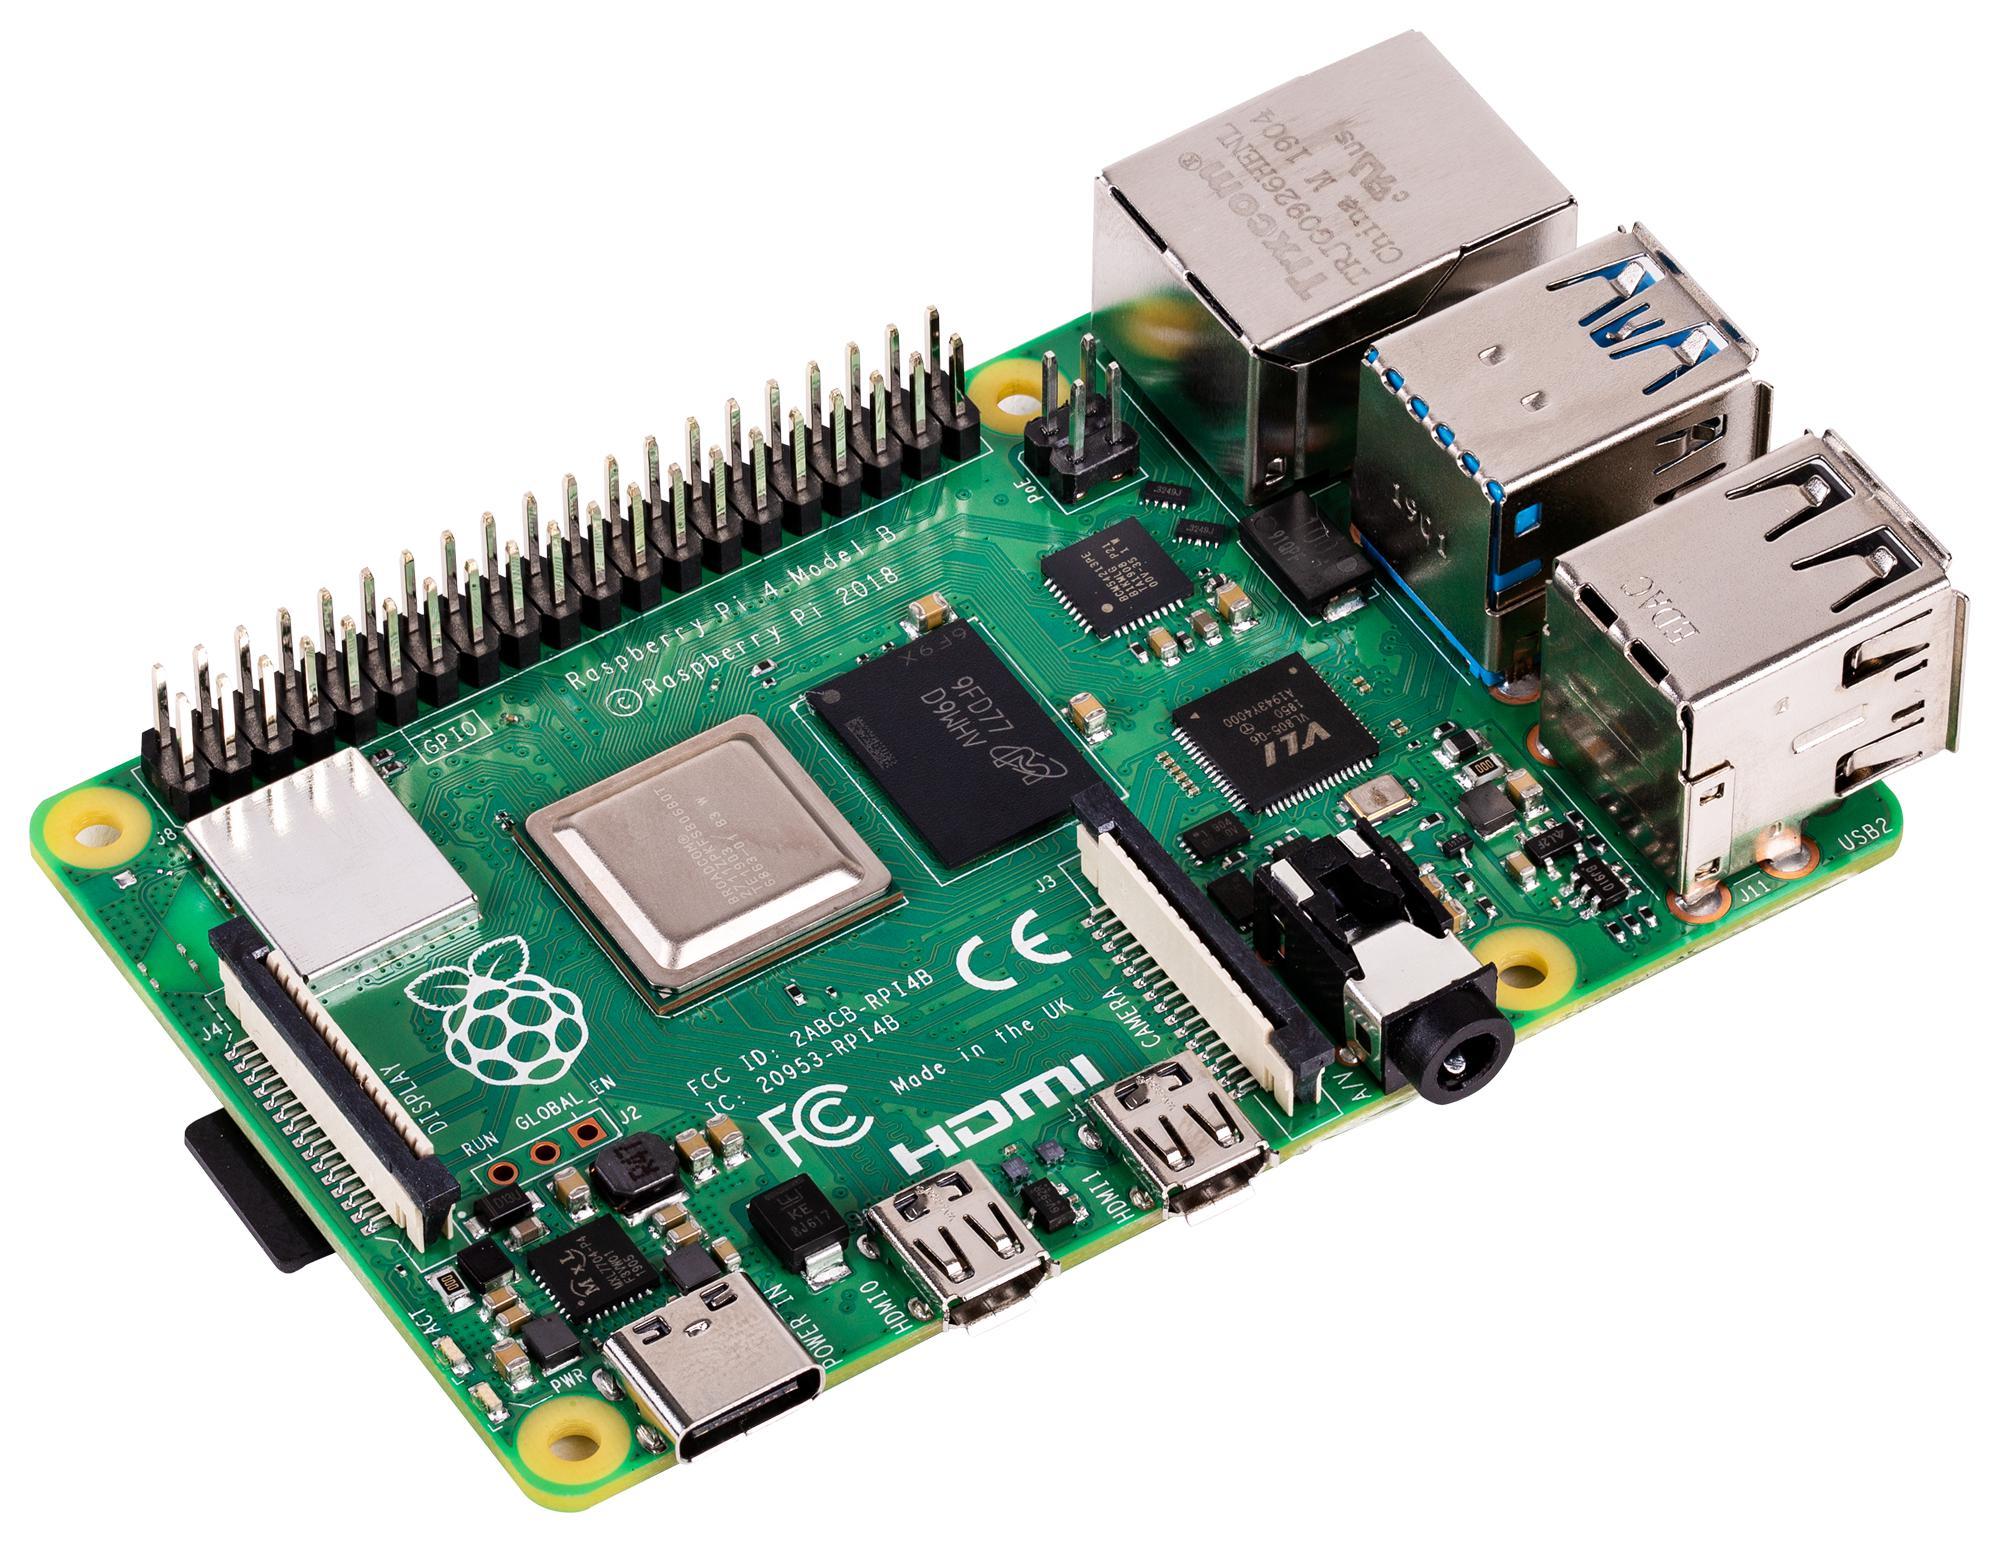
The Raspberry Pi
The Raspberry Pi is the microcontroller that controls everything. In order to do this, you need an operating system, the best choice here is the Raspberry Pi OS. To makes things a little easier, you should download the "Raspberry Pi OS with desktop and recommended software" because this version already had a lot of things preinstalled.
Link: https://www.raspberrypi.org/software/operating-sys...
Preparing the SD card
I am using a fast 32gb SD card (see BOM) for this project. This allows me to write and read fairly quickly on my SD card. You can also use a normal 16gb SD-card.
For writing the SD card, you need a special program. For this, you should use win32-disk-imager.
Link: https://sourceforge.net/projects/win32diskimager/
Preparing the config
After you have written the IMG, locate on your SD card the next file and open it with your favorite editor.
cmdline.txt
At the end of this file, paste the following code and save the file.
ip=192.168.168.169
Second you need to make a file named "ssh" without any extension, if the file automatically gets an extension then you need to delete this.
Now the SD card is fully ready for use, and you can insert it into your PI!
Connection to pi
In order for your laptop to remotely access your pi, you need to set up a static IP on your laptop.
ip: 192.168.168.xsubnet: 255.255.255.0
To connect to your PI, you can use your Favorite SSH program. In this tutorial, I recommend putty or the GUI version VNC viewer.
Link: https://www.realvnc.com/en/connect/download/viewer/
Link: https://www.putty.org/
You can open this program, enter the ip: "192.168.168.169", choose the correct port: 22 and set the connection type to SSH.
If all goes well, you should see a command line asking for your login. The default user is called "pi" and the password is "raspberry".
Settings
Before you start, it's best to do a sudo upgrade and update of your Pi
sudo apt updatesudo apt upgrade
Once the Pi is booted up you turn on the SPI, and I2C bus via the GUI or the console. Via the console, you can do this with the command
sudo raspi-config--> Interface--> SPI, I2C
In addition, to set the Wi-Fi, go to Localization Options and change the timezone and WLAN Country.
When you have done all this, you can click back and reboot your Raspberry Pi.
sudo reboot
Network settings
To connect your pi to the Internet, run the following command.
sudo wpa_passphrase 'Networkname' 'Password' >> /etc/wpa_supplicant wpa_supplicant.confwpa_cli -i wlan0 reconfigure
Then reboot the pi again.
sudo reboot
Packages
Next, you install the necessary packages.
sudo apt install apache2 -ysudo apt install mariadb-server mariadb-client -yinstall python3
GitHub repo
git clone https://github.com/howest-mct/2021-2022-projectone-Bart-Roels
Setting up database
Now set up the database and create a user, this is done by:
sudo mysql_secure_installation
--> Enter
--> Password
--> All Yes
Then create a user
sudo mysql -u root -pcreate user 'USERNAME'@'localhost' identified by 'USERNAME';grant all privileges on *.* to USERNAME@localhost;flush privileges;exit;
Apache 2
Normally, you will now see the Apache2 Debian Default Page, which is the default page of Apache
which is currently located in the /var/www/html/ folder on the Raspberry Pi. We will not be using this default folder, but you need to use the front-end folder from the repo you just cloned.
sudo nano /etc/apache2/sites-available/000-default.conf
Find the line where it says document root and modify the line to the pat where you cloned your repo.
DocumentRoot <repo>
Save the file and exit. Then restart apache2 service.
sudo service apache2
Next, we need to change something small about the permissions, open sudo nano /etc/apache2/apache2.conf and use the down arrow to look for the following lines:
<Directory /> Options FollowSymLinks AllowOverride All Require all denied</Directory>
Change these lines to:
<Directory /> Options Indexes FollowSymLinks Includes ExecCGI AllowOverride All Require all granted</Directory>
Save the file and exit. Then restart apache2 service.
Self-starting service
If you want your project to start automatically when you start pi, you can create a service that does this for you.
Create a file to my <name>.service
Place the following code in the file:
[Unit]Description=ProjectOne ProjectAfter=network.target[Service]ExecStart=/usr/bin/python3 -u <folder>/backend/app.pyWorkingDirectory= <folder>/backendStandardOutput=inheritStandardError=inheritRestart=alwaysUser=root[Install]WantedBy=multi-user.target
As root user, copy this file to /etc/systemd/system using the command
sudo cp <name>.service /etc/systemd/system/<name>.service
Now you can test the file by starting it:
sudo systemctl start myproject.service
The file can be stopped with the command:
sudo systemctl stop myproject.service
If all works well, you can have the script start automatically after booting:
sudosystemctl enable myproject.service
Fritzing
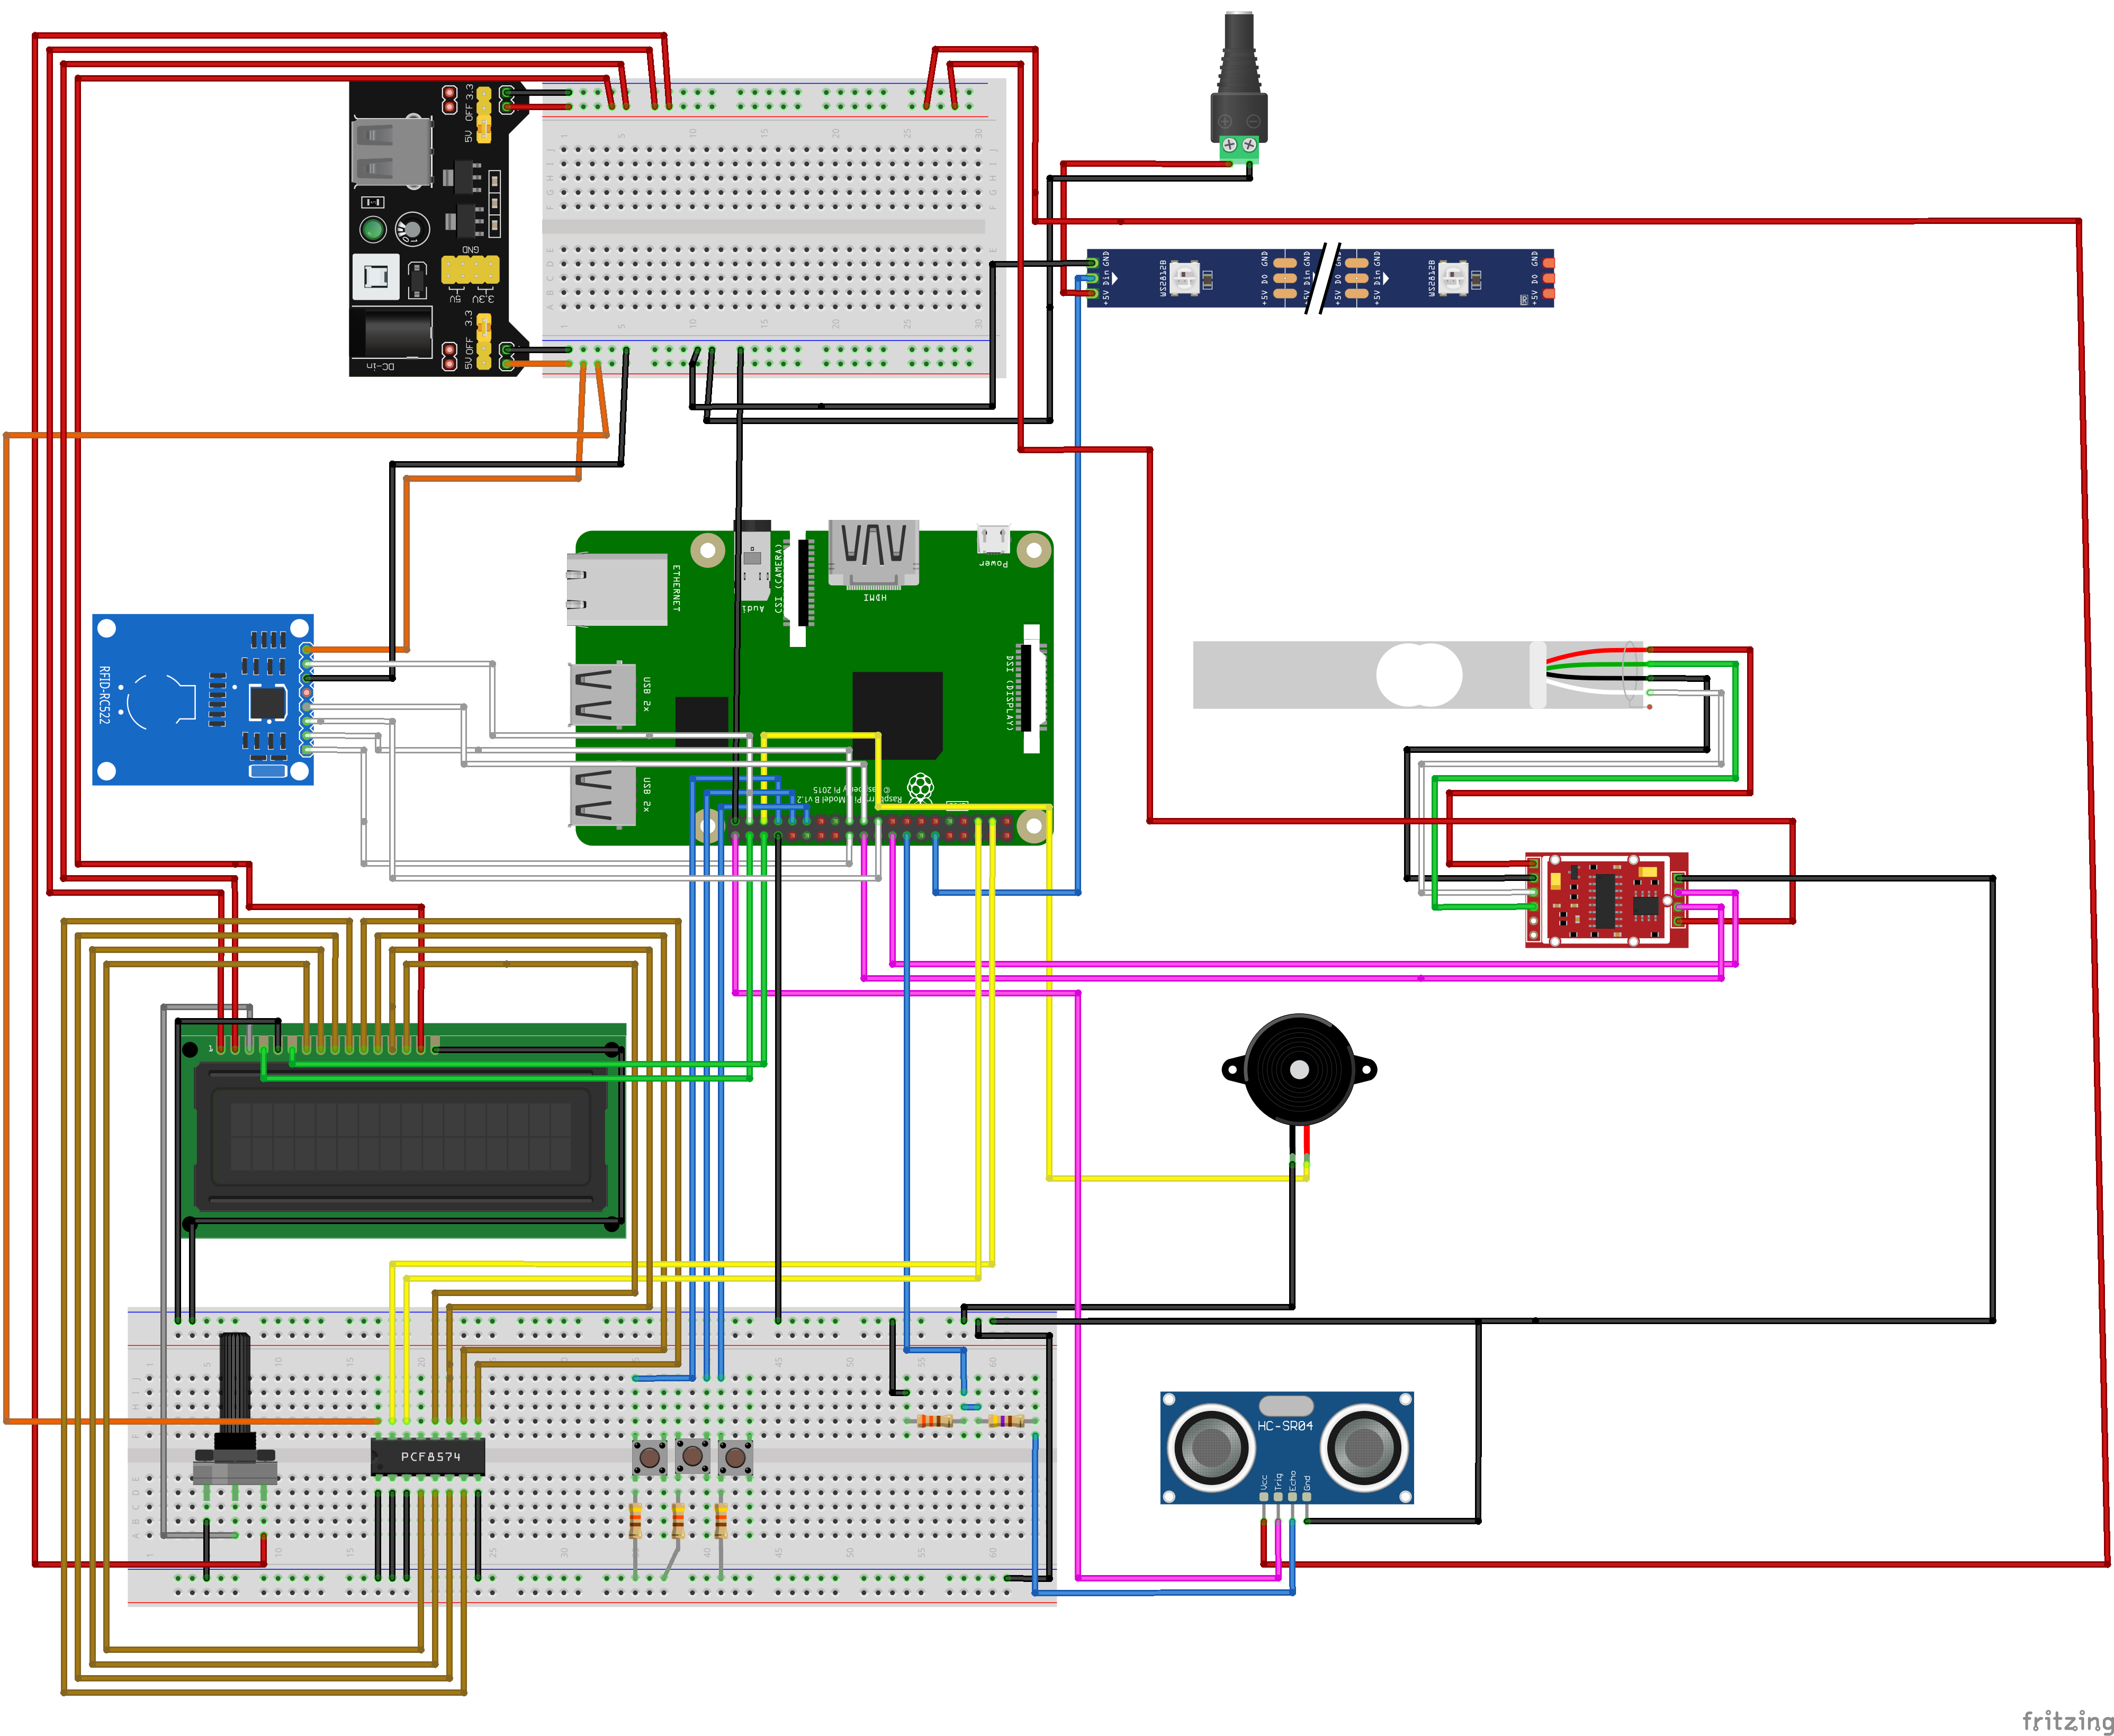
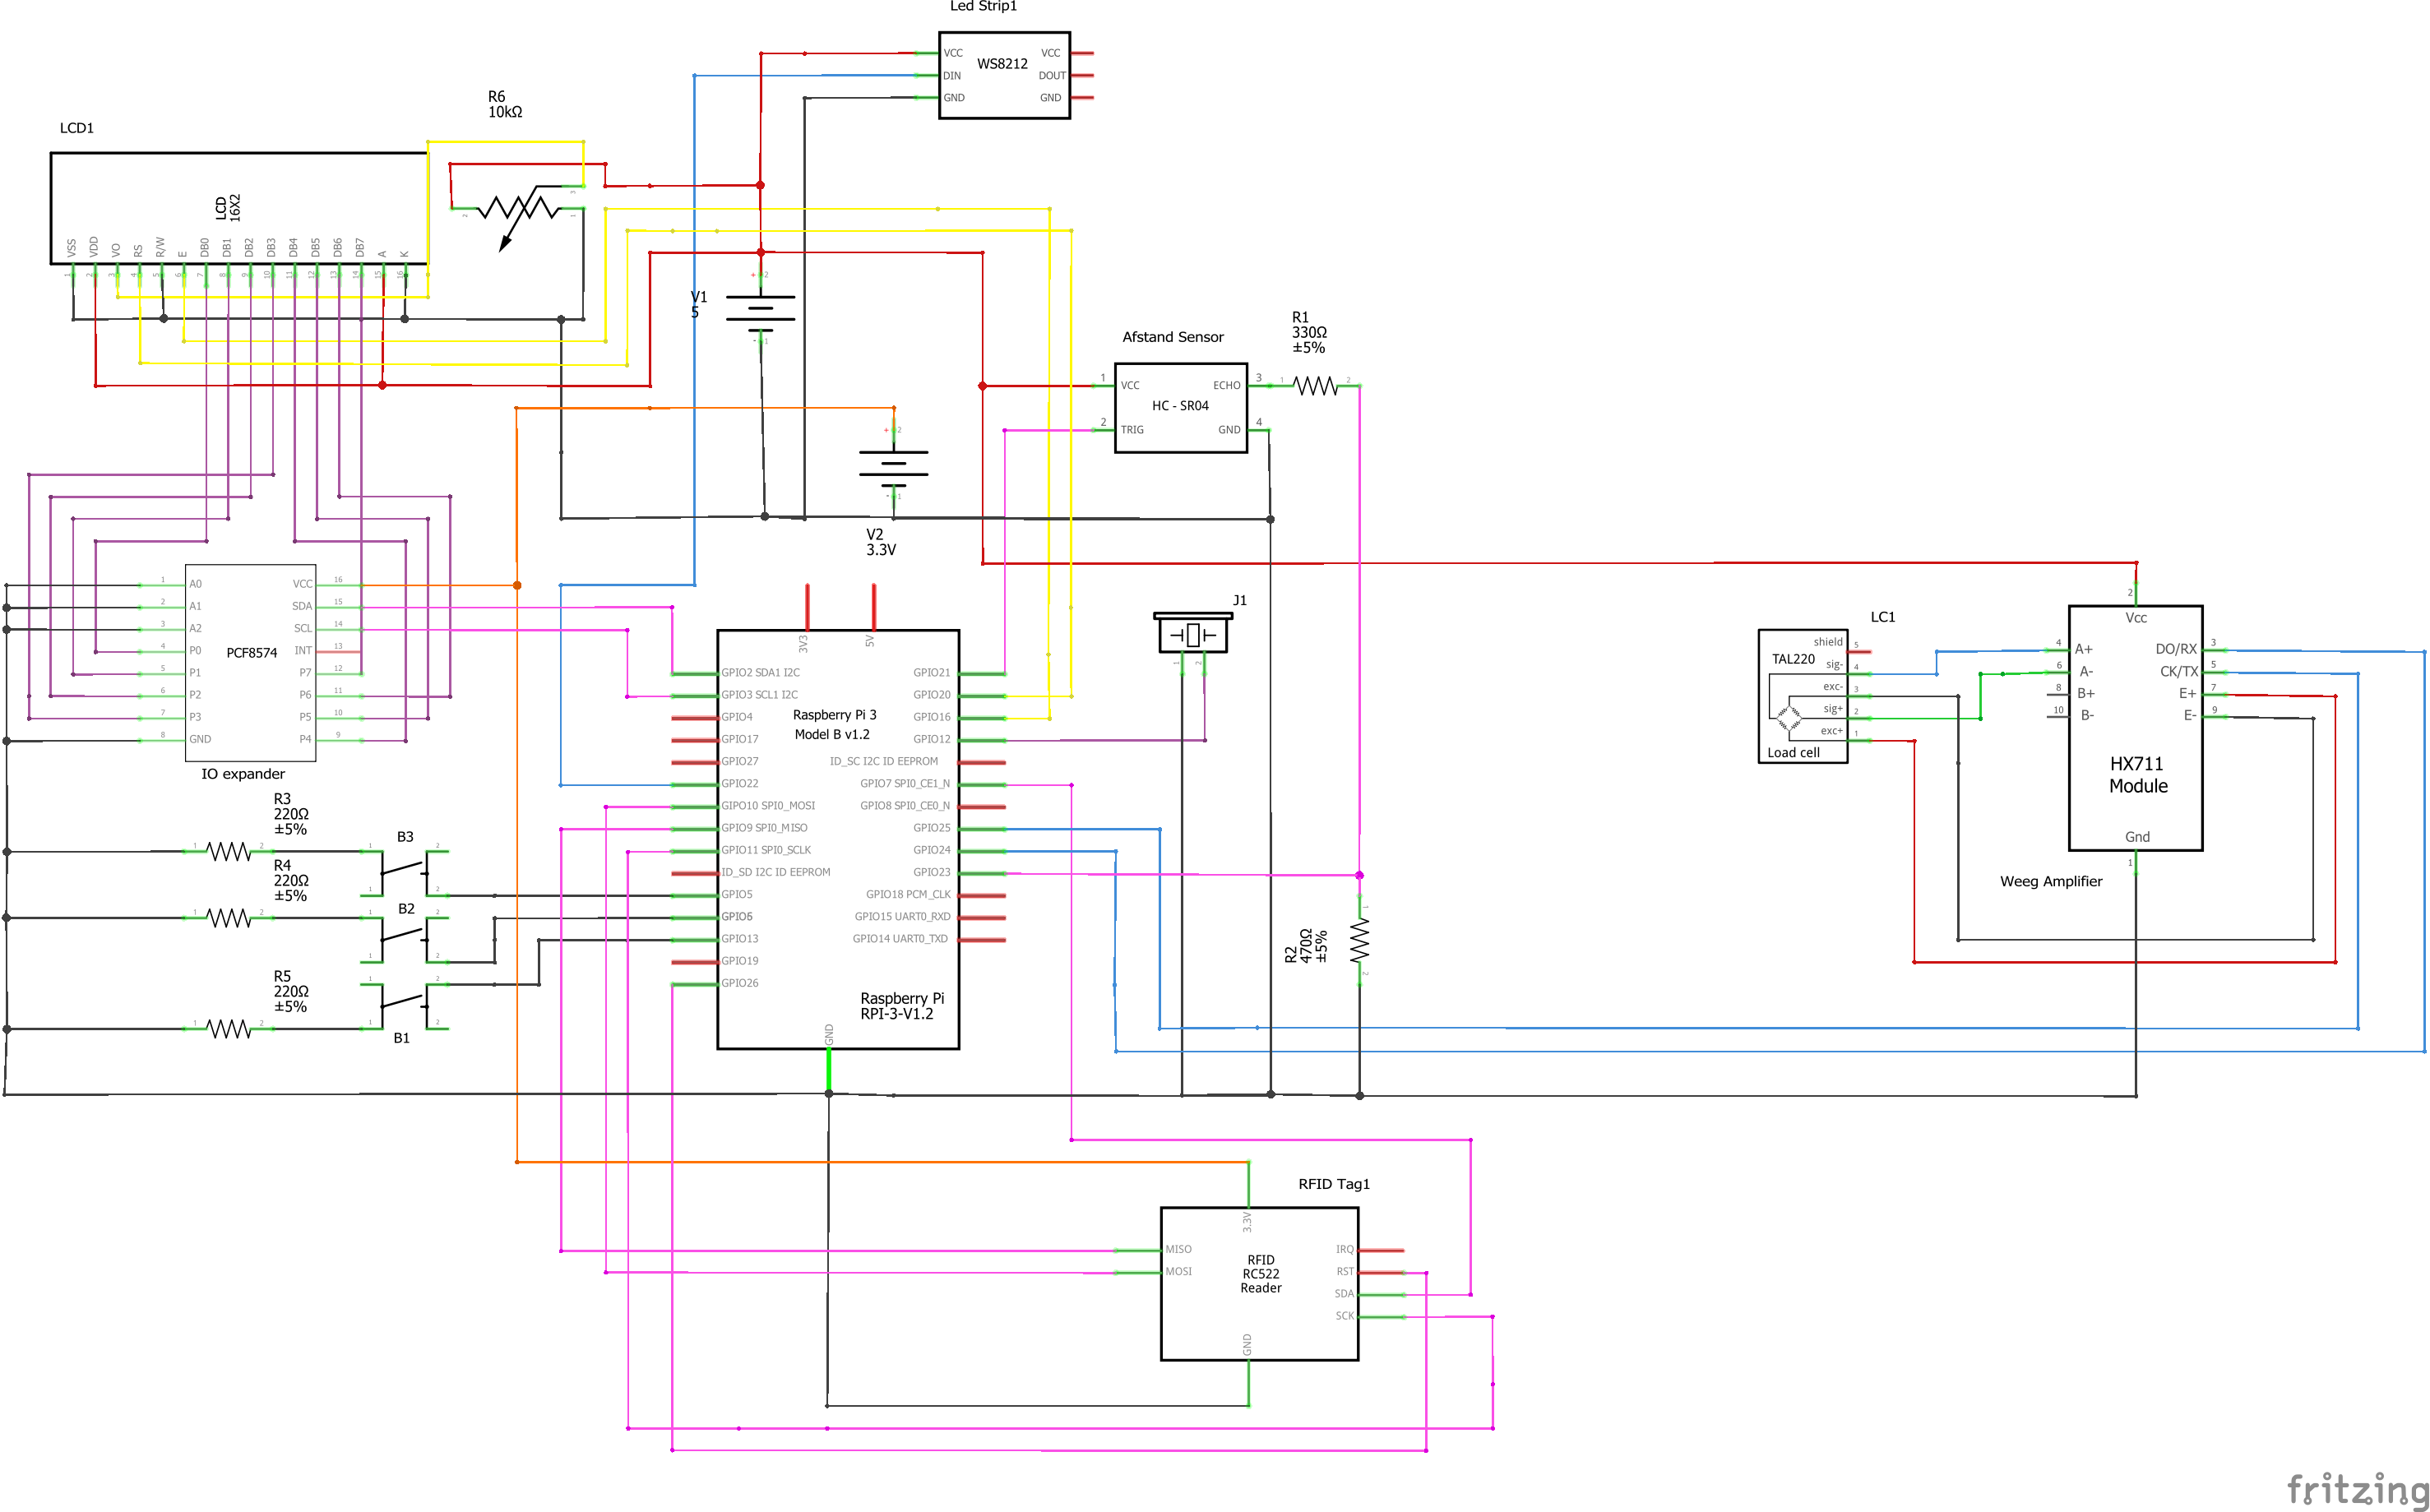
Above, you can find the electric circuit for building this smart scale.
Red = 5V
Orange = 3.3V
Black = GND
You can find my files below to take a closer look at it.
Important!
Look at all the components very carefully, as some operate at 5 volts. Do not confuse between 5 and 3.3 volts, and do not connect directly 5 volts to your GPIO pins.
Database
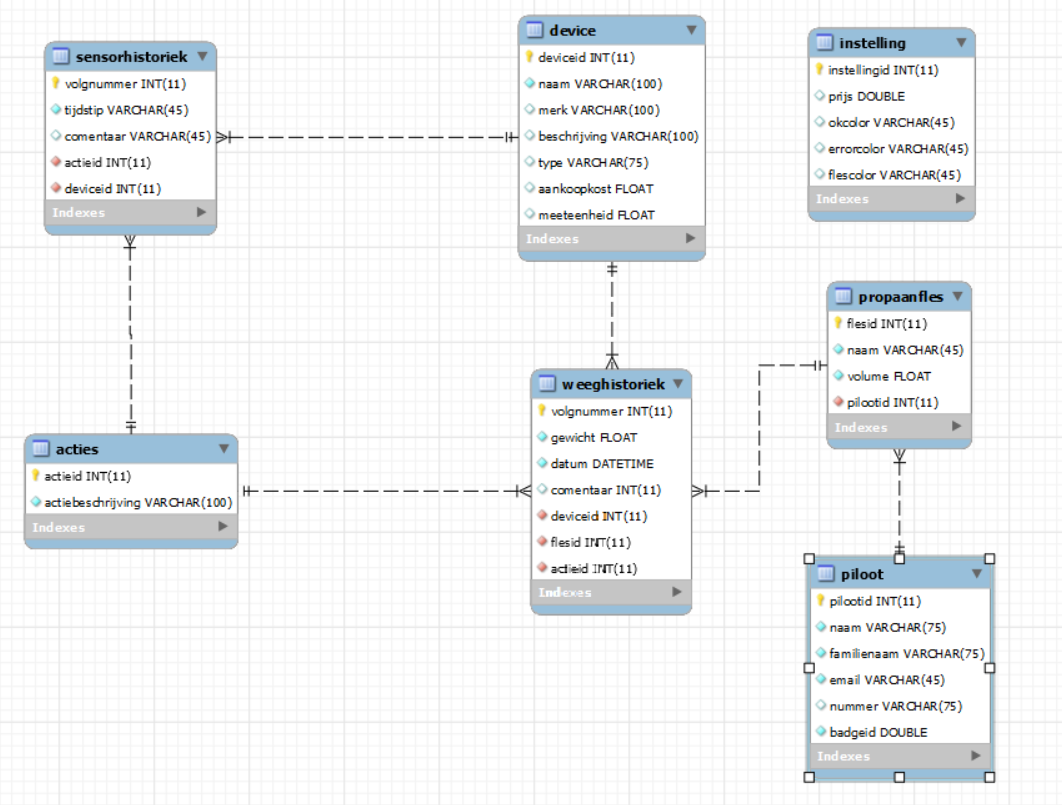
1. Devices
This table contains every sensor. It describes the sensor name, description and measuring unit, price, etc..
2. History
This table contains the history of every action coming from a device. It contains the actionID and the date of the action it also has the deviceID.
3. Actions
This table contains action and gives it its own ID and description.
4. Pilots
This table keeps track of each pilot with their data and badge id.
4. Propaanfles
Propane bottle is a table of all propane bottles. This has a relationship with pilot using pilot id.
5. Weeghistoriek
Weighing history is a table with all the measurements that happened. It has a relationship to a particular propane bottle. Because of this relationship, a measurement is also immediately linked to a pilot. Also with relation action. This can be for example empty or full weight weight.
6. Instellingen
Settings is a table with all the settings for the program such as the gas price etc.
Backend
The program is programmed entirely in Python,JavaScrip, HTML
The backend is very important to send data to the frontend. In the backend I used routes, socket.io and threading.
API endpoints:
The frontend retrieves data from the backend via API endpoints.
Socket.io:
Socket.io allows me to pass live data to my web page without refreshing. It is very convenient to implement this.
Important note's:
Go to config.py. You need to set your Database credentials (user, password and database).
This config file care of the connection to your database.
To run the backend, you must run it with sudo! This is because the library for the led strip only runs with sudo!
Frontend
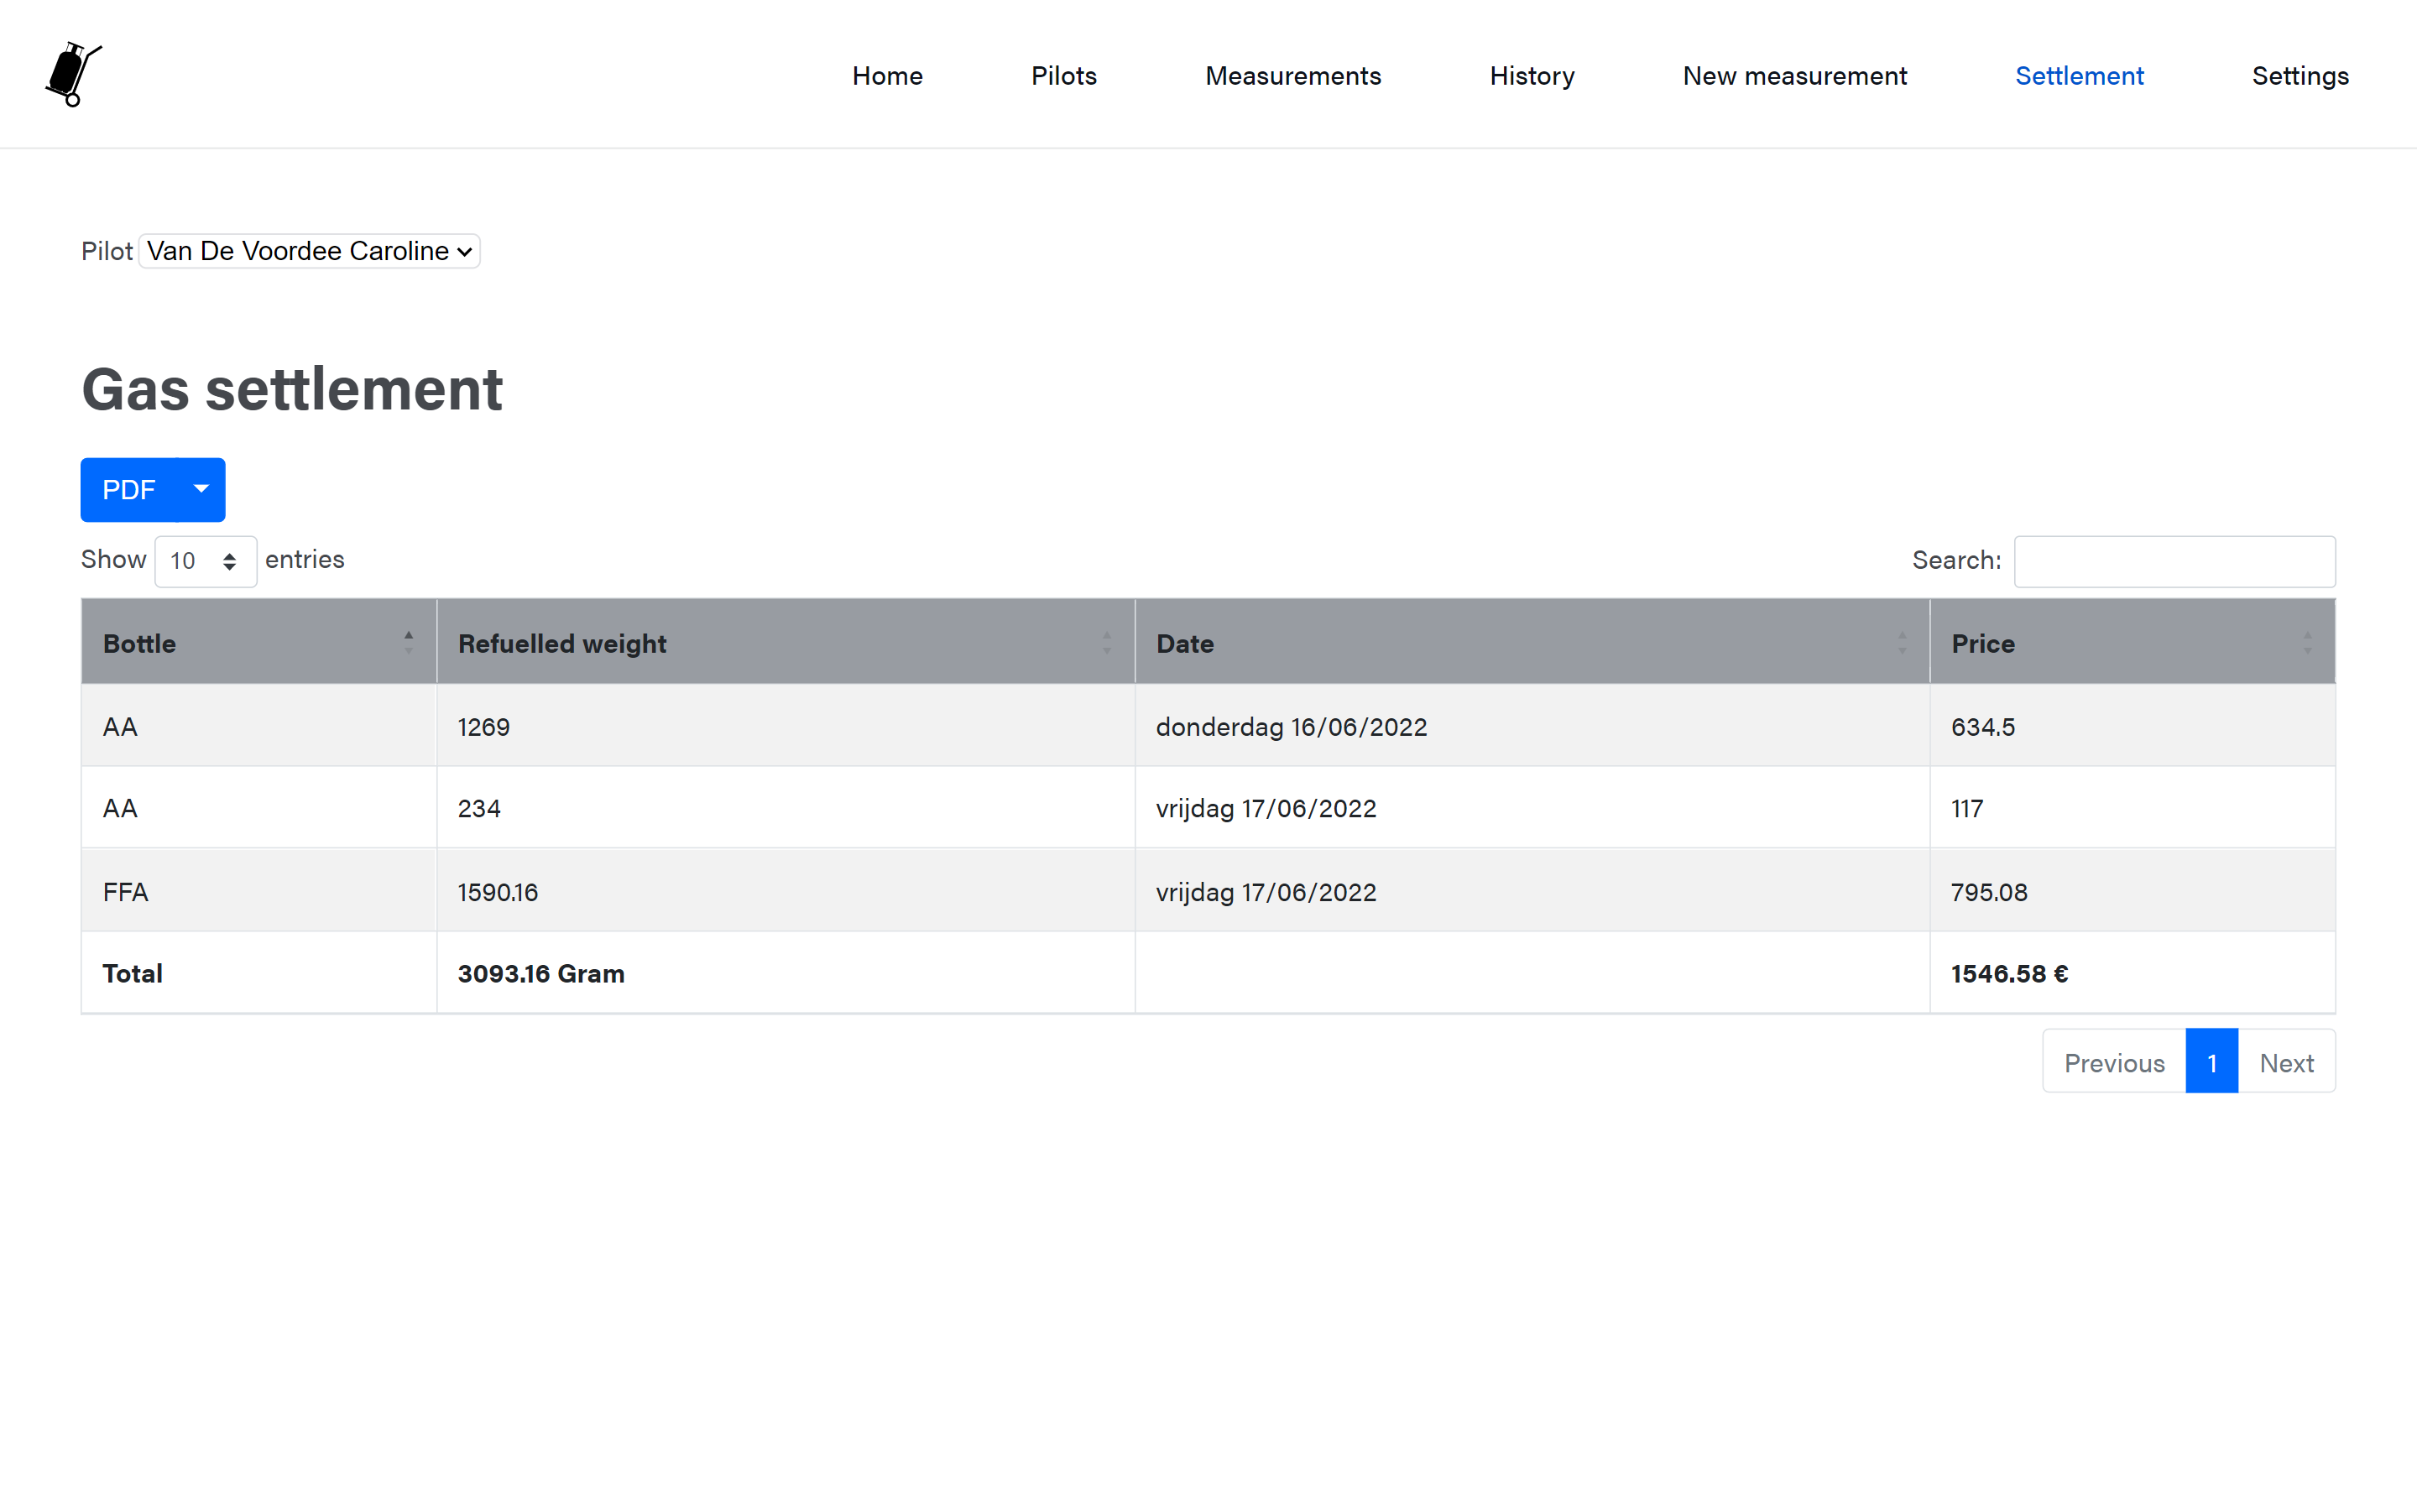
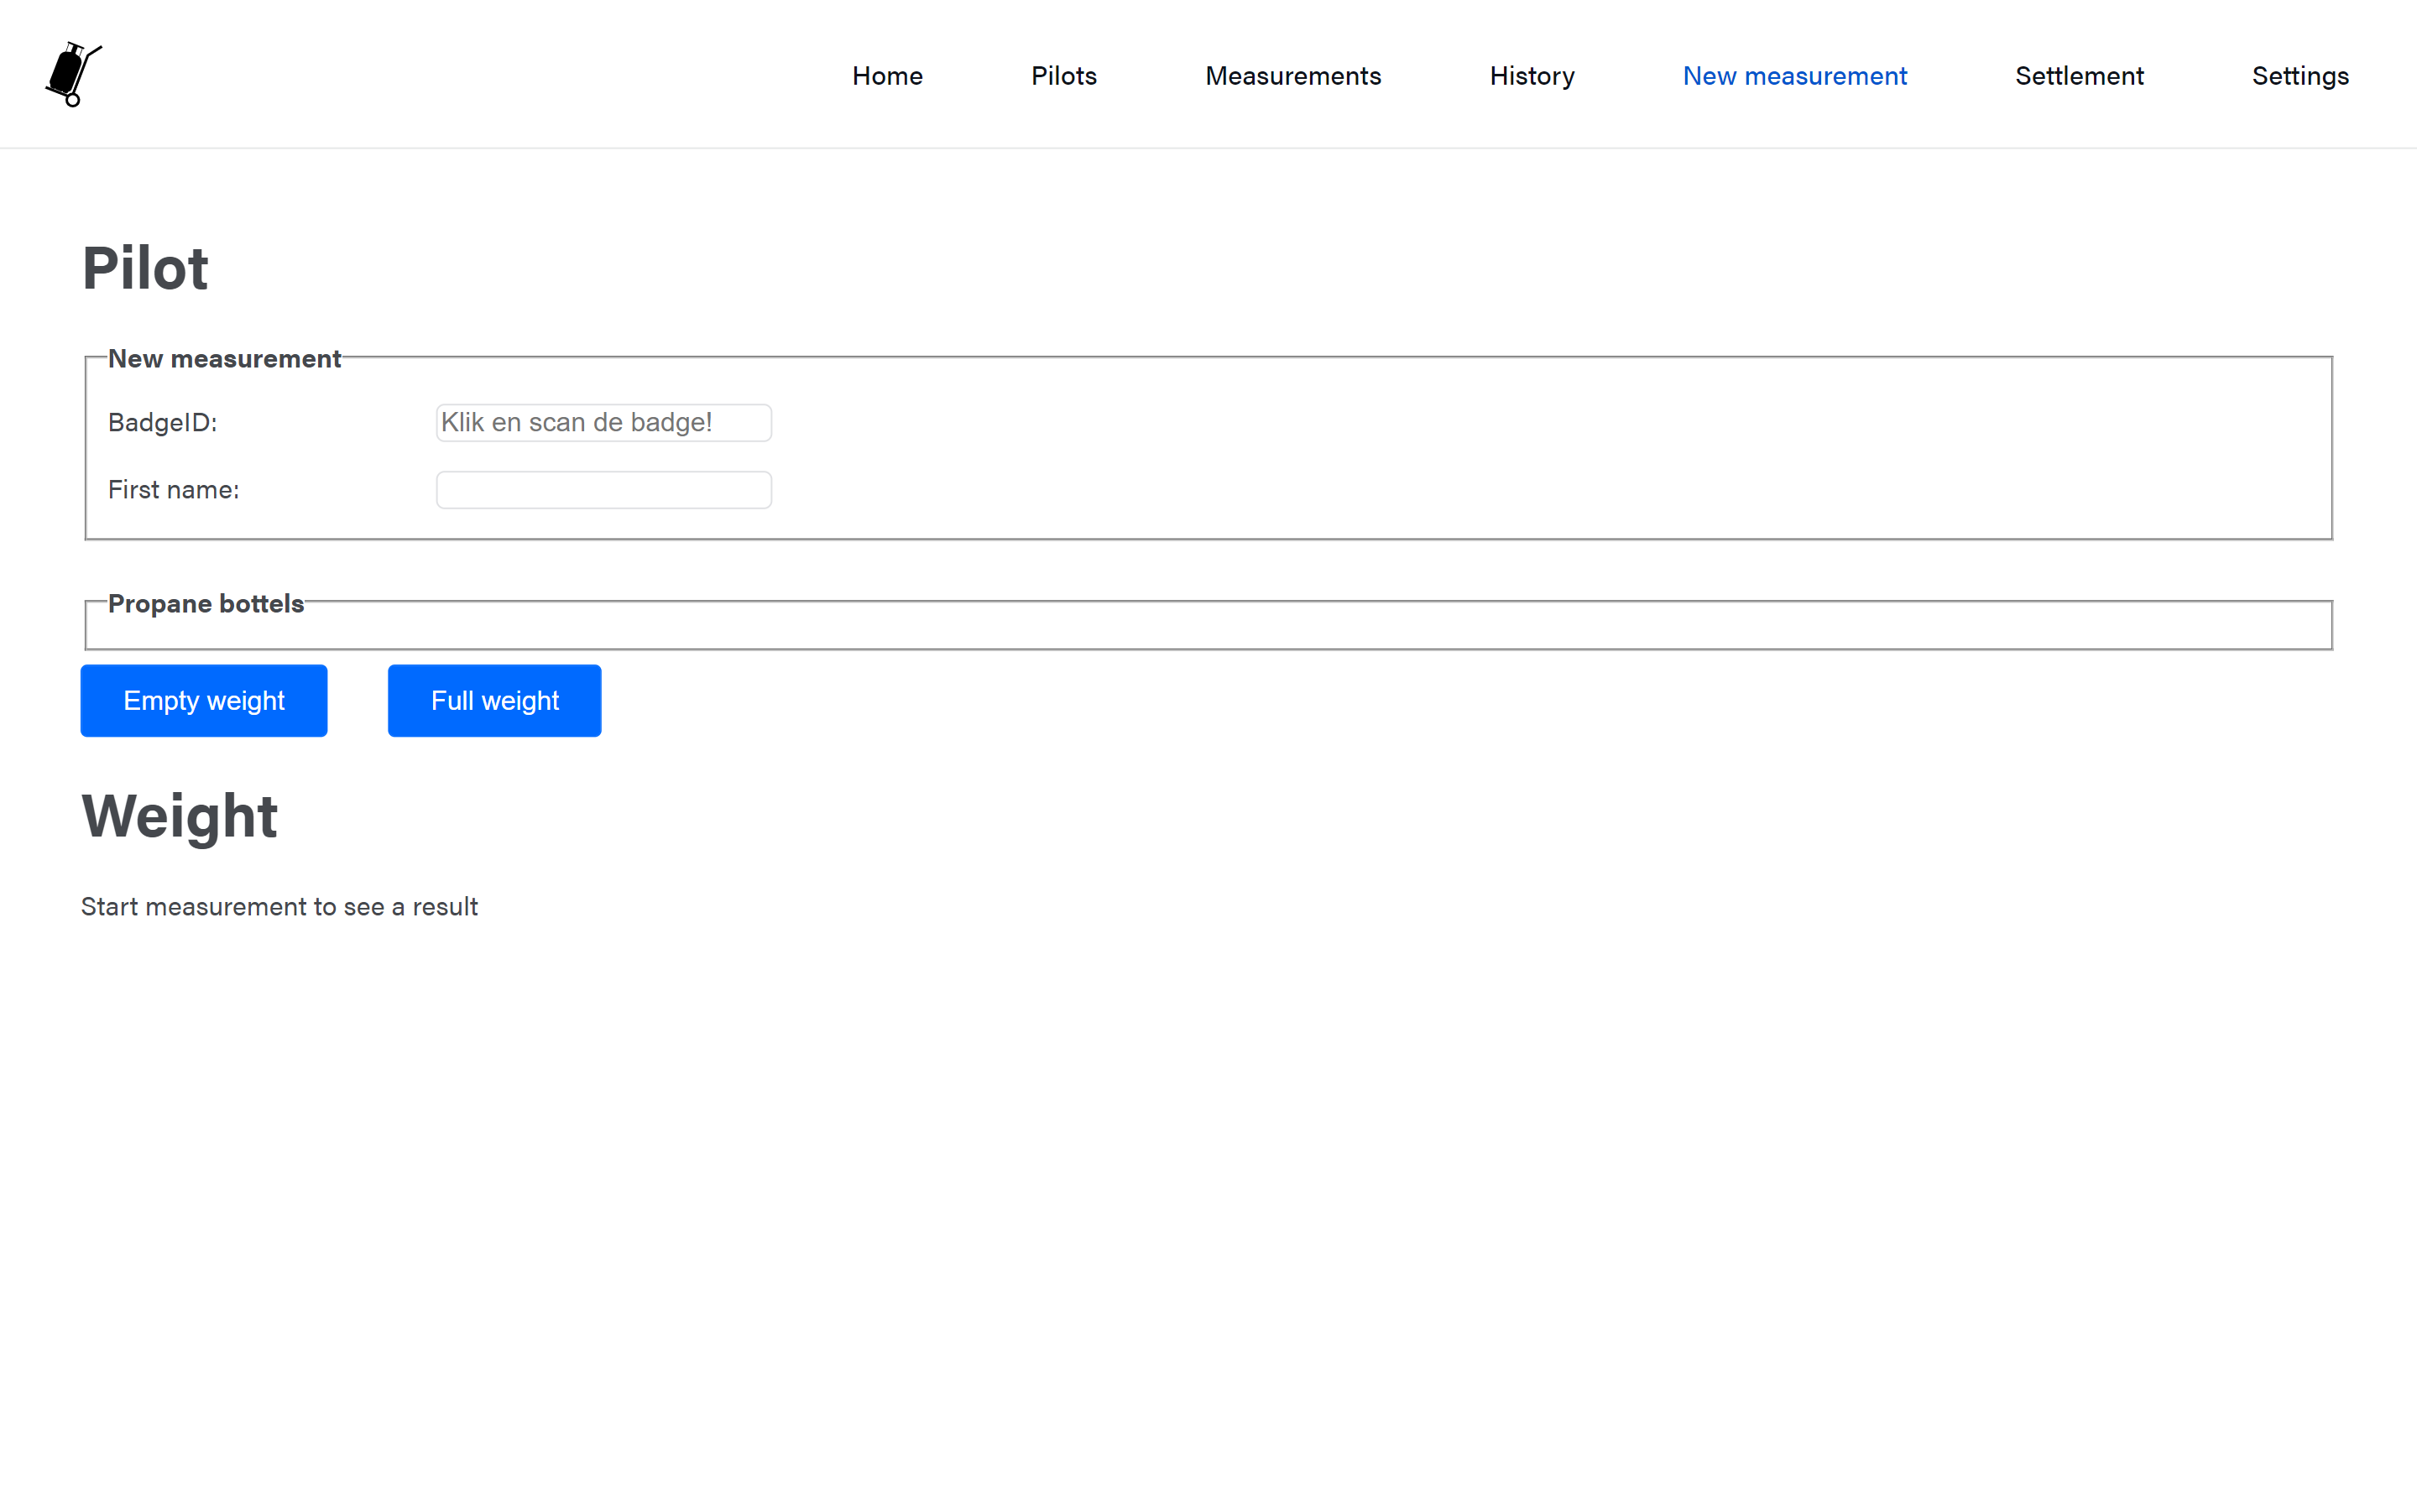
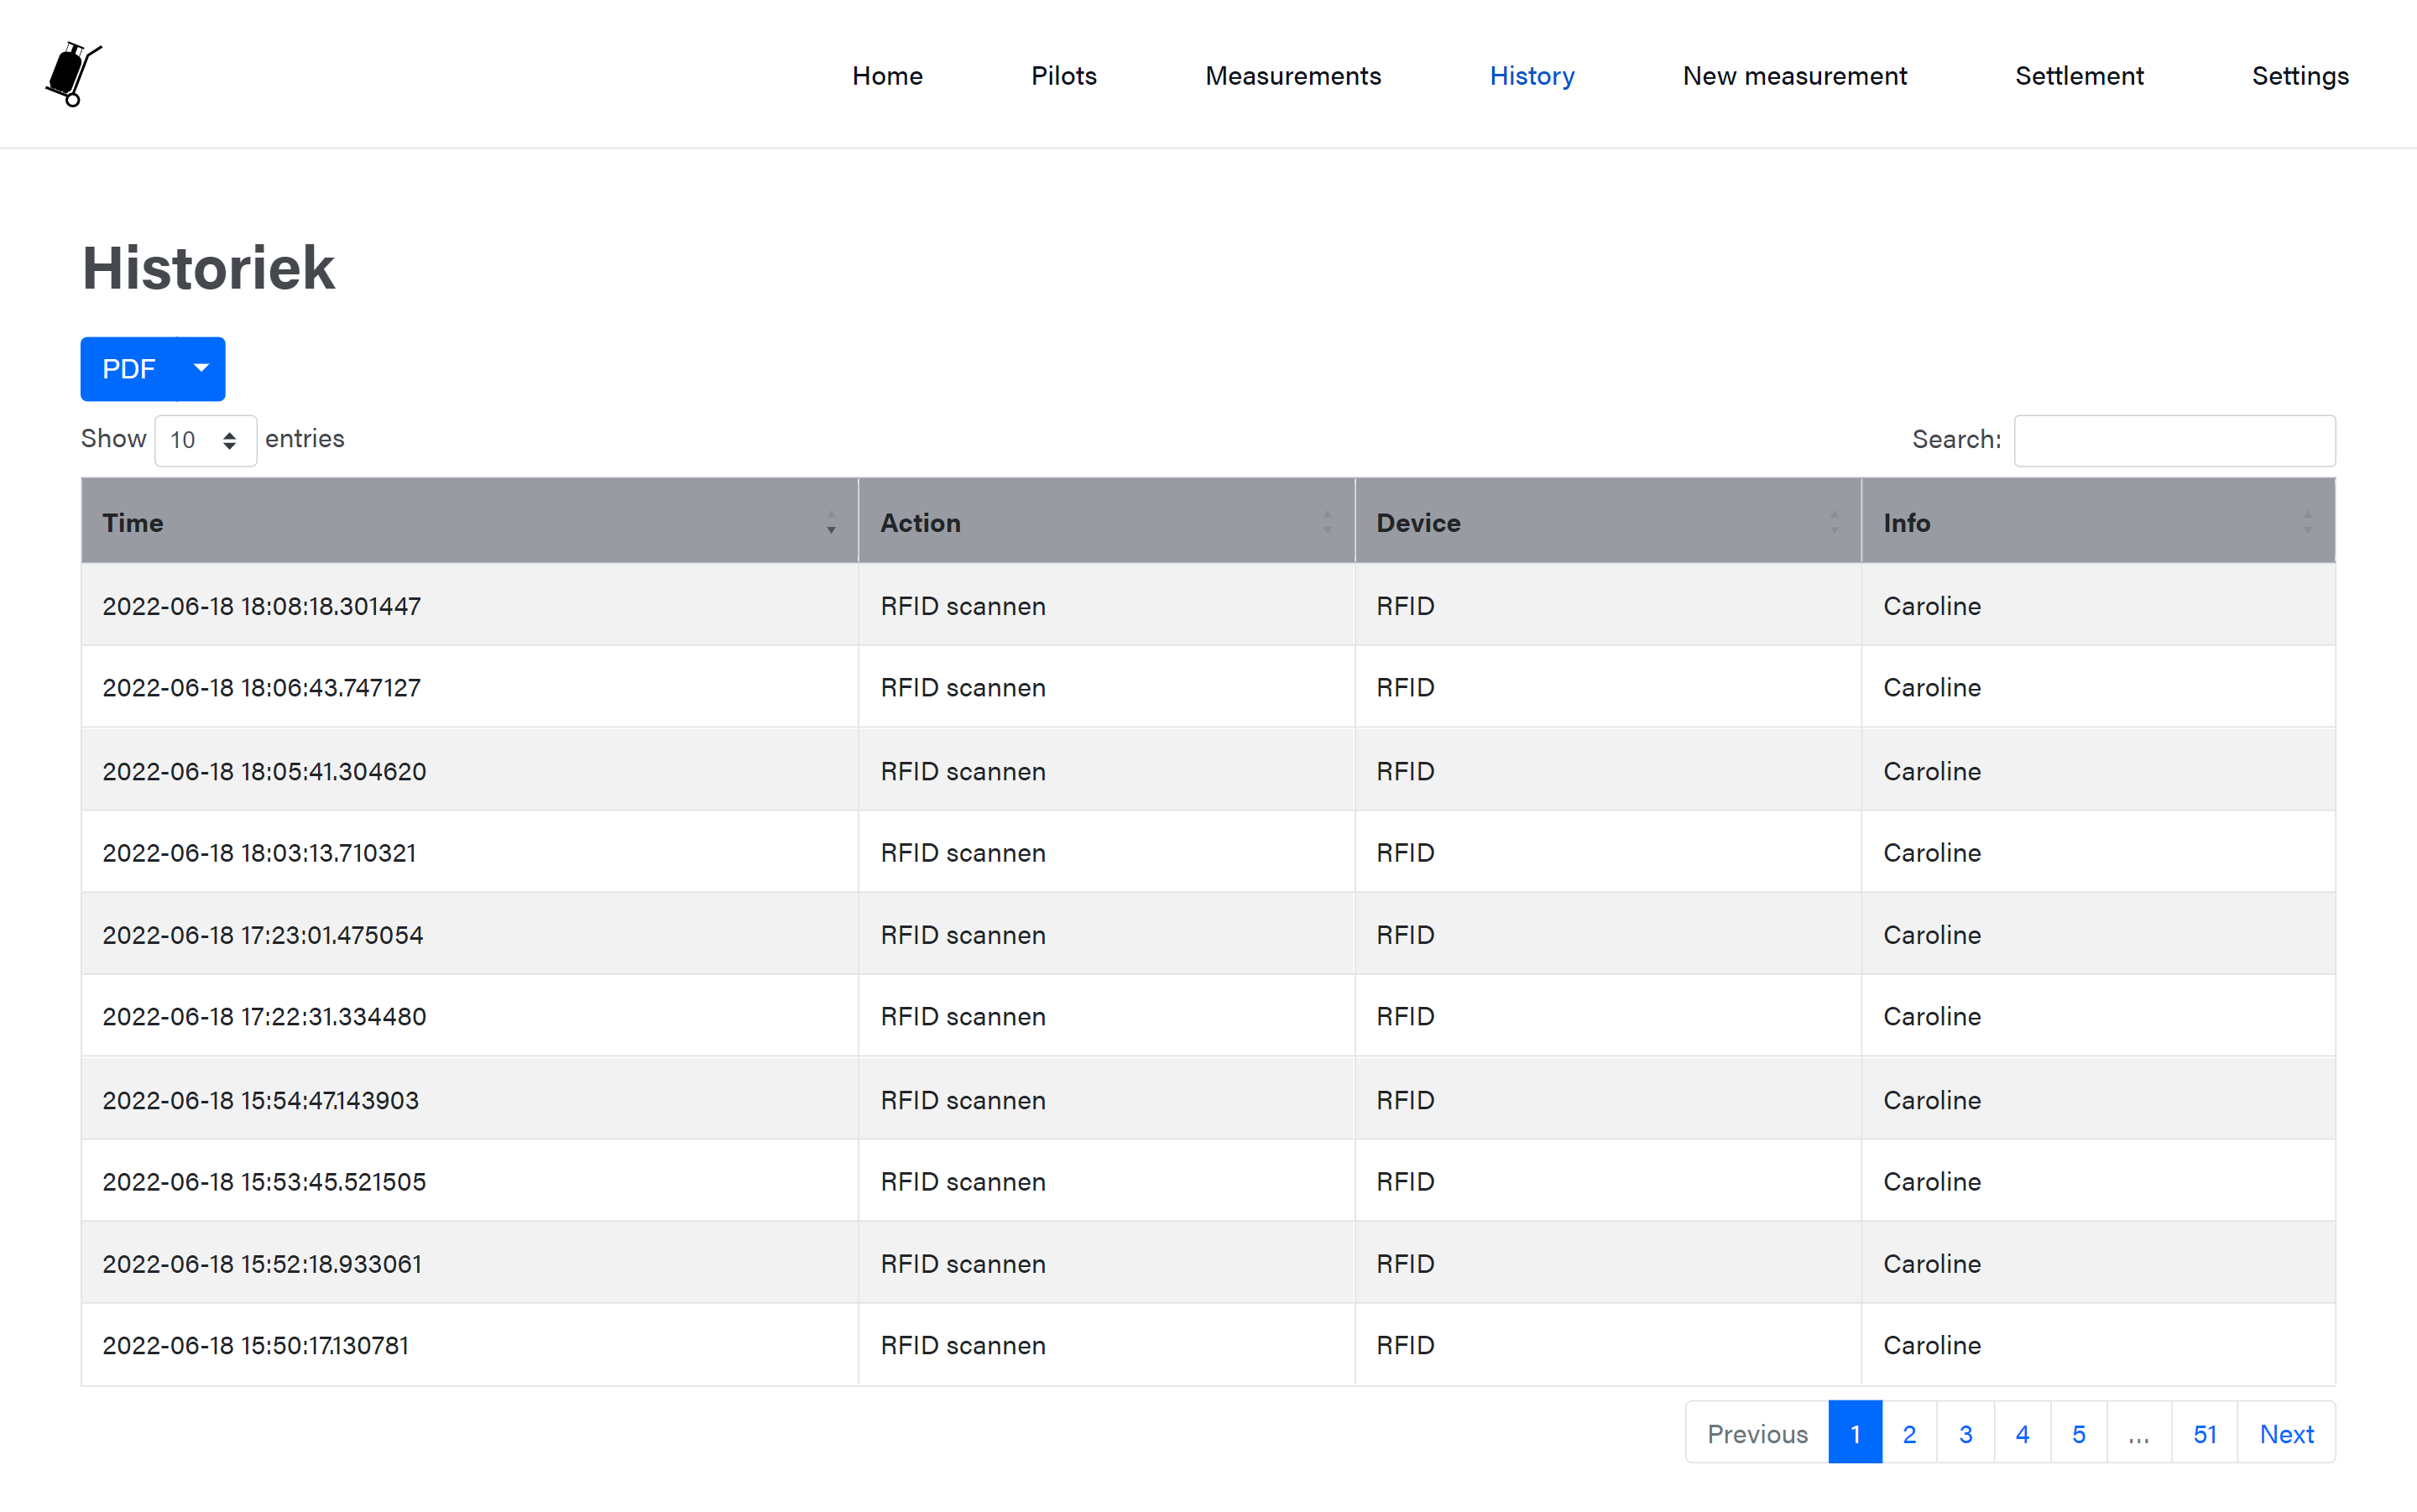
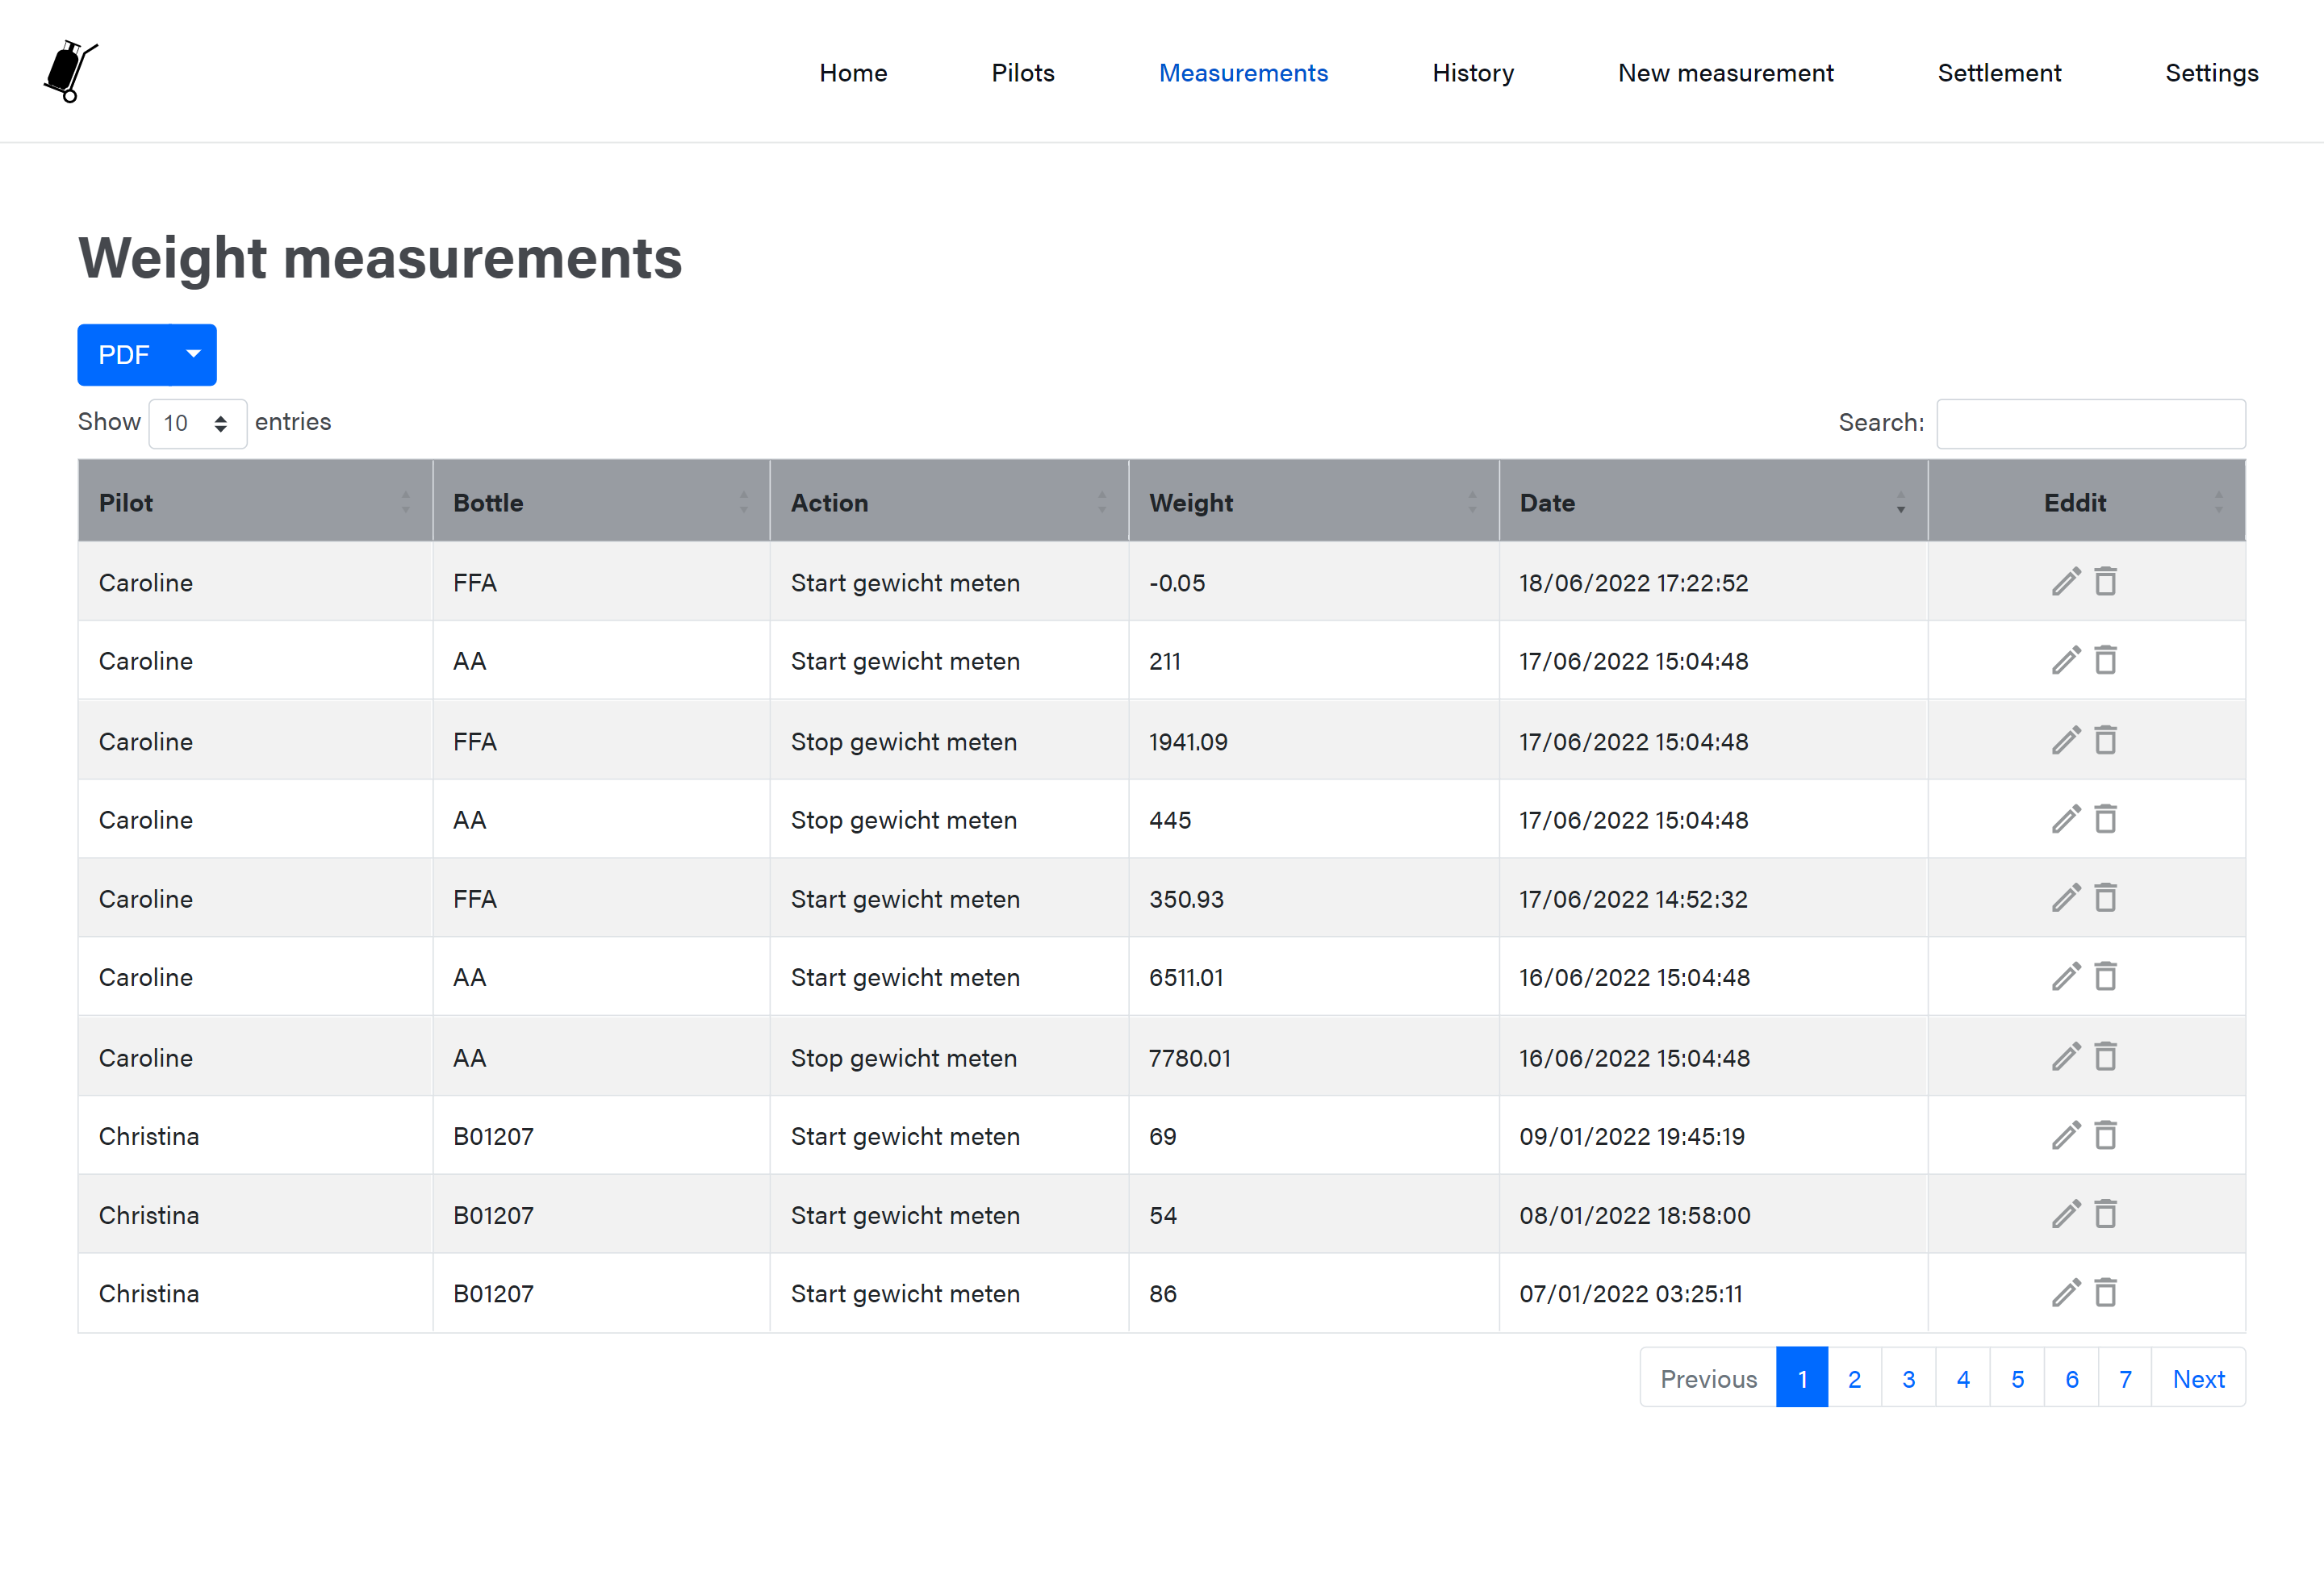
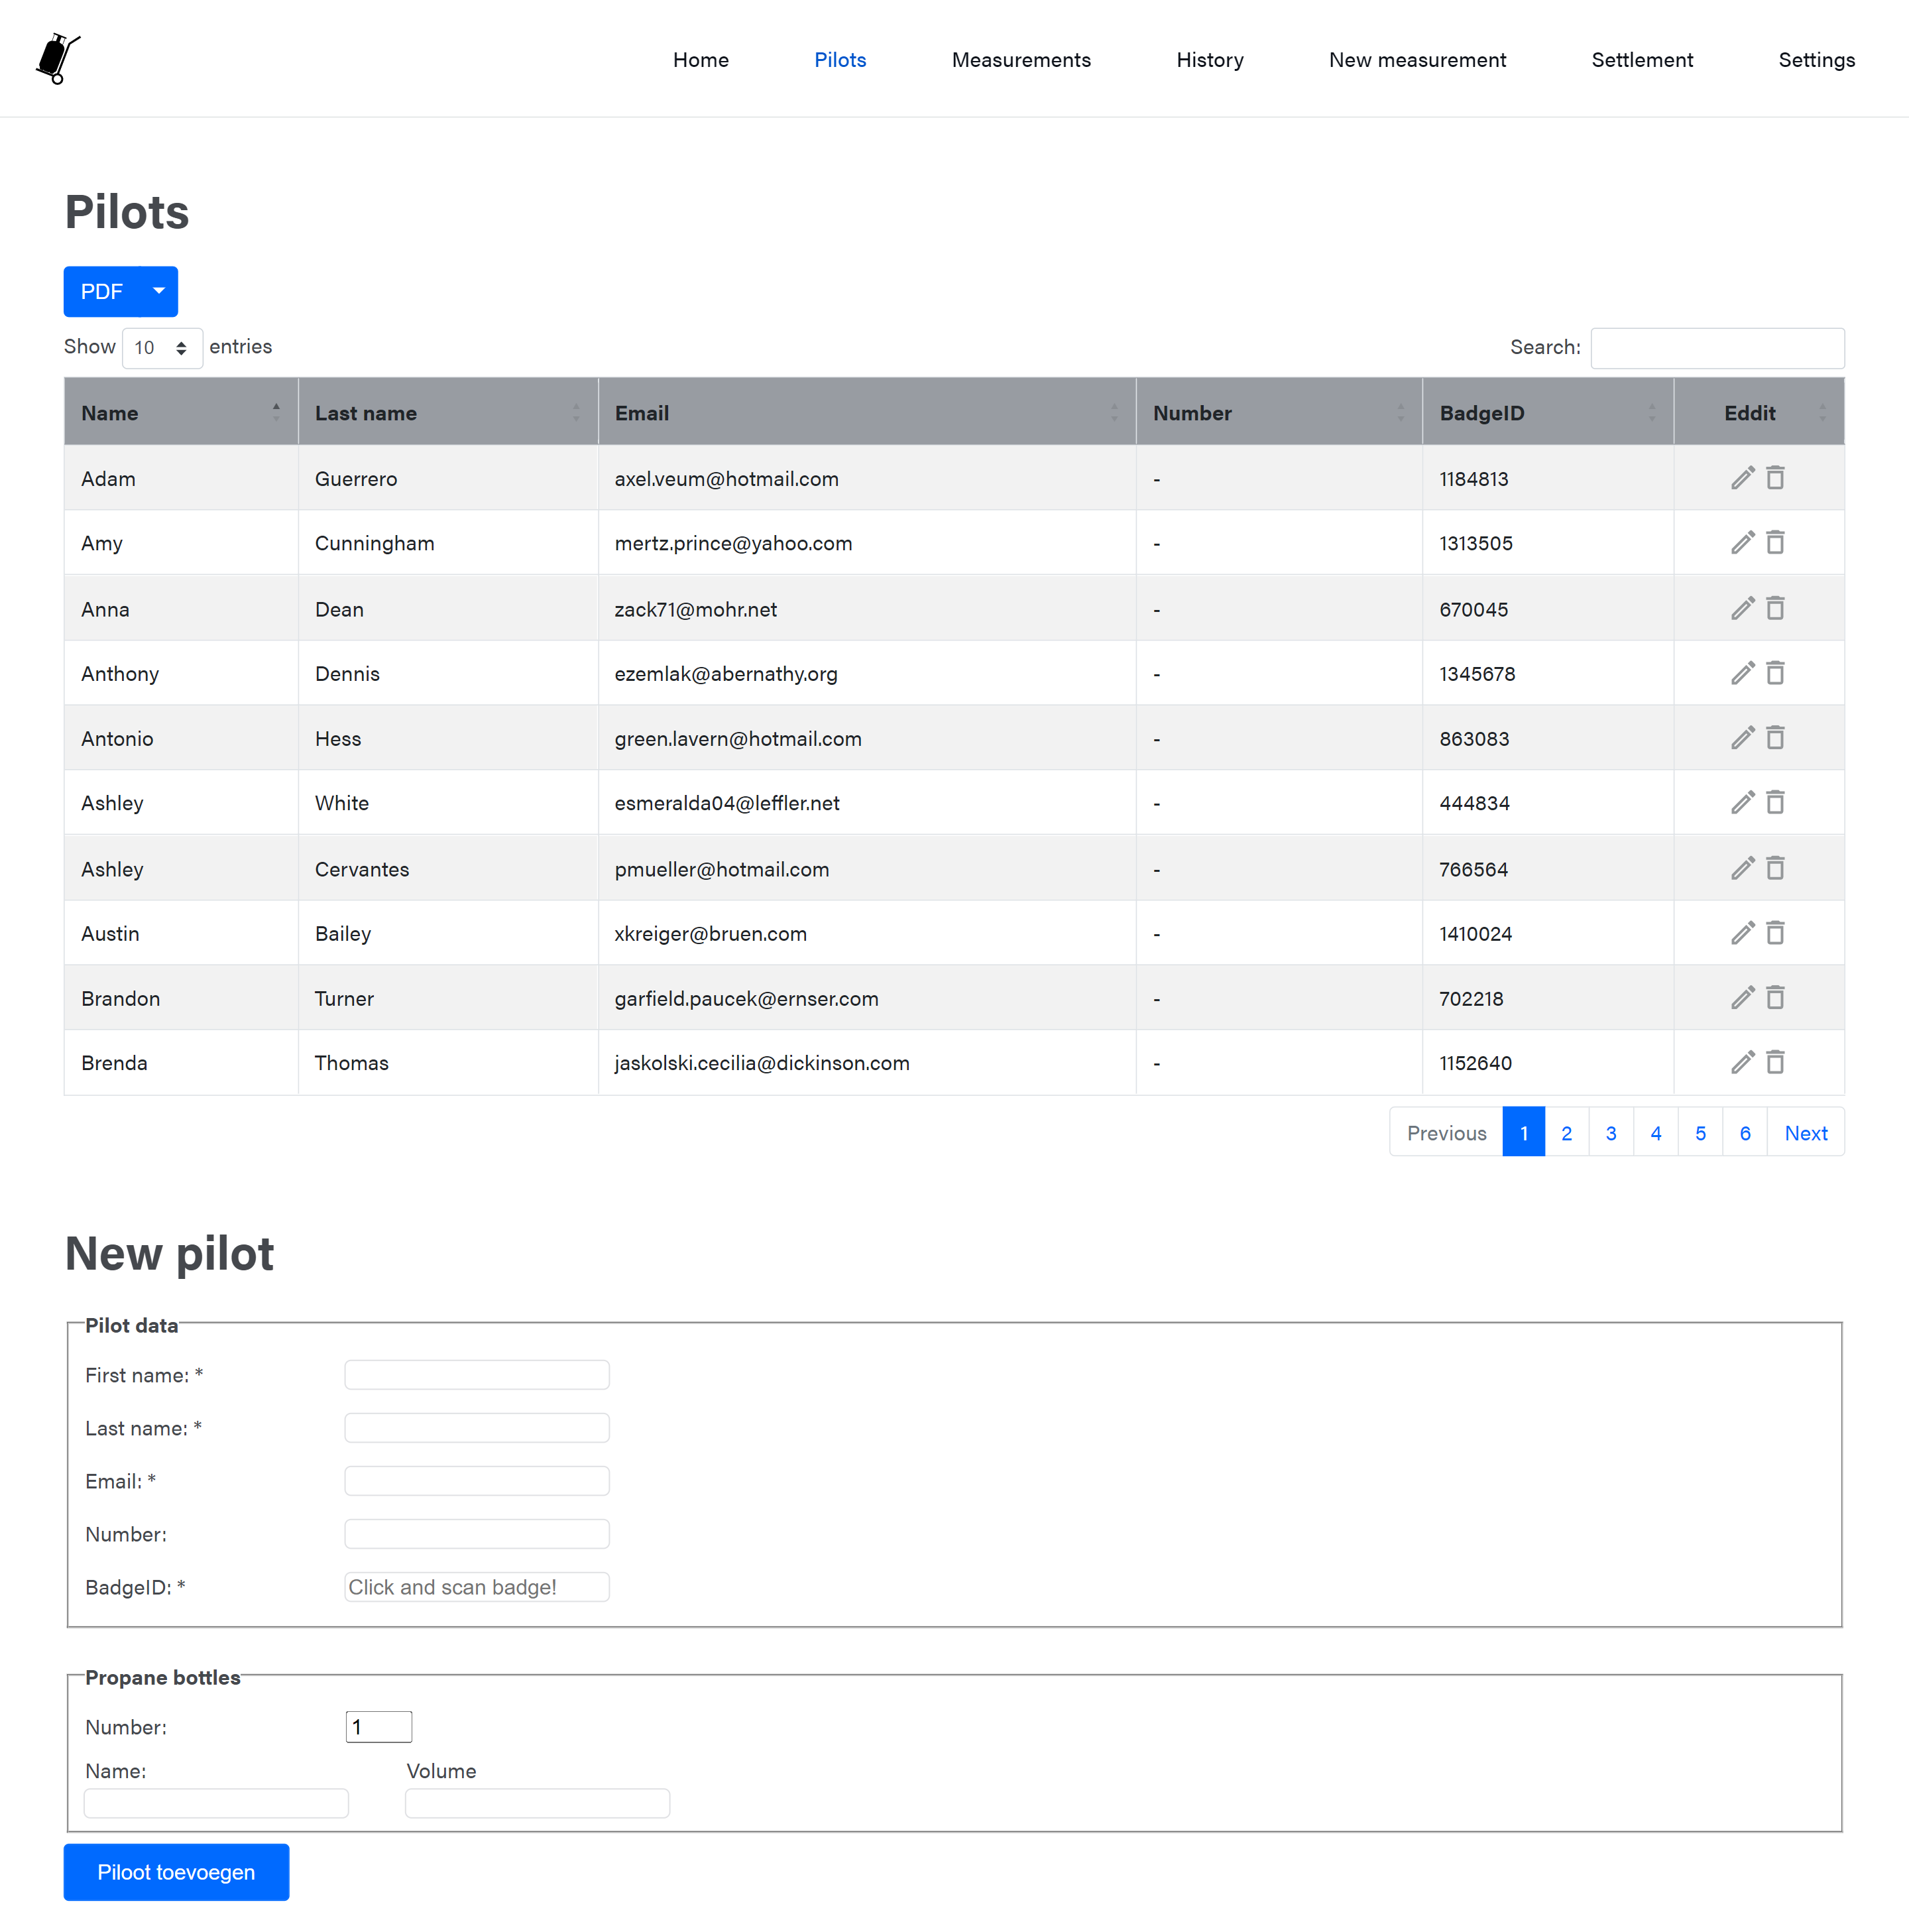
Here you have an overview of what functionalities the website has. I first designed the website in Adobe XD and then created it in HTML.
The Housing

.PNG)
.PNG)
.PNG)
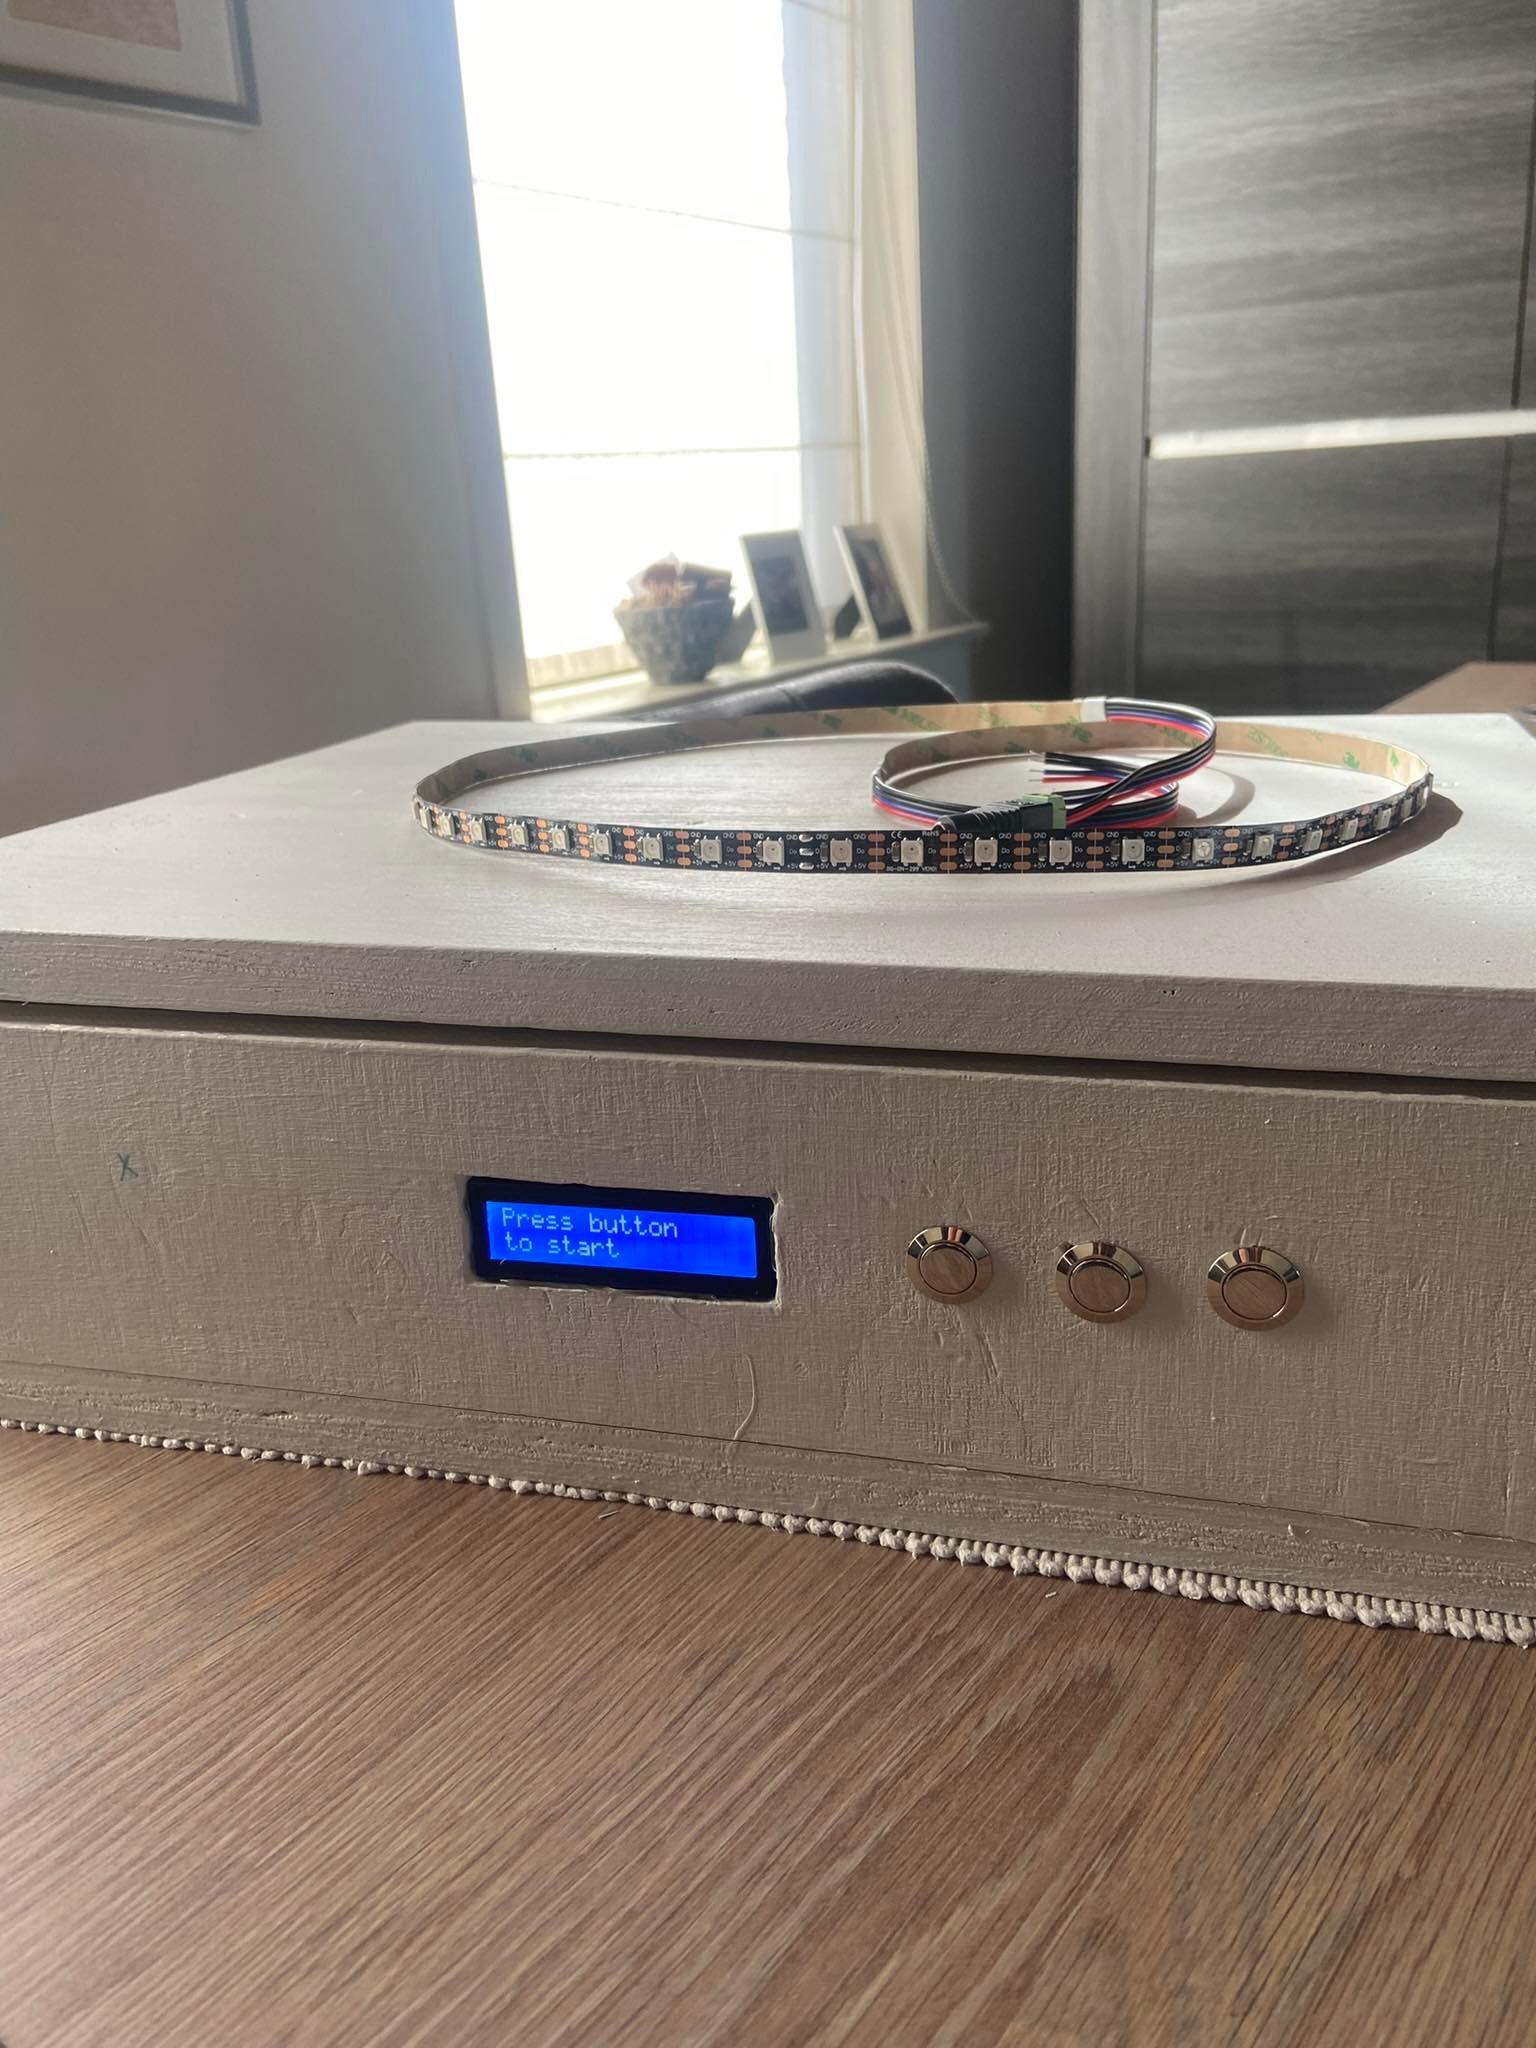
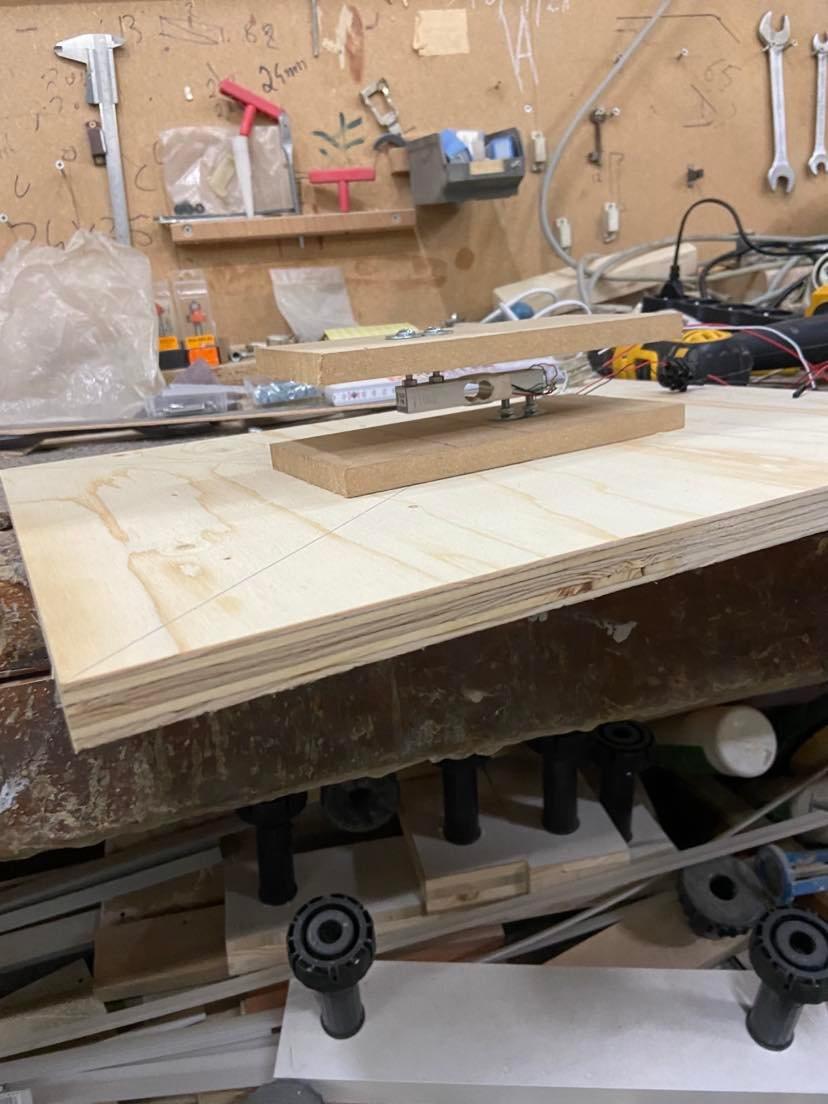
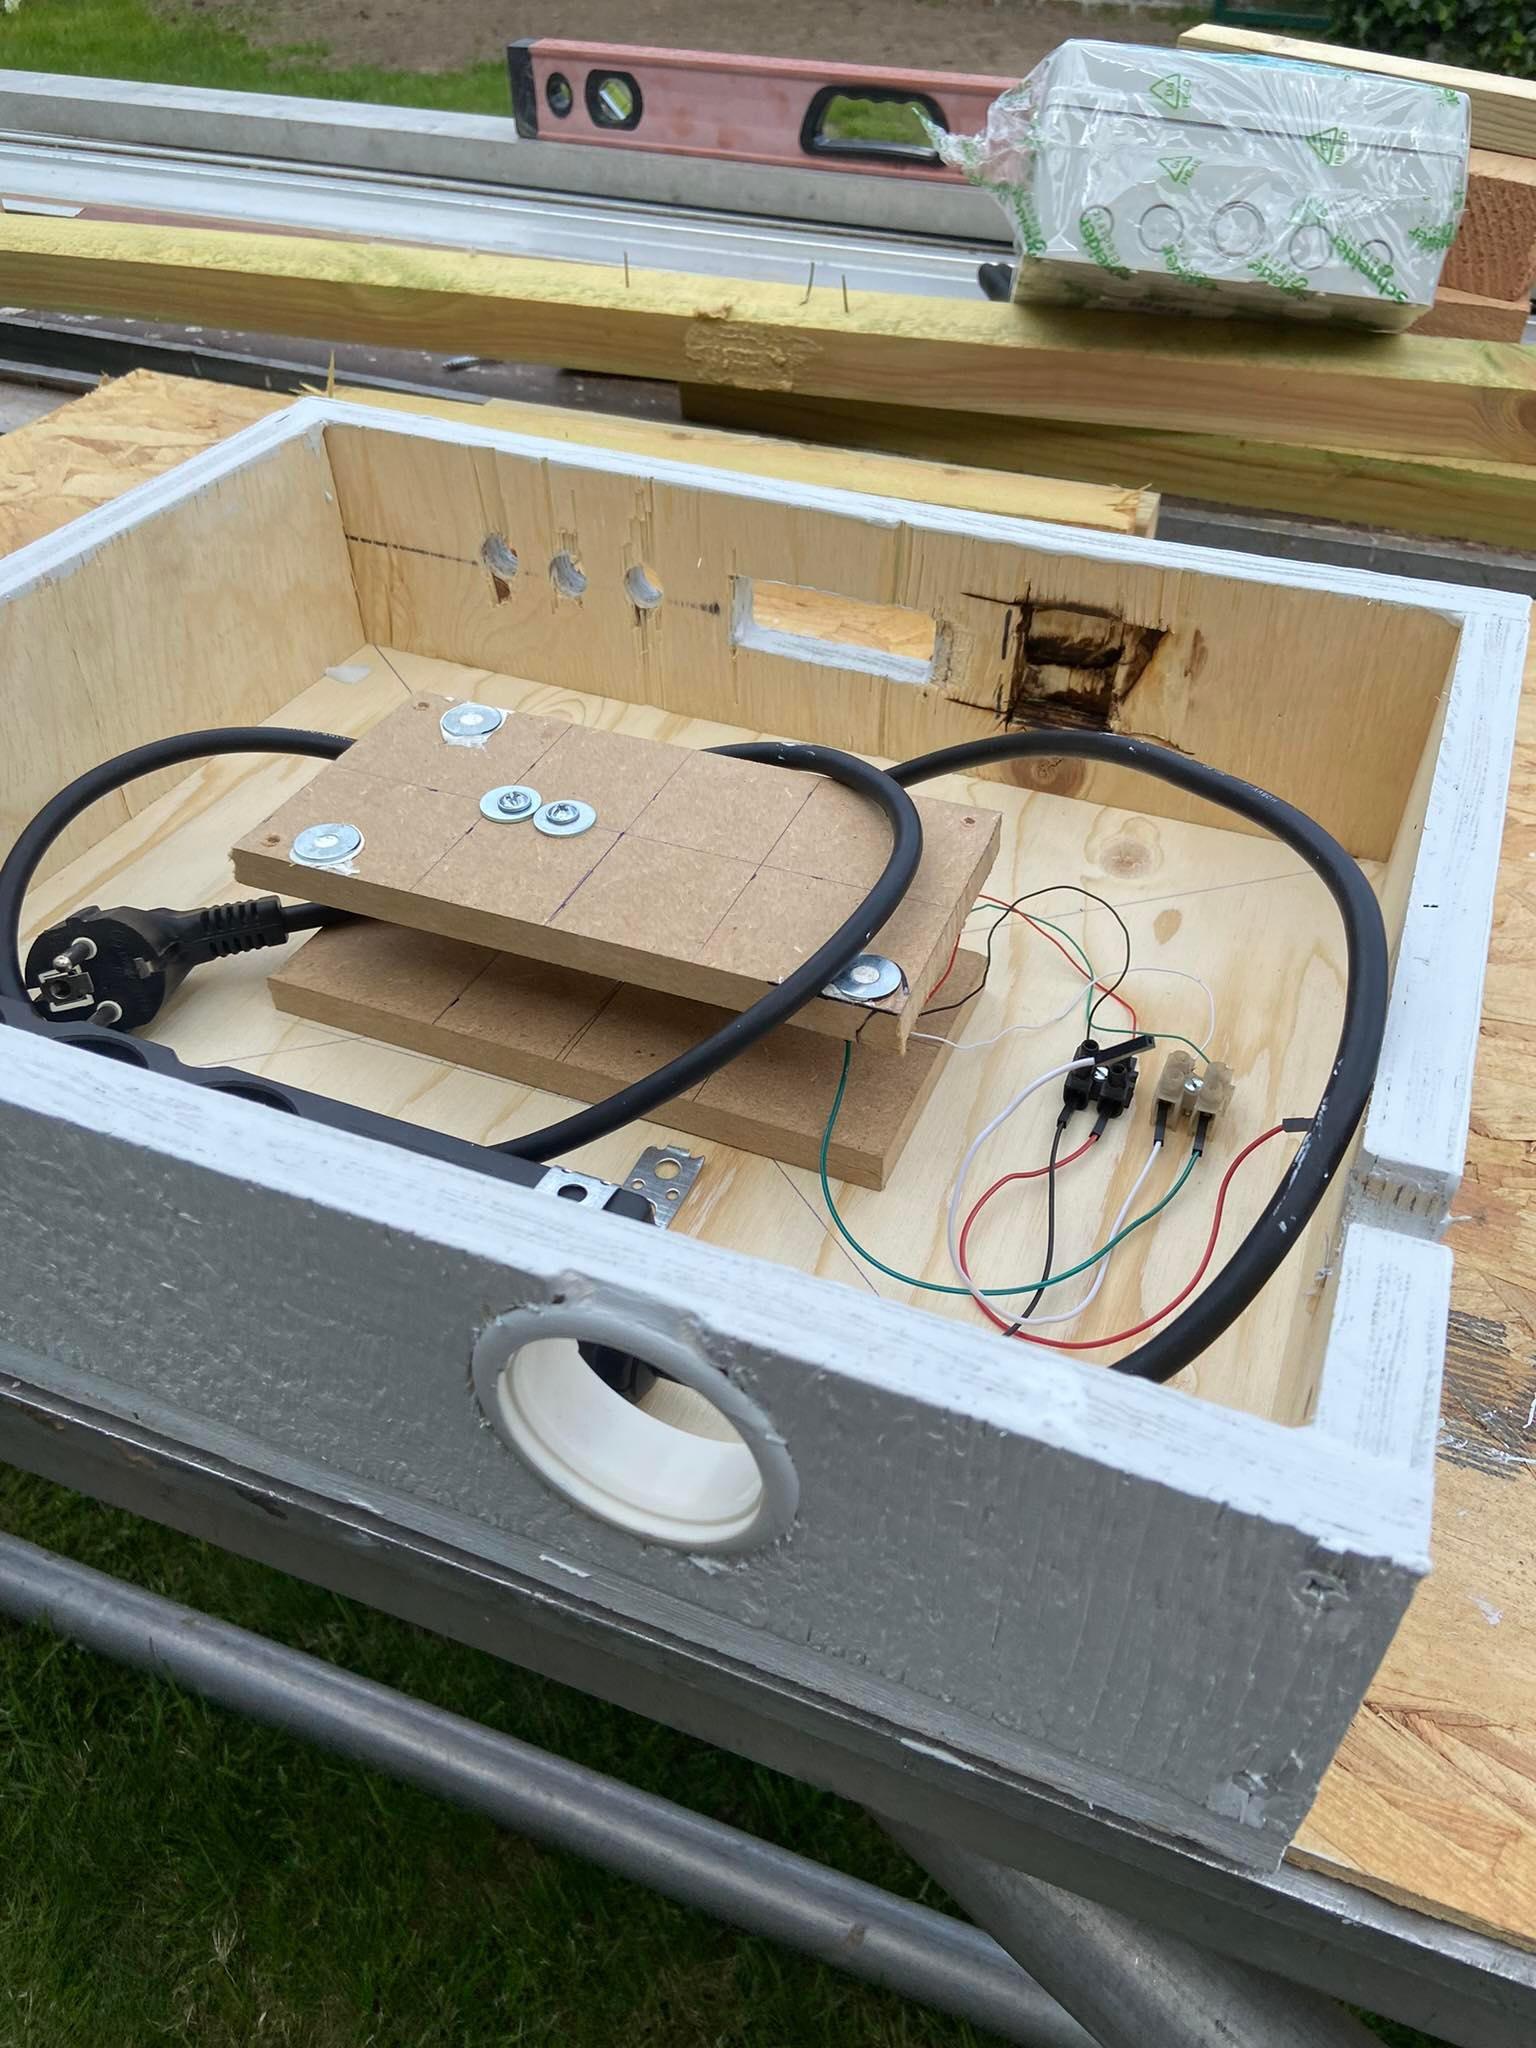
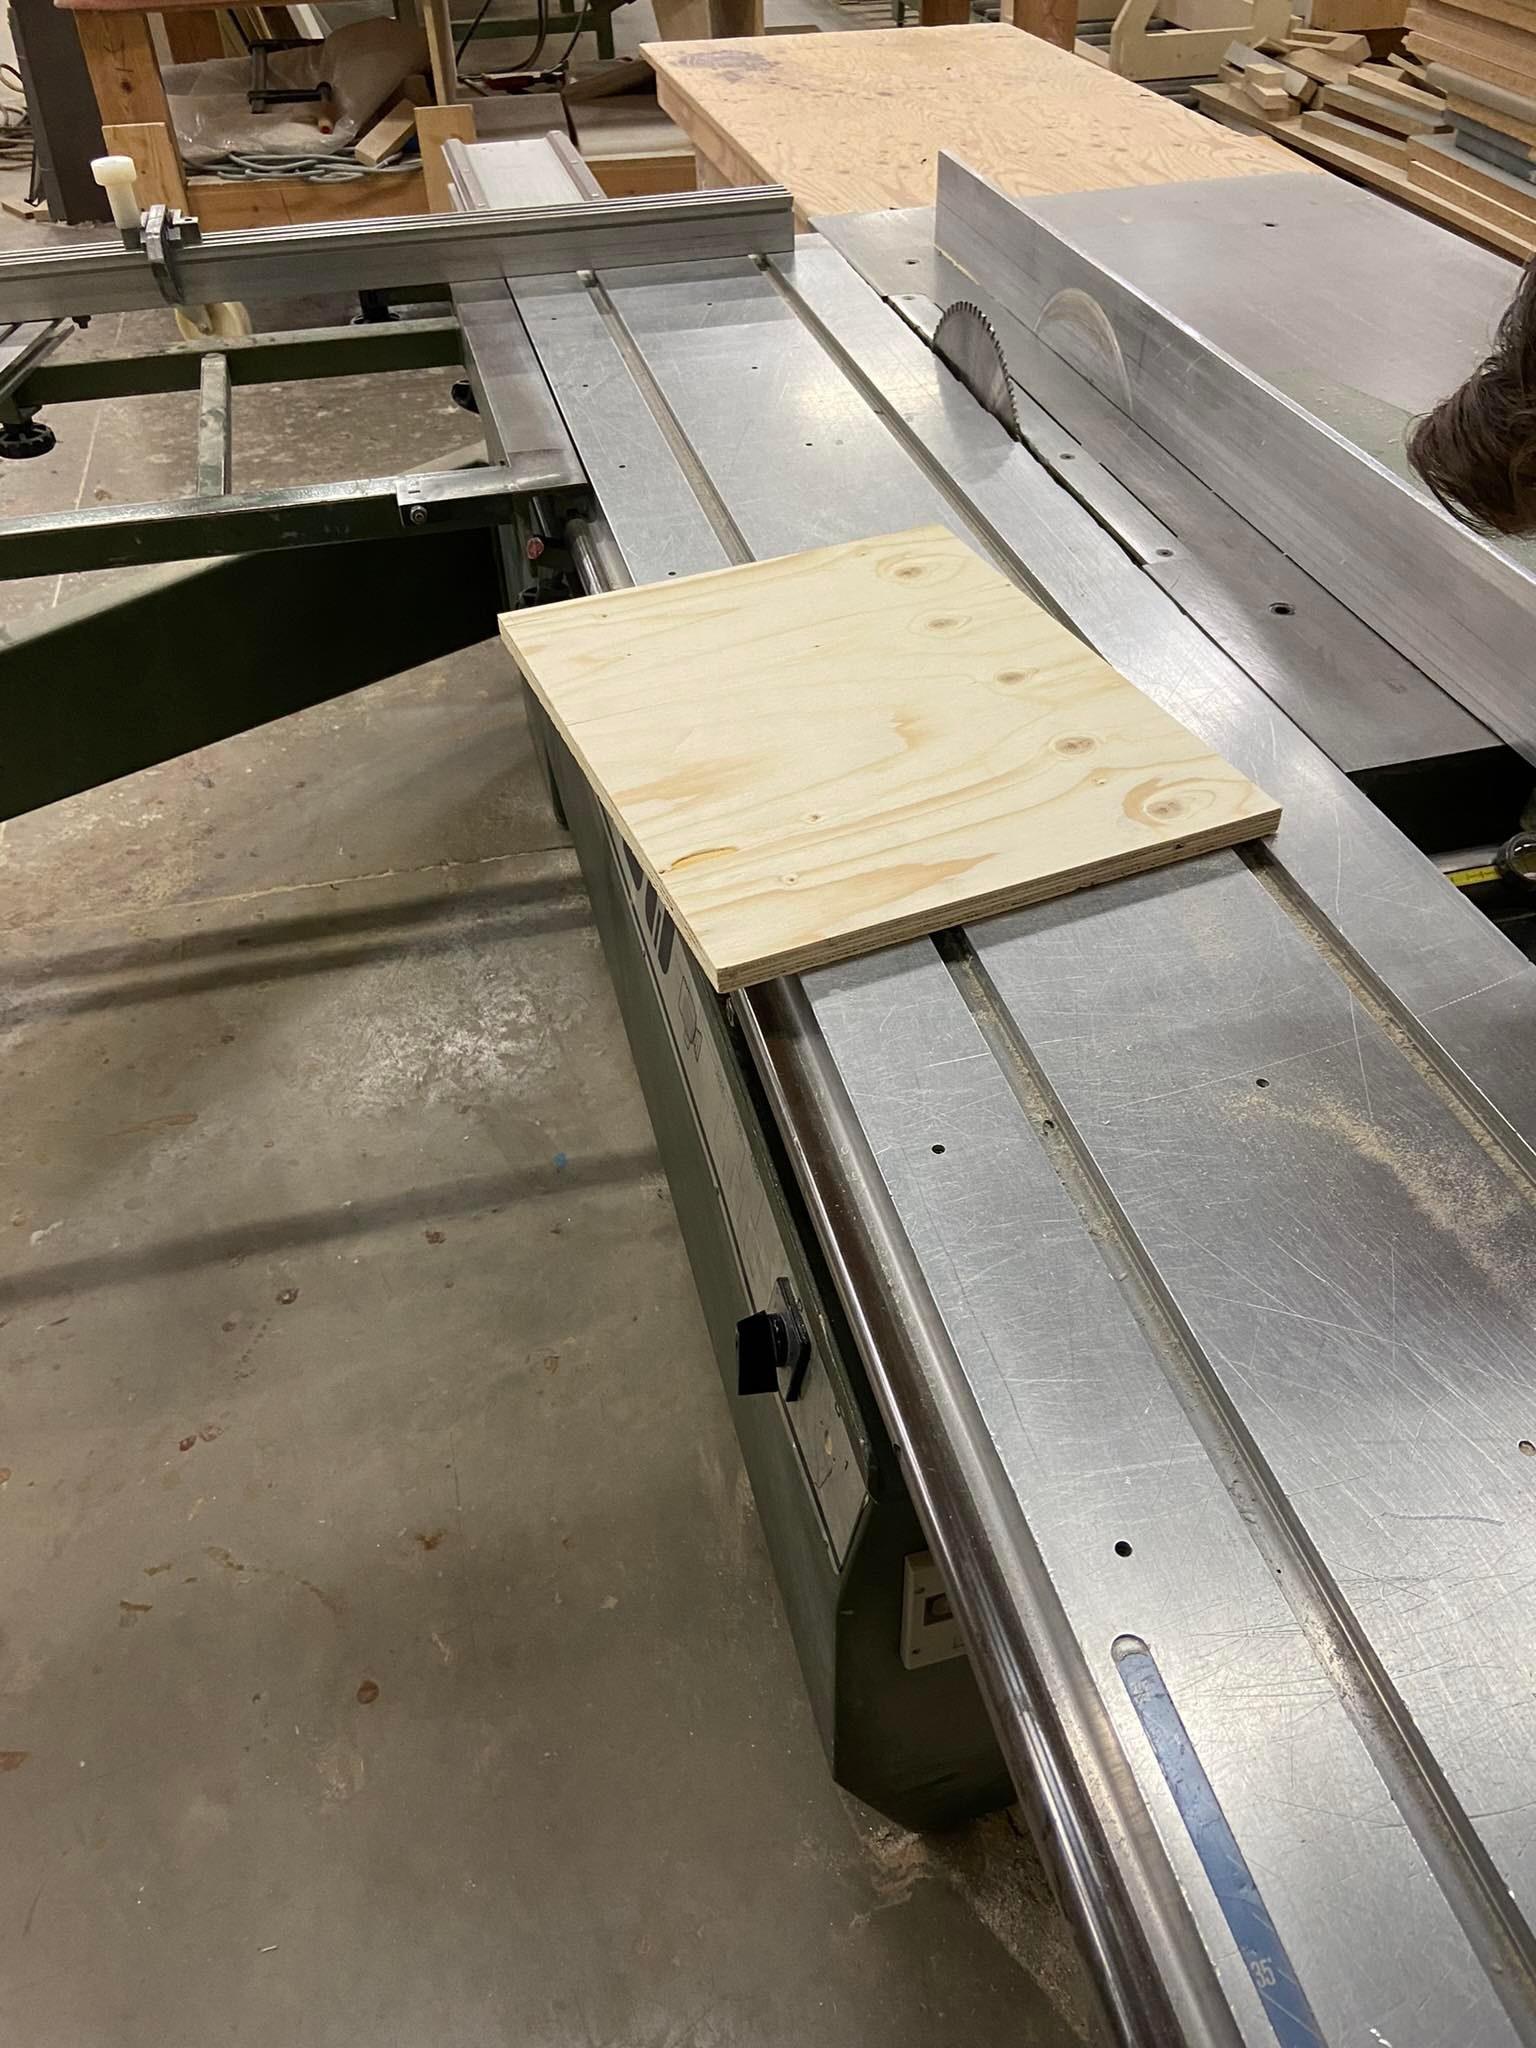
Wooden housing machined and glued together to become this housing
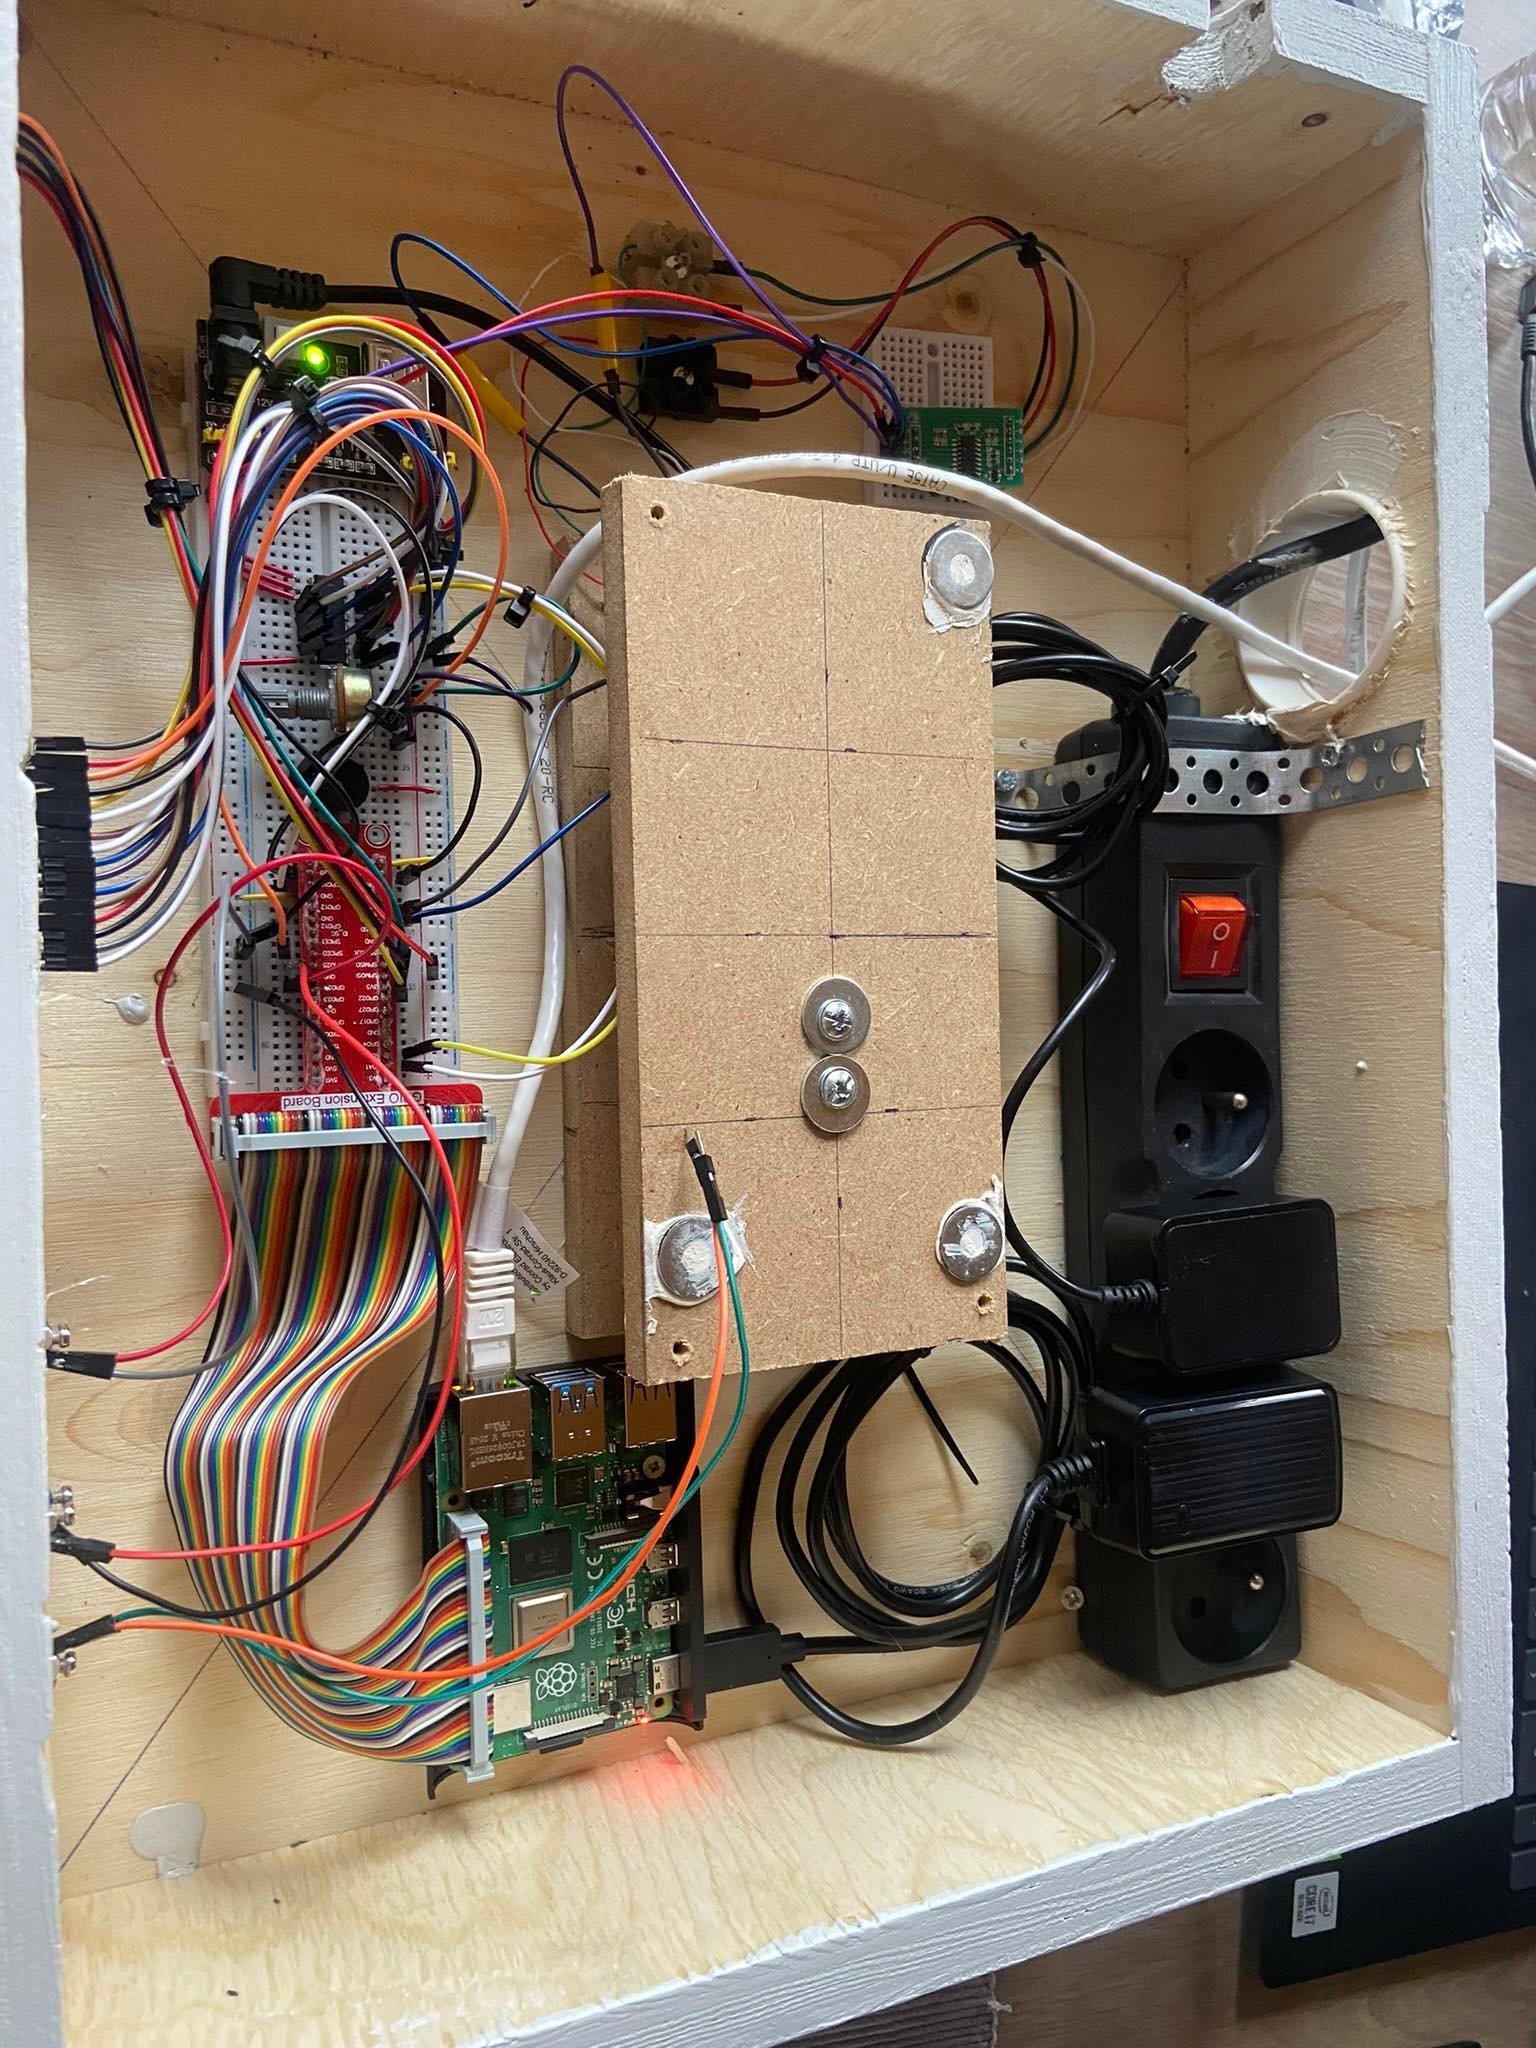
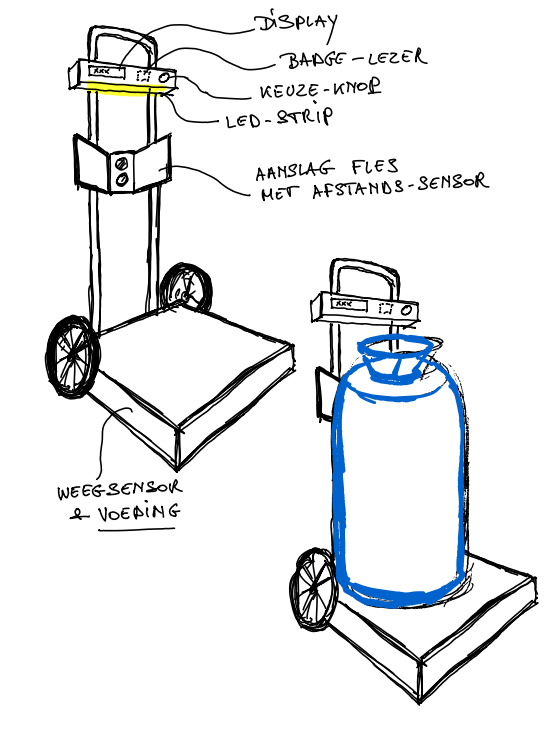
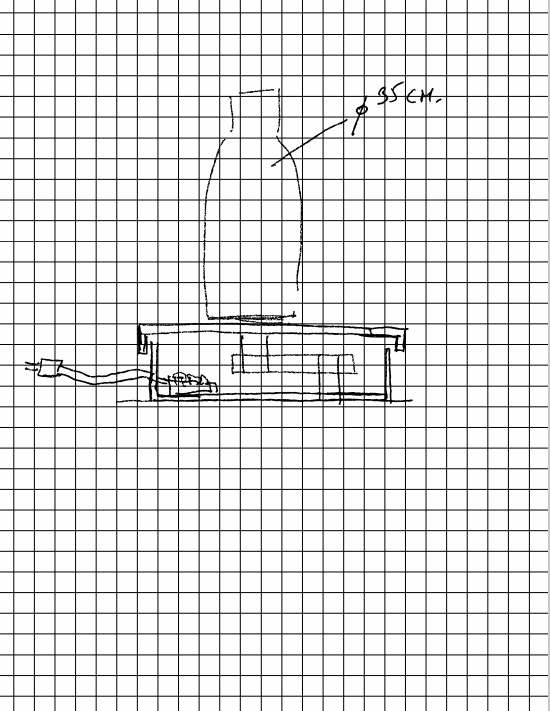
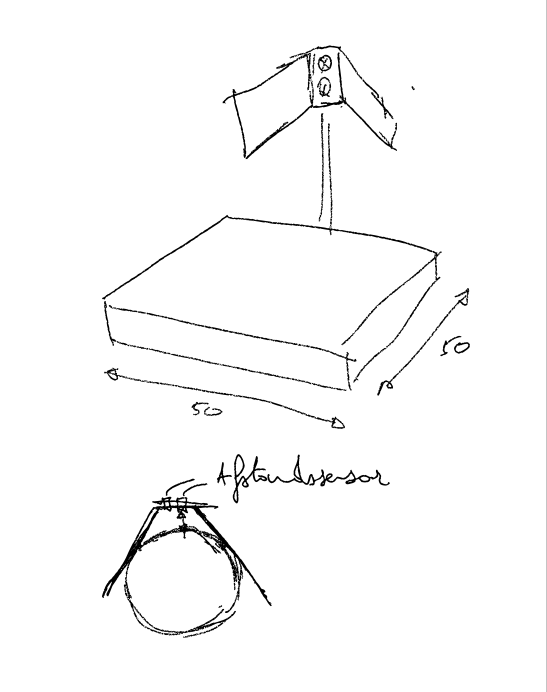
I first started sketching how I wanted the case to look, something important was that it had to be big enough for everything to fit in since we got a big circuit to put in the case but had to stay compact so that it didn't take alot of space.
It is important that you position the weighing sensor as best you can. I mounted it on two wooden boards with bolts and nuts. On top of that I mounted a wooden plate that serves as a weighing plate. All this in a wooden housing with enough space for the electronics.
How big the shelves are in your case doesn't really matter this depends mostly on how big the things are that you are going to weigh. As long as all the electronics fit in the box it is good.
I made the case out of wood, I think it is the easiest to work with when you don't have that much experience with building cases and you also have a lot of things you can do with it.
I started with making the case out of leftover carton I had laying around to avoid redoing the wooden case multiple times. Try doing the same so you still have room for error!