IoT LED Cheering Stick

This instructables show how to use ESP8266 to make a mobile configurable IoT LED cheering stick.
Preparation


Cheering Stick
Any LED cheering stick that can put LED strip in should be ok, I have an old cheering stick bought 10 years ago when I go to concert
ESP Board
ESP-07 or ESP-12(E) should be ok, ESP-12E can simply flash NodeMCU WebIDE full image (can be more lazy)
LED Strip
NeoPixel, WS2812 or SK6812 should be ok, I have a 144 uint / meter SK6812 in hand, I only need 28 unit to fit in my cheering stick
Mercury Switch
For detecting cheering stick waving motion
Ressitors
3 x 10 k Ohms resistors
Other tools
screw driver, soldering iron, USB serial cable...
Flash NodeMCU WebIDE

Please follow my previous instructables to flash the latest NodeMCU WebIDE, it is already included the LED stick sample code.
Ref.:
De-Assembly Cheering Stick


Use screw driver de-assembly the cheering stick, remove the blinking circuit board, LEDs and color plate.
This cheering stick have 2 switches and a 3 AAA batteries battery holder, it can be reuse in this project.
Soldering Work


Here is the connection summary:
ESP Board
GPIO05 -> 10 k Ohm resistor -> Gnd
       -> Mercury Switch -> Vcc
GPIO02 -> LED Strip Data Pin
GPIO15 -> 10 k Ohm resistor -> Gnd
Gnd    -> Battery Holder Negative Pin
EN     -> 10 k Ohm resistor -> Vcc
Vcc    -> Power Switch -> Battery Holder positive Pin
LED Strip
Vcc  -> LED Switch -> Battery Holder Positive Pin
Data -> ESP GPIO02
And  -> Battery Holder Negative Pin
Re-Assembly Cheering Stick

Squeeze all components in the cheering stick and use screw driver re-assembly it. If you found the LED strip cannot stay straight, you may use card board, wood stick or PET plate stick to the LED strip back for supporting.
Design Display Message


- Use your mobile connect to the ESP board. (if you direct connected to the ESP WiFi SoftAP, browse to http://192.168.4.1/ or if you already configured the ESP and your mobile connected to same AP, try browse to http://nodemcu-webide.local./)
- Select led-stick.html
- Press preview button (the eye button)
- Type the text you want to display, if you are using iPhone or iPad, you can type emoji too
- Press set button
- ESP is very limited in resource for receiving large image data, please be patient to wait for sending the message image data
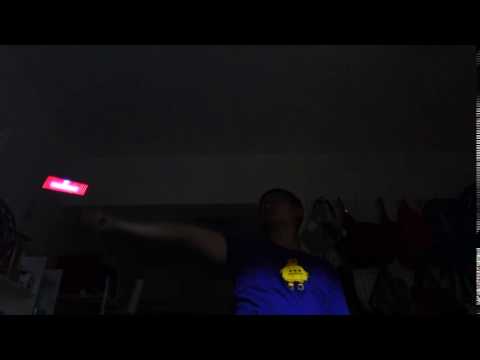
Happy Cheering & Light Painting!


Its time play it at night!
If you are going concert, you may type the message in your mobile and show it by waving the cheering stick.
You may also use it for light painting, the above sample photos are take by S mode with 1 to 2 seconds shutter speed.
P.S. If you have already saved the image but powered off the stick, you may start the led-stick program by power on the stick and browse to http://192.168.4.1/les-stick.lc?
Customizable Factors
Number of LED unit
It means the displaying image height, it can be configured at:
led-stick.html line 10
... height="28" ...
led-stick.html line 15
var h = 28;
led-stick.lua line 2
local pin, w, h, offset = 1, 140, 28, 0
Displaying image width
led-stick.html line 10
... width="140" ...
led-stick.html line 14
var w = 140;
led-stick.lua line 2
local pin, w, h, offset = 1, 140, 28, 0
Auto start at power on
init.lua last line (uncomment)
dofile('led-stick.lc')()NodeMCU WebIDE
You may refer my previous instructables step 7 for further NodeMCU WebIDE configuration