(IoT) Intertnet of Things With Ubidots (ESP8266+LM35)
by mcmchris in Circuits > Sensors
2187 Views, 3 Favorites, 0 Comments
(IoT) Intertnet of Things With Ubidots (ESP8266+LM35)
 Internet de las cosas con Ubidots | ESP8266 + LM35 | Temperatura)
Today we are going to learn to use the Ubidots platform to visualize data over the internet in a friendly way.
Materials and Assembly:
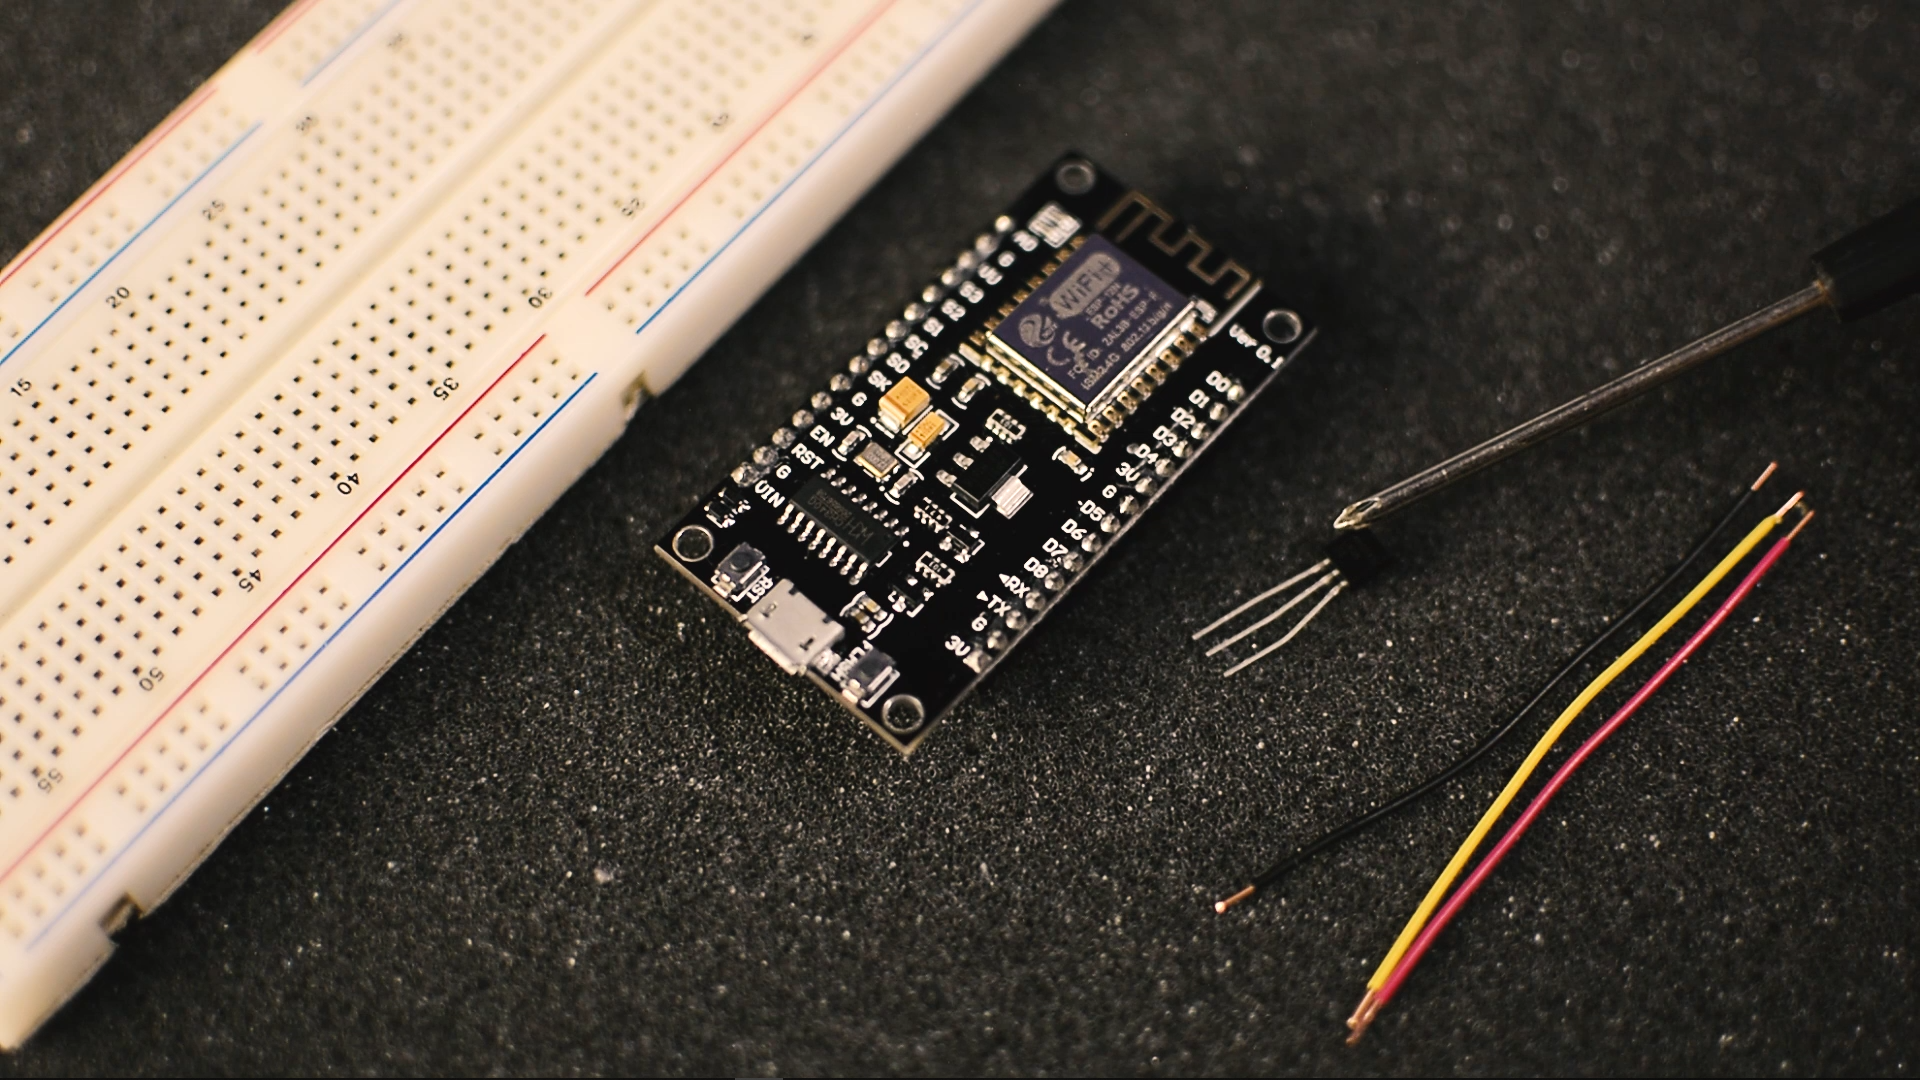
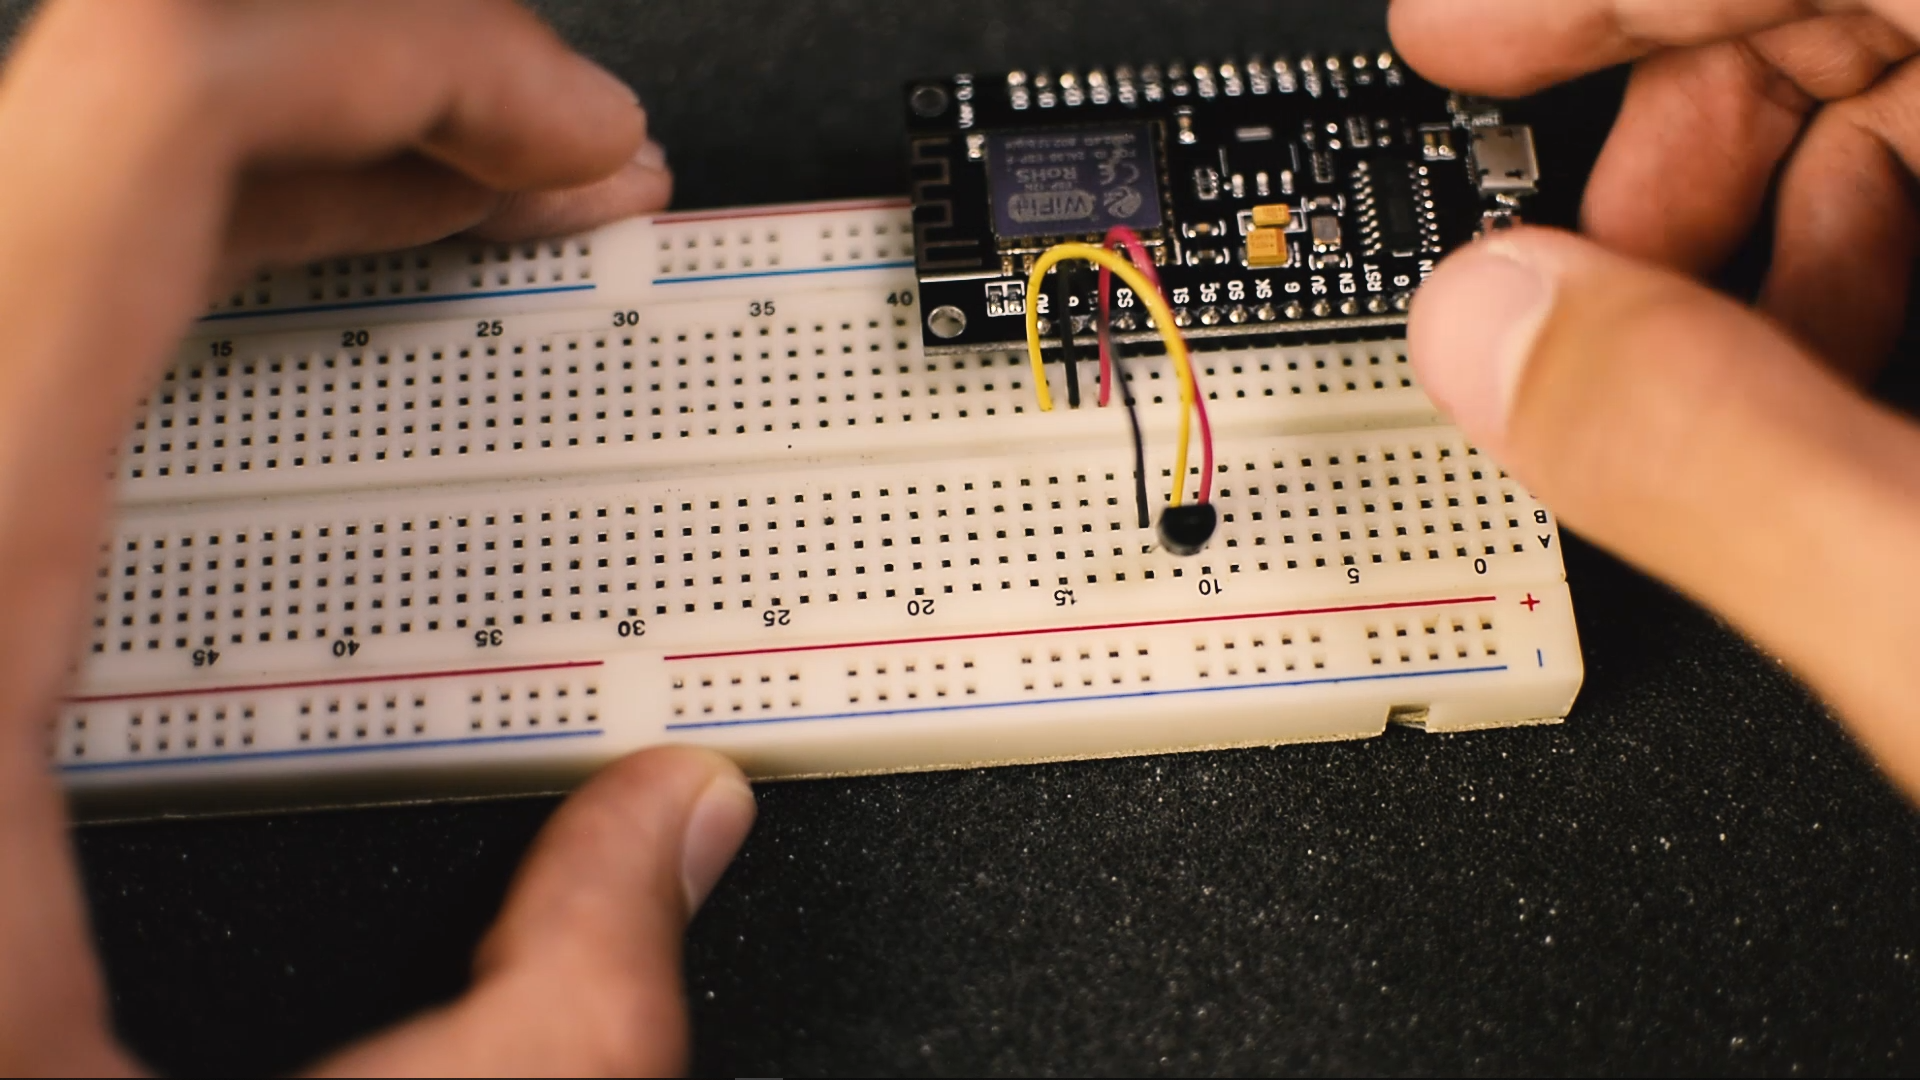
1-Protoboard.
2-NodeMCU (ESP8266)
3-LM35 temperature sensor.
4-Some wire
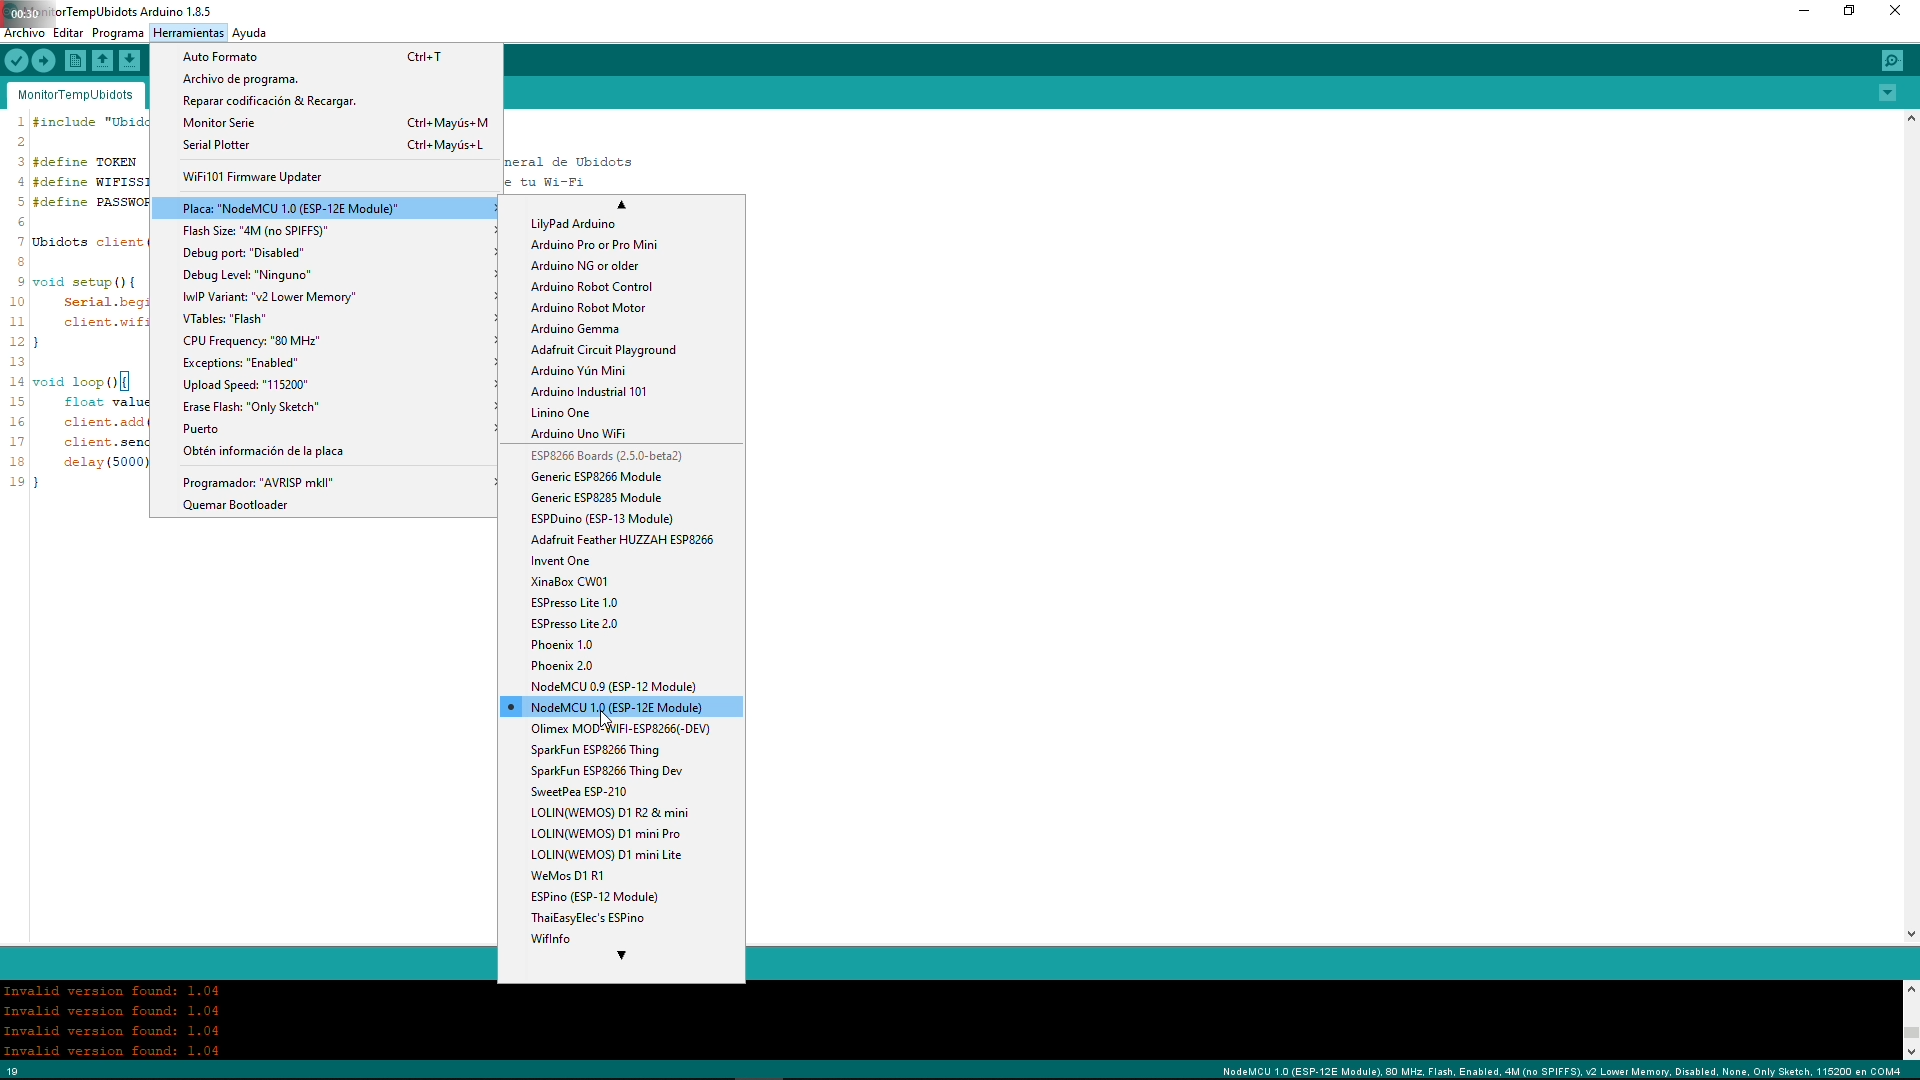
Arduino IDE Setting Up to NodeMCU:
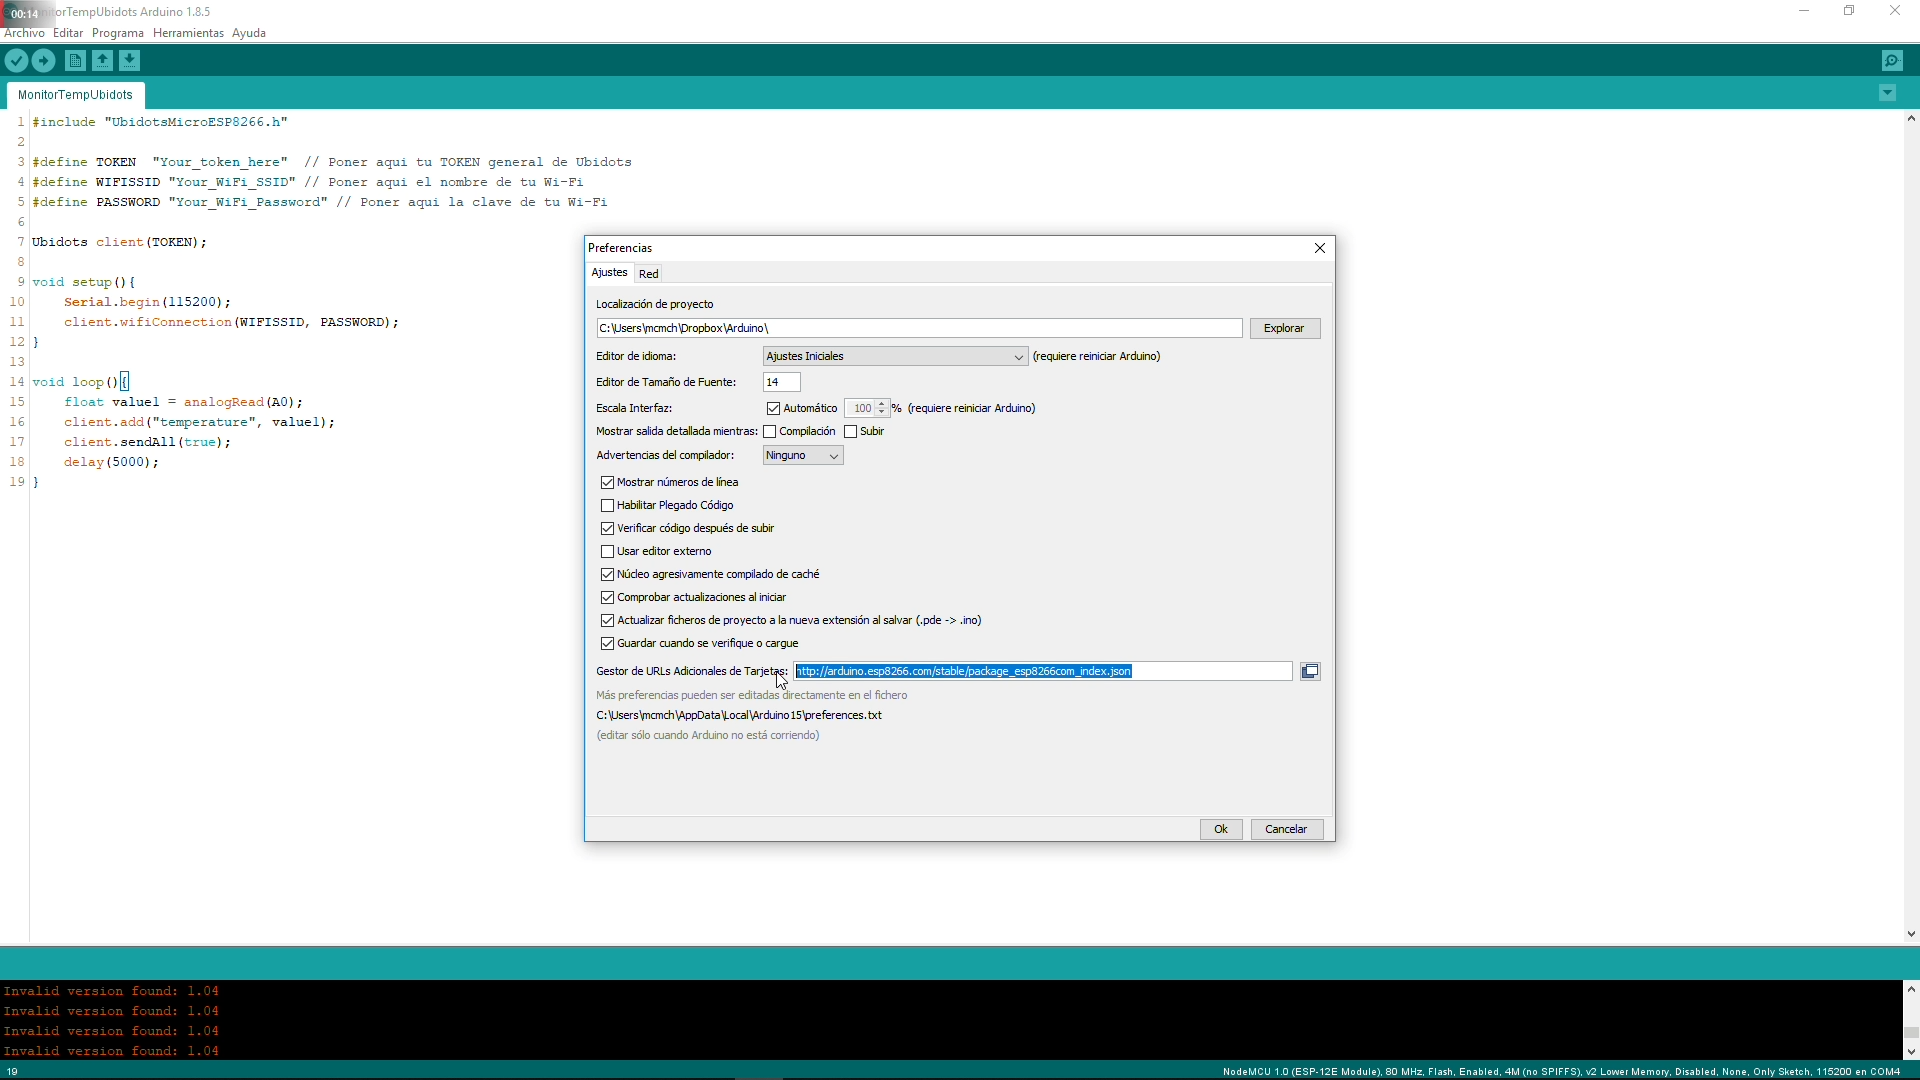
Link to be pasted in preferences boards URL:
http://arduino.esp8266.com/stable/package_esp8266c...
-Download the ESP8266 shields package in the boards manager.
-Select your board (NodeMCU).
-And that's it.
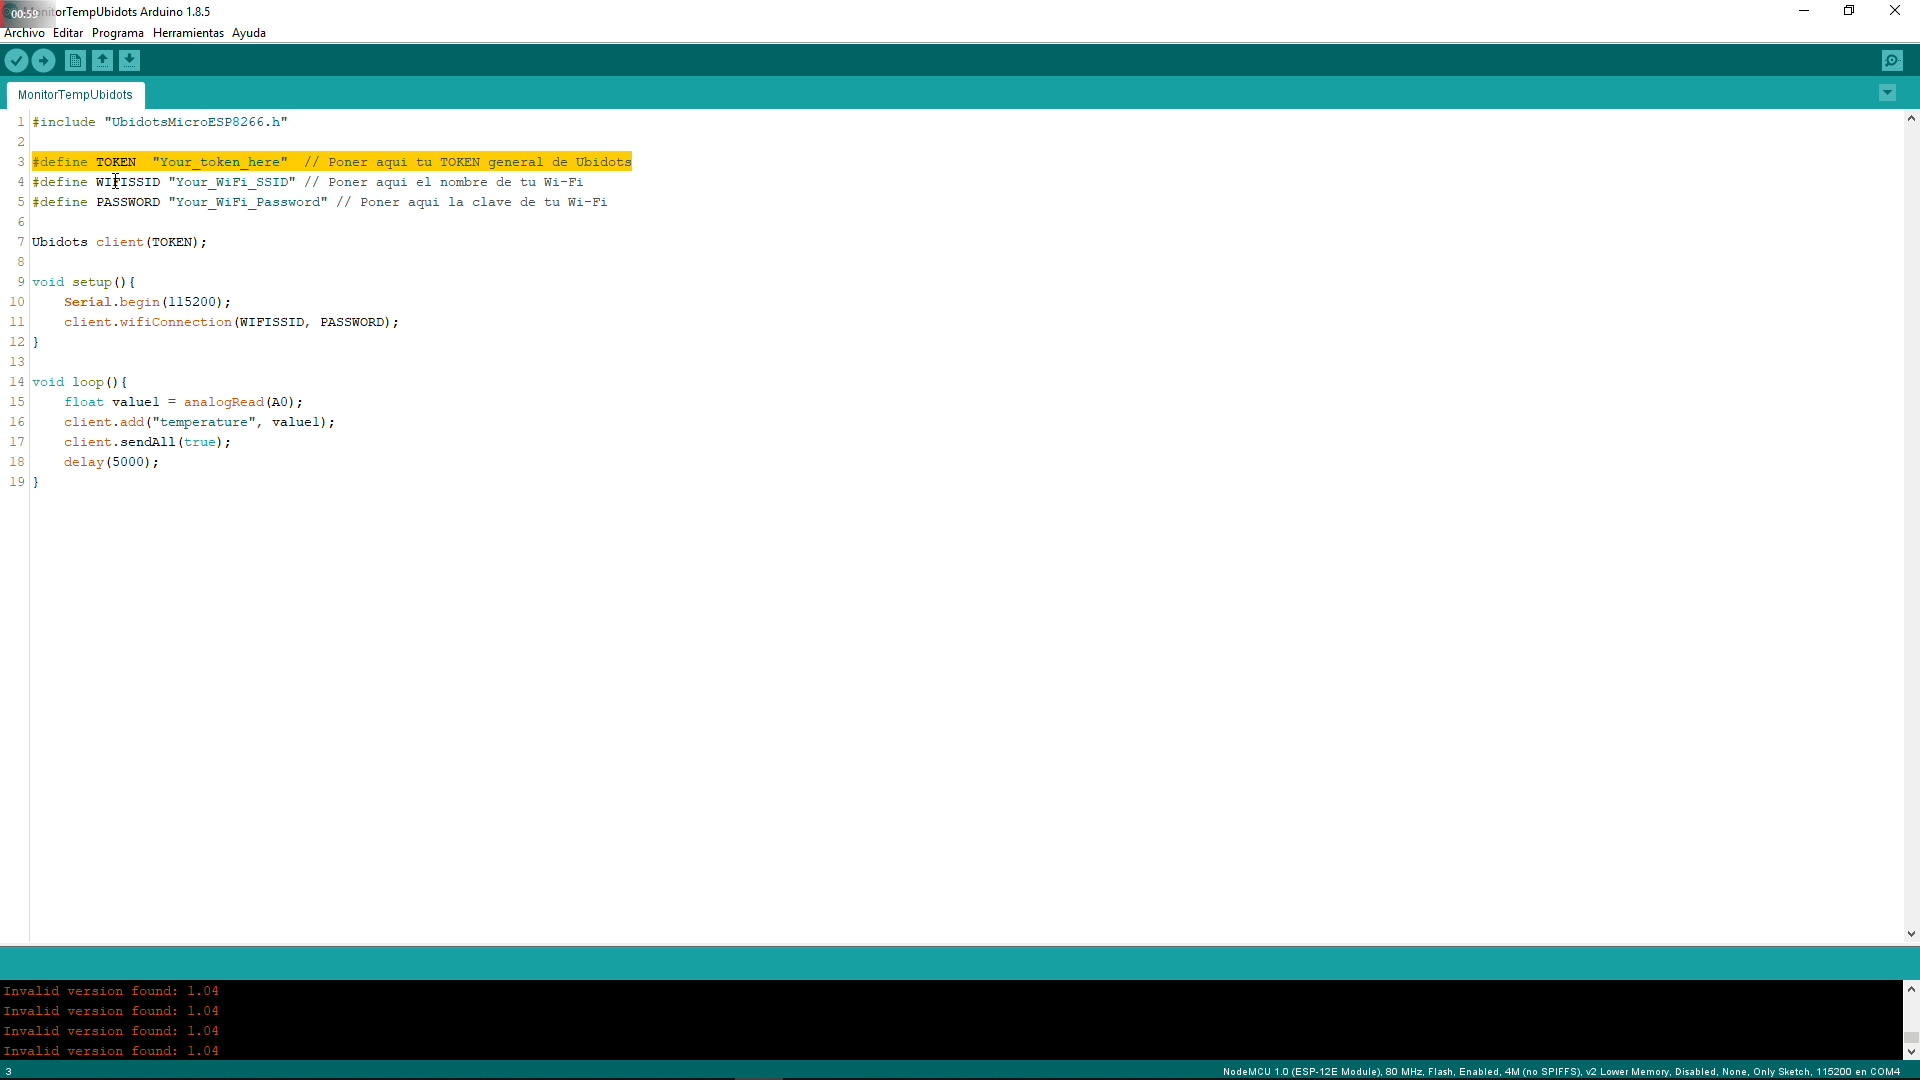
Code Credentials Fill and Ubidots Account:

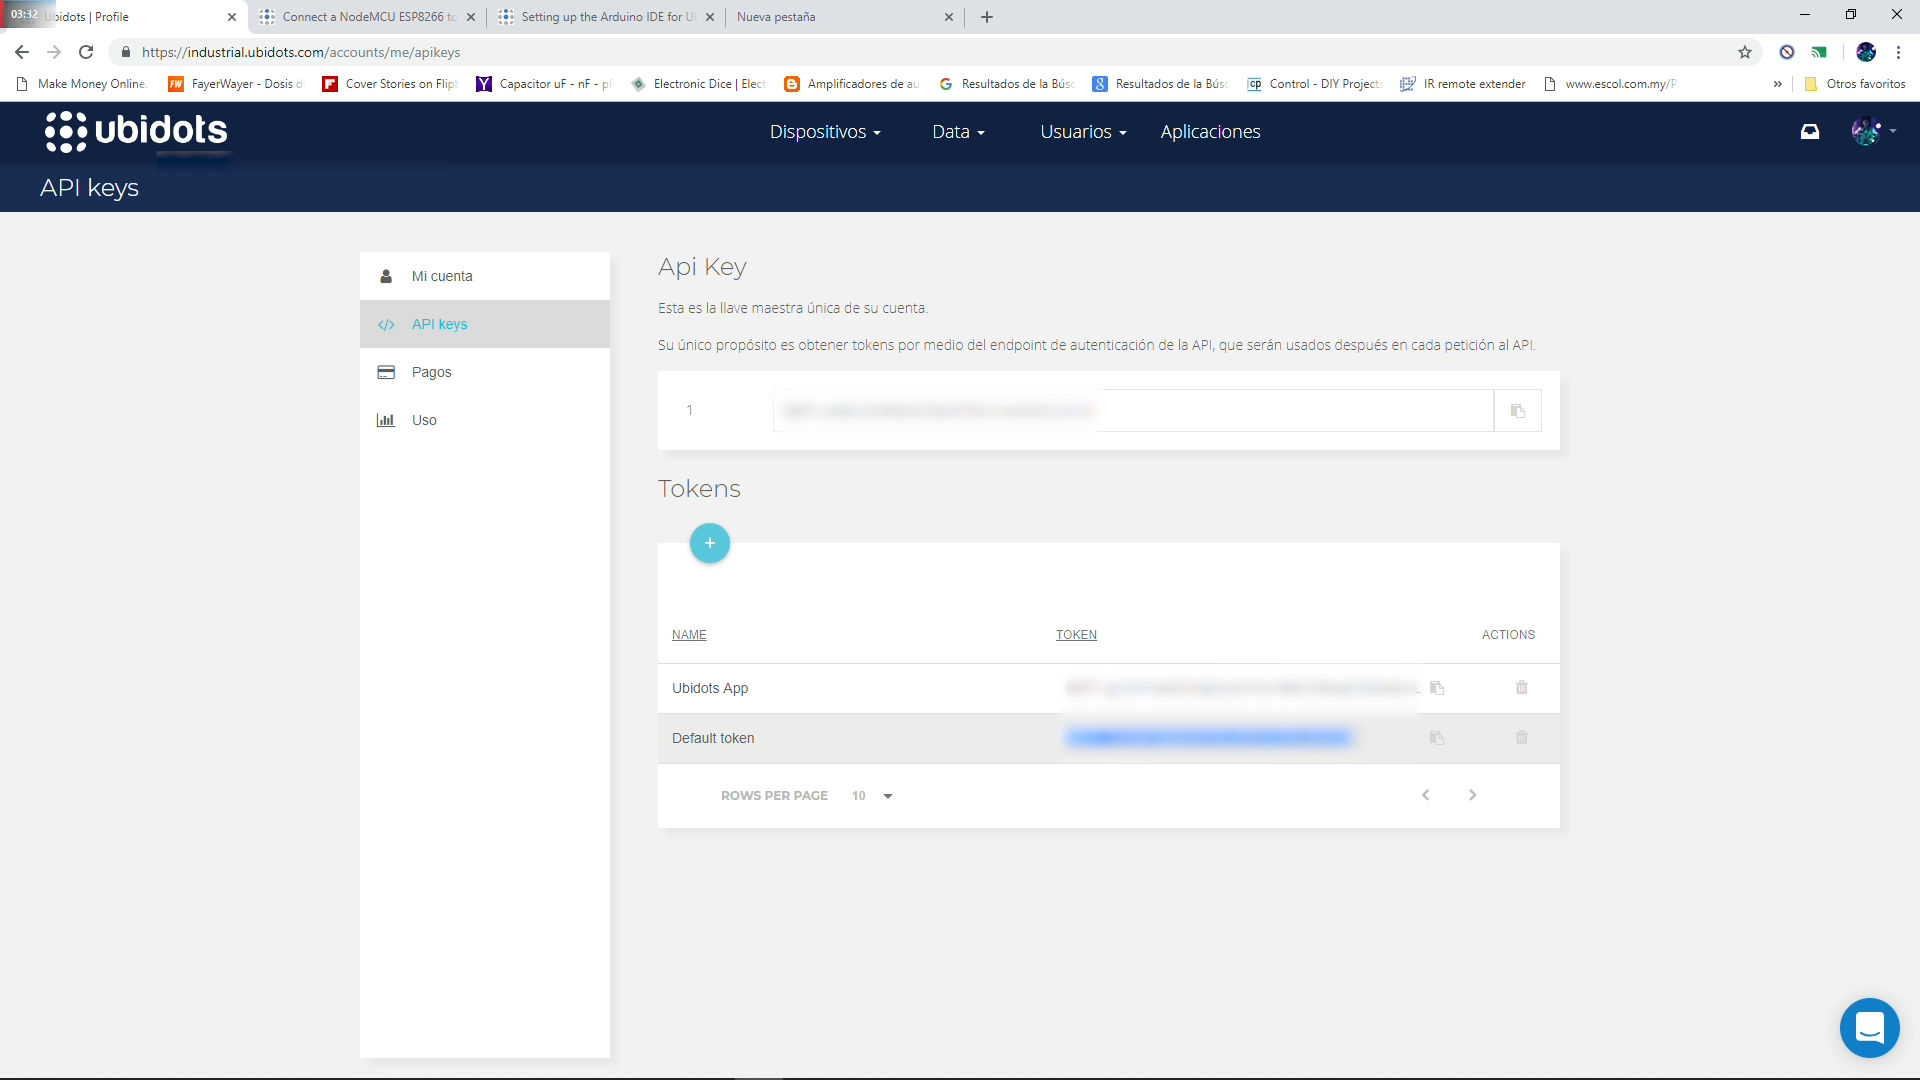
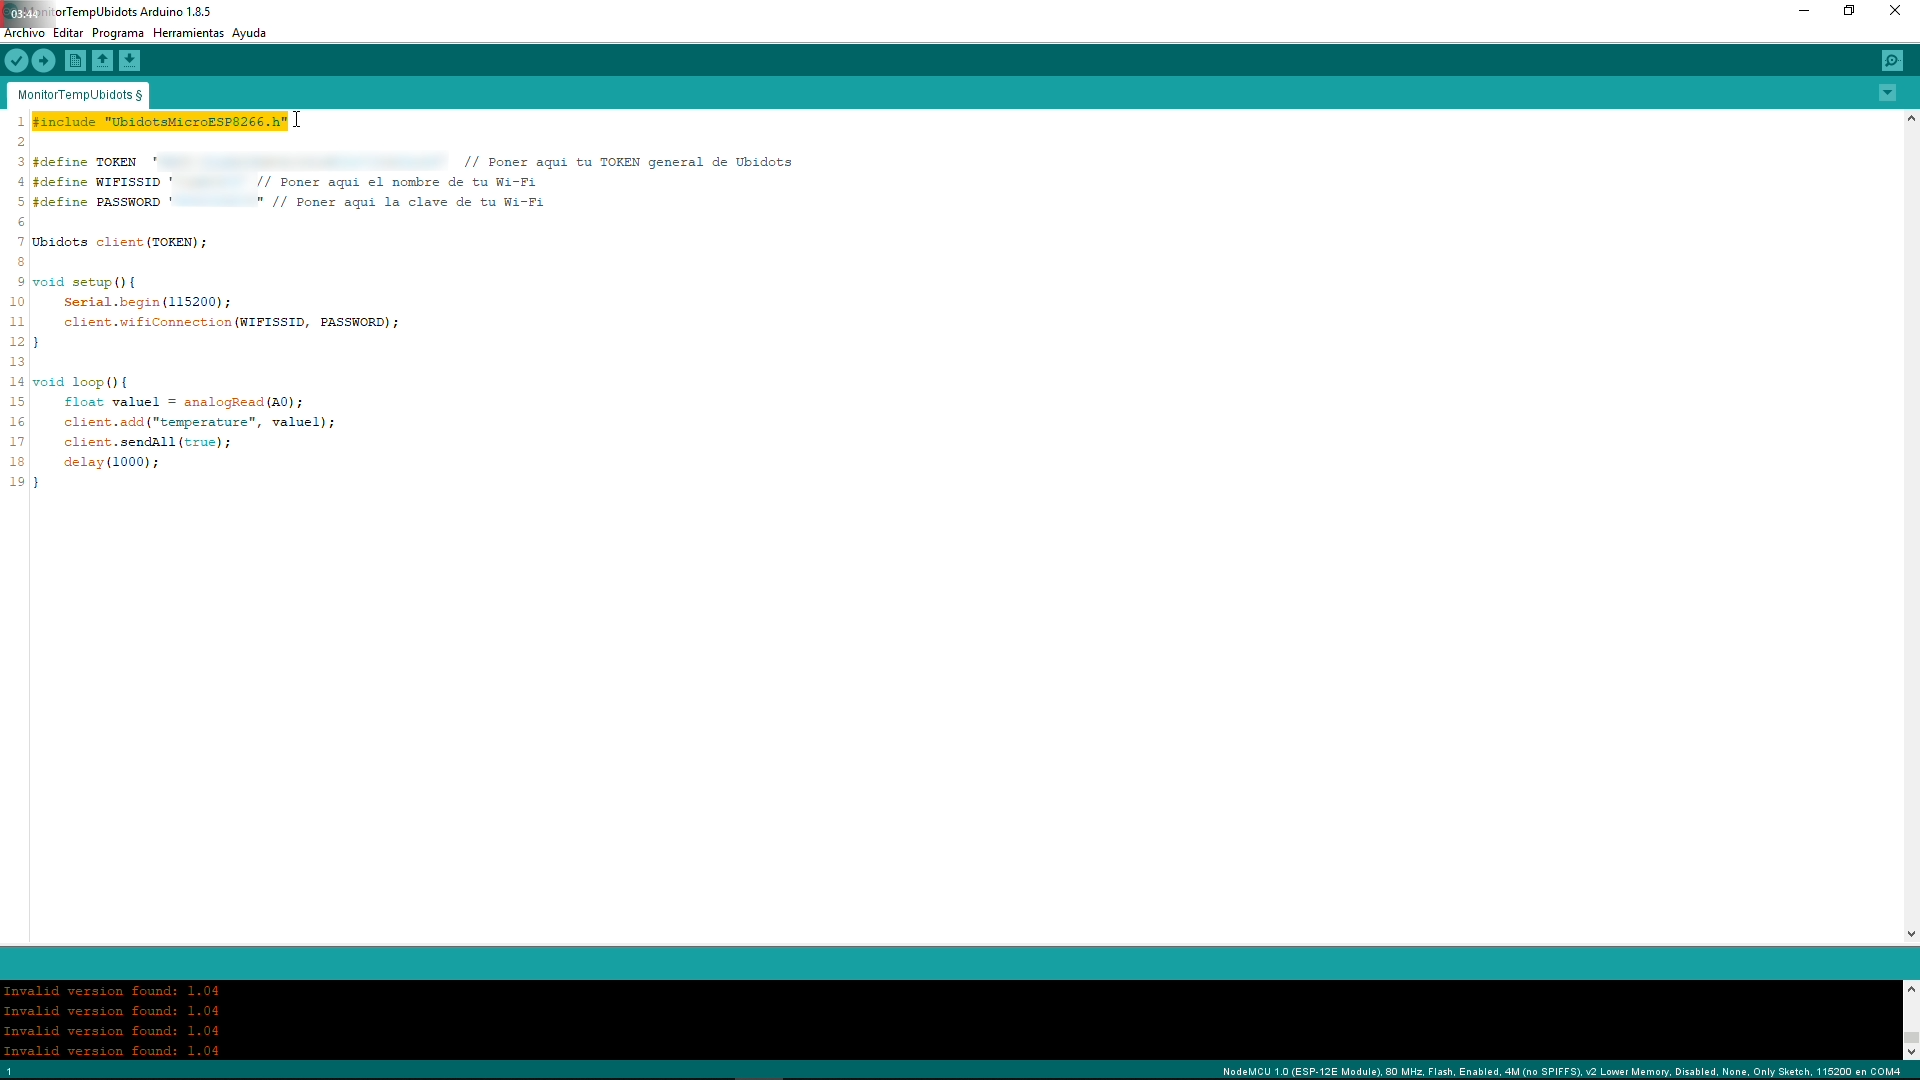
Go to https://ubidots.com/ , sign up, and search for your "default token" and paste it in the code, next to your Wi-Fi credentials.
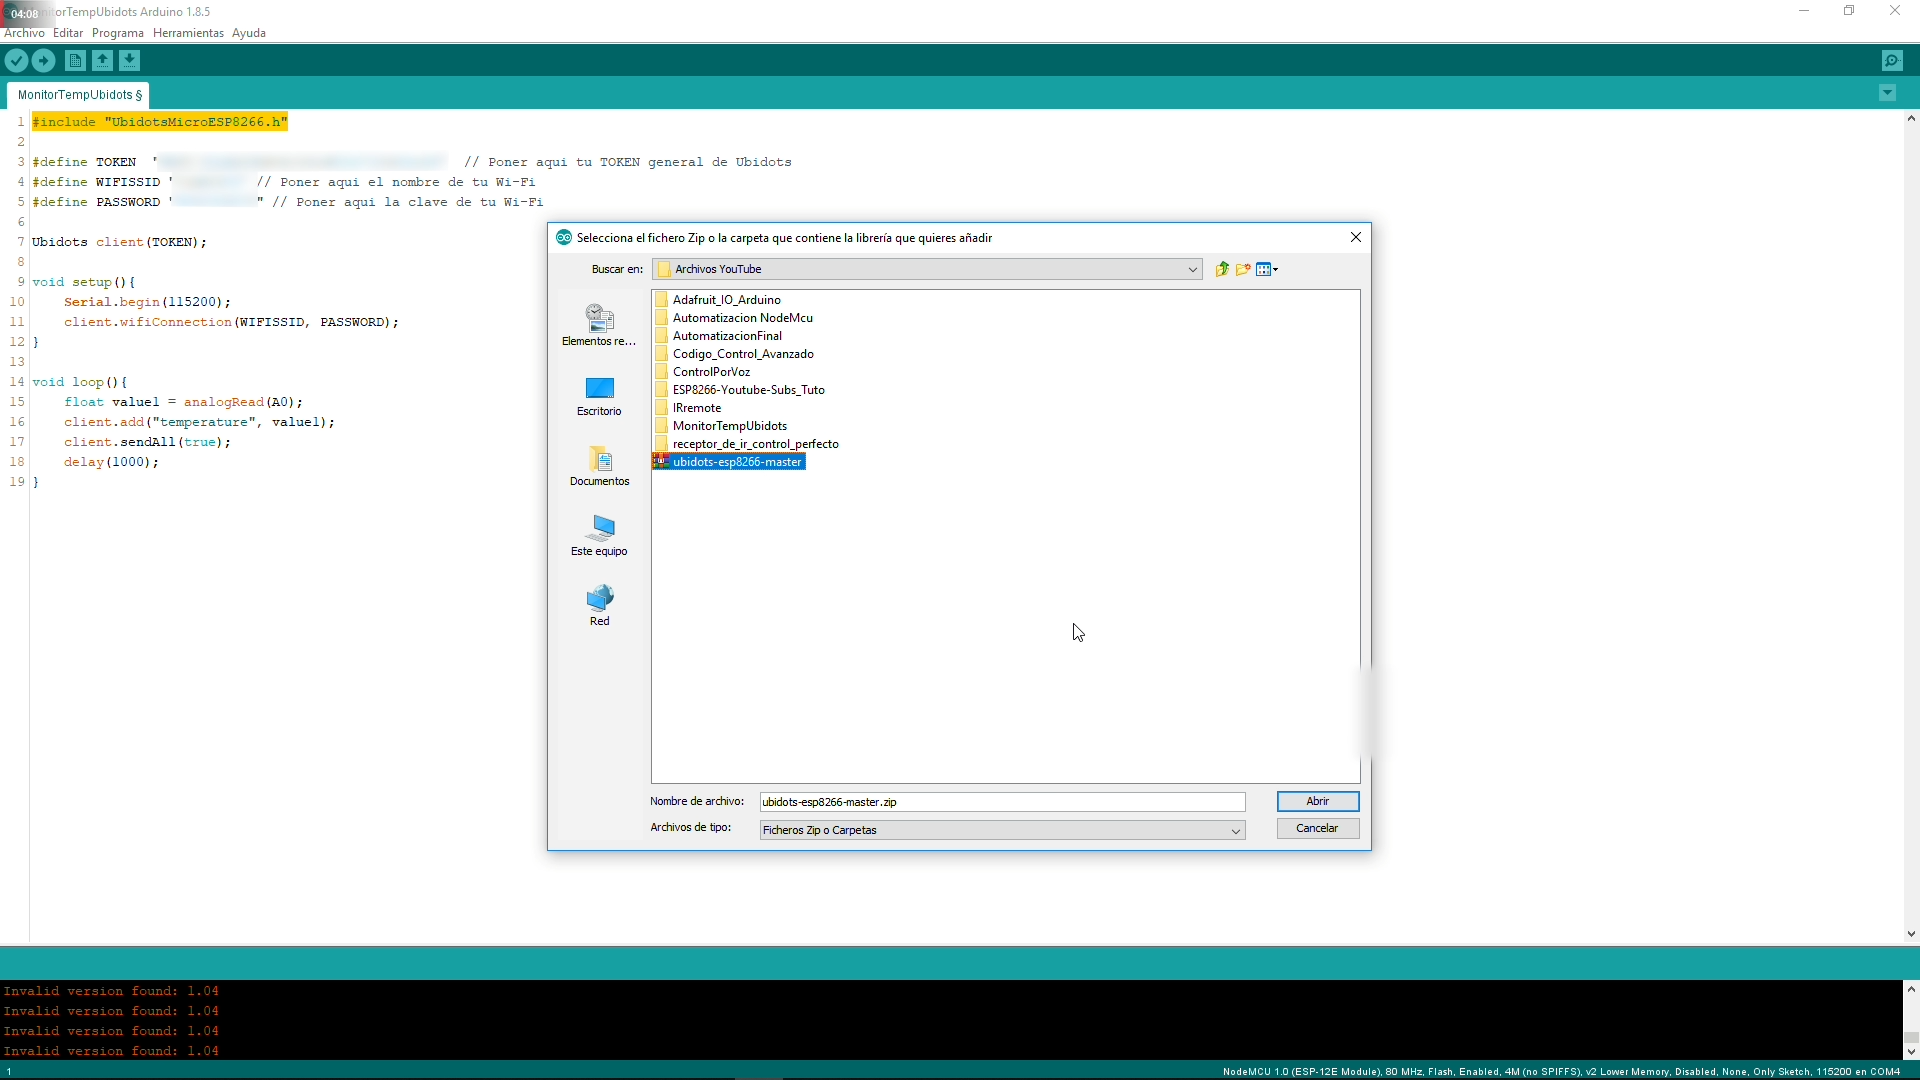
Library and code here:
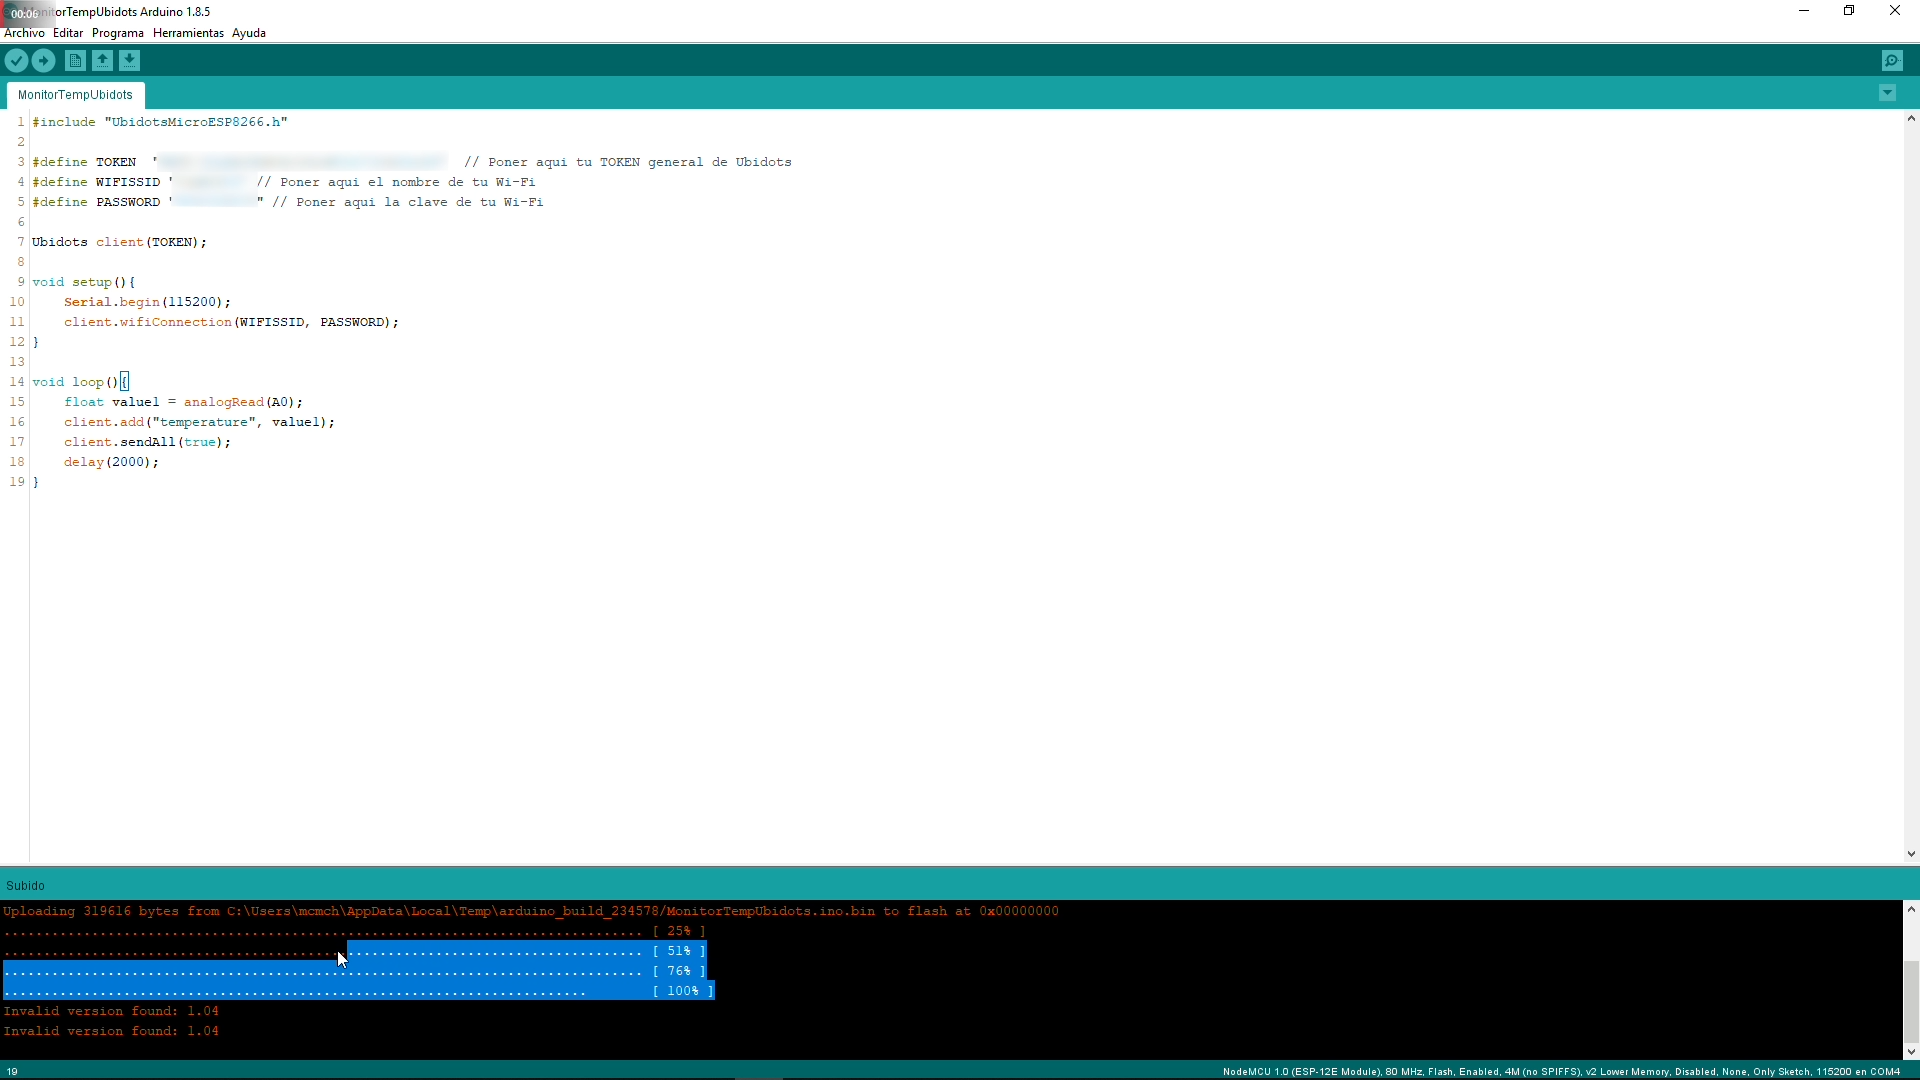
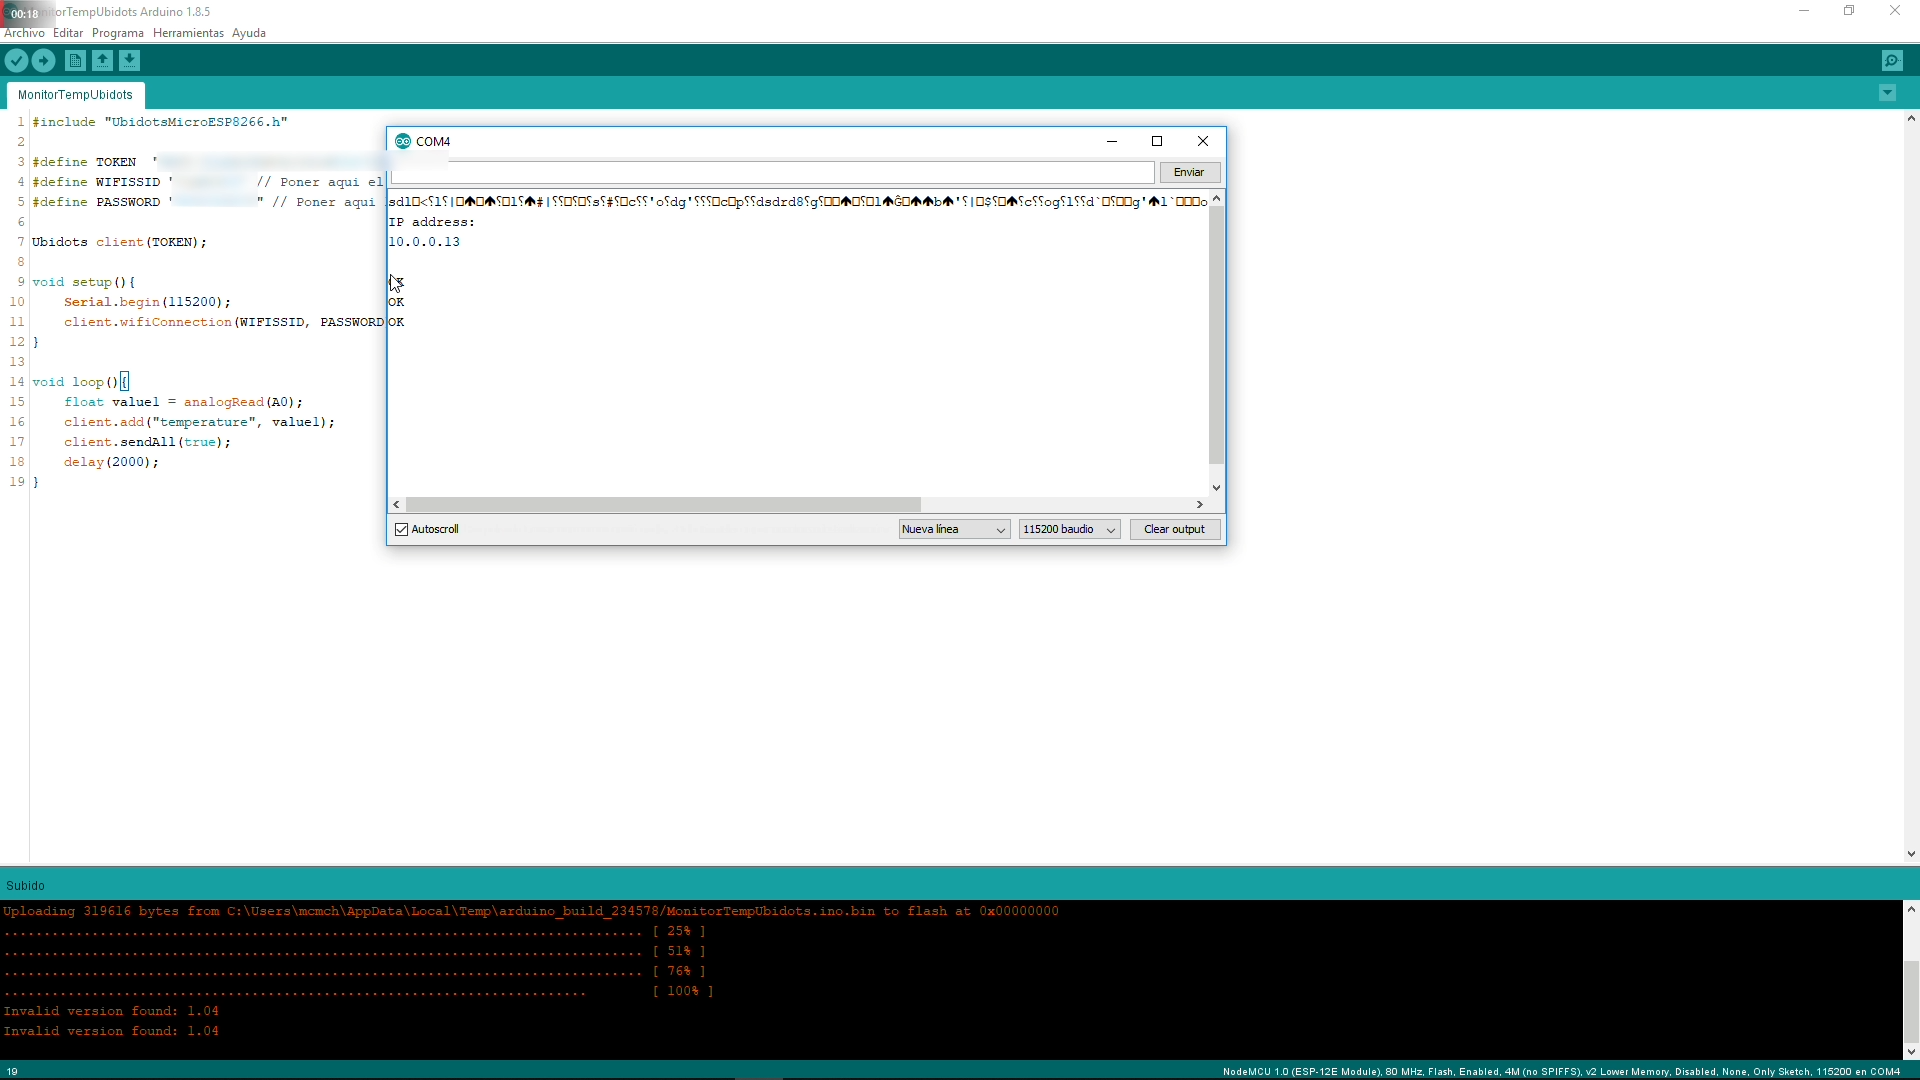
-Upload the code to the NodeMCU and verify that it got connected and says OK.
Ubidots Config and Visualization:

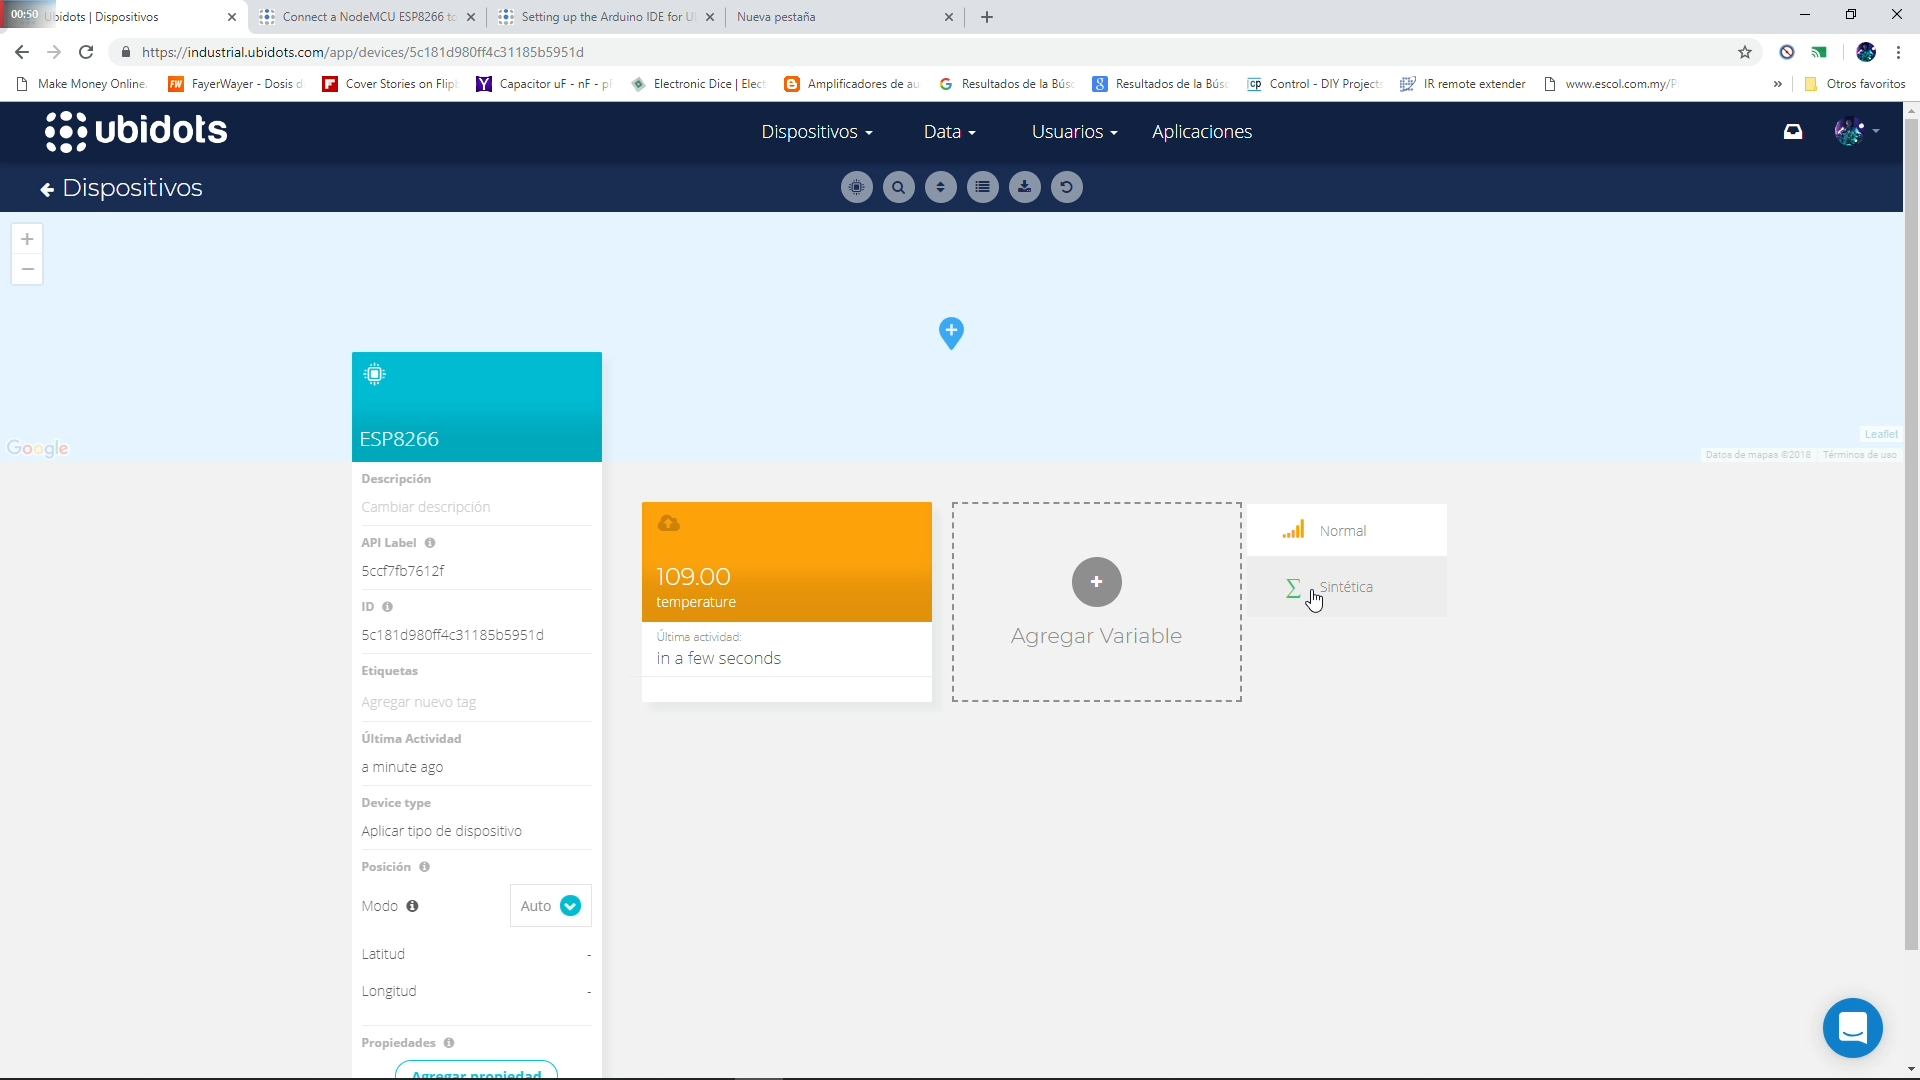
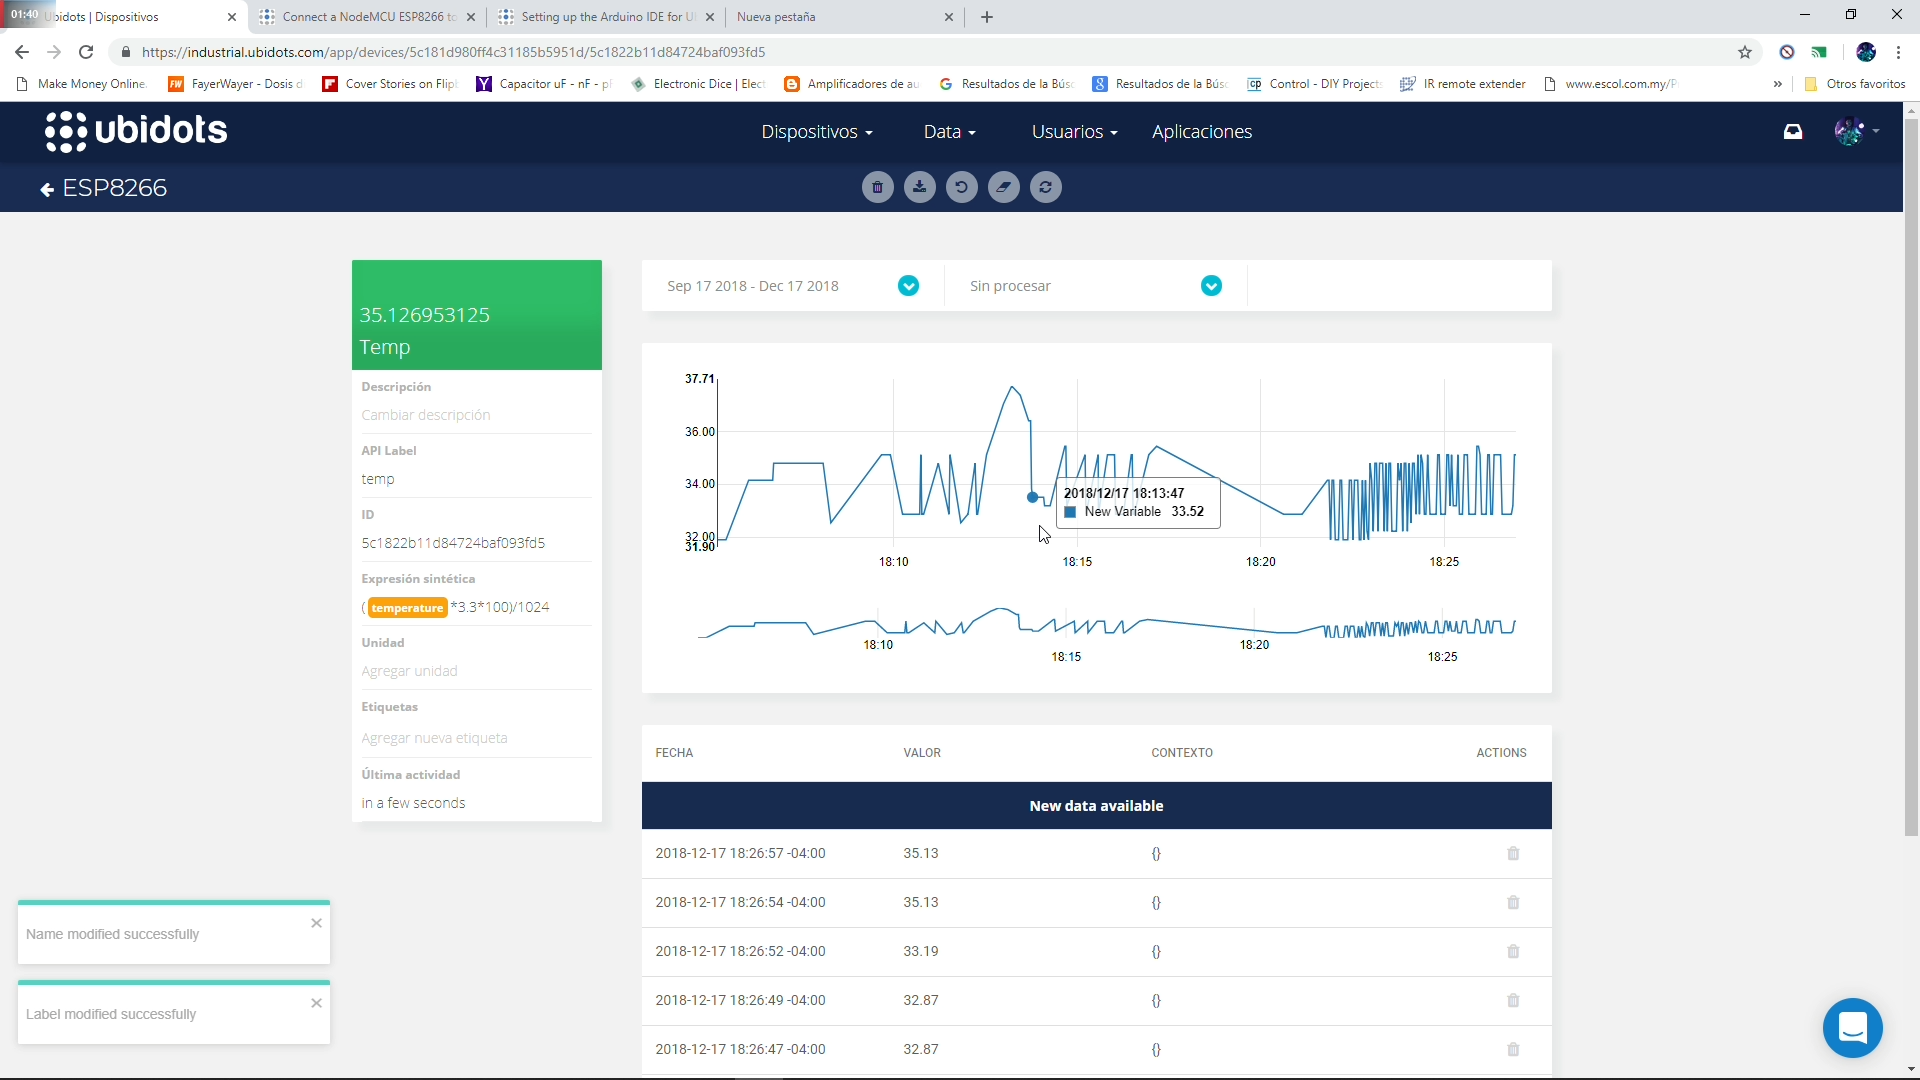
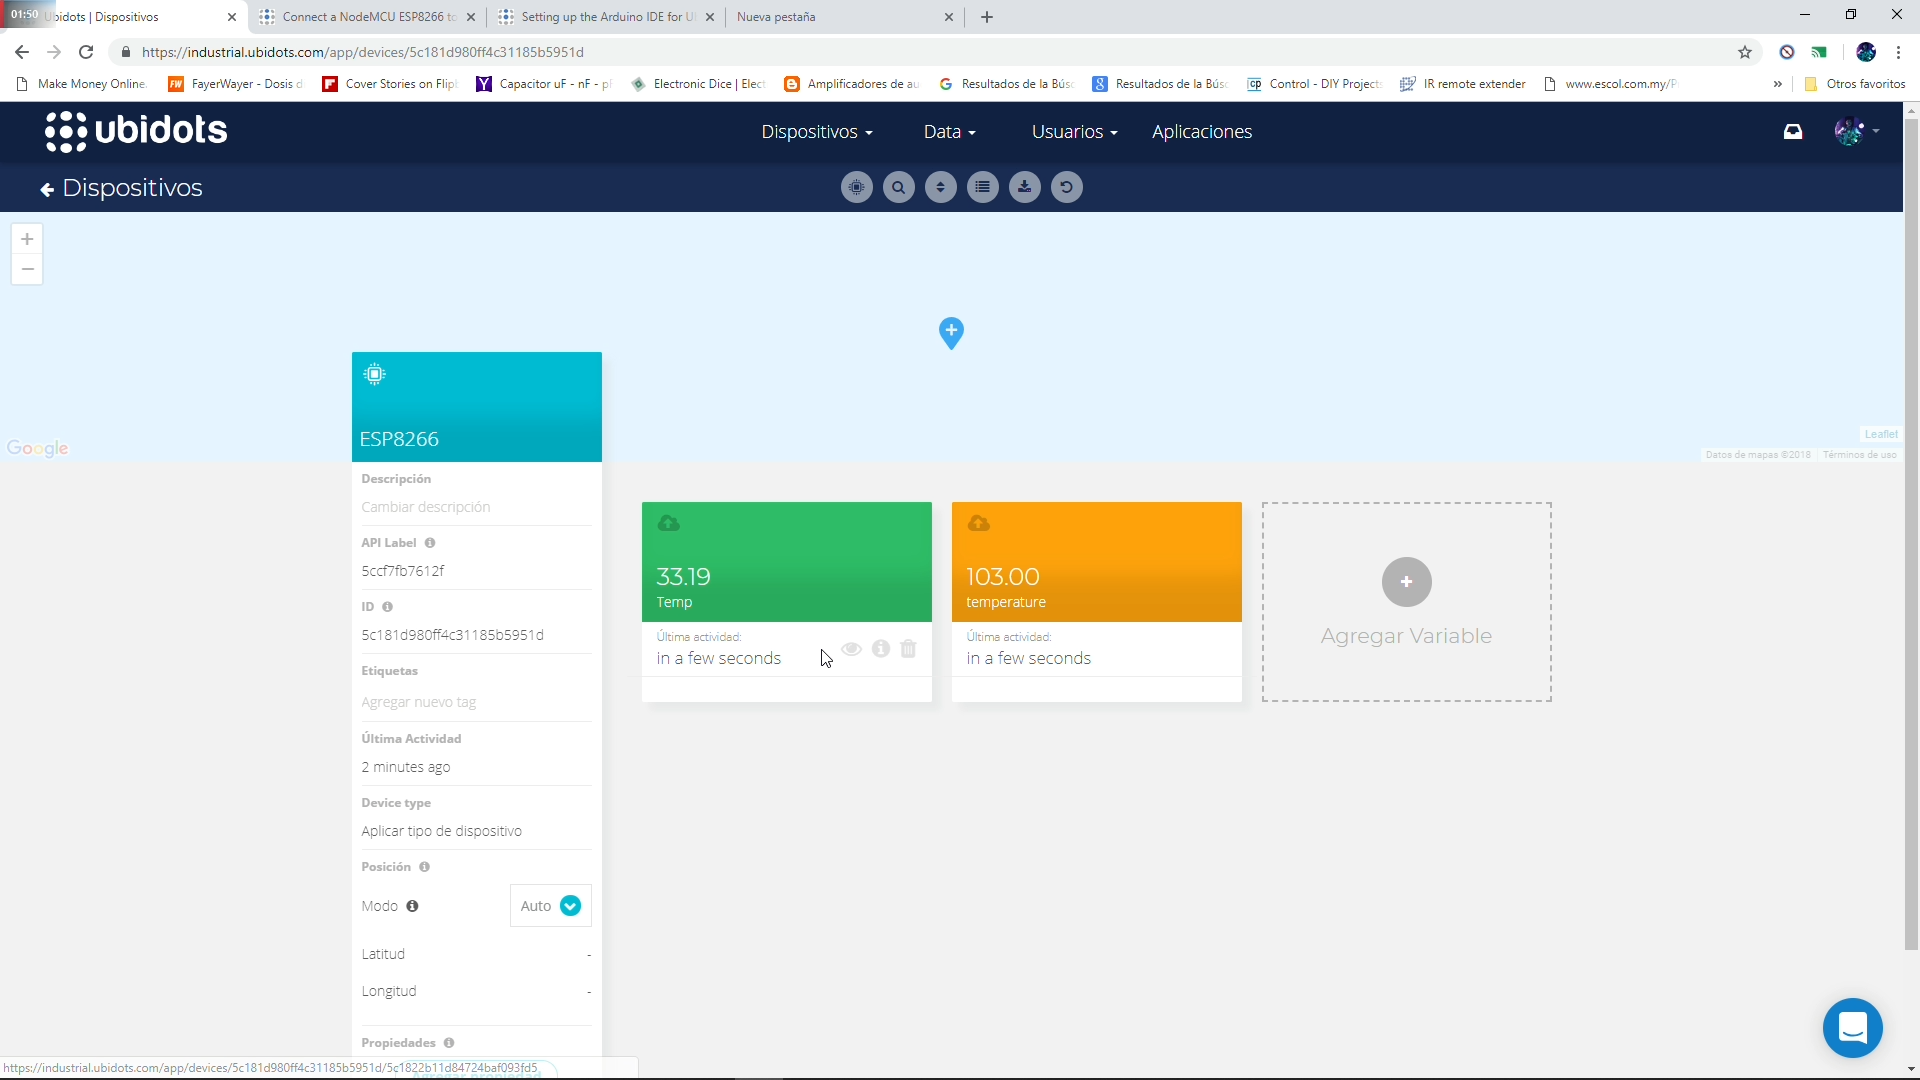

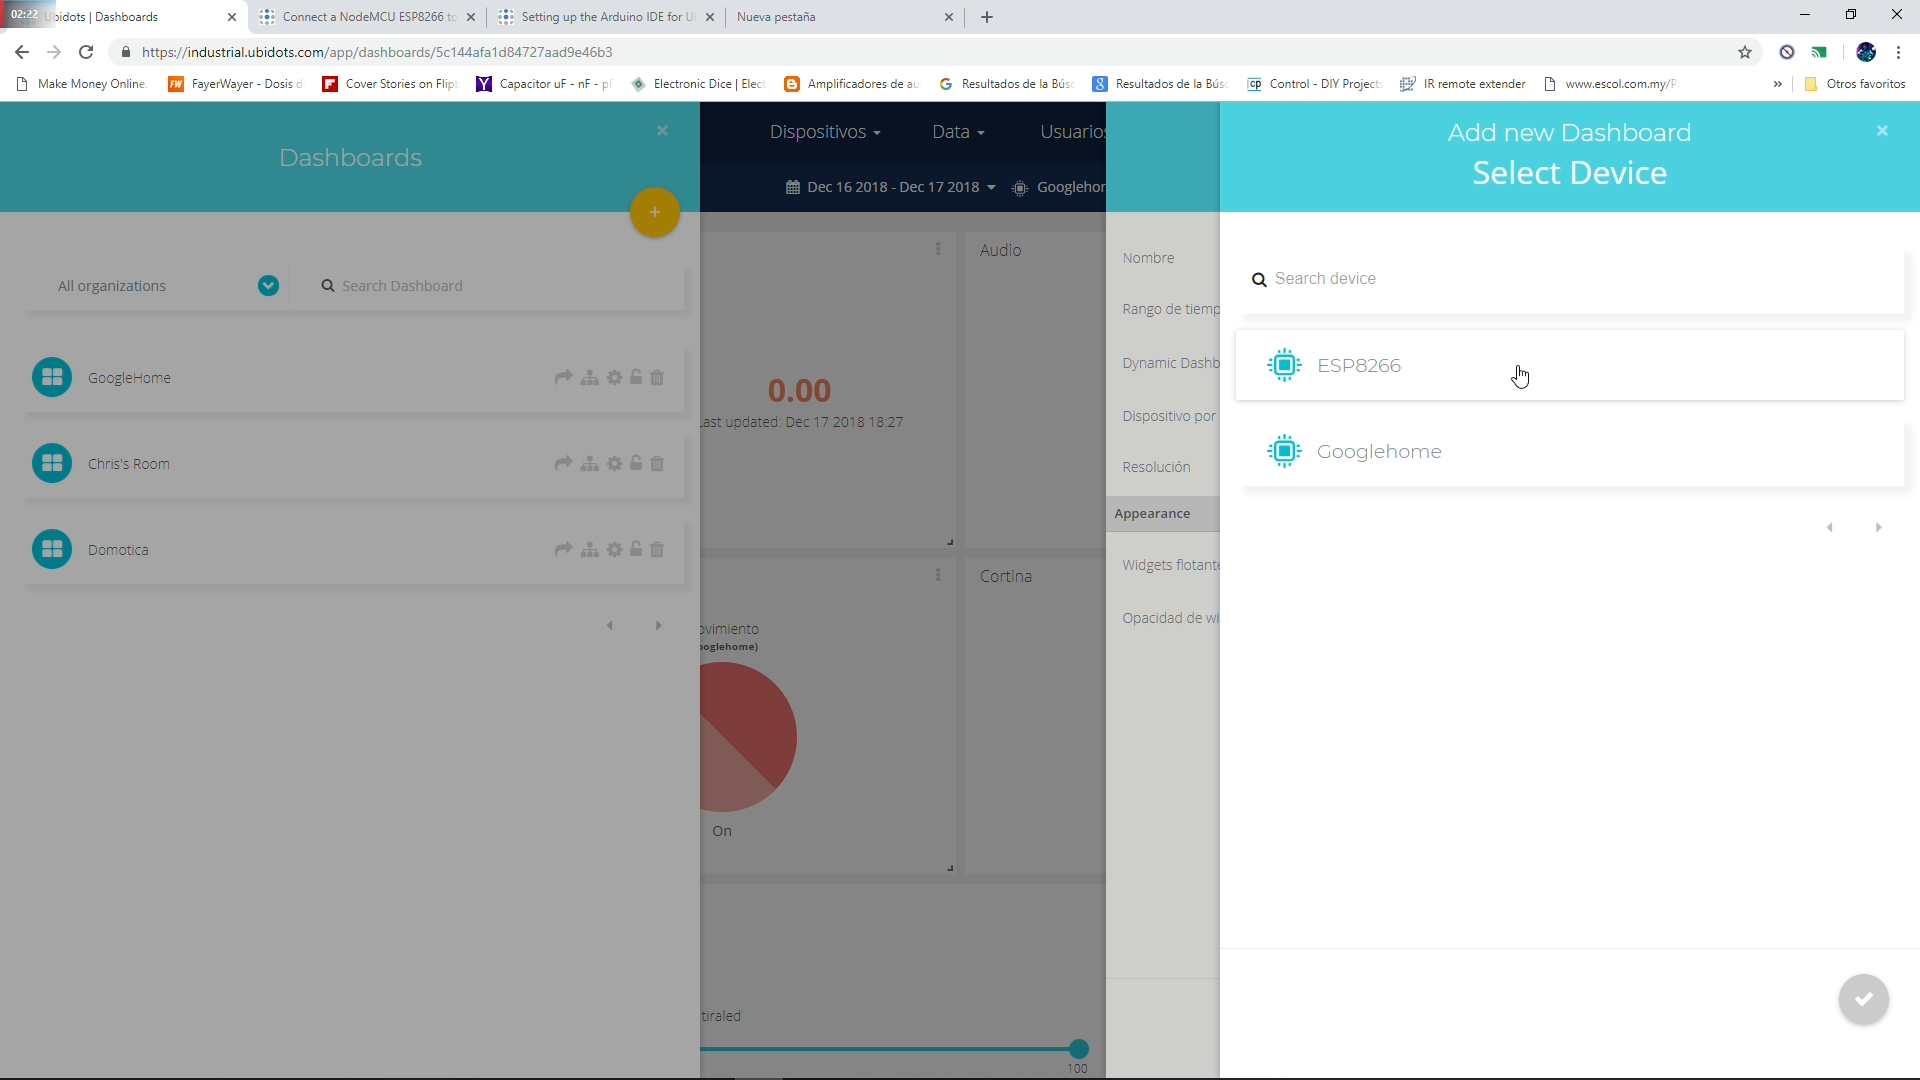


1-Automatically a device called ESP8266 will appear on your Ubidots devices after uploading the code.
2-It will has a variable showing the lecture of the sensor in a range of 0-255.
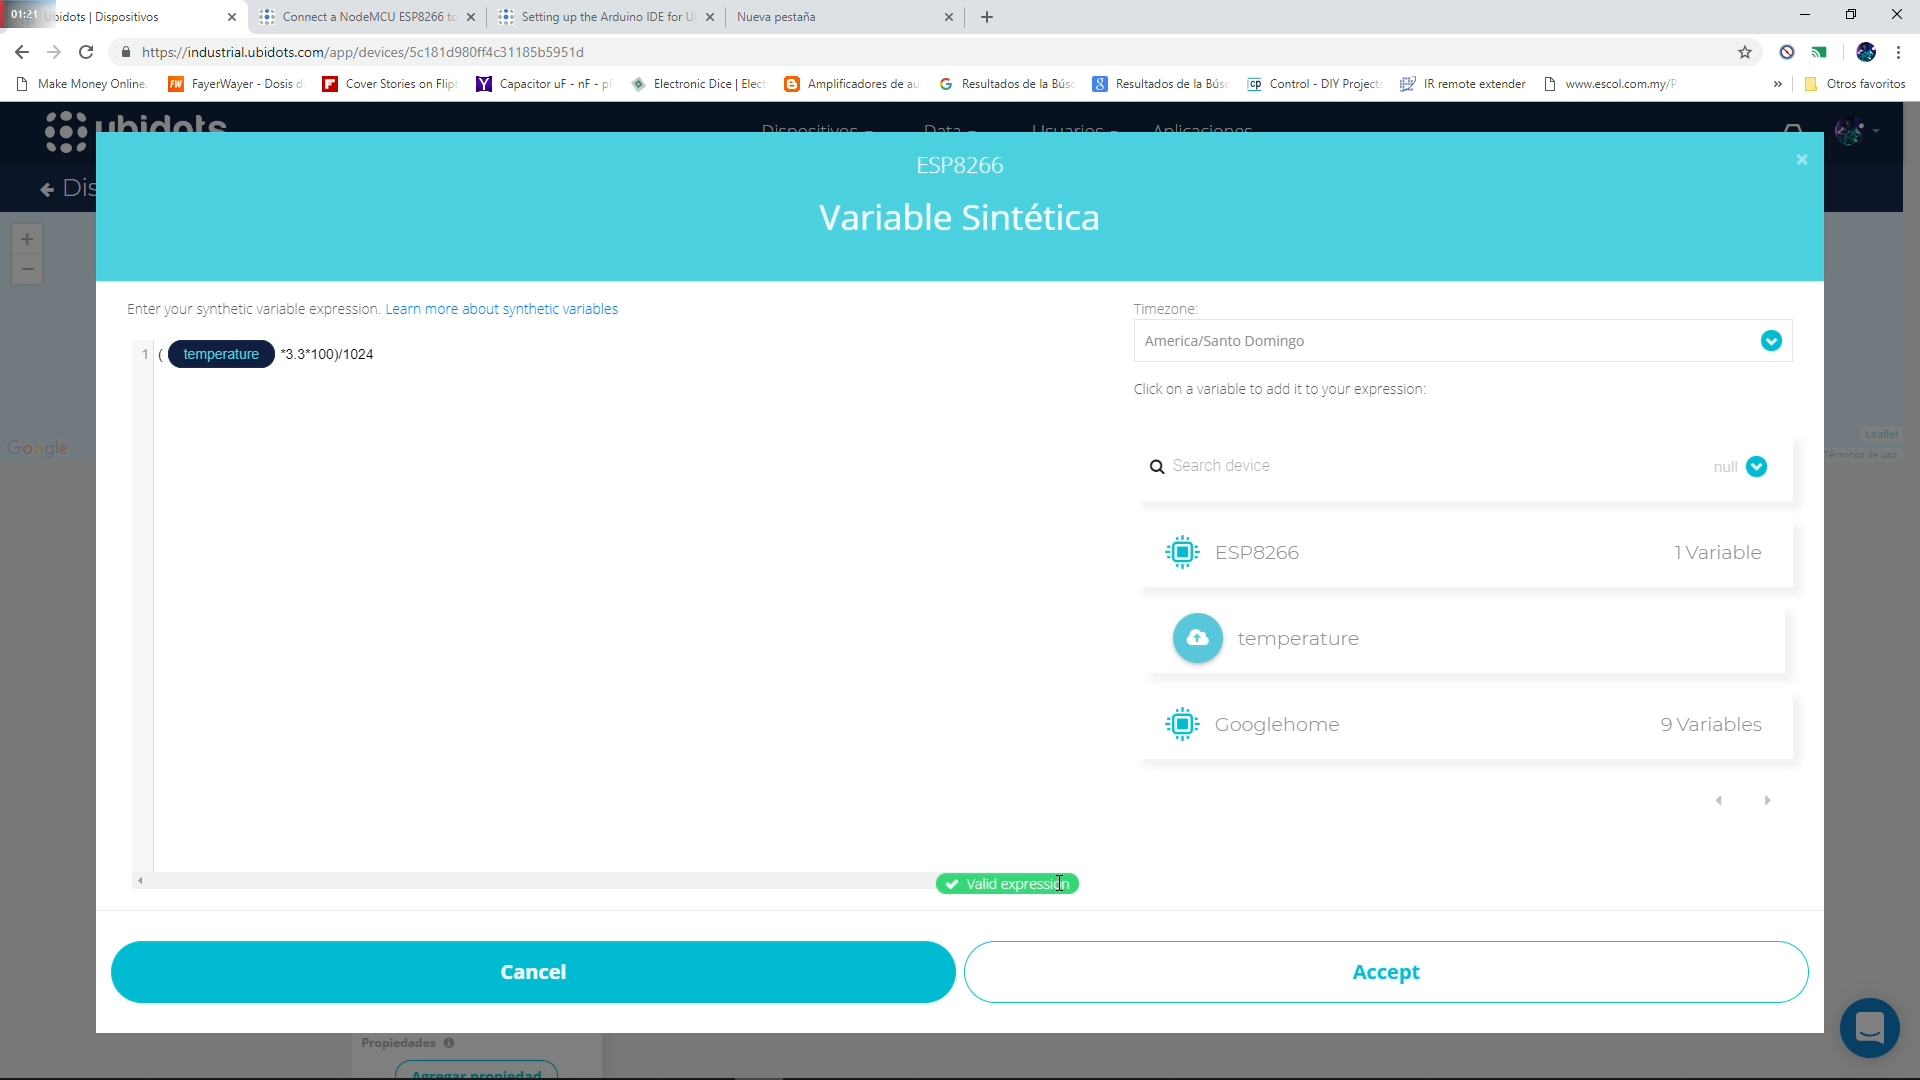
3-We need to create a synthetic variable in function of the first one. To converte the 0-255 value into a Temperature (C) value we most use a function. ((value)*(3.3)*(100))/1024 = centigrade degrees.
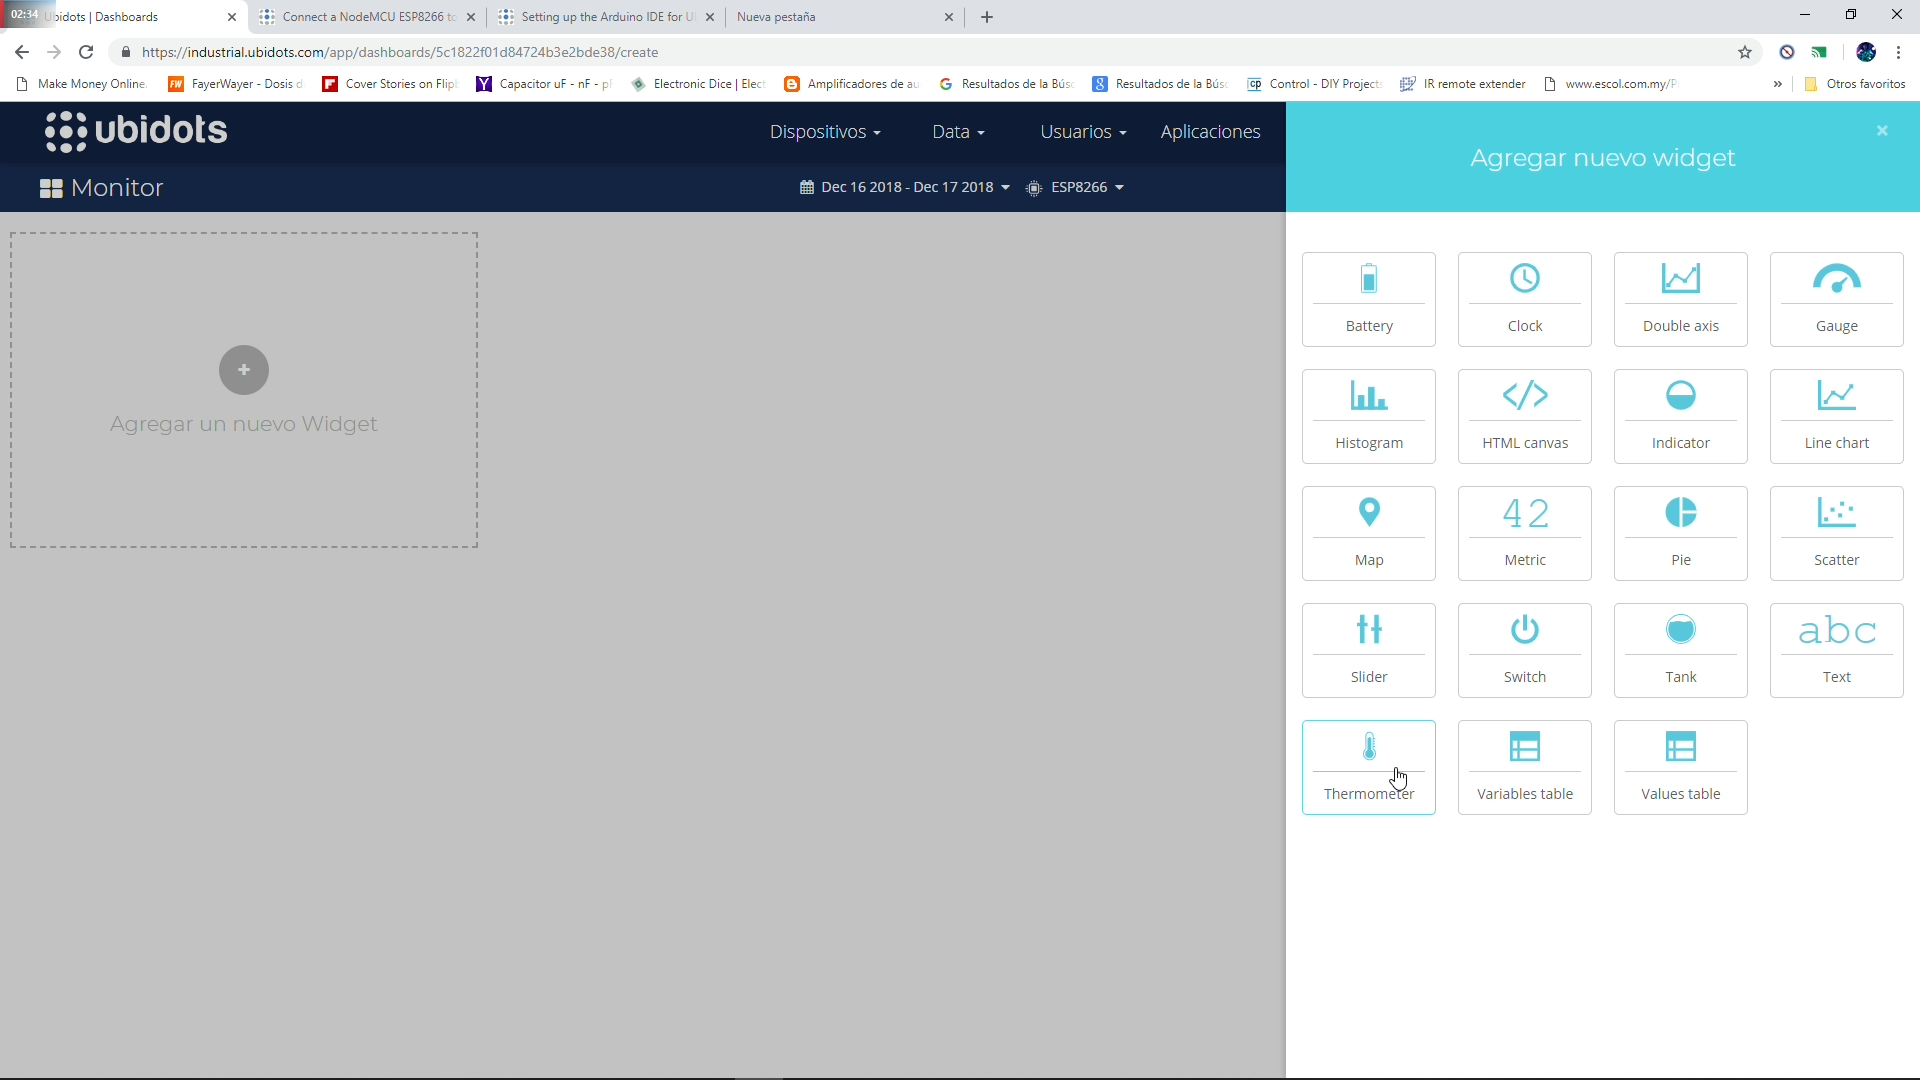
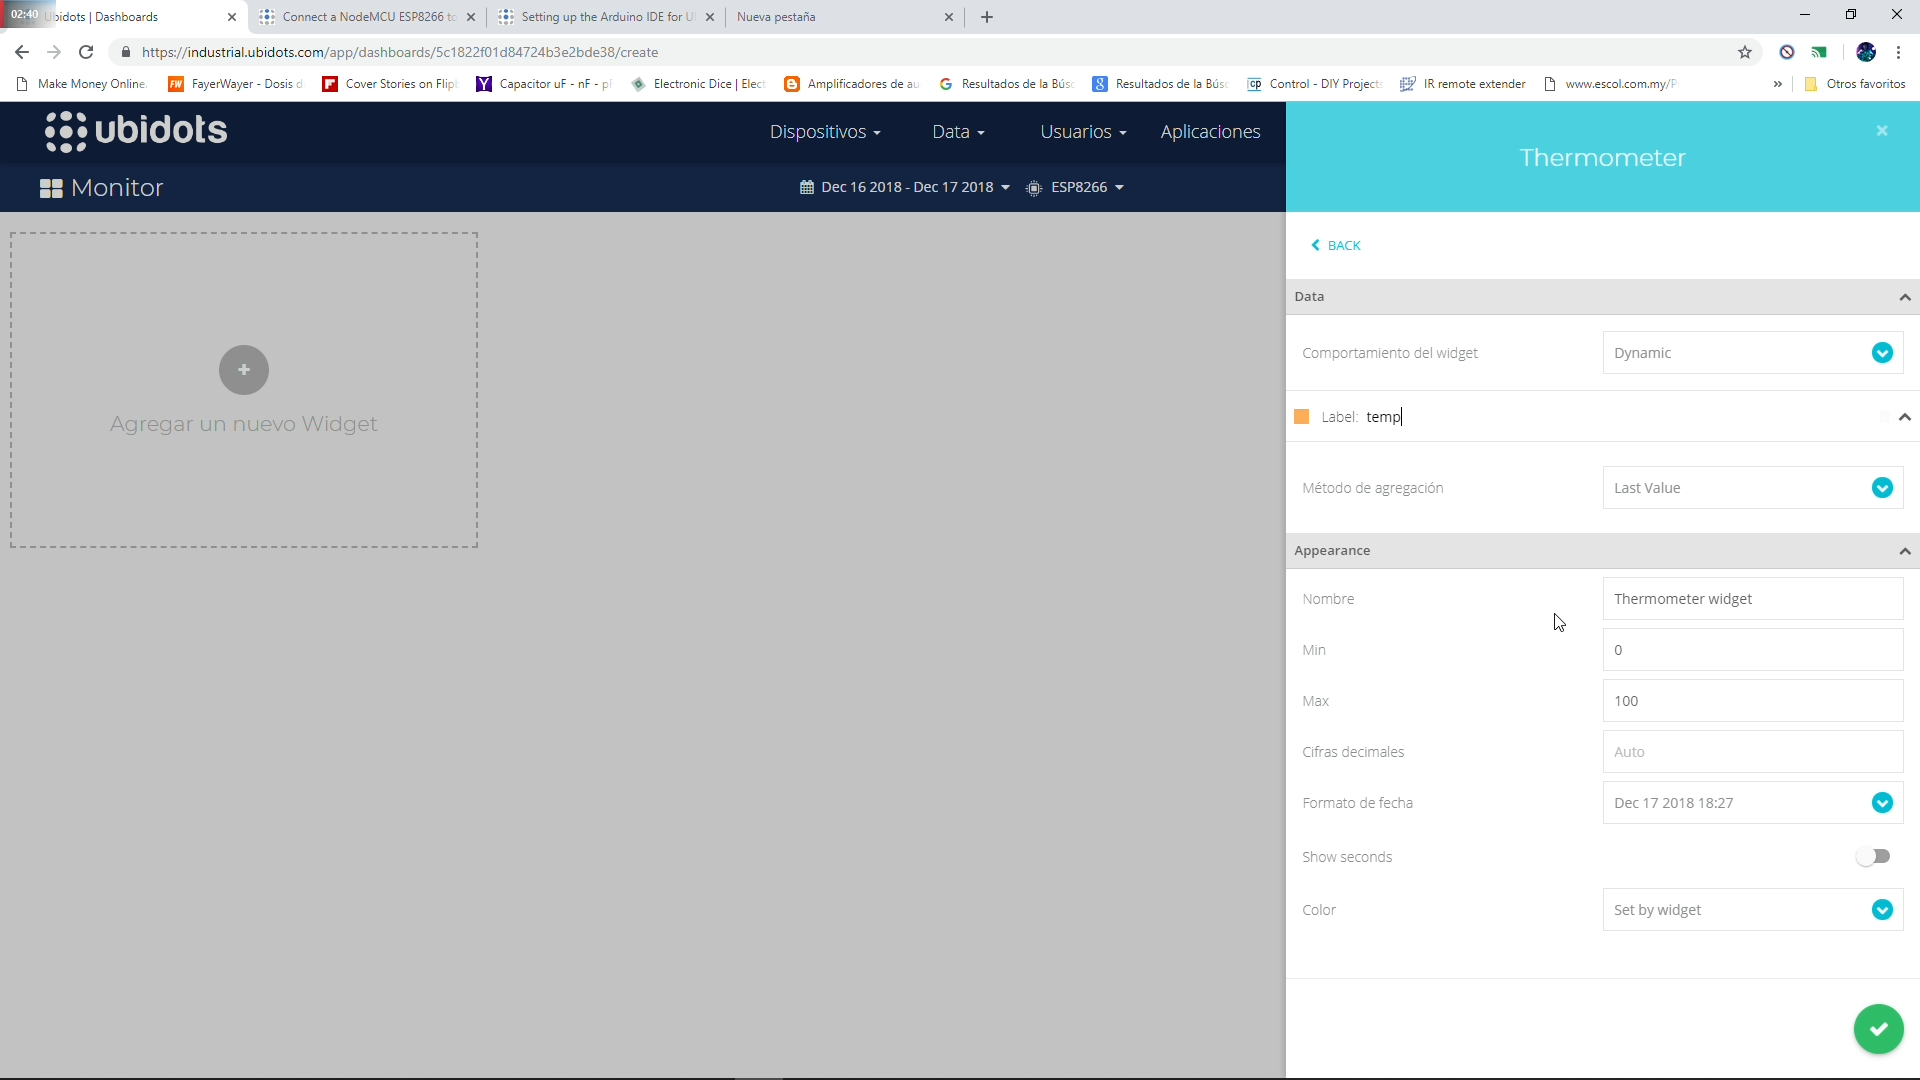
4-We create a table in the data field, with a thermometer widget, typing the name of the variable (API LABEL), in this case is called "temp" and click ok.
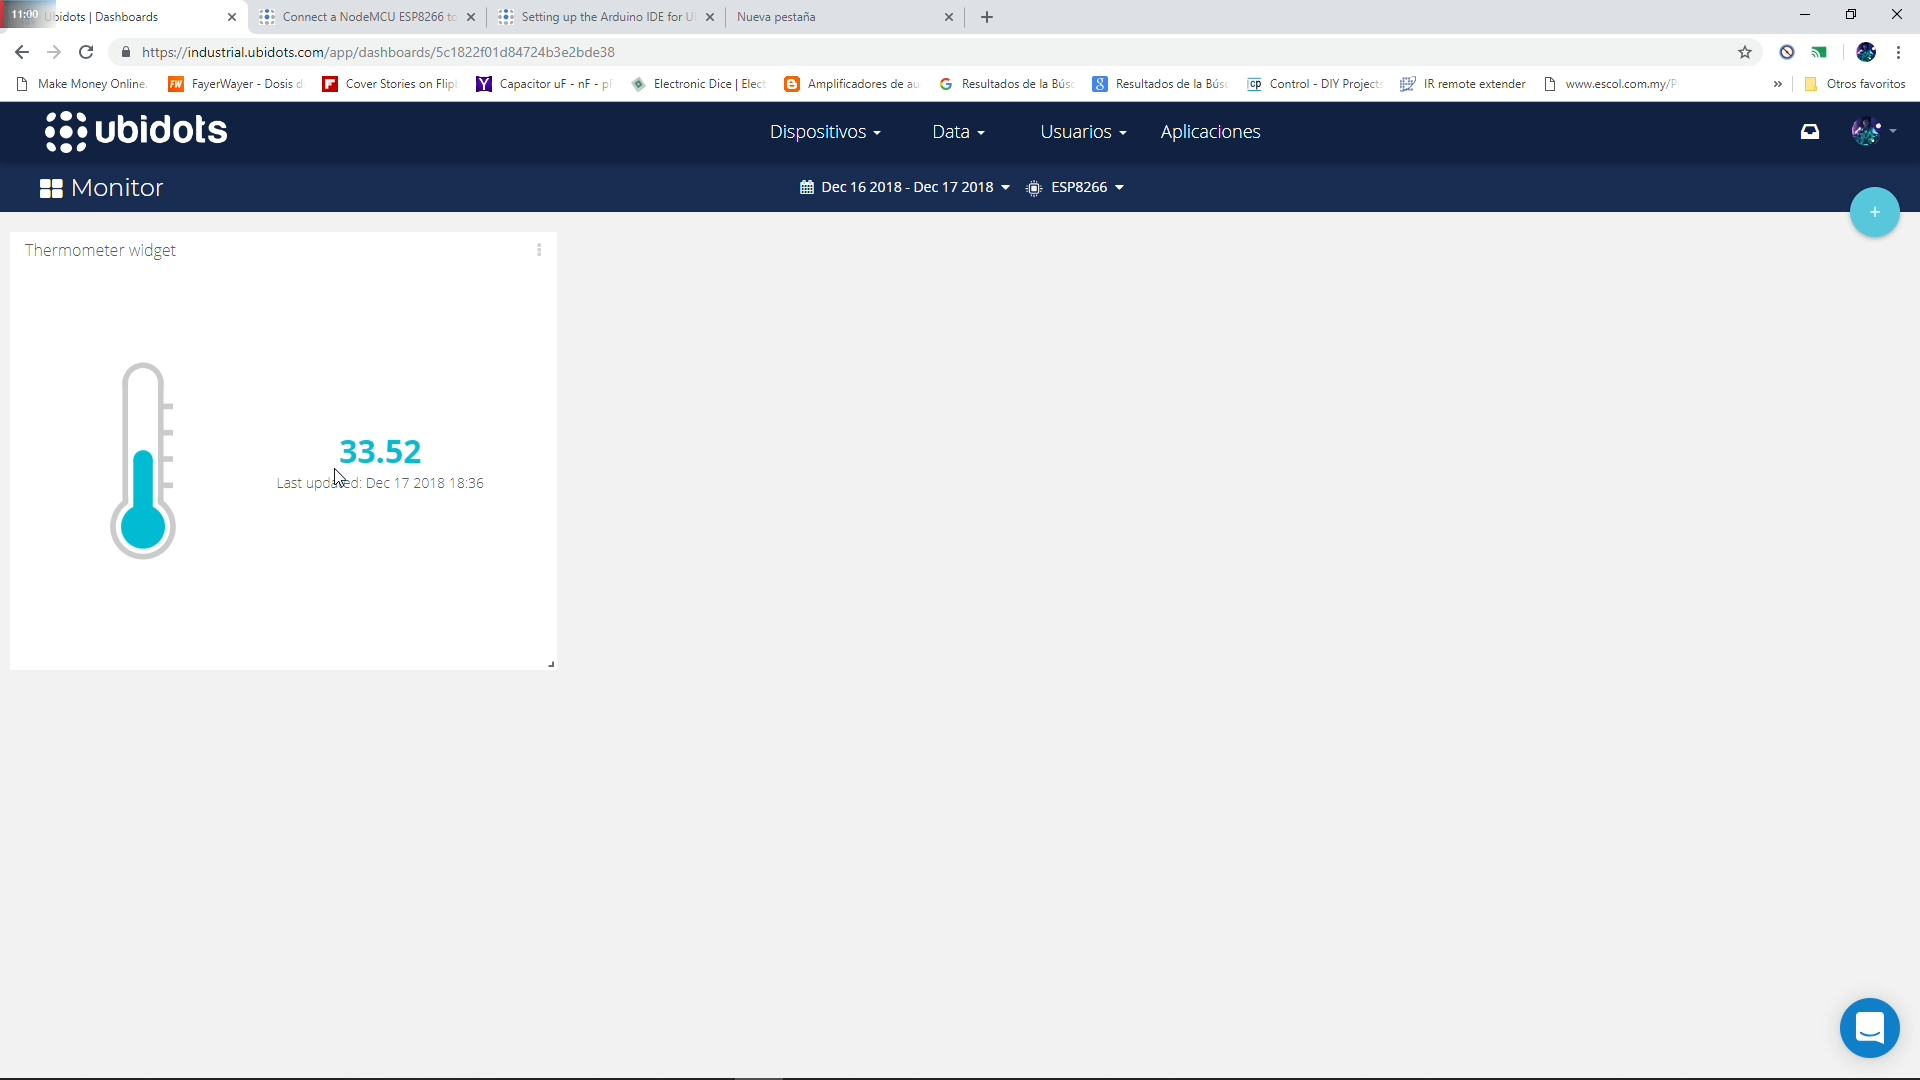
5-And finally we are able to visualize the temperature of the sensor over the web, wherever we are, could be by the smartphone app and on.