IoT Code Breaker Game Device
by KaylaB72 in Circuits > Raspberry Pi
765 Views, 3 Favorites, 0 Comments
IoT Code Breaker Game Device

IoT, or the Internet of Things, is a growing field in computer science. The following instructions allow for one to create a device part of the IoT. The device itself can be used to play a code breaker game. One player is able to set a code using a browser window, proceed to give the second player clues, and then have the second player try to input the code using the hardware device. If the second player is correct a light will flash. If not, the game can be played again. This simple device is not only fun, but it teaches basic hardware and application design using a Raspberry Pi and python flask software.
Gather Materials for Hardware Device
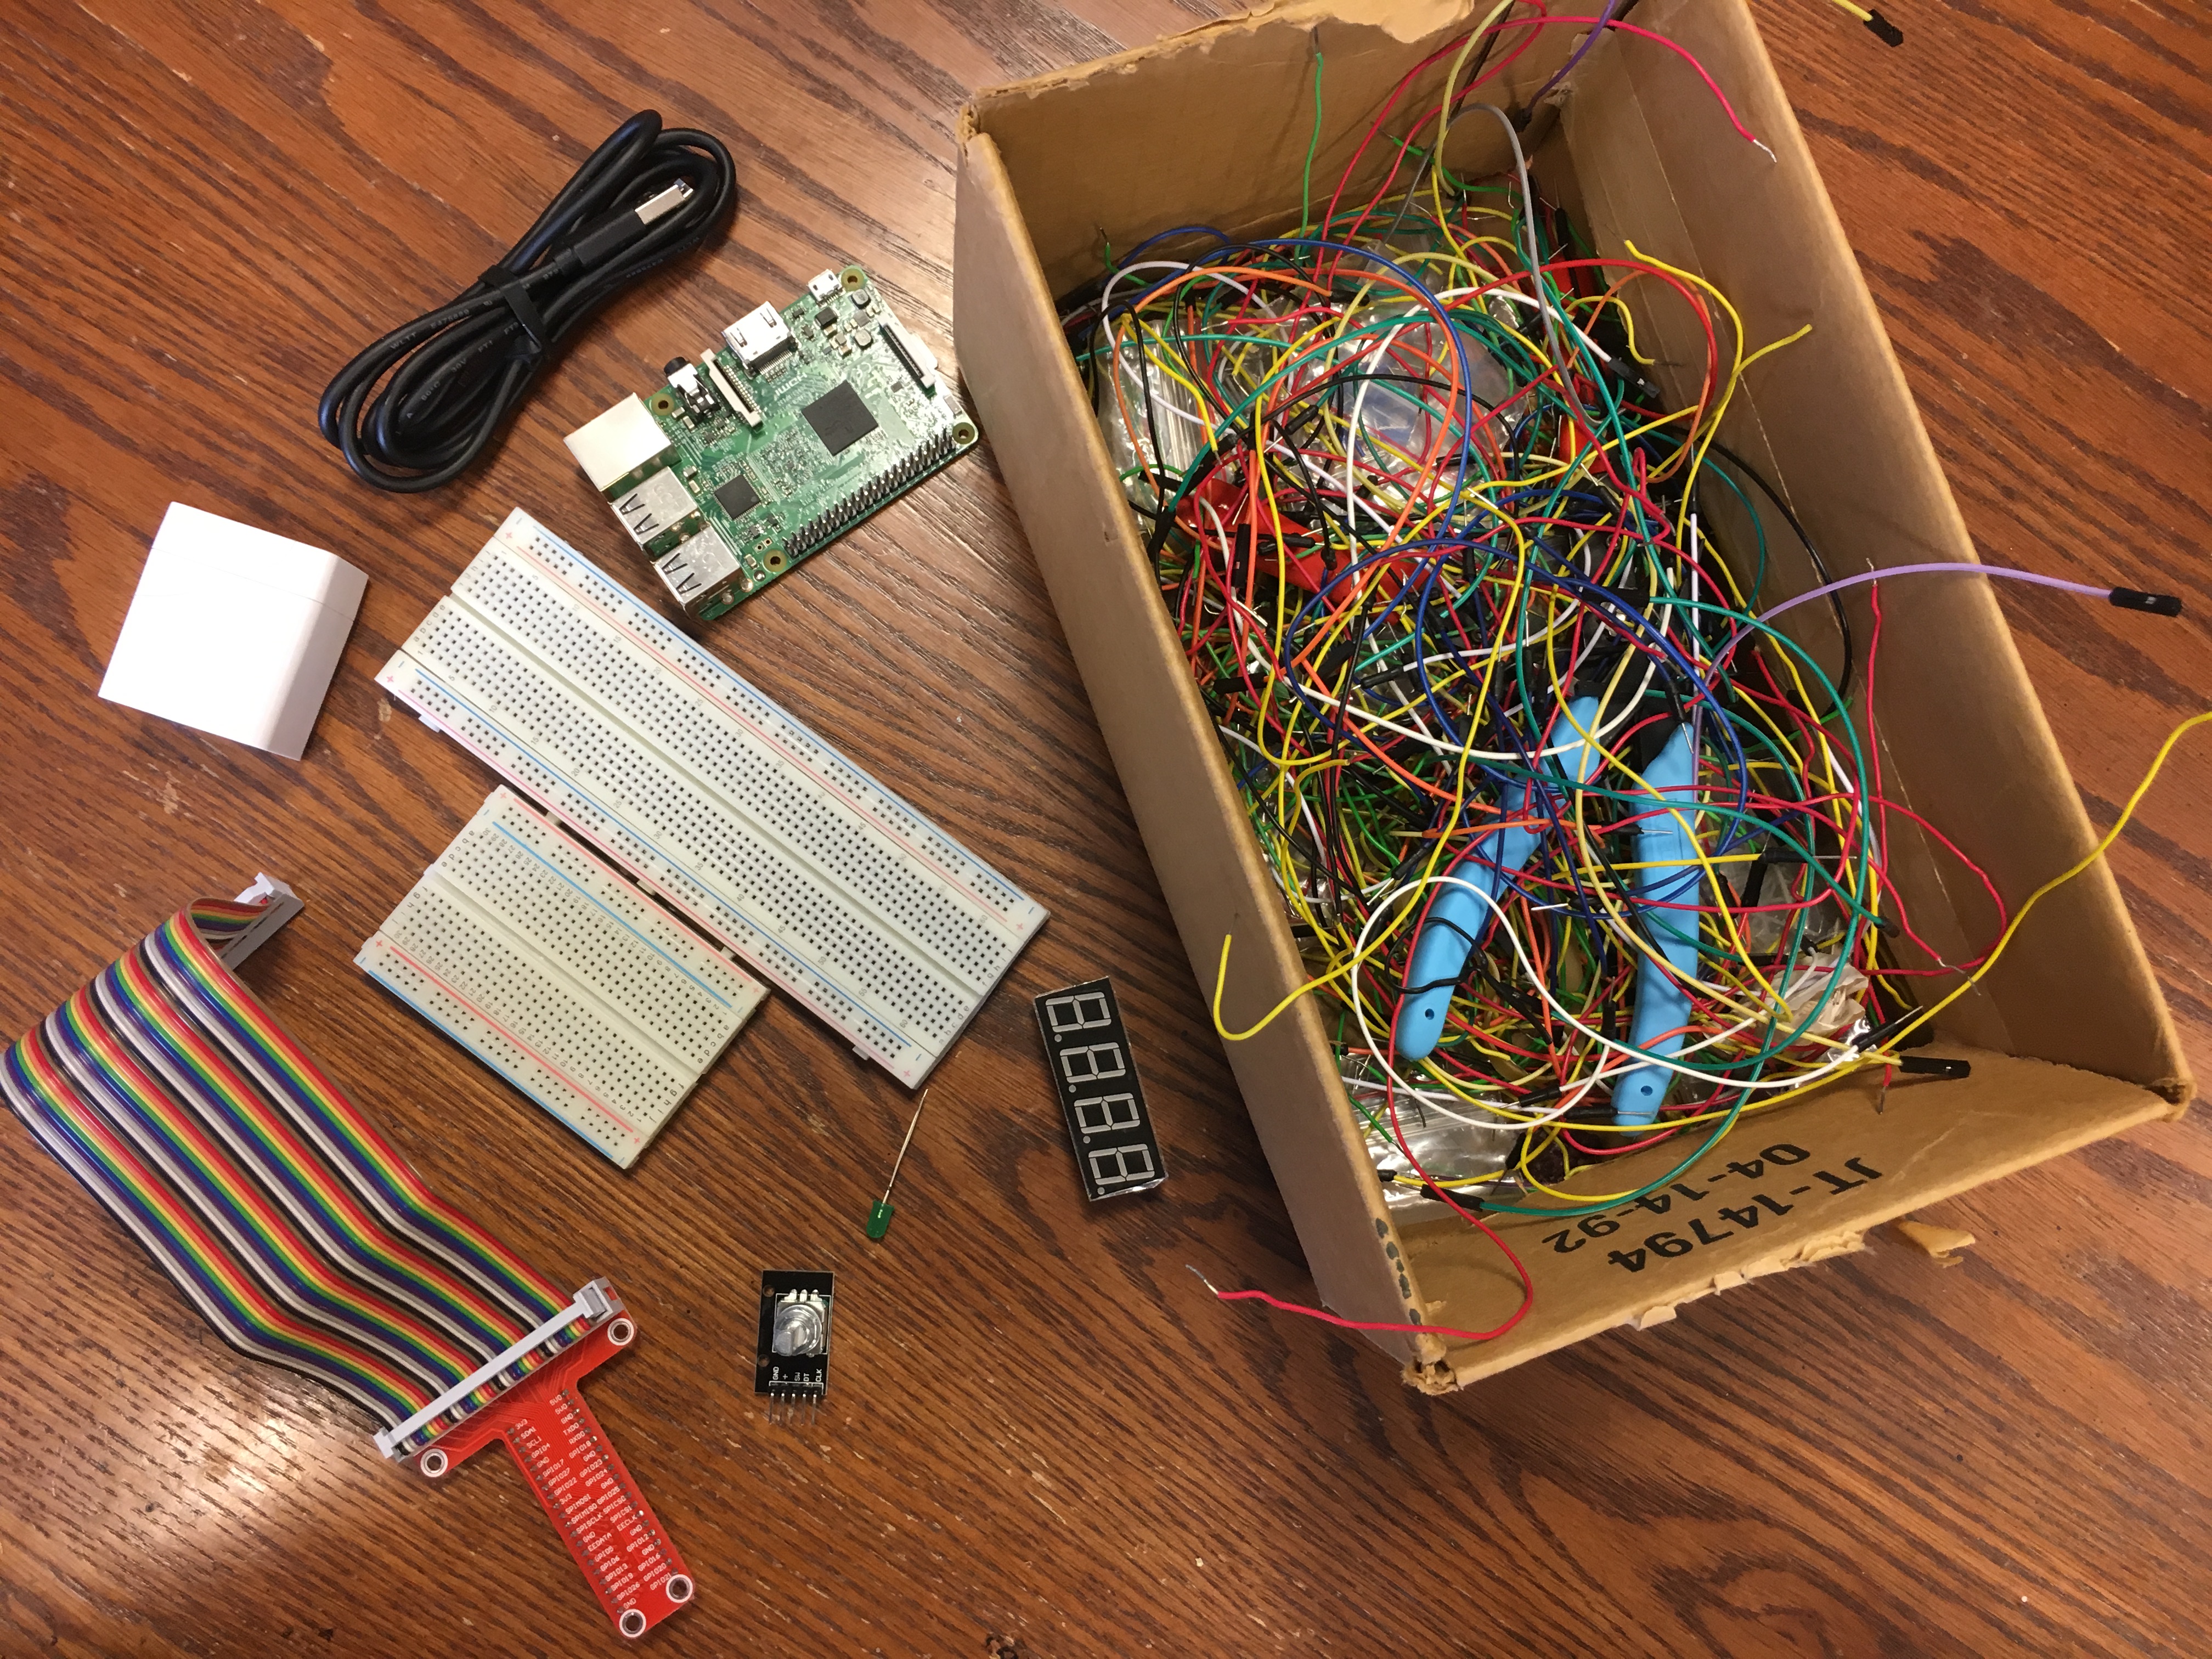
First, the builder will need to gather the needed materials for the hardware portion of the game. The materials are listed below.
- 1 Raspberry Pi
- SD Card for the Raspberry Pi
- 1 Rainbow Wire Ribbon
- 1 Raspberry Pi to Bread Board Connector
- 1 Large Breadboard
- 1 Small Breadboard
- 1 Rotary Encoder
- 1 LED
- 1 7 Segment LED Screen
- 9 330 Ohm Resistors
- Various Simple Wires
Installing the Rotary Encoder
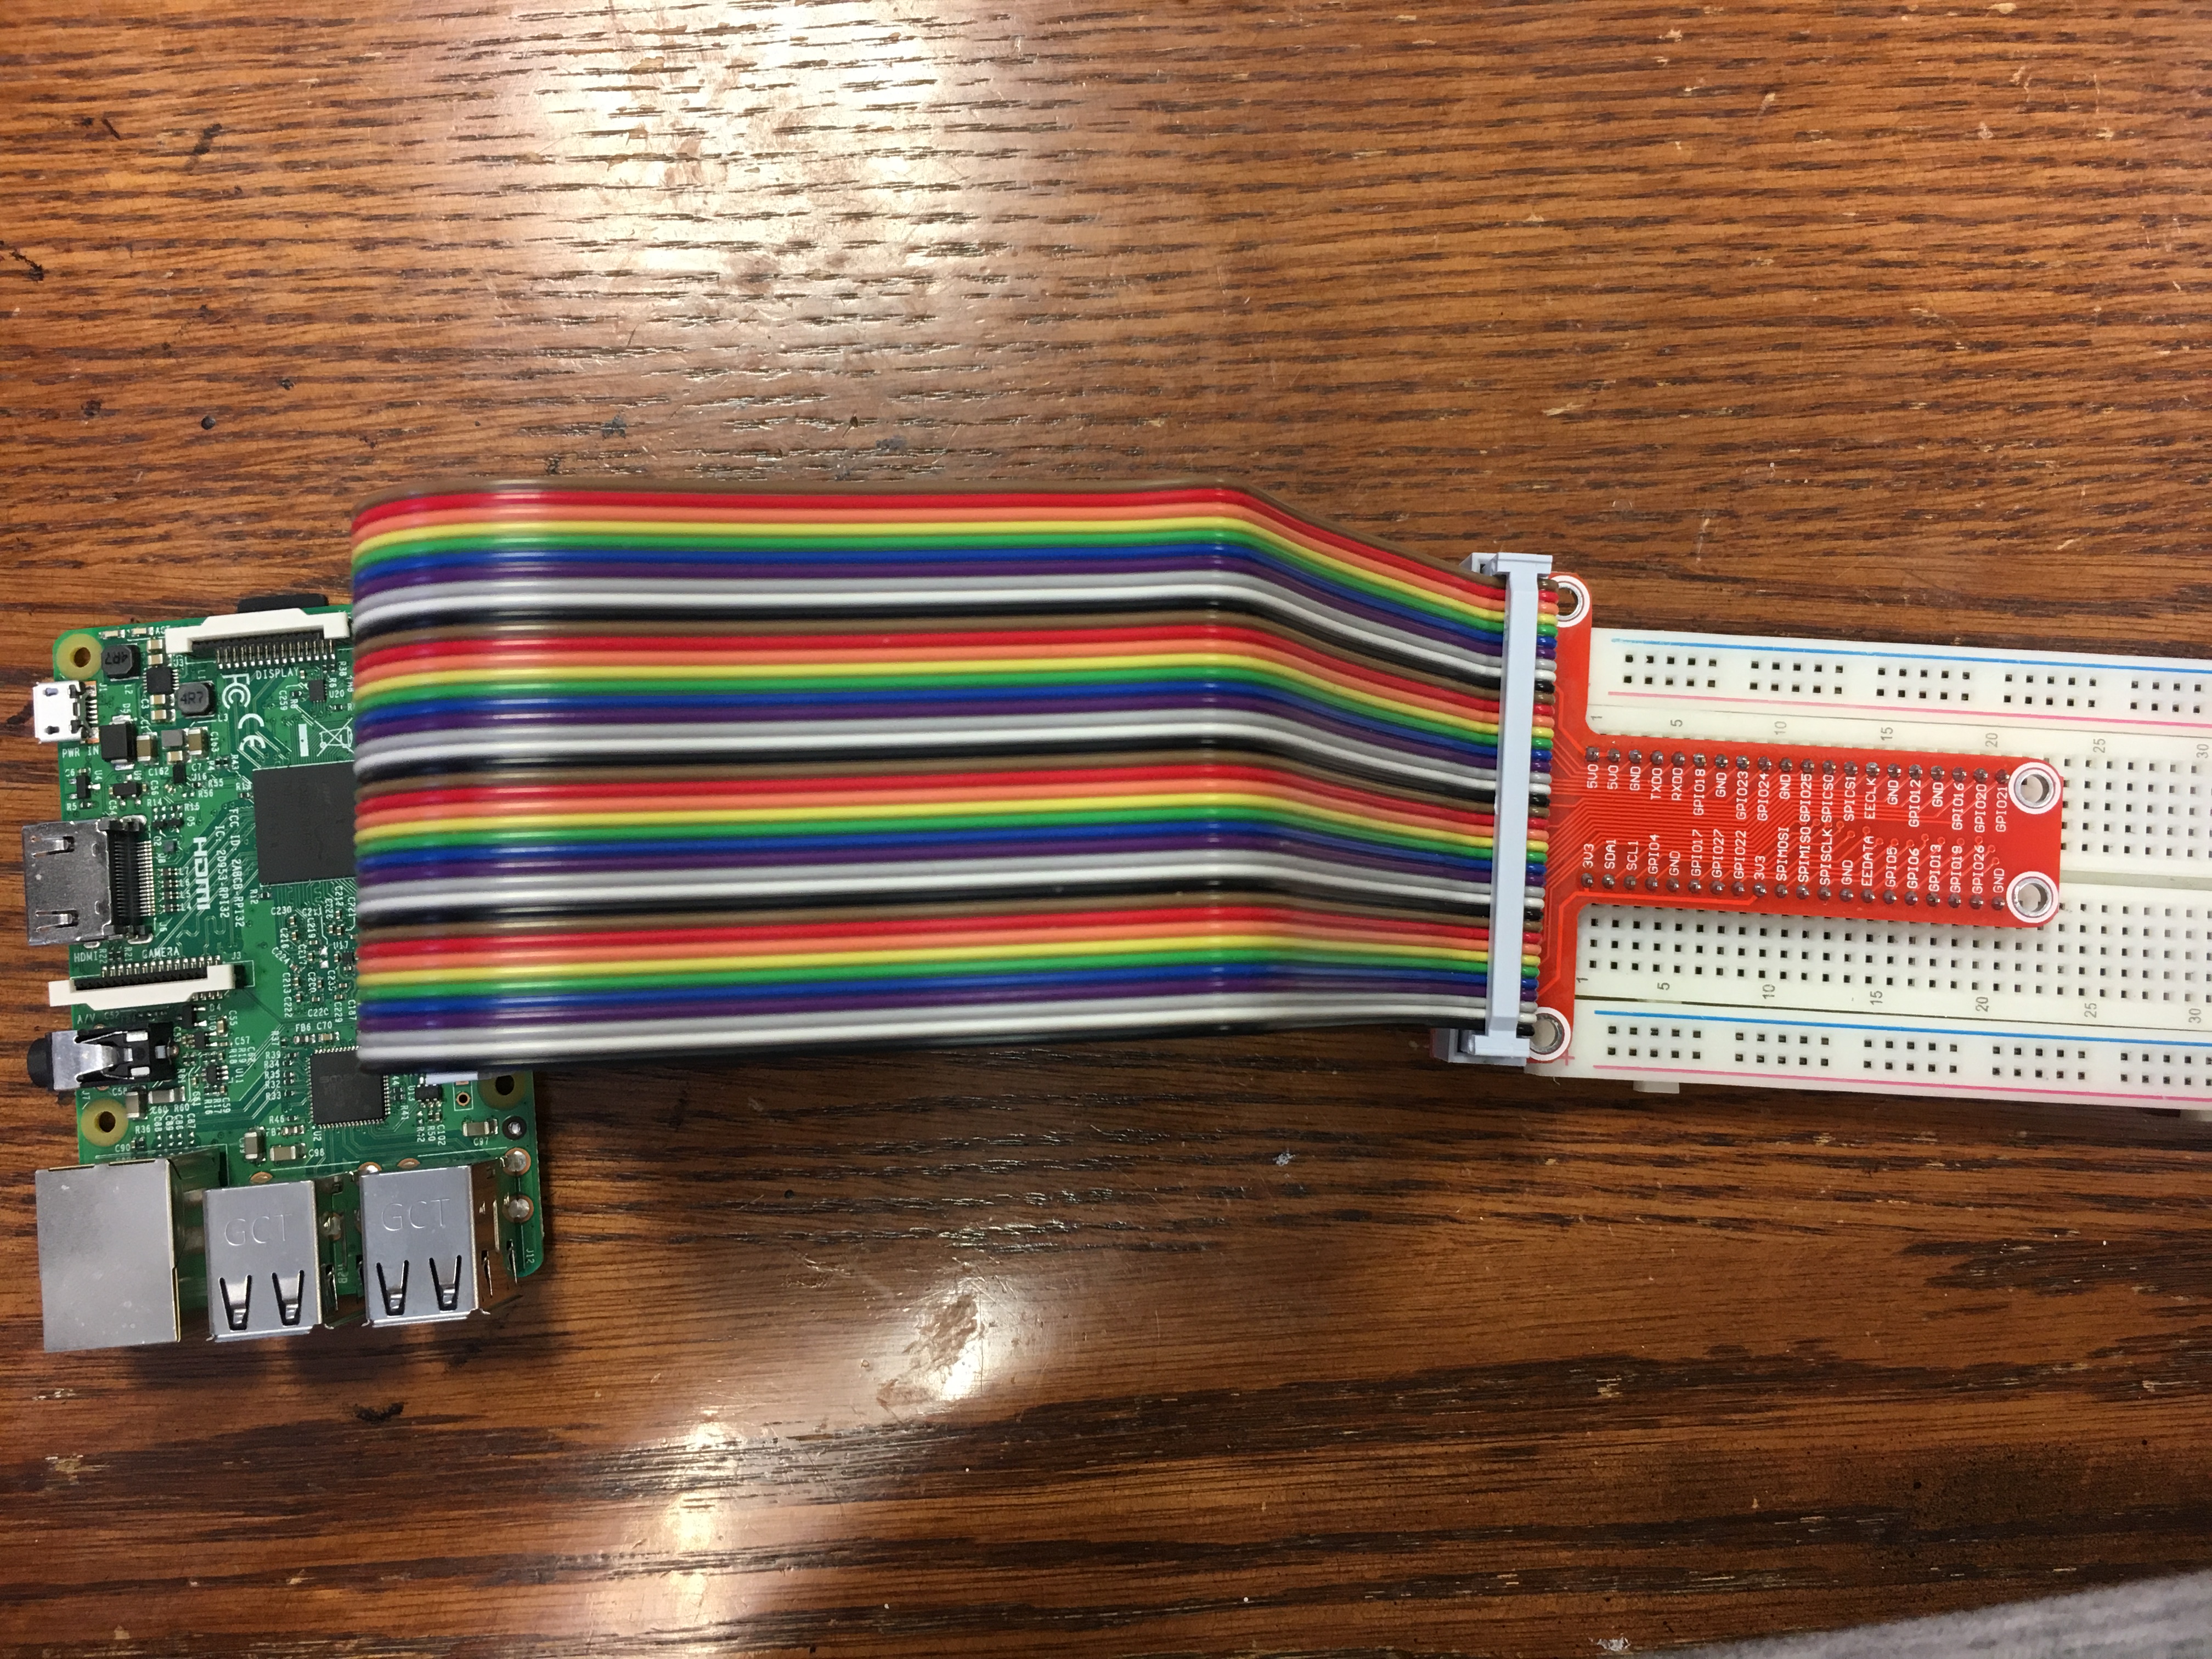
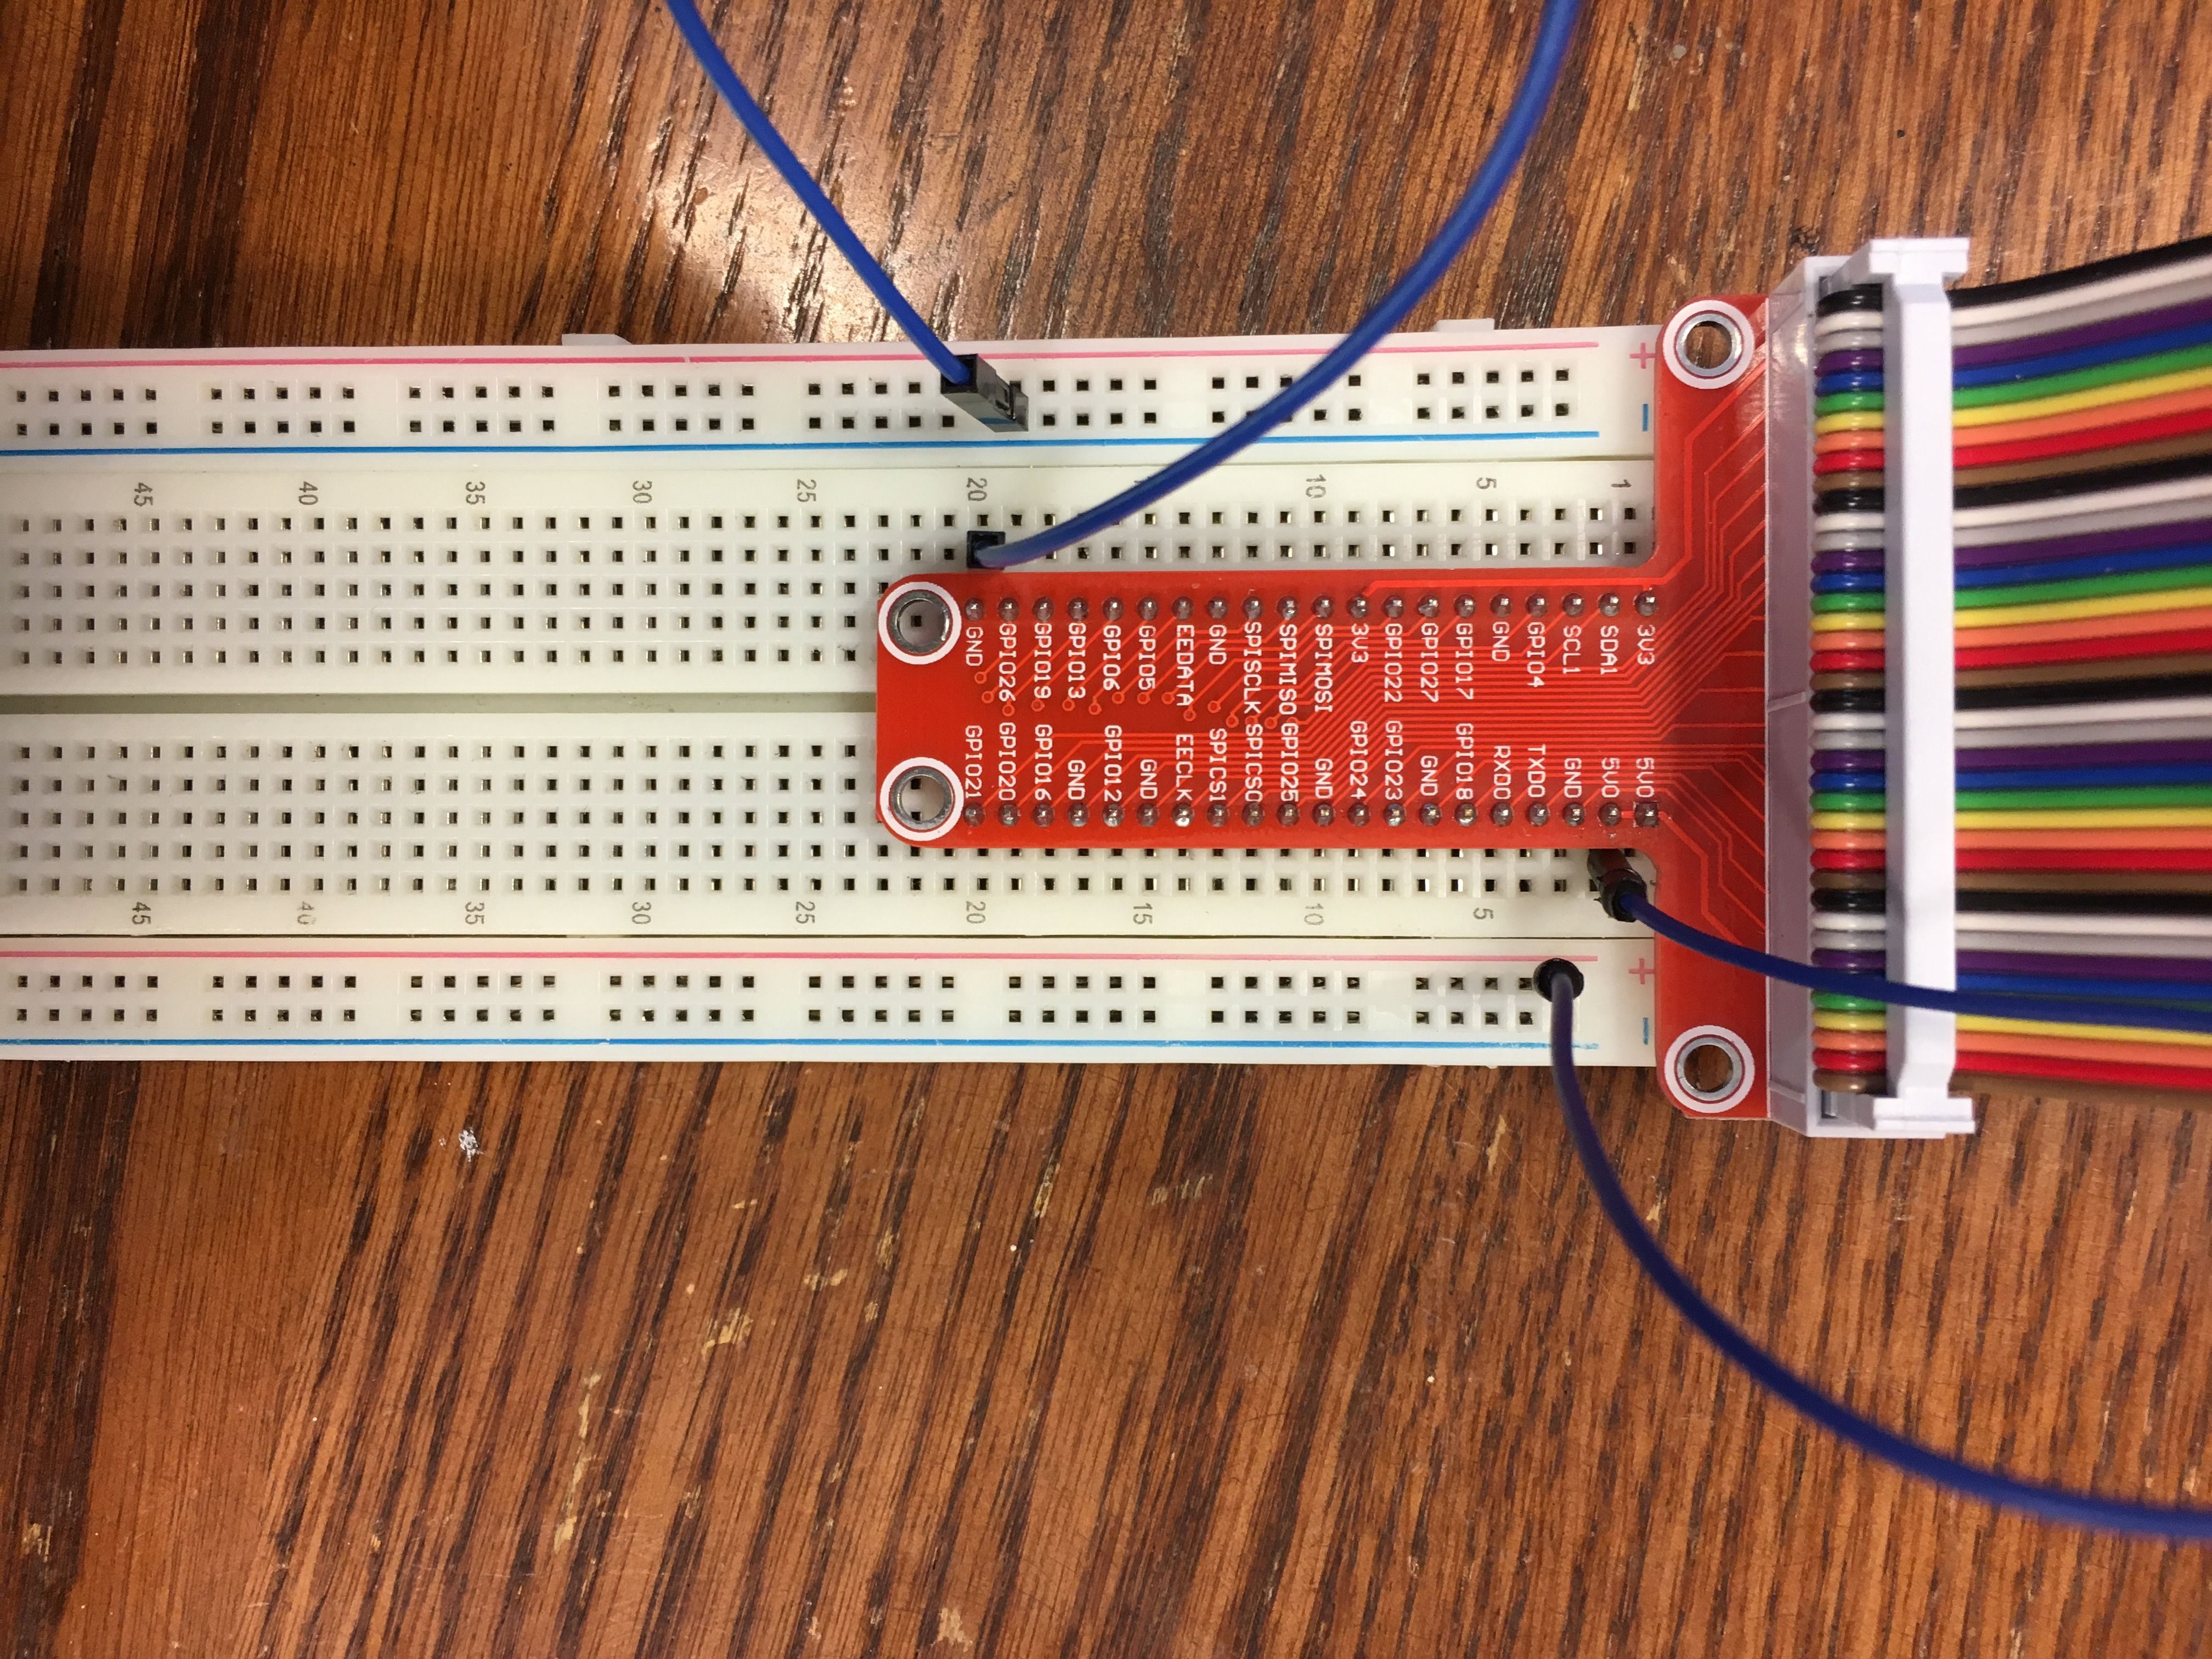
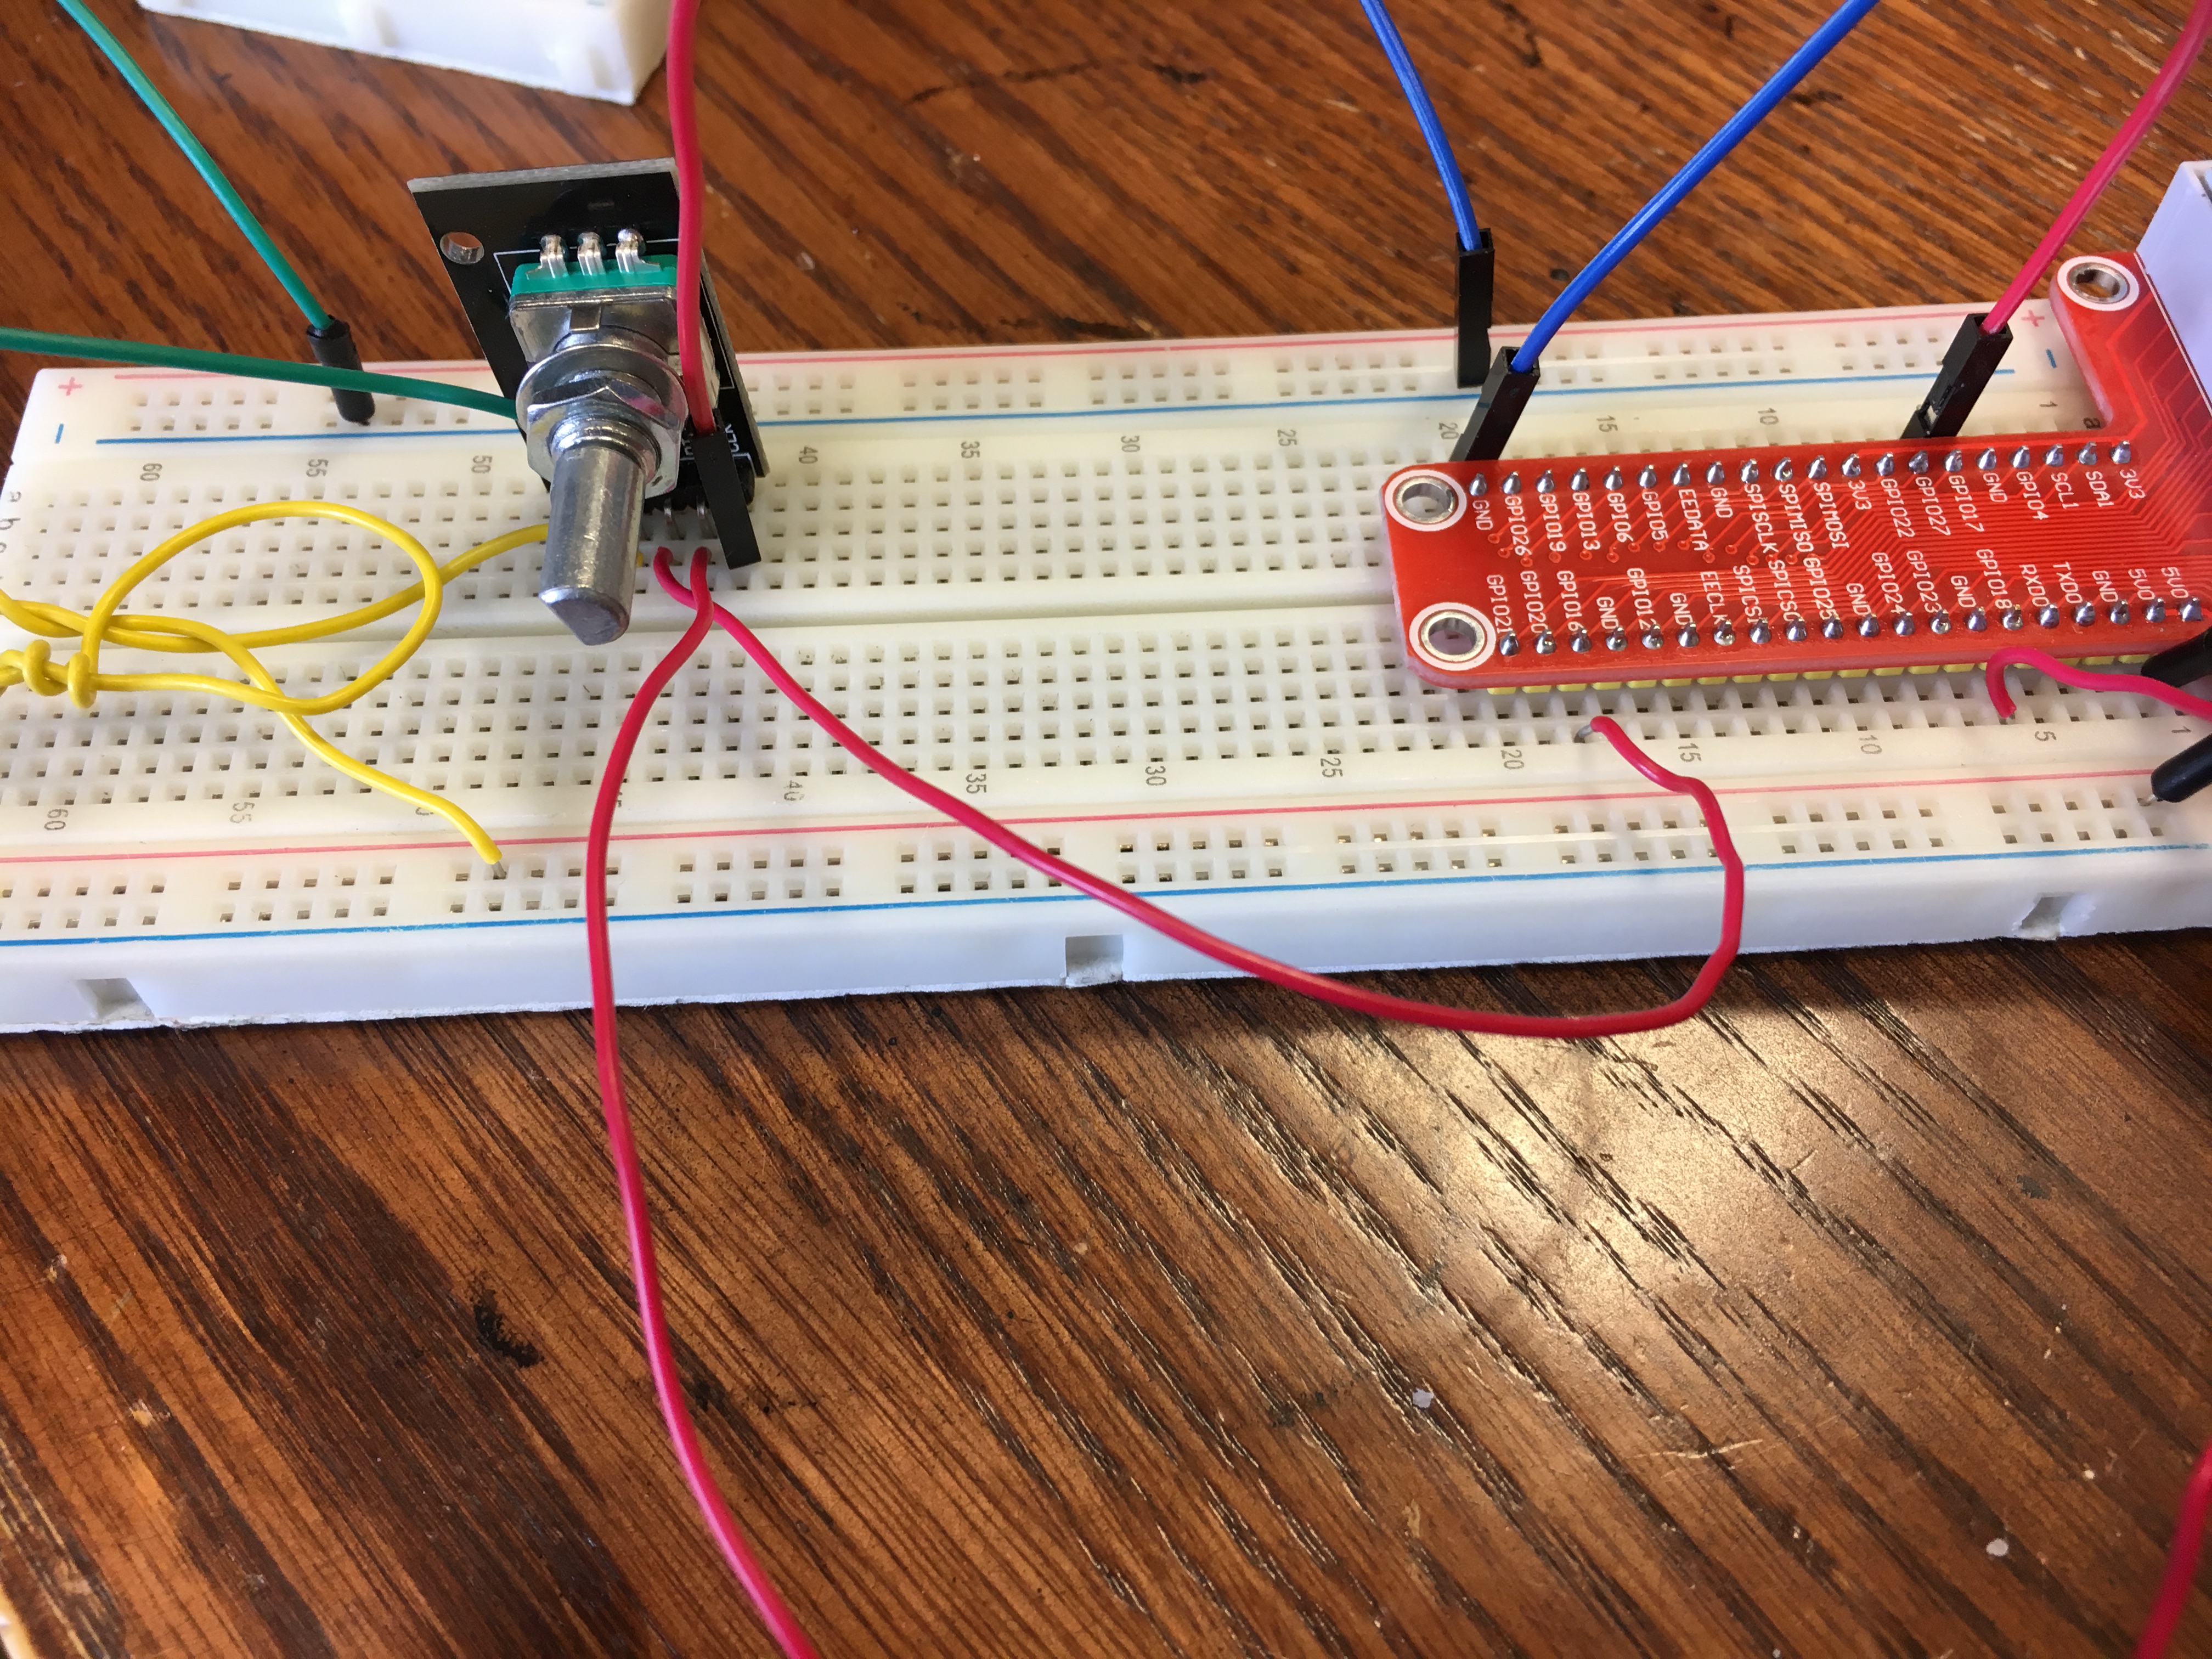
To begin installing a Rotary Encoder, we start by procuring a large breadboard, a Raspberry Pi, a rainbow wire connector, the Pi connector, the Rotary Encoder, and various wires. We do NOT need a resistor here, due to the fact that the Rotary Encoder already has a resistor built into it. We begin by connecting the rainbow ribbon to the Raspberry Pi and to the breadboard connector. We then connect the connector to the breadboard. Be careful when placing and removing the rainbow ribbon as it may bend the pins on the Raspberry Pi.
Now we need to connect the power and ground lines of the breadboard to the power and ground pins of the connector. How to do this is shown in the second photo above.
Place the Rotary Encoder on the breadboard. Make sure that the pins of the Rotary Encoder are all in different rows of the board. The encoder has five pins in total. First, connect the pin labeled GND or ground to the ground line on the breadboard. This is the column of spaces marked with the blue line. Next, we need to connect the encoder to power. Connect the pin labeled + to power. The third pin on the Rotary Encoder is labeled SW. This pin reads if the head of the encoder has been pressed down. We connect this pin to the pin labeled GPIO16 on the connector. The last two pins on the encoder register read where the knob of the encoder is currently set. Connect the pin labeled DT to the pin label GPIO18 on the connector and the pin labeled CLK to GPIO17 on the connector.
Now, the Rotary Encoder is connected to the Raspberry Pi.
Figuring Out the 7 Segment Screen
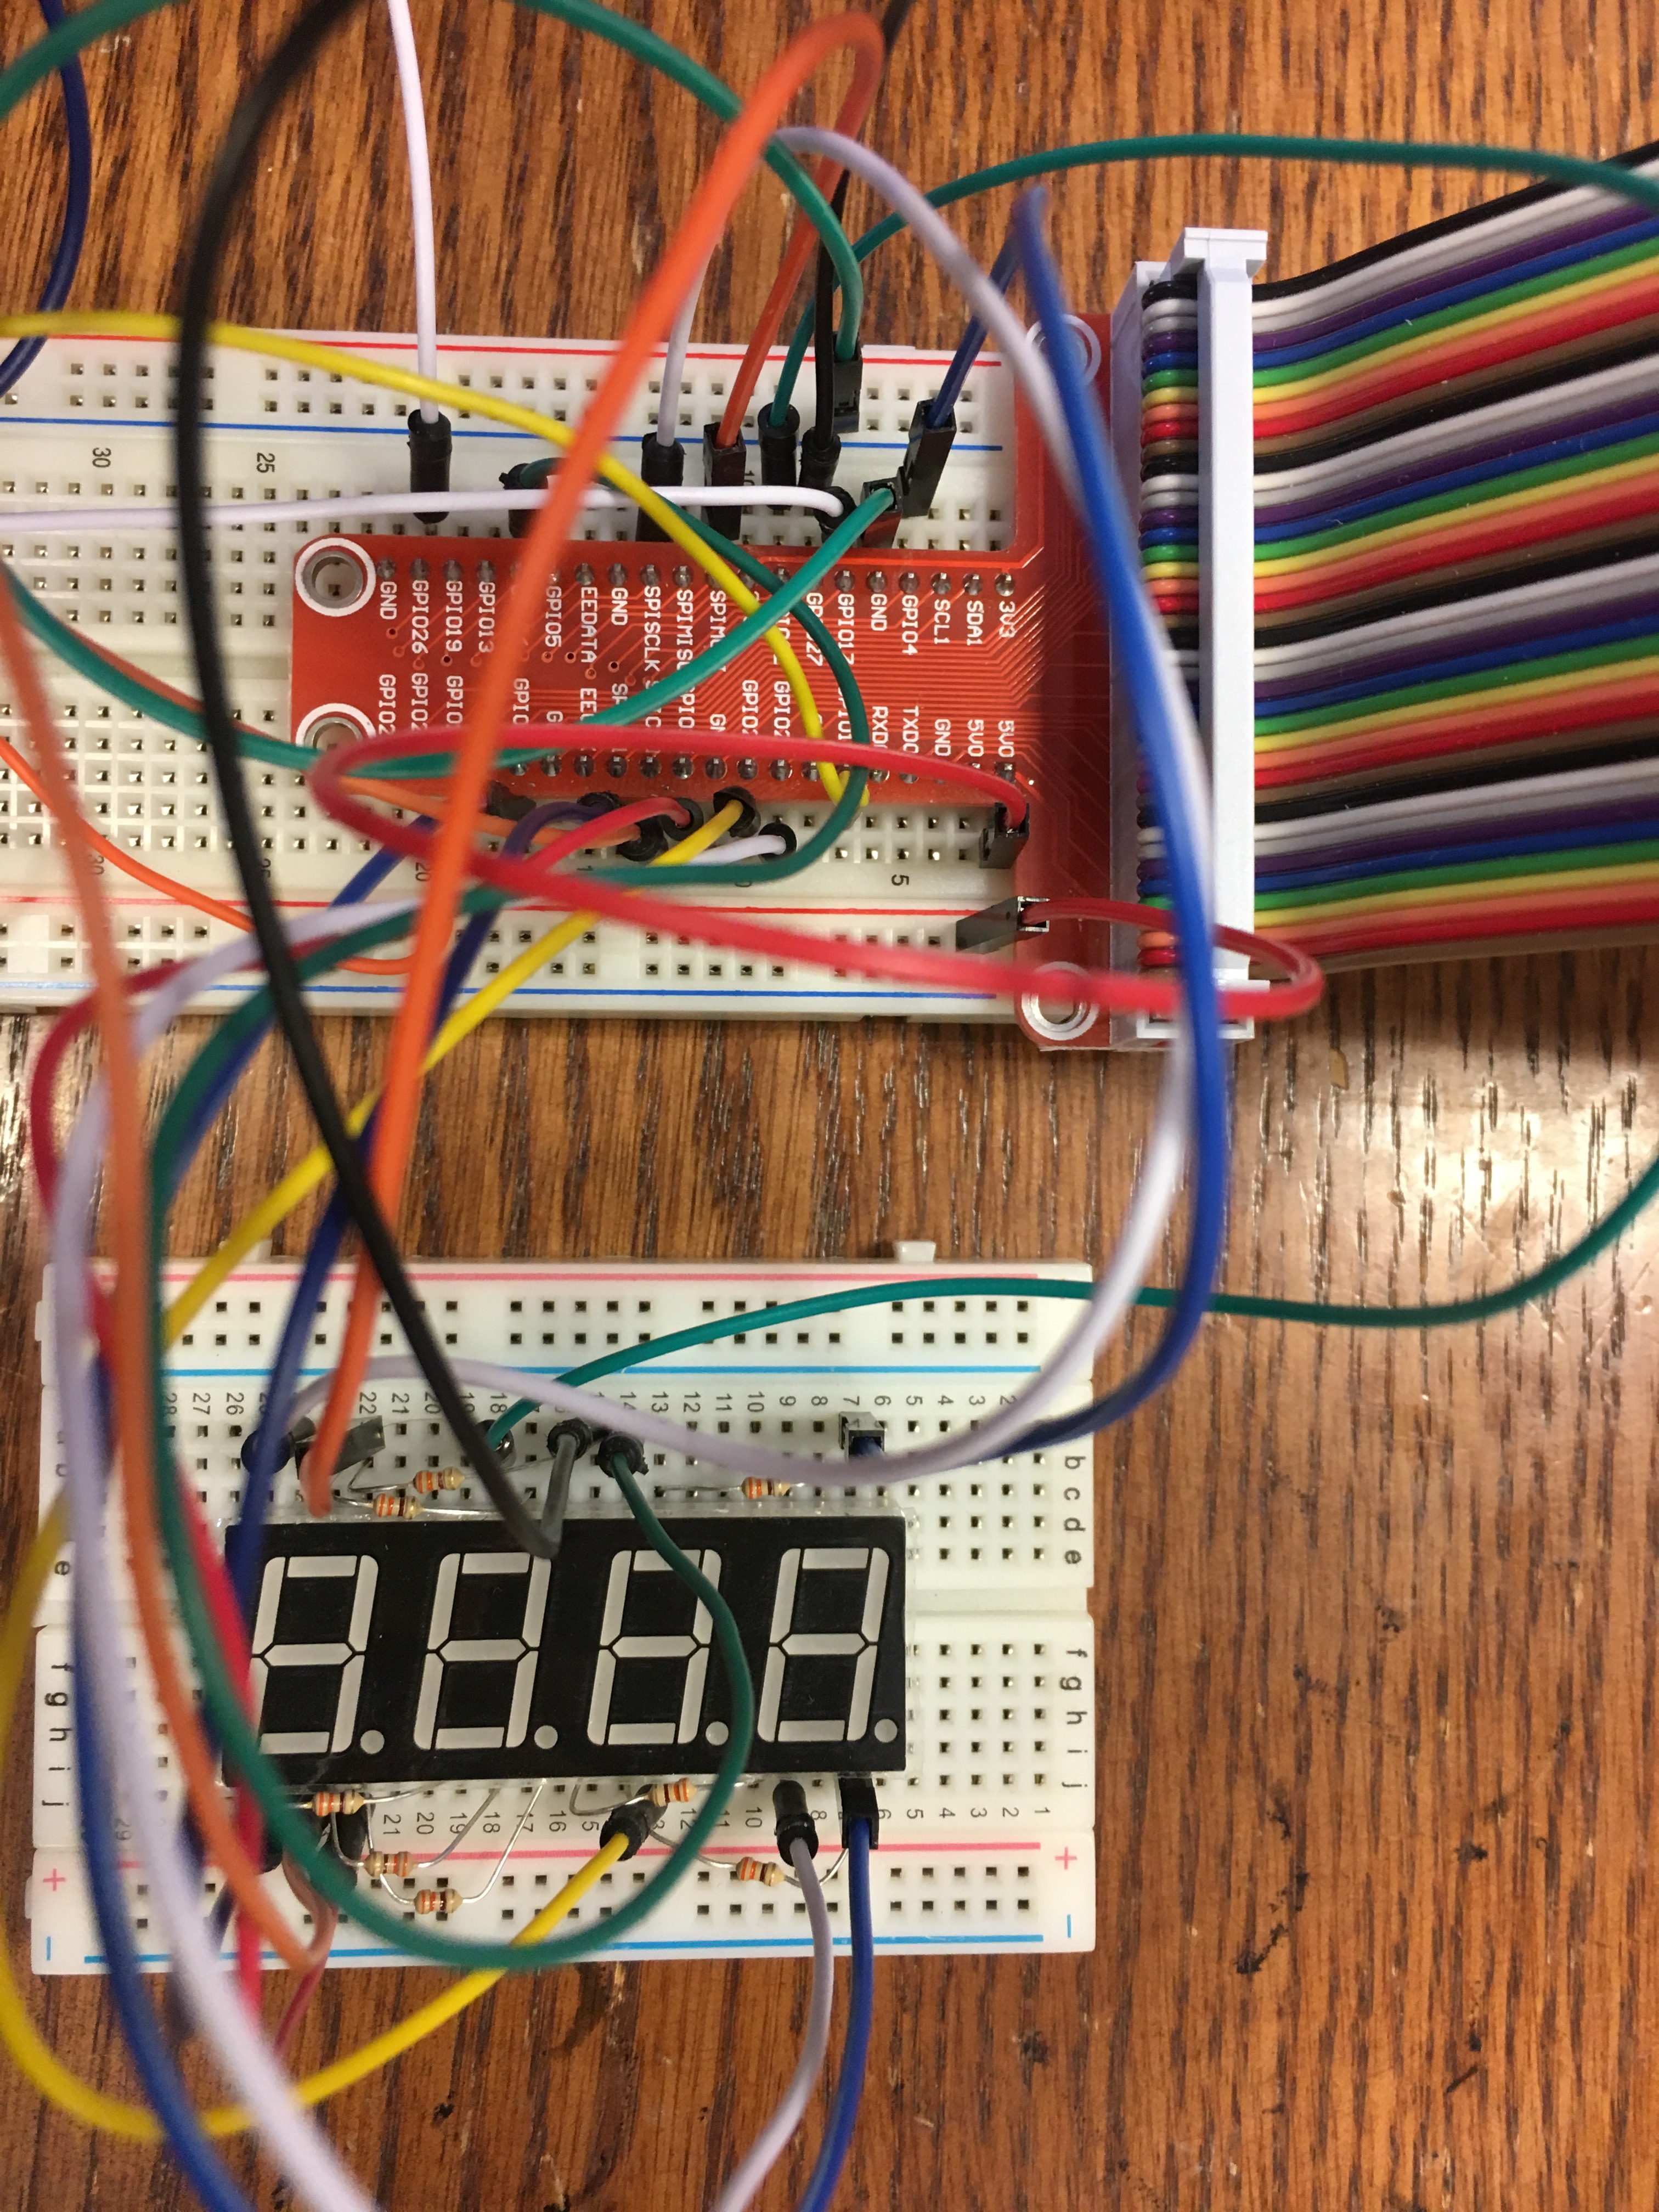
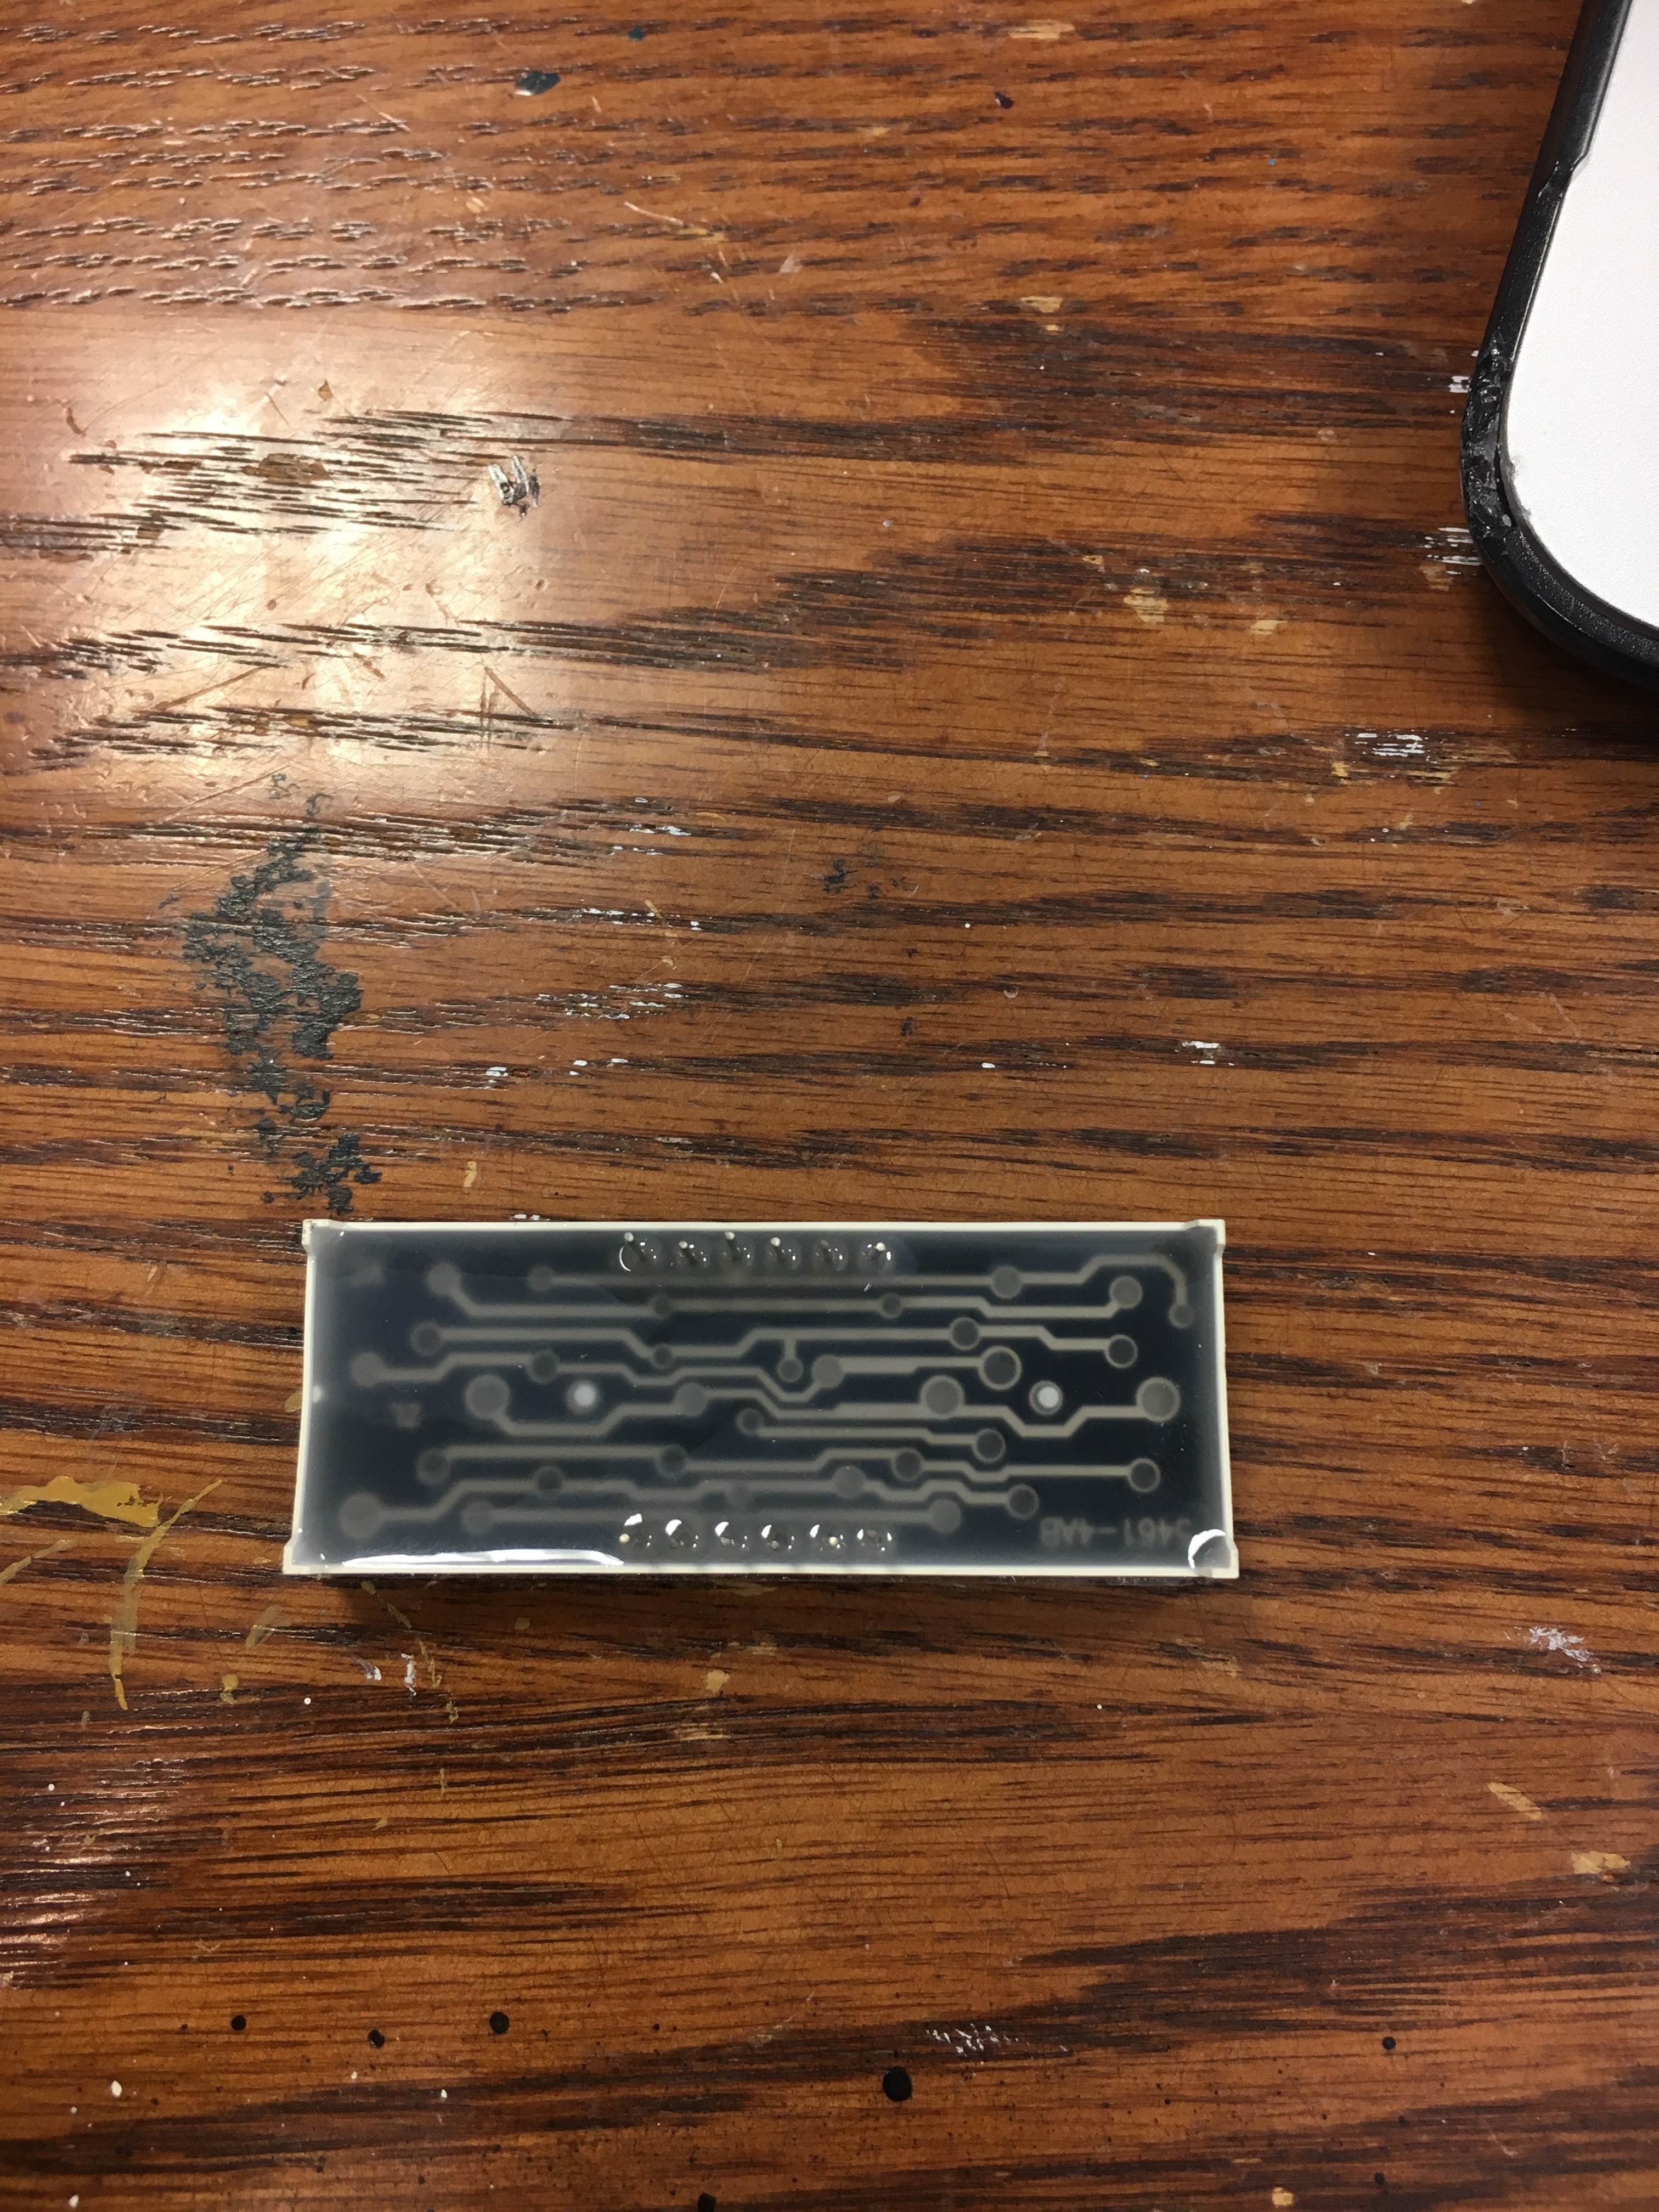
Once, the Rotary Encoder is set up, we can work on wiring the 7 segment LED screen. First, we need to acquire an additional small breadboard as well as the 7 segment itself, eight 330 Ohm resistors, and various wires.
It is very important that the 7 segment is wired correctly as it does NOT have resistors built into it like the rotary encoder does. The seven segment has twelve pins in total. Pins one through six are located on the top row of the 7 segment running from left to right. Pins seven through twelve are located on the bottom row and run right to left. The bottom row is the side of the 7 segment marked with a small dot behind each of the numbers on the 7 segment.
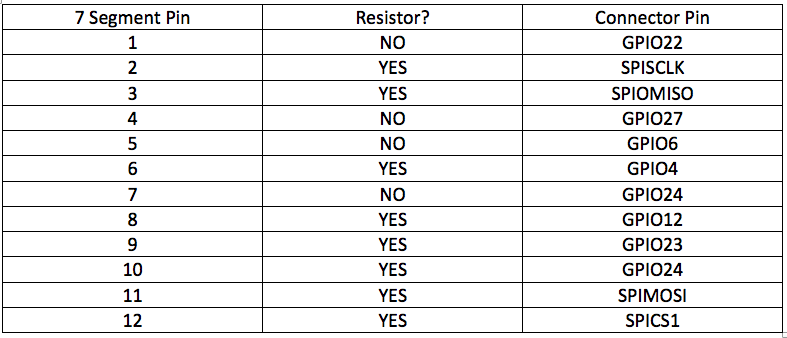
We place the 7 segment on the small breadboard and wire each of the pins as shown in the table above. If a resistor is needed place the resistor between the 7 segment pin and the connector pin. Additionally, make sure none of the resistors touch one another while using the device. This can mess up the flow of electricity.
Wiring an LED
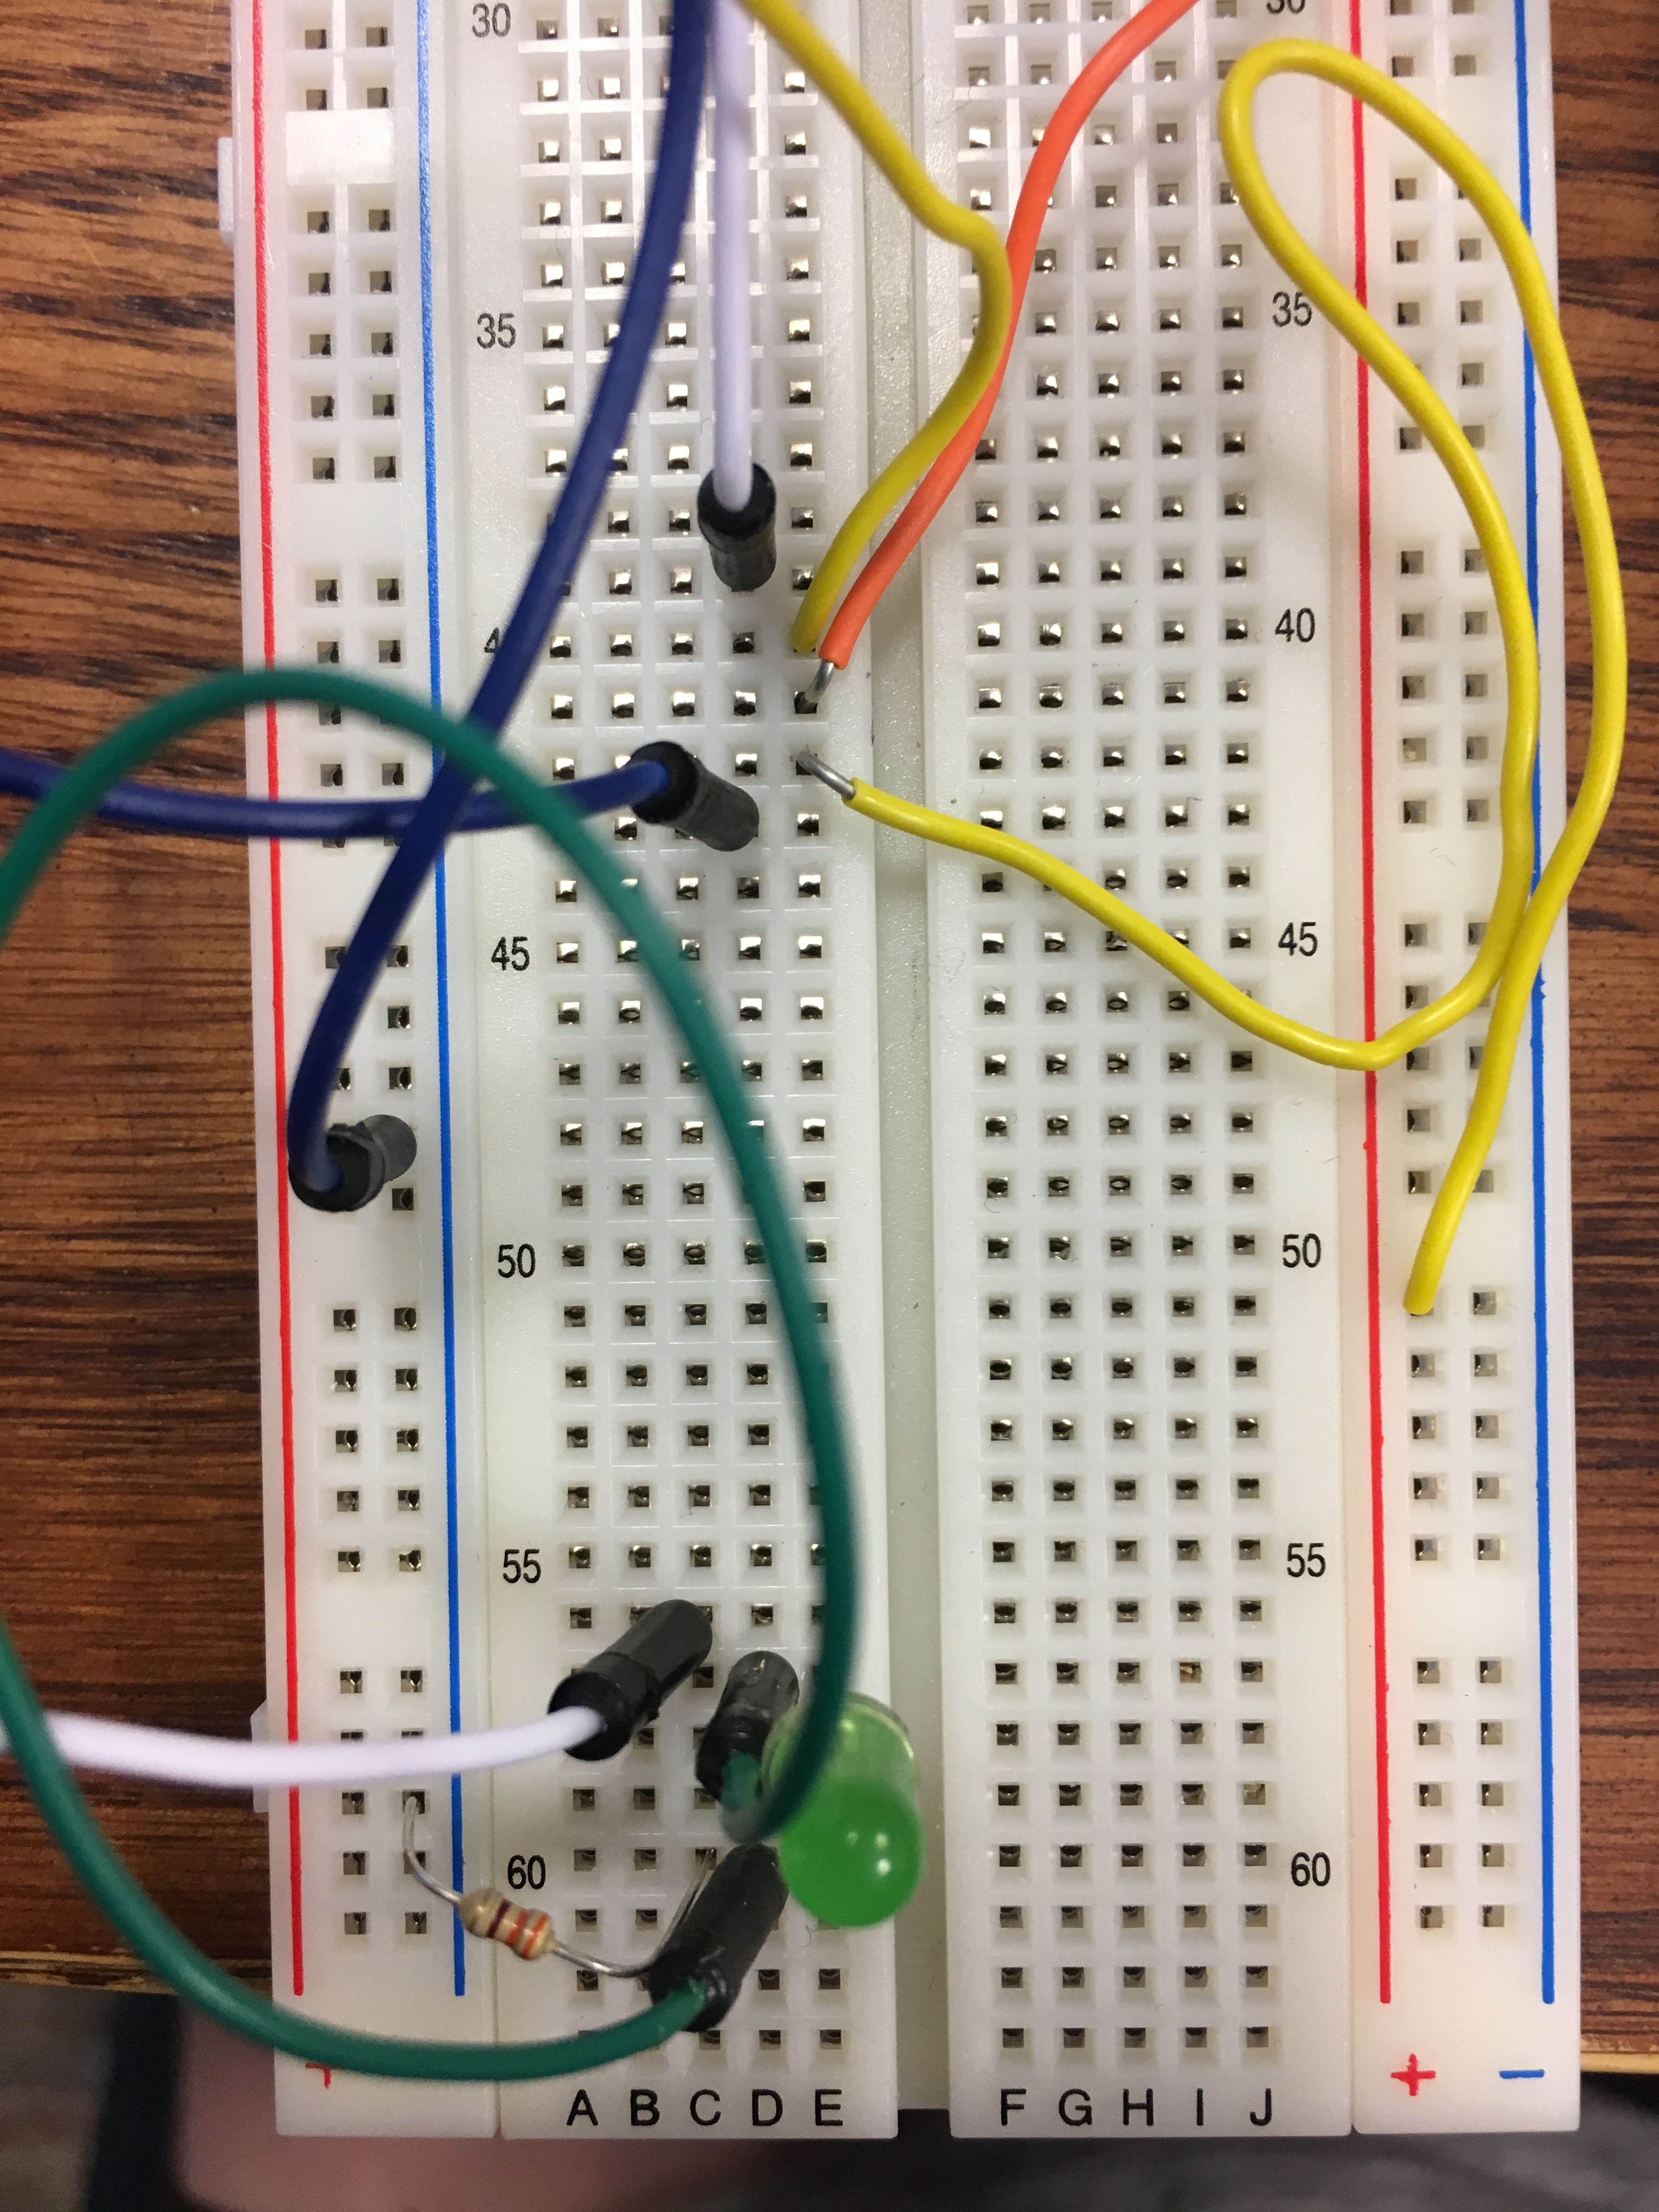
Since we have the rest of the hardware set up now, we can finish by installing the LED. This LED will let us know when the code that we have entered is correct. To do this, we will need an LED, a 330 Ohm resistor, and several wires.
The LED has two pins attached to it. One side is slightly longer than the other. First, we need to connect the longer of the two sides to power. To do this, we connect the longer side through a wire to pin GPIO26 on the connector. This way we can later turn the LED on and off. Then we can connect the shorter of the two sides to ground. However, we must do this through a resistor, so that we do not burn out the LED.
Once, we have done this, we are done with the LED and the hardware overall.
Time for the Application
In order to create the application for this device, one will need access to Python Flask. Flask is an easy to use web development software that can be used to create simple browser-based applications.
To initially download and learn more about Flask follow the link provided: FLASK INFORMATION
To create the application specific to this device. Begin by creating a folder on your Raspberry Pi. This folder should be called "iotapp". Download and drag the "iotapp.py" file into this folder. Additionally, inside this folder, create a second folder called "appFolder". Inside "appFolder" download the "__init__.py", "forms.py", "RE.py", and "routes.py" files provided. Then create another folder called "templates". This new folder should also be inside "appFolder".
HTML Files
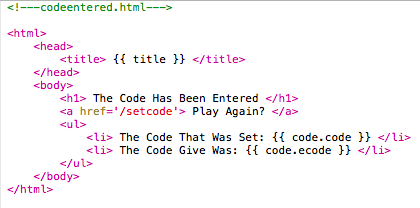
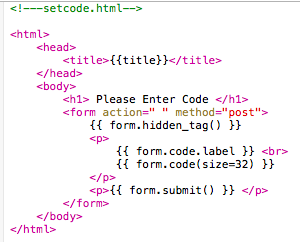
Now that we have the "templates" folder created we can create the HTML files that will format the pages for our application. Create two HTML files: codeentered.html and setcode.html. The code for these files is shown in the pictures above.
Running the Application
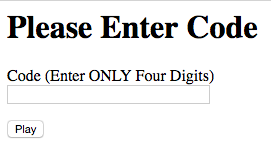

In order to run the application, begin by opening the terminal window. Then SSH into your Raspberry Pi. Navigate to the "iotapp" folder and from the command line, enter the following commands:
$ export FLASK_APP=iotapp.py
$ python -m flask run --host 0.0.0.0
If the application is running correctly, the command line in the terminal should read:
* Serving Flask app "iotapp"
* Running on http://0.0.0.0:5000/ (Press CTRL+C to quit)
In order to reach the application, you should visit the application site by entering the IP address of your Raspberry Pi followed by ":5000/setcode". For example: http://140.141.207.119:5000/setcode
Now the device is entirely up and running. The code game can be played.
In order to stop the device, press CTRL+C in the terminal window and shut down the Pi.
Playing the Game
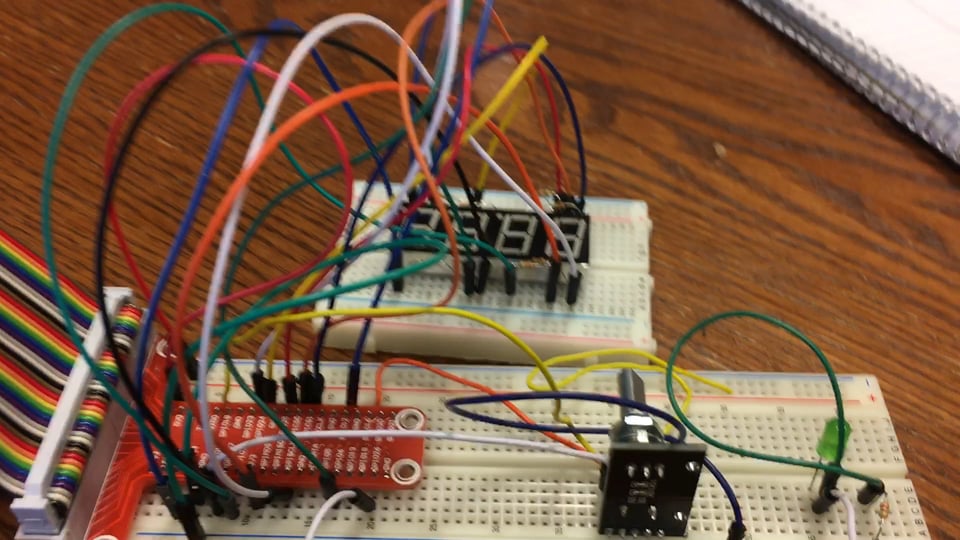
The following is a video of the working device.