Introduction to Turn/Mill
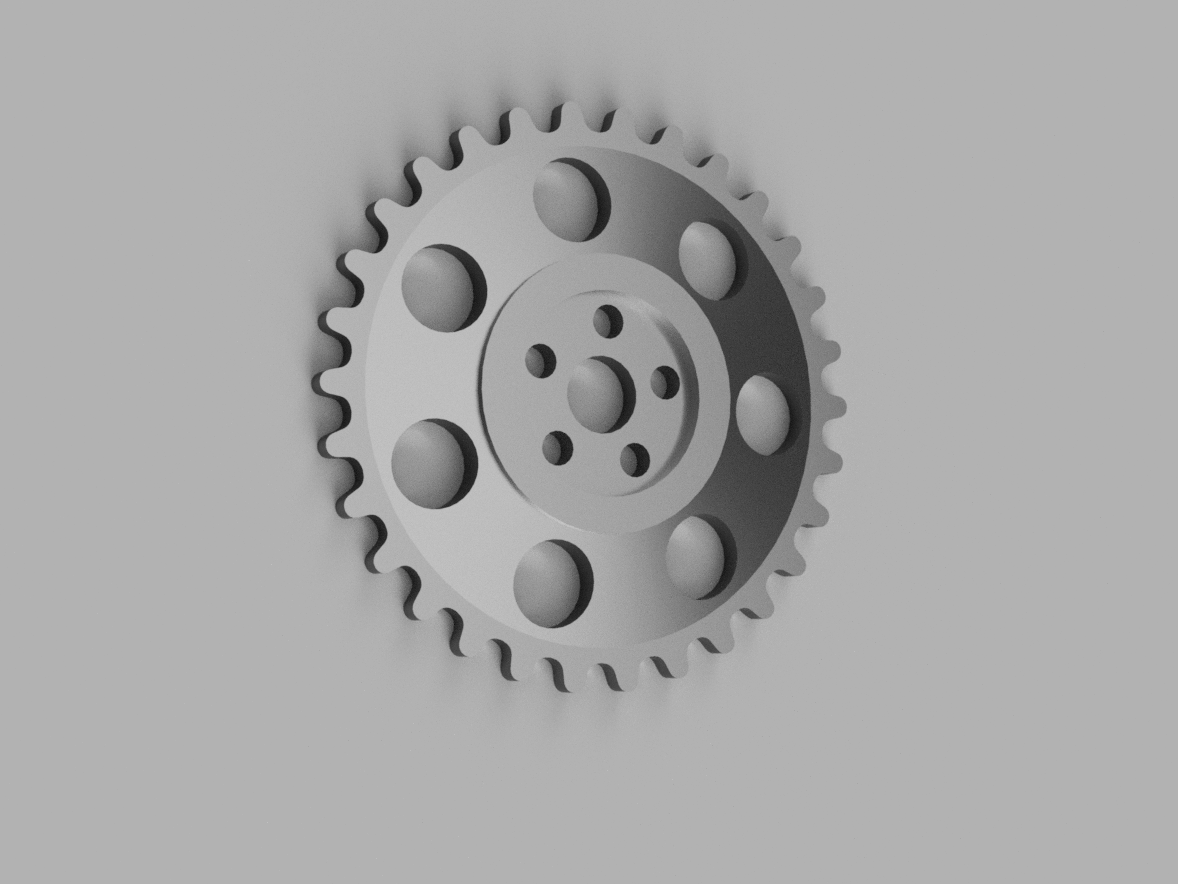
In this lesson, we will be programming a part using live-tooling. You will learn how to use feature recognition to create milling features directly from a solid model.
As in the previous lessons, we will be following our systematic workflow to help guide us through the programming steps.
Import, Stock, Machining Prep

The first step in our workflow is opening a new document. This is where we define what type of machining we will be doing, the units of measurement and the machining configurations.
- Open a new document
- Turn/Mill Setup
- Inch
- None
- My Configuration
With a blank milling document open, we can now import our solid model to program features from.
- Import Turning Part 3.x_t
Once the part is imported, we are met with the Import Wizard, and reach the next step in our Workflow – Stock.
The Import Wizard will help us setup our part, covering our stock step, as well as some of our machining prep.
- Align the Z direction by using ‘Align z with center of a revolved surface’
- Reverse Z if necessary
Step through the next few windows in the import wizard to define the piece of material we will be machining this part from
- Round stock shape
- OD: 9”
- Length: 1”
- Length Offset: 0.03”
- ID: 0
- Aluminum
- Place the Setup at face of the stock and offset the Z so that the setup is even with the part face, as opposed to the stock face.
- Finish
Now that we have completely worked through the import wizard, we are just a few short steps away from creating features.
- Select the ‘basic’ tool crib
- Select the Turn Post 3 post-processor
With our part imported, stock setup, and machining details accounted for, we are ready to start programming.
Create Features

- Create a Face Feature
- Thickness 0.03”
- Inner Diameter 0
- Outer Diameter 9”
- Press Next
- Position at Z = 0
- Press Finish
- Create a Turn Feature
- Geometry from revolved boundary
- Chain curve from geometry
- Extend Curve to stock edge
- New turn feature
- Offset location: 0

- Create a new Turn/Mill feature
- ‘Extract with feature recognition’
- Side Feature
- ‘Along the setup z axis’
- ‘Automatic feature recognition’
- Press Next, any potential side features should be highlighted
- Click on the side feature representing the gears
- Press Finish

- Create a new Pocket Feature
- ‘Extract with Feature Recognition’
- Pocket feature
- ‘Along the setup z-axis’
- ‘Automatic Recogntion’
- Select the recognized pocket feature
- Finish
Now with the center of our part machined, let’s create a few additional pocket features to machine the larger holes around the OD of our part.
- Create another new Pocket Feature
- ‘Extract with Feature Recognition’
- Pocket feature
- ‘Along the setup z-axis’
- ‘Select side surfaces’
- Select the cylinder walls that make up these seven pockets
- Leave the remaining dimensions/strategies as default
- Finish
· Create a new Hole pattern
- Create a new Hole pattern
- Select ‘Extract with feature recognition’
- Select ‘Hole’ and then press Next
- Select ‘Along the setup z axis’ and then Next
- Select ‘Recognize and construct multiple holes’
- Select ‘Exclude holes with diameter:” and greater than 0.75”
- Press Next
- Press ‘Select all’
- Finish
This will create a pattern feature containing all the holes with a diameter less than 0.75.
Now with the front of our part completely programmed, let’s wrap up our program by parting off our part.
- Create a Cutoff Feature
- Cutoff from Dimensions
- OD: 9”
- ID: 0”
- Width: 0.25”
- Locate the feature on the back edge of the solid model
At this point, we have programmed all the features necessary to machine this model accurately, and are ready to simulate our results and make any necessary revisions.
Simulate, Revise

Before we run our first simulation, we need to correct an issue. It appears that our cutoff feature was unable to find a tool.
- Select tool for the cutoff operation
- Open the cutoff feature properties window
- Navigate to the tools tab of the cutoff operation
- Edit the properties of the 'SW_Cut_250RH' tool
- Length: 8"
- Cut Depth: 5"
- OK
- Set tool as new override.
Now, let's simulate the Features we just created, make any necessary changes, and simulate our final code.
- Run a Centerline Simulation
- Run a 3D Simulation
Everything is looking good so far, but let's make a few small changes to clean up the machining of this part, and account for some common real-world scenarios.
As we've done in the past, let's extend out milling features to ensure the best possible surface finish on our part.
- Adjust the depth of the side feature
- Open the side1 properties window
- Type an additional '+0.03' in the depth box
- Repeat this process for the remaining milling features
Finally let’s add a thread to our small off-center holes by changing the hole type.
- Alter the hole type for the patterned hole feature to a threaded hole
- Open the hole1 properties window
- Change the hole type to 'Tapped Hole'
- Standard Thread: 0.500-13 UNC
- Apply and OK
Before moving on, take some time to customize each feature to your own liking.
- Run a final 3D Simulation
NC Code

With our final simulation run, our NC Code has been generated and is ready to be sent to the machine.
- Select the Show NC icon
 to open our NC code in the Results window.
- Select the Save NC
 icon to save the displayed code.
- Save the NC code to your desired directory.
Note: This exercise is for educational purposes. The post-processor used in this exercise is a generic post-processor used for training that will likely not work for your machine. Do not attempt to run any code generated in this exercise.