Introducing the Crumb Buster Mini Vacuum
by Kevr102 in Workshop > 3D Printing
1643 Views, 11 Favorites, 0 Comments
Introducing the Crumb Buster Mini Vacuum
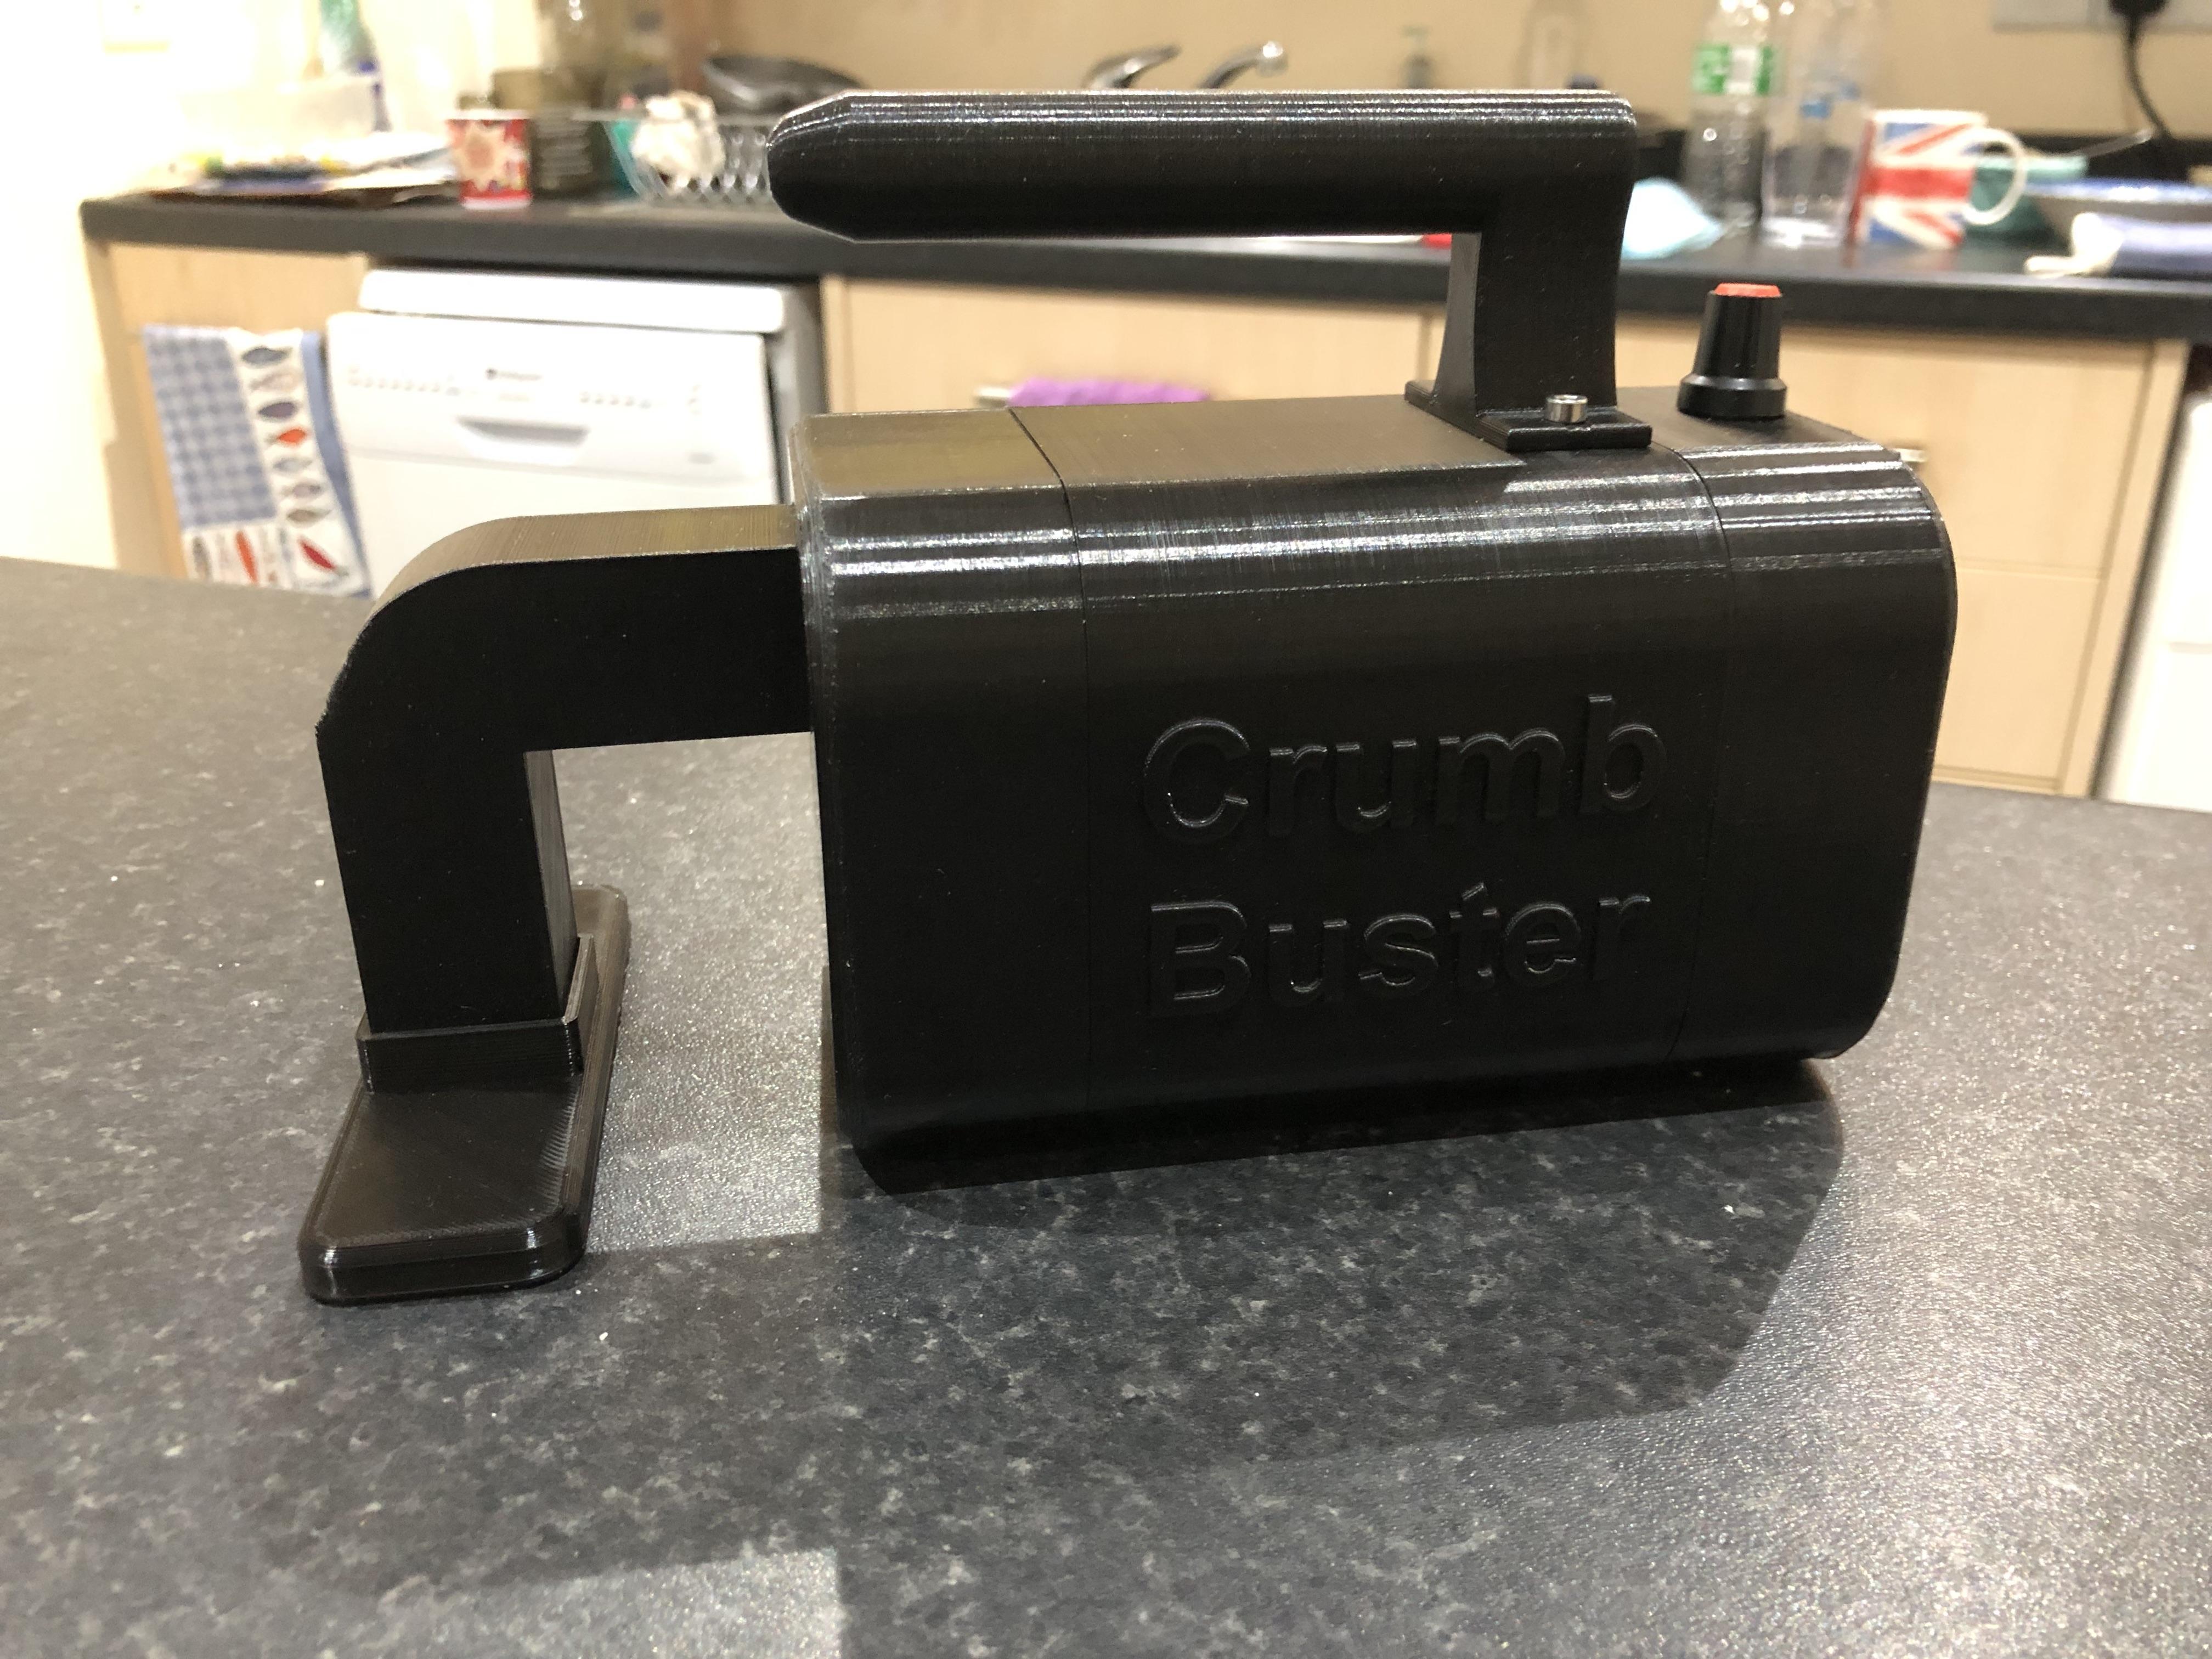
This is an Instructable where I’ve used my loaf! This Mini Vacuum "The Crumb Buster" has one purpose and that purpose is to vacuum up bread crumbs.
When it comes to Bread, my Wife and I favour the sliced wholemeal variety, with this type of bread comes crumbs, it produces a lot more crumbs than the usual thin sliced varieties and these crumbs seem to get everywhere, even more so when toasted, there is no easy way to clean these up, the normal route would be with a hand vacuum(which we dont have at this moment in time :)) wipe with a cloth into the hand or dustpan and brush, they just seem to ricochet off anything and there no matter how hard you try, you think you are there, look again only to find more crumbs, our worktop is like a black onyx style, and the flooring is also black laminate which doesn't help so I need a solution.
I looked online like you do and most small vacuums are not that small, so my thoughts are, why not just make a bespoke one, I have a 3D printer, motors, switches etc etc, and I understand the basic principle of a vacuum so there is nothing to stop me.
Onto Fusion 360:
Supplies
3D Printer
1.75 PLA
12-24v 22000rpm DC Motor(Amazon)
Chassis Barrel Plug
10amp Motor Speed Control(Amazon)
12v 5A Wall Power supply
CA Glue
Screen mesh or similar for the filter
3mm Allen head bolts washers and screws
Fusion 360 Crumb Buster Design
.png)
.png)
.png)
.png)
.png)
.png)
.png)
.png)
.png)
.png)
.png)
.png)
.png)
.png)
.png)
.png)
.png)
.png)
.png)
.png)
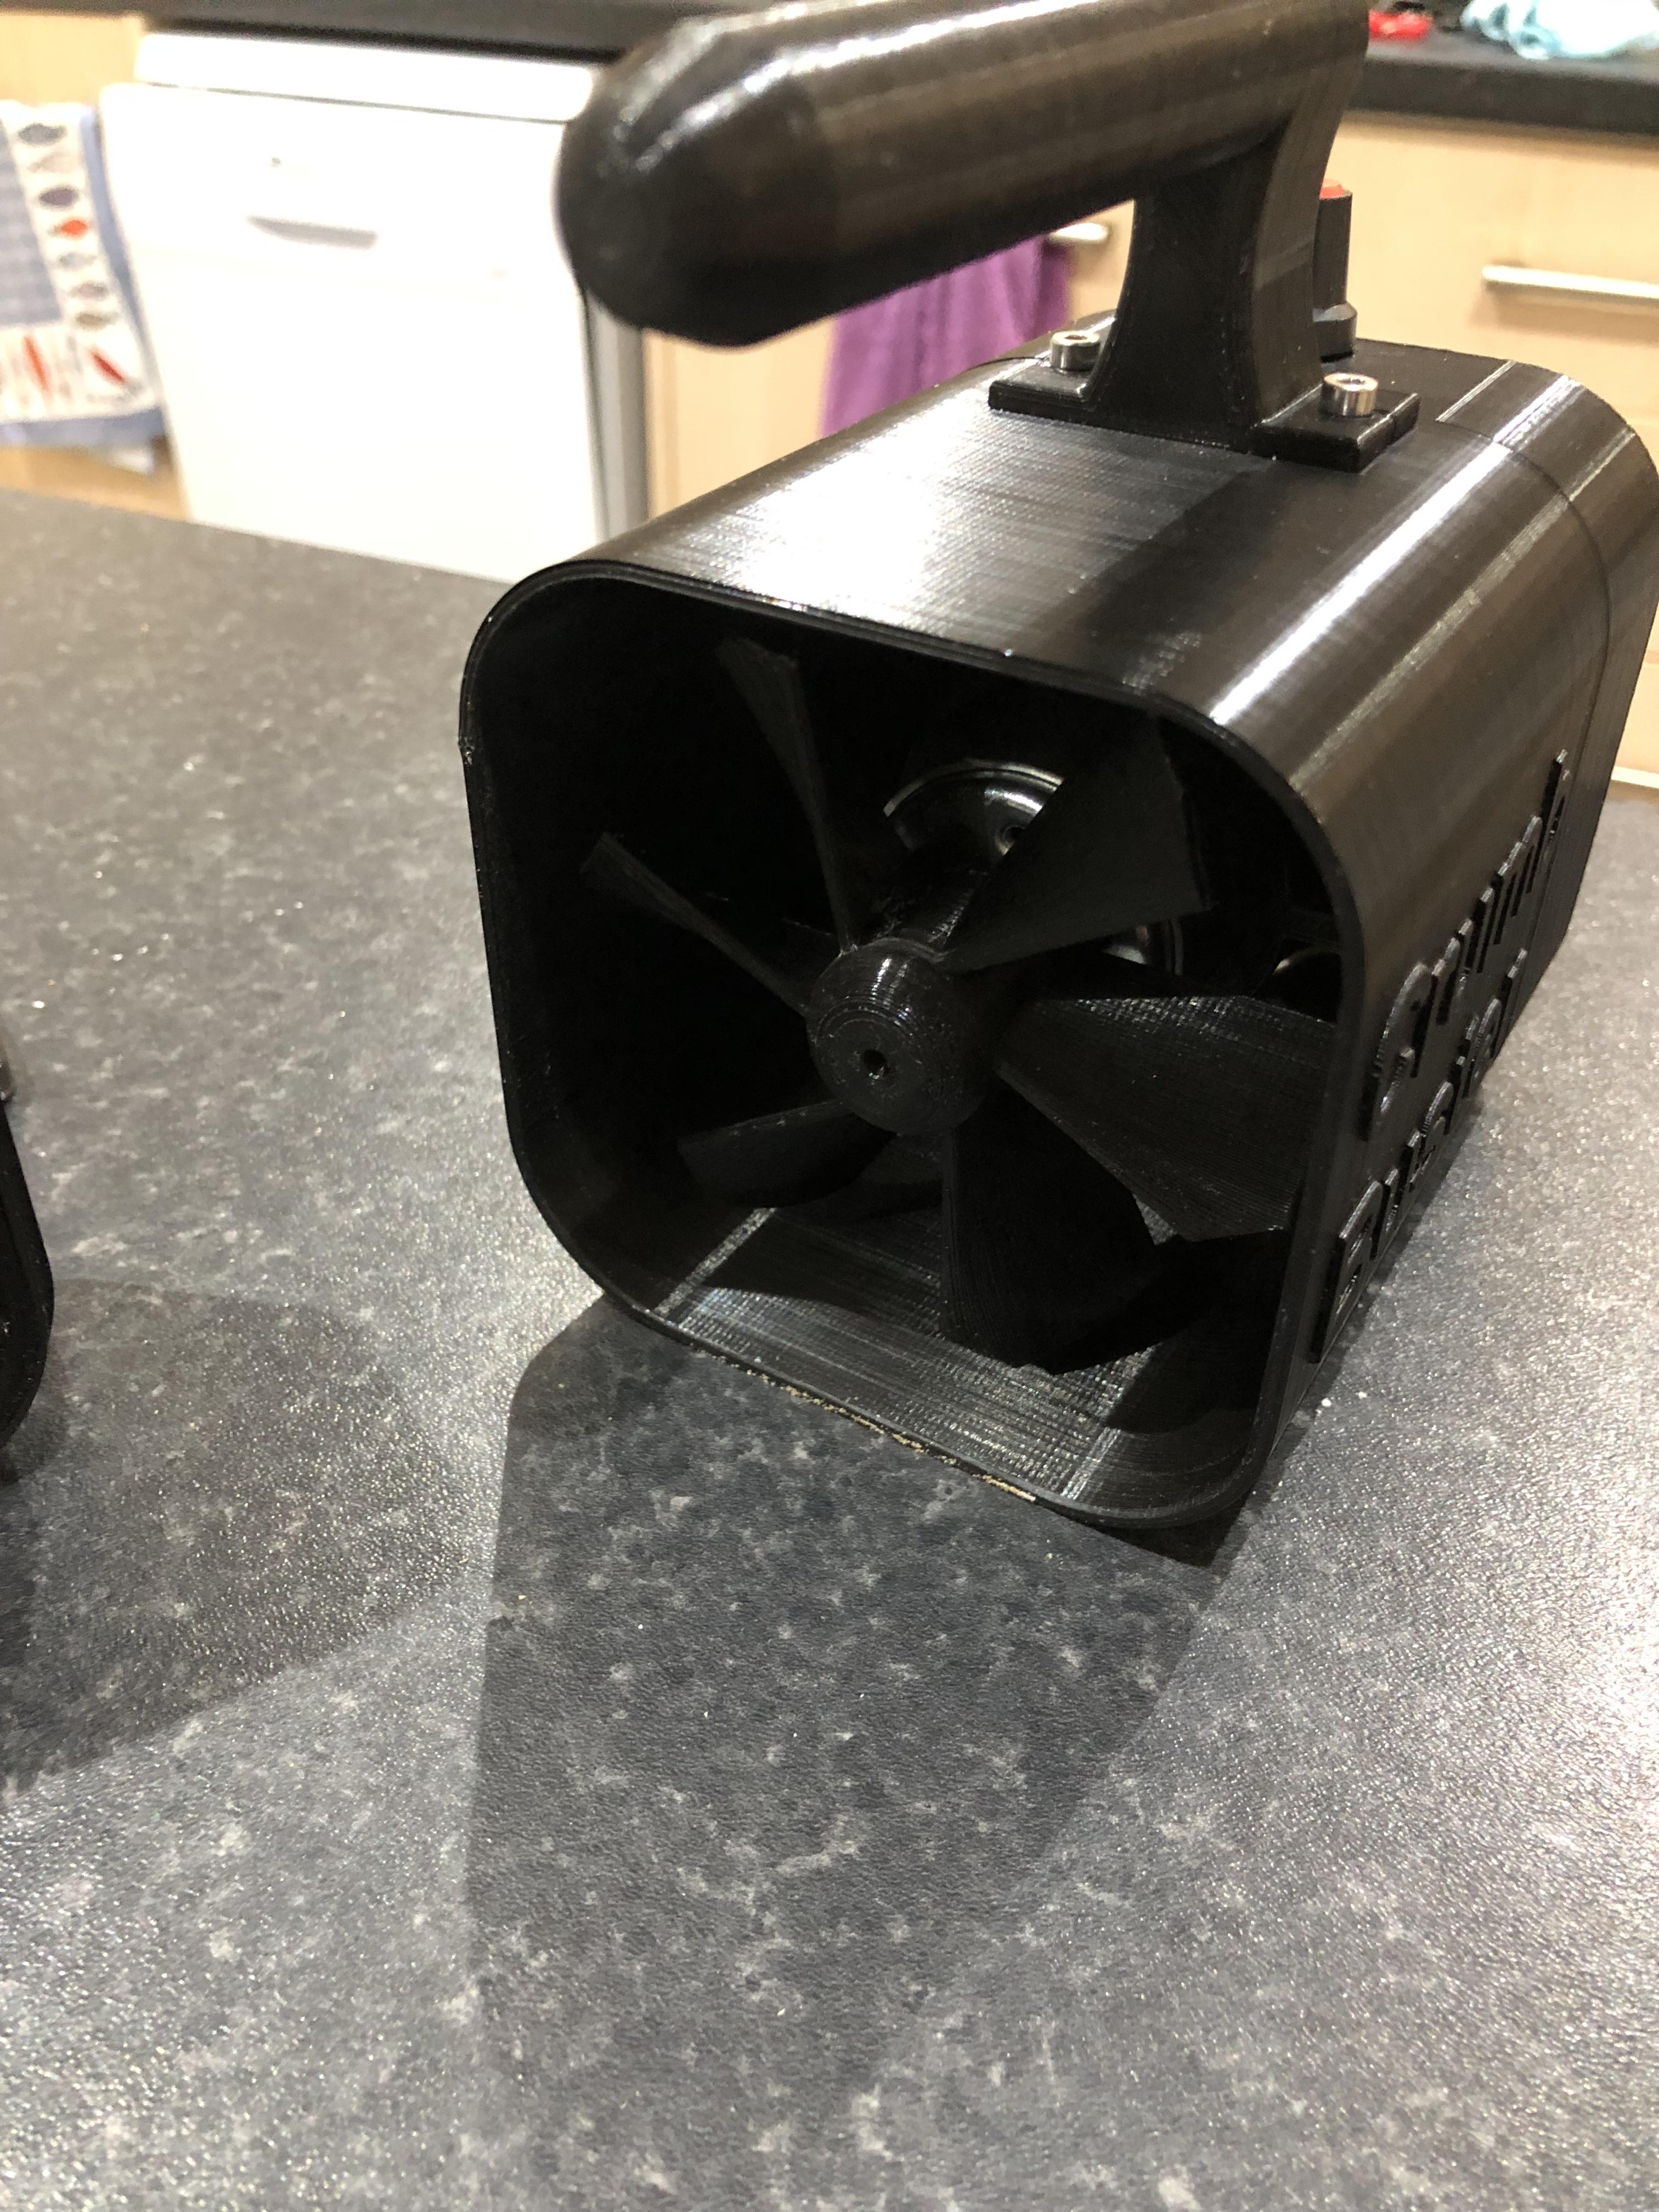
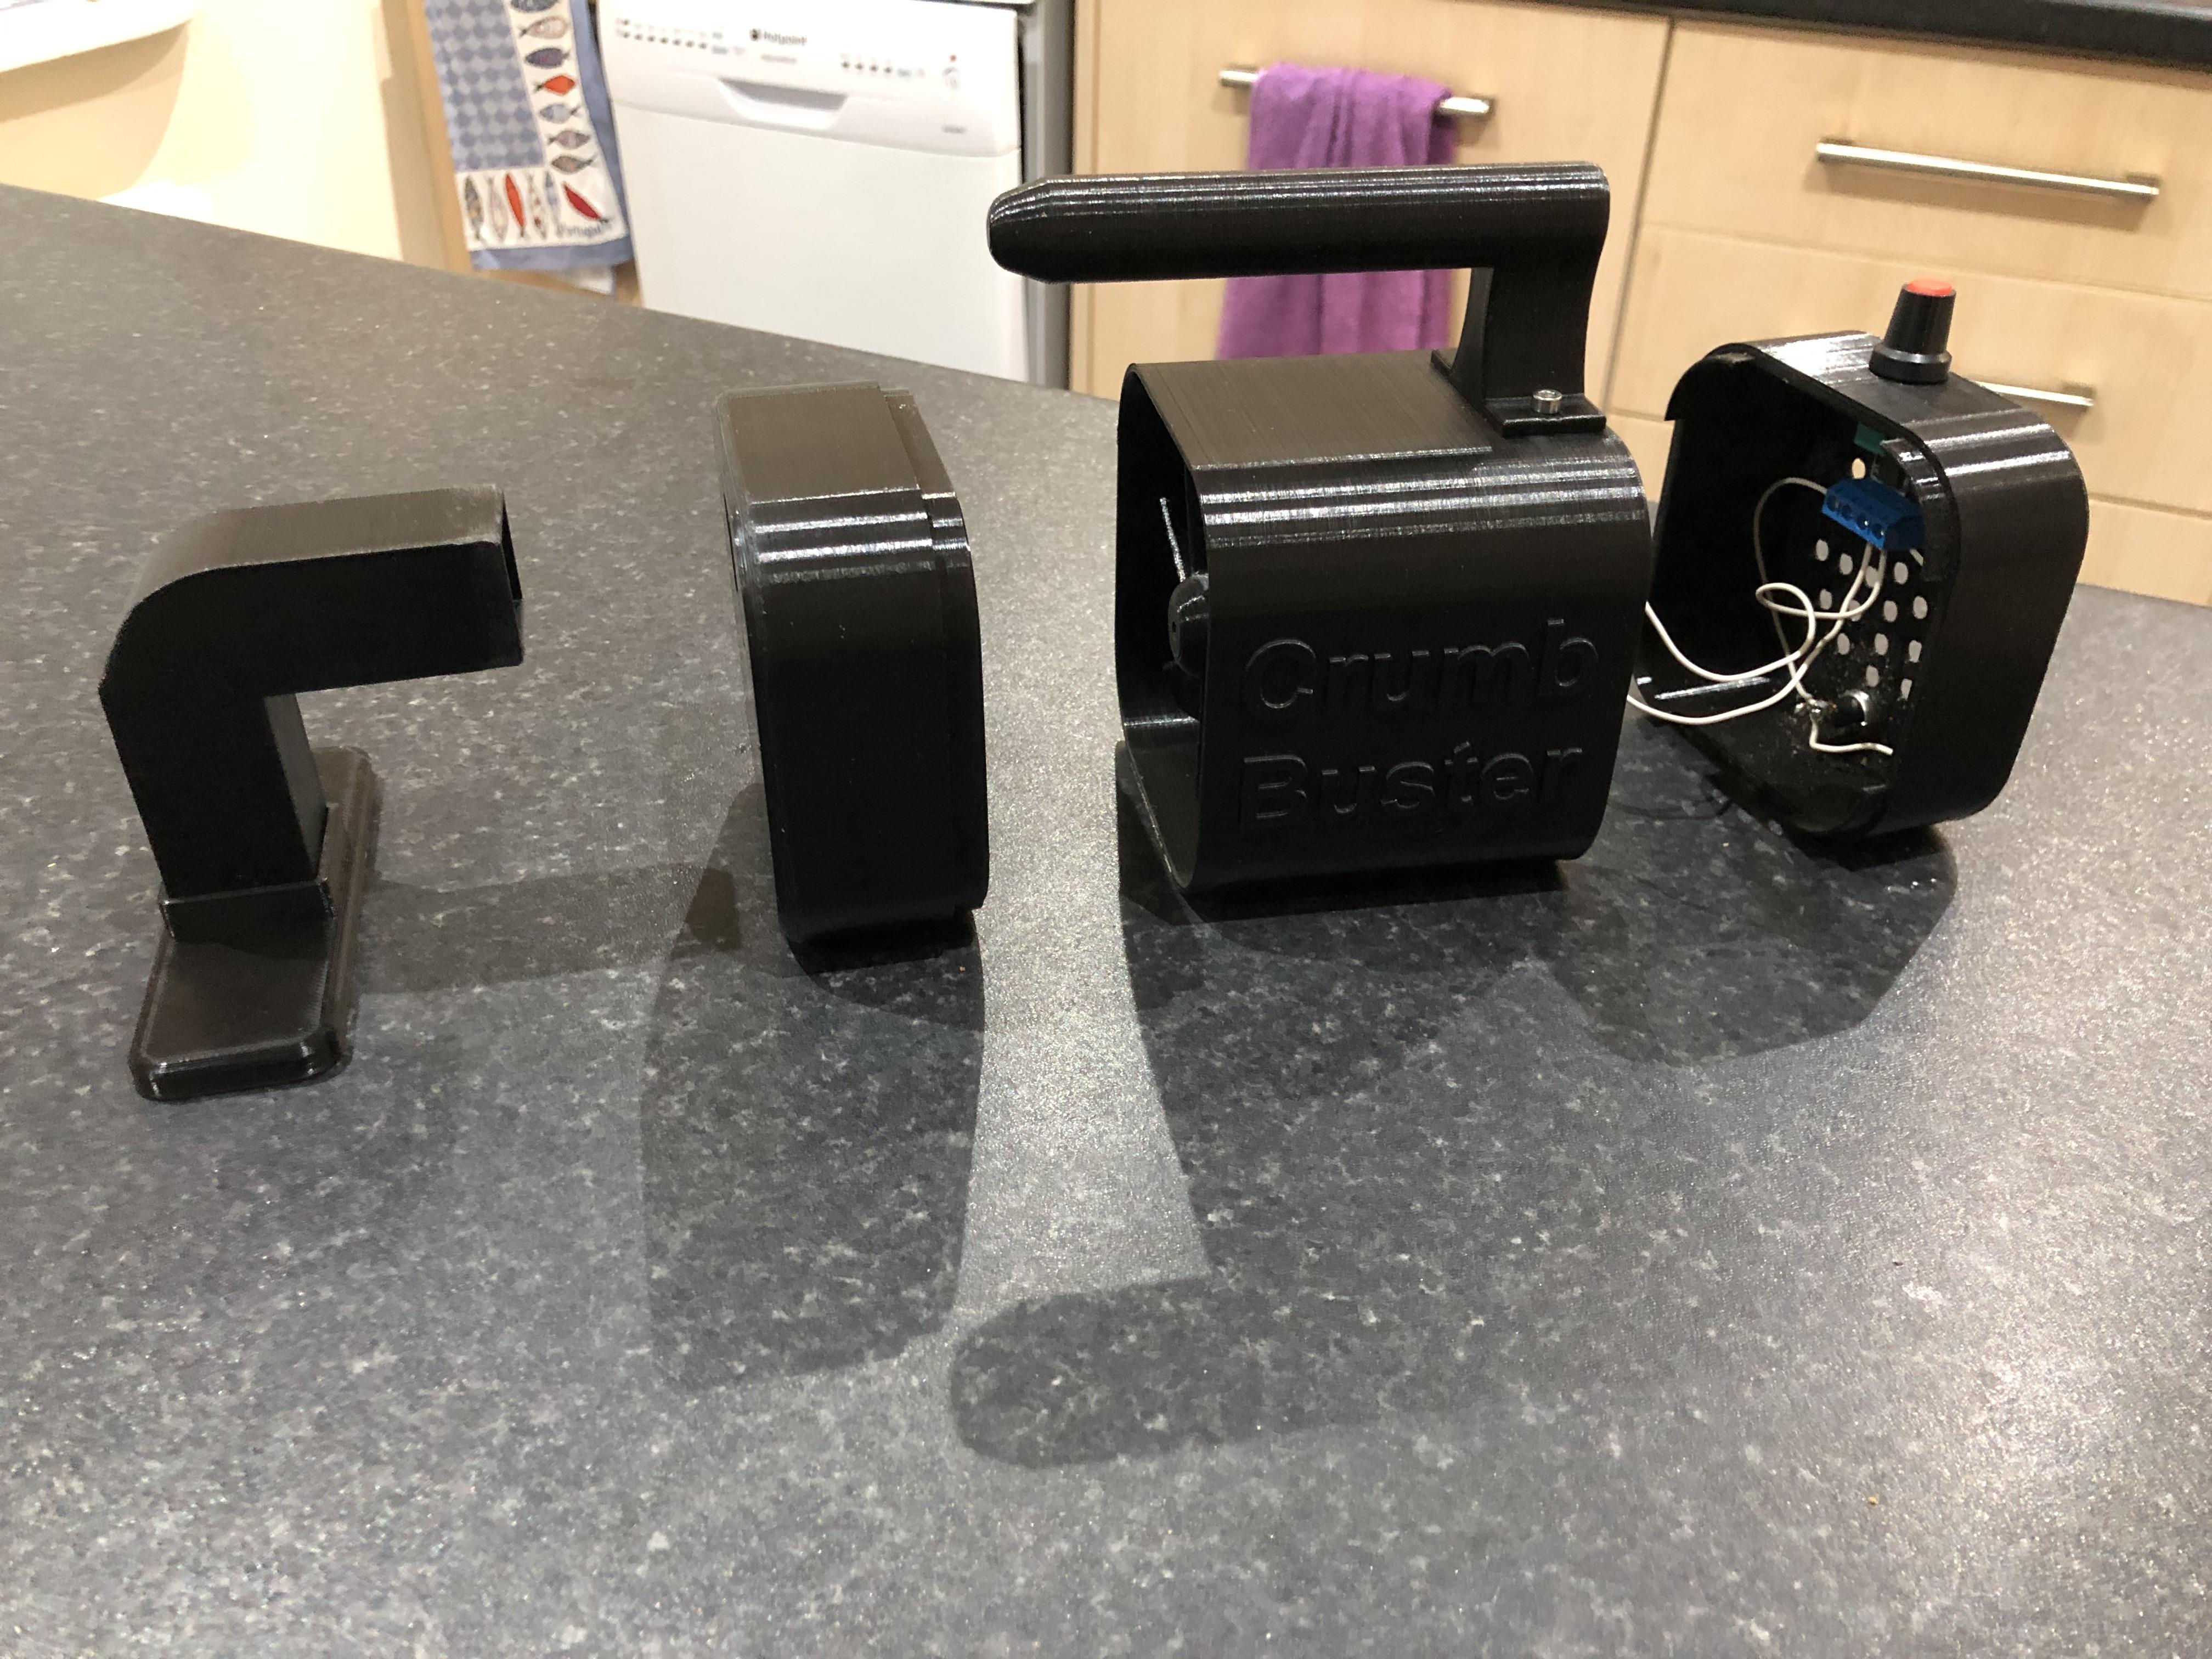
The 2 main ingredients of this Vacuum are the chamber and the fan, and the collector to harvest the crumbs, I would like this to be removeable to dispose of the contents with ease.
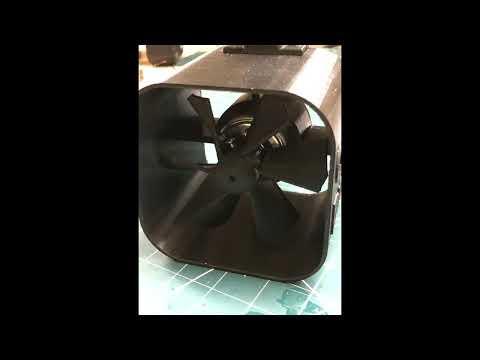
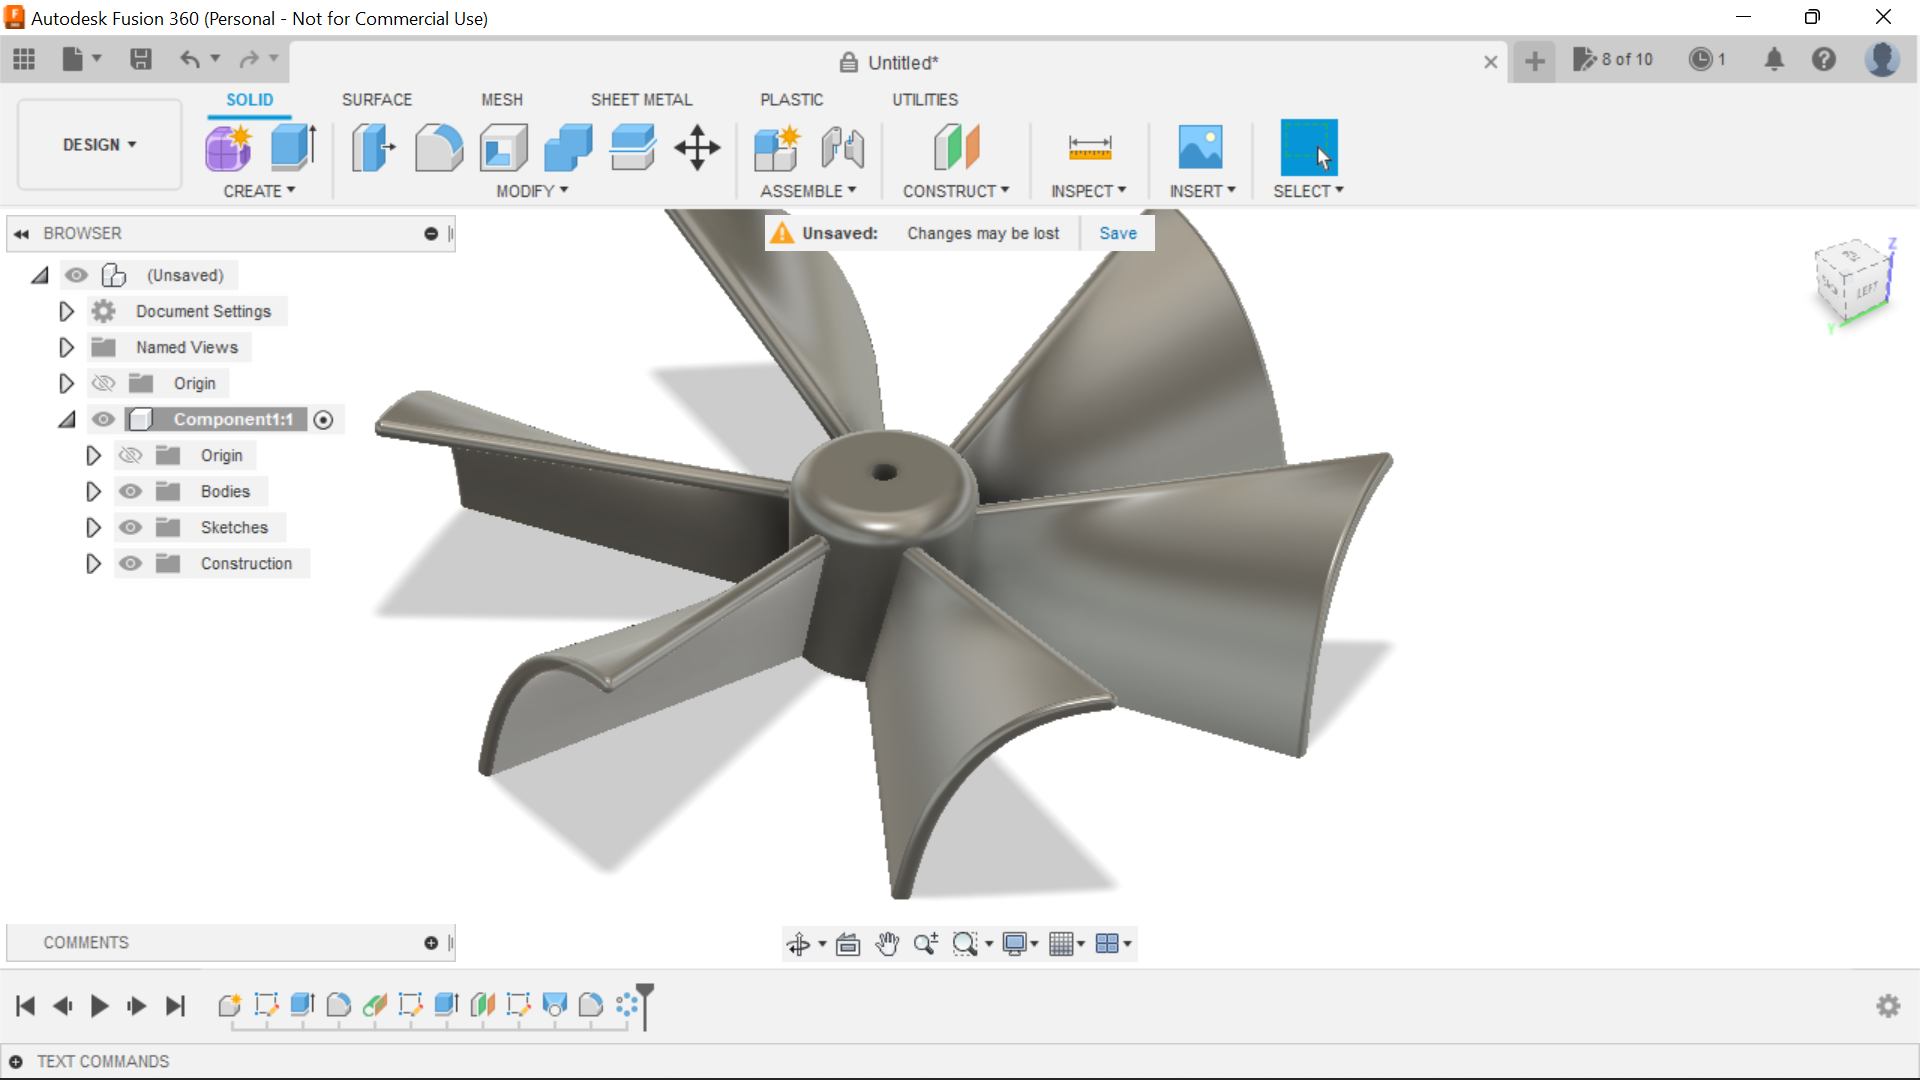
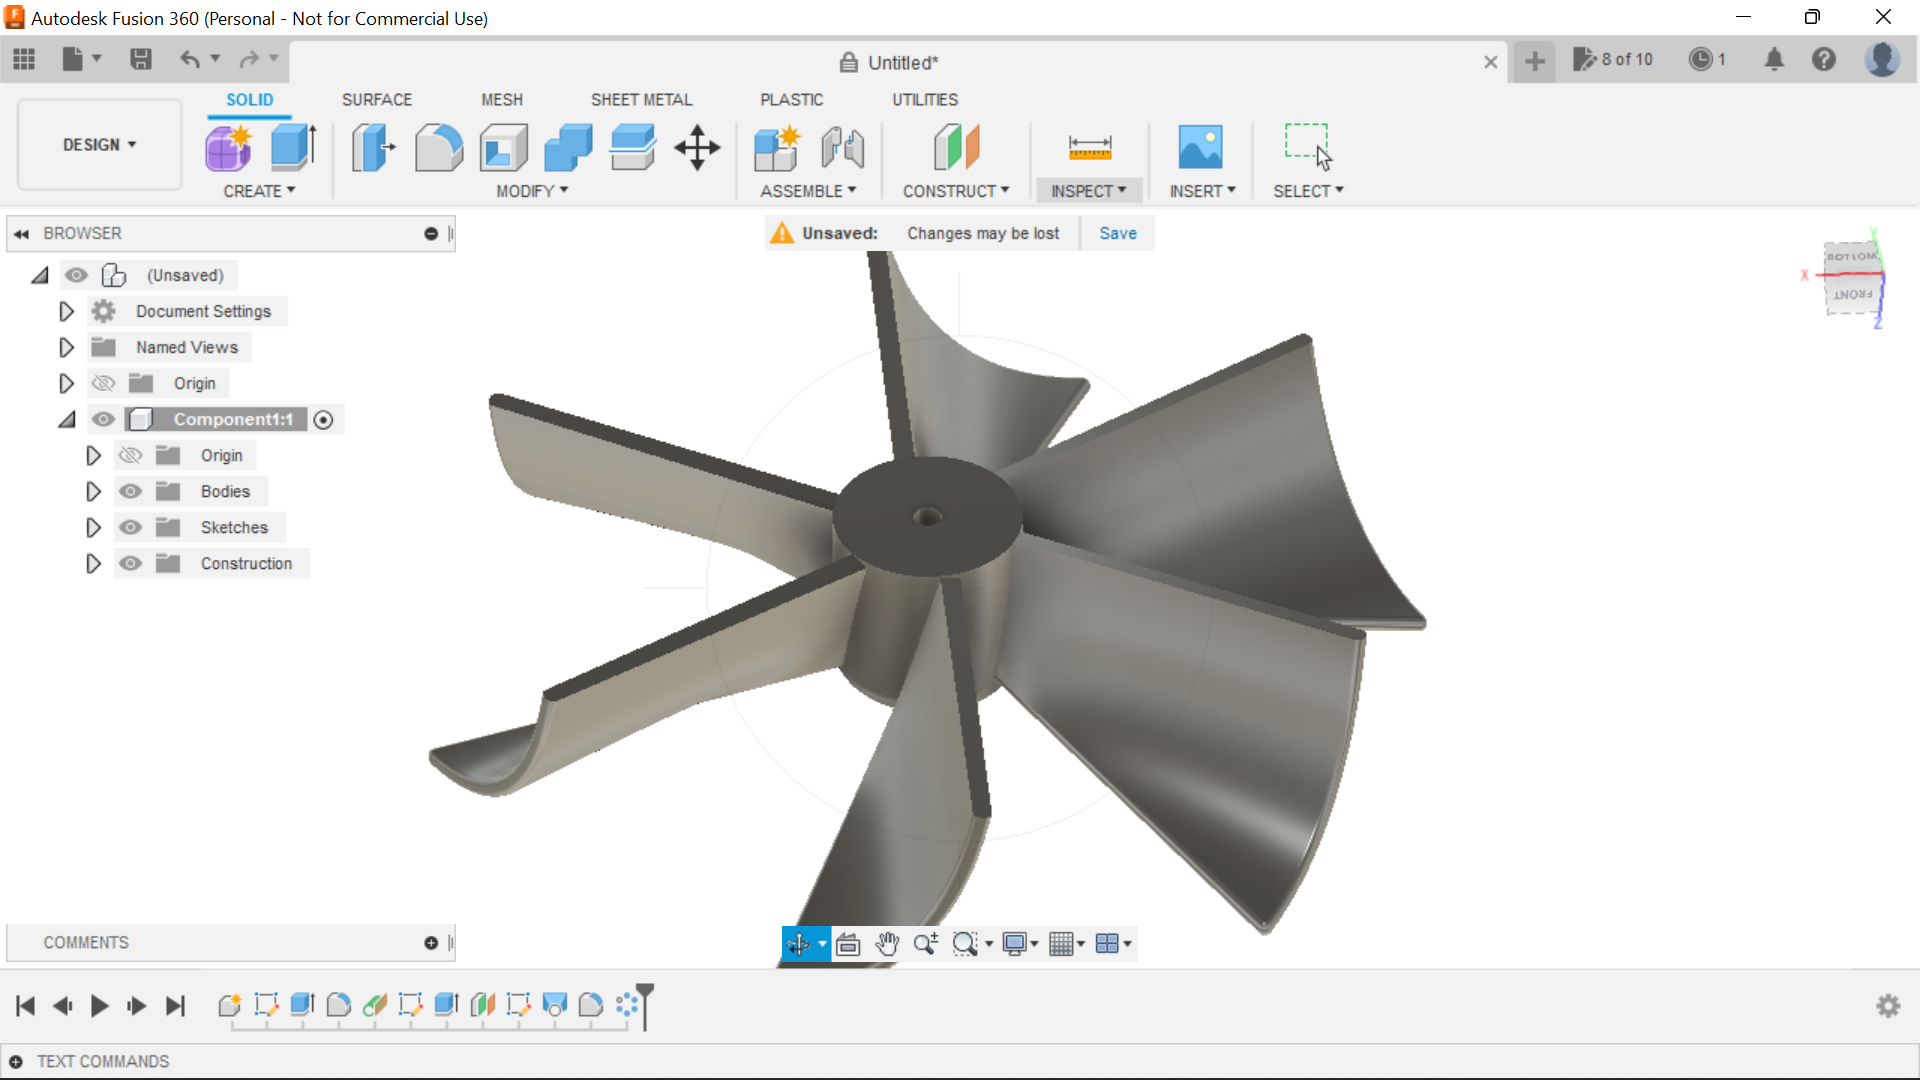
The fan will be designed first, and the blades will need a good sweep to create good airflow at full revs, and getting the direction of the blades to motor rotation will be key.
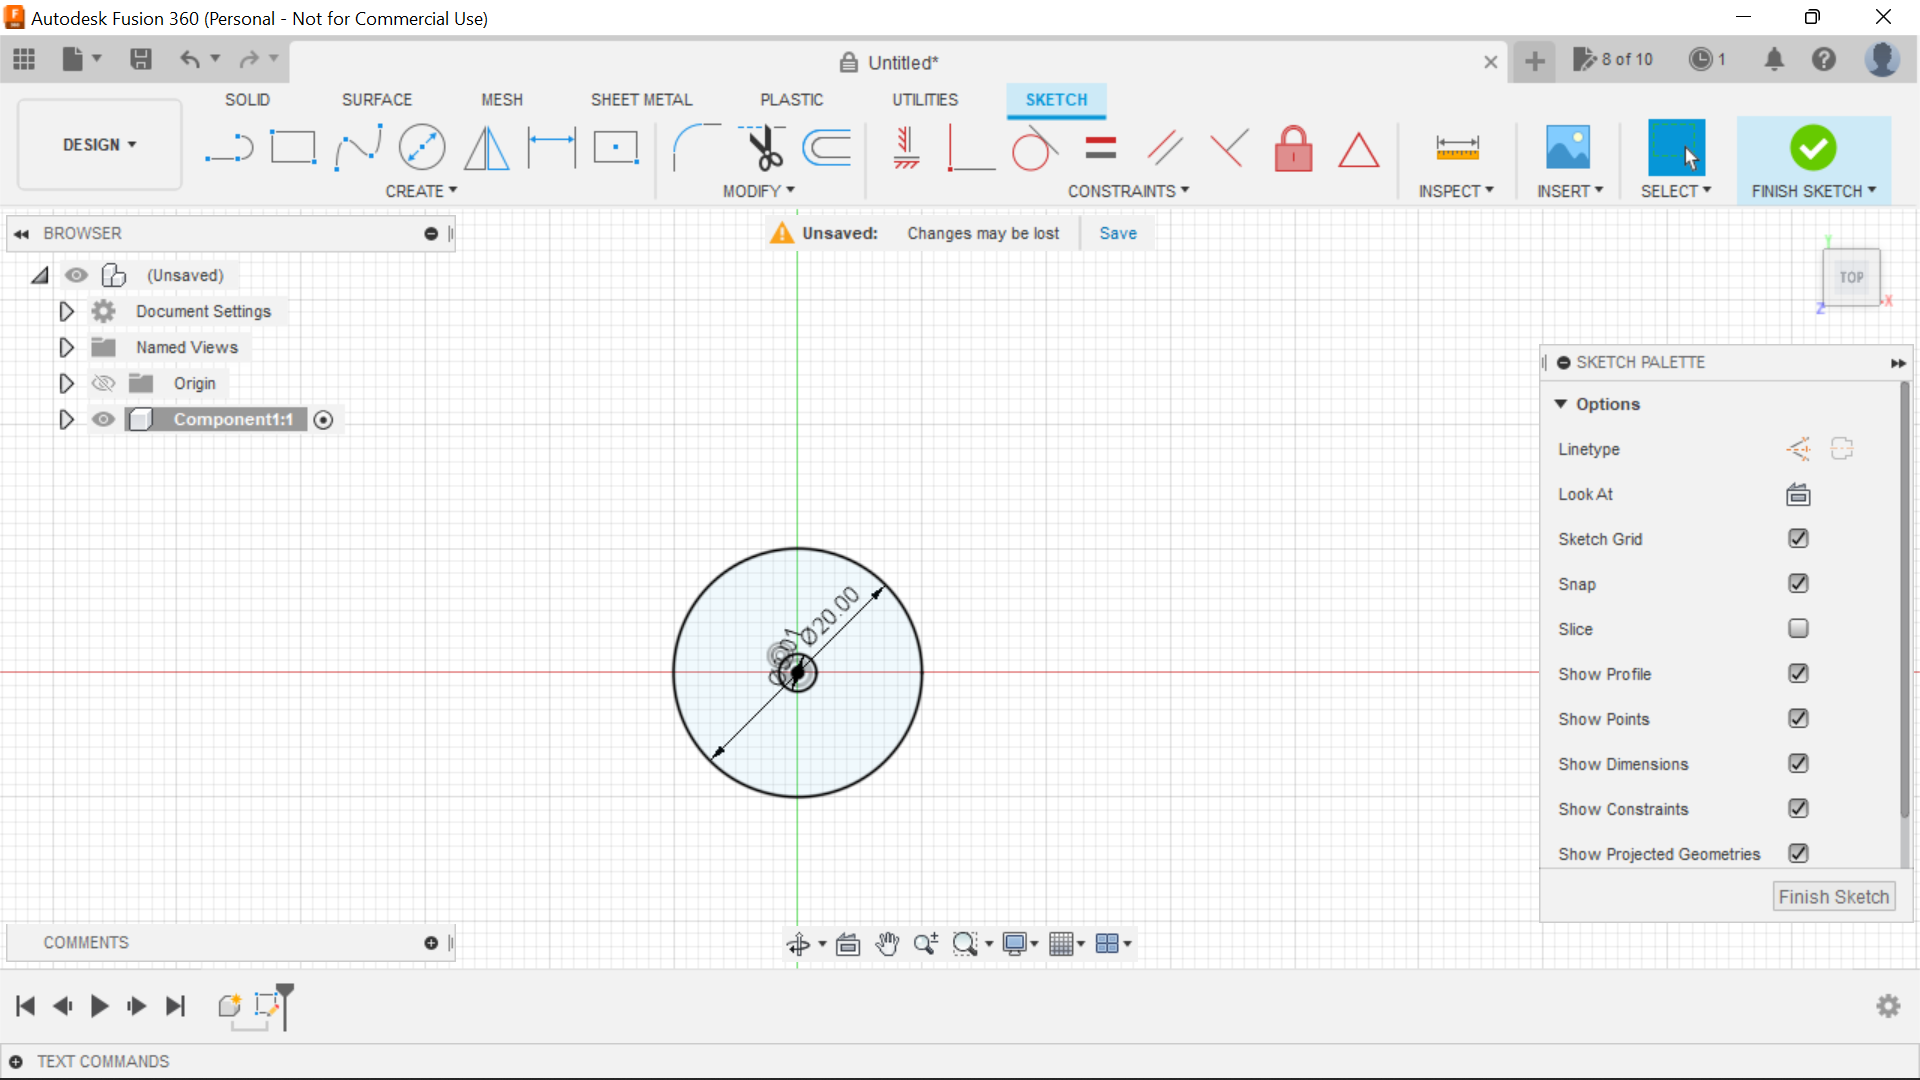
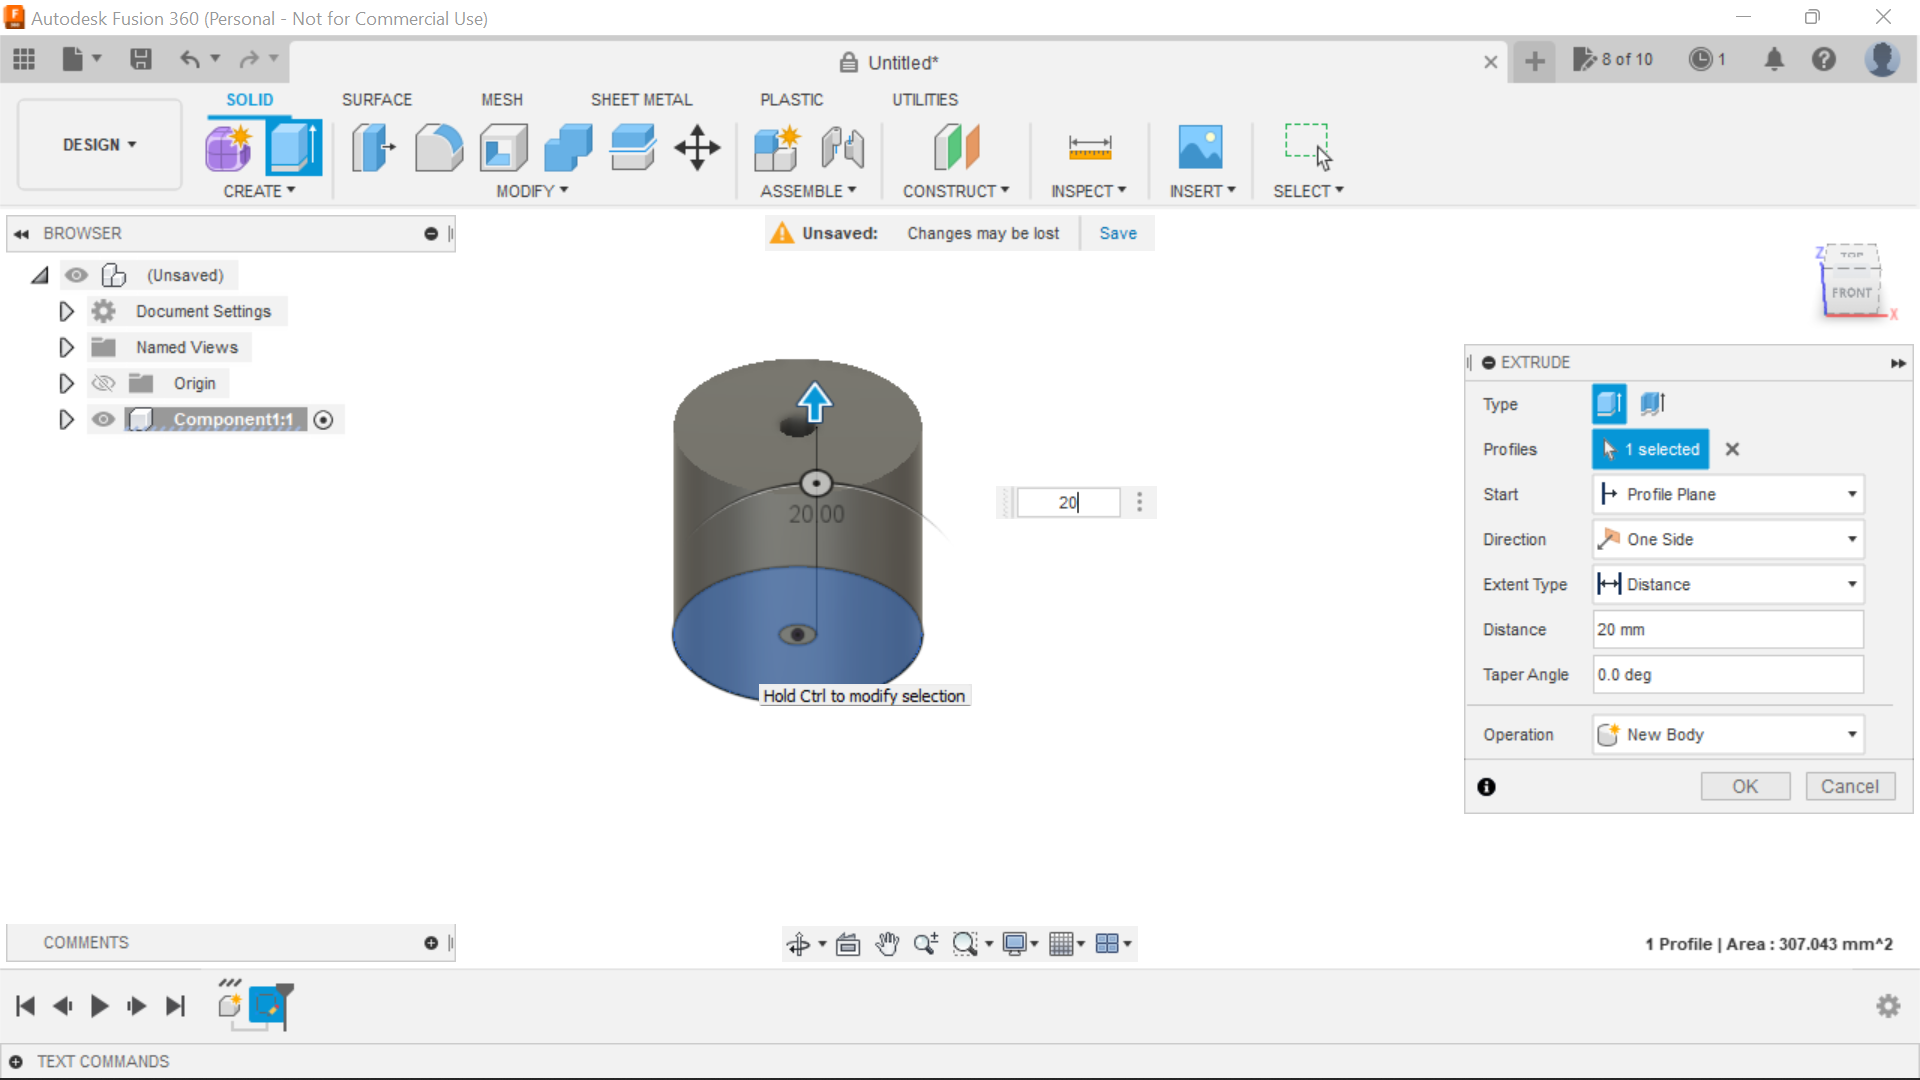
To design this fan we first create a sketch, the selecting the top plane, we create a centre circle of 20mm and a smaller centre circle the diameter of the motor spindle with a slight offset, a snug push on fit is good with it being a round spindle with no flat point, I will add a means so that I can secure with a 3mm Allen head bolt to the shaft as well.
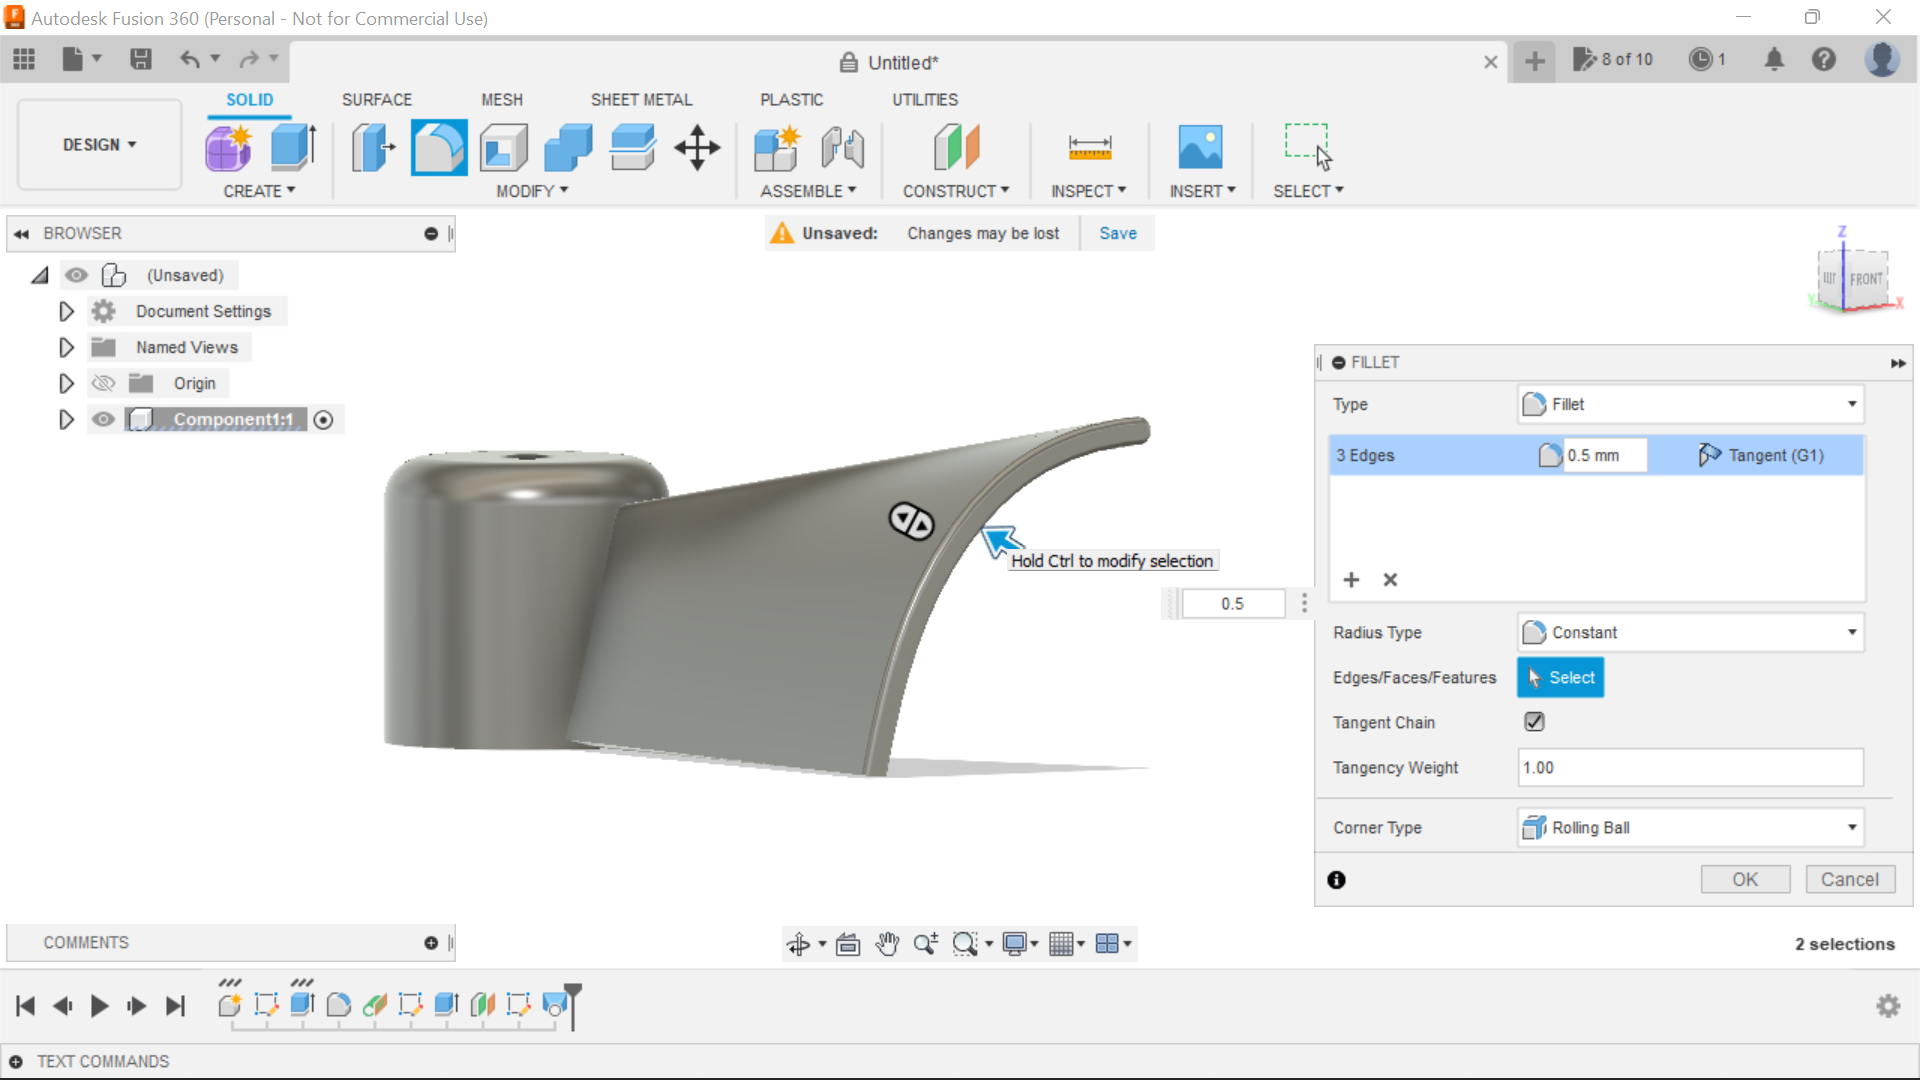
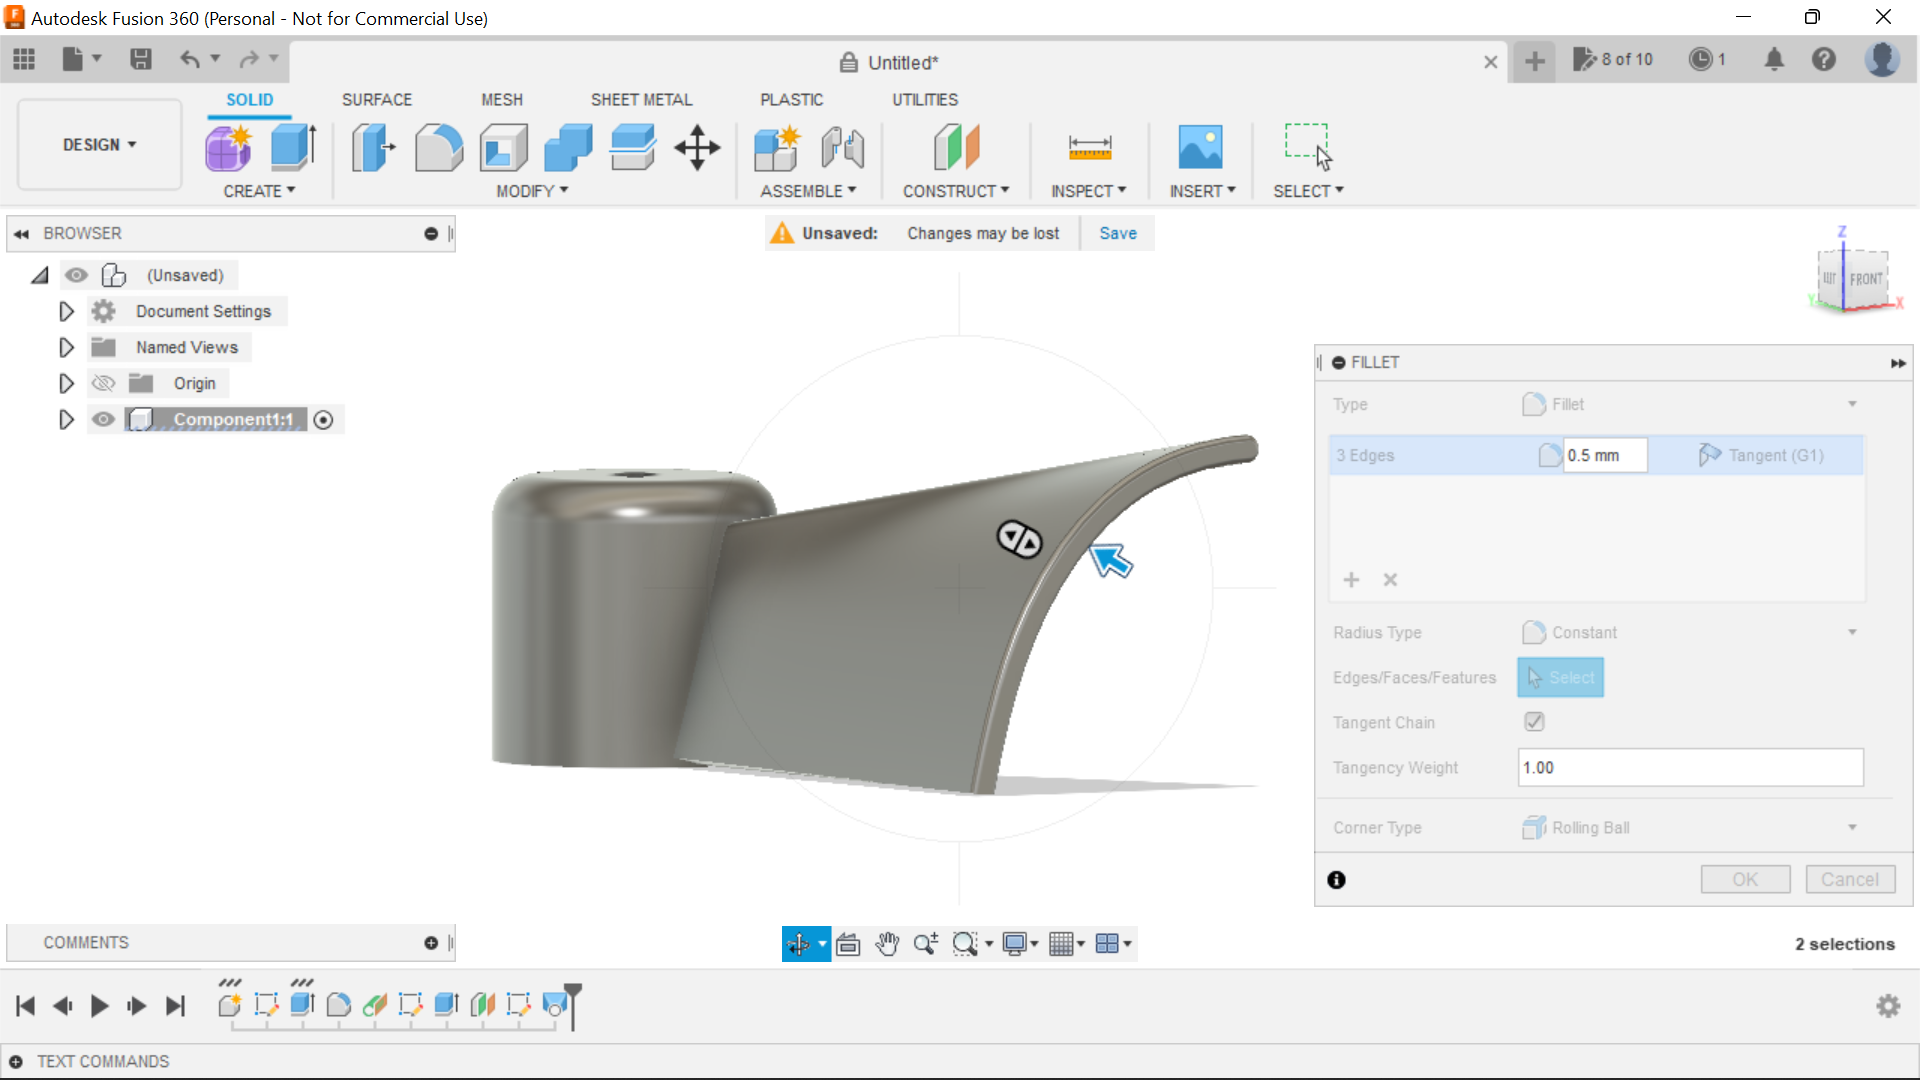
The outer circle can now be extruded, I went for something like 20mm, and did a 3mm fillet to the top, from this point we just need to make one blade, we can use the circular pattern tool to copy the rest.
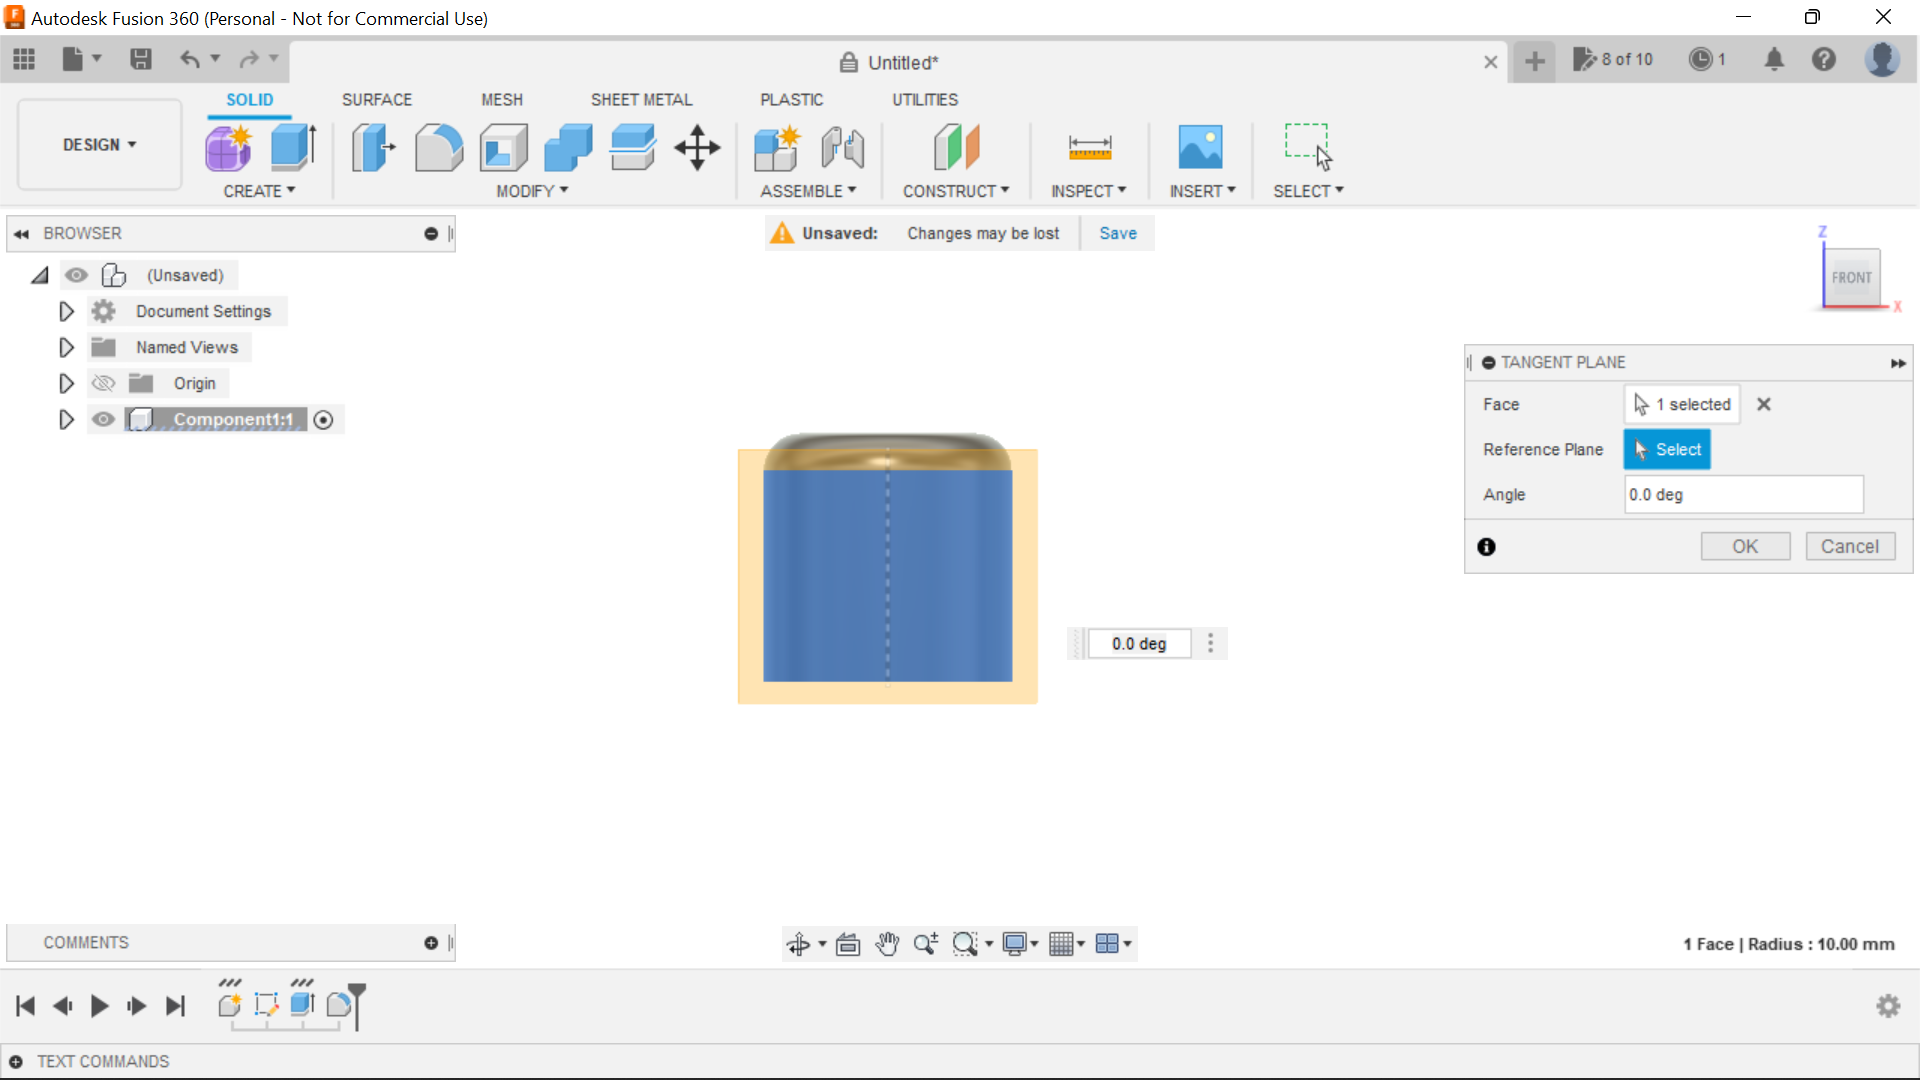
To make a blade this is how I did it, using the front view, select the tangent plane tab and then sketch from this plane,
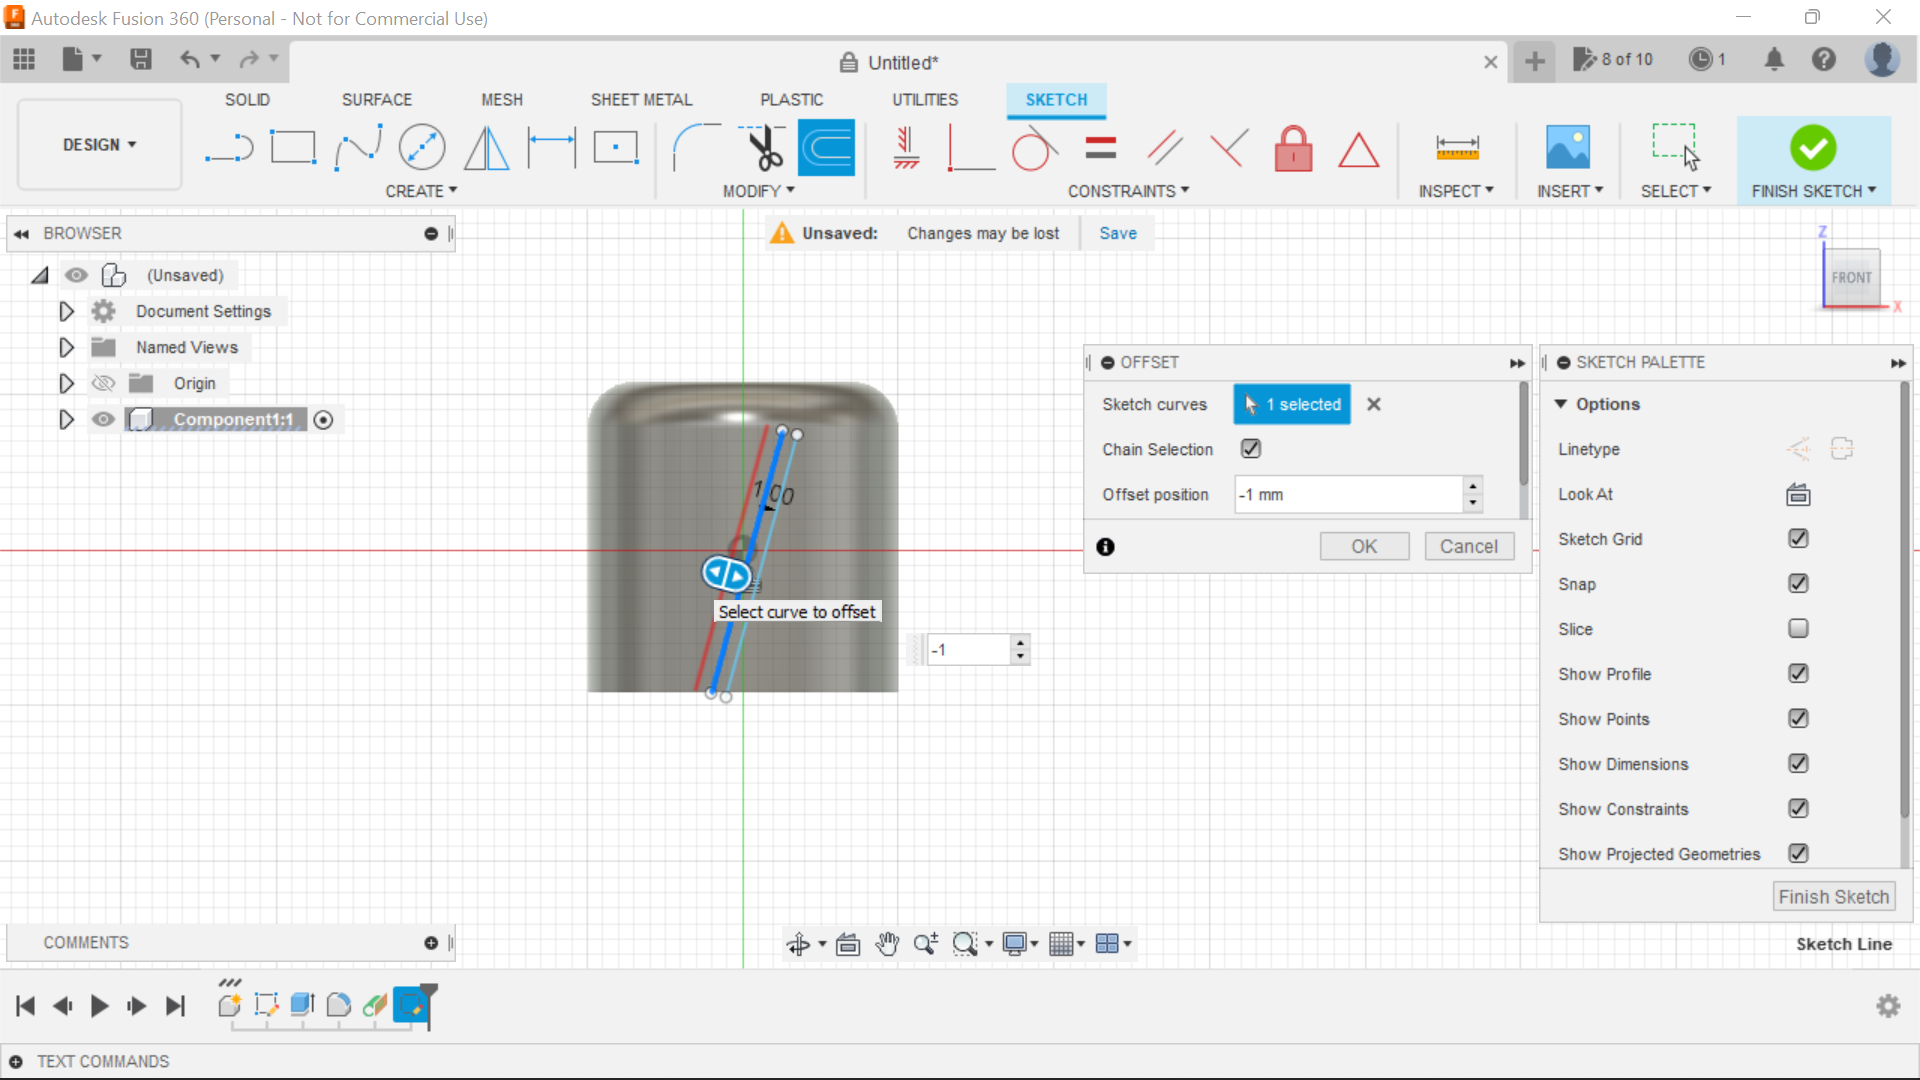
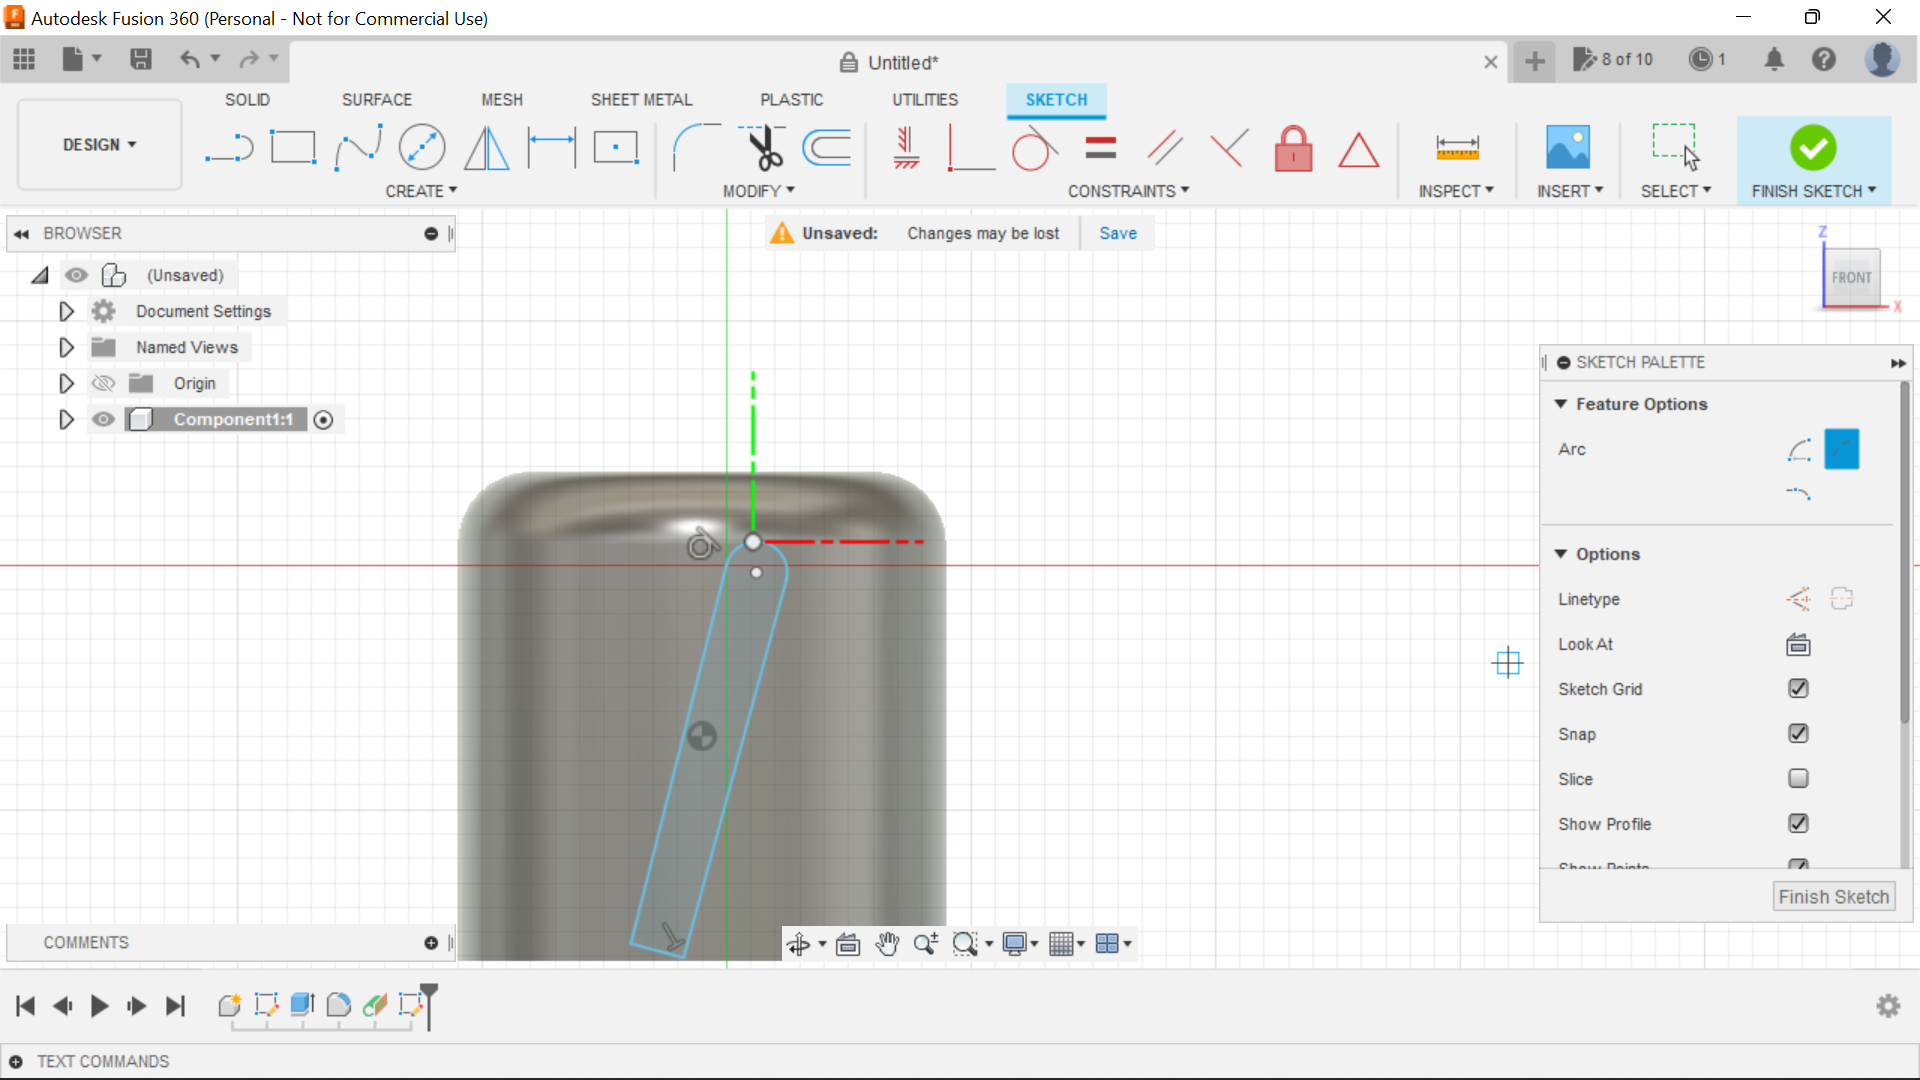
I sketched a line at a slight angle from the bottom of plane to the top and then offset this each way so it ended up at 2mm, make sure you tie in the ends as well or it won't extrude, the top end I made an arc using 3 point arc.
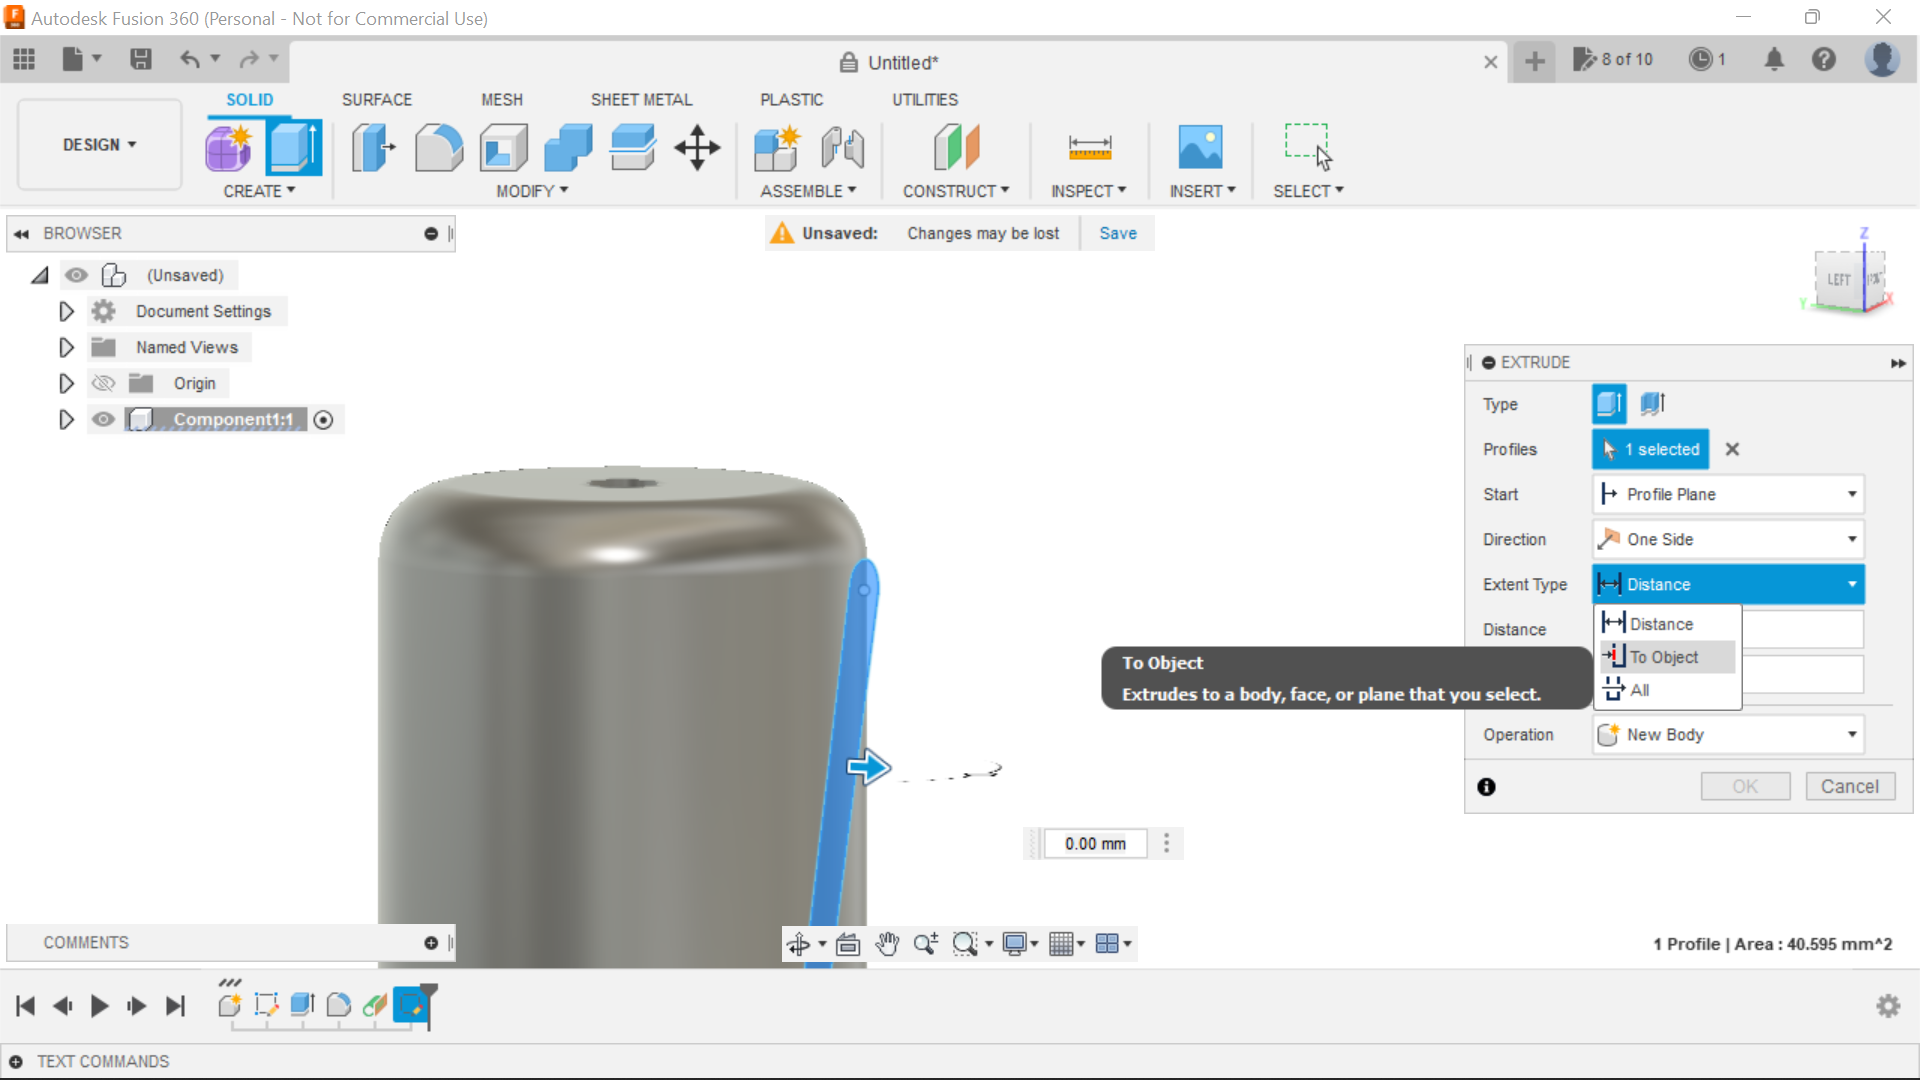
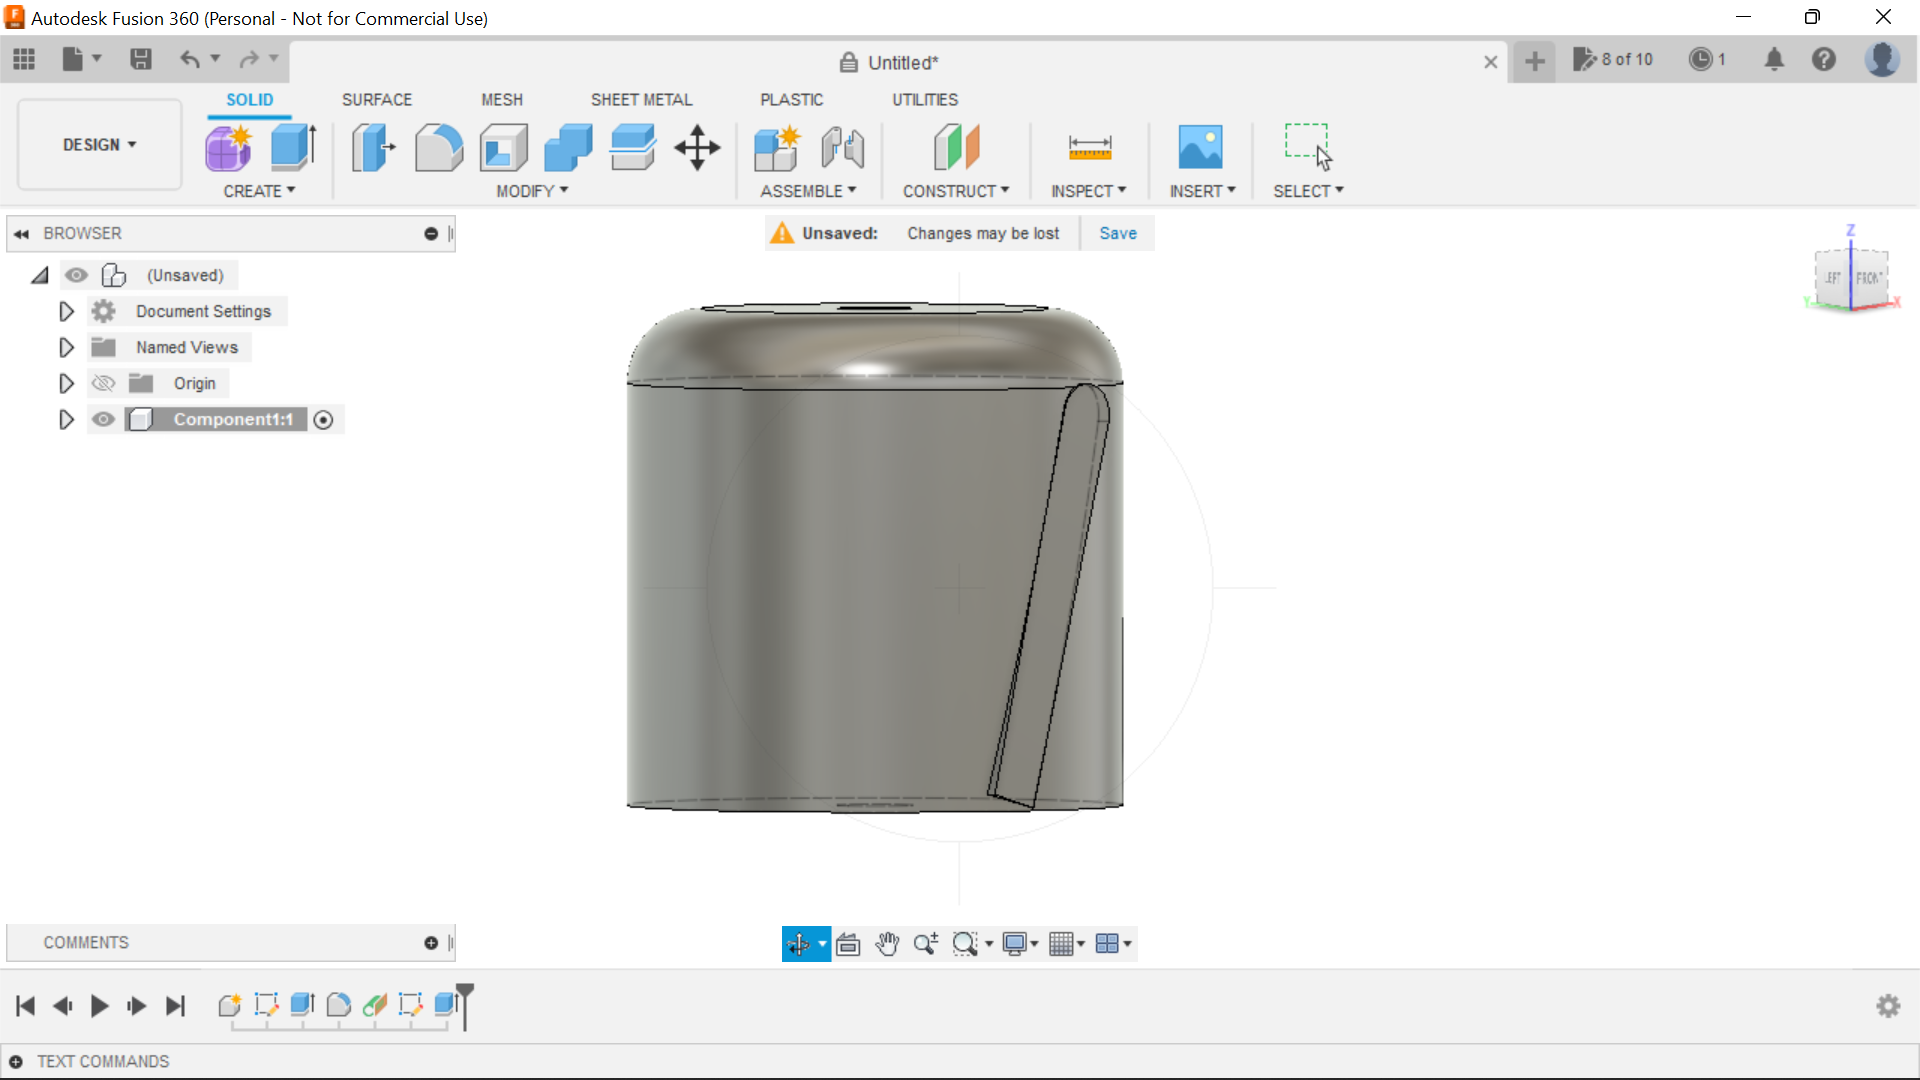
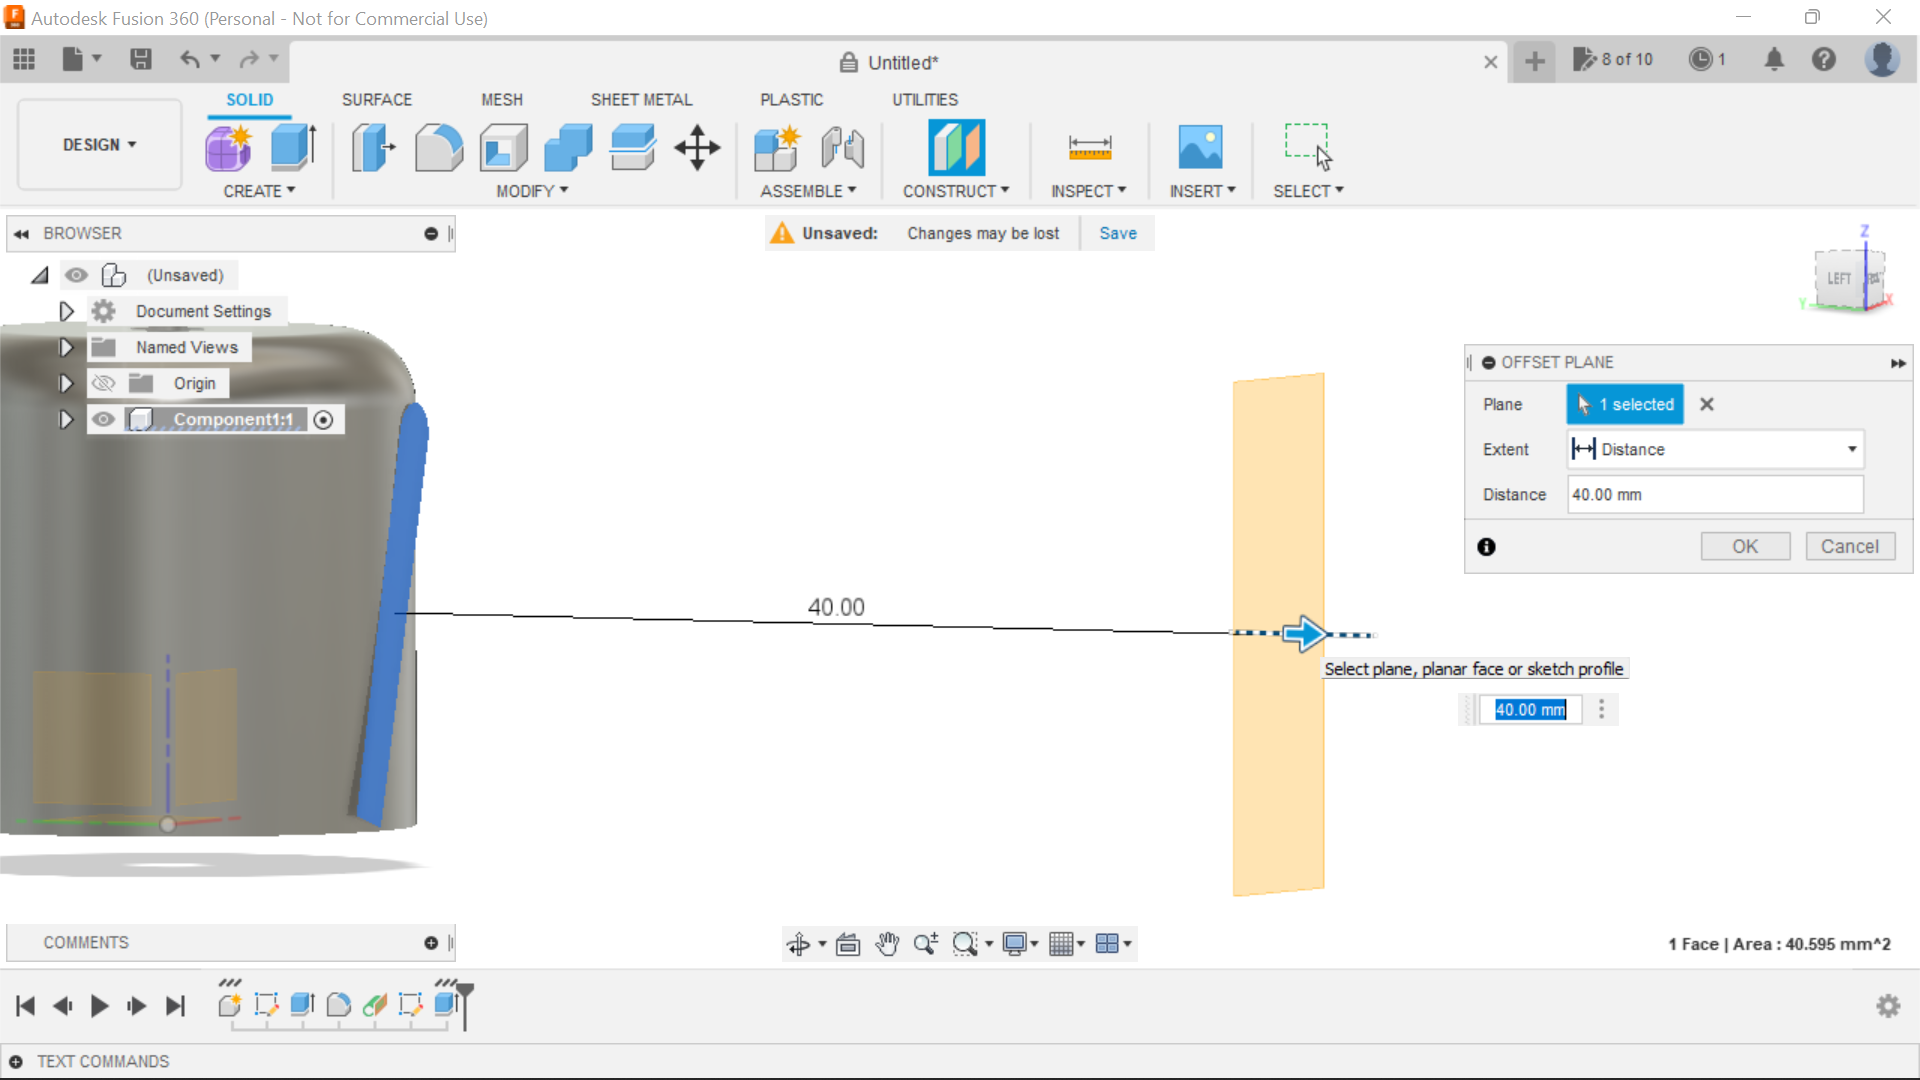
Now using the extrude tool extrude this to the object use join and then this is tied to the object, end sketch and use the face of this new extrusion to create an offset plane, the distance of the plane will determine the length of the blade, I will use 40mm for this example.
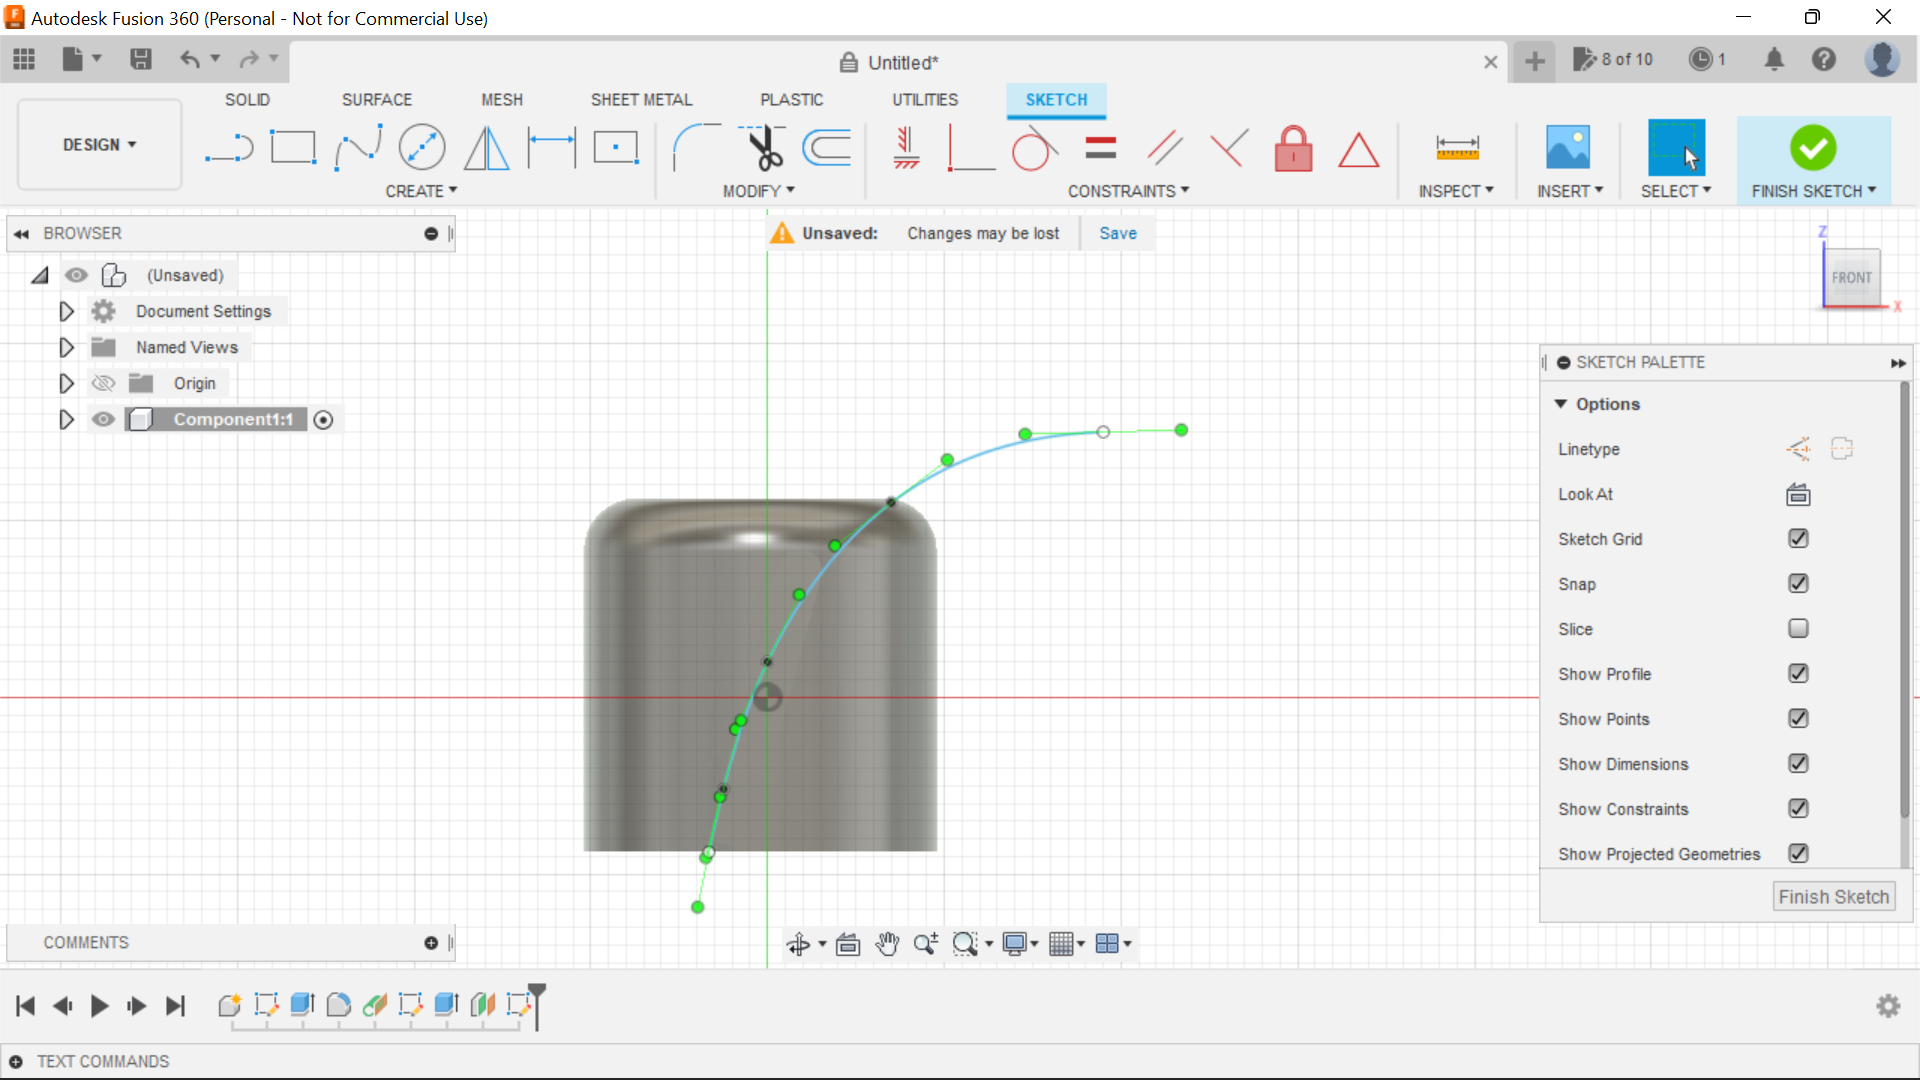
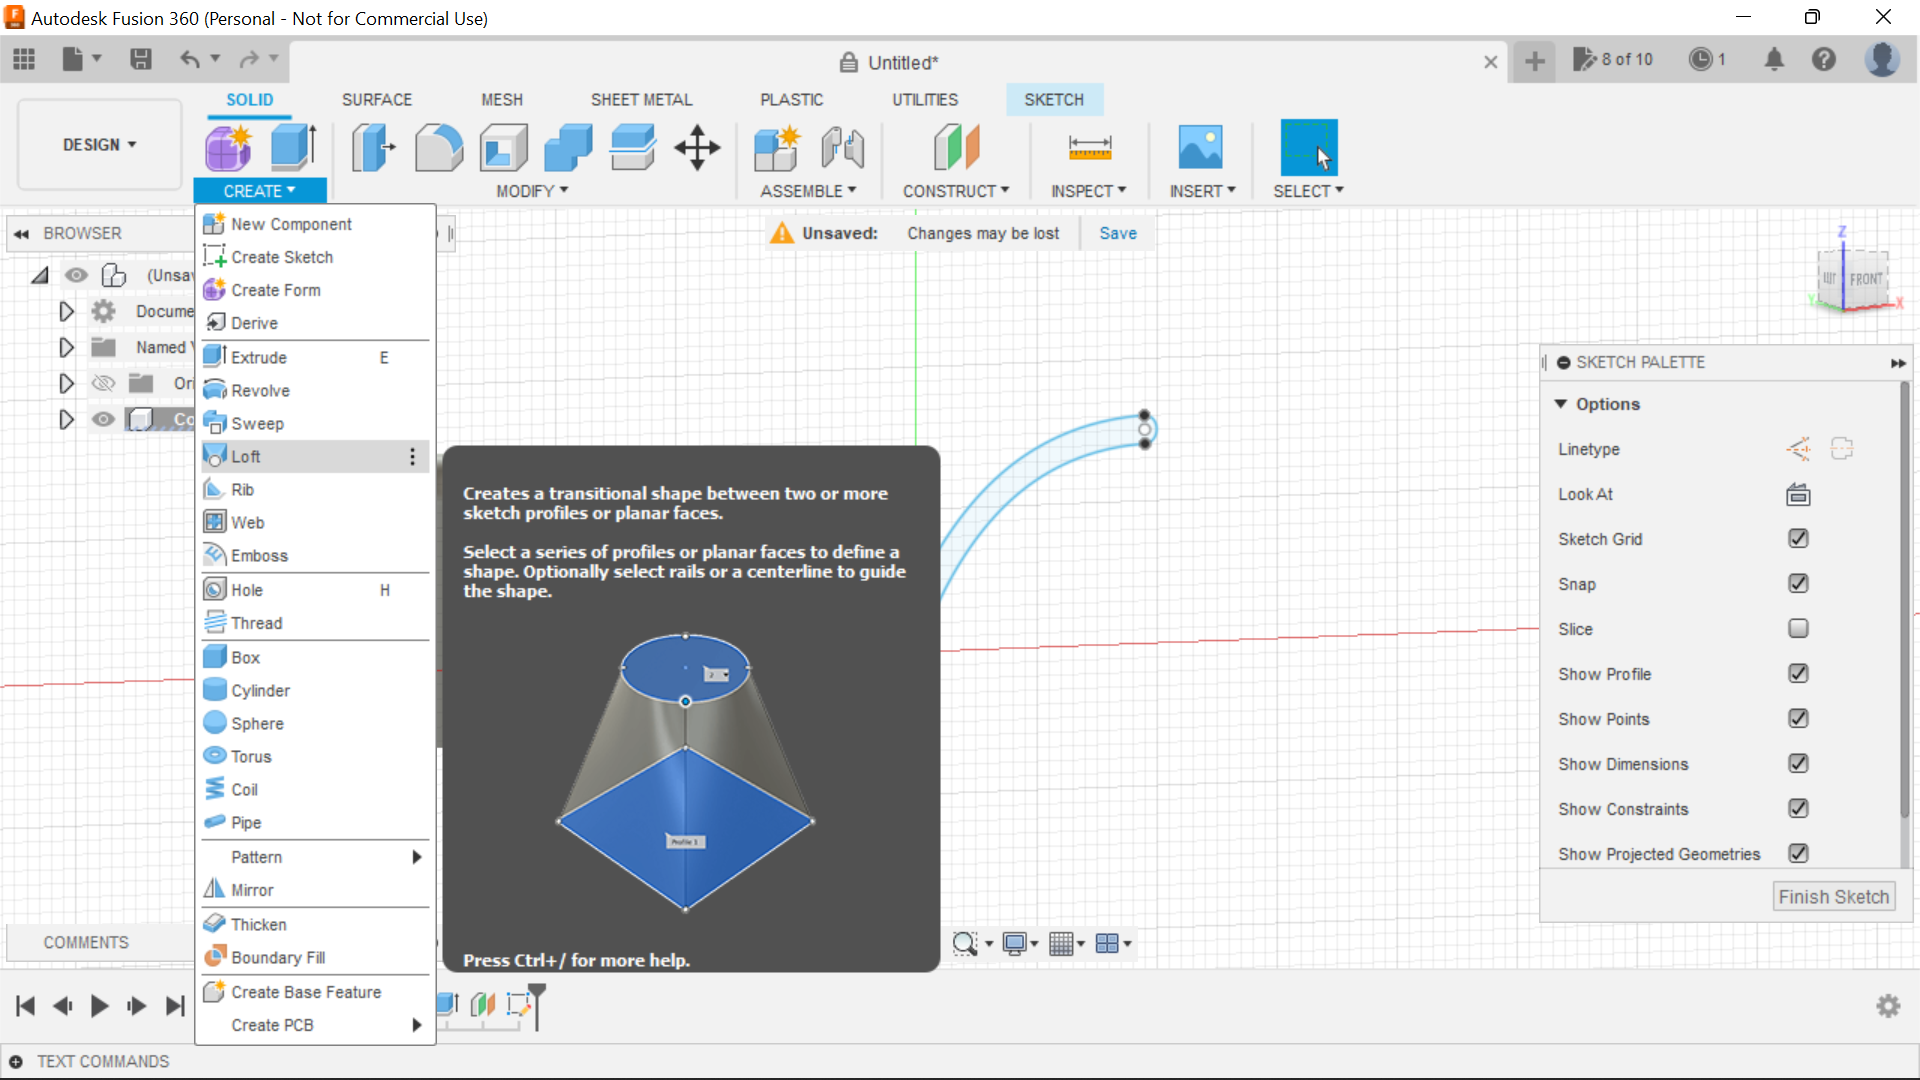
Create a new sketch and using the offset plane, sketch what you might think would make a good blade shape, one which will move some air, use the spline tool to create a good curve, the offset this both ways 1mm and tie in the ends, I used the 3 Point arc tool at the top to give our blade a smooth edge.
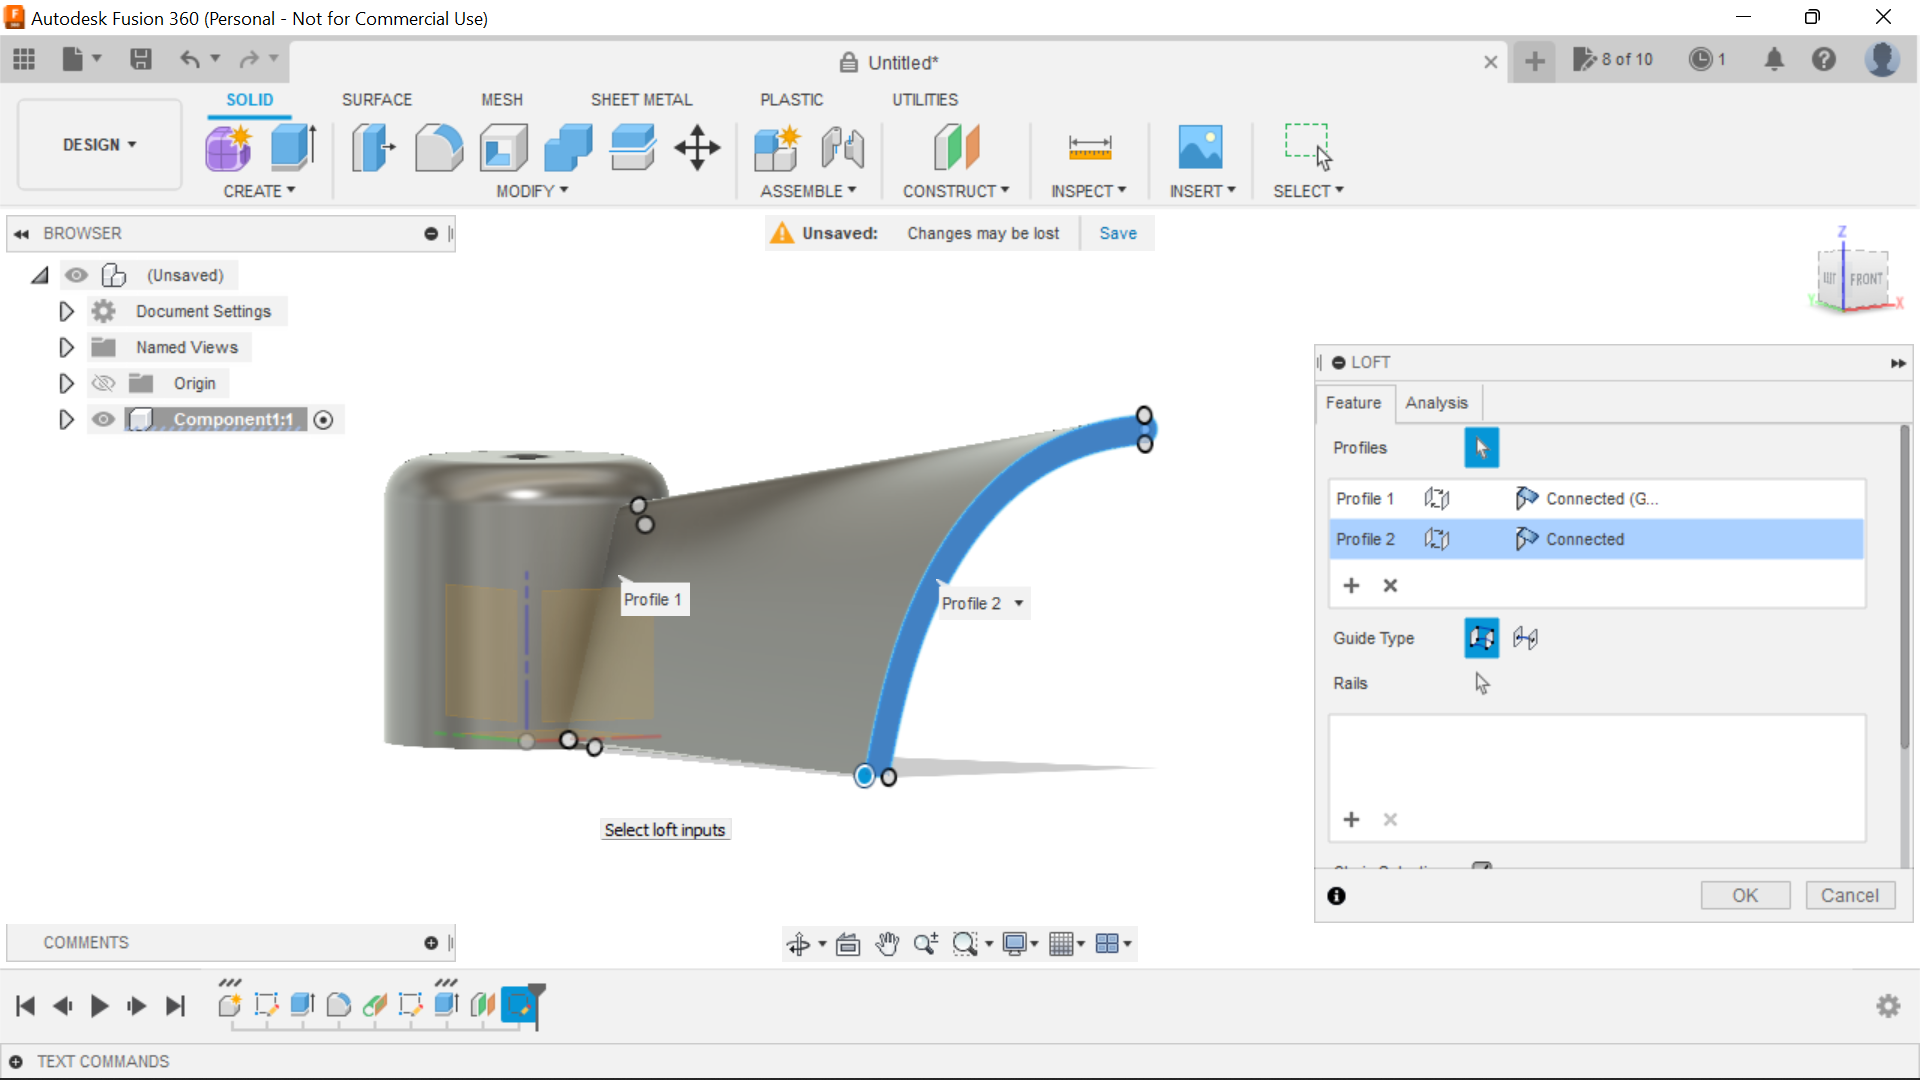
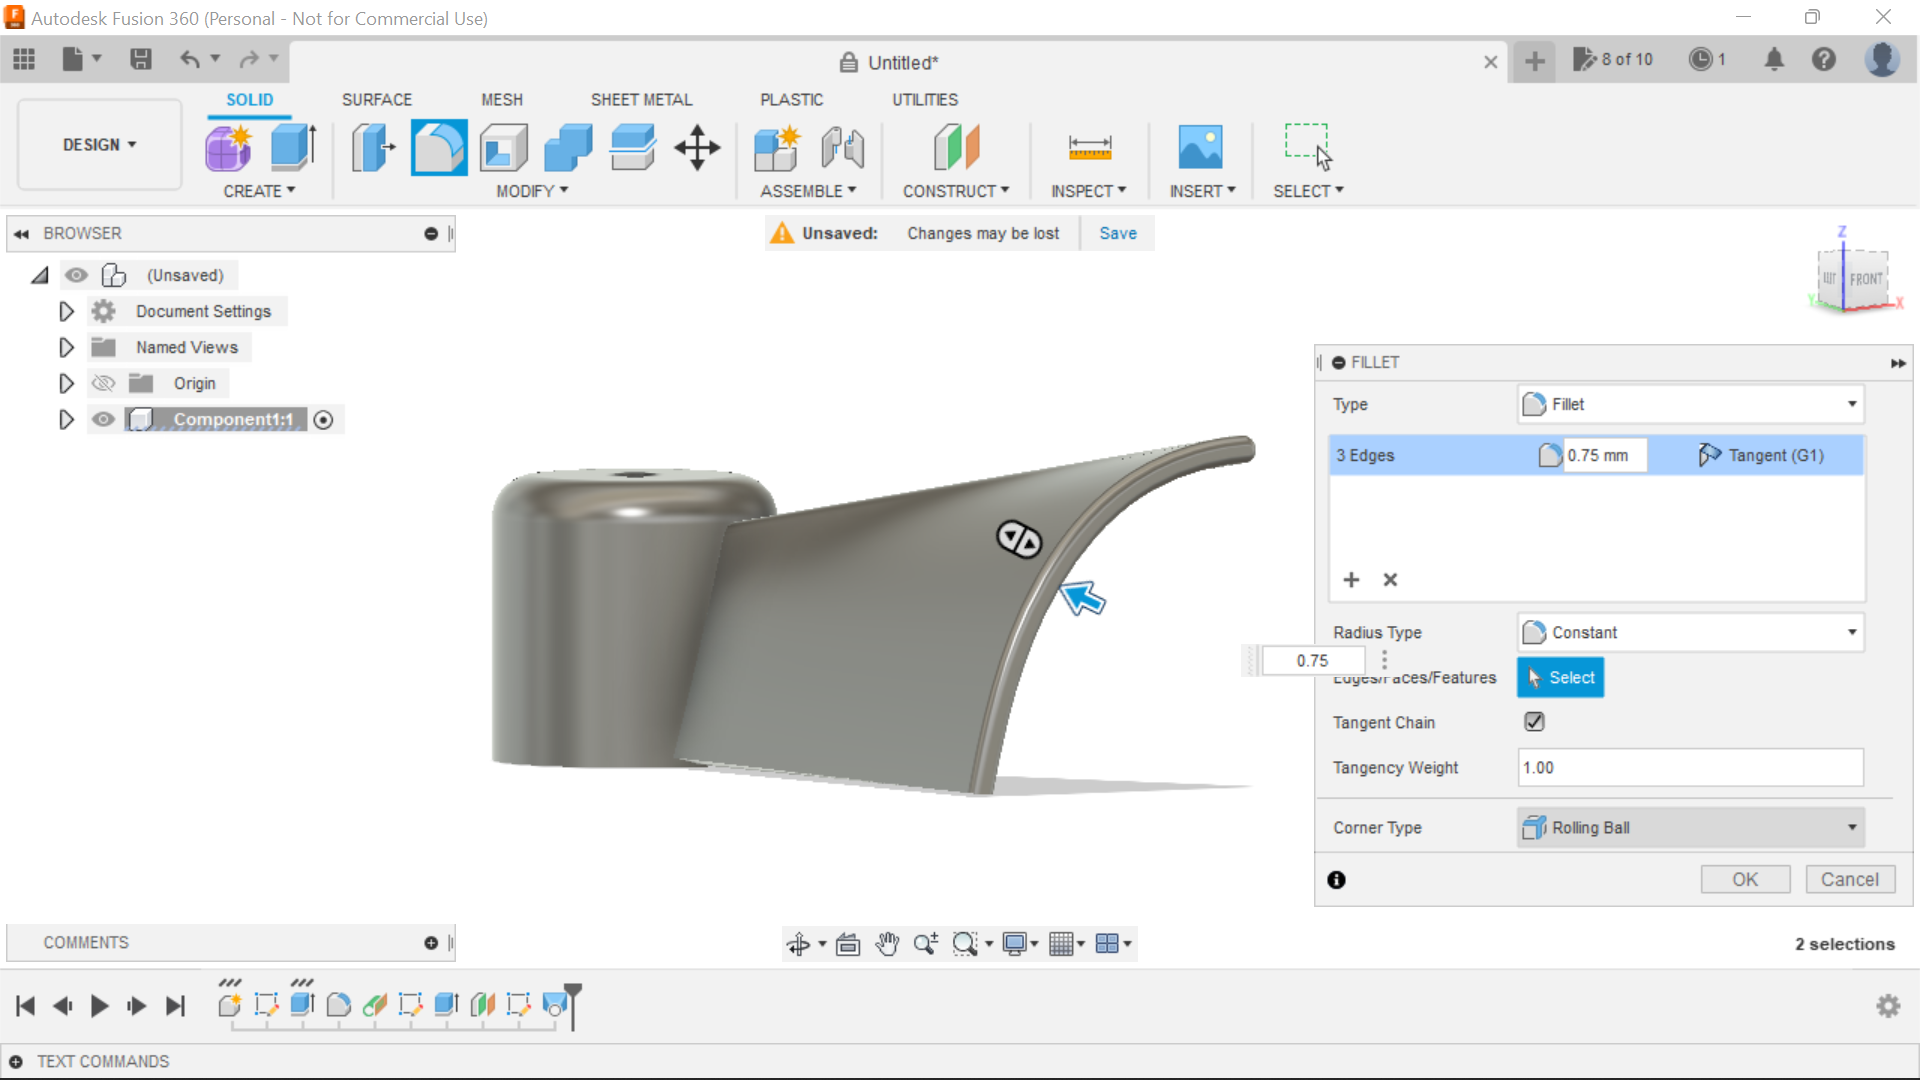
We now use the loft tool to create the blade, highlight the extruded blade face the the sketched face and the blade is created, I filleted the ends of the blade 0.75mm as well.
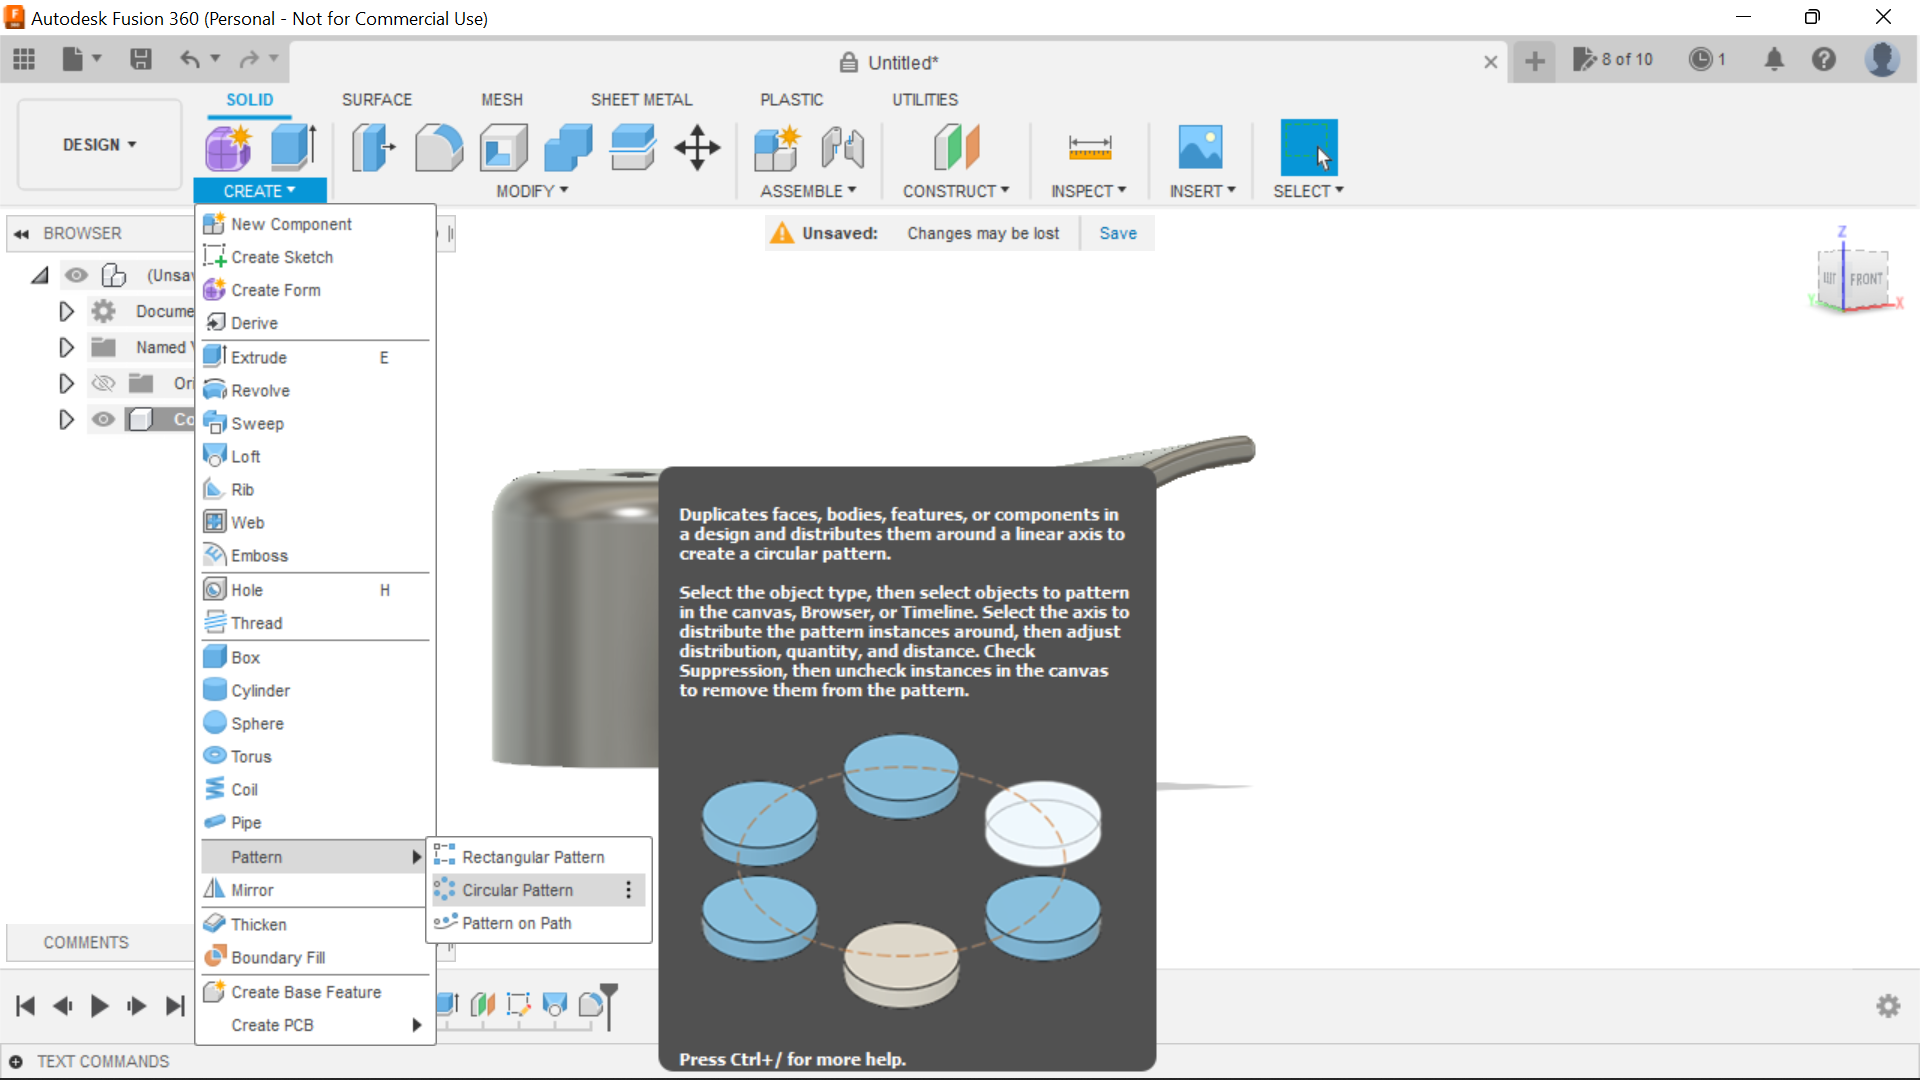
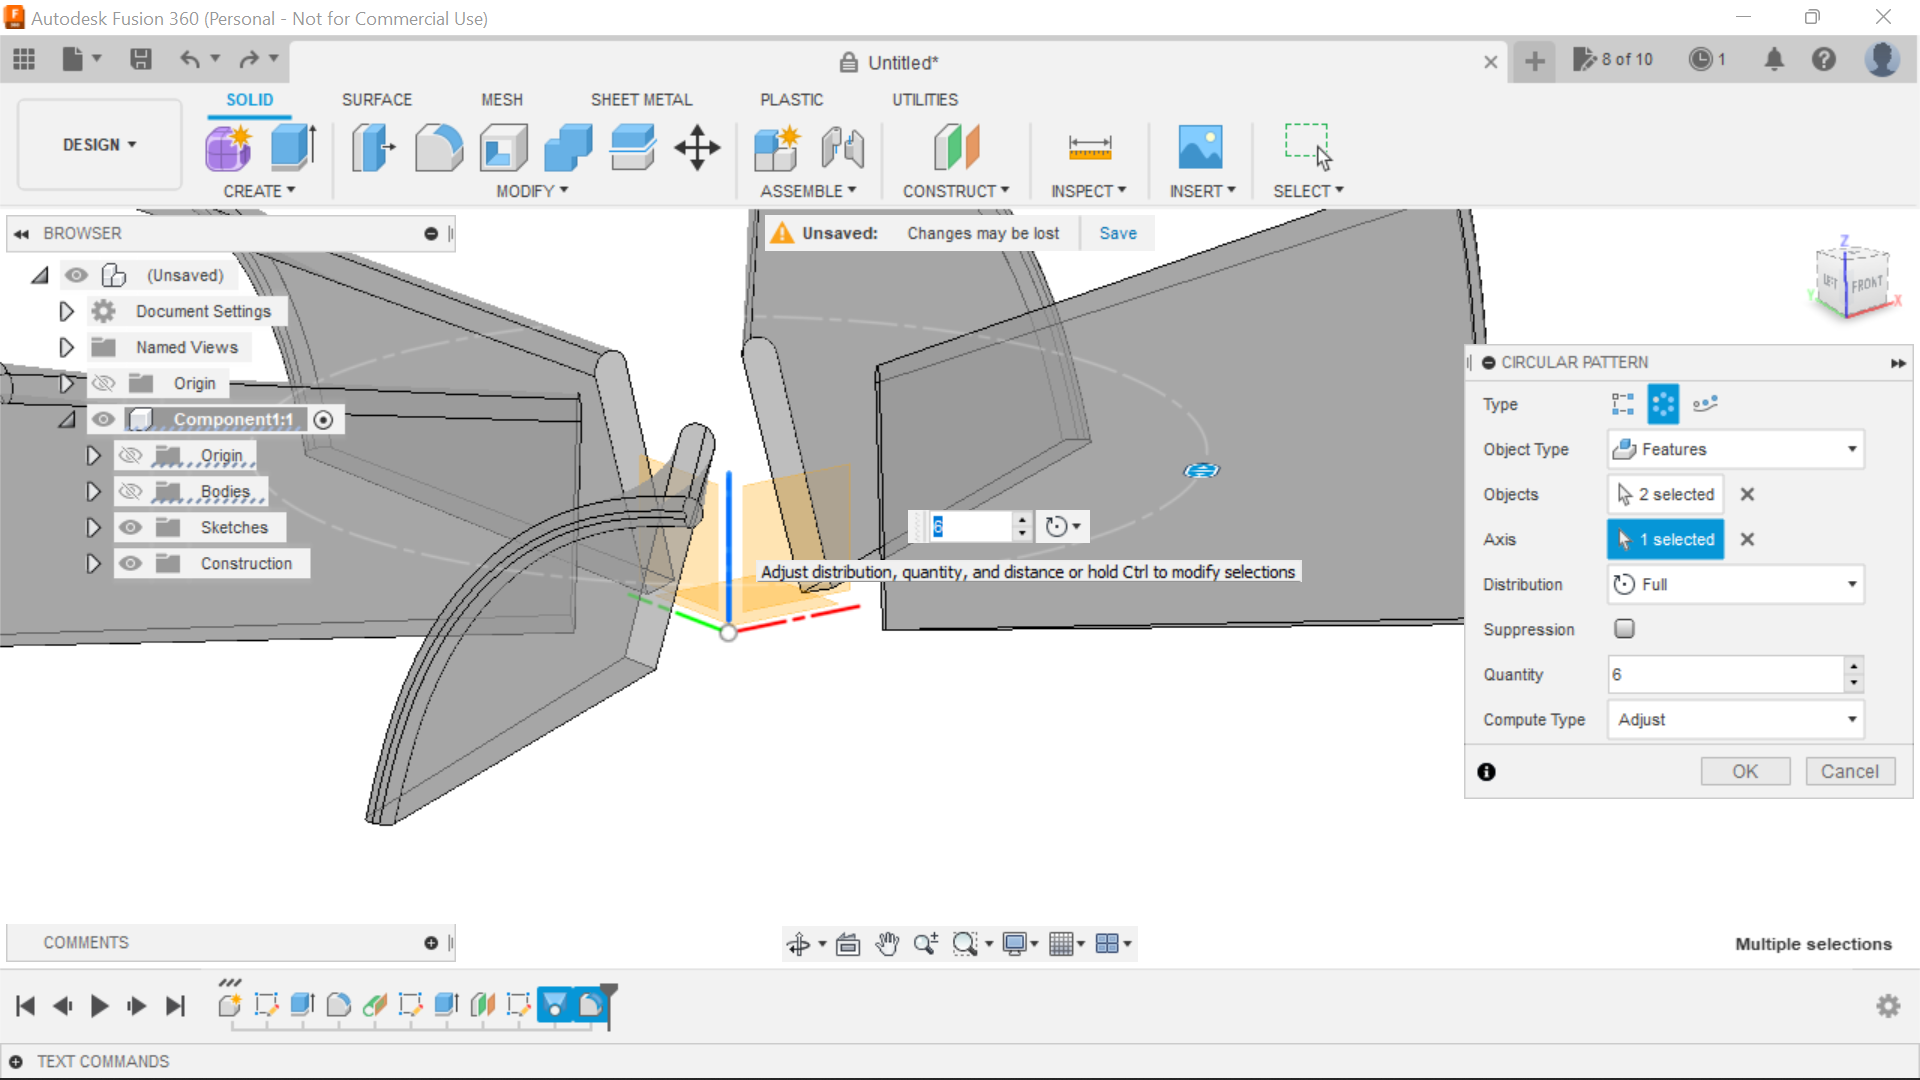
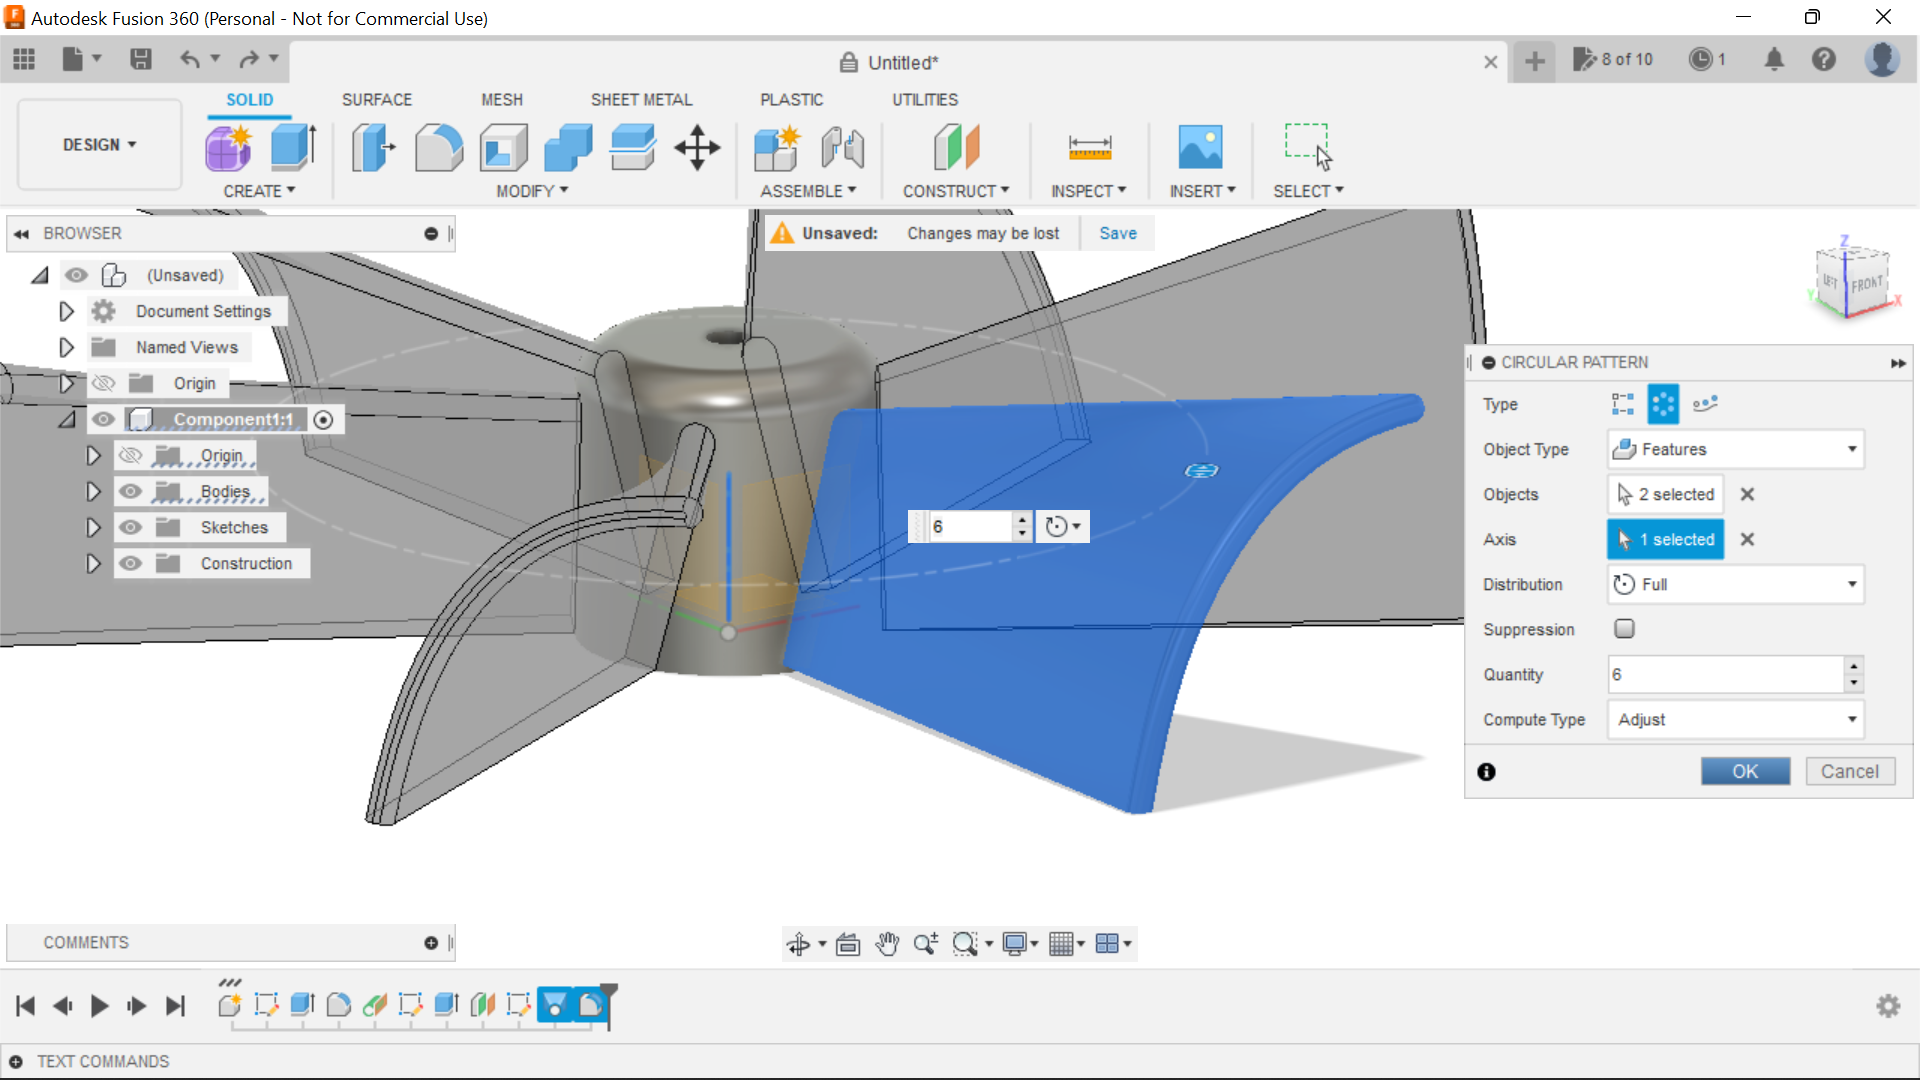
With one blade complete, we now need to create 5 more and to do this we will use the circular pattern tool, highlight the object and use body from the drop down box, I used feature initially and it missed some objects, we now need to click on Axis from the selection box now the axis we want which is the centre of the origin is hidden within the body, so in the browser, click on the body eye and turn off momentarily, select the blue axis and then turn the body back on, I went for 5 additional blades.
Think how will this print, not too much overhang etc, its an easy way of making a pretty complicated object which could be used for a boat propeller, rc plane etc etc.
The Chamber Design
.png)
.png)
.png)
.png)
.png)
.png)
.png)
.png)
.png)
.png)
.png)
.png)
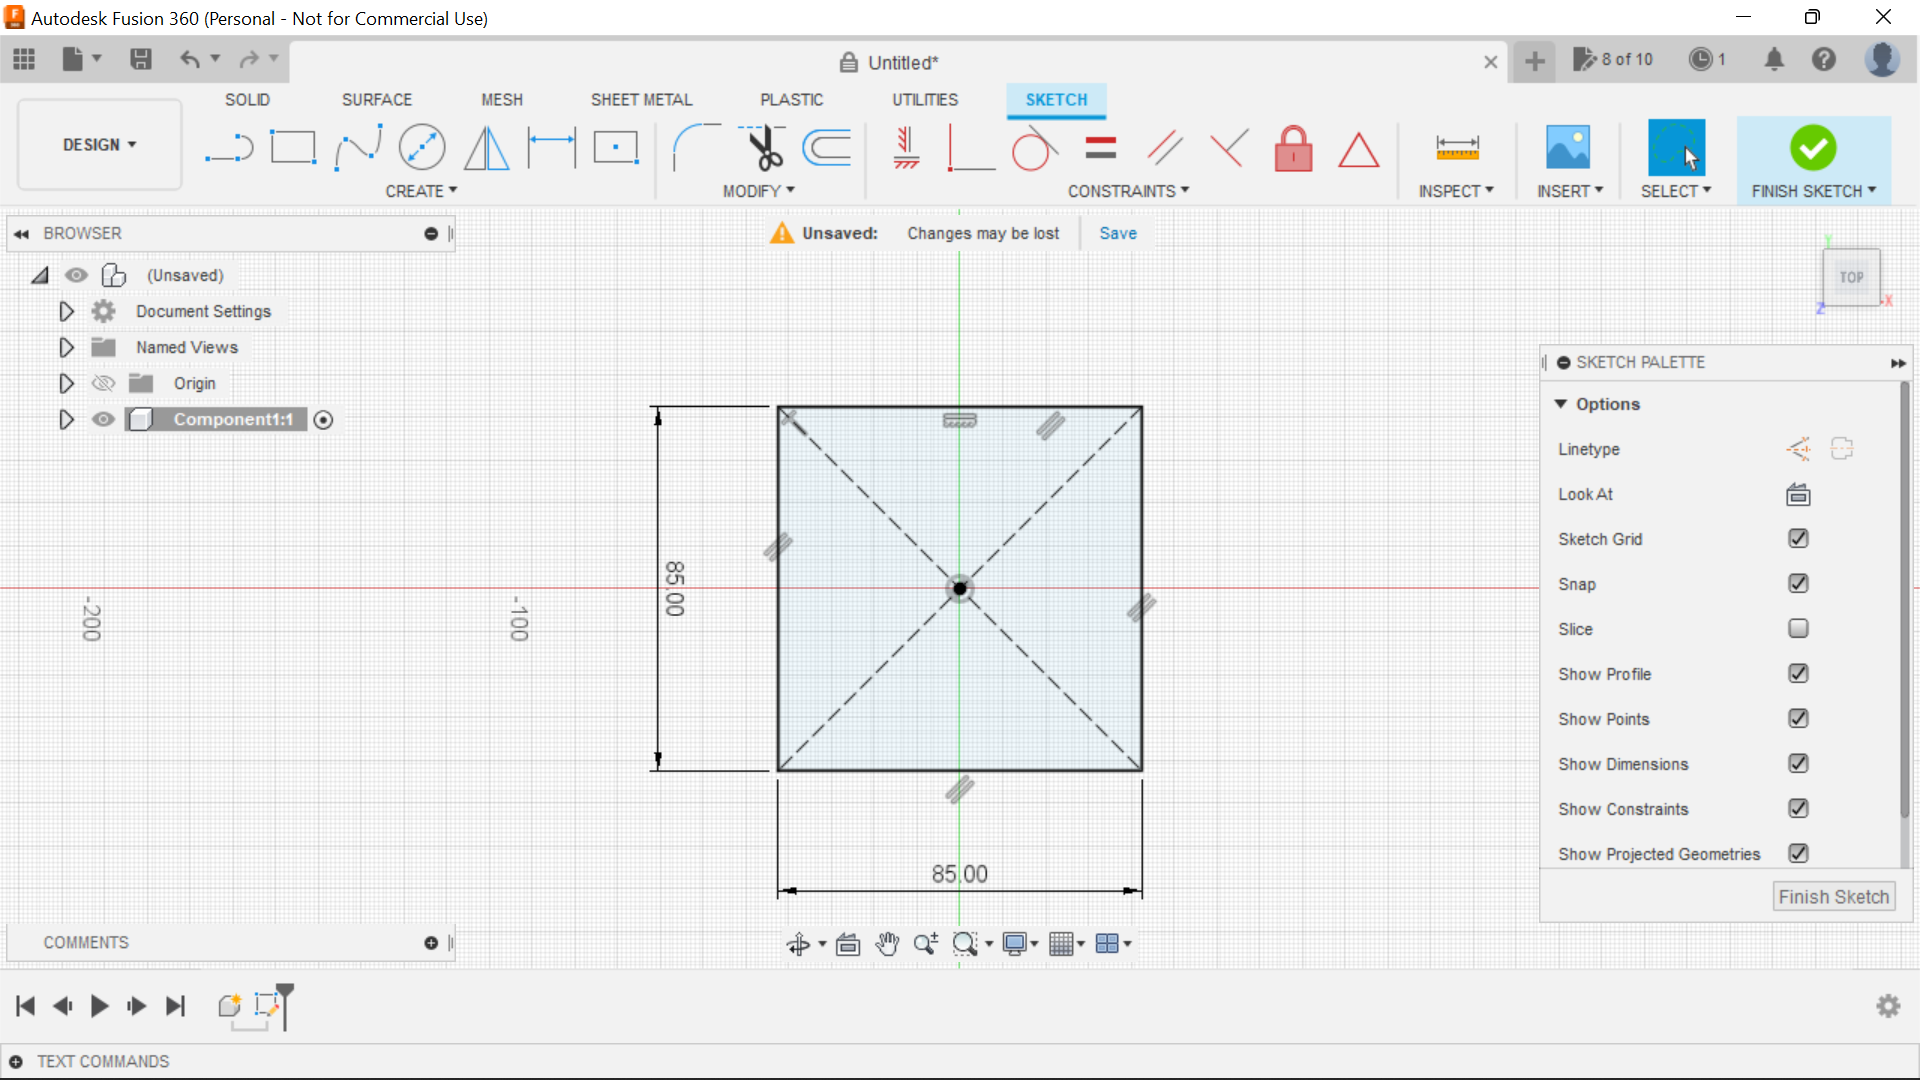
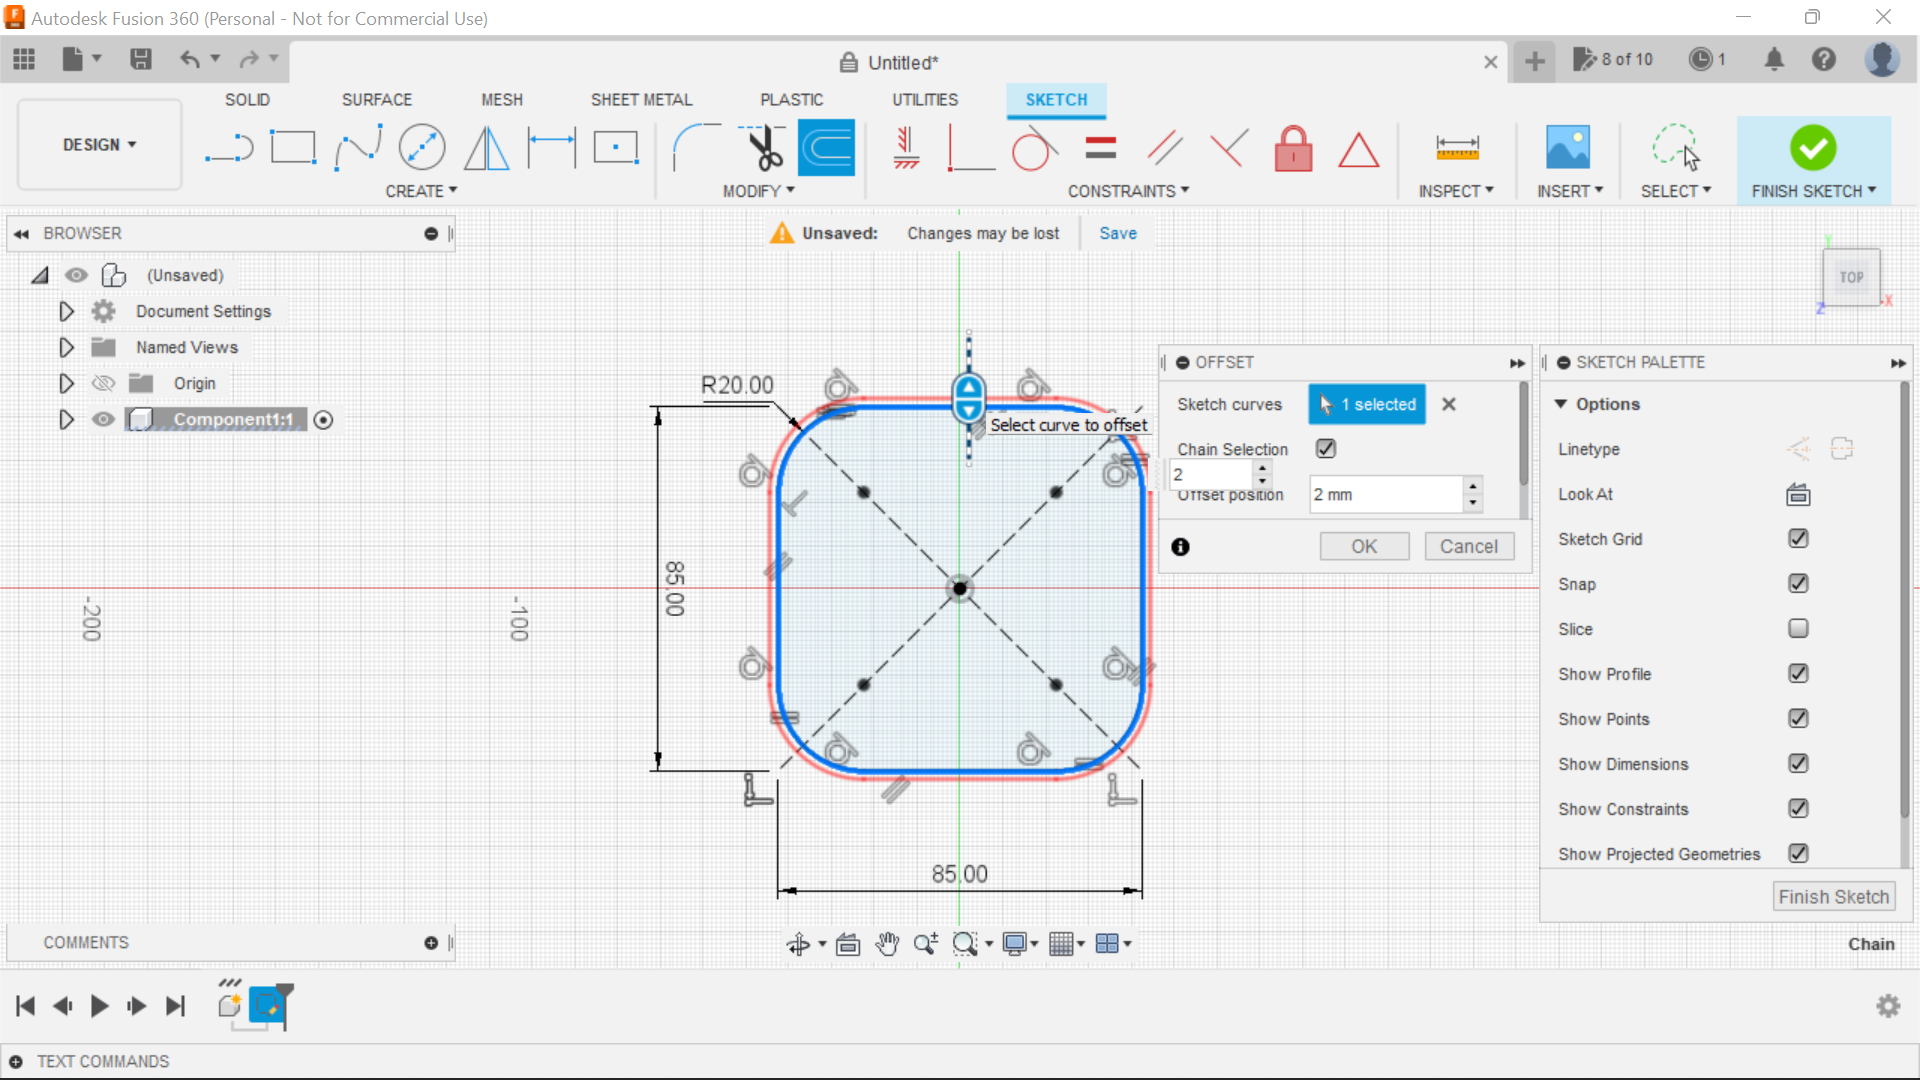
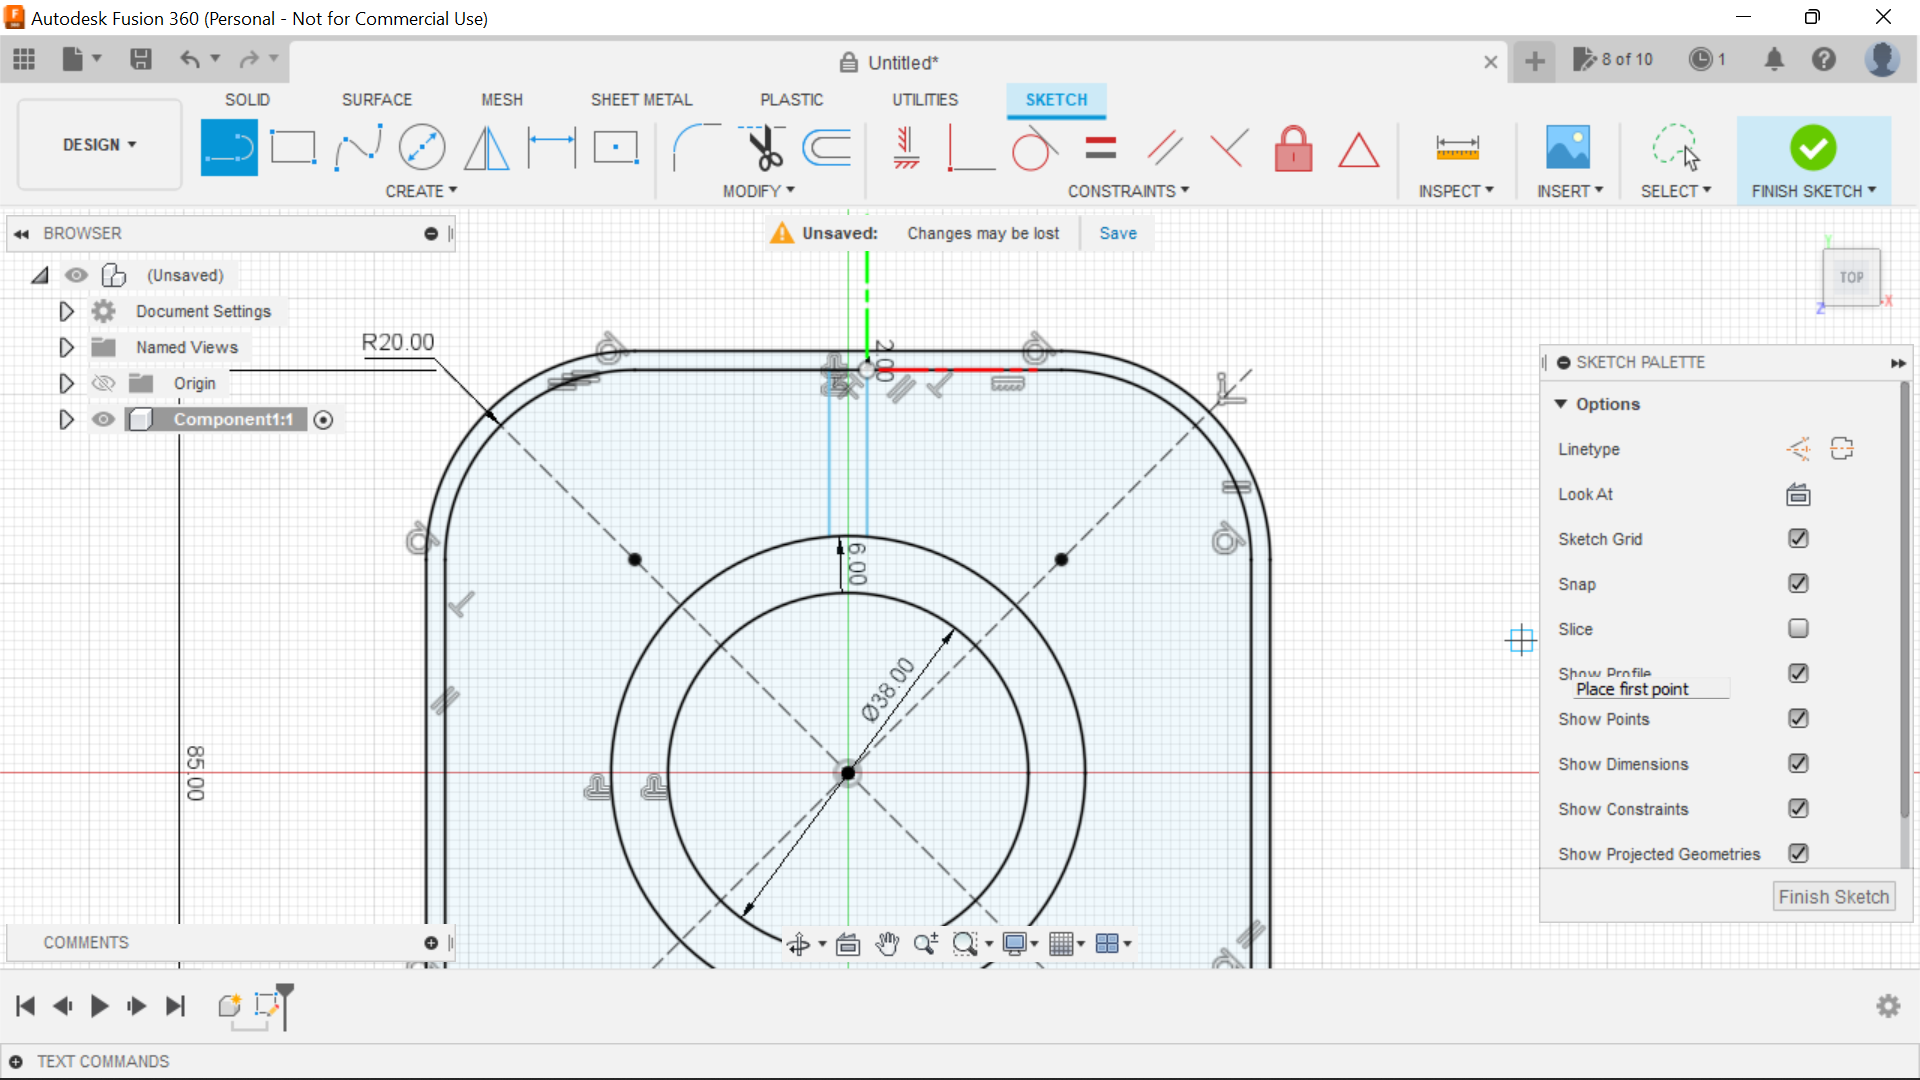
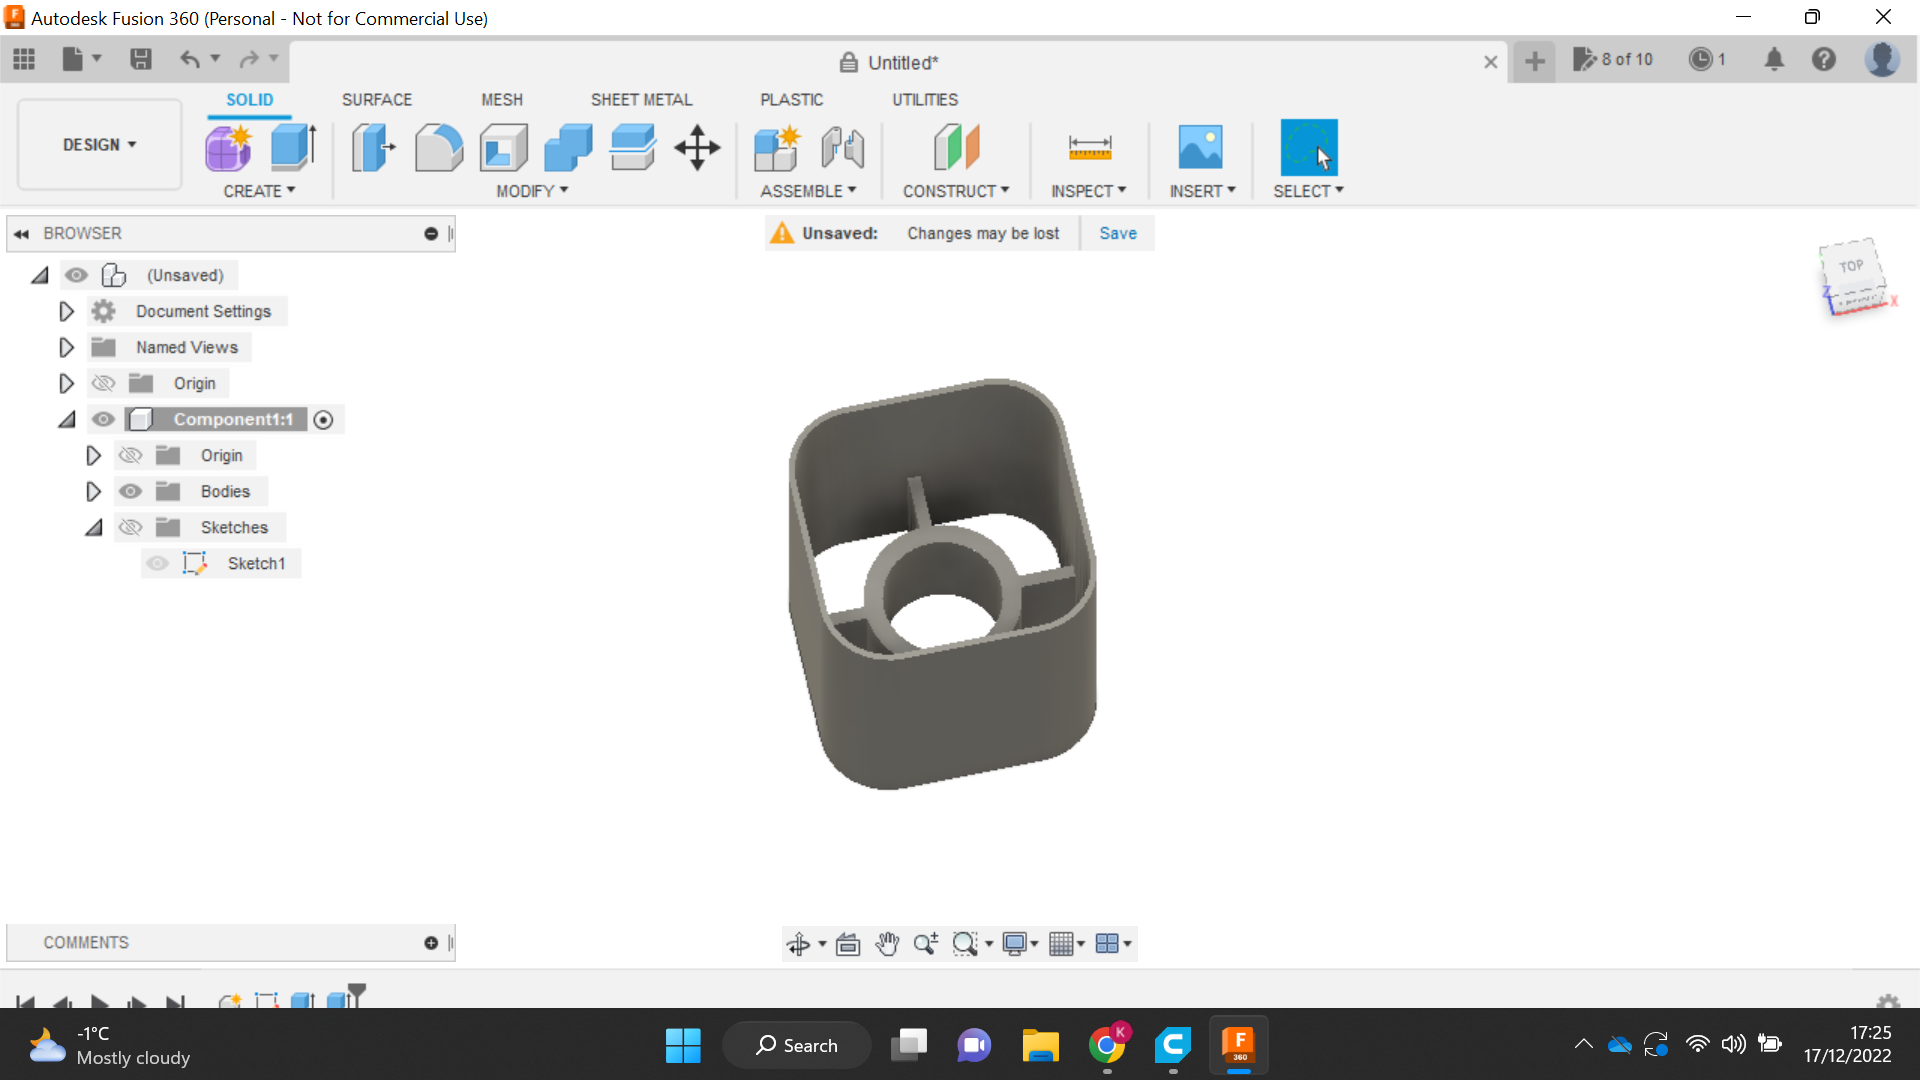
This chamber will house the 12v motor for this project so we need to create a way of securing the motor in a centralised position so to start off with I sketch an 85mm square this is dependant on the diameter of the blade of course, I then add a 20mm fillet to the corners, I now offset the square 2mm this will be the wall thickness which should be adequate for this purpose.
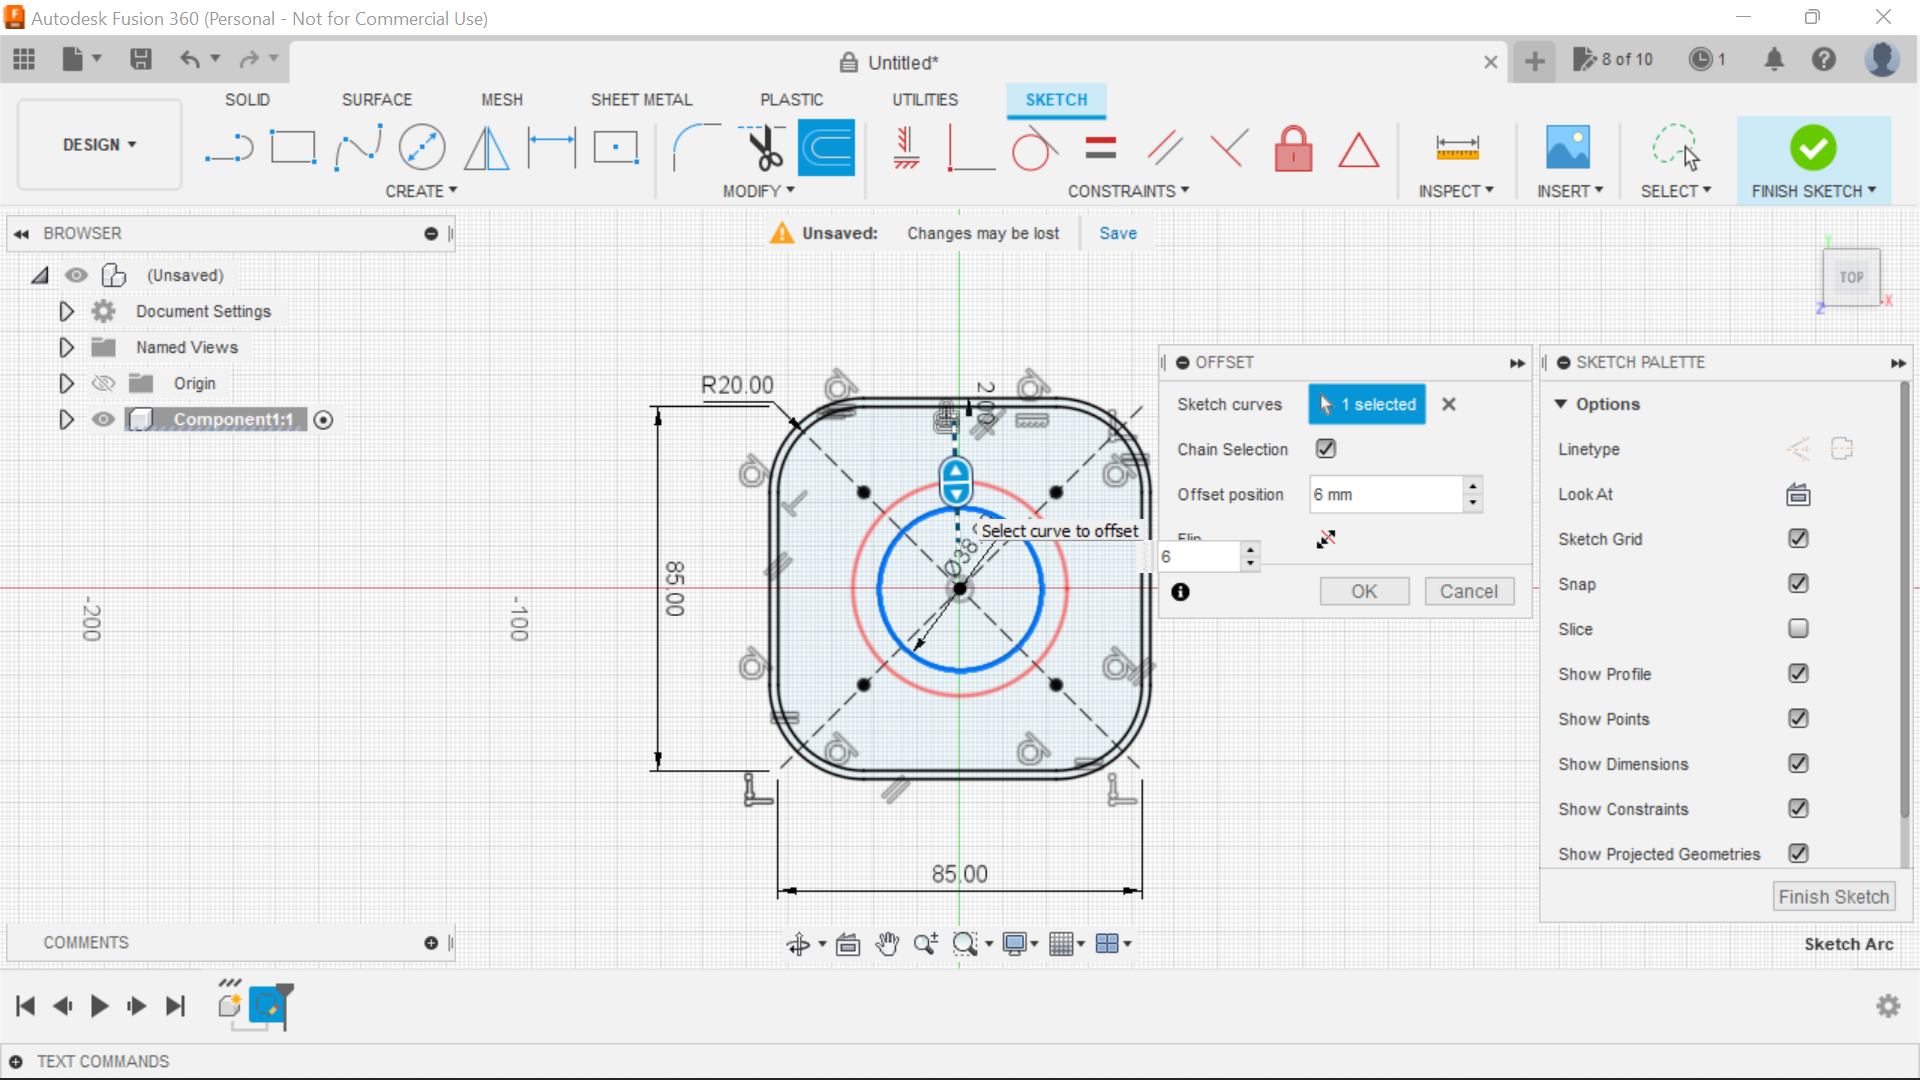
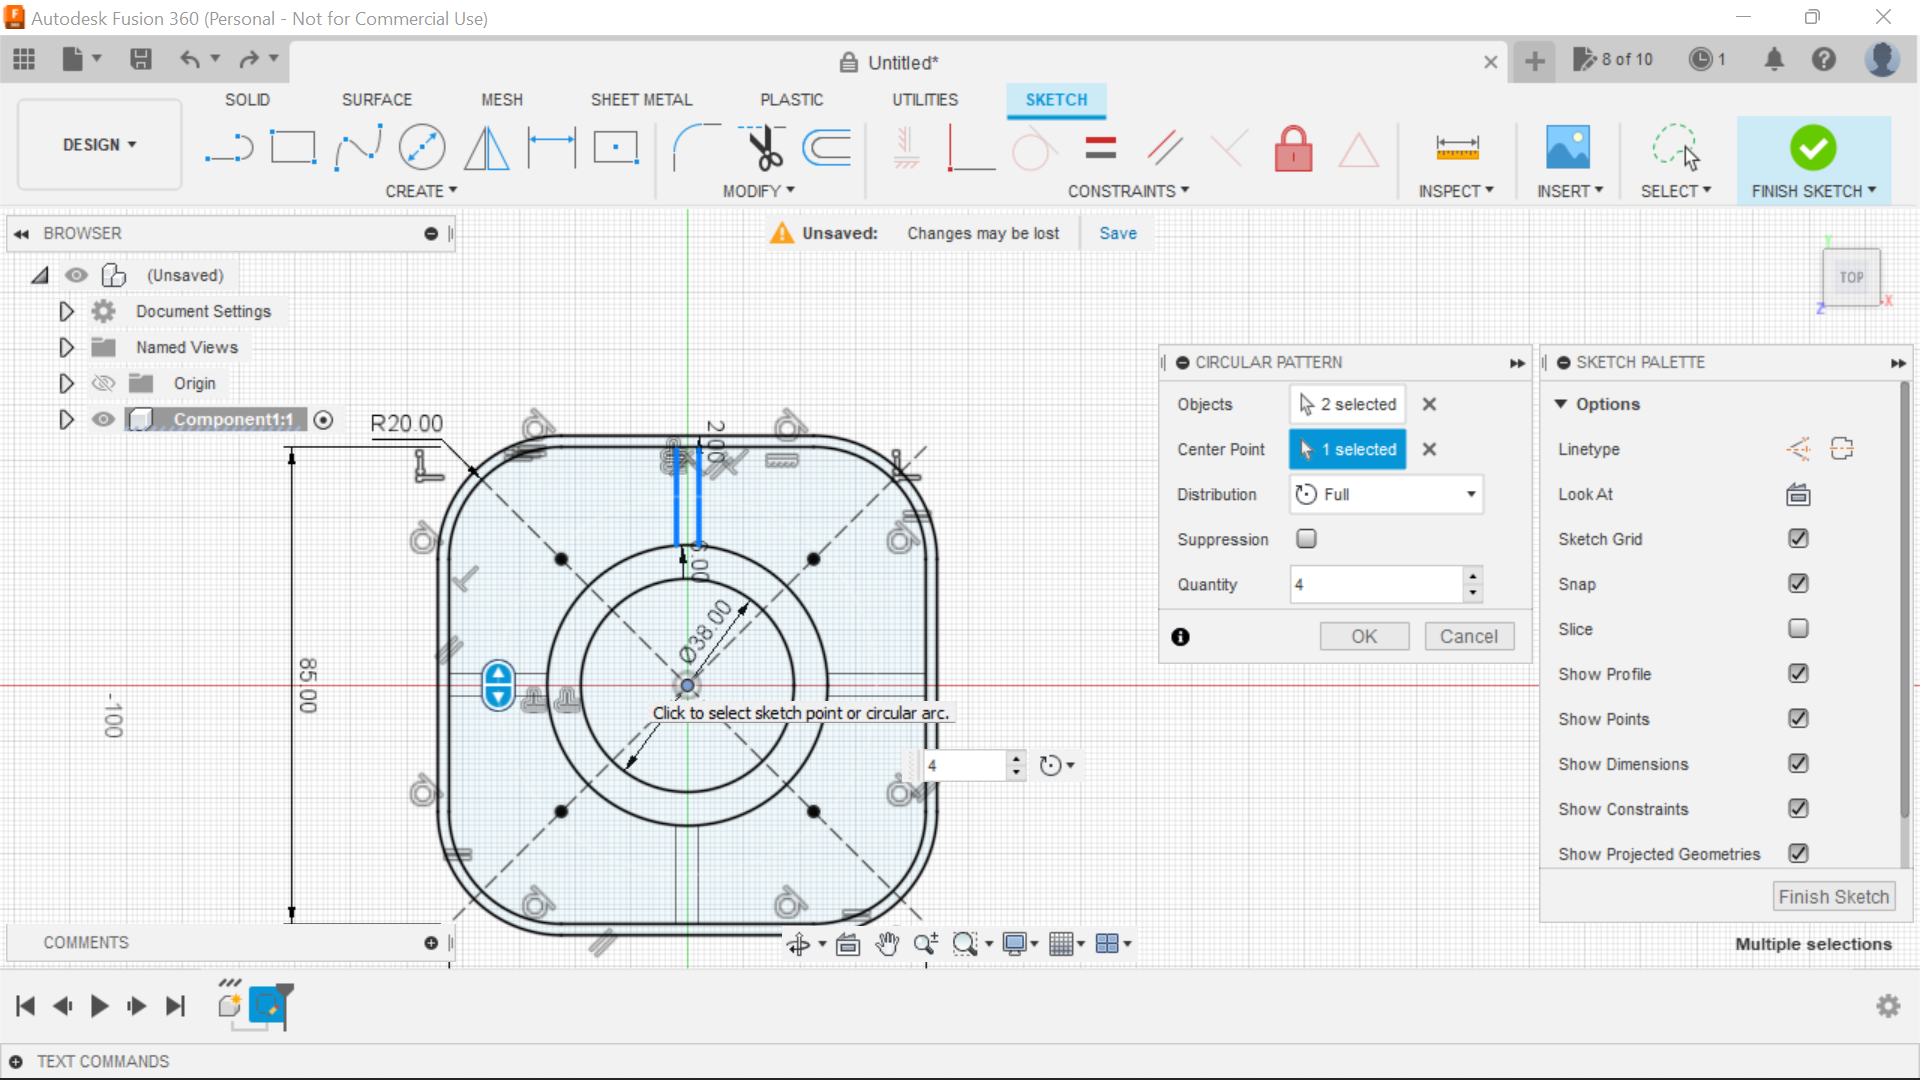
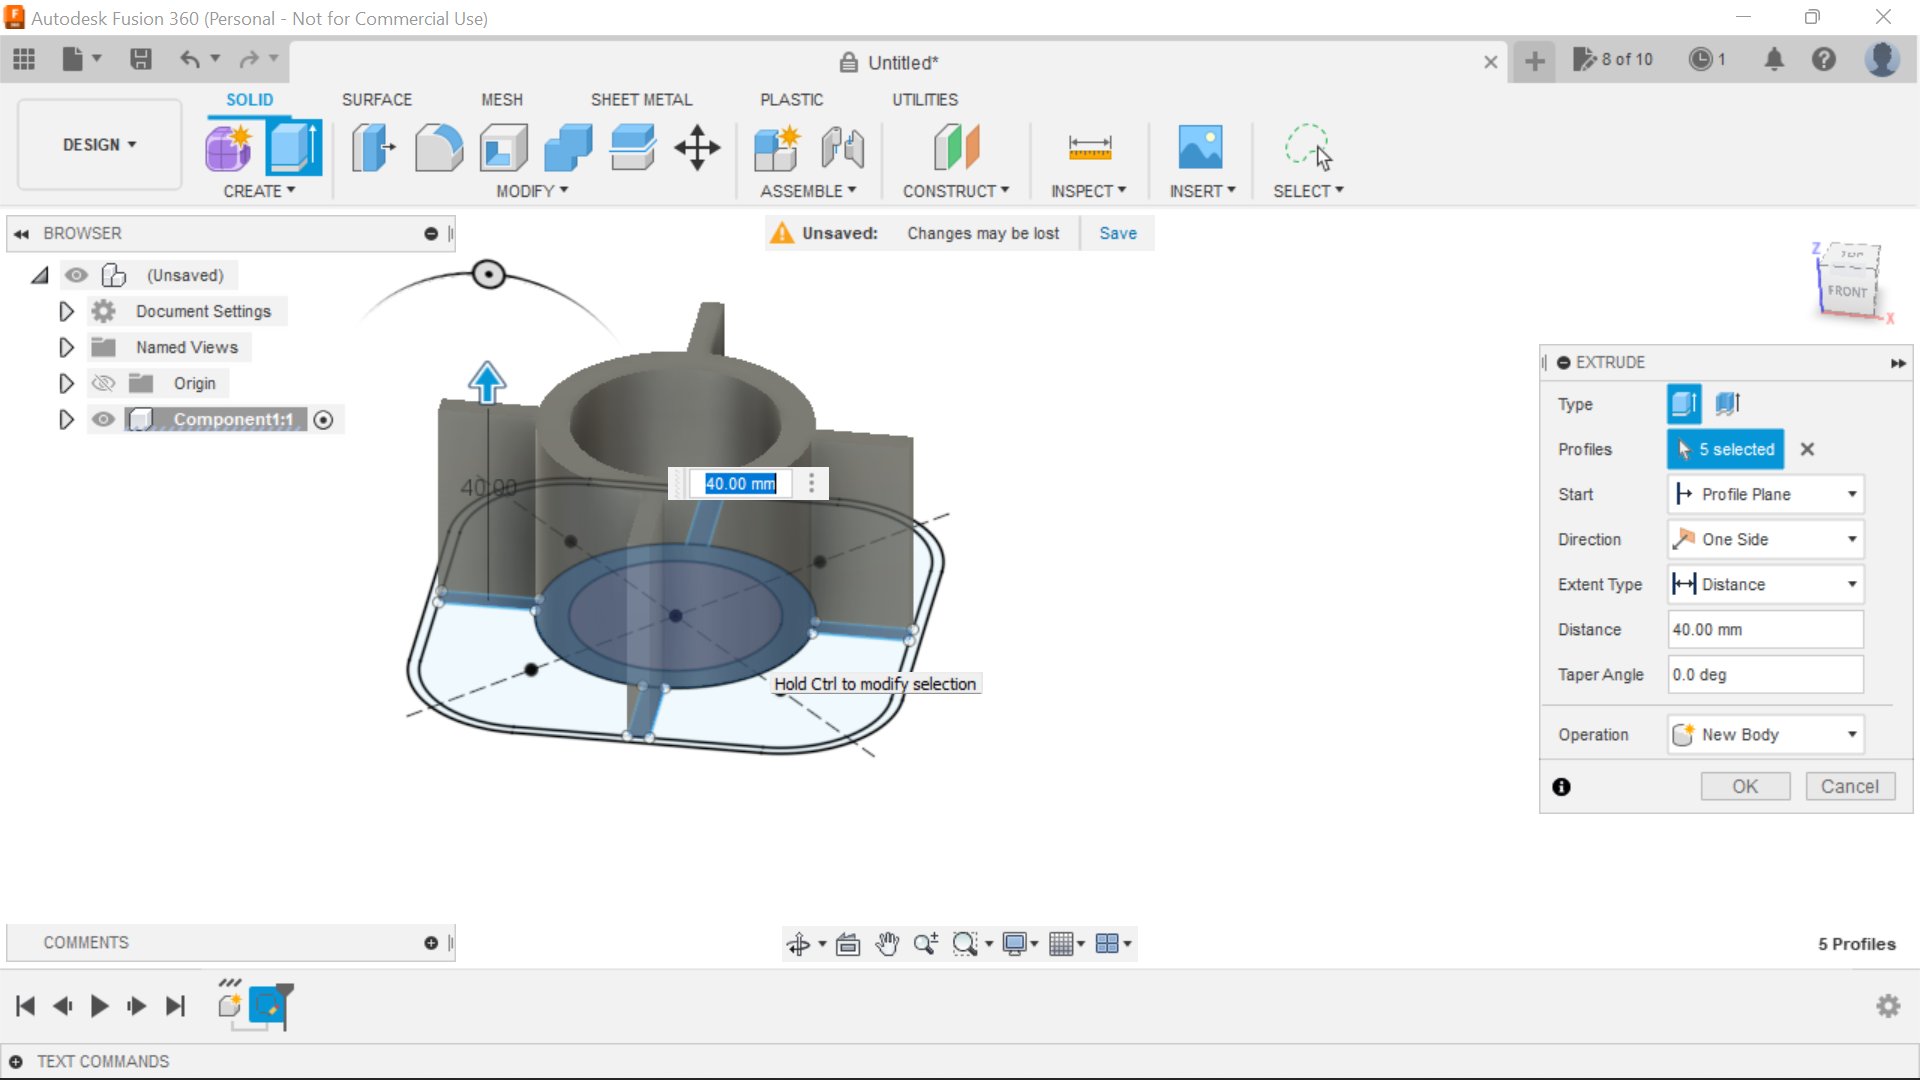
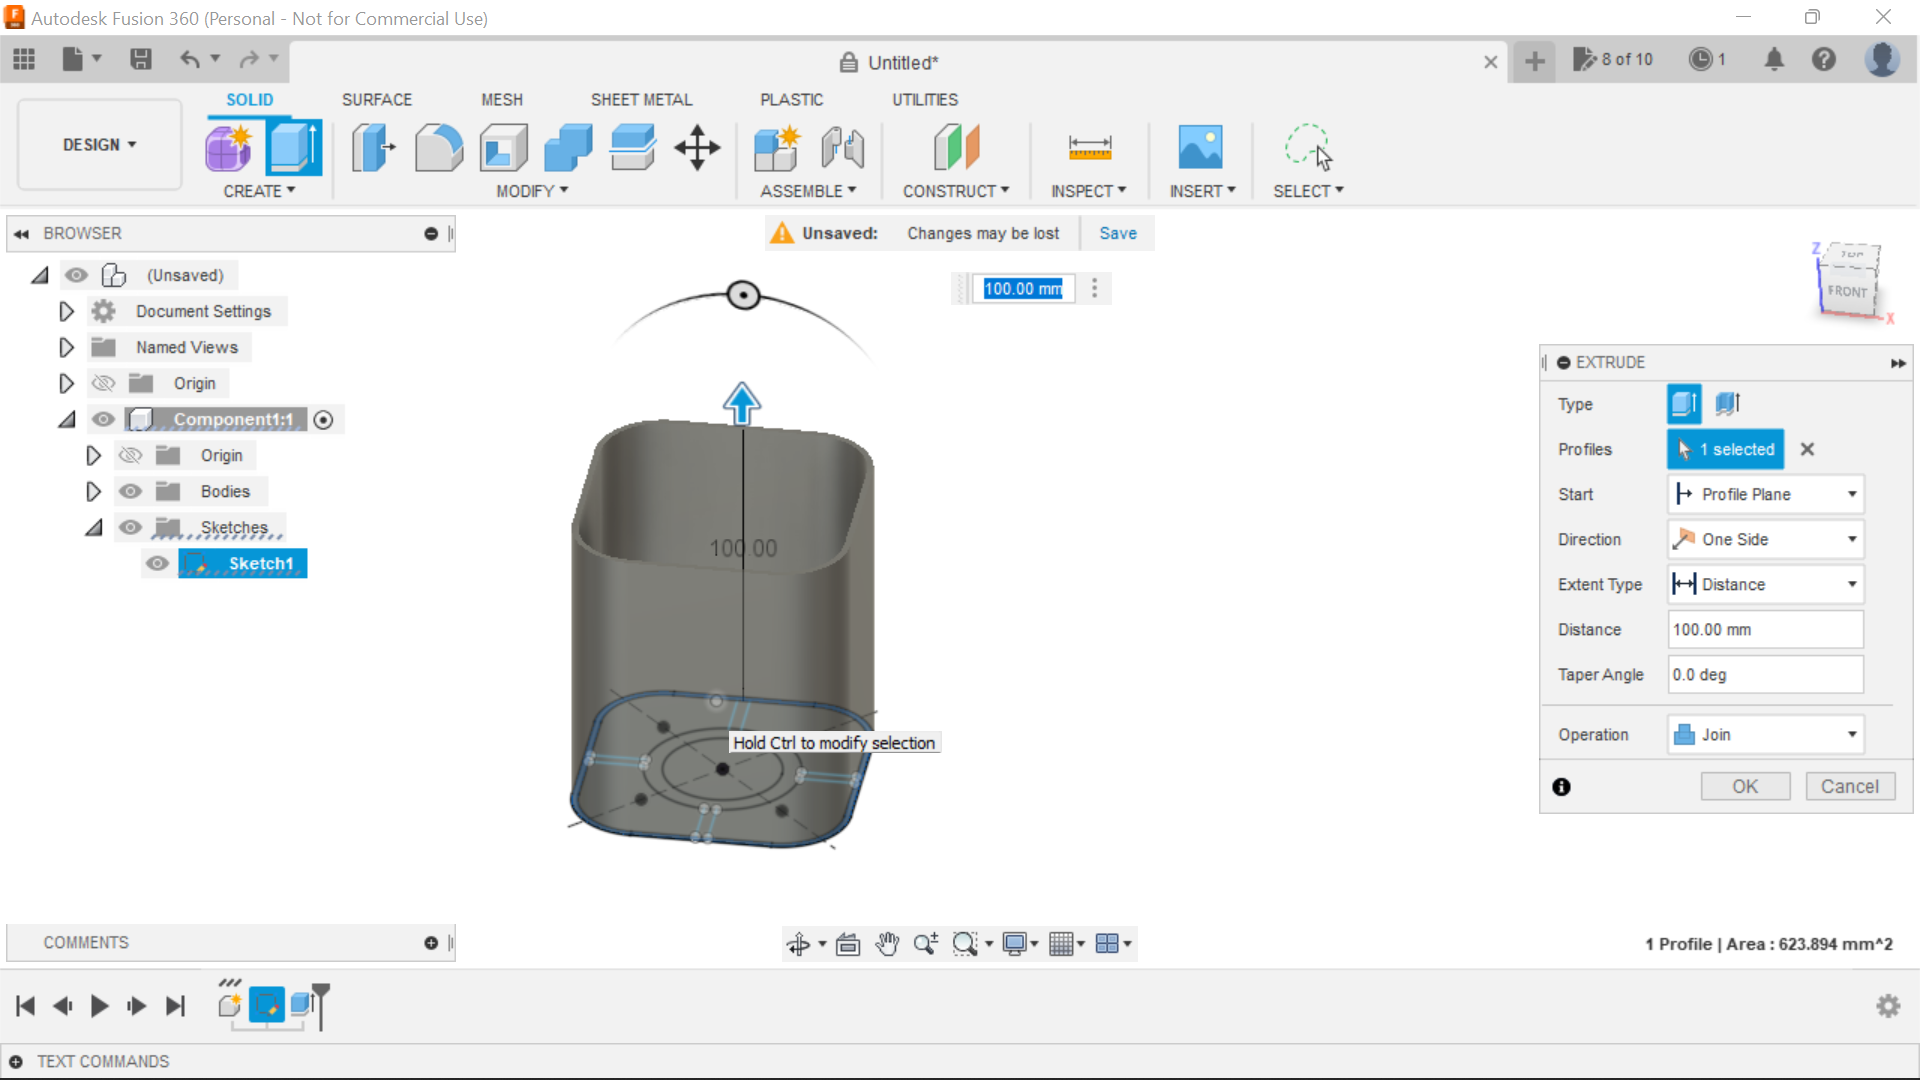
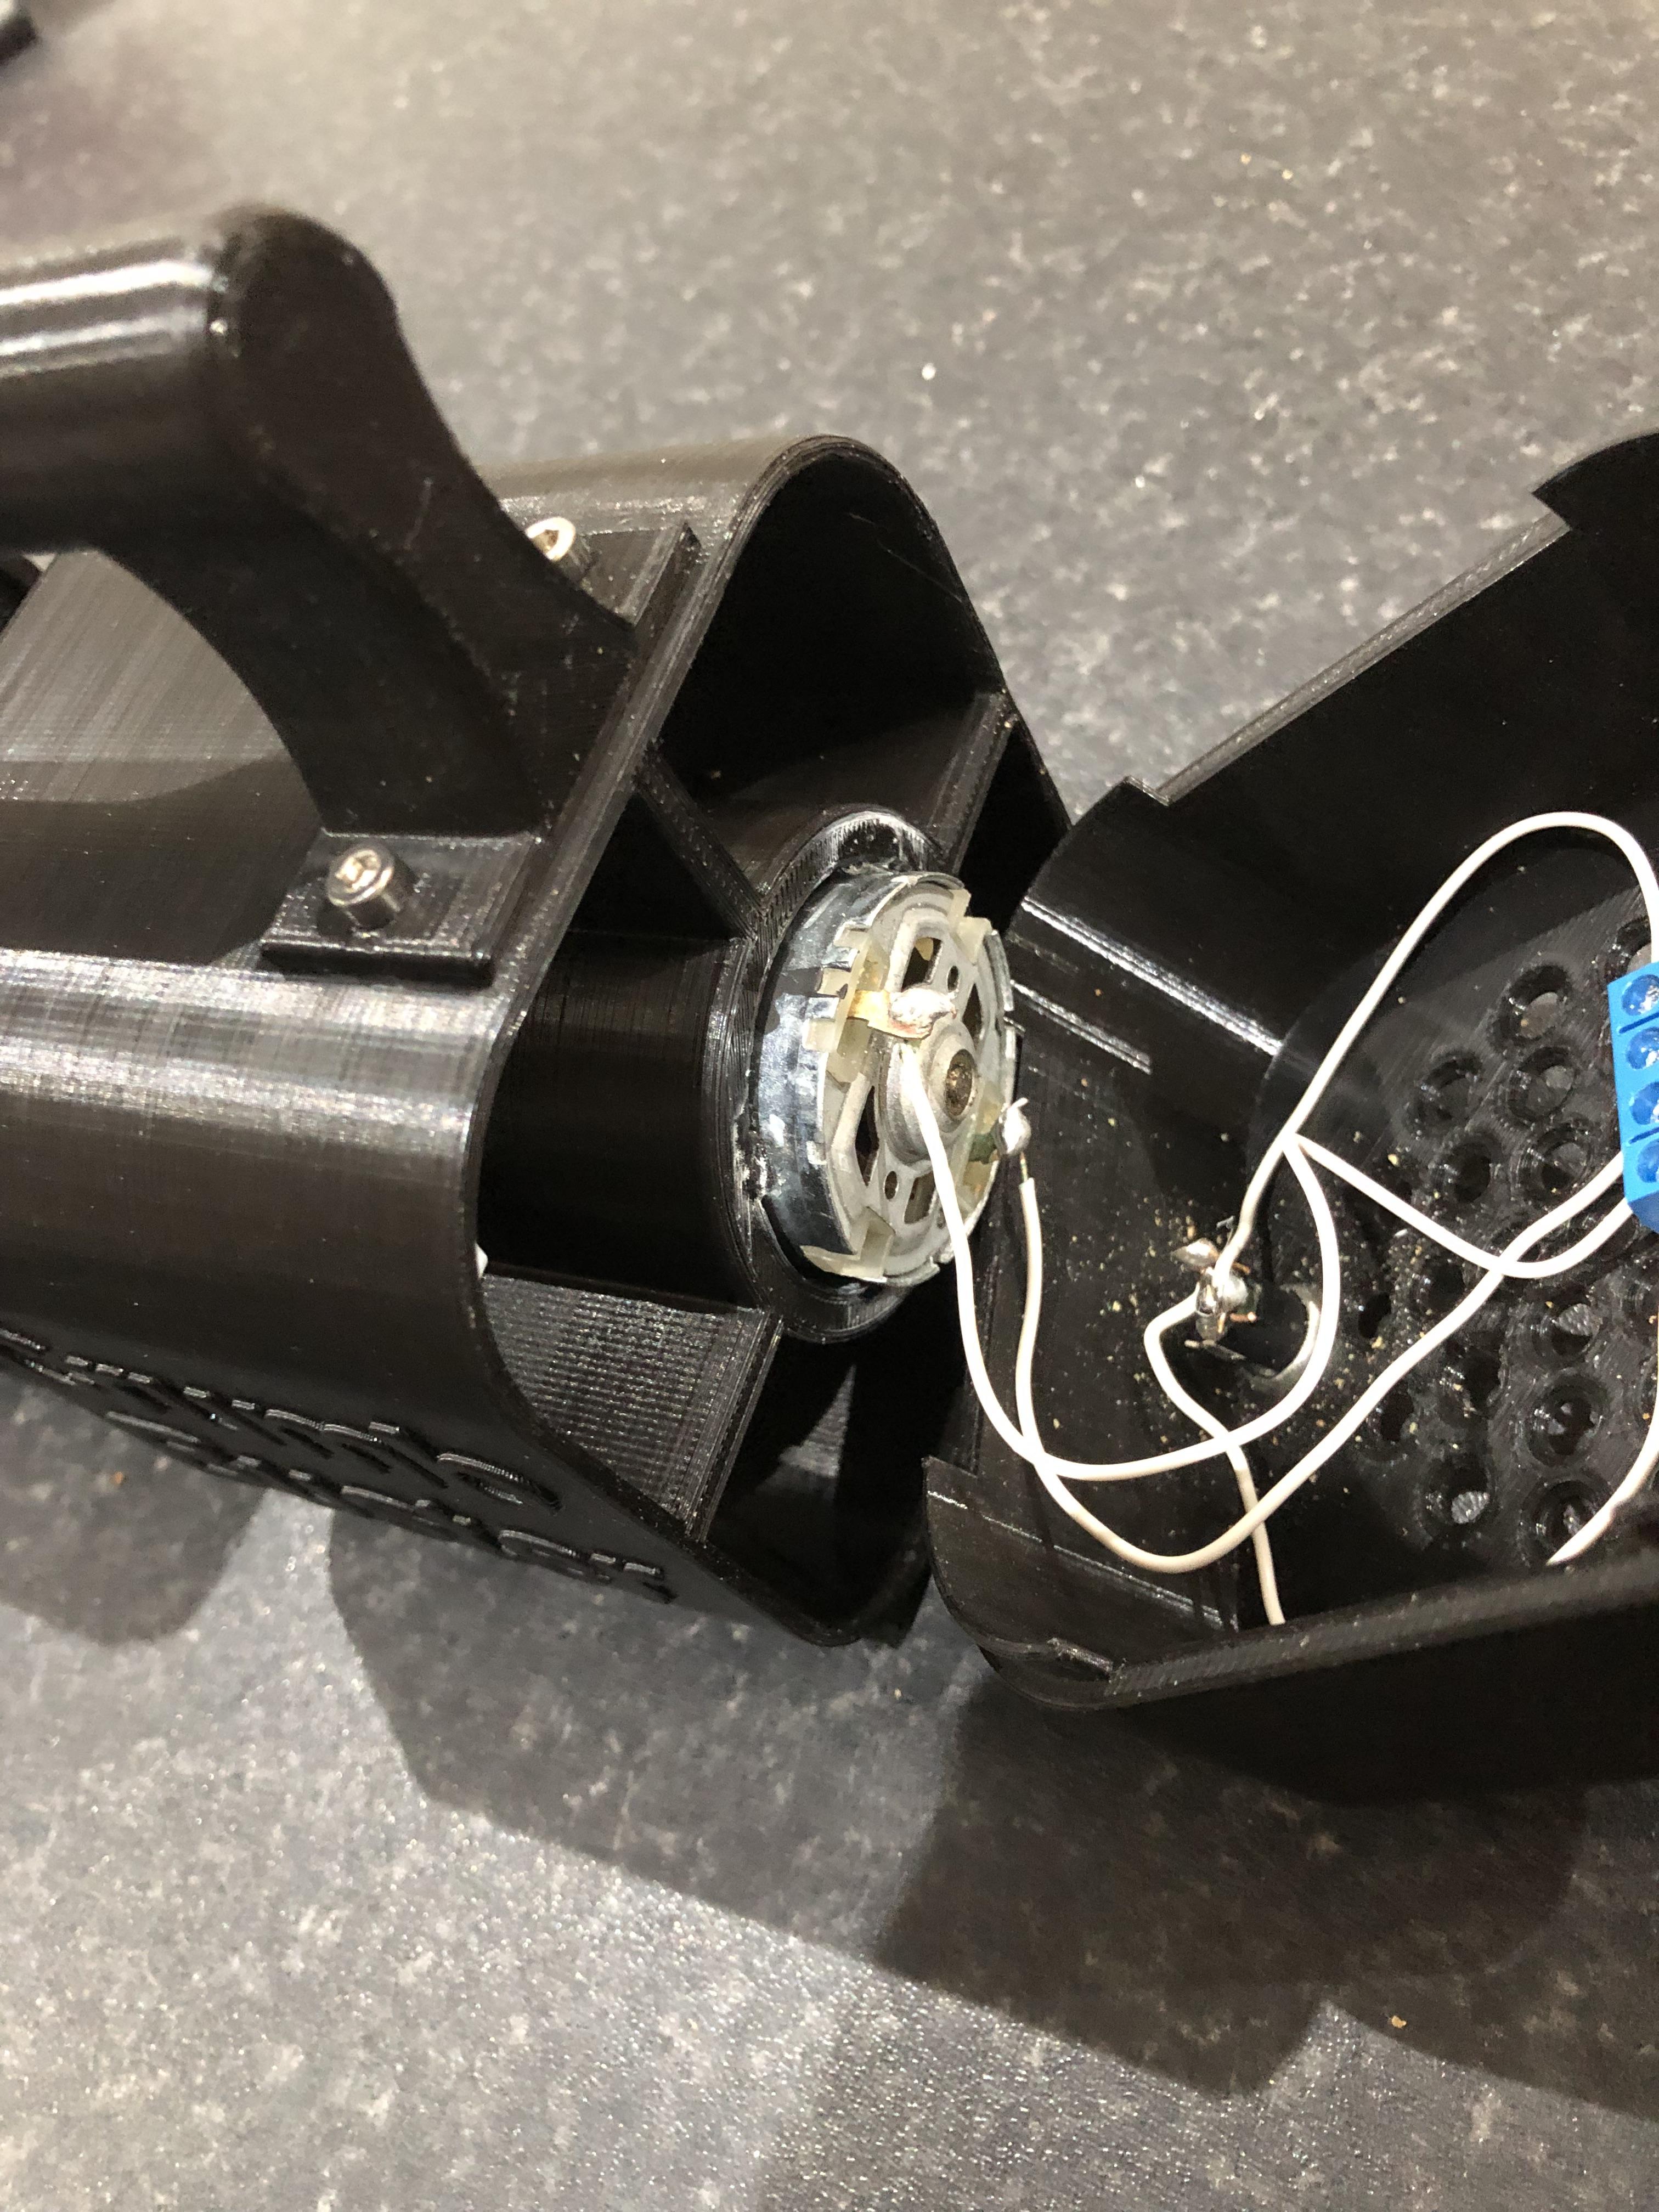
The motor diameter is 37.96mm or thereabouts, so I sketch a centre circle @38mm to the top of the circle I create a spar at 4mm, then using the circular pattern tool create 3 additional spars, so now we have a spar on each of the sides, extrude the spars and centre circle to 40mm and then the wall to 100mm and join them, the motor will push into the hole and the spars hold everything in place and keep it central.
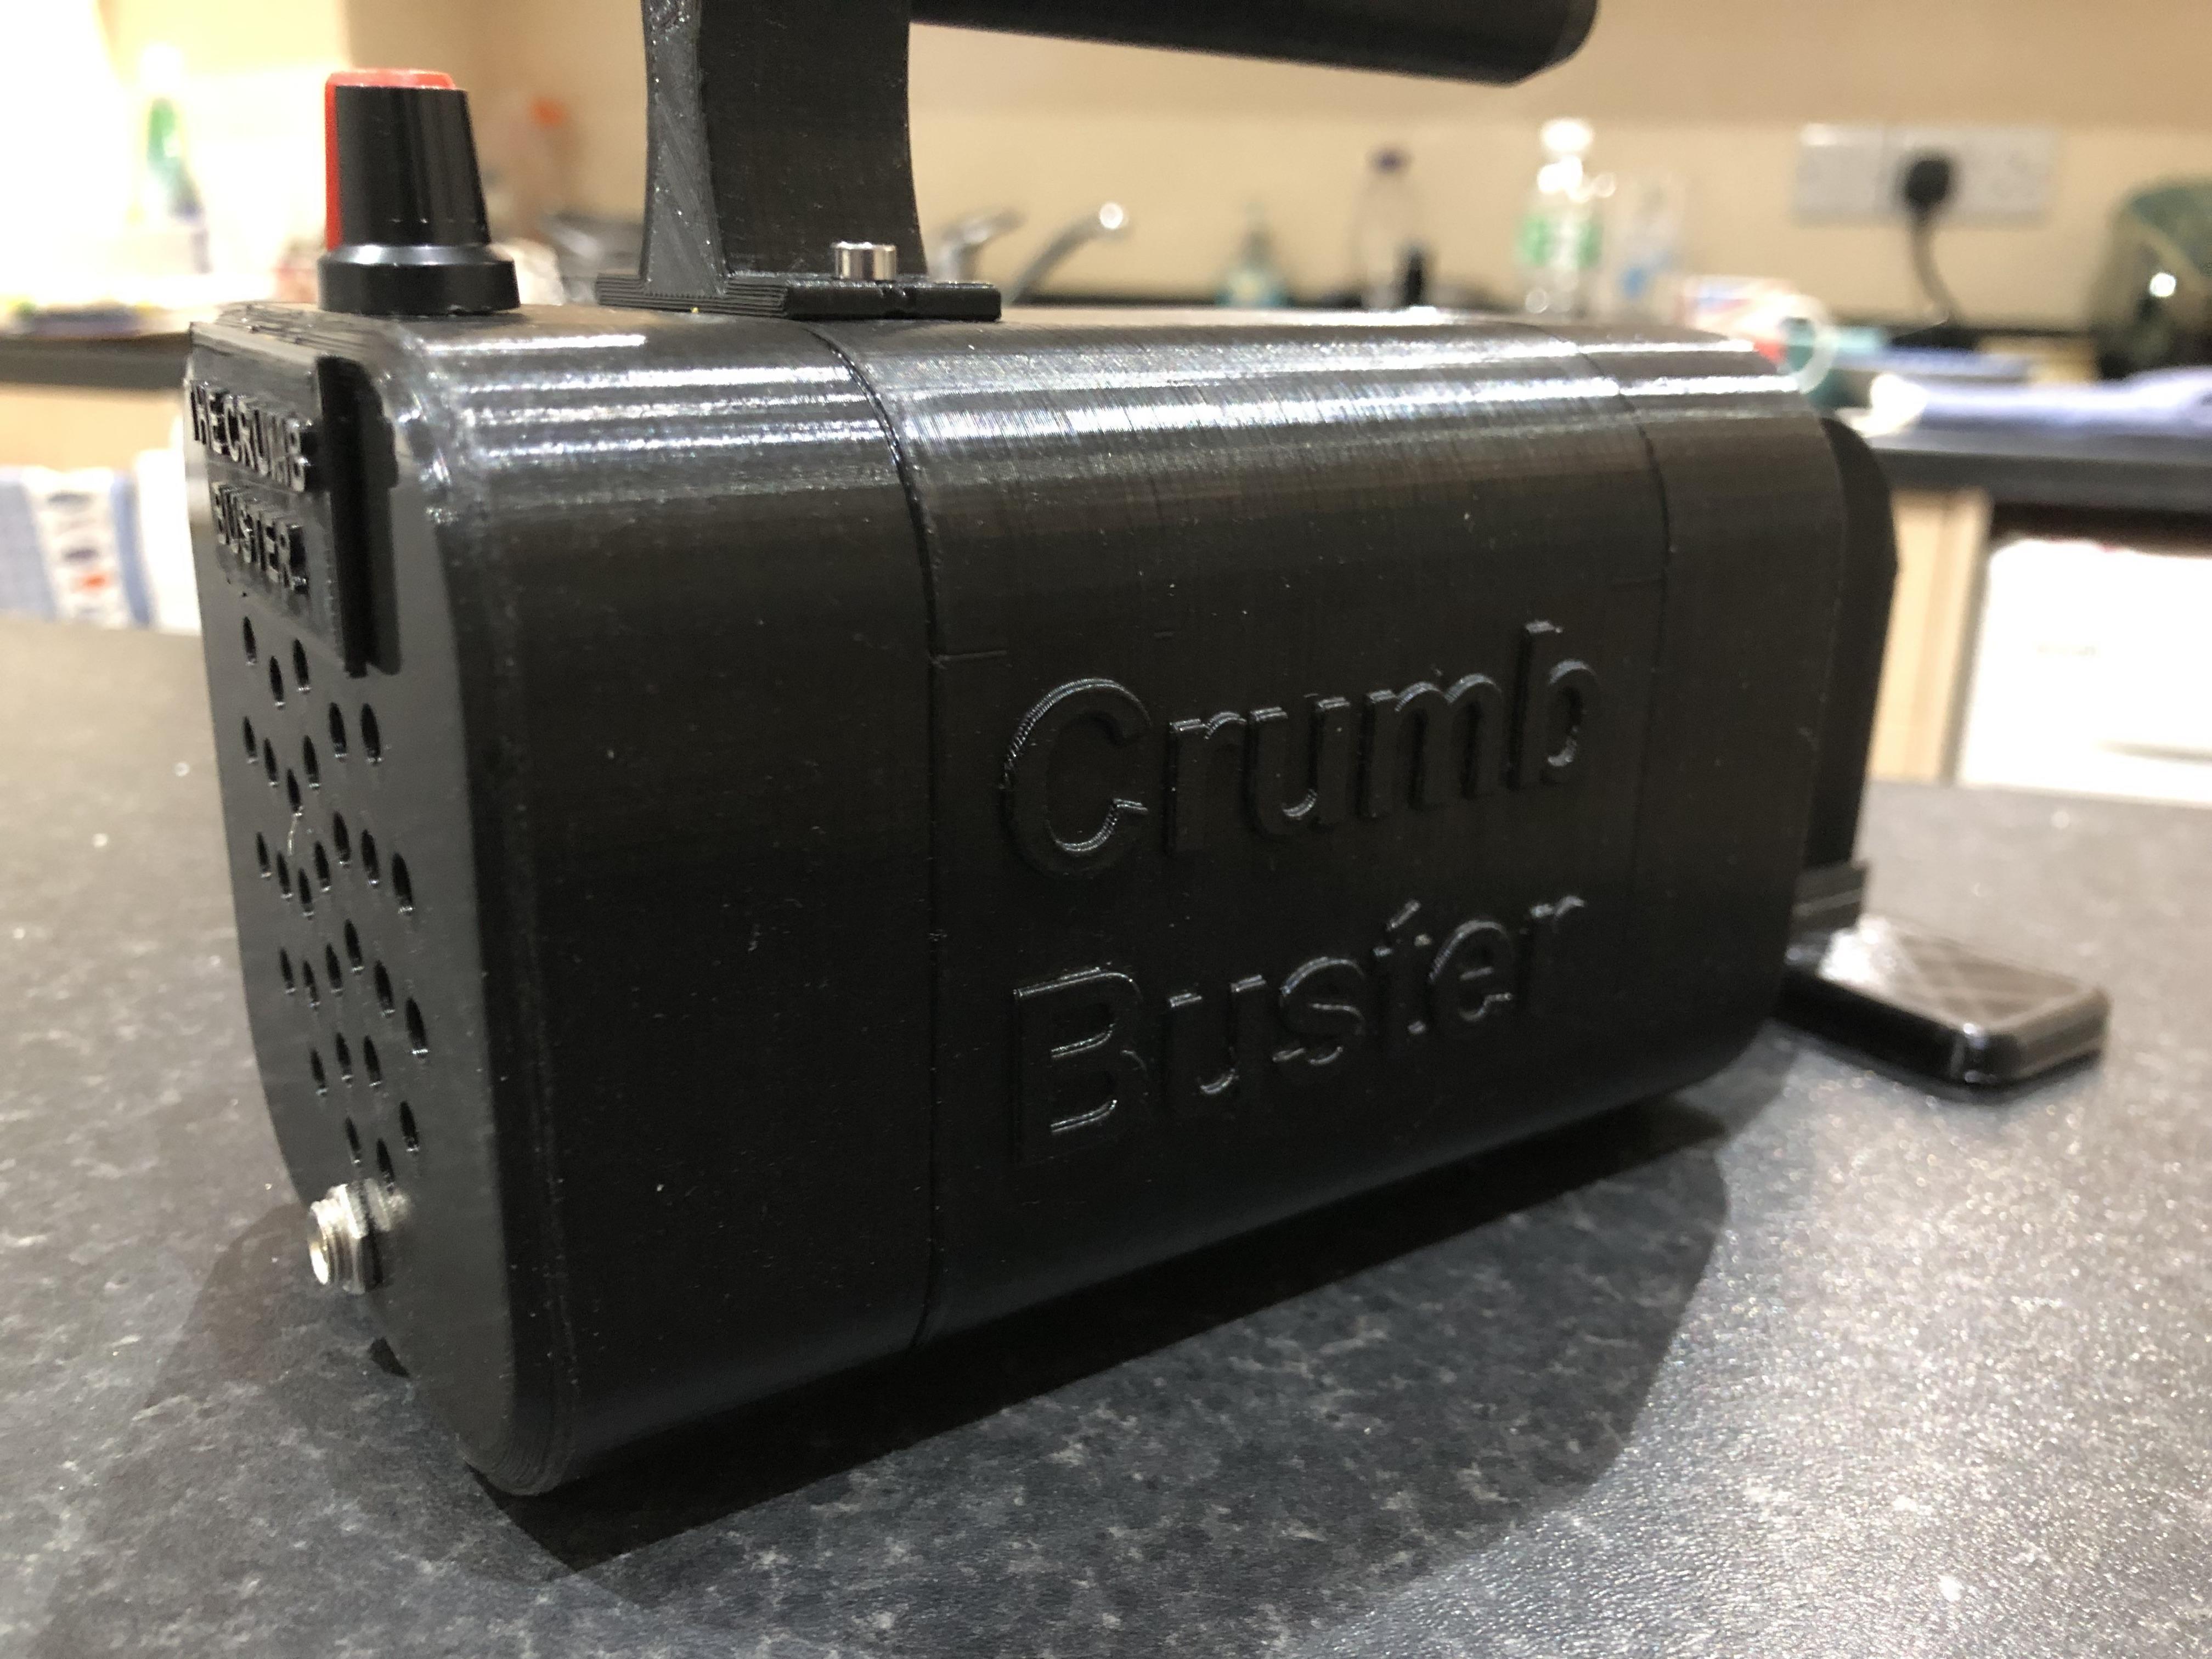
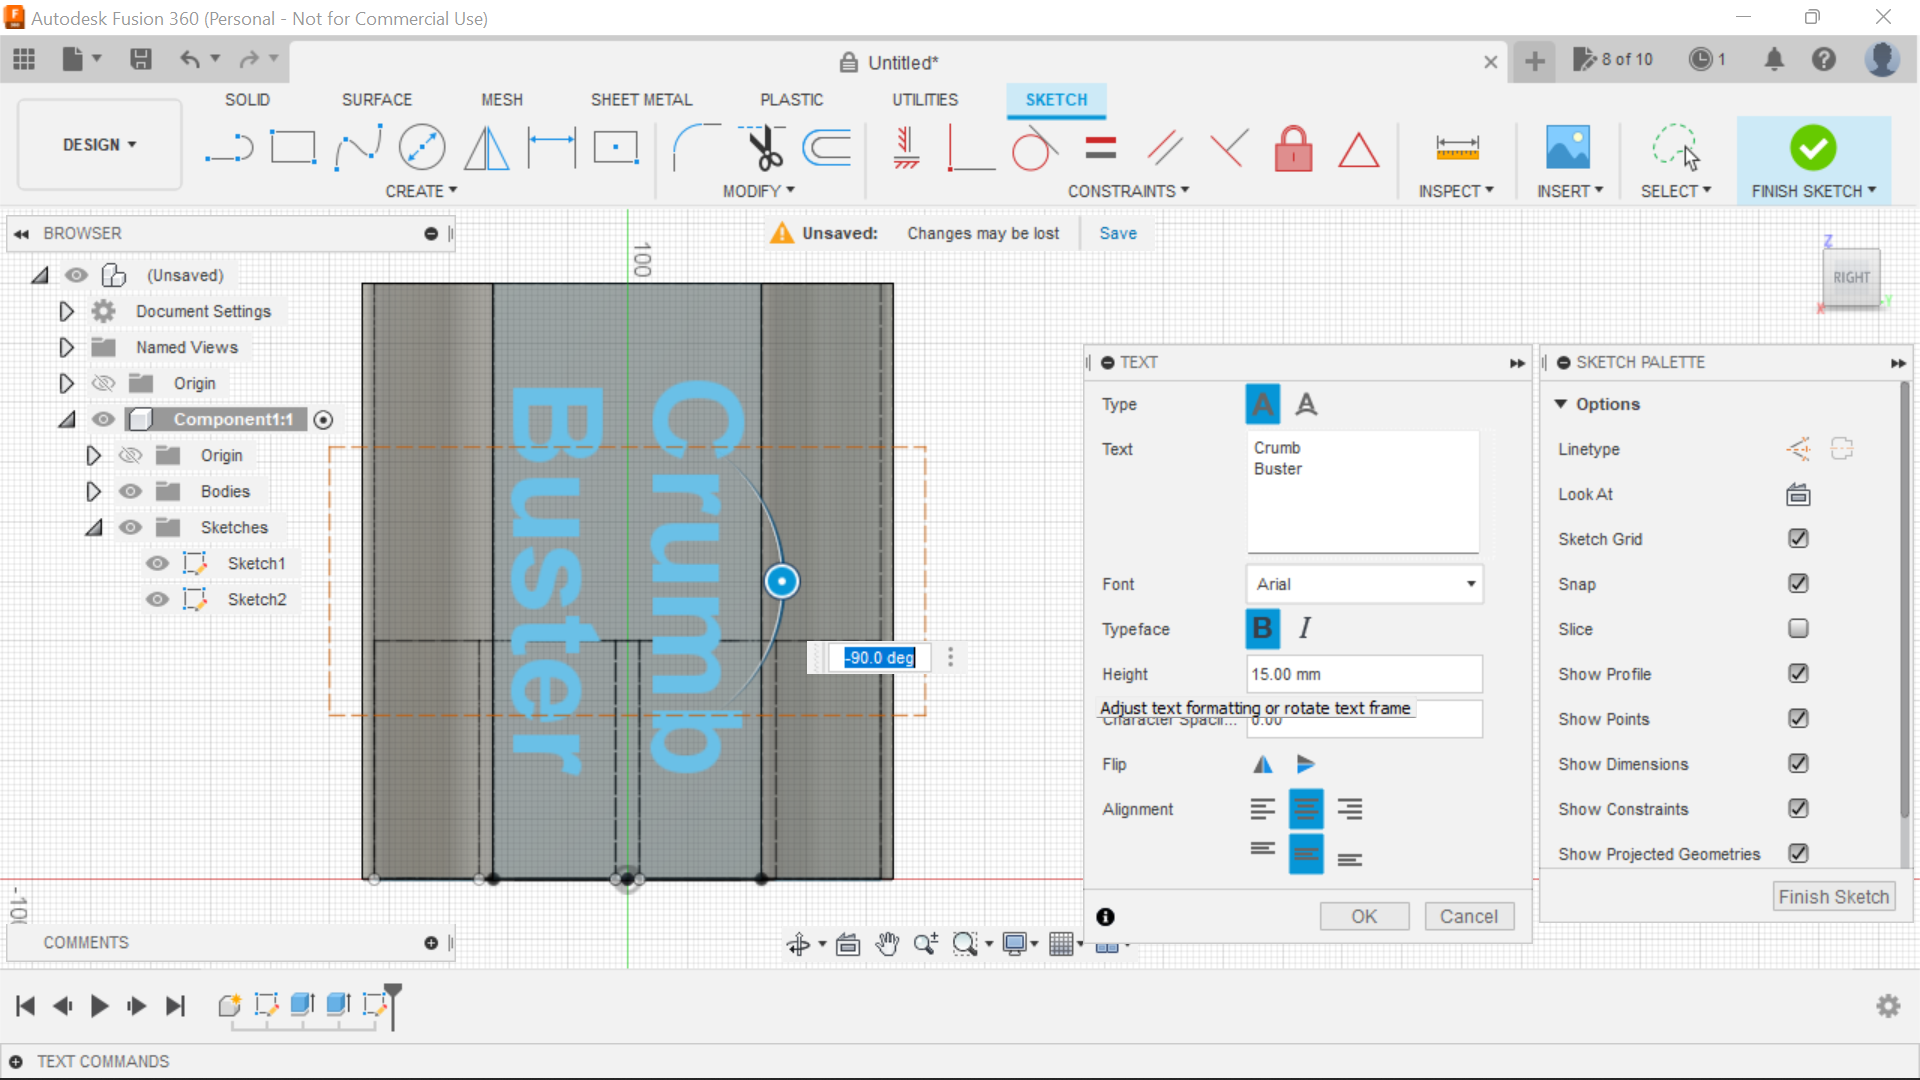
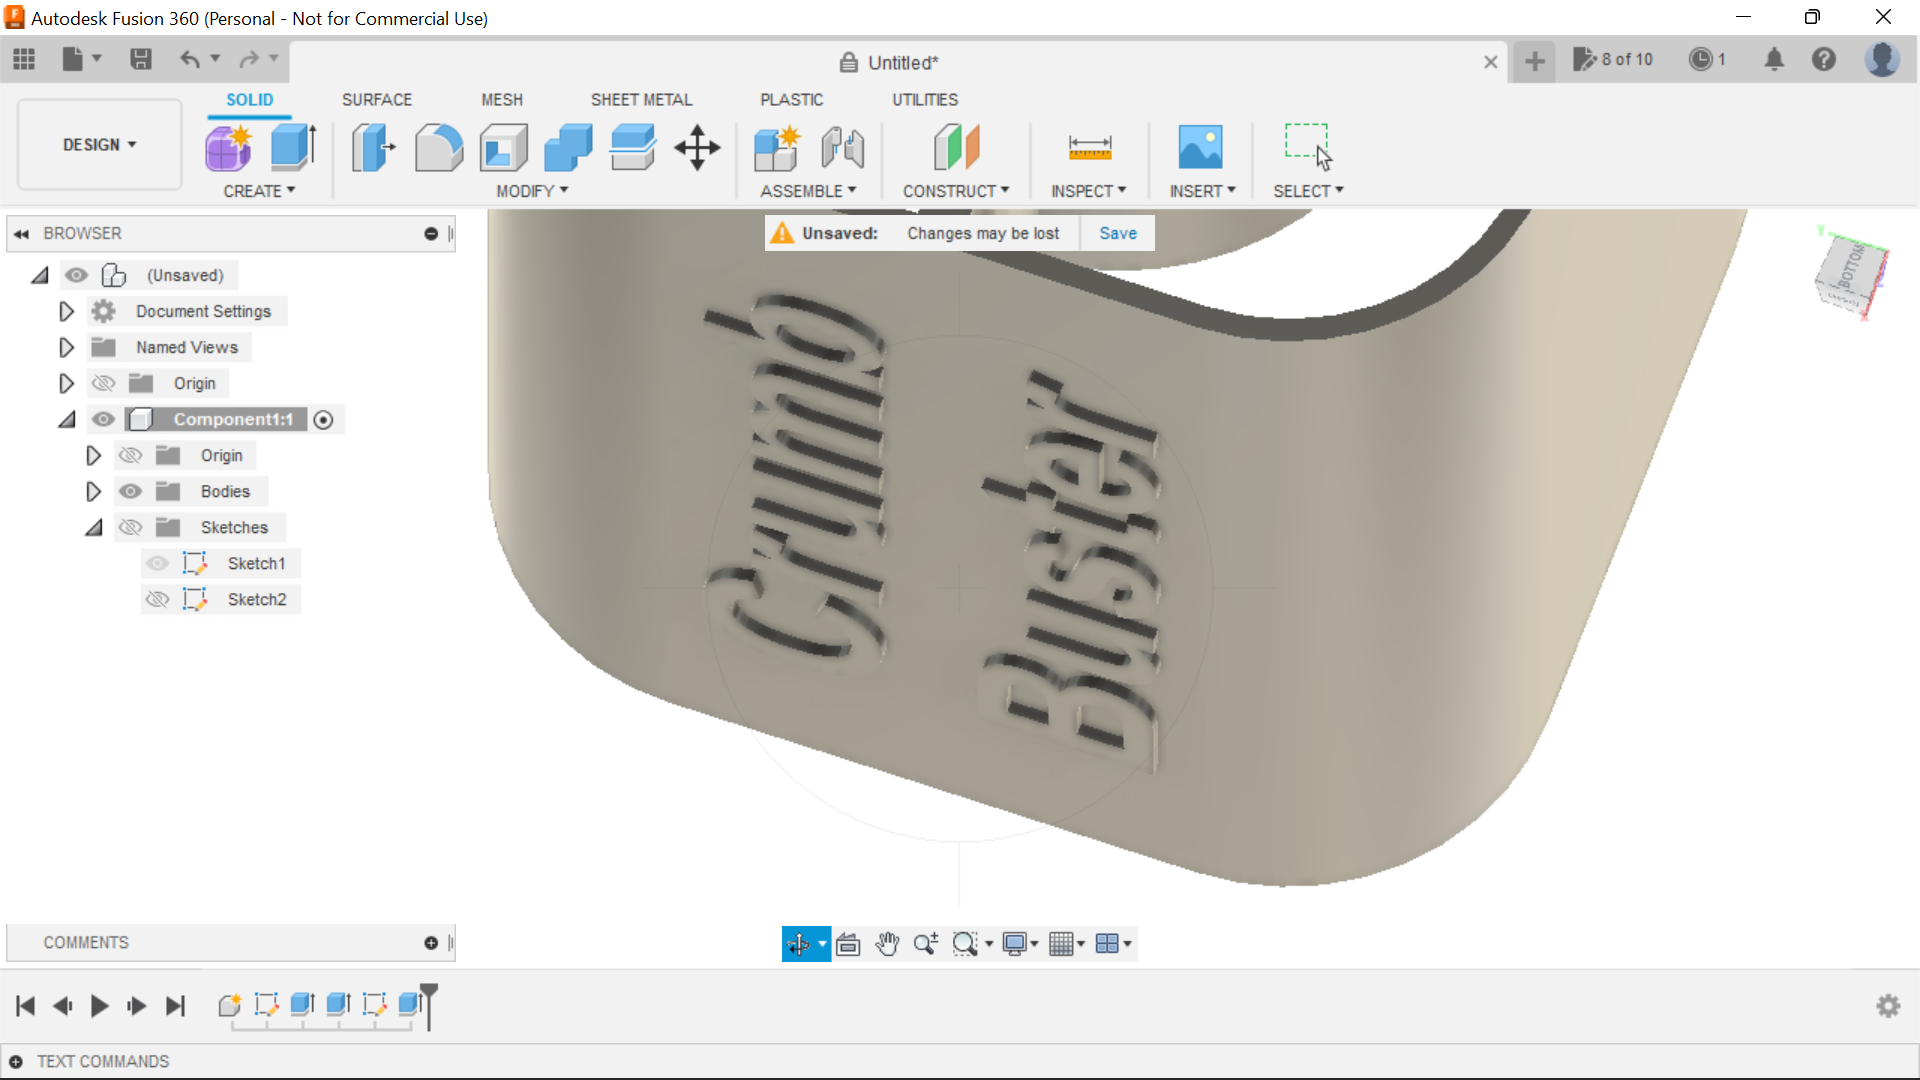
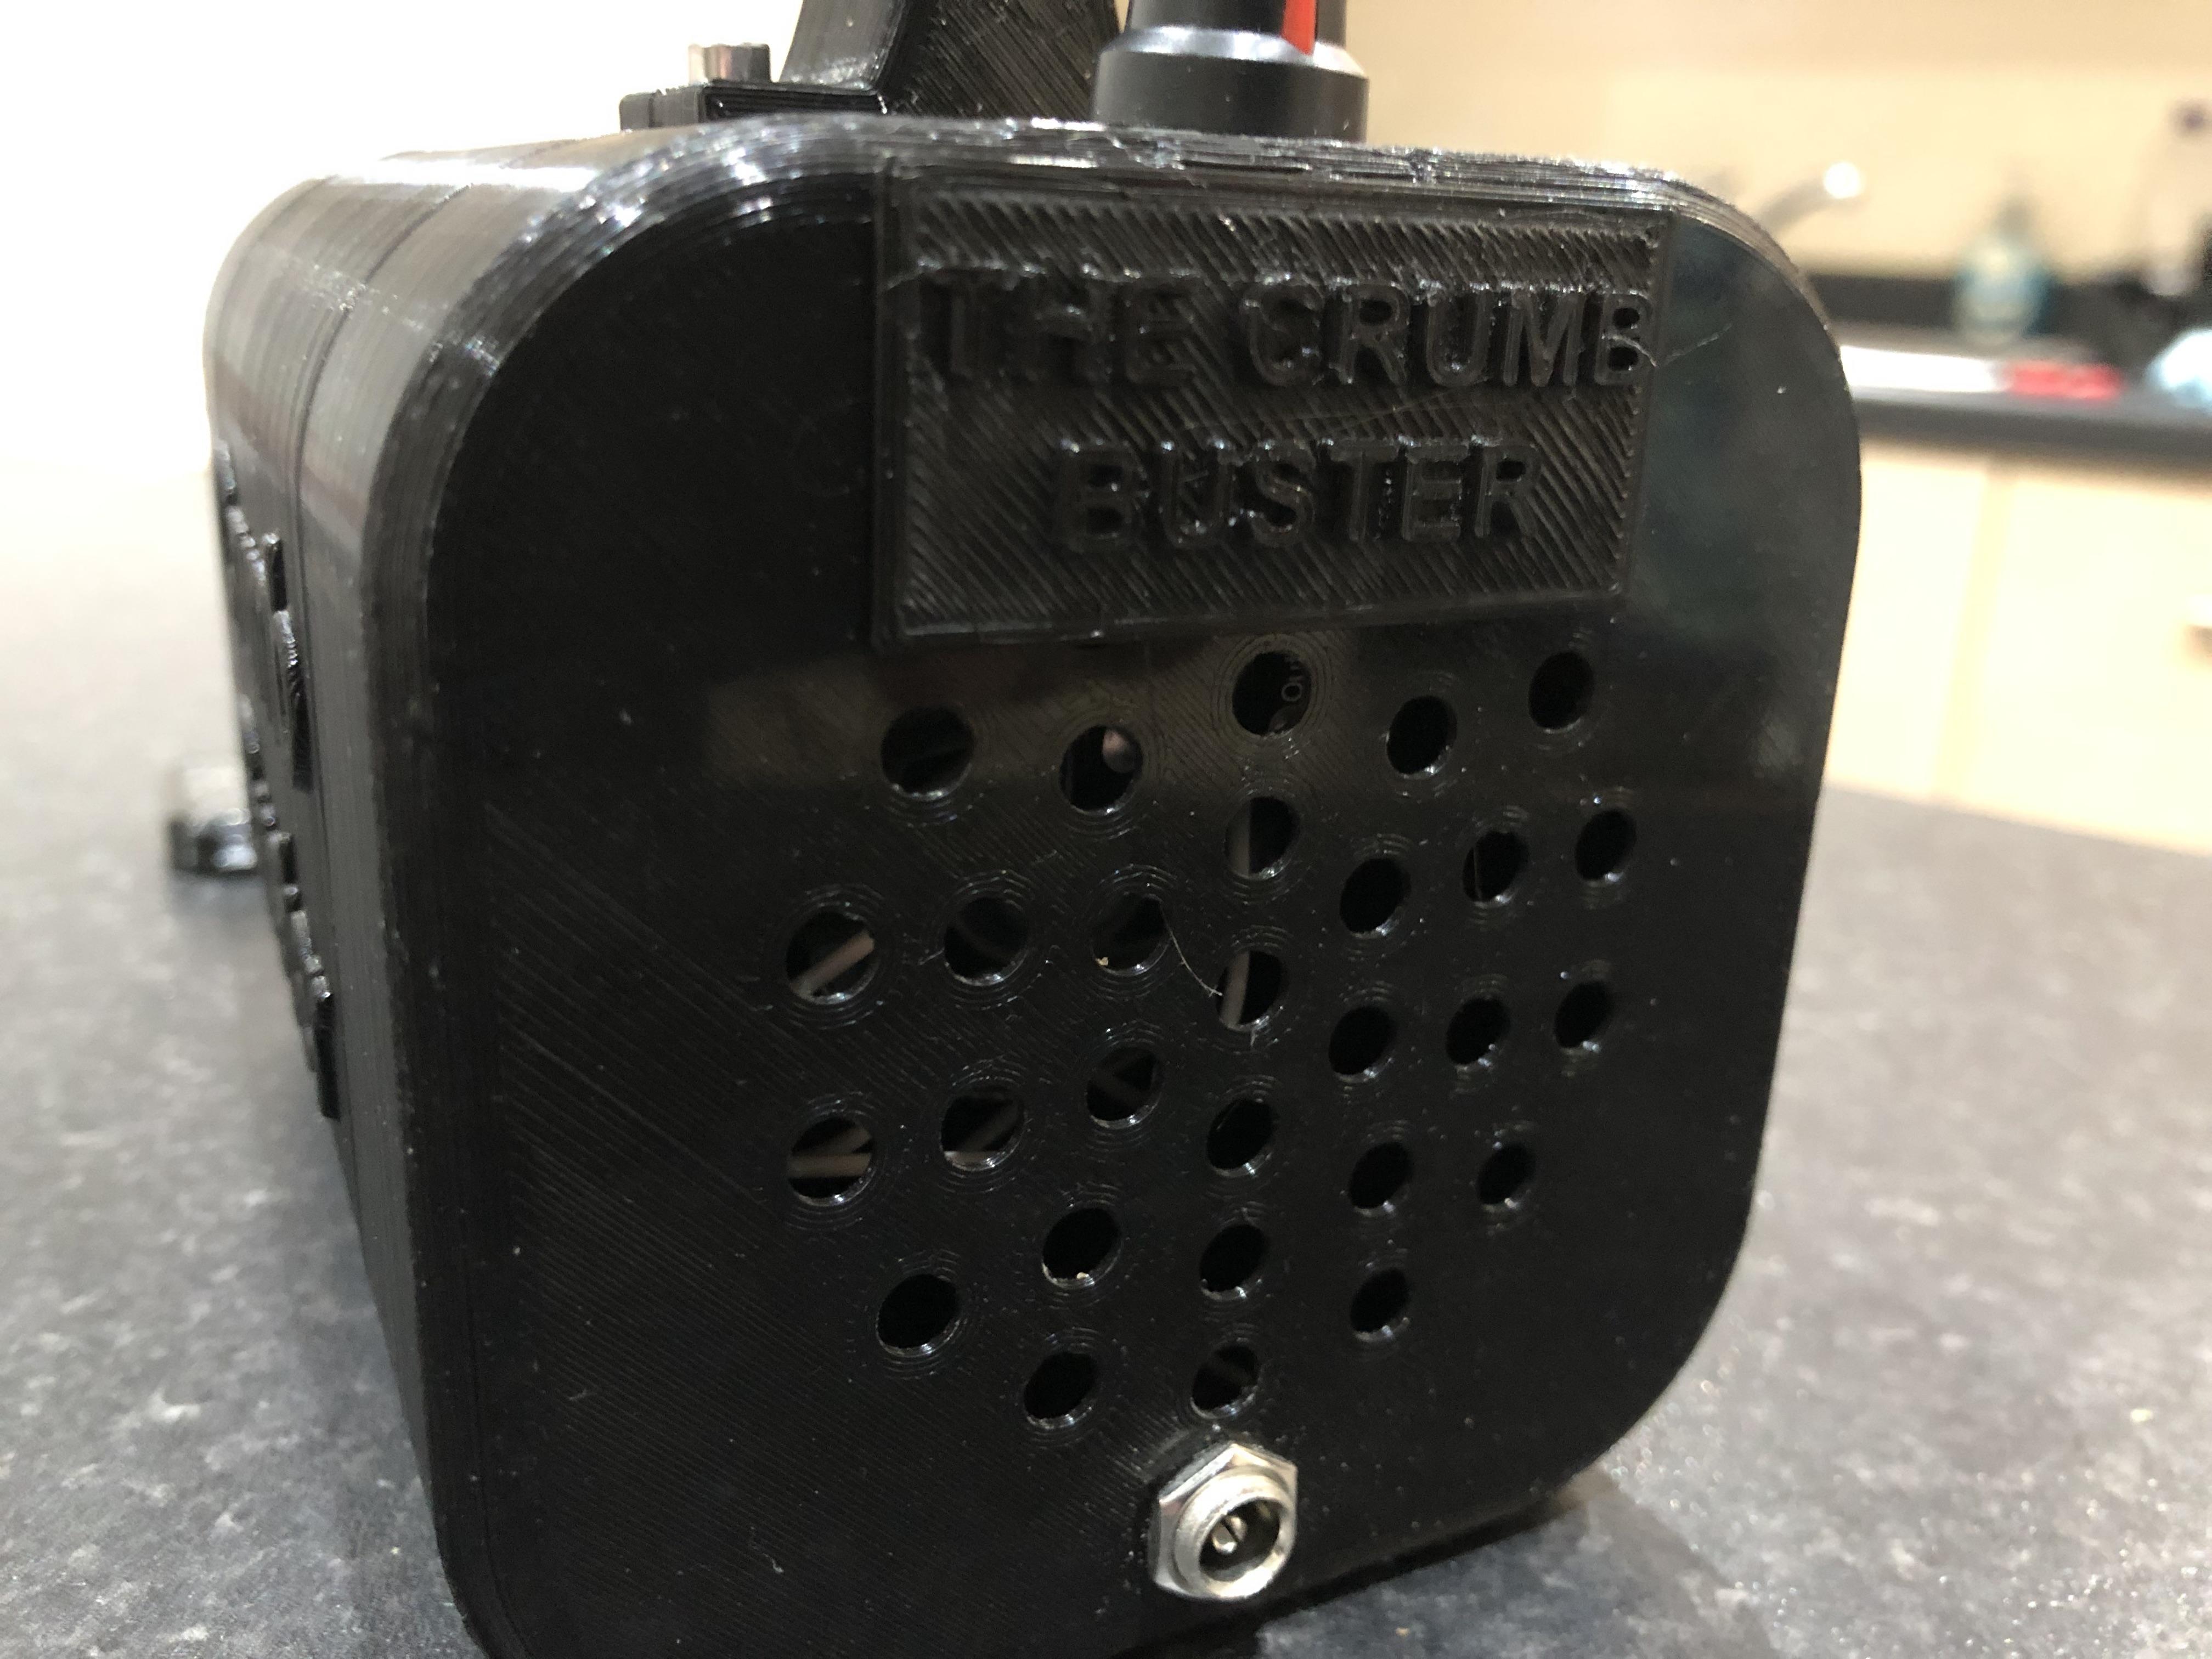
I wanted to add text to the sides of the Chamber "Crumb Buster" so I selected a side face to sketch to and pressing S on the keyboard and then T we can choose text, I highlighted the centre section and typed in the words, Text height 15mm and Bold, I rotated the text to get it in the right direction, then using extrude, I extruded the text out to 1mm, the same applied to the other side albeit the text was in the opposite direction.
Making the end caps:
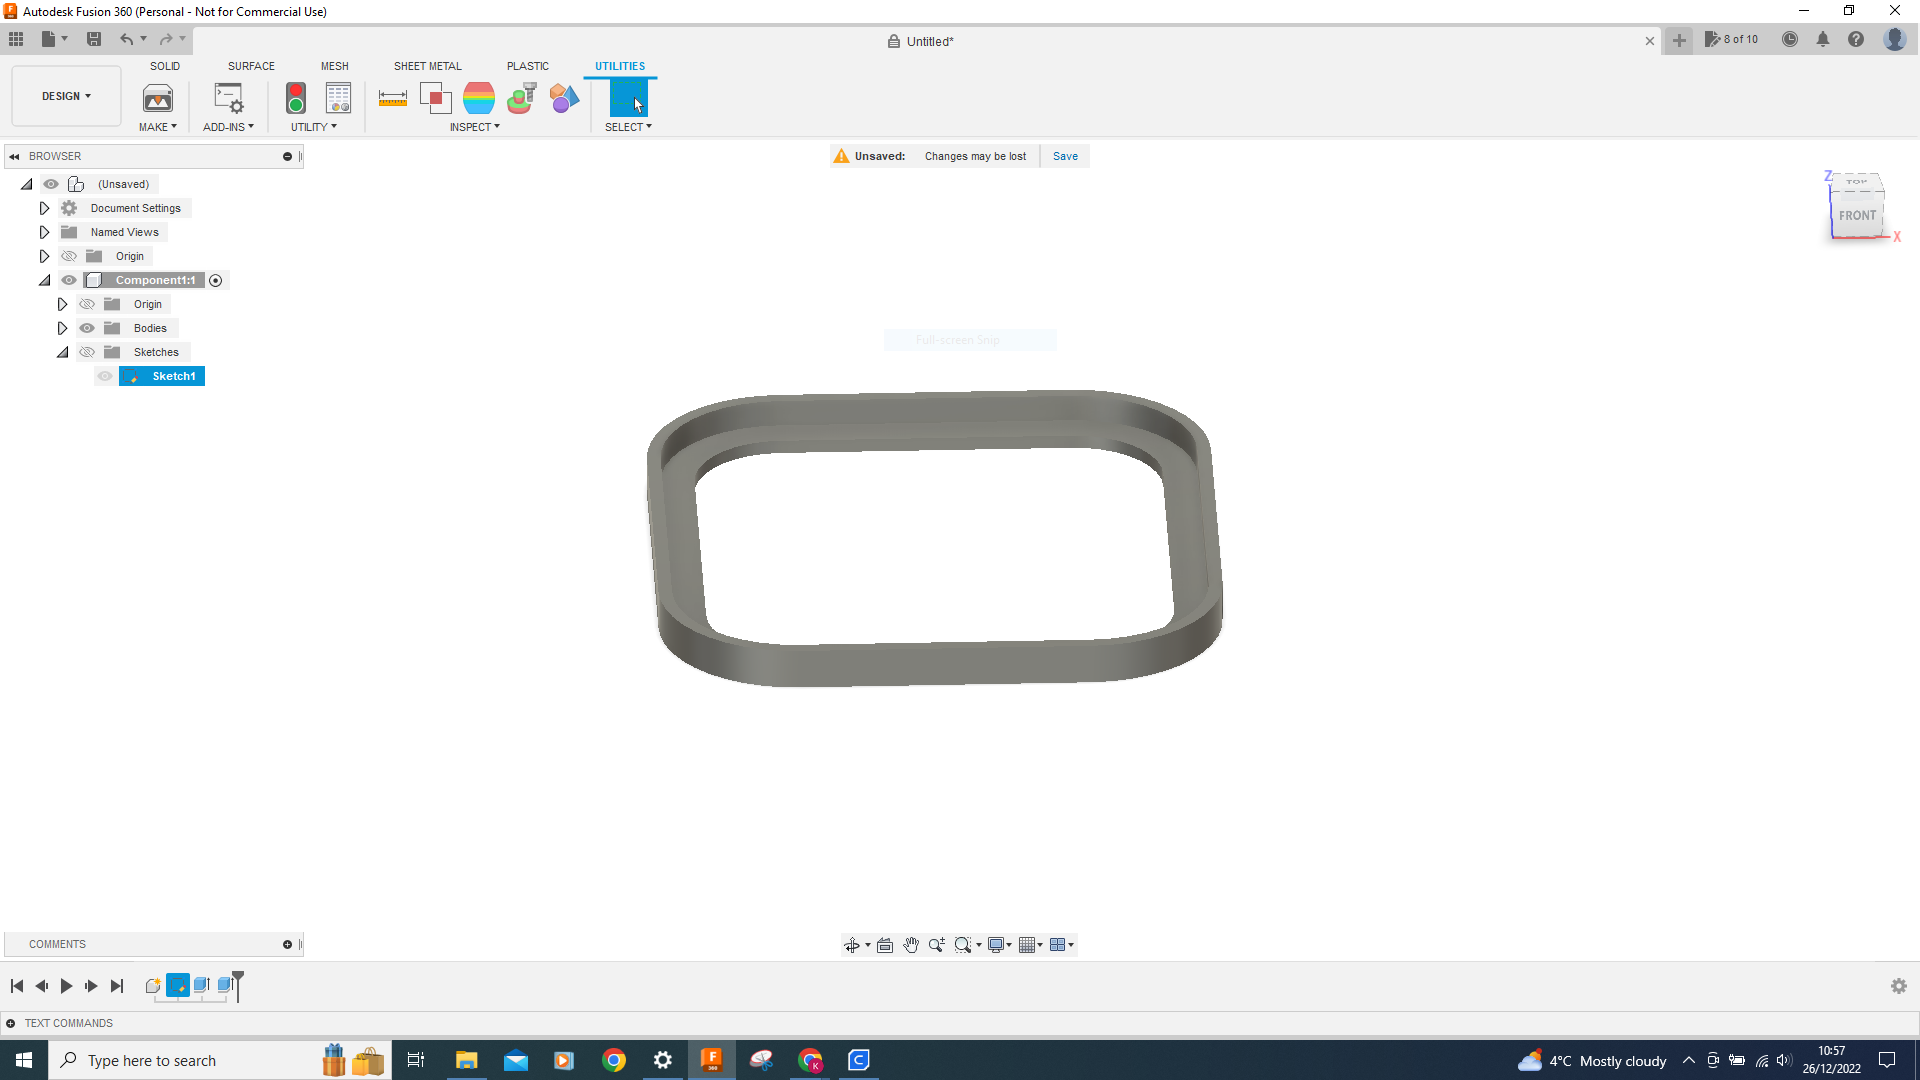
Making the End Caps and Vacuum Component
To make the end cap, I projected the outline of the bottom outer lines of the chamber.
I projected the top face then offset the outer line 2mm inboard and extruded this to 40mm then flipping the component over, I projected the outer line and then extruded the whole thing up to 2mm and joined, I can now had some vent holes to the end cap using the circular pattern tool and also create a hole for the power connector.
I wanted to have 4 x tabs one in each corner these would hold the end cap in place to the main chamber so to achieve this I projected the inner line of the opposite end of the end cap I then offset thin inward un checking the chain box so I could highlight each of the corners, I then offset these to 1mm and closed off the ends, these could now be extruded to 8mm to create our corner tabs, I neglected to take screenshots of this procedure but the component is set up to print n Cura giving you the idea.
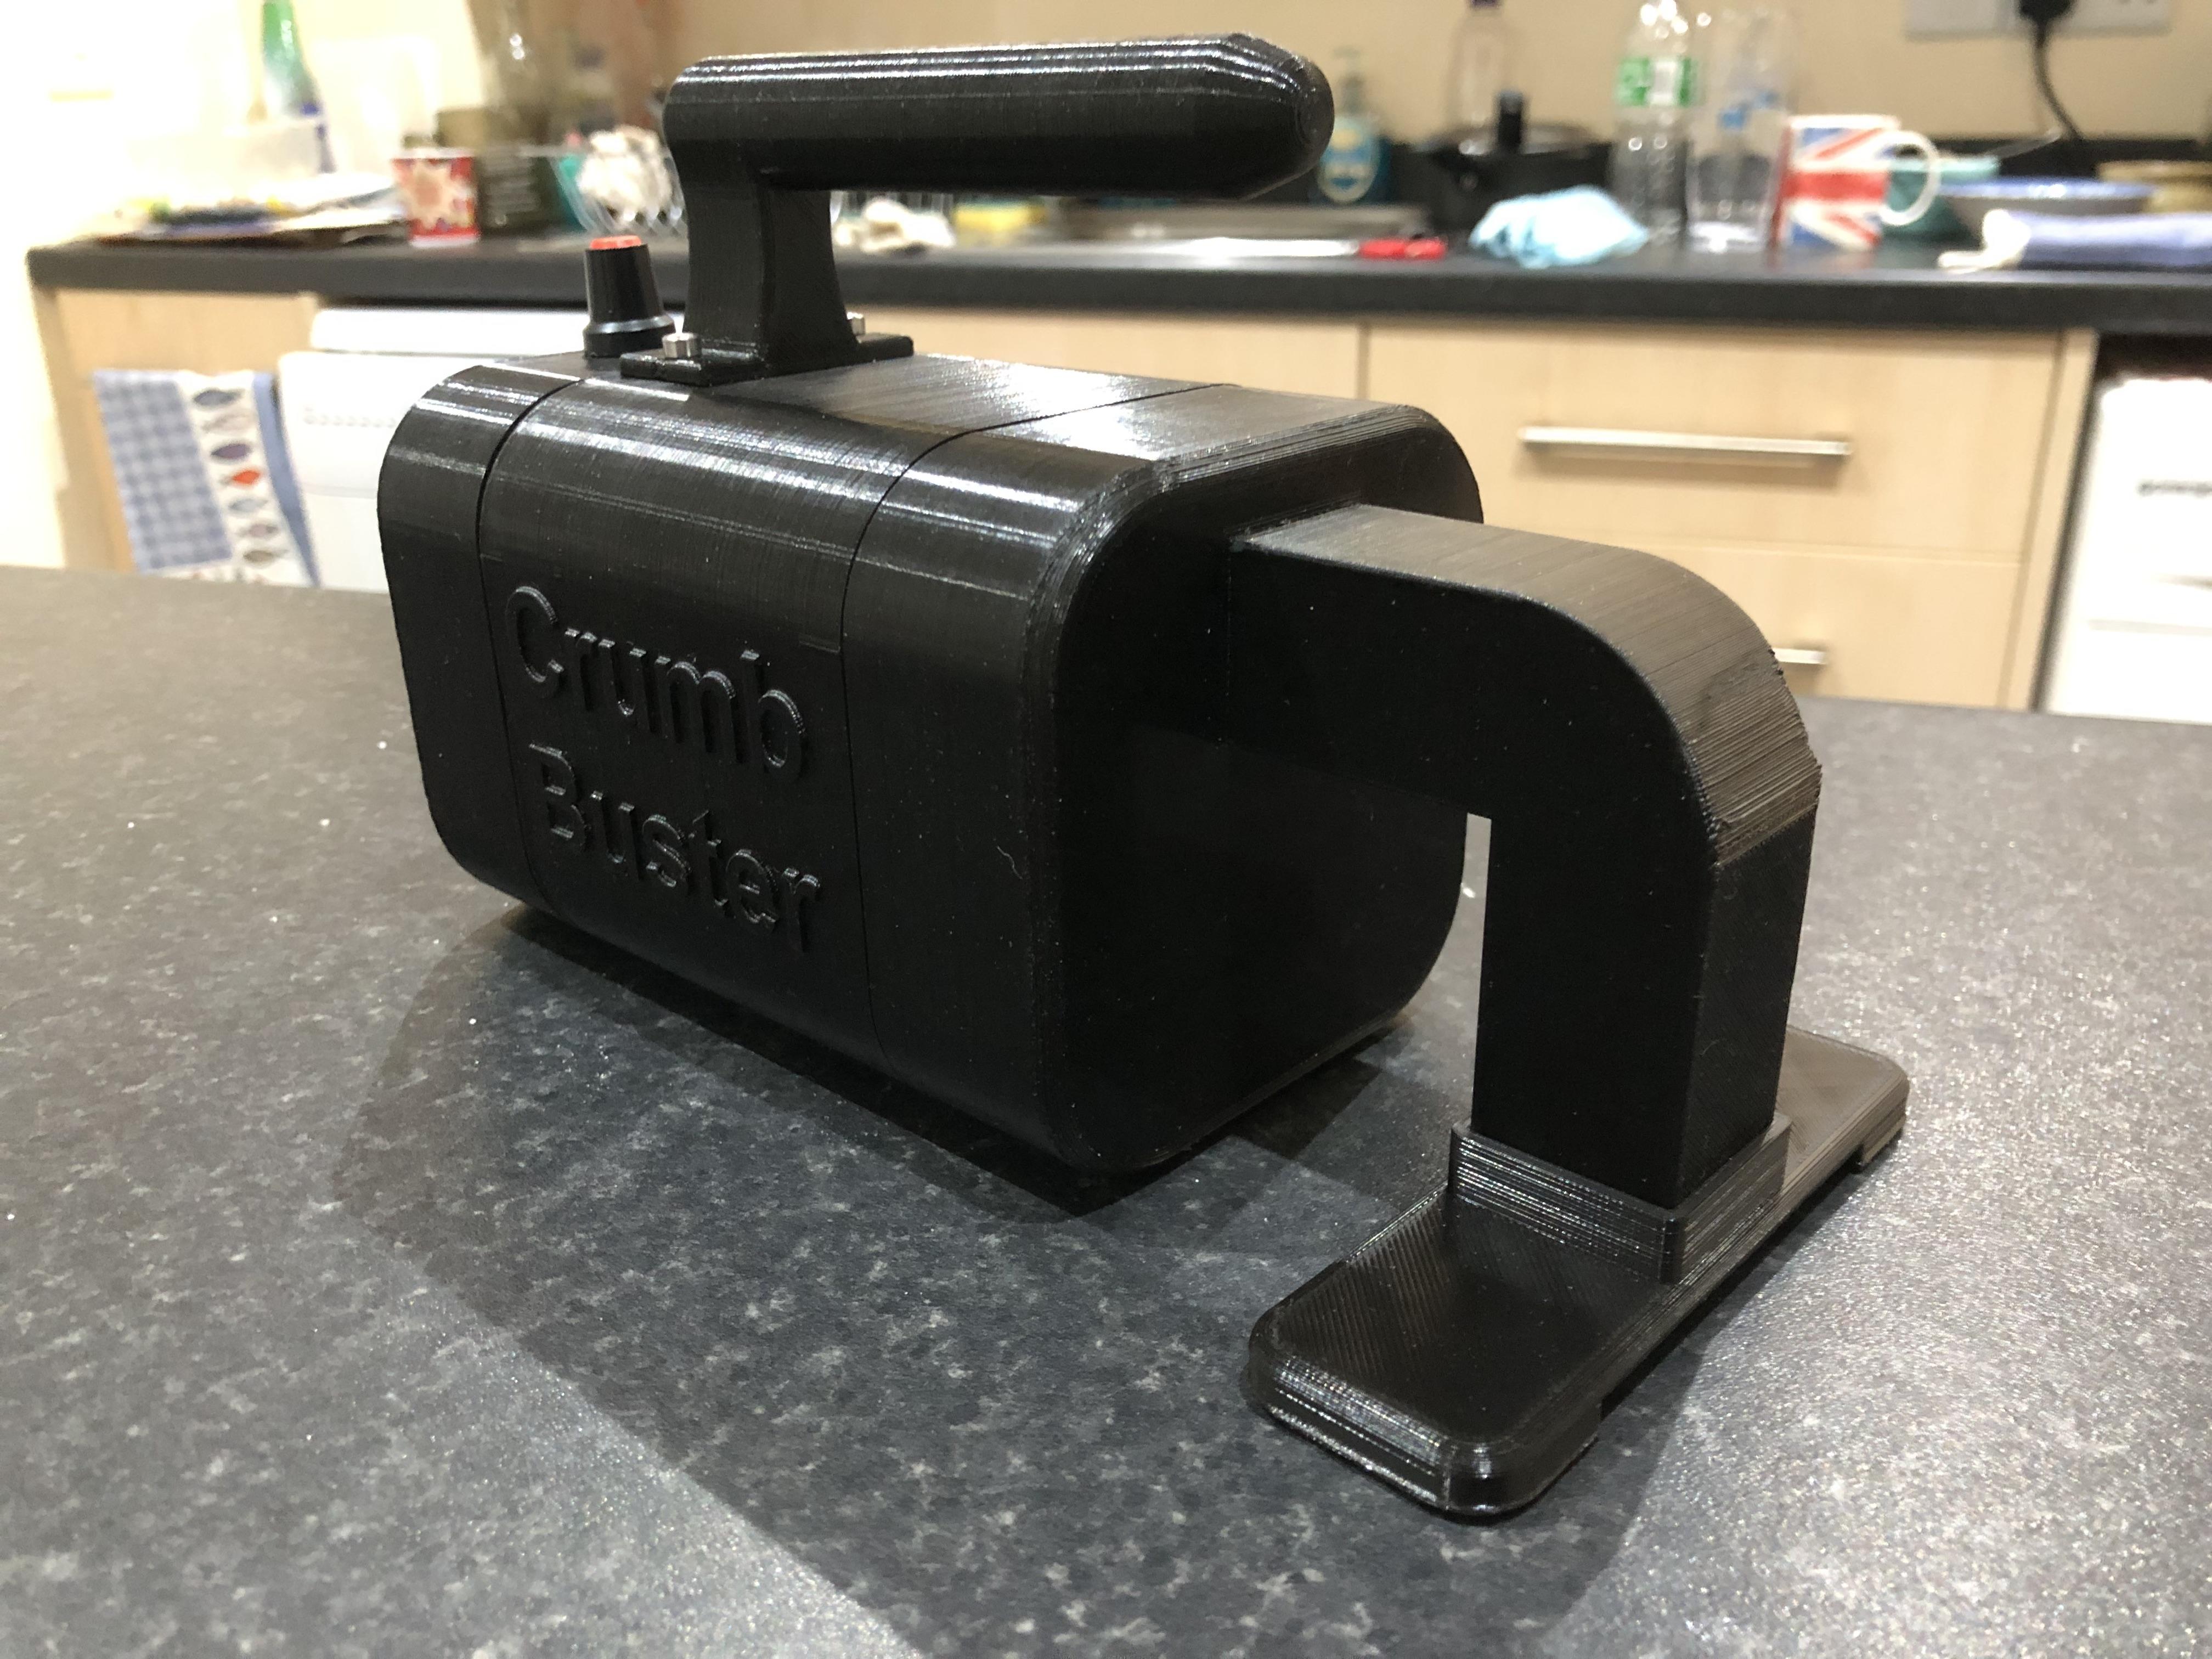
The same procedure applies to the front cap but instead of creating 4 tabs I created a tab the full circumference of the component and extruded this to 6mm I then created a 25mm outlet for the vacuum pipe.
To create the Vacuum pipe I started a sketch from a mid plane and selected the side of the middle of the 25mm square I had just created ans sketched a vertical up to where I thought a good place to make the bend would be and then sketched a horizontal line down to where it would meet the crumb scoop, I put a good fillet on the angle, then I used the pipe tool to create a pipe but instead of round which would have been harder to print, I opted for the square geometry, this was made as a new component, both ends could be adjusted for length when solid.
To sketch the crumb scoop I selected the bottom of the pipe to sketch from then projected it and offset it slightly 2mm, from this square I made first made, this was first extruded up the horizontal pipe to 6mm I then created a rectangle to for the crumb scoop, filleting the corners and then offsetting this 2mm to create the walls, I then extruded the inner of the rectangular shape to 2mm and then the walls to 8mm I then created a slot in the front, this would be for the crumbs to pass through.
Unfortunately my original laptop expired and using a new older laptop doesn't have the screen shot application so I haven't been able to save the Fusion 360 end cap design, the finished printed components will show you how this was achieved.
Electrics
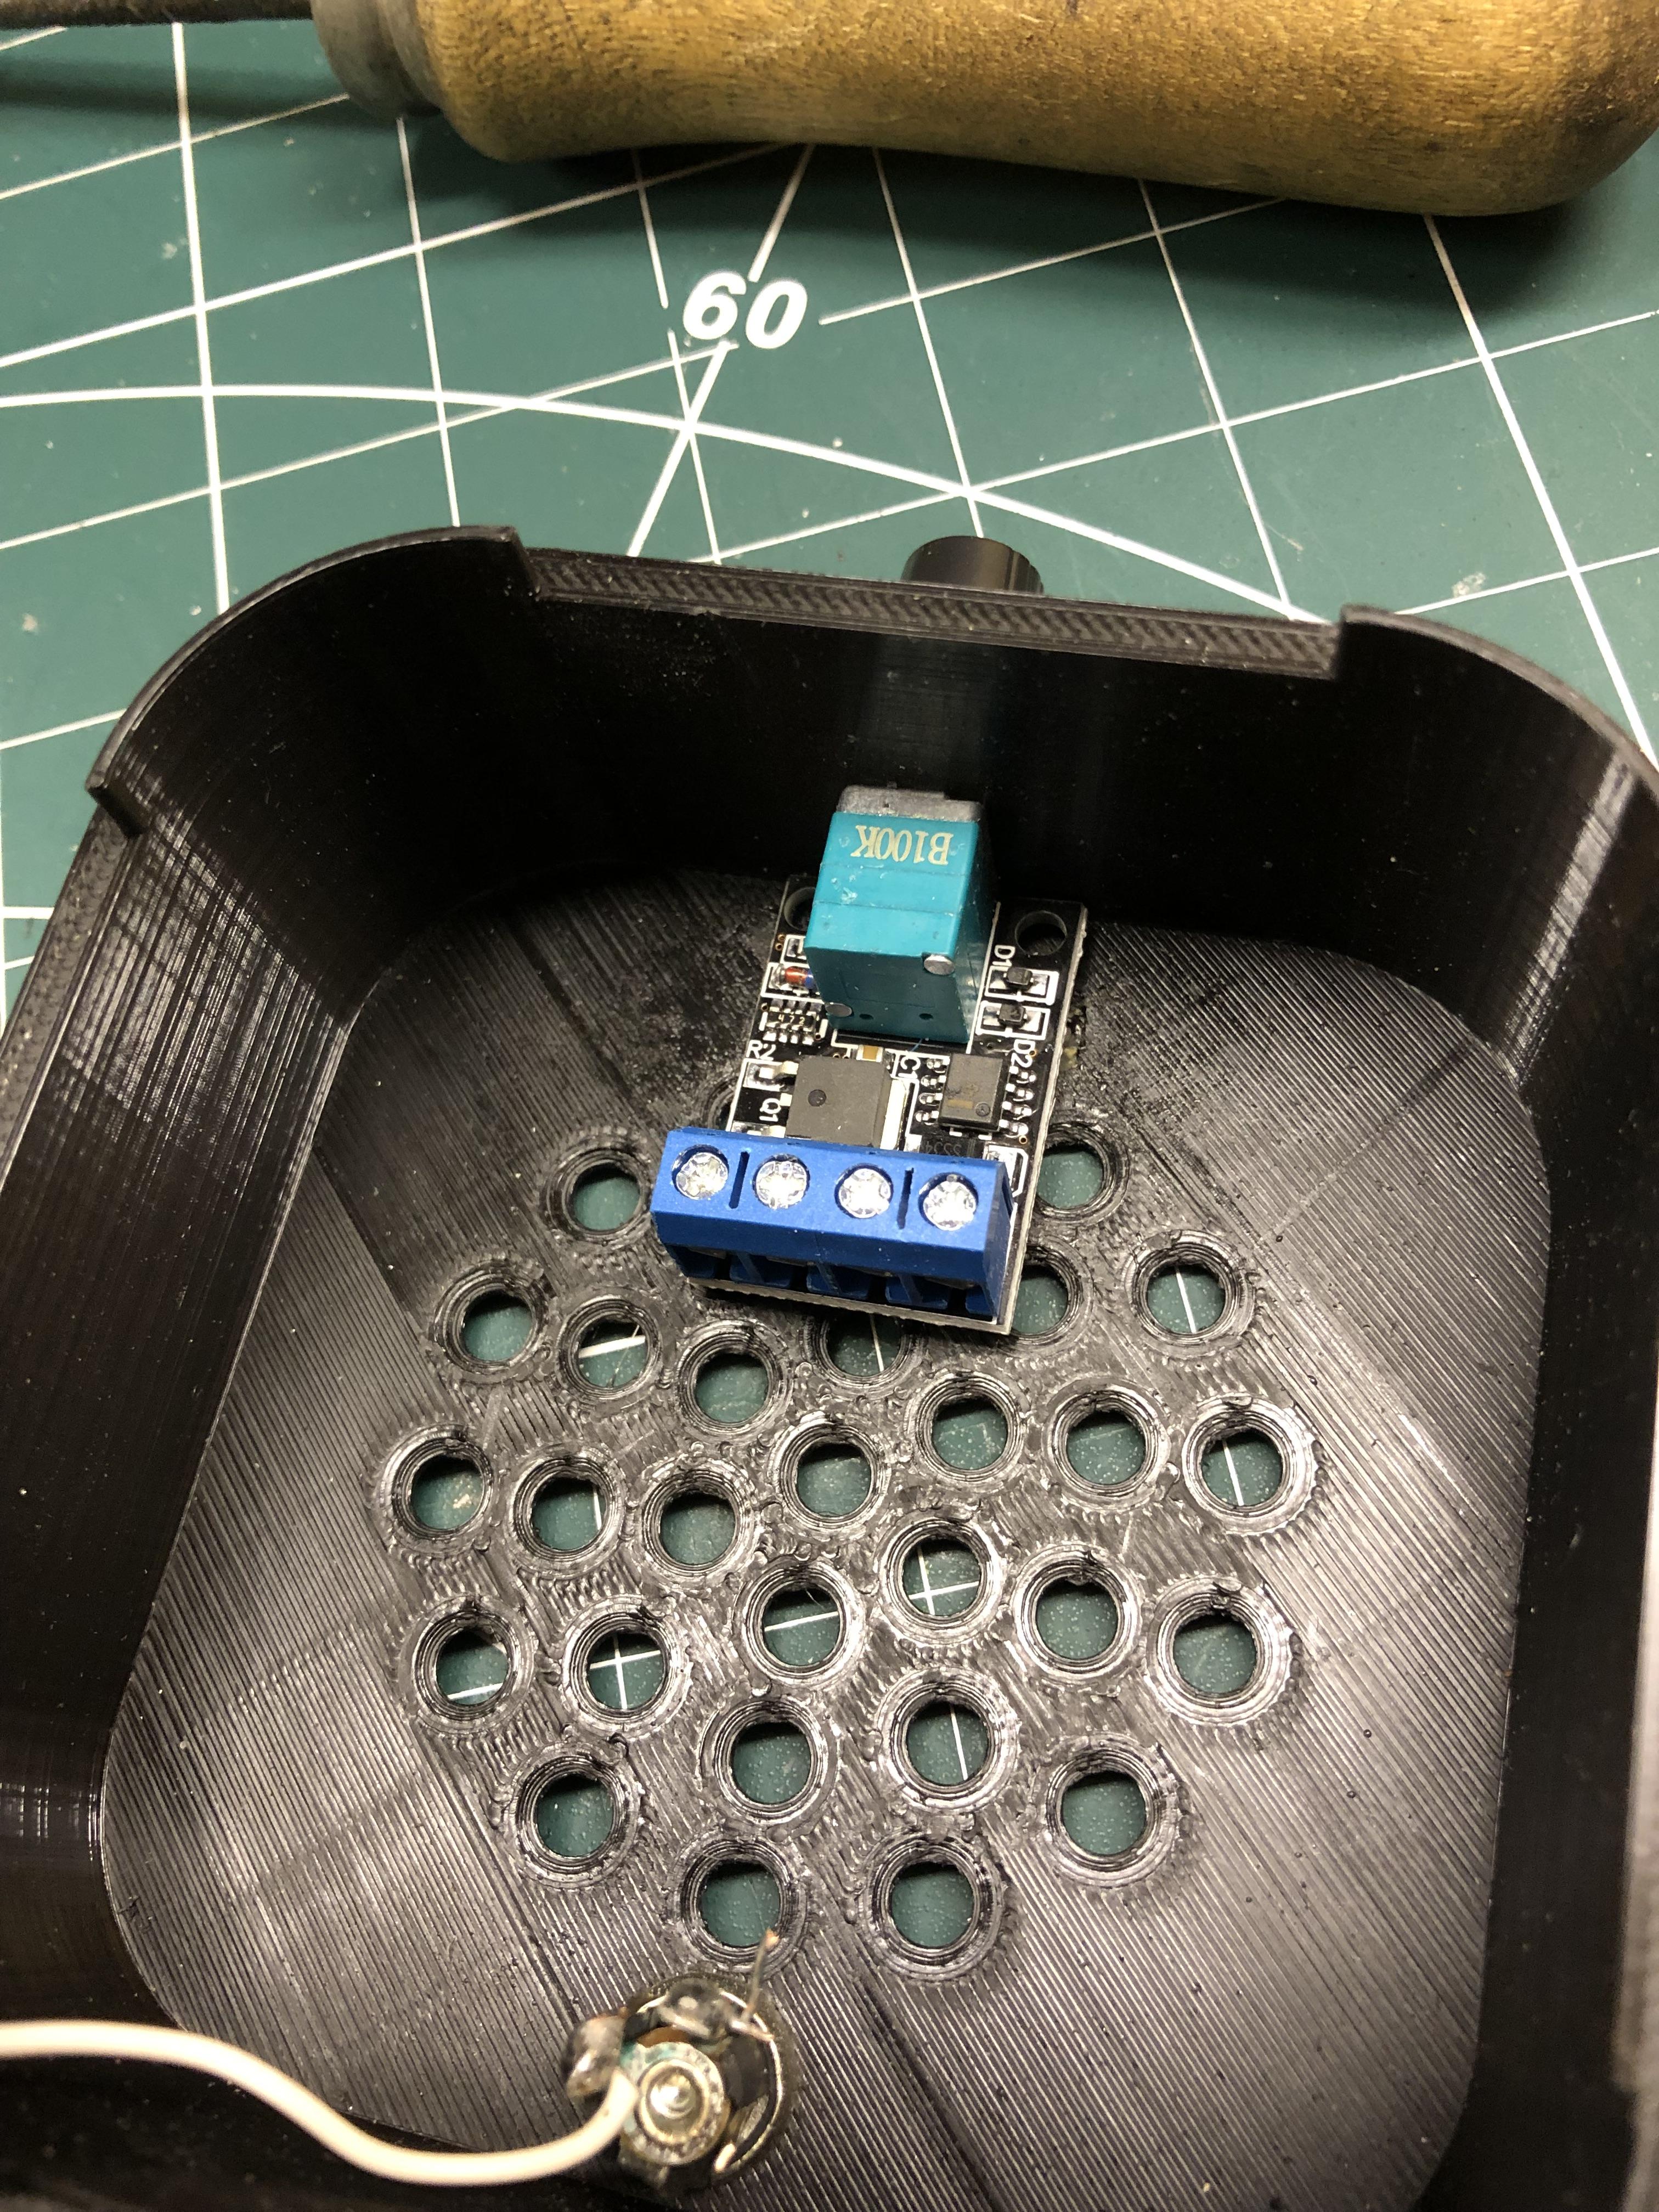
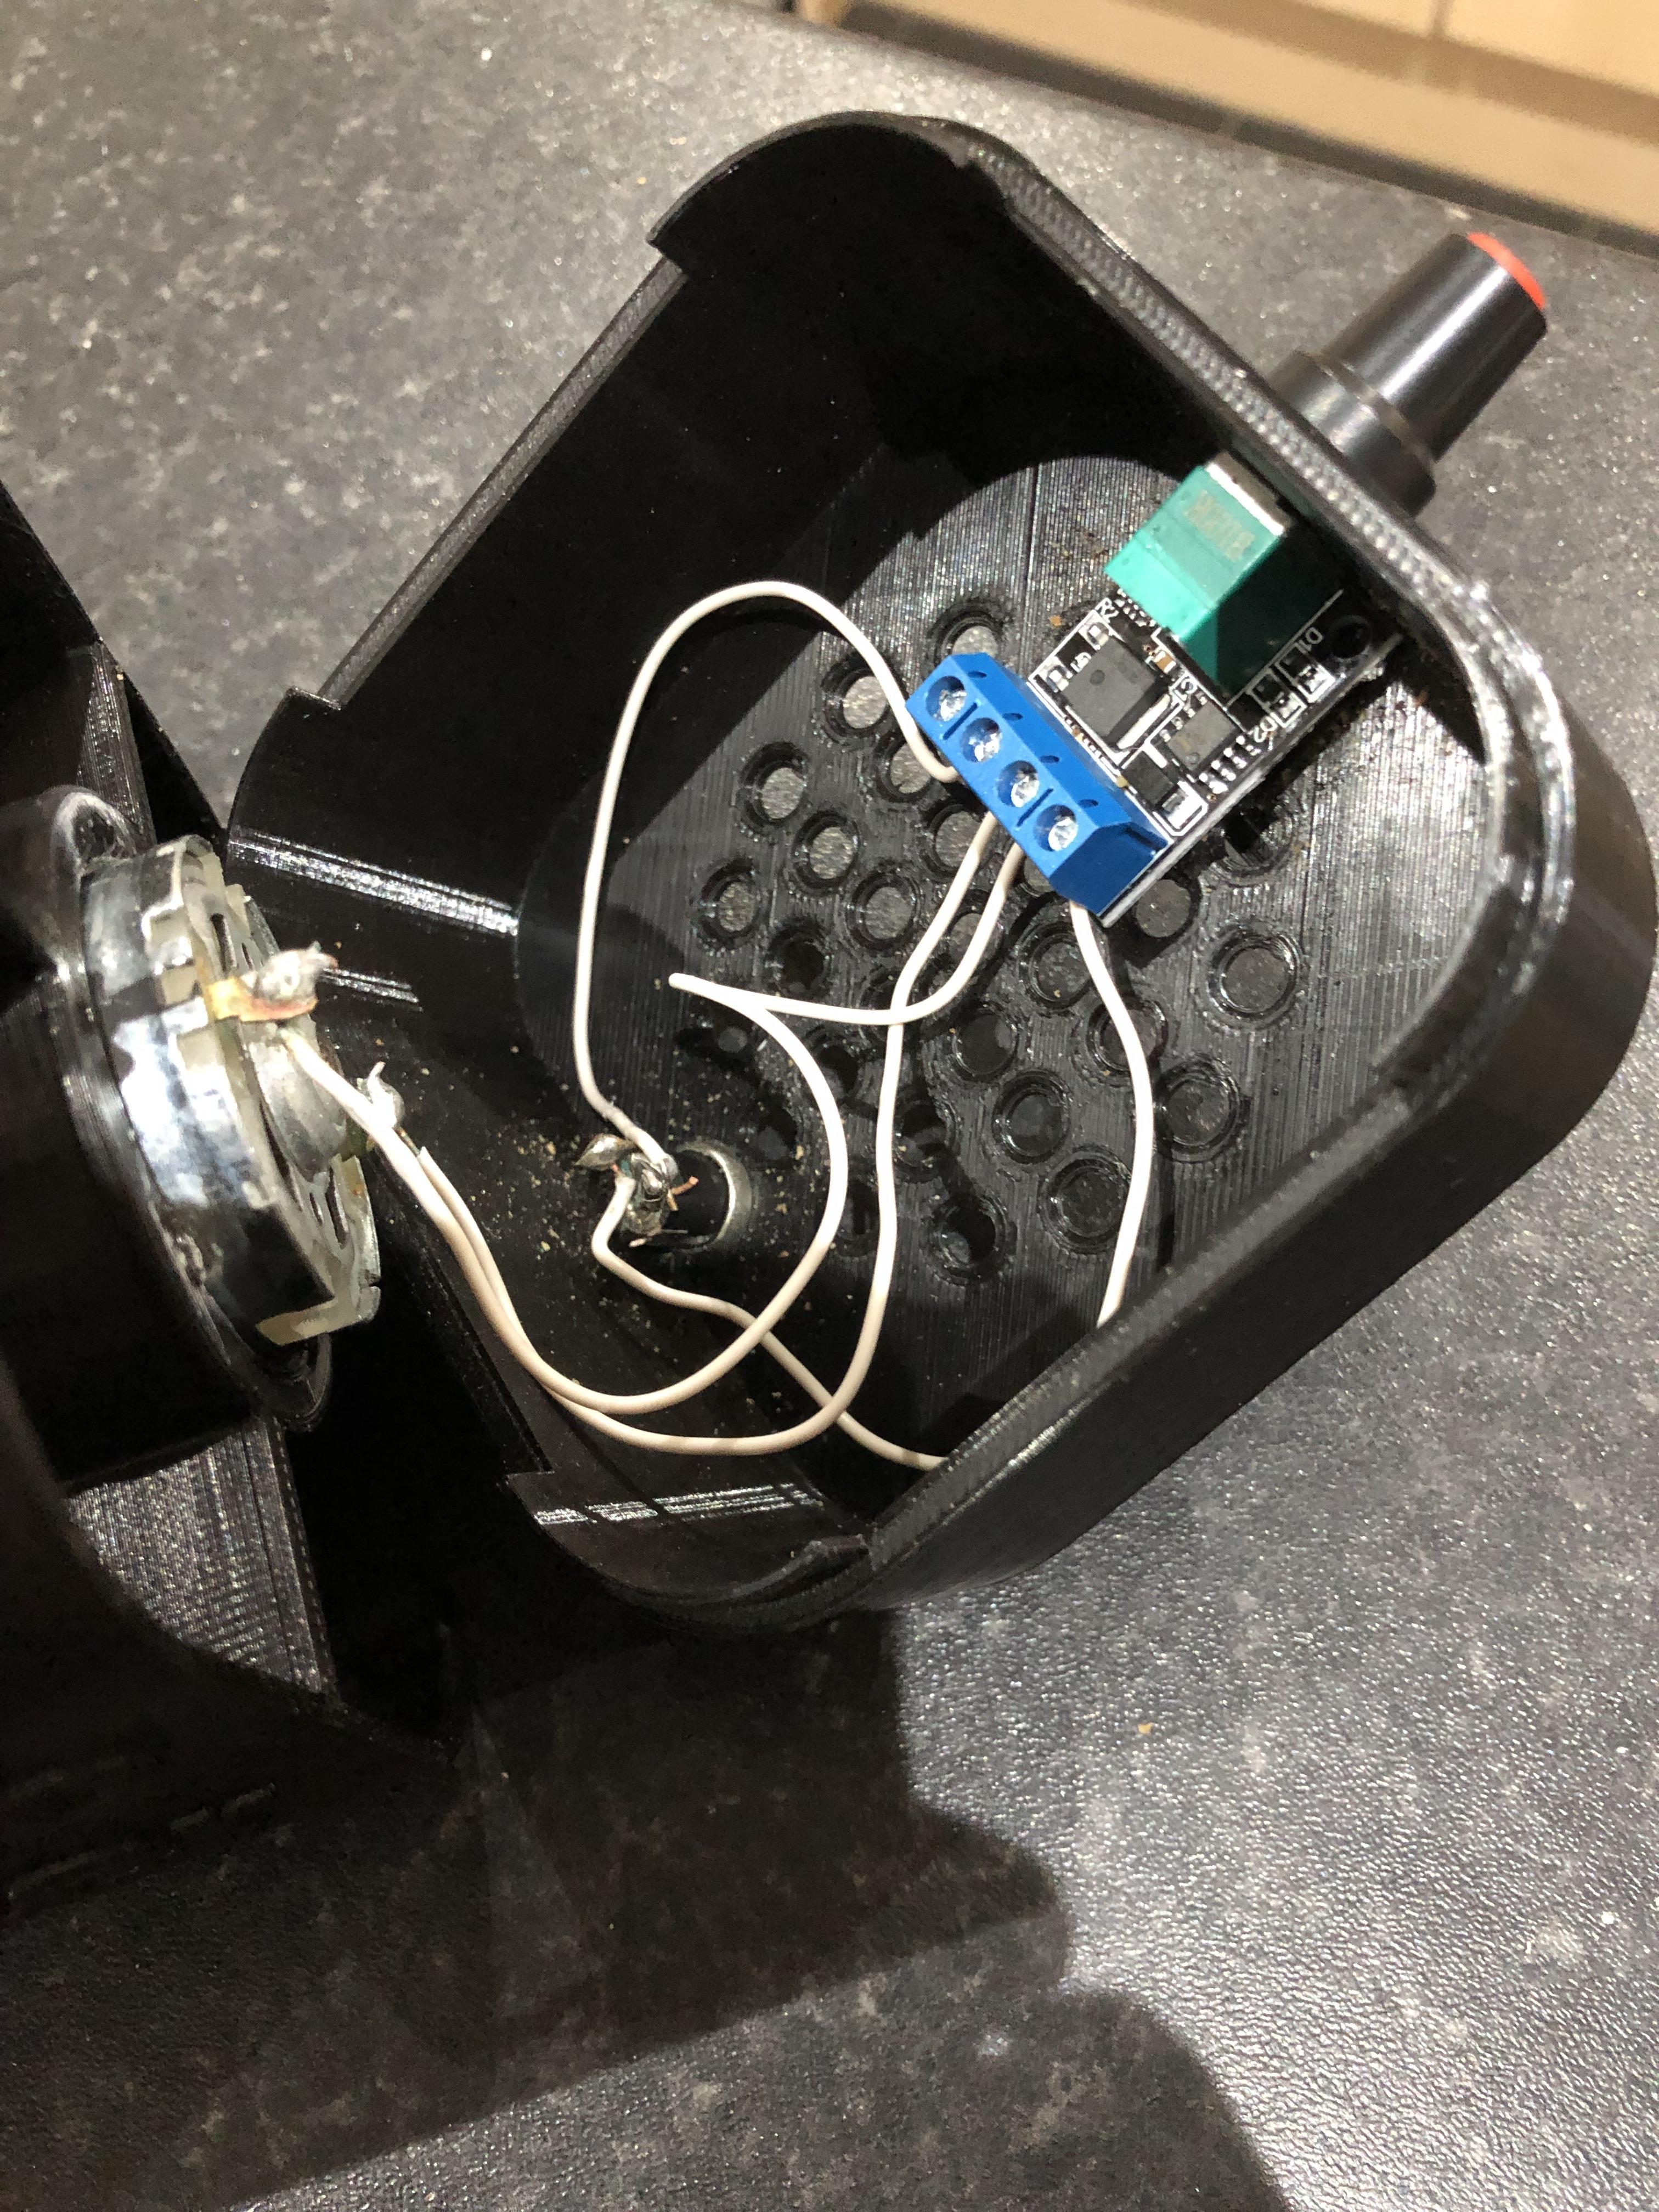

Powering the vacuum is pretty straight forward, there is a female 12v Barrel chassis connector on the end cap this + and - is wired into the Power in + and - on the speed controller, then use the motor + and - to connect to the motor.
Filter Arrangement
The Vacuum requires some sort of a filter to stop the crumbs been extracted through the back end of the Vacuum and my thoughts are just a piece of filter material, which I already have or door screen mesh and a simple 3D printed framework to trap the filter and make it removable for cleaning etc.
This was done simply by taking the inner dimensions of the nozzle end cap and making a sleeve which would be a tight fit with the end cap, just remove the end cap and eject the crumbs(In theory) as always, the door mesh is the favorable option as I can rinse this in warm water, this is secured using hot glue around the perimeter.
Vacuum Handle
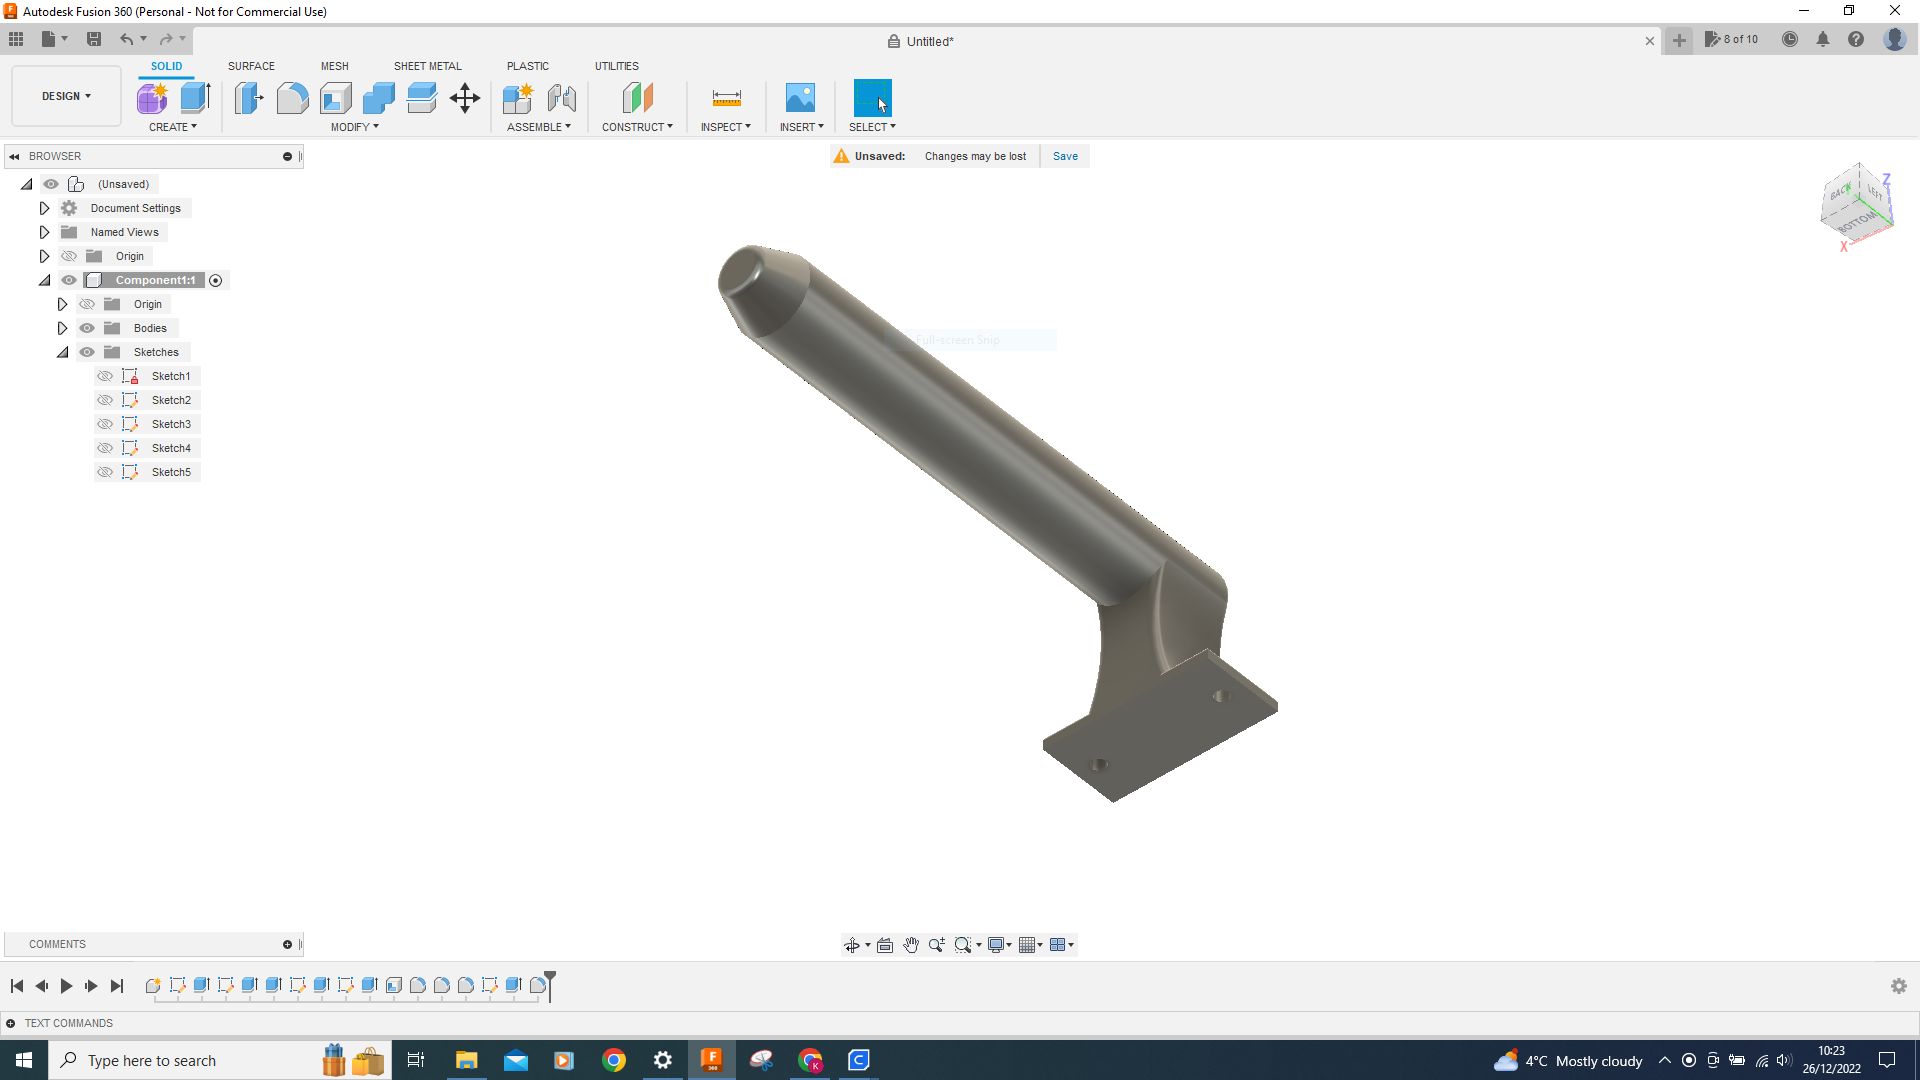
For the handle arrangement, I designed and 3D printed a simple bolt on handle which is secured to the rear top of the chamber, that's where the motor is situated and where the bulk of the weight is, it only needs to be secured at the back of the the chamber and secured with 2 x M3 Allen head Bolts, Washers and Lock nuts.
The handle printed vertically with no skirt or support.
Final Assumptions
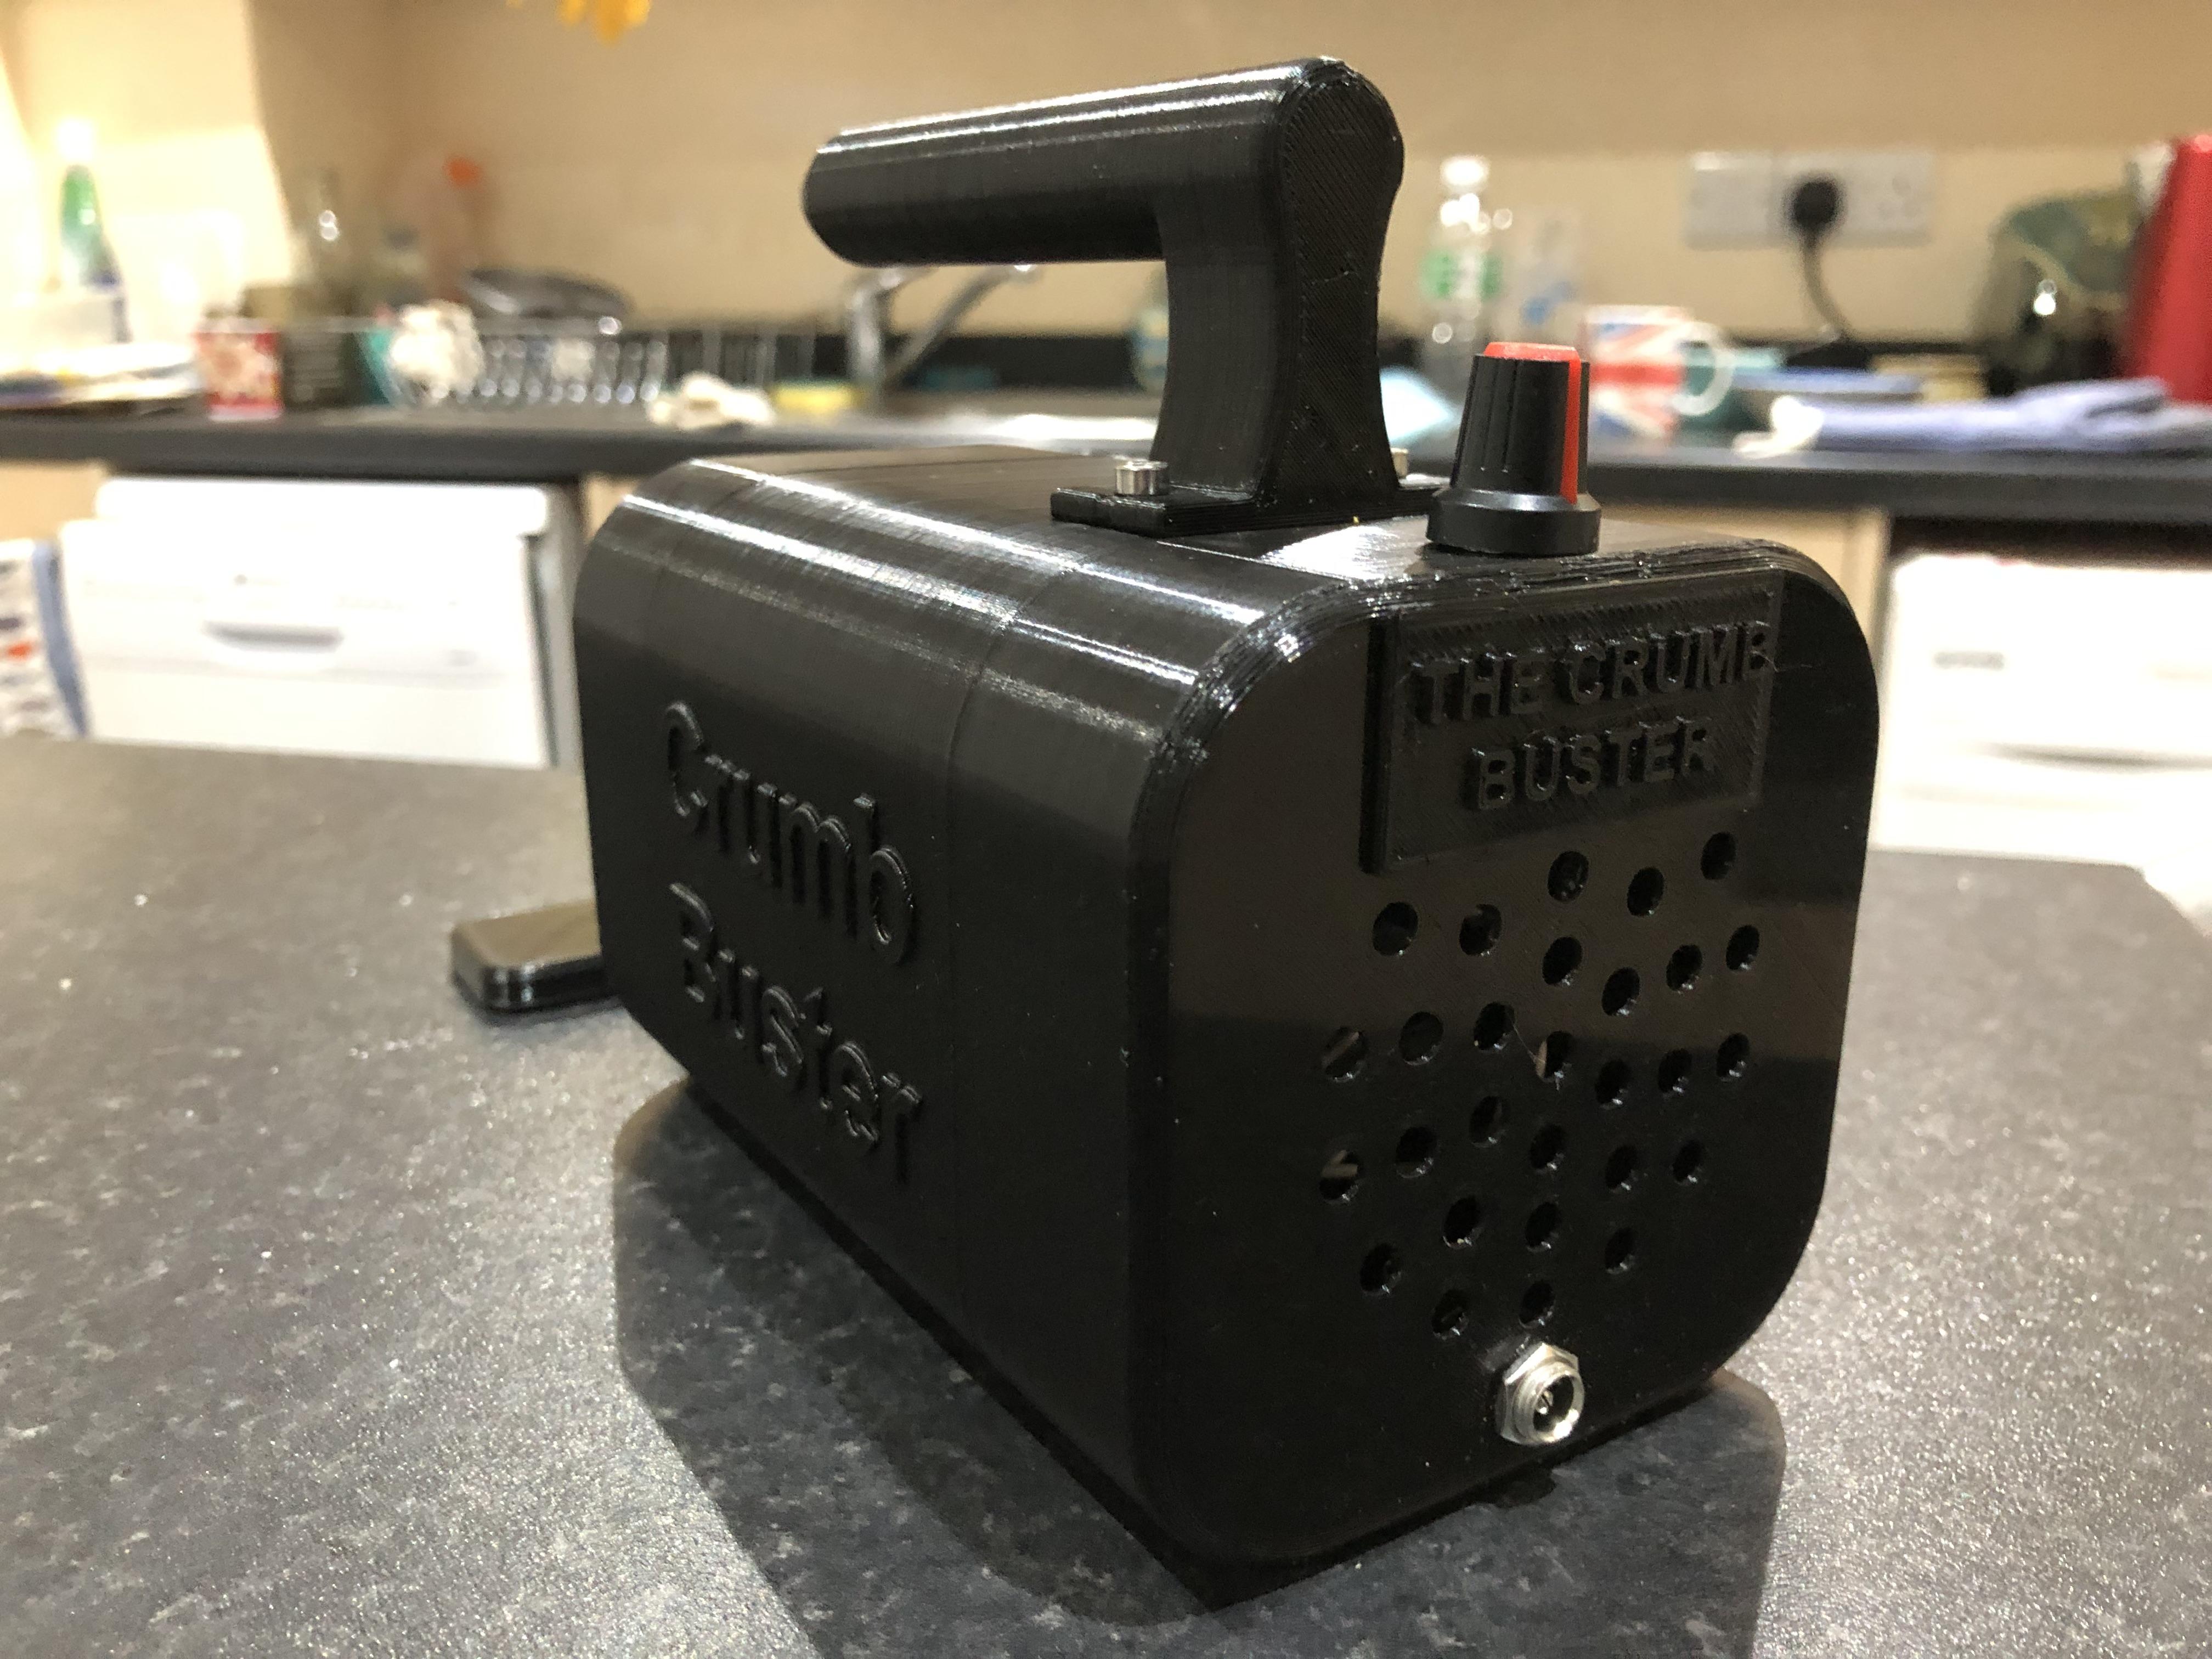
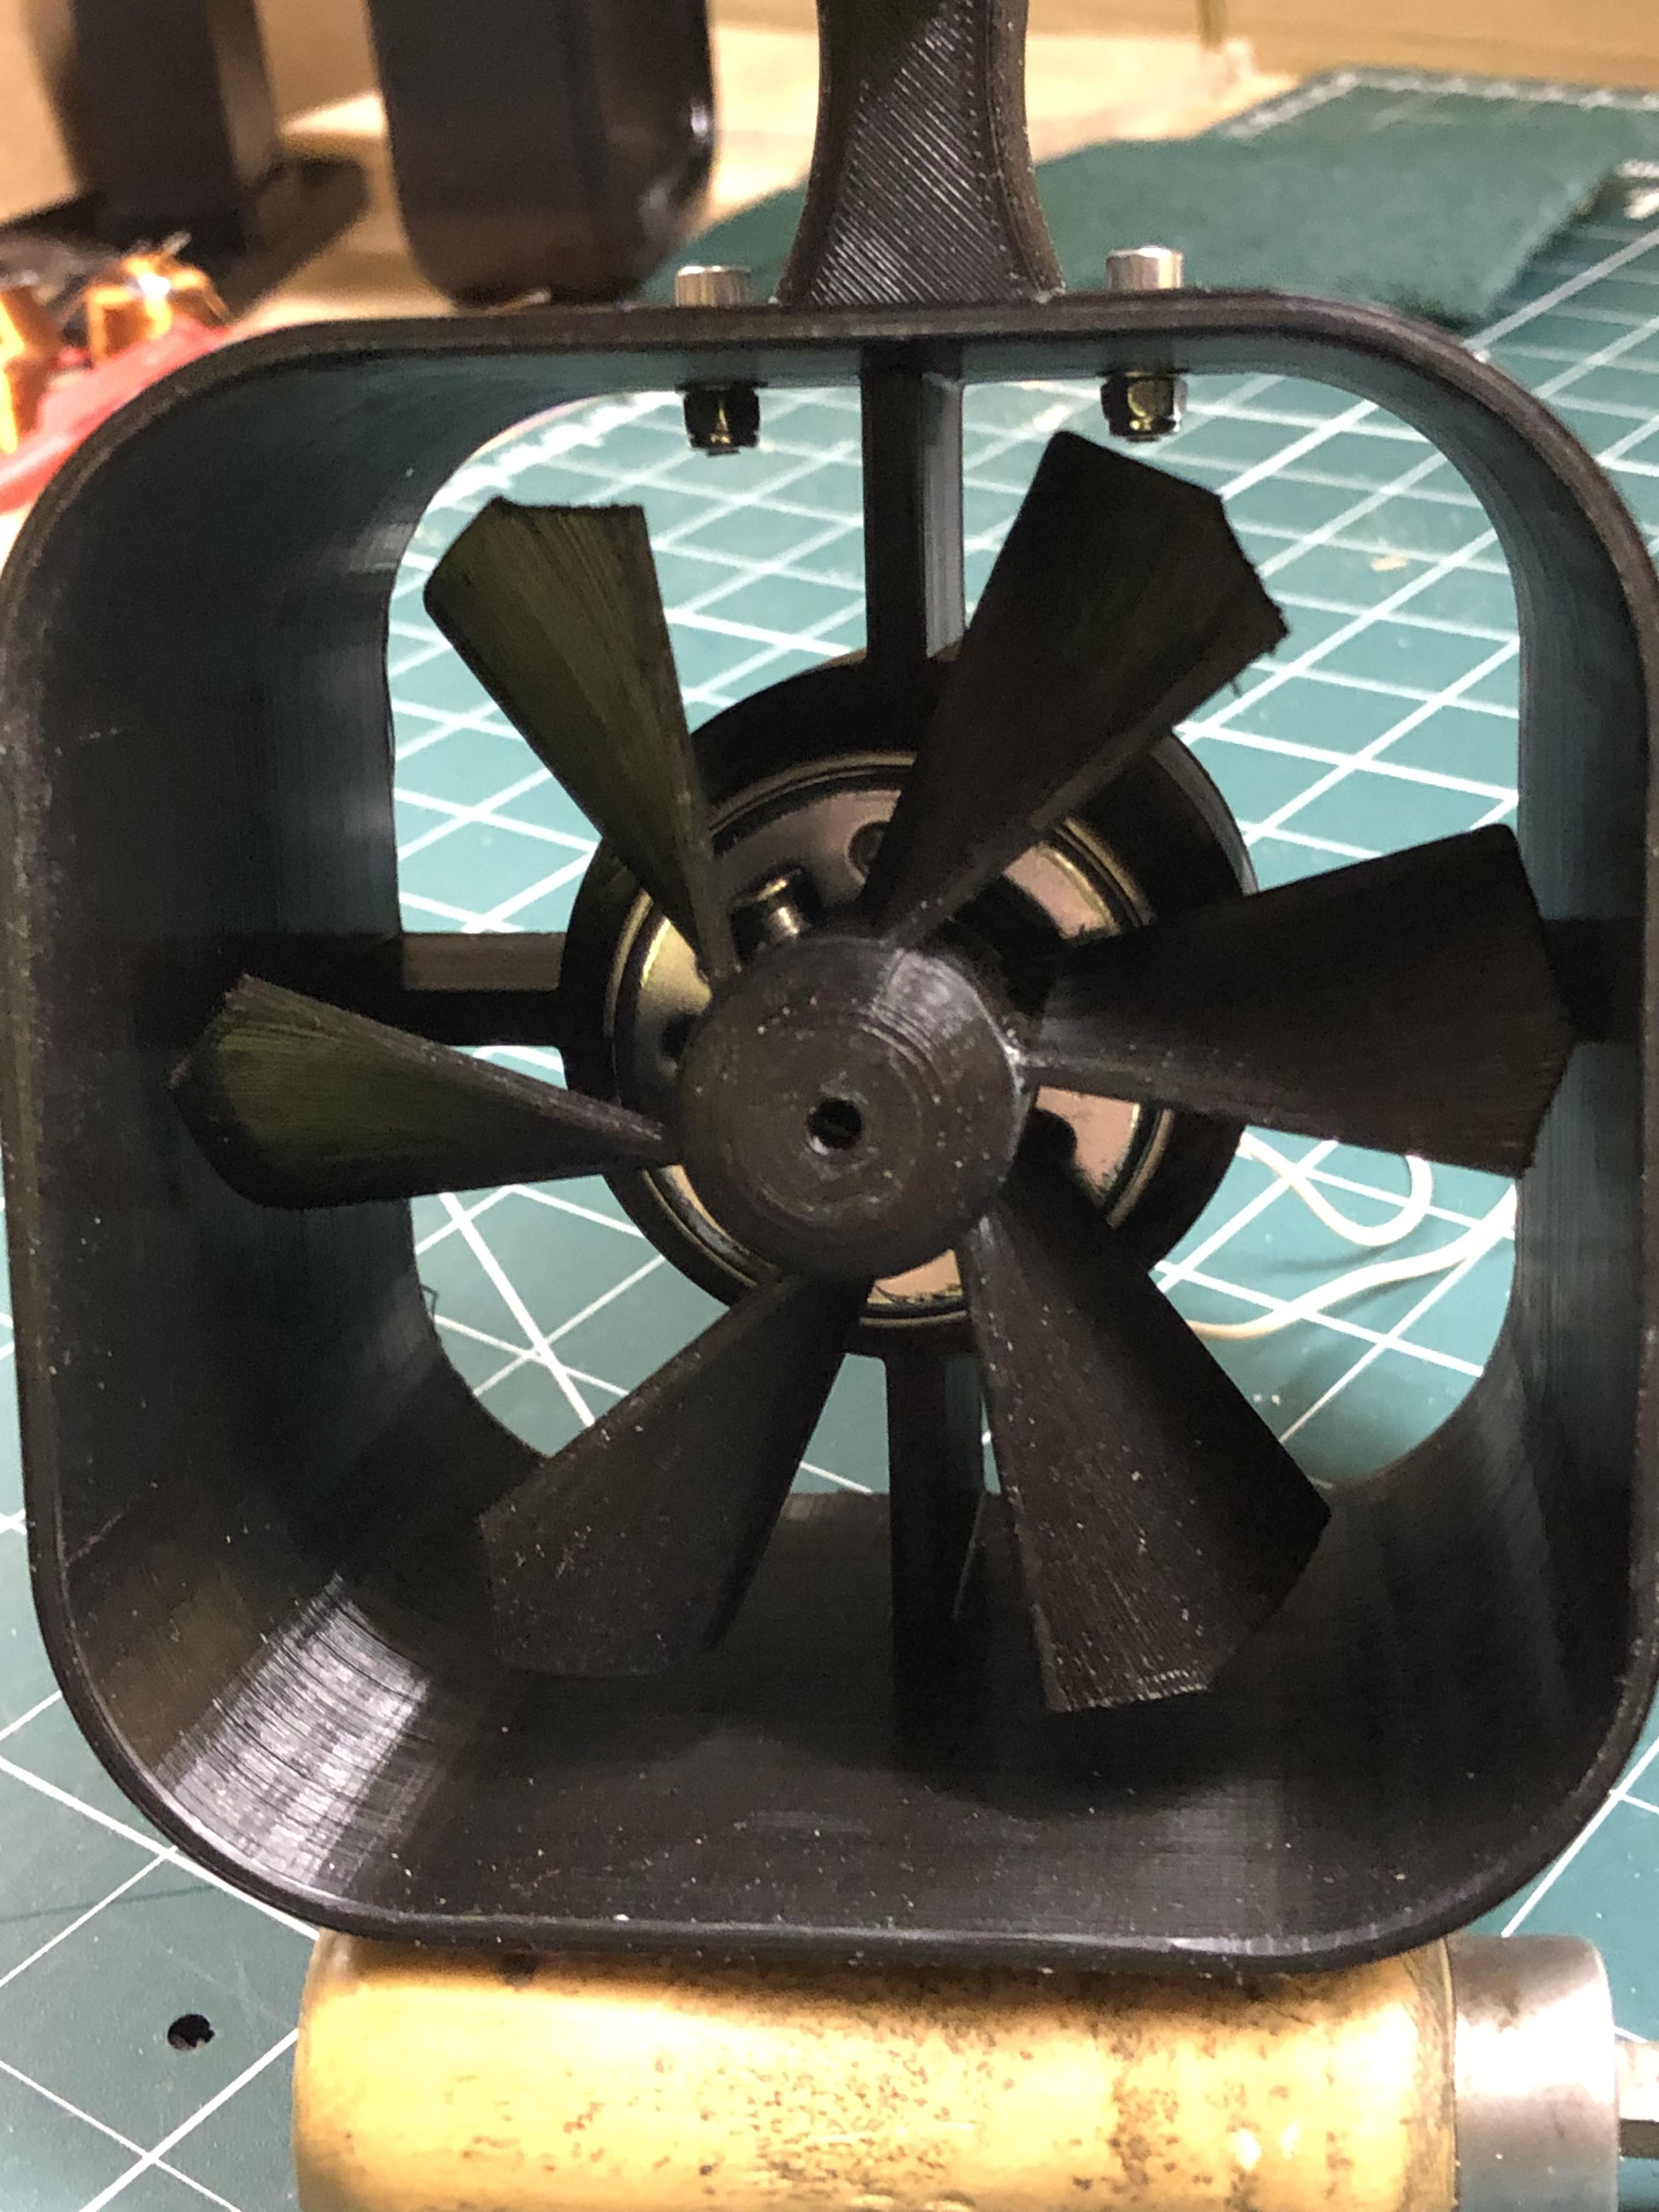
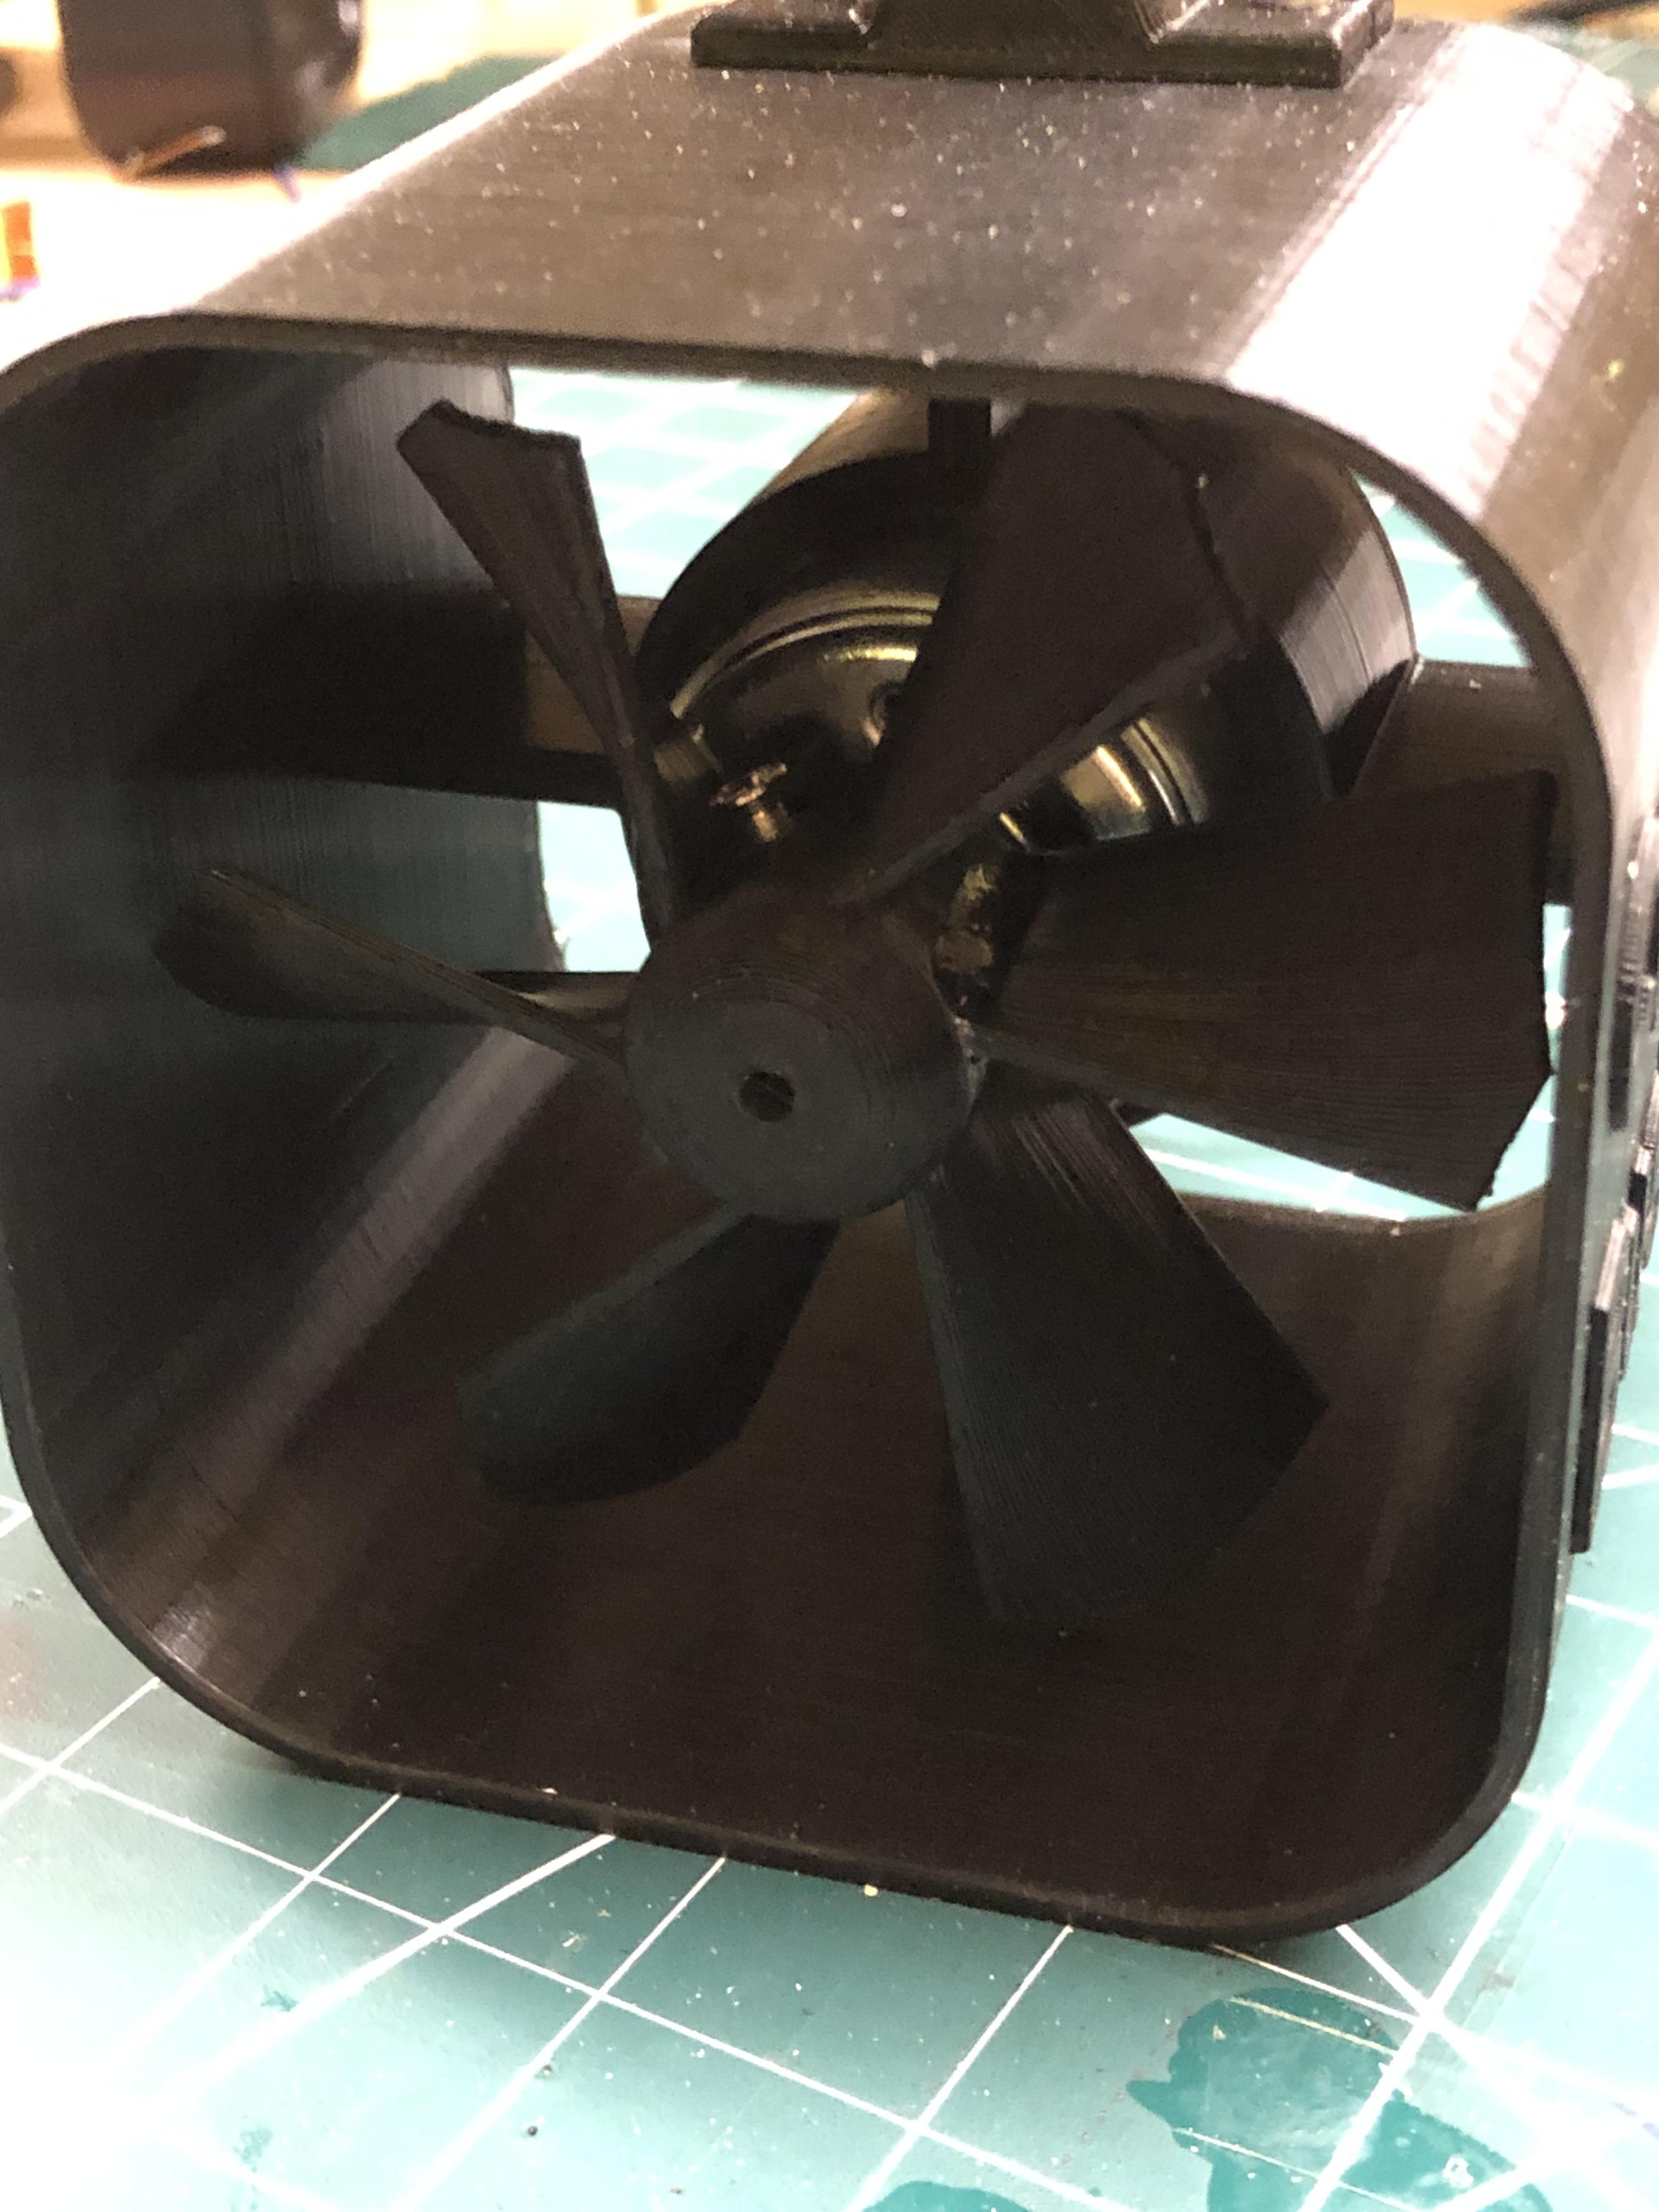
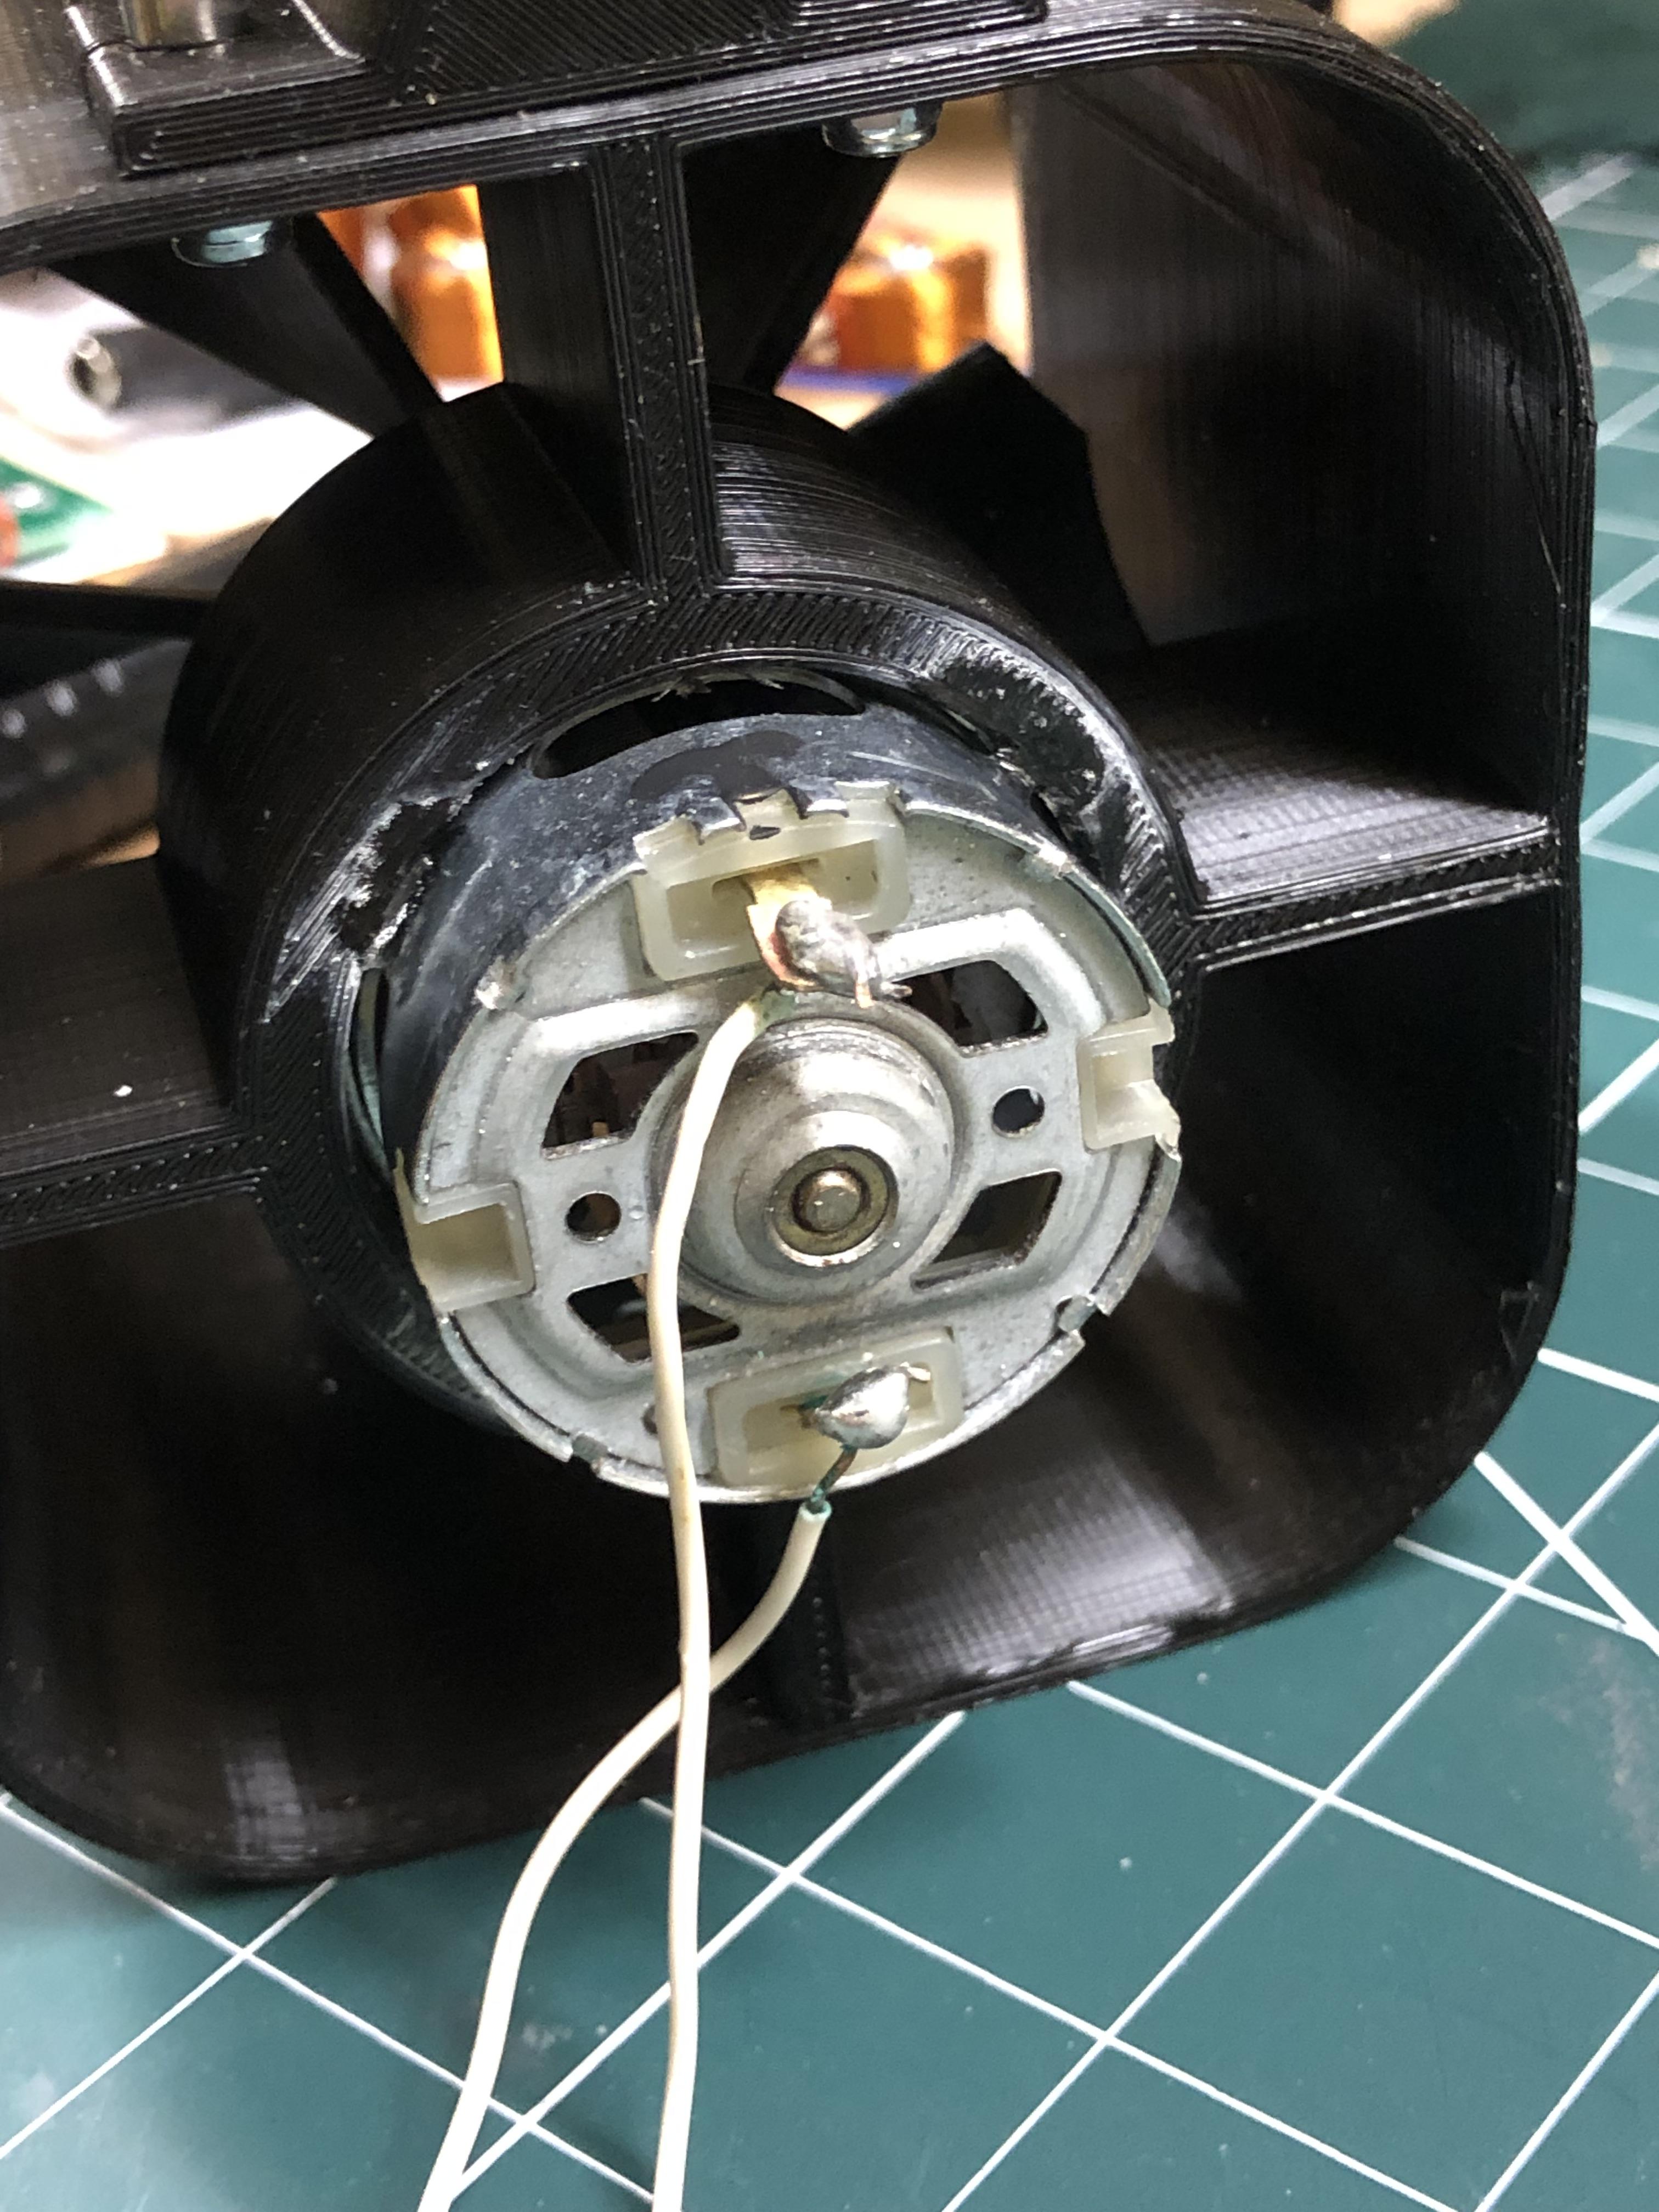
There you have it, a Fusion 360 designed 3D printed Mini Vacuum Crumb Buster, with 3D Printed fan.
I enjoyed putting this together, I had a bit of fun along the way, I was testing the fan in the chamber with a DC variable power supply and applied too much power and the fan literally left the motor such was the draft, I eventually found the fan in the shed, it was missing a blade which was soon secured back in position with CA Glue, The fan is also secured to the motor shaft with a 3mm Allen head bolt which wasn't fitted at the time so that should hold it in place.
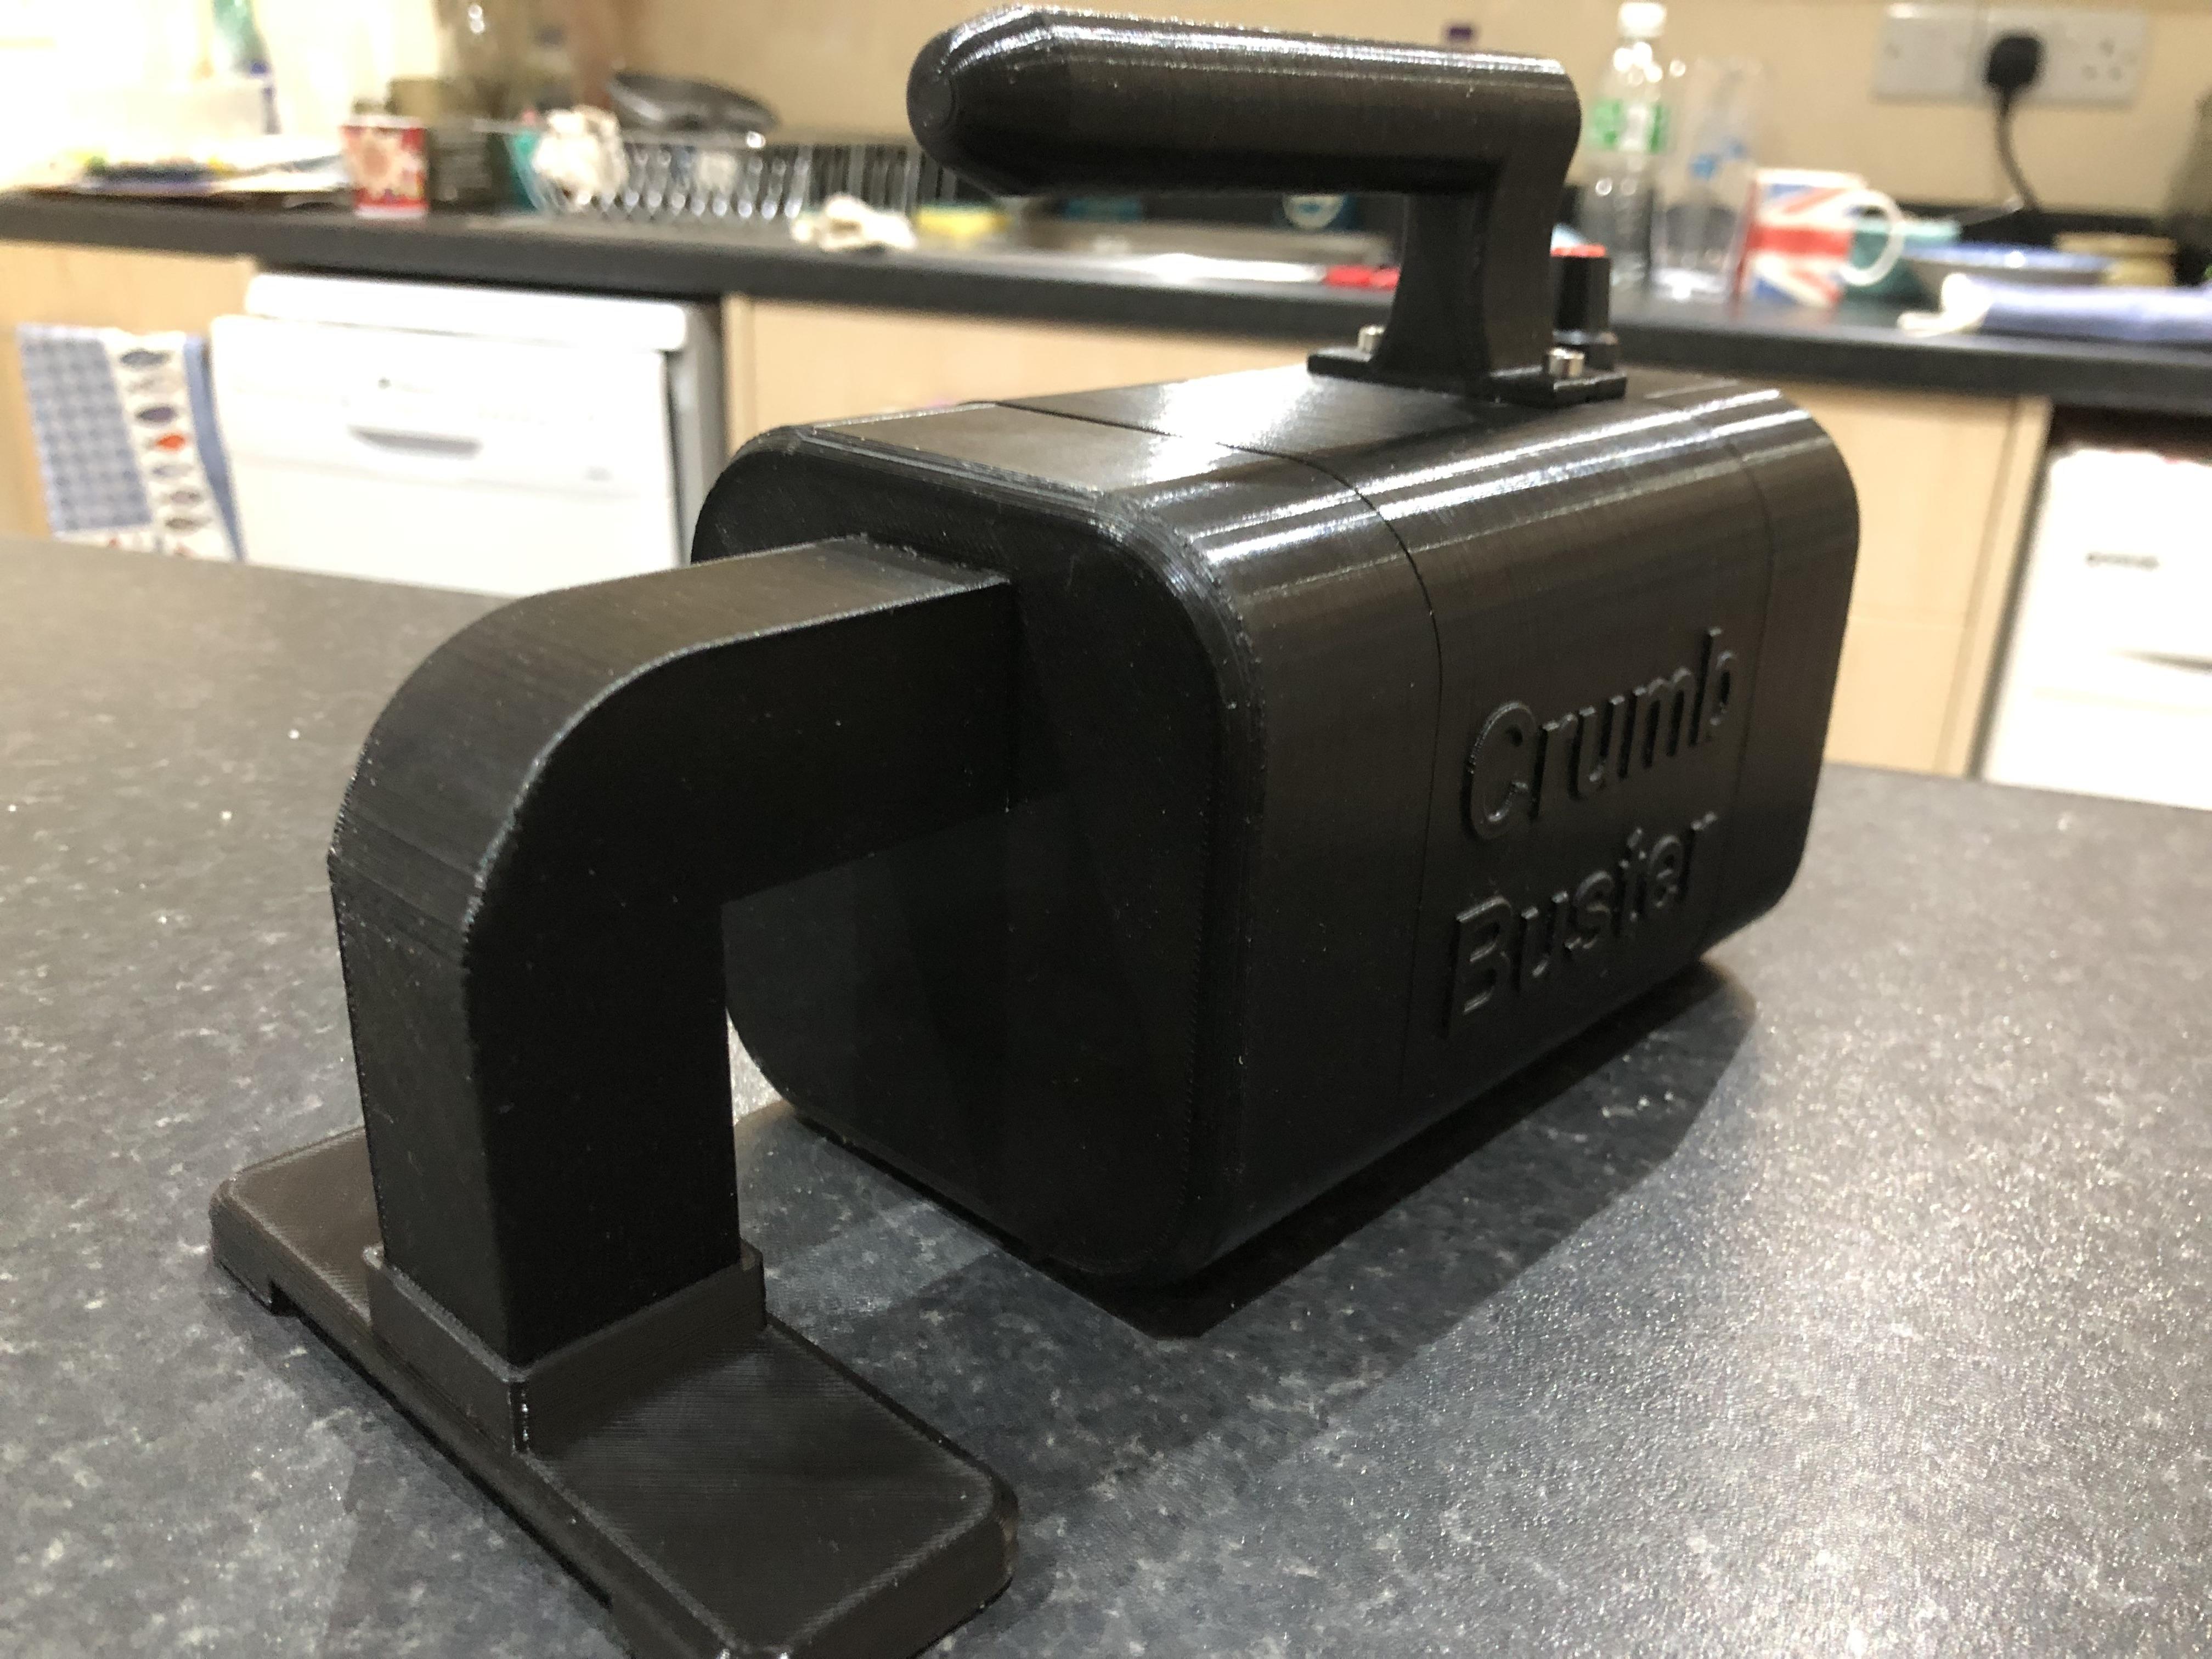
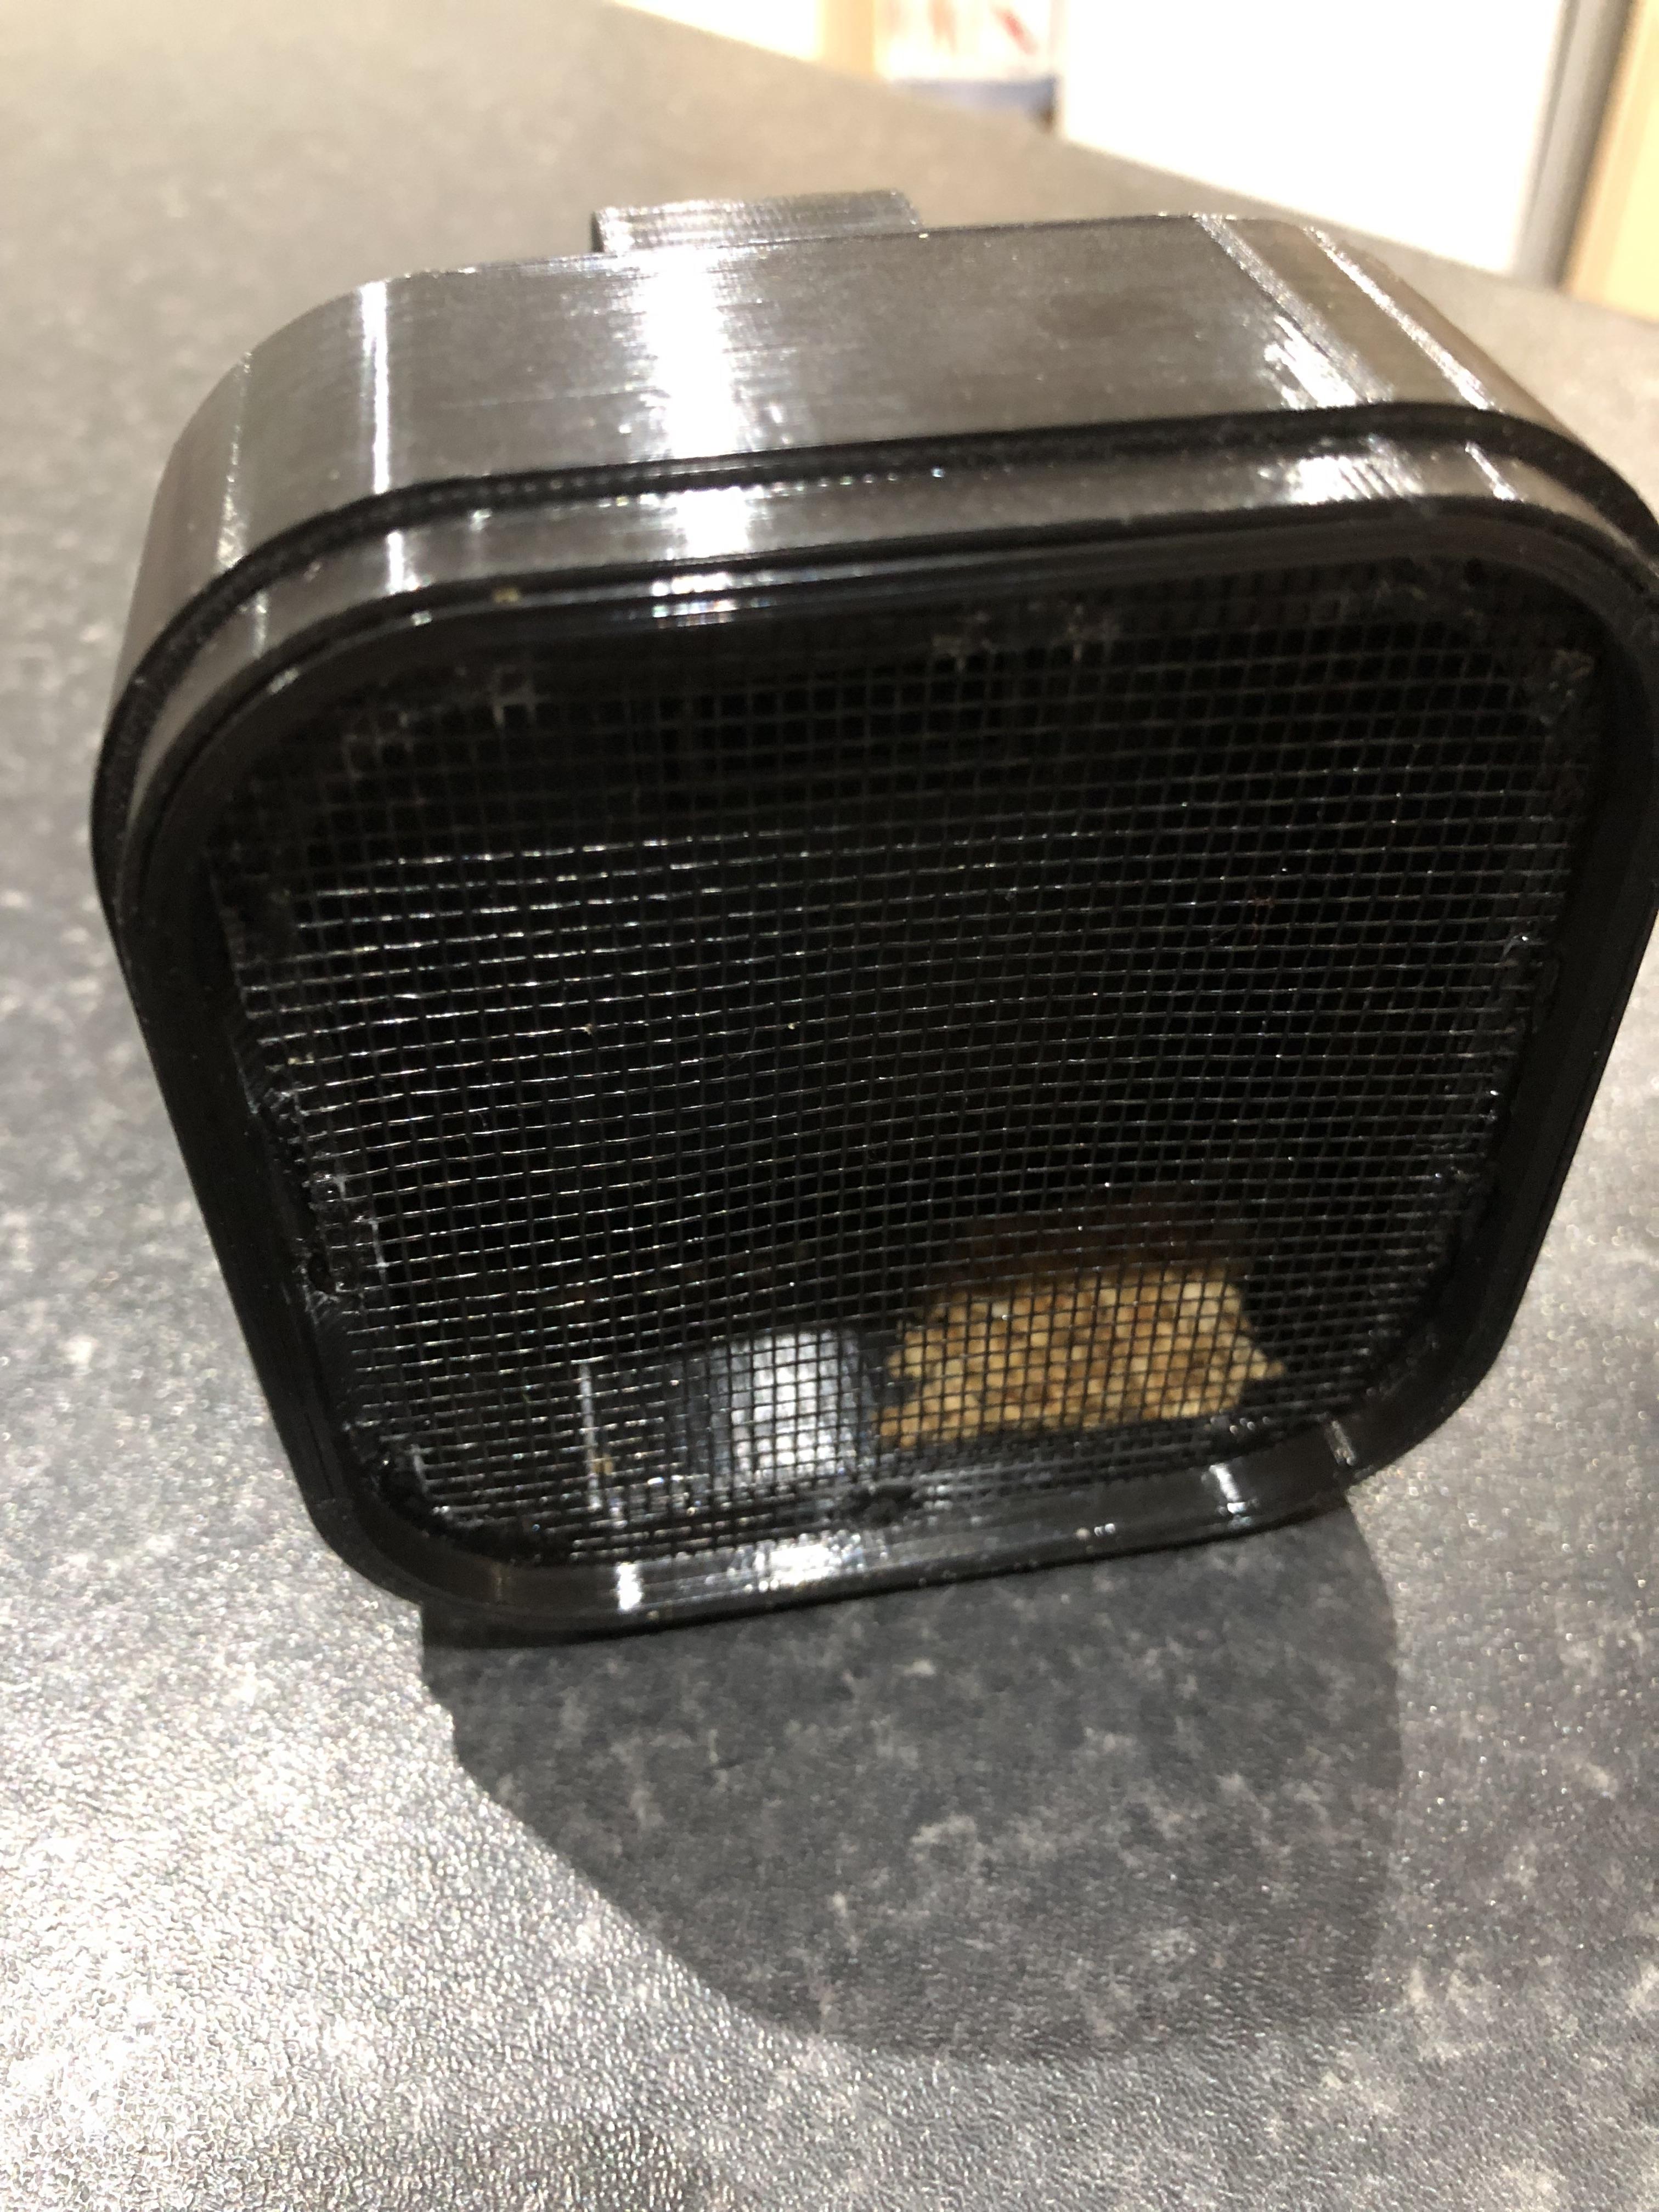
As far as testing goes, the vacuum can hold onto a piece of card, so I created a few crumbs and put it to the test, it hoovered the lot up, result and removing the front cap the crumbs are revealed beyond the filter, it works amazingly well.
All the components of the Vacuum are a push together fit, the rear end cap I could secure with glue if it became loose for some reason, the front cap just pulls off to reveal the filter which is also just a snug push fit, the Vacuum nozzle is removable too.
If the front cap becomes loose after use I can make some small pull clips to hold it in place, but for now its working great.
It still amazes me that you can take an idea and Using Fusion 360 you can bring these ideas to life, and make something which works as designed to and functional.
I hope you enjoyed this Instructable and thanks for looking.