Internet Servo

INTRODUCTION
I like to feed birds in my garden, but sadly enough, the black rat also takes advantage from this. So i thought of a way to prevent the rats from eating the birds food.
The black rat is only active in the dark so we need to close the bird feeder at nights. Because i'm lazy, i thought of a way to automate this. And so the idea of an internet controlled servo erose.
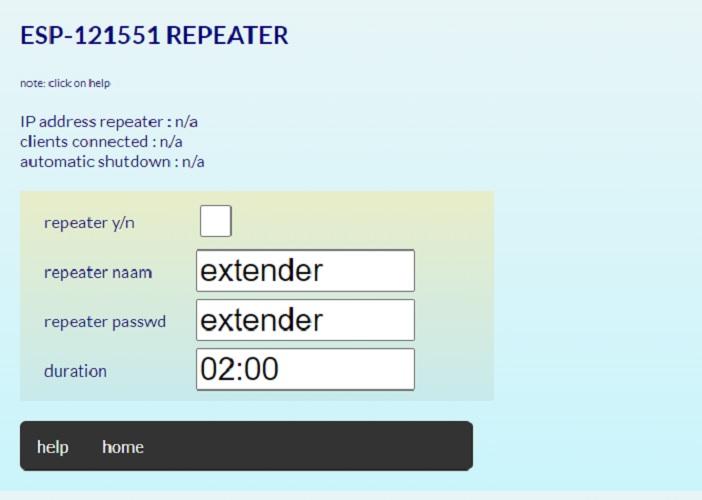
Since the birdsfeeder is in your garden, it would be nice if the ESP could also serve as as wifi range extender. Grant your guests acces to internet without revealing the password of your wifi network.
The result of the programming is a highly flexible servo controller that can be configured to fit in any project. It has the a.o. the following features:
- The user can determine the start and end position of the servo.
- The speed of movement can be set.
- The servo can be controlled manual via the webinterface or a pushbutton.
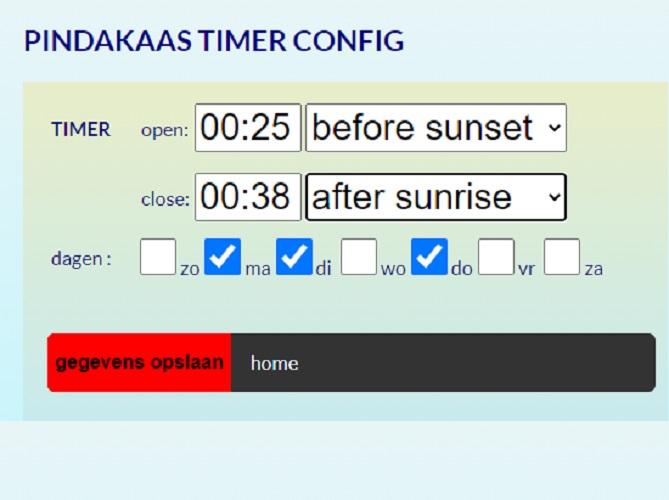
- A configurable timer can automatically close and open the birdsfeeder at certain times.
- Closing and opening automatically can be relative to sunrise an sunset.
- Simple to connect to your wifi network.
- Messages can be send via mqtt at certain events.
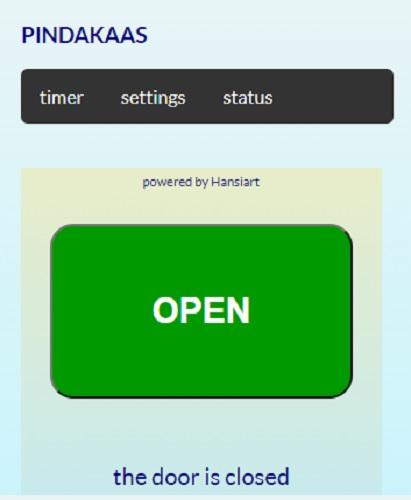
- The Servo can be controlled by domoticz via a direct link like "ip-of-servo/SW=ON"
- Can be moved to any position by using the slider or a link like "ip-of-servo/POS=90"
- We also can use it as a wifi repeater / extender.
- We can have a led on as a night light in the garden.
The video will give you an idea on what you can make with this technology.
Supplies
-
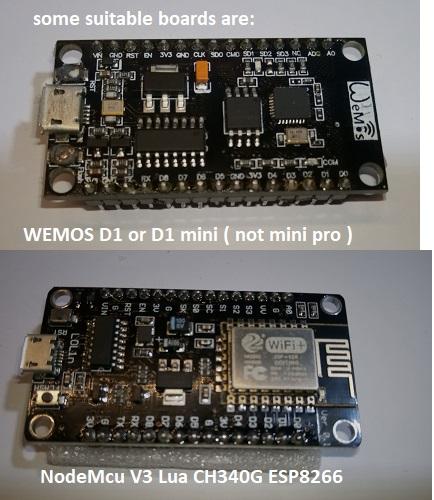
a NodeMCU v3 or Wemos d1 (mini) board ( $2,50 )
-
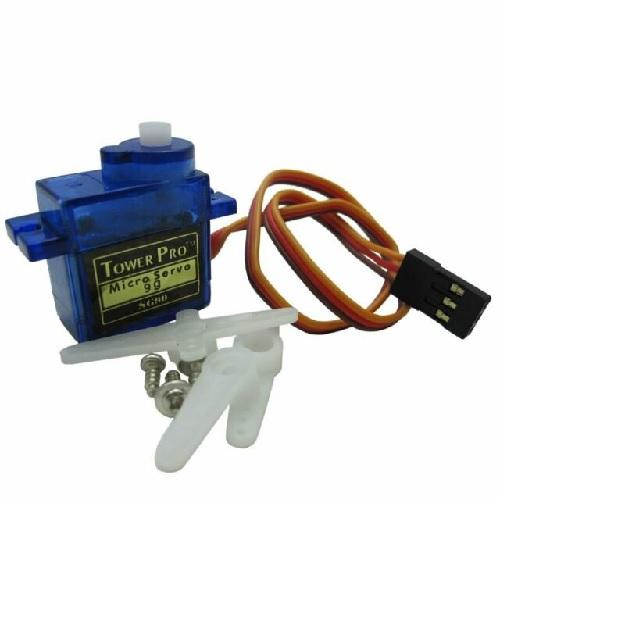
a mini servo SG90 9G ($2)
-
a 5v usb power supply
Optional a tactile switch and/or one or two LED's with resistor and some wire.
Building It
the hardware
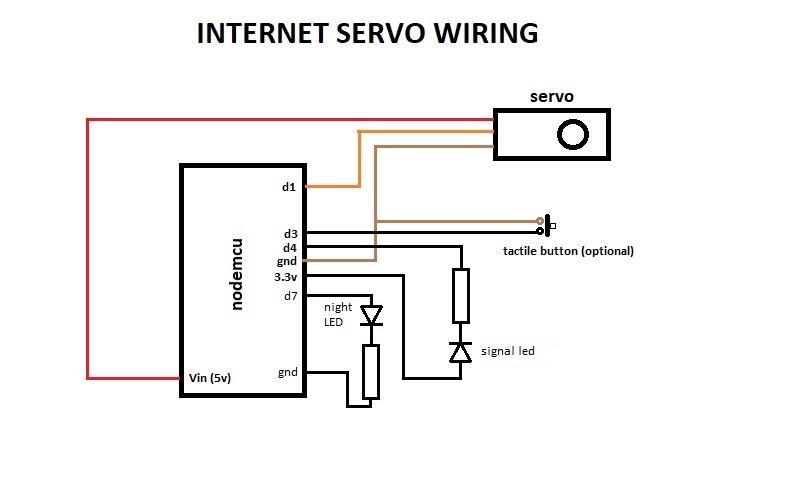
The servomotor has 3 wires that have be connected to the nodemcu. Red = vcc and should be connected to Vin (5v) . The black or brown wire is Gnd and the orange or yellow wire is the data wire and should be connected to pin D1. Sometimes it is required to connect a pull-up resistor of 10k to the datapin to avoid eratical moves at bootup.
the software
I made it extremely simple to install the software on your ESP device. Please follow these steps:
Download and unzip the file in a folder on your computer. Enter this folder and click on Serial_Communicator.exe, the program will start. Connect the ESP via the usb cable to your computer. You can test now on which com port the ESP is connected. Read the help text to proceed. When the software is installed, the blue onboard led wil light up. Now you can proceed to the chapter "how does it work".
Now you also have a nice tool to communicate with the ESP through serial. Connect the esp with the usb cable to your windows computer. You can issue some commands to move the servo and see boot and debug information.
update 23 dec 2020: New version with timed nightlight added.
How Does It Work
connect to wifi
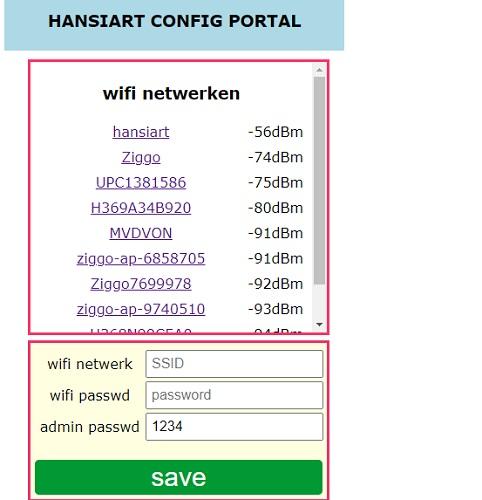
Once the software is uploaded, the wemos boots and the blue LED is lighted up continuously. This means an accesspoint (AP) is opened where you can connect it to your wifi. Now open the wifi settings on your laptop, phone or tablet. You'l see a netwerk called ESP-123456 or similar.
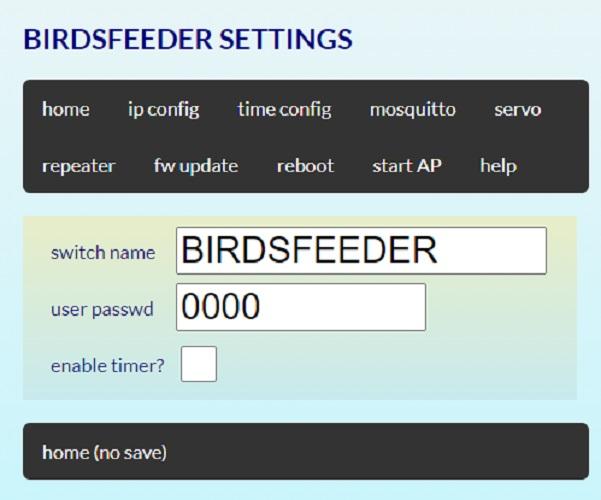
Connect to this network with password 123456789 and browse to 192.168.4.1. Enter your credentials and follow the further instructions.
Don't forget to set the administrators password. Default this is 000000000. When successfully connected, the ESP will reboot and the led flashes 3 times.
boot up
At bootup, the Esp reads the settings from the filesystem, connects to internet to set the systemtime and moves the servo to its closing position. Than the led blinks 3 times to indicate that it's ready.
settings
After the first boot you should do some housekeeping first. Go to the settingspage and click "time config". Here you can set your geographical position and the time offset. If daylight time saving is applied in your country than check that. Save. The device reboots and calculates the sunset and sunrise times. Check the status page to see if all is correct.
servo settings
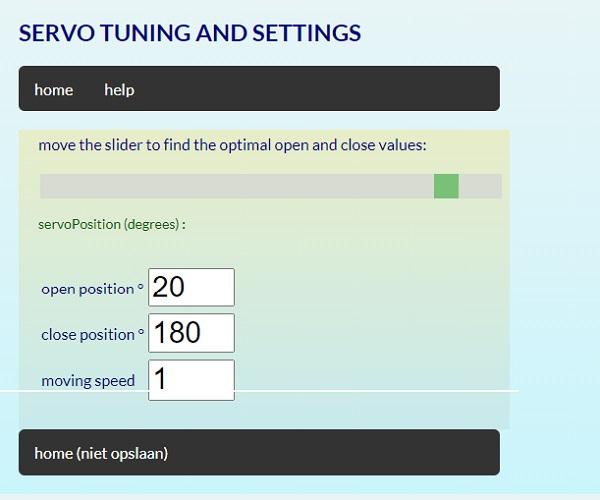
It is important to do the servo settings. We don't want the servo to move to positions where it's vibrating, as this is a high current state and might destroy your servo or even your nodemcu. Visit the servo page, here you can determine the extremes between which the servo can move safely. Call it the open and closing position, or vice versa, to determine what happens when you hit the close or open button. This makes it very easy to adapt the servo to your specific project.
You can also determine the speed of the servo movement. Check "slow closing speed" if you don't want to catch birds in your feeder.
domotica
The servo can also be controlled by domotica applications like "domoticz". By sending a http request like "ip-of-espservo/SW=ON" (close) or "ip-of-espservo/SW=OFF", the servo can be controlled. You can test this in your browser.
mosquitto
When mosquitto is enabled, messages such as {"idx":"123","cmd":"SW=ON"} or 123,SW=ON can be send to the servo. On open or close events, json messages are sent like {"idx":123,"nvalue":1}. This json format and can be understand by domoticz.
tactile button
If you connect a button, this has the following functionallity:
- When the button is clicked, the servo toggles from open to close or vice versa.
- Long press until the led lights op will reboot the ESP
- Longer press untill the led goes out: The ESP will forget the wificredentials and start an AP.
The button on the nodemcu board has the same functionallity
Troubleshooting
eratical moves
If the servo unexpectedly moves at powerup or when controlled, it sometimes helps to connect a pullup restistor of 10K between 3.3V and the datapin d1.