Internet Controlled Security Robot W/ Night Vision
by MAPS Media Institute in Circuits > Arduino
790 Views, 6 Favorites, 0 Comments
Internet Controlled Security Robot W/ Night Vision
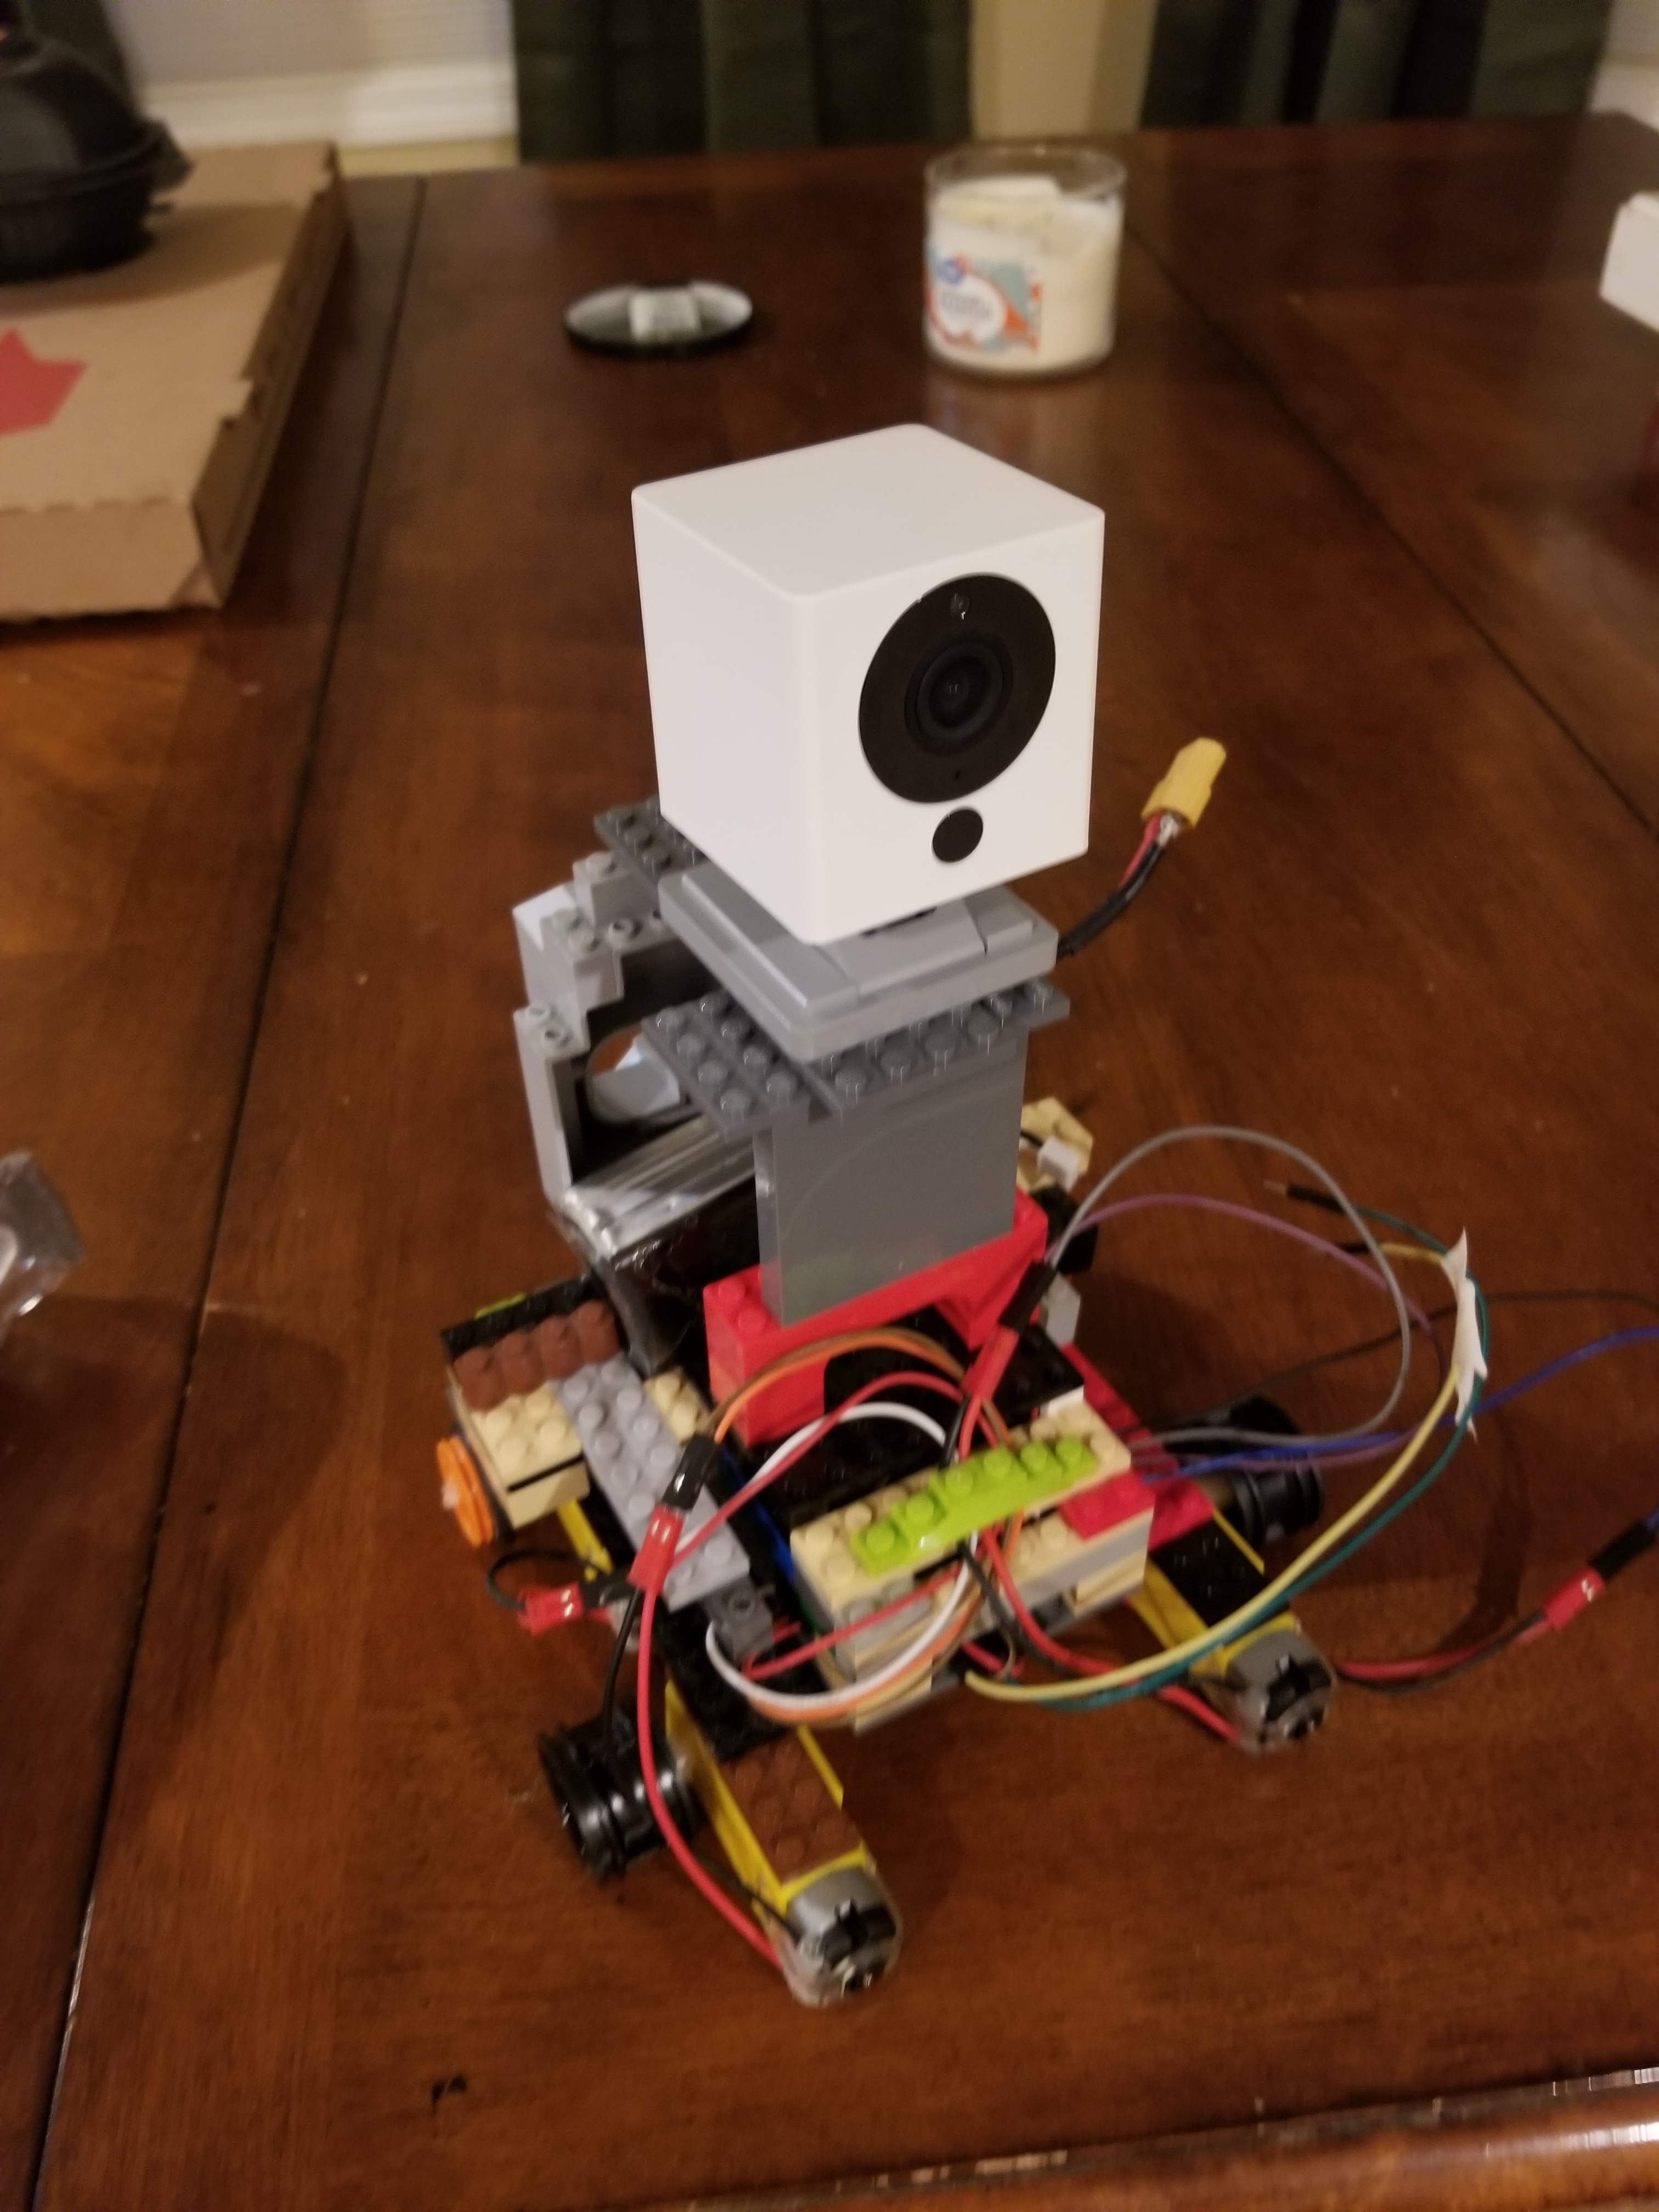
This is a project that should open up the world of controlling nearly any electronic device across the internet. This project will show you how to build a robot with night vision you can control through any smartphone or tablet across the internet using an app called Blynk where you can actually design your own user interface. It should even be possible to control this robot through Alexa by using a website called If This Then That or IFTTT. You could even build triggers for this robot based on internet weather data, tweets, or Dominos pizza delivery. Regardless of where you are on the planet you should be able to see and control what this robot does anywhere on the planet where a wifi router can be connected to.
Supplies
All prices listed are from July 10 2020
Wyze Cam $23
NodeMCU ESP2866 wifi module $4-6
L298N Motor driver $3-6
TT Motor "I" shape x 2 or x4 about $2 each
Male to male jumper wires 10ish
Male to female jumper wires 6ish
Something to use for wheels some available online to purchase or 3d print
Something to use for chasis (legos work great)
Blynk App Free
Wyze App
Computer to program on (preferably PC)
Cell phone or tablet to use as control
Software Setup
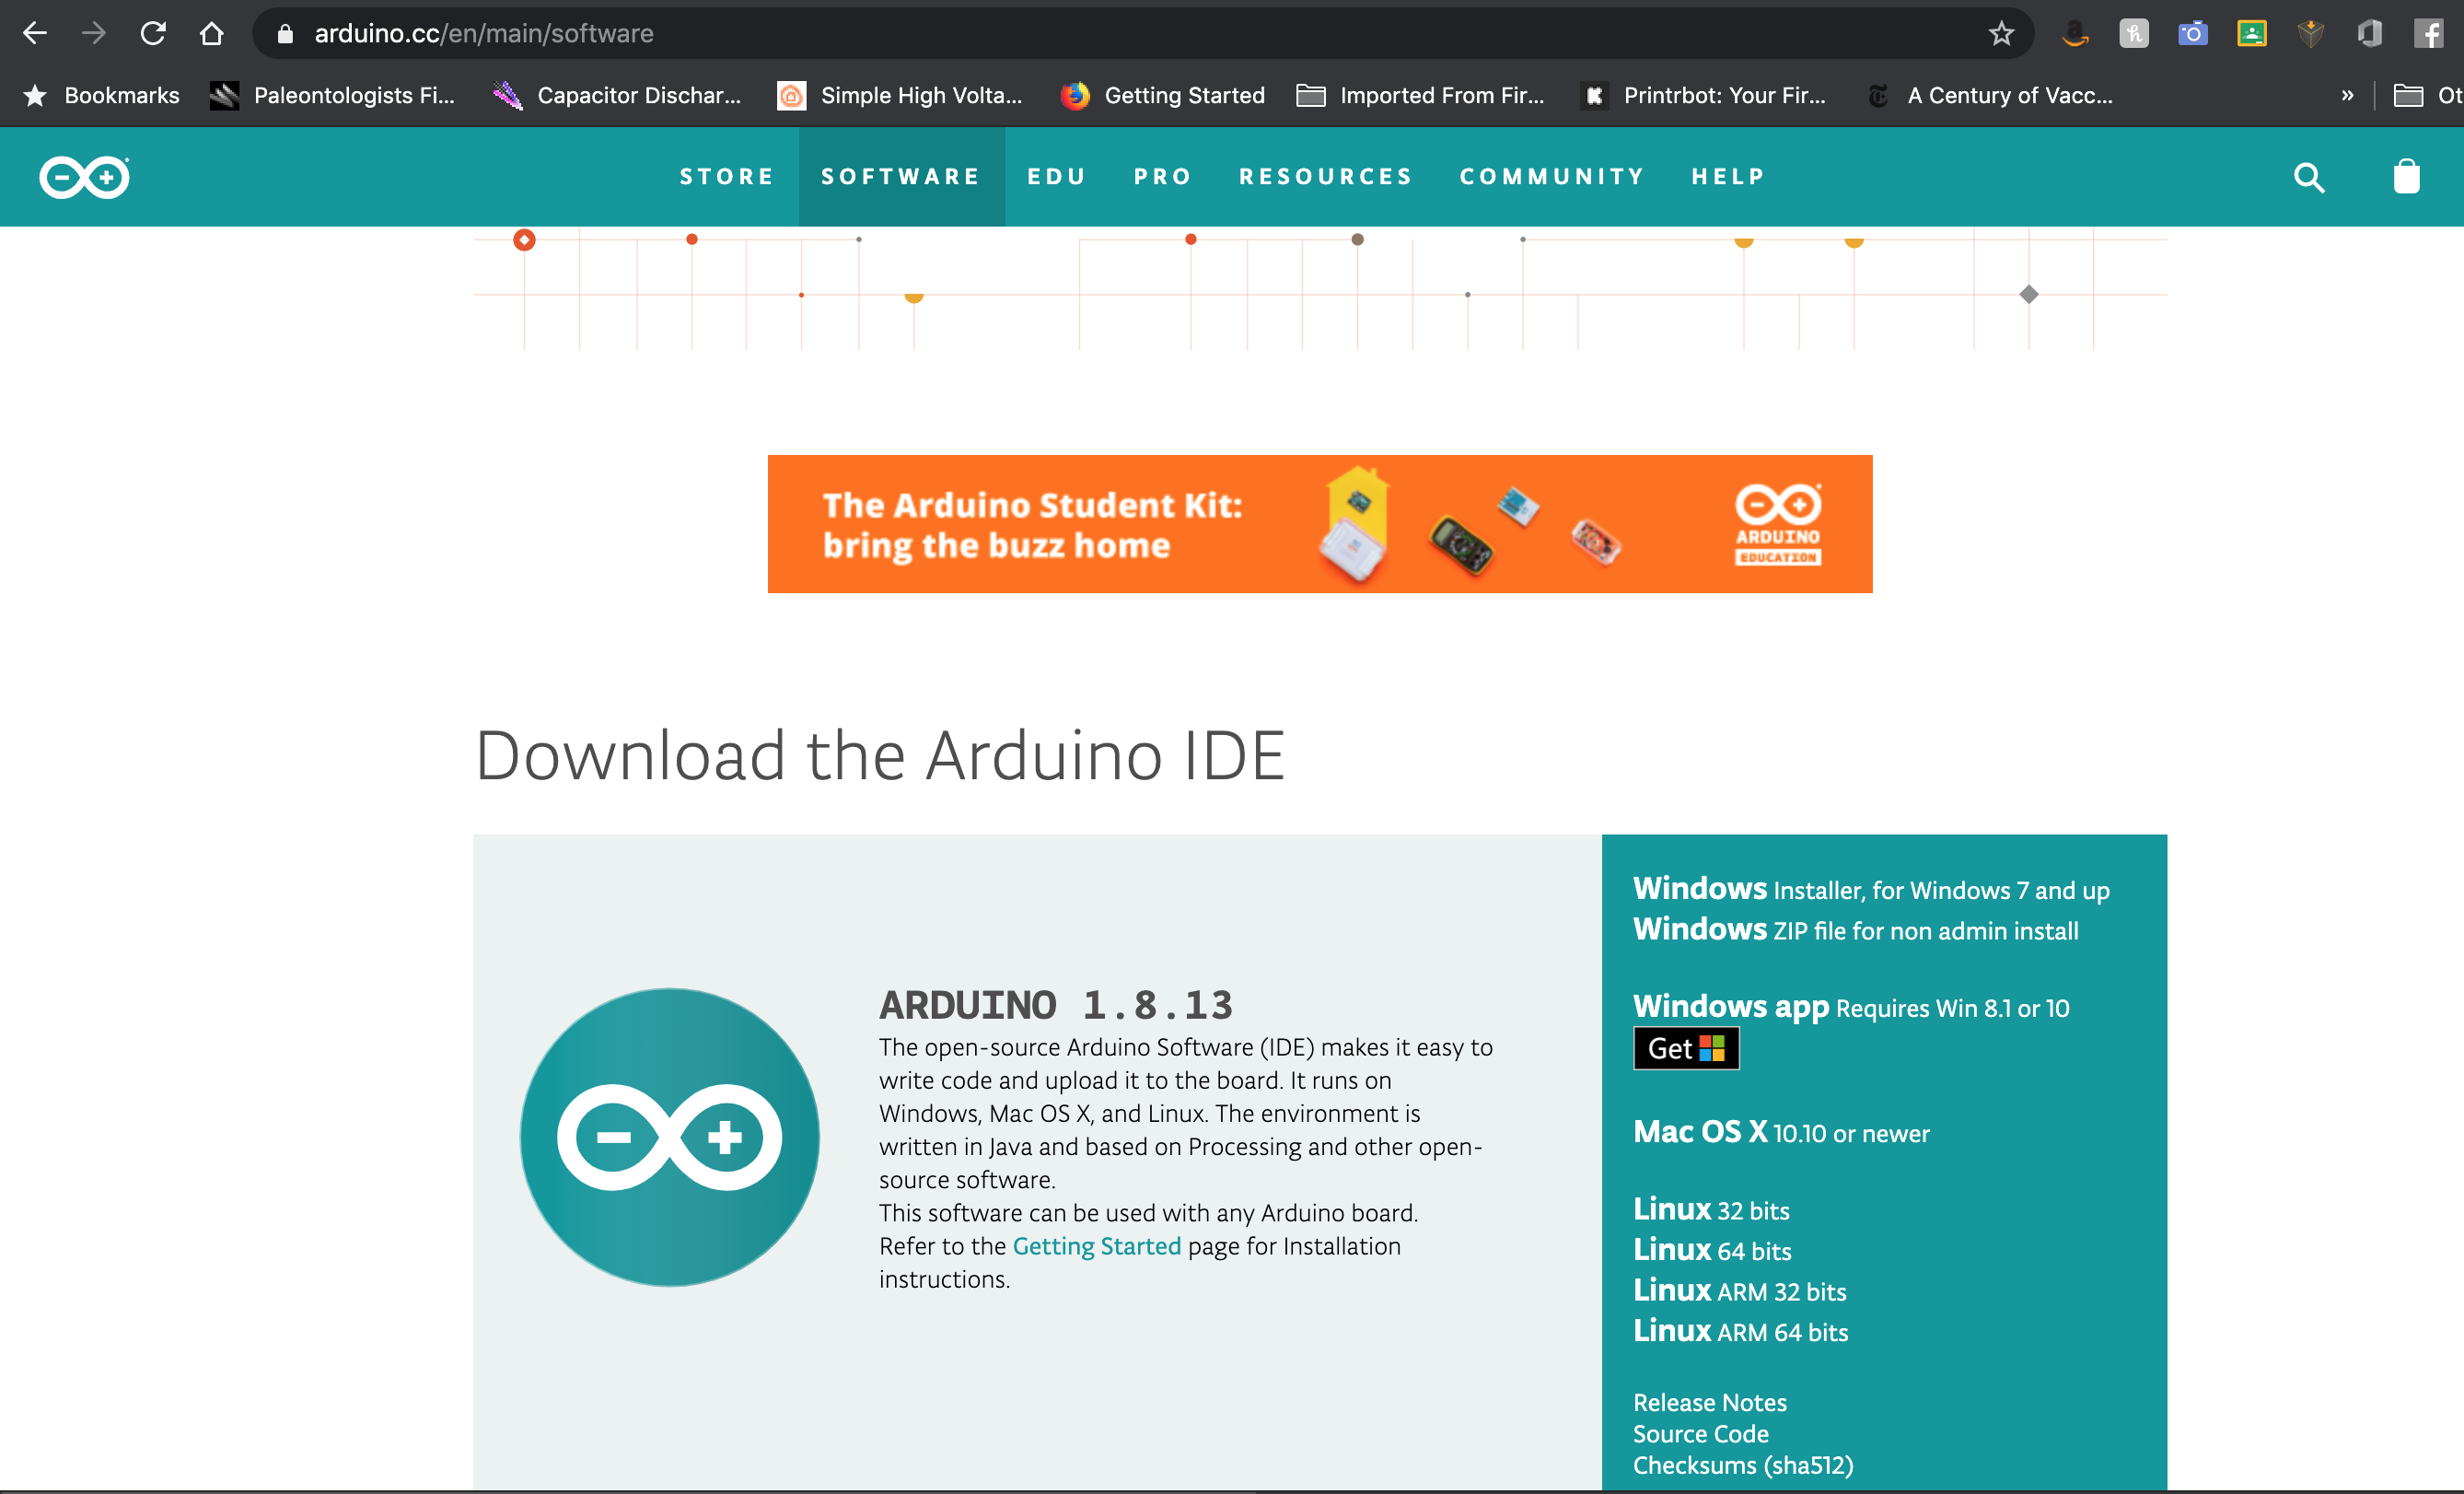
You will need to download some free software to make this all happen. First you need the Arduino IDE to talk to the brains of this robot the NODEMCU ESP8266 board. I have been working on getting this to work on a MAC but so far have not been successful though I do think it's possible. This guide however will only work for PCs. If you figure it out share your story in the comments. Arduino IDE https://www.arduino.cc/en/main/software
This software will not have the ability to put code on this board until we give it some info. So click on File and go down and click on Preferences. Where it says Additional Boards Manager URLs paste the address: http://arduino.esp8266.com/stable/package_esp8266com_index.json
Next click on Tools > Board:>Boards Manager.. you may have to wait a minute for the package to finish downloading before doing the next step. You'll see a progress bar on the screen that just popped up. Once it's downloaded type nodemcu into the search bar. You'll get something that pops up that says esp8266. Install that by clicking install. Boom! Now we can talk to the brains of this soon to be world dominating robot.
Now click on Sketch > Include Library > Library Manager. Next, type in blynk in the search bar. Install the Blynk Library (it should be the 1st one on the list that says "build a smartphone app"). This will allow us to talk to the brain of this bot with the Blynk app over wifi.
Download Blynk app from App store or Google Play to your phone or tablet and install on the device you are going to control the robot from.
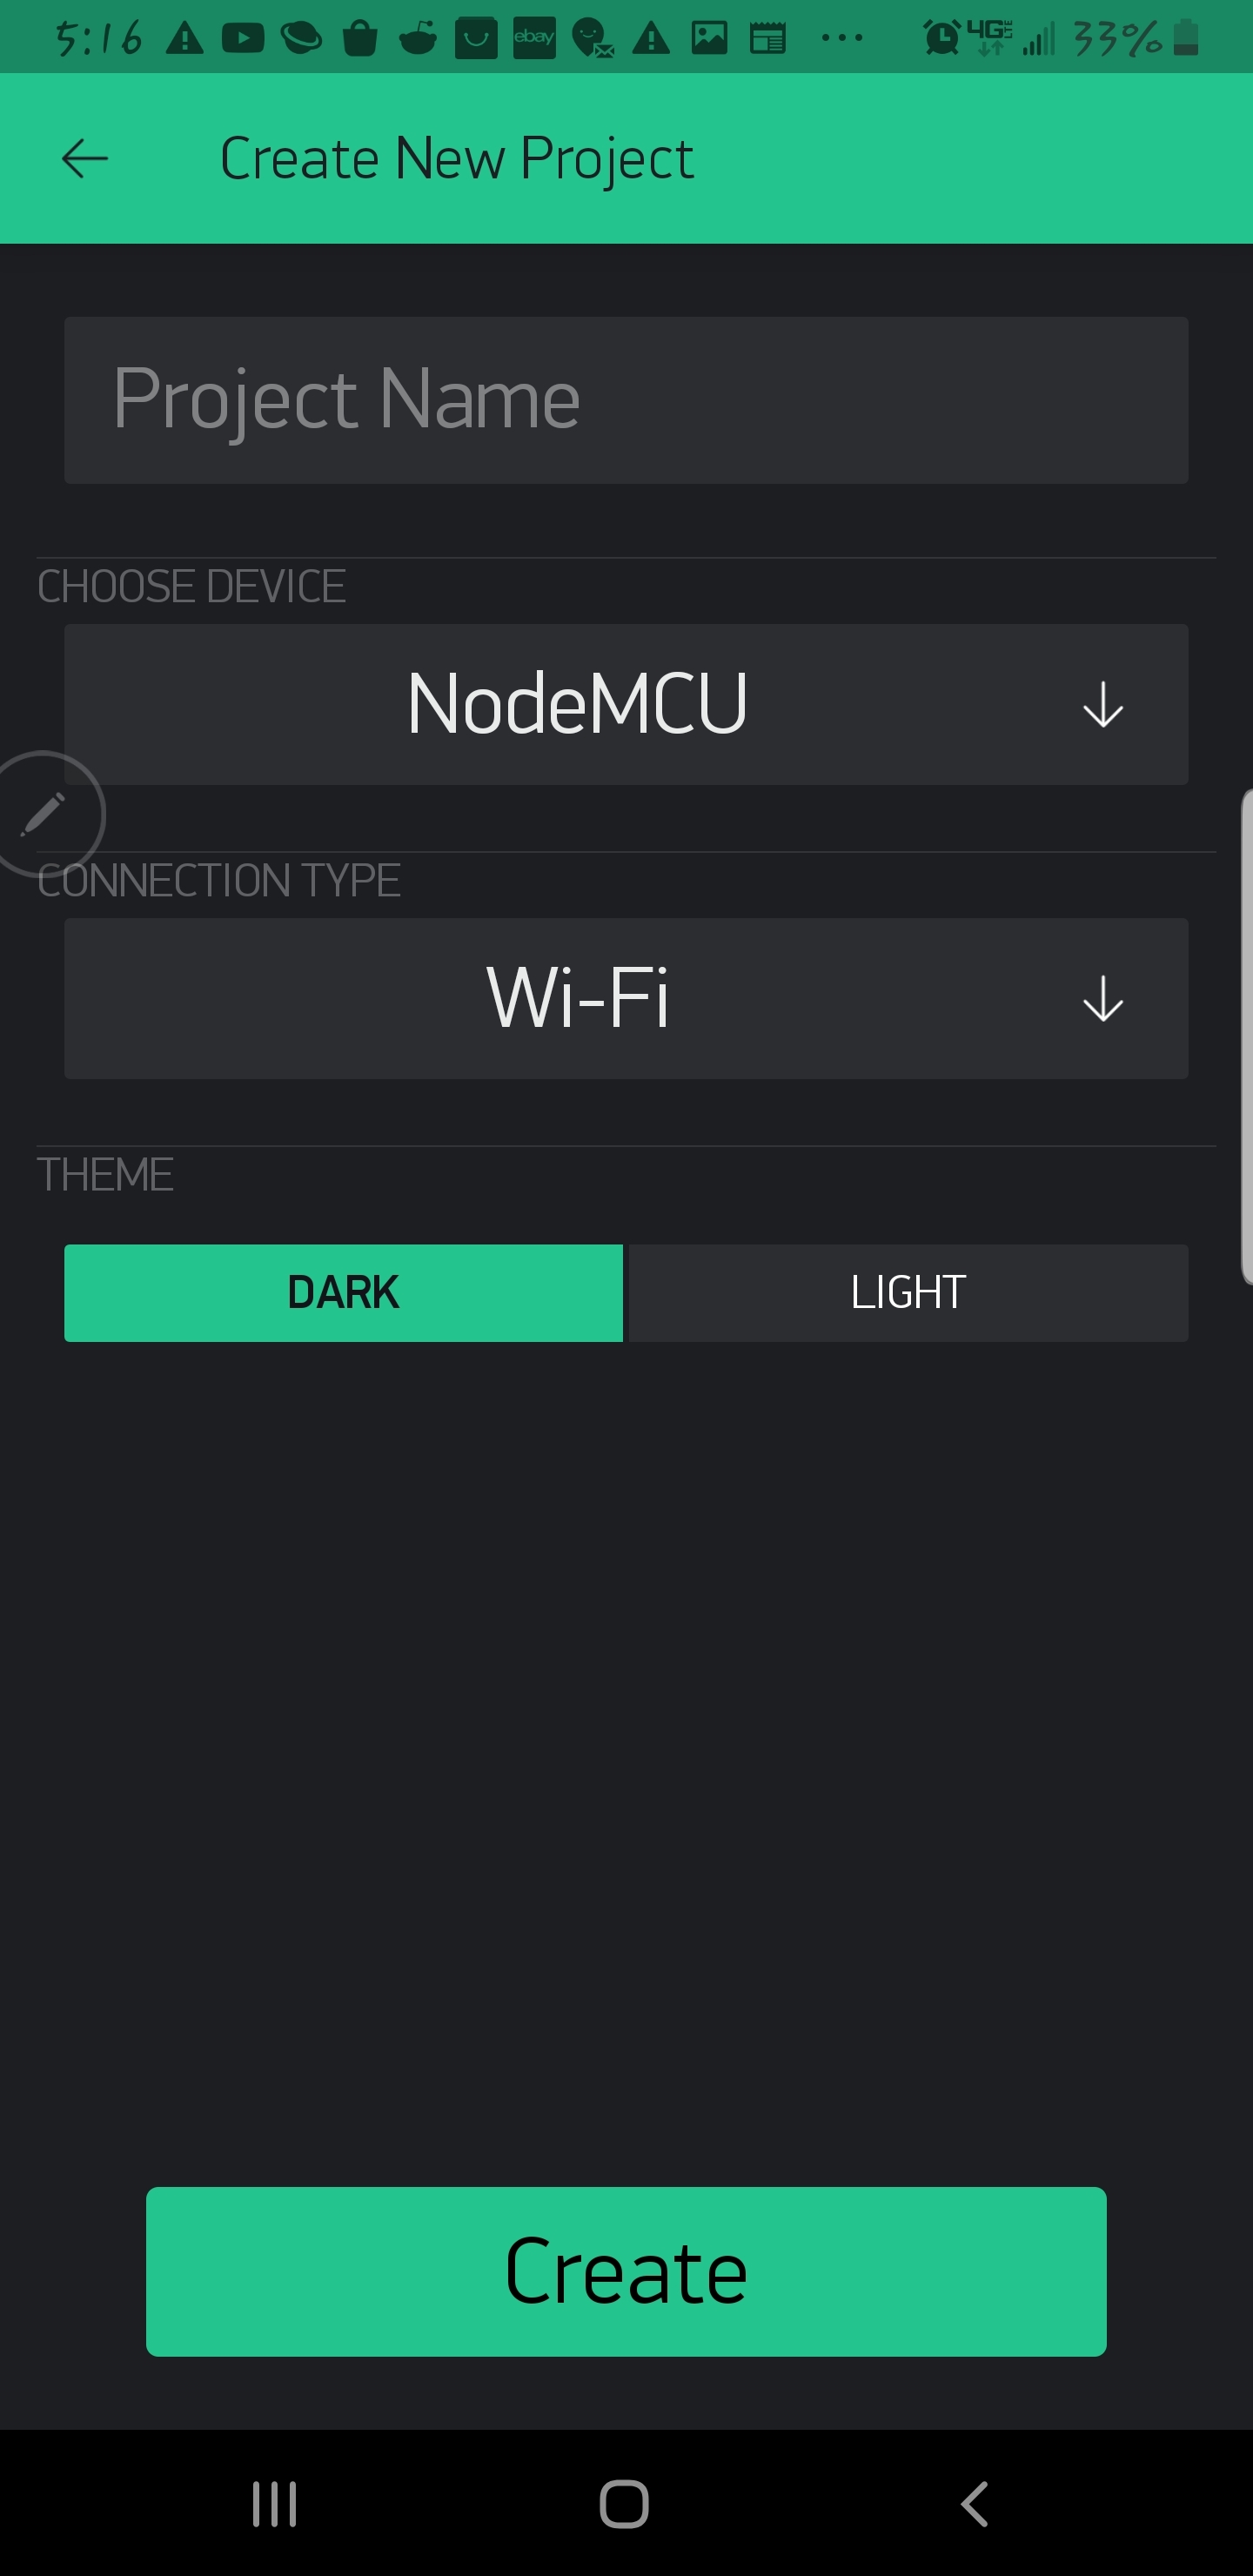
Open the blynk app and tap "create a new project" chose the NodeMCU board and Wifi if prompted. Tap create and an email should be sent to you that will give you the code for your project. You will need this later when programing your NodeMCU.
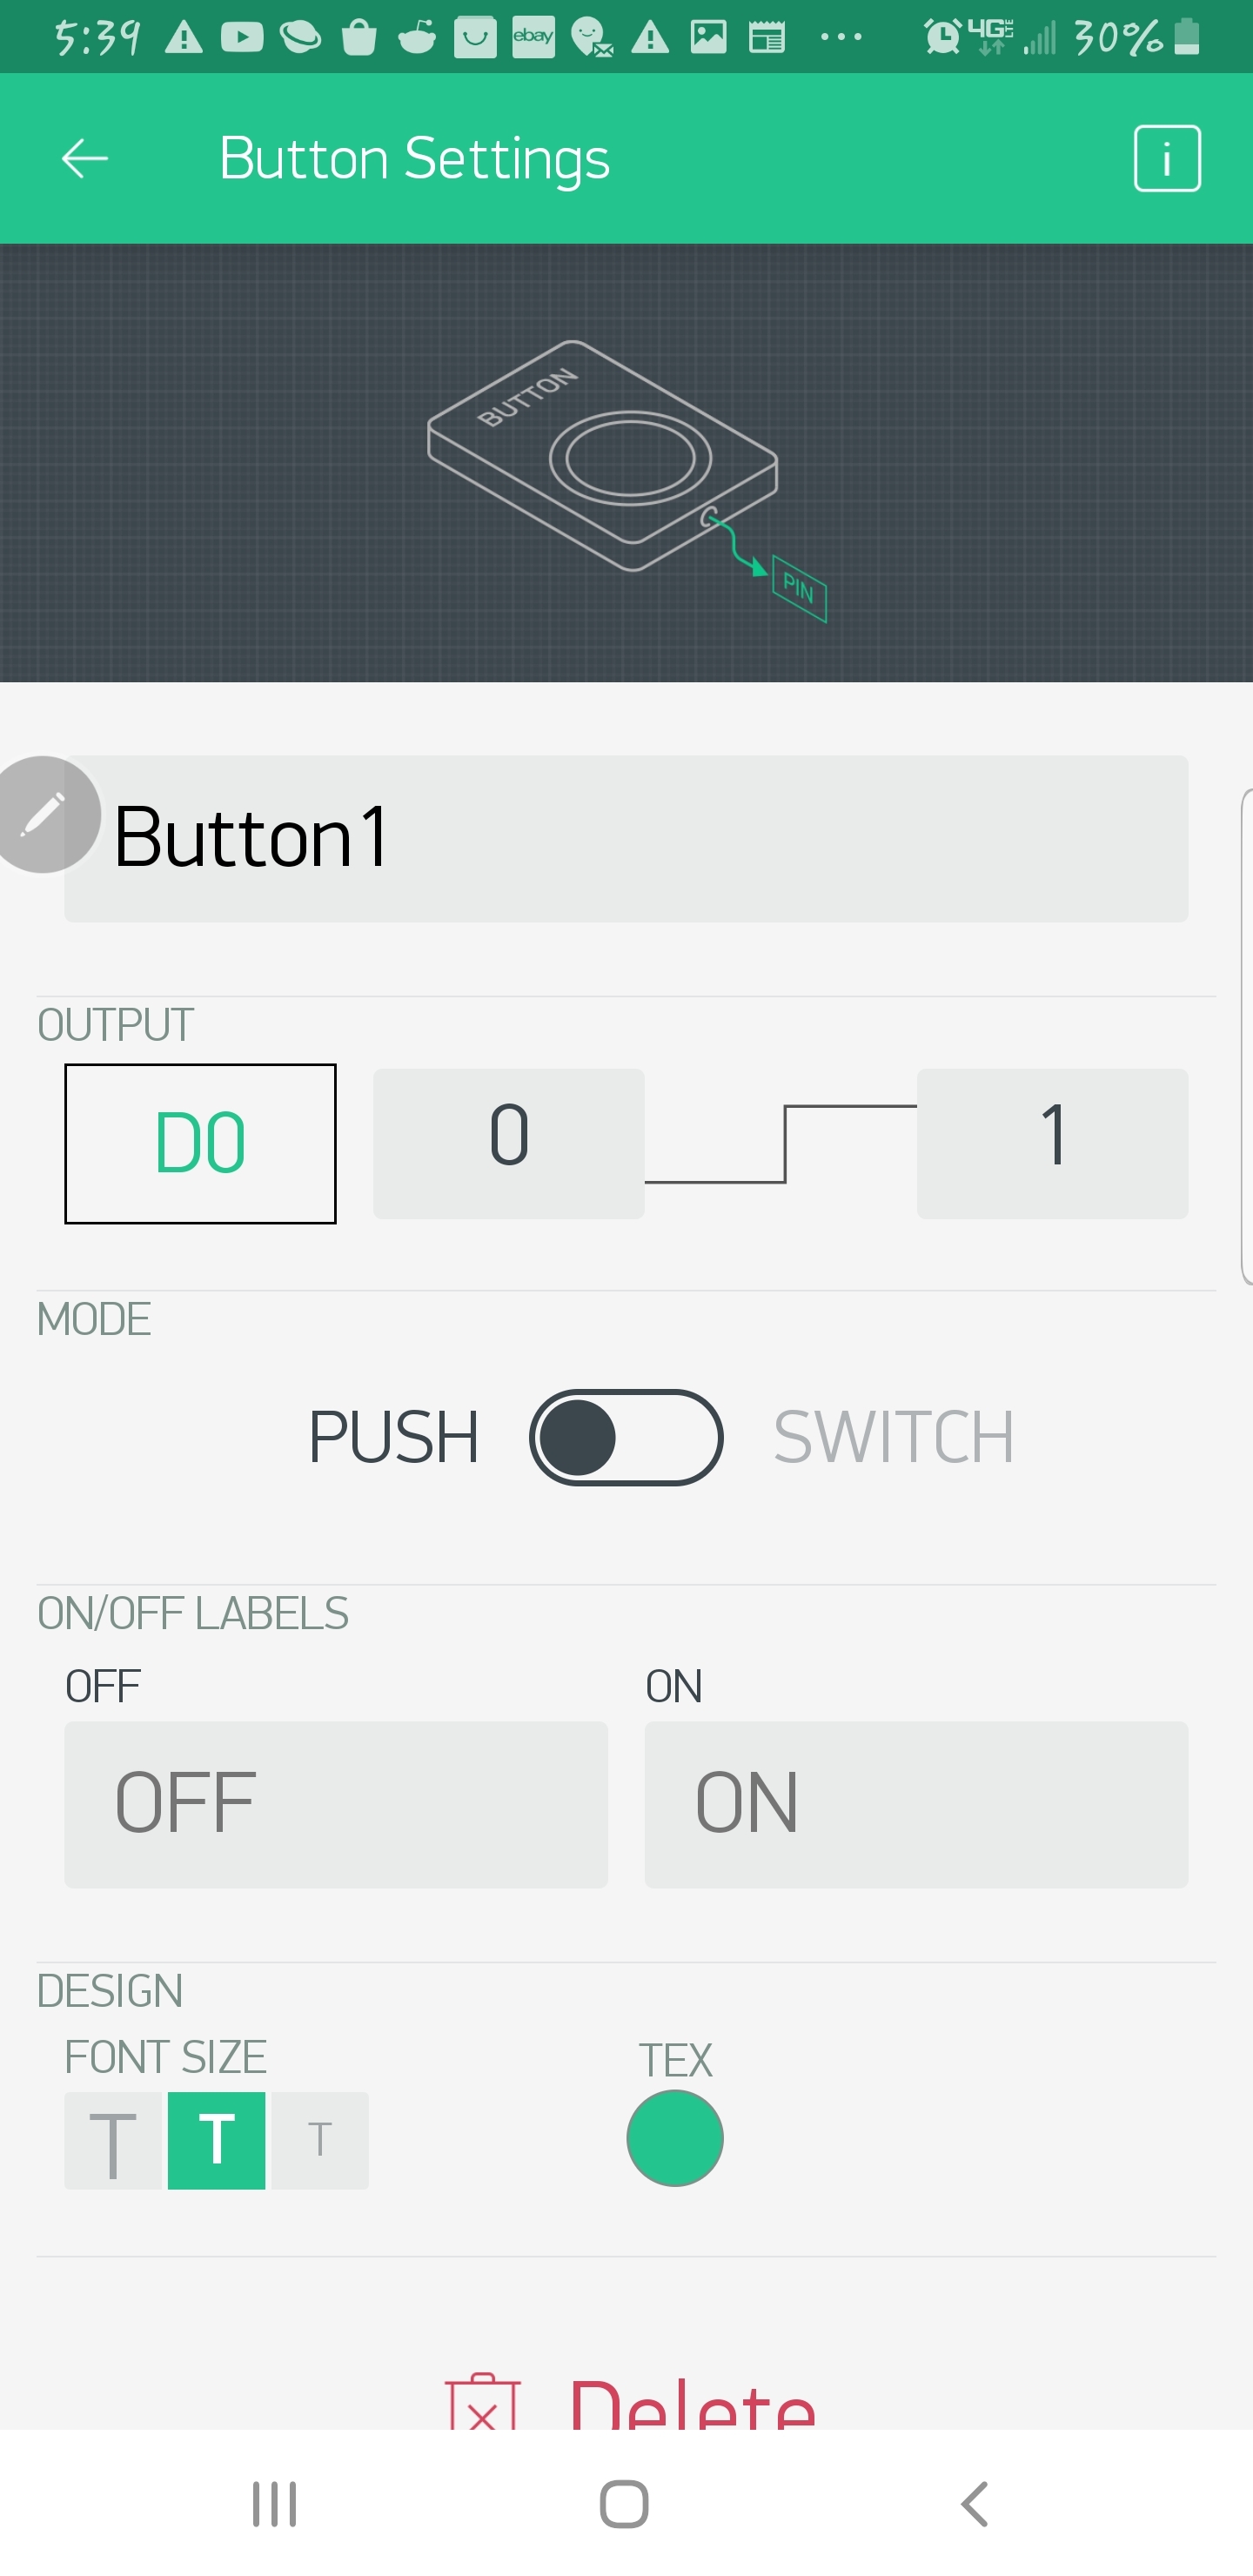
Tap the circled + to add a button. This button will turn your motor on so you can drive. Tap the pin button to assign a pin to this button (make sure it's a digital pin). Pick pin 0. Repeat this step and make the next button pin 1. Repeat this attaching pin 3 to button 3. Lastly attach pin 4 to your last button.
Download the Wyze app to your robot controlling mobile device as well. Setup an account and go through the instructions given to you on the app to setup your Wyze camera on your local wifi network.
Robot Hardware Setup
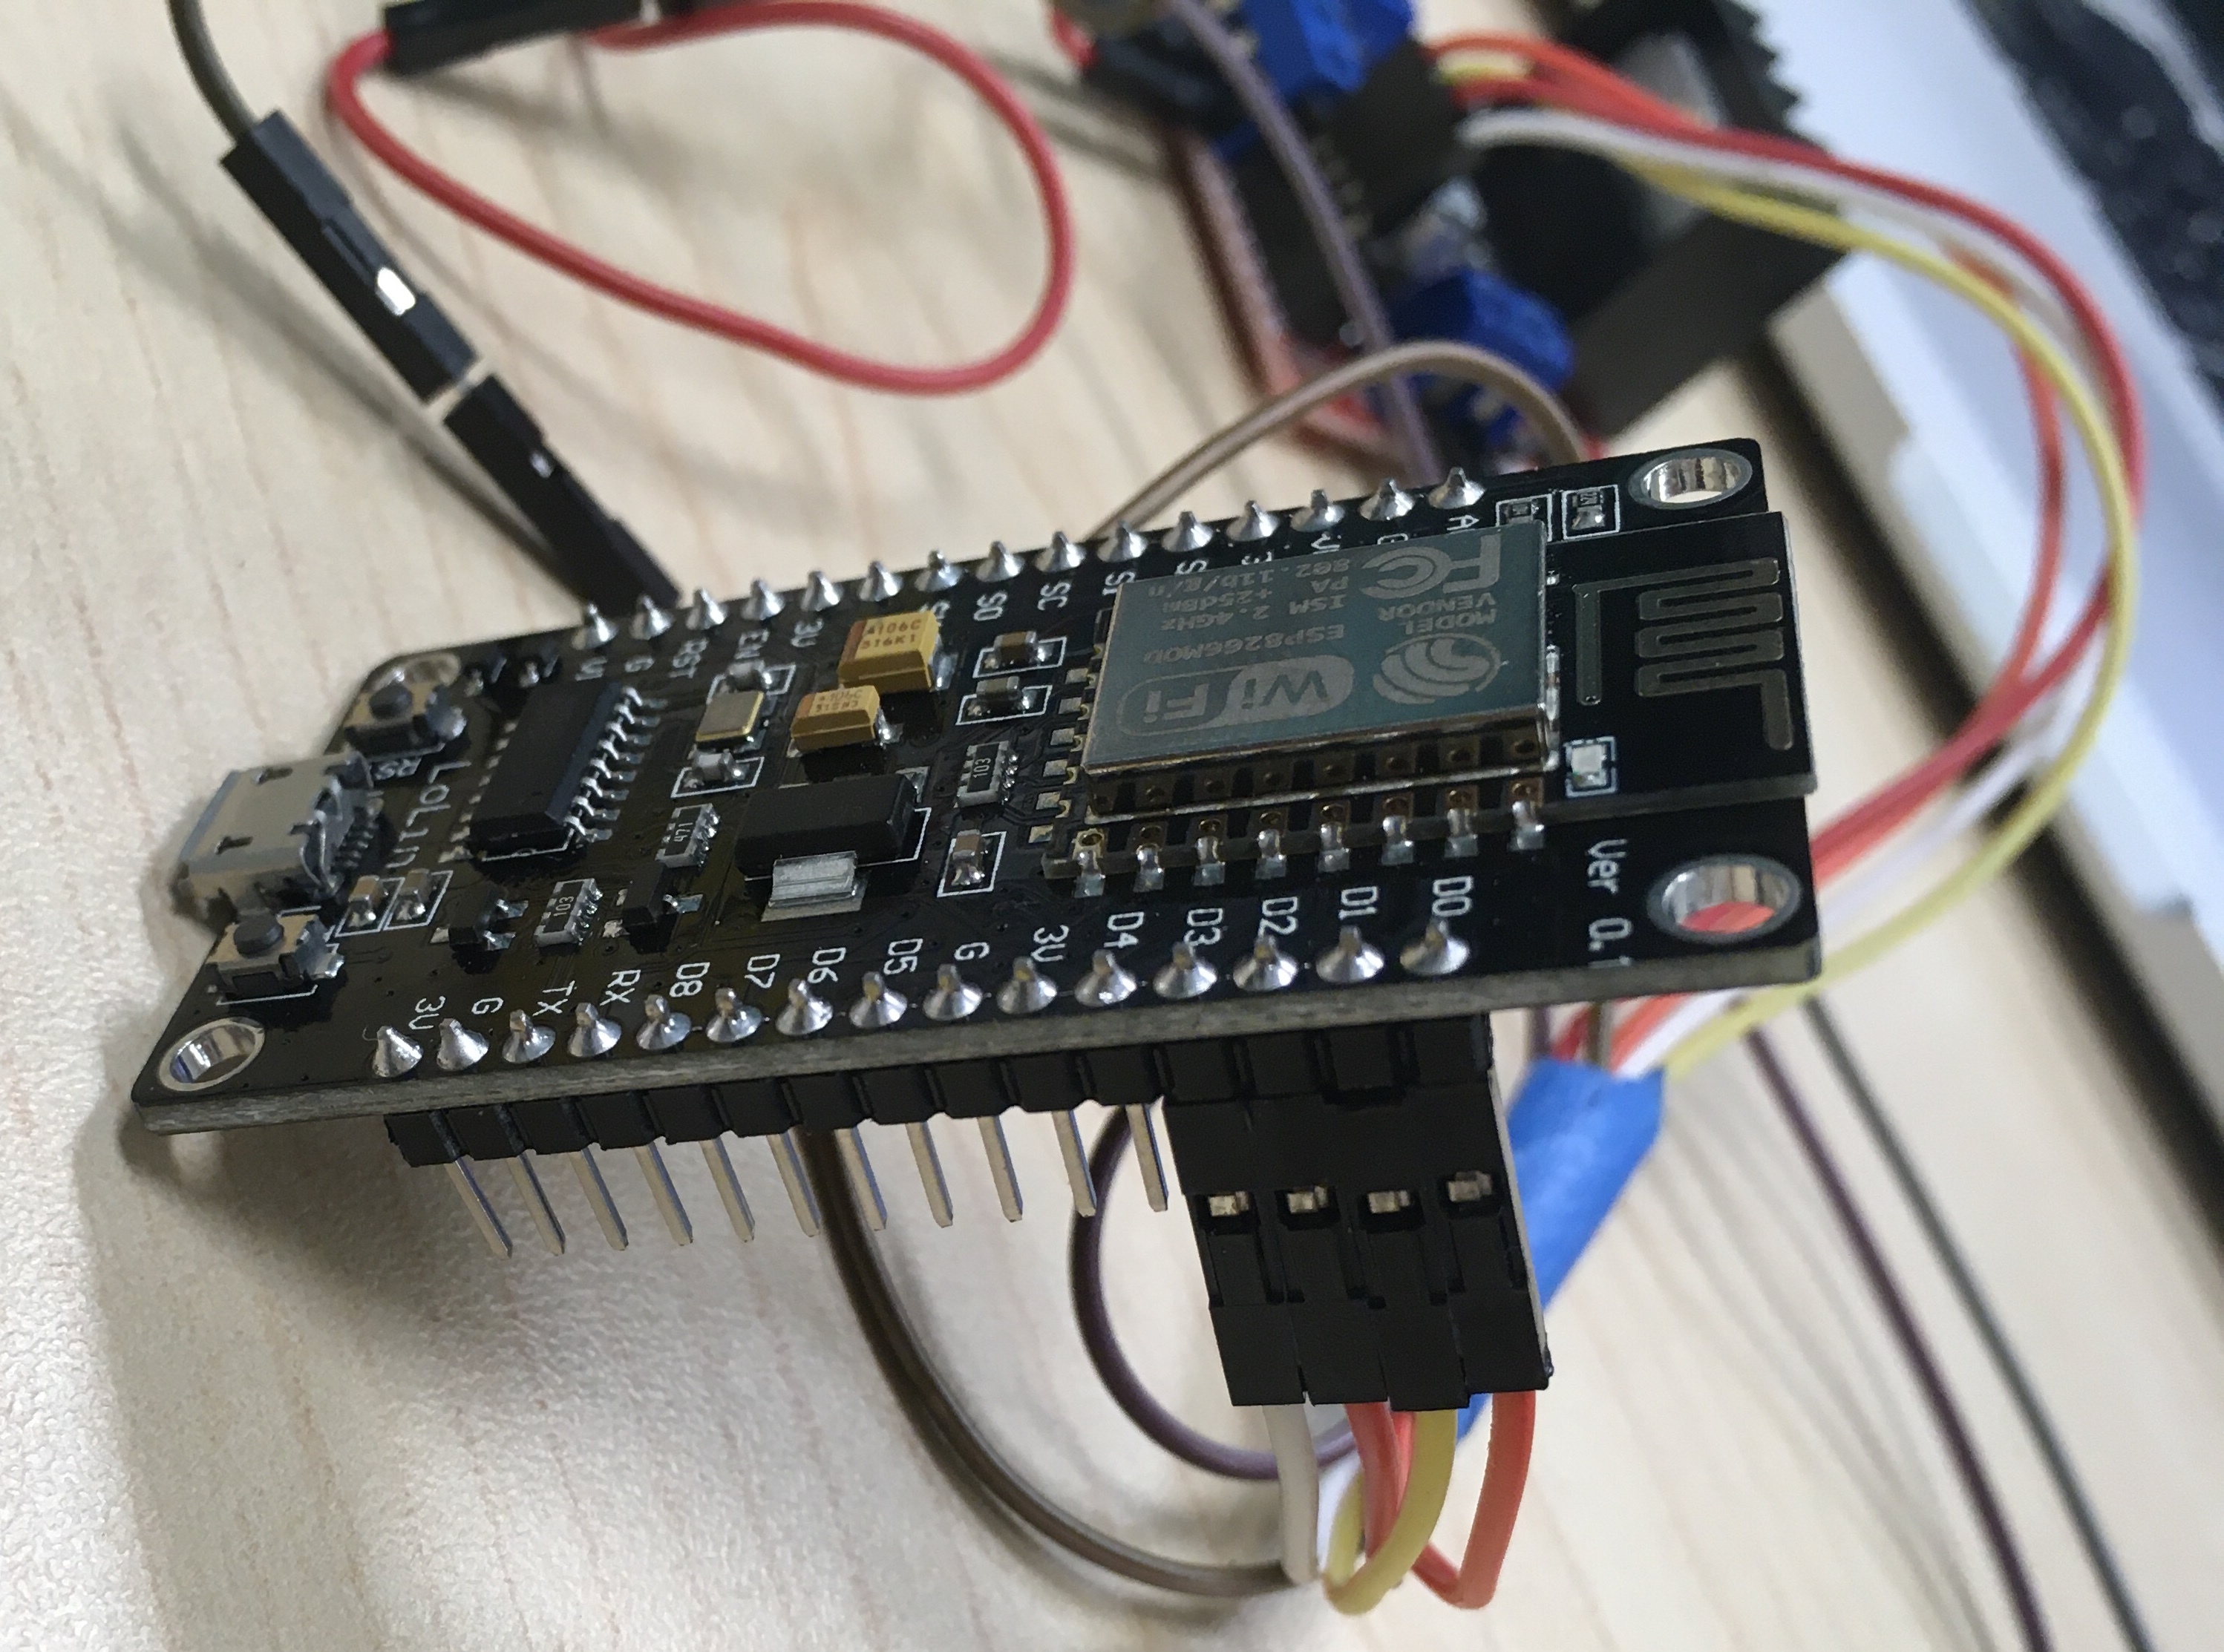
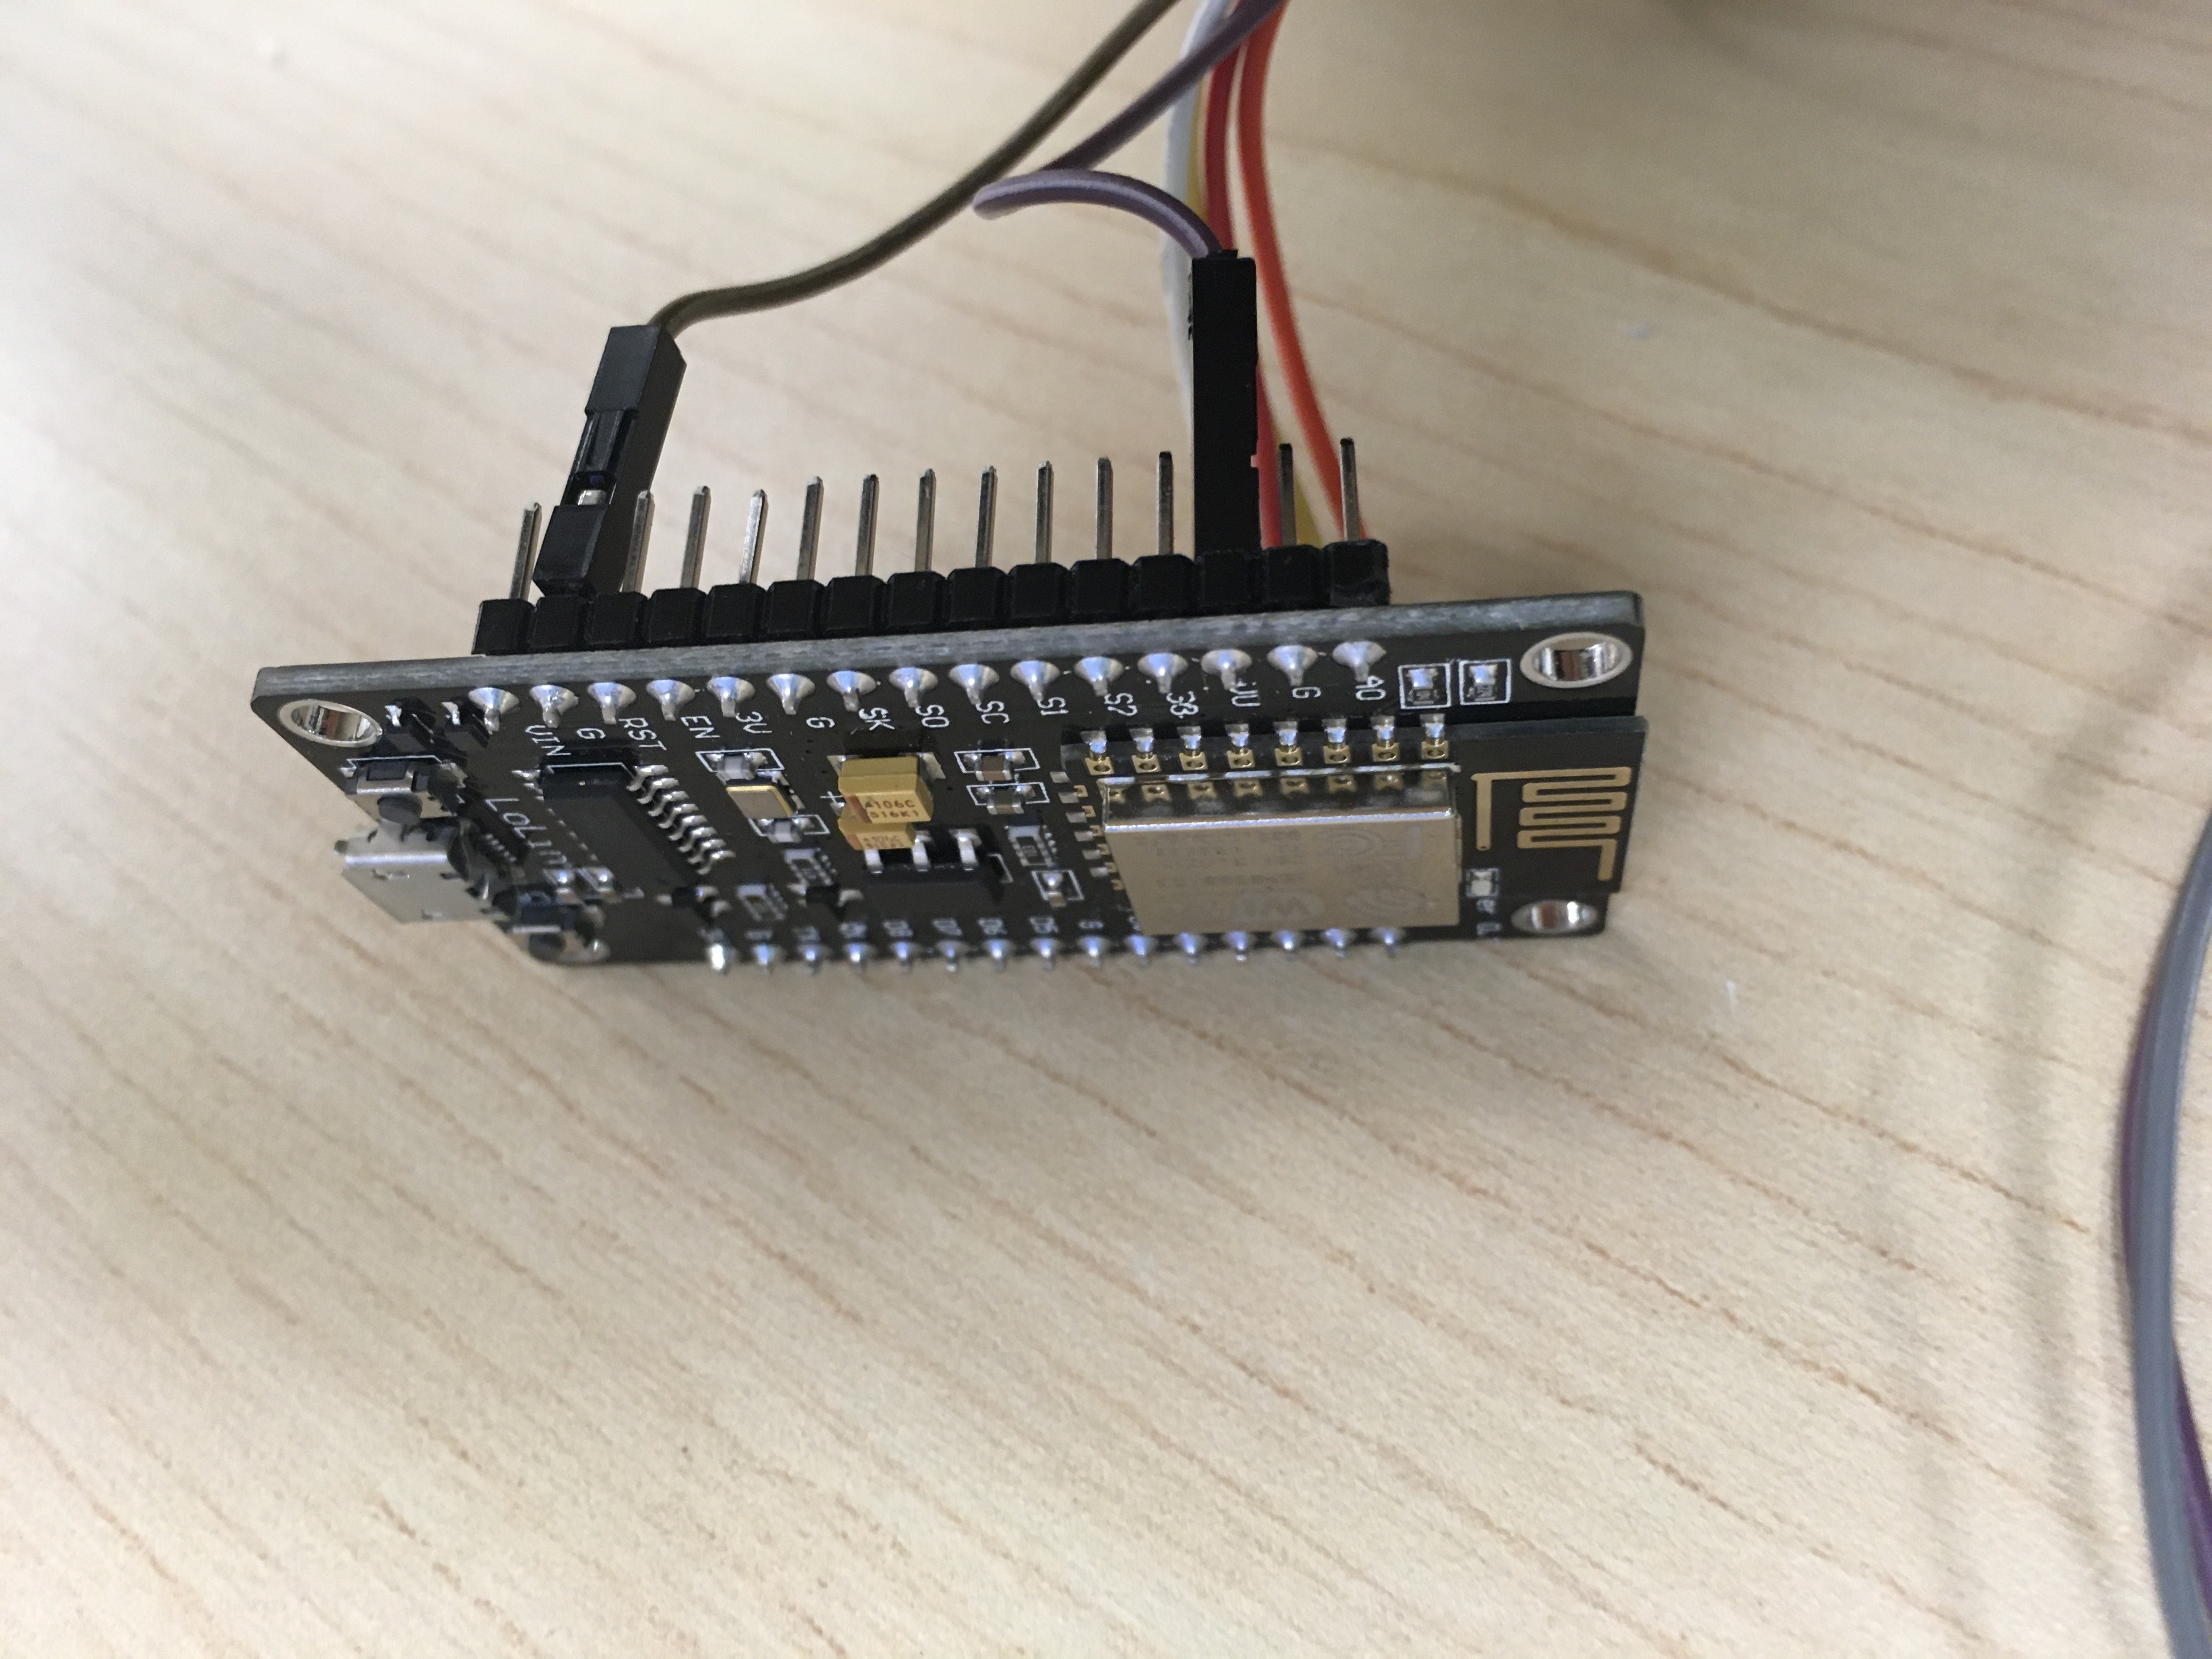
.jpg)
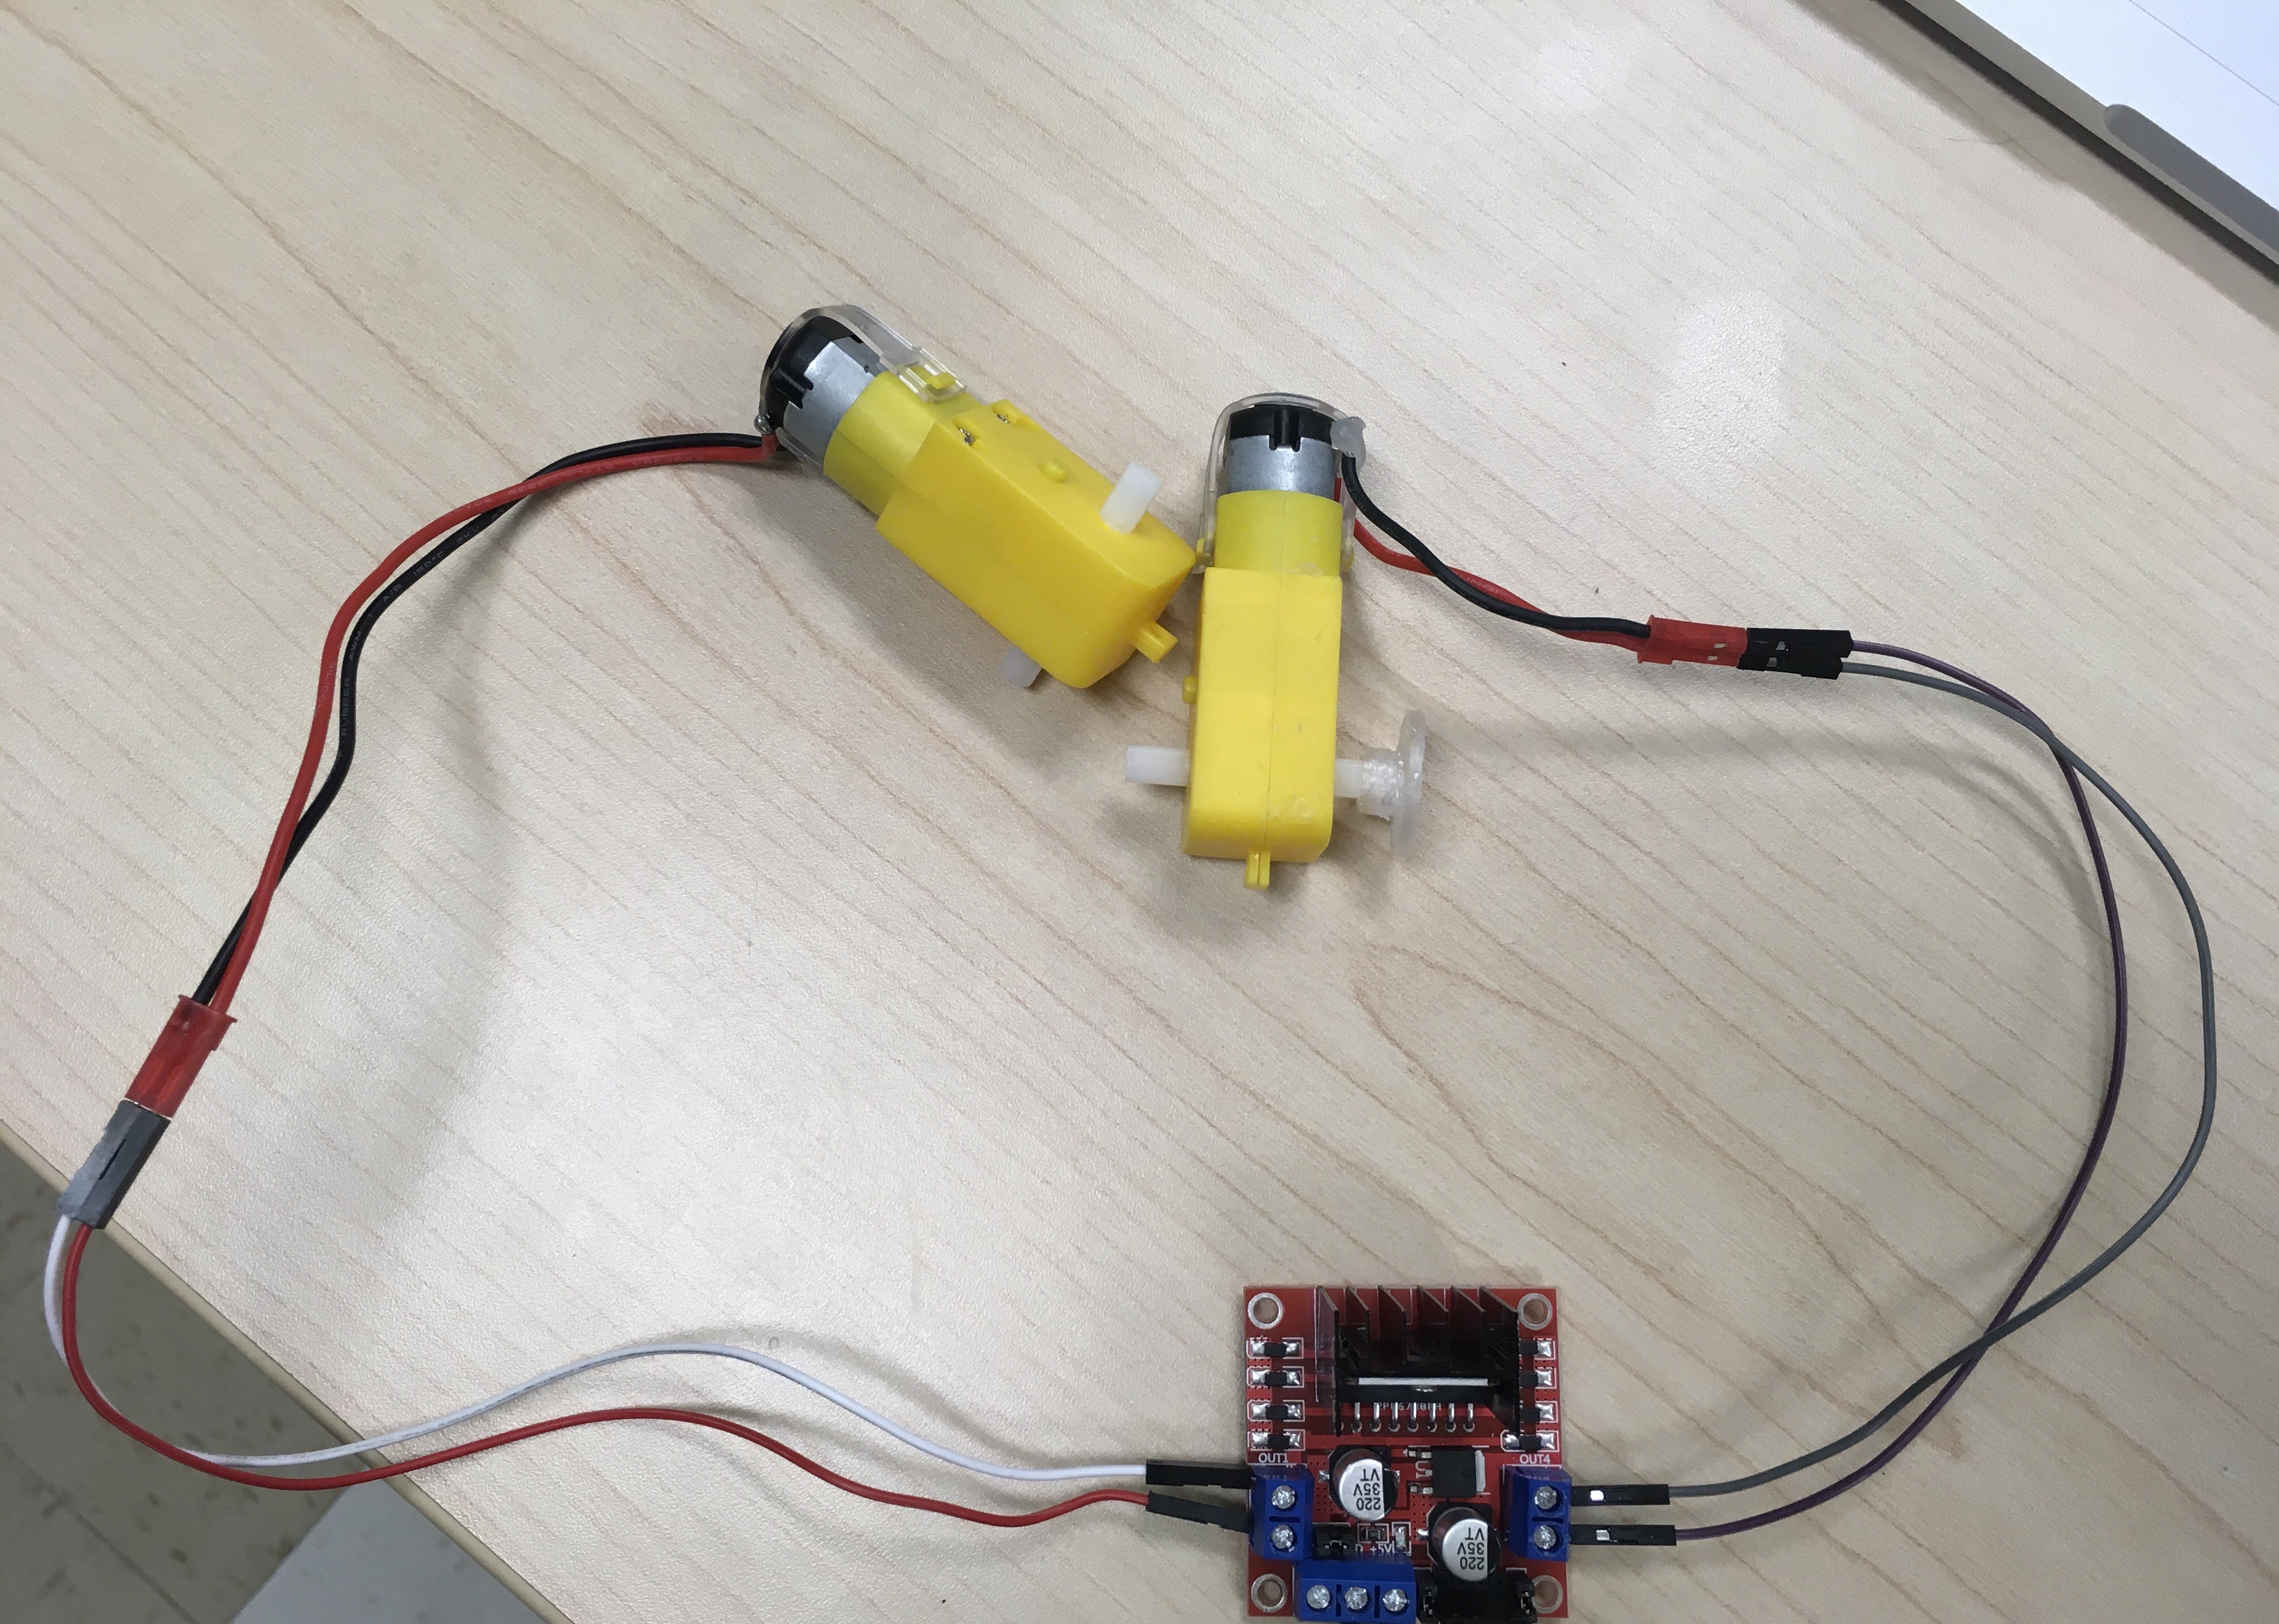
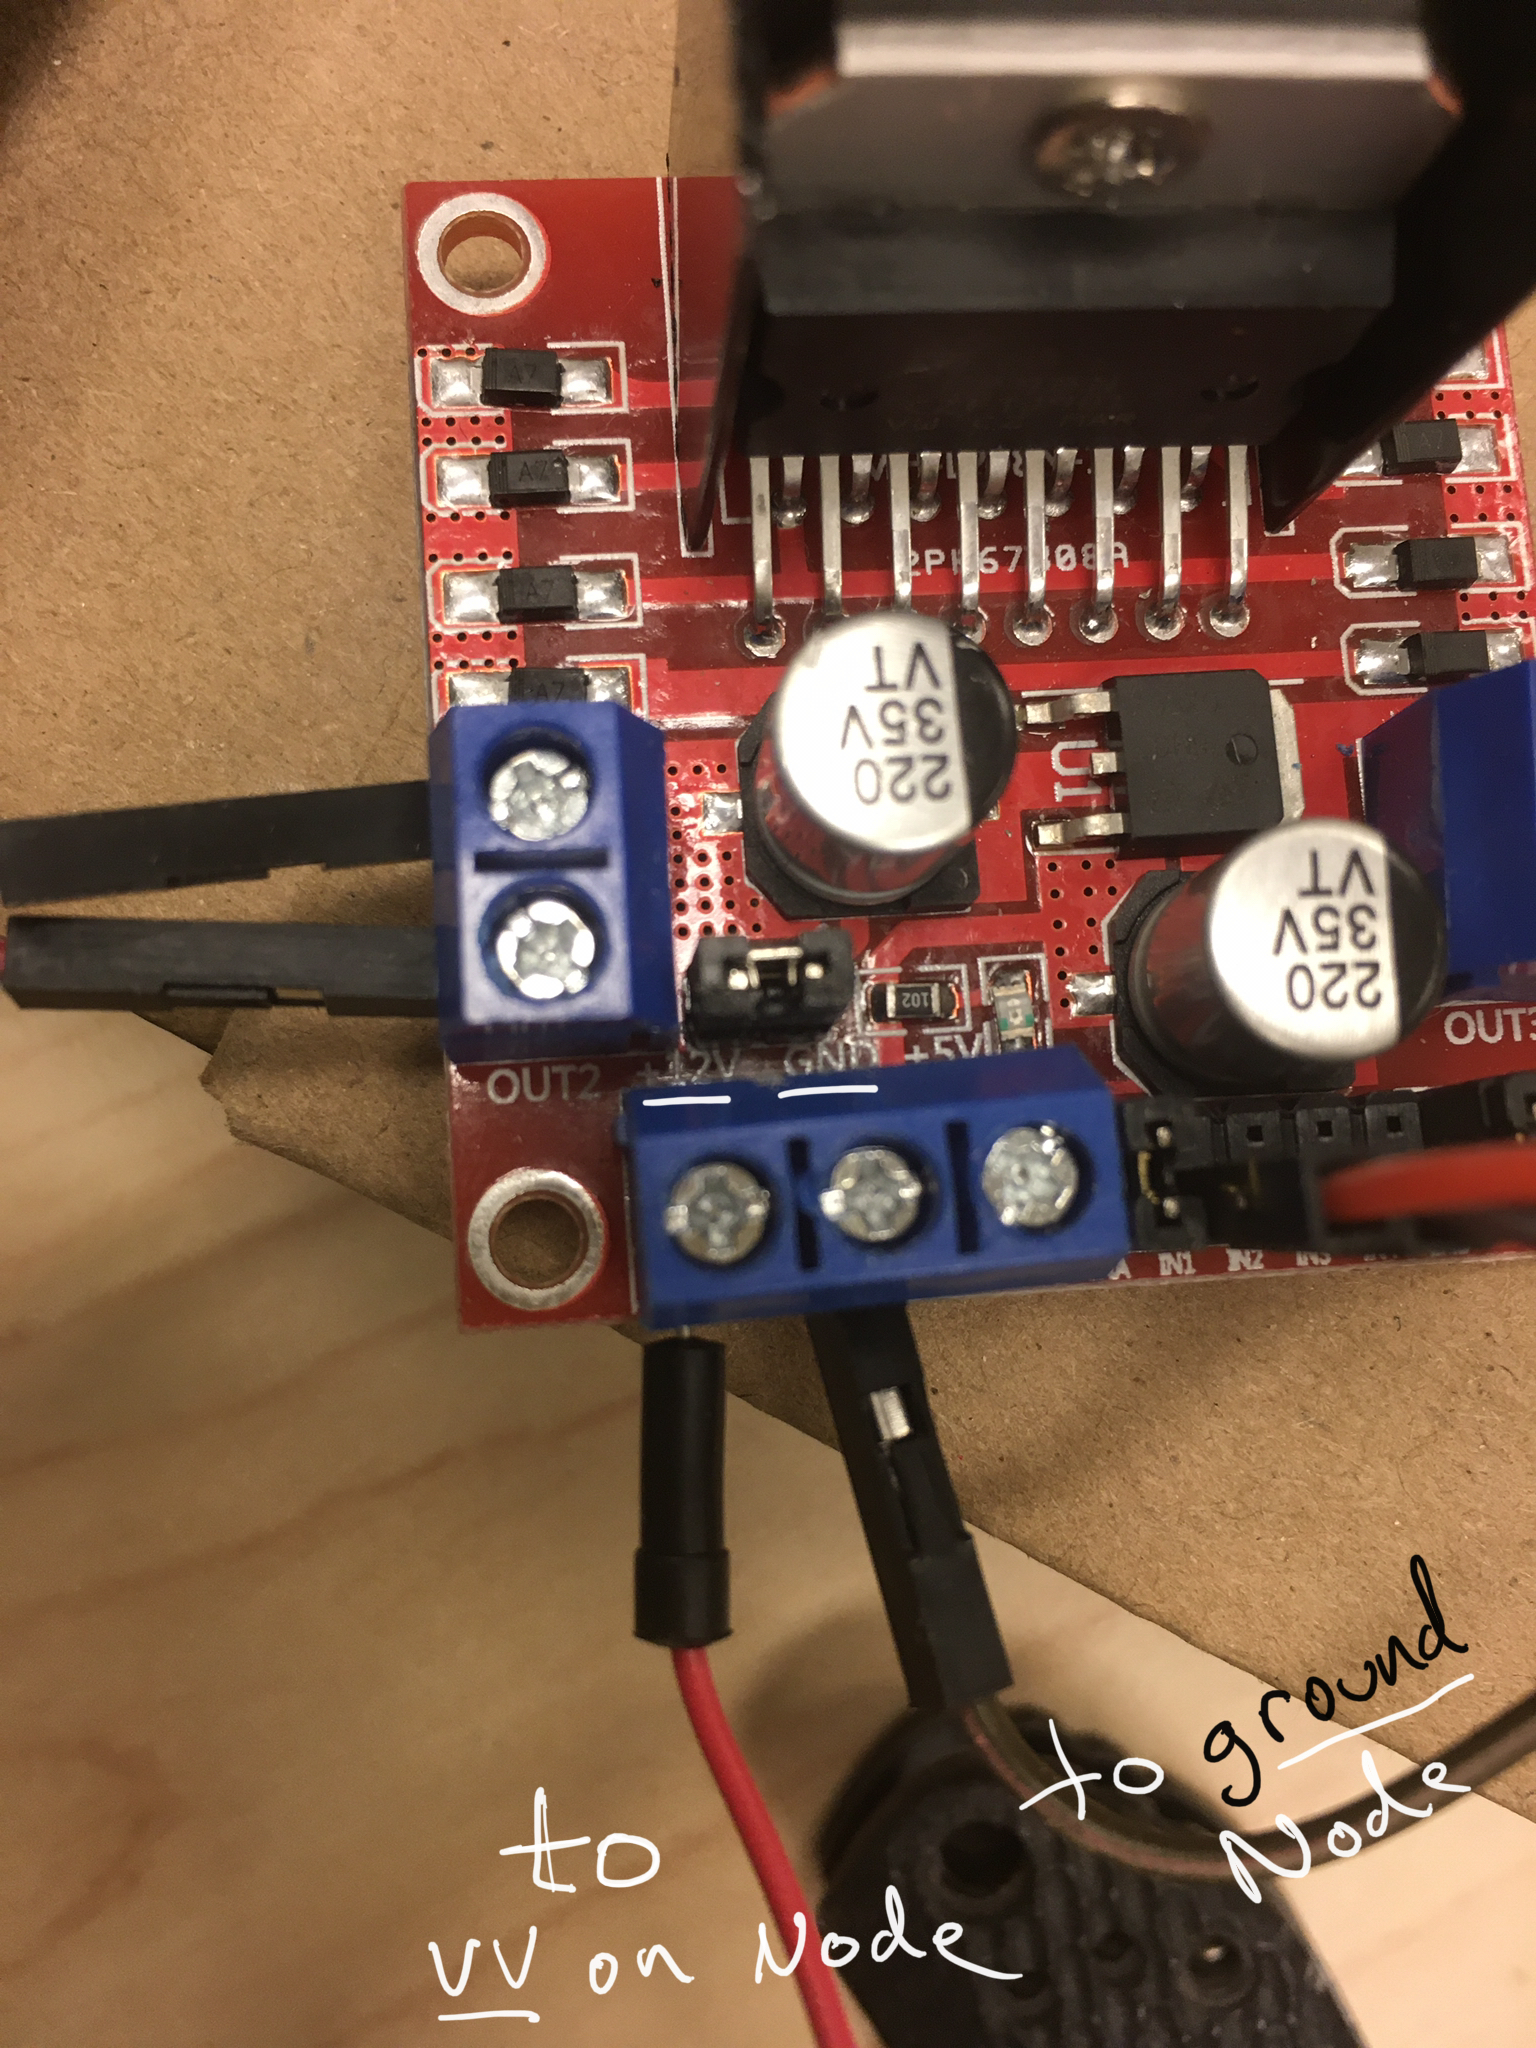
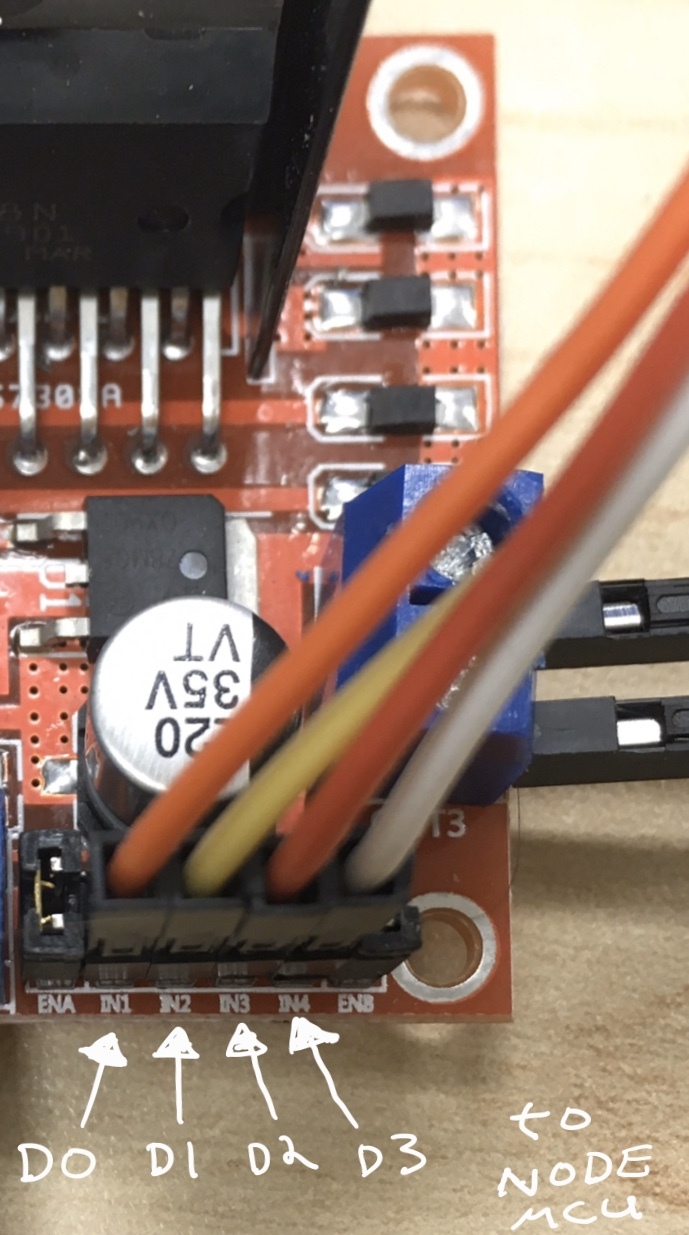
First wire up the red L298N motor driver to the NodeMCU board. Use the pictures as a guide. You have to run female jumper wires from the pins on the L298N as shown. The L298N's In1 Pin goes to D0 on the Node MCU, In2 goes to D1, IN3 goes to D2, and IN4 goes to D3. Now the brain board can be capable of controlling the motor board. A male to female jumper will have to go from GND(ground) on the L298N to the ground labeled "G" on the NodeMCU. A male to female jumper will have to go from the L298N's +12V to the NodeMCU's pin VV. This will take power from the NodeMCU board to power the motor driver board and the motors. It may seem like the wrong way to do it since you are using 5V and there is a spot labeled +5V on the board but that +5V is for powering something else that needs 5V. If you were running the L298N motor board off of 12V you could power the NodeMCU off that 5V. Next use male jumper wires to connect from the out 1-4 plugs to the motors. Out 1-2 will hook to one motor Out 3-4 will connect to another. If you find at a later time that the motor(s) are spinning the wrong way just swap 1 with 2 or 3 with 4 respective to the motor that's going the wrong way.
Build Your Bot's Bod

So there are a lot of ways to approach this and it's a chance for you to let your creativity make this bot awesome. You can just hot glue all this stuff to a light board of wood or cardboard and just slap some sort of wheels on the motors axels and it will work fine. I will link some 3d print files that can help if you have access to a printer. I built my robot's body from legos and a little hot glue. you can glue wheels to the motors. Search "tt motor" in thingiverse.com to find plenty of downloadable files for motor attachments. https://www.thingiverse.com/search?q=tt+motor&type=things&sort=relevant You can also buy tt motor wheels on Amazon.
Add Firmware and Drive
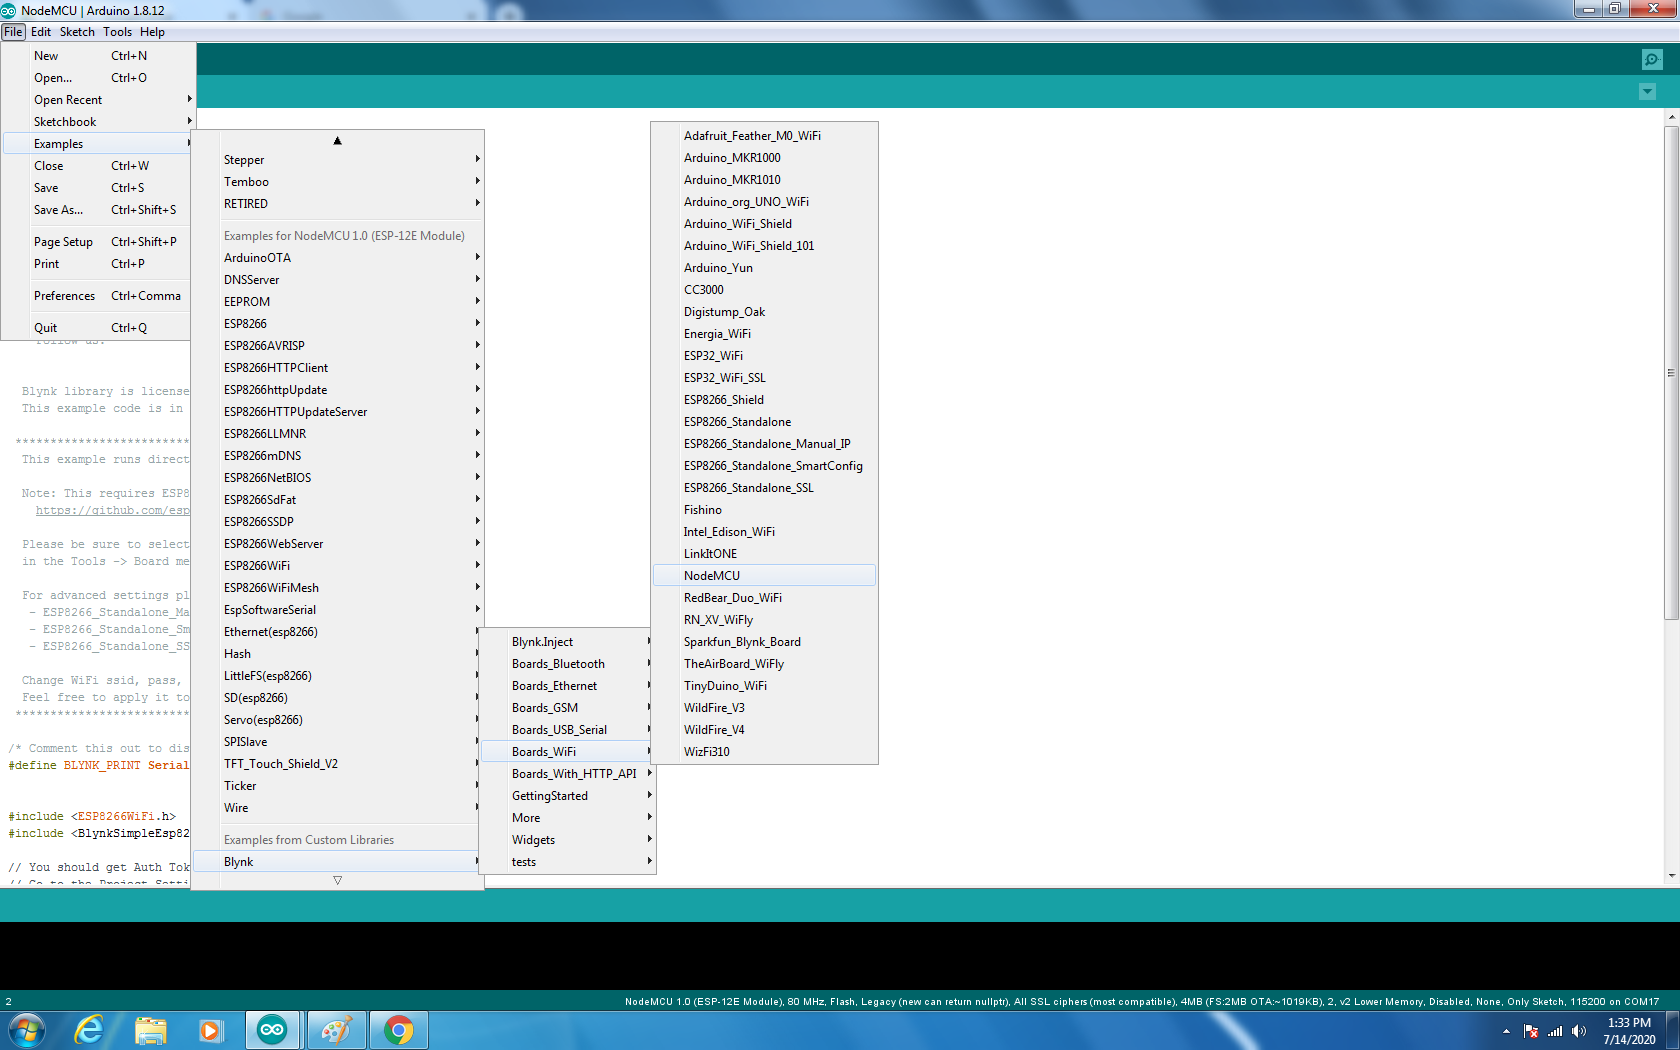
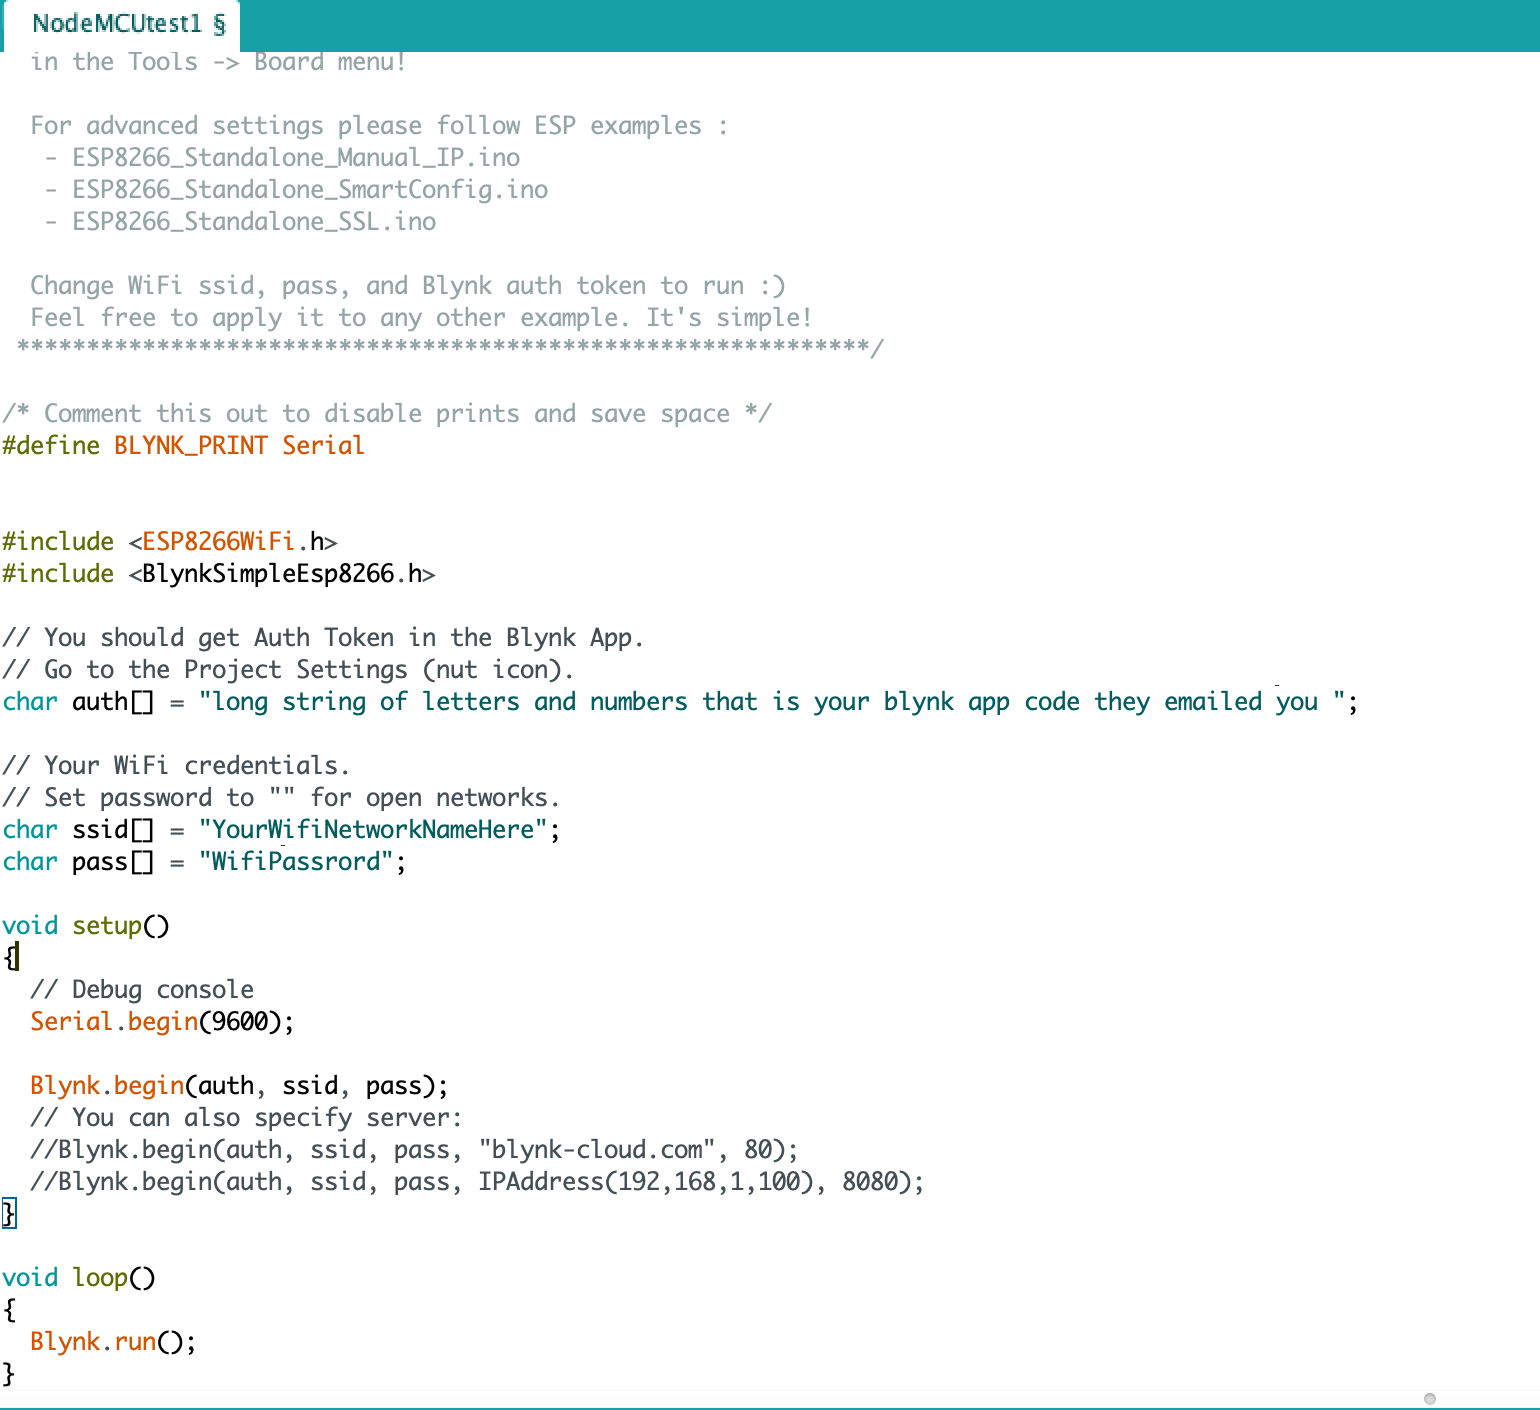
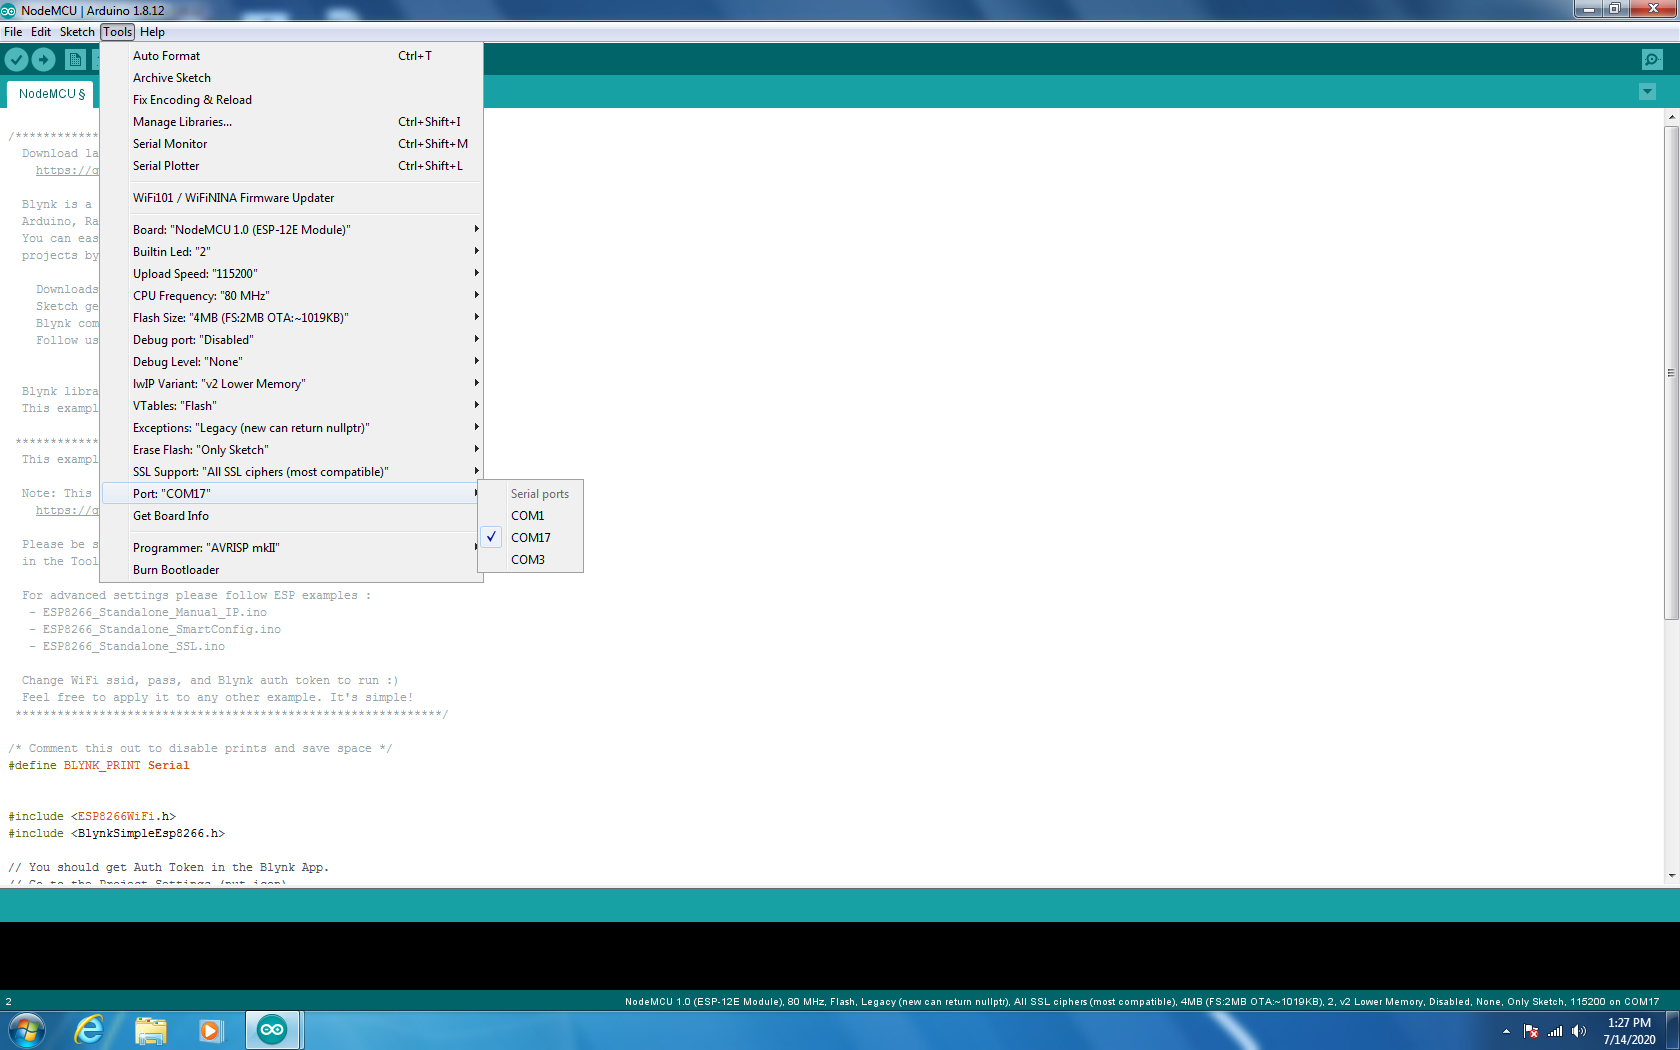
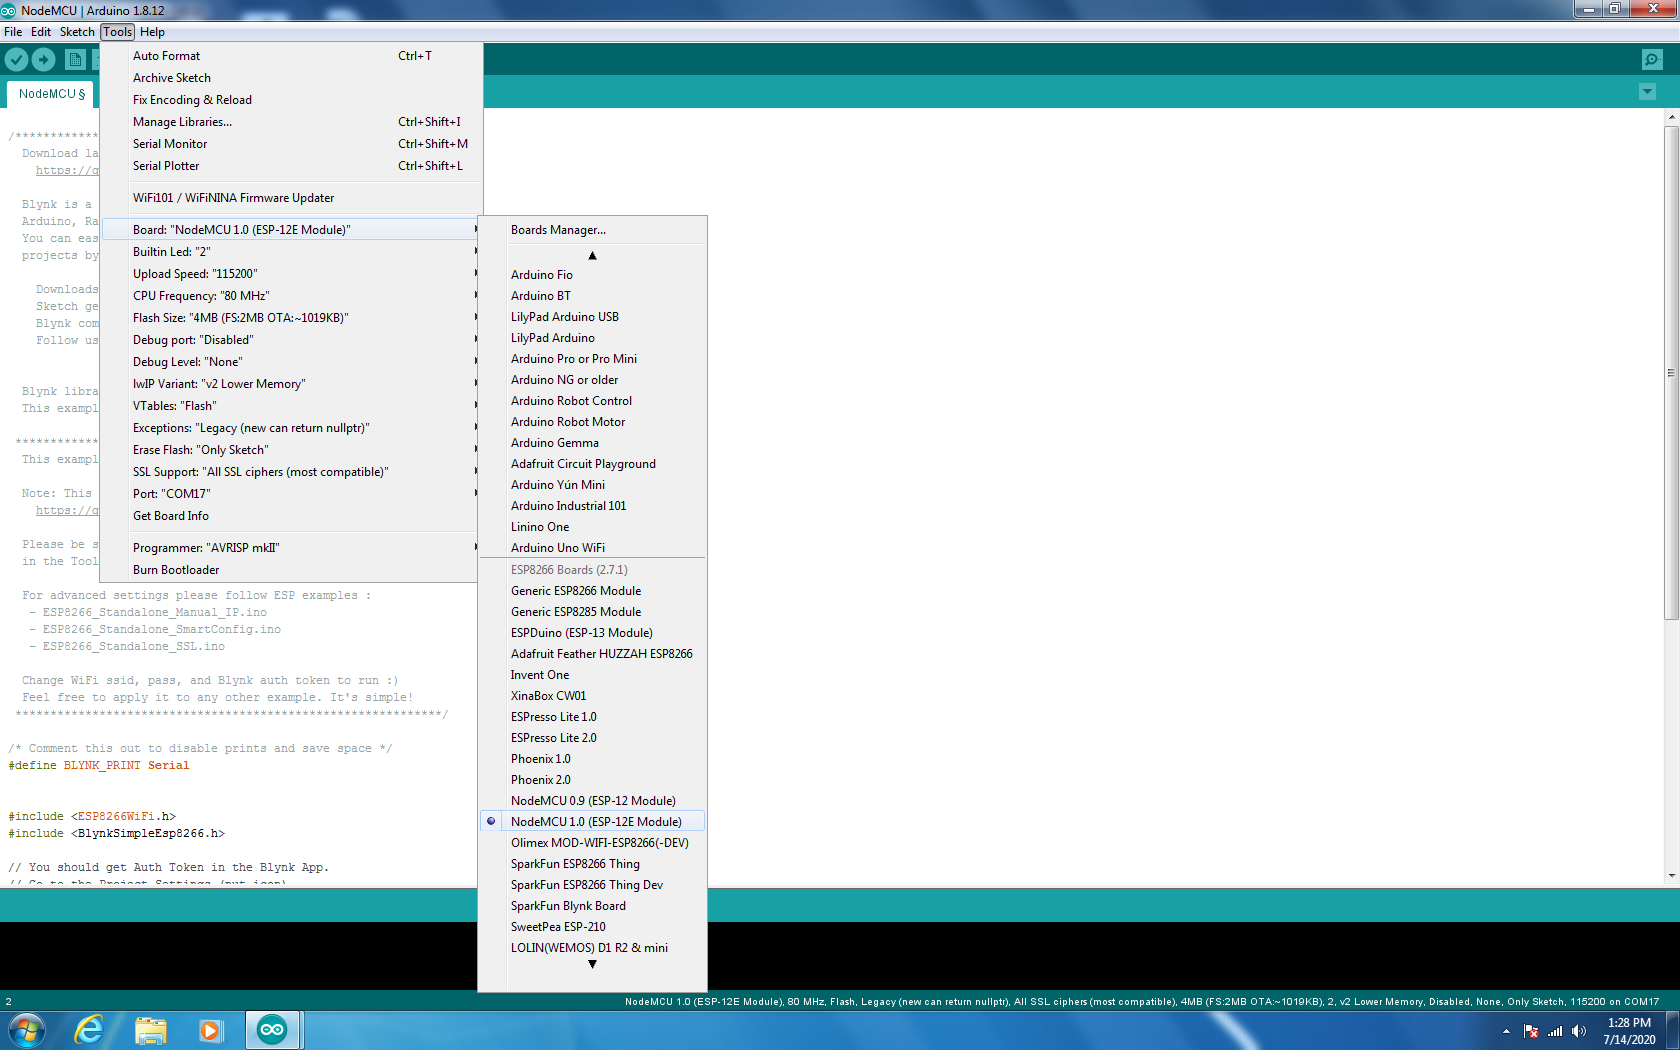
To get the sketch we need to make the board work with the Blynk app you need to do the following in the Arduino IDE (with your NodeMCU plugged into your PC via usb):
Click File > Examples > Blynk > Boards_WiFi > Node MCU
This should open a new sketch called NodeMCU
You will need to make some changes to the code to make this work for your particular wifi network and the particular variation on the blynk app you created.
where it says char auth[] = "long string of letters and numbers that is your Blynk app code they emailed you "
where it says char ssid[] = "your bot's Wifi network name goes between the quotes no spaces"
where it says char pass[] = "your Wifi password goes between the quotes"
Before you upload your code to the board make sure you have the right board selected. The board you are using is called the NodeMCU. make sure you have the correct port selected too (the port you are plugged into). It's usually the higher number one.
You'll have to use a power supply like a phone charger pack preferably with 2 usb ports. You can plug the Wyze cam into one and the Node board into the other. After a few moments you should be connected to wifi.
You can run your phone in split screen mode and watch the Wyze cam footage in one half and have your motor controls in the other.
Just boot up the blynk app and run your app and you should have control of the robot.