Interfacing LED Matrix With Processing
by ICARUS in Design > Software
498 Views, 2 Favorites, 0 Comments
Interfacing LED Matrix With Processing
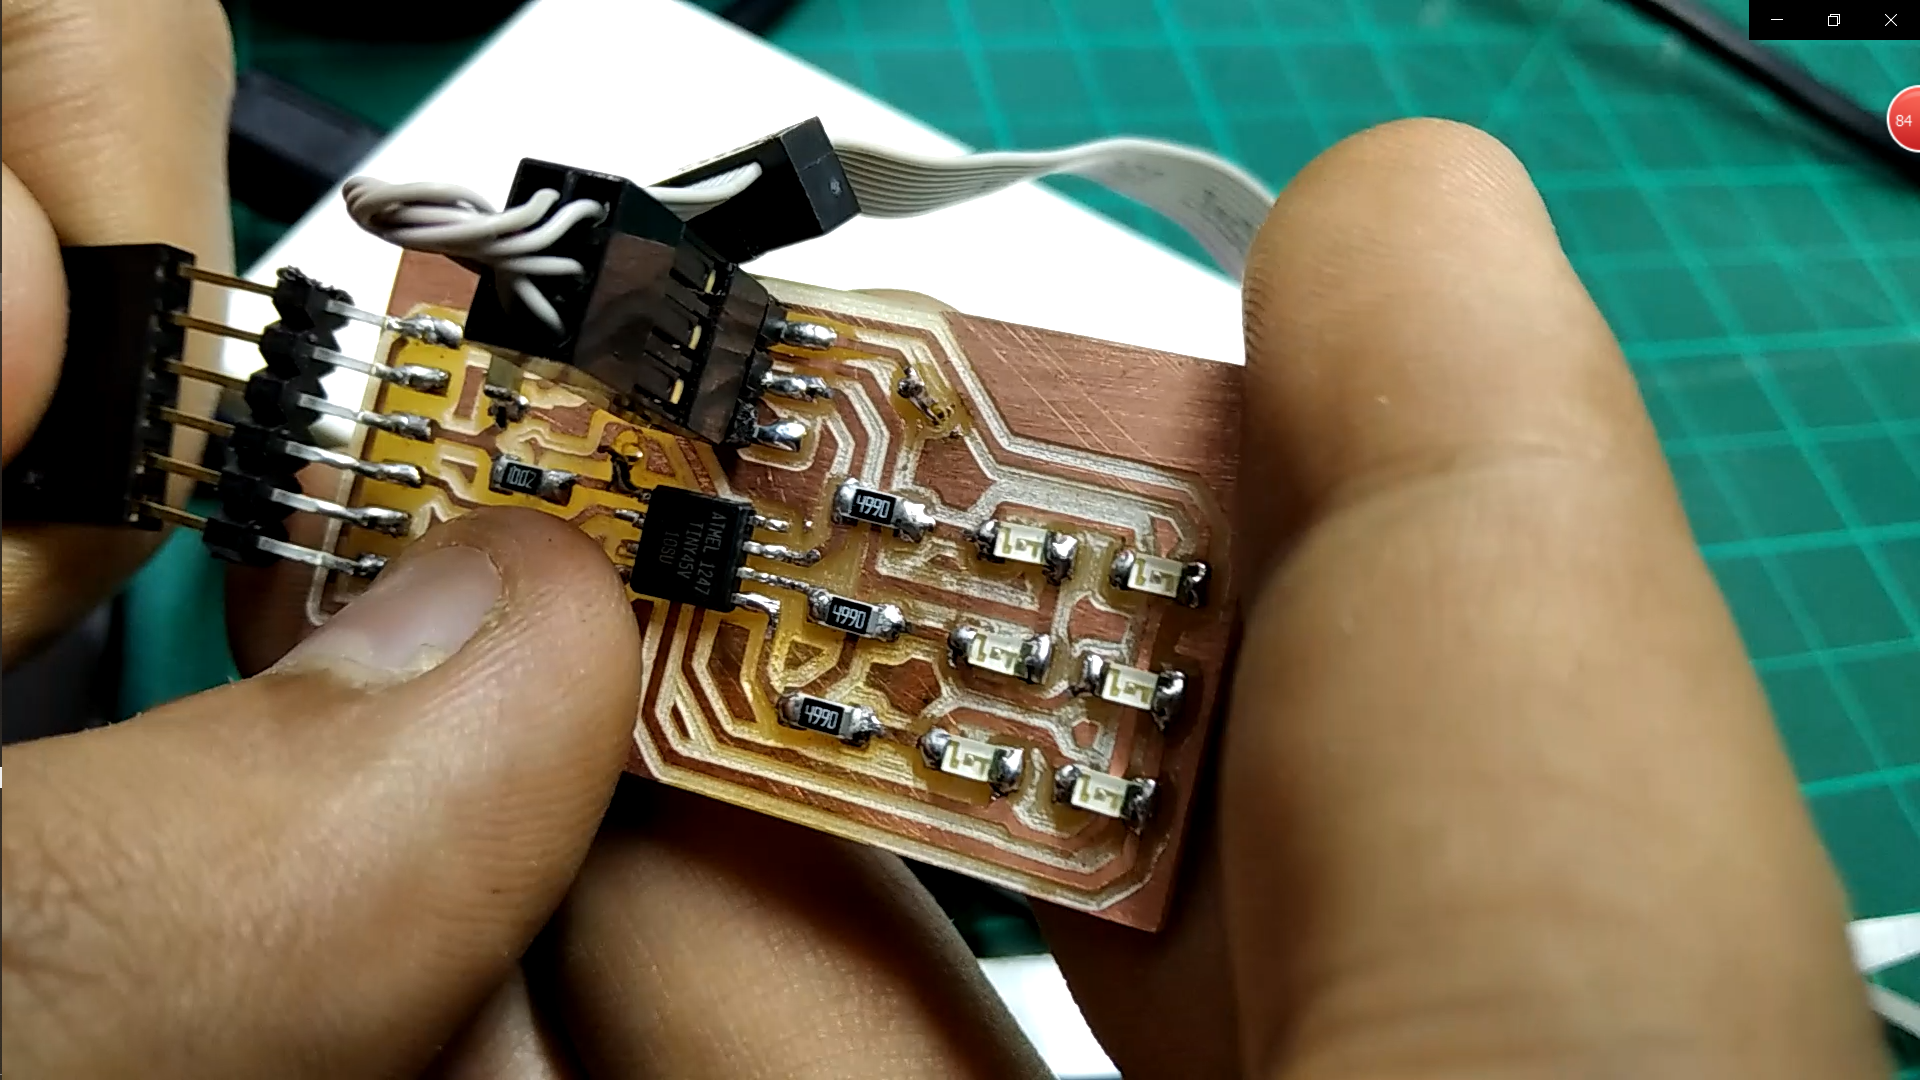
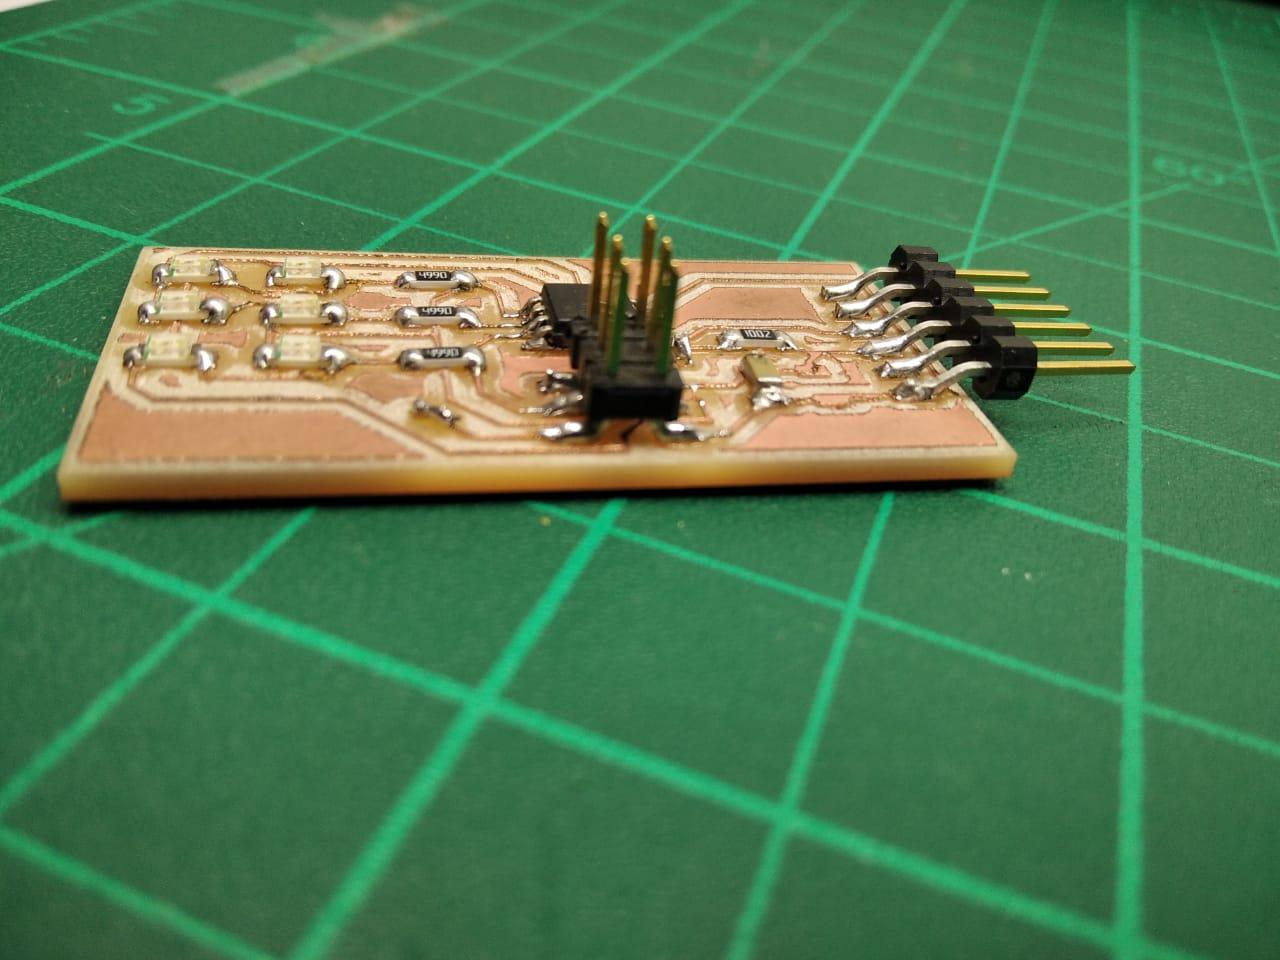
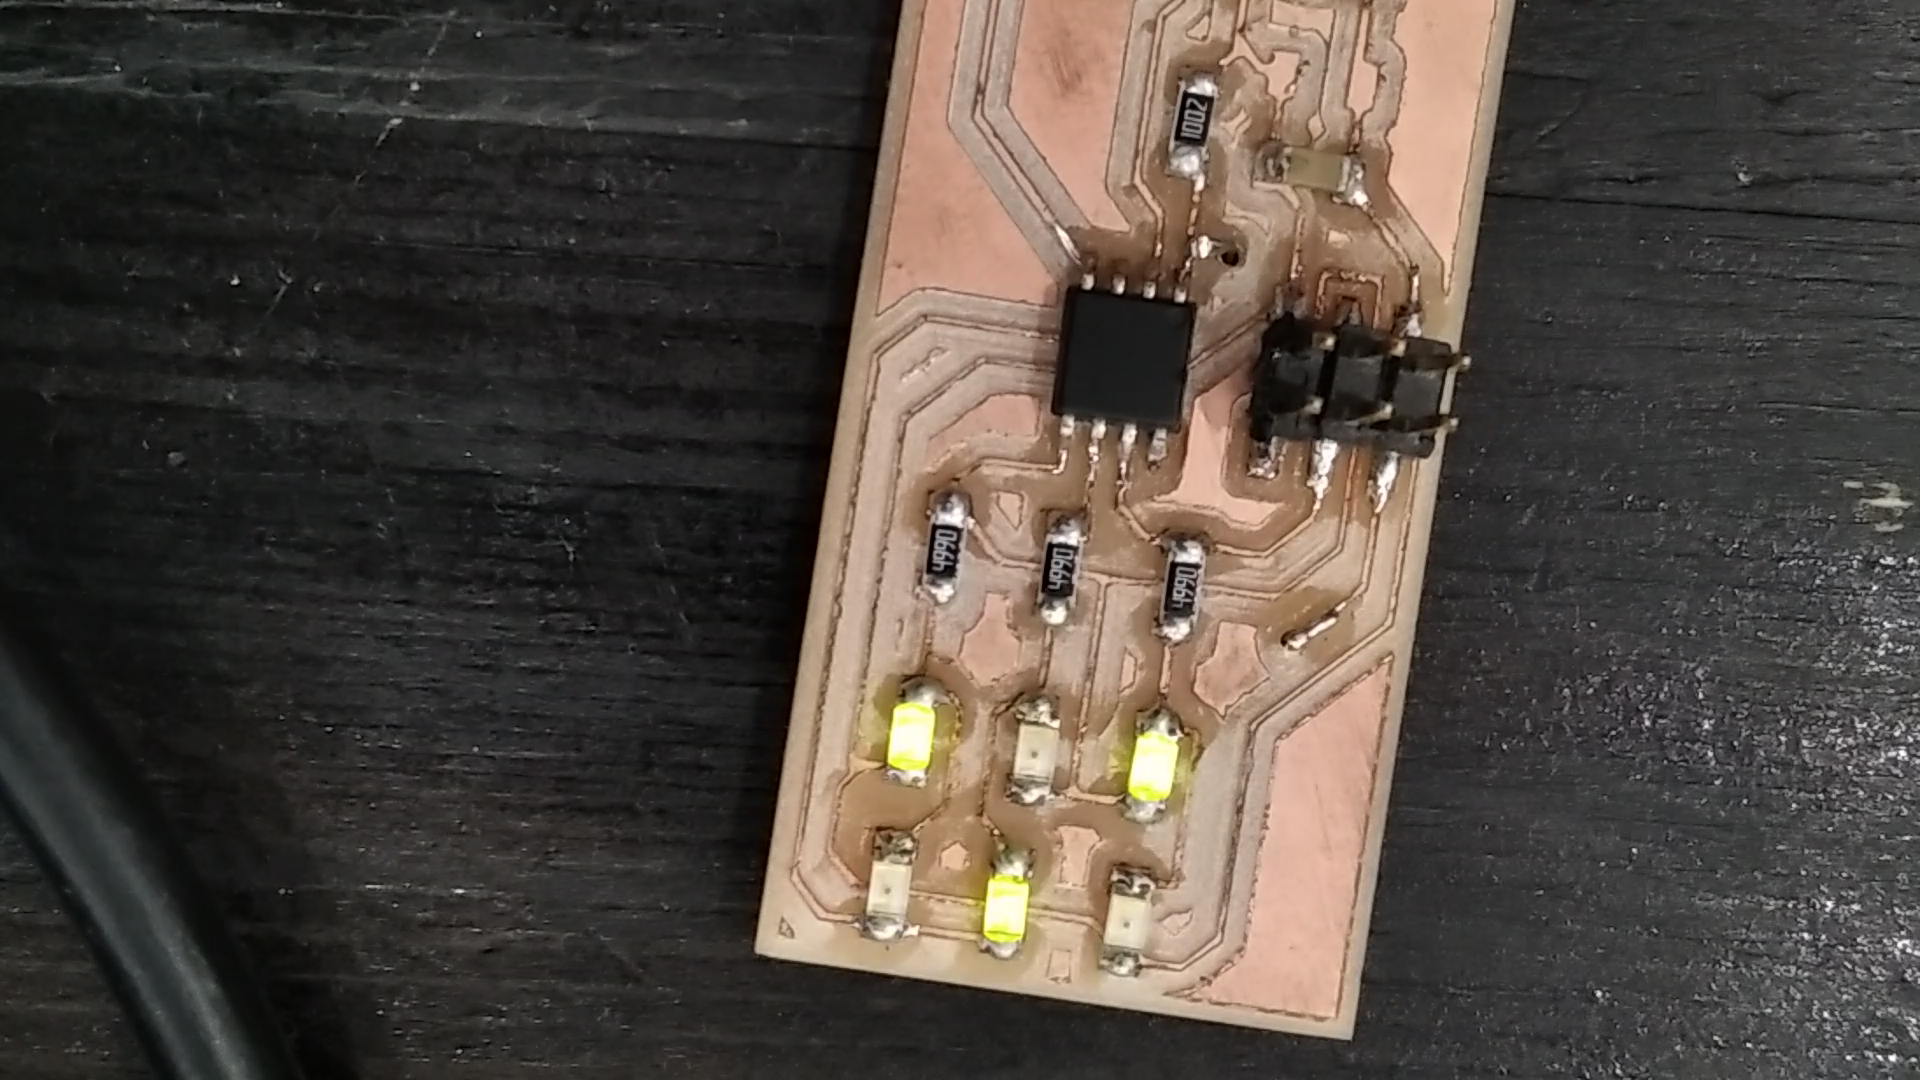
In the last tutorial, I explained how to make your first PCB ever Step by step
if you didn't see the last tutorial I recommend taking a look
https://www.instructables.com/LED-Matrix-PCB-Full-Beginner-Tutorial/
Because we will go throw the last step in the last tutorial
Supplies

Processing Software
Arduino Code
Arduino Code
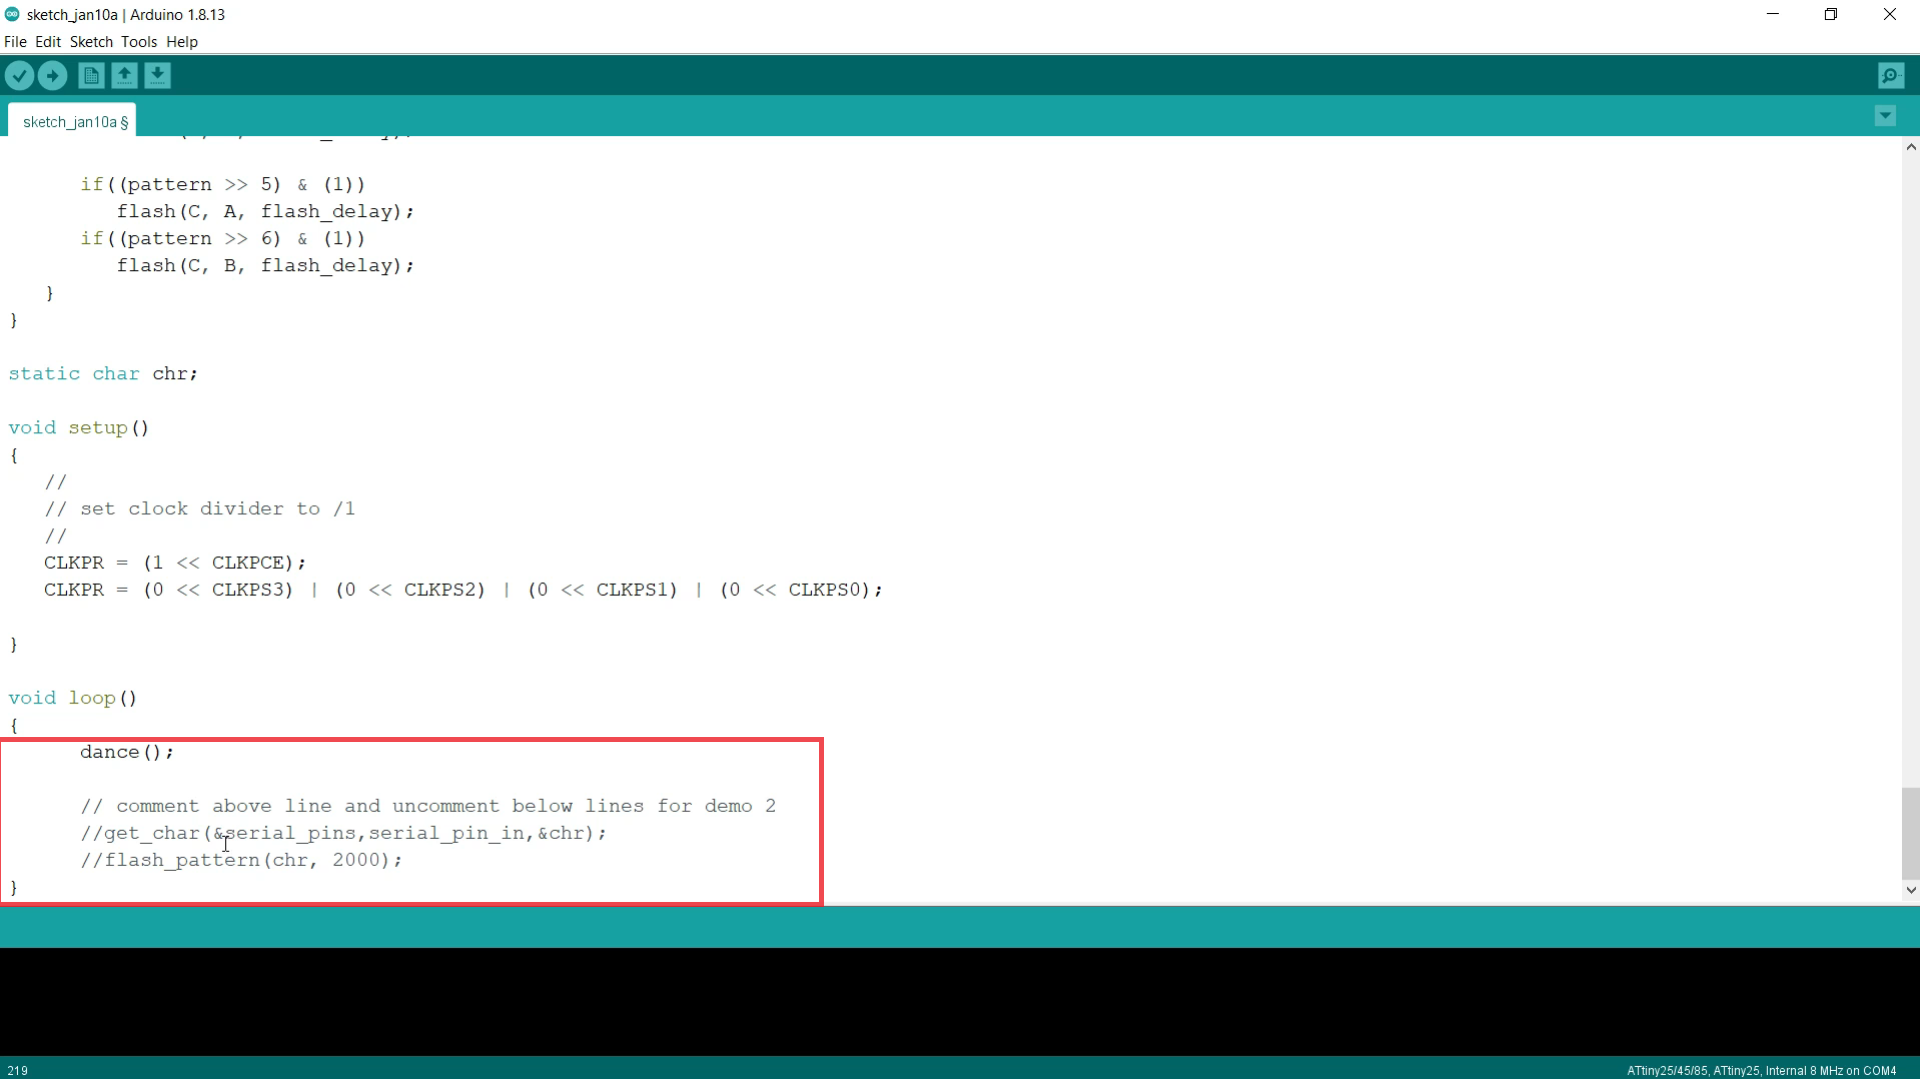
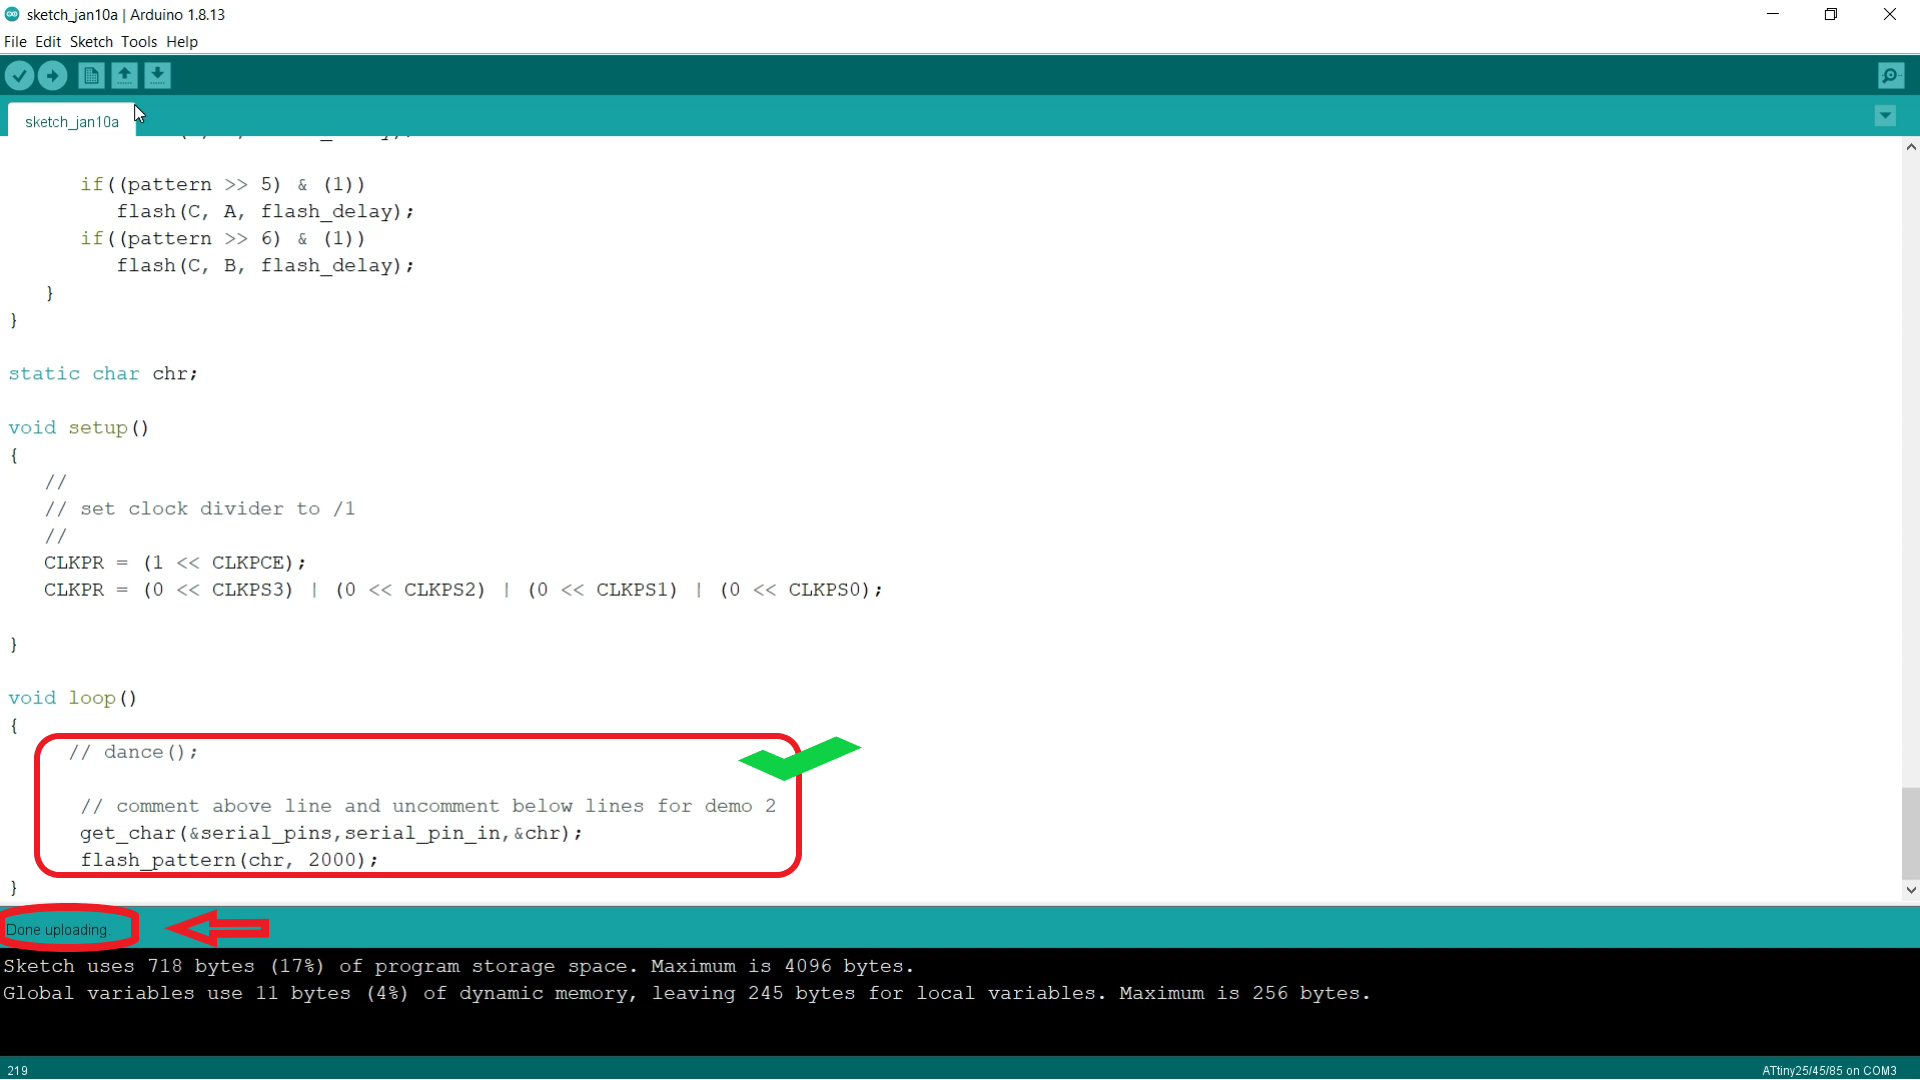
we need to Edit our Arduino Code so Follow up on the instructions
- open **Arduino IDE** comment and and uncomment lines
- and Then Upload the code to the microcontroller By **Sketch >> Upload Using Programmer**
Downloads
Processing
Download Processing Here [Here](https://processing.org/download/)
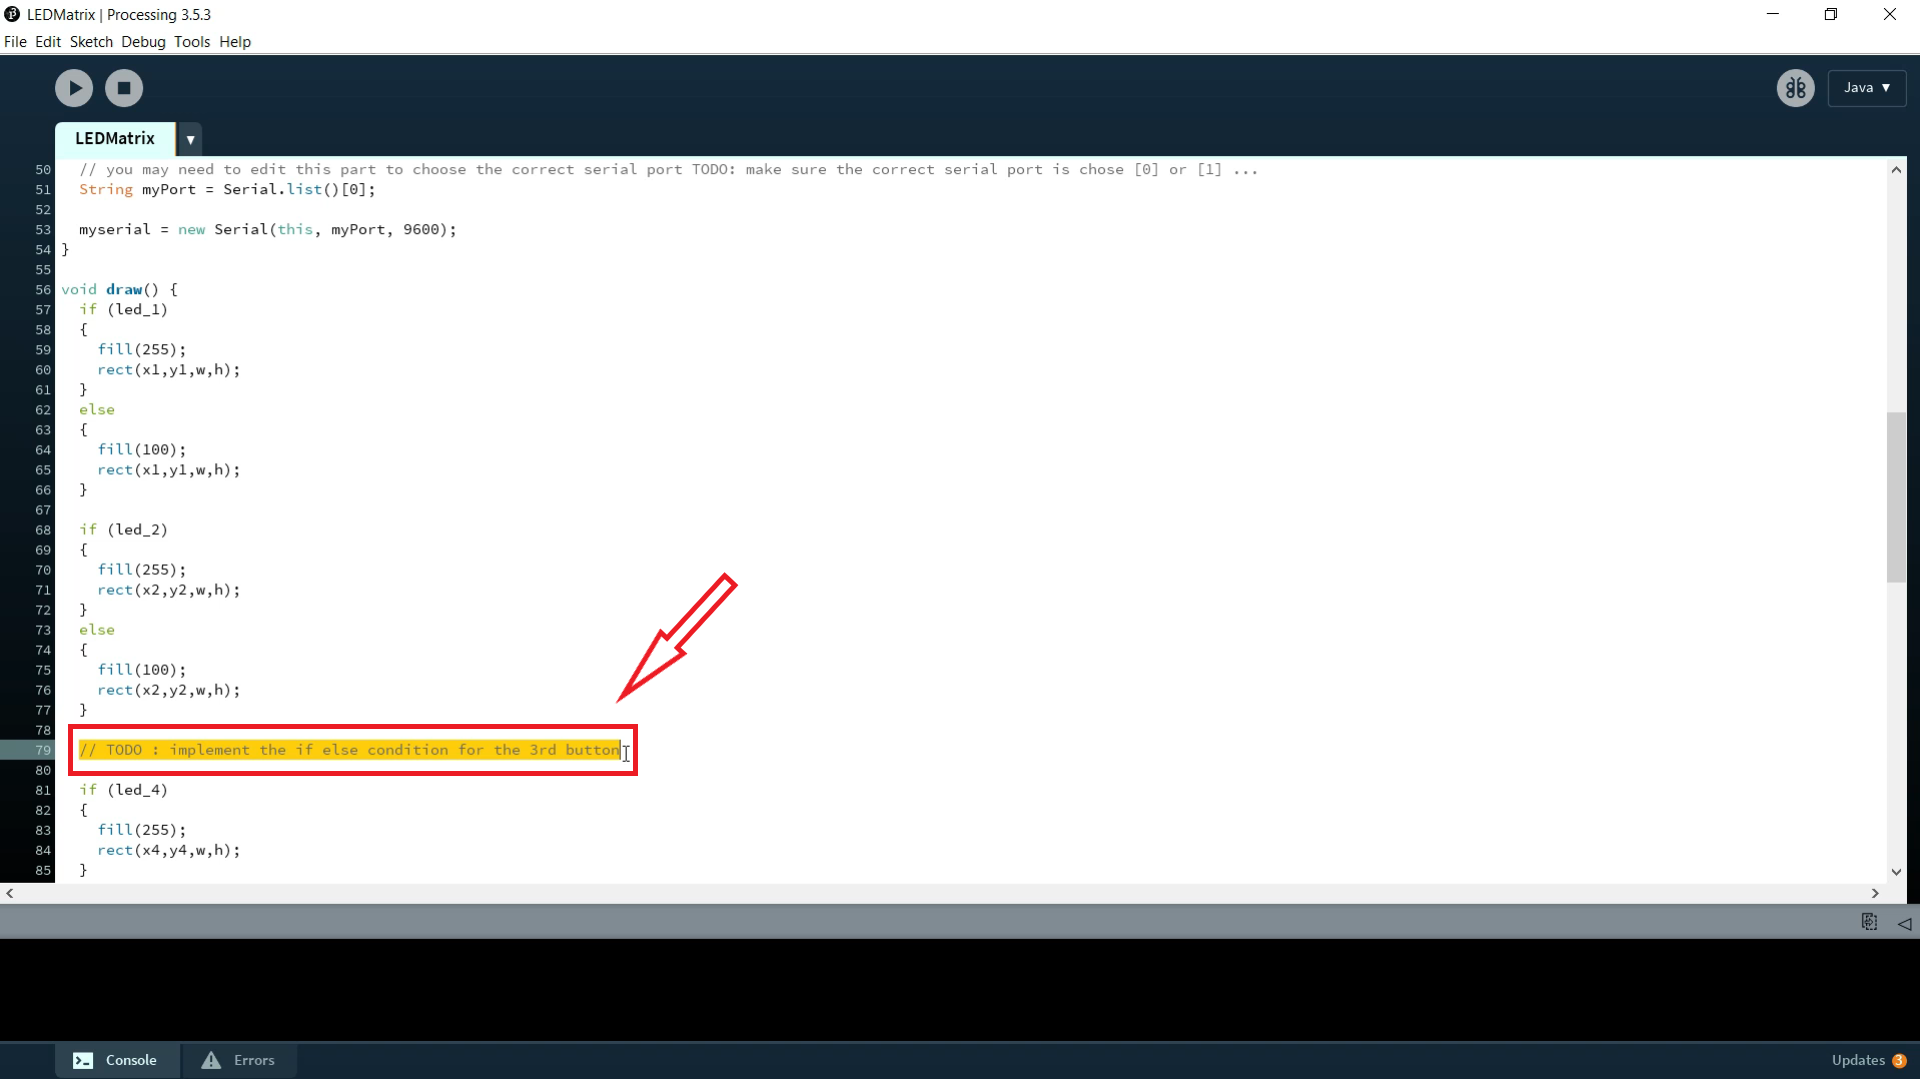
- Complete the missing codes
- You Need To Edit the button and change its orientation I will leave the Edited Code Down Here
```
import processing.serial.*;


Serial myserial;


int data = 0;


boolean led_1 = false;
boolean led_2 = false;
boolean led_3 = false;
boolean led_4 = false;
boolean led_5 = false;
boolean led_6 = false;


int bit_1 = 0;
int bit_2 = 0;
int bit_3 = 0;
int bit_4 = 0;
int bit_5 = 0;
int bit_6 = 0;


int offsetx = 150;
int offsety = 125;
int x1 = 50;
int y1 = 50;


int x2 = x1 + offsetx;
int y2 = y1;


int x3 = x2 + offsetx;
int y3 = y2;


int x4 = 50;
int y4 = y1 + offsety;


int x5 = x4 + offsetx;
int y5 = y4;


int x6 = x5 + offsetx;
int y6 = y5;


int x7 = x5;
int y7 = y6 + offsety;


int w = 100;
int h = 75;


void setup() {
  size(500, 400);

  // you may need to edit this part to choose the correct serial port TODO: make sure the correct serial port is chose [0] or [1] ...
  String myPort = Serial.list()[1];

  myserial = new Serial(this, myPort, 9600);
}


void draw() {
  if (led_1)
  {
    fill(255);
    rect(x1,y1,w,h);
  }
  else
  {
    fill(100);
    rect(x1,y1,w,h);
  }

  if (led_2)
  {
    fill(255);
    rect(x4,y4,w,h);
  }
  else
  {
    fill(100);
    rect(x4,y4,w,h);
  }

    if (led_3)
  {
    fill(255);
    rect(x2,y2,w,h);
  }
  else
  {
    fill(100);
    rect(x2,y2,w,h);
  }


  if (led_4)
  {
    fill(255);
    rect(x5,y5,w,h);
  }
  else
  {
    fill(100);
    rect(x5,y5,w,h);
  }


  if (led_5)
  {
    fill(255);
    rect(x3,y3,w,h);
  }
  else
  {
    fill(100);
    rect(x3,y3,w,h);
  }

  if (led_6)
  {
    fill(255);
    rect(x6,y6,w,h);
  }
  else
  {
    fill(100);
    rect(x6,y6,w,h);
  }

  fill(50);
  rect(x7, y7, w, h);


}


// When the mouse is pressed, the state of the button is toggled.
void mousePressed() {
  if (mouseX > x1 && mouseX < x1+w && mouseY > y1 && mouseY < y1+h) {
    led_1 = !led_1;
    bit_1 = bit_1 ^ 1;
  }


  if (mouseX > x4 && mouseX < x4+w && mouseY > y4 && mouseY < y4+h) {
    led_2 = !led_2;
    bit_2 = bit_2 ^ 1;
  }


  if (mouseX > x2 && mouseX < x2+w && mouseY > y2 && mouseY < y2+h) {
    led_3 = !led_3;
    bit_3 = bit_3 ^ 1;


}

  if (mouseX > x5 && mouseX < x5+w && mouseY > y5 && mouseY < y5+h) {
    led_4 = !led_4;
    bit_4 = bit_4 ^ 1;


}

   if (mouseX > x3 && mouseX < x3+w && mouseY > y3 && mouseY < y3+h) {
    led_5 = !led_5;
    bit_5 = bit_5 ^ 1;


}


    if (mouseX > x6 && mouseX < x6+w && mouseY > y6 && mouseY < y6+h) {
    led_6 = !led_6;
    bit_6 = bit_6 ^ 1;


}

  if (mouseX > x7 && mouseX < x7+w && mouseY > y7 && mouseY < y7+h) {
    data = bit_6<<6 | bit_5<<5 | bit_4<<4 | bit_3<<3 | bit_2<<2 | bit_1<<1;
    myserial.write(data);
  }


}
Downloads
Testing
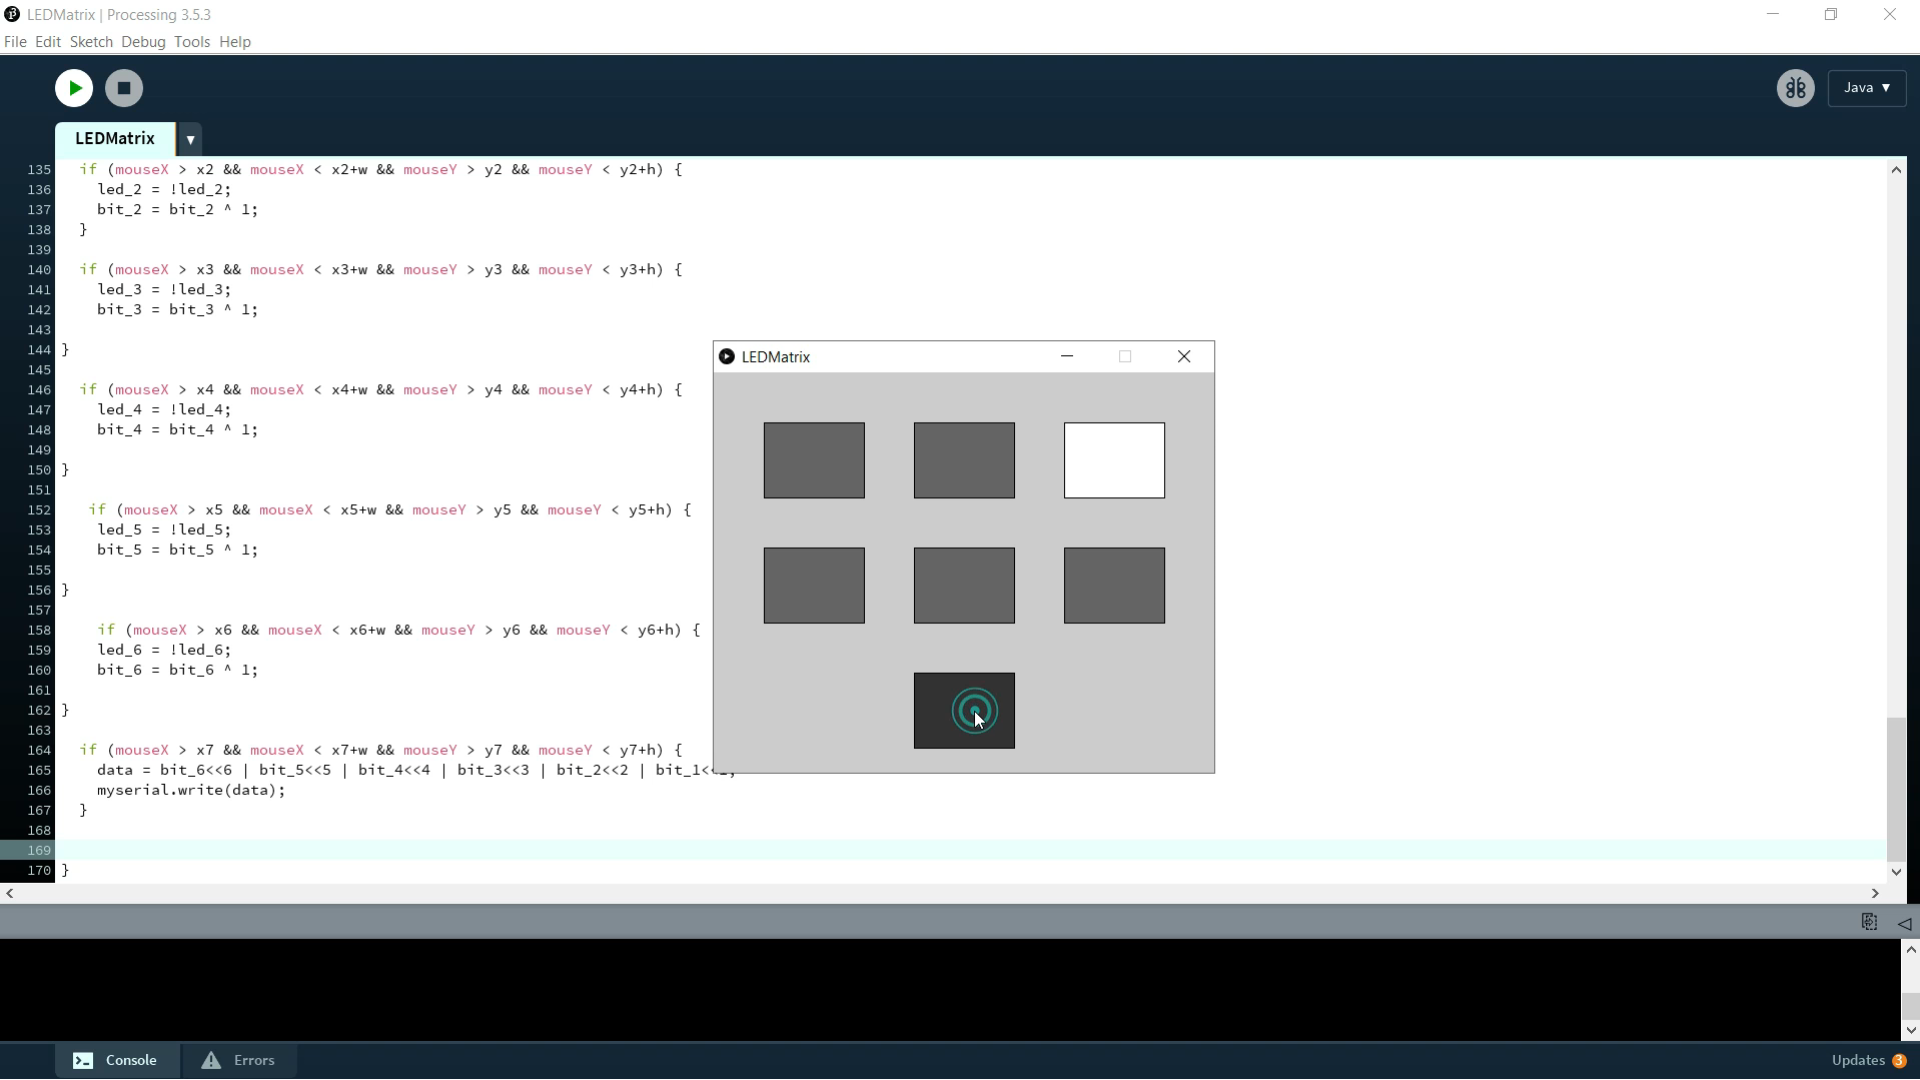
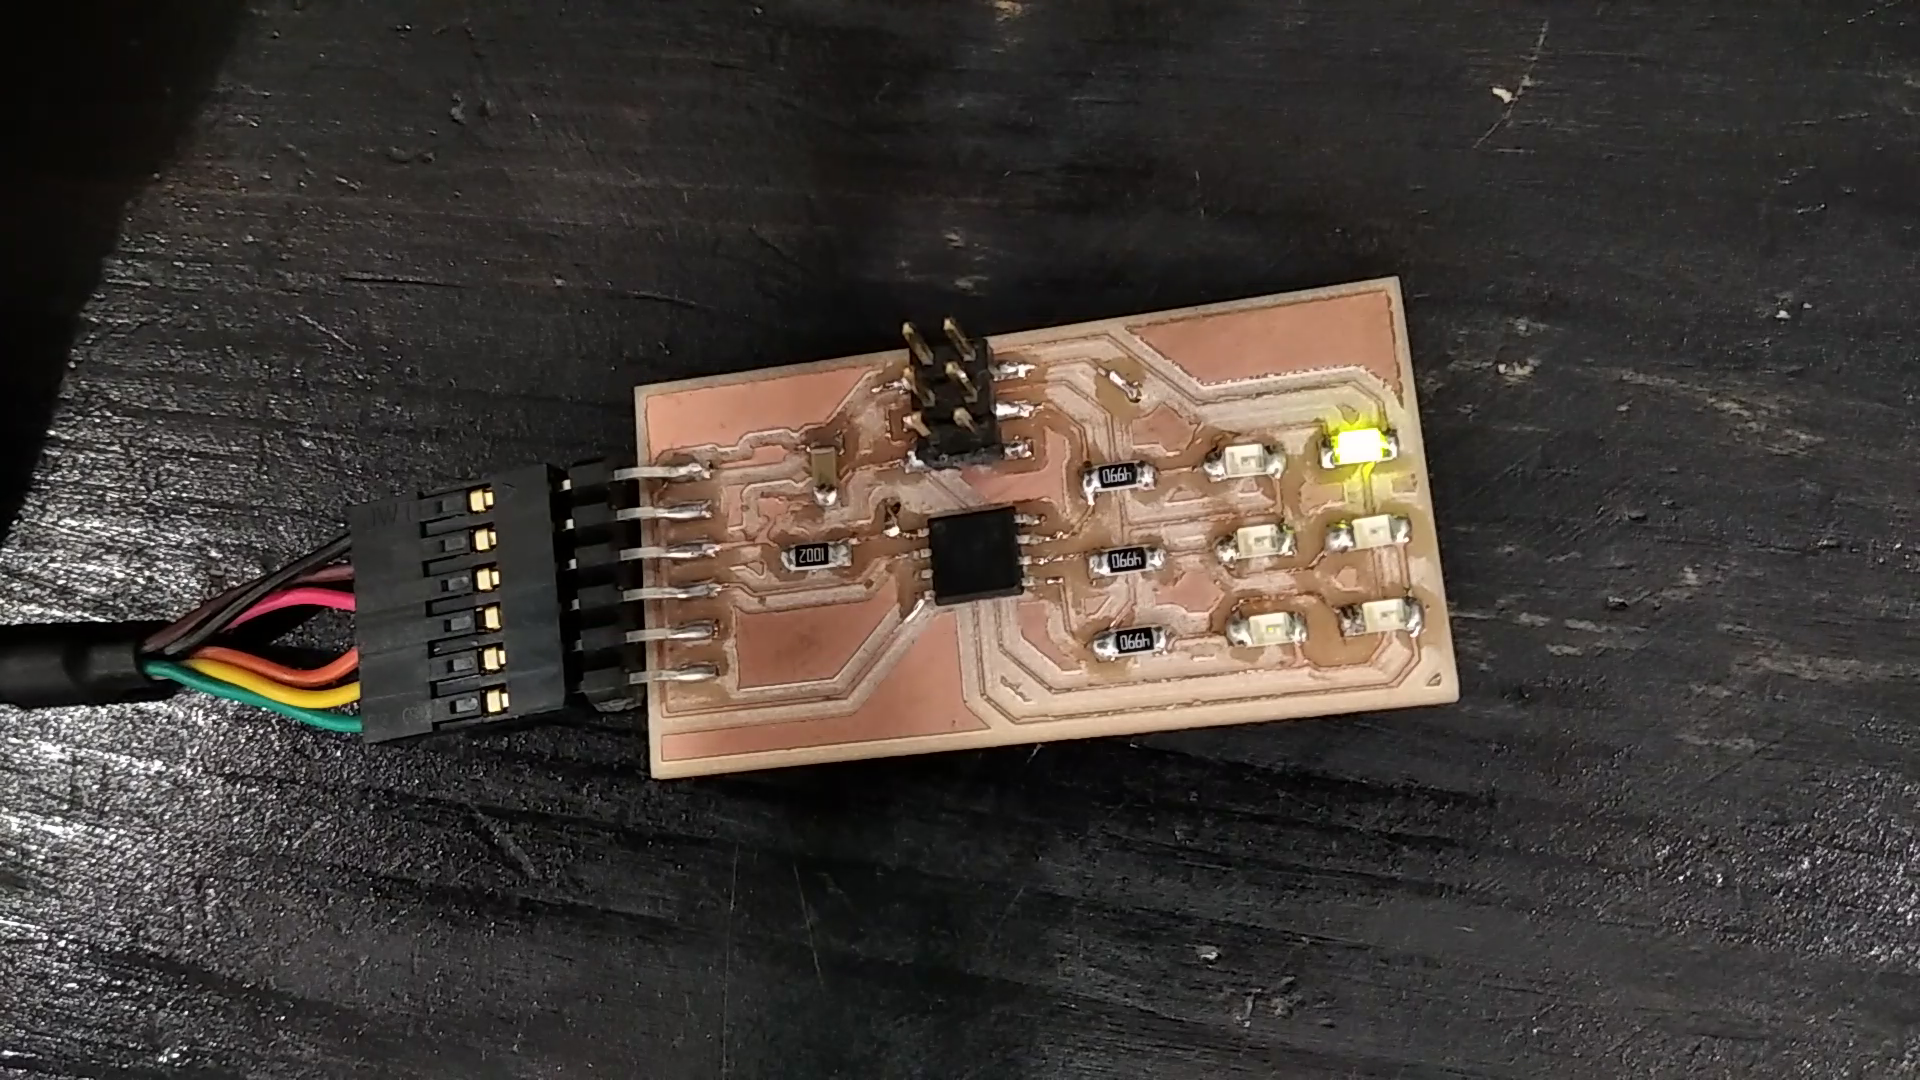
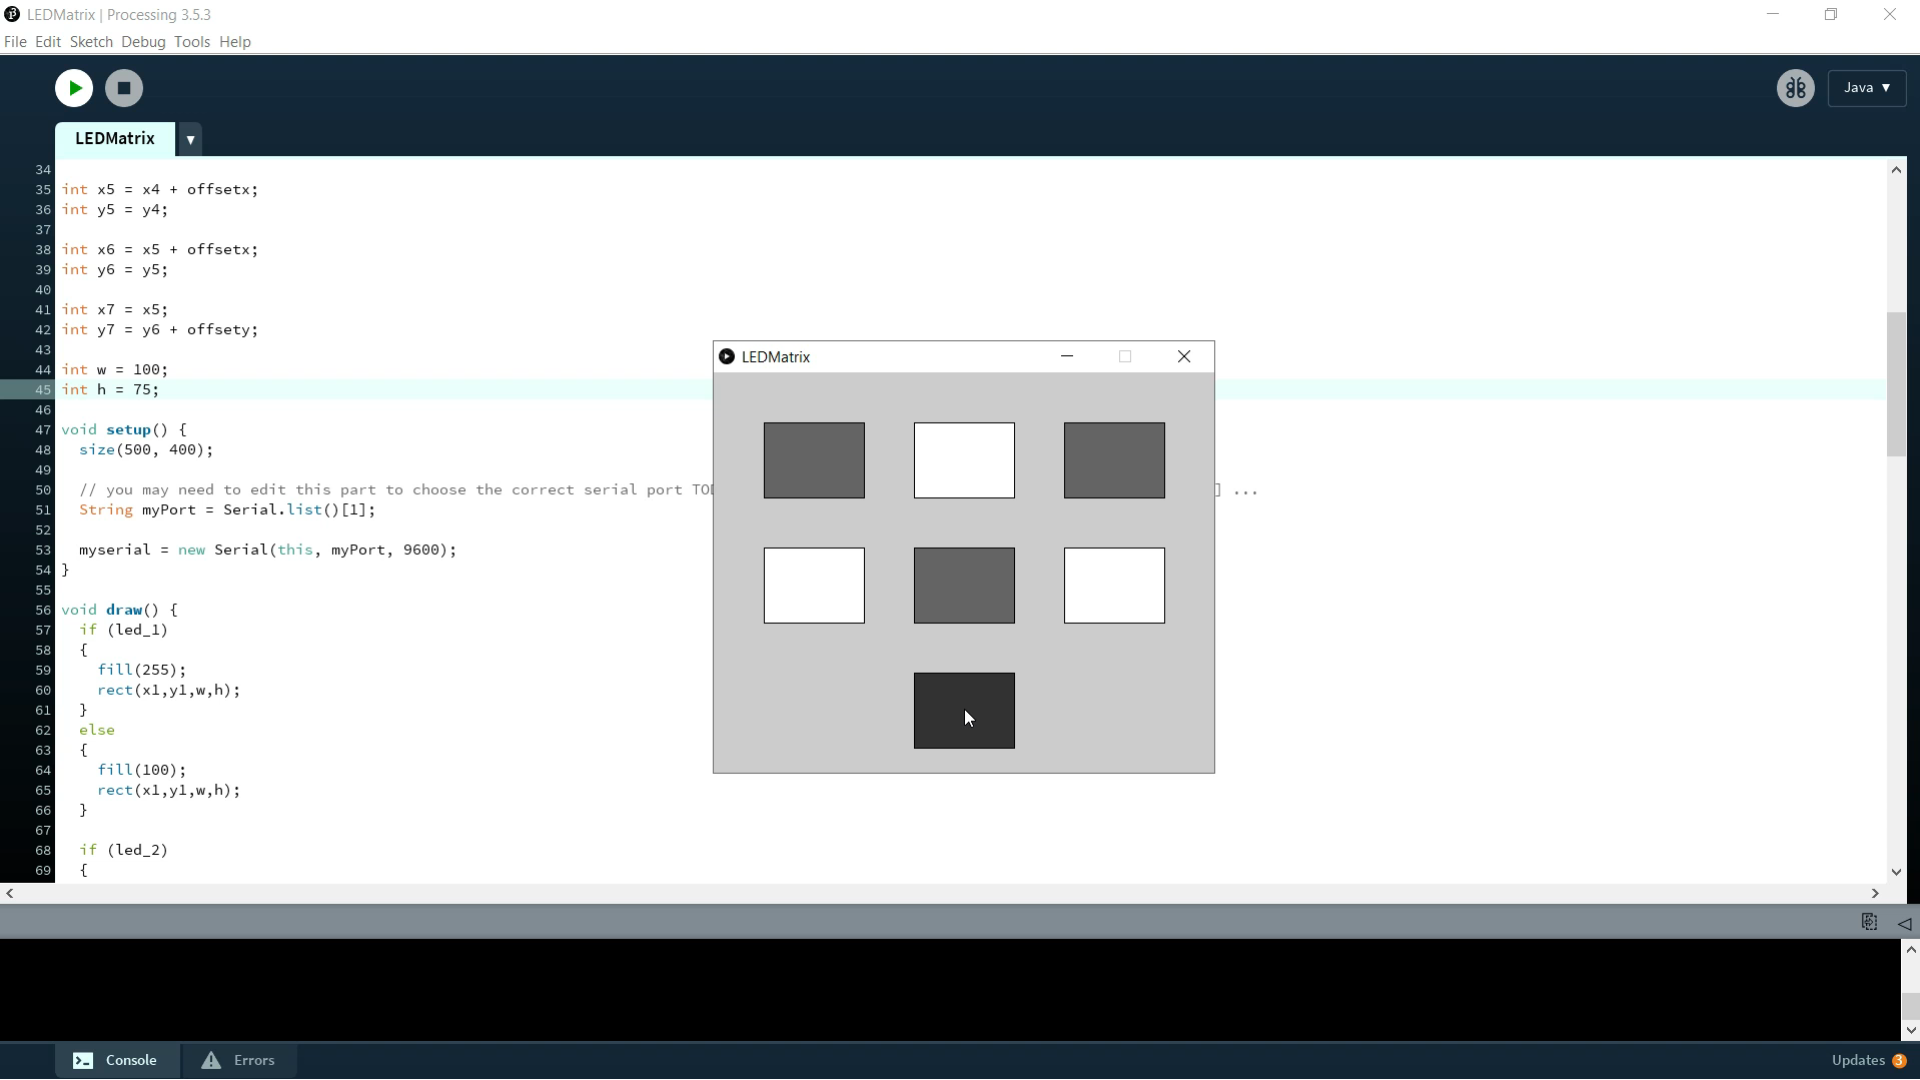
And now for the truth, we will Run the code and see the results
Issues & Solutions

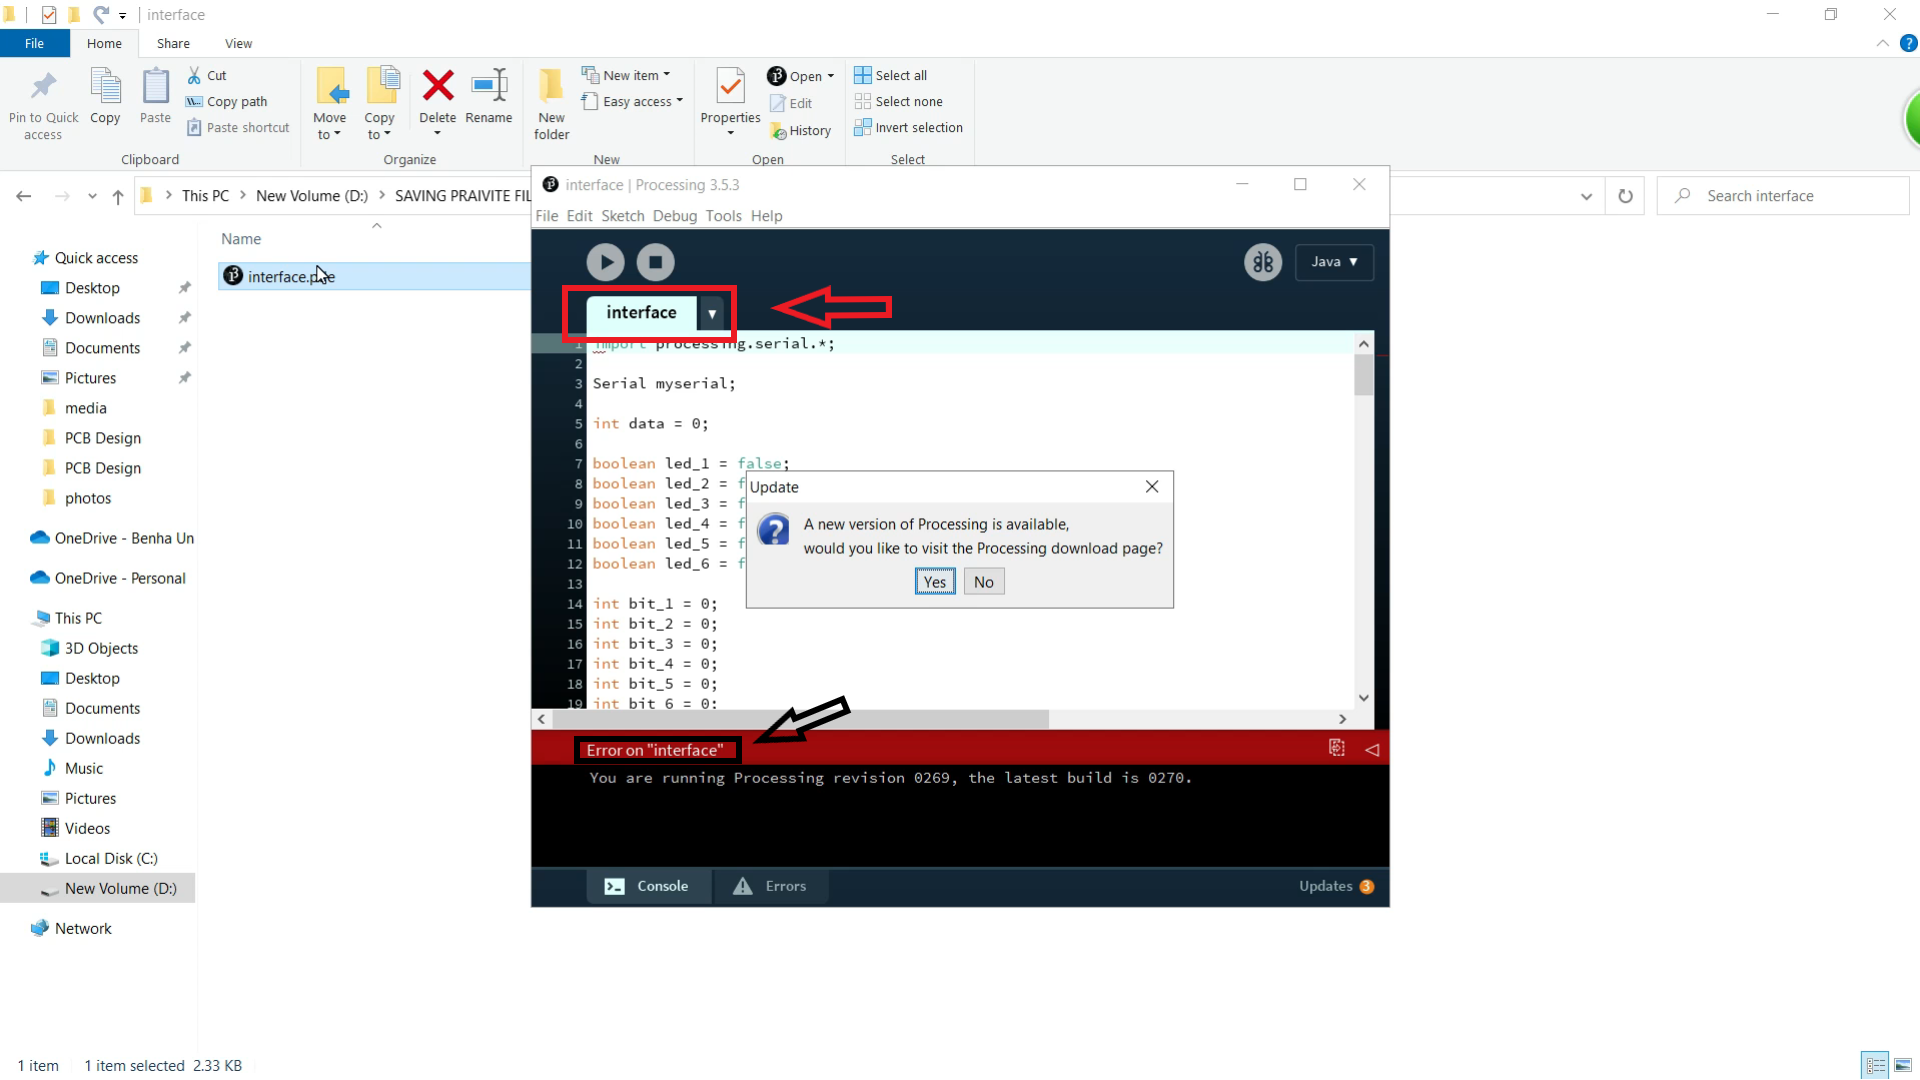
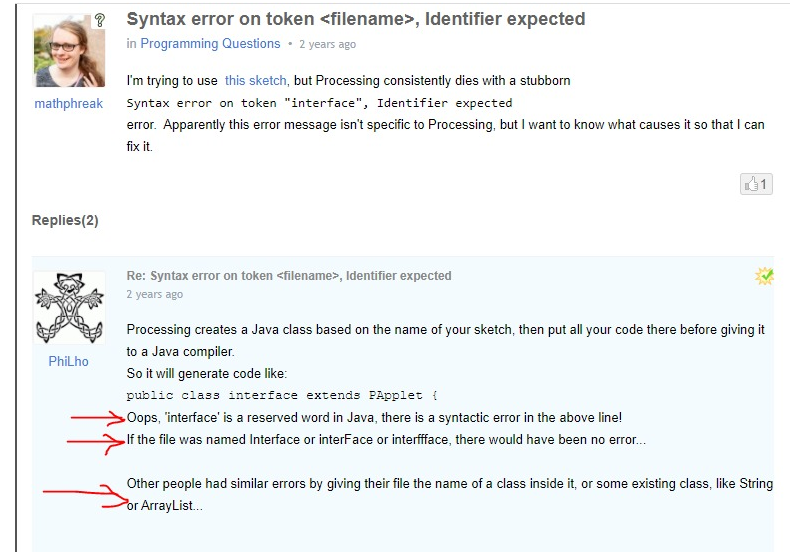
The first Issue may face you is that you will find the Error Like that
to solve this Error you should change the file name of the file from **Interfacing** to any name
The Full Video