Interfacing HC-05 Bluetooth Module With Arduino
by Rachana Jain in Circuits > Arduino
8815 Views, 6 Favorites, 0 Comments
Interfacing HC-05 Bluetooth Module With Arduino
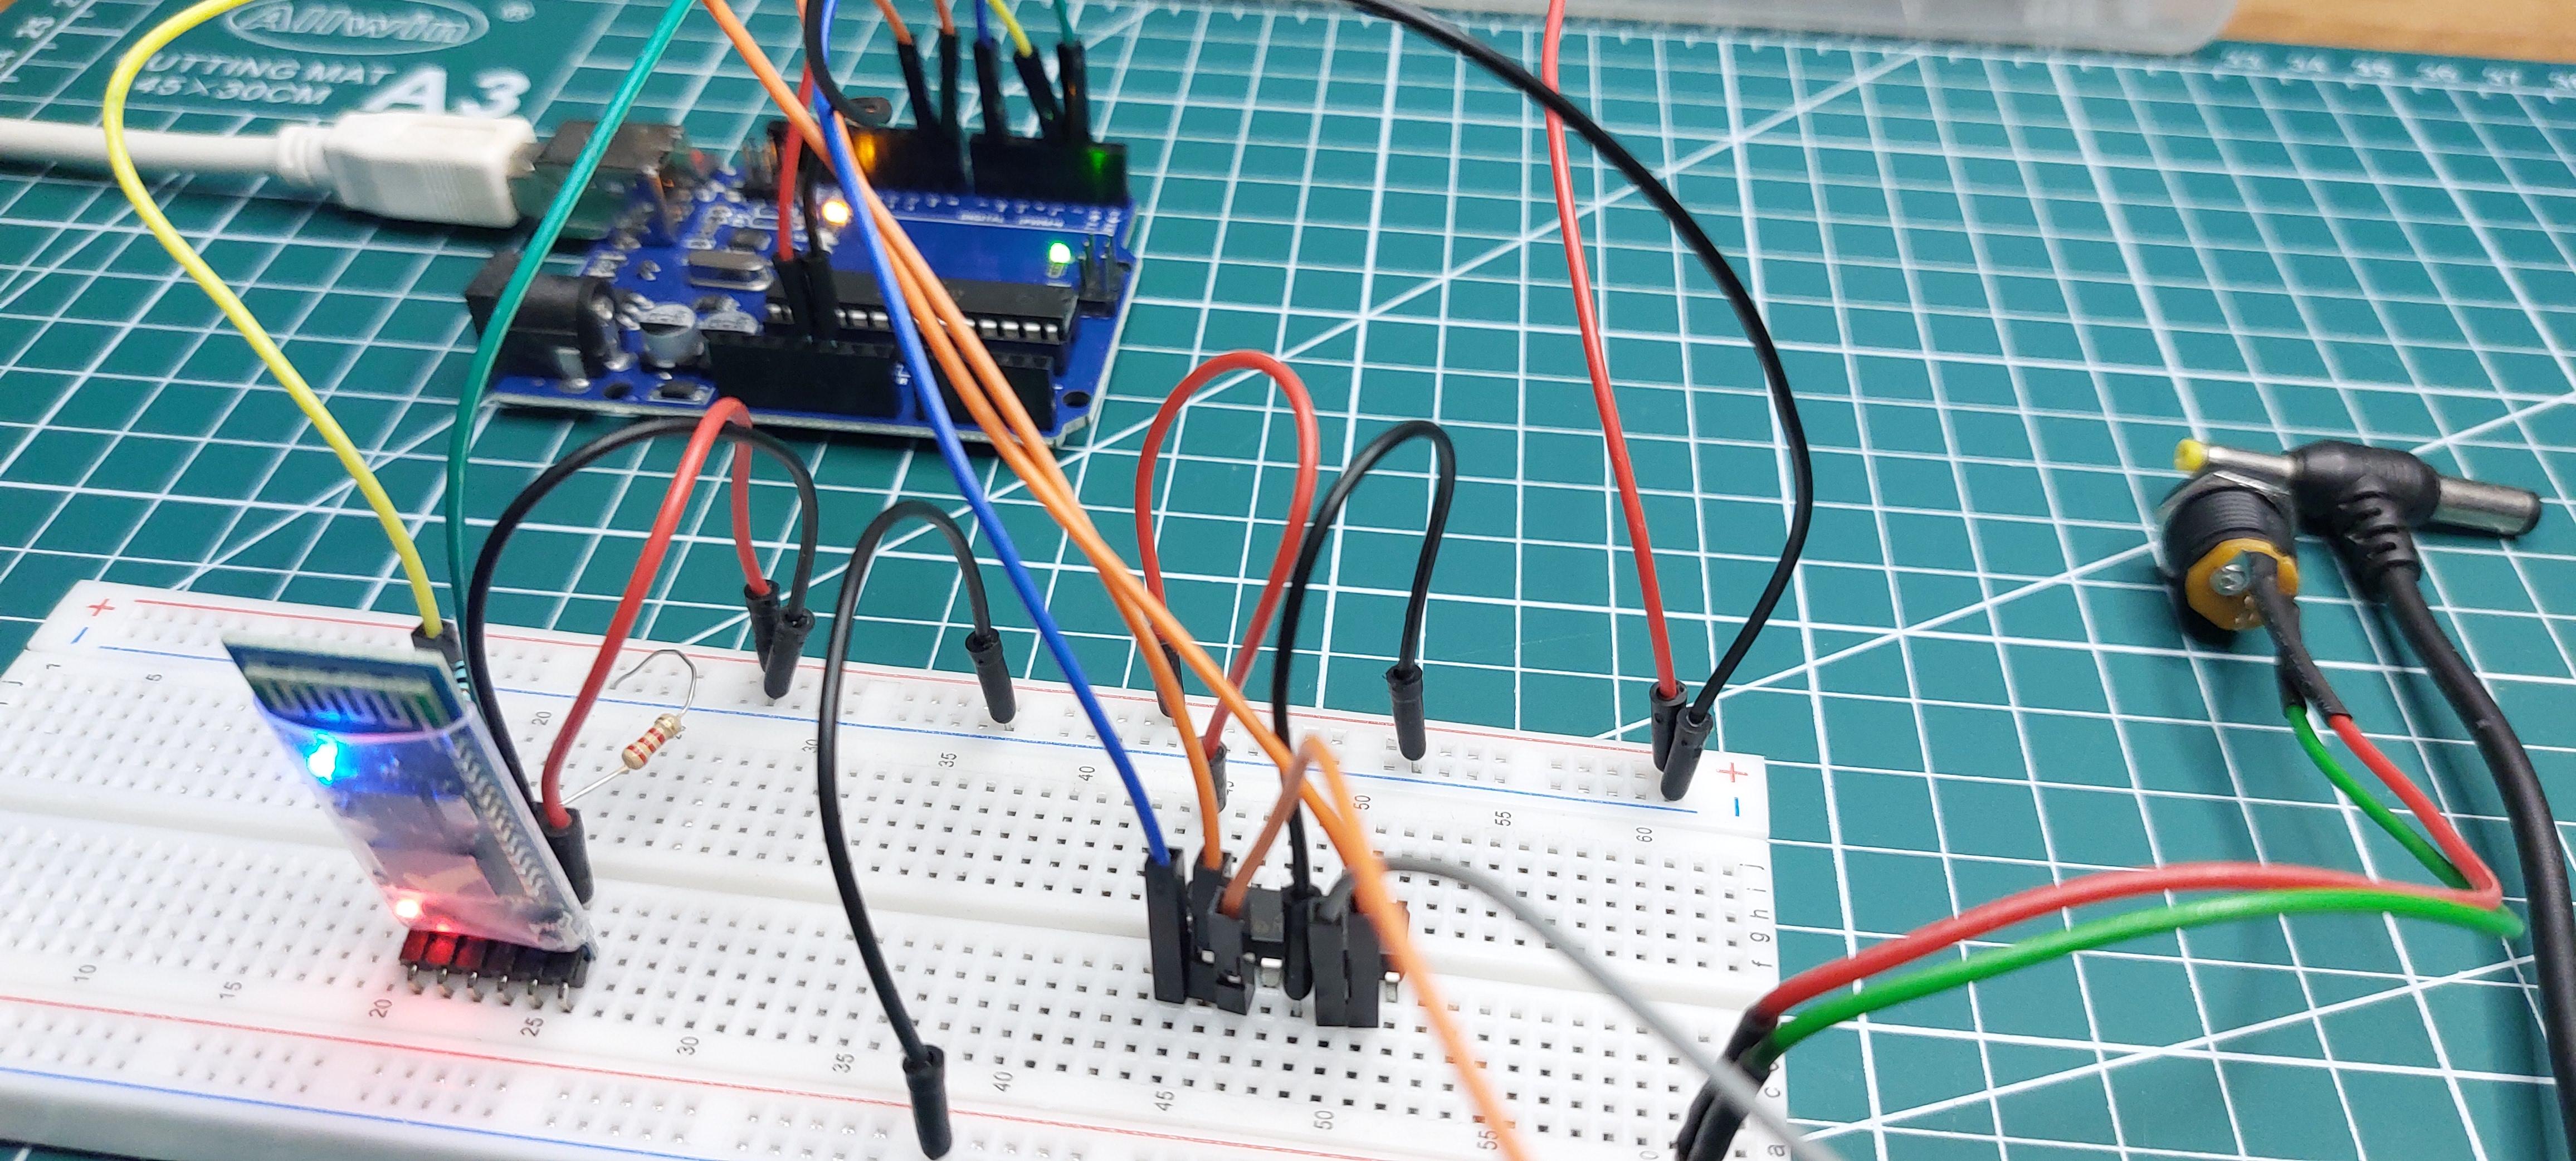
In this project, we'll learn how to interface an HC-05 Bluetooth Module with an Arduino Uno. We'll establish a communication link between an Android smartphone and the Arduino, using HC-05 for wireless control.
Supplies
- Arduino Uno: https://amzn.to/4dtZ7st
- HC-05 Bluetooth Module: https://amzn.to/3XQNerK
- Breadboard: https://amzn.to/3MSFi2U
- Jumper wires: https://amzn.to/47x6G00
- 12V Supply Adapter: https://amzn.to/3ztsZHf
- 1k and 2k Resistor: https://amzn.to/4exfbKz
HC-05 Bluetooth Module
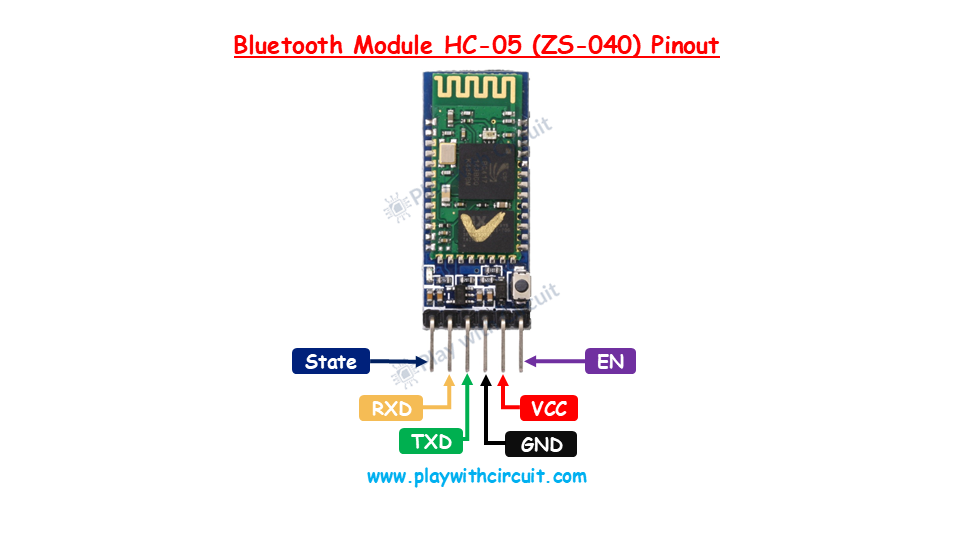
What is the HC-05 Bluetooth Module?
The HC-05 is a Bluetooth module designed for wireless communication. It can be used in a master or slave configuration, making it versatile for a variety of Bluetooth applications, such as controlling devices remotely via a smartphone.
Specifications of HC-05 Bluetooth Module
- Bluetooth Protocol: Bluetooth 2.0 + EDR (Enhanced Data Rate)
- Operating Voltage: 3.3V (Internally regulated from 5V)
- Range: Up to 10 meters
- Communication: UART interface (9600 baud rate by default)
- Baud Rates: 9600, 19200, 38400, 57600, 115200, 230400, and 460800
Modes of Operation
The HC-05 can operate in two modes:
- Command Mode: Used for configuring the module as Master or Slave.
- Data Mode: Used for transmitting and receiving data between devices.
In this project, we'll primarily focus on Data Mode, where the HC-05 will communicate with the Arduino and a smartphone.
Configurations
The HC-05 Bluetooth module can be configured in two main modes, each serving a distinct role in communication: Slave Mode and Master Mode.
Slave Mode: In this mode, the module waits for a connection request from a master device, such as a smartphone, laptop, or another Bluetooth-enabled device.
Key Characteristics:
- The HC-05 does not initiate any connection on its own.
- It responds to the connection requests sent by a master device.
- Suitable for applications where the module simply receives data from or responds to the master device.
Master Mode: The HC-05 takes on the responsibility of initiating connections to other Bluetooth devices.
Key Characteristics:
- The module searches for available Bluetooth devices (typically slave devices).
- It actively initiates connections, enabling communication with other modules or devices.
- Useful in scenarios where the HC-05 needs to control multiple devices or manage connections to slave devices like sensors or other Bluetooth modules.
HC-05 Pinout
The HC-05 has 6 pins:
- Enable/Key: It is used to control the module’s power state.
- VCC: Connect to a 5V supply.
- GND: Ground.
- TXD: Transmit pin, connected to the RX pin of the device it communicates with.
- RXD: Receive pin, connected to the TX pin of the device it communicates with.
- State: Used to provide status information about the module’s connection state.
Basic Communication of HC-05 With Android Phone
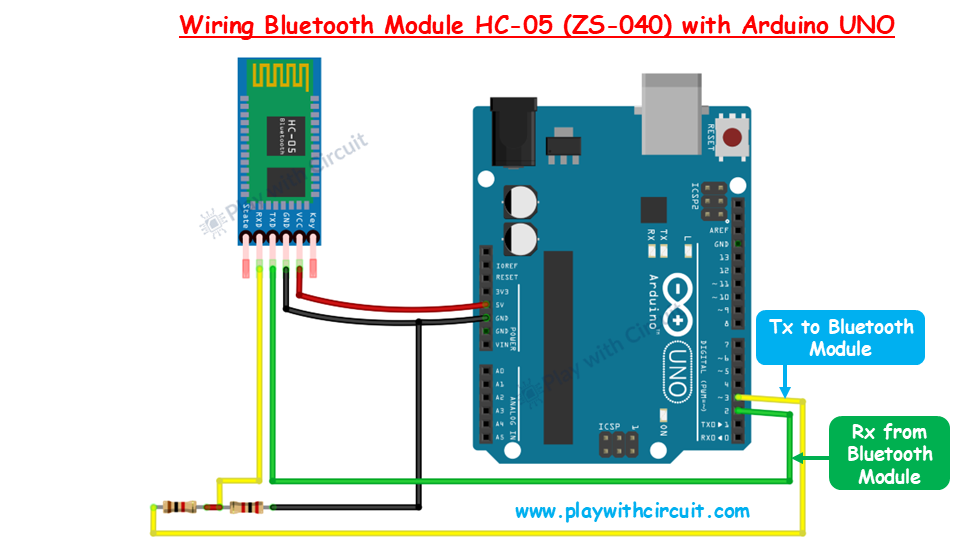
To interface the HC-05 Bluetooth module with the Arduino's limited serial interfaces, we use pins 2 and 3 of the Arduino as custom Rx (receive) and Tx (transmit) pins through software serial communication.
To communicate with the HC-05 without interfering with the USB connection, we reassign pins 2 and 3 for UART communication using the SoftwareSerial library. The Rx pin of the HC-05 module is not 5V tolerant (it operates at 3.3V), so to avoid damaging the module, a voltage divider is needed to step down the Arduino’s 5V signal to a safe 3.3V.
A 1kΩ and 2kΩ resistor are used to create the voltage divider. The free end of the 1kΩ resistor is connected to pin 3 (Arduino's Tx). The free end of the 2kΩ resistor is connected to GND. The junction of the two resistors (where the 1kΩ and 2kΩ resistors meet) is connected to the Rx pin of the HC-05.
The VCC pin of the HC-05 is connected to the 5V pin of the Arduino. The GND pin of the HC-05 is connected to the GND of the Arduino. Pin 2 of the Arduino is connected directly to the Tx pin of the HC-05.
Arduino Code
Upload the following Arduino sketch to communicate between the HC-05 and your Android phone:
The Bluetooth Terminal Application
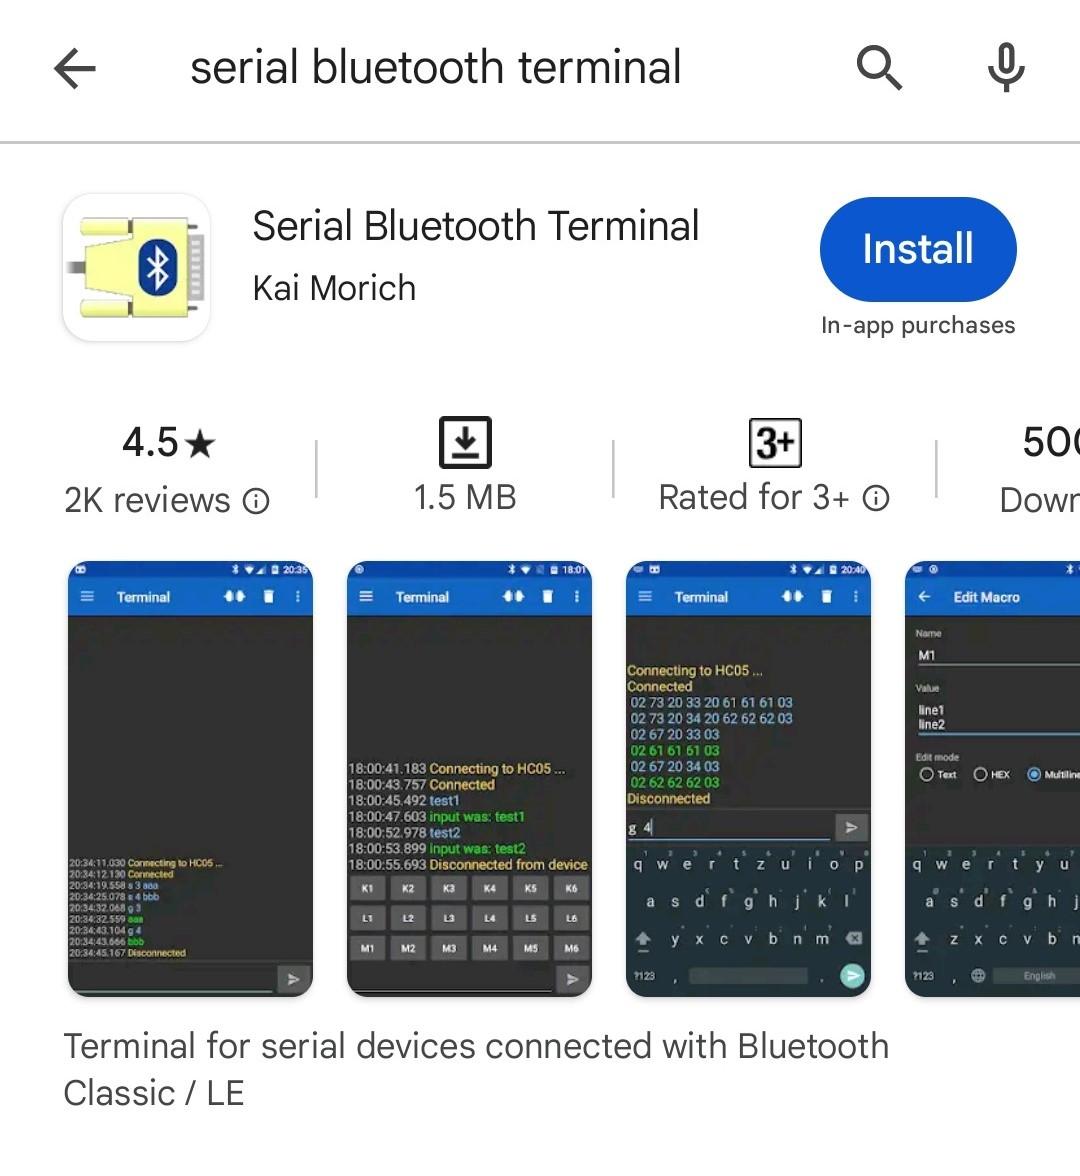
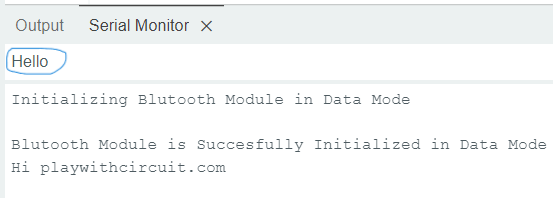
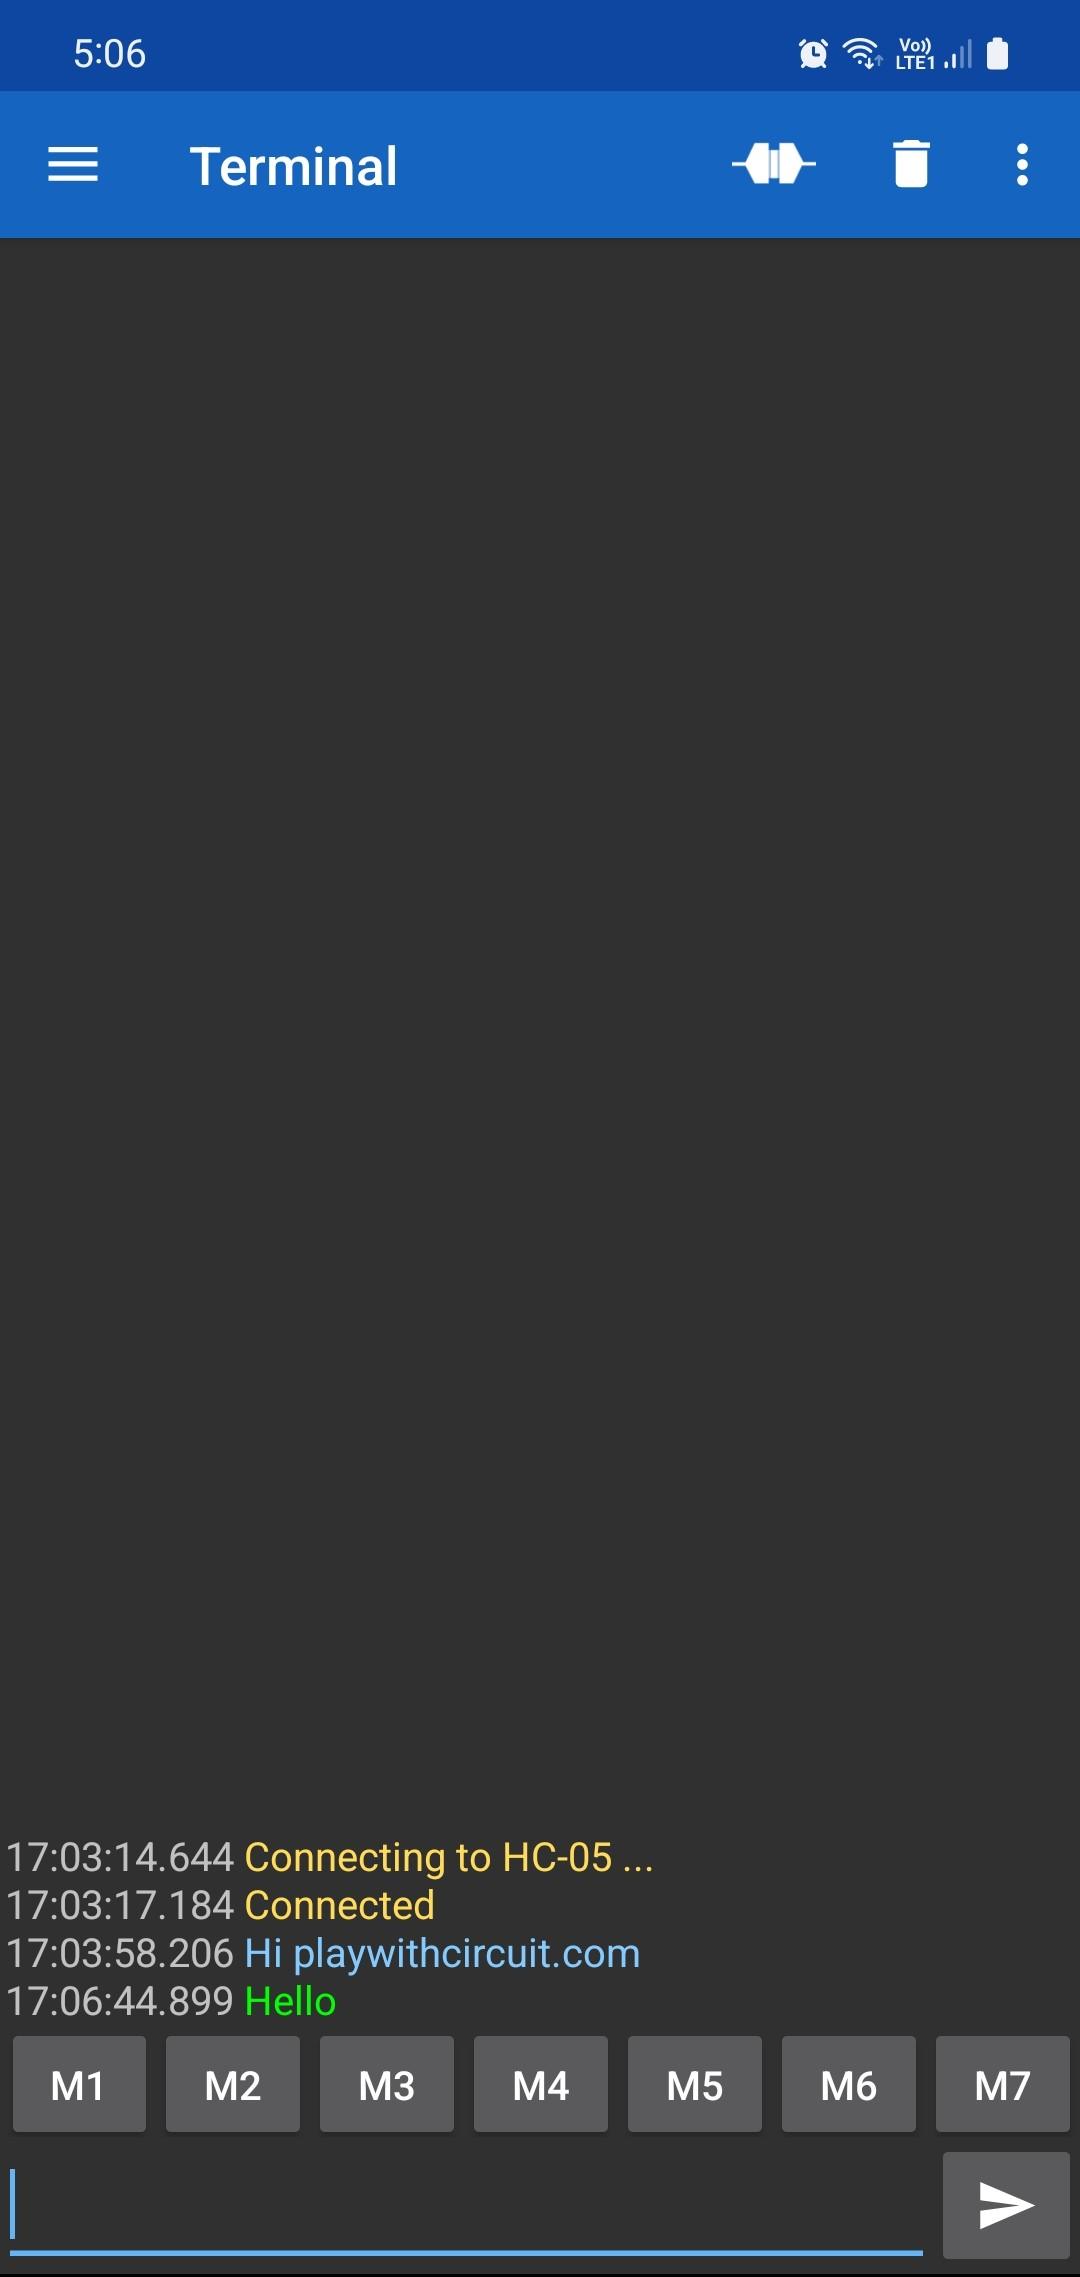
1. Install the Bluetooth Terminal Application:
- Open the Play Store on your Android device.
- Search for "Serial Bluetooth Terminal" app.
- Install the app on your phone.
2. Enable Bluetooth on Your Phone:
- While the app is downloading, turn on the Bluetooth on your Android phone.
- Ensure your HC-05 module is powered up and its LED is blinking, which indicates it is discoverable.
3. Pair the HC-05 with Your Phone:
- Go to Bluetooth settings on your phone.
- Look for HC-05 under "Available devices." (If it’s not listed, check if the HC-05 is powered and in pairing mode, with the LED blinking).
- Select HC-05 from the list of devices.
- When prompted, enter the default pairing code: either 1234 or 0000.
4. Connect the HC-05 with Serial Bluetooth Terminal:
- Open the Serial Bluetooth Terminal app.
- Press the three-line button next to the "Terminal" heading to open the menu.
- Select the Devices menu option.
- Tap the Refresh button to scan for paired devices.
- Once the HC-05 is displayed, tap on its name to connect.
- Allow any permissions if prompted by tapping Allow.
5. Start Sending and Receiving Data:
- After successfully connecting, the status icon in the app’s top right corner should indicate a connection.
- In the app’s terminal window, you can type a message and send it.
- The message sent from the app will be transmitted to the HC-05, which will display it on the Arduino Serial Monitor in the Arduino IDE (if properly configured).
6. Test Communication from Arduino to Phone:
- Open the Serial Monitor in the Arduino IDE.
- Type and send a message from the Arduino Serial Monitor.
- The message should be received in the Serial Bluetooth Terminal app on the phone, highlighted in green.
Key Points:
- Password: Default passwords for the HC-05 are generally "1234" or "0000."
- Serial Monitor Feedback: Messages sent from either the Arduino IDE or the mobile app should reflect in both devices' terminals, confirming two-way communication.
- LED Status: The LED on the HC-05 will blink rapidly while in pairing mode, but once connected, it will blink more slowly or remain solid.
Conclusion
In this tutorial, we’ve explored how to set up and use the HC-05 Bluetooth module with Arduino, allowing for seamless wireless communication between your projects and external devices.
To learn more about HC-05 module in detail and how to control a 12V DC Fan Speed and Direction from Android Application using HC-05 check out: HC-05 Bluetooth Module Interfacing with Arduino