Interface LED With Arduino
by ogonyesolomonoche in Circuits > Arduino
246 Views, 0 Favorites, 0 Comments
Interface LED With Arduino
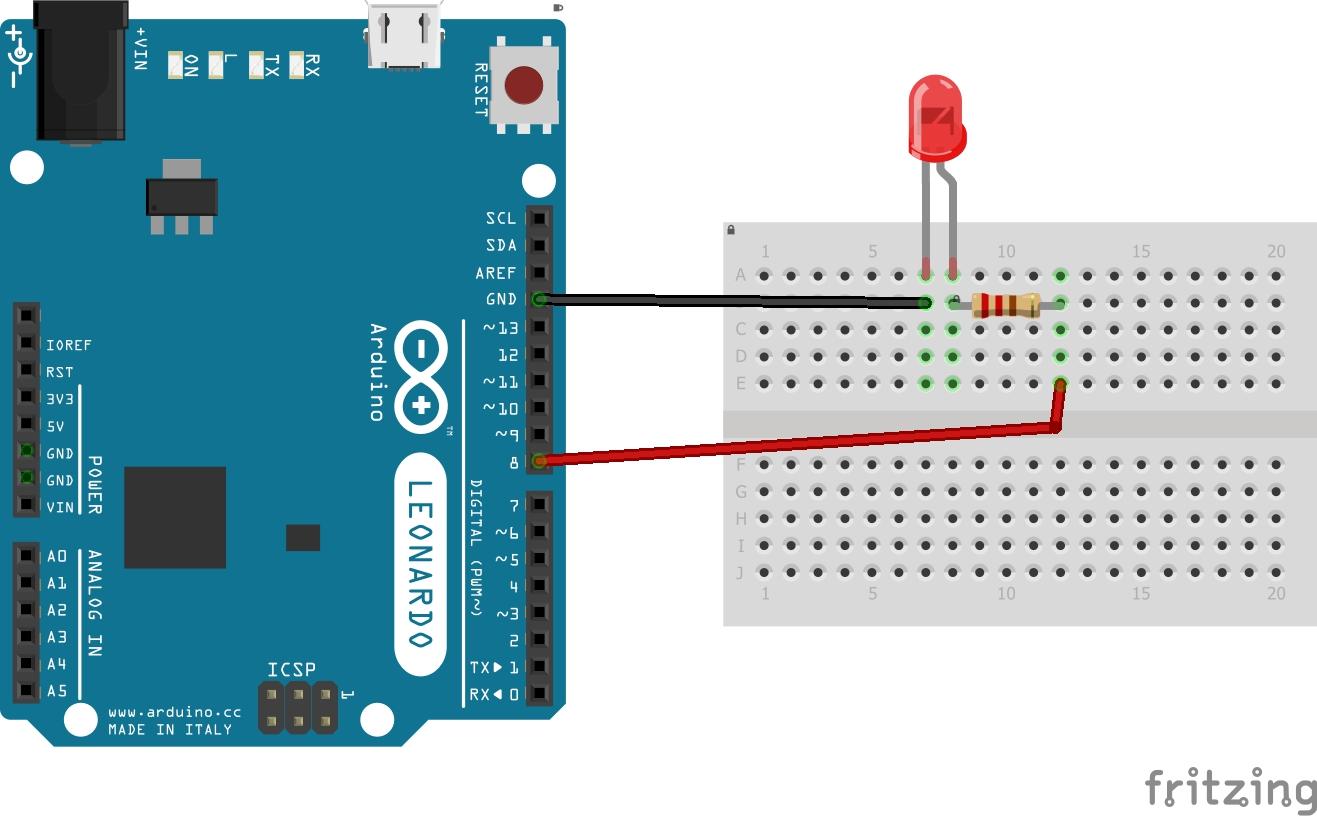
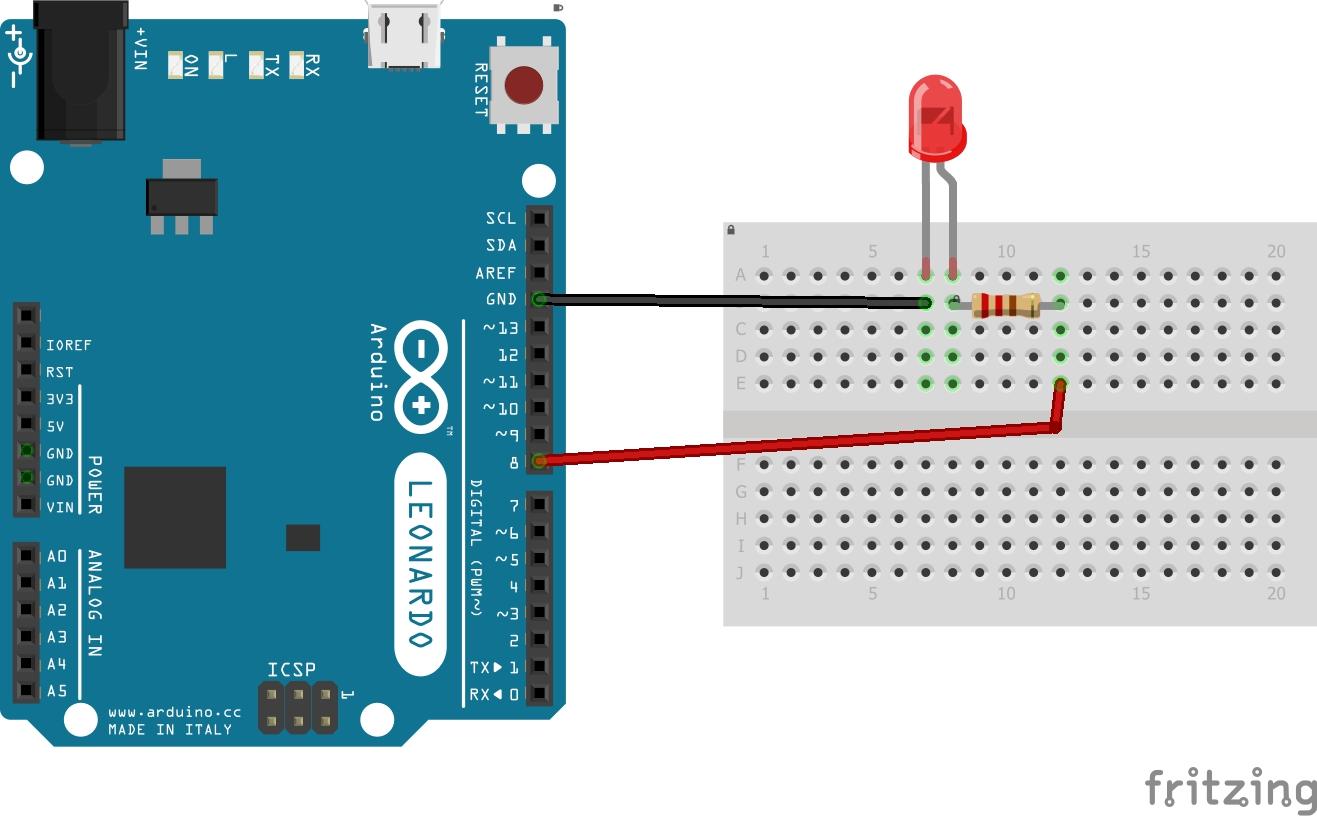
This project gives an introduction to Arduino and Arduino programing language. It involves turning ON and OFF an LED using the Arduino.
Supplies
HARDWARE REQUIRED
- Arduino board
- Jumper wires
- 220 ohm resistor
- breadboard
SOFTWARE REQUIRED
- Arduino IDE software
- Your Computer
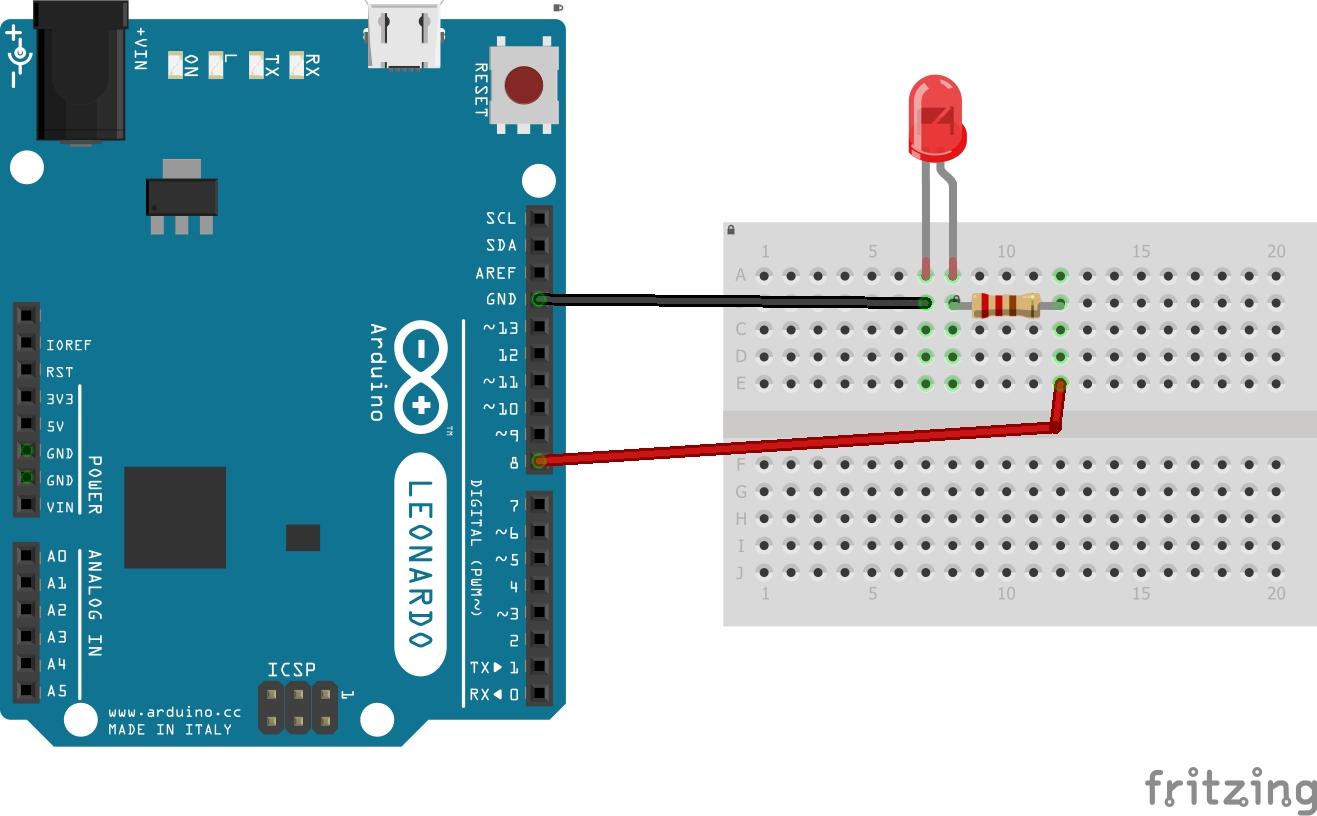
CIRCUIT SETUP
Use the circuit diagram below to the components on the breadboard by connecting the anode (the longer, and the positive leg) of your LED to digital output pin 8 on your breadboard through a 220 ohm resistor. Connect the cathode (the shorter, negative leg) directly to ground.
Downloads
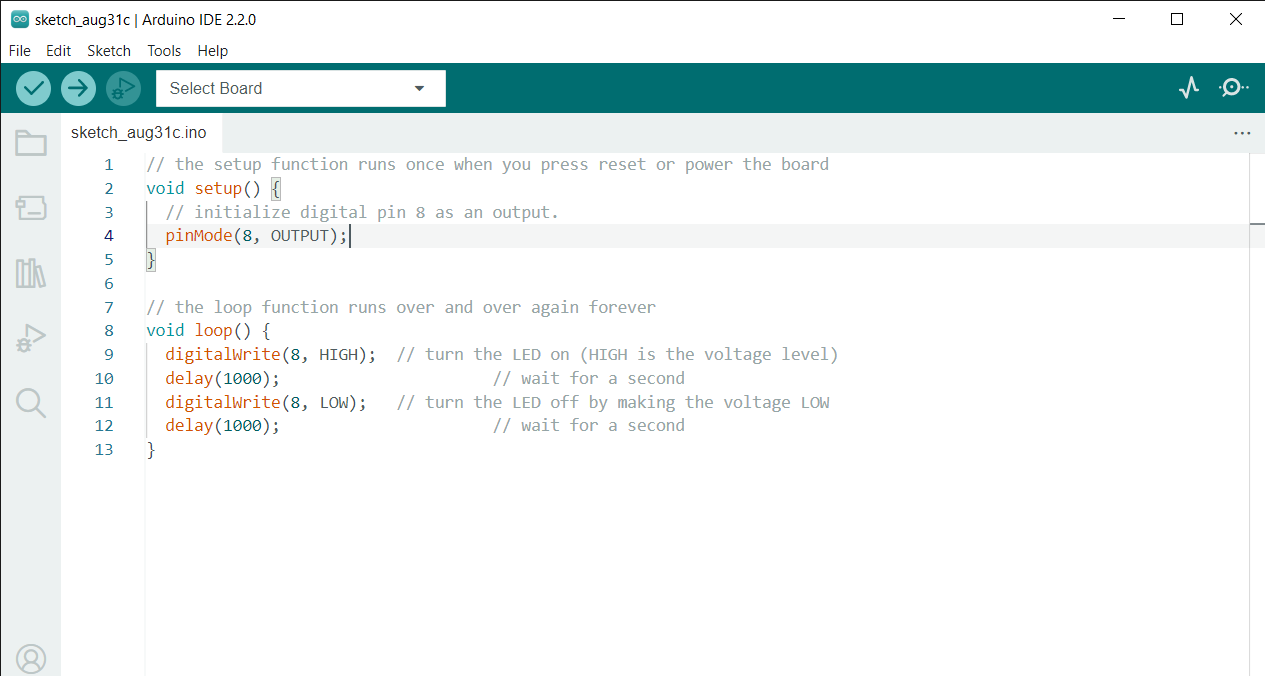
CODE
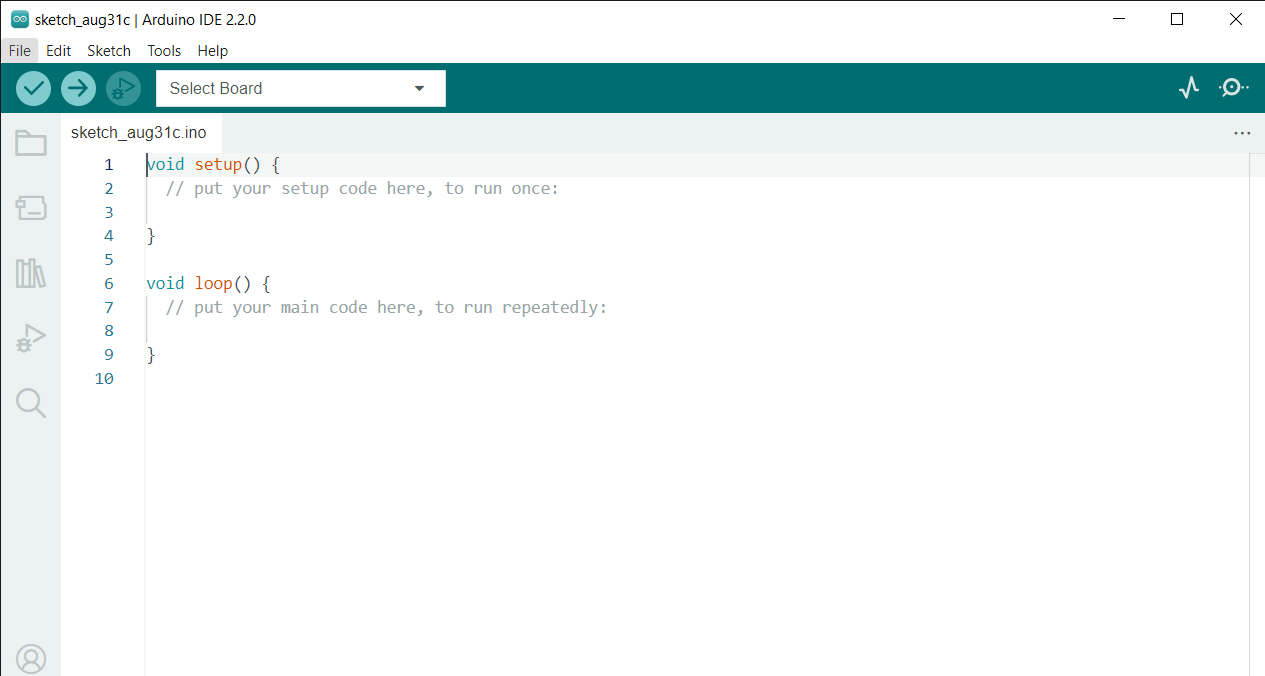
Download the Arduino IDE software on your computer.
Open the Arduino IDE software on your computer and then open the new sketch File by clicking New.
UPLOAD AND RUN THE CODE
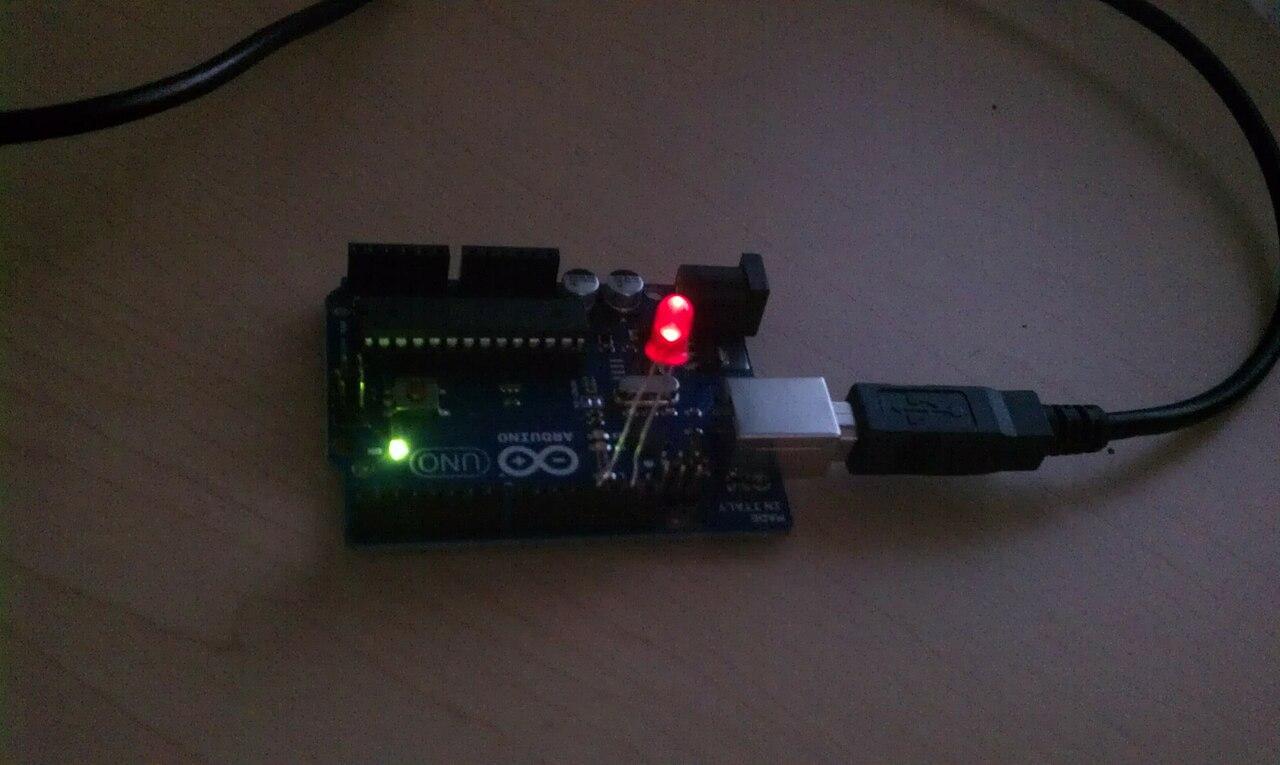
After you uploaded the code you should see your LED turn on and off. If no result, recheck the assembled the circuit correctly, and verified and uploaded the code to your board again.