Interactive Jack-o-lantern (sees You, Taunts and Changes Colour): Use Electronics to Scare Your Friends This Halloween
by TinkerElectric in Circuits > Arduino
1898 Views, 33 Favorites, 0 Comments
Interactive Jack-o-lantern (sees You, Taunts and Changes Colour): Use Electronics to Scare Your Friends This Halloween

Want to make something spooky this Halloween? Want to scare your friends, family and pedestrians? Gather round adults and kids. We are going to make a Jack-o-lantern, one that can sense when people are near, lure them in, then BOOO, scare them!
This Jack-o-lantern can see how far you are, calls you to come closer and then.... BOOO!
Want to join the challenge? Sign up here to get support in making your own and to hear about more DIY projects and classes.
You will use an Arduino, LEDs, Distance Sensor and Sound system to help your Jack-o-lantern become possessed. From there you can customise your lantern to make it your own.
Getting Help!
Remember, you can reach out at any time for support on this, or other projects. TinkerElectric on Facebook
Let's get started!
Supplies
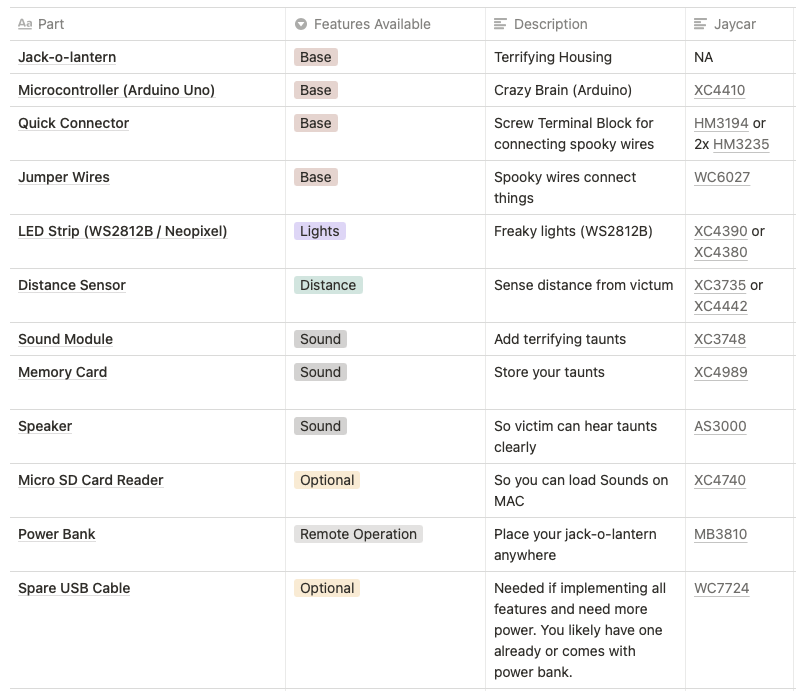
The below collection is broken down by feature. Collect all the parts to make a fully functional jack-o-lantern. This list is optimised for Australia currently (Jaycar and Kmart). I will be adding more suppliers. Who is your fav supplier?
Wire It Up
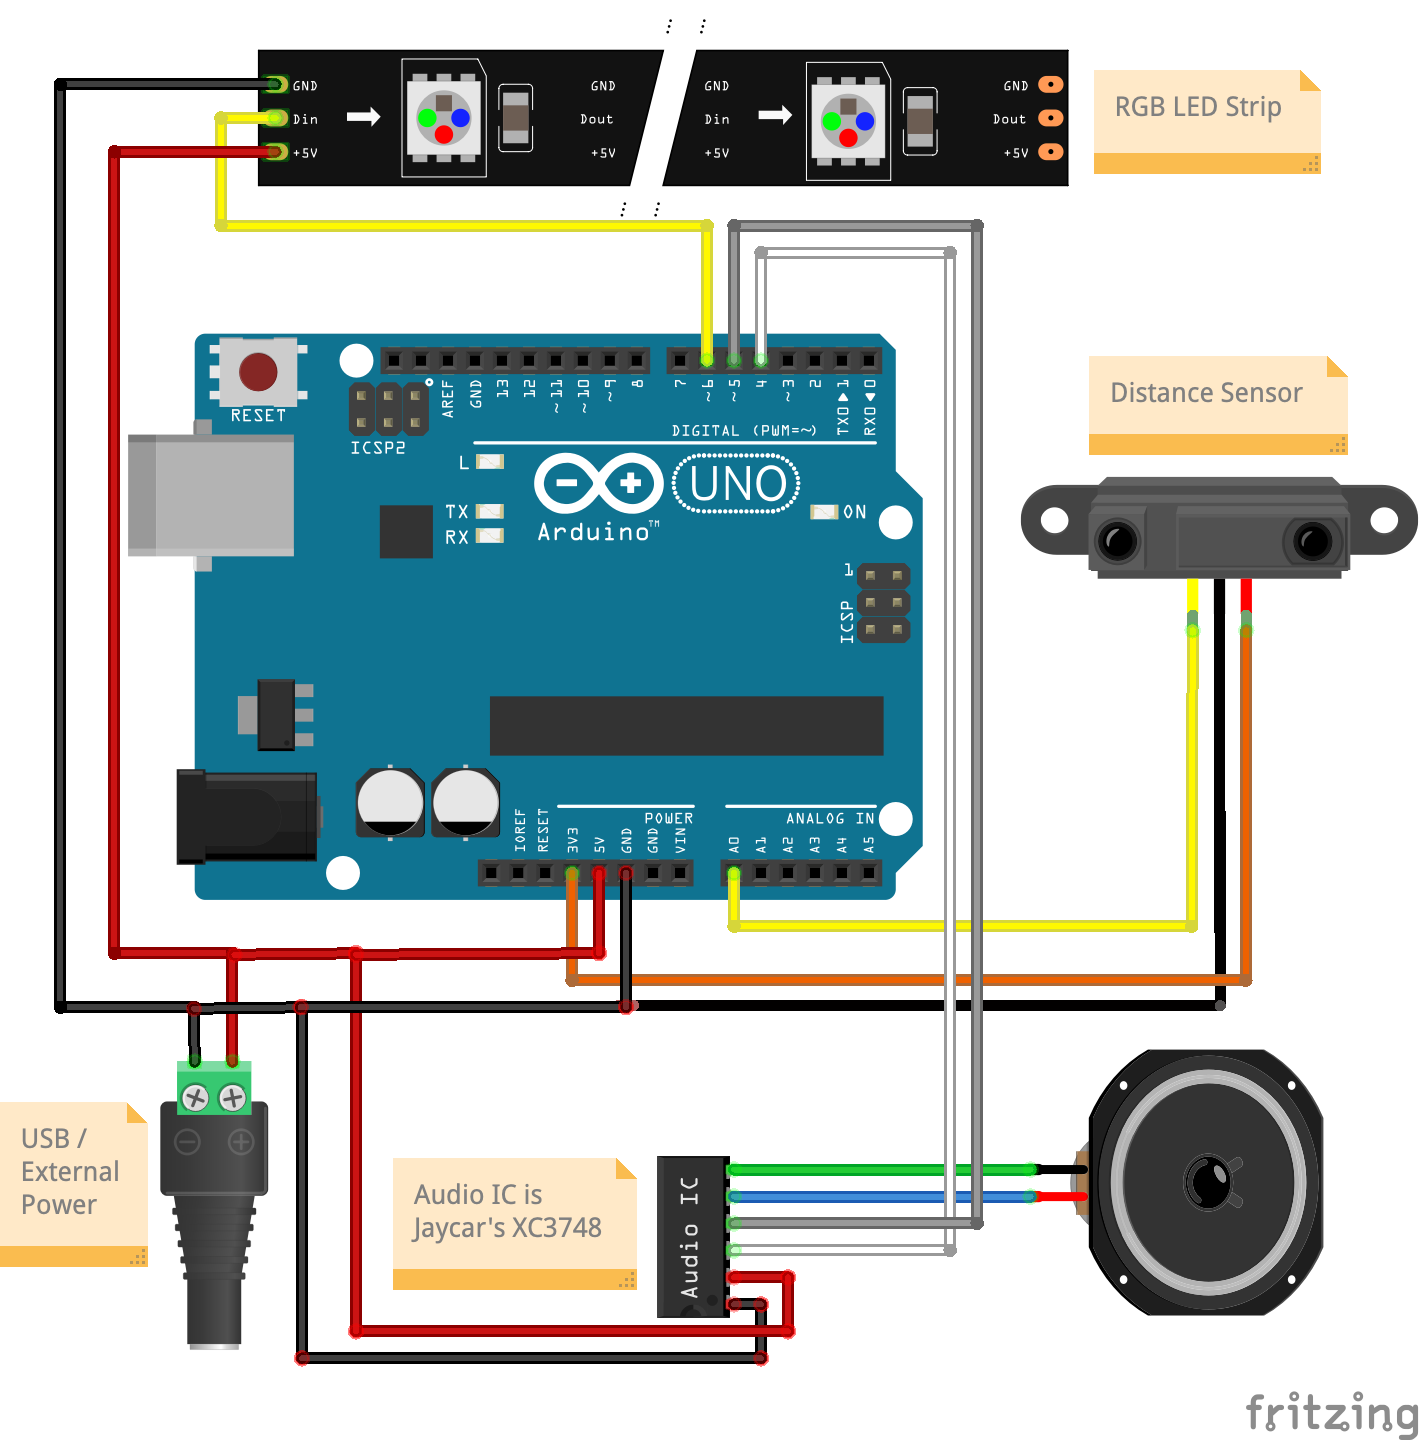
After collecting the parts (contact us on FB for a kit in Australia), wire them up as seen below.
Note that they all tie back to an external USB supply. We use this to supply enough power when everything is connected. The external jack can be a USB cord that you have cut and use the red/black wires.
In this edition the audio board is the JayCar XC3748
Software - Prepare SD Card
Prepare the SD Card
Format the SD card as FAT32 (google for this, just ensure you target the SD card)
Create a folder called 01
Place the files attached into the folder
Insert the SD card into the Audio Player
At a later date you can modify these files. Note that they are referenced by the number 001, 002 003 etc, the -snore etc is just for humans to read it. You will notice in the code there is a reference to files by numbers.
Software - Install Arduino IDE

Install the Arduino software by going to: https://www.arduino.cc/en/software
Click your operating system, and install Arduino's Software
Donate where possible, they have helped a lot of people make many awesome things
Install Libraries

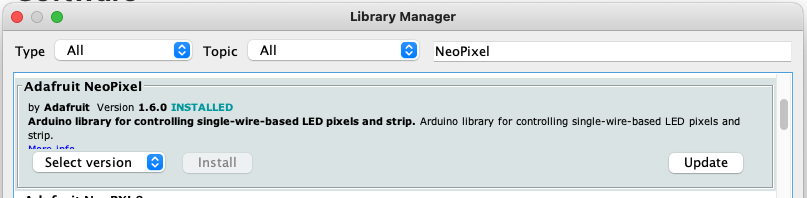
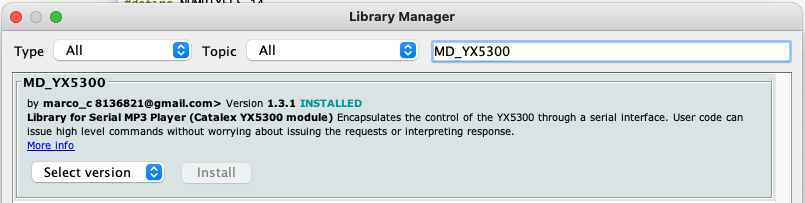
We need the Adafruit NeoPixel and MD_YX5300 libraries
In Arduino, using the menu at the top, go to: Tools > Manage Libraries
Type "neopixel" in the top right search. Then click install on the one seen below
Type "neopixel" in the top right search. Then click install on the one seen below
Load the Code

Open the attached file in your Arduino IDE
Connect your Arduino board via USB to your computer. Its light should turn on.
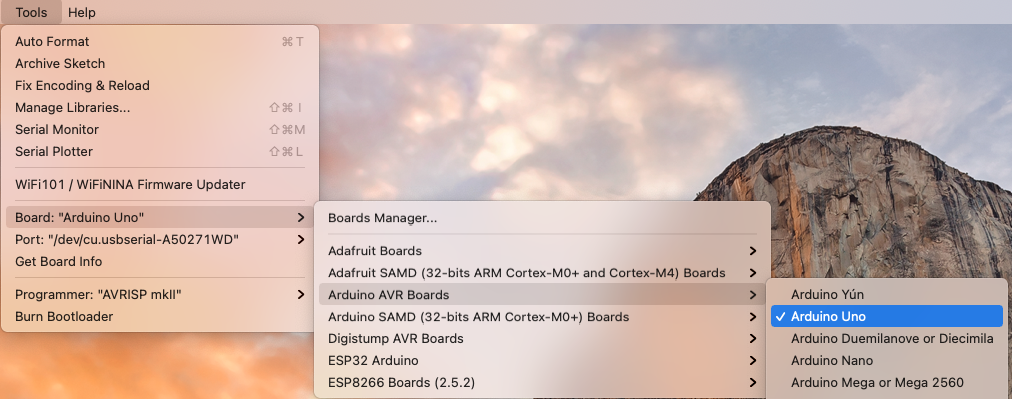
In the Arduino IDE, Select your board, it should be an Arduino UNO MENU > TOOLS > BOARD > Arduino AVR > Arduino Uno
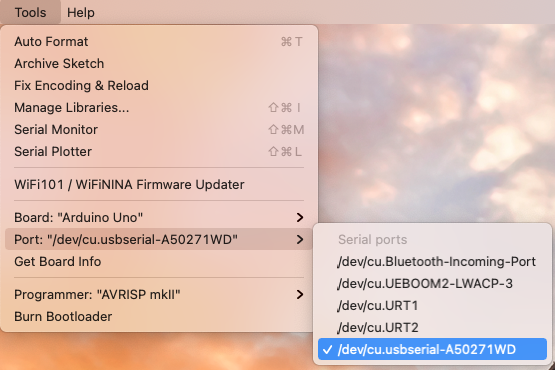
Select the Port your Arduino is connected to, you will know it because it appears/disappears when you connect/disconnect your Arduino. MENU > TOOLS > PORT > select your device
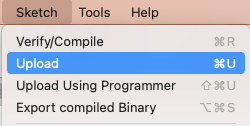
Upload the code by using the Upload button or in the menu, MENU > TOOLS > SKETCH > UPLOAD
Downloads
Test: Scare Yourself
Step back, see that it works as expected. BOO! HAHAHAaAaaaaa
Install in Your Jack-O-Lantern
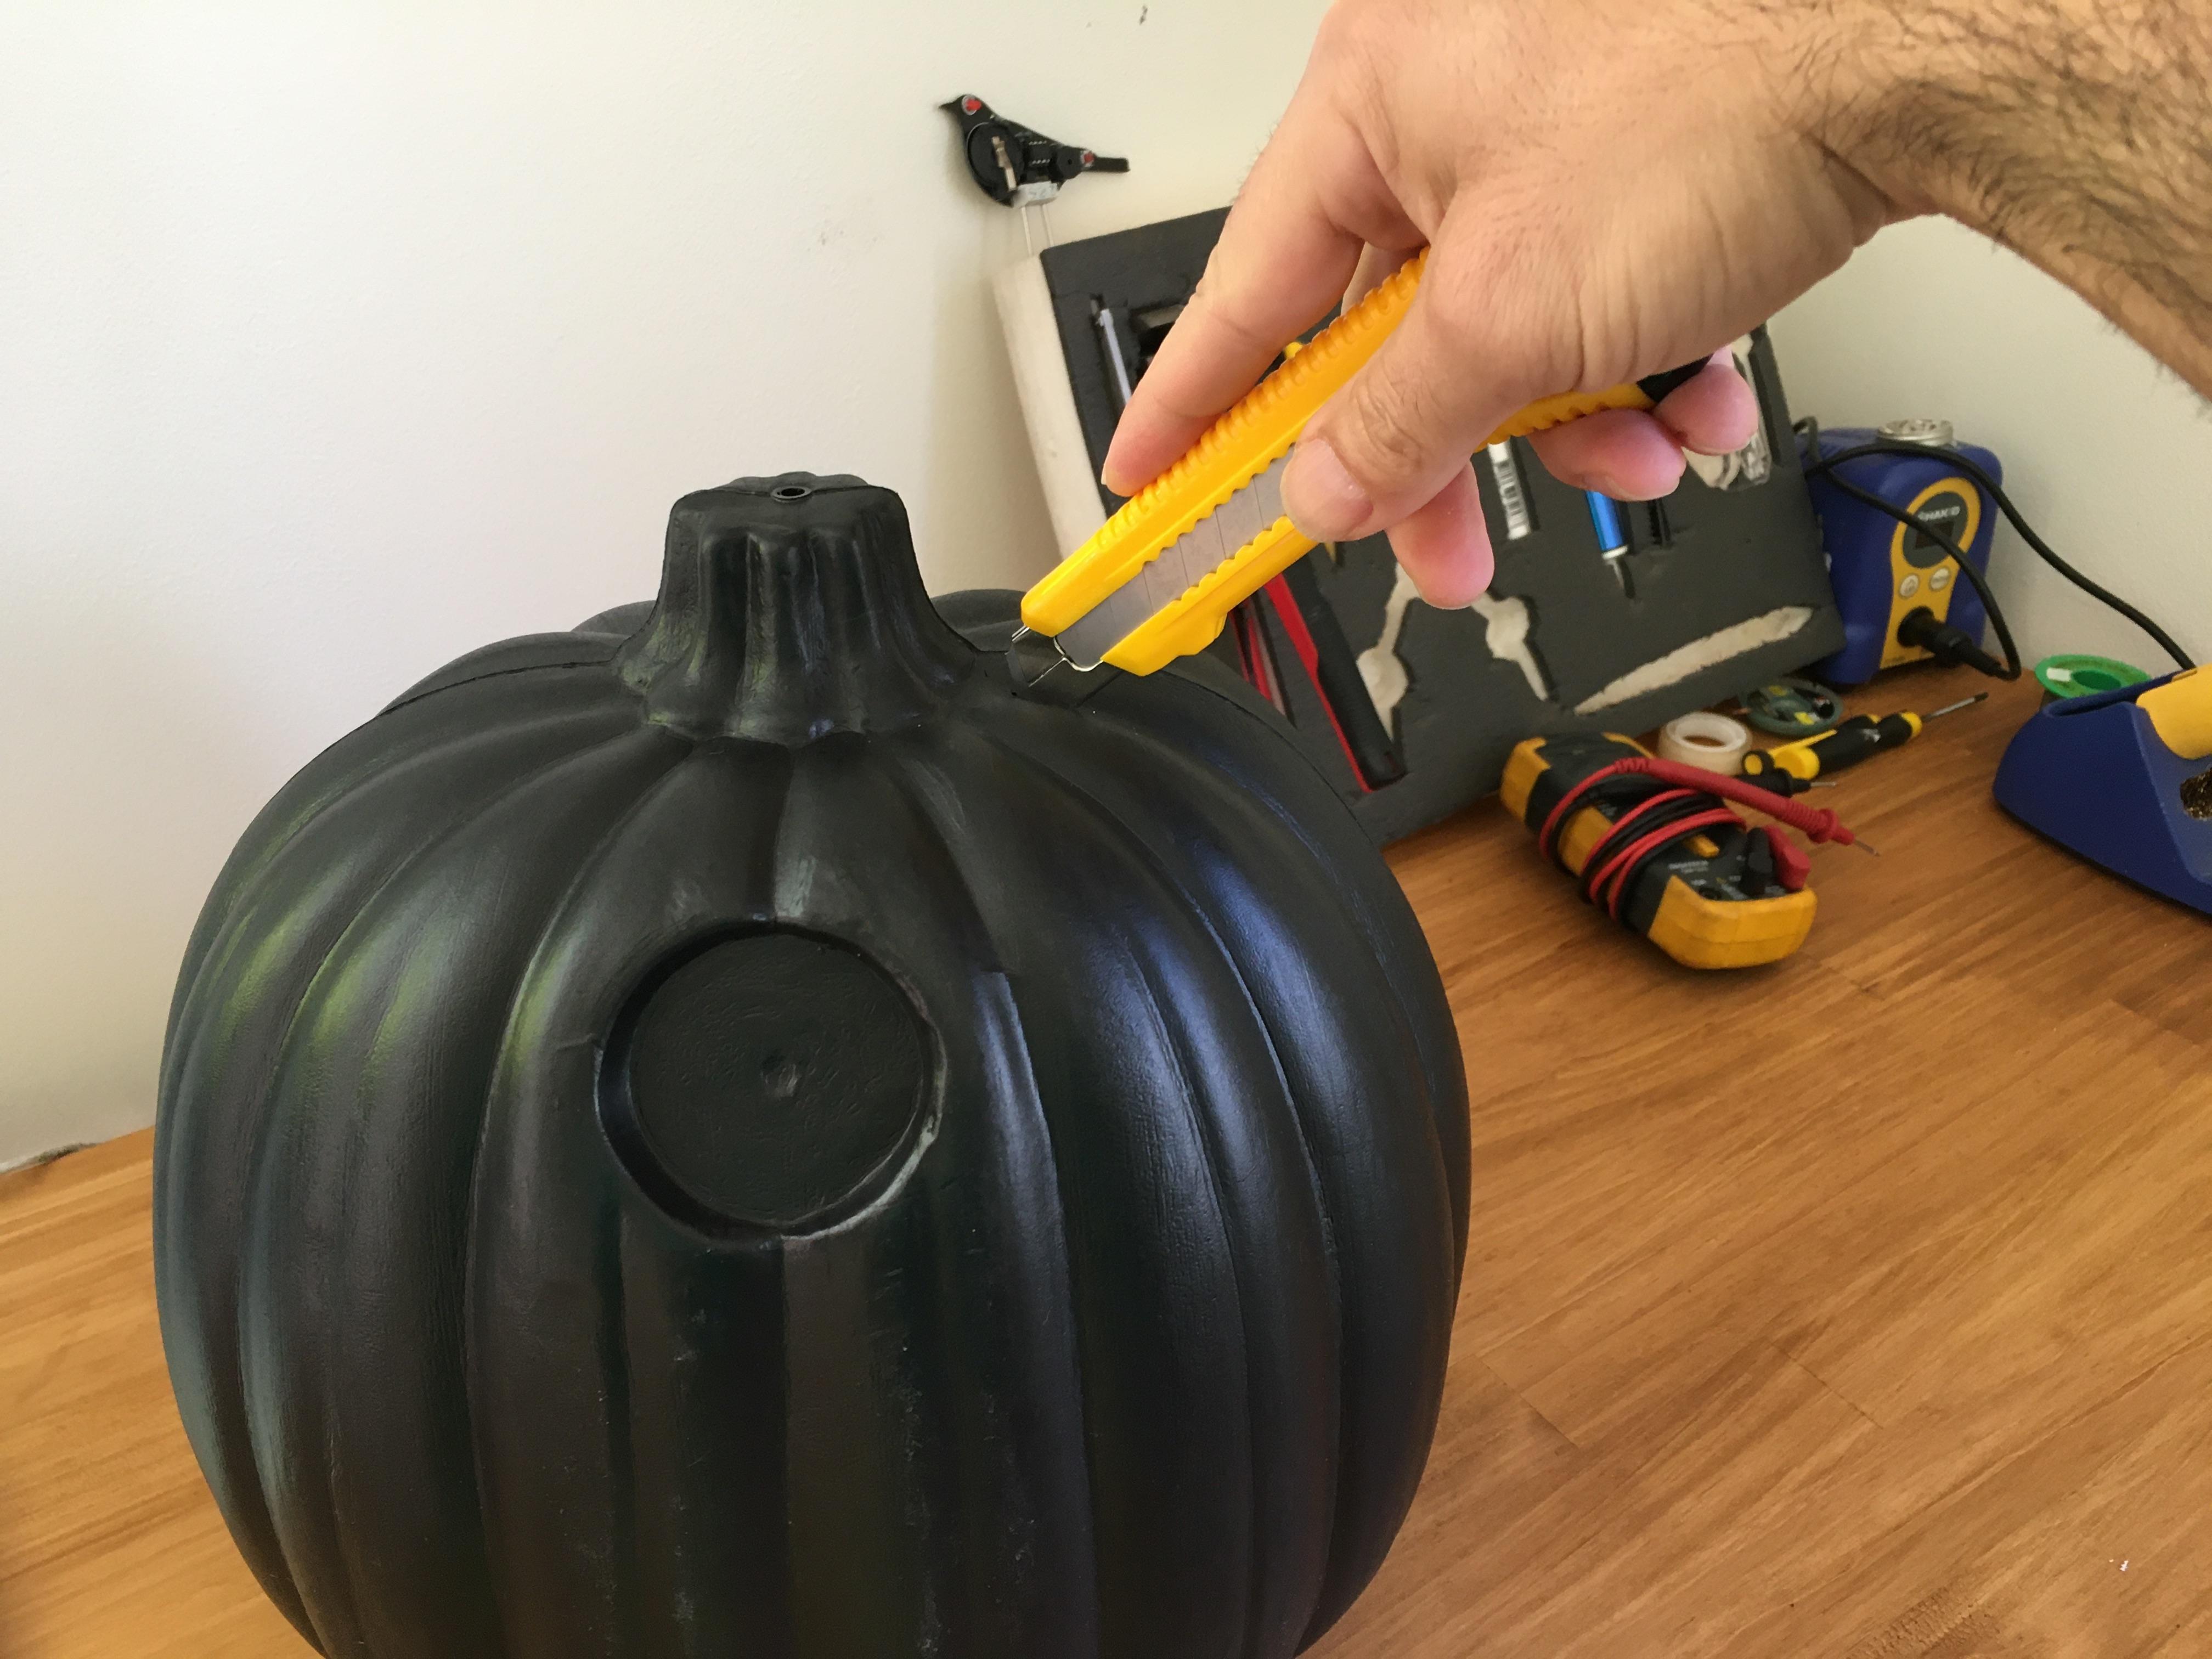
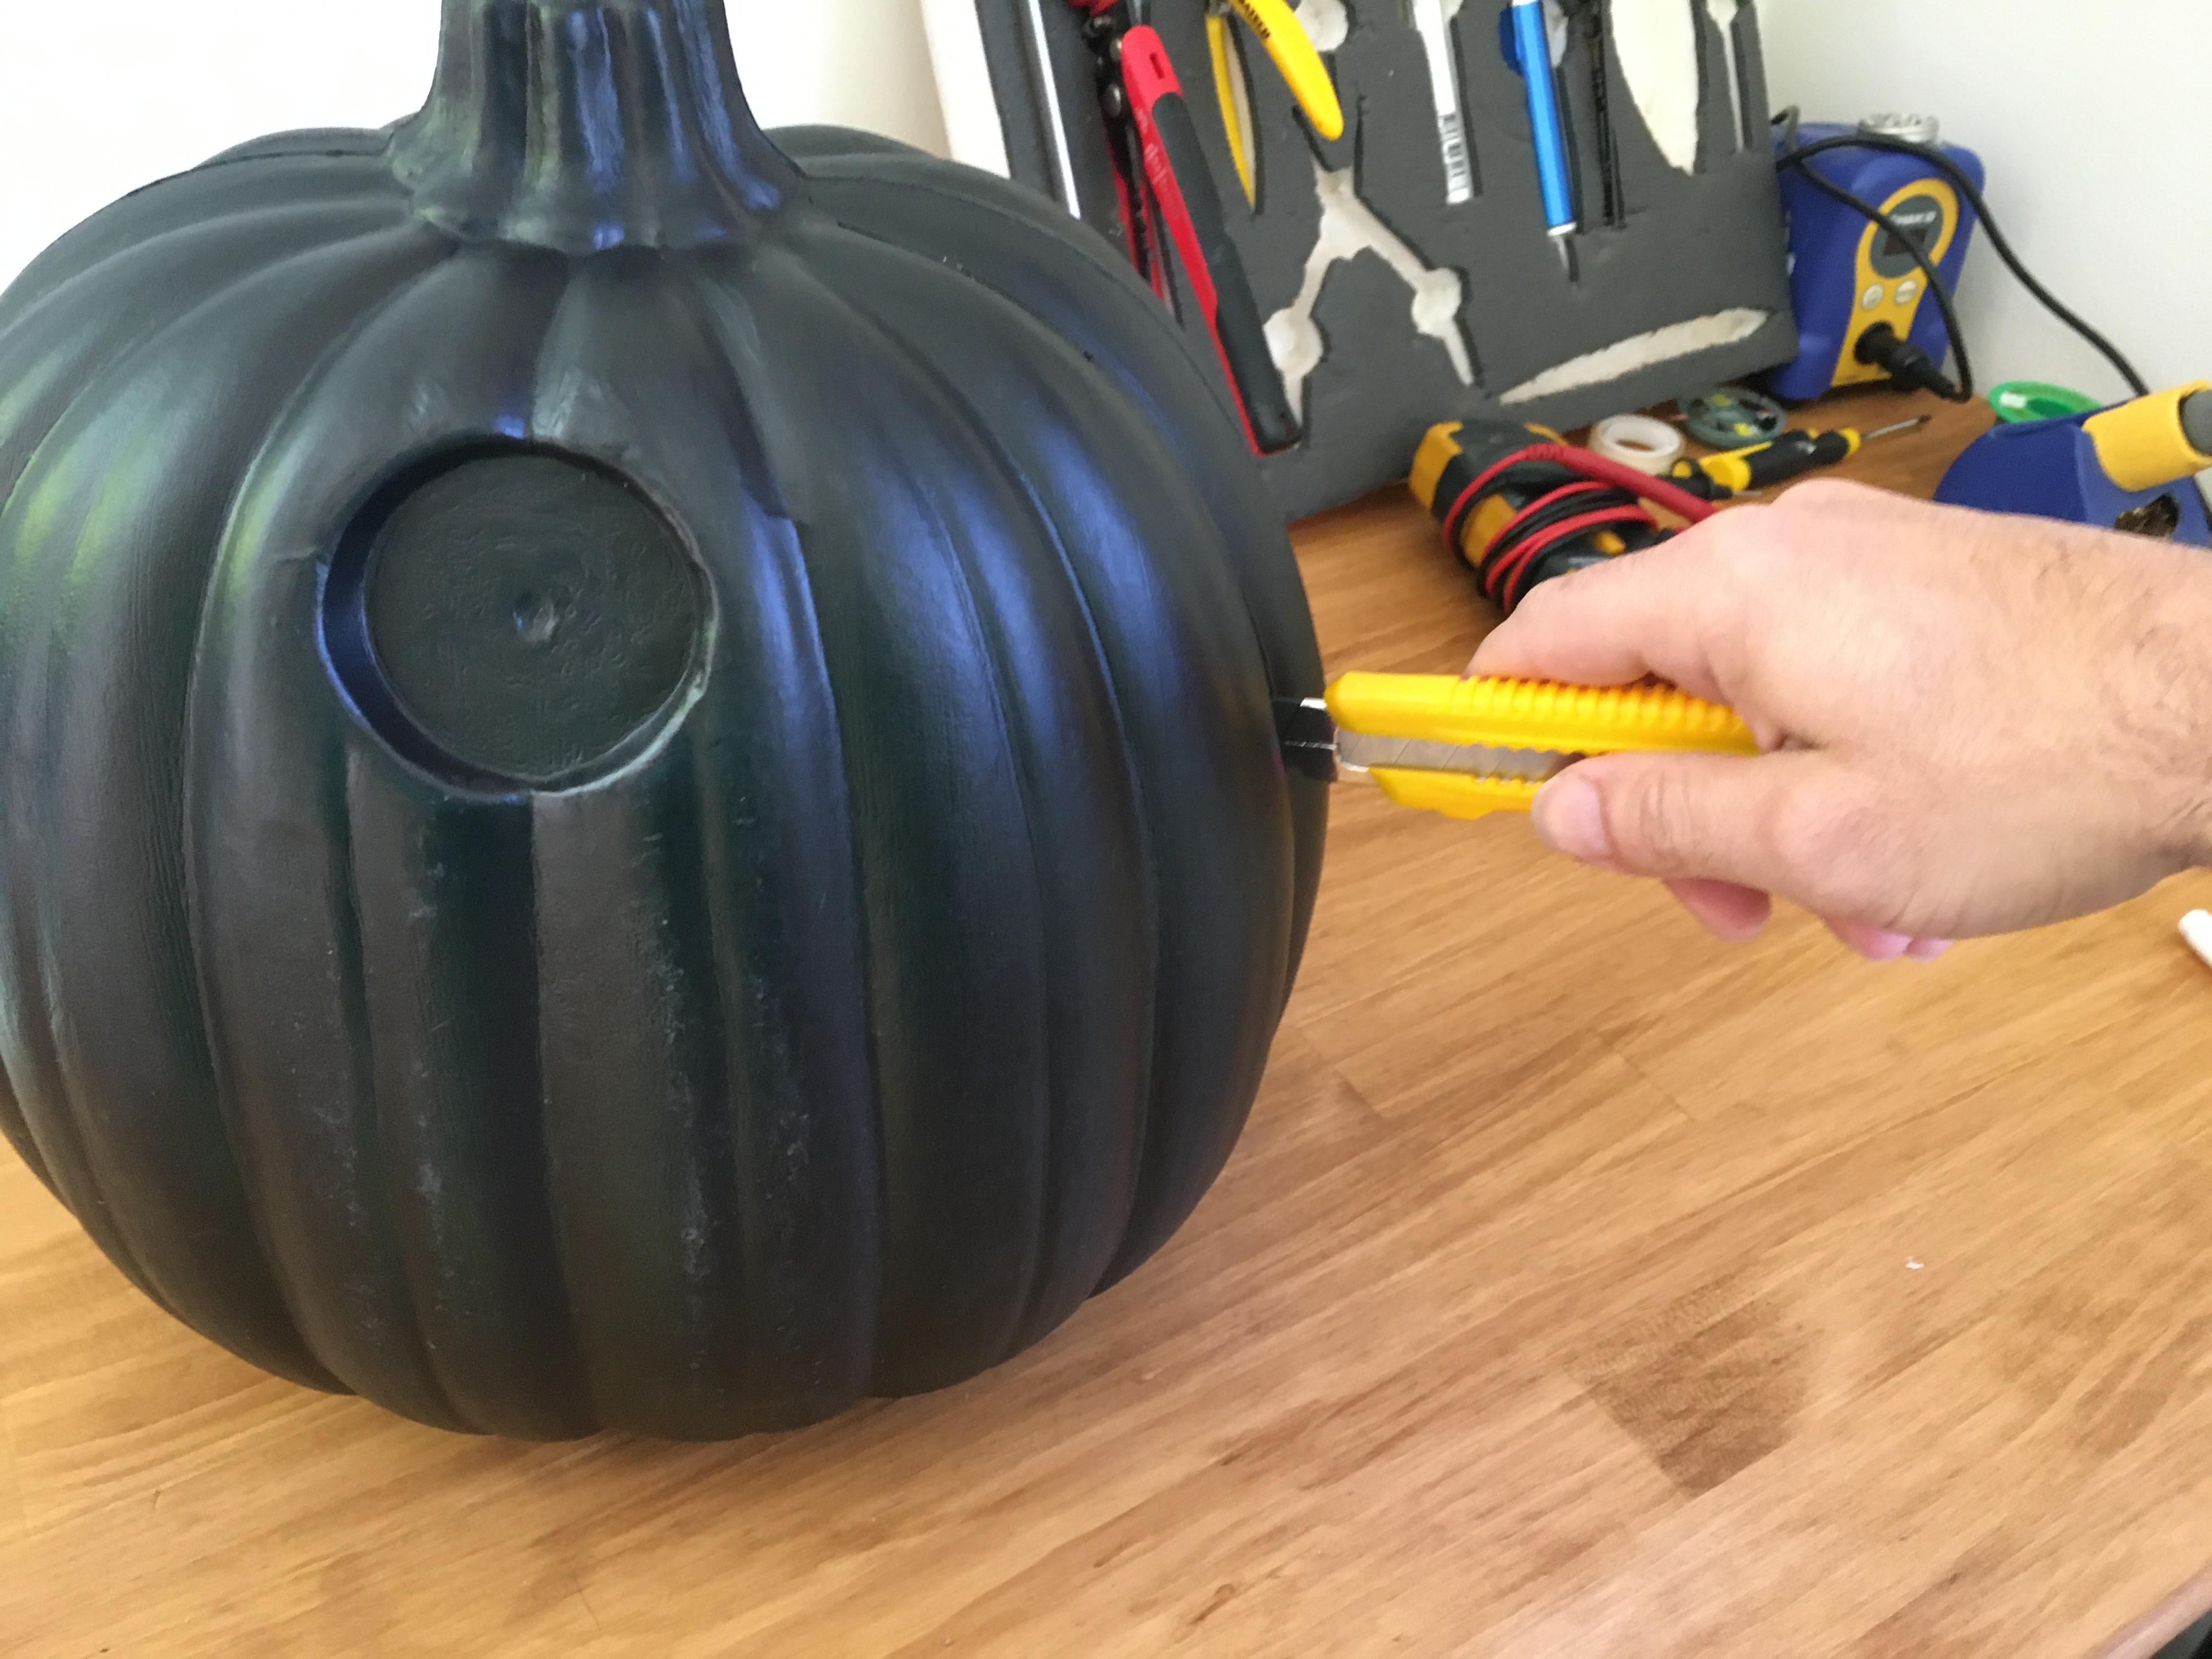
The Jack-O-Lantern I use is from Kmart for $6.
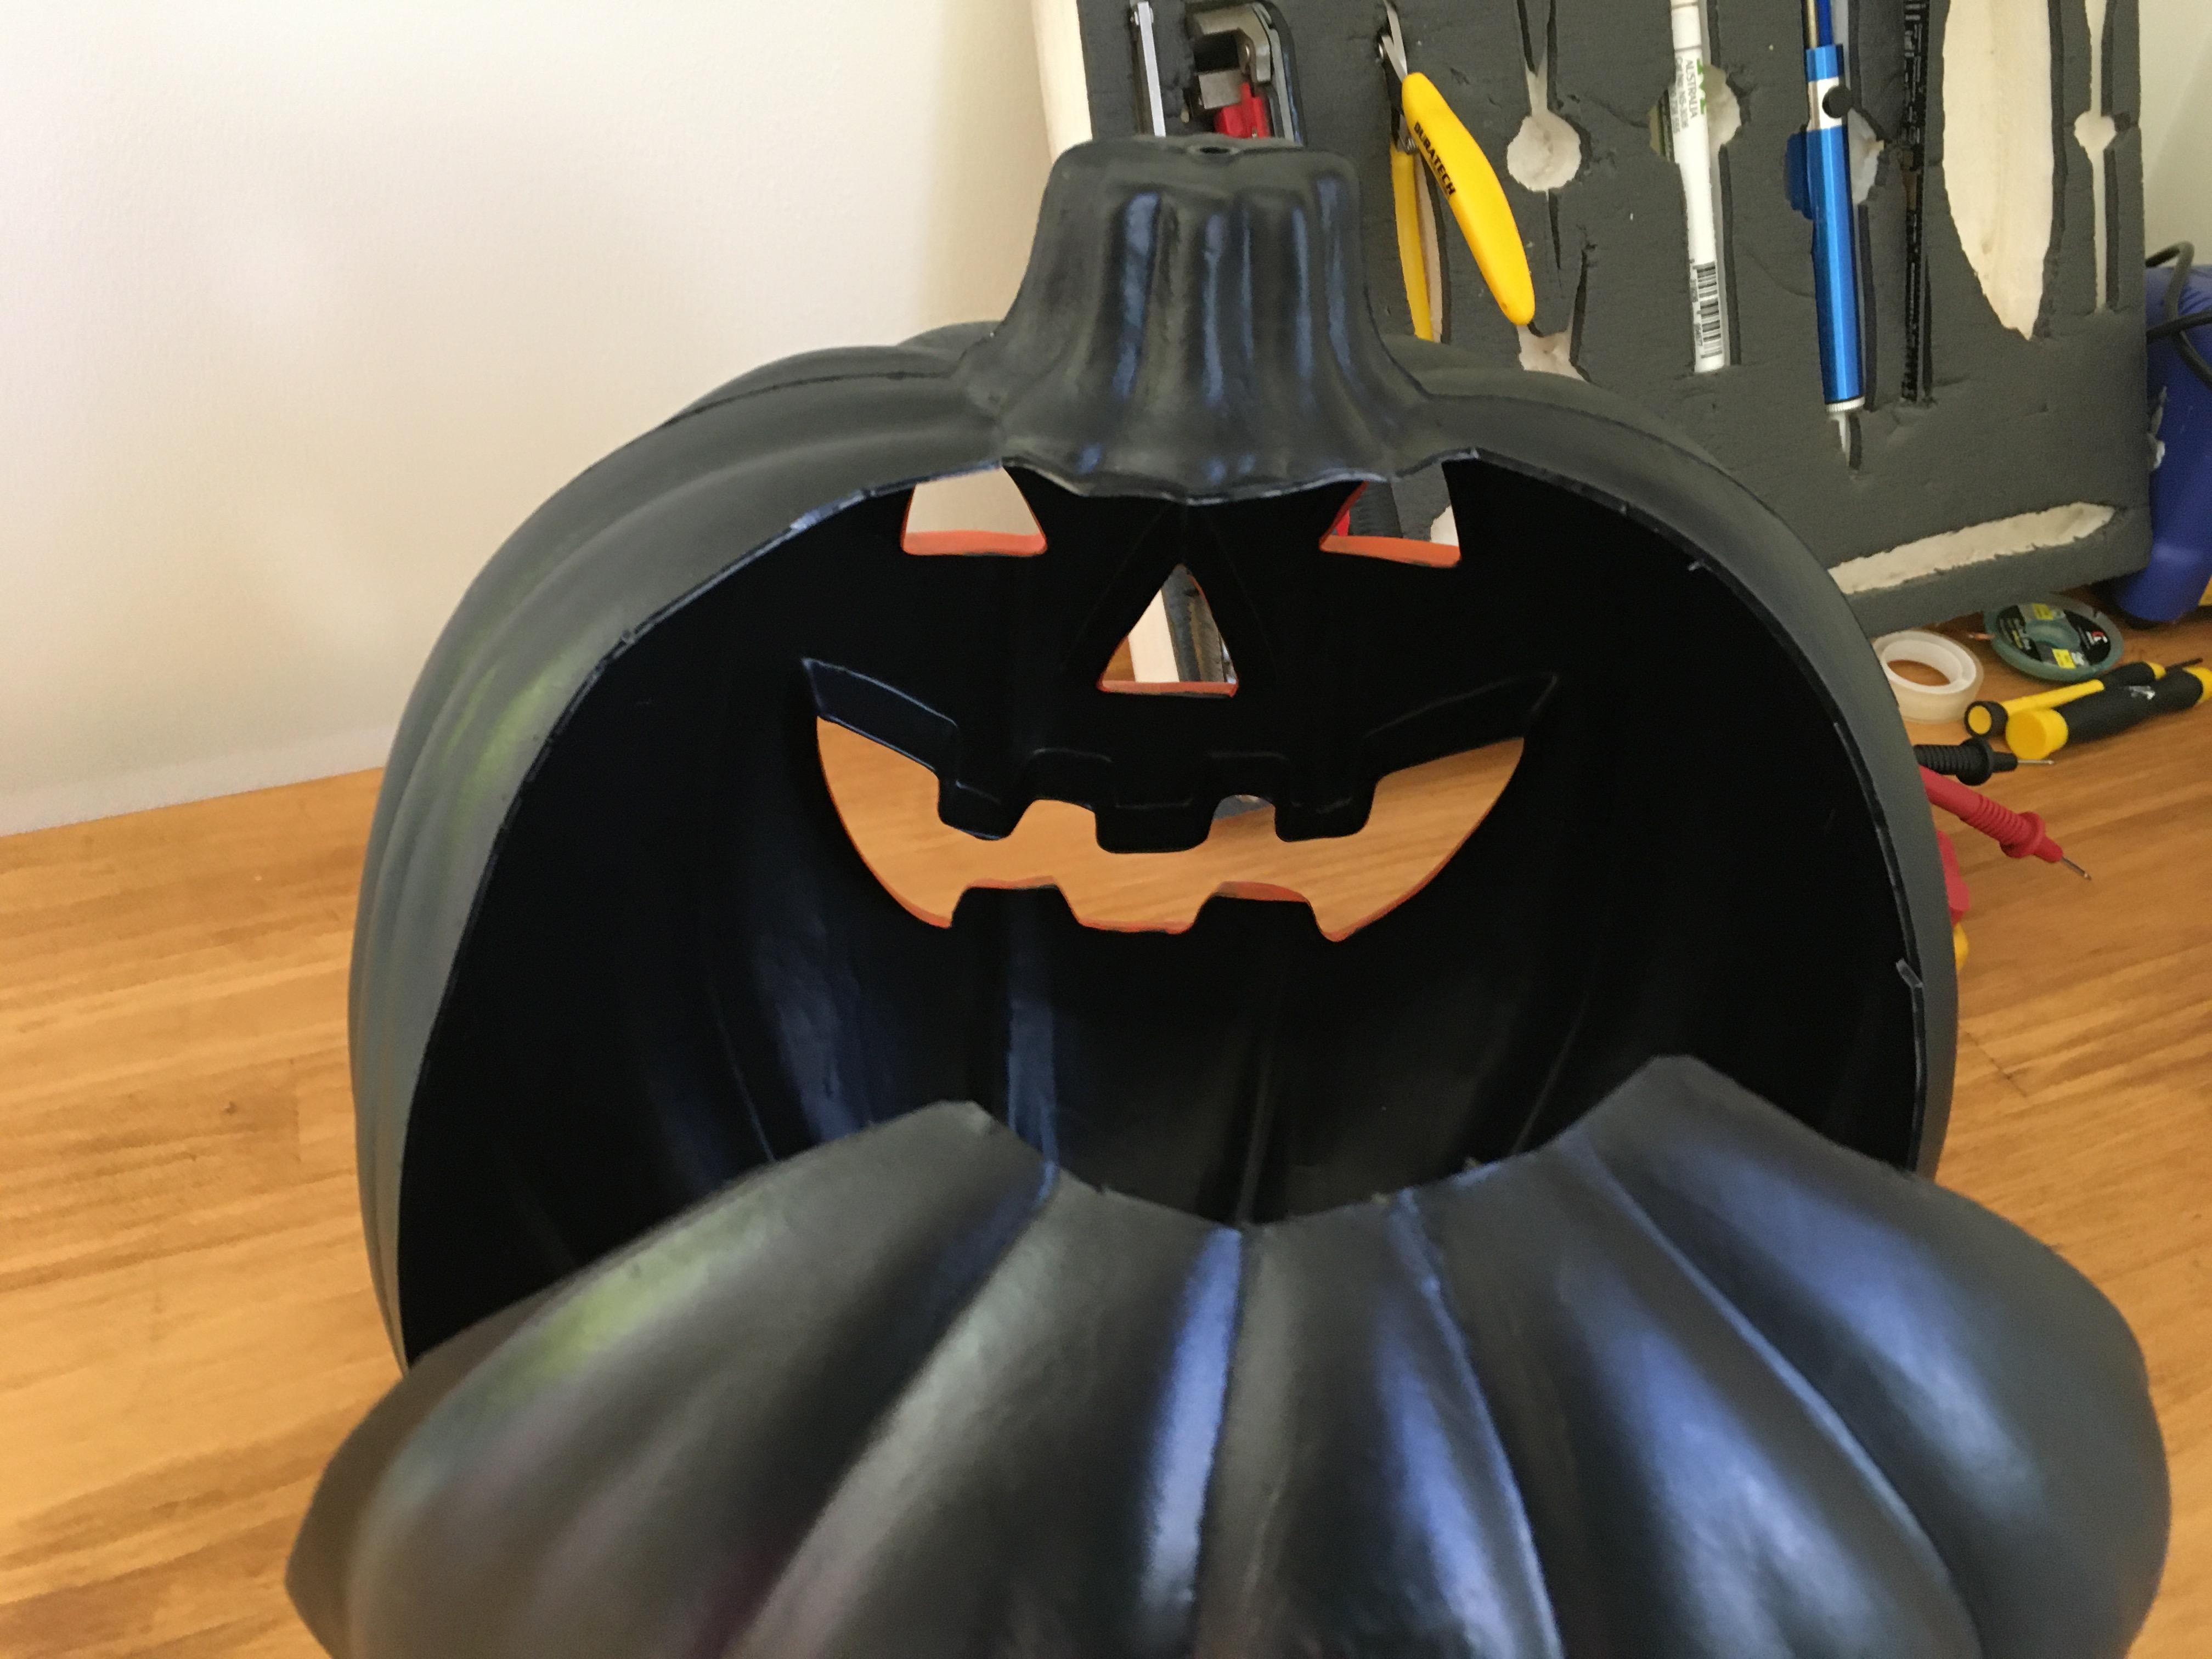
CAREFULLY, cut it open. Always cut AWAY from yourself to avoid injury.
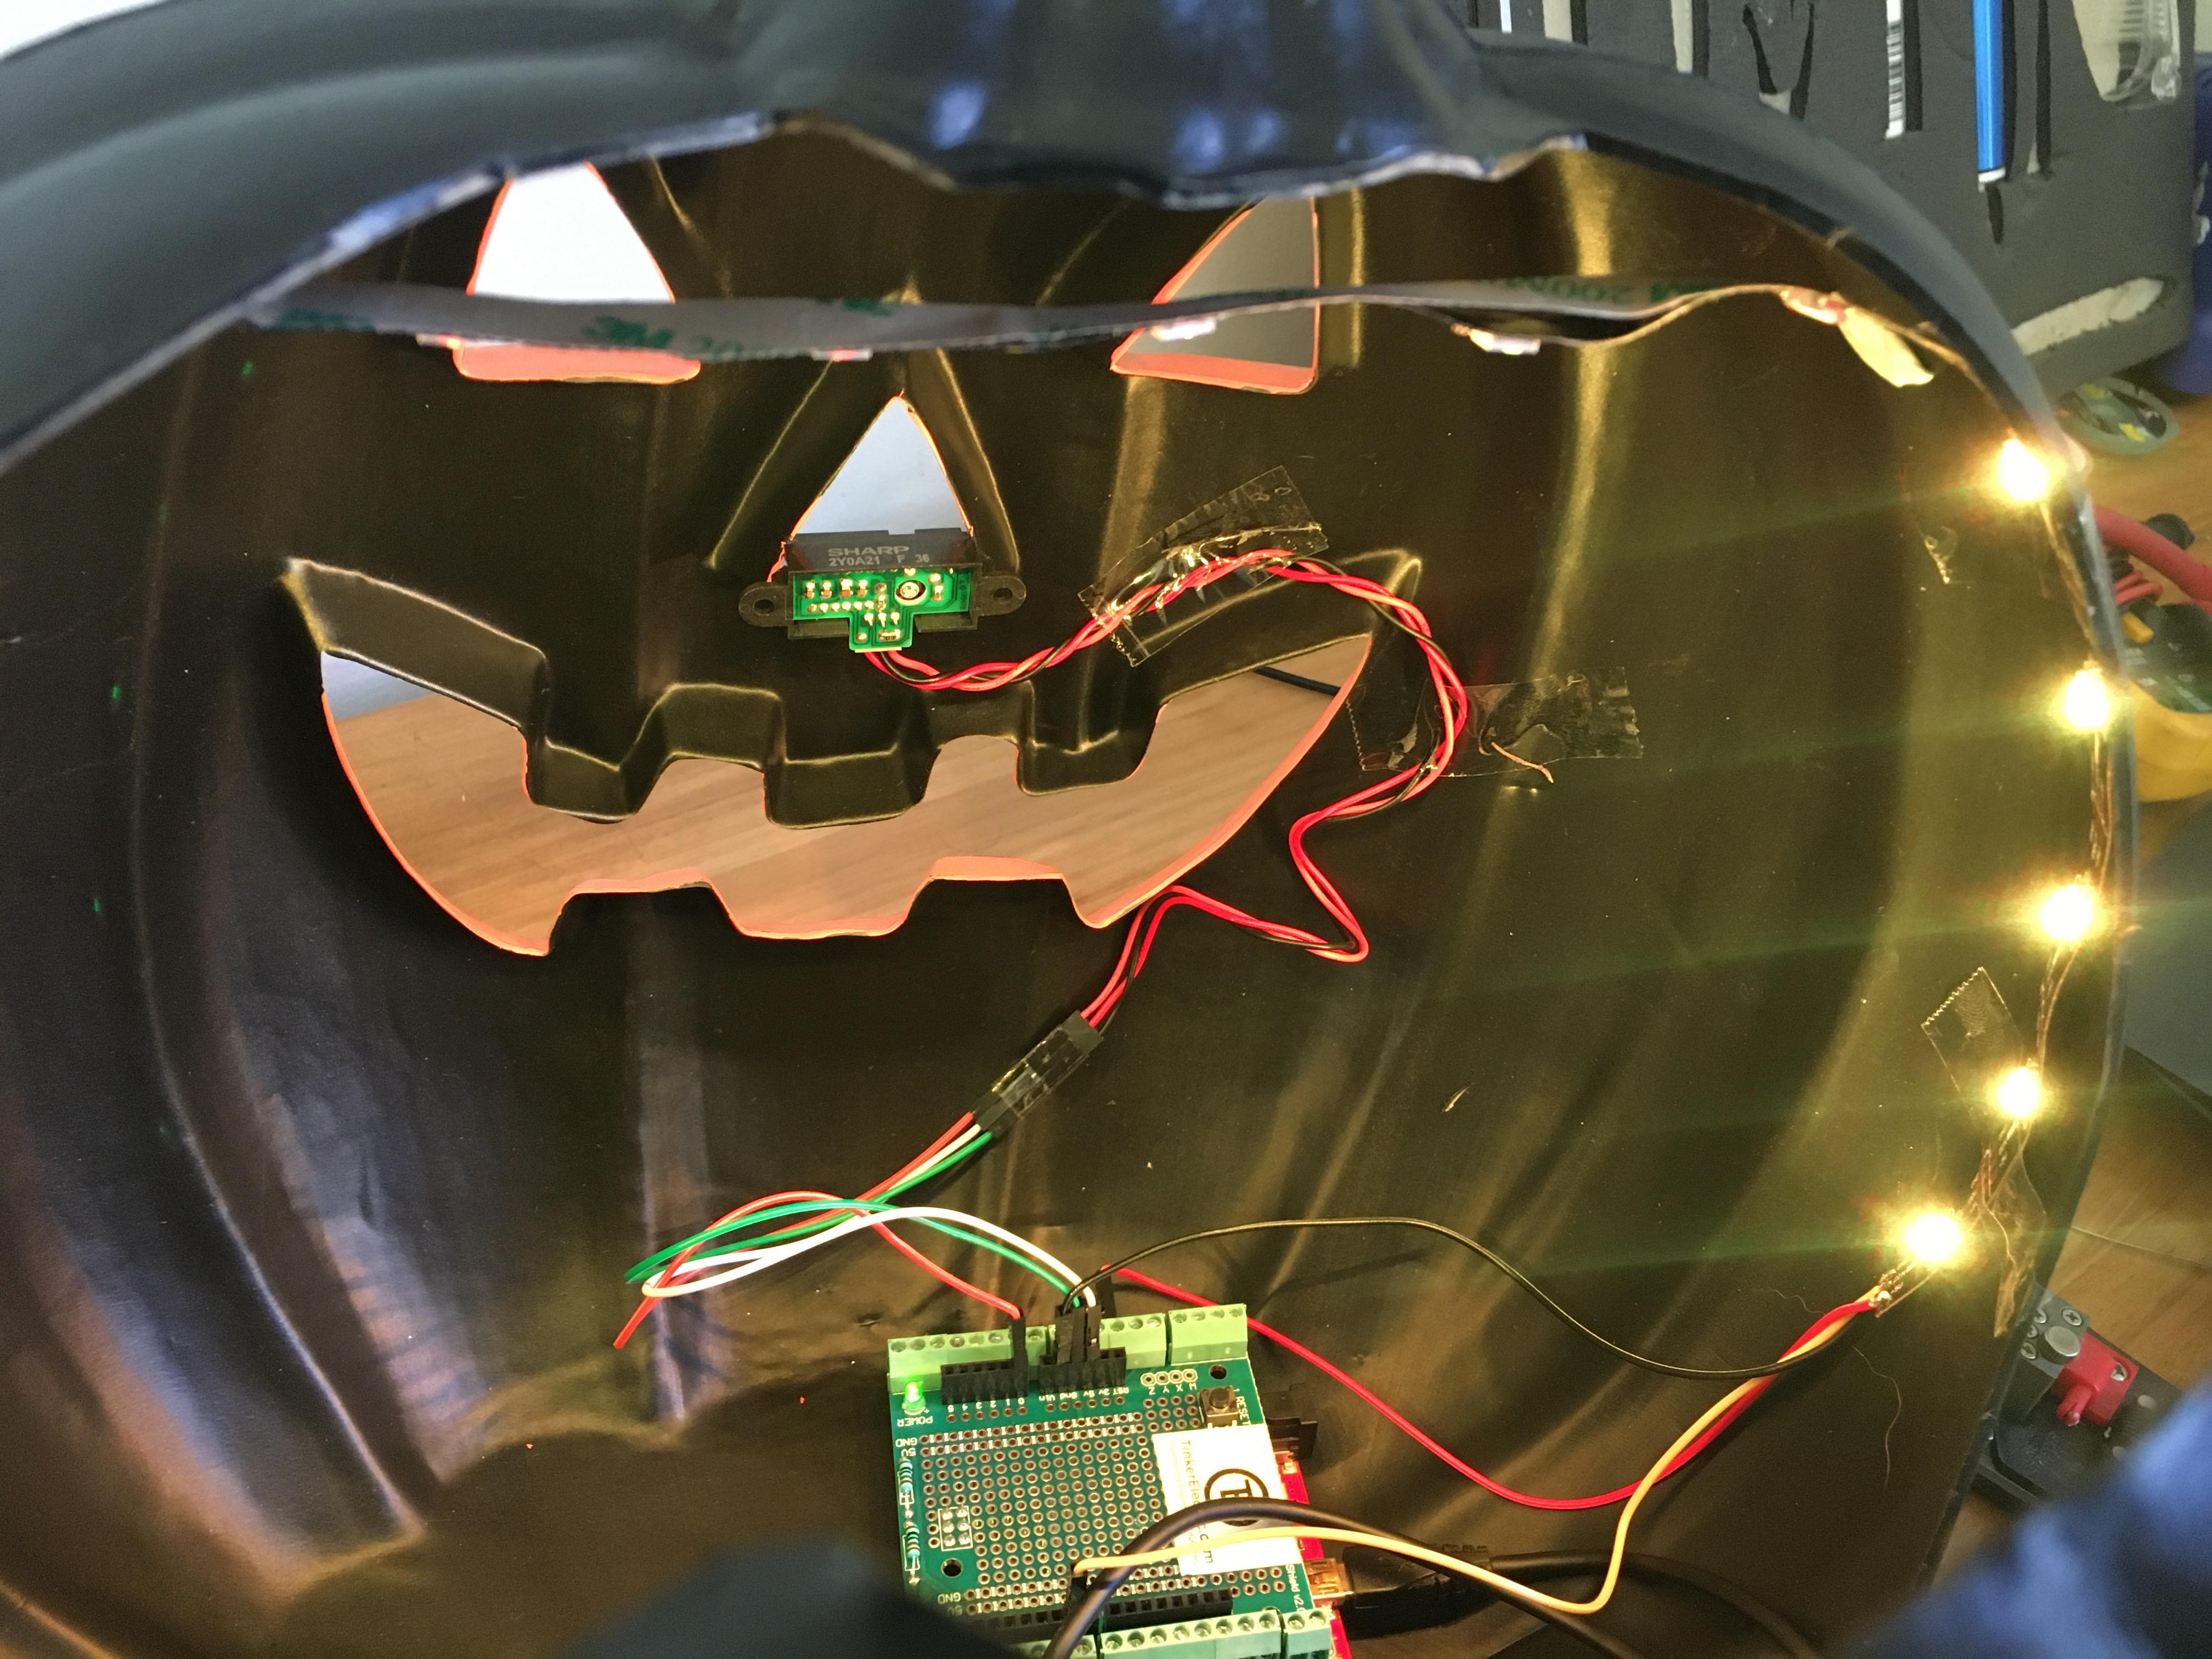
Place your components into the Jack-O-Lantern
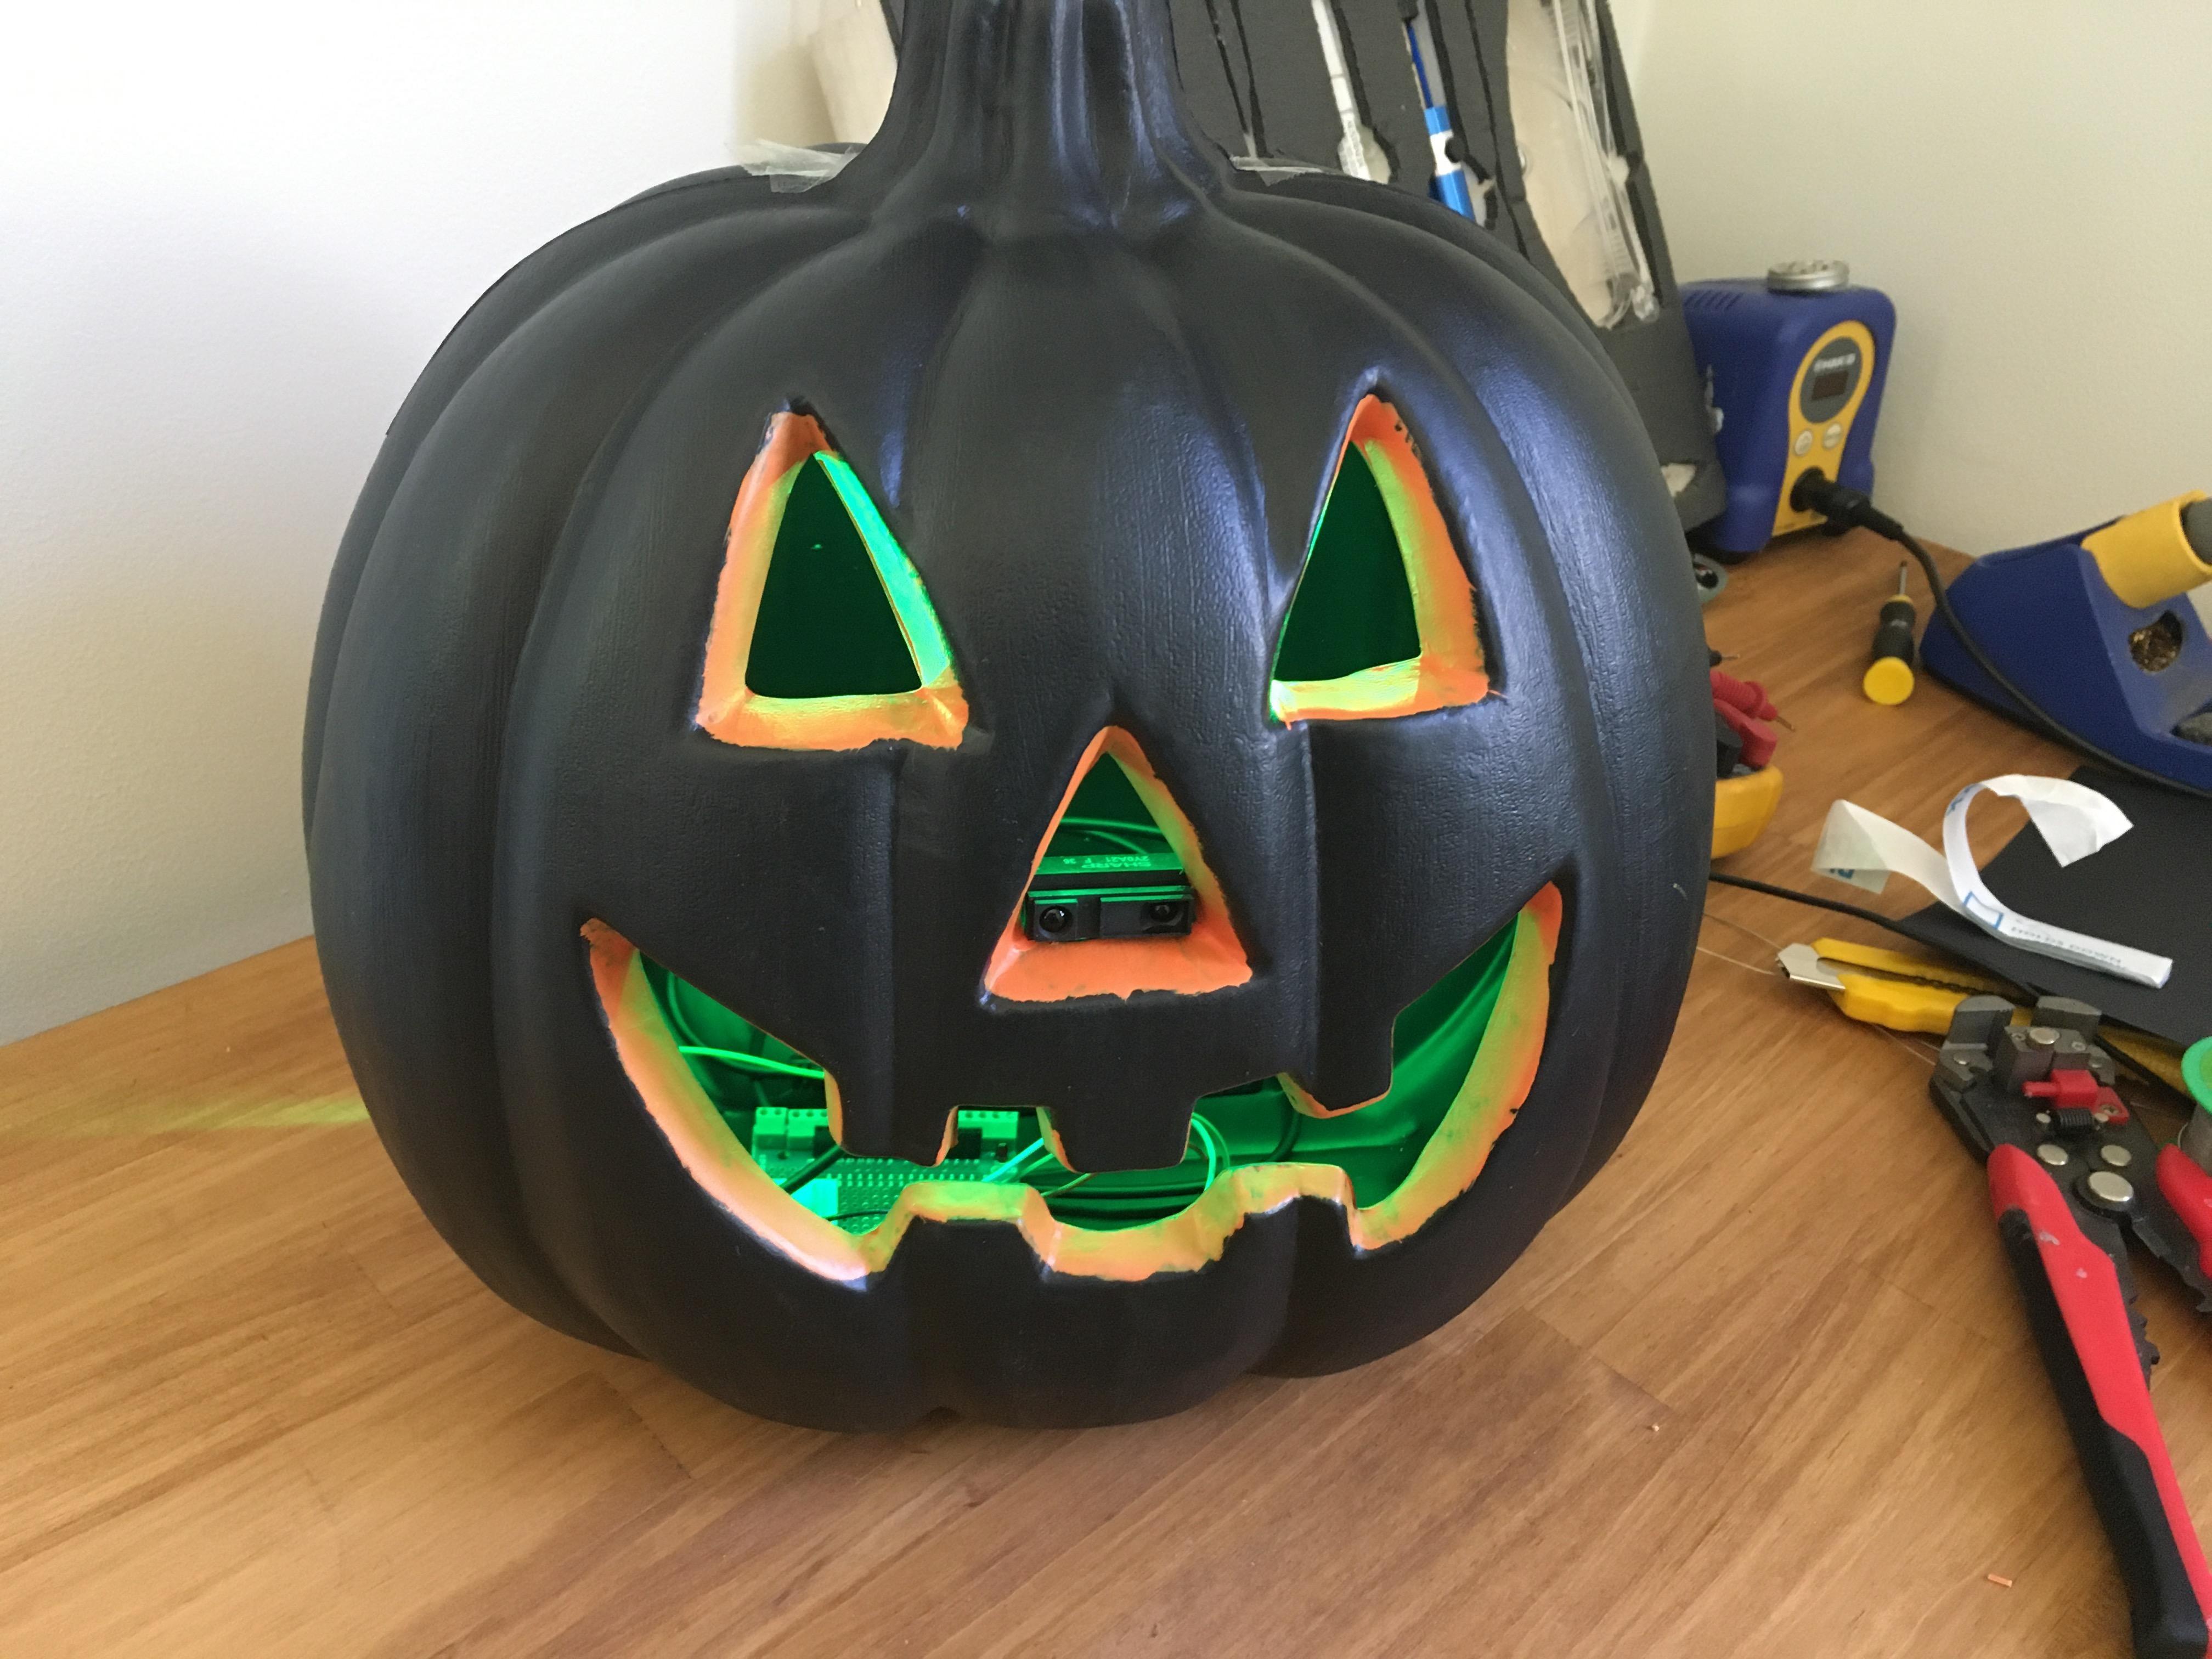
Place the LEDs so that they can be seen externally
Face the speaker so that the sound is projected out of the face of the lantern
Place the distance sensor to face forward out of the nose or mouth of the lantern
Run the External USB power cord out of the lantern
Re-seal the lantern after you have tested your spooky creation. A good idea is to make is to make it easy to access the Arduino's USB port so that you can make adjustments.
Share + Congrats
Congrats, I'm so glad you got to this point. One more crazy Jack-o-lantern and so much more Halloween festivities.
I would love to see your version and hear about the fun you had creating and using it. Share via #TinkerElectric or email. Have a happy Halloween and for more classes and projects make sure you join the TinkerElectric mailing list
Halloween Challenge Class Sign-up Here
TinkerElectric Mailing List Sign-up Here
-John of TinkerElectric