Intelly Kitchen
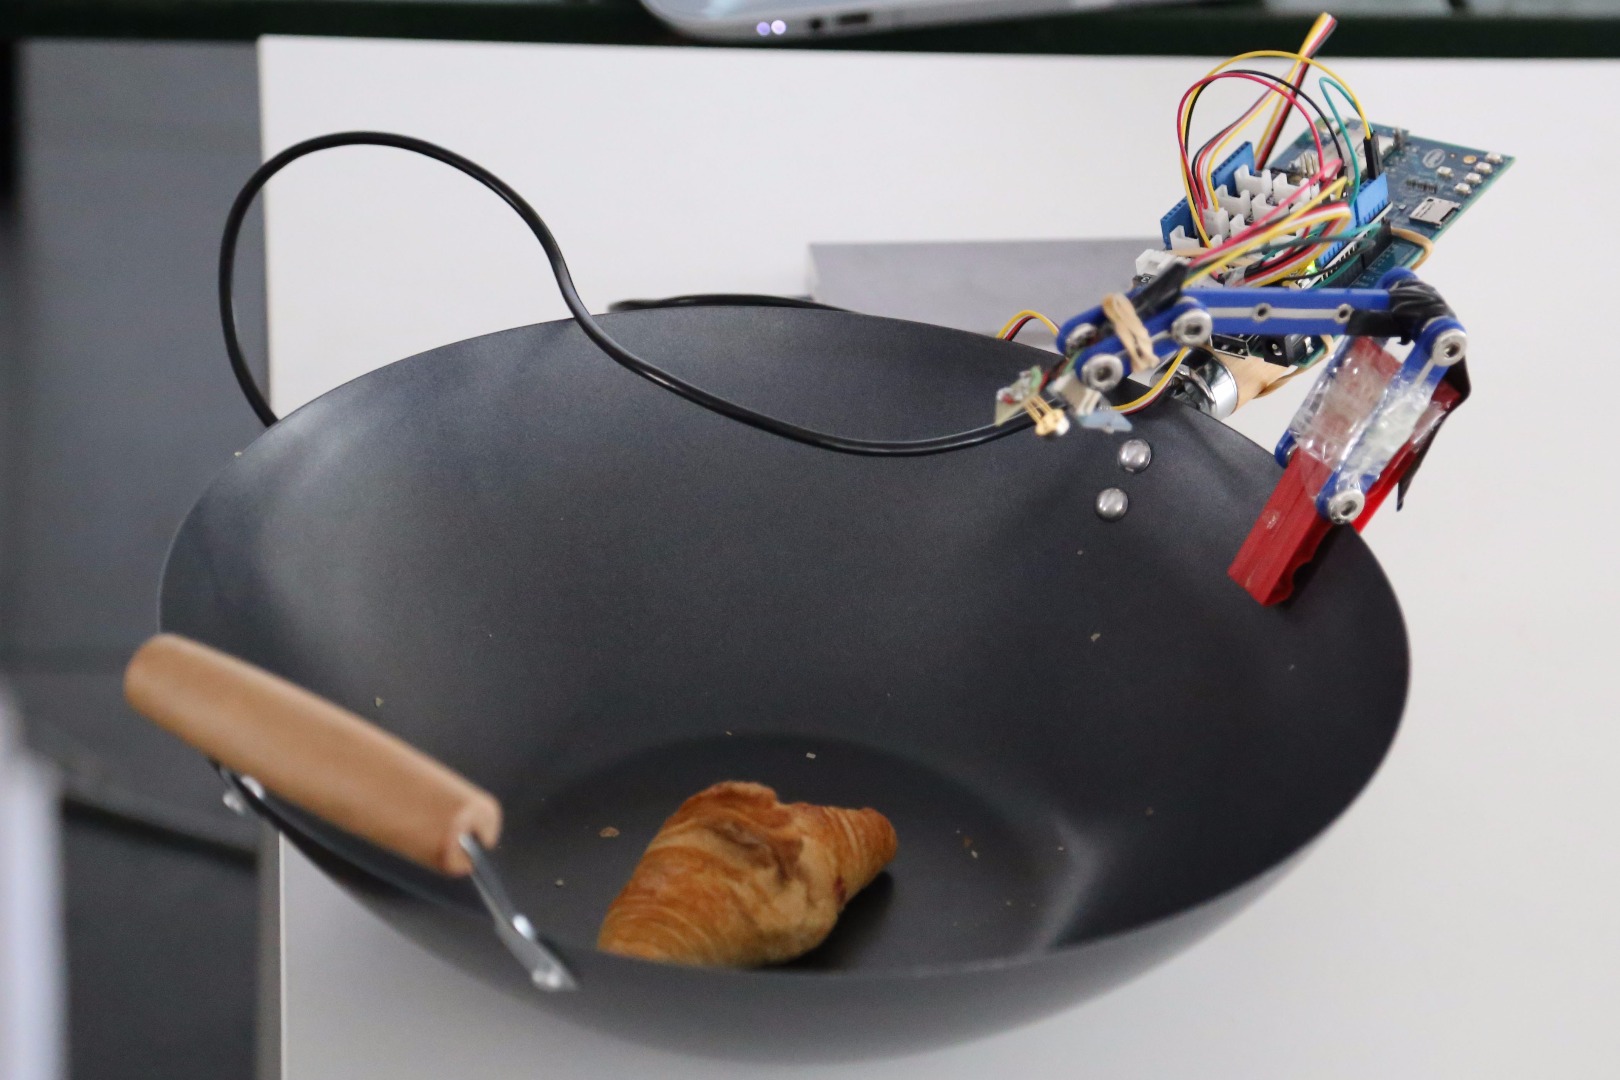
Did you ever burn something in your life? If you say no, you are lying. I did all the most terrible things you can imagine, like burning empty pans or fries i had to throw to the trash. The first european Intel IoT Roadshow gave to Daniel and its team the possibility to solve this problem in a creative way.
Here comes Intellikitchen, a project that comes to life to make our kitchens smarter. The basic idea behind it is to create a low price product you could easily integrate, without having to change your cookers or ovens.
Here the main points that characterise the idea:
- Easy to use. A pincers you can attach to any pan, making it smart through a communication with your smart phone.
- Easy to control. An infrared sensor used to measure the temperature of what’s inside the pan (e.g oil, water).
- Safe enhancement. Used or not, the pincer has a gas sensor detecting losses of gas.
- Recipes based. All settings (alarms and boundaries) are set by choosing the recipes you are going to cook. Interoperability. The smart pan must be able to communicate with other smart devices like a smart cooker.
- Safe. The sensor can be positioned to a safe distance from the content of the pan.
Lets make an example. Suppose you want to cook a pasta. You open the app and choose the amatriciana recipe. You put the water to the pan, attach the pincer and turn on the gas. Then you take off the home made source prepared last summer and start to cut the onions and the bacon. While preparing the source, the water starts boiling and a notification is sent to your smart phone: “Gianni, it’s time to put the pasta into the pan”. And so, you put the pasta in the pan.
At one point your baby starts to cry (of course :) ) and you have to move out of the kitchen, trying to make her stop in all the ways a parent can do. In the meantime the pasta is cooking and you forgot about it, but luckily a notification saying the pasta is ready (and avoiding an overcooked meal) is sent to your phone. Also, the gas lower down, giving you the time to go back to the kitchen without having to hurry up. Every one is happy. You, your baby and your kitchen.
Even more, few days after you are at work, and at one point a notification is sent from Intellikitchen. A gas leak has been recognised in your kitchen. You heedless!
Hardware
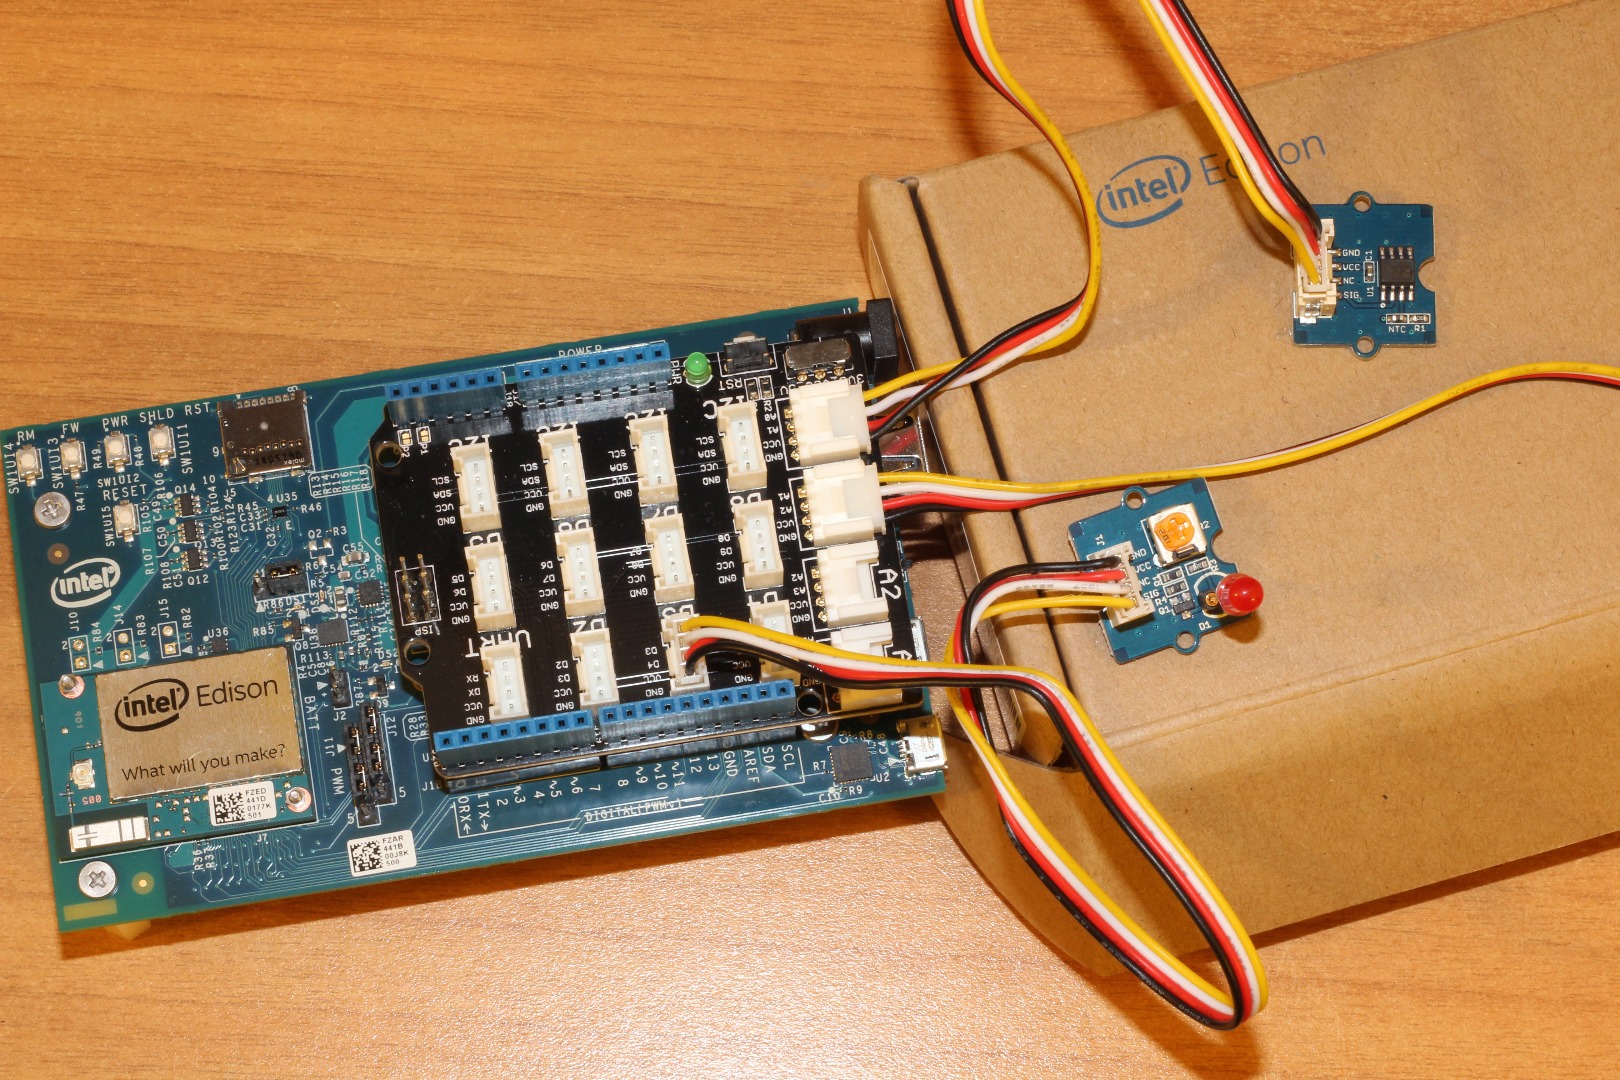
The used hardware is the Intel® IoT Developer Kit - a complete set of hardware and software resources for creating innovative IoT solutions. IoT dev kit is part of a larger Intel IoT developer program targeted at hobbyists, students and entrepreneurial developers. In addition to the IoT dev Kit, the program includes IoT developer zone for downloads, latest content and support, local Hackathons & meet-ups to showcase and share ideas, and IoT Academic courseware program that will assist leading universities in building curriculum for the Internet of Things.
Here a detailed list of the used hardware:
- Intel Edison
- Intel Edison dev board
- Grove Starter Kit(Intel IoT edition)
- IR Sensor (for temperature measuring)
- Gas Sensor (for gas leak)
- Led (to visually send a notification)
Haven’t you all components? Don’t worry, just start having fun! You can use the Grove temperature sensor instead of the IR sensors, and also add the gas sensor later on.
Let's start to connect some sensors:
- Temperature - A0
- Gas or Air quality - A1
- Led - D3
Software
- Lelylan (IOT Platform). A cloud platform for the Internet of Things, enabling makers and developers to prototype new solutions in a short time (you can get started in 15 minutes). It offers an Open REST API, wrappers in different languages, web components, an open source dashboard and it’s open to any hardware (learn more on the dev center).
- Intel XDK IoT Edition (Hardware Dev). We decided to build a complete IoT solution using Node.js using the (often crashing) Intel XDK IoT Edition. Although I don’t normally use IDEs, it’s a pretty good tool that offers several tutorials to get started.
- Ionic (Mobile Dev). Free and open source, Ionic offers a library of mobile-optimized HTML, CSS and JS components, gestures, and tools for building highly interactive apps. Perfect to build mobile apps in combination with AngularJS.
Lelylan Setup
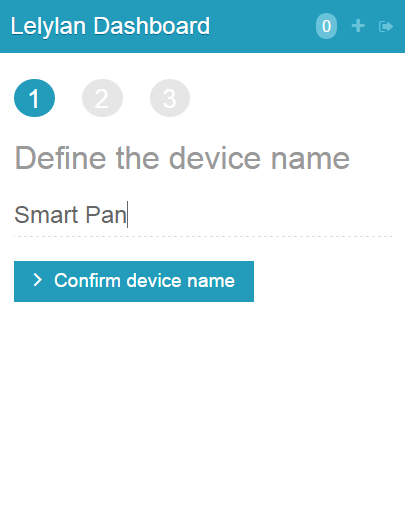
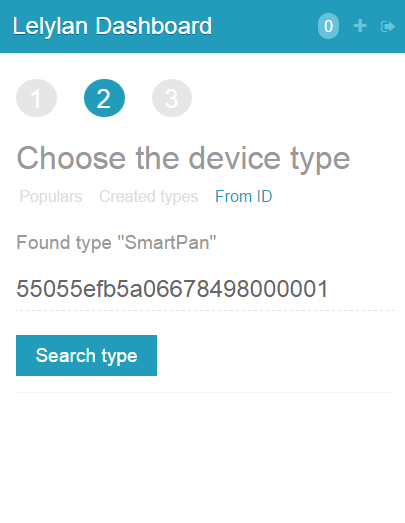
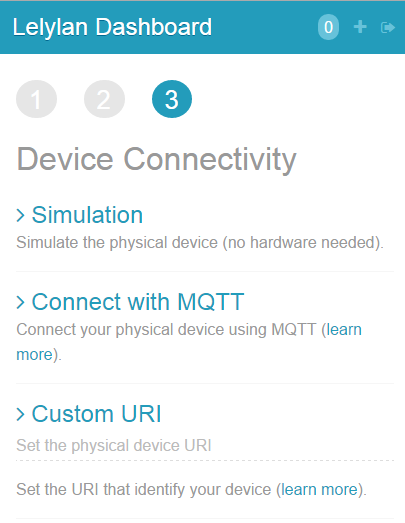
Open Lelylan Dashboard and create a new smart pan by following 3 simple steps (if you are new to Lelylan, you can sign up for free).
- Set a meaningful name (e.g. "smart pan").
- Select the smart pan type. To do so, select the menu “from ID” on the top and use the ID 55055efb5a06678498000001 (a type defines what a device is by defining its properties, functions and statuses. Learn more on dev center).
- Choose "Connect with MQTT" as connectivity option. In this tutorial we'll use MQTT, a lightweight publish subscribe protocol for the Internet of Things. At this point you can get the Device ID and Device Secret. Once the device is created, click the settings link (placed under the device name) and get the device ID and device secret. You'll need them in the next section to program the Intel Edison.
Javascript Code for Edison
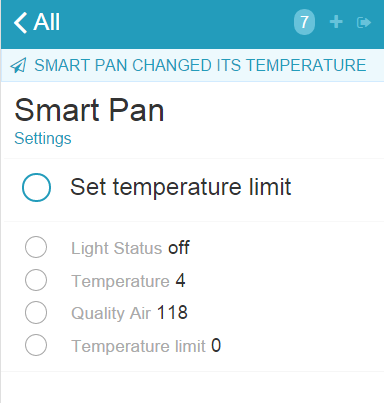
Programming the Edison was a piece of cake, when using the Groove Kit Sensors. The integration with Lelylan was easy to setup thanks to the dev center documentation and the fact that we already had experiences on setting a working MQTT Node setup.
Follows GIST the used code where we read the temperature and gas sensor values to then upload the data to Lelylan and the Mobile App. We then added some code to make the led turn on when the temperature limit were going upper to the defined limit.
https://gist.github.com/lollotek/88e46aee0228a5381cab
To run correctly the code remember to modify the package.json adding the mqtt dependency:
https://gist.github.com/lollotek/4302d8d8d38c079d7990
Also remember to save before upload and, at the first try, use the build command instead upload to install all dipendencies.
You made it !!
If you run successfully the code, you have already a full working IoT system!
Just connect to the lelylan dashboard (also from mobile) and see the values coming from your Edison.
Code Explained
The device id and device secret are used to authenticate the physical object (like Edison, Arduino, Raspberri PI, ..) with Lelylan. To get the device credentials open the Dashboard, select the newly created device, click on settings and copy the Device ID and the Device Secret.
/* Device Settings */
var device = { id: ‘’, secret: ‘’ }
Lelylan uses MQTT, a publish subscribe protocol for the Internet of Things. To make Lelylan communicate with the Edison you need to set two topics: one receiving messages from Lelylan (inTopic) and one sending messages to Lelylan (out/opic). These topics are unique and identified by the device id.
var inTopic = 'devices/' + device.id + '/get' // receiving messages ,
outTopic = 'devices/' + device.id + '/set'; // publishing messages
Every device in Lelylan is characterised by a type, which in turn is identified by a list of properties, functions and statuses (learn more on the dev center). For this project we created the smart pan type with the properties status (led on or off), temperature (pan content degrees), quality air (gar detection) and temperature limit (after which the alarm will raise).
What we do is to check the received (or send) message and parse (or create) the JSON with a specific property id. This way we can understand the received property or update the physical values in Lelylan.
// For this example we use the smart pan type ID is 55055efb5a06678498000001)
var type = {
'status': { id: '55055eff5a06673360000001' },
'temperature': { id: '5505607f5a06673360000004' },
'air': { id: '550560935a06673360000005' },
'tempLimit': { id: '550560a65a0667cff2000001' },
};
Set the Lelylan MQTT server (MQTT server IP and port) and device (id and secret) where to connect. We also enabled a secure connection thanks to the Edison computational power (not possible with an Arduino for example).
var settings = {
host: '178.62.108.47', // MQTT server IP
port: '8883', // MQTT server port
username: device.id, // device.id as client username
password: device.secret, // device.secret as client password
protocol: 'ssl', // secure connection
rejectUnauthorized : false
}
In this section we define the used pins to control the led, to get the temperature and to get the quality air (gas detection).
/* LED definition */
var digitalPin3 = new mraa.Gpio(3); digitalPin3.dir(mraa.DIR_OUT);
var ledState = true;
/* Temperature definition */
var analogPin0 = new mraa.Aio(0); /* Gas detection definition */
var analogPin1 = new mraa.Aio(1);
At this point we open the MQTT connection and we can start sending the temperature and air quality values to Lelylan. Here follows the code to read and send the temperature to Lelylan, where we read the current value and create a JSON to send through MQTT to Lelylan (made up from the temperature id and the temperature value). Similar logic lives for the gas sensor.
var client = mqtt.connect(settings); client.on('connect', function() {
function readTemp() {
var analogValue = Math.round(analogPin0.read(), 2);
setTimeout(readTemp, 10000);
console.log('Publishing the temperature to Lelylan’);
message = {"properties": [{ "id": type.temperature.id, "value": analogValue}]};
client.publish(out_topic, JSON.stringify(message)); […]
At this point if the temperature overpass the defined limit, the led is turned on and changes are sent to Lelylan.
if (analogValue > tempLimit) {
console.log("Turn on light (TEMPERATURE) - ", analogValue);
boardLight.write(255);
message = {"properties": [{ "id": type.status.id, "value": "on"}]};
client.publish(out_topic, JSON.stringify(message));
} else {
console.log("Turn off light (TEMPERATURE) - ", analogValue);
boardLight.write(0);
message = {"properties": [{"id": type.status.id, "value": "off"}]};
client.publish(out_topic, JSON.stringify(message));
}
The last excerpt of code is used to subscribe for all messages coming form Lelylan, to dynamically update the temperature limit from the web. This way we can vary its value directly from Lelylan Dashboard or any mobile app.
client.subscribe(in_topic);
client.on('message', function(topic, message) {
var prop = JSON.parse(message).properties[0];
console.log('Received message', status); /* Set the temperature limit */
if (prop.id == typelight.tempLimit.id) {
tempLimit = prop.value;
boardLight.write(255);
console.log('The temperature limit was set to', tempLimit);
}
client.publish(out_topic, JSON.stringify(message));
console.log('Message received (topic)', topic, '(message)', message);
});
Mobile Code
For the mobile code we used a mix of solutions. The first one was based on Lelylan Dashboard (demo here), which gives you a ready to be used solution to control and monitor in realtime your physical devices that works on all devices (mobile, tablet and desktop).
The second was used on Ionic and AngularJS. We defined a knob solution displaying the actual temperature of the pan content, adding the capability of setting the desired notification limit.
You can download the source code for the Ionic App.
Downloads
Conclusions
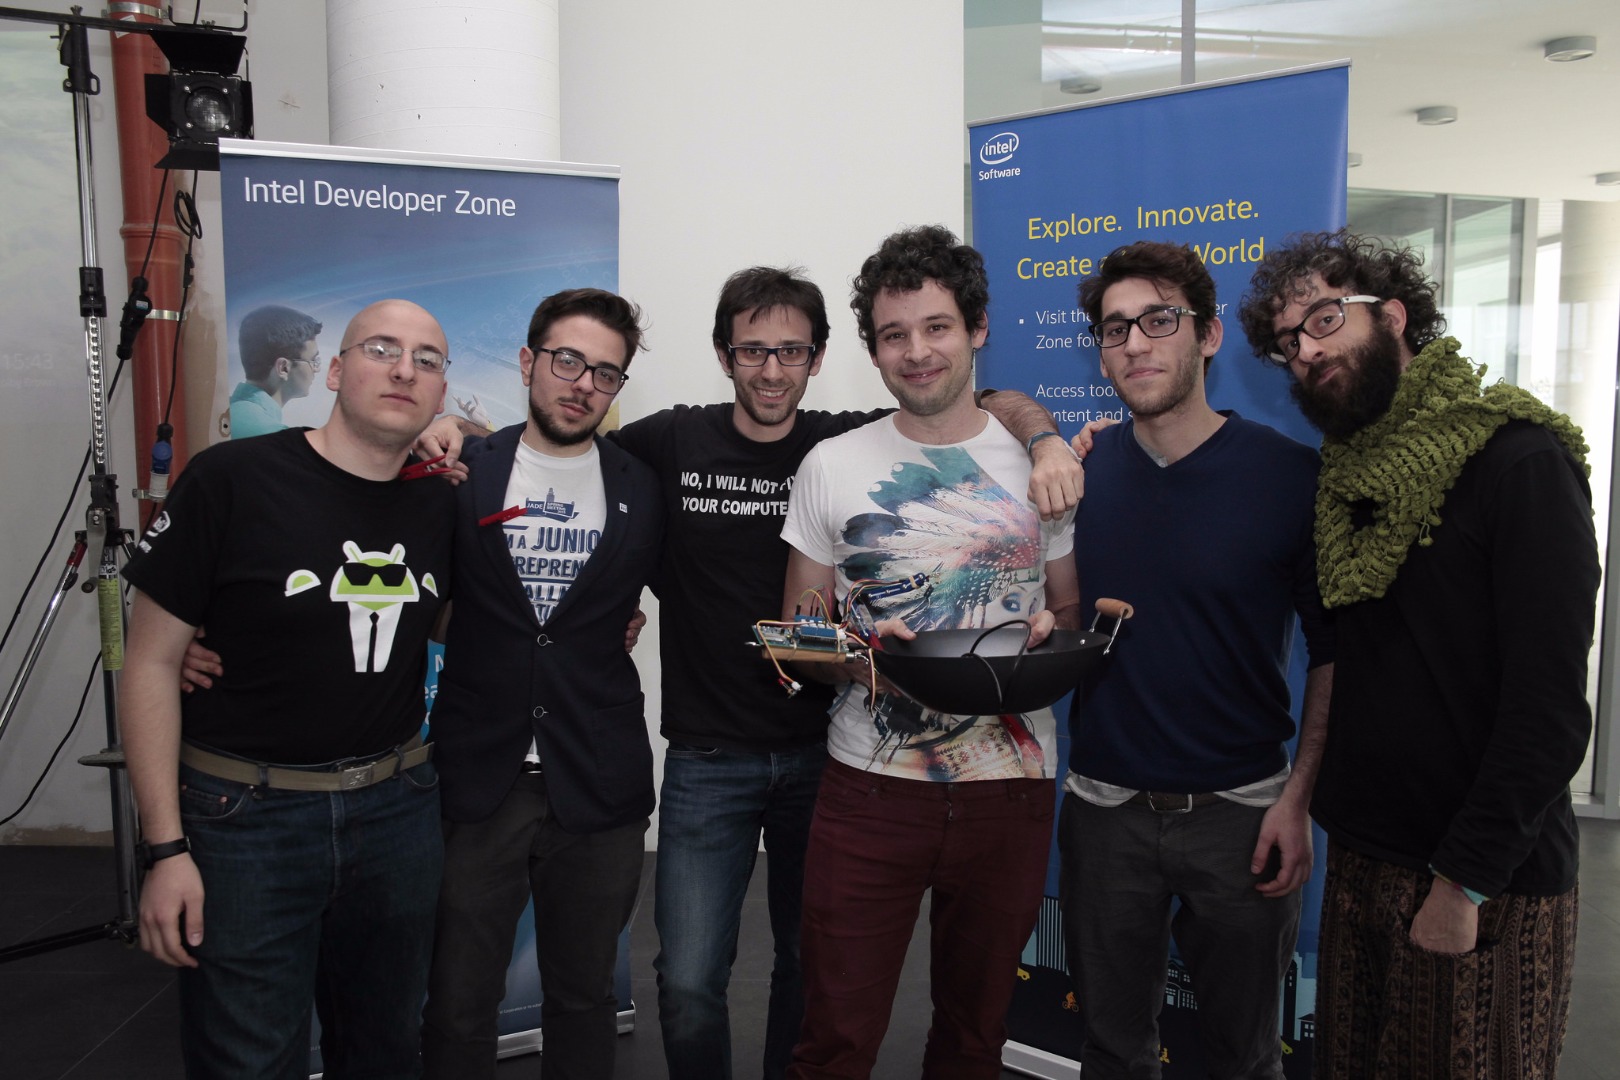
The Intel IoT Roadshow was a great event where to hack new solutions for the Internet of Things and where to meet great new people. Sure, the platform is a bit immature, and some sensors/actuators simply do not work. But it’s a matter of time. If you have the chance, get into one of these Hackathons!