IntelliGate - Automatic Gate System || Ai Incorporated Through Teachable Machines
by d17ara in Circuits > Arduino
77 Views, 0 Favorites, 0 Comments
IntelliGate - Automatic Gate System || Ai Incorporated Through Teachable Machines


My partner and I made a smart toll gate system using Arduino to show how to automate toll gates using sensors and a servo motor. When the ultrasonic sensor detects a vehicle, the gate automatically opens, and once the vehicle passes, it closes again.
We made this to explore how basic electronics and coding can reduce traffic delays and eliminate the need for a toll booth operator. It's a small-scale model, but it shows how smart systems can make real-life transportation more efficient.
Supplies


- Arduino Uno — 1
- HC-SR04 Ultrasonic Sensors — 2
- Servo Motor (for gate control) — 1
- RGB LEDs (Blue & Red) — 2
- Jumper Wires (Male–Male) — 18–20
- Breadboard (Large) — 1
- USB Cable (for Arduino) — 1
- Webcam (for AI detection) — 1
- Servo Motor Arm (3D Printed) — 1
🔷 Circuit and Layout Setup
To build the system correctly, follow the wiring using a Tinkercad model or this step-by-step guide.
⚠️ Power Note:
- Ground = Black wire
- Power (Vcc) = Red wire
✅ Step-by-Step Hardware Assembly:
Step 1: Power Rails
- Connect Arduino GND to the - rail of the breadboard.
- Connect Arduino 5V to the + rail.
Step 2: Ultrasonic Sensors
- Place Sensor 1 on the left side of the breadboard.
- Trig = pin 10
- Echo = pin 9
- Place Sensor 2 on the right side.
- Trig = pin 12
- Echo = pin 11
Step 3: Servo Motor
- Attach the servo in the middle of the breadboard using tape or a 3D printed holder.
- Connect:
- Brown wire → GND
- Red wire → 5V
- Orange wire → Pin 3 (signal)
Step 4: LEDs
- Connect the Blue LED to pin 6 (via resistor).
- Connect the Red LED to pin 7 (via resistor).
Step 5: Status LED (optional)
- Connect another LED to pin 4 to show gate activity.
Step 6: Copy/Paste Arduino code
- Copy code:
#include <Servo.h>
// Pin Definitions
String inputString = "";
bool aiInputLocked = false;
const int trigPin1 = 10;
const int echoPin1 = 9;
const int RedPin = 7;
const int GreenPin = 6;
const int trigPin2 = 12;
const int echoPin2 = 11;
const int servoPin = 3;
const int ledPin = 4;
Servo gateServo;
const int threshold = 11; // Trigger distance in cm
bool gateIsOpen = false;
bool sensorsEnabled = false;
void setup() {
Serial.begin(9600);
pinMode(trigPin1, OUTPUT);
pinMode(echoPin1, INPUT);
pinMode(trigPin2, OUTPUT);
pinMode(echoPin2, INPUT);
pinMode(ledPin, OUTPUT);
pinMode(RedPin, OUTPUT);
pinMode(GreenPin, OUTPUT);
gateServo.attach(servoPin);
gateServo.write(90); // Start closed
digitalWrite(ledPin, LOW);
}
void loop() {
if (!aiInputLocked && Serial.available()) {
char inChar = (char)Serial.read();
inputString += inChar;
if (inChar == '\n') {
inputString.trim();
Serial.println("Received: " + inputString);
if (inputString == "Car") {
analogWrite(GreenPin, 255);
analogWrite(RedPin, 0);
sensorsEnabled = true;
aiInputLocked = true;
} else if (inputString == "Hand" || inputString == "Background") {
analogWrite(RedPin, 255);
analogWrite(GreenPin, 0);
sensorsEnabled = false;
} else {
analogWrite(RedPin, 0);
analogWrite(GreenPin, 0);
sensorsEnabled = false;
}
inputString = "";
}
}
if (sensorsEnabled) {
long distance1 = getDistance(trigPin1, echoPin1);
long distance2 = getDistance(trigPin2, echoPin2);
Serial.print("Sensor1: ");
Serial.print(distance1);
Serial.print(" cm\tSensor2: ");
Serial.println(distance2);
if (!gateIsOpen && distance1 > 0 && distance1 <= threshold) {
gateServo.write(0);
digitalWrite(ledPin, HIGH);
gateIsOpen = true;
delay(1000);
}
if (gateIsOpen && distance2 > threshold) {
delay(1000);
distance2 = getDistance(trigPin2, echoPin2);
if (distance2 > threshold) {
gateServo.write(90);
digitalWrite(ledPin, LOW);
gateIsOpen = false;
sensorsEnabled = false;
aiInputLocked = false;
analogWrite(GreenPin, 0);
}
}
}
delay(200);
}
long getDistance(int trigPin, int echoPin) {
digitalWrite(trigPin, LOW);
delayMicroseconds(2);
digitalWrite(trigPin, HIGH);
delayMicroseconds(10);
digitalWrite(trigPin, LOW);
long duration = pulseIn(echoPin, HIGH, 30000);
if (duration == 0) return 999;
return duration * 0.034 / 2;
}
- Attach the usb to arduino, then transfer it into the arduino by clicking this:
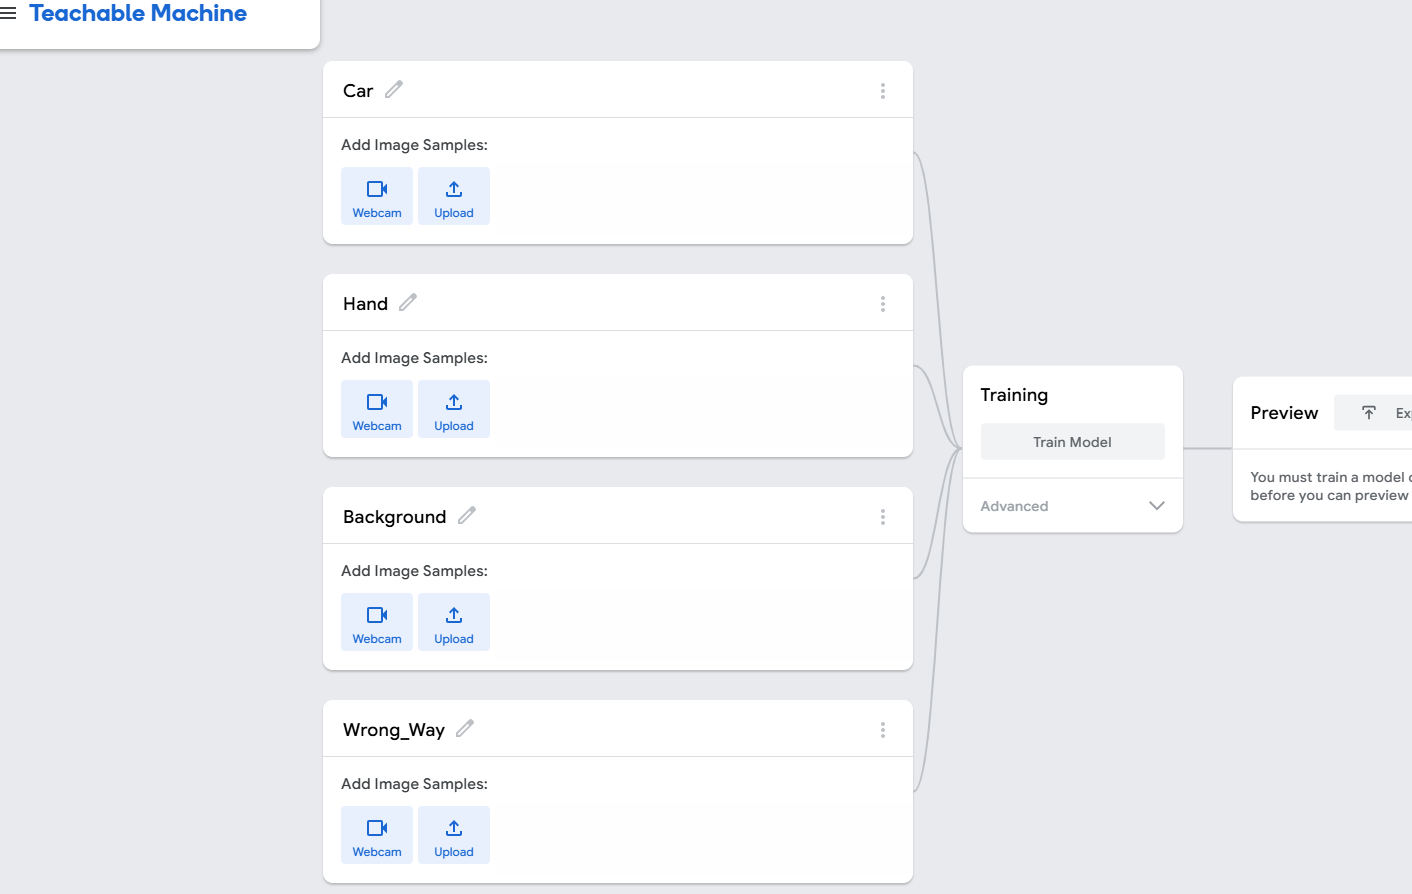
🔷 AI Model (Teachable Machine)
- Classes Trained: Car, Hand, Background, Wrong_Way
- Open Teachable Machines ; Select ‘Get Started’
- Then select ‘Image Model’
- Lastly, select ‘Standard Image model’
- Once that is set, attach the webcam through usb.
- After, Create 4 Classes like so;
- Collection Method: Captured images using a webcam from various angles and lighting.
- Start taking images of the vehicles, Hands, and background in different forms to truly give the AI many options to train with.
- Make at least 900 - 1200 images per class, then start training your model by clicking ‘Train Model’
- Export Format: Exported model as TensorFlow.js:
- Name file something that you can find easily
- Platform Used: Visual Studio Code with live webcam input
- Download Visual Studio on your device
🔷 Visual Studio Code (HTML)
- Go to Extensions and Install “Live Server”

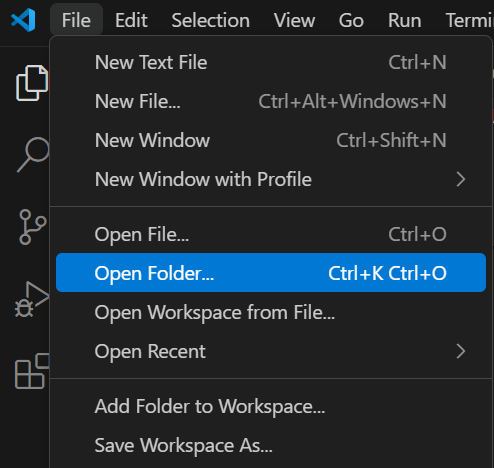
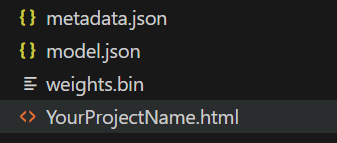
- Open folder where you put your AI model
- Make a new file and name your file ______.html
- Write your code
- Copy/Paste the code below
<!DOCTYPE html>
<html>
<head>
<title>Thumbs Detection</title>
<script src="https://cdn.jsdelivr.net/npm/@tensorflow/tfjs"></script>
<script src="https://cdn.jsdelivr.net/npm/@teachablemachine/image@latest/dist/teachablemachine-image.min.js"></script>
</head>
<body>
<h2>Thumbs Gesture Detection (Offline + Arduino)</h2>
<button onclick="init()">Start</button>
<p id="status">Waiting...</p>
<!-- ✅ Your custom JS goes here -->
<script>
let model, webcam, writer;
let lastClass = "";
let lastSendTime = 0;
const sendInterval = 400; // milliseconds between predictions
async function init() {
try {
document.getElementById("status").innerText = "Loading model...";
const modelURL = "model.json";
const metadataURL = "metadata.json";
model = await tmImage.load(modelURL, metadataURL);
webcam = new tmImage.Webcam(200, 200, true);
await webcam.setup();
await webcam.play();
document.body.appendChild(webcam.canvas);
const port = await navigator.serial.requestPort();
await port.open({ baudRate: 9600 });
const encoder = new TextEncoderStream();
encoder.readable.pipeTo(port.writable);
writer = encoder.writable.getWriter();
document.getElementById("status").innerText = "Camera + Serial Ready!";
window.requestAnimationFrame(loop);
} catch (err) {
console.error("Setup failed:", err);
document.getElementById("status").innerText = "Error: " + err;
}
}
async function loop() {
webcam.update();
const now = Date.now();
if (now - lastSendTime > sendInterval) {
await predict();
lastSendTime = now;
}
window.requestAnimationFrame(loop);
}
async function predict() {
const prediction = await model.predict(webcam.canvas);
let maxIndex = 0;
for (let i = 1; i < prediction.length; i++) {
if (prediction[i].probability > prediction[maxIndex].probability) {
maxIndex = i;
}
}
// If you have more Classes add them here. [..., "Class4", "Class5", ...], also add DisplayName#...
const classNames = [ “Car”, “Hand”, “Background”, “Wrong_Way”];
const displayNames = [ “Car”, “Hand”, “Background”, “Wrong_Way”];
const selectedClass = classNames[maxIndex];
// Only send to Arduino if changed
if (selectedClass !== lastClass && writer) {
await writer.write(selectedClass + "\n");
lastClass = selectedClass;
}
// Show a friendly name on screen
document.getElementById("status").innerText = displayNames[maxIndex]; // You can change this text
}
</script>
</body>
</html>
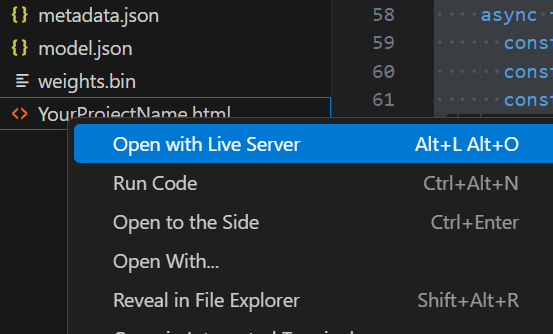
- Open with Live Server
- Press Start and connect your arduino (Use chrome as your browser)

Connecting External Camera
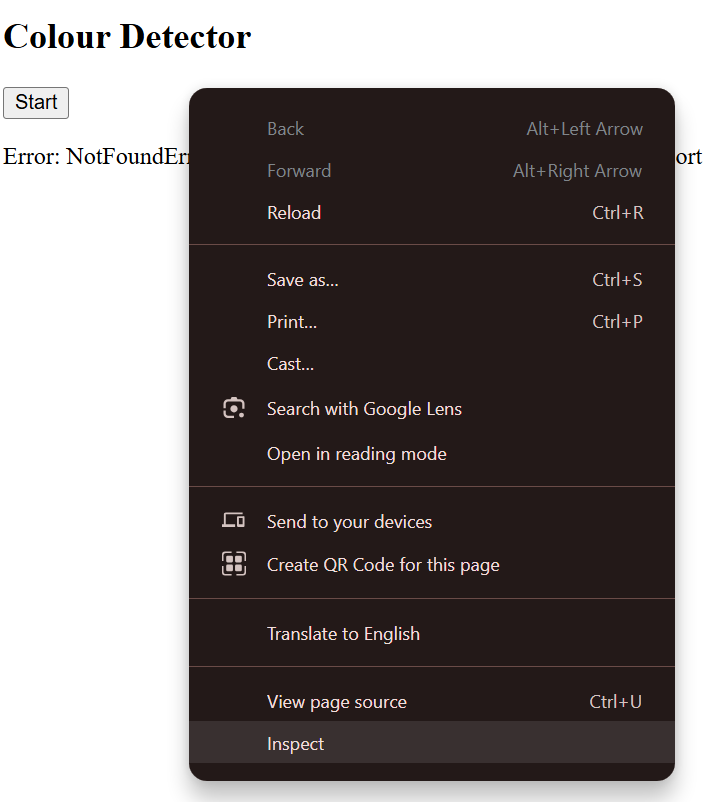
- Right Click on a chrome page
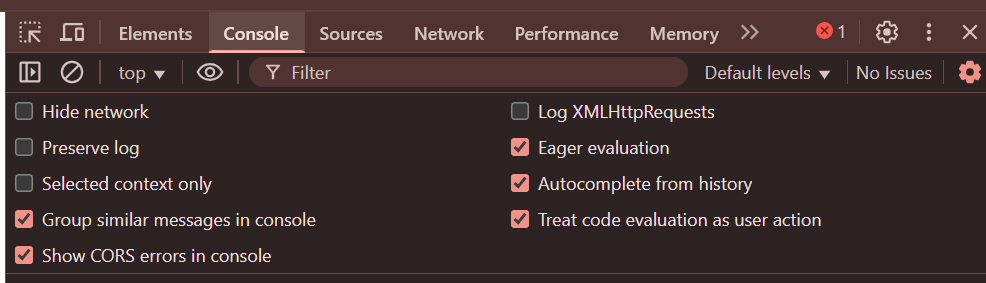
- Open console
- Write code below
navigator.mediaDevices.enumerateDevices().then(devices => {
devices.forEach(device => {
if (device.kind === "videoinput") {
console.log("Camera:", device.label || "Unnamed", device.deviceId);
}
});
});
- Copy the id
- Change your code
- await webcam.setup();
- To
- const deviceId = "0e8061431ede9dca7f7e6065fa07fe03e9d723110fc0444e2b726f01a614bb52";
- await webcam.setup({ facingMode: "user", deviceId: deviceId });
- The AI communicates with Arduino through Serial.print() from JavaScript running in the browser.
Downloads
🔷 AI Model (Teachable Machine)
- Classes Trained: Car, Hand, Background, Wrong_Way
- Open Teachable Machines ; Select ‘Get Started’
- Then select ‘Image Model’
- Lastly, select ‘Standard Image model’
- Once that is set, attach the webcam through usb.
- After, Create 4 Classes like so;
- Collection Method: Captured images using a webcam from various angles and lighting.
- Start taking images of the vehicles, Hands, and background in different forms to truly give the AI many options to train with.
- Make at least 900 - 1200 images per class, then start training your model by clicking ‘Train Model’
- Export Format: Exported model as TensorFlow.js:
- Name file something that you can find easily
- Platform Used: Visual Studio Code with live webcam input
- Download Visual Studio on your device
🔷 Visual Studio Code (HTML)
- Go to Extensions and Install “Live Server”
- Open folder where you put your AI model
- Make a new file and name your file ______.html
- Write your code
- Copy/Paste the code below
<!DOCTYPE html>
<html>
<head>
<title>Thumbs Detection</title>
<script src="https://cdn.jsdelivr.net/npm/@tensorflow/tfjs"></script>
<script src="https://cdn.jsdelivr.net/npm/@teachablemachine/image@latest/dist/teachablemachine-image.min.js"></script>
</head>
<body>
<h2>Thumbs Gesture Detection (Offline + Arduino)</h2>
<button onclick="init()">Start</button>
<p id="status">Waiting...</p>
<!-- ✅ Your custom JS goes here -->
<script>
let model, webcam, writer;
let lastClass = "";
let lastSendTime = 0;
const sendInterval = 400; // milliseconds between predictions
async function init() {
try {
document.getElementById("status").innerText = "Loading model...";
const modelURL = "model.json";
const metadataURL = "metadata.json";
model = await tmImage.load(modelURL, metadataURL);
webcam = new tmImage.Webcam(200, 200, true);
await webcam.setup();
await webcam.play();
document.body.appendChild(webcam.canvas);
const port = await navigator.serial.requestPort();
await port.open({ baudRate: 9600 });
const encoder = new TextEncoderStream();
encoder.readable.pipeTo(port.writable);
writer = encoder.writable.getWriter();
document.getElementById("status").innerText = "Camera + Serial Ready!";
window.requestAnimationFrame(loop);
} catch (err) {
console.error("Setup failed:", err);
document.getElementById("status").innerText = "Error: " + err;
}
}
async function loop() {
webcam.update();
const now = Date.now();
if (now - lastSendTime > sendInterval) {
await predict();
lastSendTime = now;
}
window.requestAnimationFrame(loop);
}
async function predict() {
const prediction = await model.predict(webcam.canvas);
let maxIndex = 0;
for (let i = 1; i < prediction.length; i++) {
if (prediction[i].probability > prediction[maxIndex].probability) {
maxIndex = i;
}
}
// If you have more Classes add them here. [..., "Class4", "Class5", ...], also add DisplayName#...
const classNames = [ “Car”, “Hand”, “Background”, “Wrong_Way”];
const displayNames = [ “Car”, “Hand”, “Background”, “Wrong_Way”];
const selectedClass = classNames[maxIndex];
// Only send to Arduino if changed
if (selectedClass !== lastClass && writer) {
await writer.write(selectedClass + "\n");
lastClass = selectedClass;
}
// Show a friendly name on screen
document.getElementById("status").innerText = displayNames[maxIndex]; // You can change this text
}
</script>
</body>
</html>
- Open with Live Server
- Press Start and connect your arduino (Use chrome as your browser)
Connecting External Camera
- Right Click on a chrome page
- Open console
- Write code below
navigator.mediaDevices.enumerateDevices().then(devices => {
devices.forEach(device => {
if (device.kind === "videoinput") {
console.log("Camera:", device.label || "Unnamed", device.deviceId);
}
});
});
- Copy the id
- Change your code
- await webcam.setup();
- To
- const deviceId = "0e8061431ede9dca7f7e6065fa07fe03e9d723110fc0444e2b726f01a614bb52";
- await webcam.setup({ facingMode: "user", deviceId: deviceId });
Open Live Server again (don't forget to close the Arduino Software tab) and start using the model :))