Intel Galileo Garage Monitor
by joe in Circuits > Microcontrollers
4278 Views, 40 Favorites, 0 Comments
Intel Galileo Garage Monitor
The intel Galileo is an amazing platform to make IoT devices. This is an example of using Python and a few sensors to create a garage monitor/alarm system.
Parts
You will need the following parts:
-Intel Galileo
-Intel Galileo compliant Wifi card
- 2x Overhead Door Switch http://www.amazon.com/Potter-Amseco-ODC-59A-Overhe...
-1x Magnetic Door Switch https://www.sparkfun.com/products/13247
- 3x 1K resistors
- Arduino Proto Shield http://www.amazon.com/Arduino-Proto-Shield-R3-Asse...
- 3x Screw Terminals https://www.sparkfun.com/products/10571
- DuinoCase Enclosure http://www.amazon.com/duinoCase-G2-Quality-Metal-E...
-TMP36 Temp Monitor https://www.sparkfun.com/products/10988
- Terminal Block https://www.sparkfun.com/products/13061
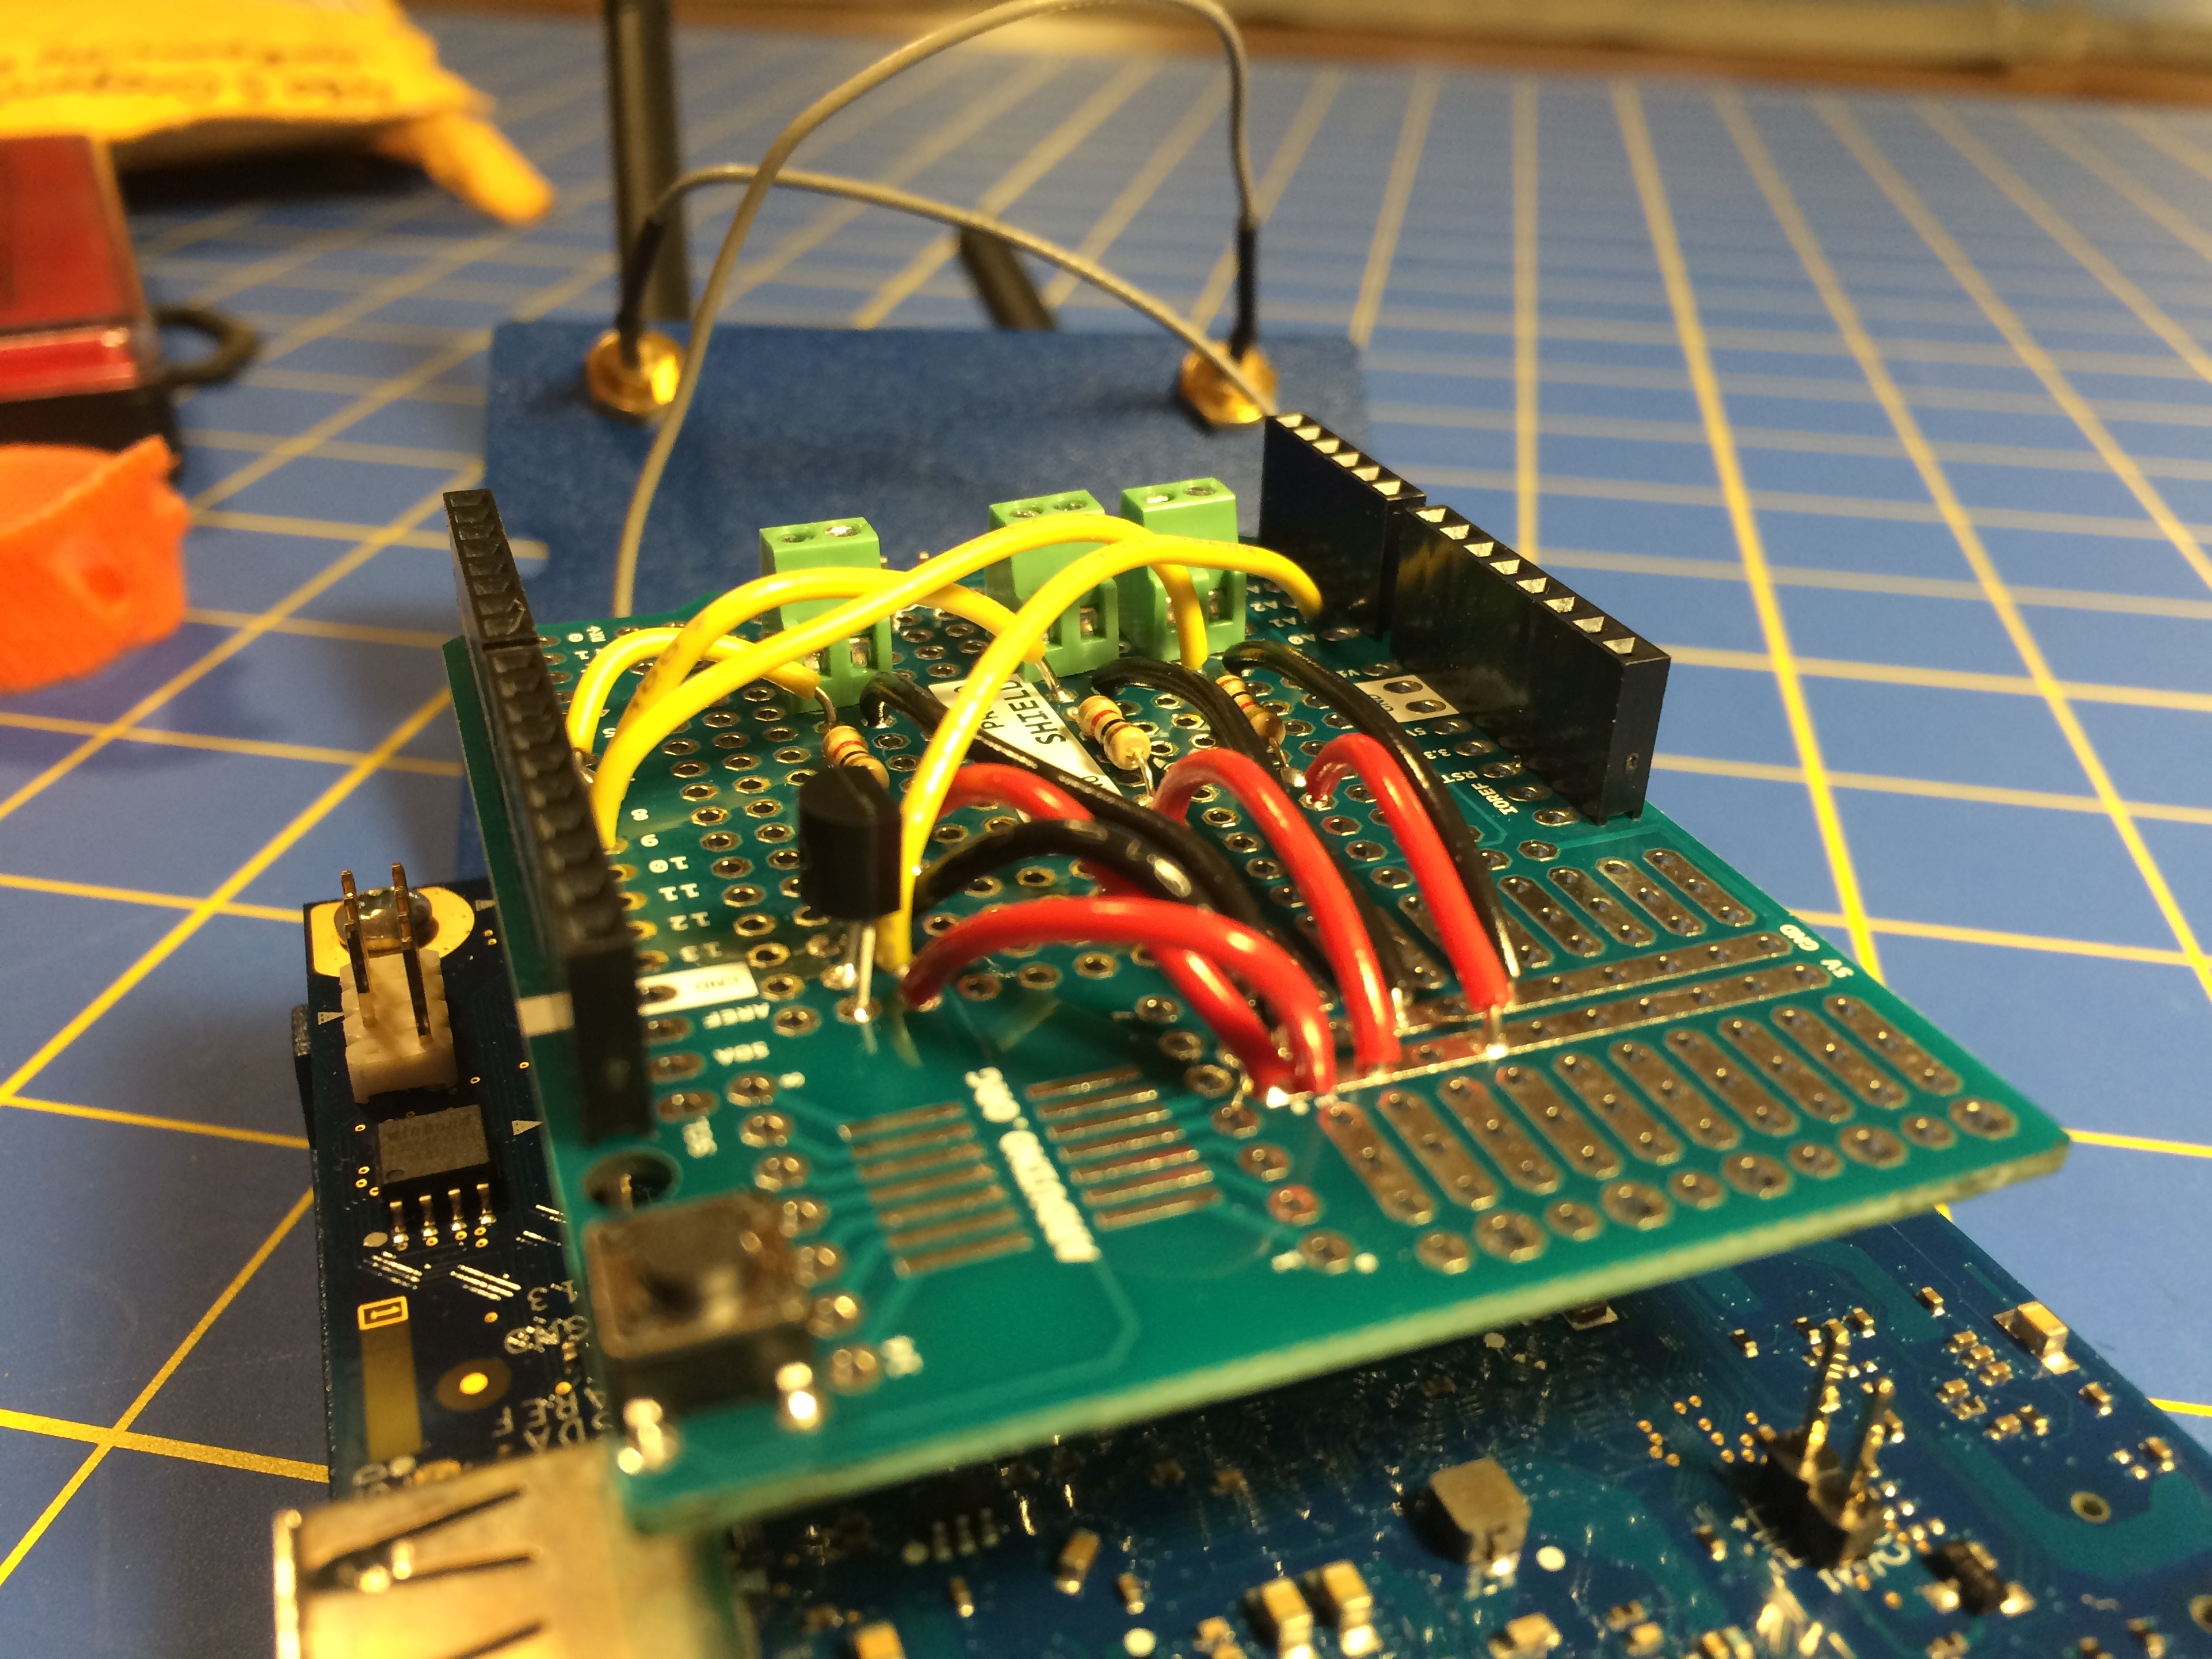
Assemble
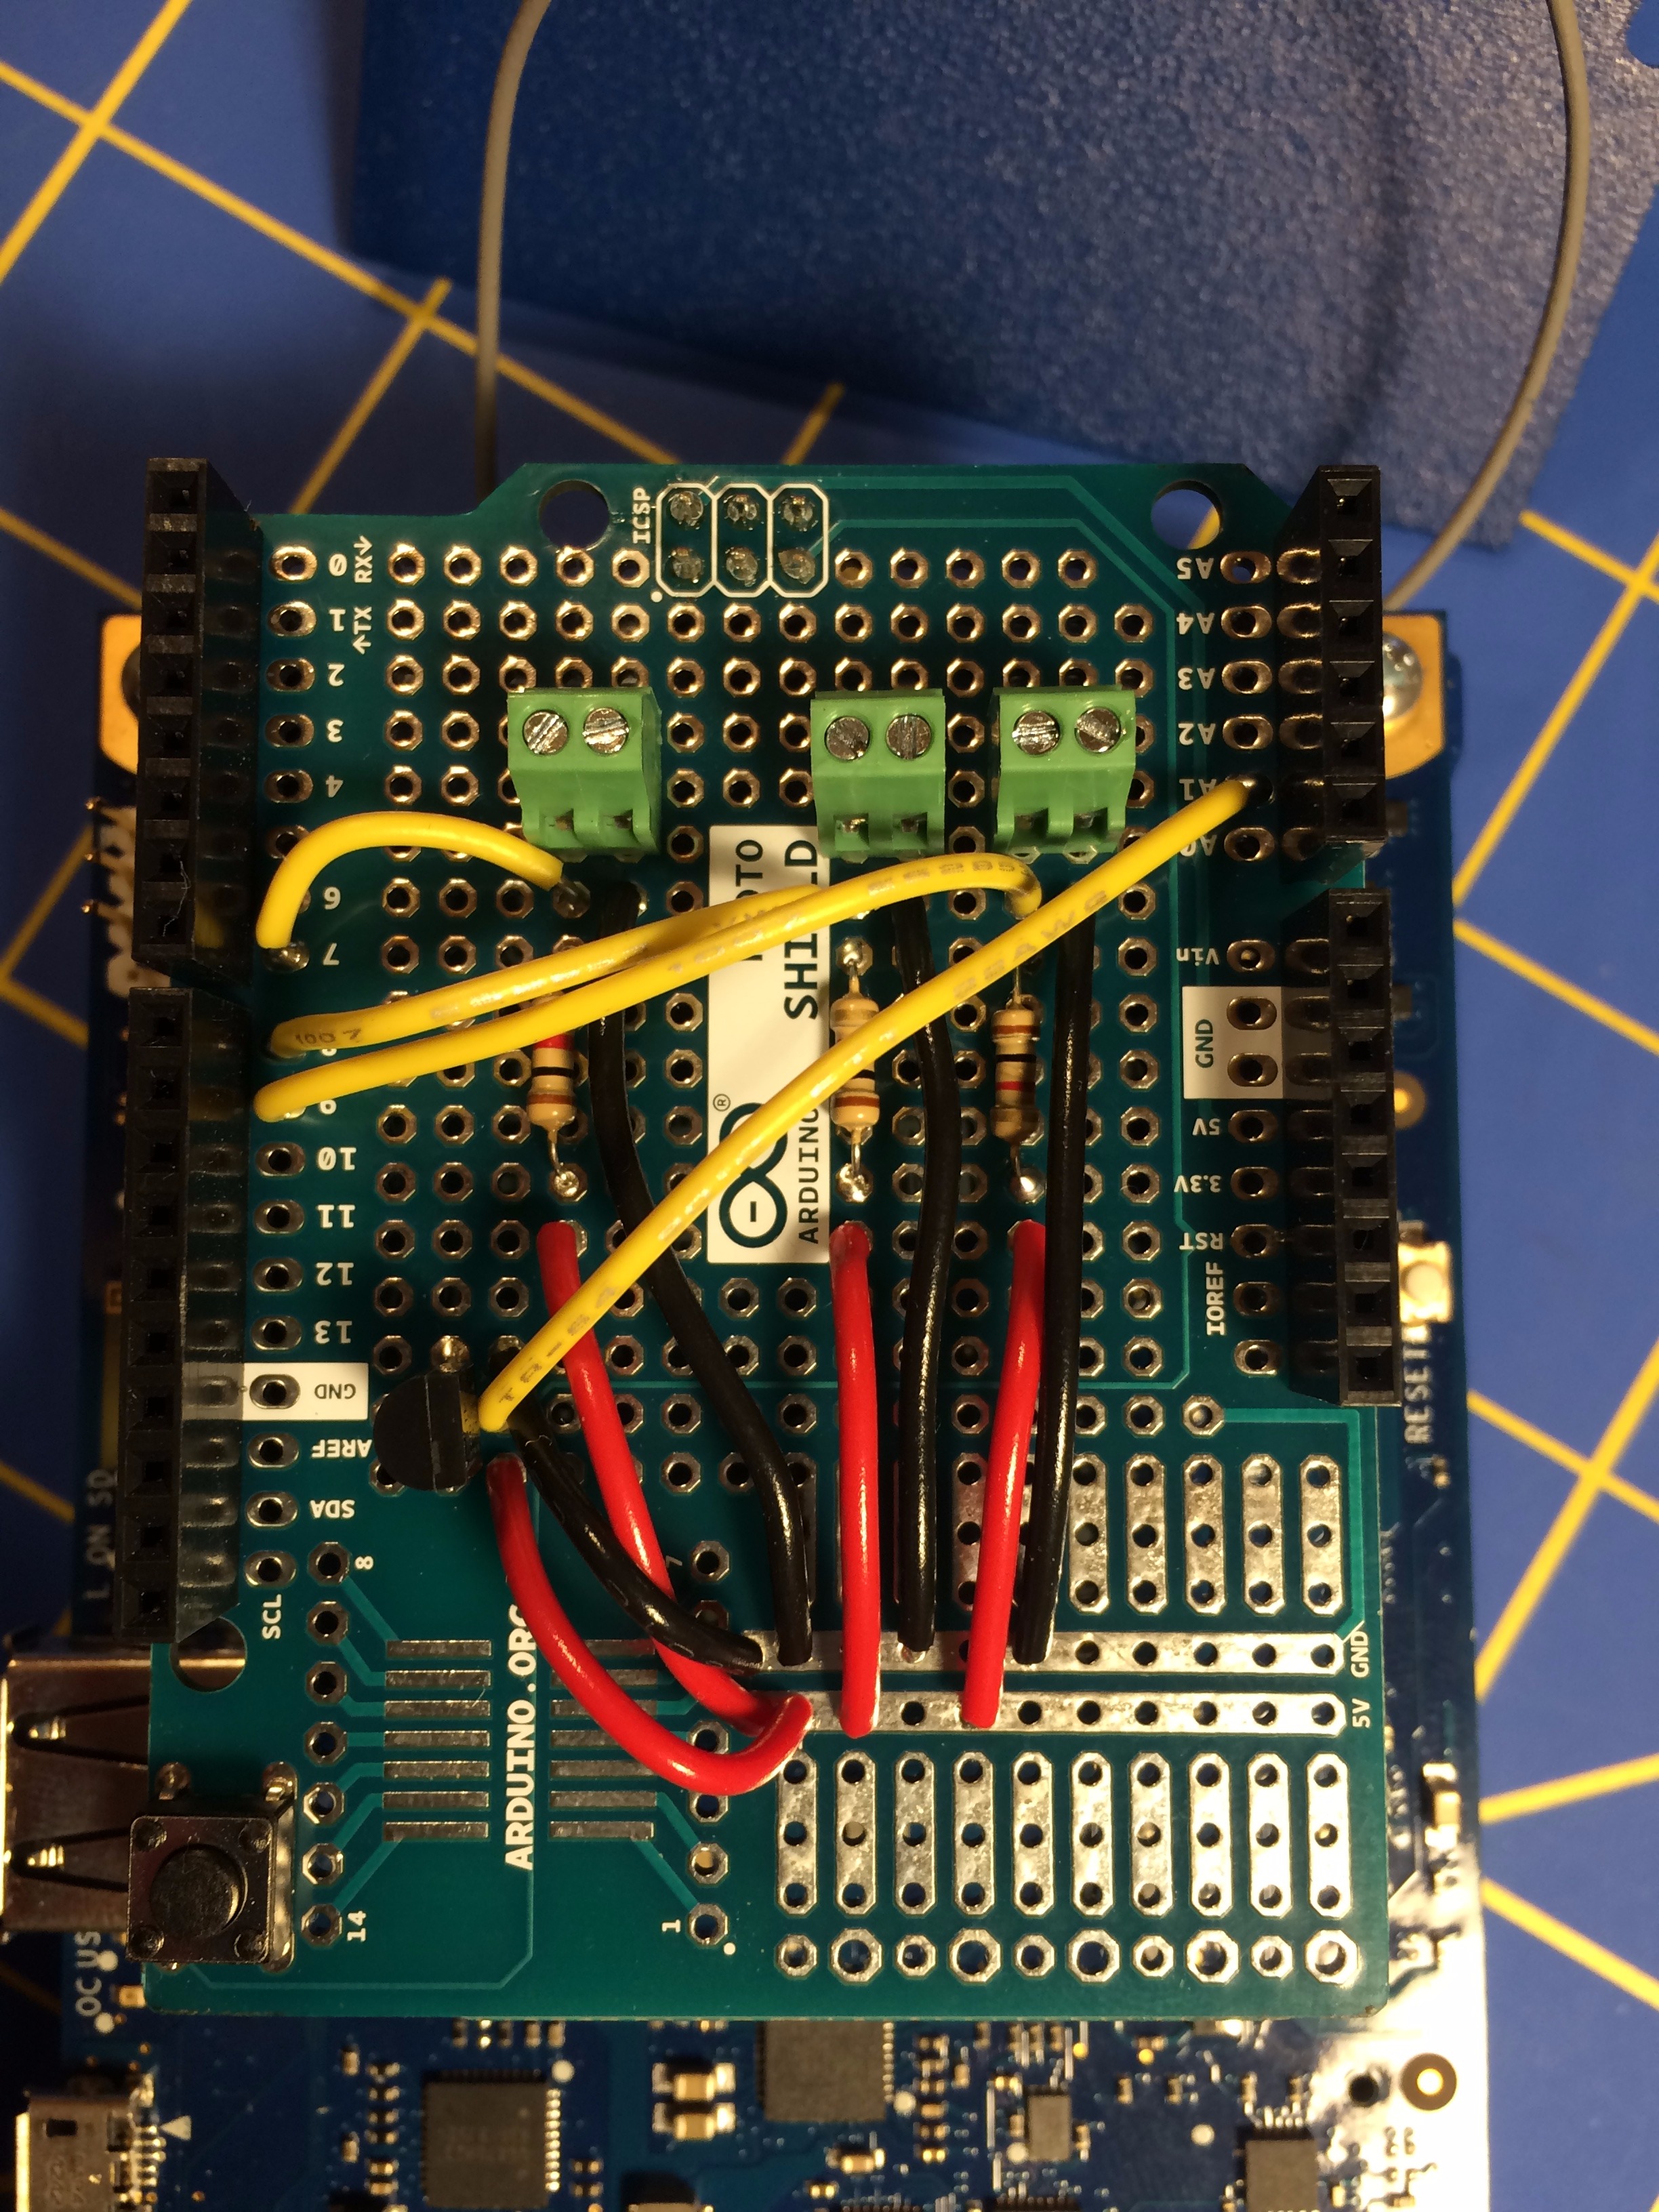
Assemble your switches. I wanted to make this modular but also a production service, so I needed to move beyond the solderless breadboard.
To do that I used a Arduino Protoshield and screw terminals. This would allow me to open the case and tinker while also being hardwired.
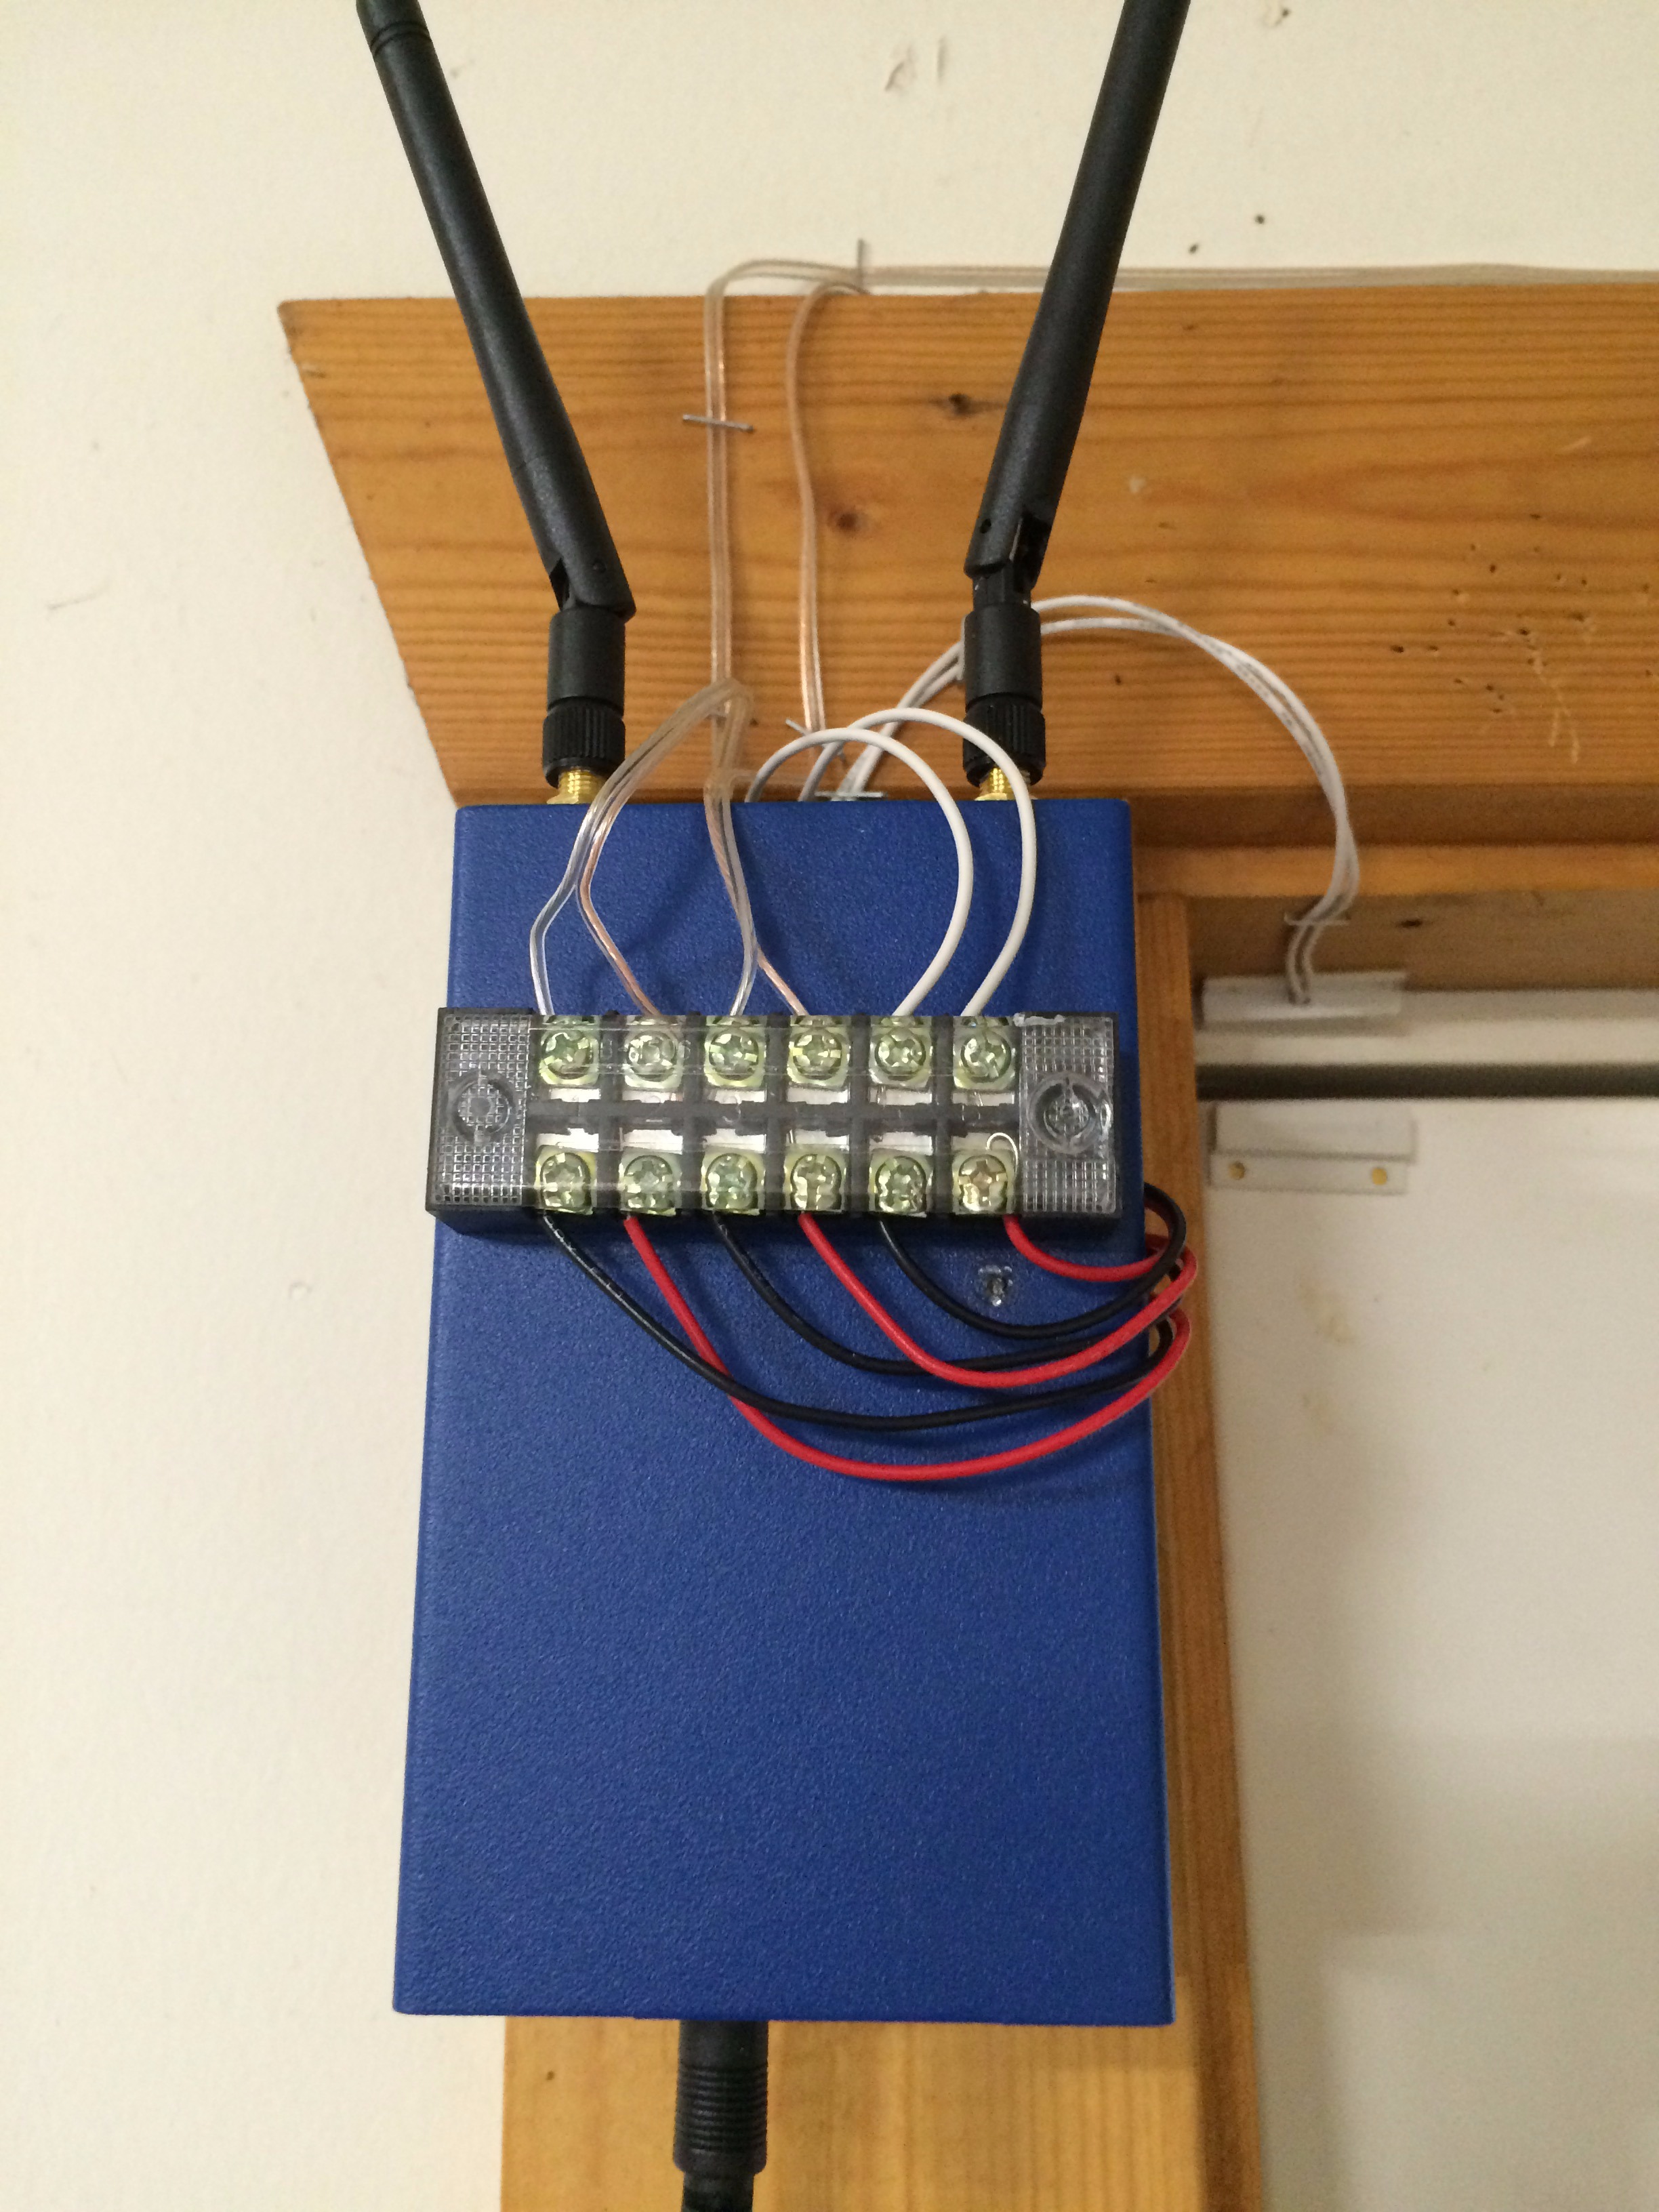
Case
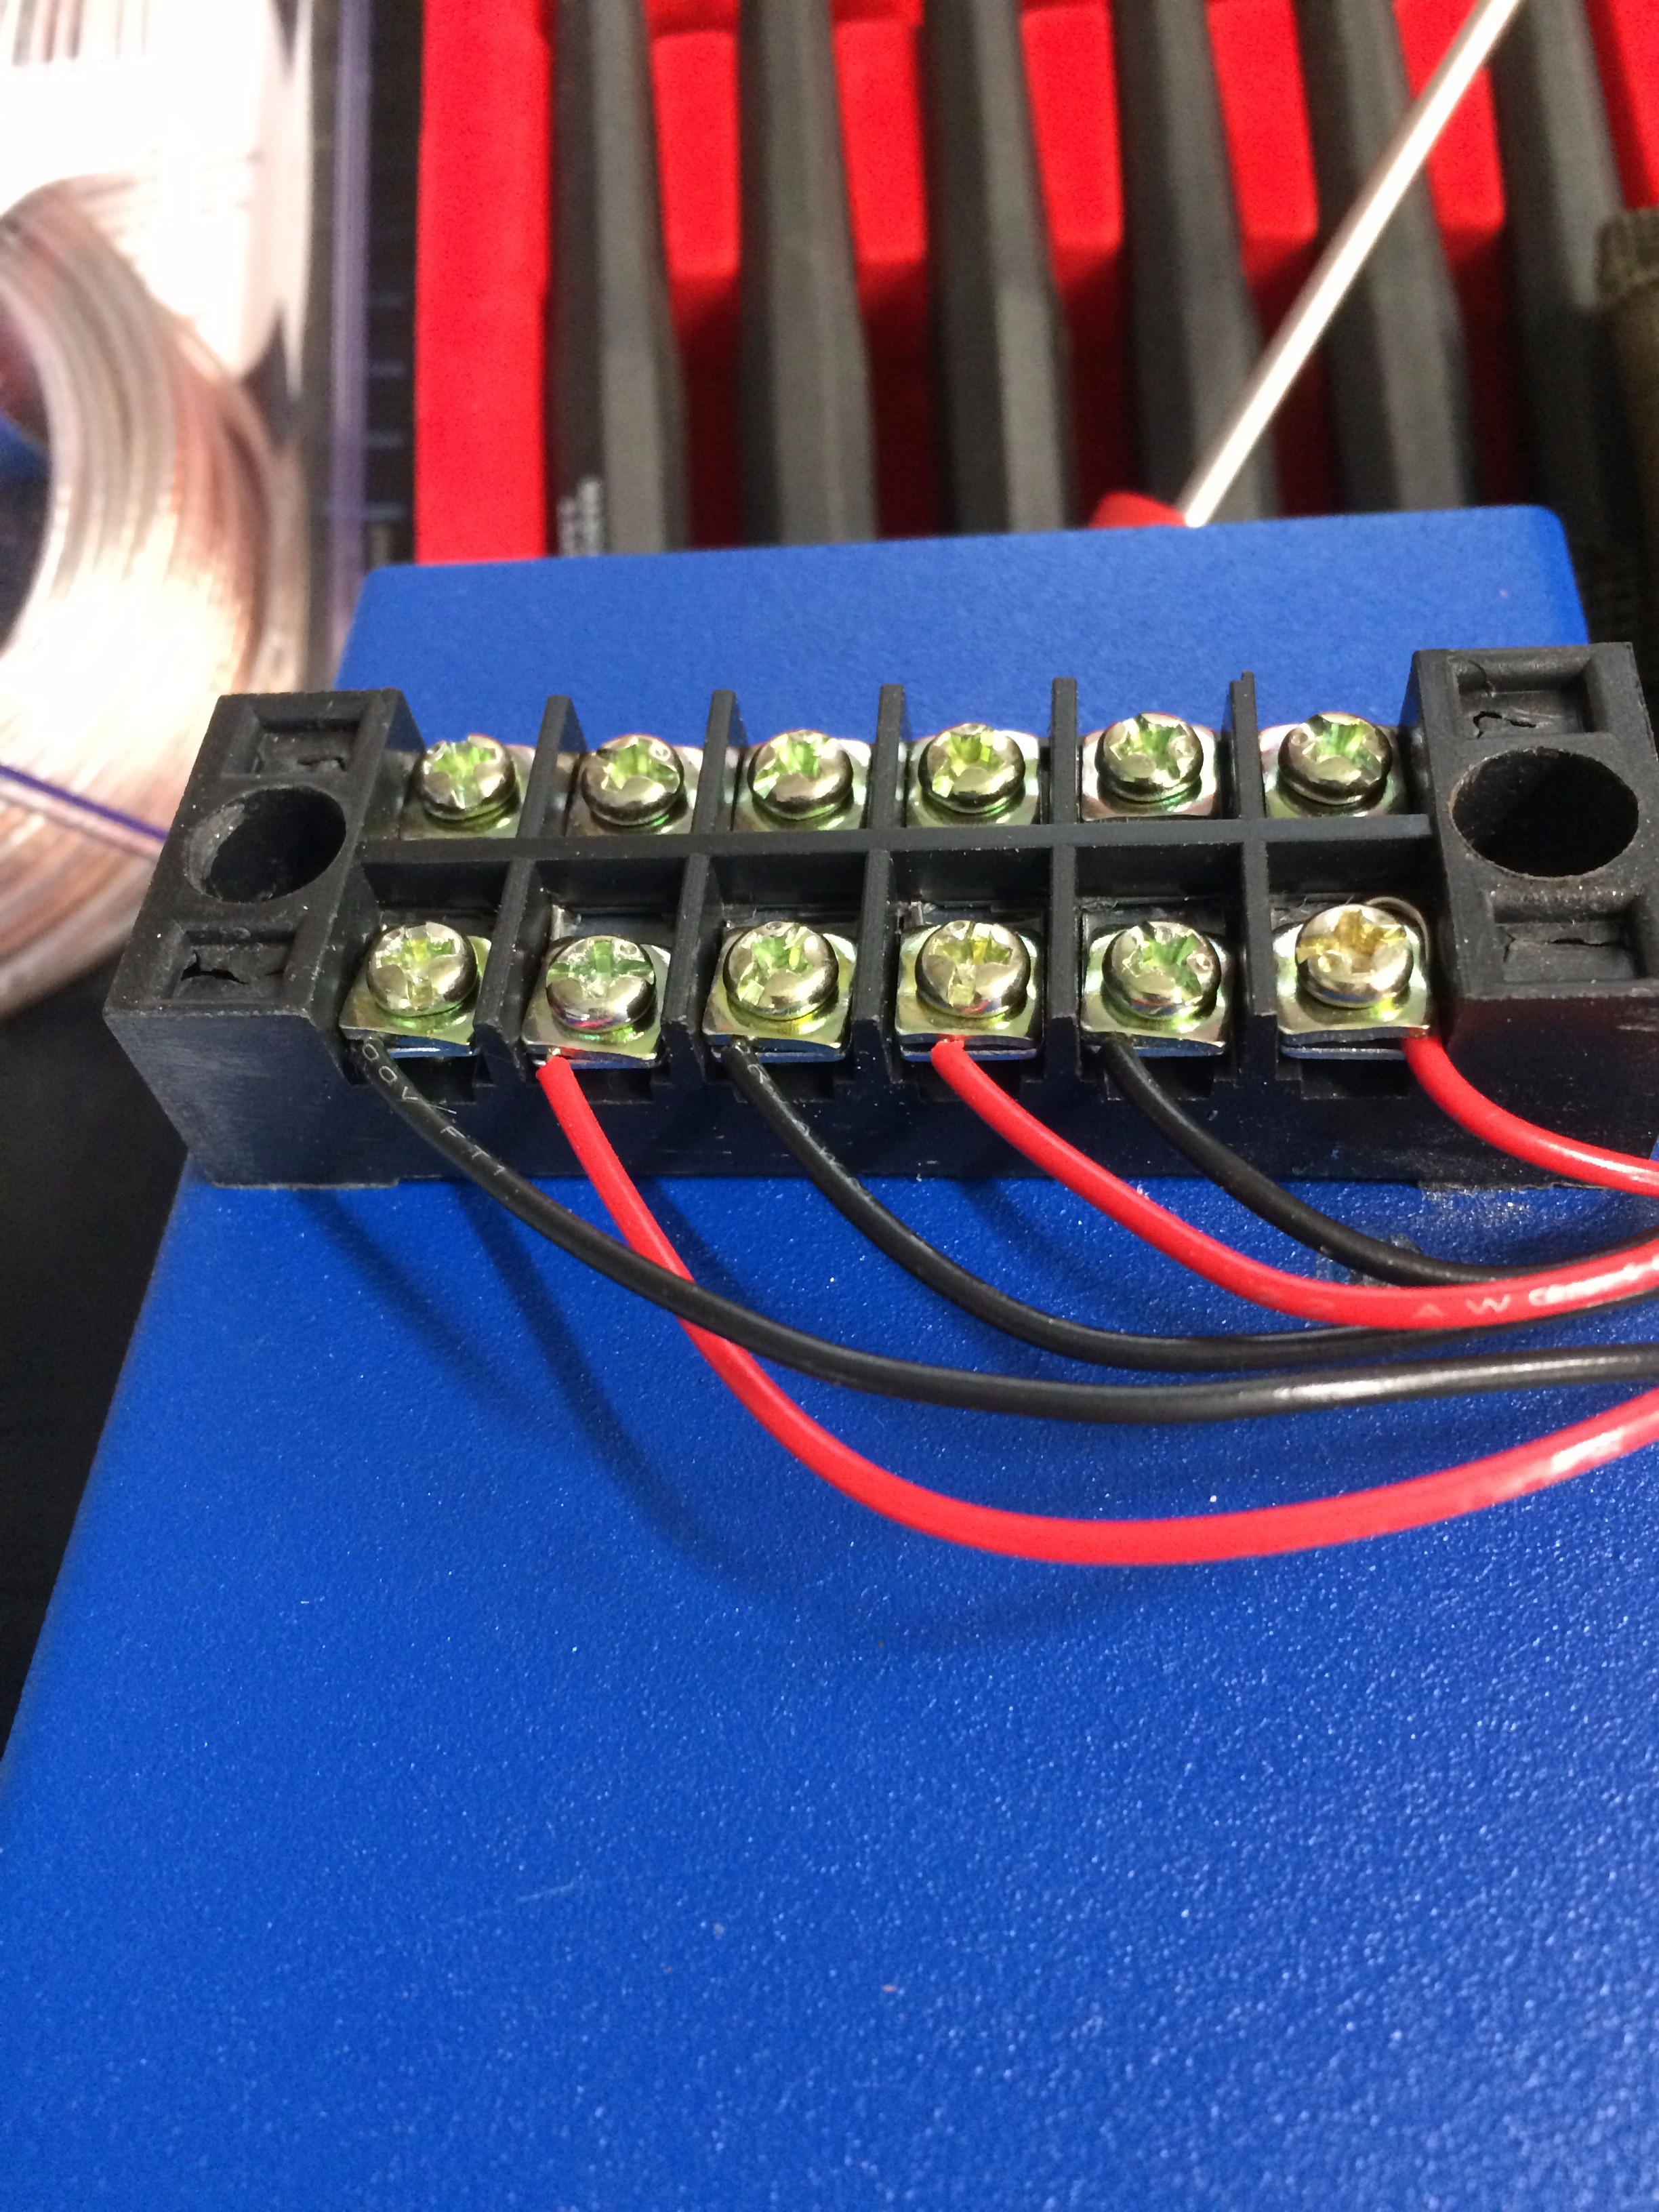
I added a 6 screw terminal block to the outside of the DuinoCase to make wiring it to the switches easier.
Switches
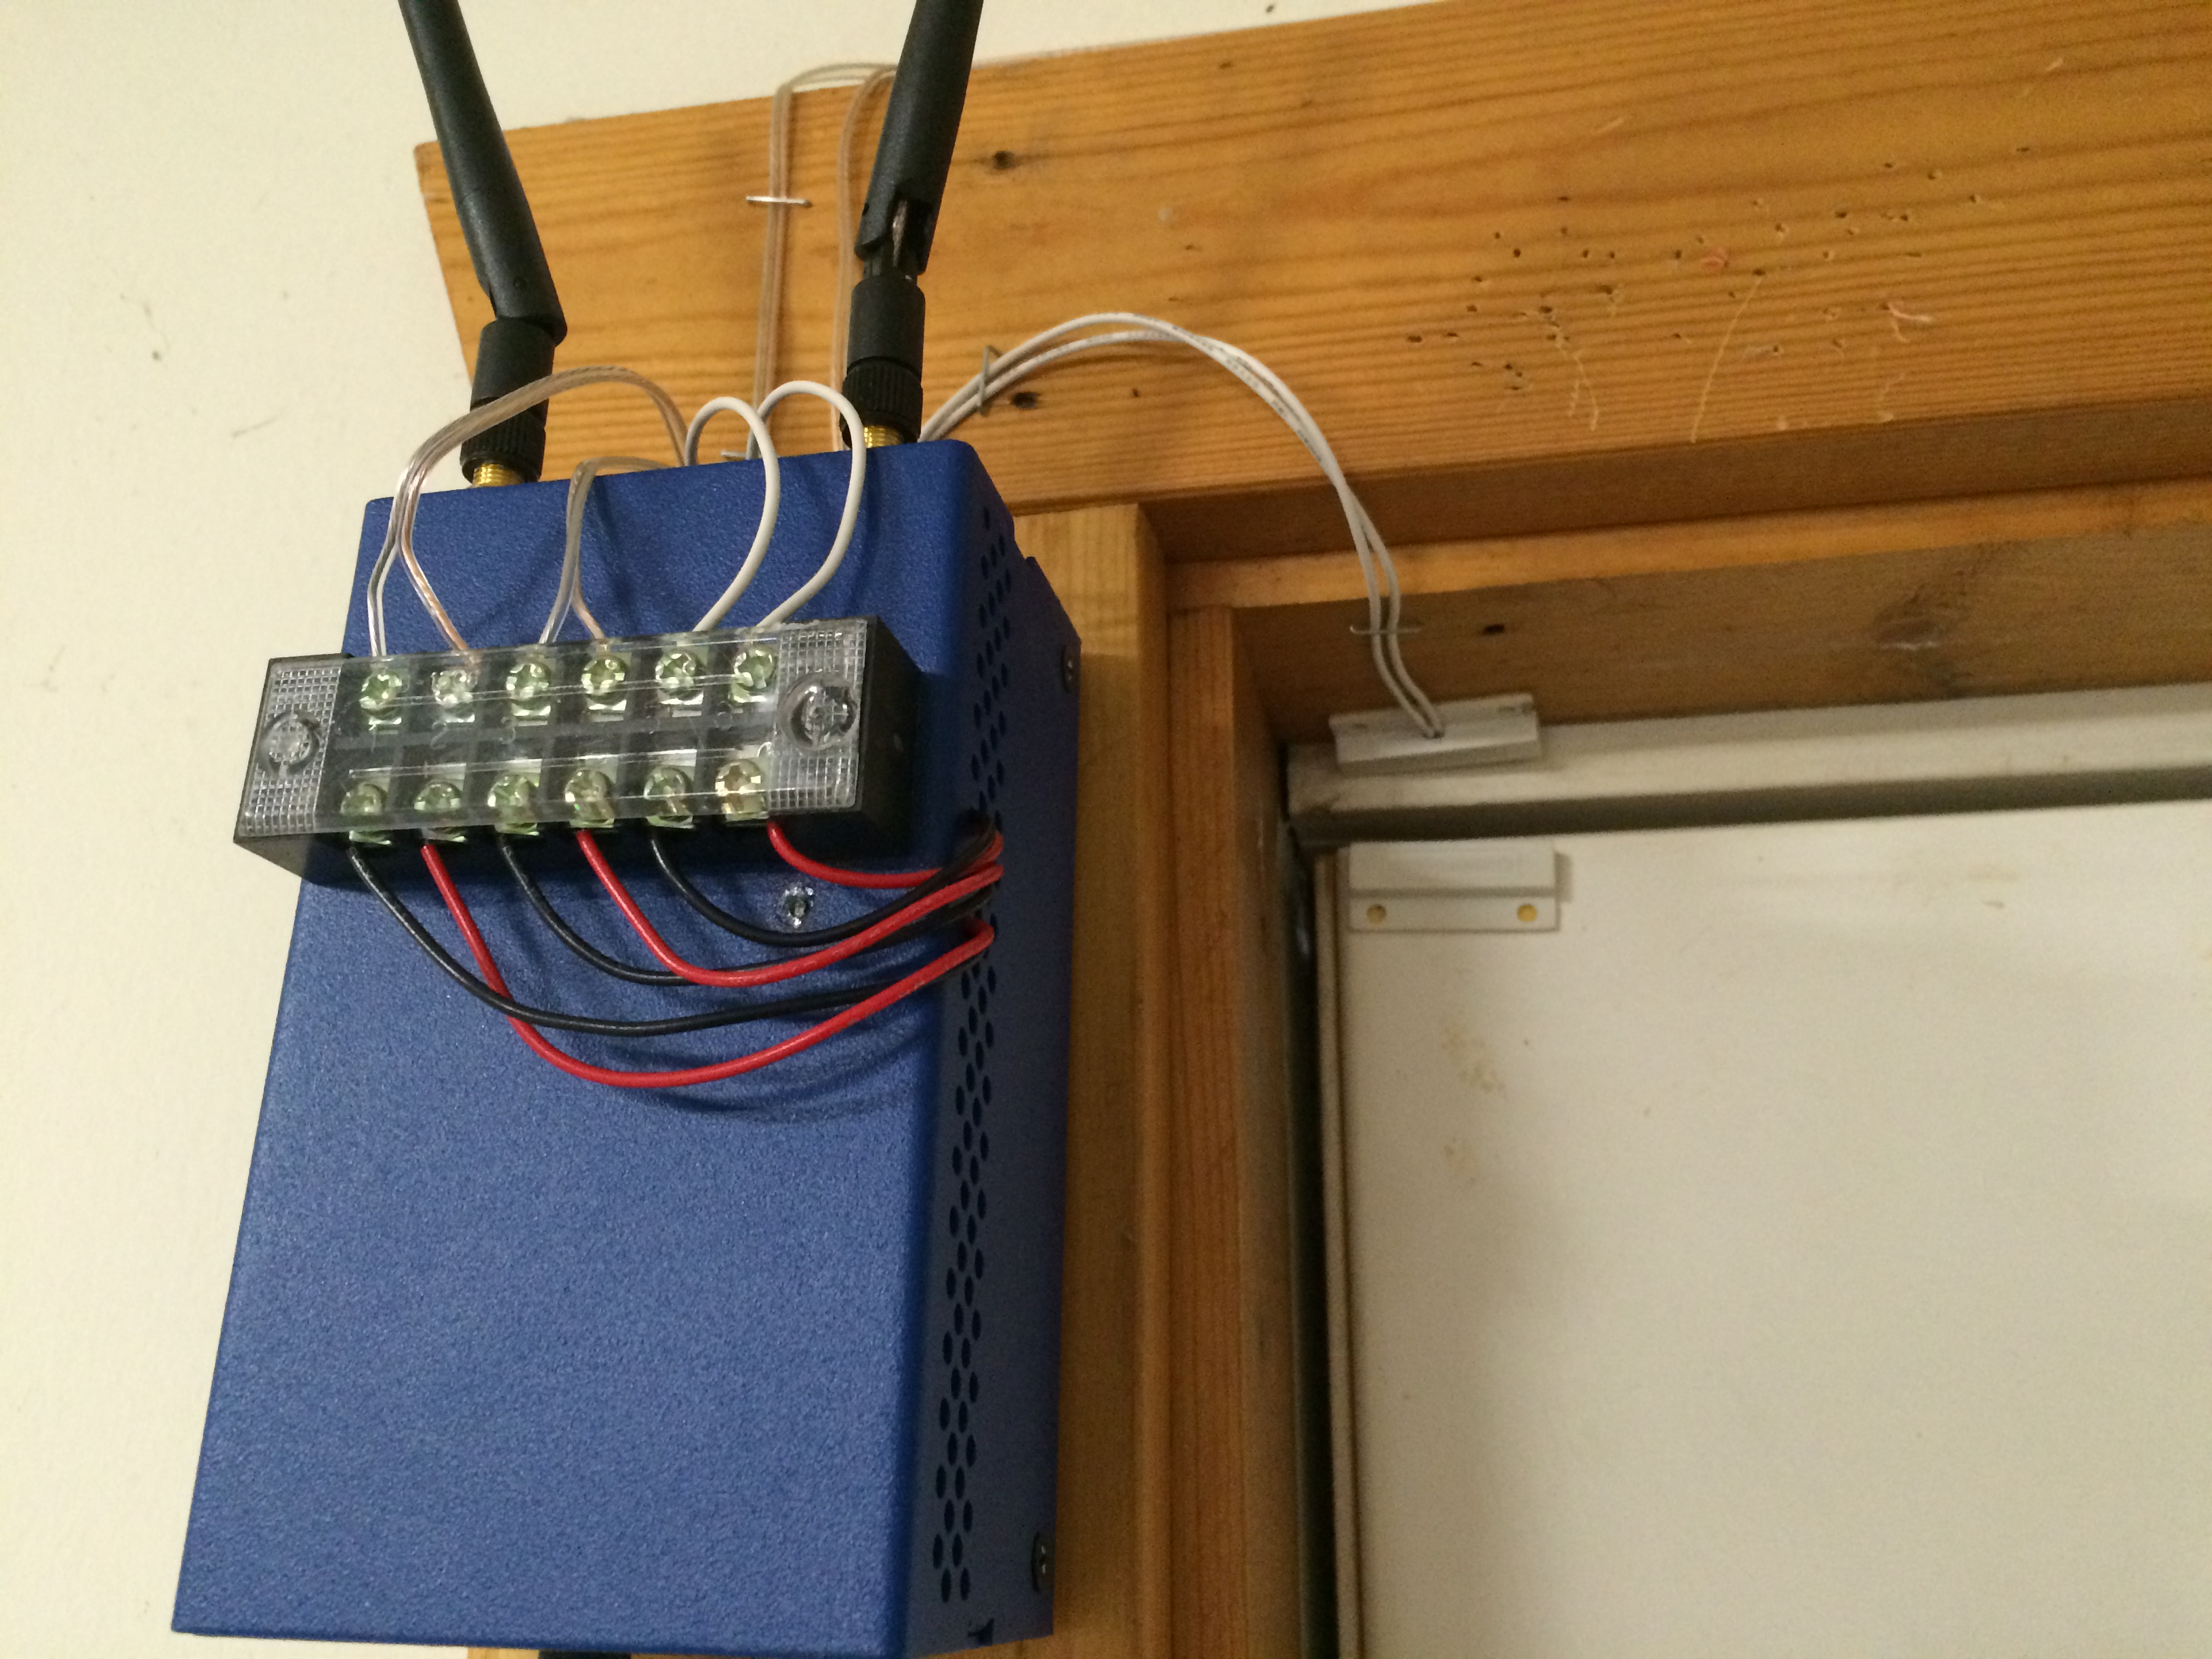

Install your switches at the door and attach it to the terminal blocks
Software Prerequisites

You will need to install flask and gunicorn. To do that you need to use pip.
Pip relies on ez_setup, so install that first. If you have not installed PIP, follow these instructions.
curl https://bootstrap.pypa.io/ez_setup.py -o ez_seetup.py
python ez_setup.py --insecure
Then you must install PIP. curl https://bootstrap.pypa.io/ez_setup.py -o pip-8.0.2.tar.gz
tar -zxvf pip-8.0.2.tar.gz cd pip-8.0.2
python setup.py build install
pip install gunicorn
pip install Flask
Code Overview
Now we get to the heart of the matter. This consists of 2 scripts, one which will run every minute to make DB entries and send emails. The other script is the flask web server.
The scripts can be downloaded from GitHub here: https://github.com/joemcmanus/galileoGarageMon
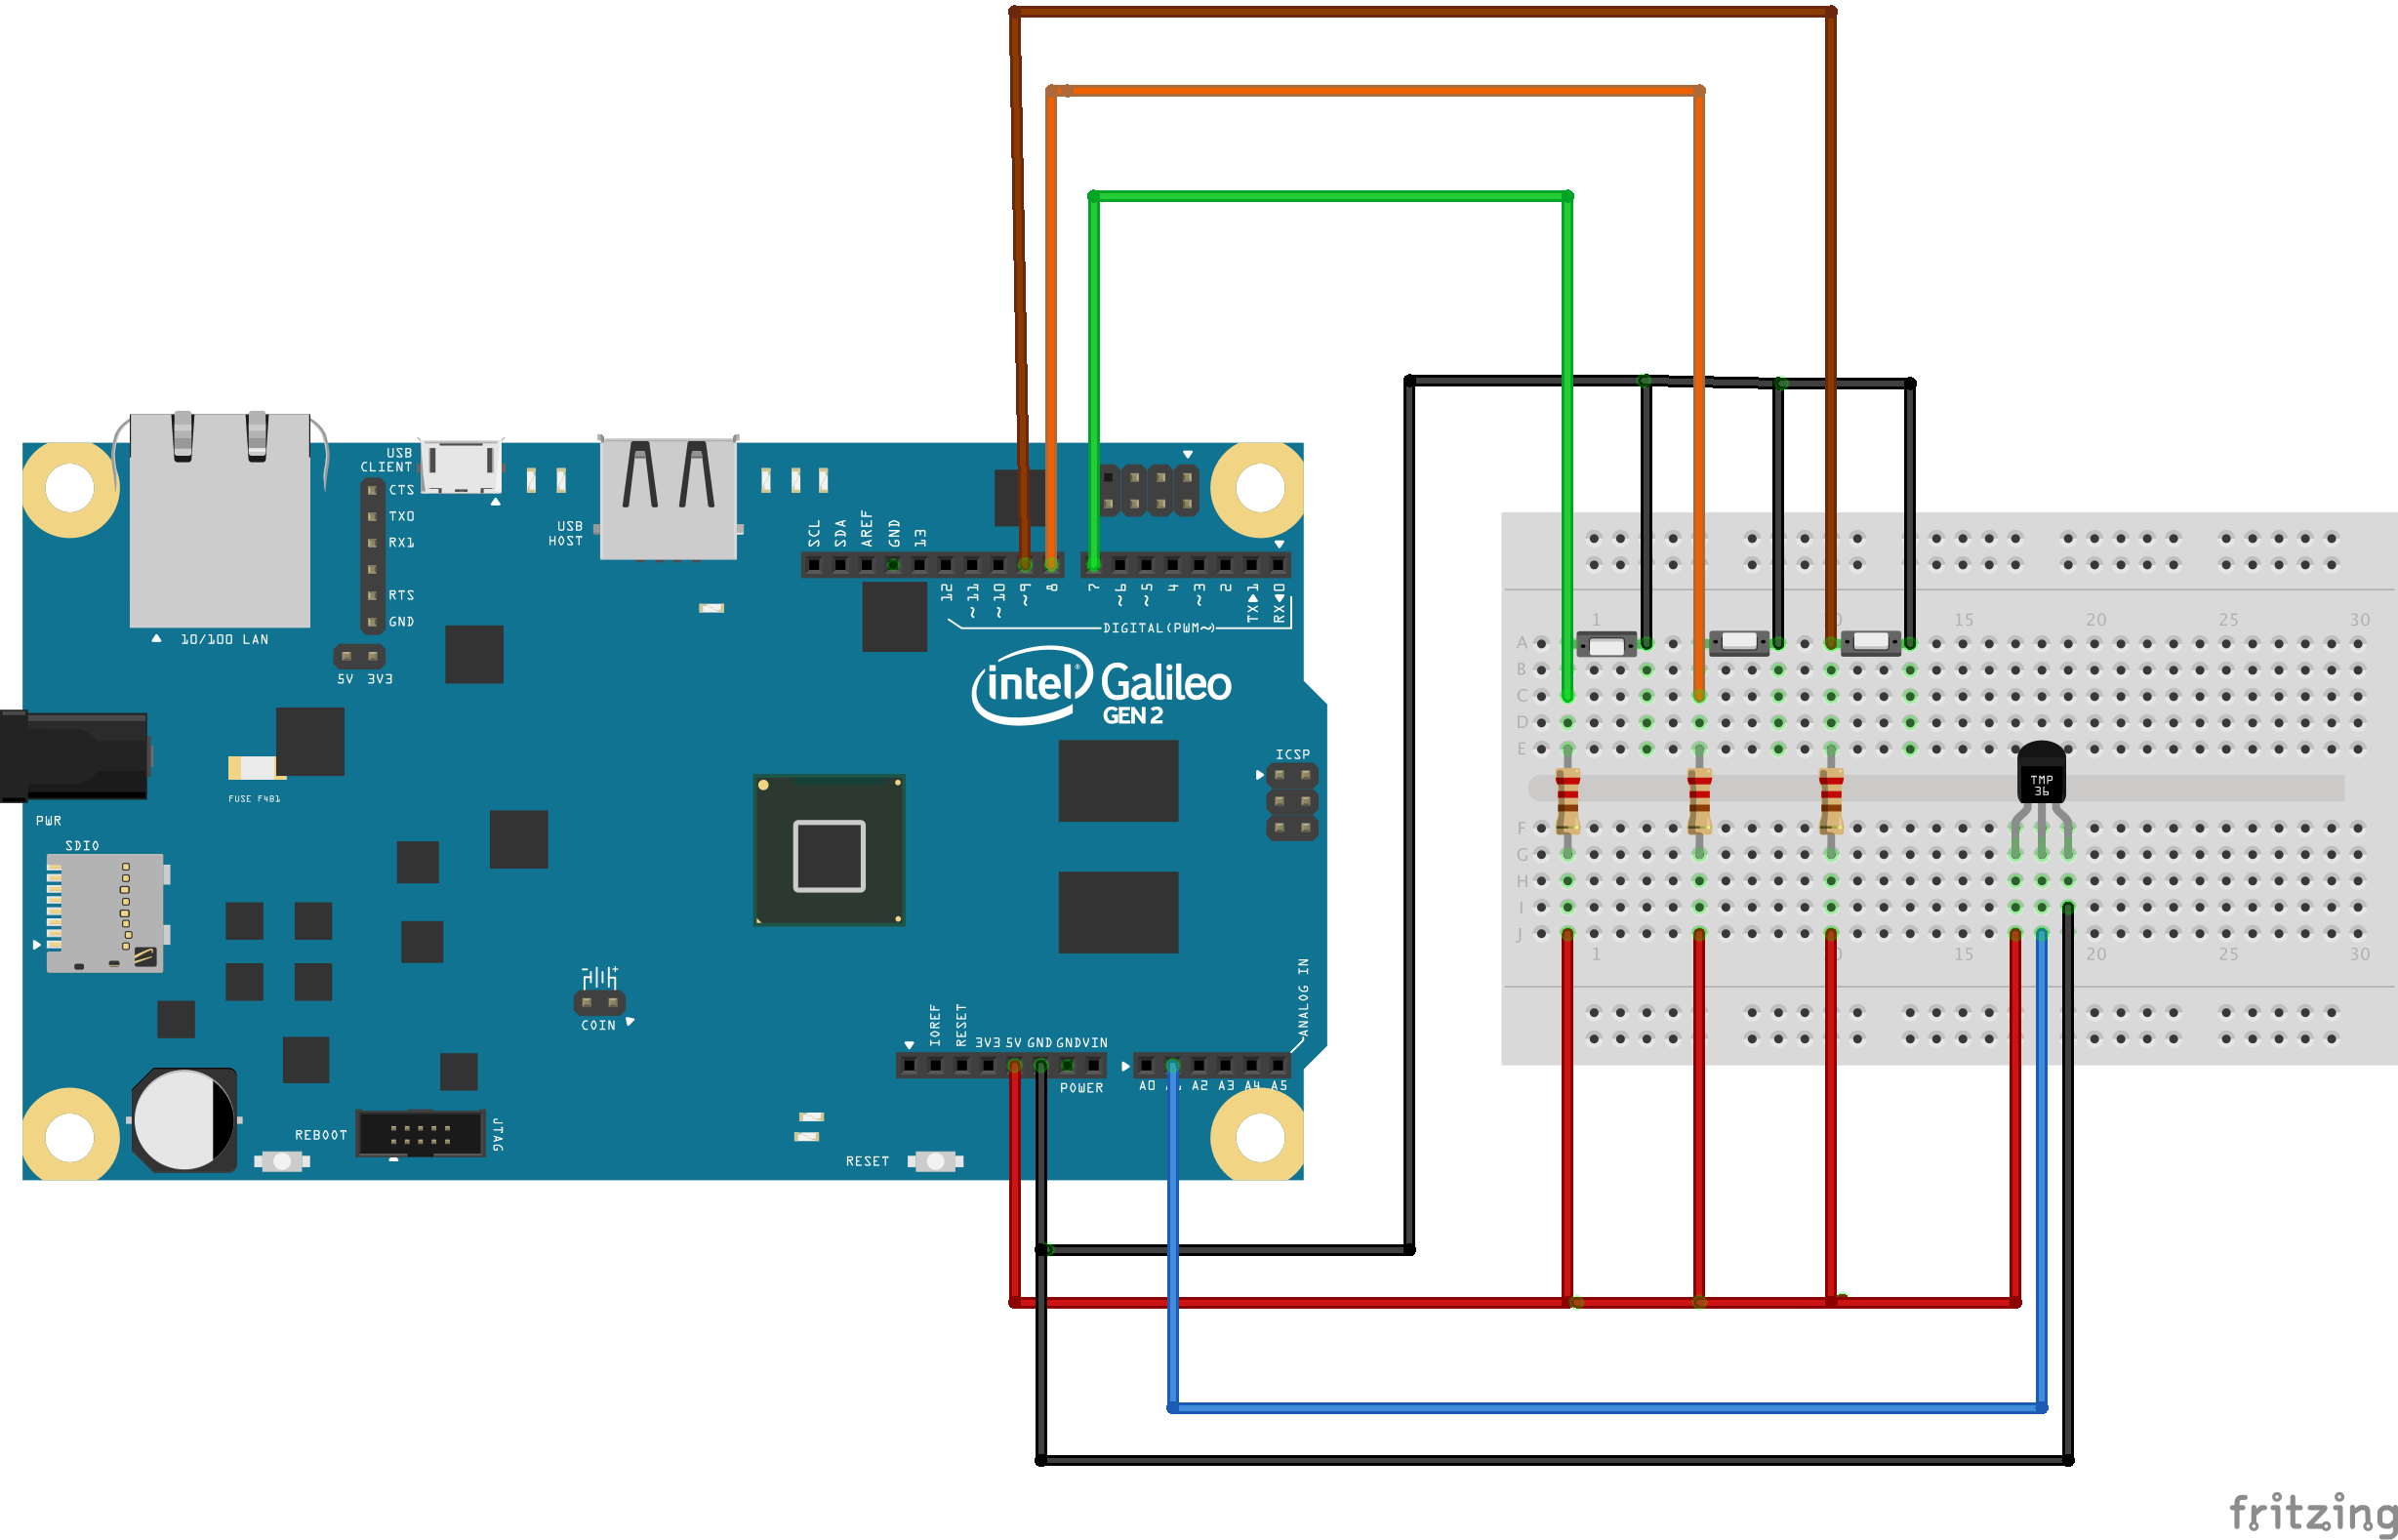
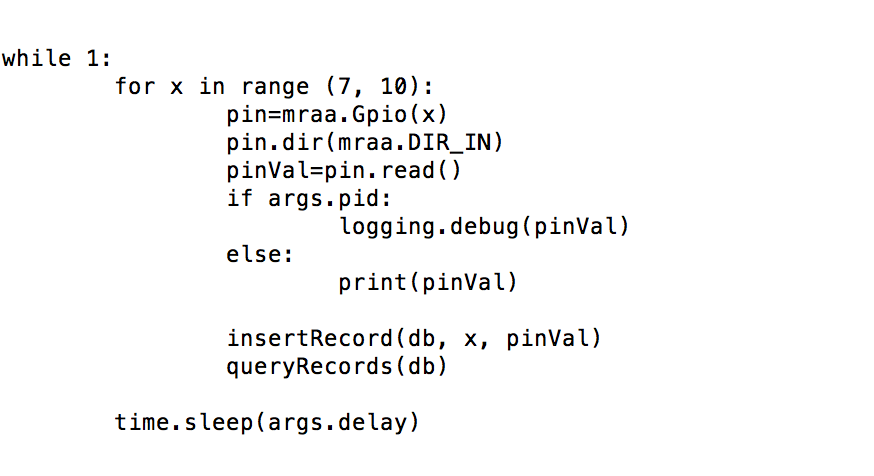
You want to read the door pins with mraa.
In python you will import mraa, define a pin, then read it.
pin=mraa.Gpio(7)
pin.dir(mraa.DIR_IN)
pinVal=pin.read()
Door Code
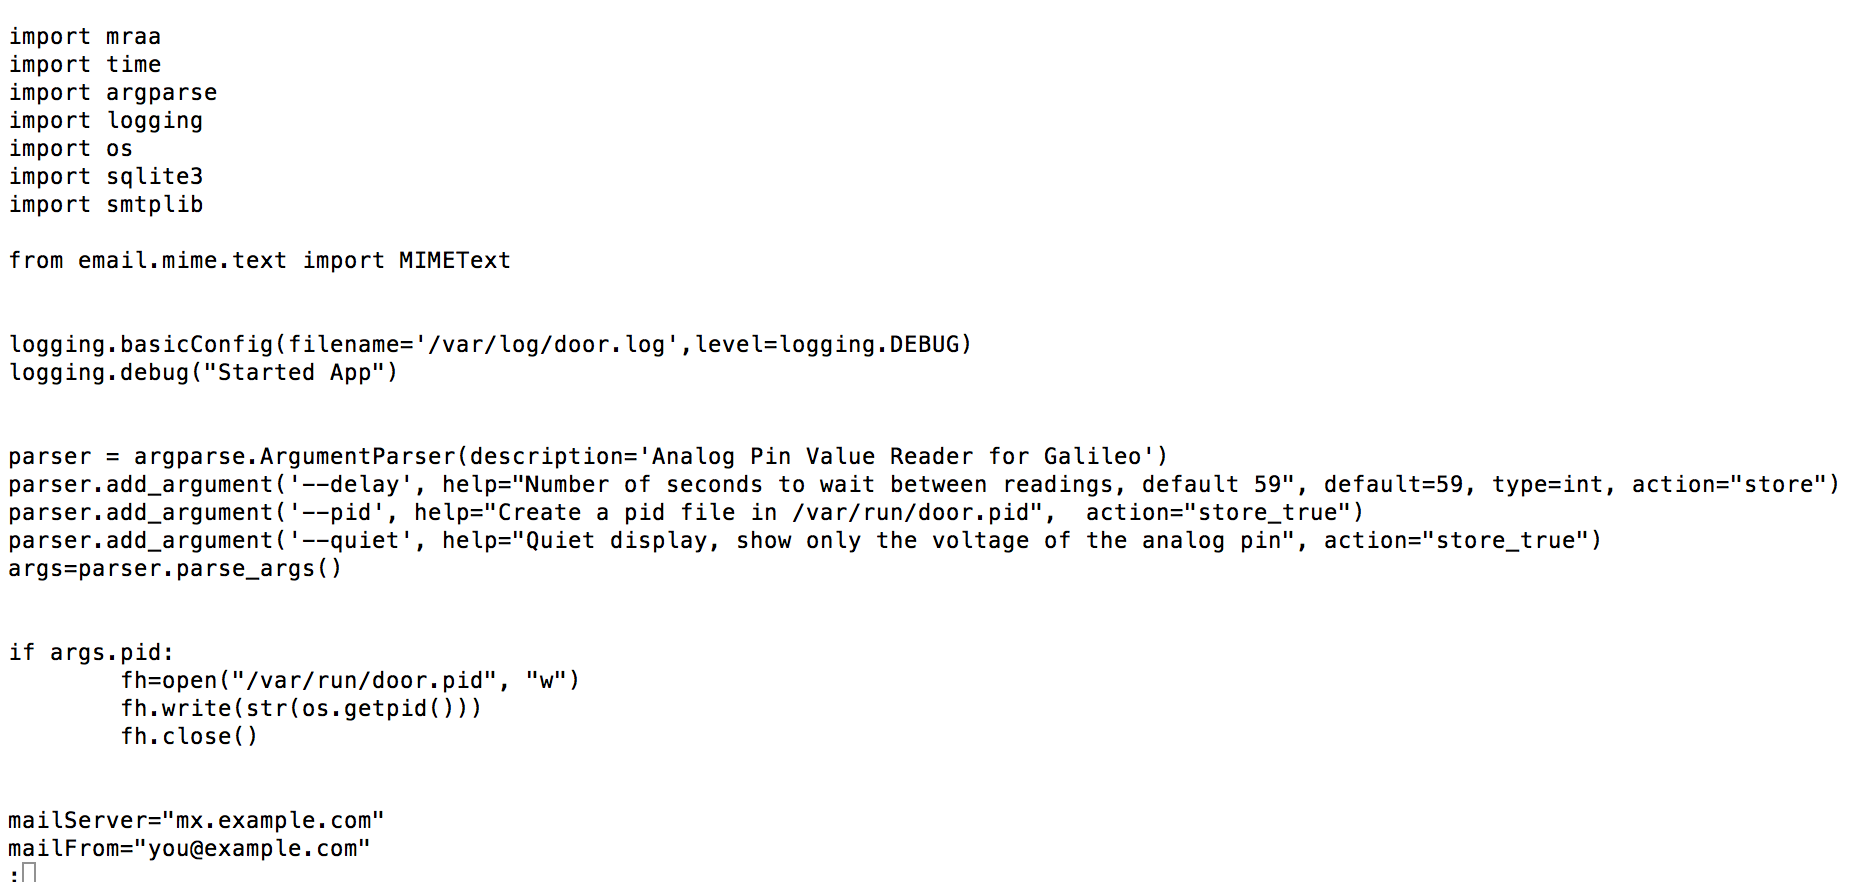
The script that will monitor your doors for email purposes is called door.py. It will run as a systemd process and start on boot.
Edit the mailto and mailfrom lines to receive email.
Flask
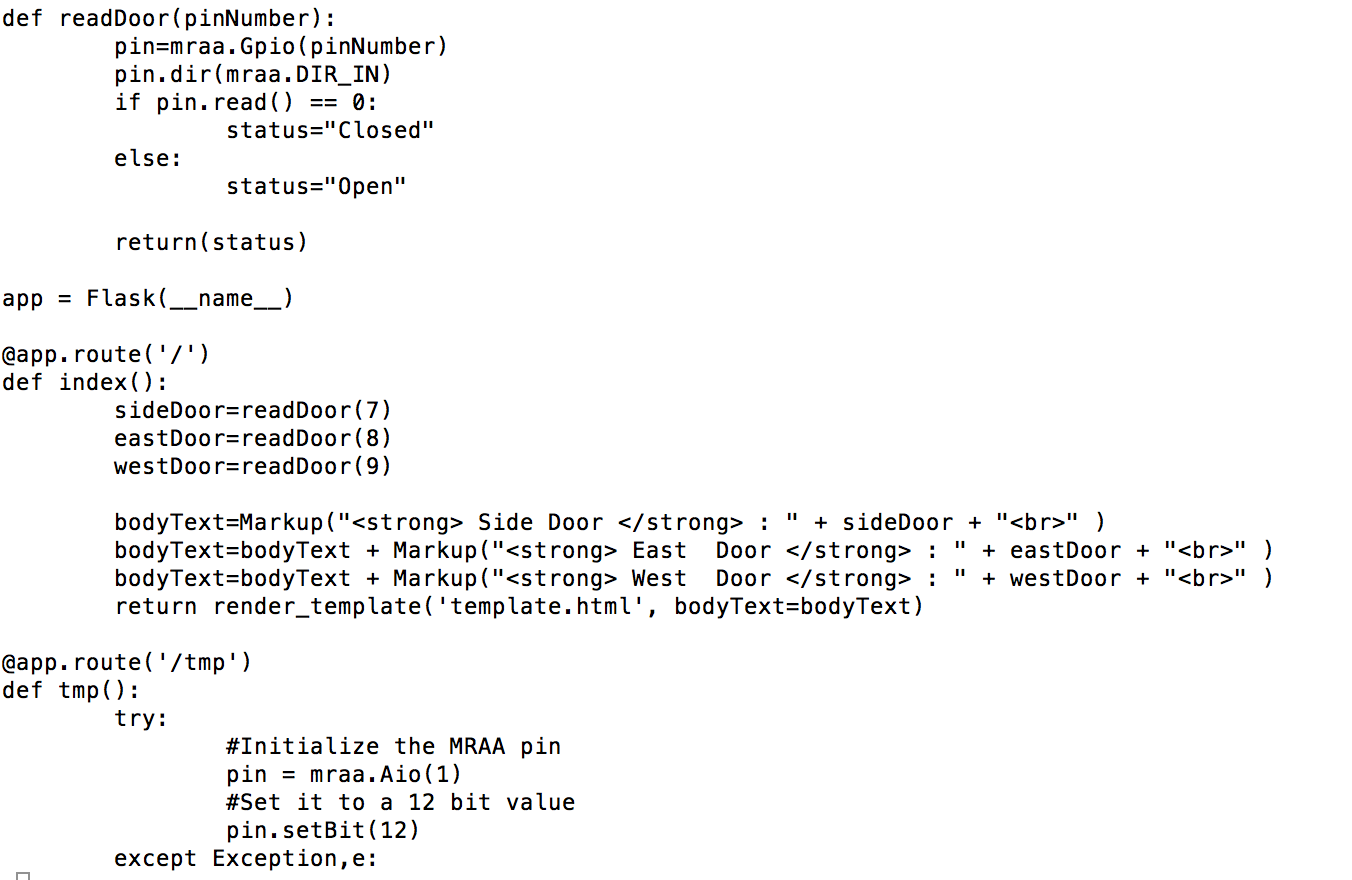
The web server is written in python using flask. You will want to copy the flask folder from git hub in to /data/flask .
There is a login page... although I am not doing anything with it in this first version.
Startup Processes
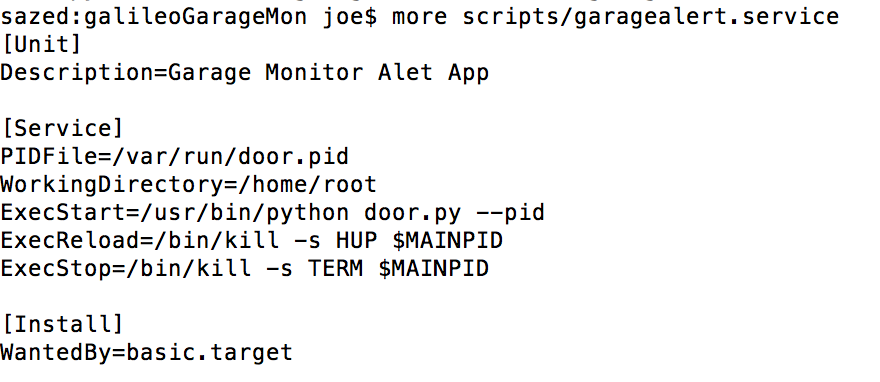
You will want all of this to start on boot. In this IoT OS we will use the systemd unit files to get this working.
Copy the garage*.service files /lib/systemd/system/
Then add them to the startup process using systemctl enable .
systemctl enable garagemon.service
systemctl enable garagealert.service
Start it up!
systemctl start garagemon
systemctl start garagealert

Sample email shown. It will email if a door is open more than 5 minutes.
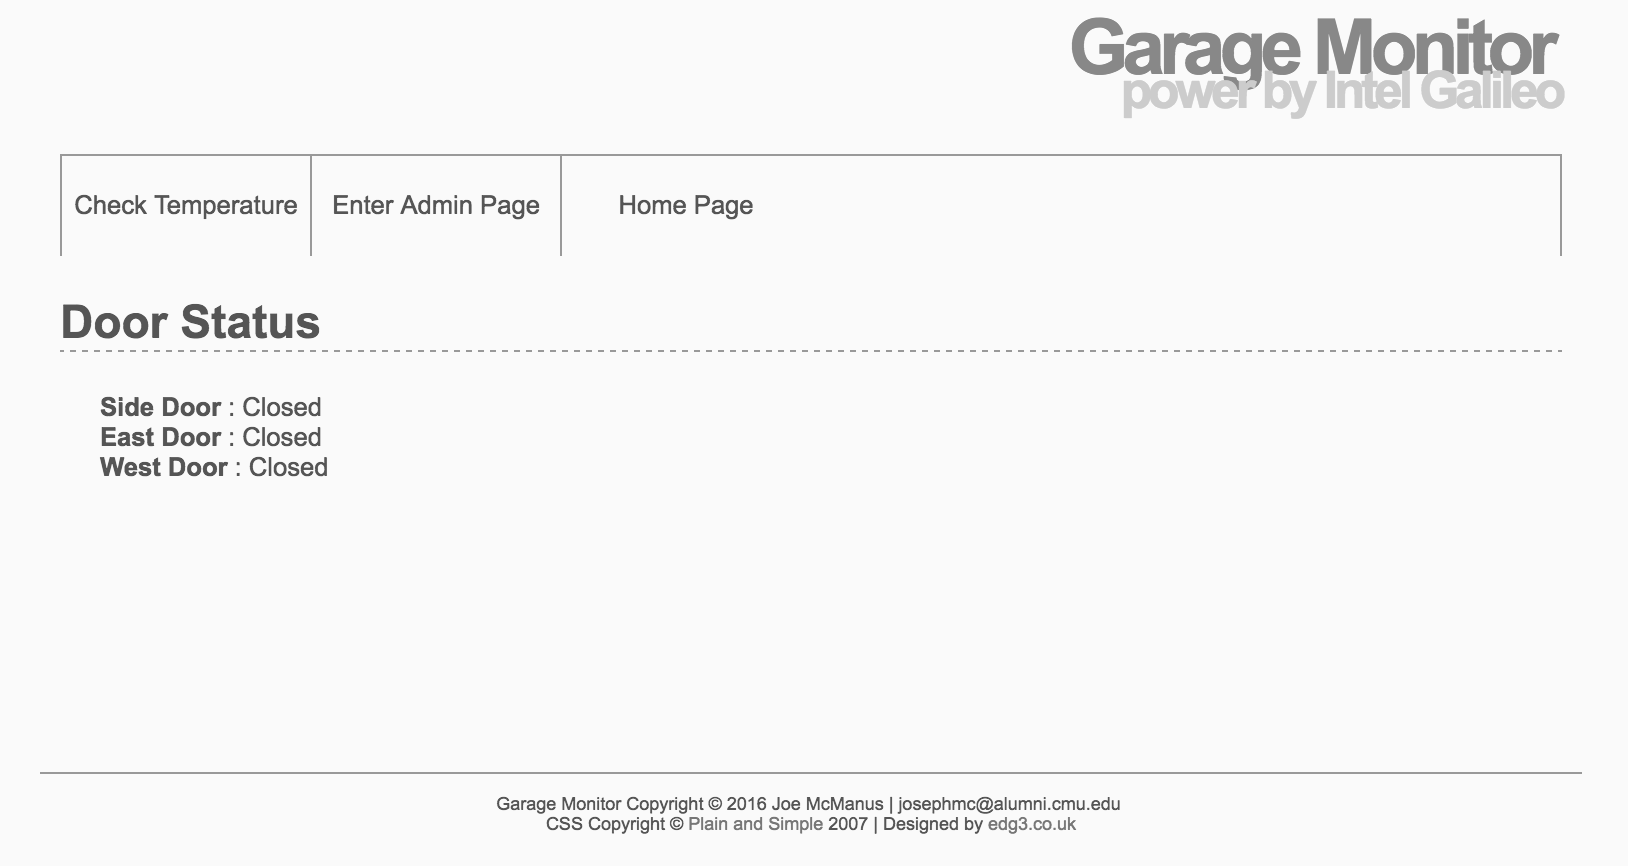
Web Interface


If you browse to http://yourGalileo.local you will see the status of the doors. There is also a temperature read out... because why not?
Next version will allow you to edit the time frame for alerts and email info from the web.
Done

I hope you enjoyed checking out an example of a garage monitor/alarm system using the Intel Galileo Gen 2 and python.