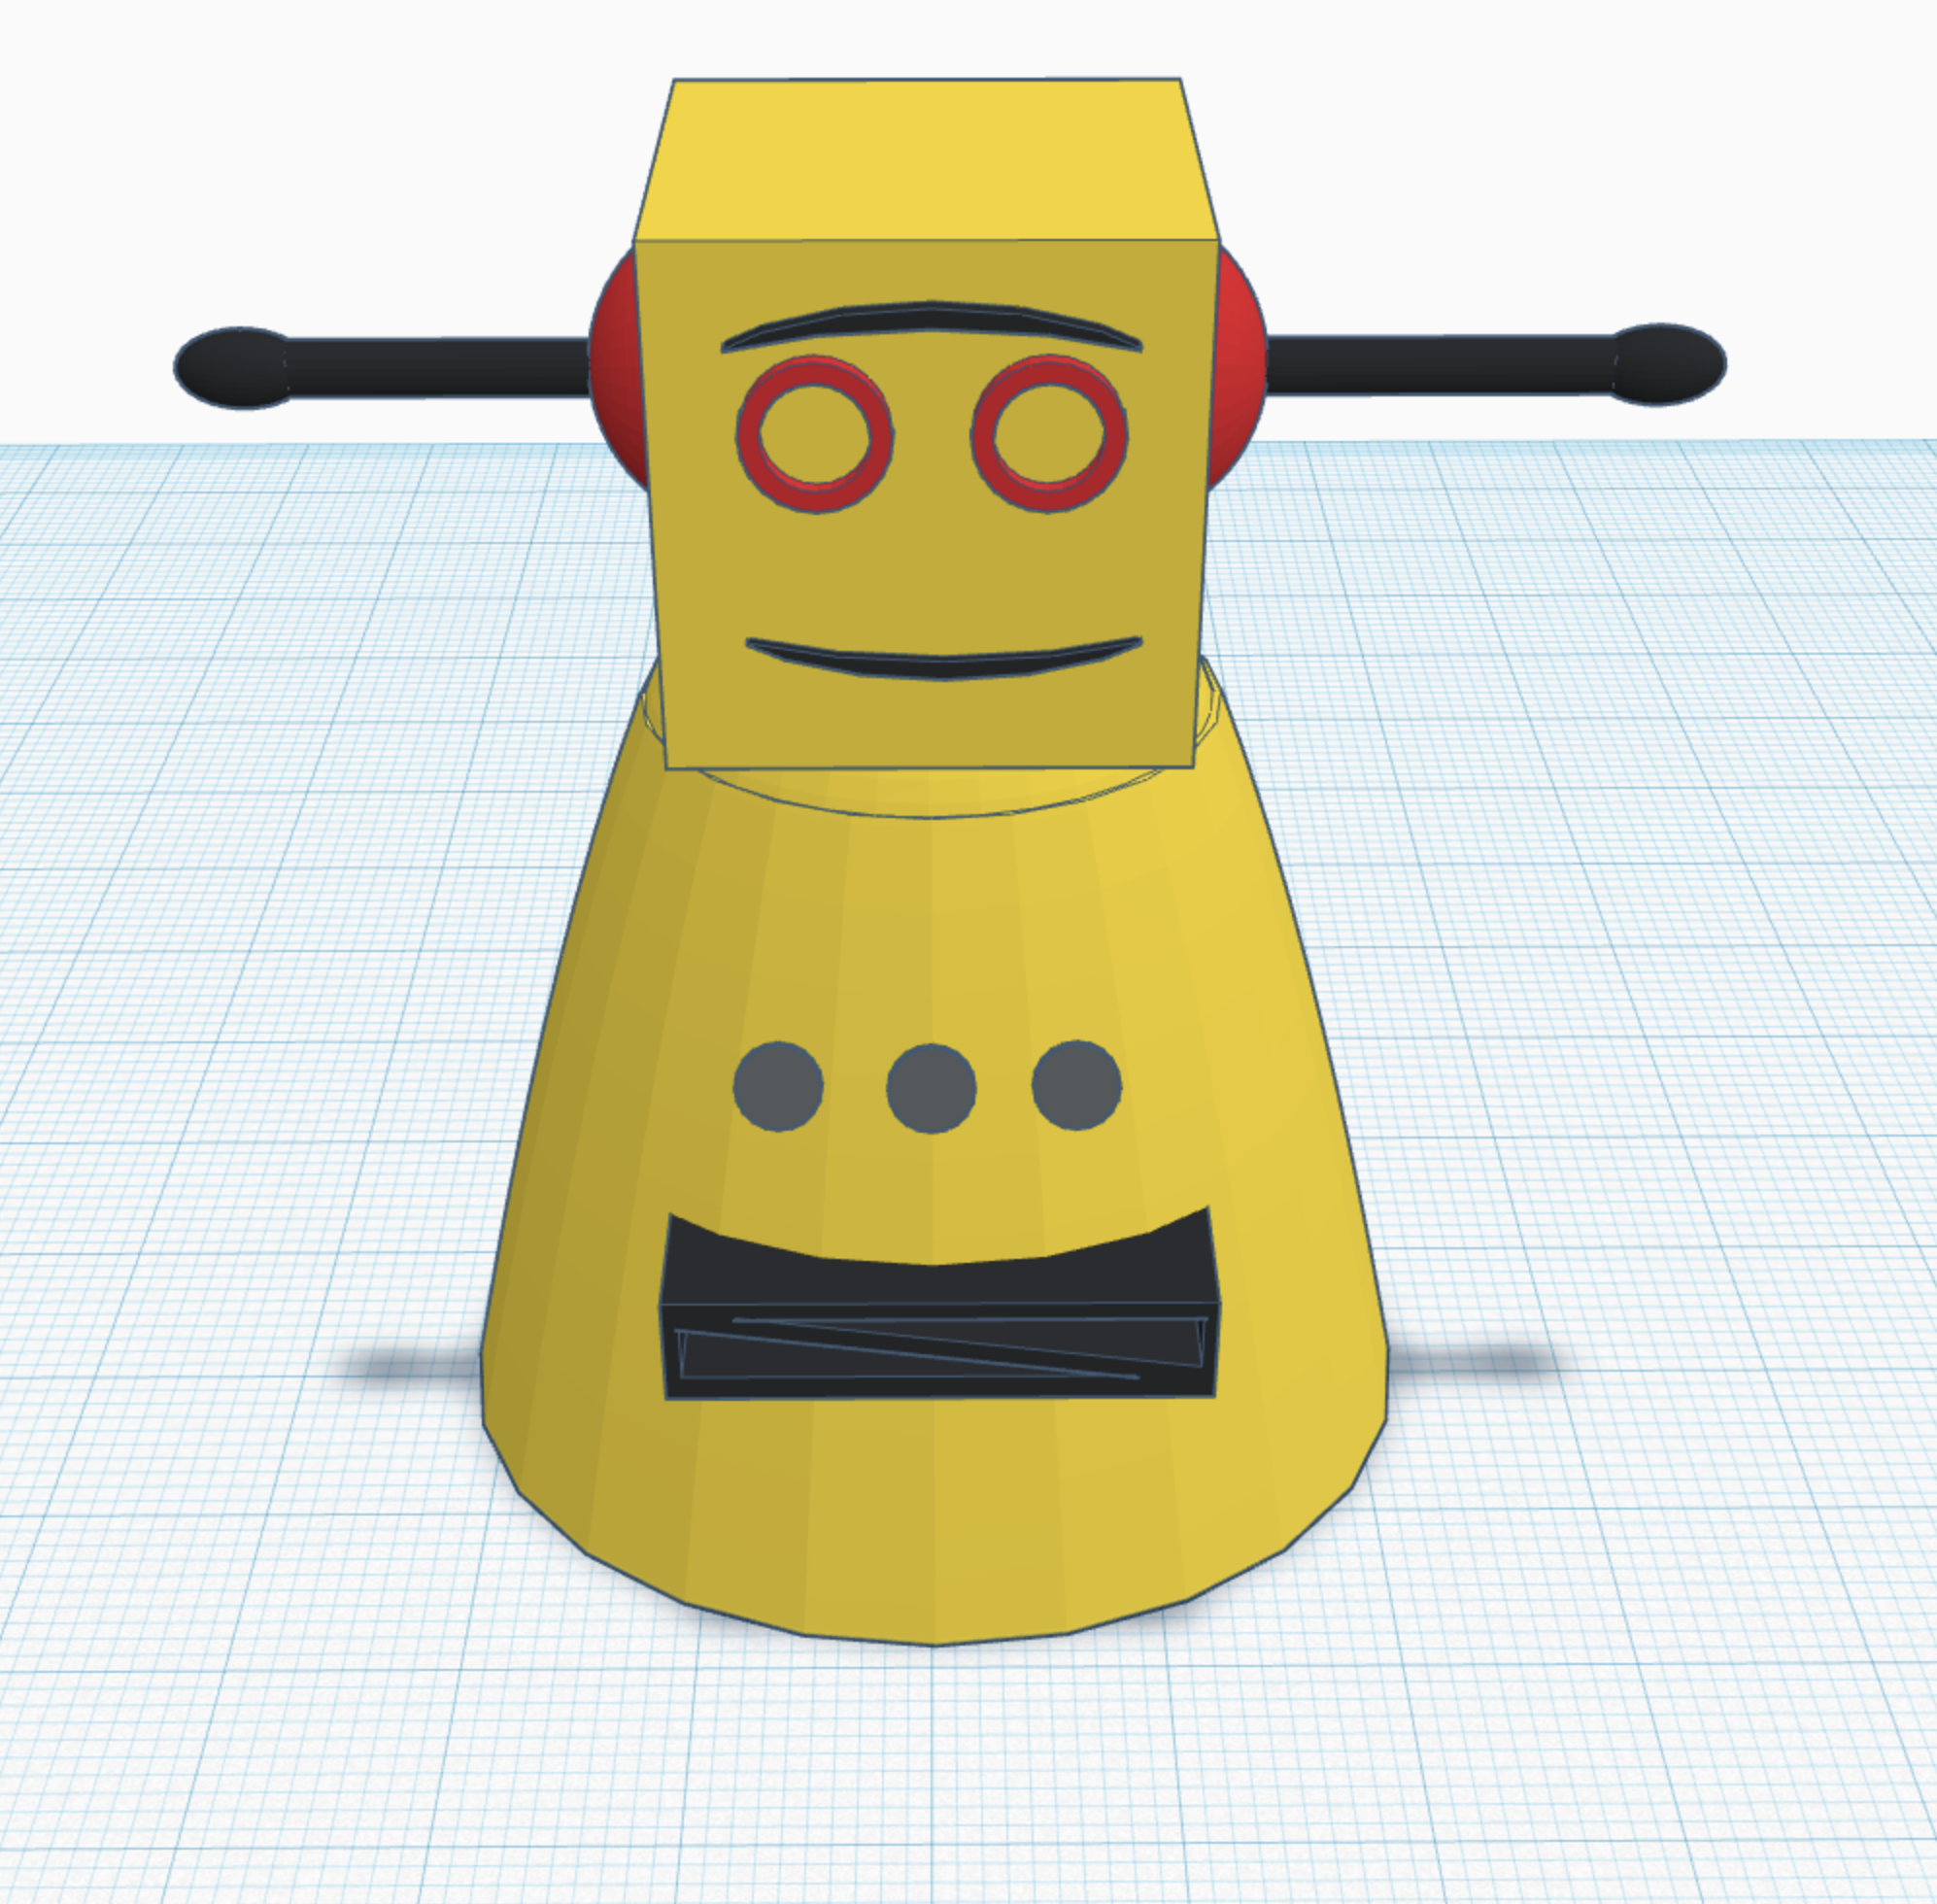
Instructables Robot in Tinkercad
by Josiah Miller in Teachers > 3D Design
2010 Views, 5 Favorites, 0 Comments
Instructables Robot in Tinkercad

I tried something for the fandom contest, I hope its good. I asked my mom what I was a fan of and she said I spend to much time on Instructables and Tinkercad. So I made an Instructables themed robot on Tinkercad!
Hope you like it.
-Josiah
Supplies
just a computer and Tinkercad.
Step 1 Head
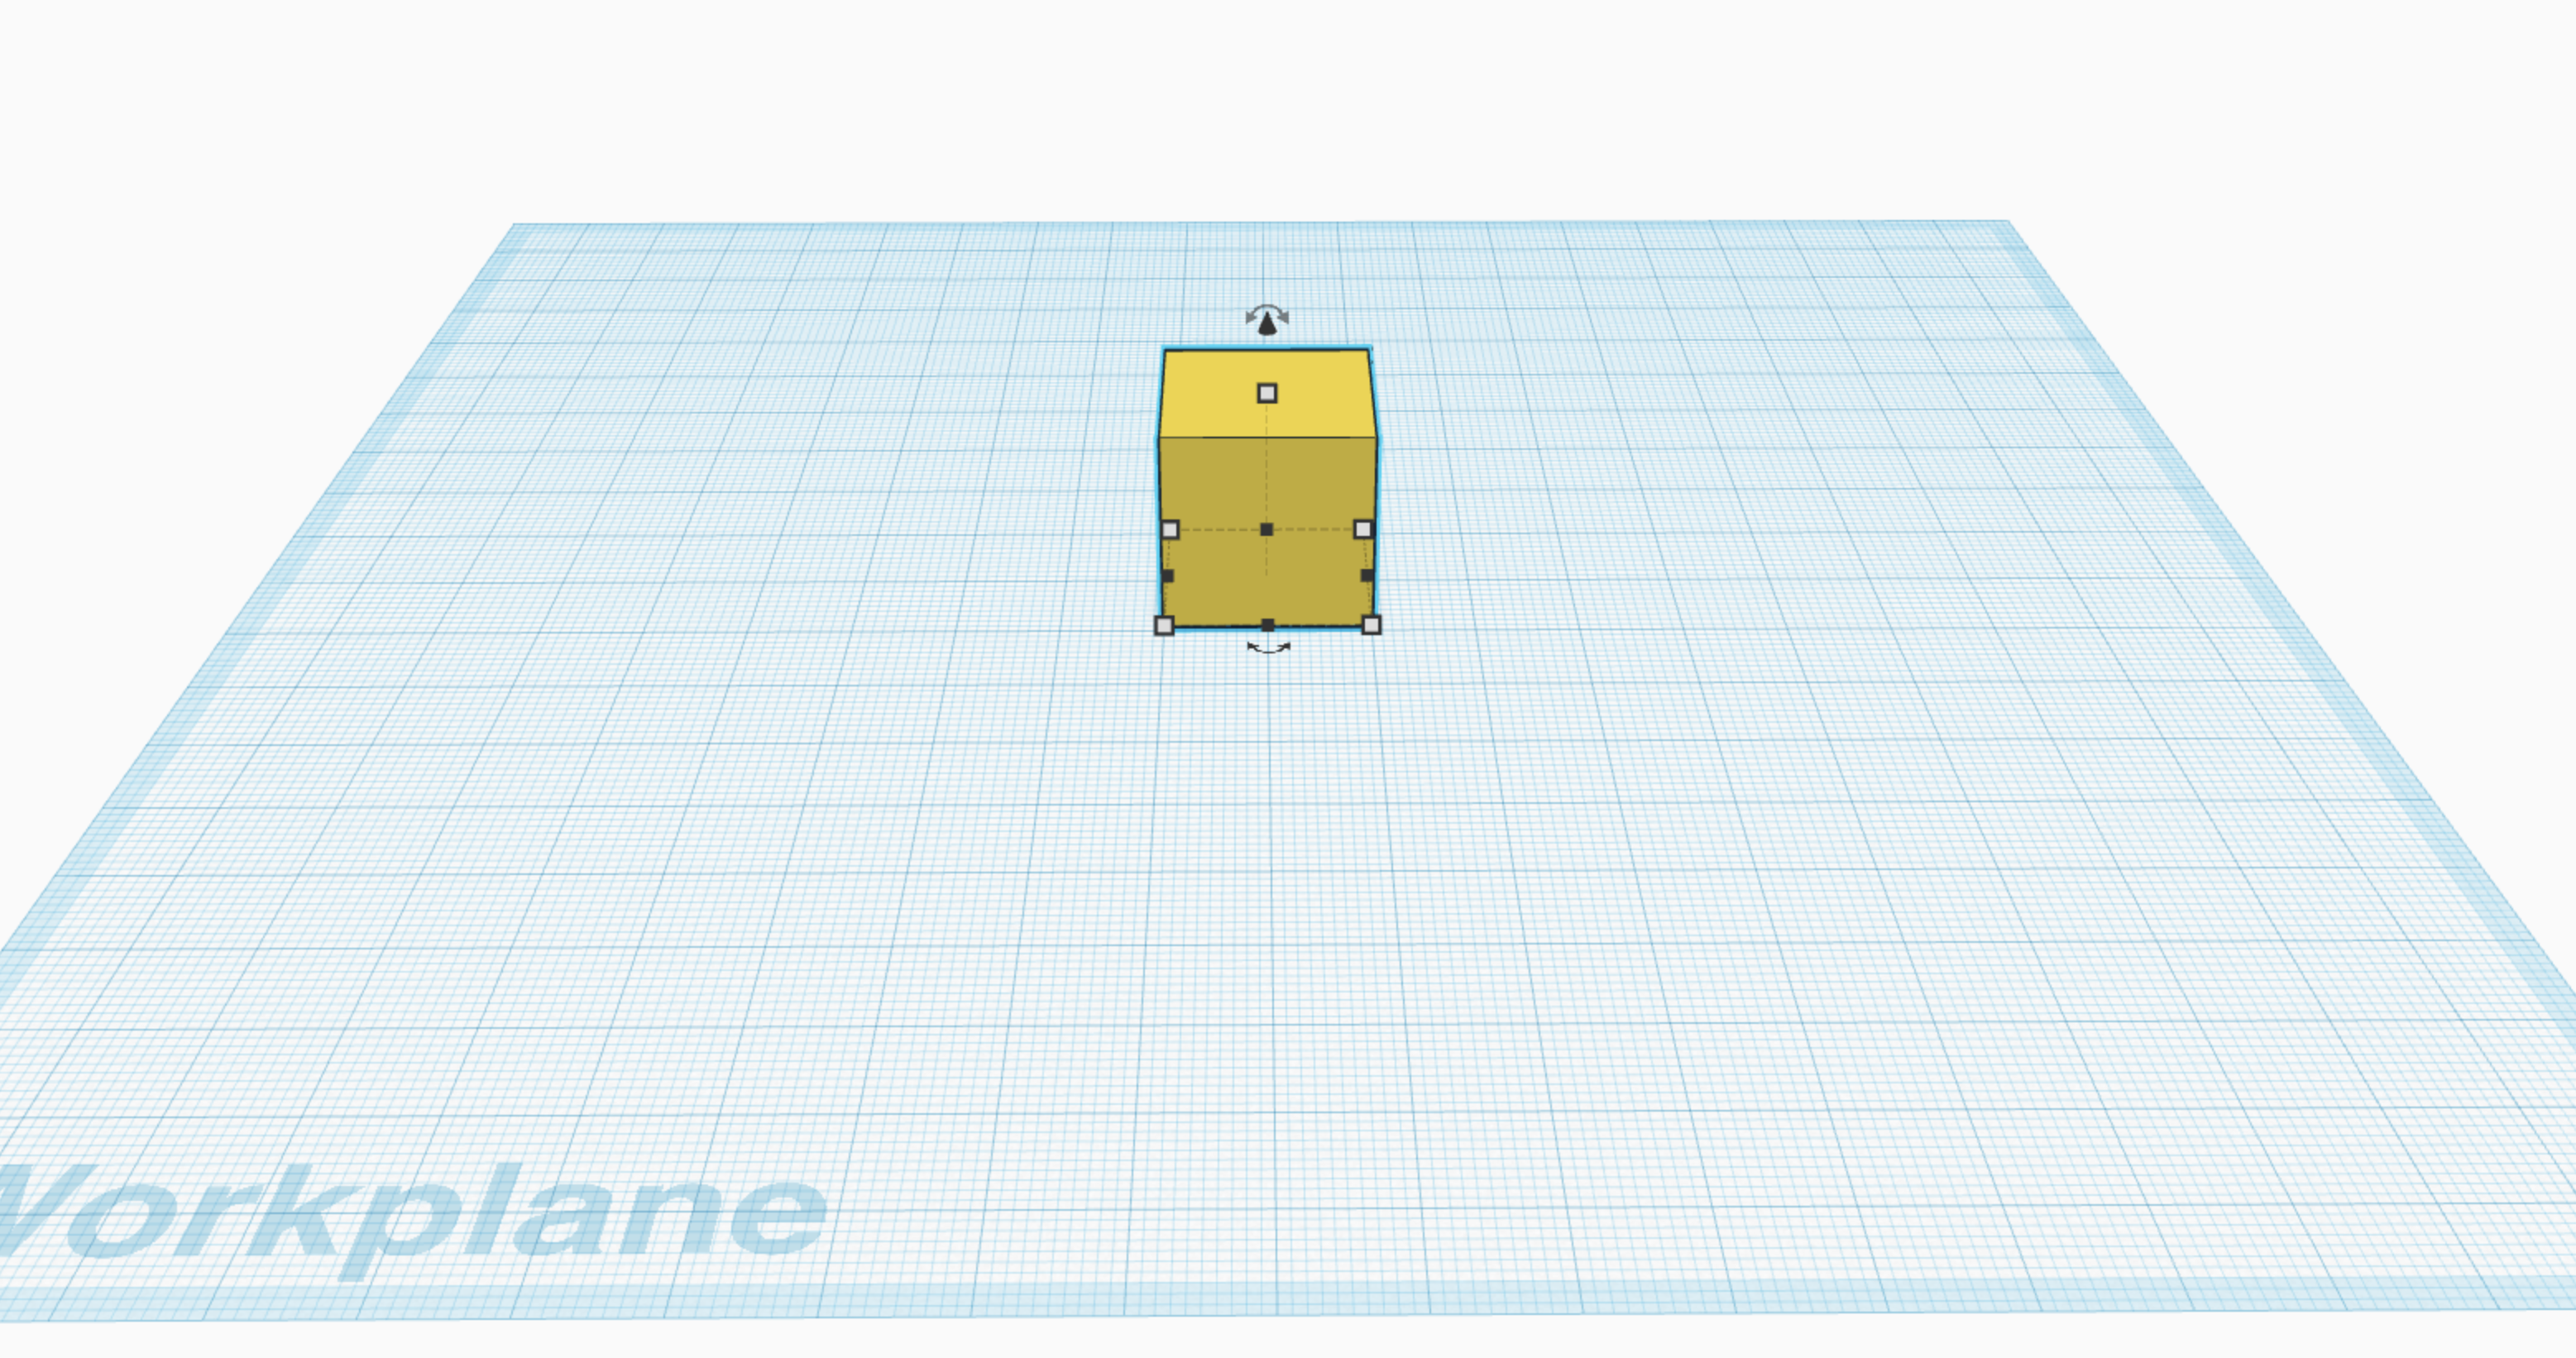
Start with the head just place a standard size cube on the screen
Step 2 "ears"
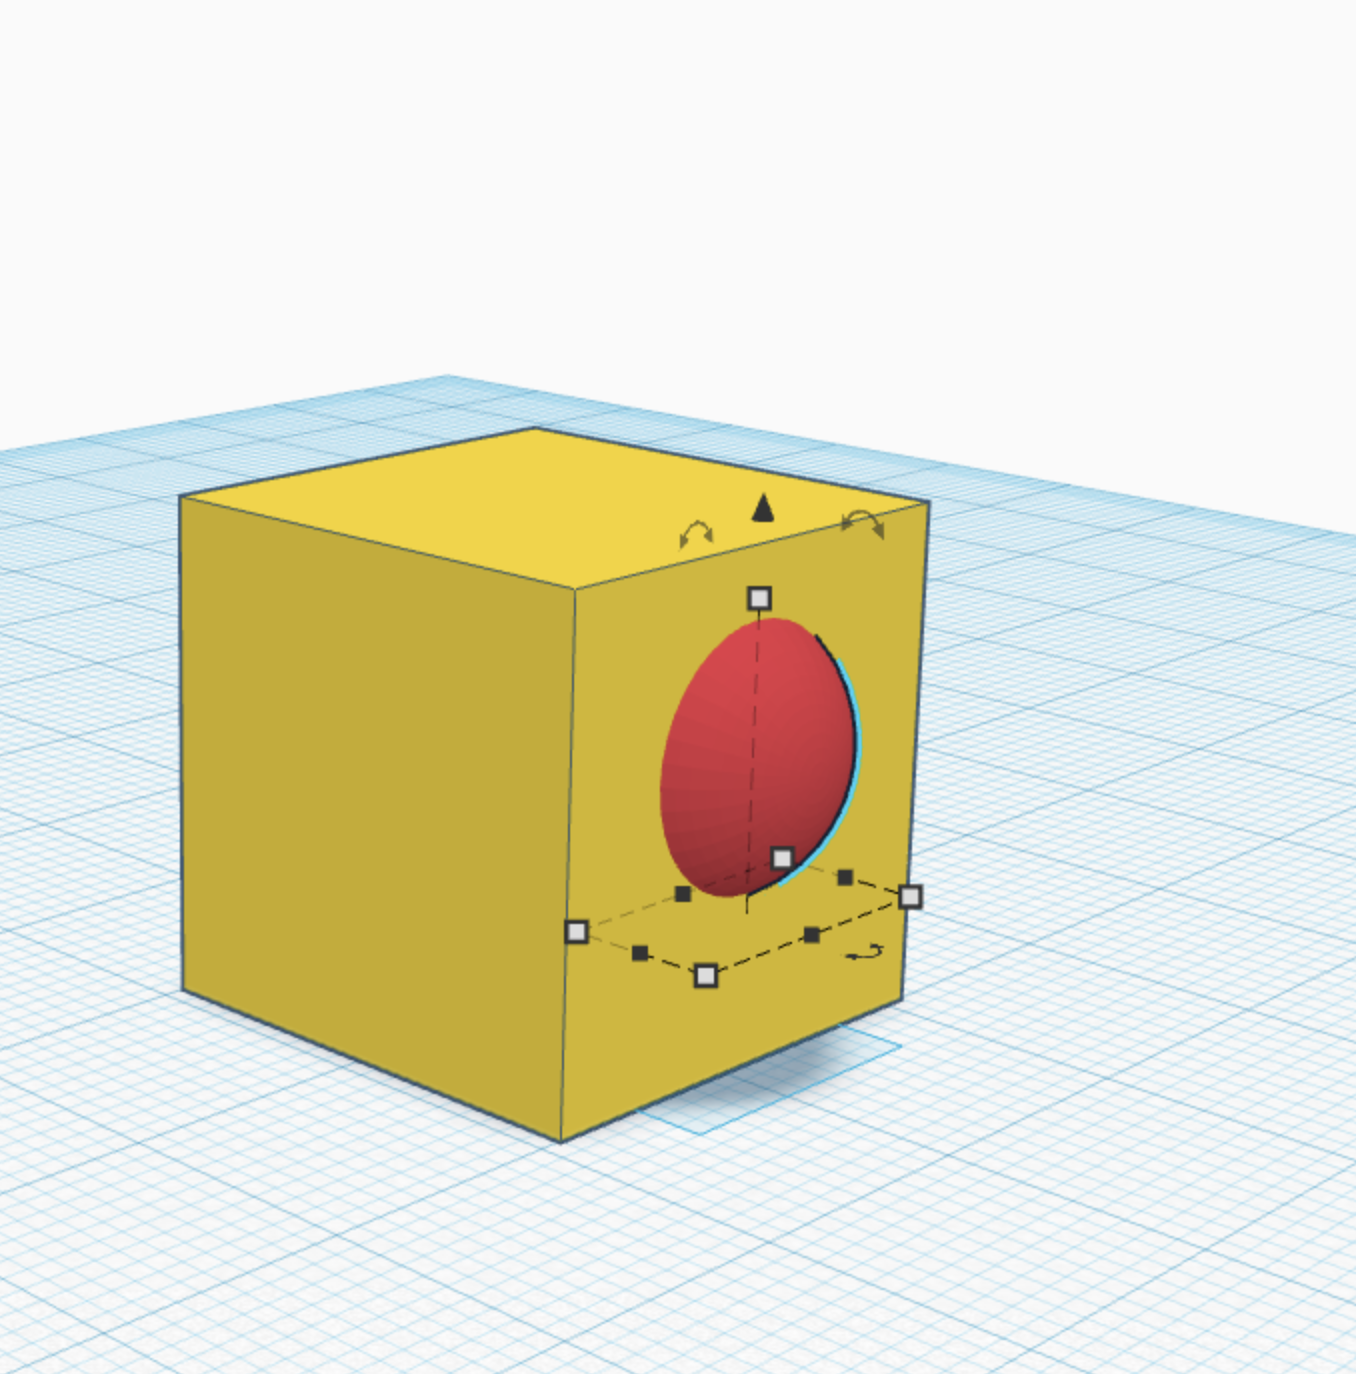
make a red semicircle, half the size of the cube and place it in the middle
repeat step on both sides.
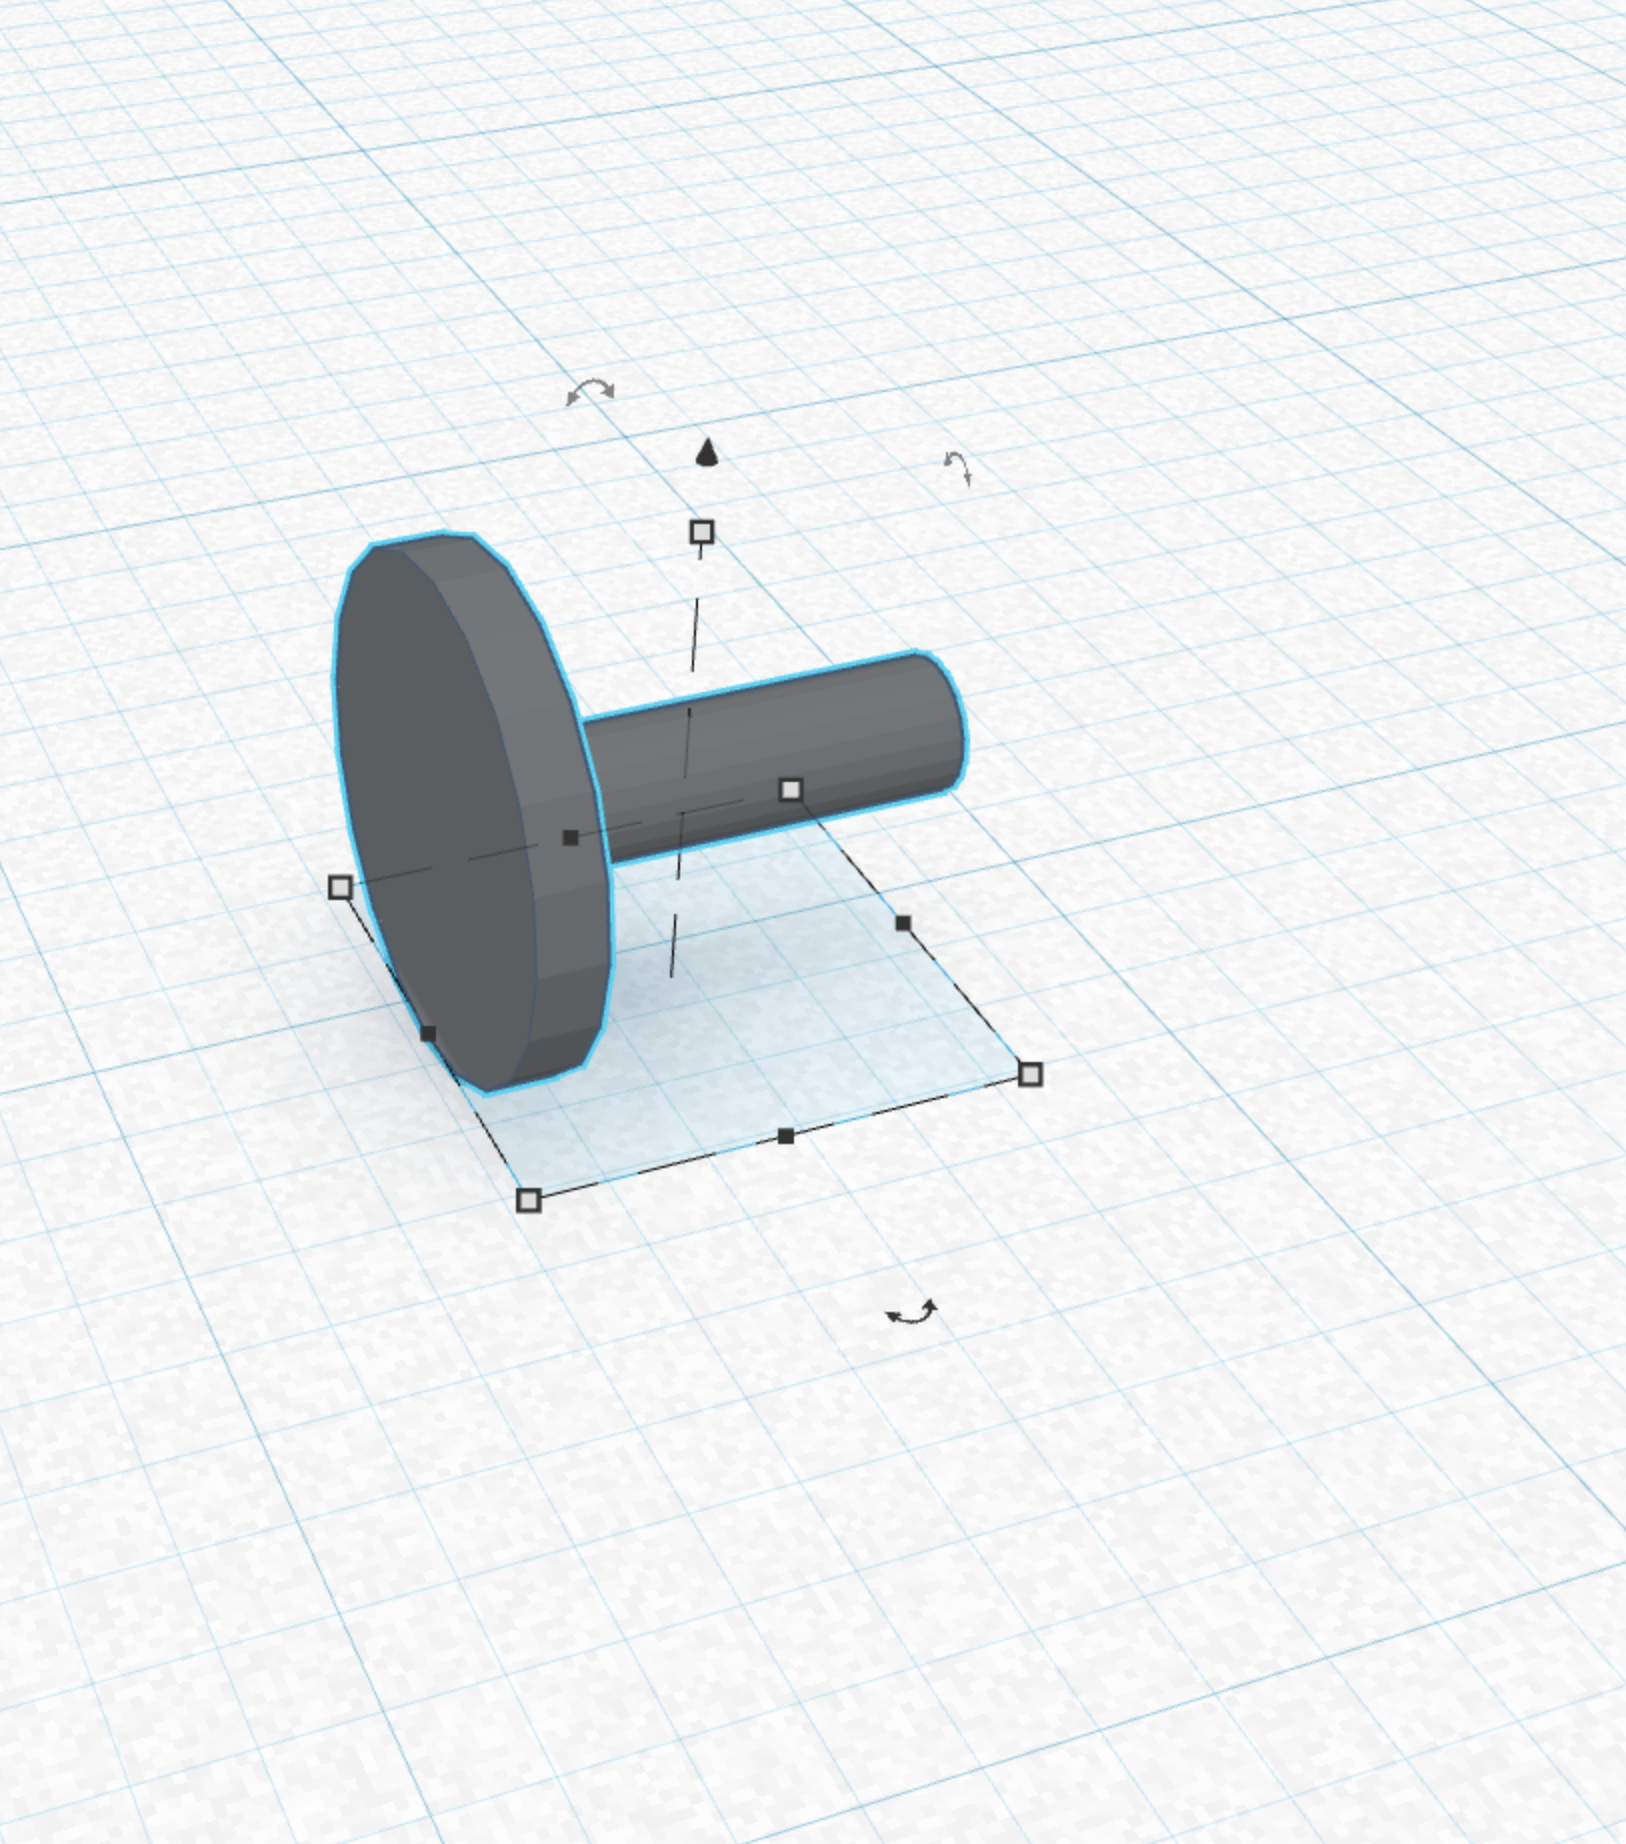
Step 3; Antennae
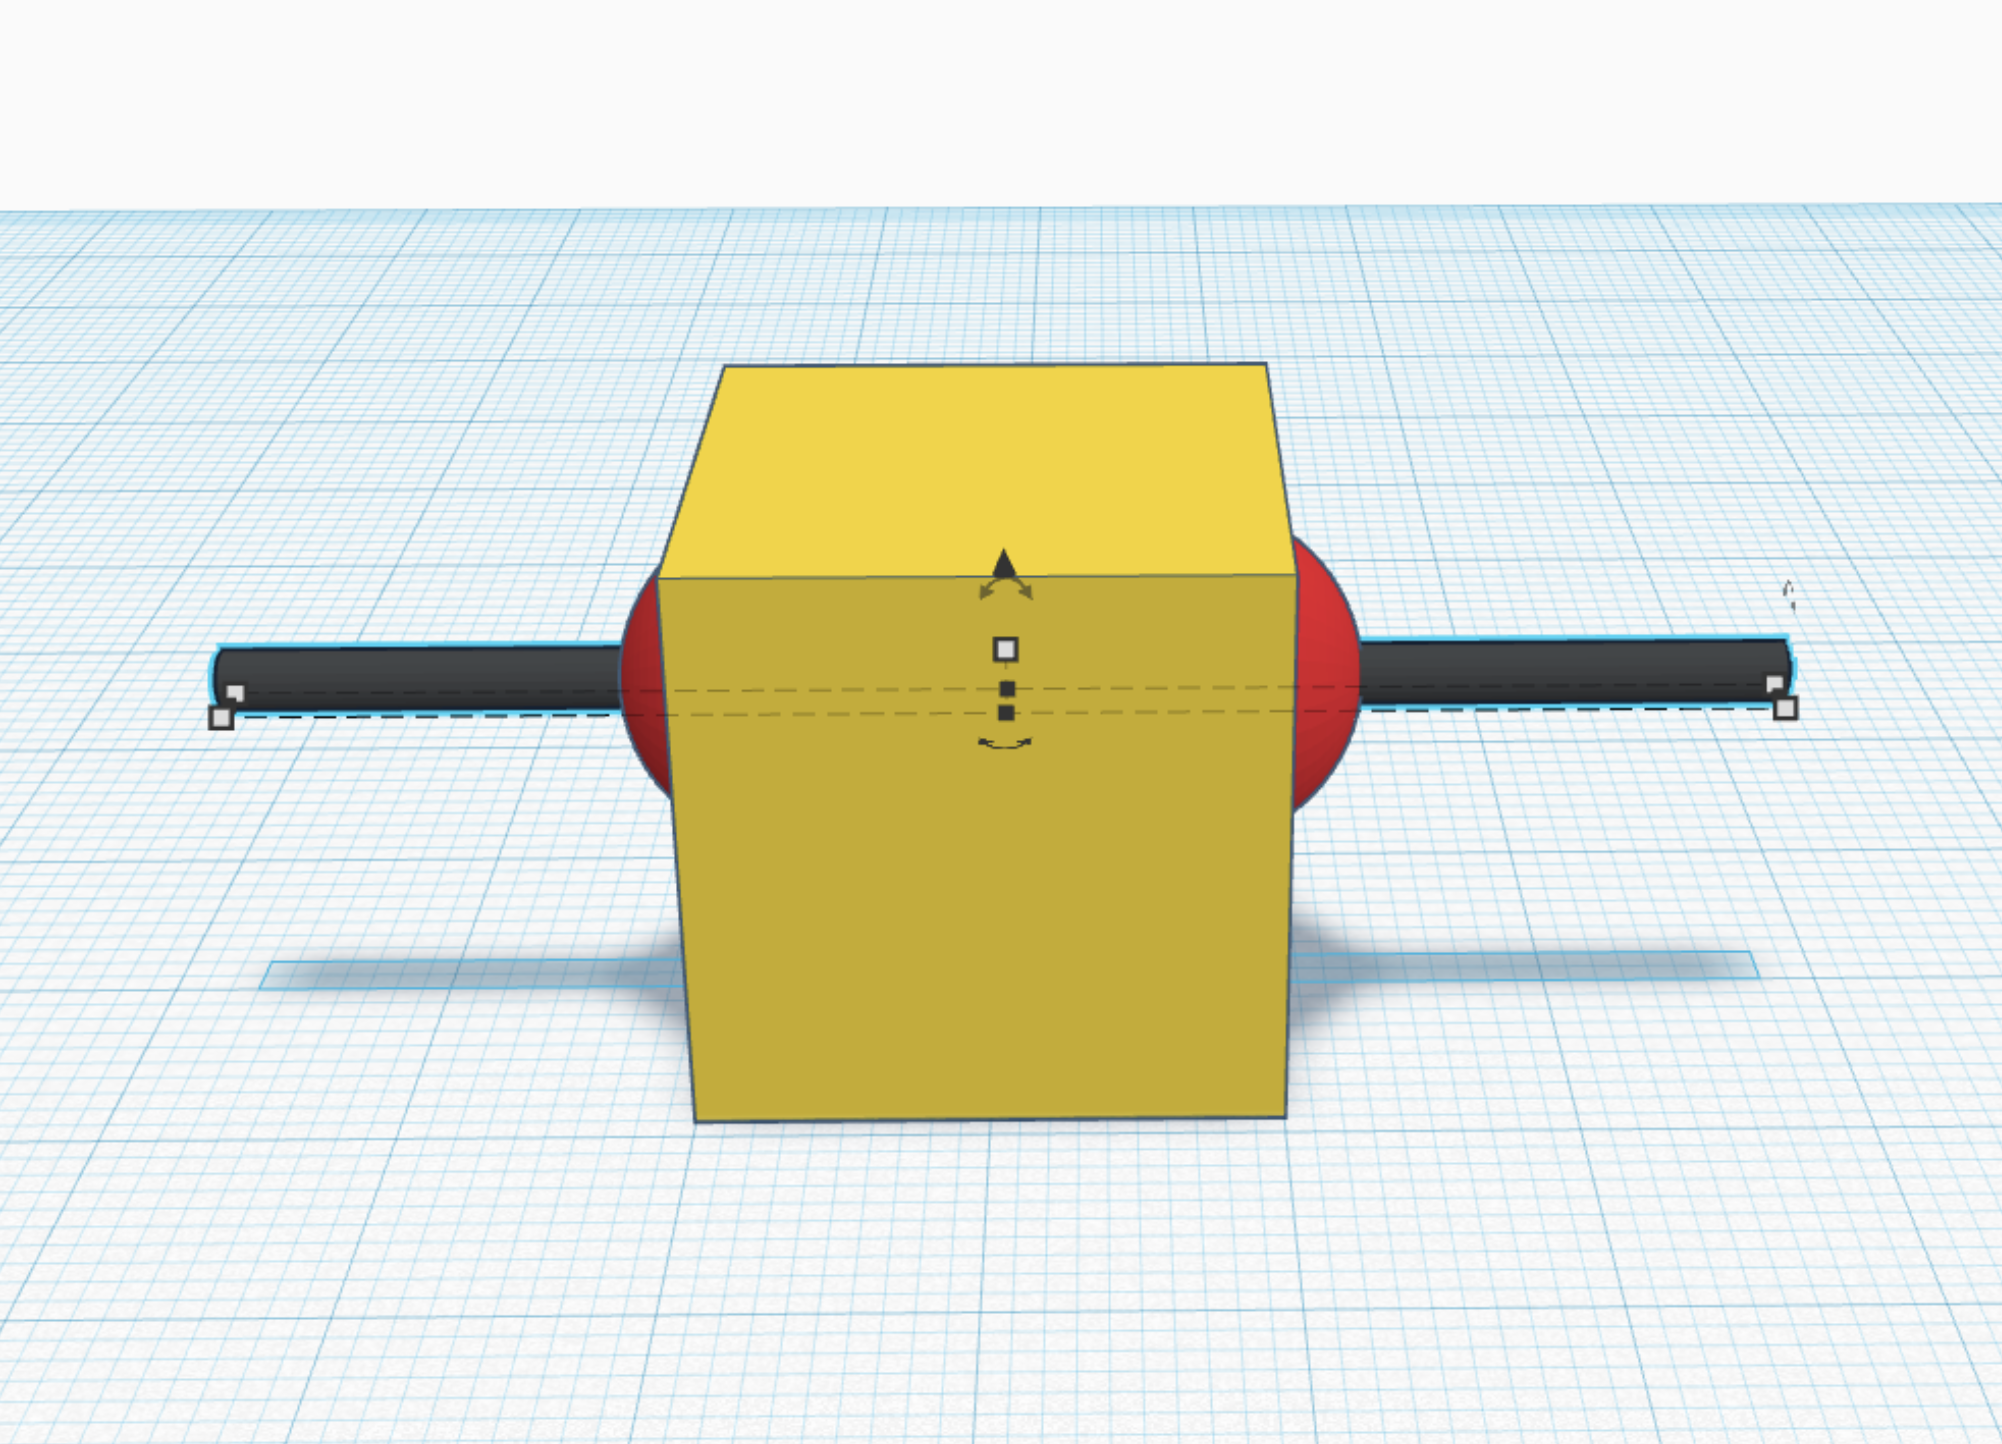
place a cylinder 1/8 of the size of the semicircle through the center of both semicircles, and make it about a 3/4 of a cubes length out of each side.
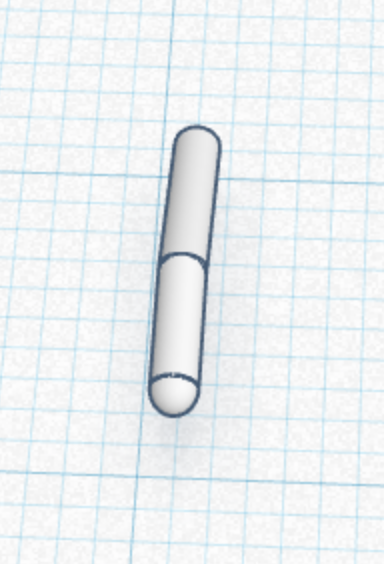
Step 4 Antennae End
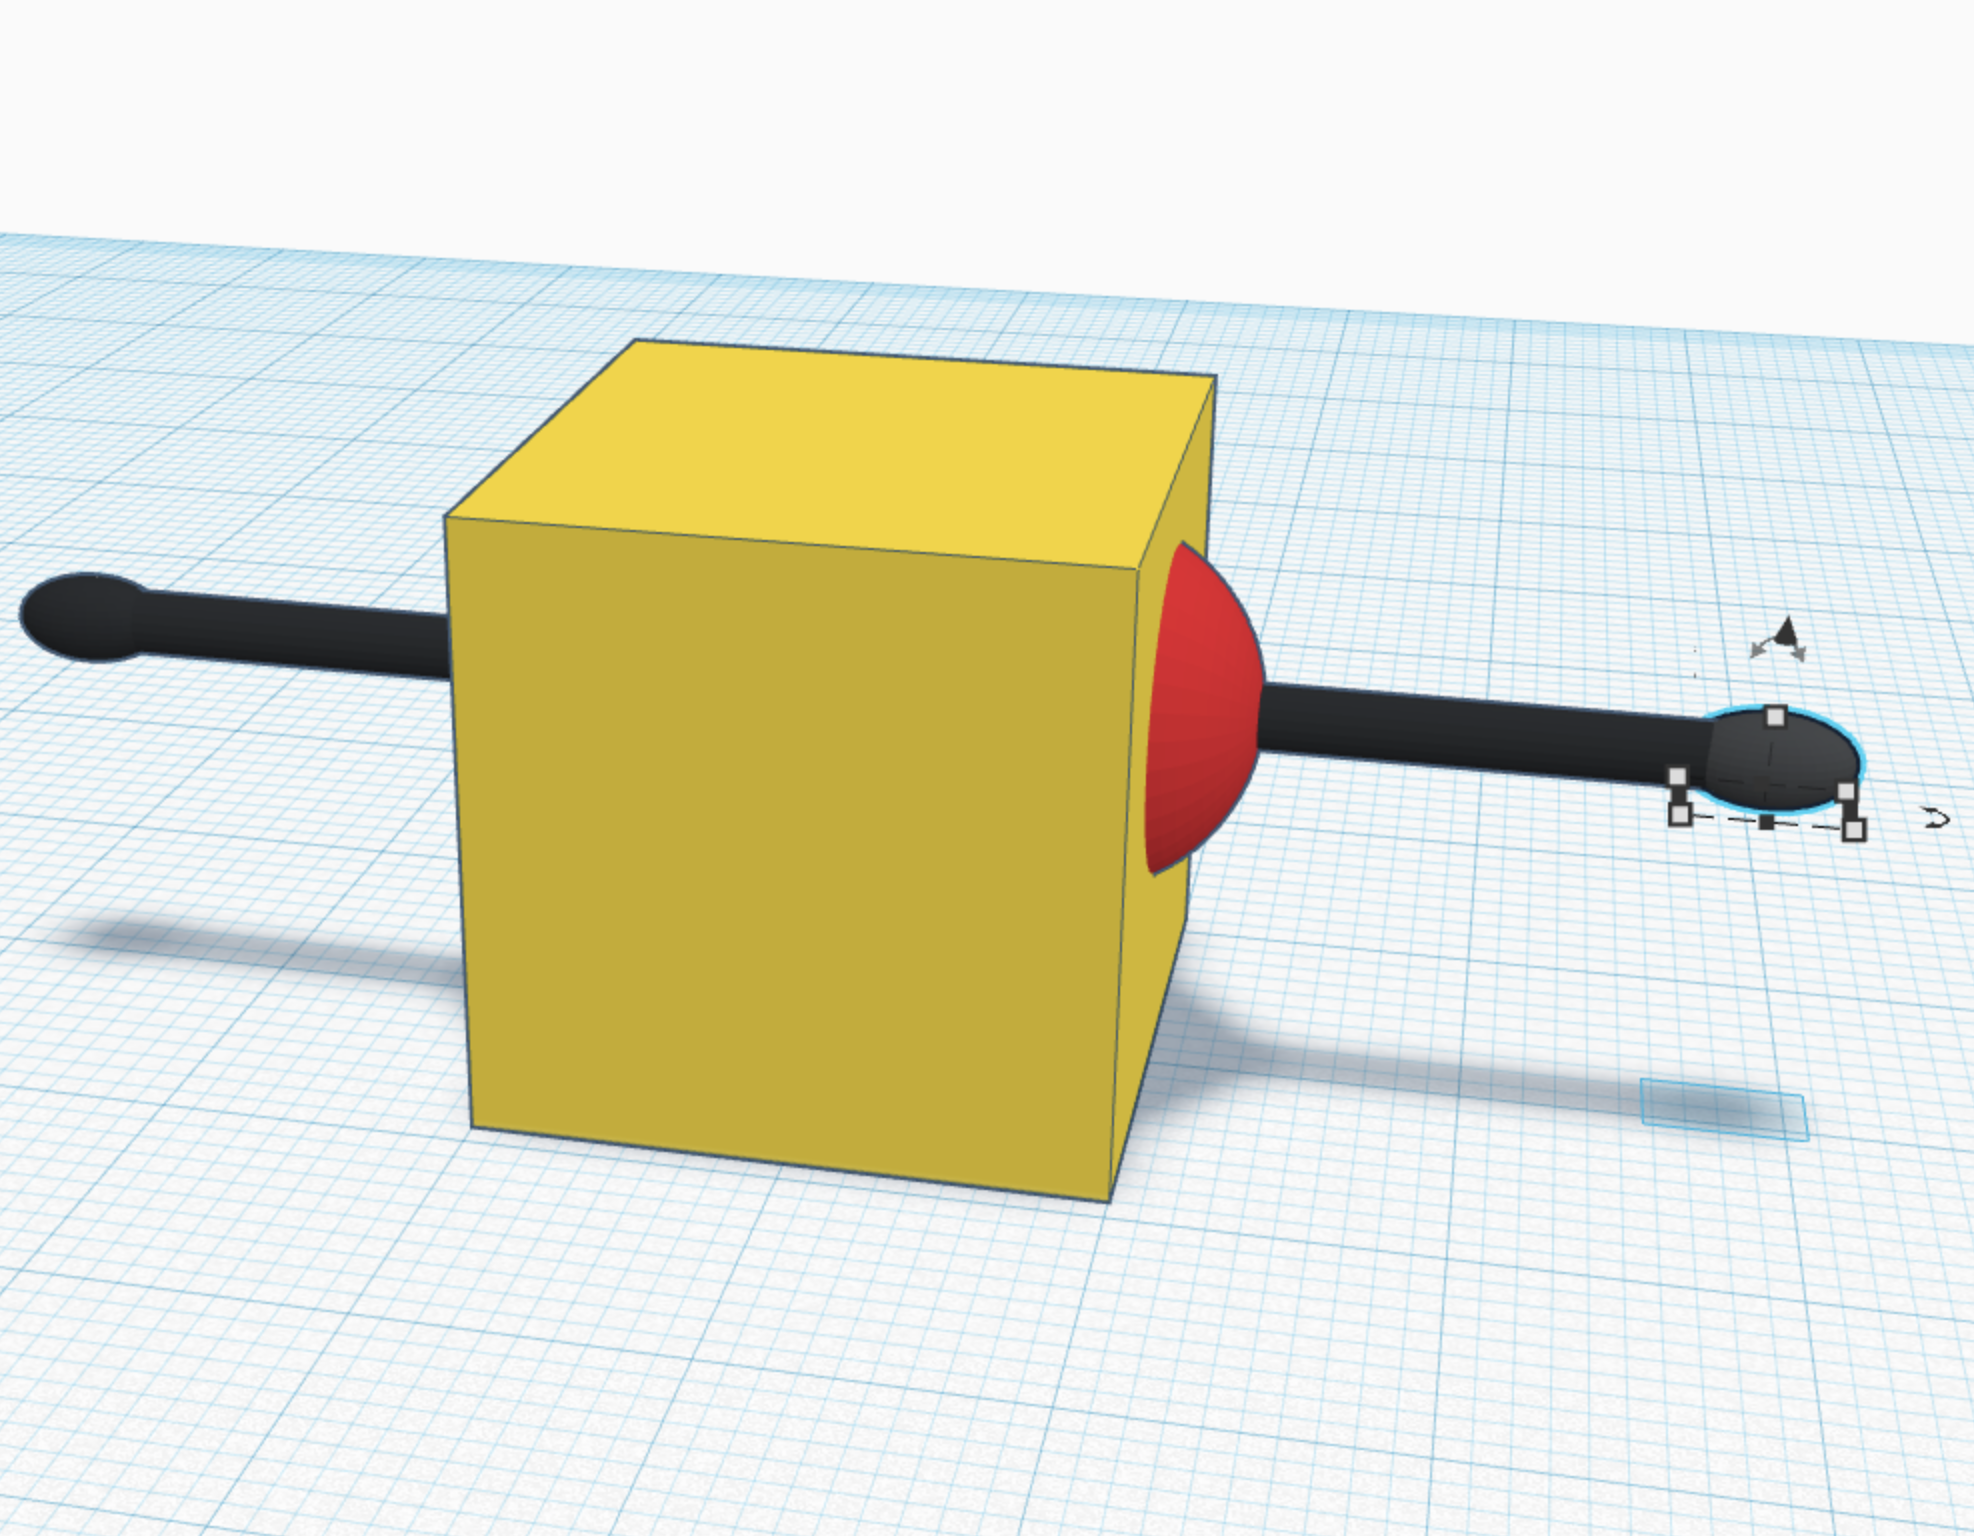
make a sphere just a little bigger than the circumference of the cylinder and double its the height of the cylinder, and place it on the end of the cylinder, repeat 2 times.
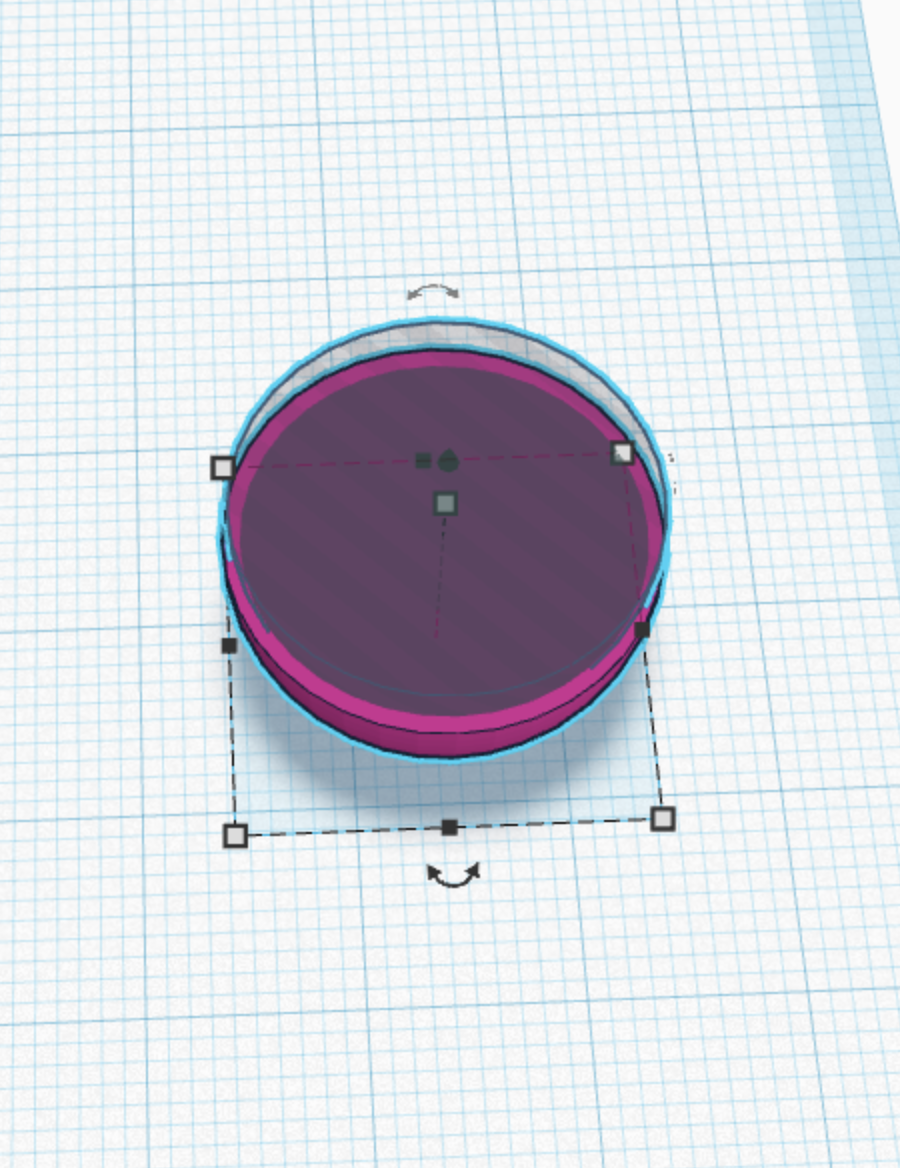
Step 5; Eyebrows
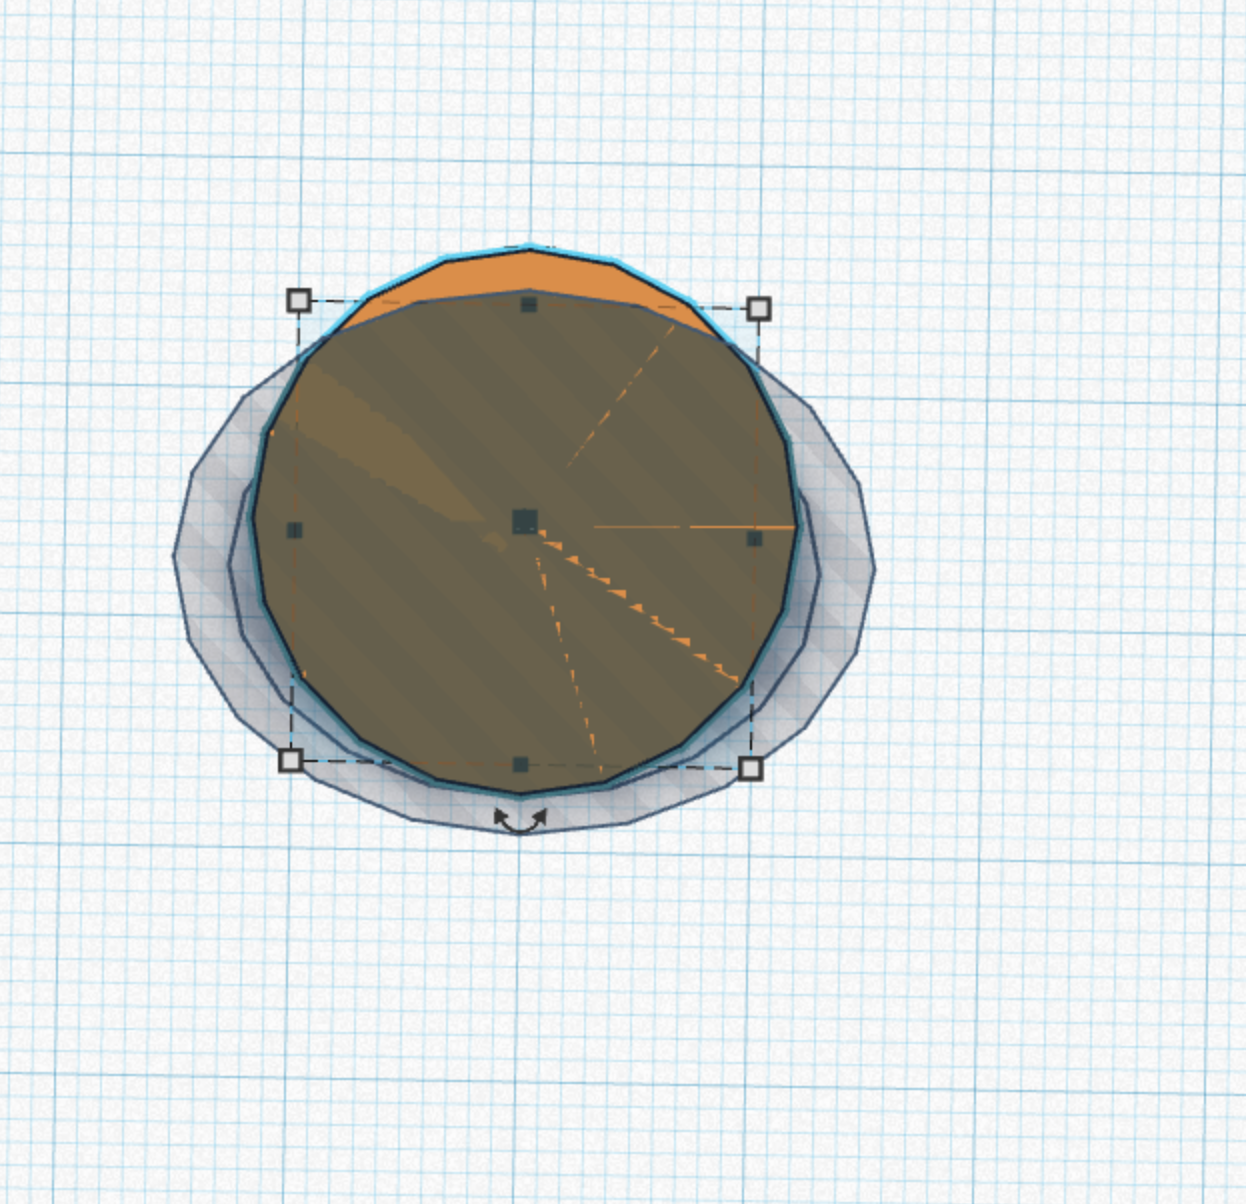
make a circle, and another one, extend the other over the first as shown and make it into a hole. group both shapes.
Step 6; What Happened.
you should have gotten this.
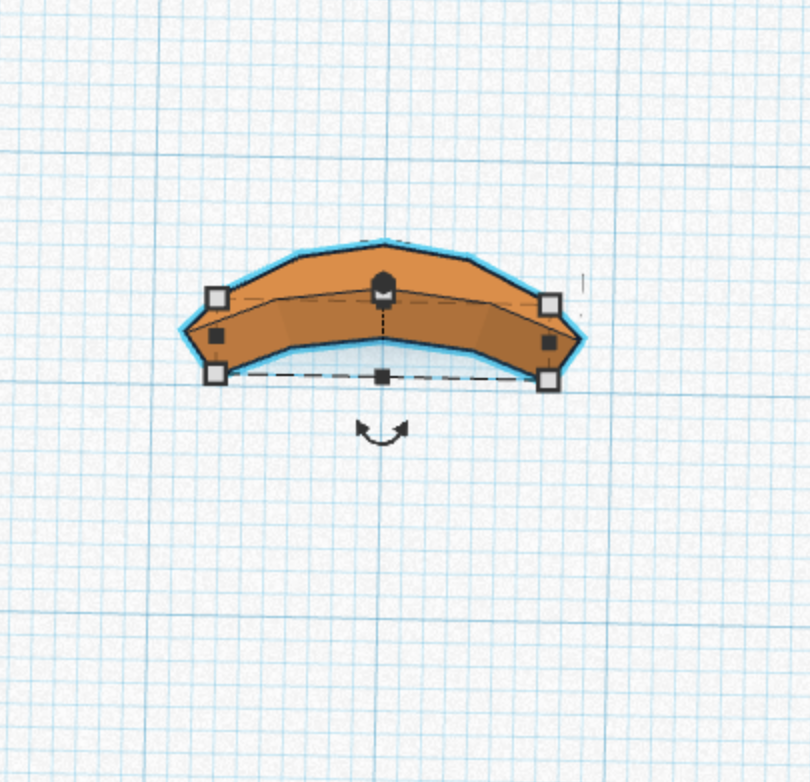
Step 7; Brows
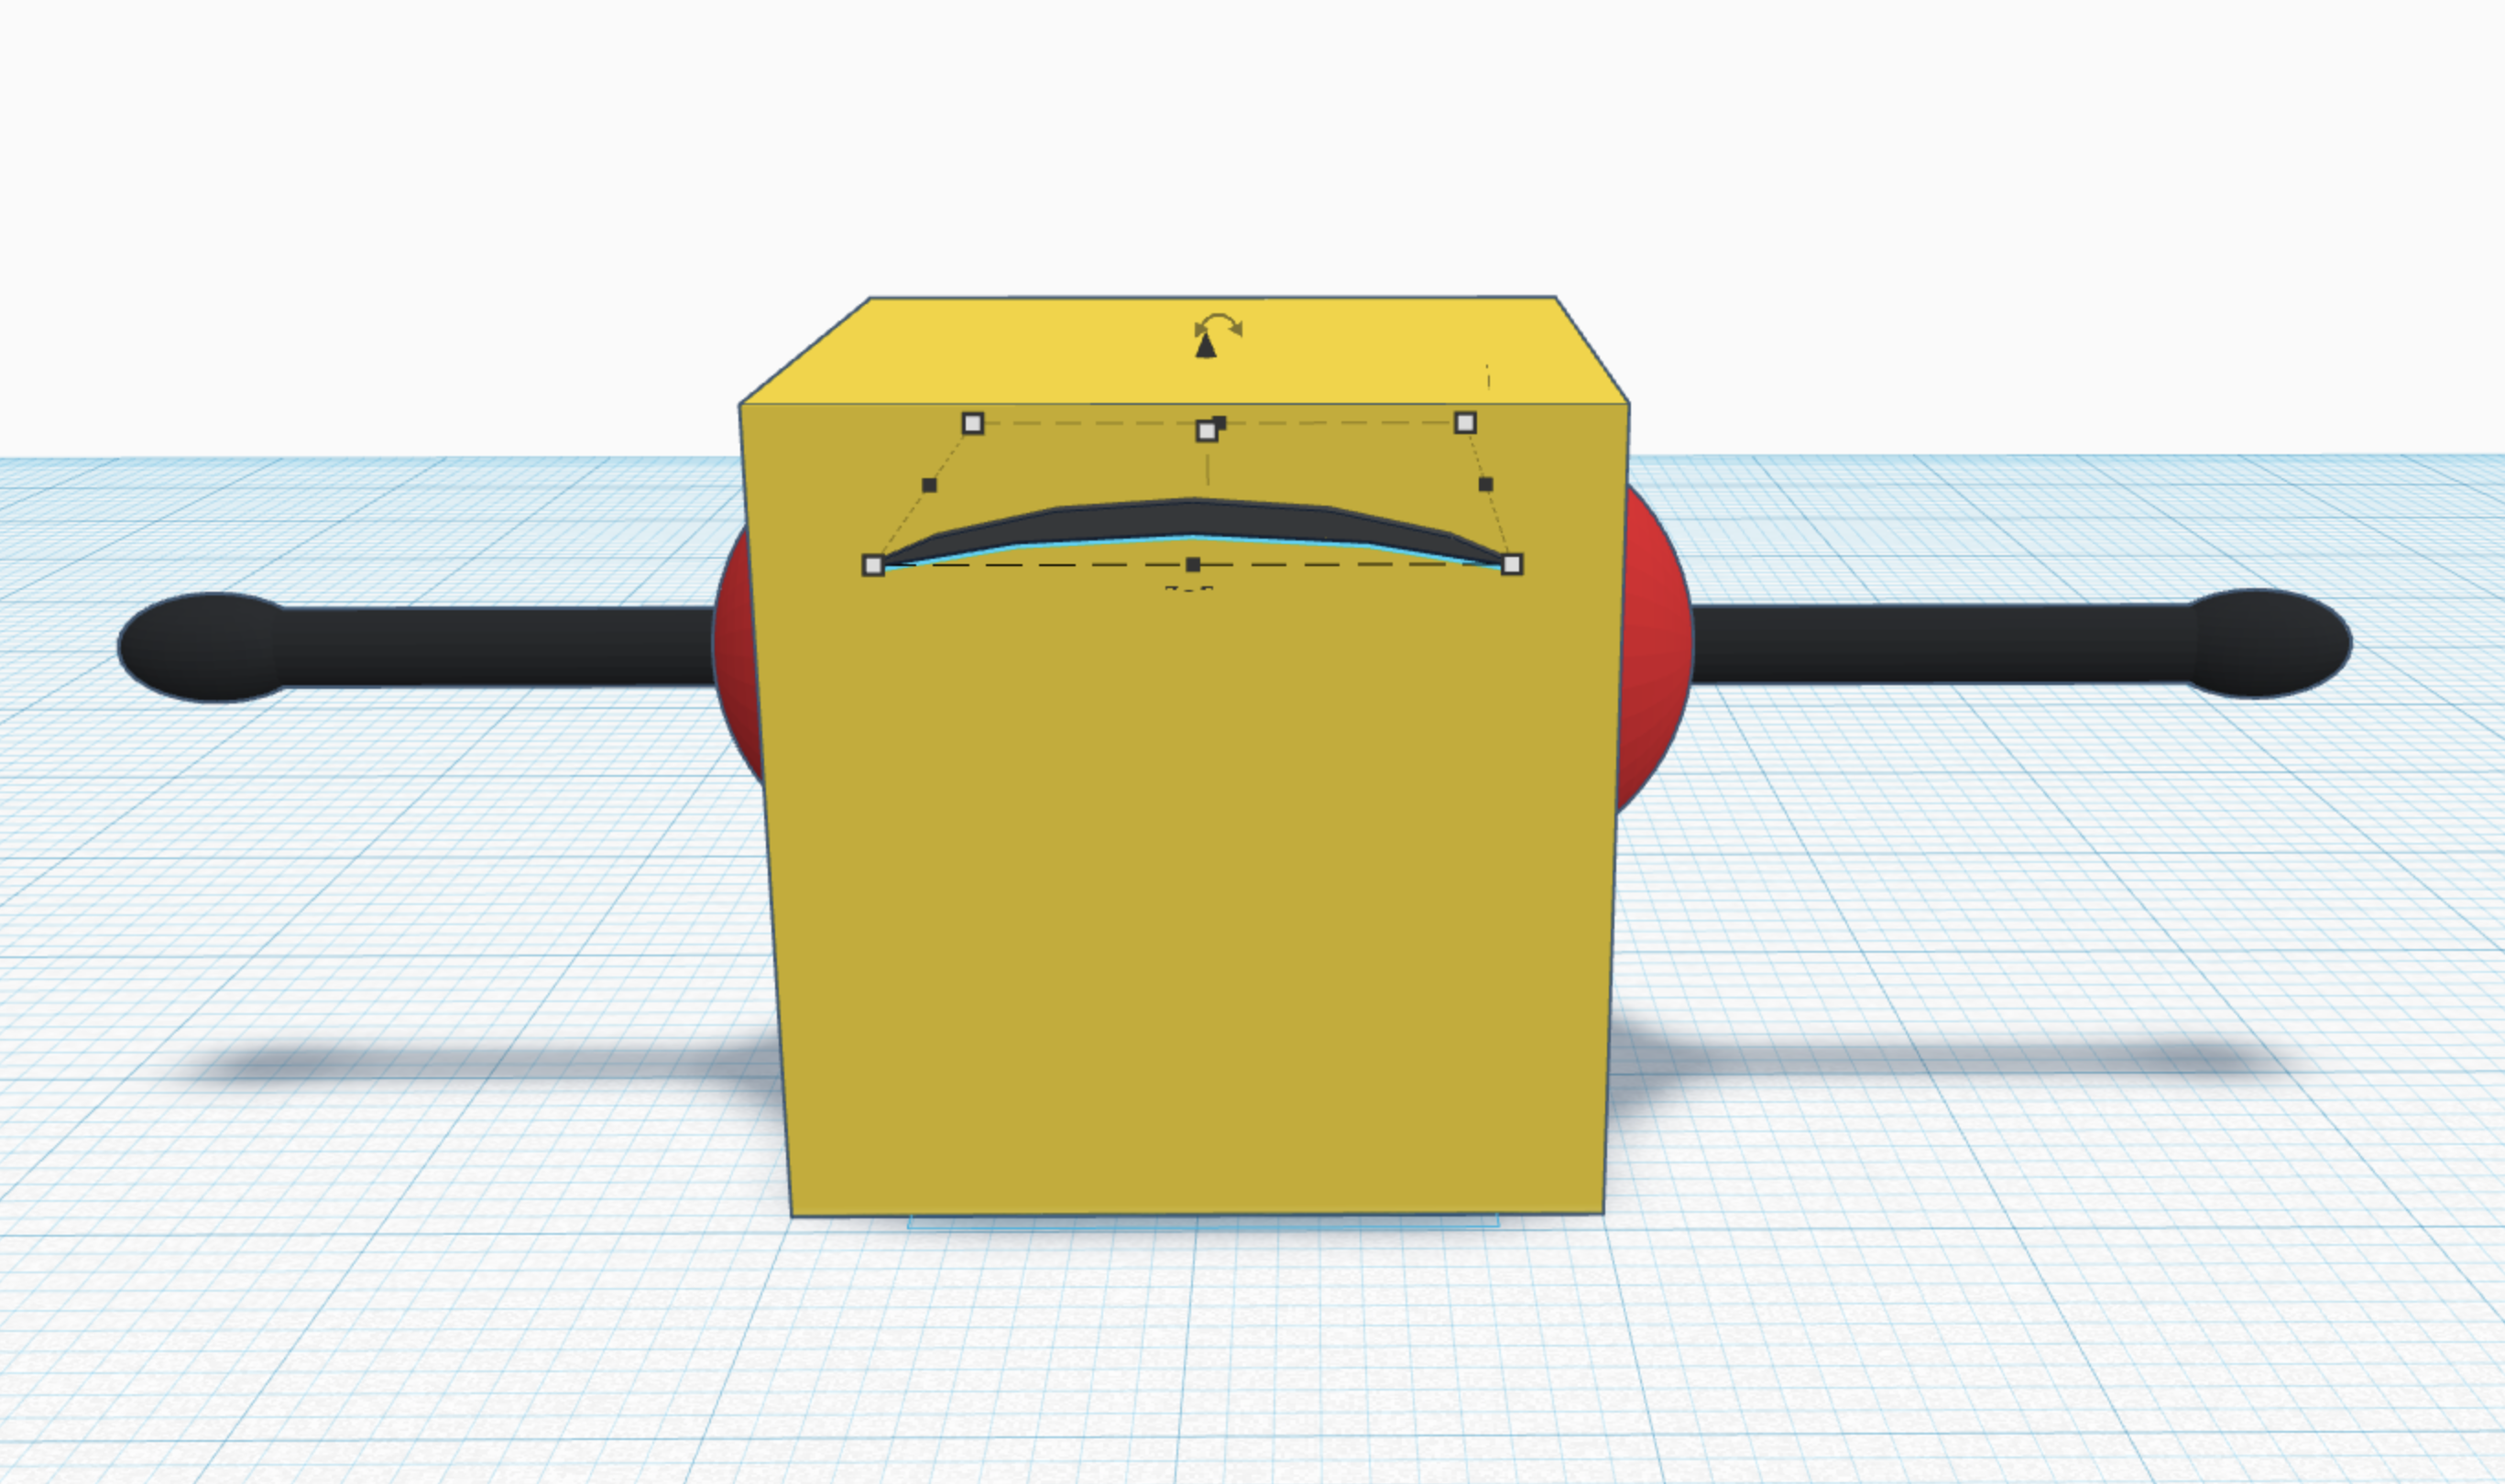
flip ninety degrees, and place above the antennae as shown.
Step 8; Eyes
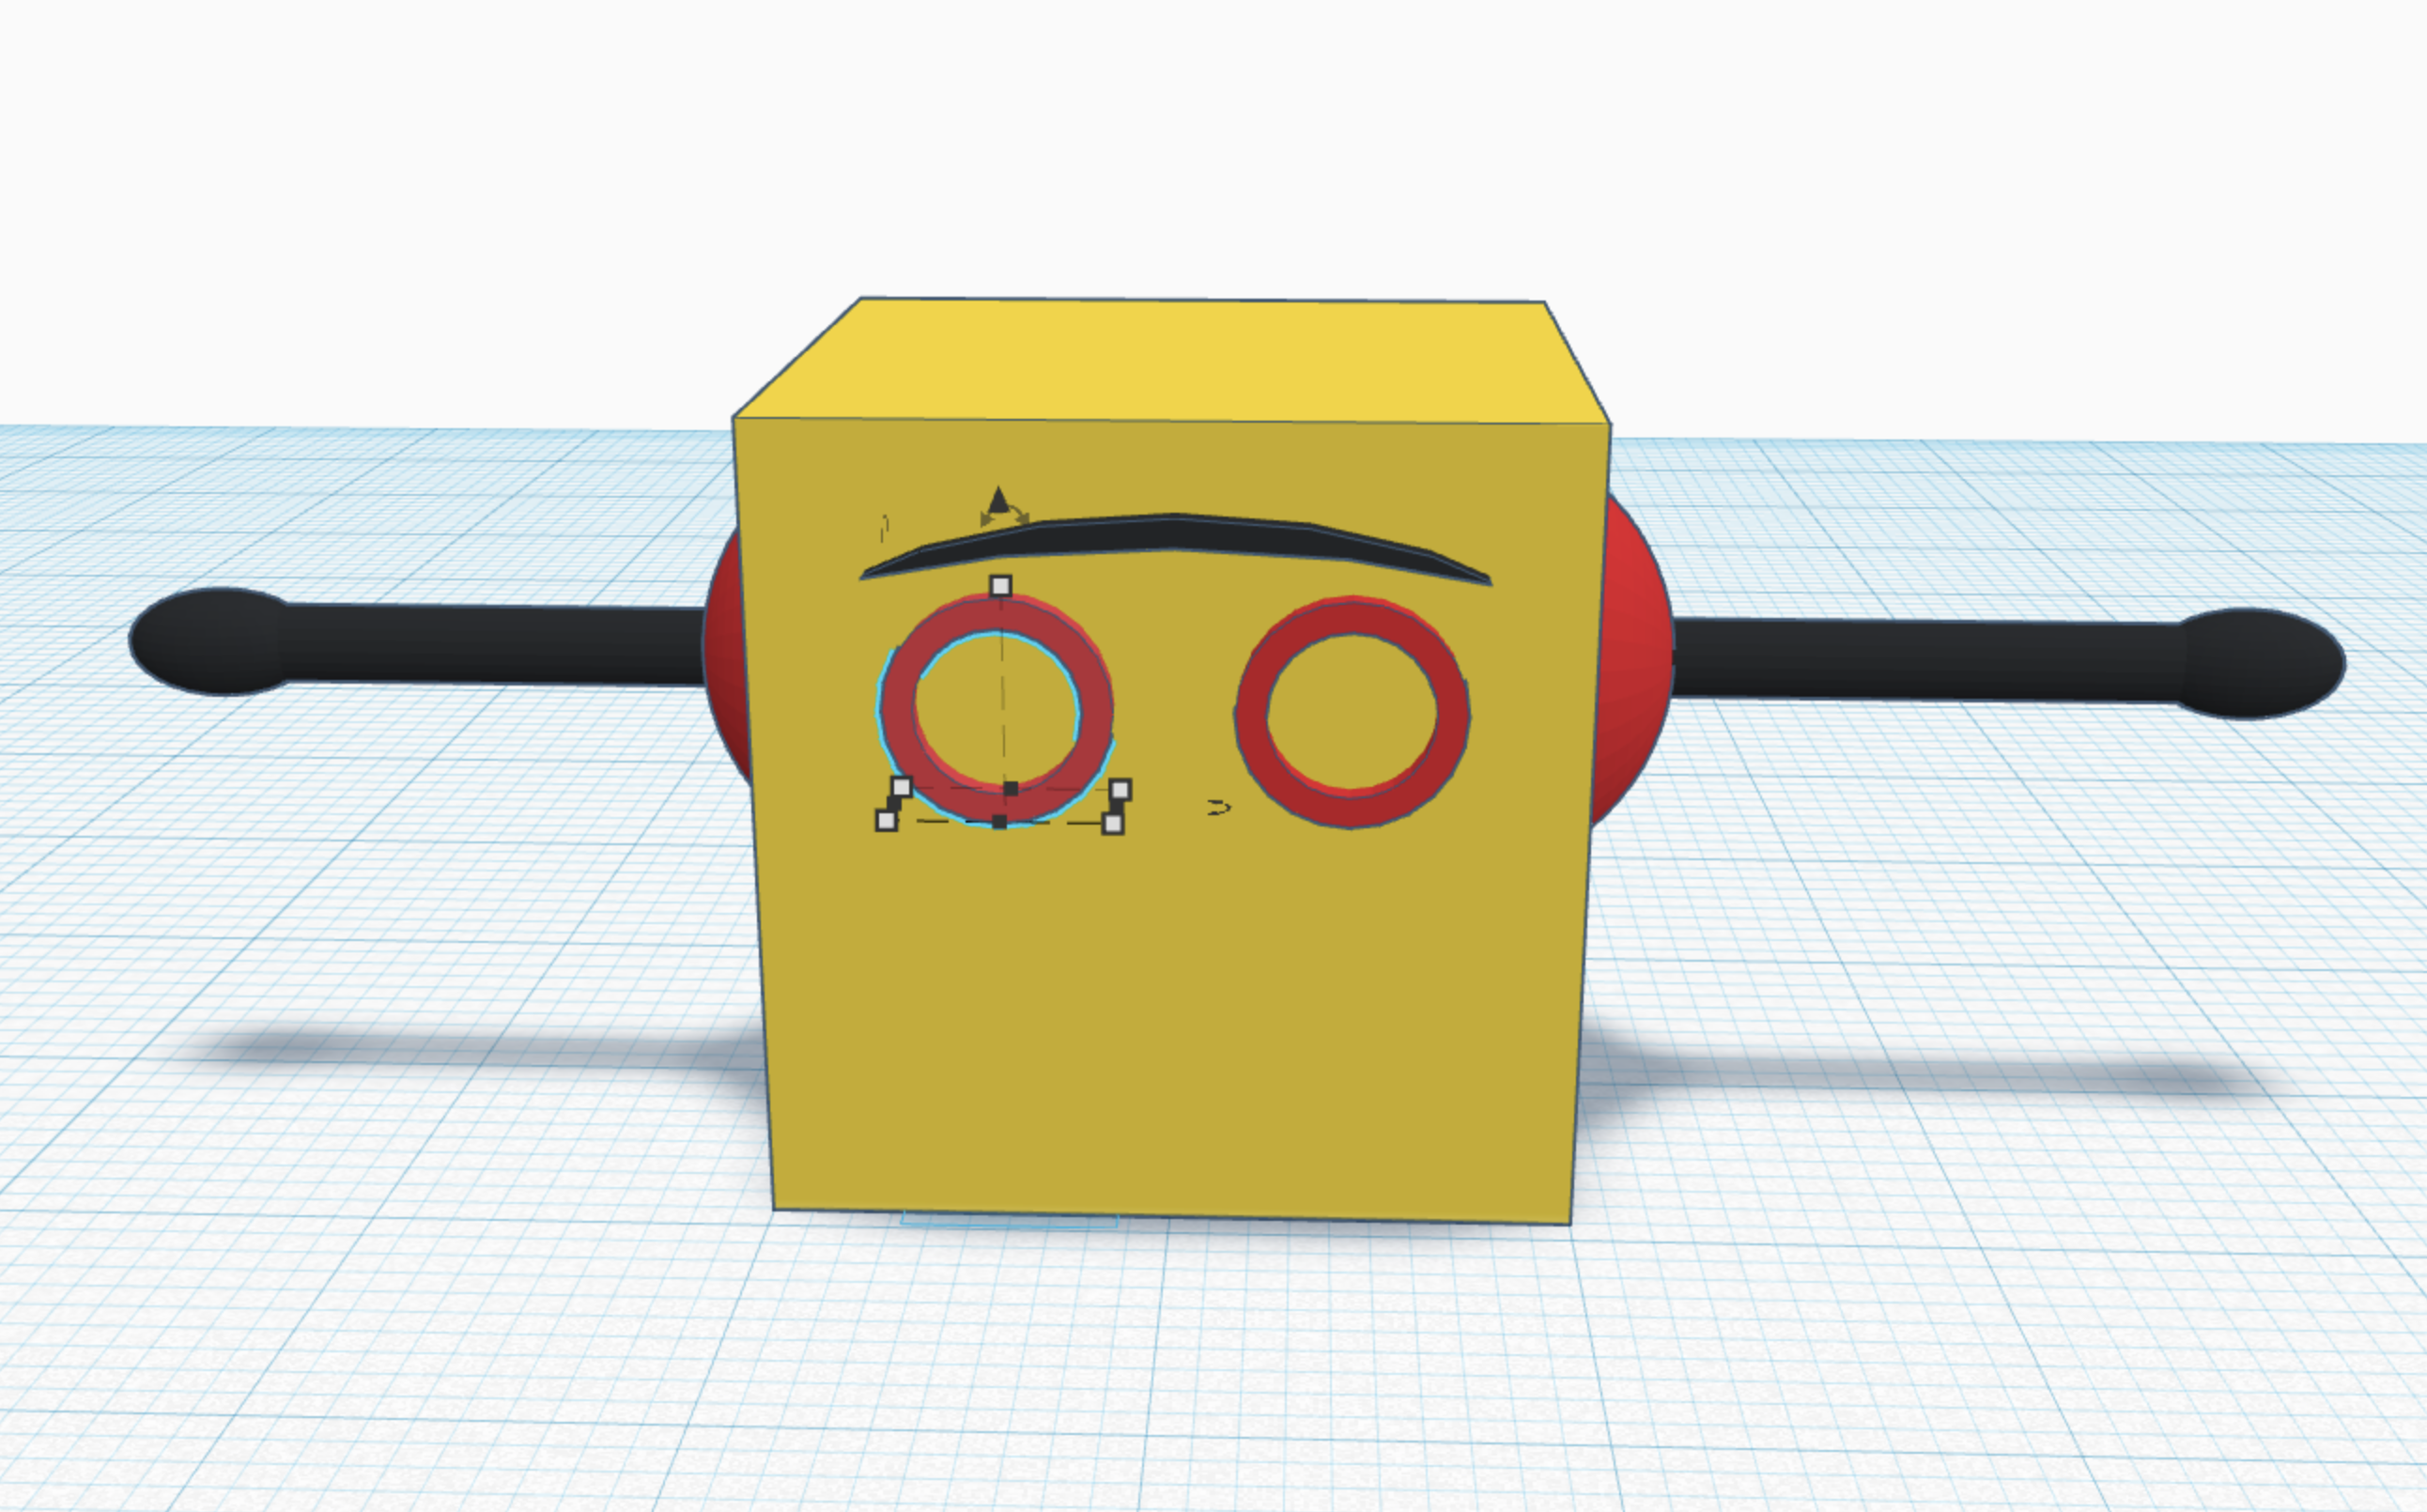
Eyes are easy take two tubes, rotate ninety degrees, and make them 1/4 the size of the head. do two times.
Step 9; Mouth
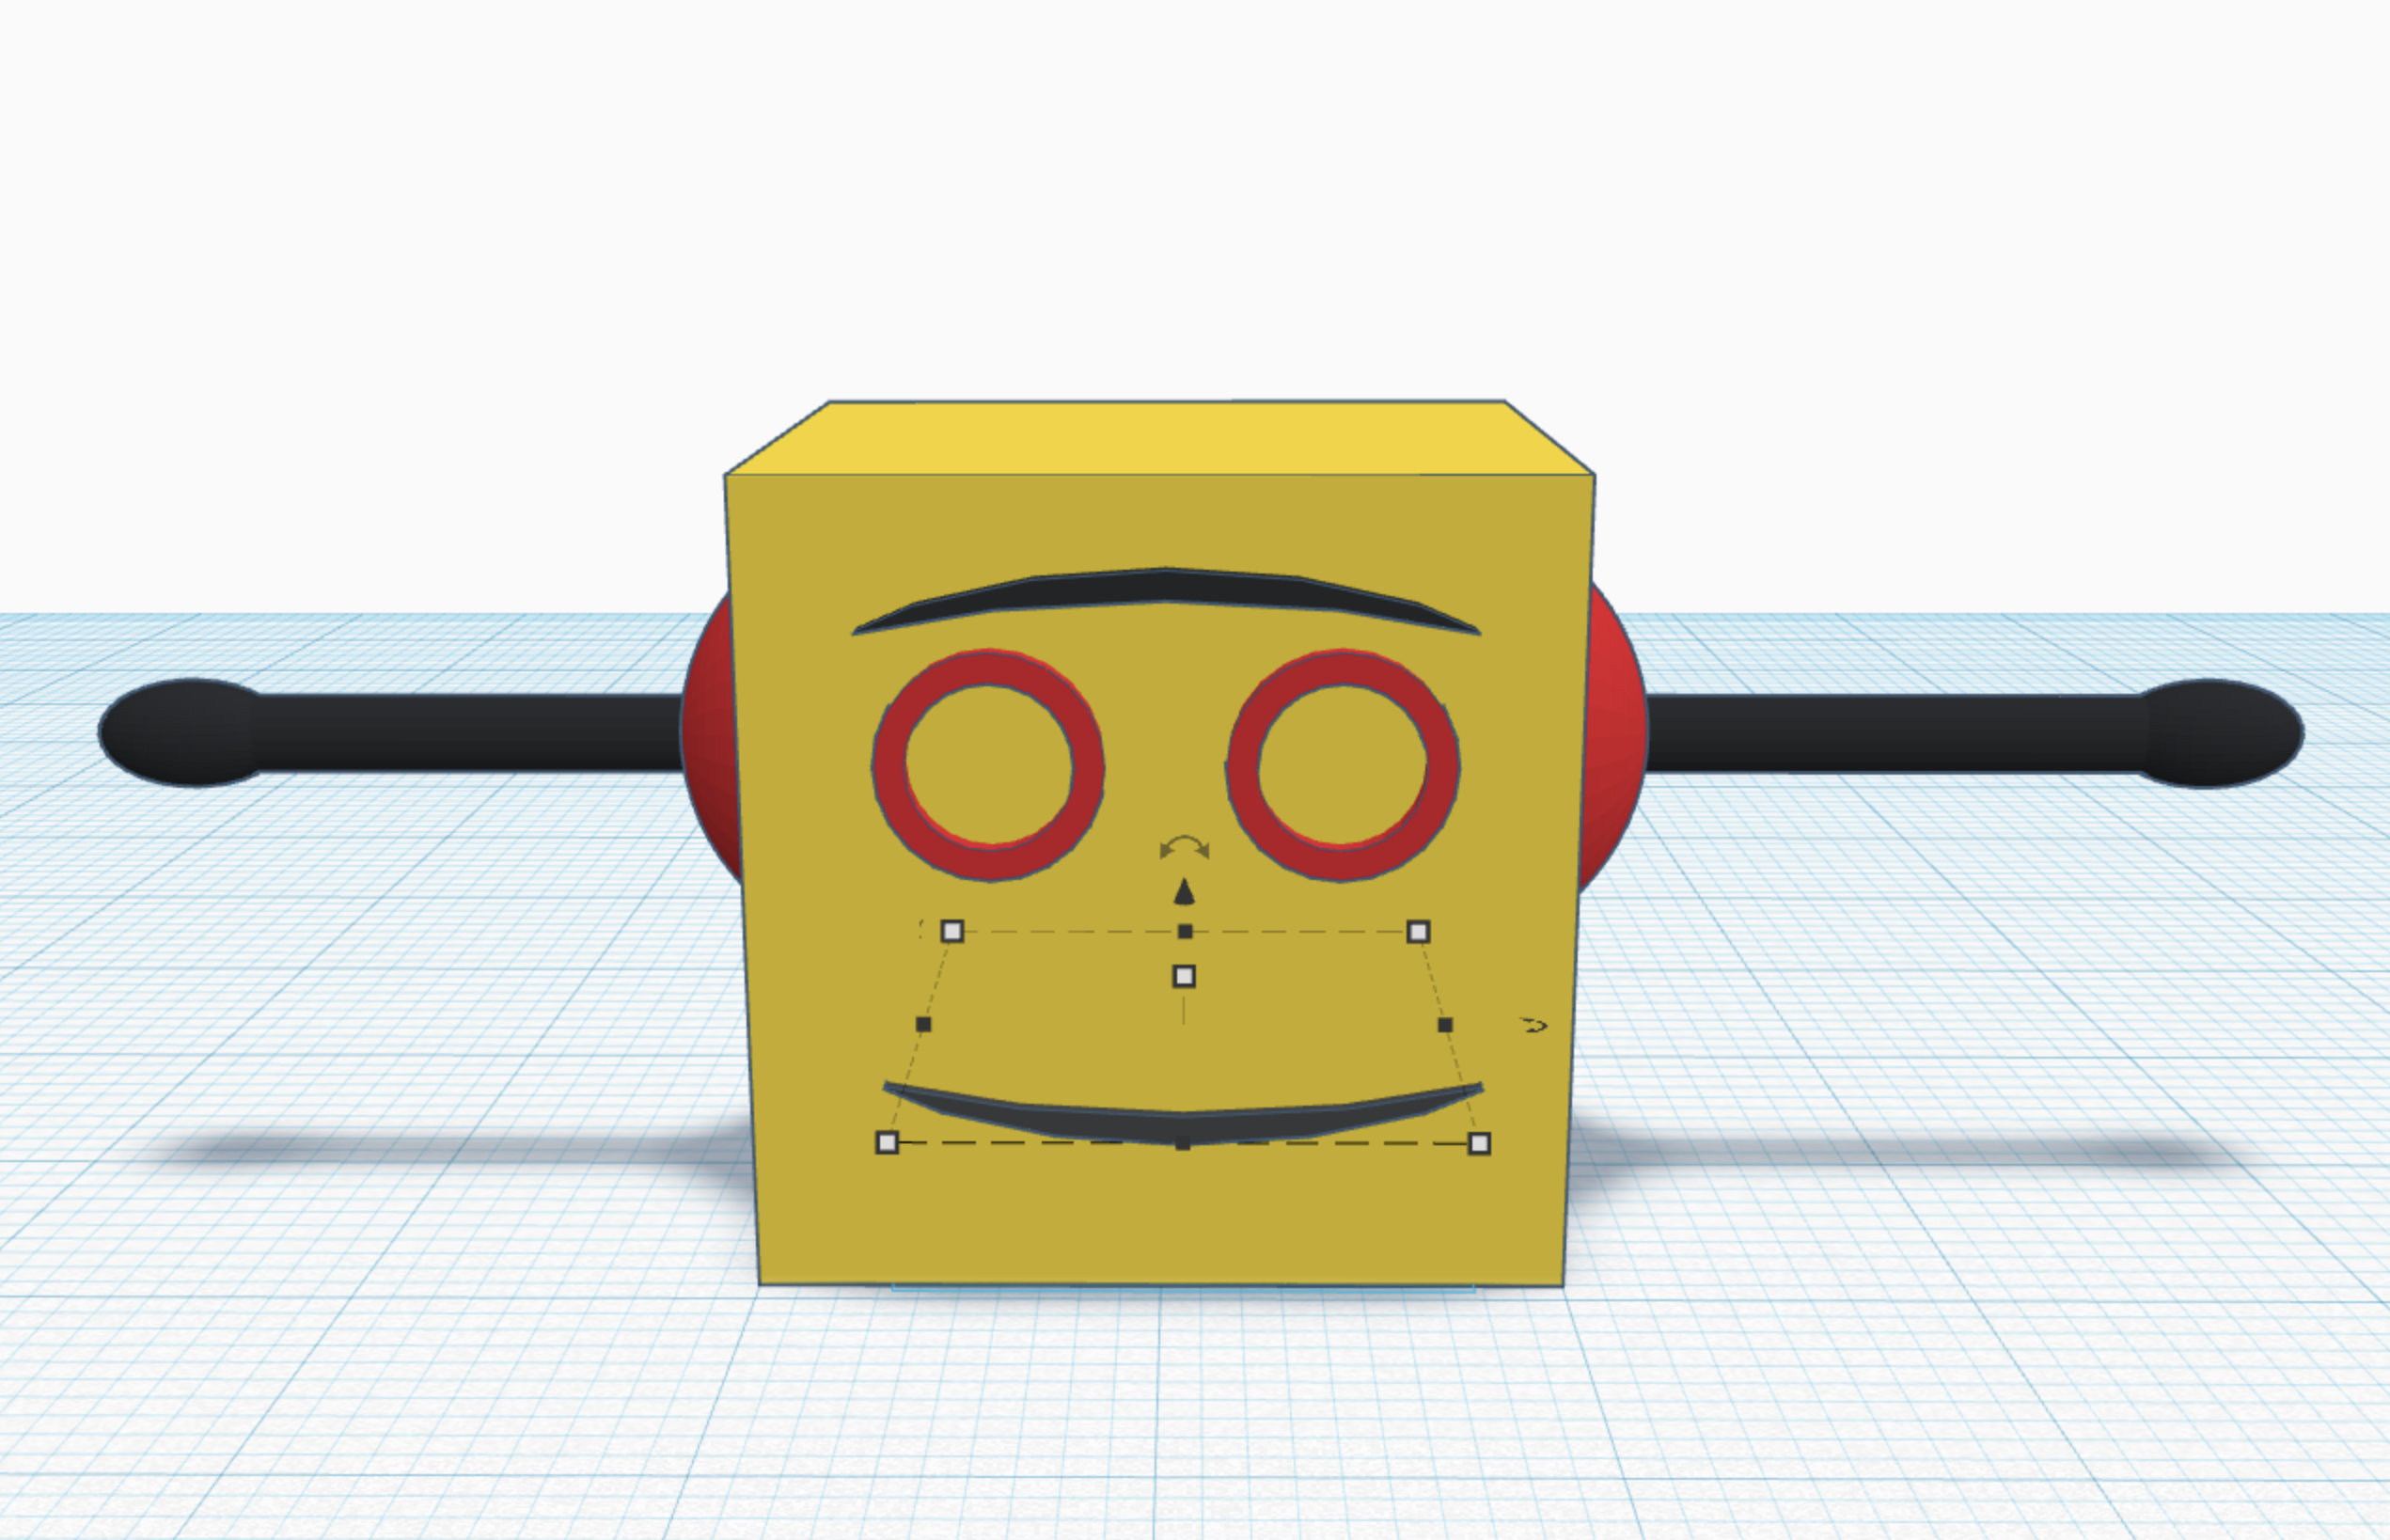
just flip the brow upside down and expand just a little. :)
Step 10; Body
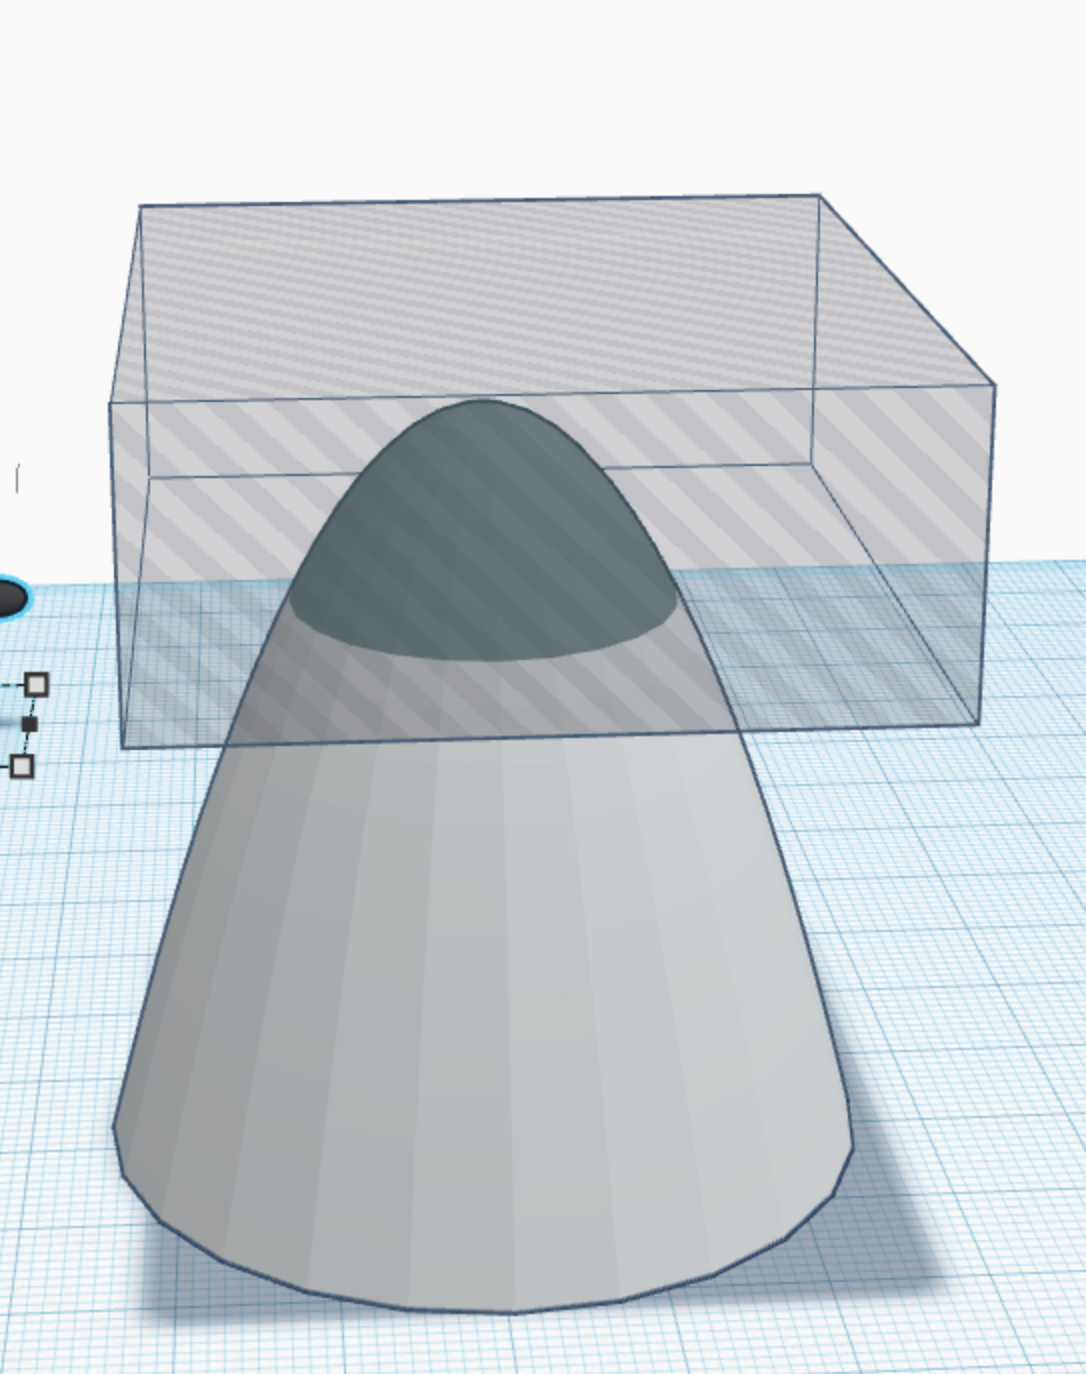
make a paraboloid and cut off the top section.
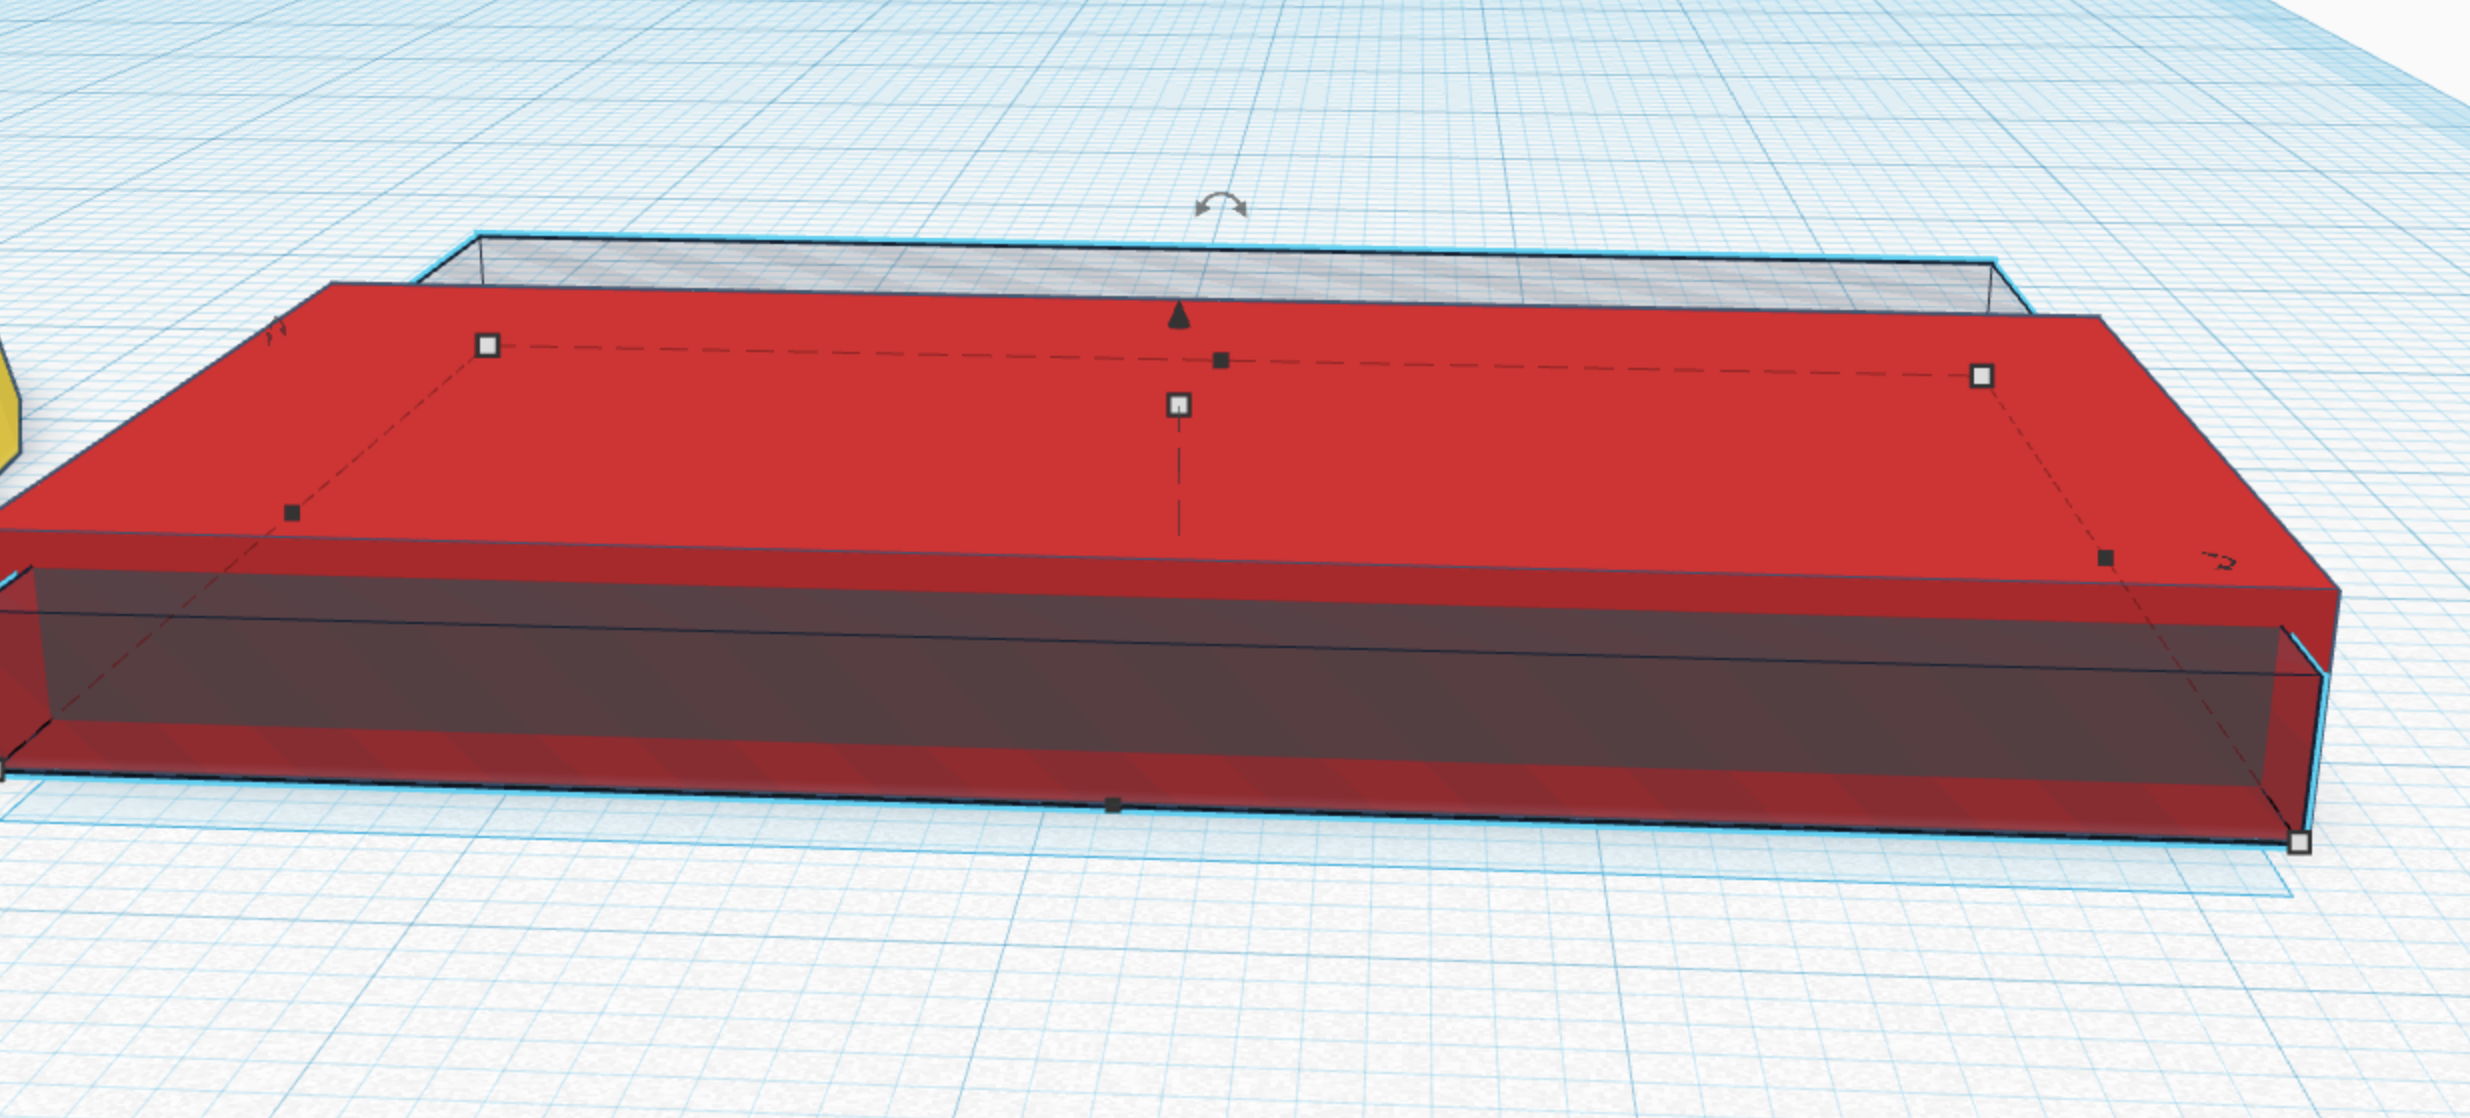
Step 11; the Body
make a half circle place it upside down. put another half circle ontop of it, and make it into a hole when grouped this will create a bowl shape.
Step 12; Still the Body
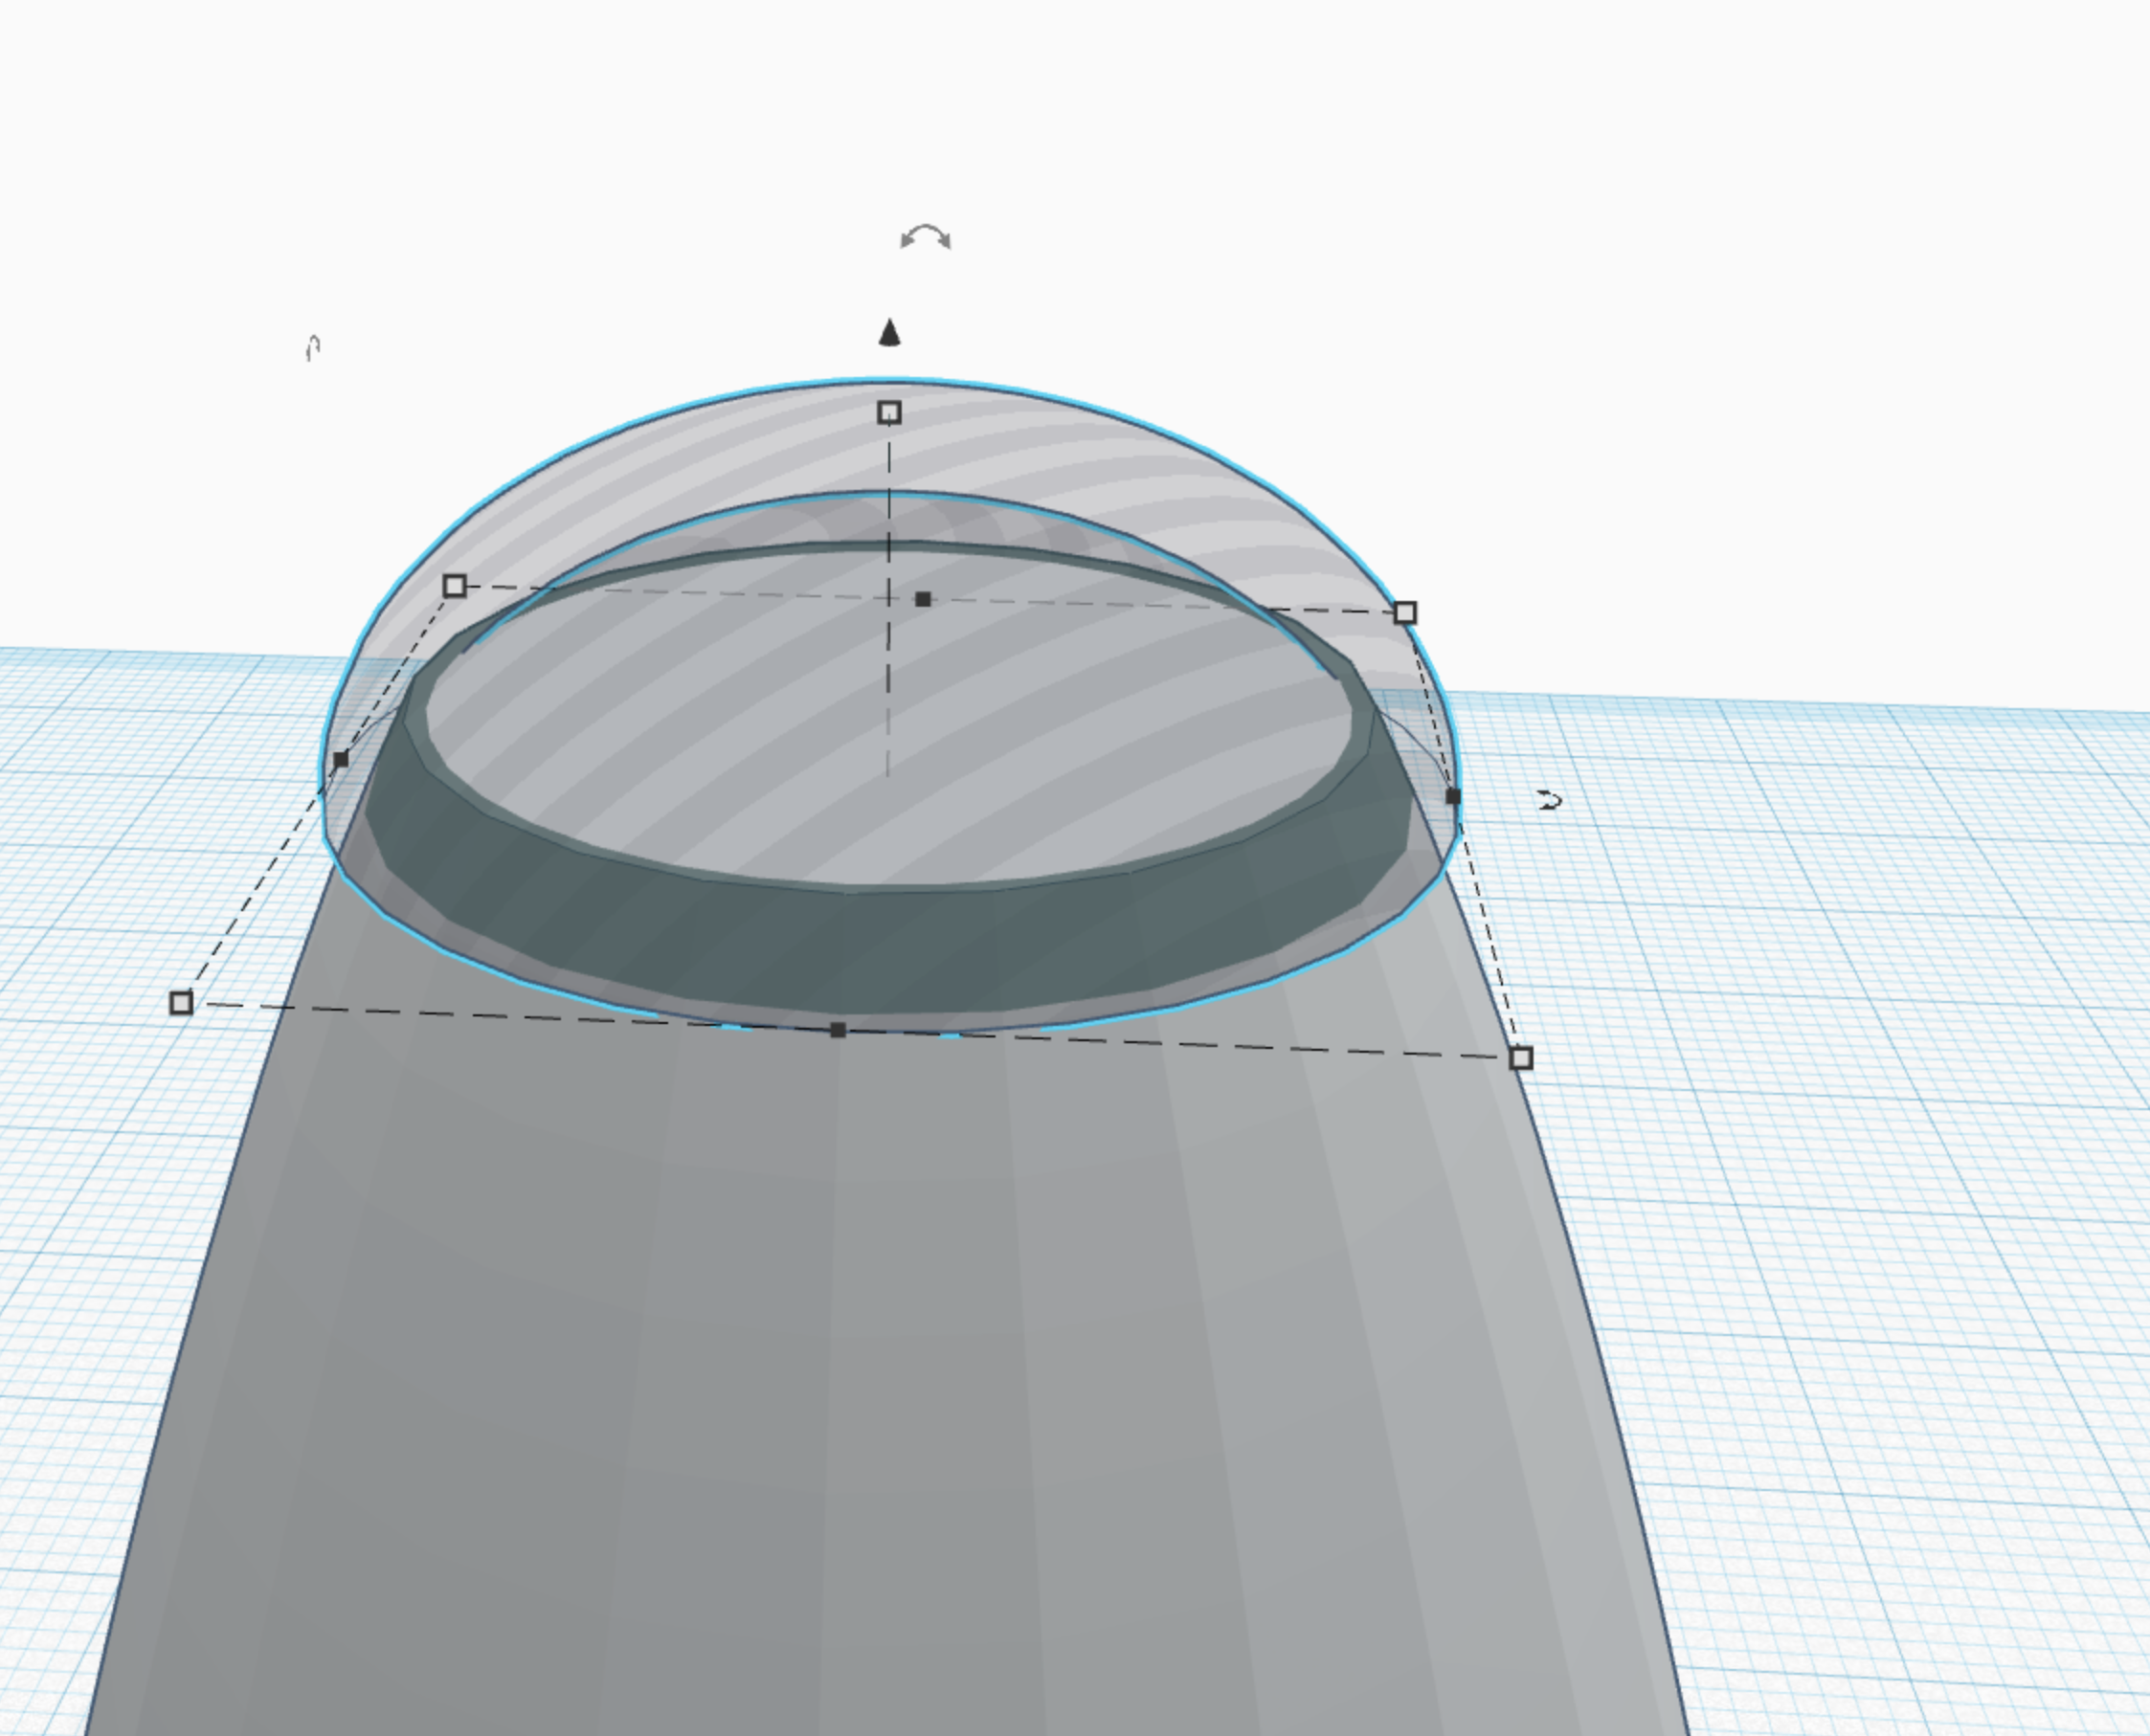
Take that bowl and make it into a hole, and put it ontop of the paraboloid to round it off. this should make it shorter than it was originally.
Step 13; Finished With the Body
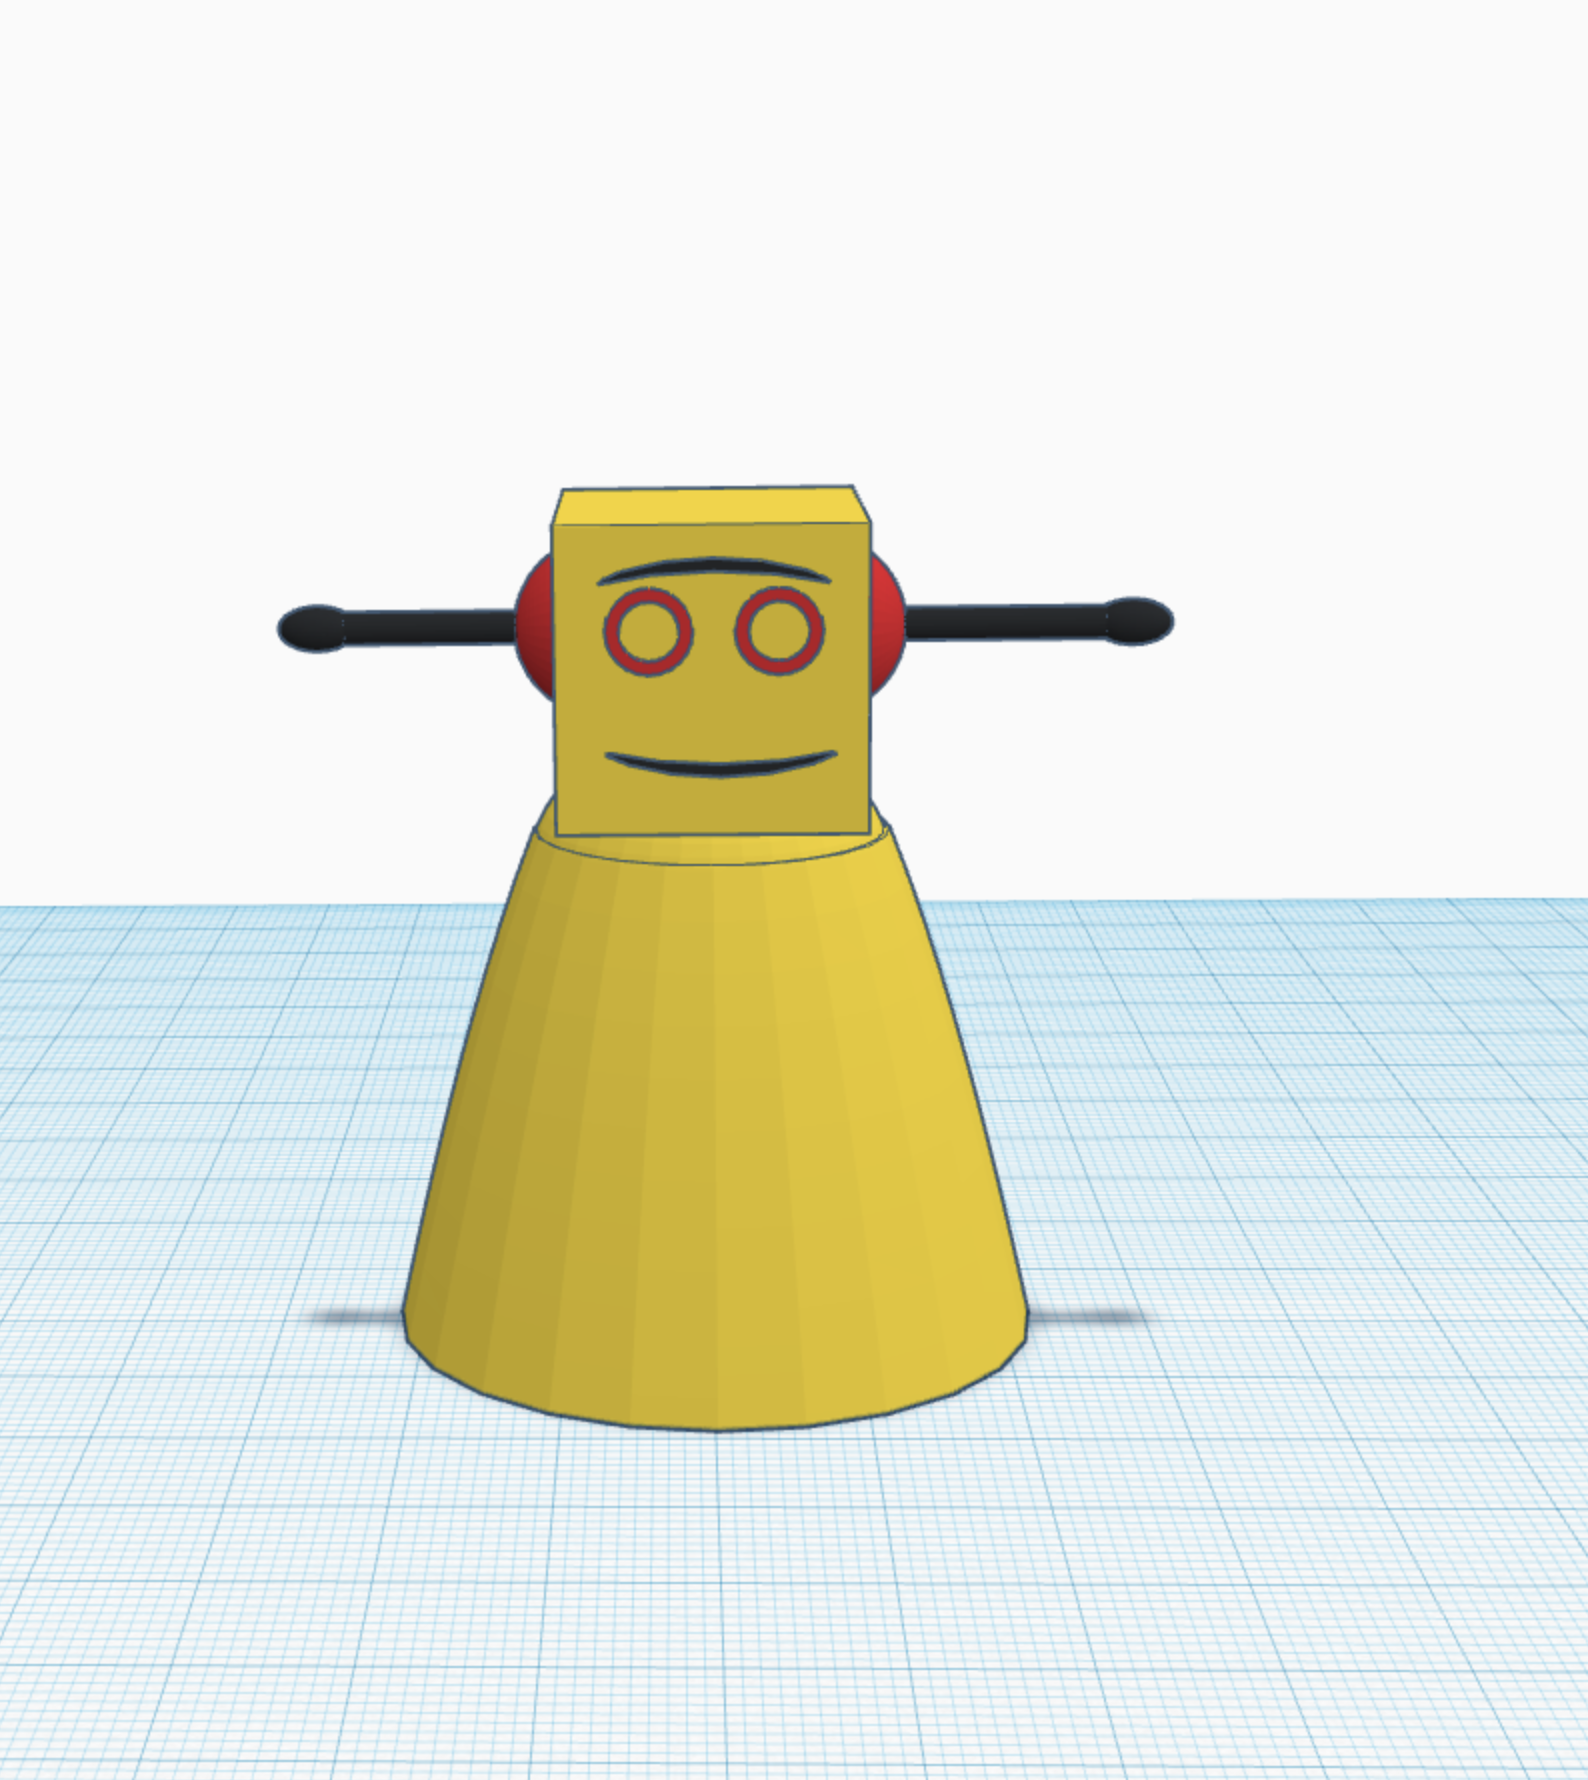
put the head on top.
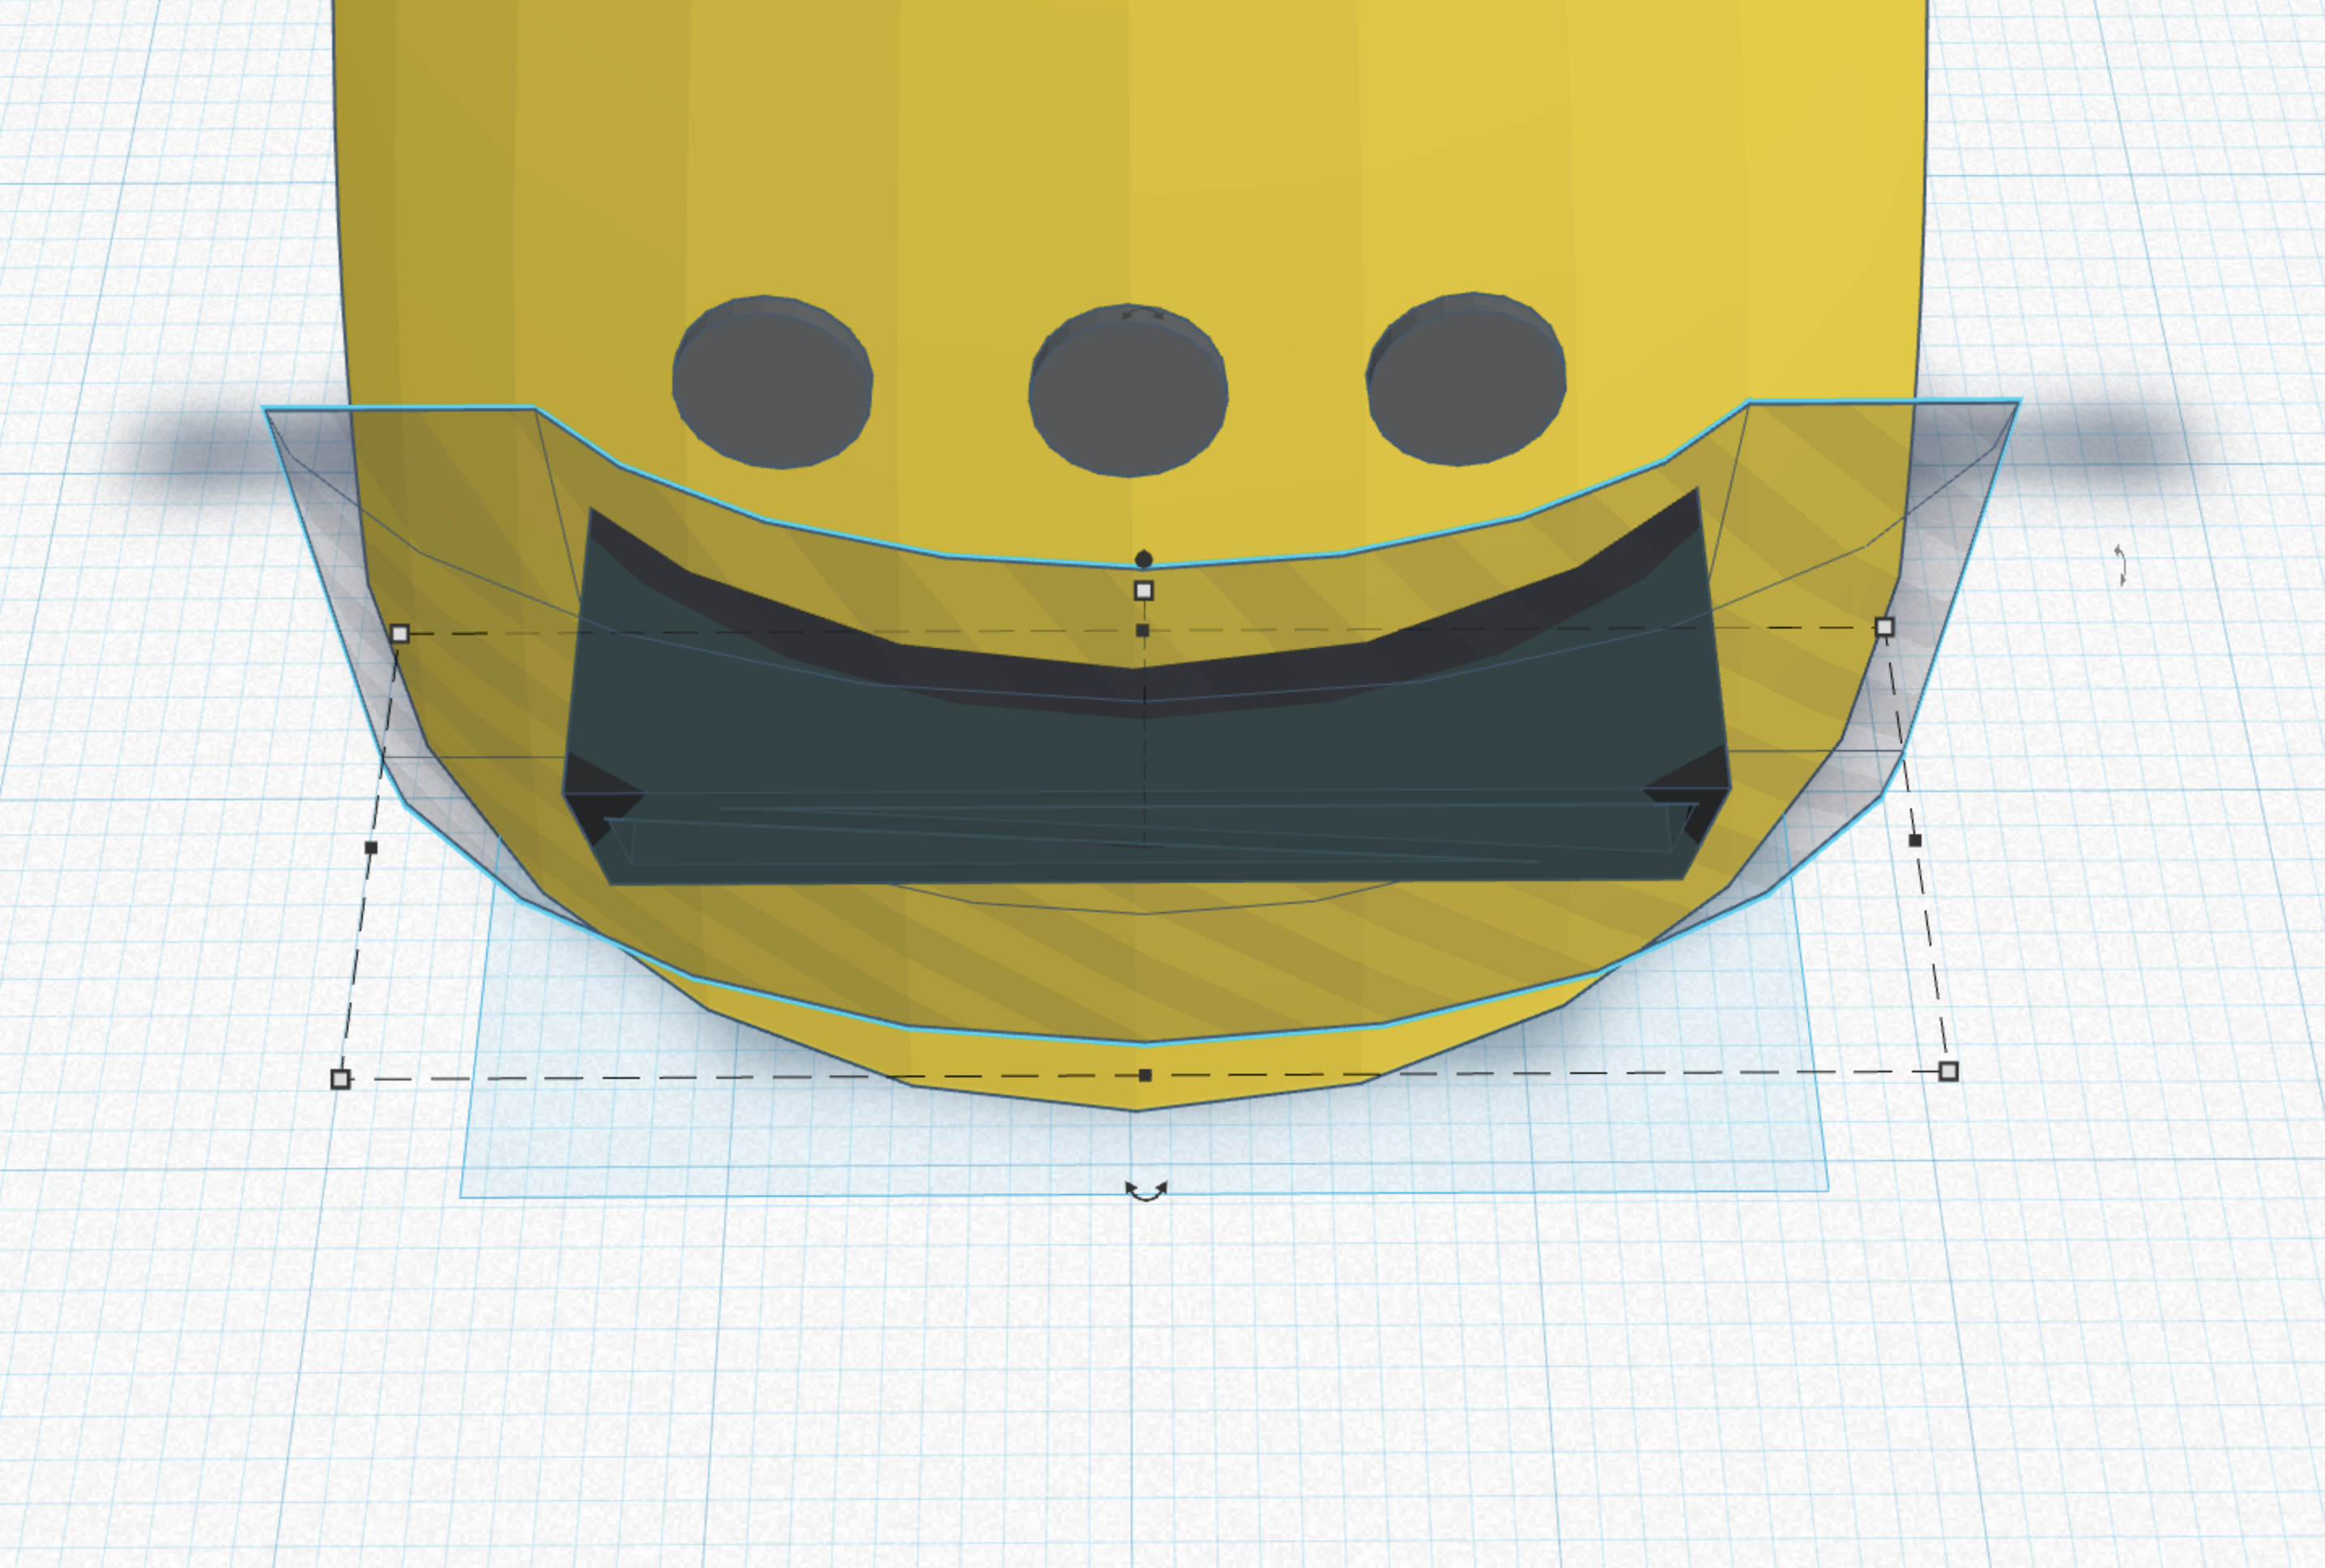
Step 14; Buttons
place a cylinder on the work plane, and make another cylinder sticking out of the back, just like the picture shows, the back one should be 1/4 the height and width of the first.
Step 15; Buttons on the Body
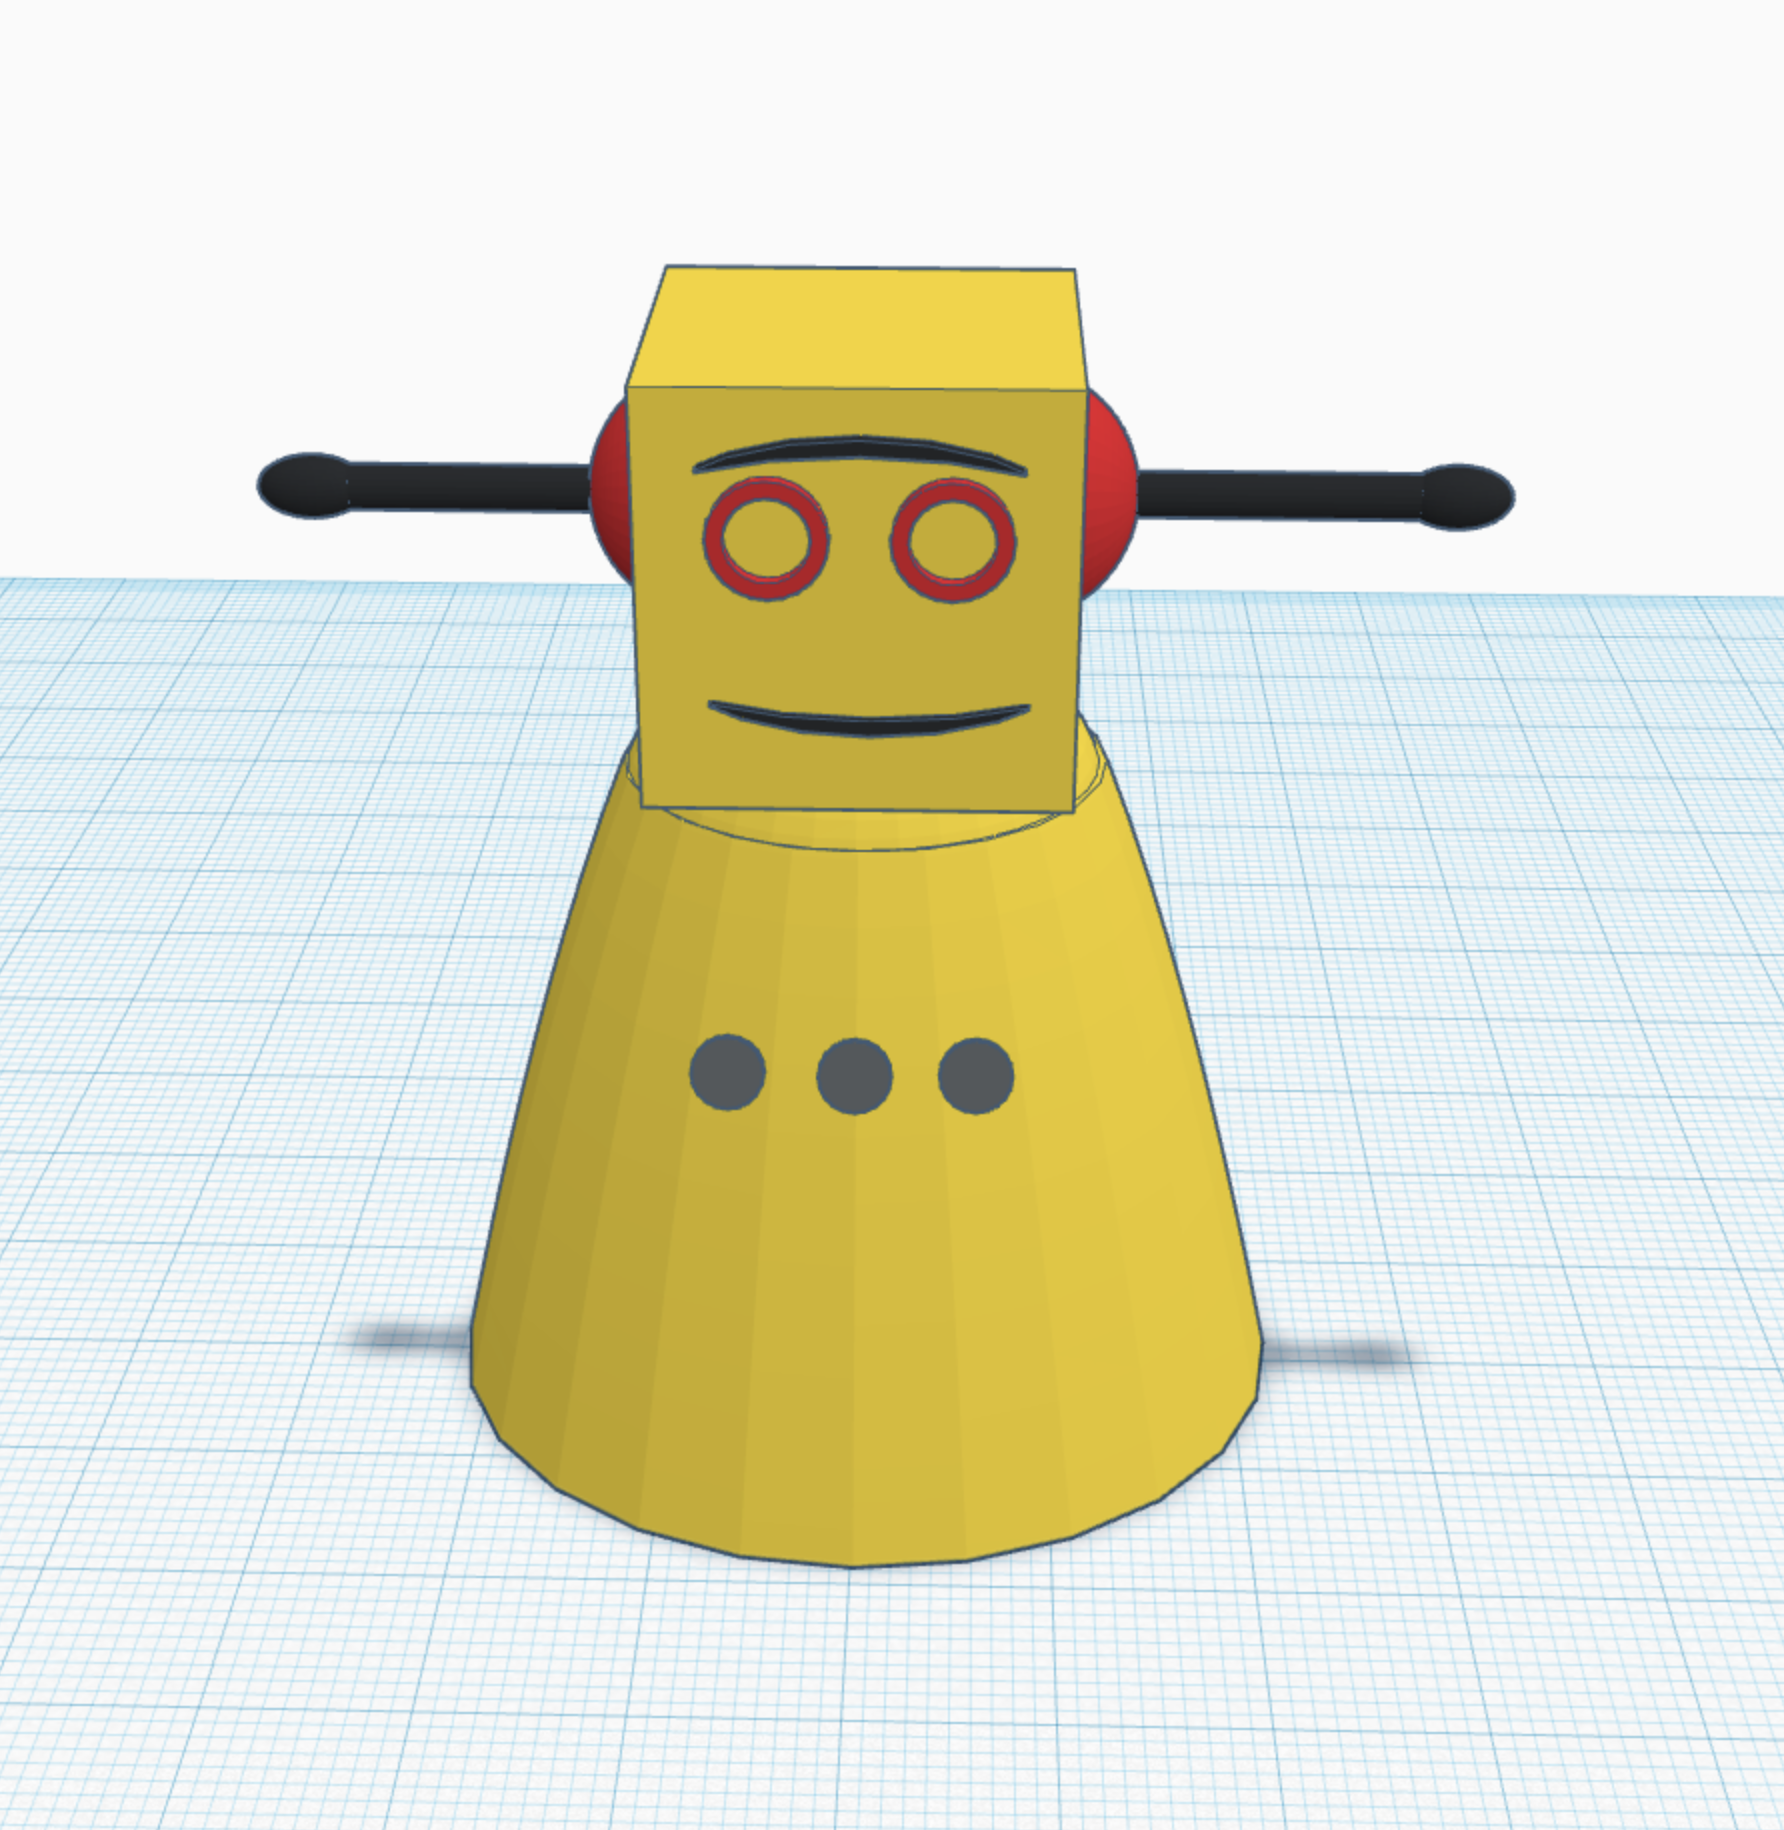
The buttons on the body just copy them three times and place them as the picture shows.
Step 16; the Grid
here's the grid, take a cube, and another one as an interior make it into a hole, and cut it out.
Step 17; Crosspiece
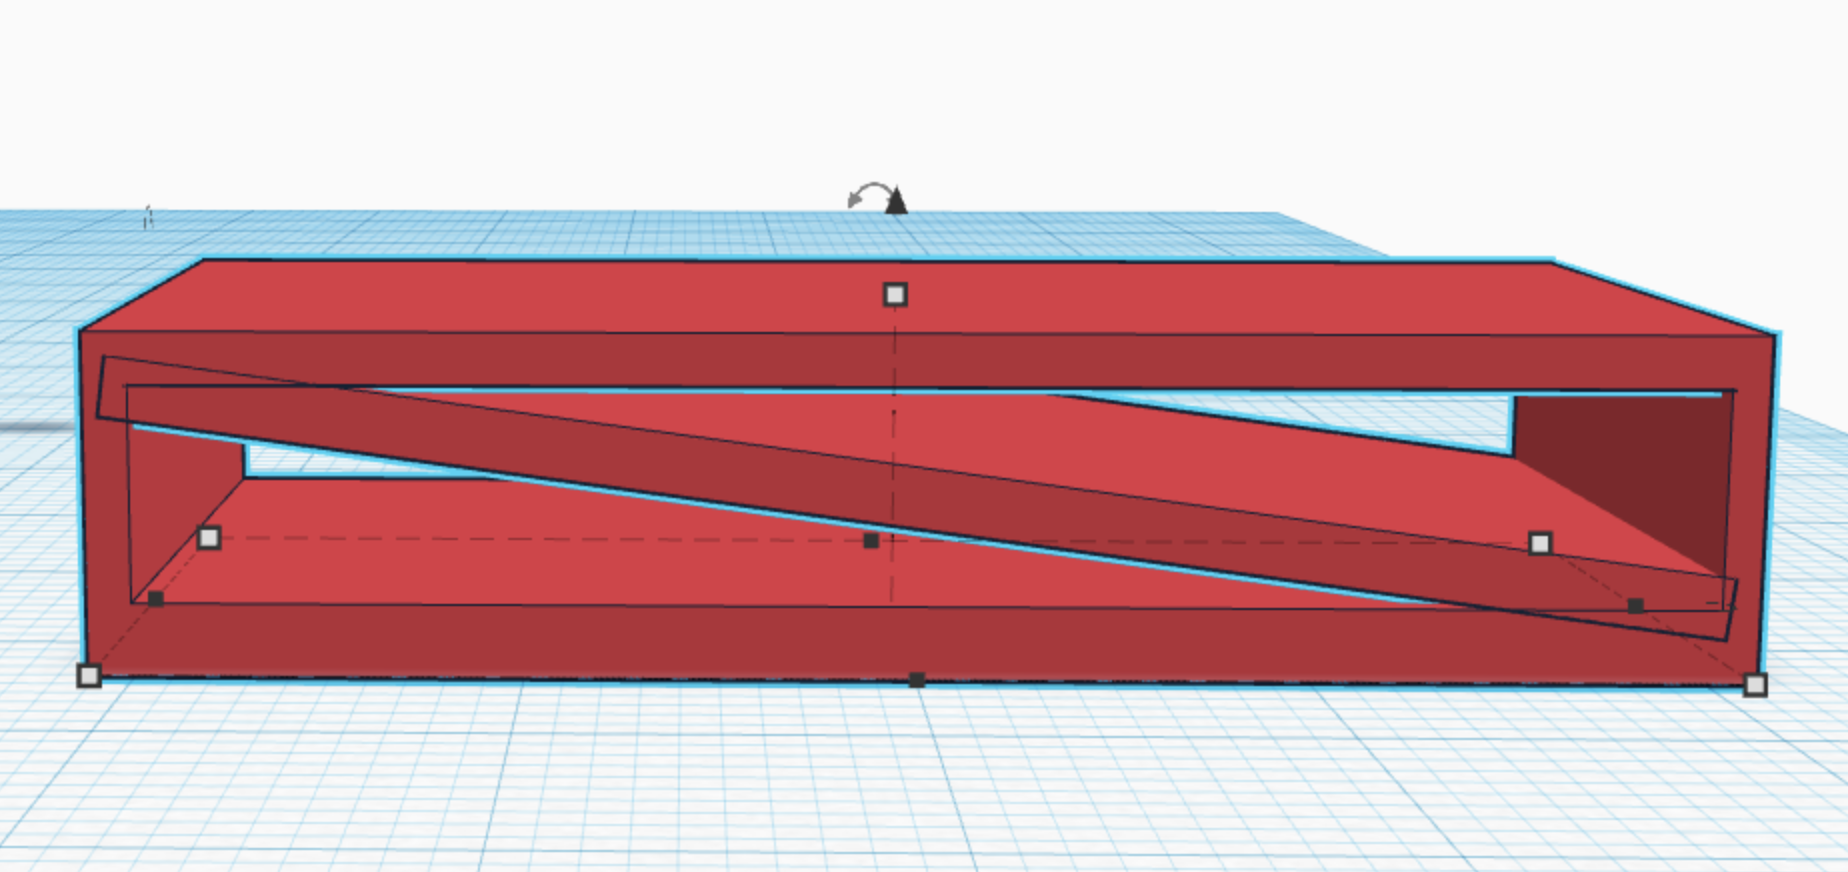
take a crosspiece at 45 degrees and lay it across the corners.
Step 18; Put It on the Robot
put it on the robot as shown.
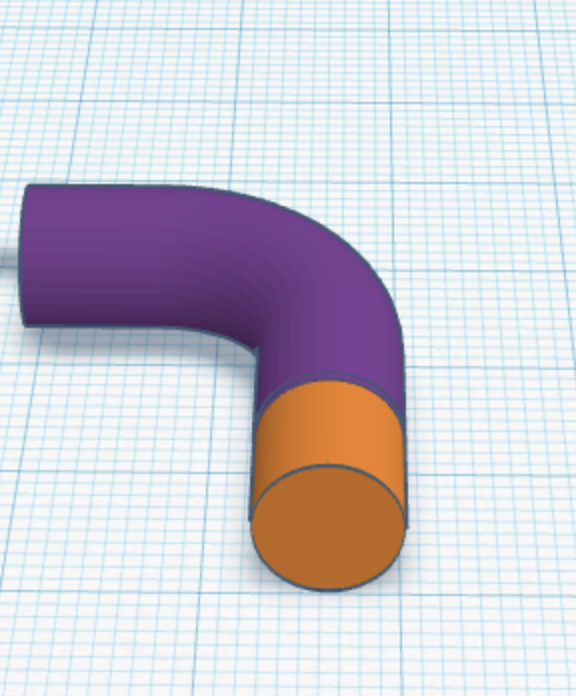
Step 19; Tube
take a tube, and a square hole and cut the tube as shown
Step 20; Hole
take the last shape as shown and place it around the grid, so that it cuts it to the desired shape, rounded around the robots body.
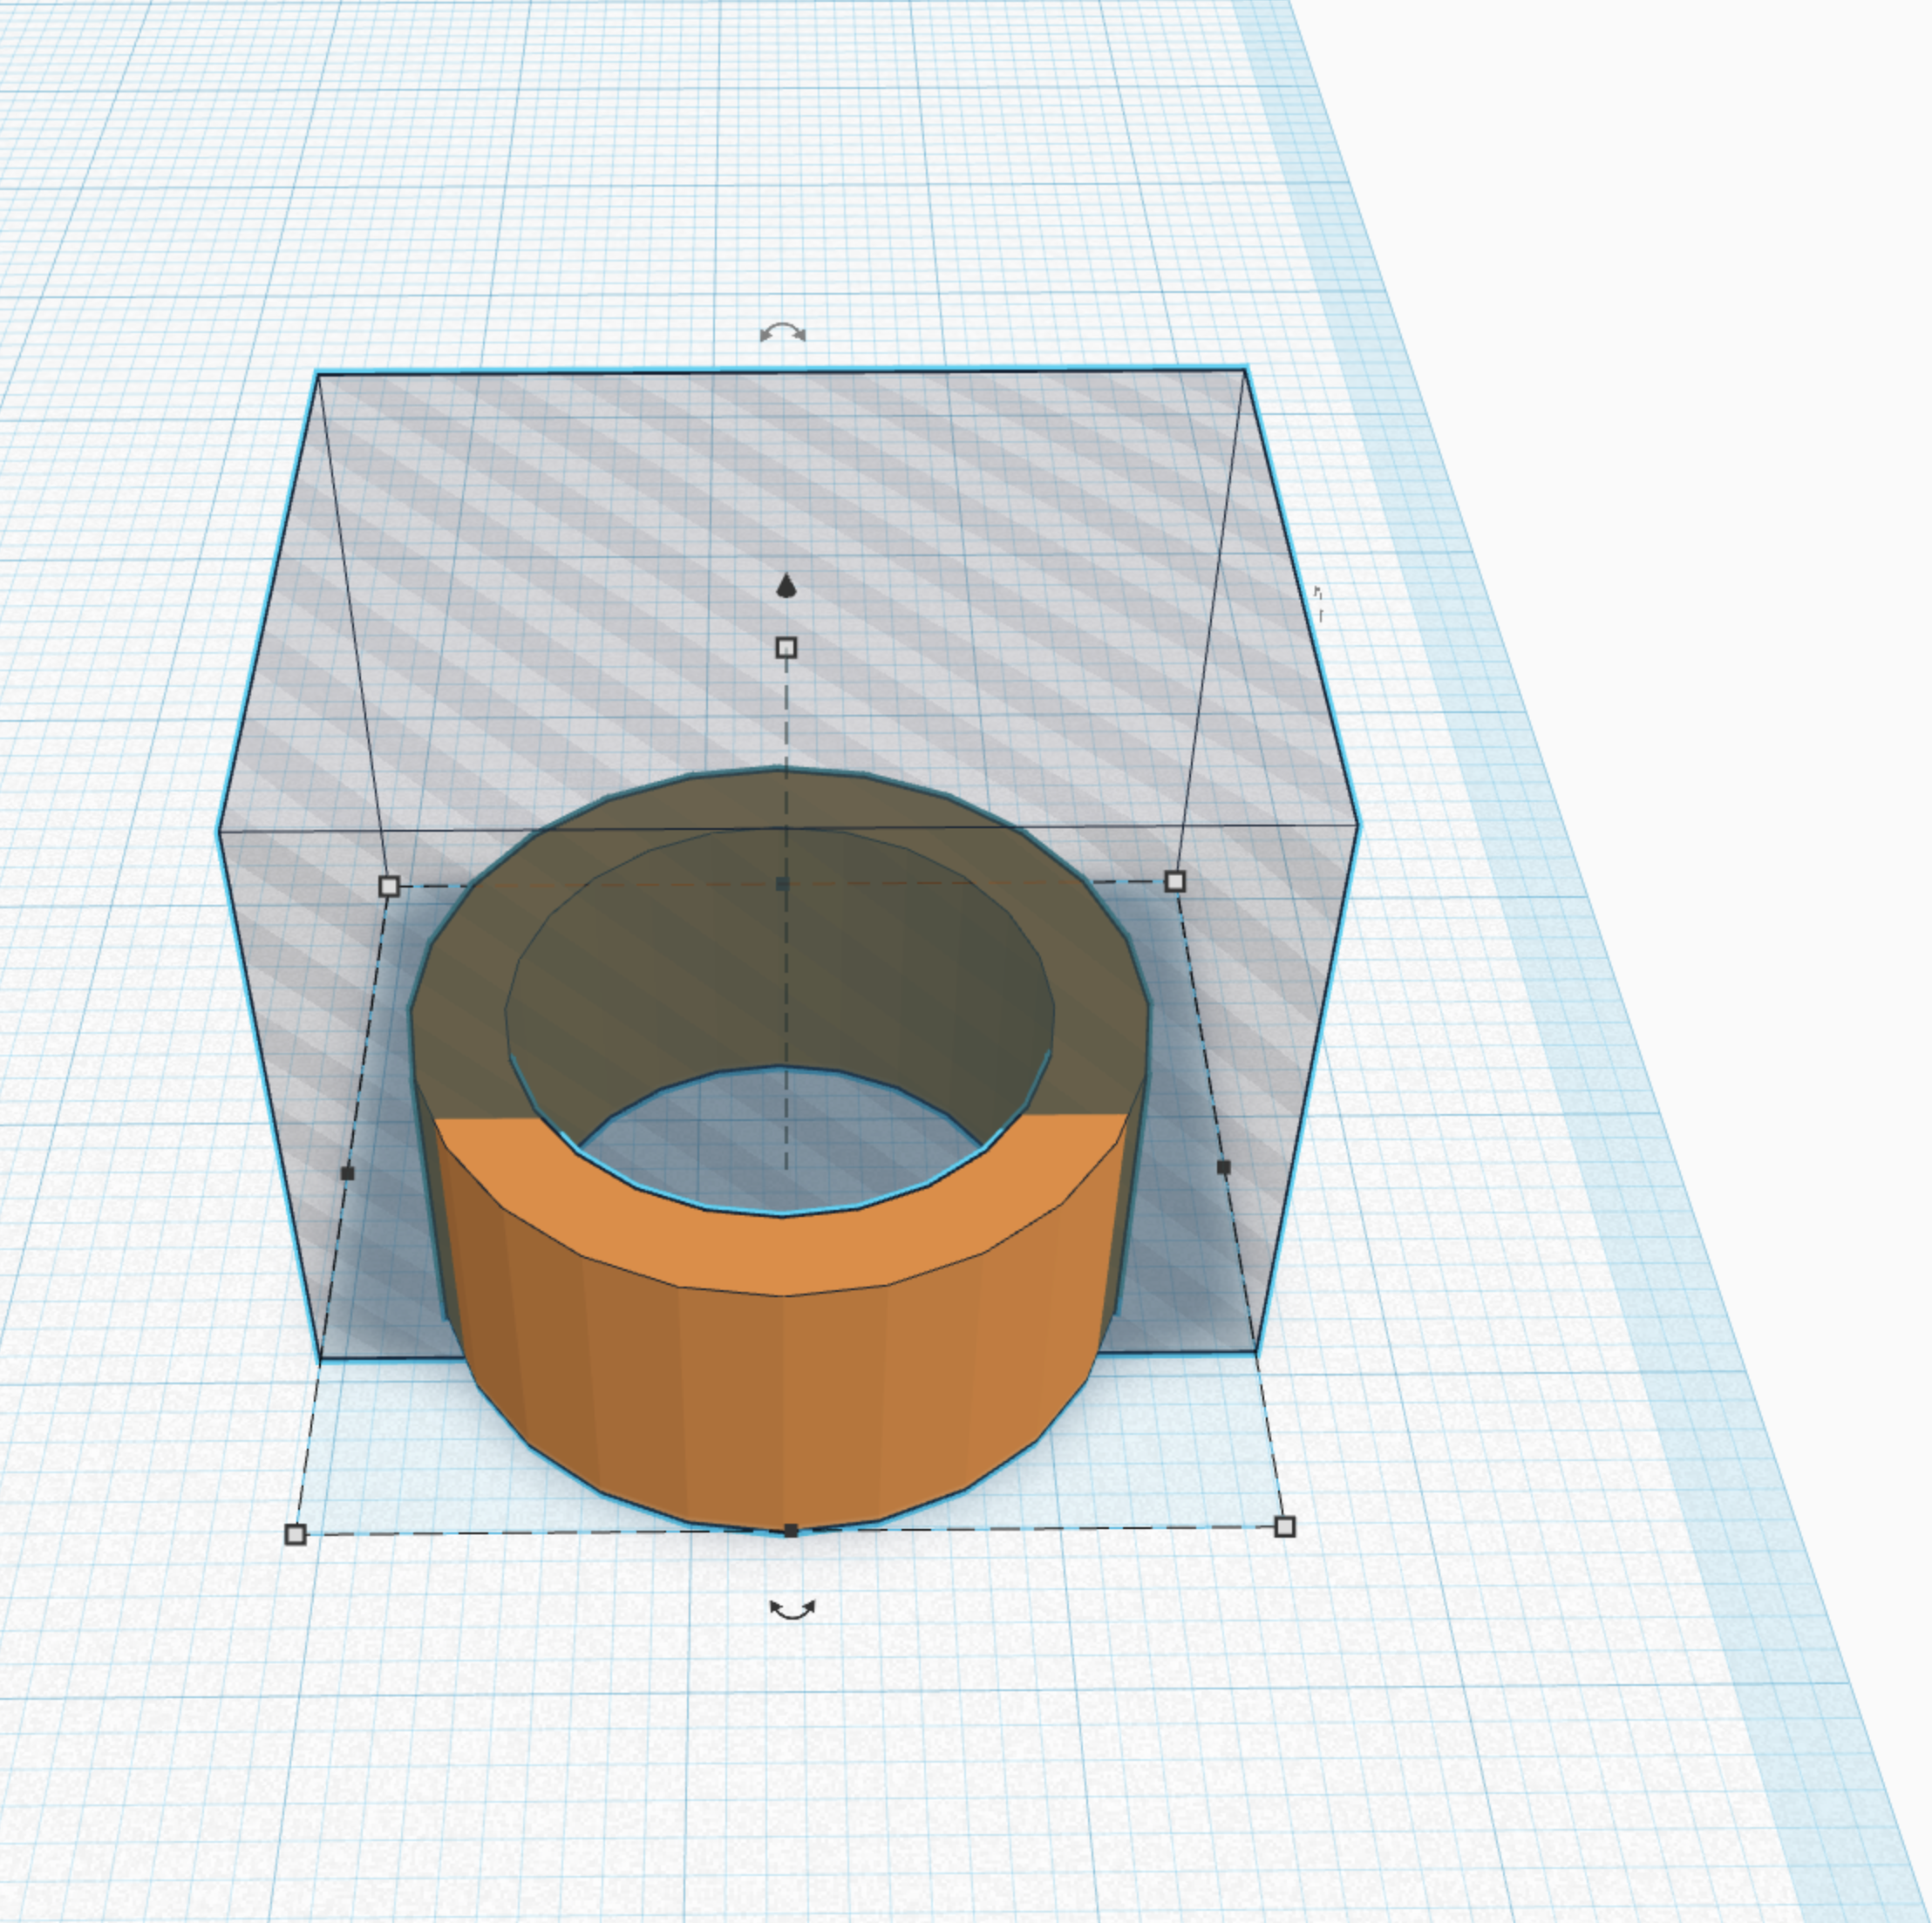
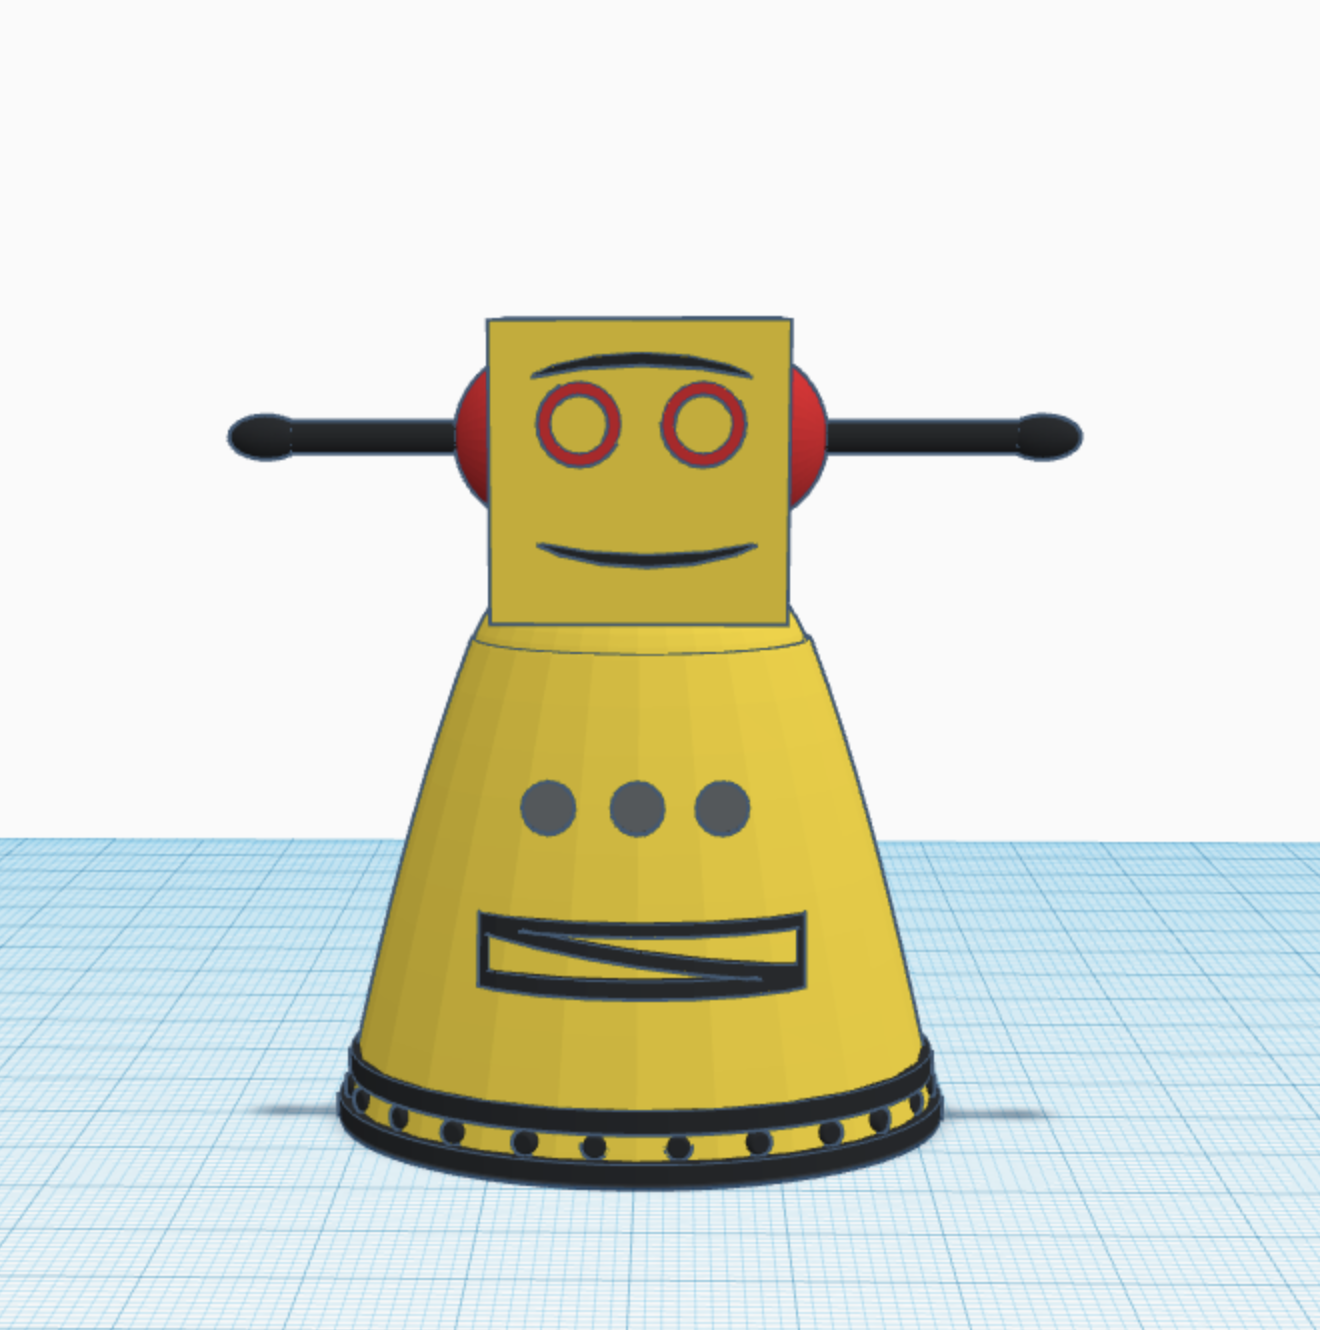
Step 21; the Base
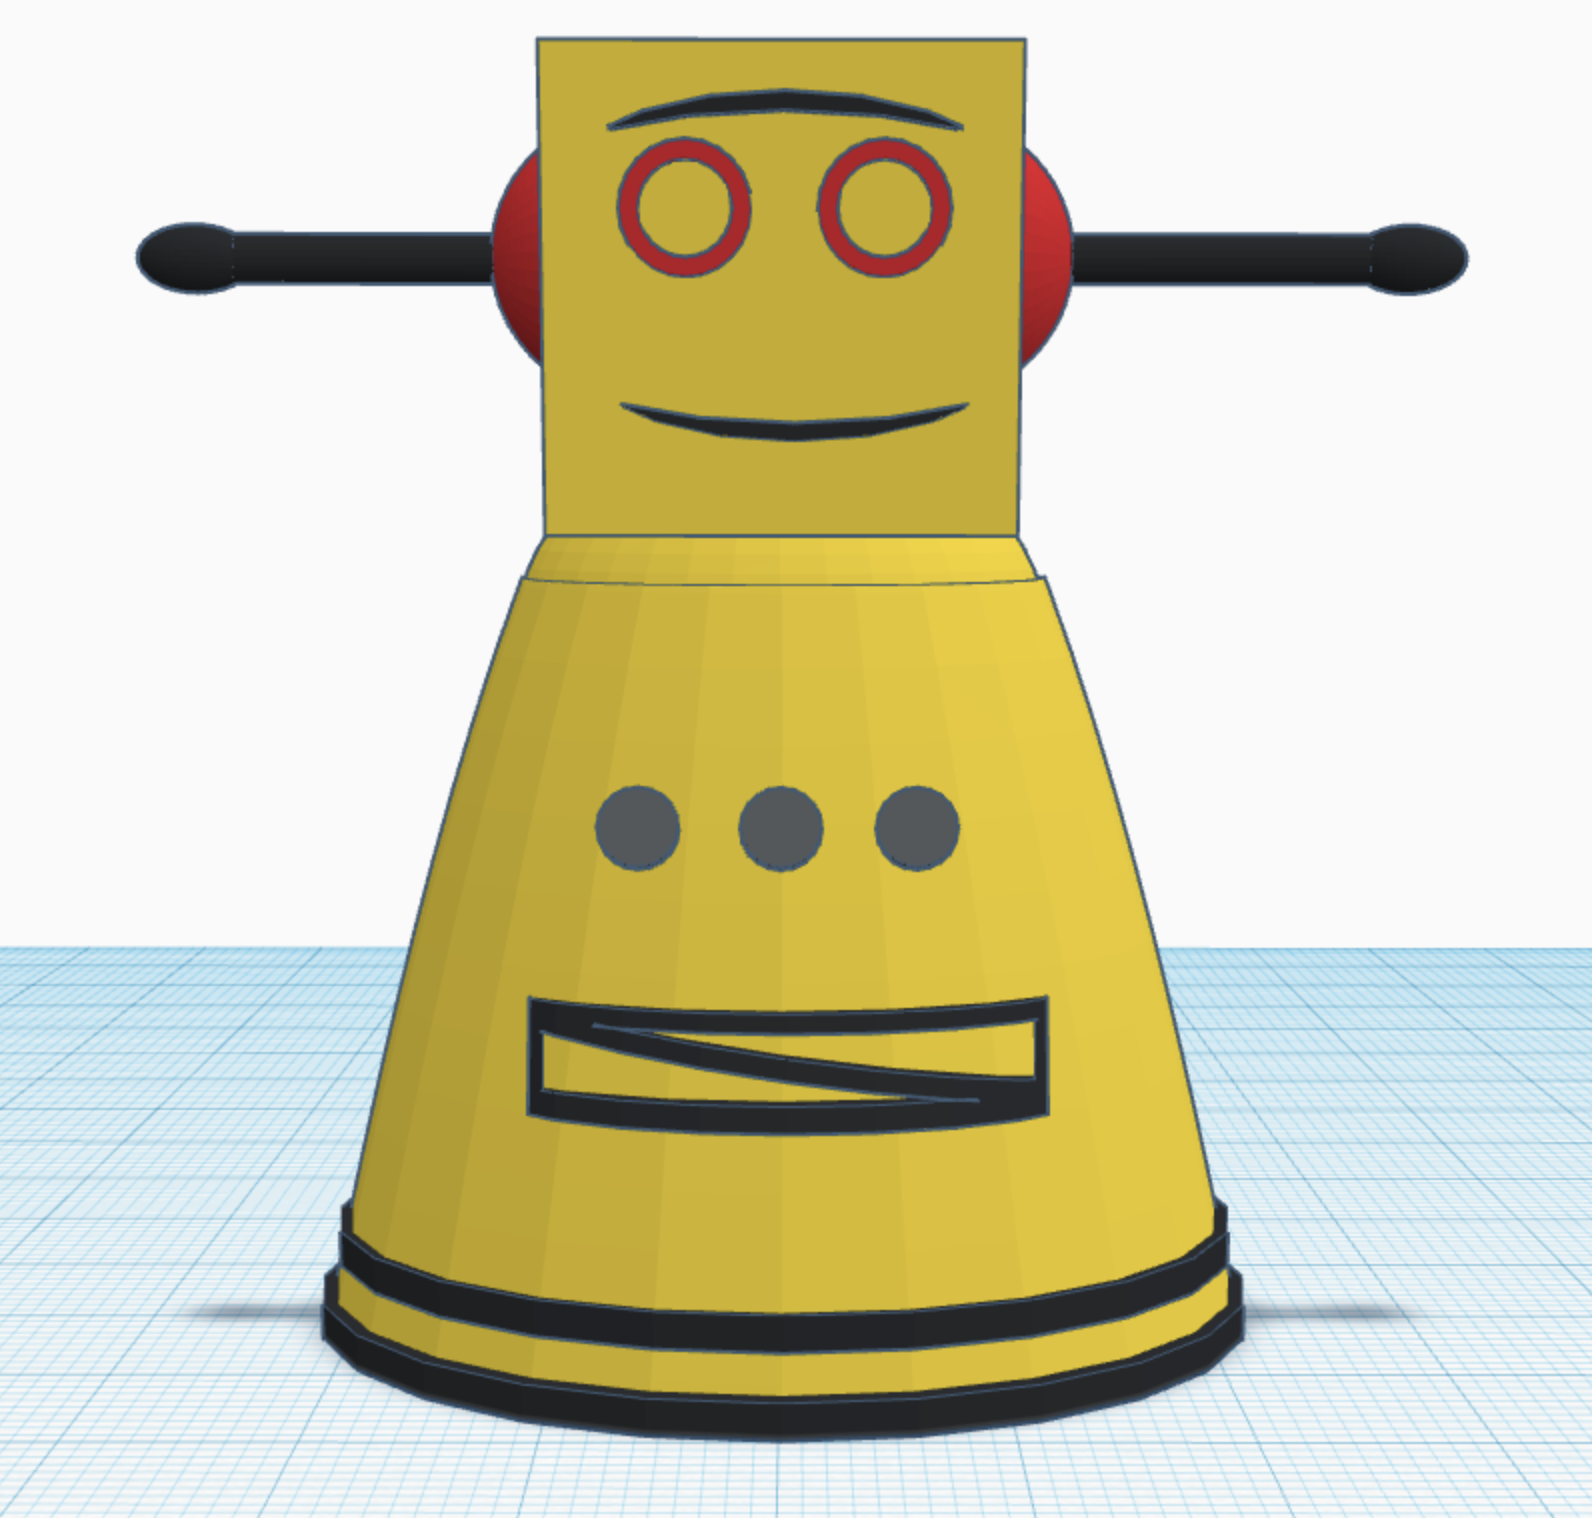
take two tubes and place them around the base of the robot, as shown, note the top one is slightly smaller.
Step 22; Nails I Guess
take cylinders and every increment in the paraboloid place on, as shown, not too hard :)
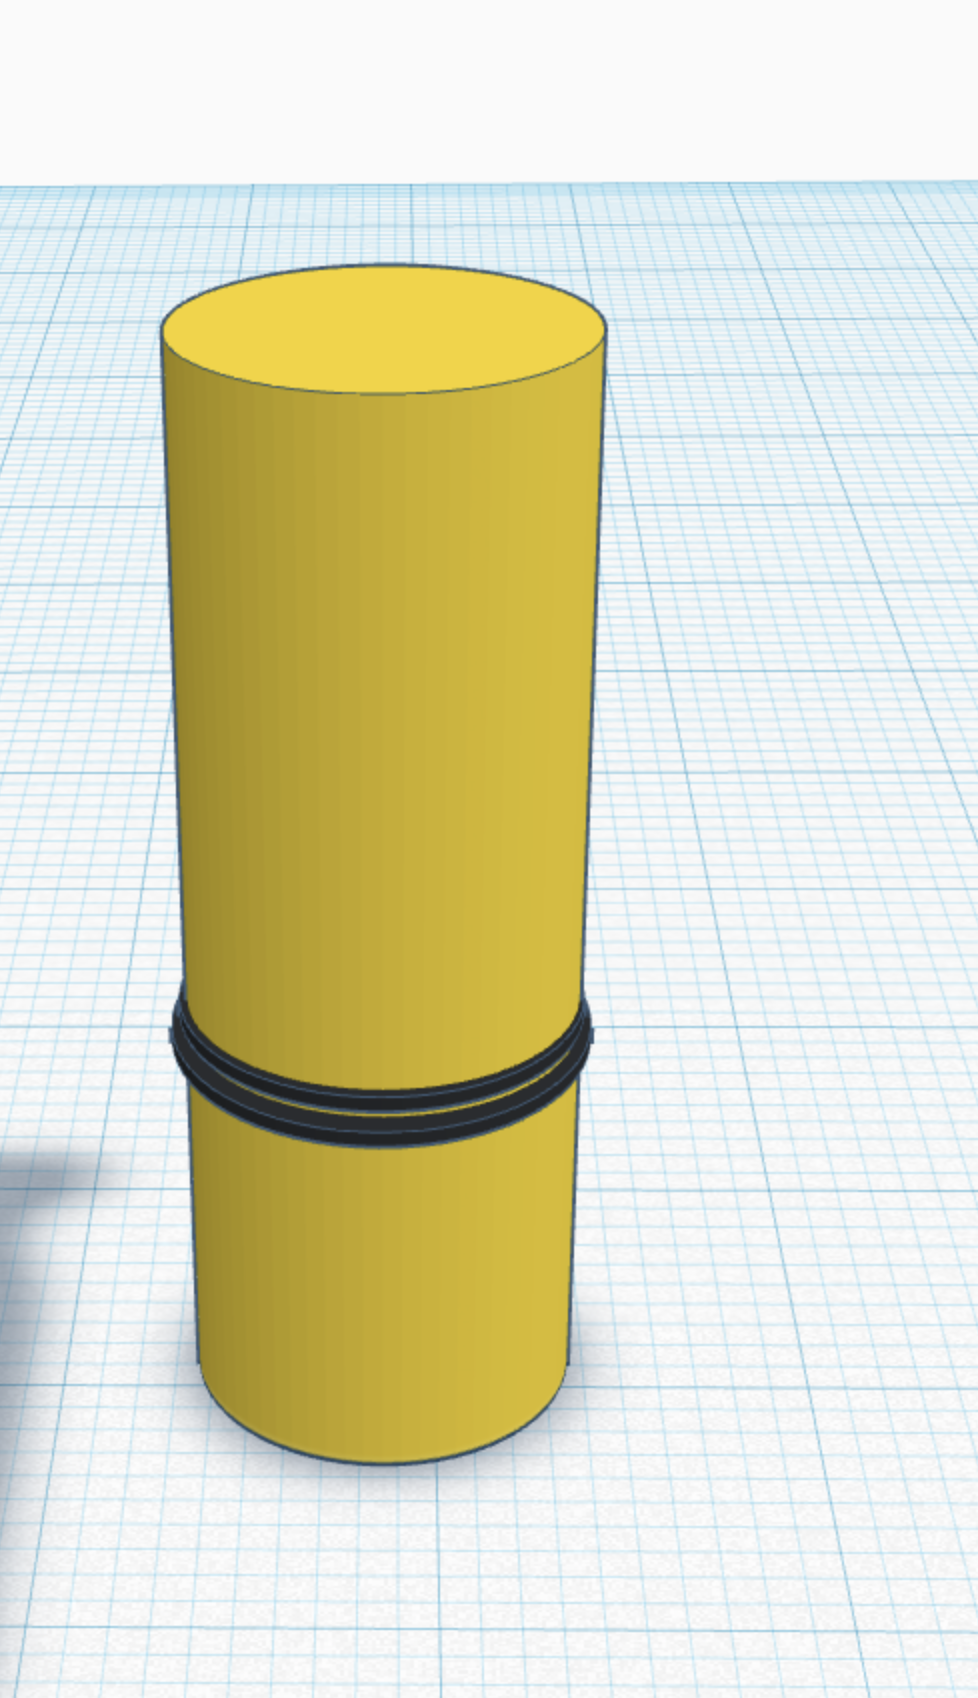
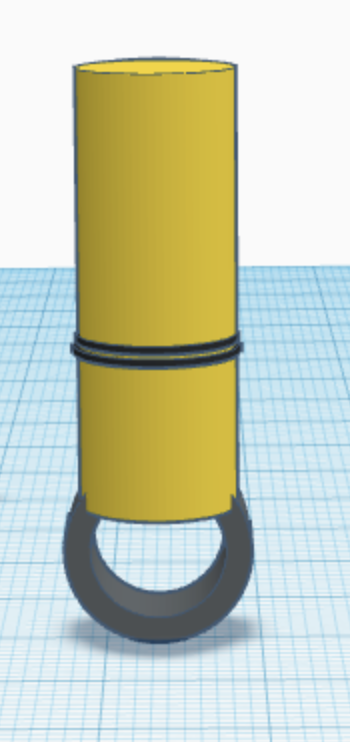
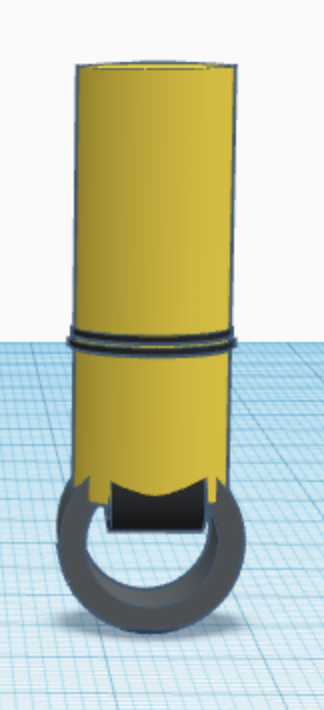
Step 13; Arms
take a tube and make it 3 times as large as it comes from the generator, an make a cylinder the same length group both shapes.
Step 24; Rings

take two tubes and place the around the base of the arm where the hadn't will be. just like on the bottom of the body.
Step 25; Fingers
fingers are made of two cylinders one at a 67 degree angle that have been grouped together. After which you will place a half sphere on the end. (robot has 6 fingers I think
Step 26; Add the Arms to the Robot
add the fingers to the arms as shown, add the arms to the body as shown.
Step 27; Legs.
make a cylinder, and place rings around it as shown. Just like the arm of the robot.
Step 28; Rollers
the rollers are really easy to make, all you do it take a tube and place them at the bottom of the legs.
Step 29; Rollers Still
take another tube and place it right against the other, at a 90 degree angle, shorten it first.
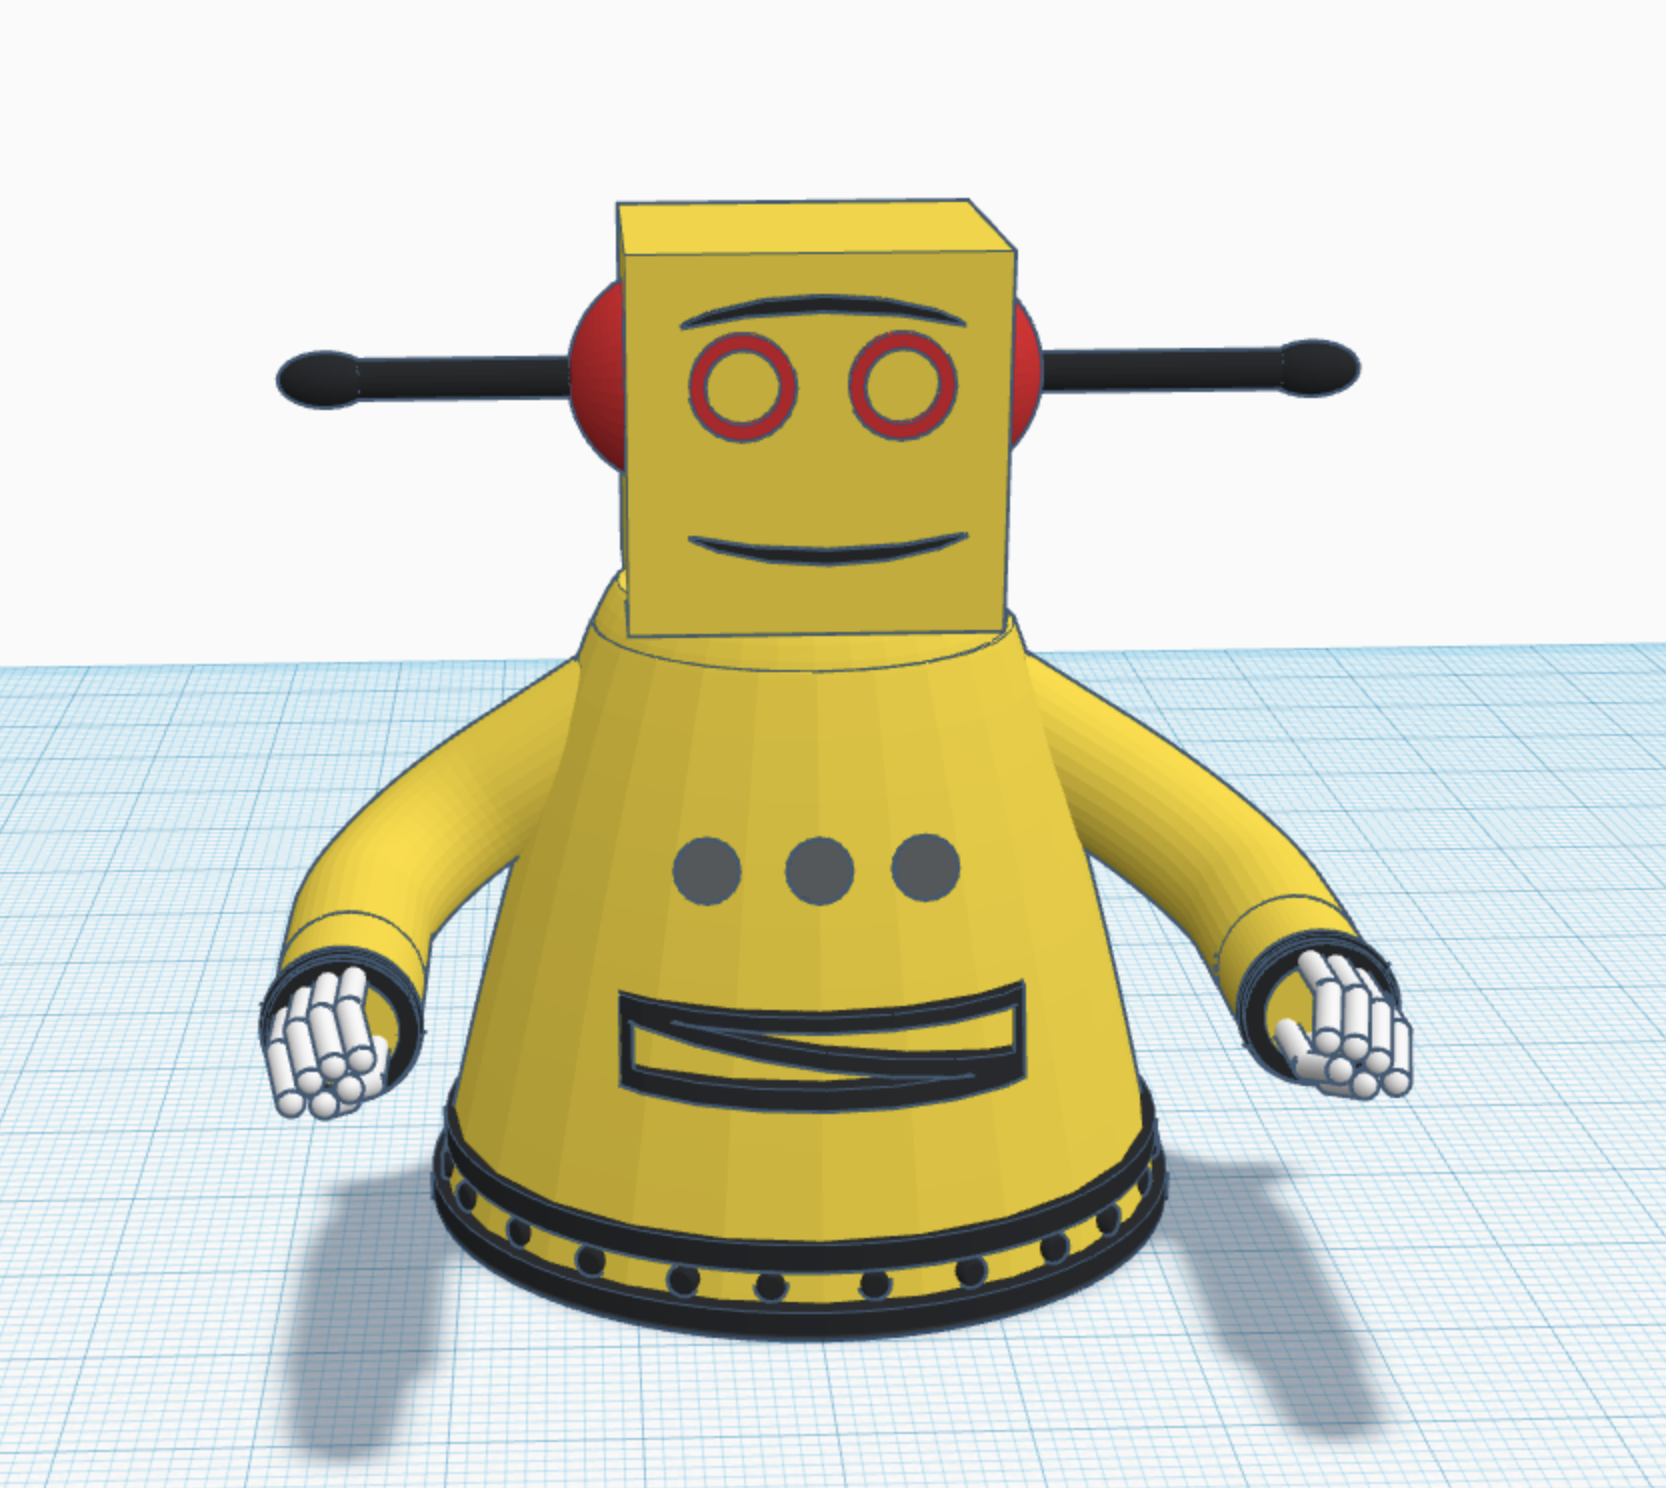
Step 30; Done
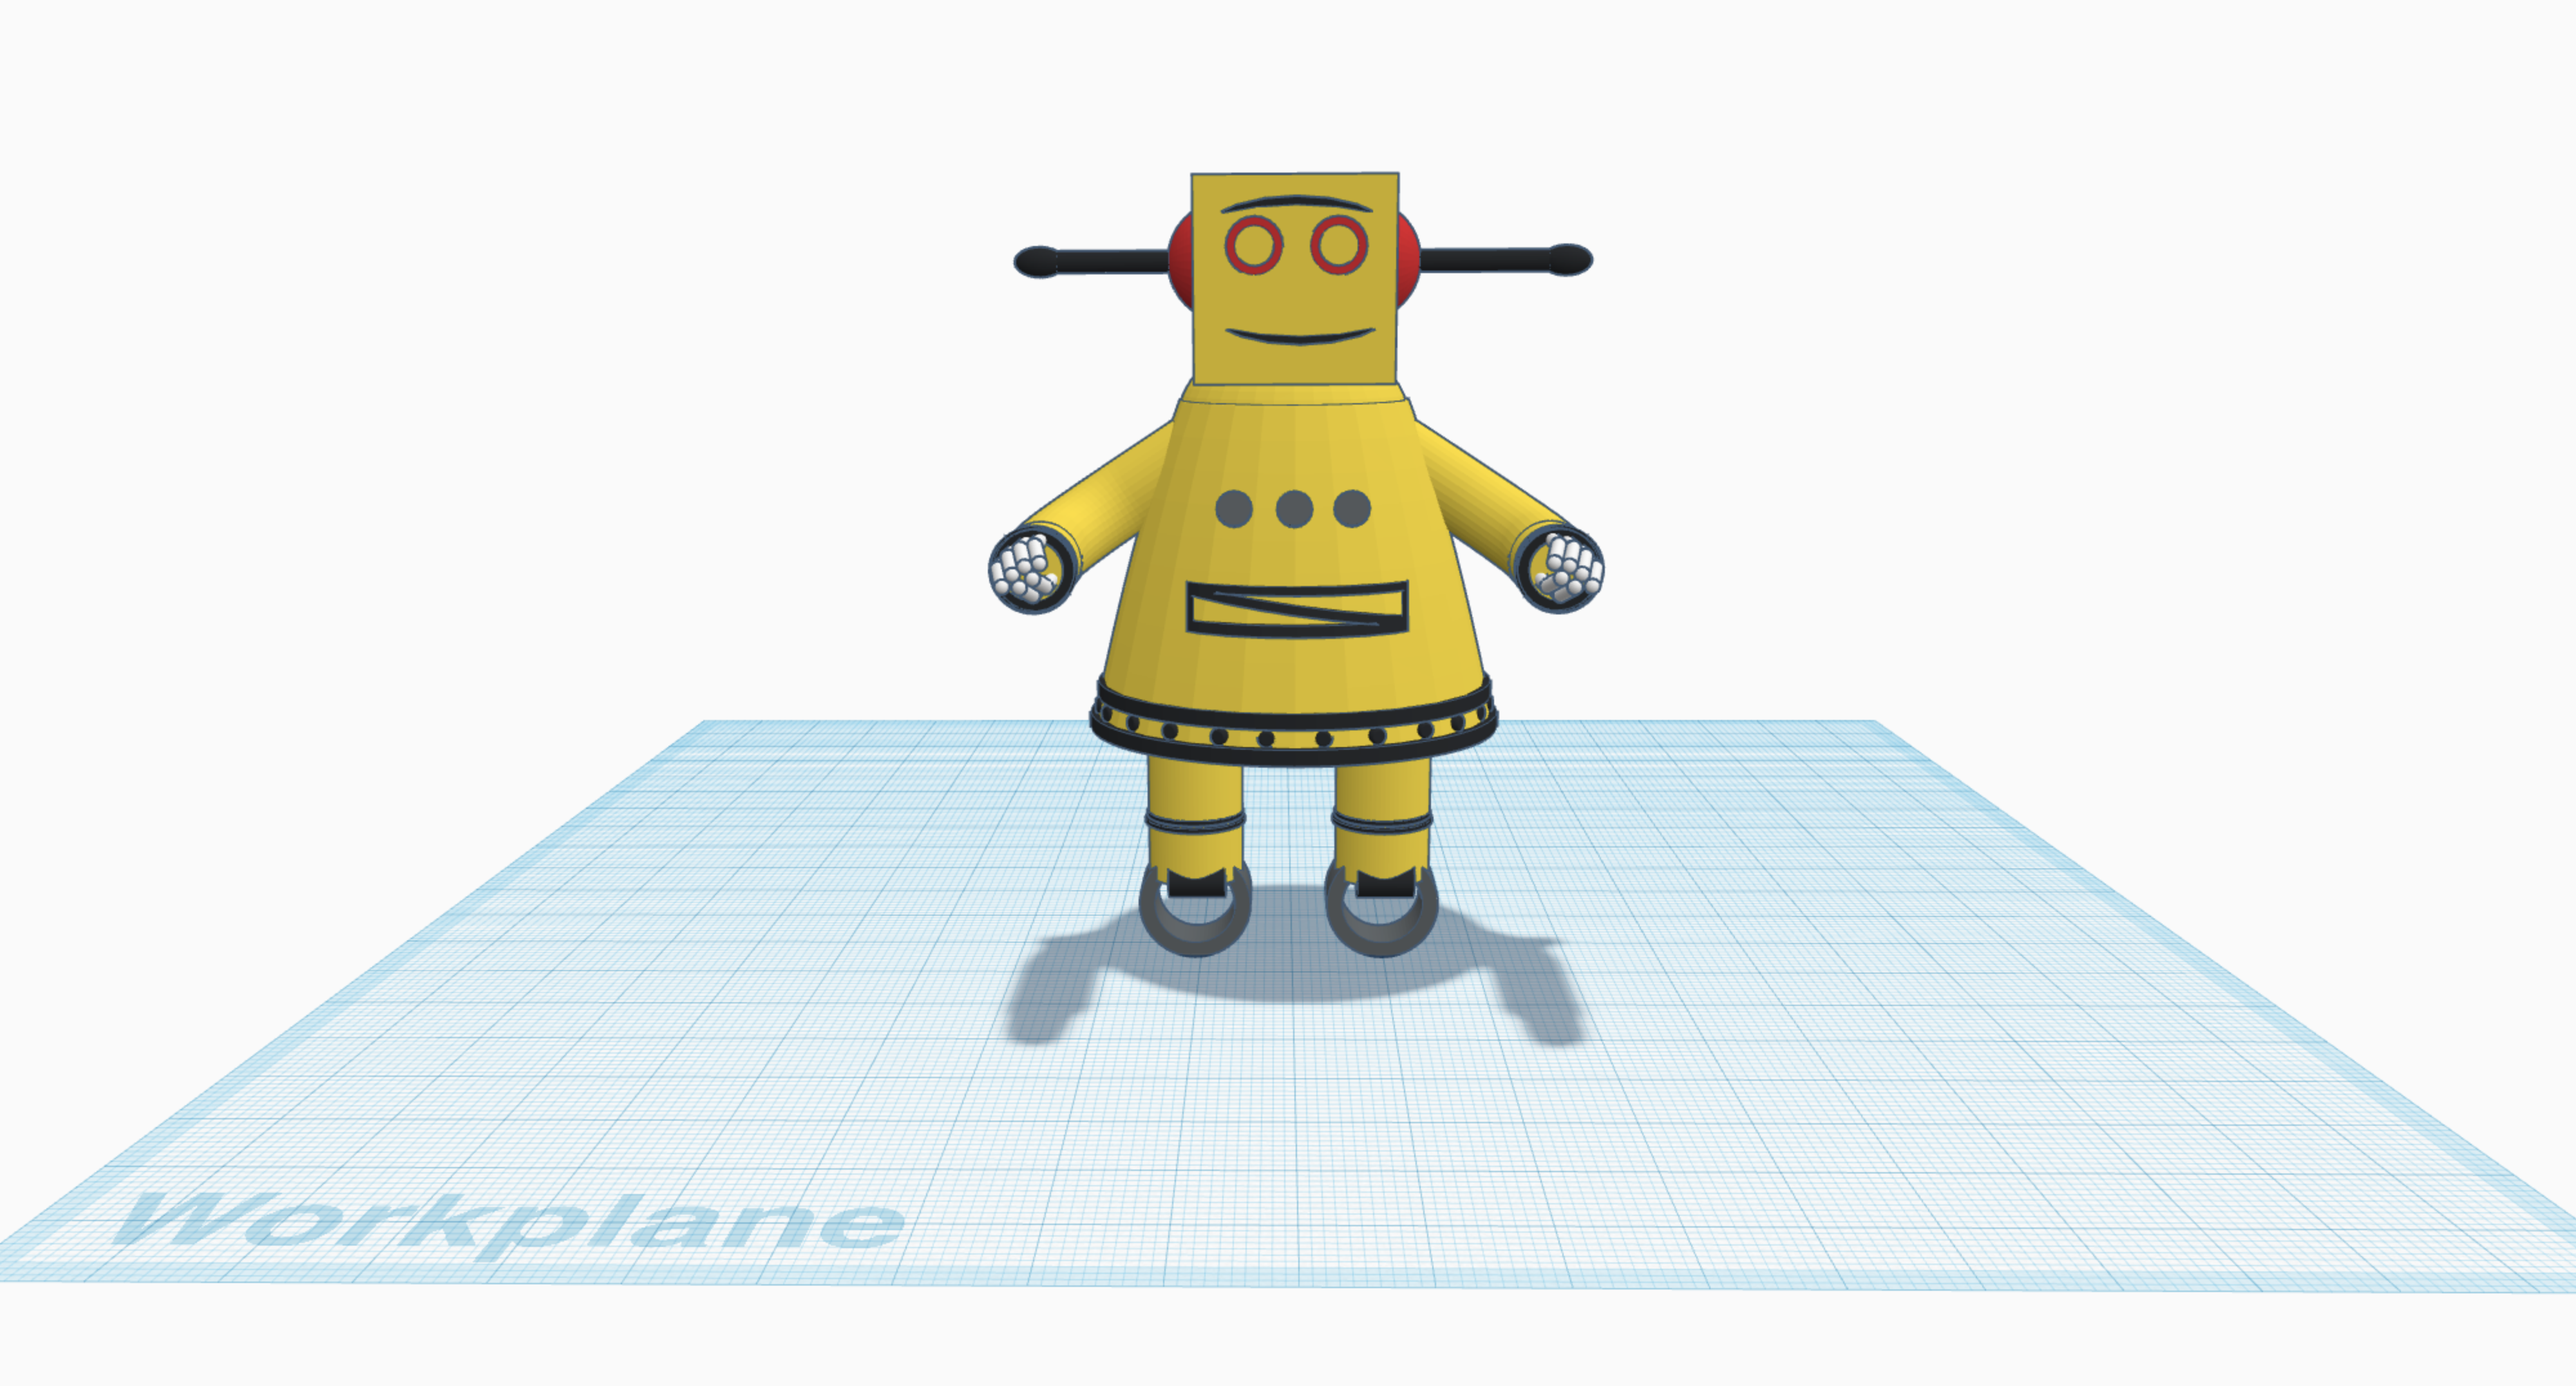
here it is!!!! Do what you like with it, pose it etc..... have fun hope you enjoyed the intractable!!!!!
link to Tinkercad https://www.tinkercad.com/things/3GGYoFOZtKI-instructables-robot