Installing Python ,tkinter and Ttkbootstrap on Windows 10/11 Using PIP for GUI Development
by xanthium-enterprises in Design > Software
8259 Views, 1 Favorites, 0 Comments
Installing Python ,tkinter and Ttkbootstrap on Windows 10/11 Using PIP for GUI Development
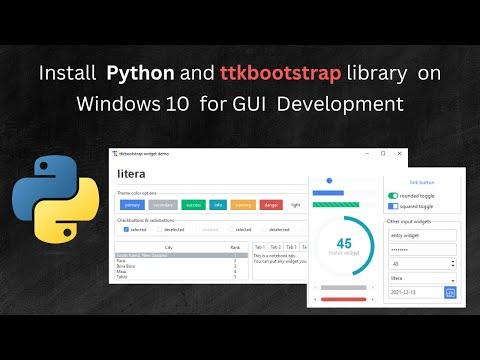
Here we will learn
- How to install Python,tkinter on Windows 10 /11 system,
- How to add Python interpreter to Windows path for command line use
- and How to install Python tkinter/ttkbootstrap GUI framework on Windows 10/11 using PIP installer
Python's versatility and ease of use make it a preferred choice for developers, while Tkinter simplifies GUI development. Leveraging ttkbootstrap further enhances Tkinter's capabilities, providing stylish, Bootstrap-inspired themes and widgets, elevating GUI design effortlessly
Supplies
- Python interpreter
- Windows 10/11 Machine
Installing Python 3 Interpretor on Windows 10/11
A Python interpreter is a program that reads and executes Python code. It translates Python code into machine-readable bytecode and then executes it. The interpreter is responsible for interpreting the code line by line and carrying out the instructions written in the Python script.
There are several types of Python interpreters available:
- CPython - >This is the default and most widely used Python interpreter. It is implemented in C and is the reference implementation of Python. CPython is known for its robustness and compatibility with various Python libraries and frameworks.
- Jython -> Jython is an implementation of Python that runs on the Java Virtual Machine (JVM). It allows Python code to interact seamlessly with Java code, enabling developers to use Python for Java-based applications.
- IronPython-> IronPython is an implementation of Python for the .NET framework. It allows Python code to interact with .NET libraries and provides integration with Microsoft technologies.
- PyPy -PyPy is a fast, alternative implementation of Python that focuses on speed and performance. It includes a Just-In-Time (JIT) compiler that can significantly improve the execution speed of Python programs.
- MicroPython -> MicroPython is a lightweight implementation of Python that is designed to run on microcontrollers and embedded systems. It provides a subset of the Python language optimized for resource-constrained environments.
- Stackless Python - > Stackless Python is an enhanced version of CPython that provides support for microthreads, allowing for concurrent programming without the need for operating system threads.
Among these interpreters,
CPython is the standard and most commonly used implementation of Python. It is the default interpreter included with the official Python distribution and is widely supported by the Python community.
Here we will install CPython interpretor on Windows 10/11
Download Python Installer:
- Visit the official Python website
- Choose the latest version of Python for Windows.
- Click on the "Download" button for the Windows installer (either 64-bit or 32-bit, depending on your system).
Run Python Installer:
- Once the installer is downloaded, double-click on it to start the installation process.
Configure Installation:
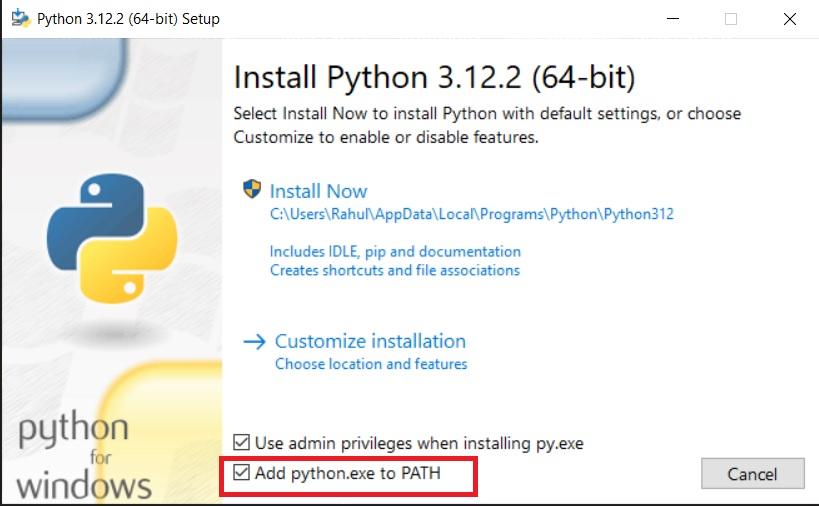
- In the installation wizard, make sure to check the box that says "Add Python X.X to PATH" (X.X represents the version number). This will allow you to run Python from the command line more easily.
- You can also customize the installation by selecting optional features, but the default settings should be sufficient for most users.
Install Python:
- Proceed with the installation by clicking on the "Install Now" button.
- The installer will then install Python on your system. This process may take a few minutes.
Verify Installation:
- After the installation is complete, you can verify that Python is installed correctly by opening a command prompt and typing:
python --version
- This command should display the installed Python version.
Verify PATH Configuration:
- To ensure that Python is added to your system PATH correctly, you can open a command prompt and type:
c:/> python
- This should start the Python interpreter. You can exit the interpreter by typing exit() and pressing Enter.
That's it! You have successfully installed CPython interpreter on your Windows 10/11 system. You can now start writing and executing Python code on your computer.
Installing Tkinter on Windows 10/11
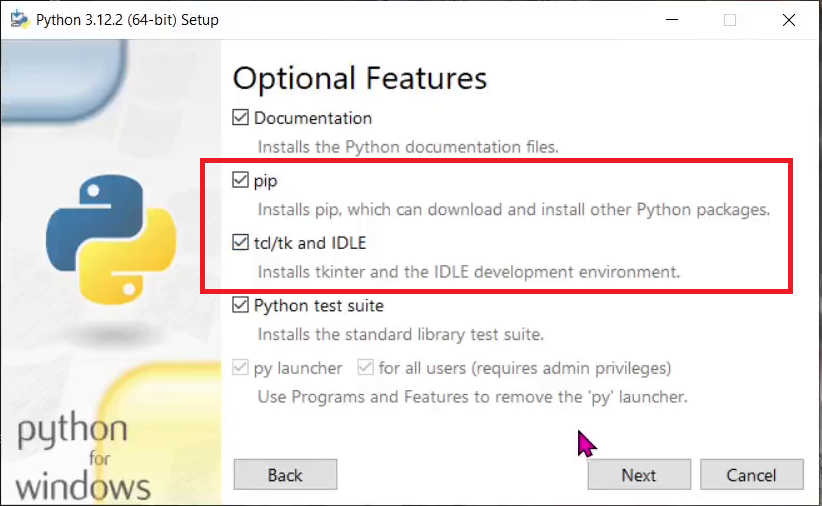
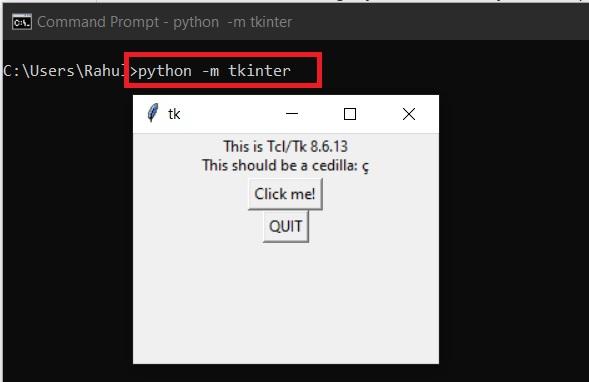
Tkinter is typically included with the standard installation of Python on Windows 10/11.
Therefore, if you have already installed Python using the steps mentioned earlier, you should have Tkinter available by default. However, if for some reason Tkinter is not installed or if you need to verify its installation, you can follow these steps:
Check Tkinter Installation on Windows
Open a command prompt by pressing Win + R, typing cmd, and pressing Enter.
In the command prompt, type:
python -m tkinter
If Tkinter is installed correctly, a new window should appear displaying the Tkinter version number and information.
Install Tkinter (if not already installed):
If Tkinter is not installed or if the above command doesn't work, you can reinstall it using pip, Python's package manager.
In the command prompt, type:
pip install tk
This command will install Tkinter using the tk package.
Verify Installation:
After installation, you can verify that Tkinter is installed correctly by repeating the steps to check Tkinter installation mentioned above.
Installing Ttkbootstrap on Windows 10 Using PIP Installer
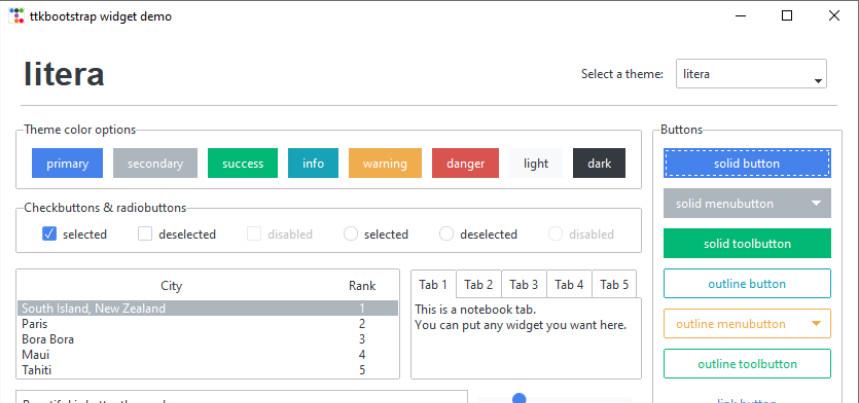
ttkbootstrap is a Python package that extends the capabilities of Tkinter, the standard GUI toolkit for Python, by providing Bootstrap-styled themes and widgets.
It allows developers to easily create modern and visually appealing graphical user interfaces (GUIs) with Tkinter, by offering a wide range of pre-styled themes and widgets inspired by Bootstrap, a popular front-end framework for web development.
With ttkbootstrap, developers can enhance the appearance of their Tkinter applications without the need for extensive customization.
The package provides ready-to-use themes and widgets that seamlessly integrate with Tkinter, enabling developers to create GUIs with consistent styling and design elements.
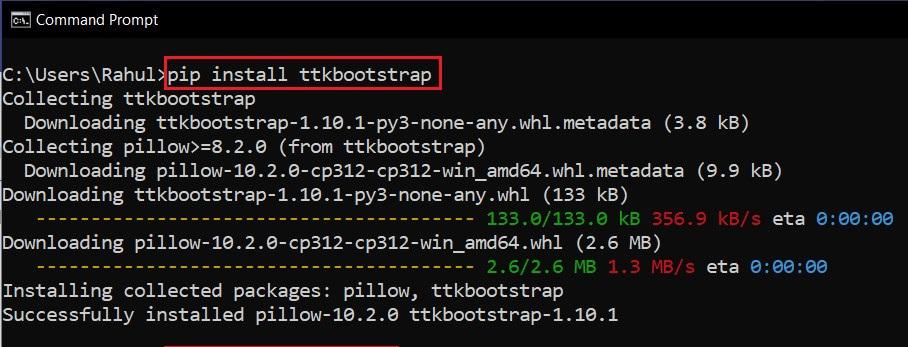
To install ttkbootstrap on Windows 10/11, you can use pip, Python's package installer. Here's how:
- Open Command Prompt:
- Press Win + R, type cmd, and press Enter to open the Command Prompt.
- Install ttkbootstrap:
- In the Command Prompt, type the following command and press Enter:
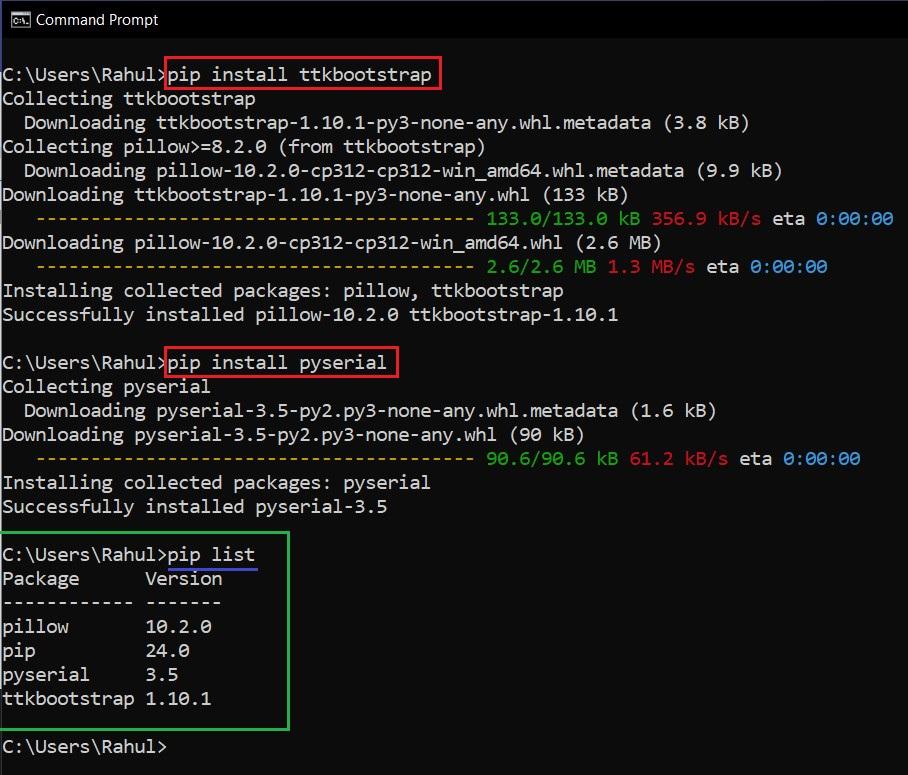
pip install ttkbootstrap
- Verify Installation:
- After the installation is complete, you can verify that ttkbootstrap is installed correctly by importing it in a Python script or the Python interactive shell:
import ttkbootstrap
- If there are no errors, then ttkbootstrap is successfully installed.
That's it! You've now installed ttkbootstrap on your Windows 10 system.
You can start using it to create stylish Tkinter GUIs in your Python projects.
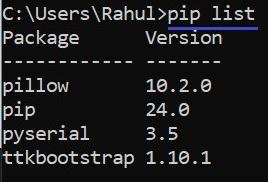
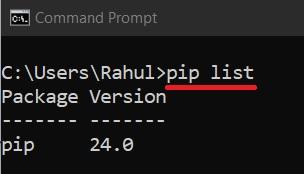
You can also use pip list command to check ttkbootstrap is installed or not .
pip list
If you are new to Python GUI Programming Do check our Tutorial
After installing Python/tkinter/ttkbootrap ,you can build some amazing projects like
- Cross Platform serial communication using Python (PySerial) and Arduino
- Data Acquisition and Logging system using Arduino Serial Port to MySQL database using Python
- GUI Serial port Data Acquisition and Logging System to CSV text file using Python and tkinter (ttkbootstrap)
- Simple Python tkinter(ttkbootstrap) GUI interface for serialport communication with Arduino
- How to automatically update the tkinter GUI widgets like Labels, Textboxes at regular intervals without user intervention