Install and Use Windows 11 on Raspberry Pi With Wifi!
by Dev Prime in Circuits > Raspberry Pi
22542 Views, 10 Favorites, 0 Comments
Install and Use Windows 11 on Raspberry Pi With Wifi!

Welcome to another Dev Prime Tutorial! Today I'm going to show you how to install Windows 11 on the Raspberry Pi 4! For me - at the start I overclocked the pi to make it faster and also put a fan above it, to cool it down, but don't worry - I'll explain and tell everything.
To install Windows 11 on Raspberry Pi 4/400, you need:
- A Raspberry Pi 4 or 400
- USB storage device, such as: HDD, USB Drive, SSD, etc. (Note: for this a SD card won't work, we do not know why, but a USB device will.)
- A USB Keyboard
- A USB Mouse
- A HDMI Monitor
- A PC
- And that's it!
Before Starting...
Make sure your Raspberry Pi 4/400 has the latest firmware, as this will enable for the Raspberry Pi to boot from USB.
To update the firmware: start by opening the Raspberry Pi terminal and typing:
sudo apt update
Then:
sudo apt full-upgrade
And finally:
sudo shutdown - r now
There! We have our pi updated to the latest firmware and software!
Download the Necessities
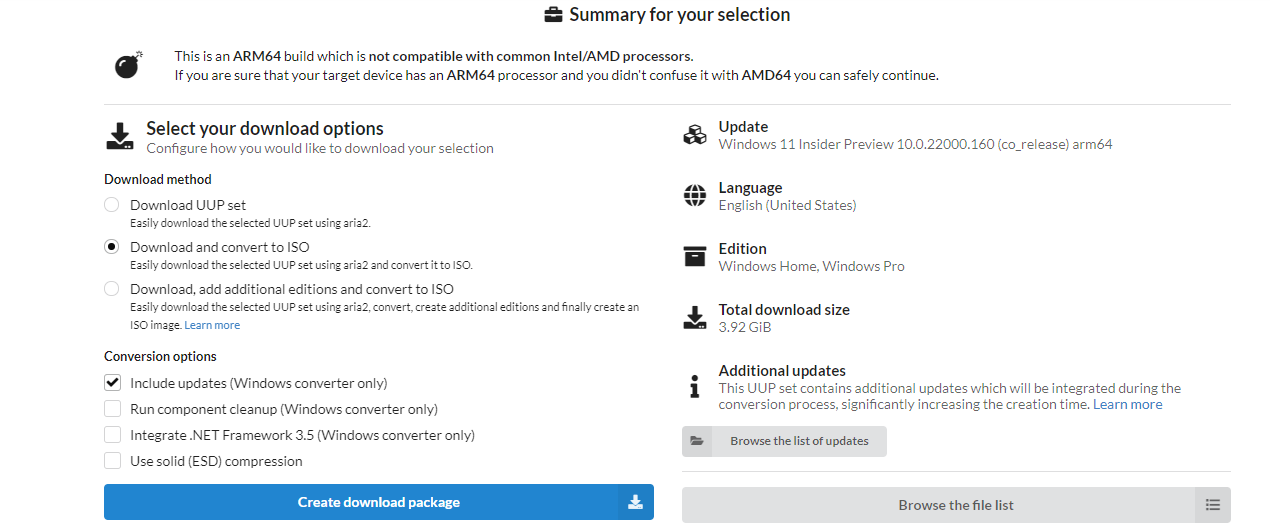
For this you will need to download some stuff, to get Windows 11 working on Raspberry Pi 4/400,
Firstly download a Windows on ARM image from UUPDUMP. This is how you do it, click this link, then choose your language, (which is English), then after choose the edition you want, (we chose only Windows Pro) and then click next, for the download method, choose 'Download and convert to ISO' and for conversion options, only choose 'Include Updates' and nothing else and then press the create download package.
Second, unzip the file to wherever you want, but make sure it is not hard to find, then click on the uup_download_windows.cmd and after click more info and run anyway, then you will see lots of text, that means it is downloading, this process may take a long time.
Thirdly, when it is done, press 0 to close the app and now we have a ISO image! Now we need to download WoR, which is short for Windows On Raspberry, download this from their website and after click download, after it is done, unzip the file to wherever you want and start WoR.exe from the folder.
Great! Now let's install!
Let's Install!
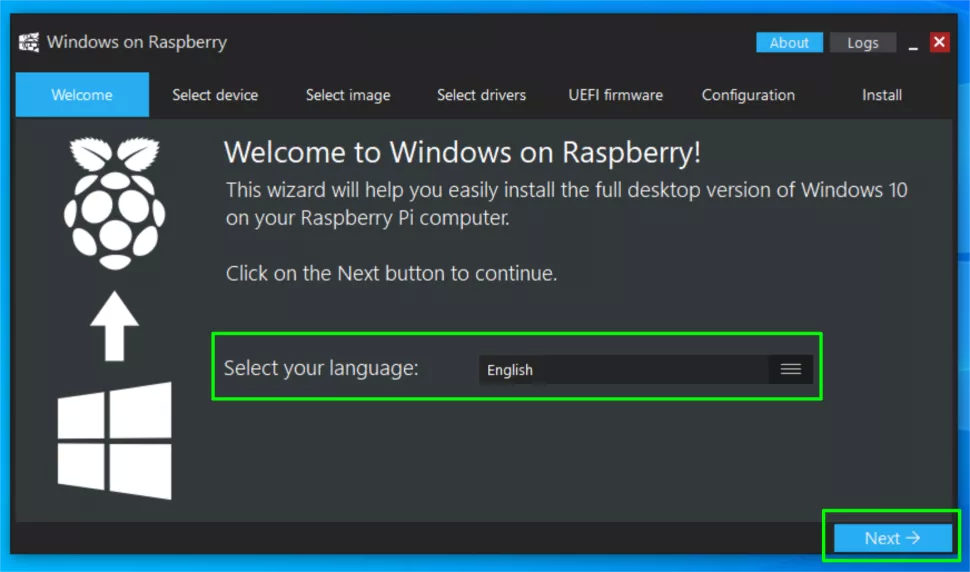
When you have run WoR.exe, after select your language and click next, now select your USB device and your Raspberry Pi version, which in our case is Raspberry Pi 4.
Next, select the ISO image we have prepared earlier, and select the edition of Windows you want, and after click next.
After, for the drivers, select the latest available on the server, and the same for the UEFI firmware.
Don't change anything for the configuration.
And click 'Install', and this may also take a long time.
When it's done, you have successfully installed Windows 11 on Raspberry Pi 4/400!
Let's move on!
Start Up the Raspberry Pi!
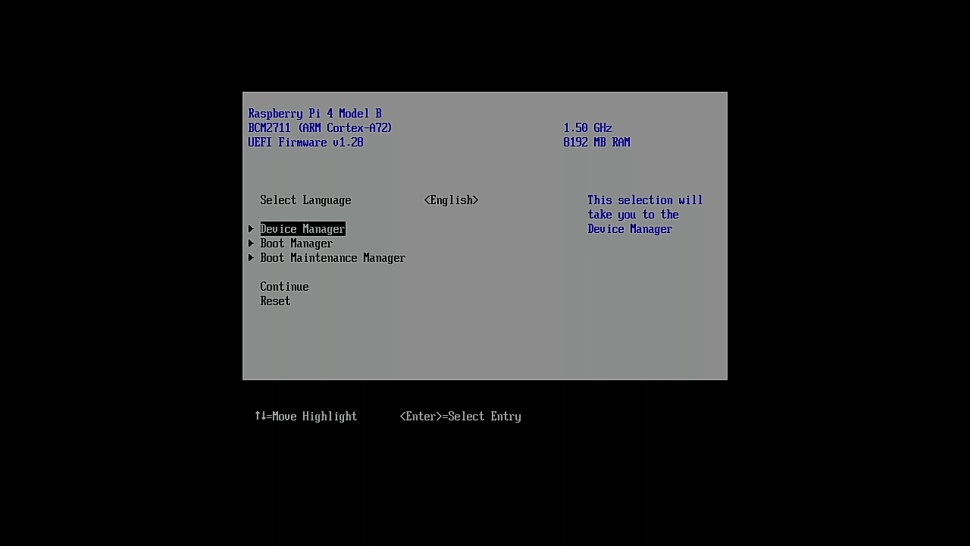
You need to be VERY careful for this step! As if you do it wrong you can fail the entire thing! Put the USB device, keyboard, mouse and the HDMI cable, when you boot it up, keep on clicking the 'esc' key, until you see the screen above, use the arrow keys to scroll down to Device Manager, then select Raspberry Pi Configuration, and select Advanced Configuration, scroll to 'Limit RAM to 3GB' and set it to 'Disabled' using the 'enter' key, press the 'f10' key to save and press 'esc' to leave and keep on pressing it to go to the first menu. scroll down to 'Continue' and it will direct you to a Raspberry Pi Logo,
In few minutes or so, you will see a loading animation under the logo, if the screen appears to be frozen, DON'T RESTART THE RASPBERRY PI! I did this once, and it never booted up again! (Like I mean Windows, not any OS) then you would see a white screen and the Windows 11 logo, and put a ethernet cable in, if you don't have one or don't want to use it, use the next steps after.
Wi-Fi on the Raspberry Pi
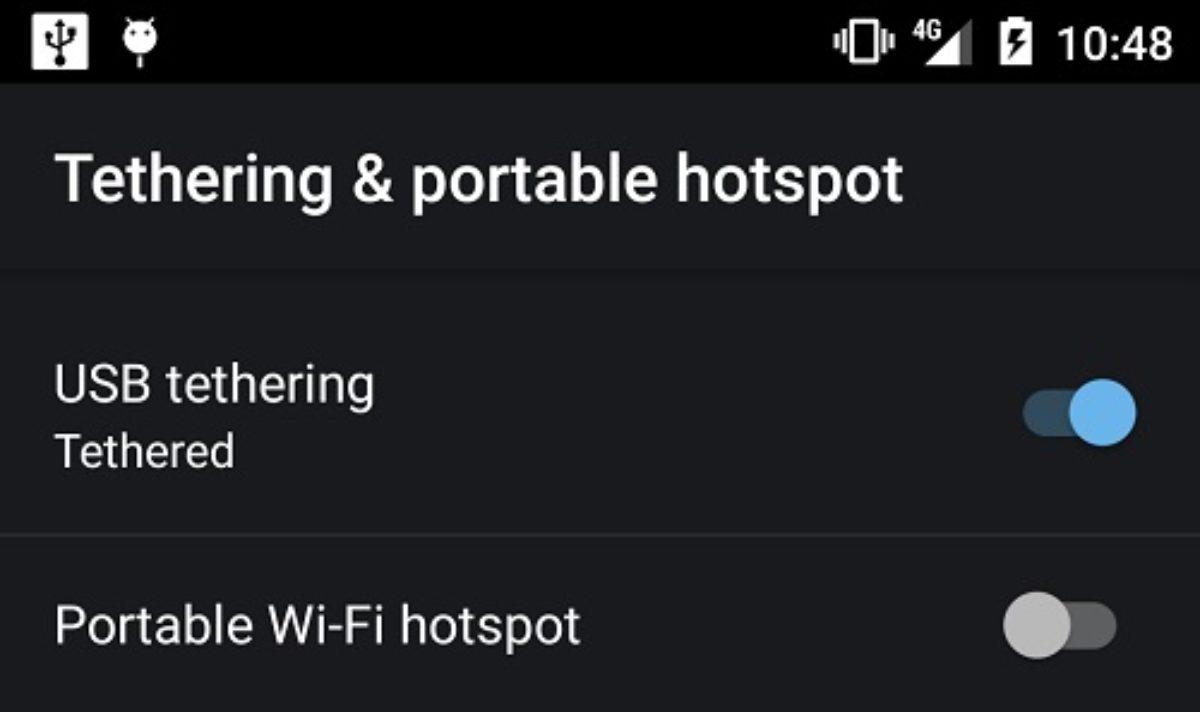
You may have noticed, the Wi-Fi doesn't work on the Raspberry Pi, let's see how we can fix this!
You need:
- A USB cable that supports both the USB in the Raspberry Pi and the phone.
- A phone
And that's it!
Firstly, you have to connect the ends of the USB cable to the phone and the pi, and open your phone and go into settings, in there search up USB tethering, and click data USB tethering, then turn it on with slider, as the image above.
You should now have Wi-Fi working on your Windows on Raspberry Pi!