Install and Configure a DD-WRT Kong Router
by f1r_CTLF in Circuits > Wireless
340669 Views, 67 Favorites, 0 Comments
Install and Configure a DD-WRT Kong Router
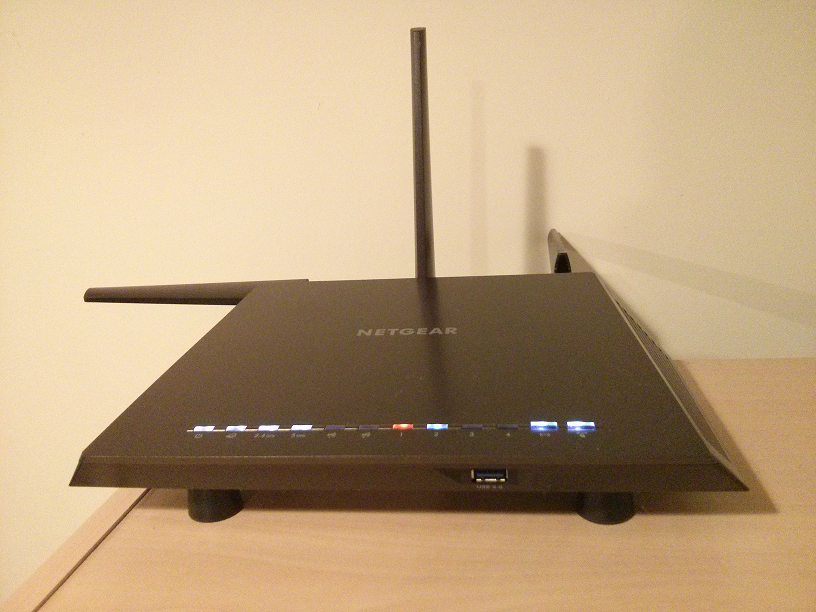
DD-WRT is a wonderful open source custom router firmware that is supported on many devices. It adds features, stability and configurability to consumer routers.
However, it's not easy for a novice starting out with DD-WRT. There hasn't been an official stable release since 2008. It's hard to choose the build for your needs (a good discussion of the various builds is here). Just choosing a router, suitable build, and revision of DD-WRT is a daunting task for a beginner; traditionally, one must pore over forum posts for information about balancing stability, features, and newer device support. Right here, right now, we're going to solve those issues.
This guide is designed to help beginners configure a fast & stable DD-WRT router with basic settings and wireless. We'll be using a Kong build of DD-WRT, which stably supports several newer devices. A couple of well-reviewed AC1900 routers that are supported are the ASUS AC68U and NETGEAR R7000. Since the R7000 is less expensive, and at the time of this writing the DD-WRT wiki specifically recommends Kong's build for this device, we'll be using it in the guide. I'll update this guide when a newer build has better results.
Note: If you already have some form of DD-WRT installed on your router, skip to Step 6: Upload the BIN DD-WRT File.
Materials:
-
NETGEAR R7000 Router
-
Ethernet cable
- PC with Ethernet capability
Get Files From Kong's Download Page
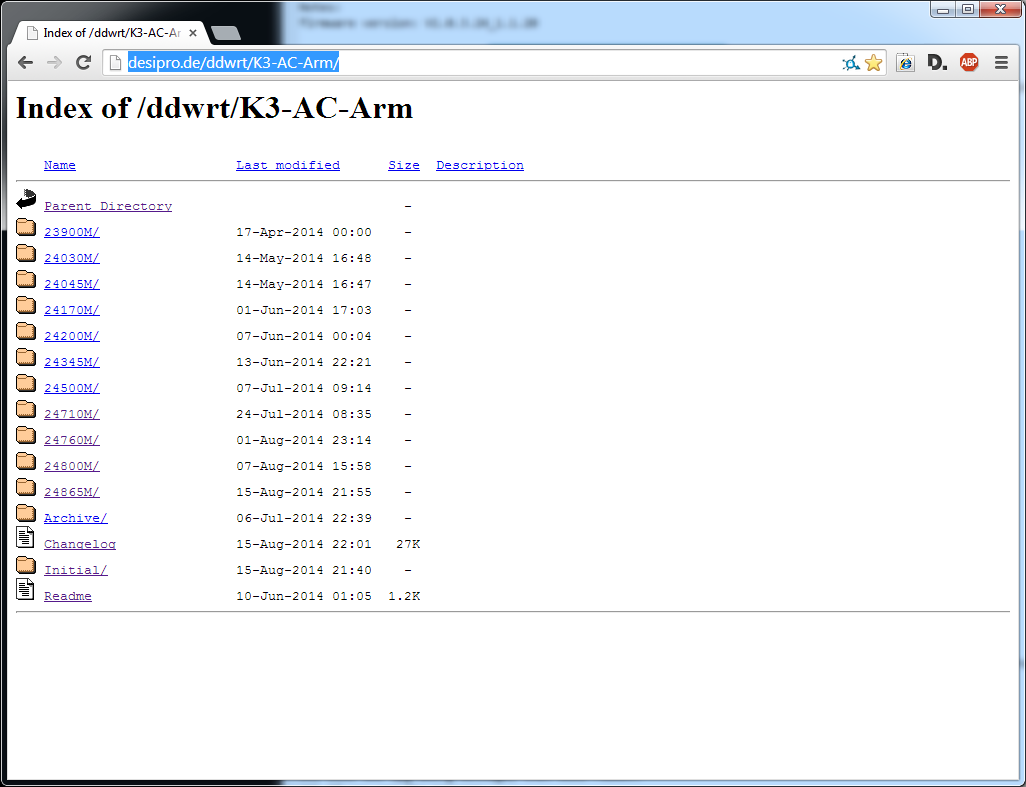
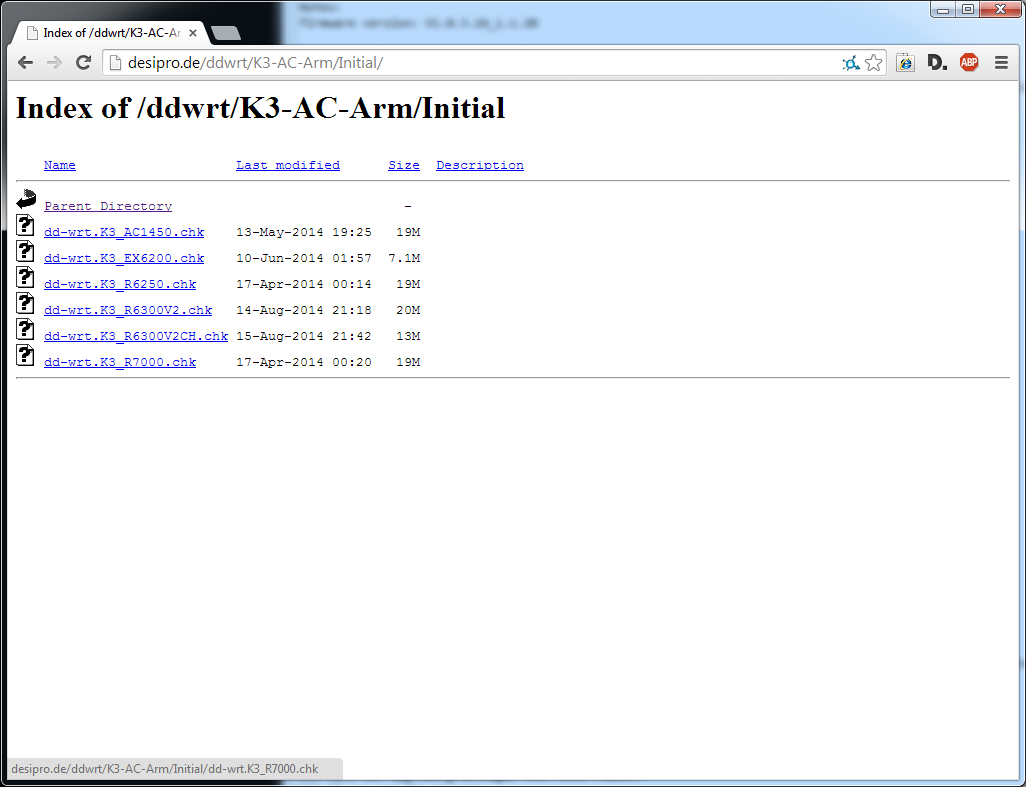
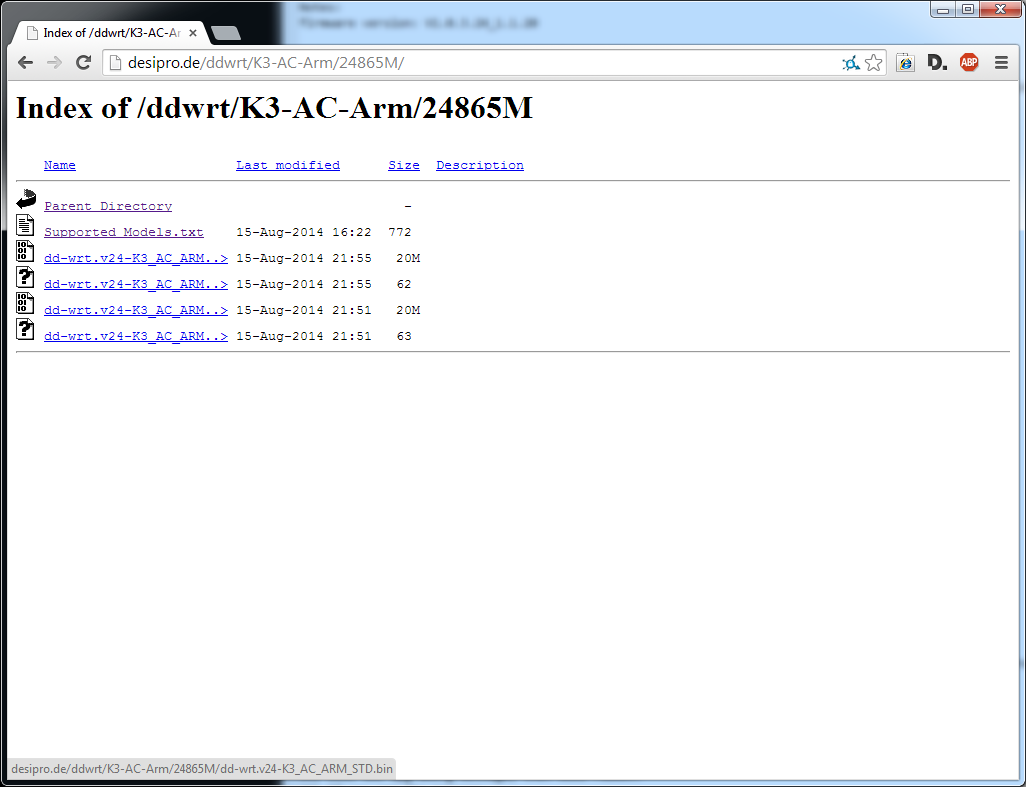
- In a browser, go to: http://desipro.de/ddwrt-ren/K3-AC-Arm/
- From the folder called "Initial", download the CHK file dd-wrt.K3_R7000.chk
- In addition, from the folder for revision 24865M, download the BIN file named dd-wrt.v24-K3_AC_ARM_STD.bin
Note: Some people find that using an even older build 24345M solves some random rebooting issues with certain DD-WRT setups. If you see these types of problems, by all means downgrade, but I haven't seen any random reboots with my tests using the specific configurations detailed in this guide, and the OpenVPN scramble and password UI in newer builds are nice features to have, if you plan to setup a VPN.
Connect to the Router


- If you have an active wireless connection on your PC, disable it temporarily.
- Connect an Ethernet cable from the PC to Port 1 on the back of the router.
- Connect power to the router, and make sure the power switch is on.
- On the PC, run cmd.exe to start a command window, and enter the following commands:
ipconfig /release

ipconfig /renew
Login to the Router's Administration Page
- In a browser, go to http://192.168.1.1/
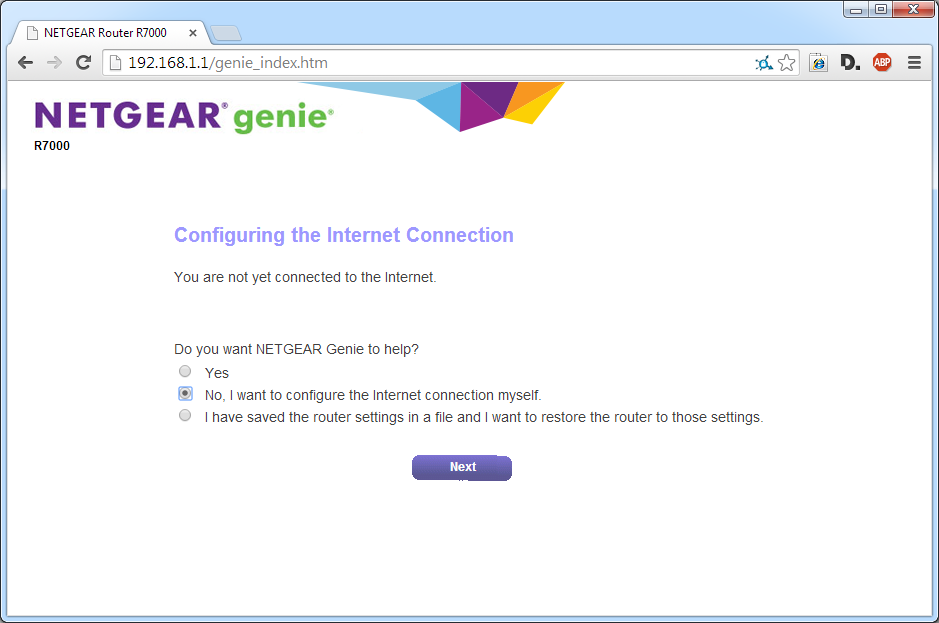
- When asked "Do you want NETGEAR Genie to help?", enter "No, I want to configure the Internet connection myself.", then select the Next button.
- When asked "Are you sure?", select OK.
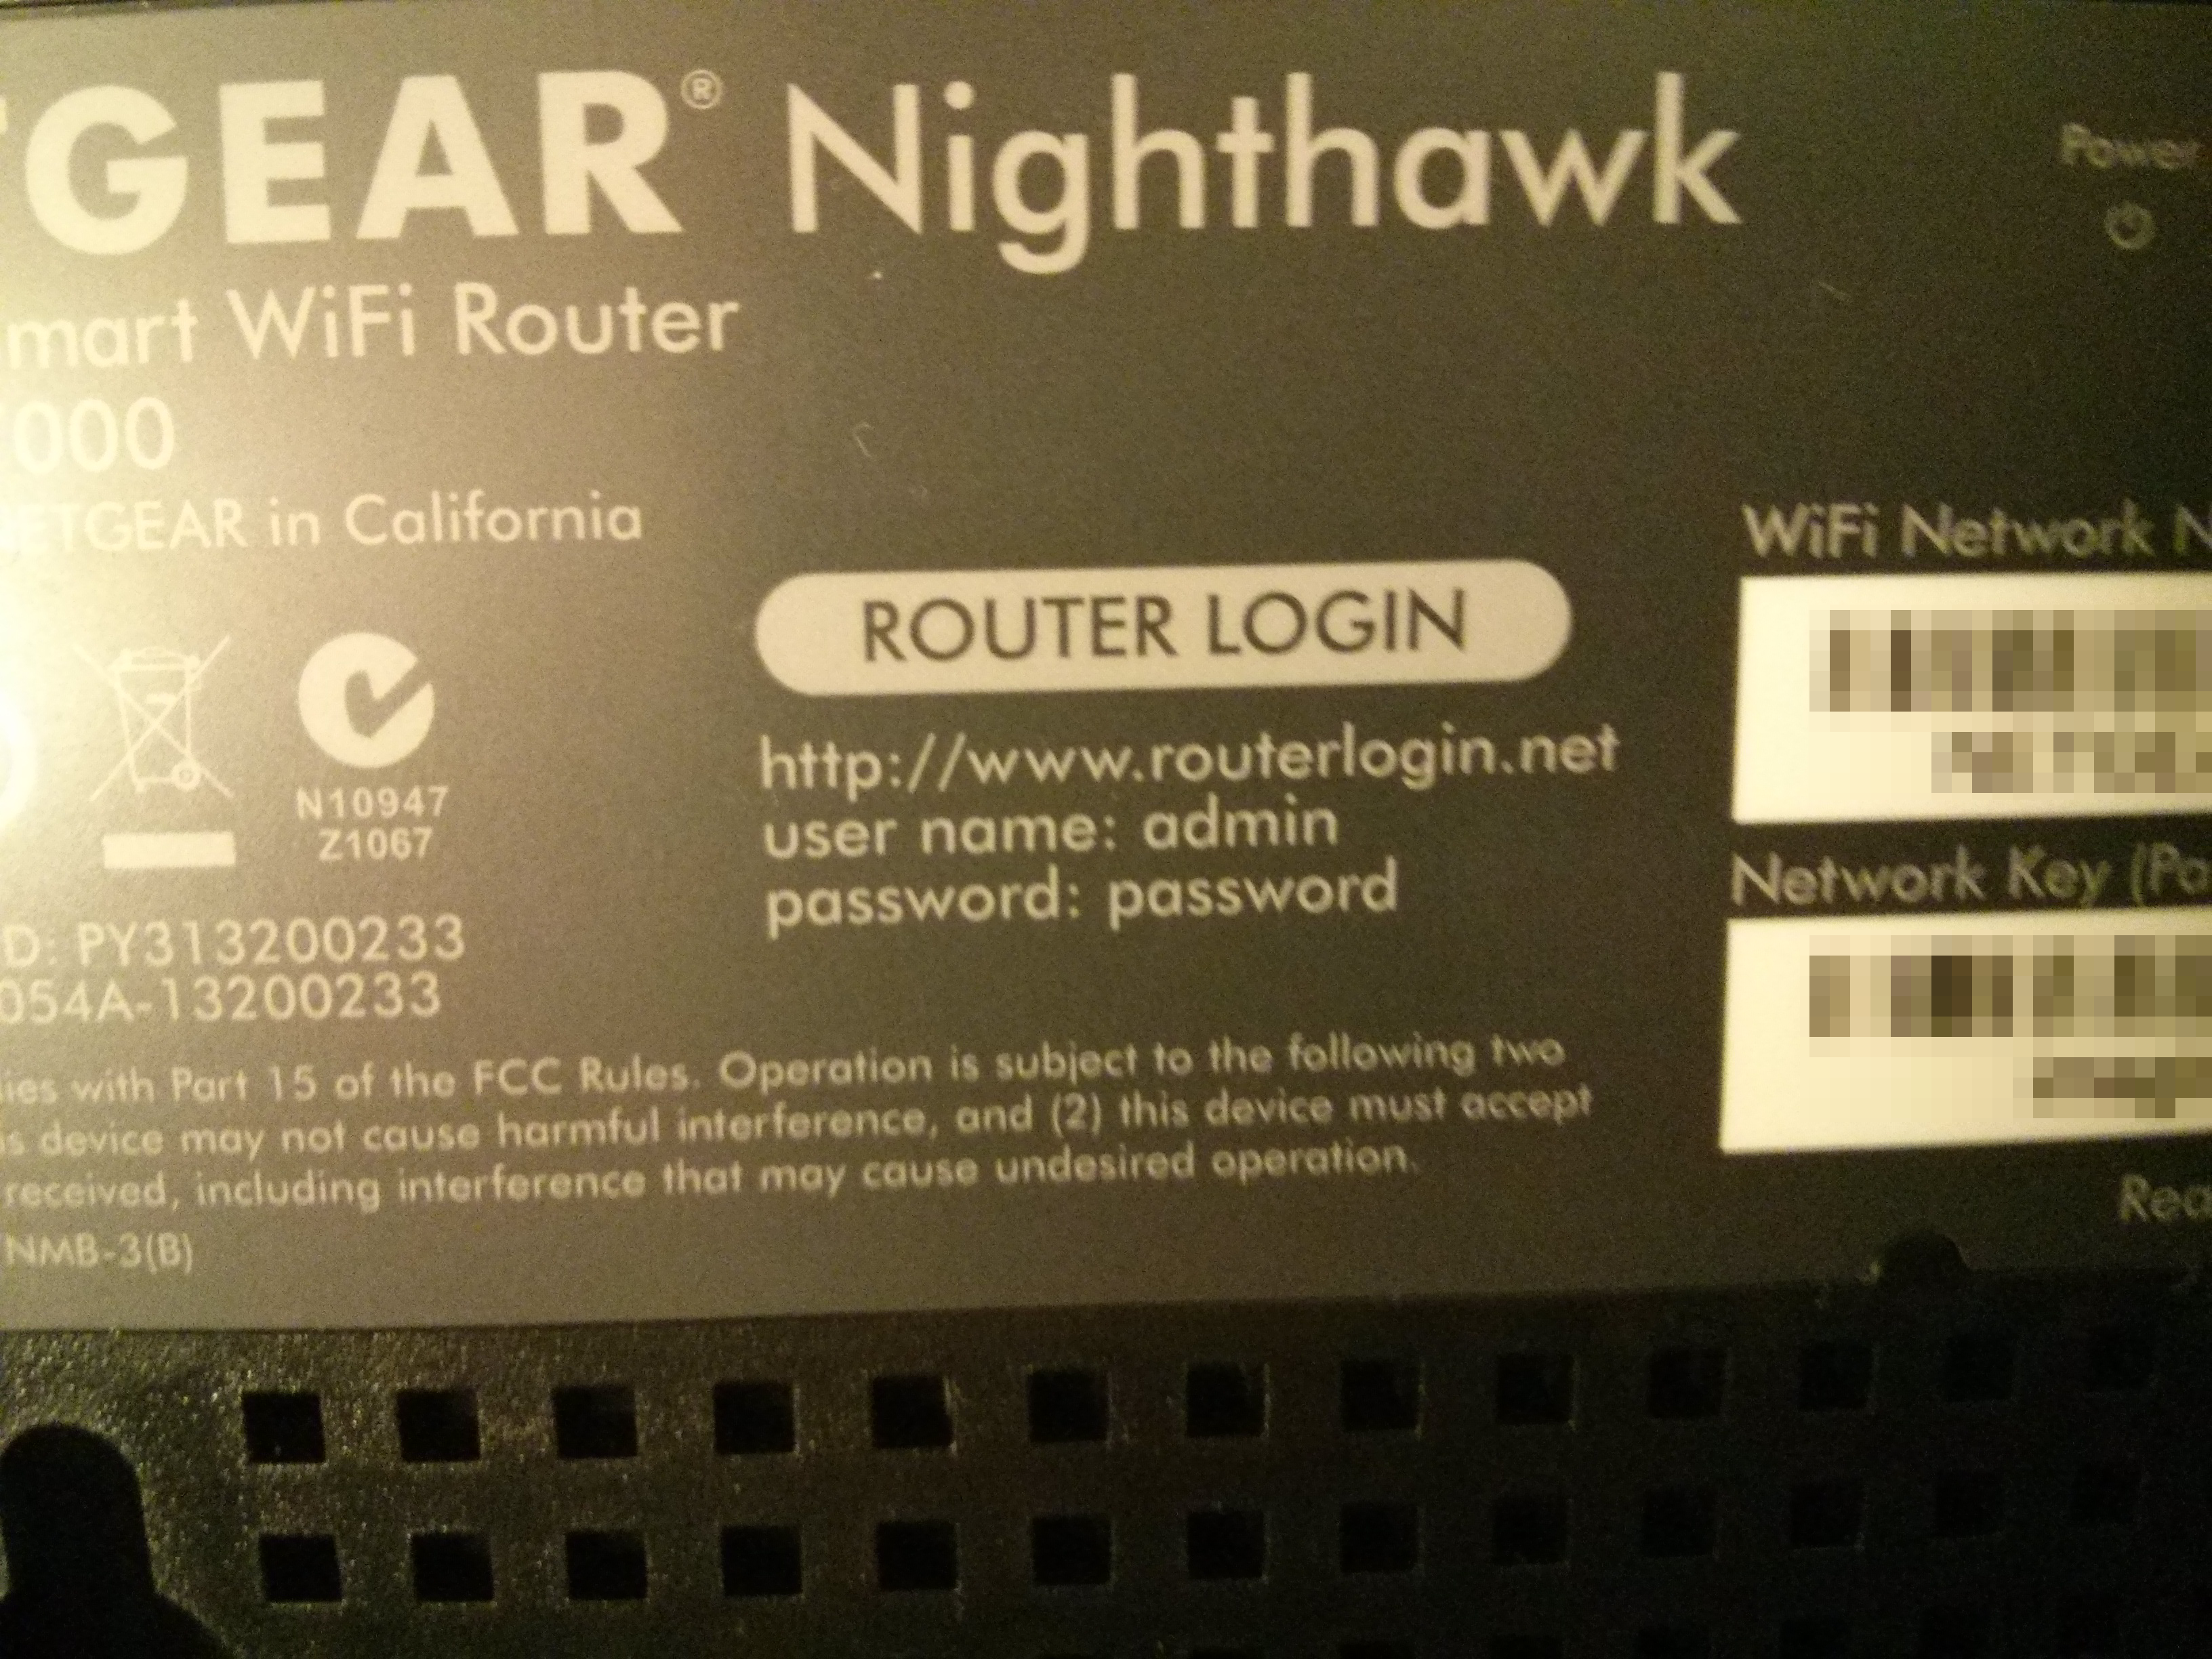
- Login with the default credentials (username = admin, password = password).
- Note: These are printed on the bottom of the router.
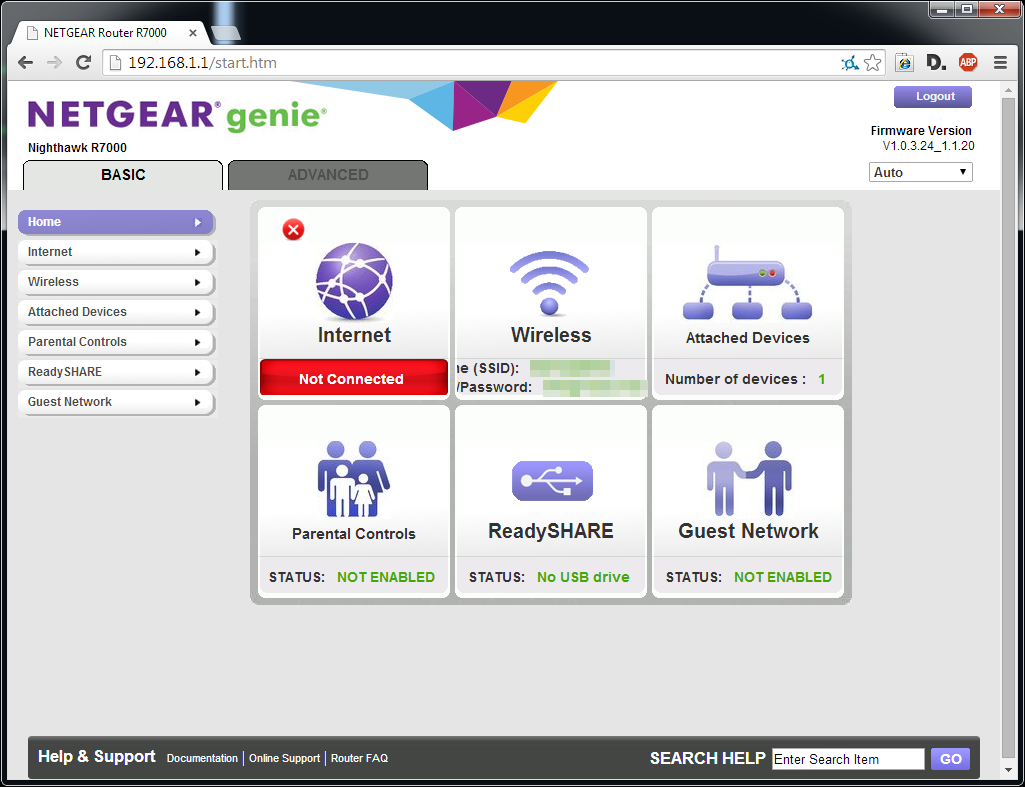
- You should then be taken to the NETGEAR genie Basic Home page.
Upload the CHK DD-WRT File
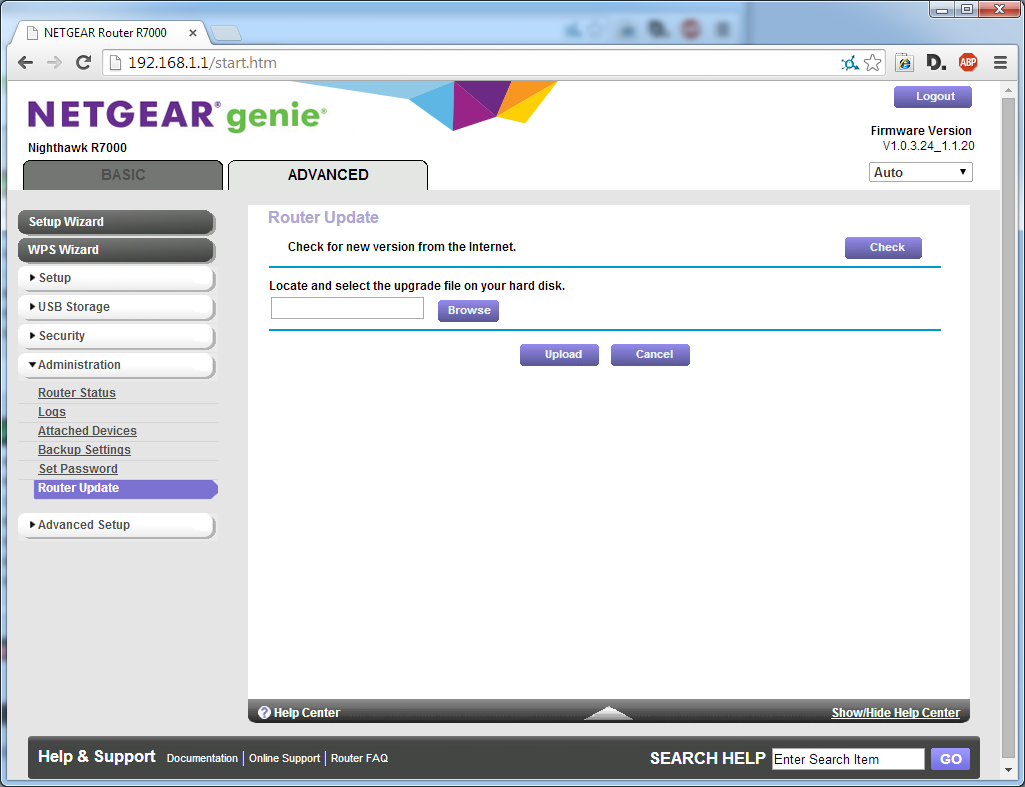
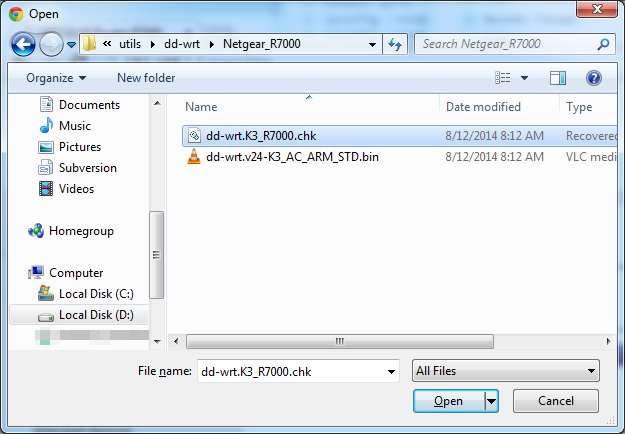
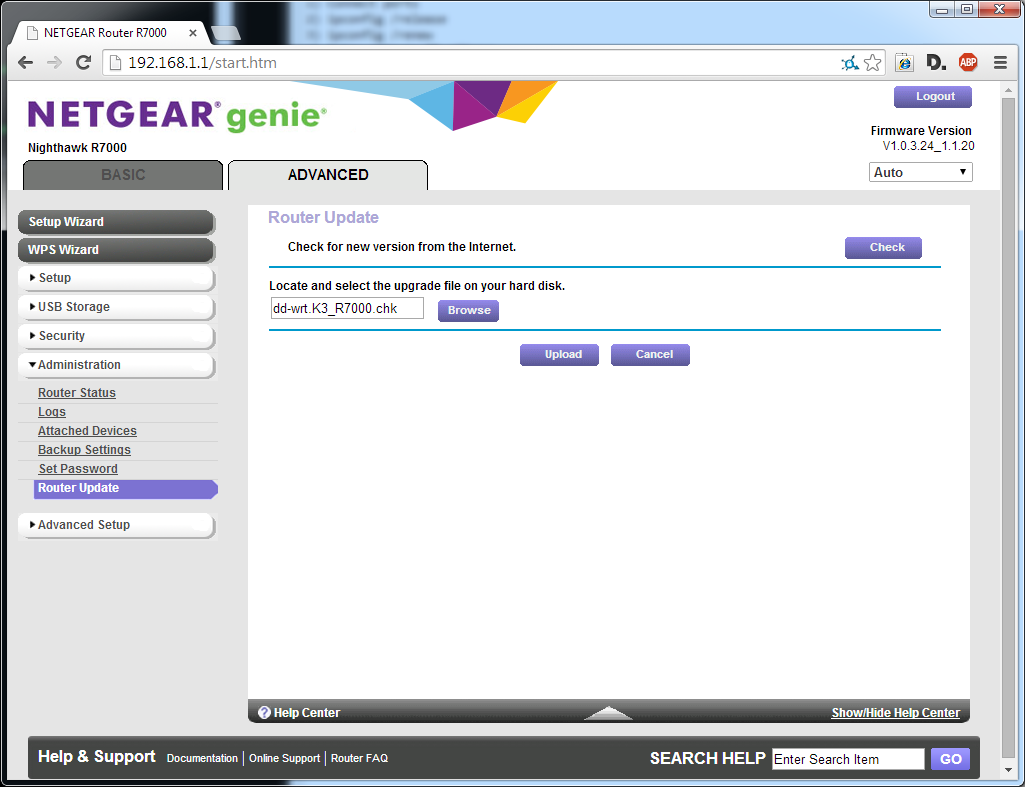
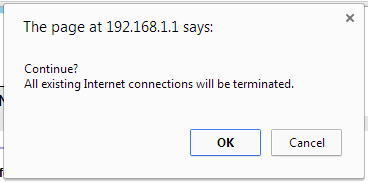
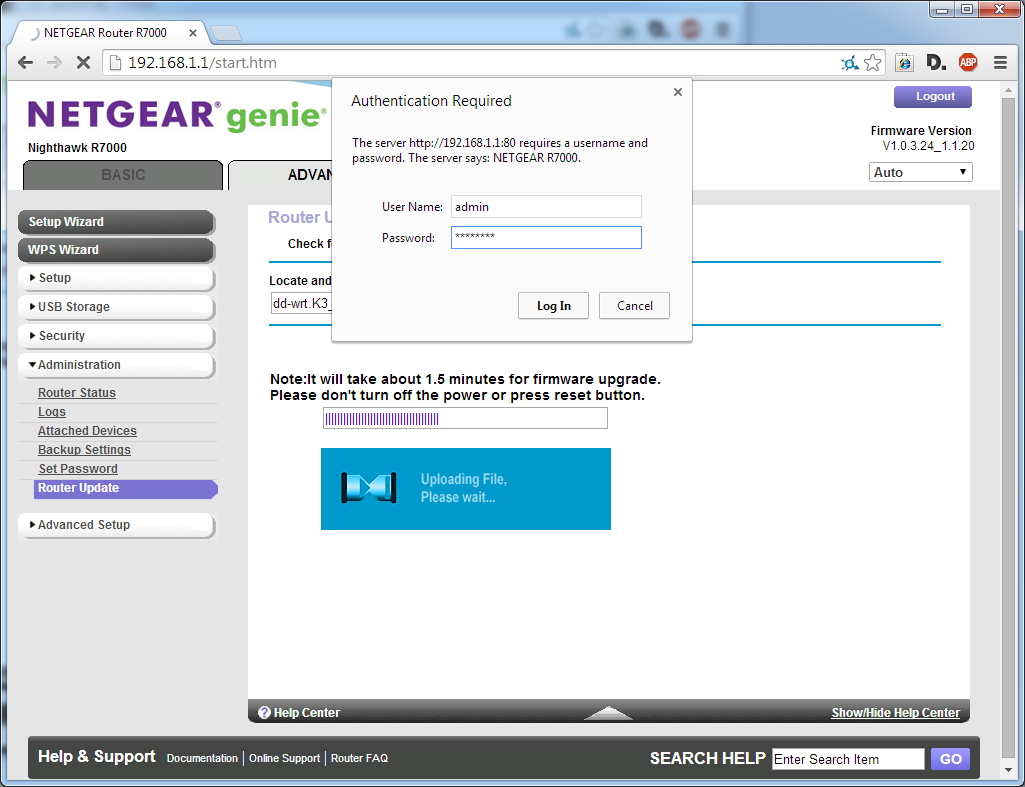
Now, we'll upload the initial CHK DD-WRT firmware file to the router. CHK builds are specifically designed to upgrade from the stock factory firmware to DD-WRT.
- Navigate to Advanced > Administration > Router Update.
- Select the Browse button.
- In the file selection dialog box, select the CHK file you downloaded earlier, then select Open.
- Back on the Router Update page, select Upload.
- When asked to "Continue?", select OK.
- The file will begin uploading. Eventually, you will be prompted to login again. Login with the default credentials (username = admin, password = password).
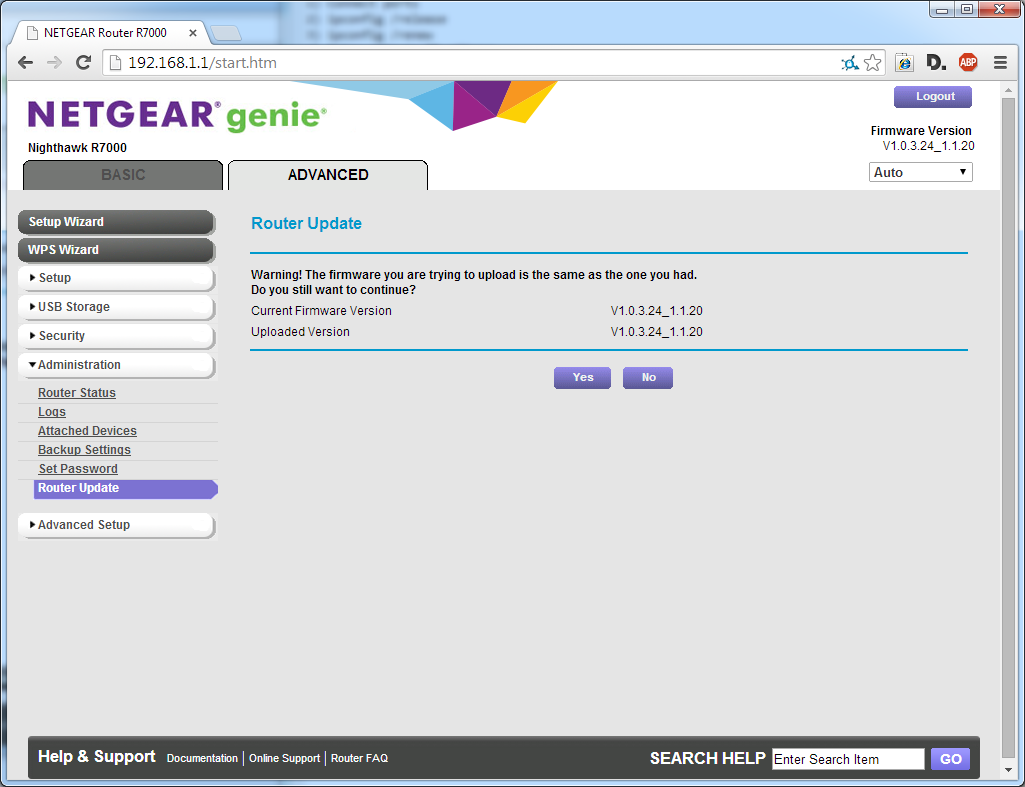
- If you see a prompt "Warning! The firmware you are trying to upload is the same as the one you had.", just select Yes. Uploading will continue.
- When finished, the router will automatically reboot. Congratulations! You are now officially running DD-WRT.
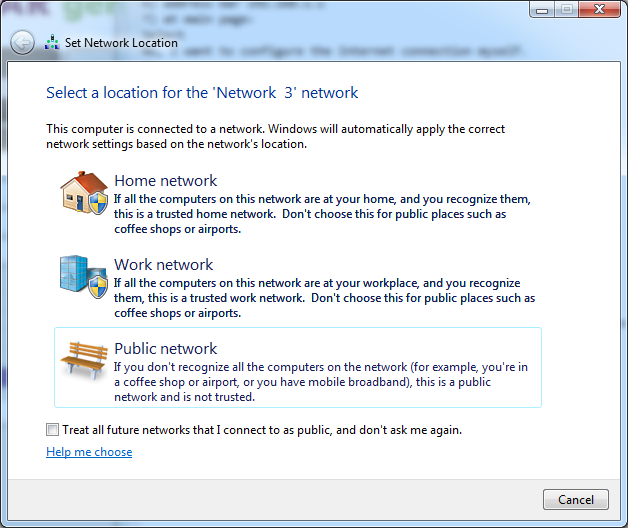
- Windows may prompt to set Network Location. If so, just select Home network in the dialog and move on to the next step.
Login to the DD-WRT Control Panel
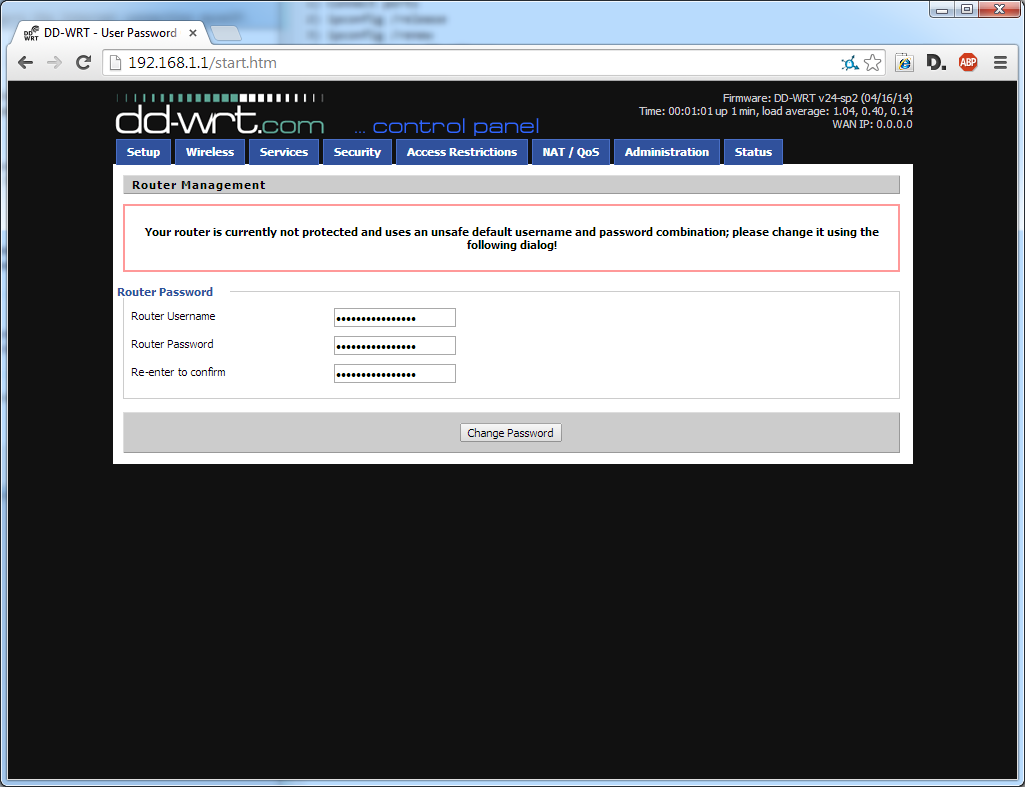
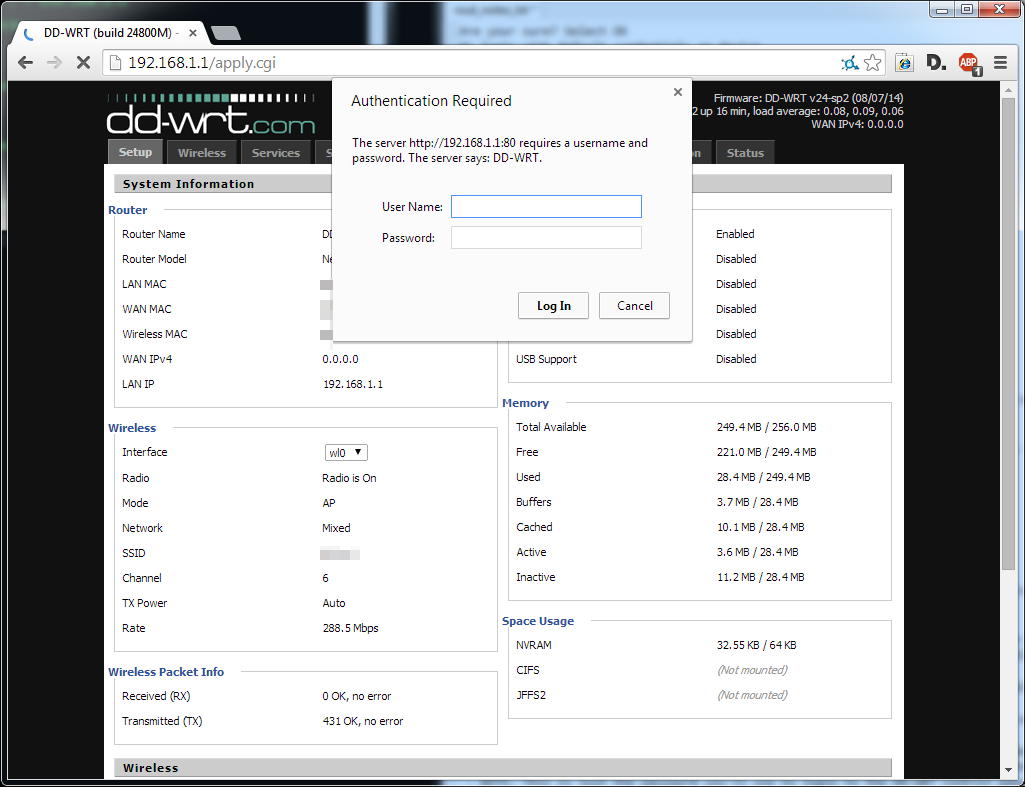
- In your browser, you will eventually see the DD-WRT Router Management page, asking to change the password. Just enter Username root and password password, then select Change Password.
- Note: This password is temporary, and will be overwritten in a future step.
-
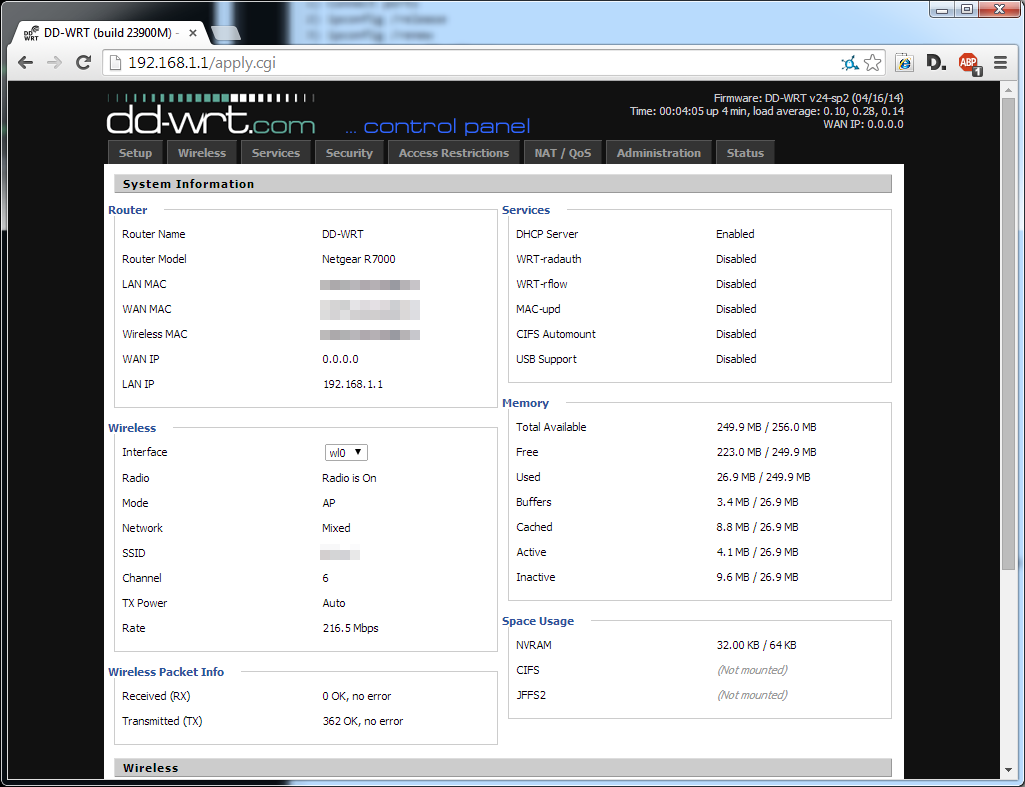
You will be taken to the DD-WRT main System Information page. Navigate to the Administration tab.
-
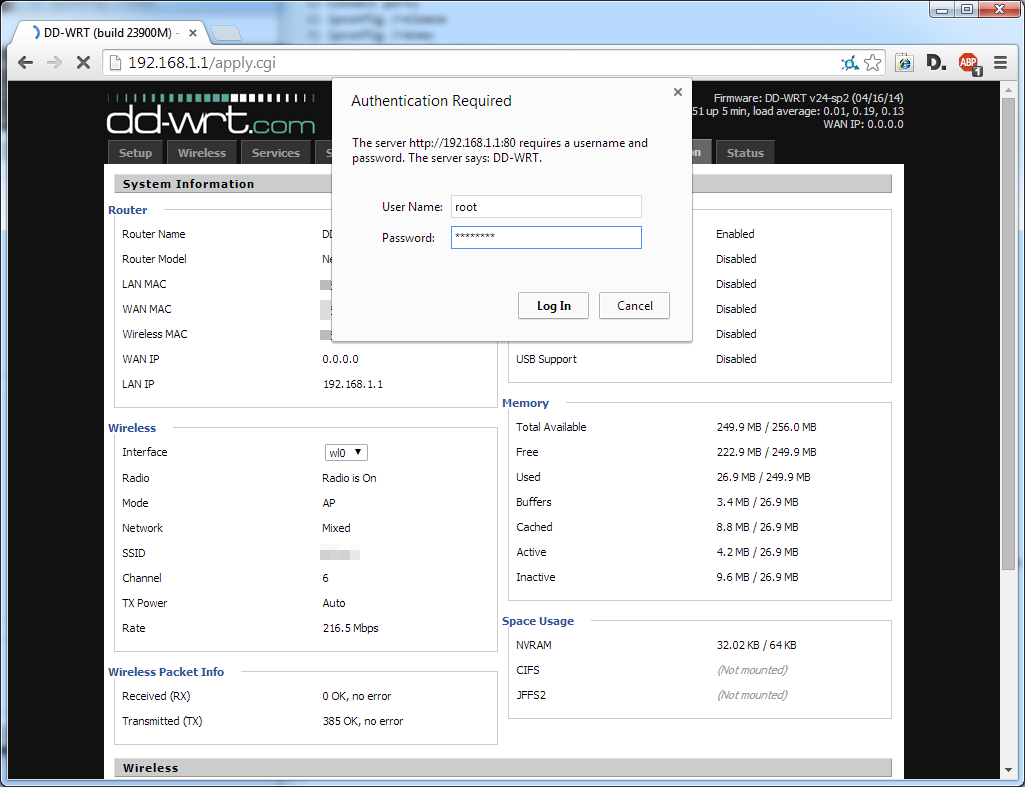
At the authentication popup, enter username root, password password, and select Login.
Upload the BIN DD-WRT File
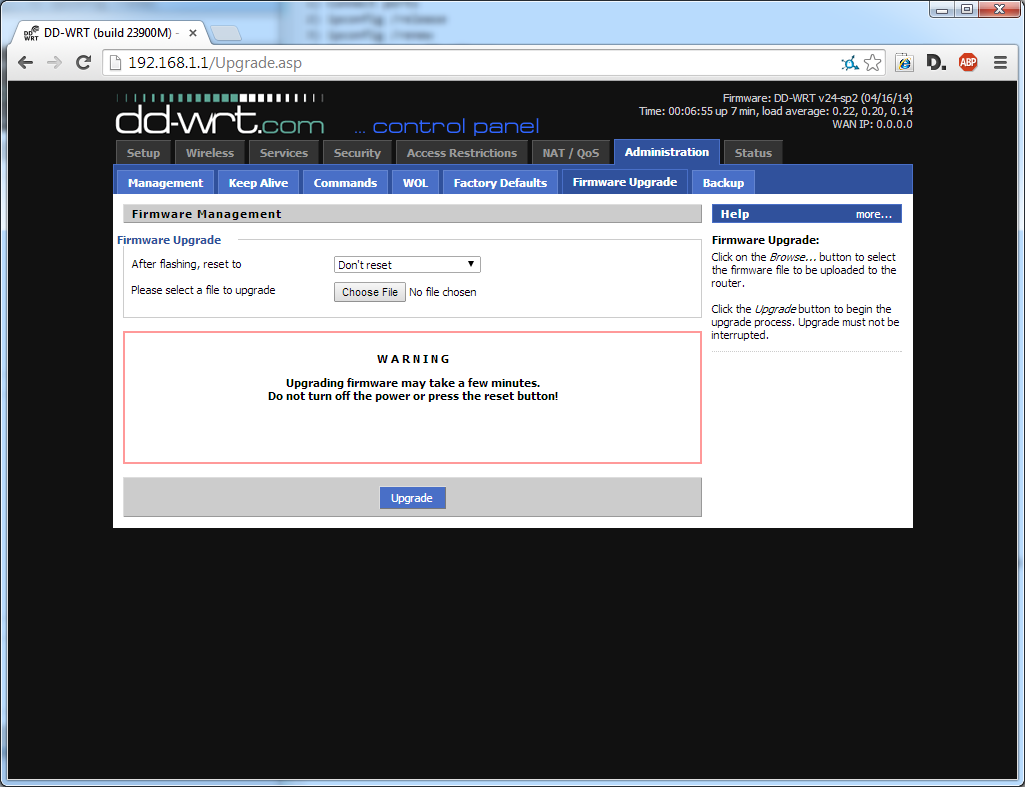
Now, we'll upgrade DD-WRT to the latest build.
- Navigate to Firmware Upgrade.
-
At the Firmware Management page, select Choose File.
-
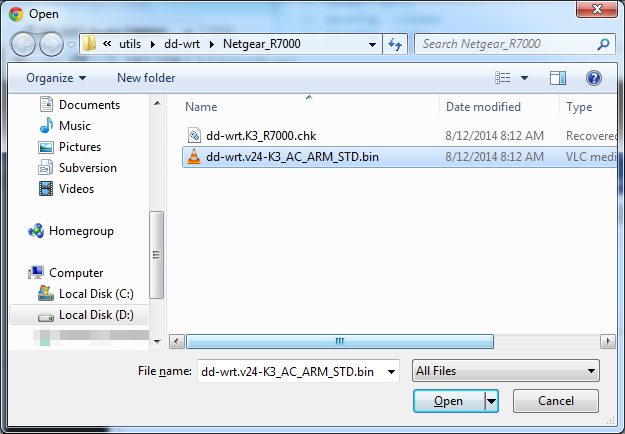
In the file selection dialog box, select the BIN file you downloaded earlier, then select Open.
-
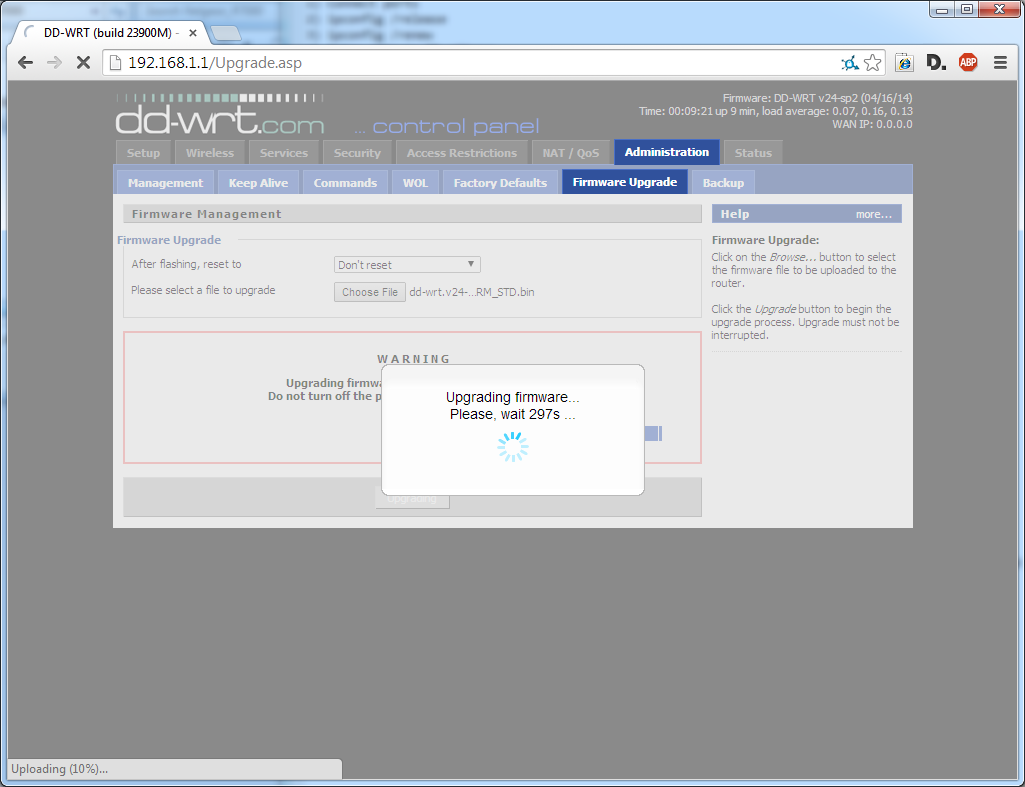
Back on the the Firmware Management page, select Upgrade.
-
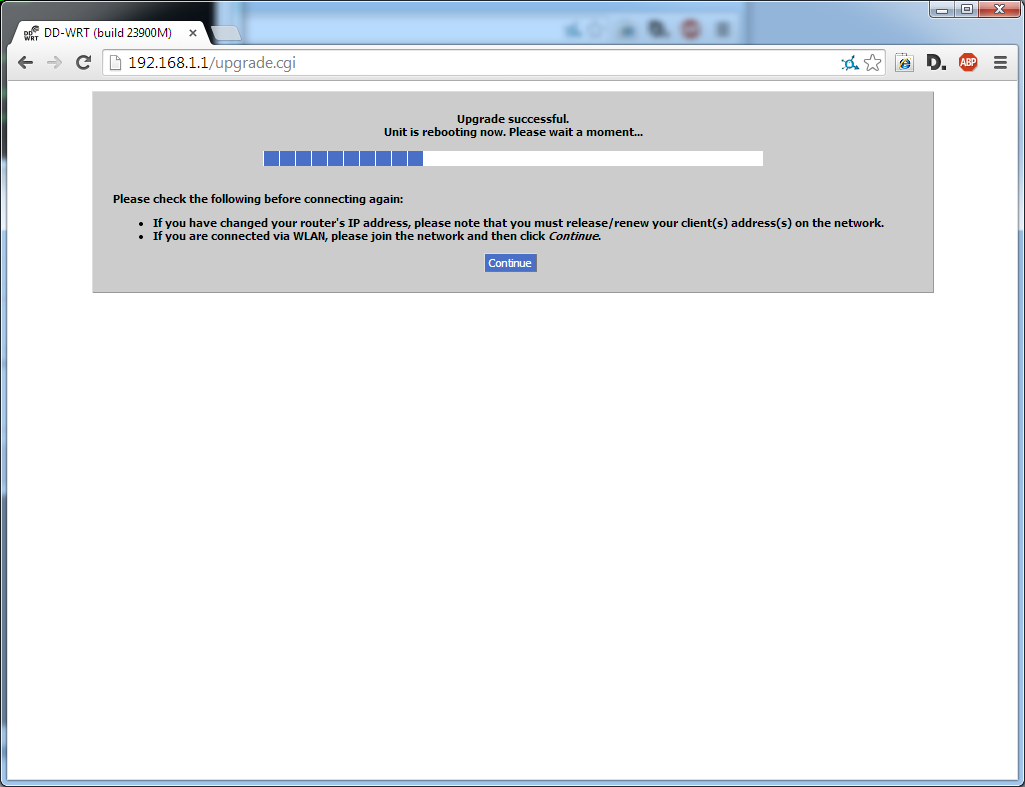
An "upgrading" message will show, then the device will automatically reboot.
-
If you see a blank page, or the message "If you have changed your router's IP address, please note that you must release/renew your client(s) address(s) on the network.", enter the following again in the cmd window:
ipconfig /release
ipconfig /renew
Restore the Router's Factory Defaults
- Select Continue.
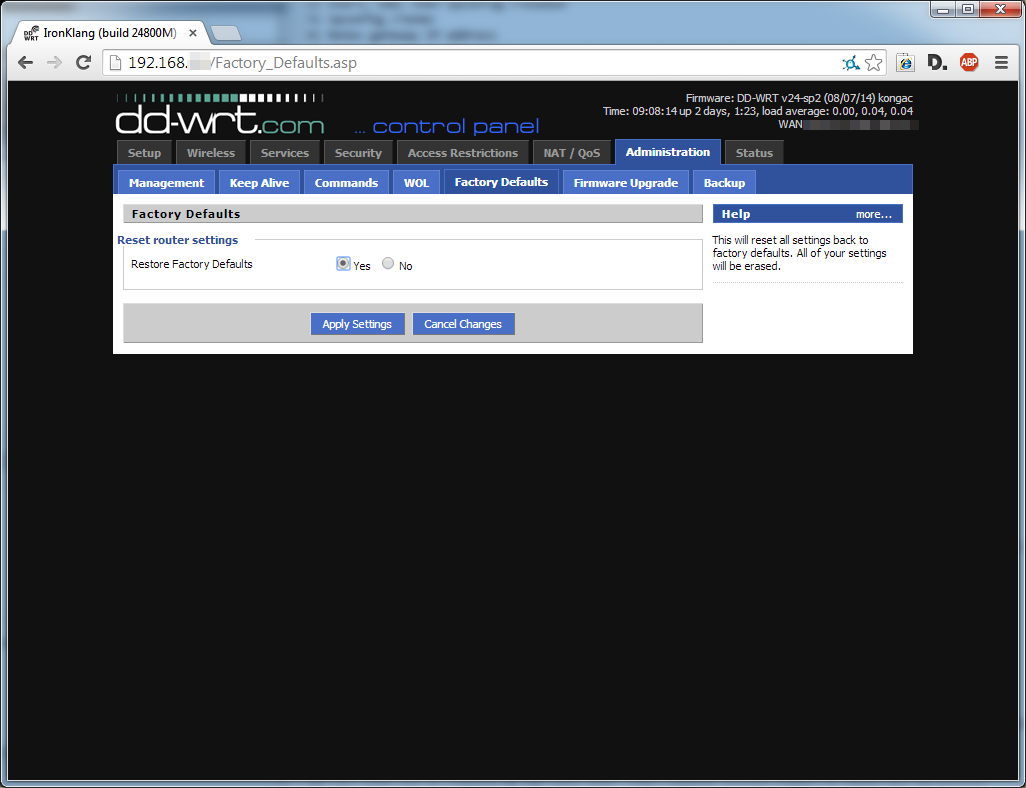
- You will see an updated DD-WRT Router Management page. Navigate to Administration > Factory Defaults.
- On the Factory Defaults page, set Restore Factory Defaults to Yes, then select Apply Settings.
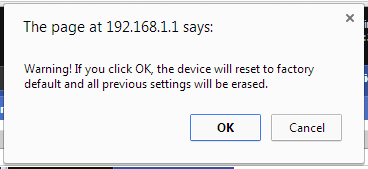
- At the warning popup, select OK.
- You'll see some lights cycle on the router. Wait 30 seconds, then point the browser to http://192.168.1.1/.
Set a New Admin Password
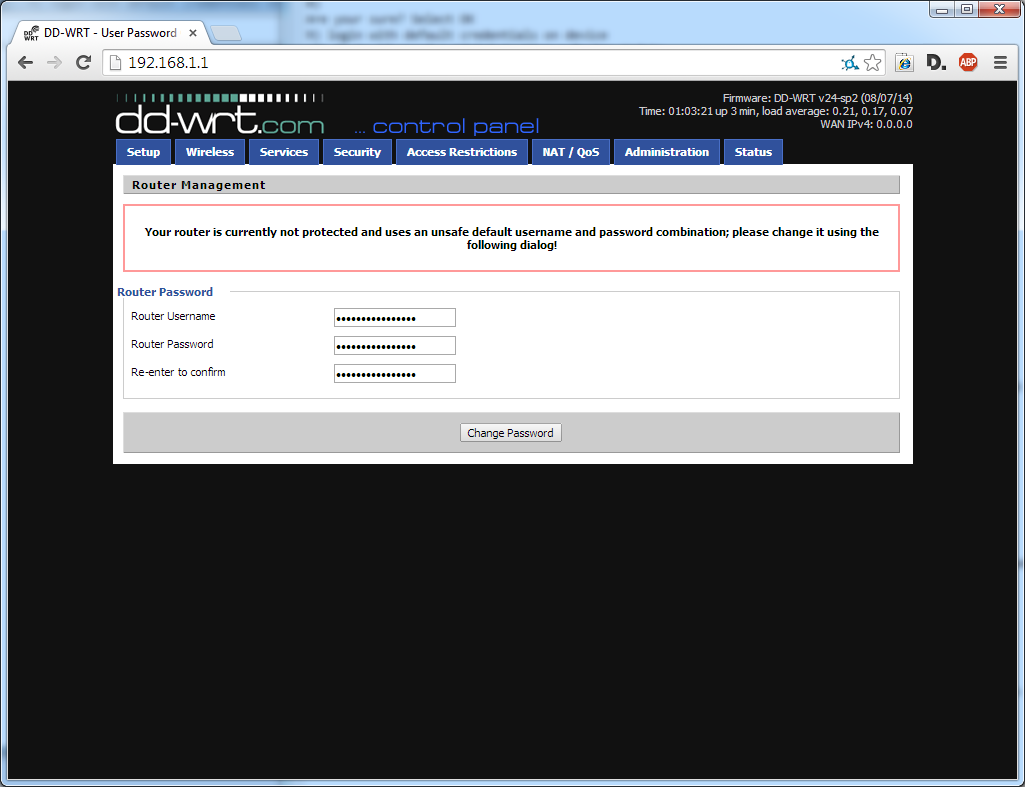
- At the Router Management page, you'll be asked to set your password again. Select a secure username and password this time, as it will be the one you use in future. Here is a good, free random password generator. Note the password you have chosen for the future, and select Change Password.
-
Note: This is the password you'll use to login to the DD-WRT Control Panel, NOT the wireless password. That is set elsewhere.
-
Find Unused Wireless Channels
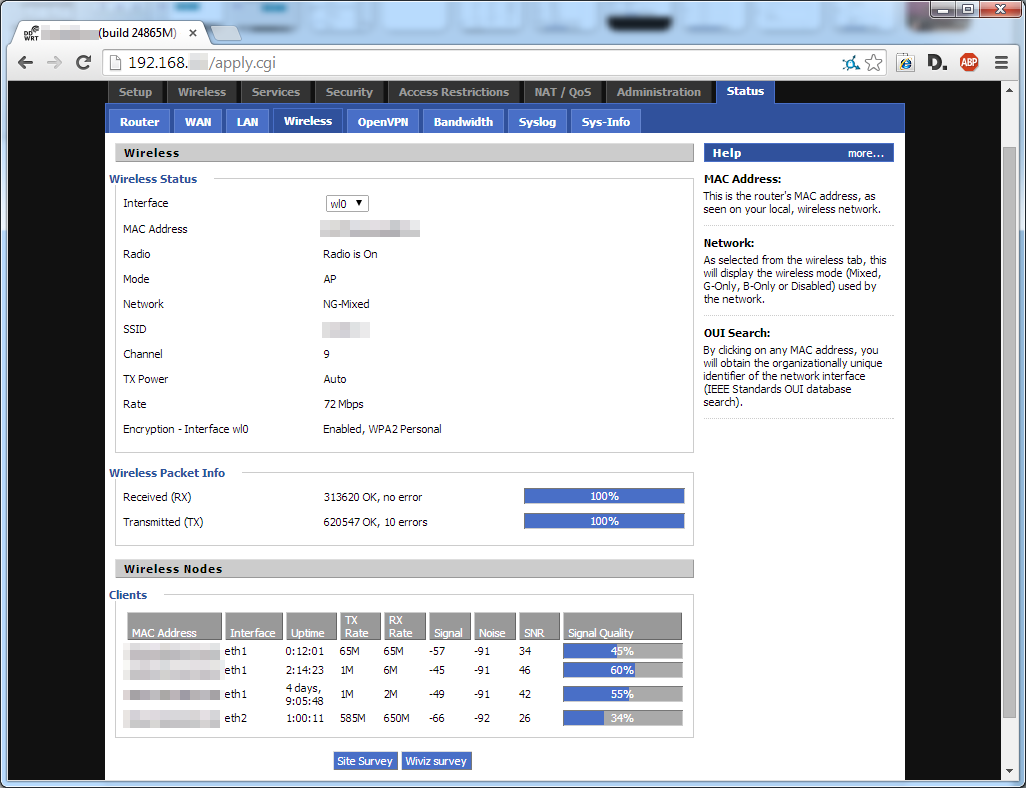
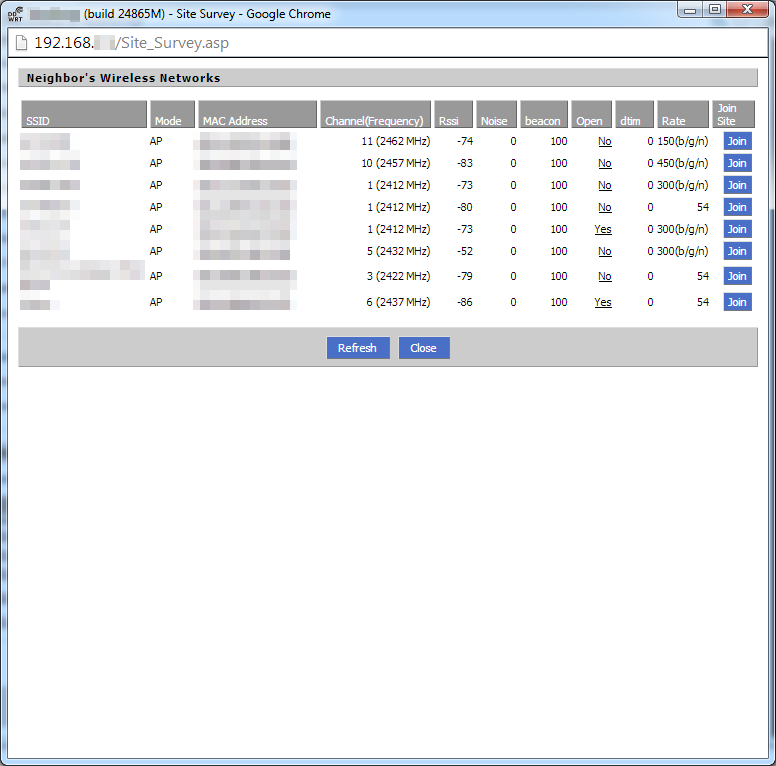
You'll be at the main System Information page again. Time to find out the best wireless channels (or group of channels) to use at your location. We plan to setup static channels later, and it's best to pick one that nobody else is using. Luckily, DD-WRT has a valuable built-in tool for this, called Site Survey.
- Navigate to the Status tab. If asked to login, supply your new Username and Password, and select Login.
- Navigate to the Wireless tab.
- You will be shown some info about your wireless device. Under Wireless Status, set the Interface to wl0 (the 2.4 GHz radio).
- Scroll down to the bottom of the page, and select Site Survey.
- The existing wireless networks will be shown in the Site Survey window. Make a note of them, or print them. In our example image, channel 9 is looking pretty open...
- Repeat the process for the 5 GHz wl1 Interface.
Setup 2.4 GHz 802.11g/n Wi-Fi
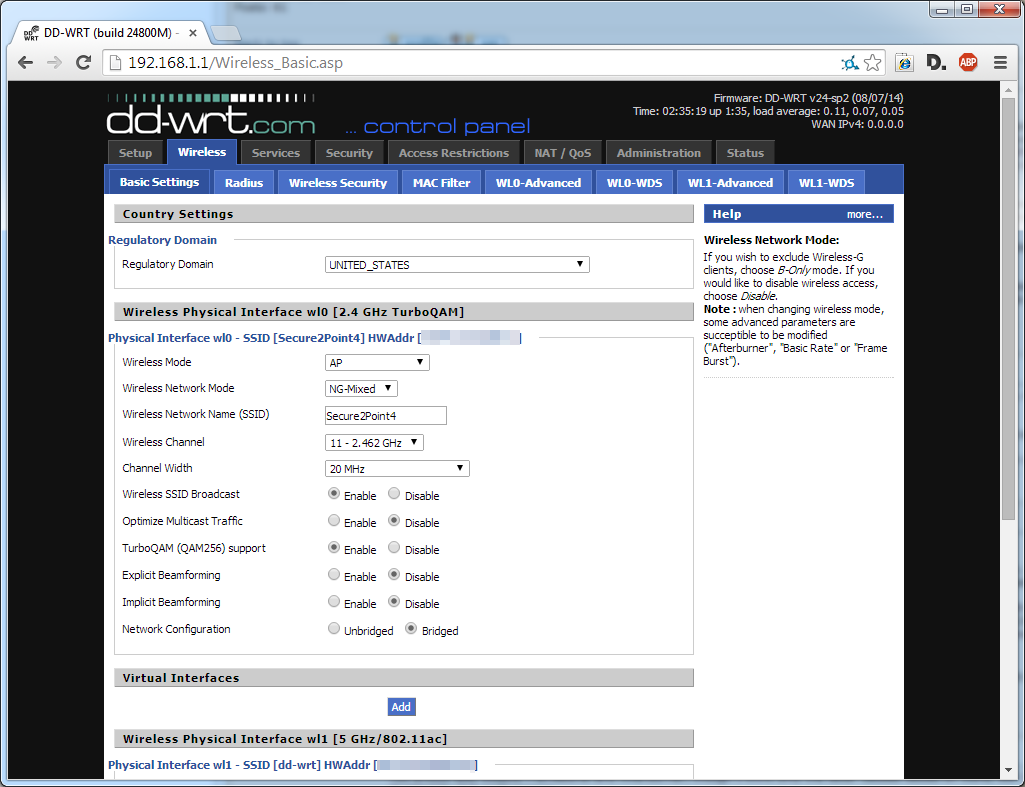
Armed with knowledge of our wireless environment, we're ready to enter some new wireless settings in DD-WRT. This is an important step, as customized settings are needed to get full performance out of this router. Luckily, both Kong and the DD-WRT forums have complete suggestions. We'll configure some settings that agree with their recommendations, but these are by no means the best settings for every application. First, we'll setup the 2.4 GHz band as an 802.11g/n network, to be compatible with a wider range of devices.
- In the DD-WRT Control Panel, navigate to Wireless > Basic Settings.
- Configure these settings for the 2.4 GHz interface, wl0:
- Regulatory Domain = pick your actual region; in this guide, we'll use UNITED_STATES
- Wireless Mode = AP
- Wireless Network Mode = NG-Mixed
- Wireless Network Name (SSID) = whatever you want; in this guide, we'll use Secure2Point4
- Wireless Channel = select an unused channel from our Site Survey in the previous step; in this guide, we'll use 9
- Channel Width = 20 MHz
- Wireless SSID Broadcast = Enable
- Optimize Multicast Traffic = Disable
- TurboQAM (QAM256) support = Enable
- Explicit Beamforming = Disable
- Implicit Beamforming = Disable
- Network Configuration = Bridged
- After you set these, scroll to the bottom of the page, and select Save.
Setup 5 GHz 802.11ac Wi-Fi
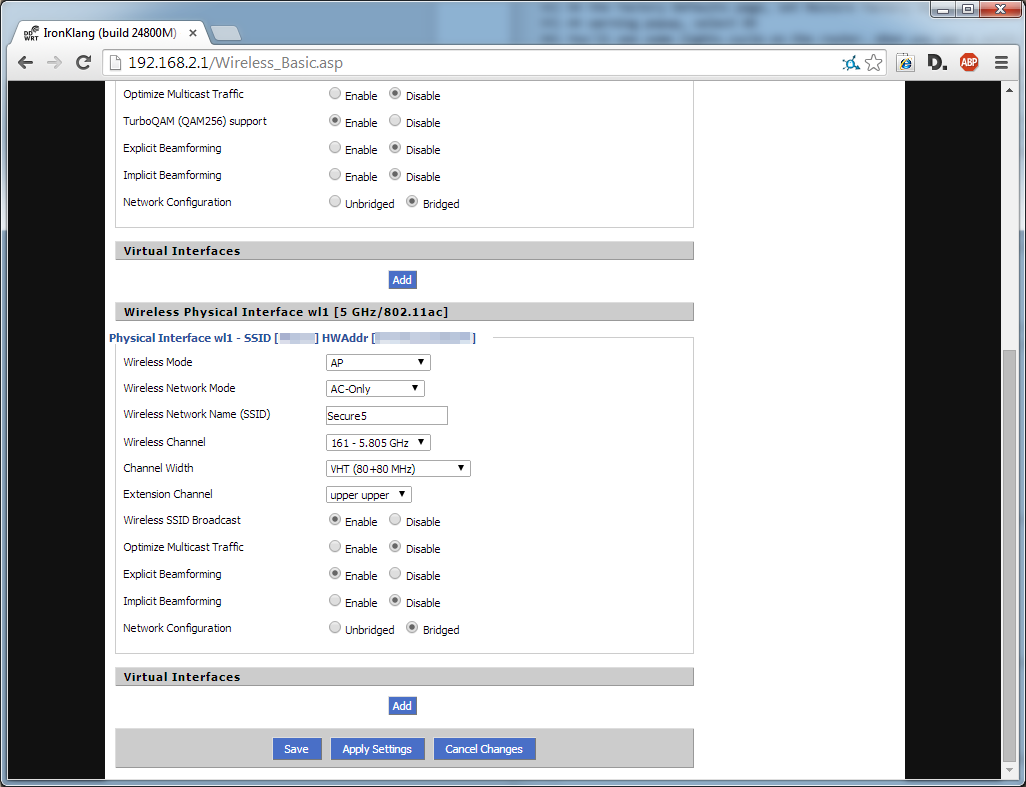
We'll optimize the 5 GHz band for 802.11ac performance. This can be challenging when setting a fixed channel as Kong recommends. In general, try to pick a high base channel (149-161) that's not used by another wireless network on your Site Survey. More info on troubleshooting channel groups can be found here. The following channel settings are just one valid example; if they work for you, wonderful! If not, happy tweaking!
- Configure these settings for the 5 GHz interface, wl1:
-
Wireless Mode = AP
-
Wireless Network Mode = AC-Only
-
Wireless Network Name (SSID) = whatever you want; in this example, we are using Secure5
-
Channel Width = VHT (80+80 MHz)
-
-
Stop here, and Save to make new options appear.
-
Set Extension Channel = upper upper. Save again.
- Continue:
-
Wireless Channel = 161 - 5.805 GHz
-
Wireless SSID Broadcast = Enable
-
Optimize Multicast Traffic = Disable
-
Explicit Beamforming = Enable (If your 802.11ac network adapters do not support beamforming, leave this disabled; we'll assume they support it, and you'll have them setup to use it.)
-
Implicit Beamforming = Disable
-
Network Configuration = Bridged
-
-
Select Save, then Apply Settings. If the page is blank after applying settings, go to http://192.168.1.1/ again, in the browser.
Setup Wireless Security
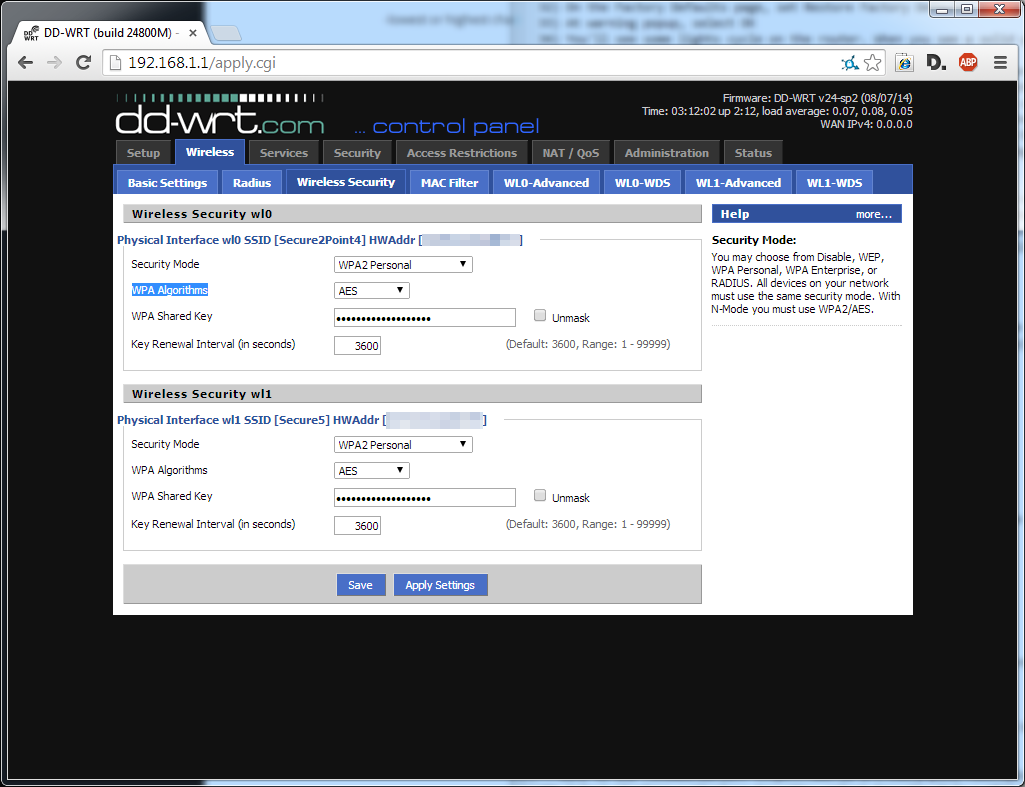
- Navigate to Wireless > Wireless Security.
- Set Security Mode = WPA2 Personal and WPA Algorithms = AES for both Interfaces, and set a strong password (recommend longer than 15 characters) for both.
- Select Save and Apply Settings.
Disable Unnecessary Default Services
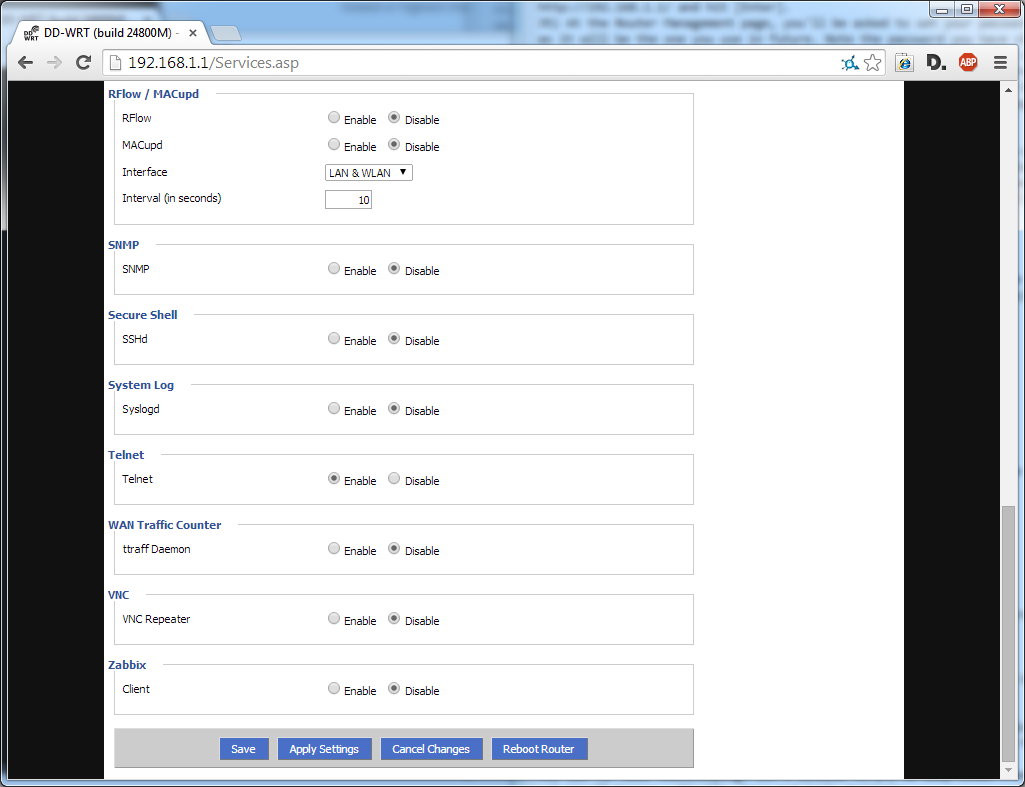
Now for some housekeeping. In the past, DD-WRT has had issues with the ttraf Daemon using up NVRAM. We can easily disable it.
- Navigate to Services > Services.
- Under WAN Traffic Counter, set ttraff Daemon = Disable.
- Save and Apply Settings.
Configure Time Settings
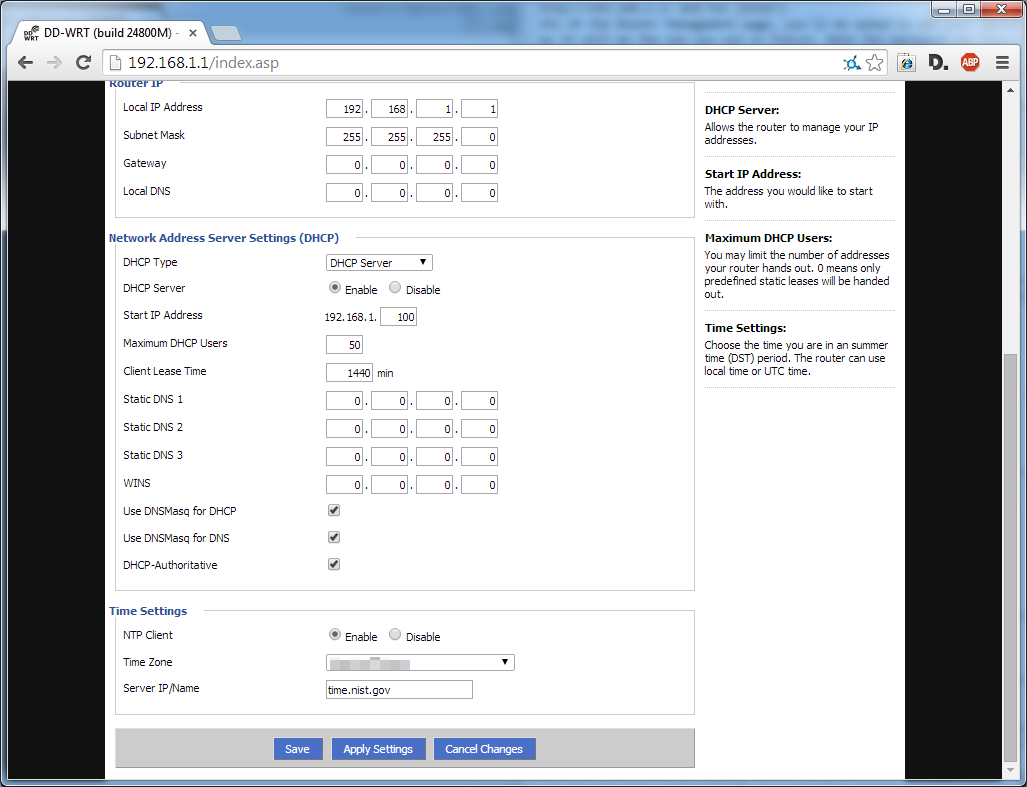
Almost done!
- Navigate to Setup > Basic Setup.
- Under Time Settings, set:
- NTP Client = Enable
- Time Zone = your city (You might have to do some research to pick a city in the same timezone, if yours isn't listed.)
- Server IP/Name = time.nist.gov (or another preferred time server)
-
Save and Apply Settings.
Backup the Settings
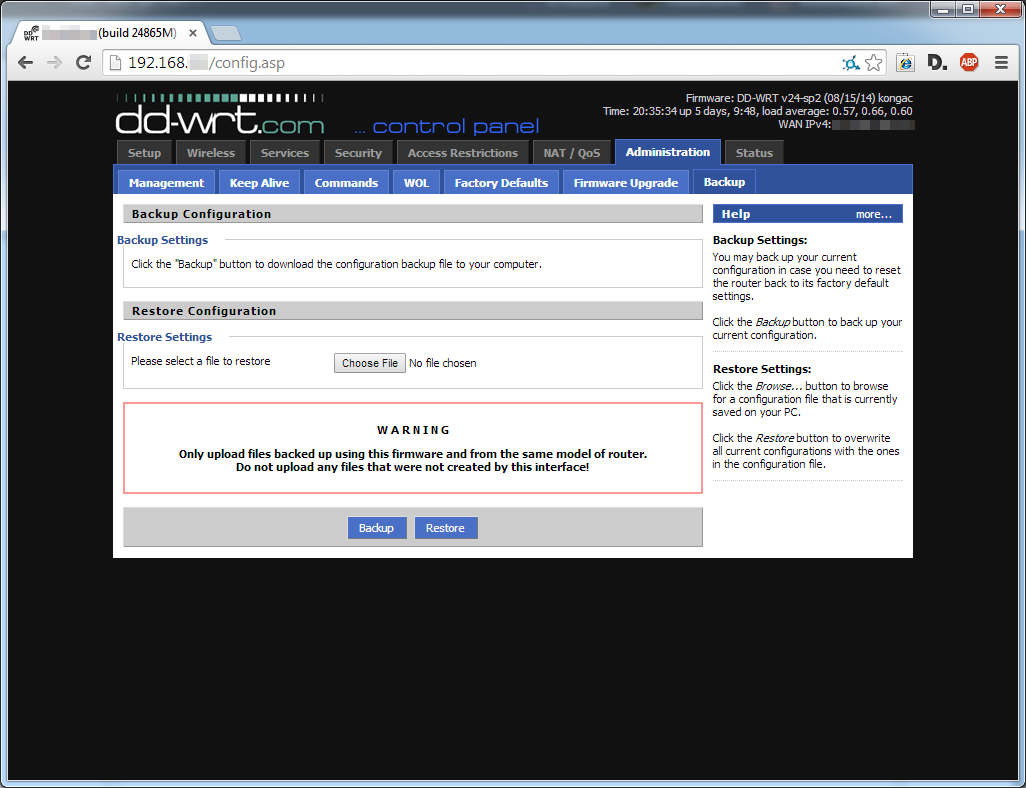
Backup your settings, in case you need to roll back later.
- Navigate to Administration > Backup.
- Select the Backup button, and a configuration file called nvrambak.bin will be downloaded to your PC. You can Restore this file later on the same screen if needed.
Conclusion and Additional Info
Conclusion
Congratulations, you're done! Connect the WAN port of your router to your cable, fiber or ADSL modem, and you're off and running. Now that you have DD-WRT setup, you might want to explore its many advanced features, like VPN, NAS, and overclocking. For extra VPN help, check out my Instructable on how to Configure VPN Settings on a DD-WRT Router for Private Internet Access.
And if you have issues, the DD-WRT forums and wiki are a great place to find help.
Additional Info
DD-WRT Forums: http://www.dd-wrt.com/phpBB2/
DD-WRT wiki page for the R7000: http://dd-wrt.com/wiki/index.php/DD-WRT_on_R7000
NETGEAR's R7000 support site: http://support.netgear.com/product/R7000
Kong's DD-WRT blog: http://tips.desipro.de/category/dd-wrt/
Special Thanks
Kong, BrainSlayer, Fractal, Eko, Steve Jenkins, Spiff
Non-Commercial Statement
I haven't been incentivized or compensated in any way by the organizations I've linked or recommended in this guide.