Install Zwave LED Bulb on TimeSquAir
by thethingbox in Circuits > Raspberry Pi
572 Views, 1 Favorites, 0 Comments
Install Zwave LED Bulb on TimeSquAir

Recipe
1- Pair the Zwave LED Bulb to the Zwave GEN5 USB stick
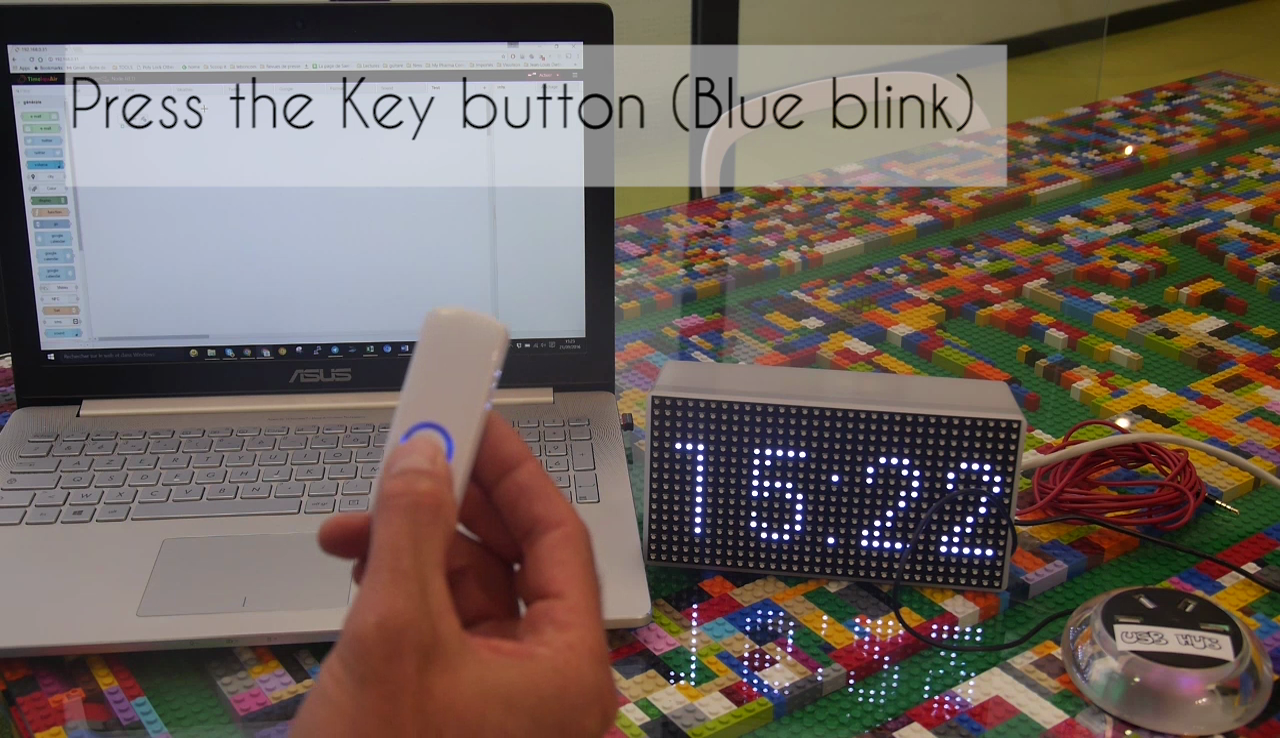
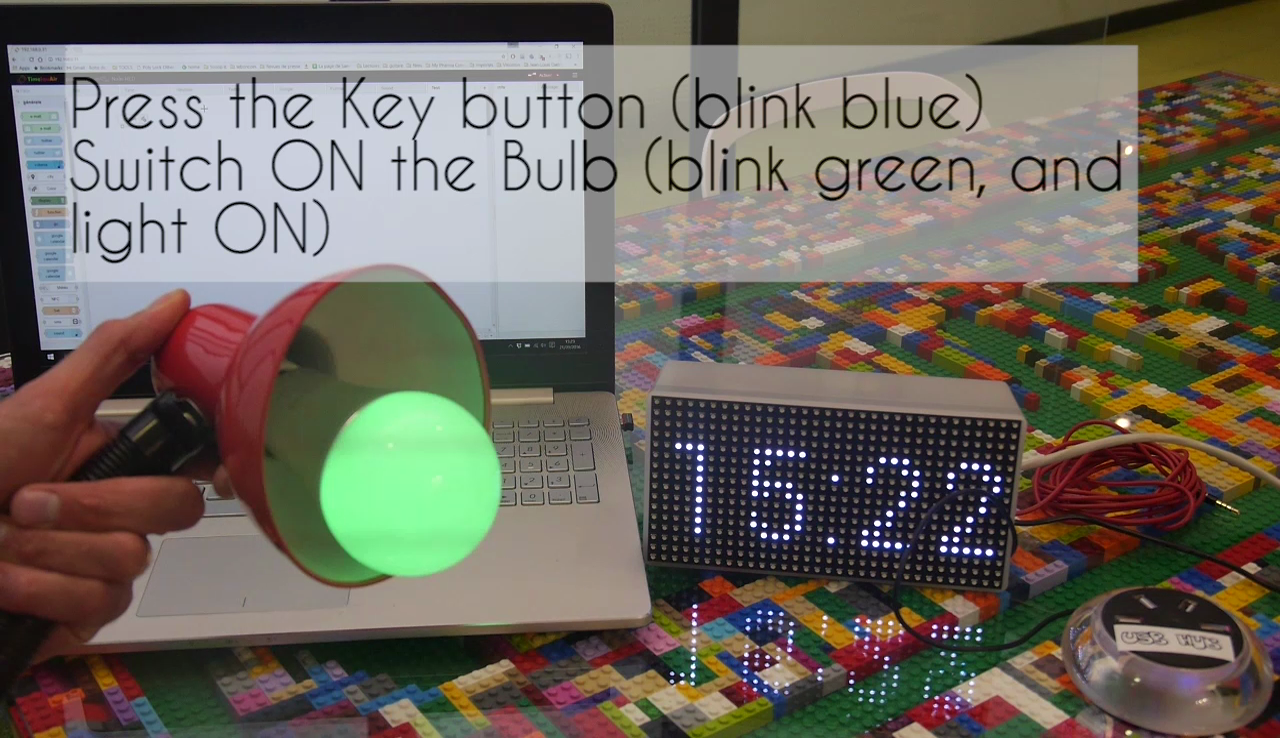
- Push the USB stick's button
- It blinks blue
- Switch on the Zwave LED Bulb
- It blinks green and lights on
2- Plug the Zwave USB stick on TimeSquAir
3- Restart Node-RED
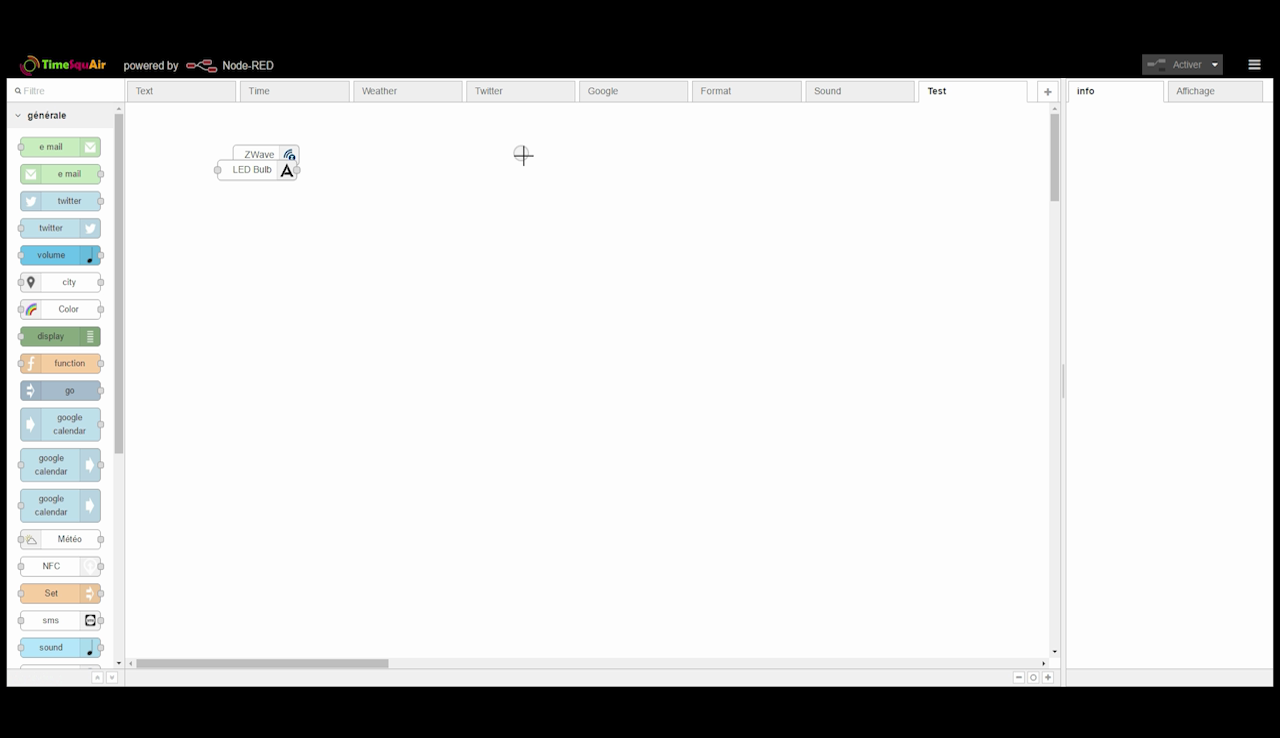
4- The Zwave LED Bulb node appears in the workspace
You're done!
Example: Change LED Bulb's Color
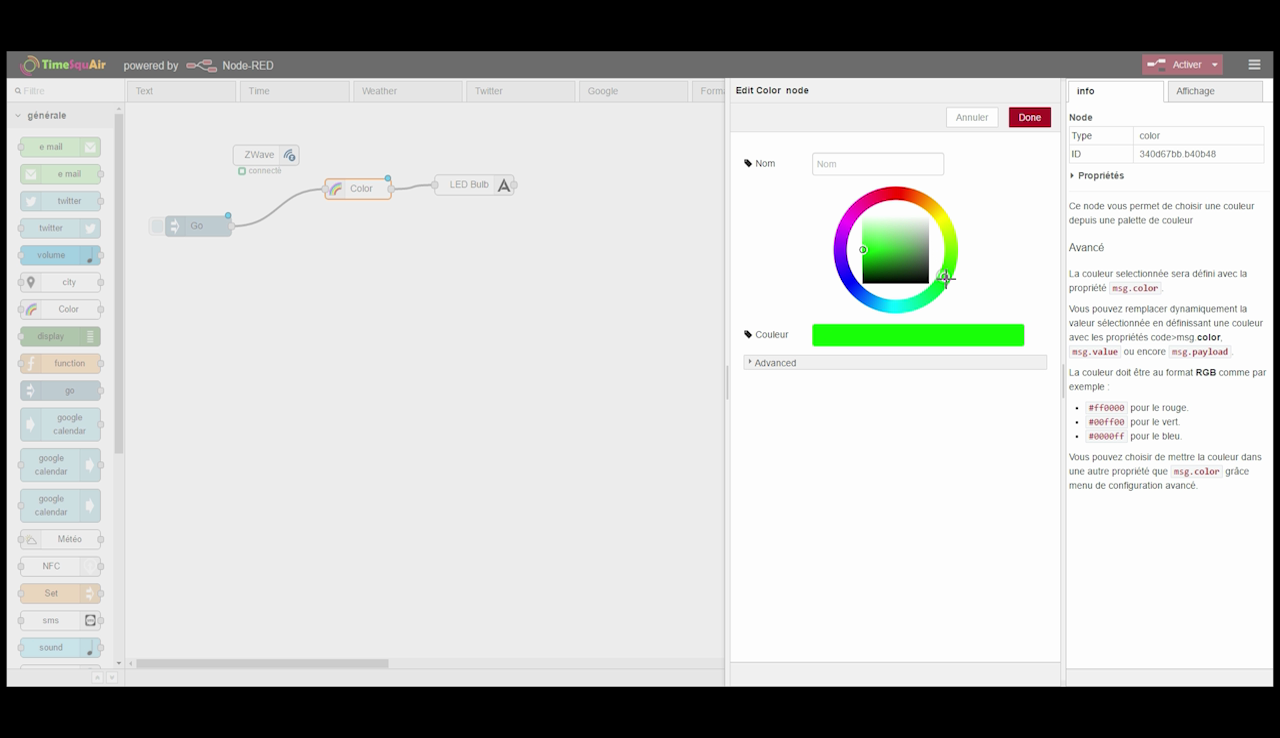
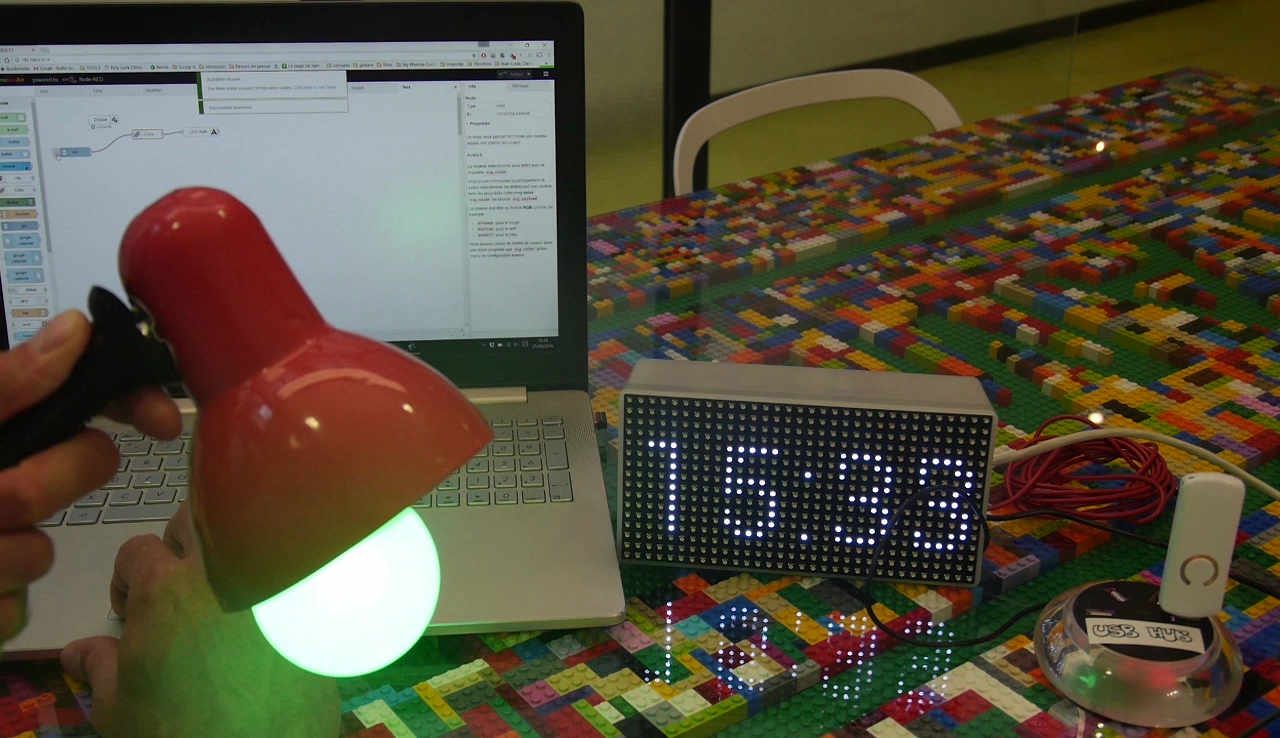
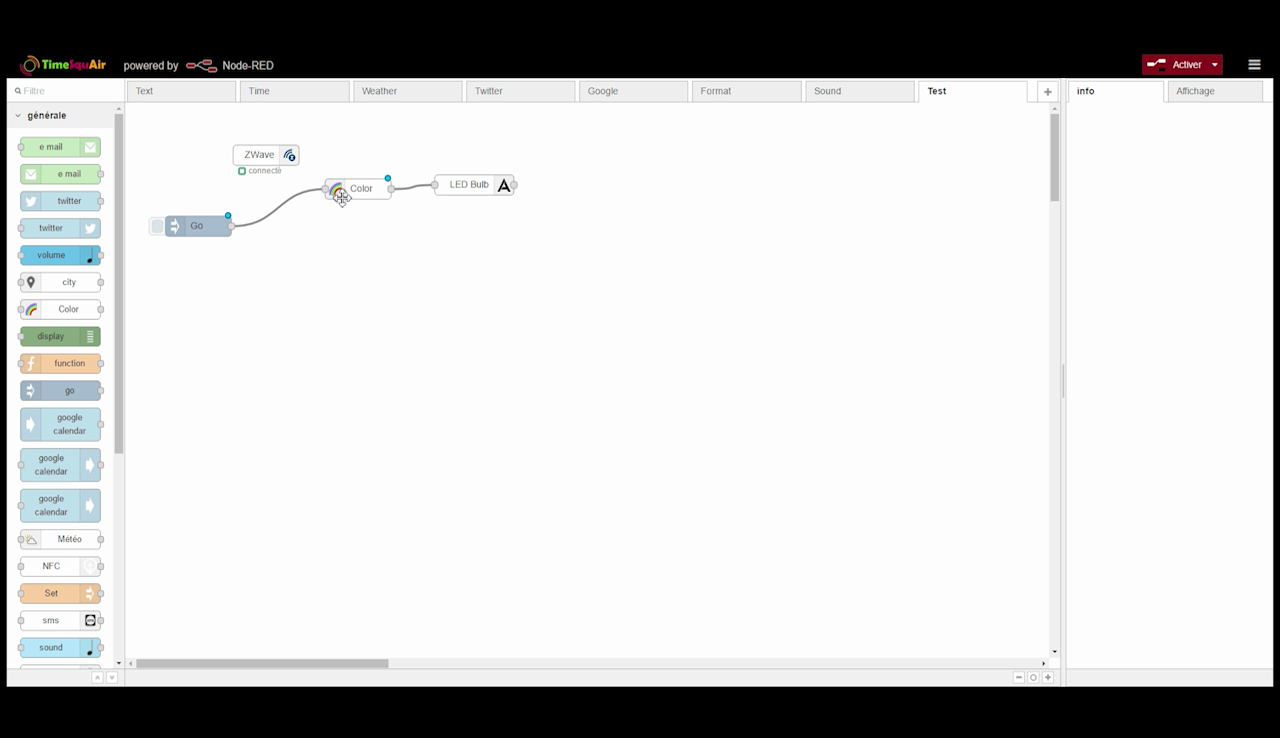
Insert a Color node, change its color. Connect this Color node to the LED Bulb's node, and add a Go node.
After activation, you'll see the LED Bulb's color change when you press the Go node.