Inserting a Picture in D2L
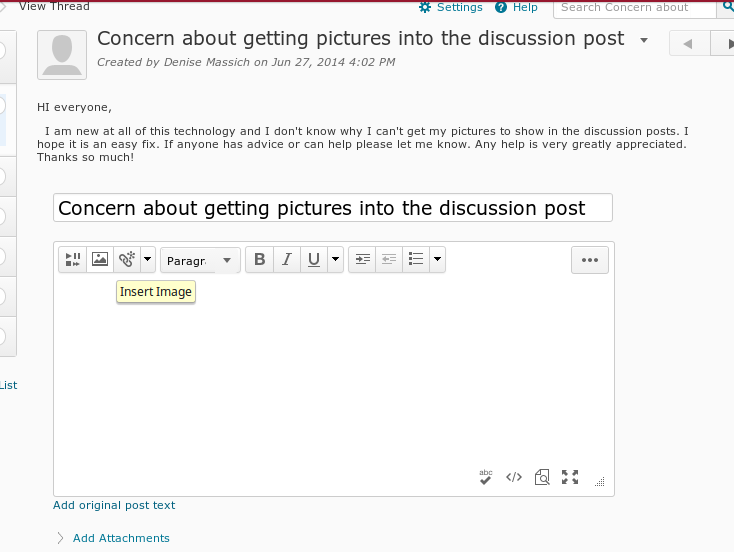
1. When you want to insert a picture into D2L discussion posts, the first step is to click on the button to the left of the one you use to insert a link. It looks like a square picture of two hills and a sun (at least that's what I see).
Inserting a Picture (D2L): Step 2
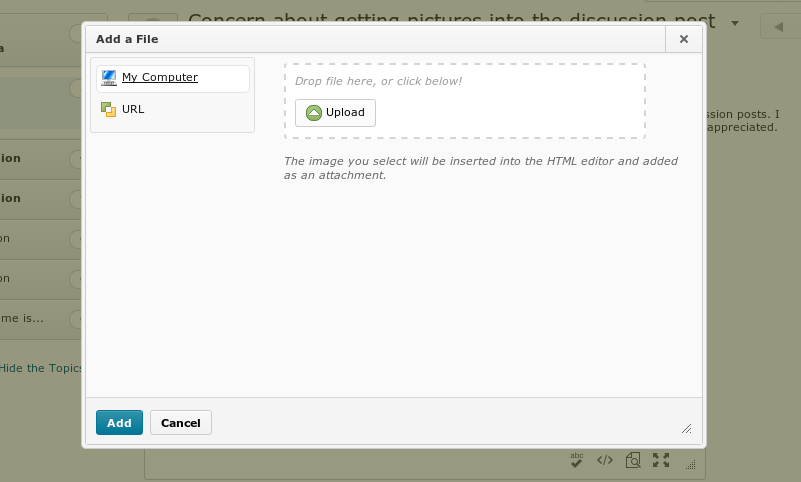
The default option for uploading a picture to a discussion post is to upload one that is accessible from your computer, zip/thumb drive, or storage spaces such as Google Drive, Cloud, or Dropbox. You can drag a file from a folder open on your computer, but I find it's just as easy to click "upload" to get started.
Inserting a Picture (D2L): Step 2.5
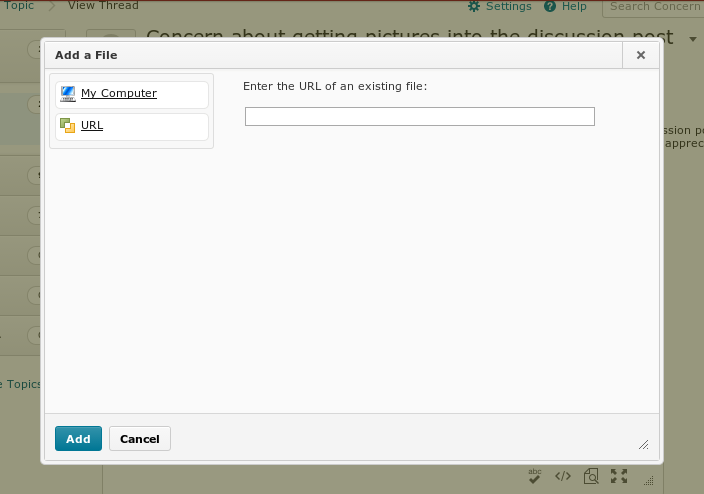
If you're sharing a picture you found online, and didn't save it to an accessible drive, click on the "URL" option. Copy and paste the complete URL from the website you found your photo from, and then continue with the process by clicking "add."
Inserting a Picture (D2L): Step 3
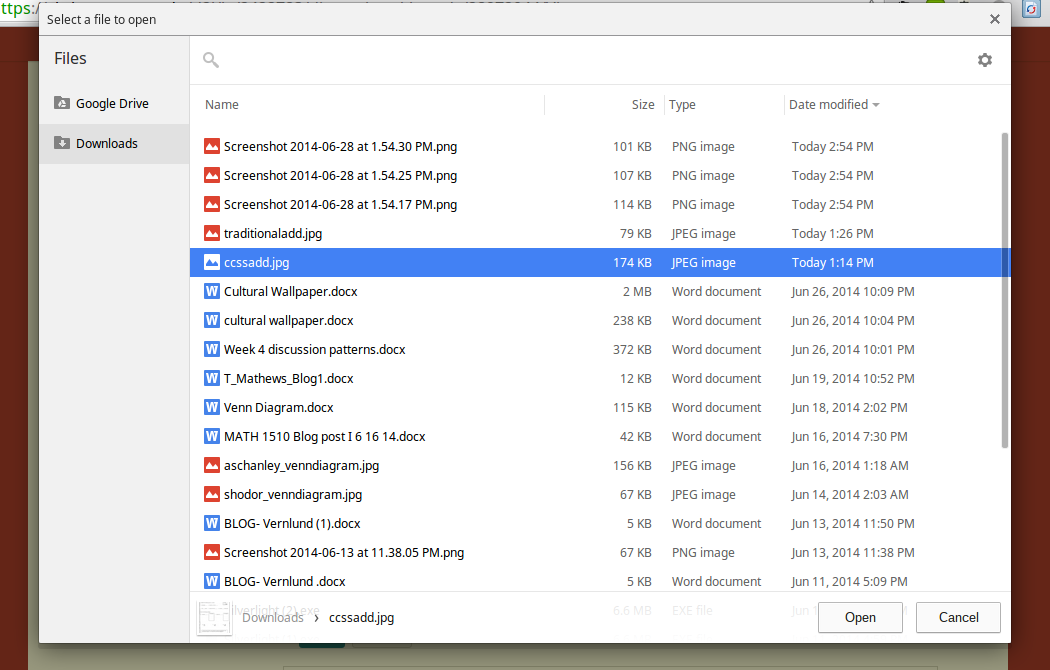
If you're uploading a photo from your computer, and have clicked "upload," you should find yourself with some kind of folder open. Navigate your folders to get to your pictures, and find the photo you wish to upload. At this point you can:
- double click the name or thumbnail of your photo
- or click it one time and then clicking "open" in the bottom right corner
Inserting a Picture (D2L): Step 4
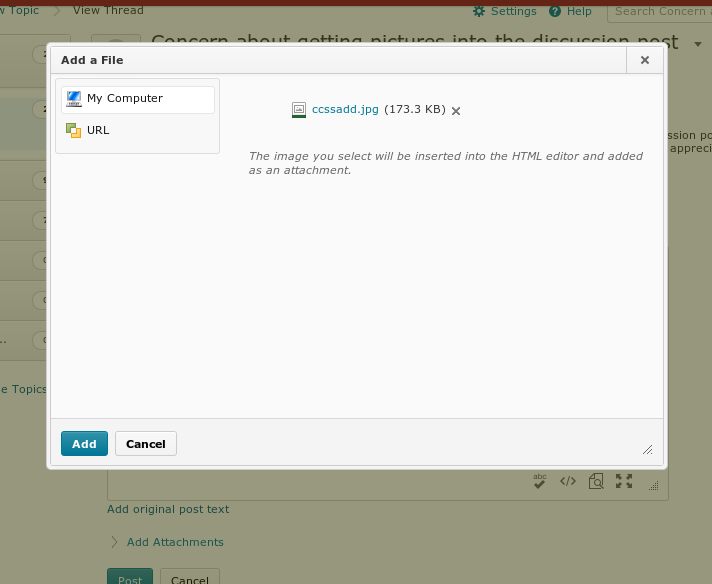
This is what you'll see when you've selected (either by double-click or a single click and then clicking "open). Continue adding your photo by clicking the "Add" button.
Inserting a Photo (D2L): Step 5
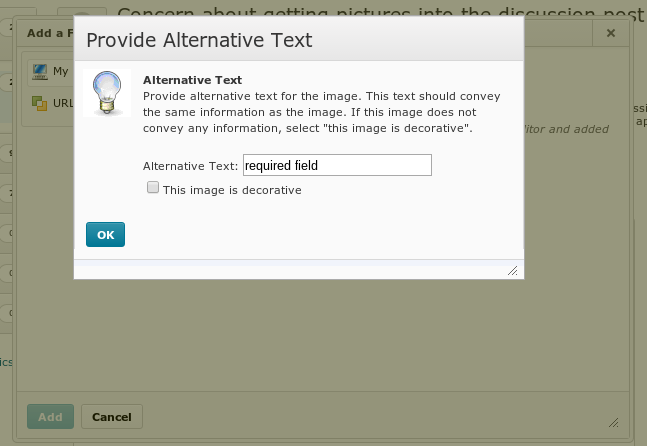
After selecting your photo, you will see a window that asks for alternative text. Alternative text is an accessibility feature that is there for people who can't see your image, but would like to know why it was there.
Individuals who are visually impaired might use a text-to-speech reader to read the alternative text.
Sometimes, other peoples' internet browsers glitch and don't show an image for a variety of reasons, so alternative text is a good avenue for readers to understand why there was an image there.
This is a required field, so add some text if your photo needs it. If you are posting a smiley face or a photo that is being used for decoration - meaning that it does not affect the meaning of your post if it isn't there - check the box that says "this image is decorative" and you won't need to add text.
Once you've got your alternative text added, click "OK" and you will see your photo in the body of your message.
So You've Posted a Photo!

If you're posting multiple photos, you will need to repeat the upload process.
After posting your photo, you might want to re-size it so that it doesn't take up too much room. Use the white boxes in the four corners of your photo to enlarge or reduce the size of your pictures.
Why Isn't My Photo There??!

One frustrating parts about sharing photos in discussion posts is that sometimes photos won't upload. Here are some of the more common reasons why photos do not end up showing:
file size: the photo you are trying to share is too large to upload. You can try to change the size of the picture using the crop tool in MS Paint, or look up a free online resource. PicResize is one that I've found.
file type: in some instances, different photo types will not upload to certain websites. Some websites will not allow you to upload photos that have .png or .gif as their file type. The most common file type is .jpg. This is a free, online resource for converting file types
If neither of these work, and you've tried a few times with no success, use websites like TinyPic, Imgur, or ImageShack as third party photo hosting websites, and use the URL option when uploading your photo.
Best of luck! :)