Inkscape: How to Make Text Follow a Circular Line ? ( ~ 9 Skills )
by apapa2 in Design > Software
5580 Views, 3 Favorites, 0 Comments
Inkscape: How to Make Text Follow a Circular Line ? ( ~ 9 Skills )

This instructable explains how to have a text follow a circular path.
Skill list:
- Text tool
- Circle tool
- Circle creation vs Oval creation
- Selection of all elements at once
- Putting text on a path
- Grouping several elements into one
- Ungrouping previously grouped objects
- Rotating an object by 90º
- Changing a stroke color
Supplies
- Inkscape
Inkscape is available on Linux, macOS and Microsoft, free of charge.
Creation of a Circle and a Text
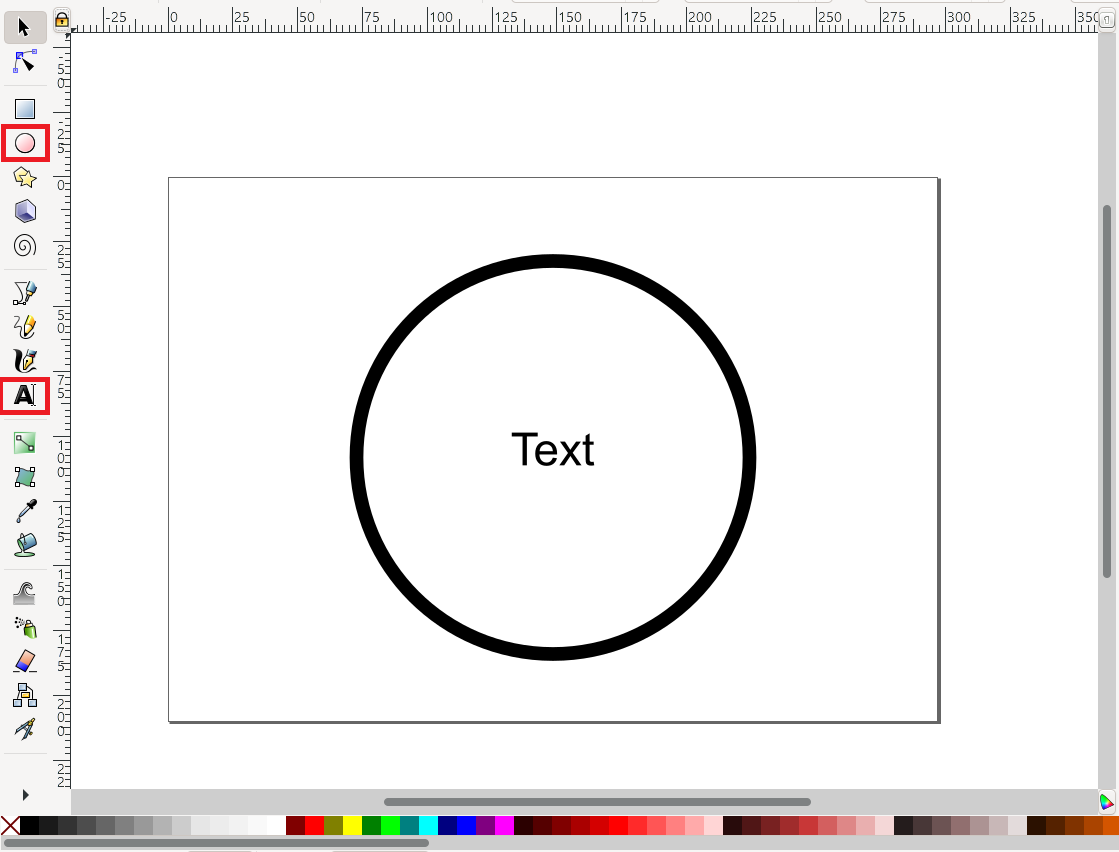
Start by creating a text and a circle.
In the illustration, they have both been centered on the page
to show the behavior of the text when using the "Put on Path" feature.
Clicking on "Ctrl" while creating the circle
helps the circle not to turn into an oval.
To learn how to center elements,
please refer to "Step 4: Centering the Elements".
Use of the "Put on Path" Feature (in the "Text" Menu)
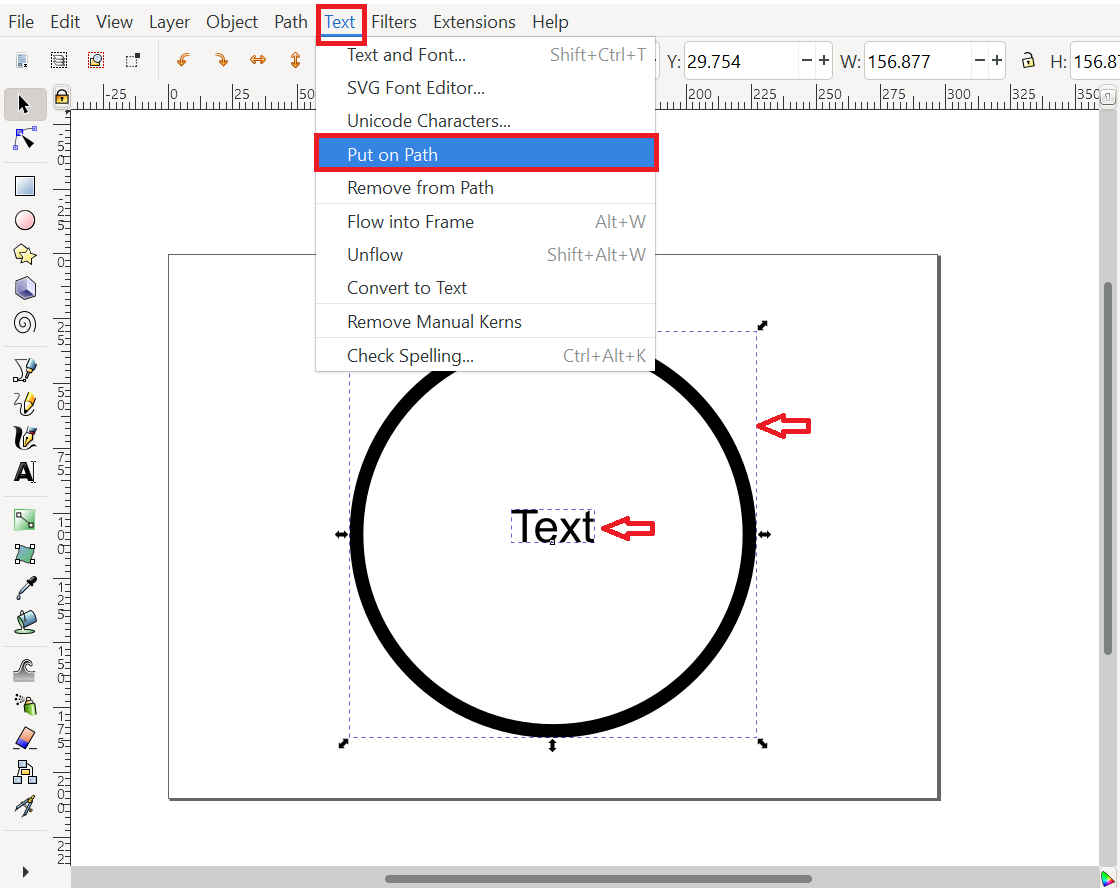
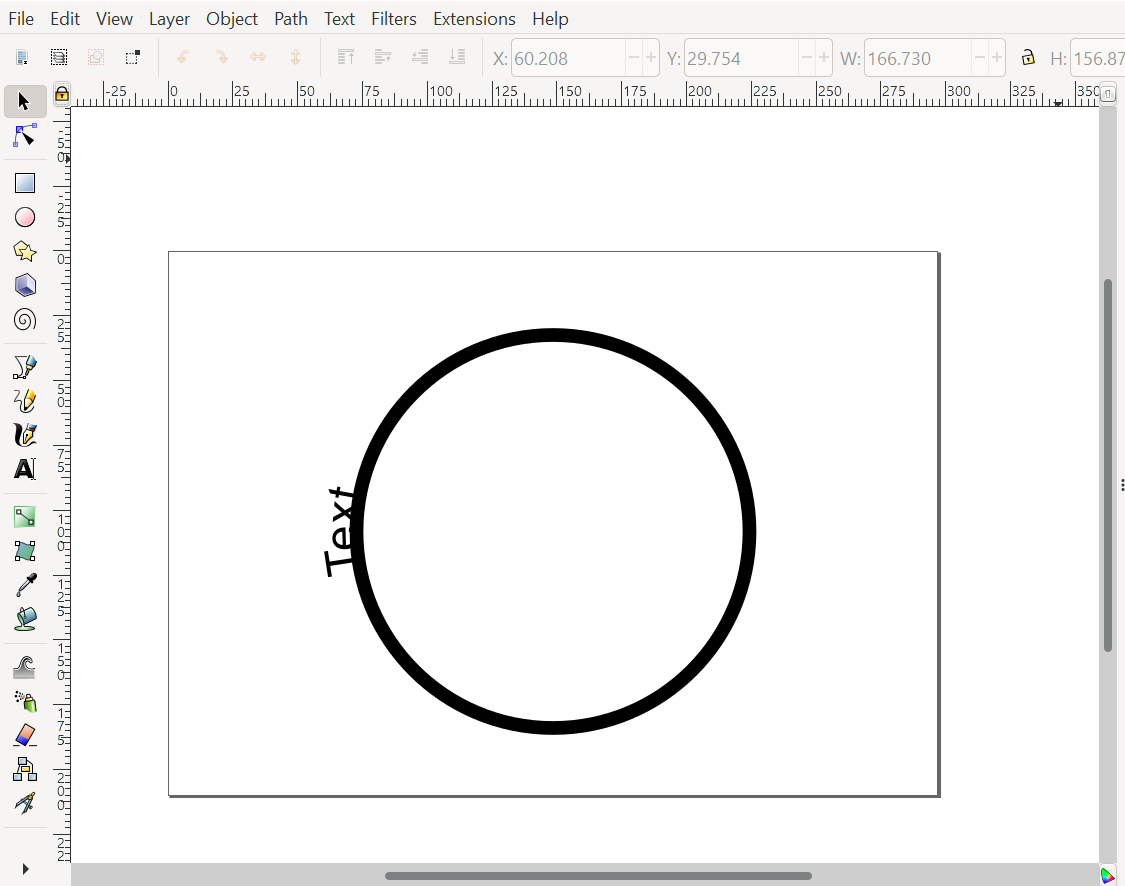
The shortcut Ctrl+"a" [ a: all ] allows selecting both the circle and the text at the same time.
When done, select "Put on Path" in the "Text" menu.
Rotation of the Text
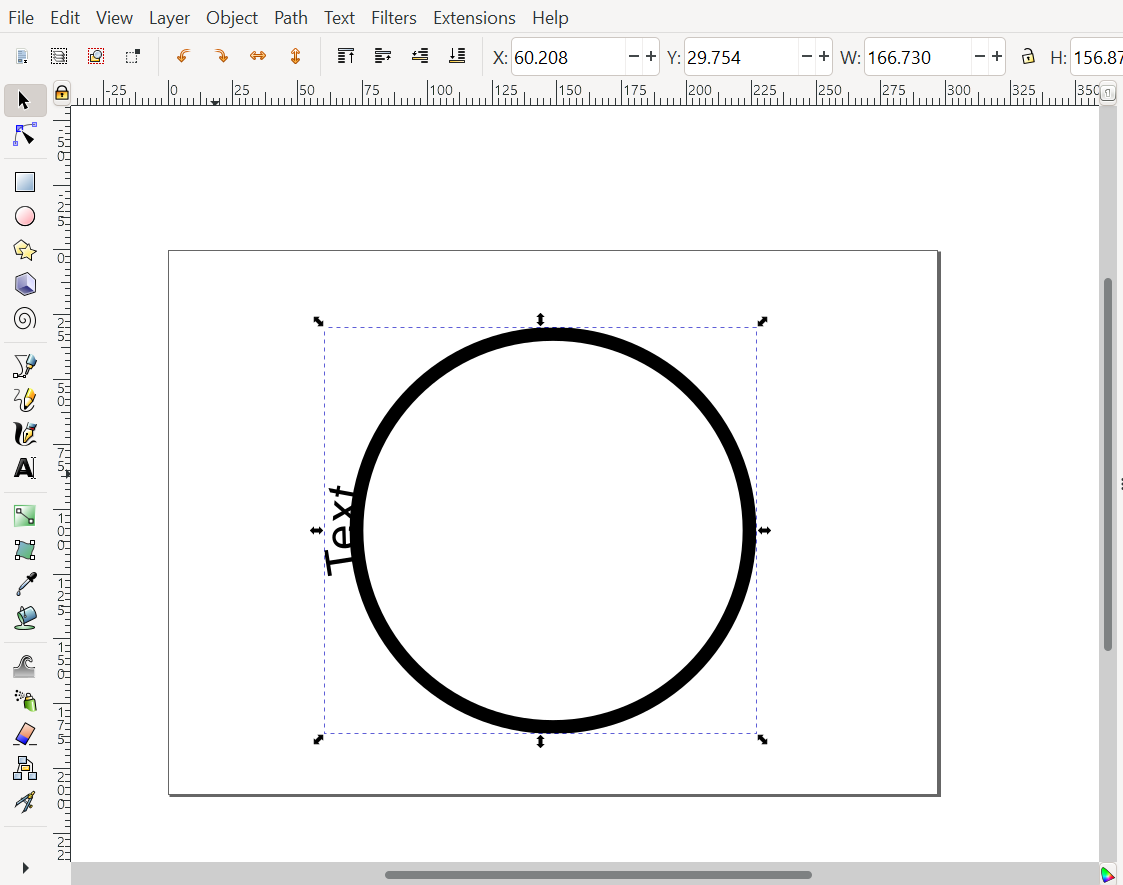
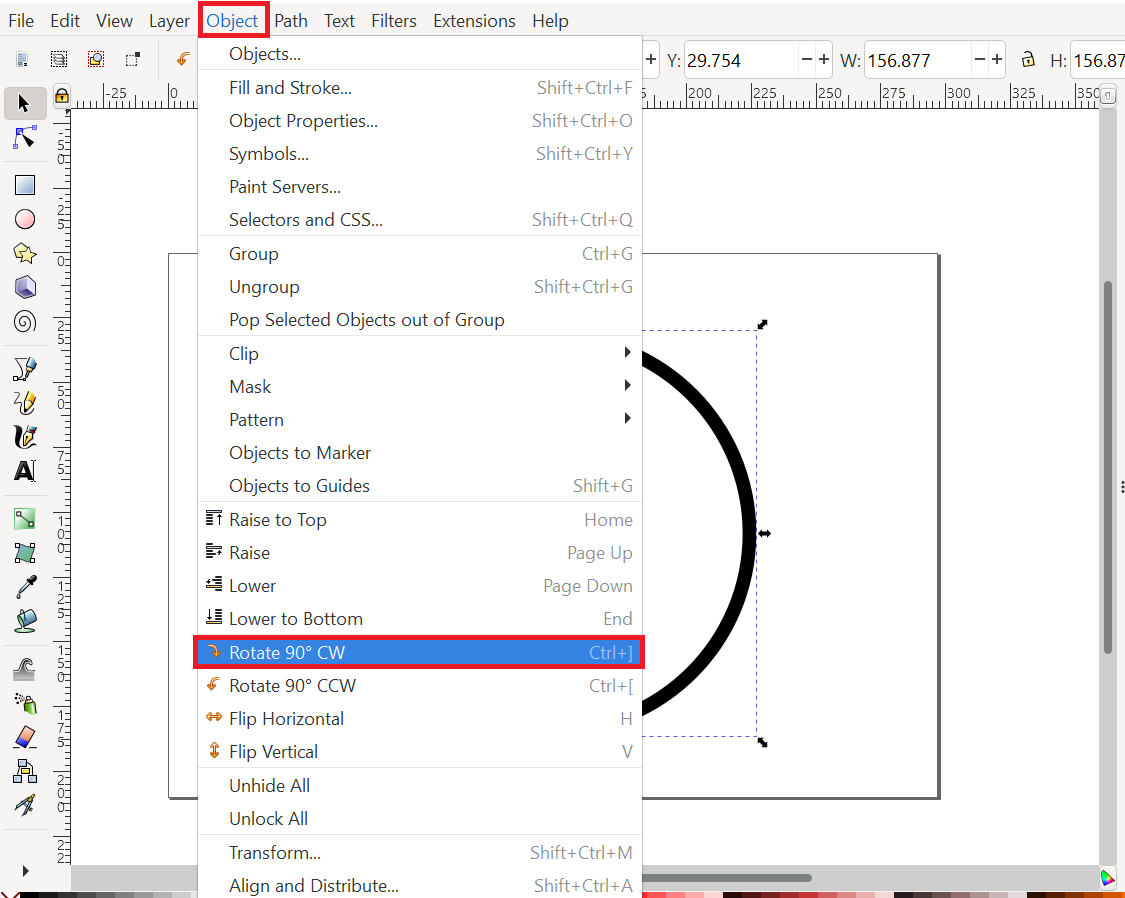
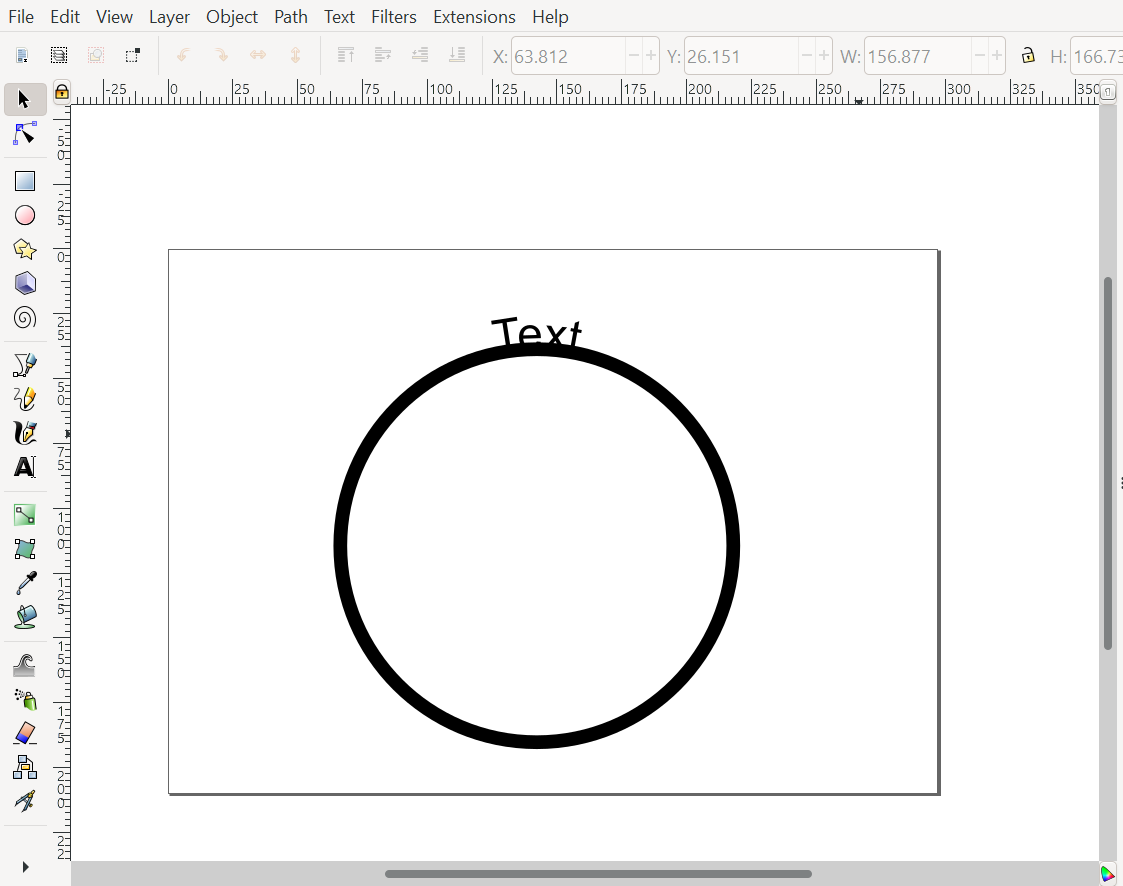
In this illustration, both text and circle are rotated 90º, in order to show the text on top of the circle.
While both elements are selected,
Ctrl+"g" [ g: group ] allows grouping the two elements into one.
Finally, the "Rotate 90º CW" feature, in the menu "Object", rotates the element.
Having the Text Inside the Circle
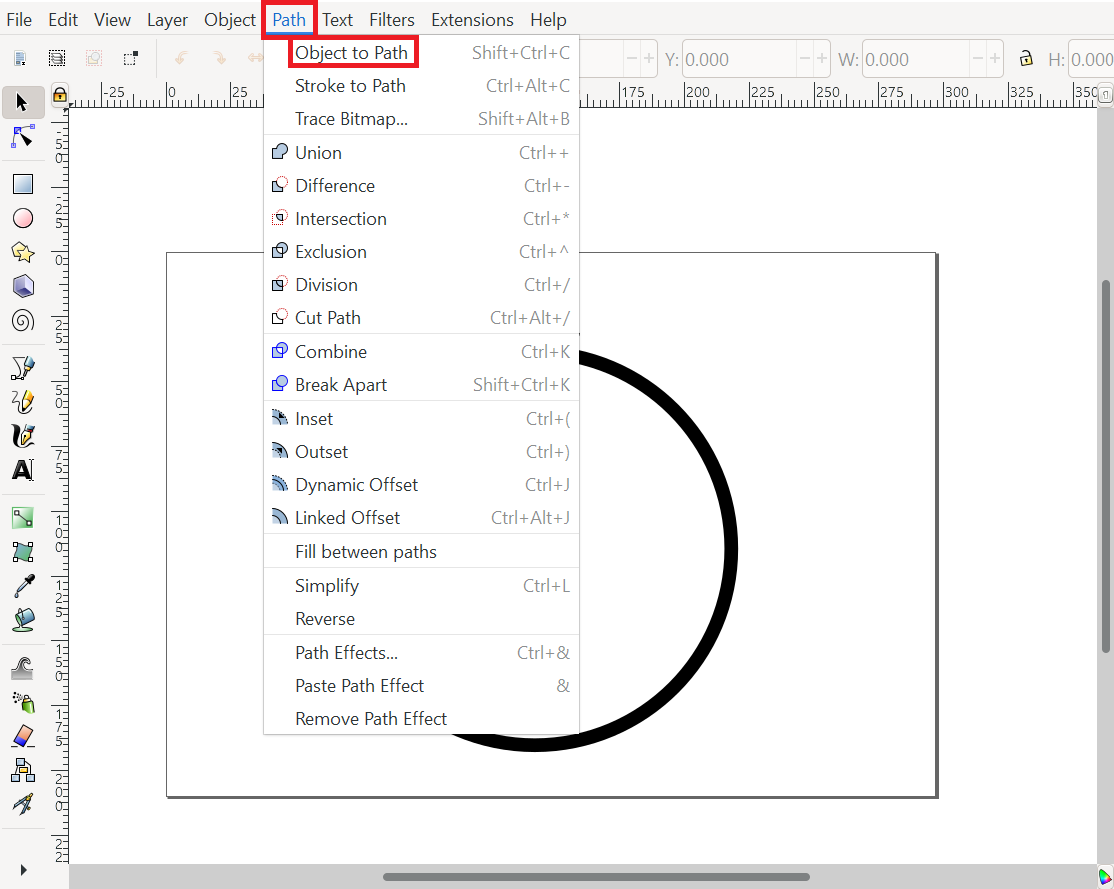
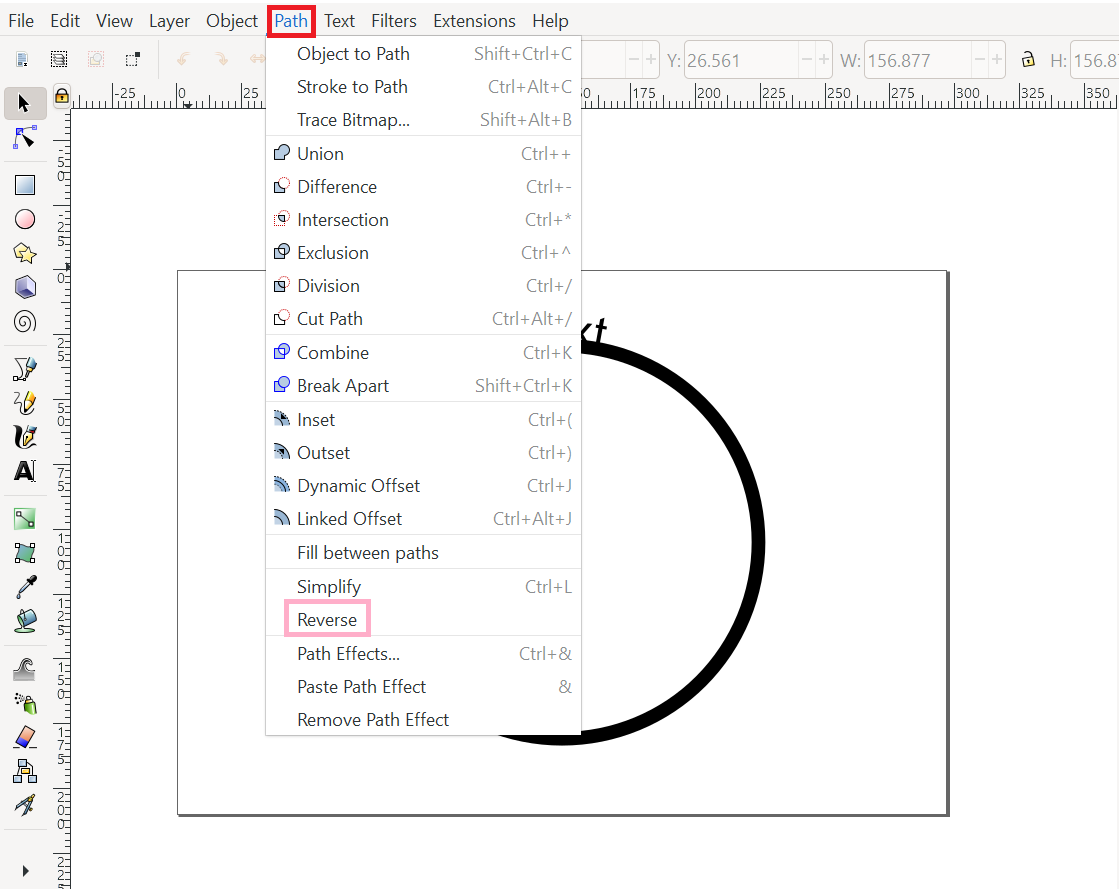
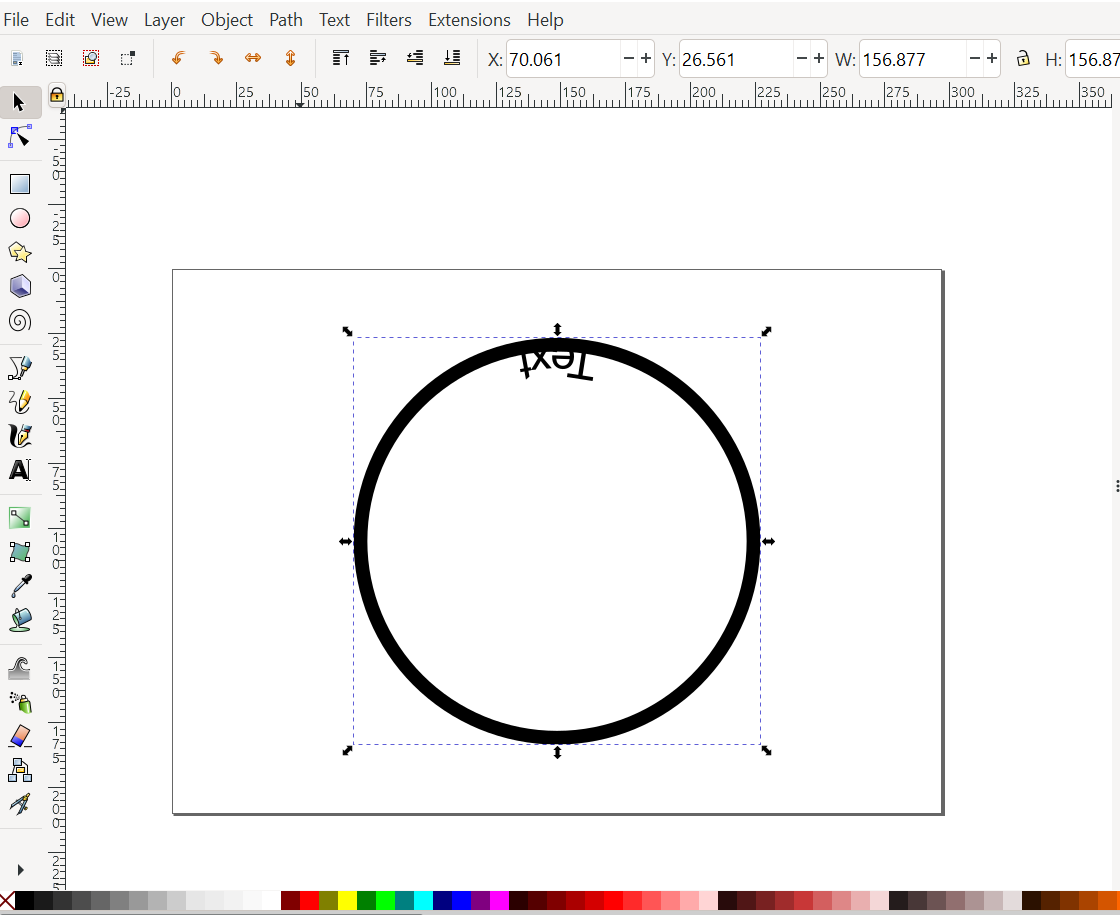
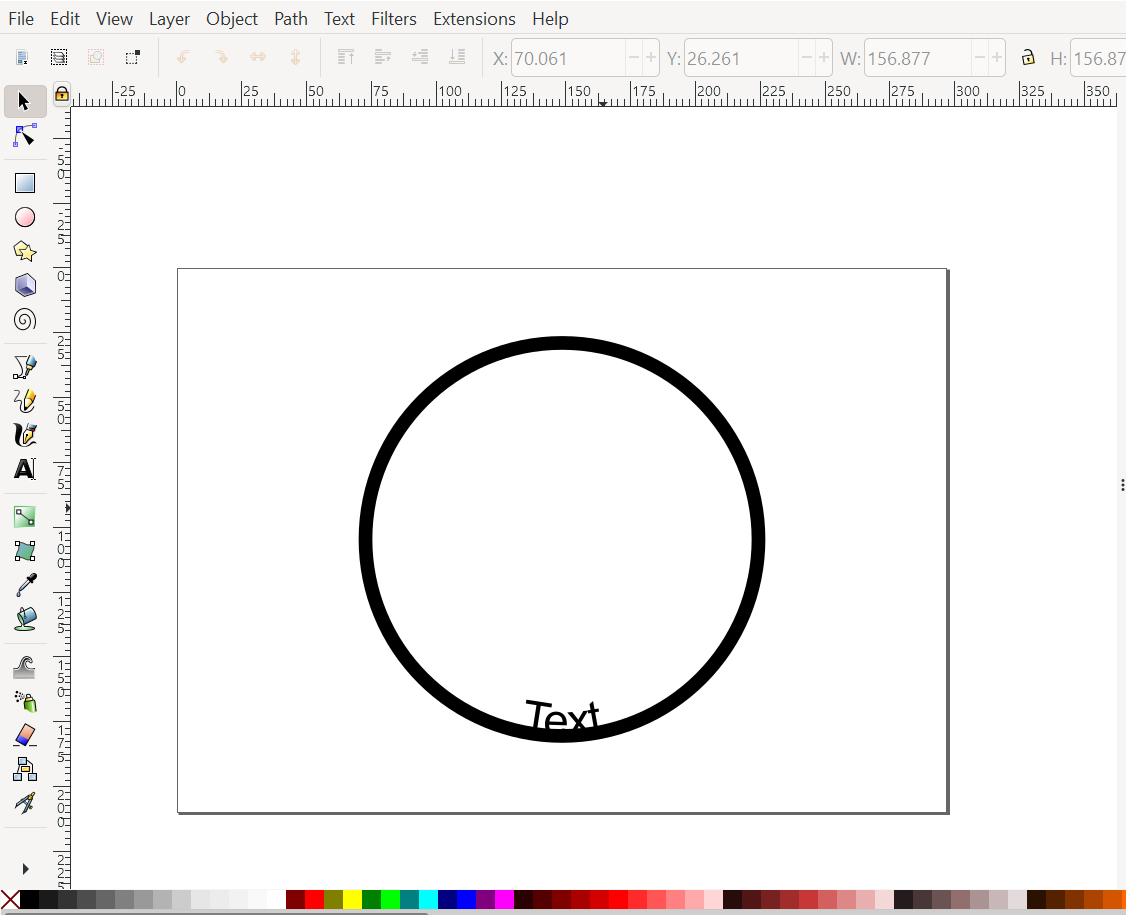
You can do so by using the "Object to Path" feature in the "Path" menu.
First, ungroup the two elements with Shift + Ctrl+"g".
After "Object to Path" has been applied to the circle,
apply "Reverse" in the ''Path" menu.
You can rotate the text by :
- Grouping text and circle into one element:
( Ctrl+"a" to select both elements at once,
then Ctrl+"g" to group the two elements ). - Using twice the "Rotate 90º CW" feature, in the menu "Object".
Removing the Circle to Have the Text Only
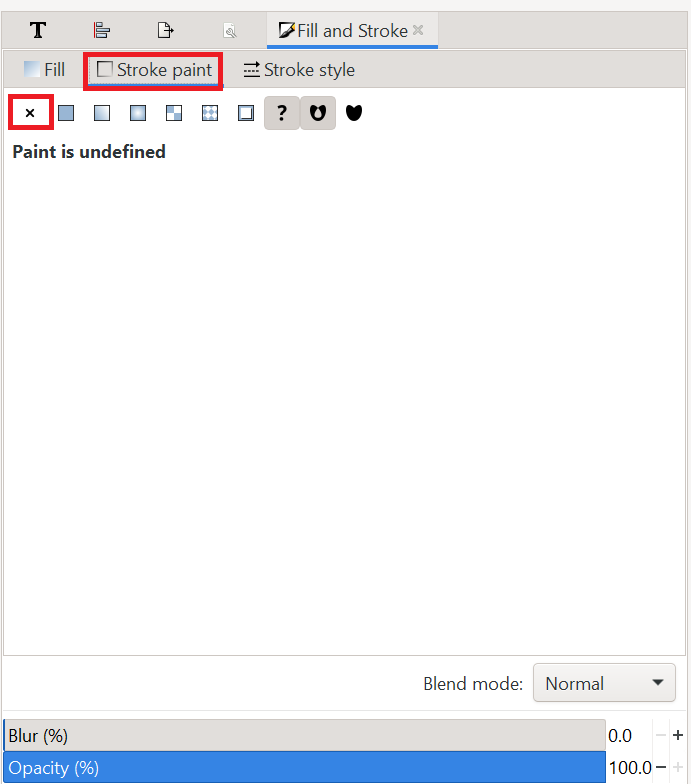
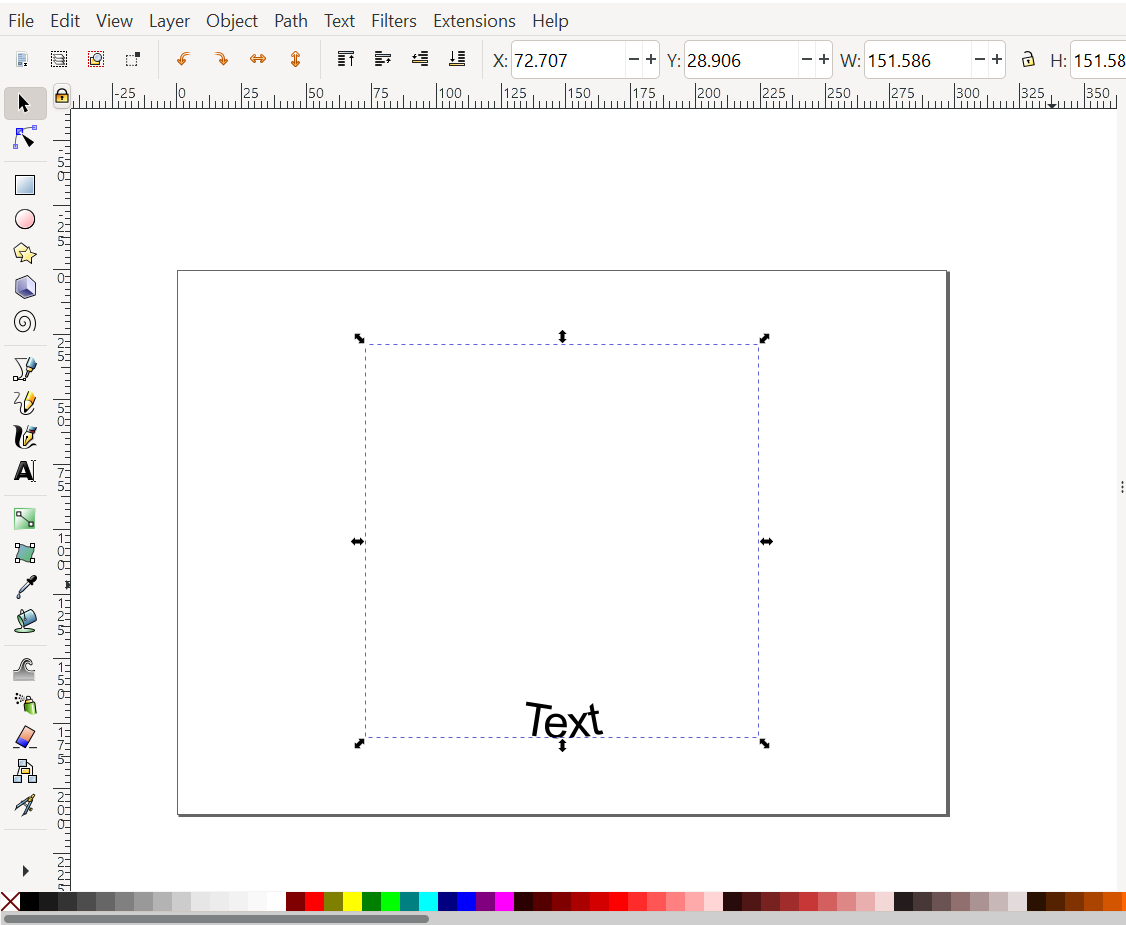
Use the shortcut Shift+Ctrl+"g" to ungroup the elements.
Click to select the circle,
then Shift+Ctrl+"f" brings forth the panel allowing to access the color settings.
Remove the stroke paint.