Infinity Clock - Arduino - WS2813 and DS3231
by aapicella in Circuits > Clocks
18889 Views, 37 Favorites, 0 Comments
Infinity Clock - Arduino - WS2813 and DS3231
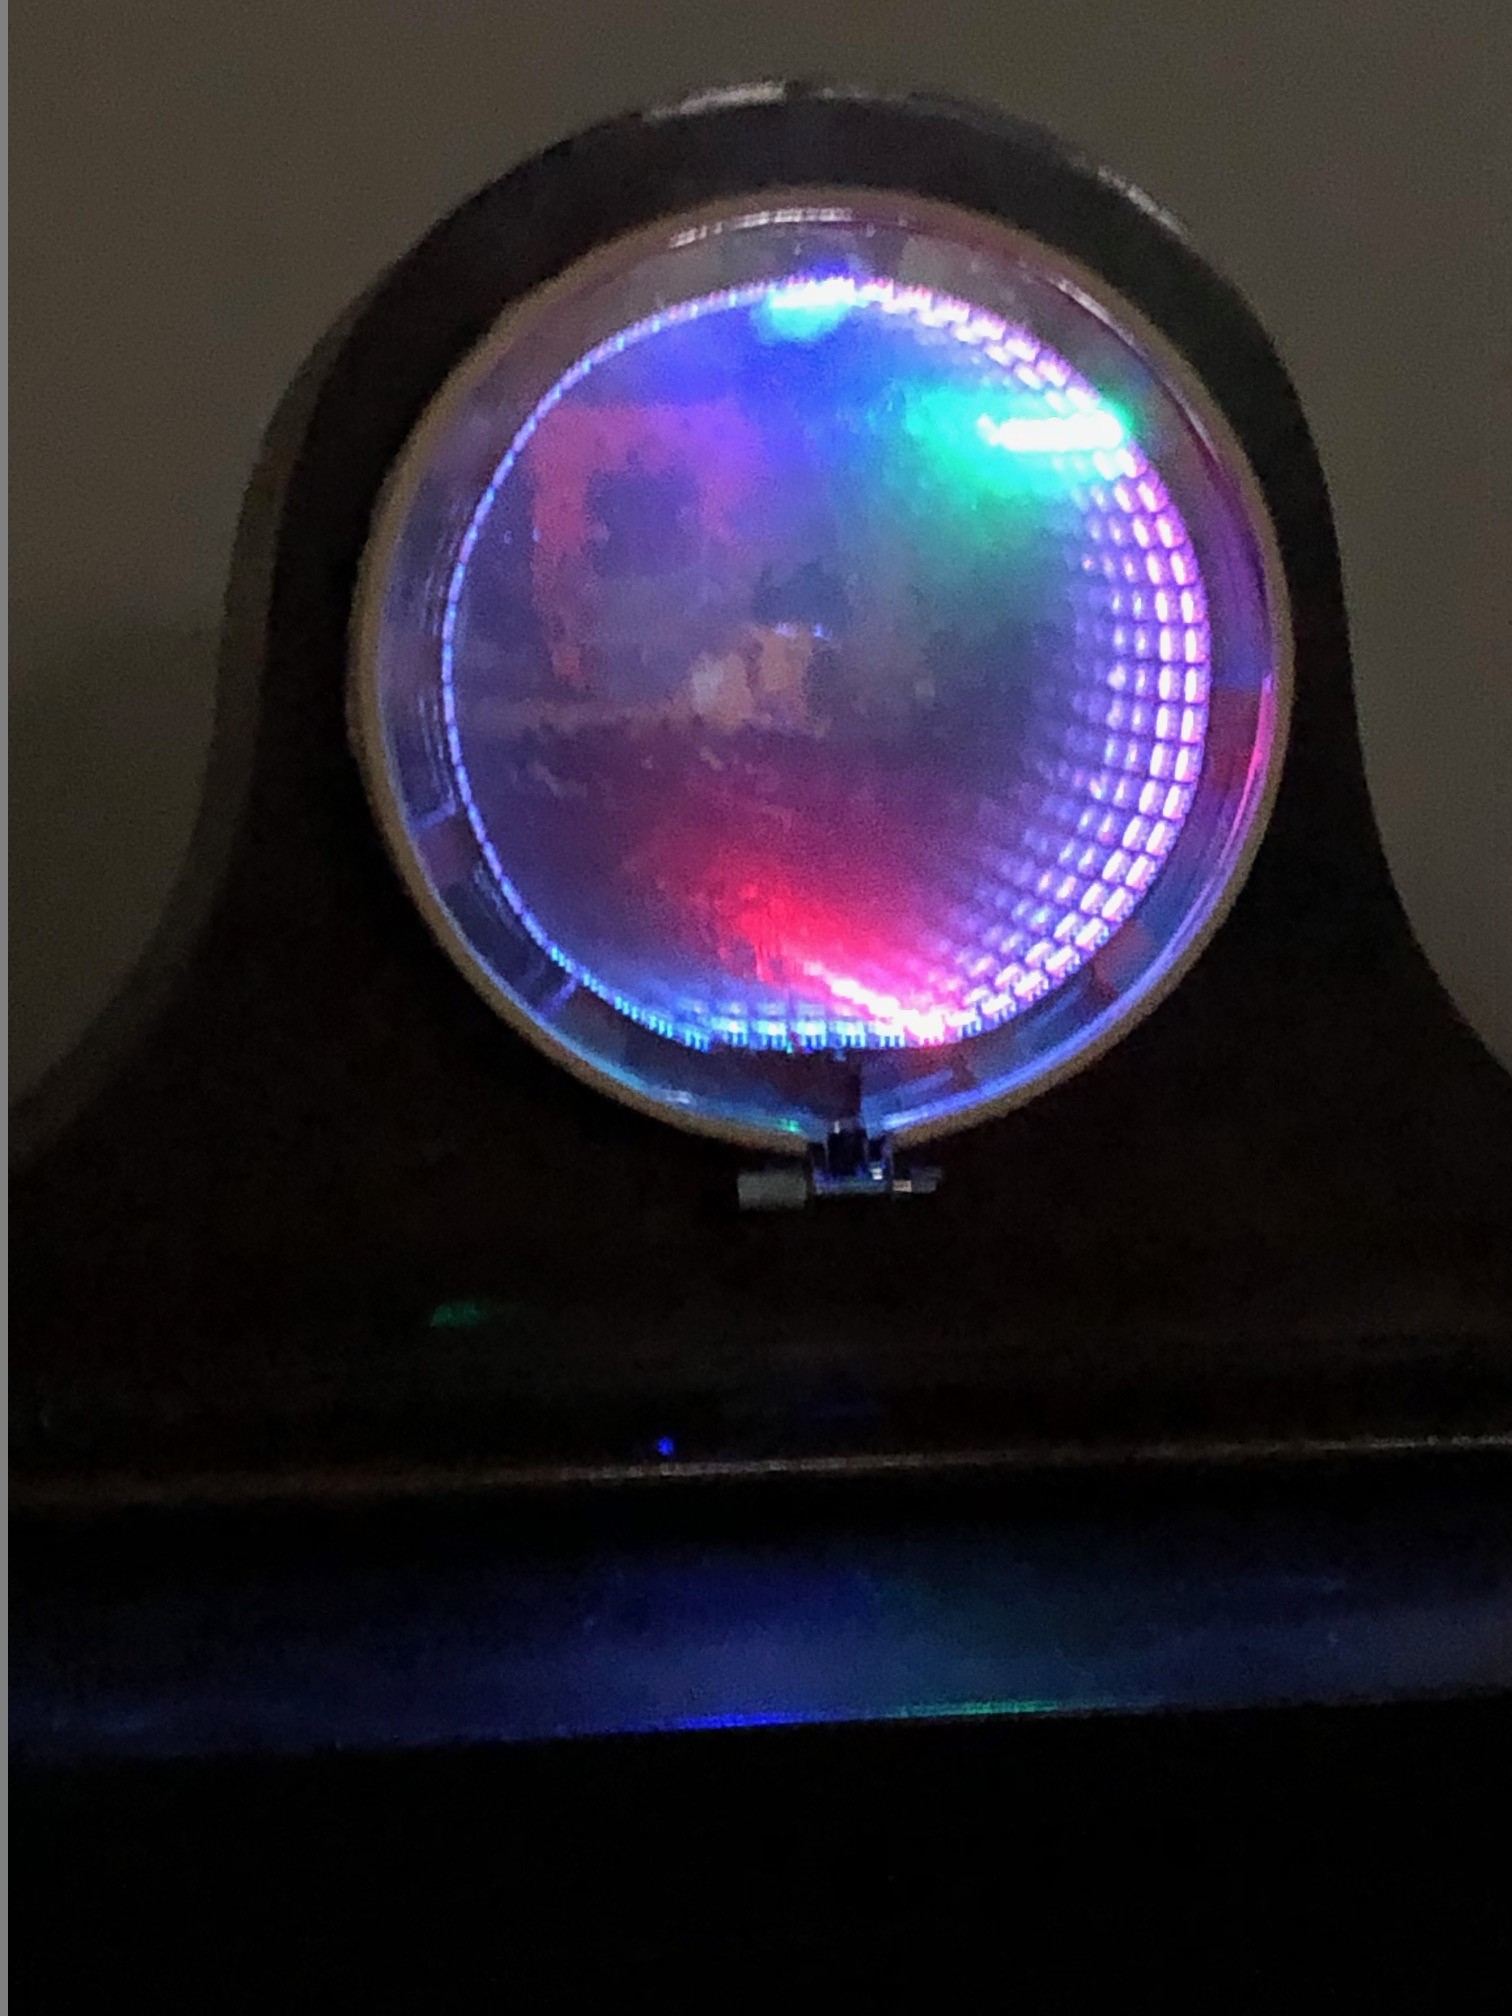
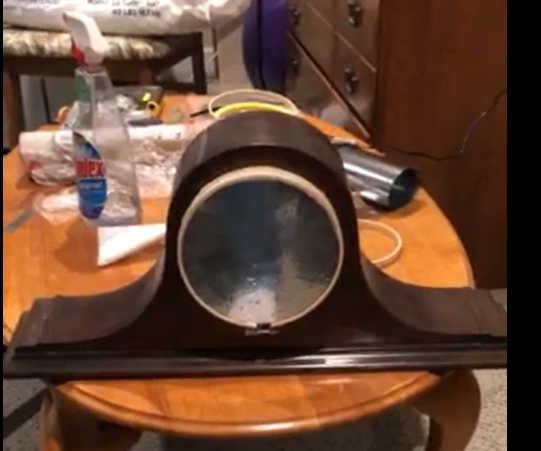
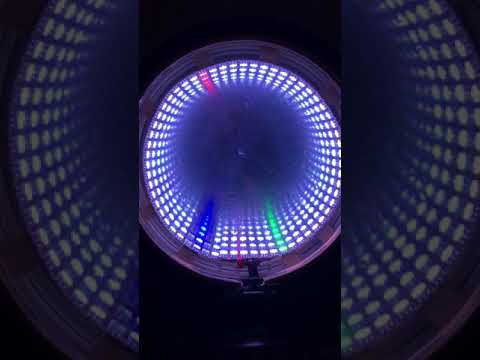
Infinity Clock - Arduino - WS2813 and DS3231
I wanted to build a clock, and liked the idea of trying my hand at making an infinity clock with an Arduino. I wanted it to build it out of common items, and write the program myself.
What is an Infinity Clock?
The 3D illusion mirror effect is produced whenever there are two parallel reflective surfaces which can bounce a beam of light back and forth an indefinite (theoretically infinite) number of times. The reflections appear to recede into the distance because the light actually is traversing the distance. By adding colored LEDs to the Infinity mirror we attempt to simulate an analog clock using the receding colored light as clock hands.
In this instructable I will walk you through the steps to create the Infinity Clock and then review some tunable parameters in the program.
Parts Needed for This Project
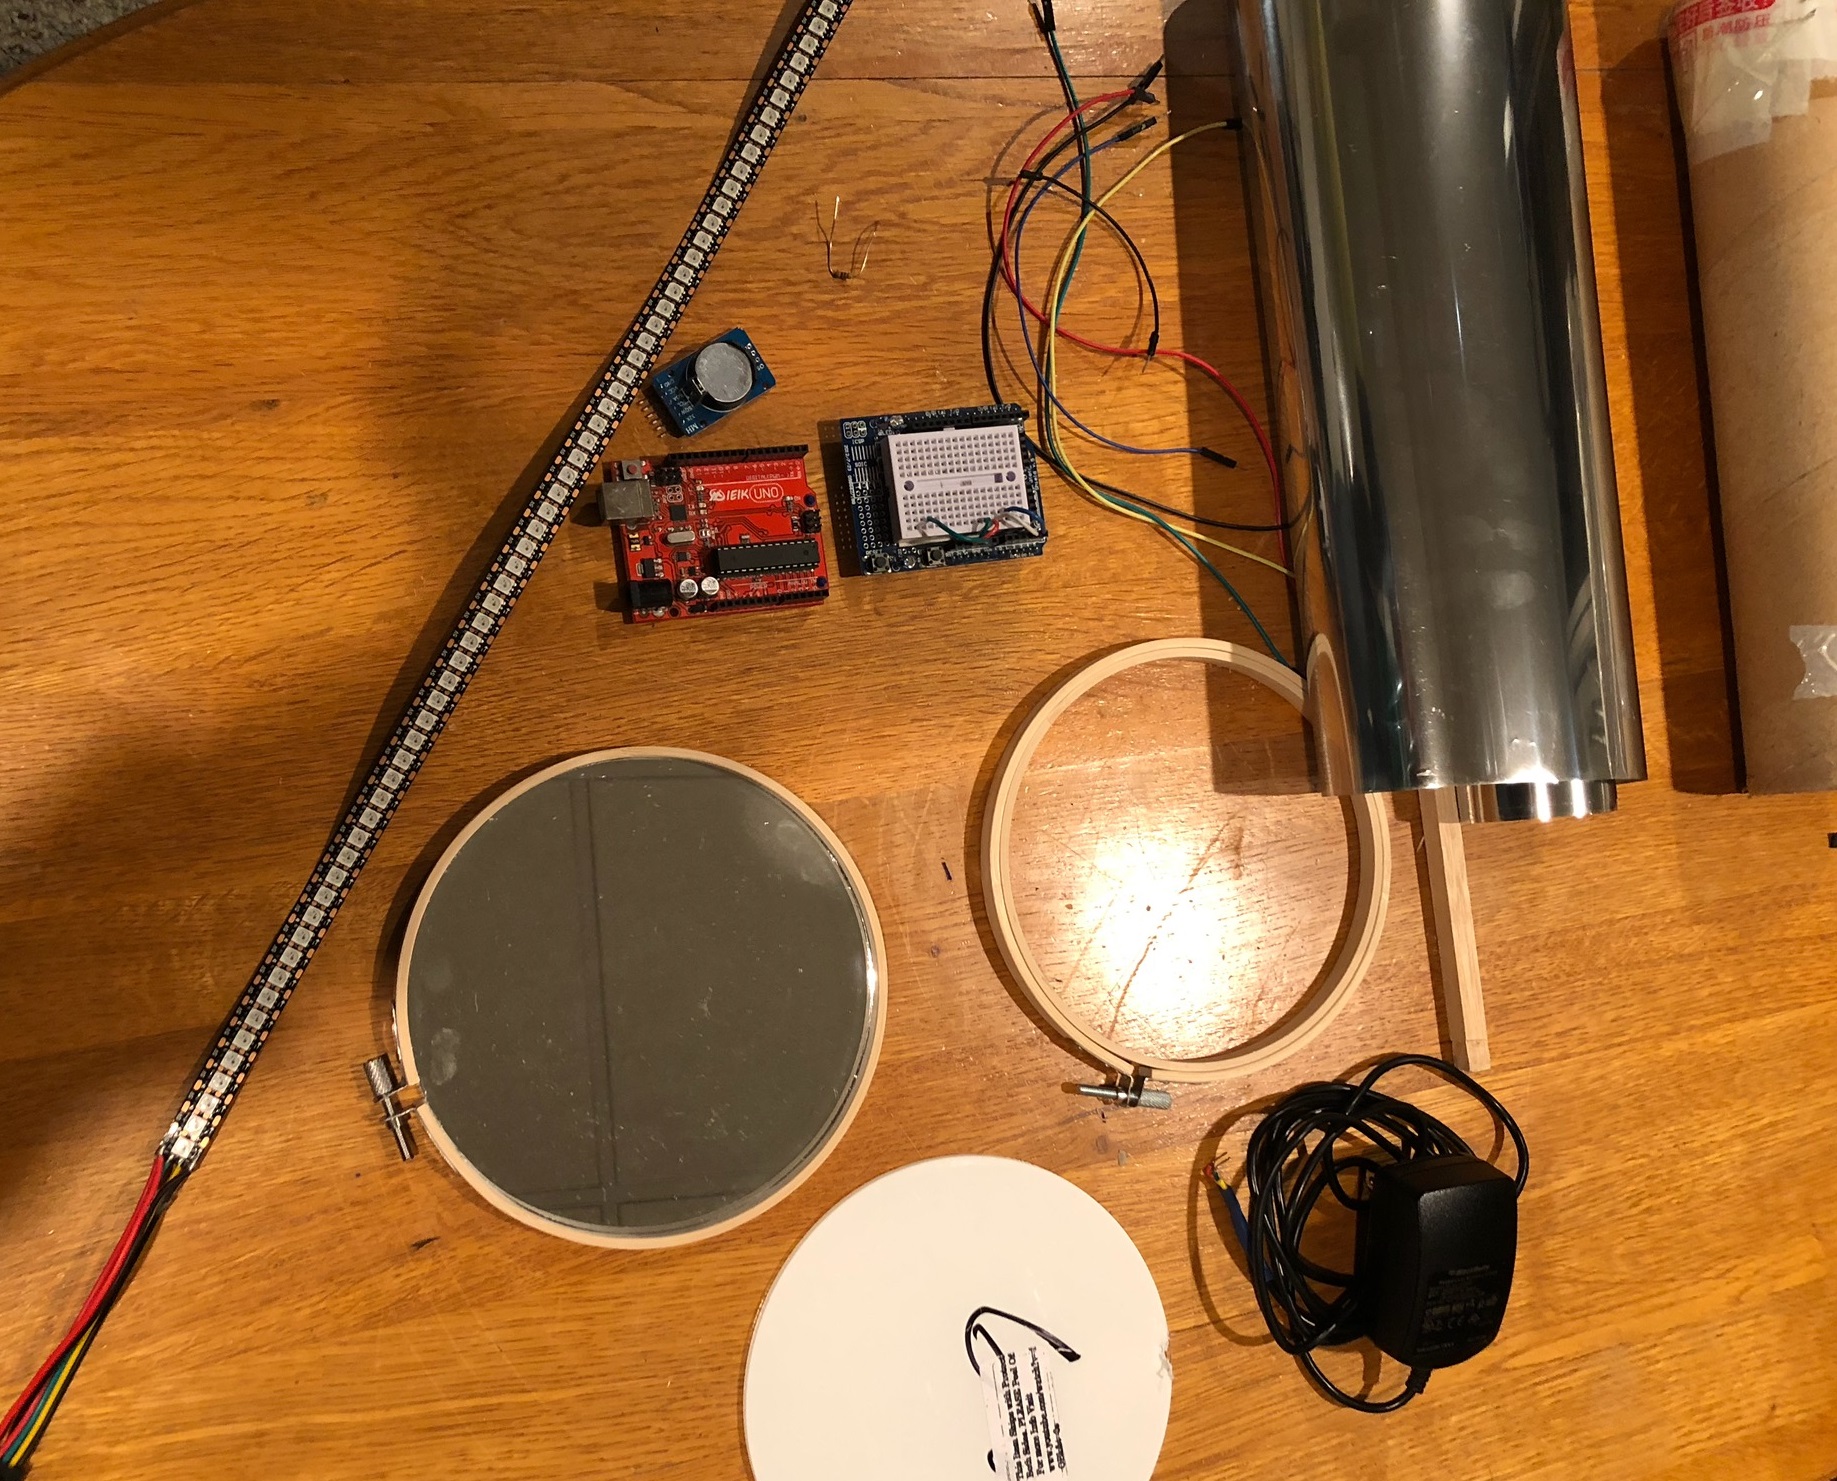
Parts List:
- Arduino Uno $6 on taydaelectronics
- Protoshield for arduino uno. You can get one for 2.50 on Amazon here.
- DS3231 plus battery. you can get one for around 3.00 on Amazon here.
- WS2813 LED 144 for 1 meter. $20 on Amazon here.
- 470 OHM 1 W Carbon film resistor around 1 cent on Taydaelectronics.
- 1000uf 16V Electrolytic capacitor 9 cents on Taydaelectronics
- 5v power supply- I used an old blackberry charger.
- 6in round mirror. around $5 on Amazon
- 6in Acrylic Disc around 10 on Amazon
- 2 - 6" wood embroidery hoops (yup thats right) $2 each on amazon
- Silver one-way mirror film. Ebay seems to be cheapest.
- Assorted wires.
- 3/8" wooden square dowel HomeDepot for $1.27
- old wooden clock base or other display stand.
- 2 small zip ties.
The prototype shield isn't required, but if you like using Arduino you will find it very handy in building these projects. Swap the prototype shield with a breadboard if needed.
You may also need a soldering iron.
I would expect the project to cost about $40.00
Setup You PC
If this is your first arduino project:
- Download the arduino software from arduino.cc
- Connect the Arduino to the PC with usb cable.
- Once you start the software you will need to install three libraries:
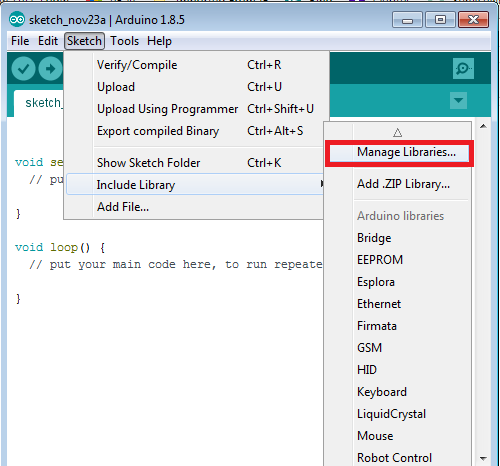
- Click on the "Sketch" menu, then click "Include Libraries" then "Manage Libraries..."
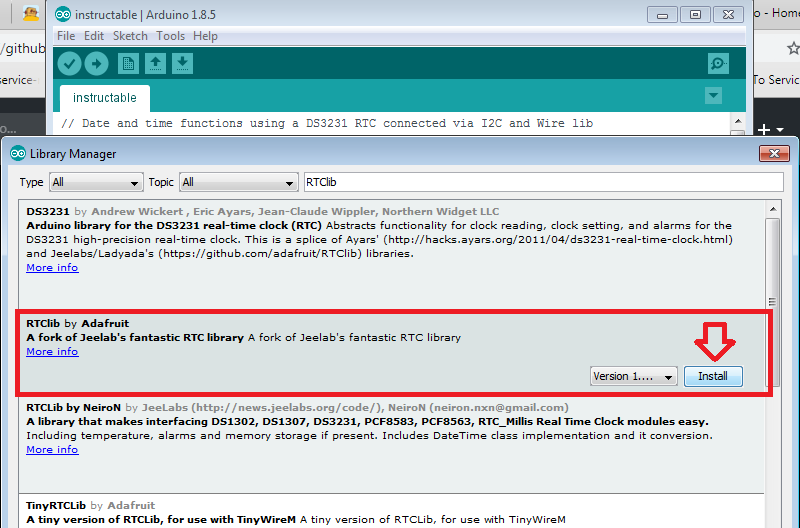
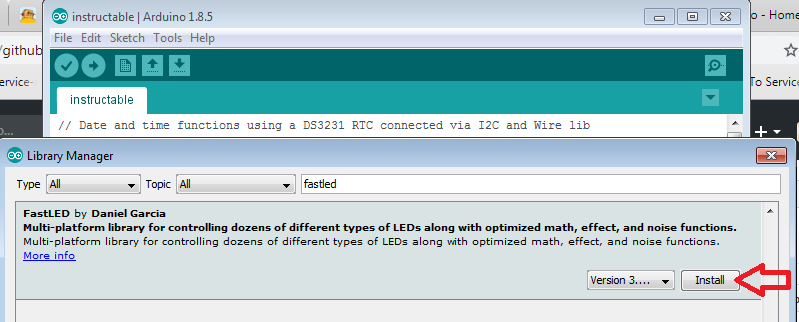
- Install the two libraries: FastLED and RTClib. See pictures for more detail.
- Get the Arduino scketch from my github
- I will review the code at the end so you can modify it as needed.
- At this point load the program Infinity_Clock_DS3231_WS2813.ino
- Go to Sketch and Upload to load the Arduino.
- That last section of the Instructable covers some of the configurable parameters.
Its best to upload the sketch now, because once the external power is added its best to not connect it to your PC.
Wiring the Project.
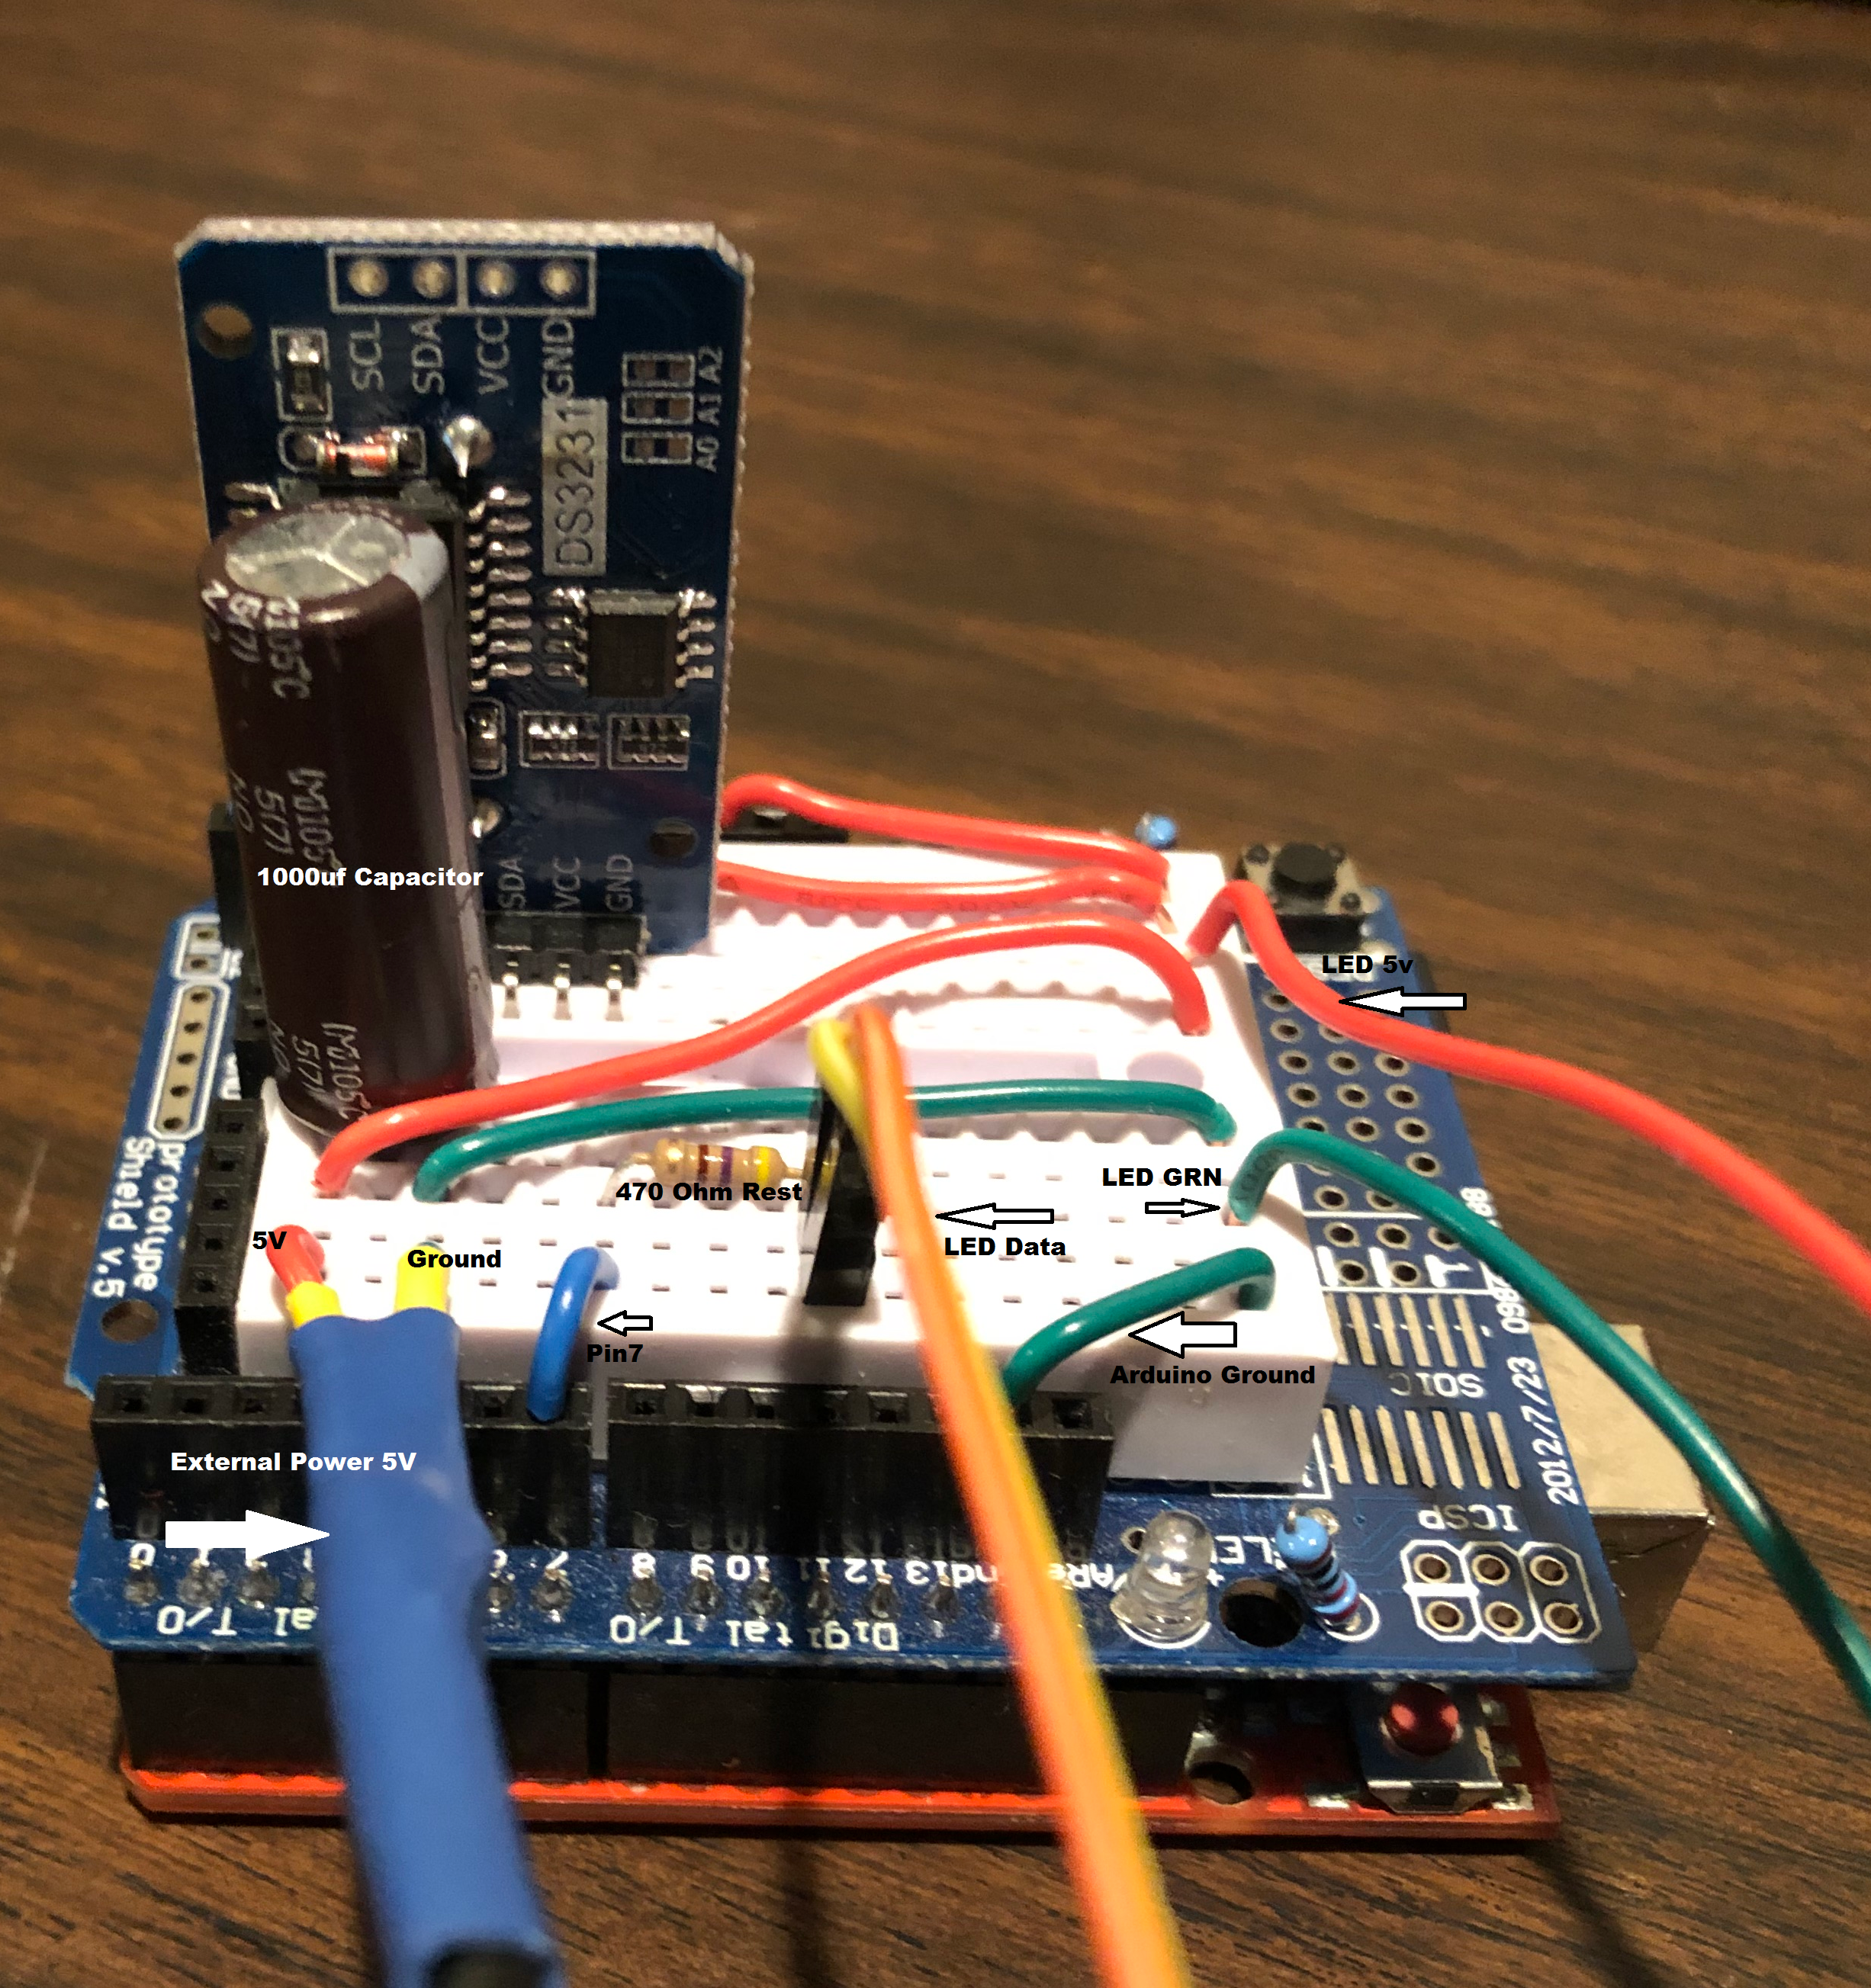
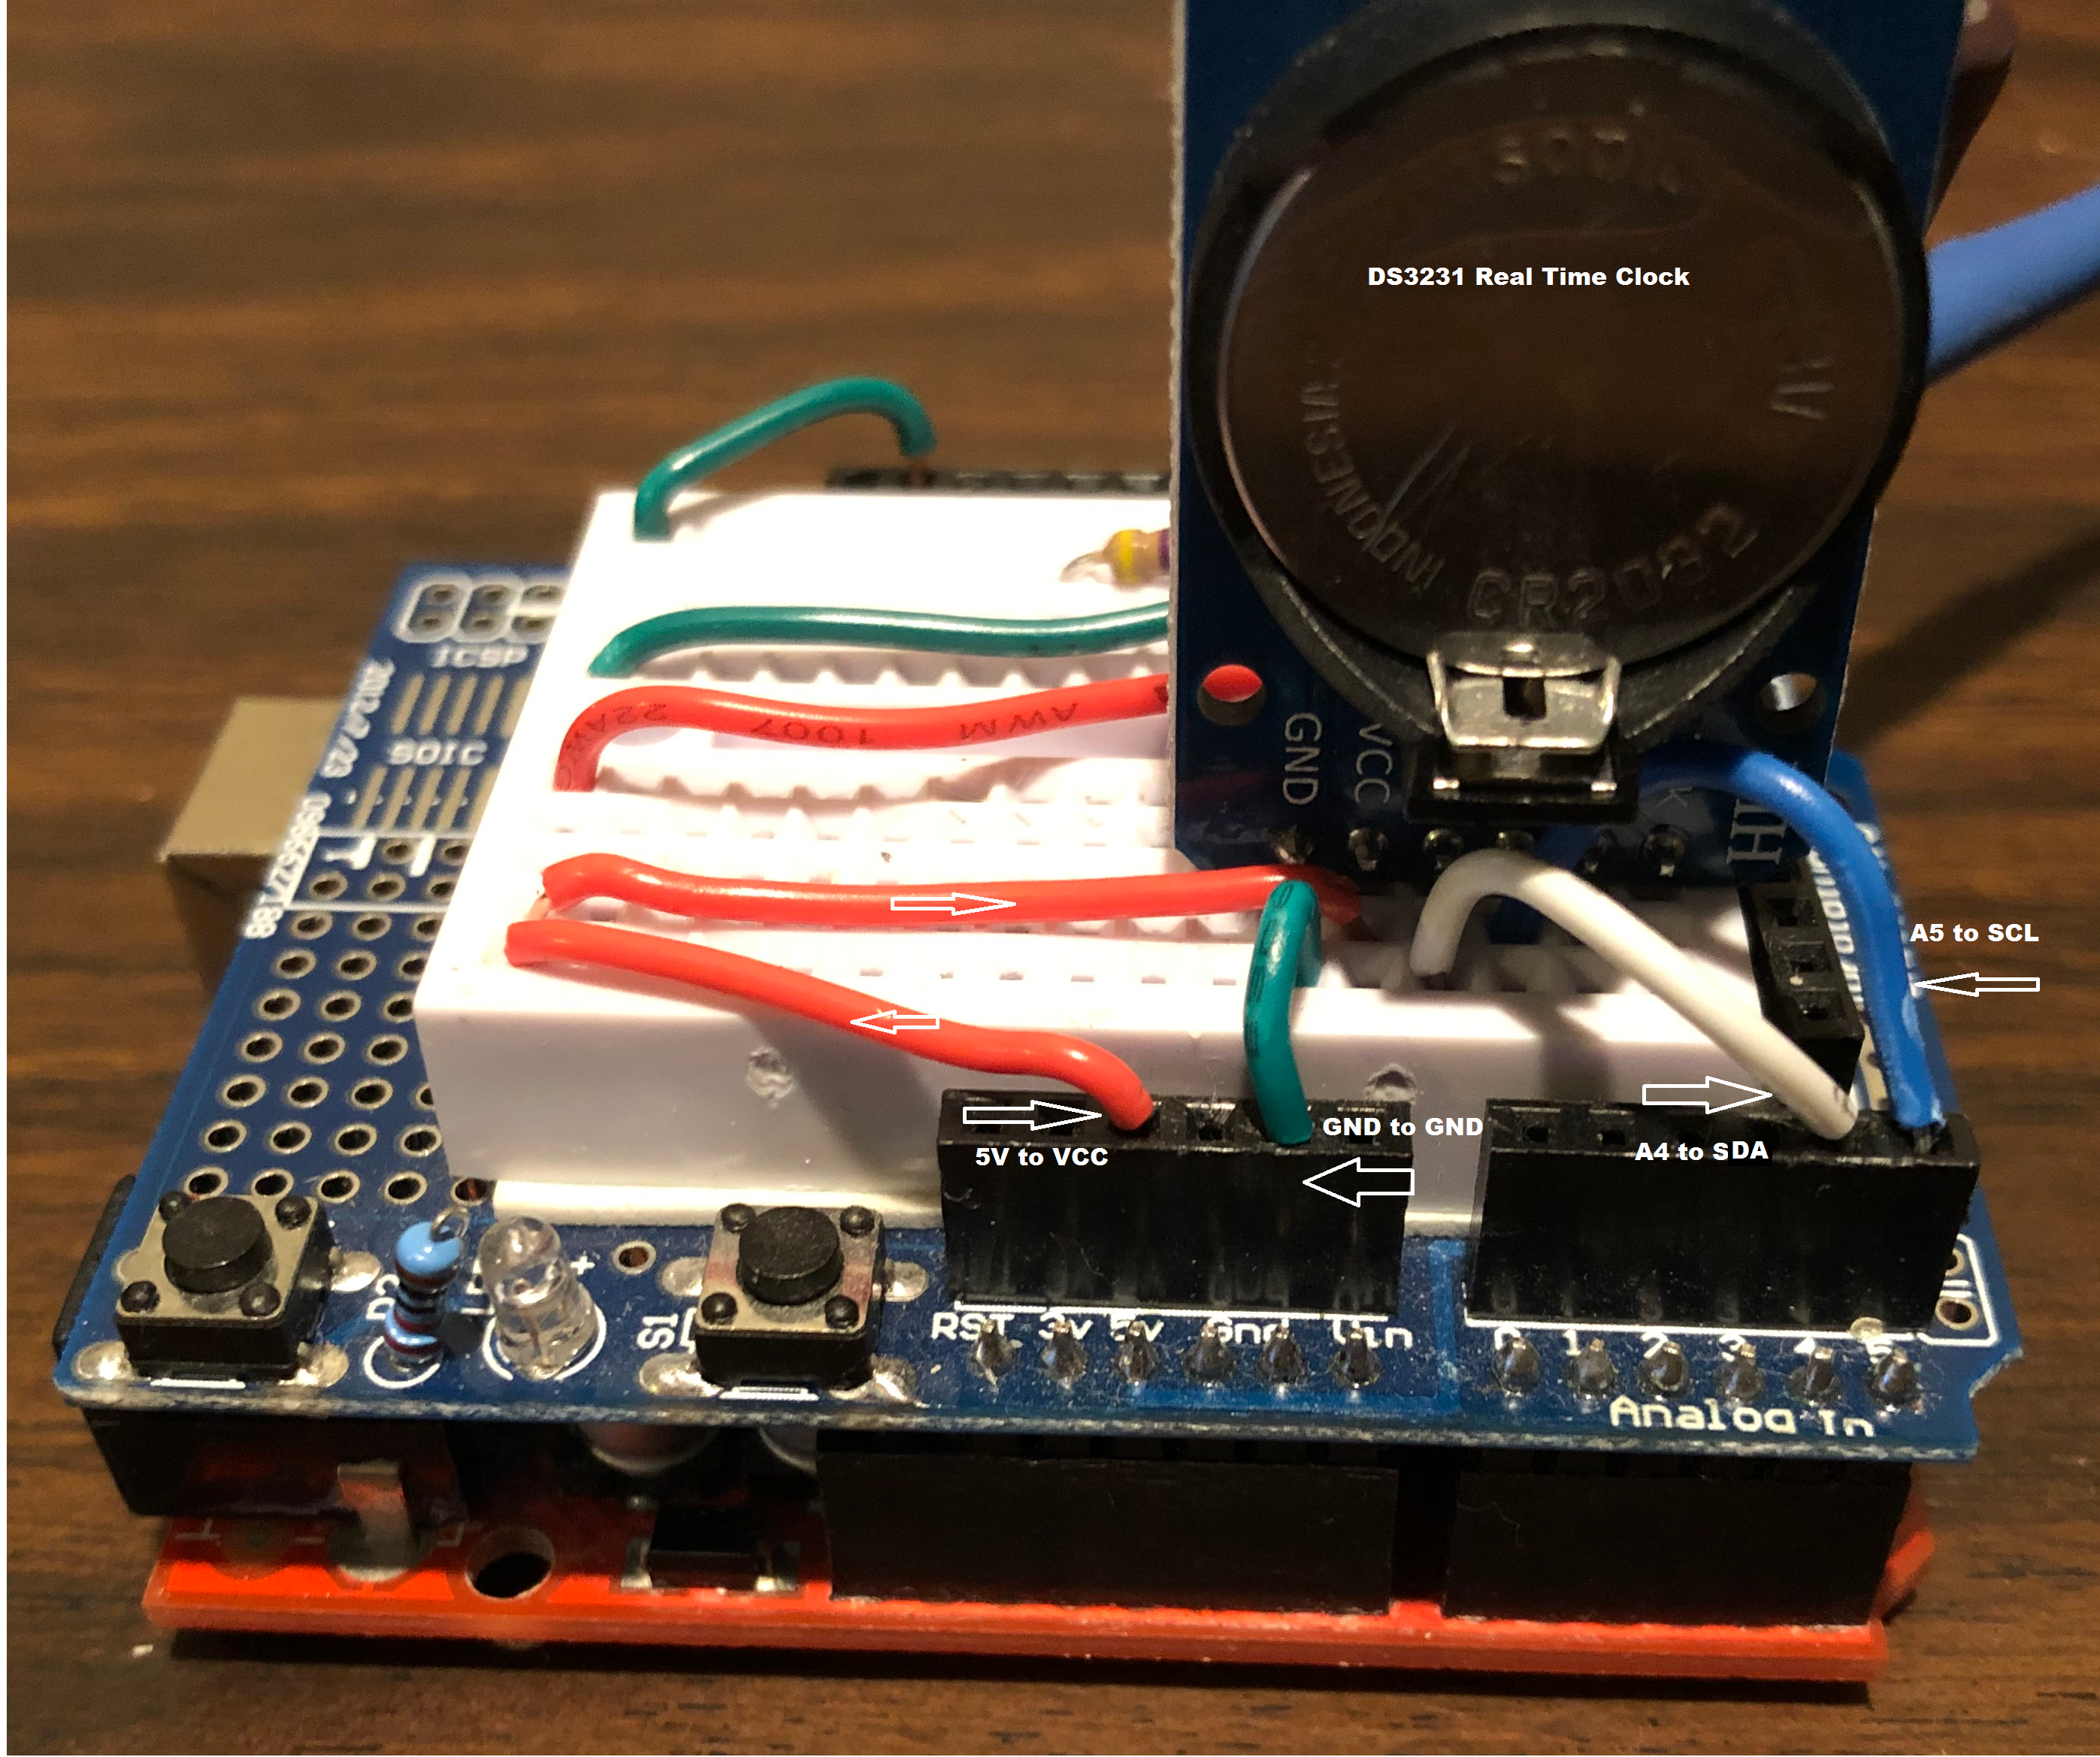
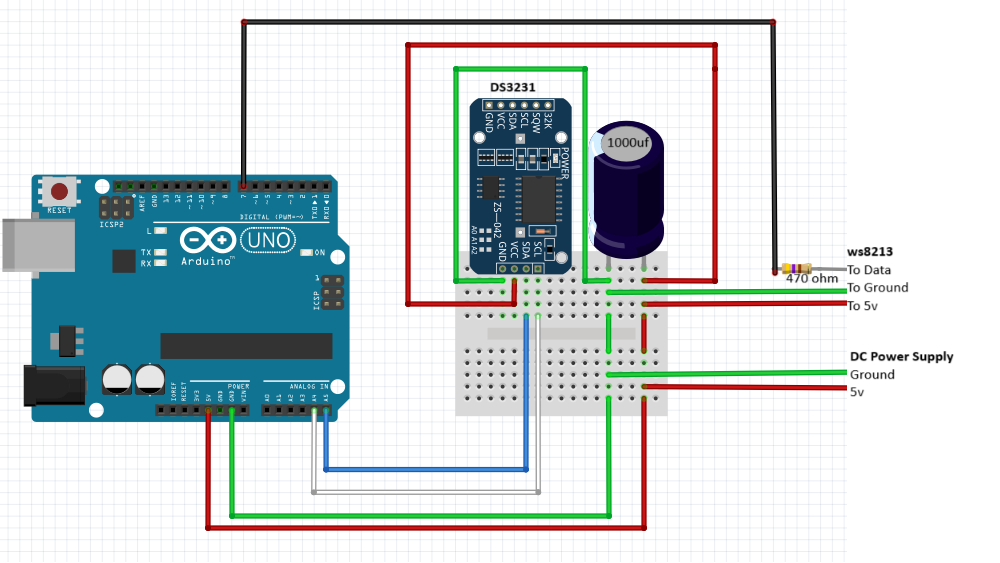
If you are using the ProtoType Shield put it on the Arduino.
The wiring is the most complex part of the project. I included pictures to help you see what I did. I recommend double checking all connections before powering on.
DS3231 - Real Time Clock Module
Put the DS3231 module in the breadboard and connect as in picture.
- Arduino Ground to GND
- Arduino 5V to VCC
- Arduino A4 to SDA
- Arduino A5 to SCL
In the picture I wire the 5v and Ground to thier own run on the breadboard because later we will want to attach external power.
Attach the WS2813 LED Strip
- arduino 5V to your 5V power.
- The middle two connectors are redundant data pins. they go to pin 7
- Make sure to put a 470 OHM resistor between the pin7 and two data leads.
- Arduino Ground to the last connector.
Attach the external 5V power supply (running the LED strip from the arduino power for long periods is not recommened).
- Put a 1000uf electrolytic capacitor between the leads.
- Connect power and ground to the Arduino Power (5V) and Ground (GND)
I don't recommend connecting the external power and USB to the Arduino at the same time.
Build the Infinity Mirror
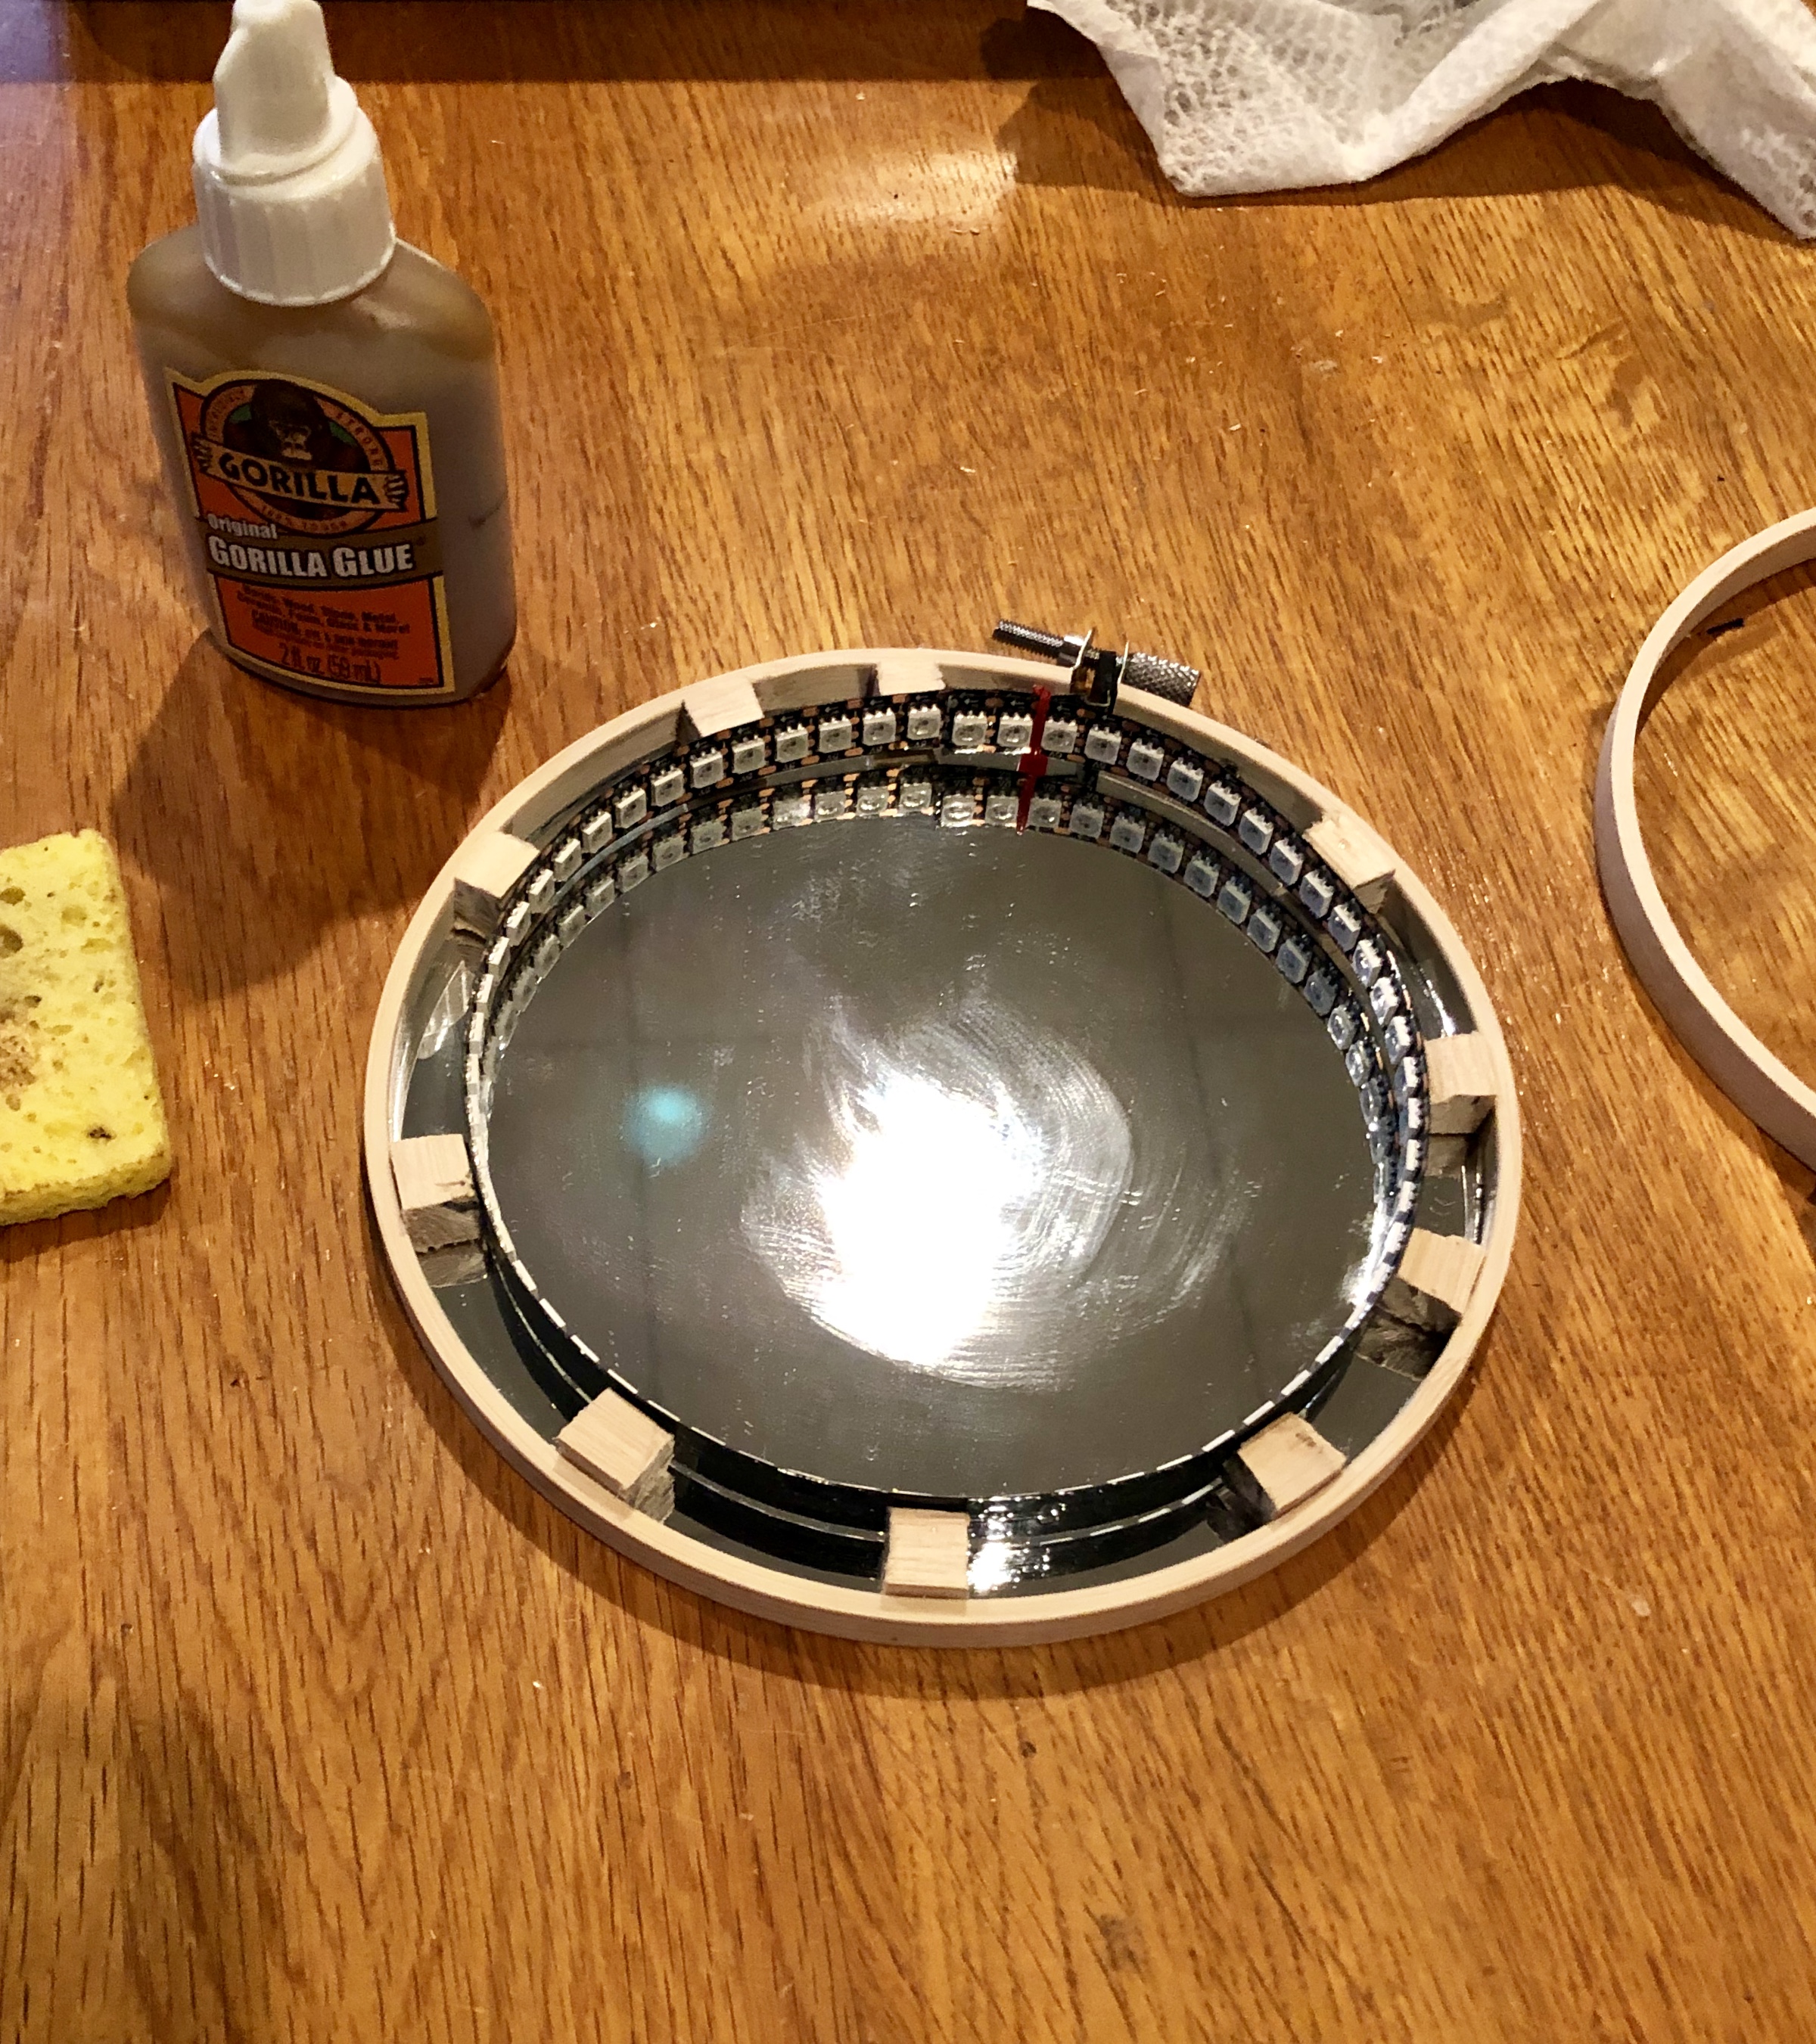
Steps to build the Infinity Mirror:
- Apply the film to the Acrylic dics. This will make your one way mirror.
- Put the Acrylic disc in the Embroidery hoop. Tighten down the screw to keep it from slipping
- Put the mirror in the other Embroiery hoop. Tighen down the screw.
- Cut the square dowel into small sections. about 1/2"
- Loop the led strip with the LEDs pointing inside the circle.
- Use the zip ties to hold the led in place.
- You may need to cut a notch in the zip tie.
- Put the loop on the mirror
- Use wooden blocks as spacers
- Glue the blocks into place. They should be secure enough to hold the led inplace.
- Put the Acrylic mirror on top of the mirror/LEDs and glue into place.
The Code
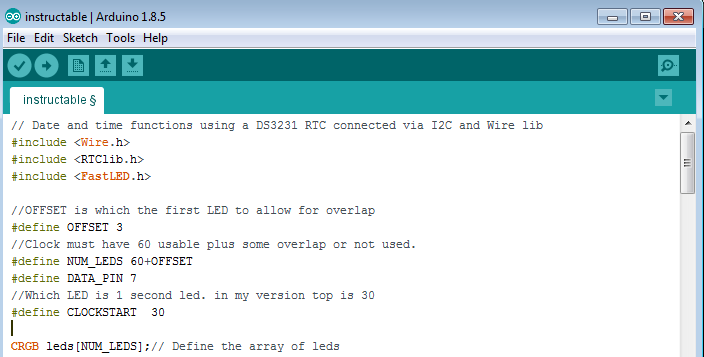
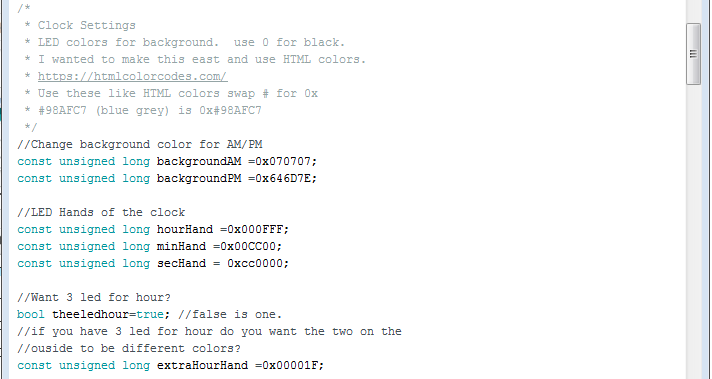
The program uses the Real Time Clock library and Fastled library.
Here are some code snippets to customize the behavior.
- OFFSET - is the overlap. The progam expects the overlap to be from LED0. I have a 3 LED offset.
- CLOCKSTART - is where the noon is on the clock. LED 30 puts it oposite from the electric connections.
I wrote the program to use HTML colors. You can get them from https://htmlcolorcodes.com/ Just swap the # for 0x in the program.
You can change the background for am/pm
- backgroundAM =0x070707;
- backgroundPM =0x646D7E;
LED Hands of the clock:
- hourHand =0x000FFF;
- minHand =0x00CC00;
- secHand = 0xcc0000;
To make it stand out I added an option to have 3 LEDs for hour hand but allow you to change the color on both sides of the middle one to make it stand out.
- theeledhour=true; //you can make it true or false
- extraHourHand =0x00001F;
Another nice feature is the RTClib will detect that your DS3231 has had the battery removed and will set the time to the PC compile time. Its a good feature for new DS3231.
If you didn't get the sketch at the begining of the doc, it can be found on GitHub
Thanks for reading this Instructable. My son helped and it was a fun project for us. I hope we are considered in the optic contest.