Importing Data Into Partwizard and Creating Toolpaths for the Shopbot
3187 Views, 6 Favorites, 0 Comments
Importing Data Into Partwizard and Creating Toolpaths for the Shopbot

Input DXF File
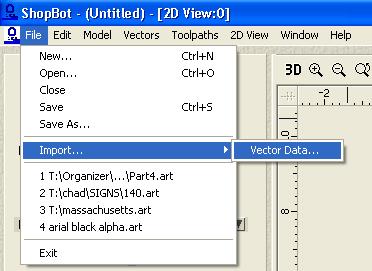
Open Partwizard and choose new project. Input the dimensions of your final product. I use top of block as the material Z zero. Go to file>import>vector data and select your .dxf file
Prepare Vectors
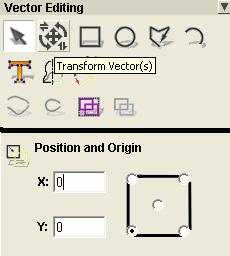
Use the Transform Vectors button to adjust the size and rotation of your outline. Using the rotation and sizing tools is pretty self explanatory. It will make things easier if you move it to the bottom left corner using the position and origin screen. Select the bottom left corner and then enter 0,0 for the coordinates.
Choose What Kind of Toolpath You Are Going to Use
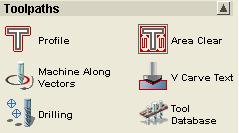
Now that everything is in place, you need to decide what kind of toolpath to use. This will vary with what your product is going to be. It is important to choose the right kind so that everything comes out to the dimensions you designed. For help choosing the right toolpath, click on a toolpath then press show help in the top right corner of the sidebar. This will give an explanation of each kind and how to use the options that are available for it. I will give a short summary of each of the 5 options here.
Profile- used for cutting outlines
Area Clear- removes all the material in between lines at a set depth
Machine Along Vectors- cuts along the line with no adjustment for tool width
V Carve Text- use with an angled bit for carving text
Drilling- drills holes
Profile- used for cutting outlines
Area Clear- removes all the material in between lines at a set depth
Machine Along Vectors- cuts along the line with no adjustment for tool width
V Carve Text- use with an angled bit for carving text
Drilling- drills holes
Create the Toolpaths
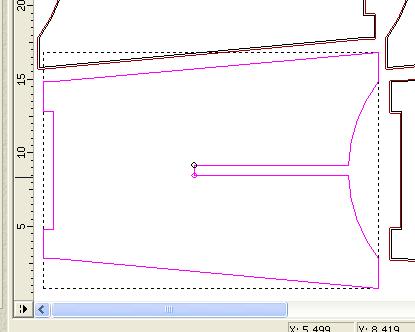
To create toolpaths, choose the vectors by holding shift and clicking on them to select each one. After more than one is selected they will turn purple. You can group them together to make things easier by choosing Vectors>Group Vectors. Select the toolpath you want to use then enter the proper things that you want. Hit create toolpath at the bottom and you are done. You can create multiple toolpaths for different kinds of cuts .
Order Them and Export As a .spb File
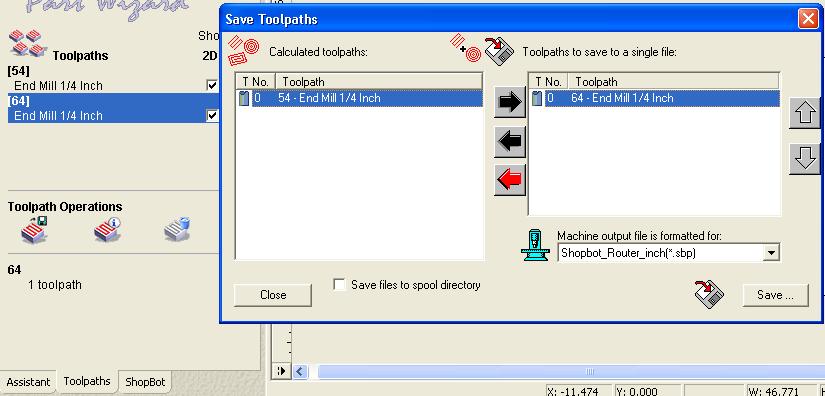
Now you need to export the toolpaths you have made so that they can be read by the Shopbot software. If you have more than one toolpath, you can either save them as one file that will run continuously in the order you want, or split them up into separate files. If you are unsure of how things are going to work out or if you have enough time to compete all of them, I would recommend saving them as separate files so that you can just cut one at a time. To save them, hit the toolpaths tab at the bottom of the page. This allows you to review them. Use the check marks to turn the view of them on and off. Under the toolpaths operations area click the floppy disc to save them. This brings up a window with two columns. Use the arrows to bring the toolpaths you want to save on the same file to the right column. Order them using the up down arrows. The order can be important. You will want to cut the profile that actually cuts the part out last to that is still held down by clamps or screws. This part is hard to explain but you need to think about what the machine is going to do in order to plan what order you want the toolpaths in. Once you are done click save and choose a name and place for the file. Save again and you are done.