Imagen De Audio En 3D (3D Audio Image)
by defendertime4 in Workshop > 3D Printing
521 Views, 0 Favorites, 0 Comments
Imagen De Audio En 3D (3D Audio Image)
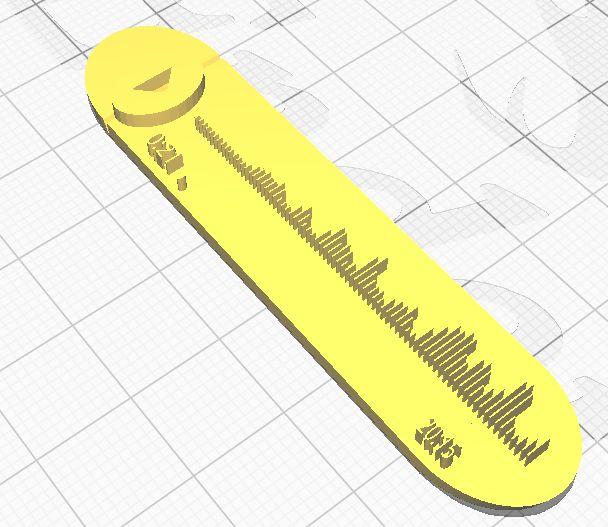
En un grupo que se dedica compartir archivos STL para imprimir, Pamela preguntó:¿ Hola a todos, les hago una consulta sabrán si se puede hacer un audio de WhatsApp así? De esa manera ? (y mostró una imagen de un llaverito que mostraba el viejo formato de los archivos de audio que tenía WhatsApp), mi respuesta fue, una serie de paso a paso como transformas una captura de pantalla para hacer un archivo STL para poder imprimir, Joaquín me pidió un video del procedimiento y como soy fiel en escribir por estos lados, les prometí un Instructable.com con el procedimiento.
Claro que este procedimiento es lo mismo para realizar muchas otras cosas, como carteles, logos, Adornos de Navidad, Etiquetas para copas (que ahora está tan de moda por el COVID), inclusive Stencils tanto para pintar como para dibujar.
Puede parecer difícil, pero como siempre digo, si yo lo puedo hacer, cualquiera puede.
In a group that is dedicated to sharing STL files to print, Pamela asked: Hello everyone, I ask you a question, will you know if you can make a WhatsApp audio like this? That way ? (and it showed an image of a keychain that showed the old format of the audio files that WhatsApp had), my answer was, a series of step by step how you transform a screenshot to make an STL file to be able to print, Joaquín asked for a video of the procedure and since I am faithful to write here, I promised them an Instructable.com with the procedure.
Of course, this procedure is the same to make many other things, such as posters, logos, Christmas decorations, Labels for glasses (which is now so fashionable due to COVID), including Stencils for both painting and drawing.
It may sound difficult, but as I always say, if I can do it, anyone can.
Supplies
- Programa de captura de pantalla (Para Celular o PC)
- Programa de edición de Imágenes (En este caso usé Photoshop, pero cualquiera sirve)
- Programa que pueda transformar una imagen en vectores (Utilicé Ilustrator, Pero sirve cualquiera que tenga esa función)
- Programa Tinkercad.com (O algún programa que permita realizar archivos STL)
- Programa Cura (O cualquiera que permita transformar archivos STL en GCODE)
- Screen capture program (For Cellular or PC)
- Image editing program (In this case I used Photoshop, but any works)
- Program that can transform an image into vectors (I used Illustrator, But anyone that has that function works)
- Tinkercad.com program (Or some program that allows making STL files)
- Cura program (Or any that allows to transform STL files into GCODE)
Capturando La Imagen Que Deseamos Imprimir (Capturing the Image We Want to Print)
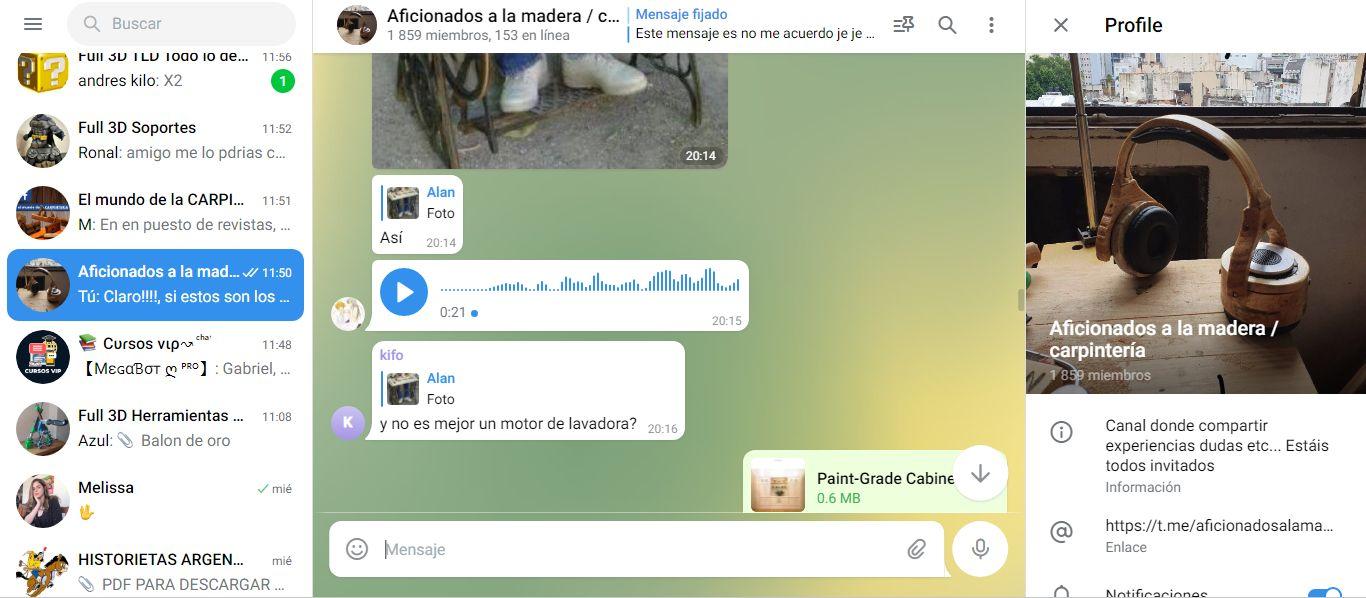


El pedido surge para transformar las ondas de audio que grafican un mensaje de voz que llega a WhatsApp, claramente sirve para cualquier programa como Telegram, etc. (De hecho el ejemplo lo voy a realizar con un audio de un grupo de Telegram, pero si se quisiera realizar con algún programa que no muestre las ondas, previamente habrá que subir el archivo en algún programa de audio para que muestre las ondas, hoy no voy a mencionar ningúno porque se merece un instructivo aparte).
En la primer imagen, se observa una conversación de Telegram donde aparece un mensaje de voz, si bien la imagen fue capturada de Telegram Web, igualmente serviría una captura desde el celular. Esa imagen, debe ser subida a un programa que maneje gráficos, para este ejemplo usé Photoshop. Lo primera será limpiar todo lo que está demás de la imagen, dejando solamente la imagen de la onda, la duración, si se quiere el símbolo de play.
Blanqueamos el fondo, pasemos la imagen a Blanco y Negro y reforzamos los negros, eliminando todo lo posible los grises. De ser posible hay que corregir cualquier suavizado en la imagen a fin de eliminar escalas de grises y completar algún pedazo faltante al eliminar los grises, como por ejemplo en las curvas, que podría perder algún pixel y dejaría algún espacio donde debería existir borde.
Como mencioné anteriormente, este procedimiento sirve para transformar no solo una pantalla capturada, sino un mensaje de texto, un logo, etc. En cada caso se partirá del origen correspondiente, por ejemplo un mensaje de texto, se puede ingresar dicho mensaje seleccionando la fuente deseada (Ojo que cuanta más floritura tenga el font más ilegible será) también se puede escribir texto en Ilustrator directamente, pero si se está modificando uno existente seguramente Photoshop sea la mejor opción.
Finalmente grabamos el archivo resultante para pasar al siguiente punto
The request arises to transform the audio waves that graph a voice message that reaches WhatsApp, clearly it works for any program such as Telegram, etc. (In fact, I'm going to do the example with an audio from a Telegram group, but if you want to do it with a program that does not show the waves, you will have to upload the file previously in an audio program so that it shows the waves, today I will not mention any because it deserves a separate instruction).
In the first image, a Telegram conversation is observed where a voice message appears, although the image was captured from Telegram Web, a capture from the cell phone would also serve. That image must be uploaded to a program that handles graphics, for this example I used Photoshop. The first thing to do will be to clean up everything else in the image, leaving only the image of the wave, the duration, if you want the play symbol.
We whiten the background, turn the image to Black and White and reinforce the blacks, eliminating the grays as much as possible. If possible, any smoothing in the image must be corrected in order to eliminate gray scales and complete any missing pieces by eliminating the grays, as for example in the curves, which could lose a pixel and leave some space where there should be an edge.
As I mentioned earlier, this procedure is used to transform not only a captured screen, but a text message, a logo, etc. In each case, it will start from the corresponding origin, for example a text message, you can enter this message by selecting the desired font (Note that the more flourishes the font has, the more illegible it will be) you can also write text in Illustrator directly, but if you you are modifying an existing one, surely Photoshop is the best option.
Finally we save the resulting file to go to the next point
Transformando Un JPG En Vectores (Transforming a JPG Into Vectors)
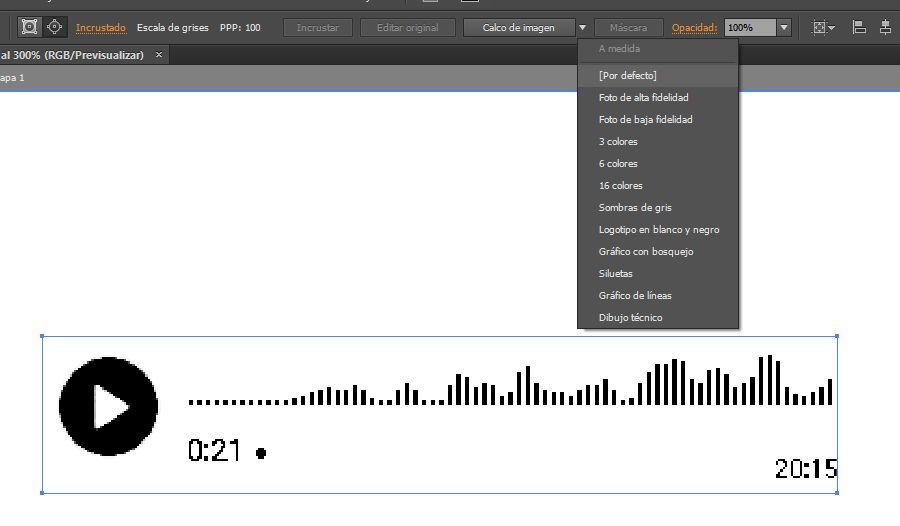
Como mencioné anteriormente, para este punto utilizaré Adobe Ilustrator, pero pueden usar el programa que deseen que les permita transformar las imágenes en vectores. En Ilustrator, abrimos la imagen que vectorizaremos, la seleccionamos y en la parte superior buscamos "Calco de Imagen", dependiendo de la complejidad de la imagen, deberemos ir probando los distintos presets para ver cual funciona mejor y deja lo más similar a la imagen que se desea. En caso de no encontrar algo que sea adecuado, recomiendo utilizar "[Por Defecto]" ya que este puede ser modificado.
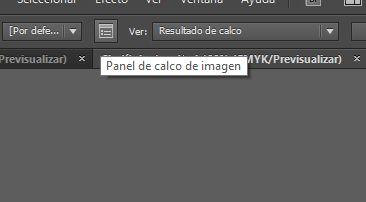
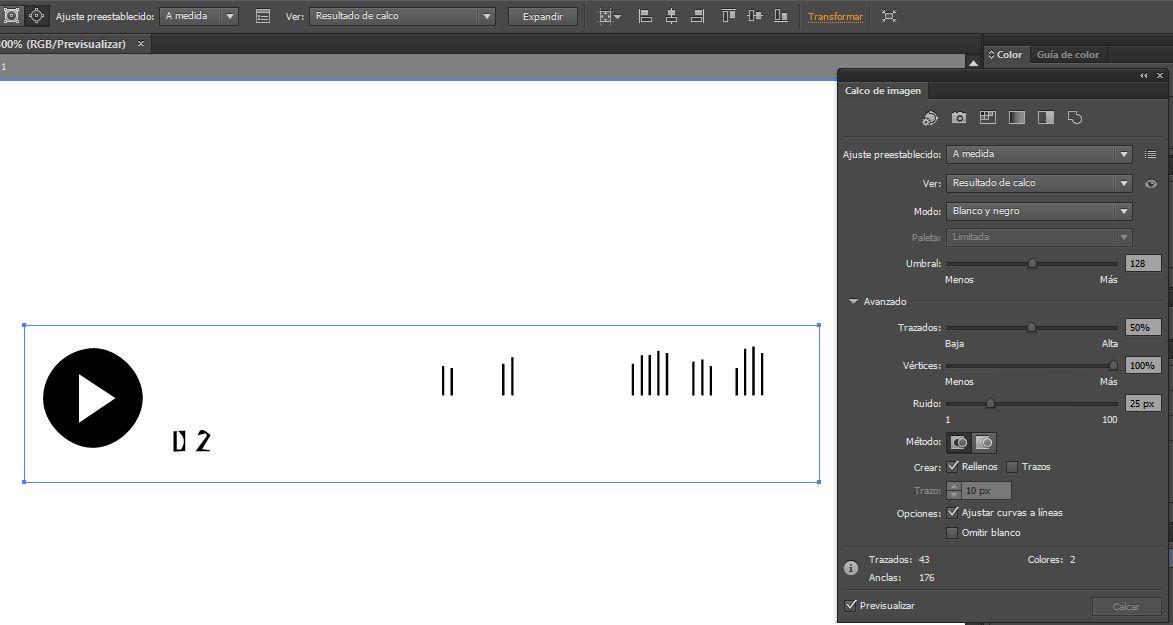
Justamente, la segunda imagen apunta a modificar los parámetros del calco, seleccionamos el botón de "Panel de calco de Imagen" y se desplegará una ventana emergente (Que se observa en la siguiente ilustración) donde podremos ir modificando los valores, como el Ruido (En este caso lo bajé a 0), los vértices (que los llevé a 100), el Umbral (a 128), etc.
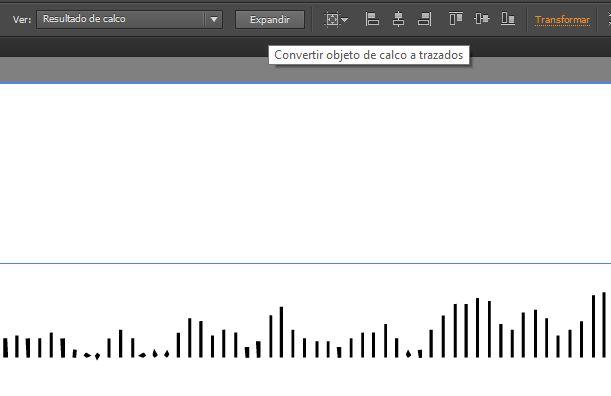
Cuando toda la imagen quedó perfectamente lista, procederemos a "Expandirla", es decir Convertir el objeto de calcos en trazados, esto permitirá que los elementos se puedan individualizar y manipular de forma independiente. Para que se realiza esto?, para corregir algún error que se pueda haber generado en todo el proceso.
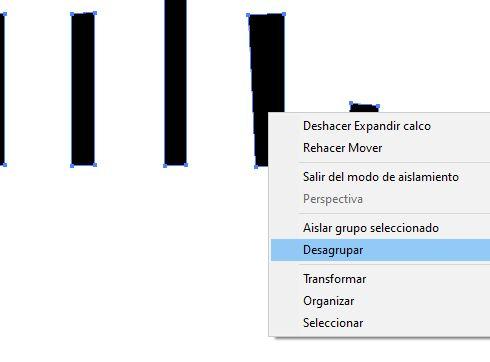
La corrección de los elementos individuales es más compleja, de hecho sería un instructivo entero para el manejo de Adobe Ilustrator, que no es la intención de este instructable. La idea es modificar los puntos que quedaran fuera de lugar, alinear y enderezar algunas líneas y corregír y alinear algo o simplemente espejar la onda para que parezca más clásica. Para ello, seleccionando la imagen, se oprime el botón derecho del Mouse y se selecciona "Desagrupar".
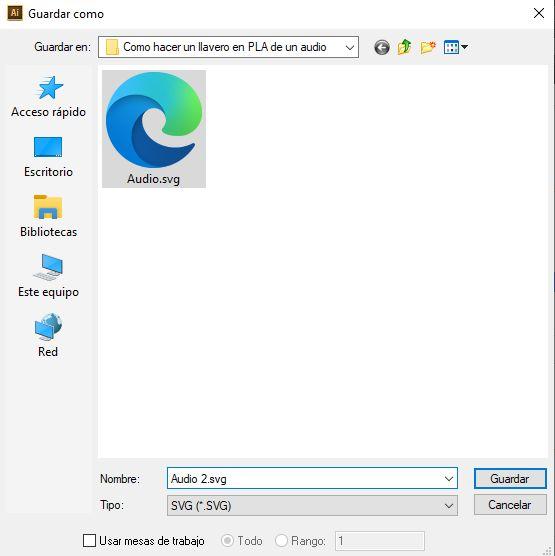
Con todas las modificaciones terminadas se procede a guardar el archivo con formato SVG.
As I mentioned earlier, I'll be using Adobe Illustrator for this point, but you can use whatever program you want that allows you to transform the images into vectors. In Illustrator, we open the image that we will vectorize, select it and in the upper part we look for "Image Tracing", depending on the complexity of the image, we will have to try the different presets to see which works best and leaves the most similar to the image that is desired. In case you can't find something that is suitable, I recommend using "[Default]" as this can be modified.
Precisely, the second image aims to modify the parameters of the tracing, we select the button "Image Tracing Panel" and a pop-up window will be displayed (which can be seen in the following illustration) where we can modify the values, such as Noise ( In this case I lowered it to 0), the vertices (which I brought to 100), the Threshold (to 128), etc.
When the entire image is perfectly ready, we will proceed to "Expand" it, that is, Convert the tracing object into paths, this will allow the elements to be individualized and manipulated independently. Why is this done? To correct any error that may have been generated throughout the process.
The correction of the individual elements is more complex, in fact it would be an entire instructional for the use of Adobe Illustrator, which is not the intention of this instructable. The idea is to modify the points that are out of place, align and straighten some lines and correct and align something or simply mirror the wave to make it look more classic. To do this, selecting the image, press the right mouse button and select "Ungroup".
With all the modifications completed, the file is saved in SVG format.
Terminando Nuestro STL (Finishing Our STL)
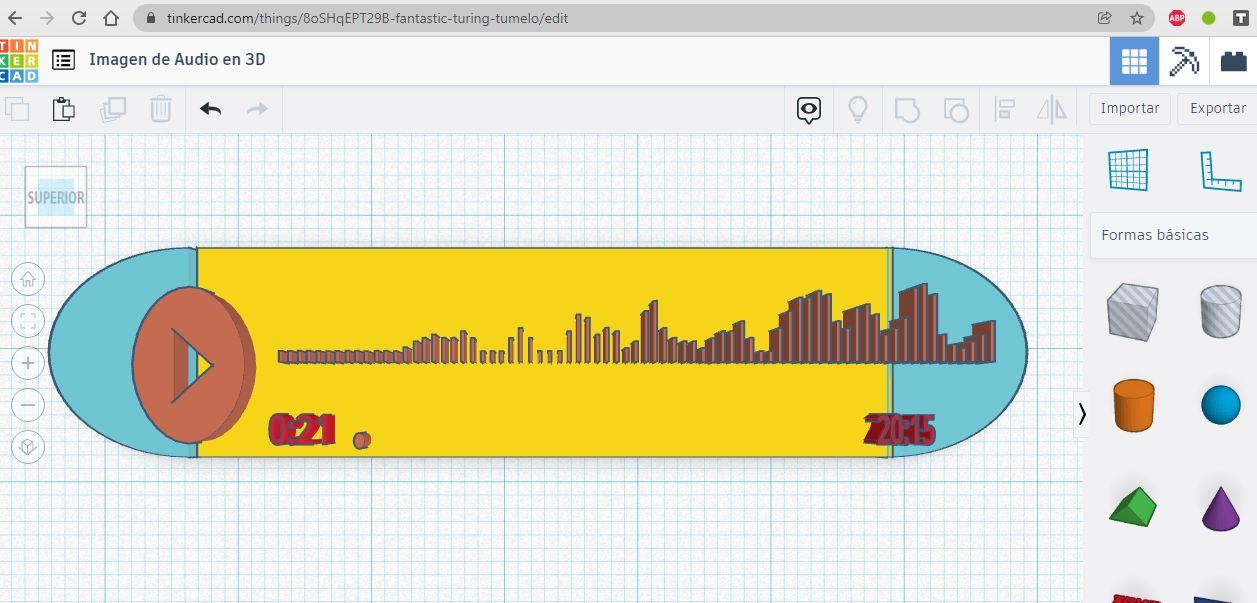
Para este punto final utilizaré Tinkercad.com, pero cualquier programa de diseño que soporte archivos SVG y STL es lo mismo. Las medidas las expresaré en Milímetros puesto que es mi sistema de medida.
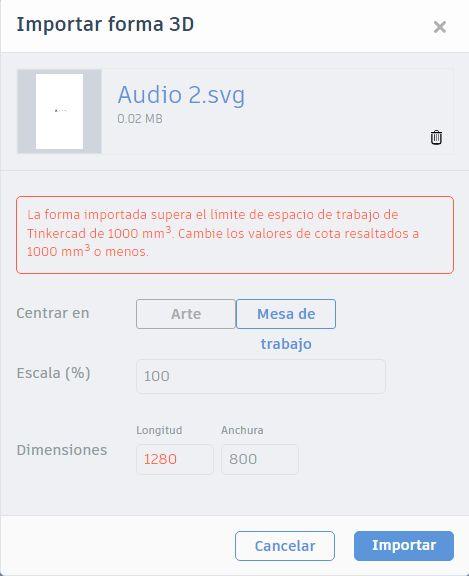
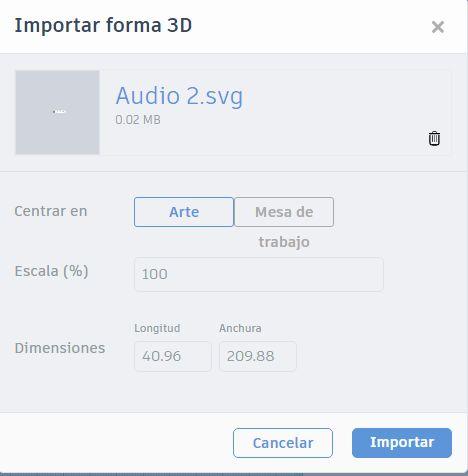
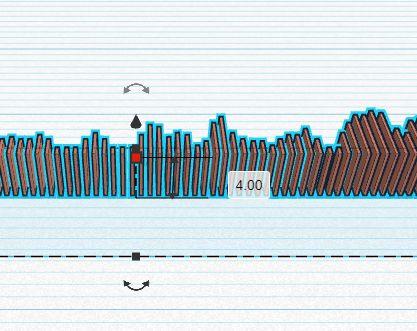
Lo primero será importar nuestro archivo SVG, pero atención, al importar, seguramente tratará de importar toda la mesa de trabajo y como se vé en la primer ilustración, la mesa de trabajo es demasiado grande, es por ello que hay que seleccionar en "Centrar En:" en el botón "ARTE", cuando el proceso termine de importar veremos en la mesa de trabajo nuestro archivo SVG con algunas medidas por defecto, por ejemplo la altura es de 10mm, pero hay que bajarlo a 4mm, si la intención es incrustarlo en alguna placa, como será .este caso.
En caso que el modelo sea muy grande, se puede reducir sus medidas, sin embargo habrá que evaluar si conviene reducirlo en Tinkercad.com o en Ilustrator. Yo recomiendo realizar las reducciones más importantes en Ilustrator y luego lo más fino terminarlo en Tinkercad.com, esto es debido a que una reducción puede conllevar a entorpecer las líneas del modelo, pero en Ilustrator la reducción es mucho más controlada.
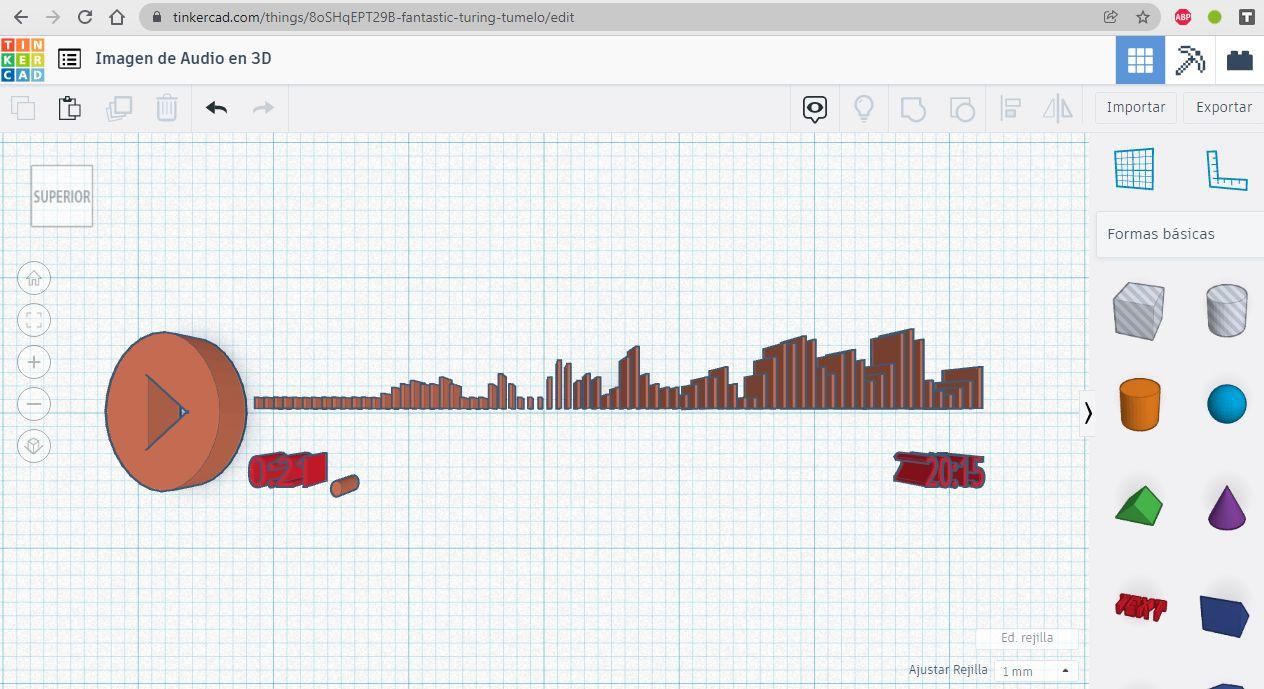
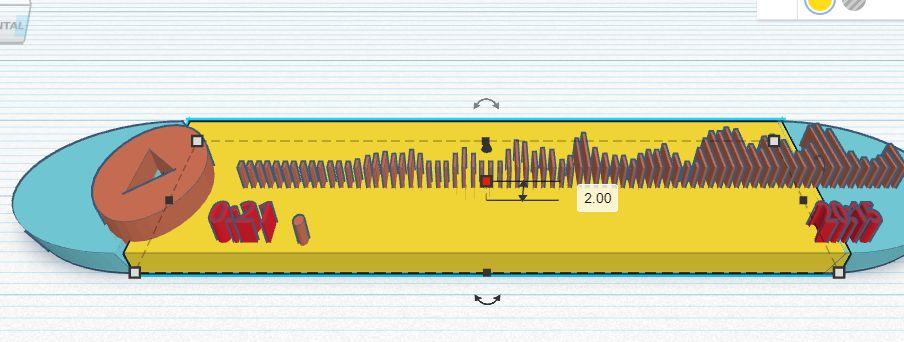
El diseño para esta placa será un rectángulo con las puntas redondeadas, algo sencillo y limpio. Tendrá una altura de 2mm,para que el diseño importado seca cubierto hasta la mitad formando una superficie de agarre fuerte. Para ello tomamos la figura de forma básica: Cubo y cambiamos las dimensiones para que encaje con nuestro diseño, menos las puntas. que para ello seleccionaremos figura de forma básica: Techo Curvo.
Ajustamos todas las piezas para que encajen, colocando la misma altura y ancho, el largo dependerá de nuestro archivo importado. Vamos haciendo zoom para ver que las piezas tengan espacios contenidos y nada quede suelto. mirando por cada lado asegurándonos que no hay puntos sueltos.
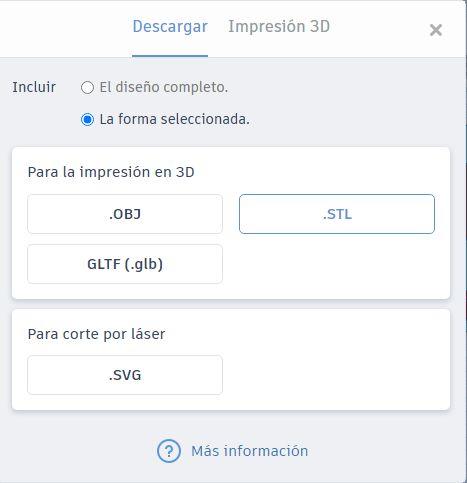
Finalmente podremos exportar el archivo con formato STL y continuar la última parte del proceso con nuestro programa para imprimir.
For this final point I'll be using Tinkercad.com, but any design program that supports SVG and STL files is the same. I will express the measurements in millimeters since it is my measurement system.
The first thing will be to import our SVG file, but be careful, when importing, it will surely try to import the entire artboard and as you can see in the first illustration, the artboard is too large, that is why you have to select "Center In: "in the" ART "button, when the importing process finishes we will see our SVG file on the work table with some default measurements, for example the height is 10mm, but it must be lowered to 4mm, if the intention is embed it in a plate, as it will be in this case.
If the model is very large, its measurements can be reduced, however, it will be necessary to evaluate whether it should be reduced in Tinkercad.com or in Illustrator. I recommend making the most important reductions in Illustrator and then finishing it finest in Tinkercad.com, this is because a reduction can lead to dulling the lines of the model, but in Illustrator the reduction is much more controlled.
The design for this plate will be a rectangle with rounded tips, something simple and clean. It will be 2mm high, so that the imported design dries covered halfway to form a strong grip surface. To do this, we take the figure in a basic way: Cube and change the dimensions to fit our design, except for the tips. that for this we will select a basic figure: Curved Roof.
We adjust all the pieces to fit, placing the same height and width, the length will depend on our imported file. We are zooming in to see that the pieces have contained spaces and nothing is loose. looking from each side making sure there are no loose points.
Finally we can export the file with STL format and continue the last part of the process with our printing program.