Identifying Objects With Neural Networks and AI | UnitV2 M5Stack
by mcmchris in Circuits > Electronics
1547 Views, 6 Favorites, 0 Comments
Identifying Objects With Neural Networks and AI | UnitV2 M5Stack
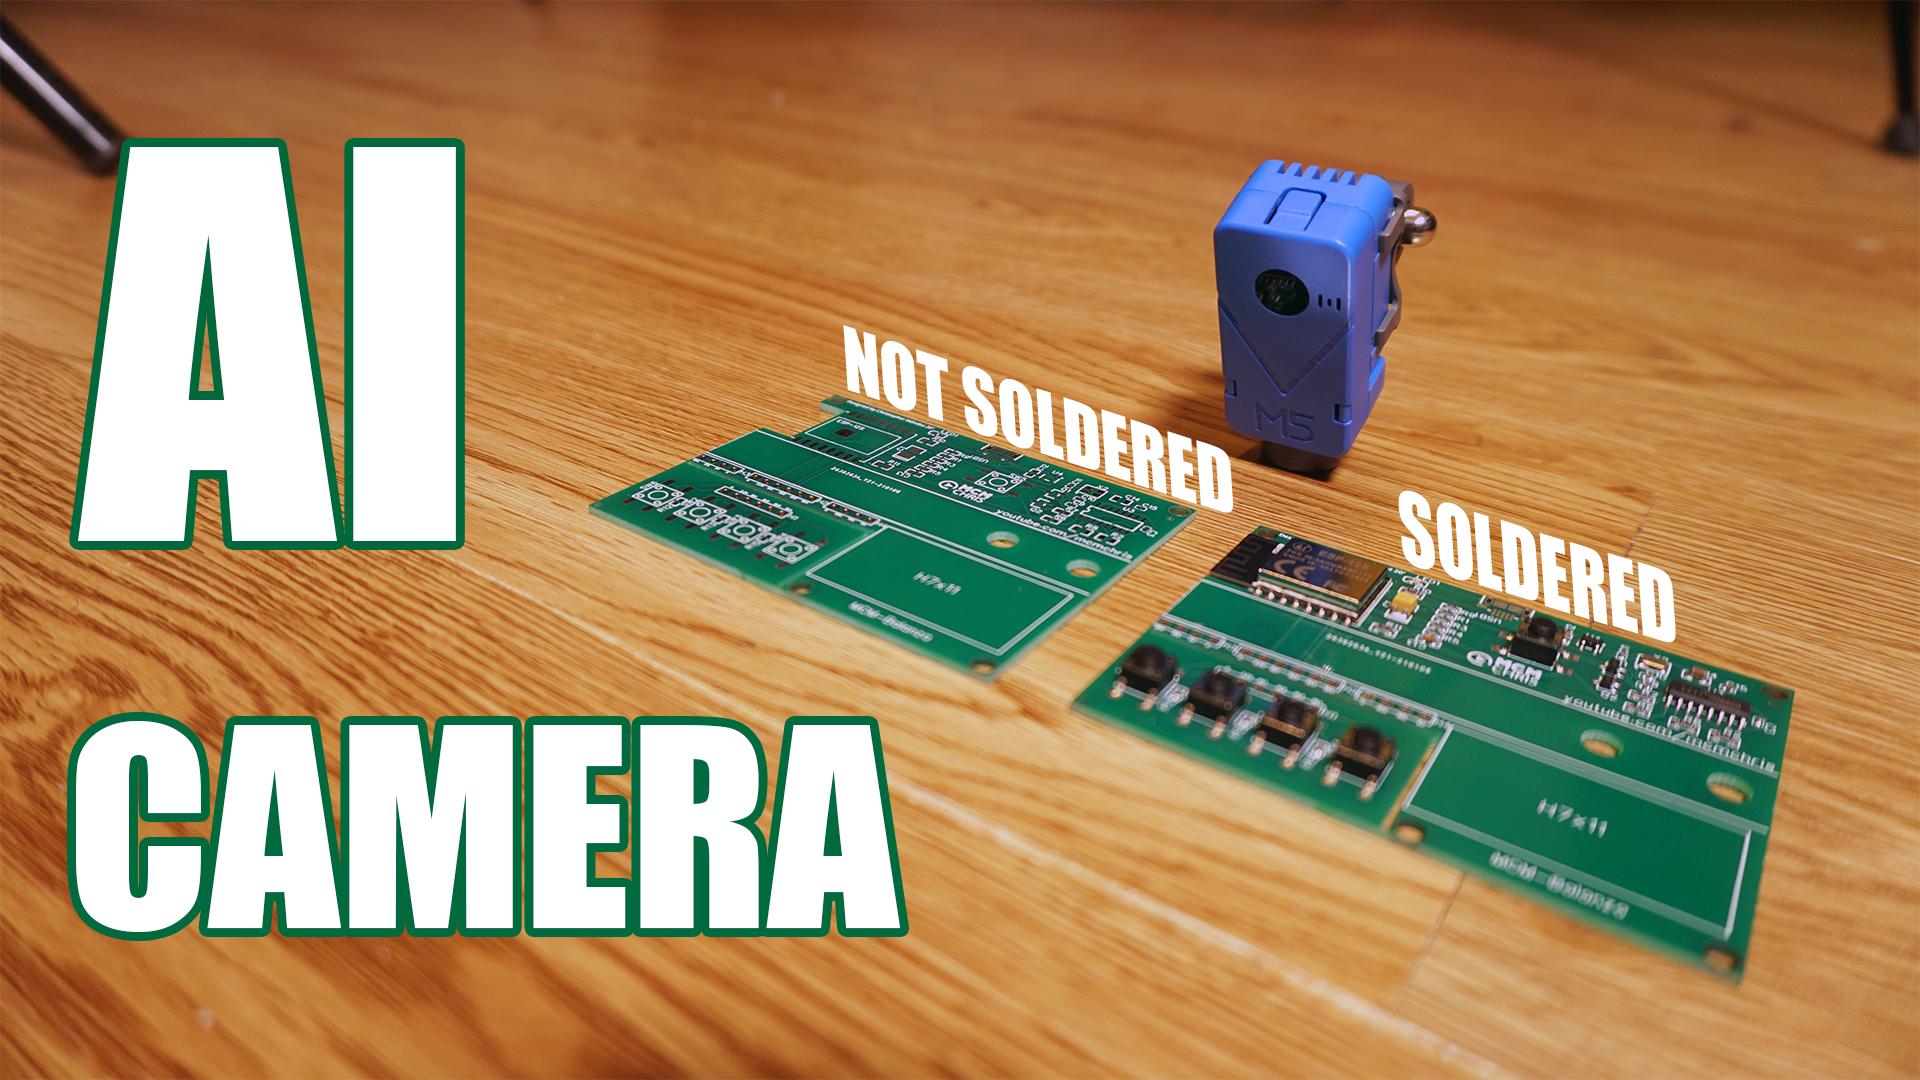
Hello to everyone, here I show a interesting project I made, it consist on a soldered and not soldered PCB identifier based on the UnitV2 AI camera from M5Stack, I used my JLCPCB boards to test it and works, this device is created for machine learning, object detection and tracking applications, so I invite you to test it and make an awesome project with it.
Here I leave you a tutorial with all the information so you can make your own version. If you are a visual learner I know that a video worth more than 1000 words, so here is a Tutorial video. (I am a Spanish speaker, so please consider turning on English subtitles):
Skills Required
.png)
.png)
.png)
For this implementation you will need to know how to:
- PCB designing (optional).
- Coding in Python (optional).
- Basic computer skills.
By the way I will teach you what you need to deploy your own classifier model, not just for PCB's.
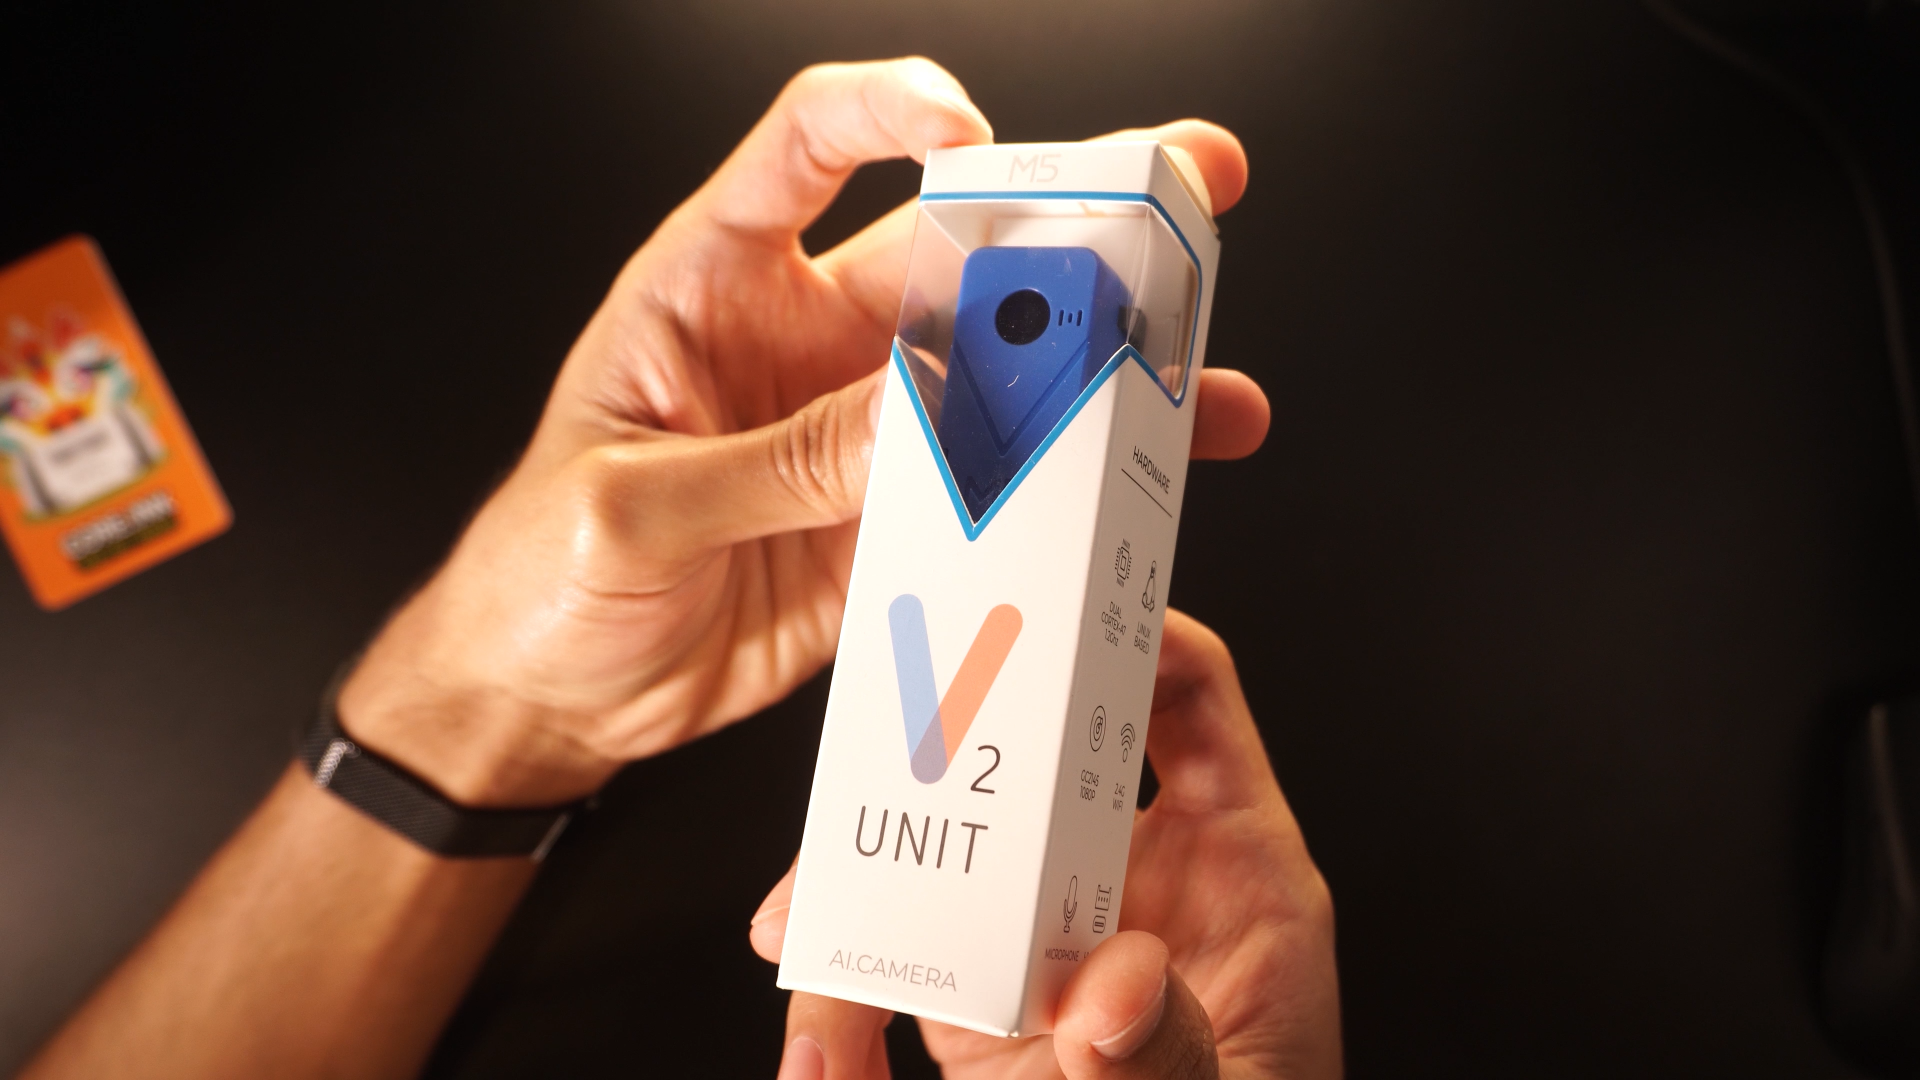
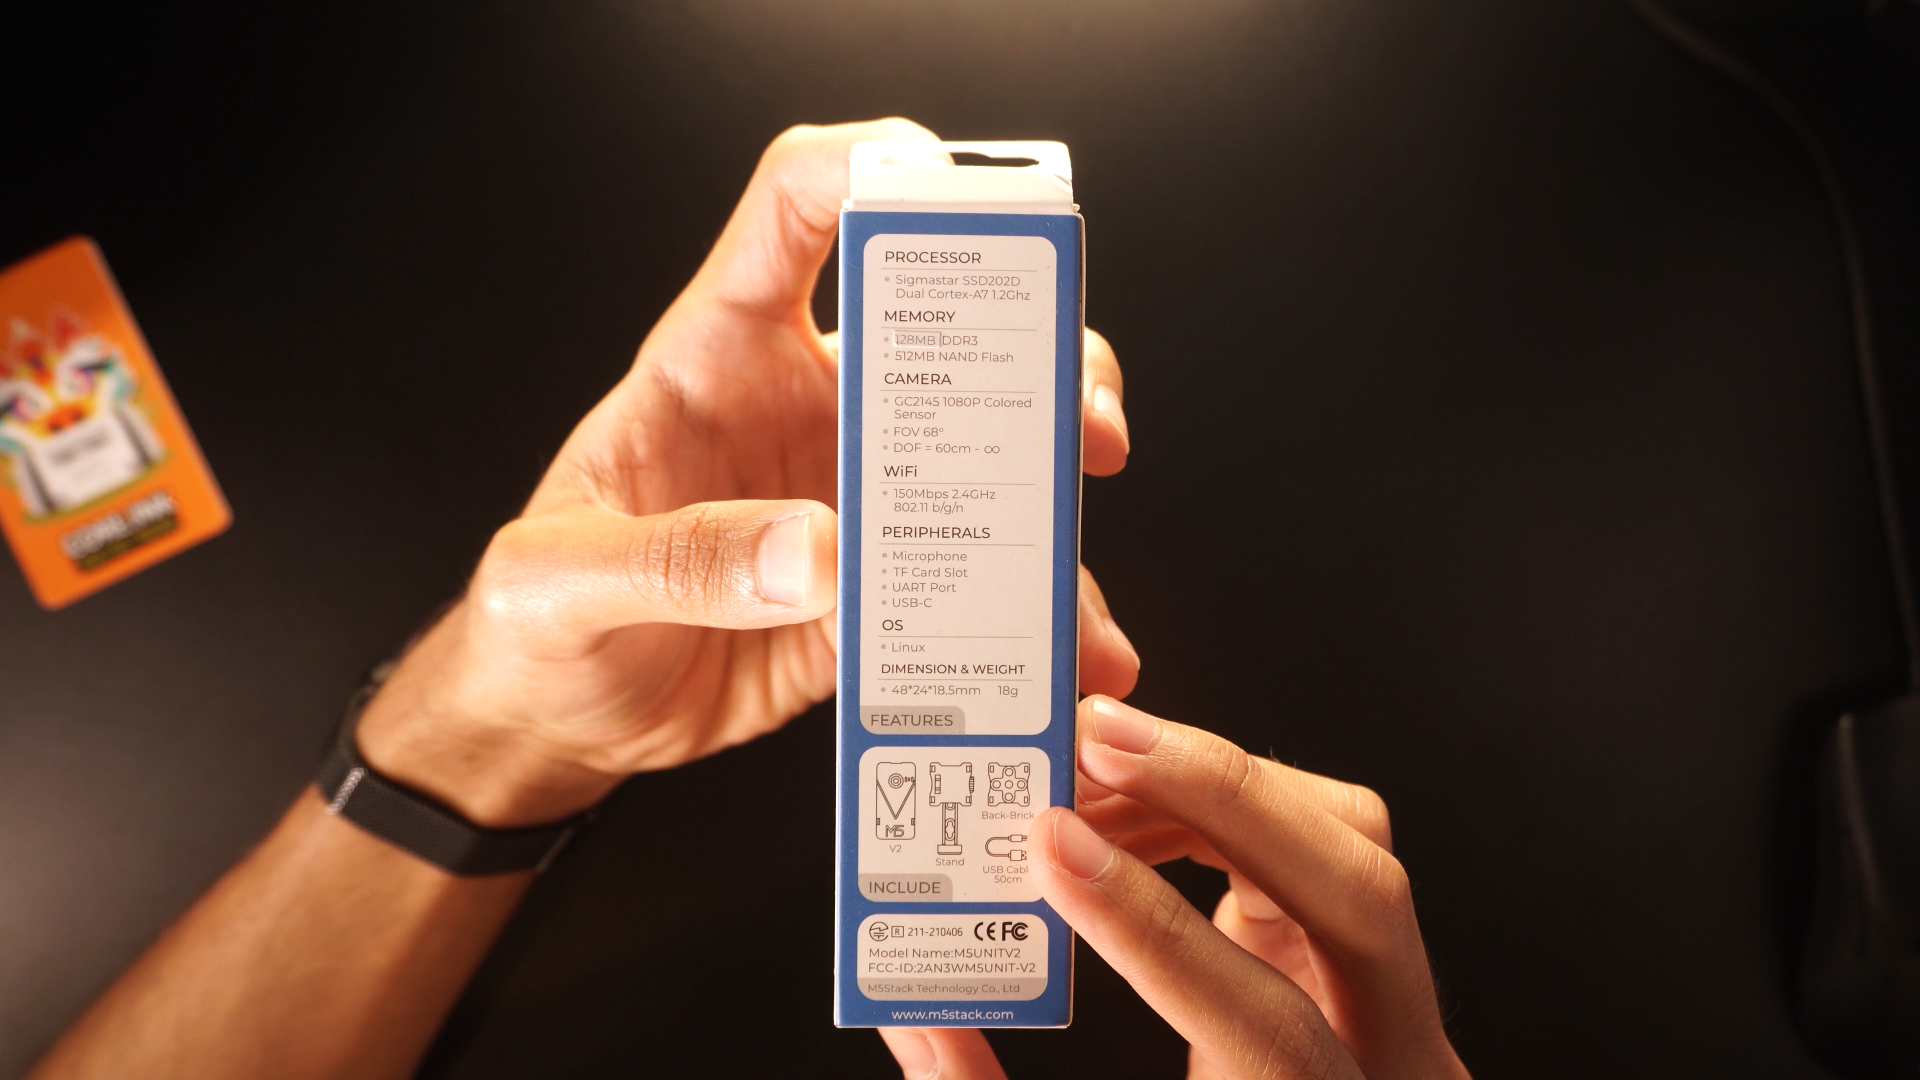
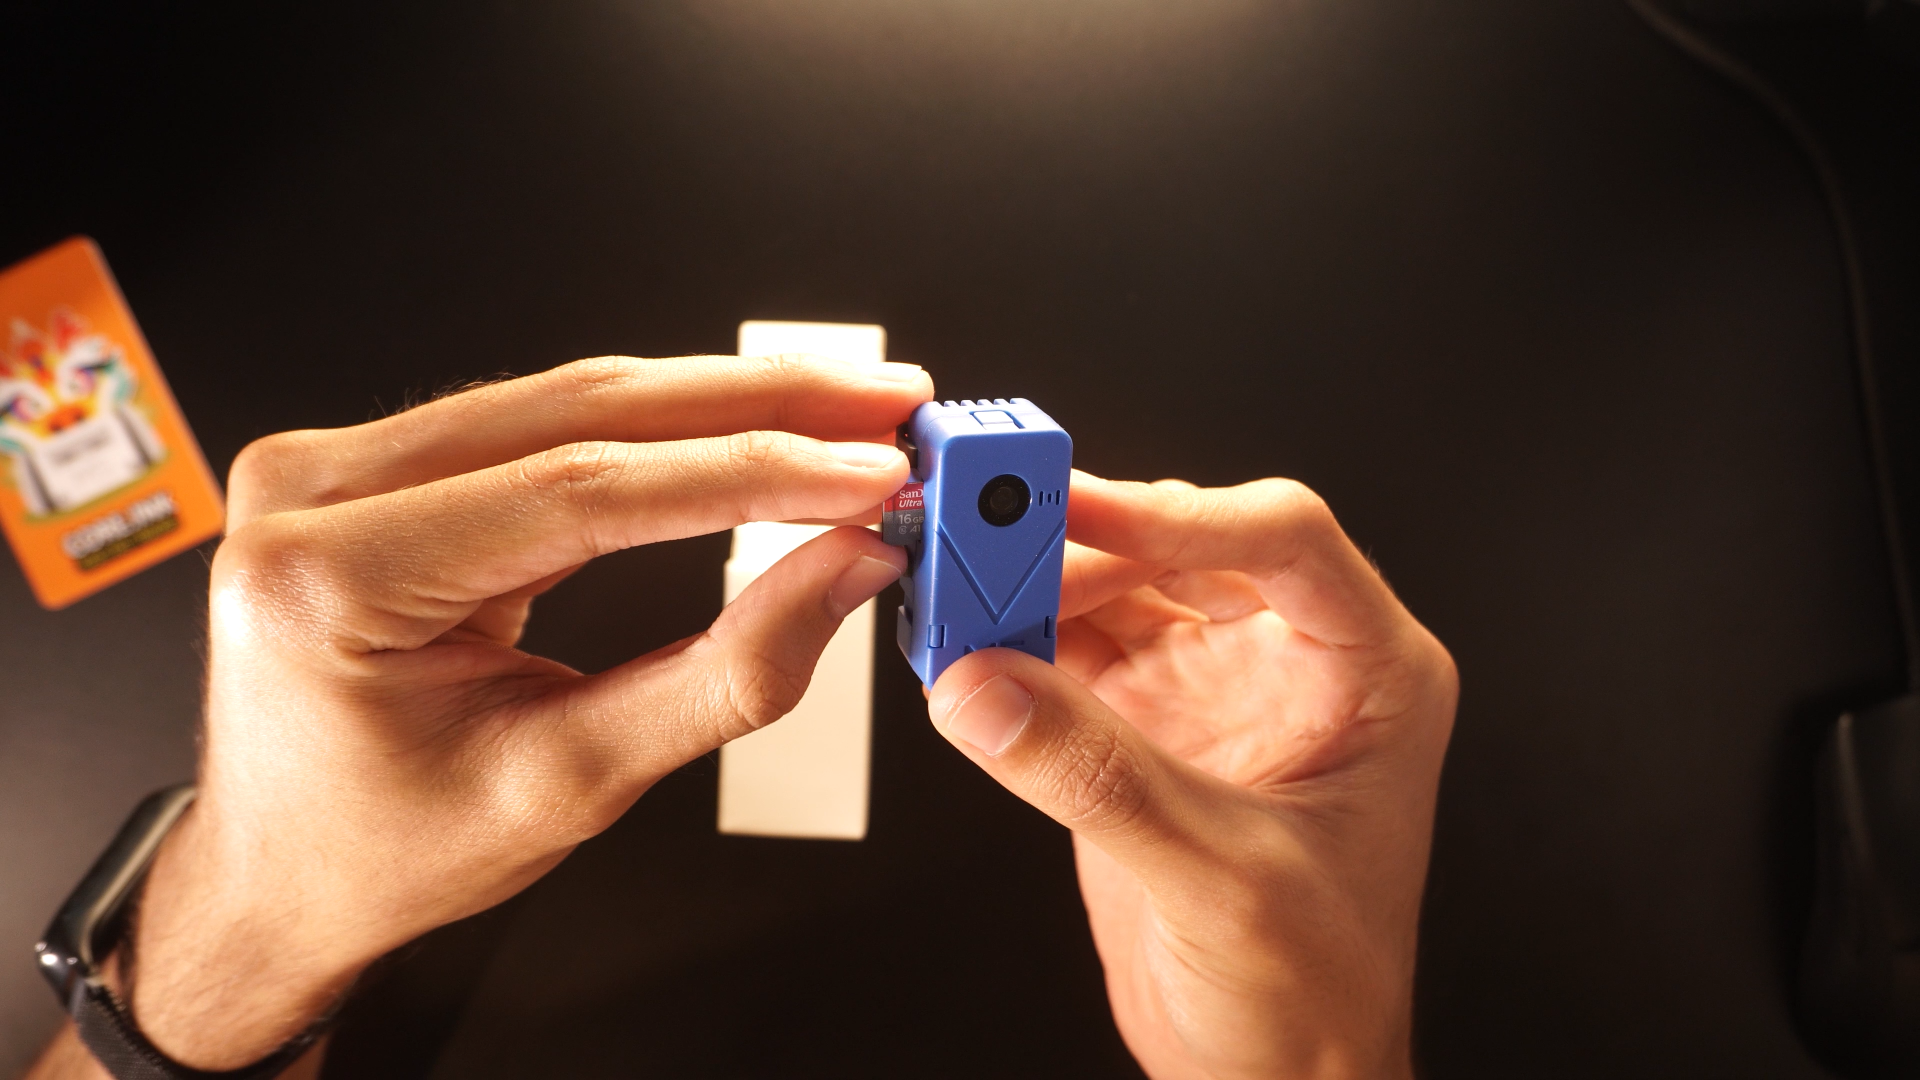
Components and Part Lists
.png)
.png)
.png)
.png)
For this project we have a lot of the hard work done by using this powerful and tiny camera, so because of that, for this project we will need:
Features of the camera:
- -Reading QR codes
- -Object recognition
- -Color tracking
- -Object tracking
- -Face identification
- -Learning with neural networks
- -And many more.
If you want more information you can visit the documentation.
For the implementation of a good project we need a reliable assembly for the circuit that makes it up, and there is no better way to do it than with a good PCB.
I suggest JLCPCB:
$2 for 1-4 Layer PCBs⚡, Get SMT Coupons🎫
If you want to implement this model recognizing other things, well you can easily adapt it.
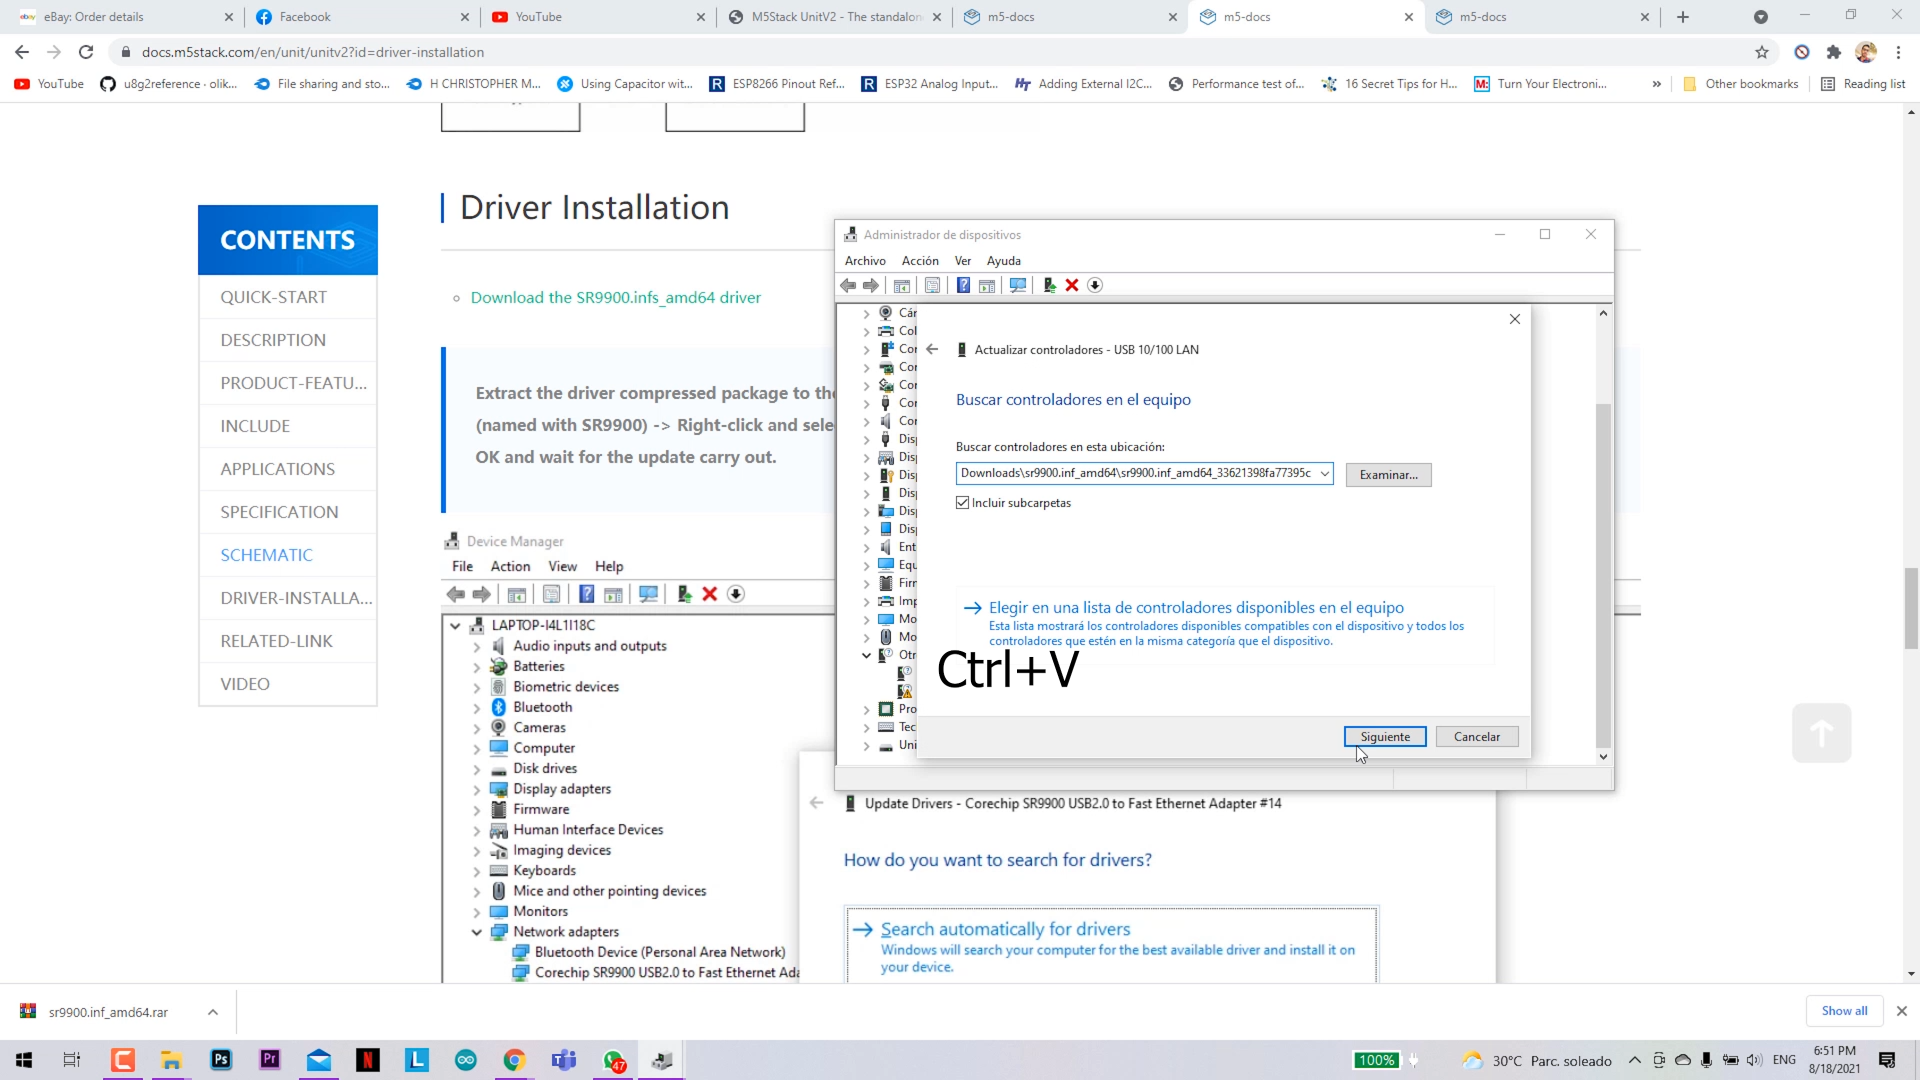
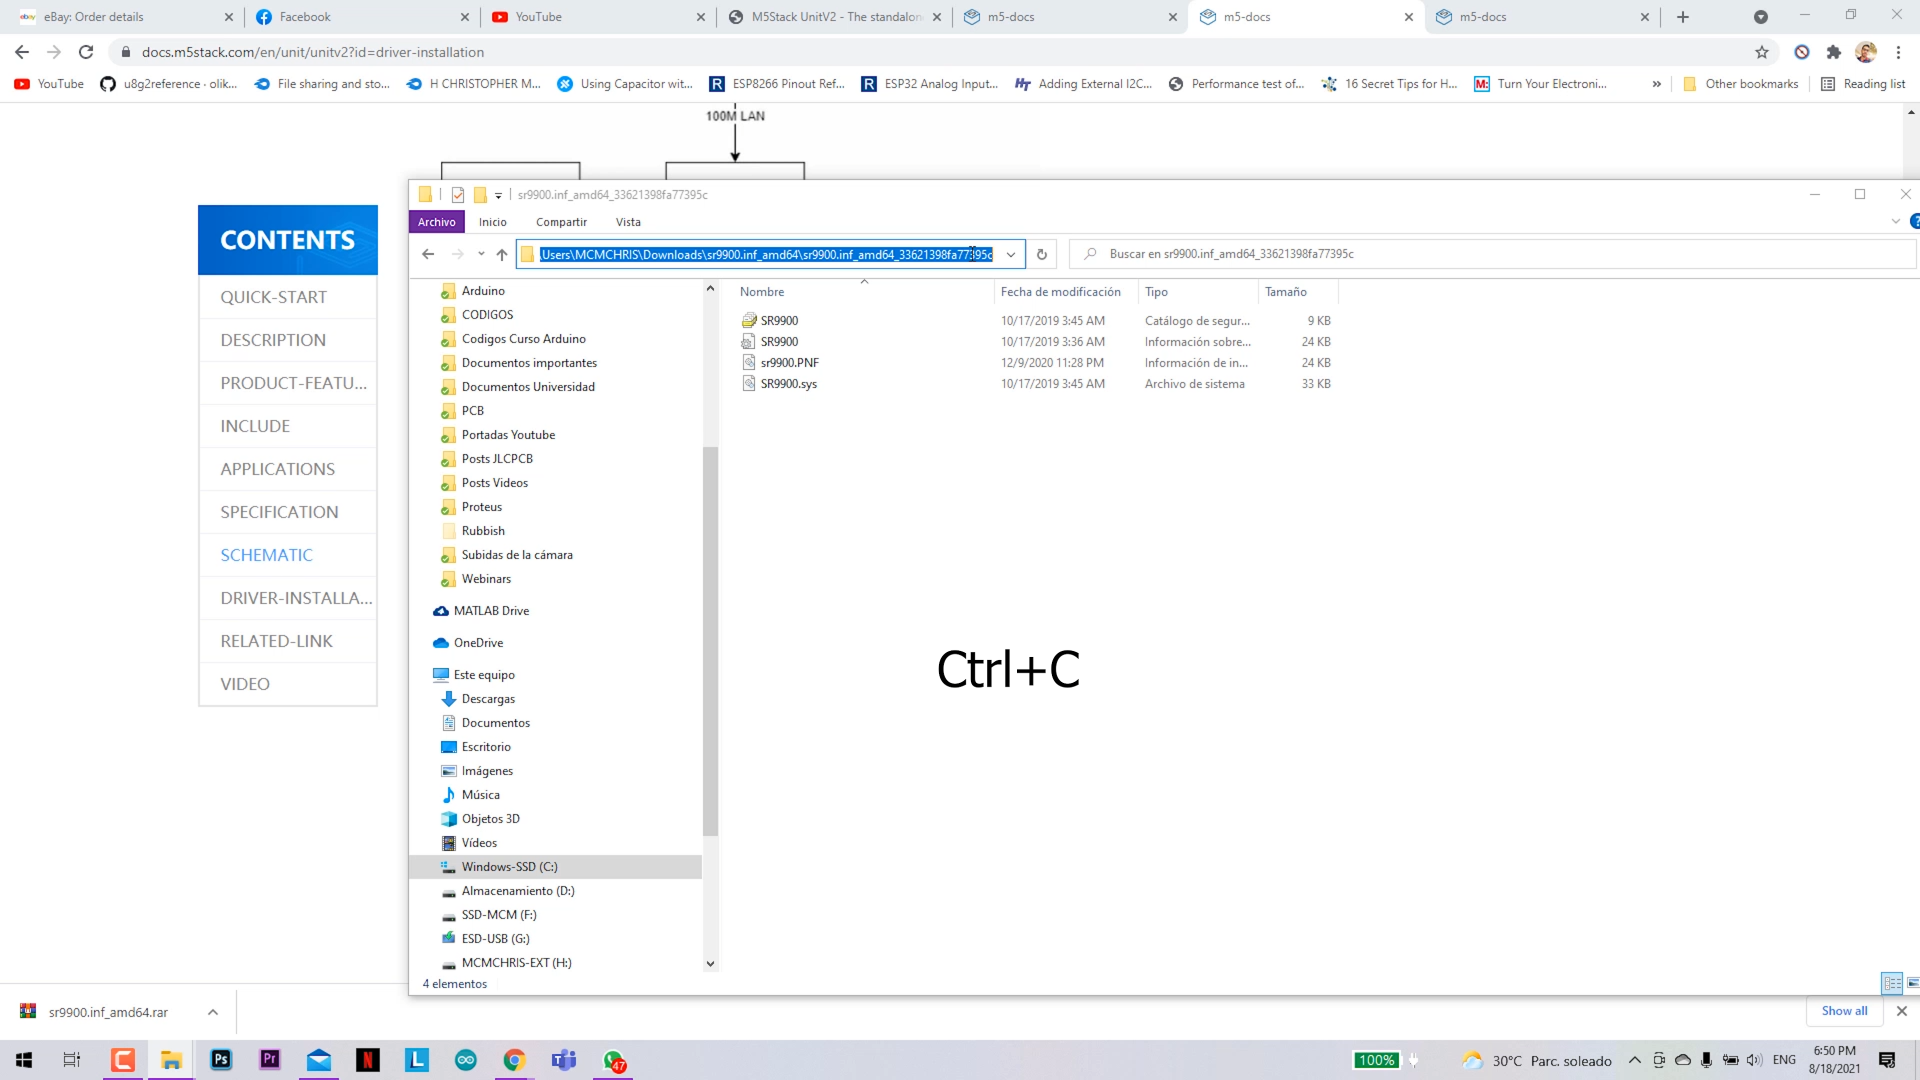
Camera Setup and Driver Installation
.png)
.png)
.png)
First you need to:
- Download the driver
- Copy the directory location of the files in the browser.
- Go to Device administrator
- Find the unrecognized device.
- Click on update driver and select local drivers.
- Paste the address of the driver directory.
- Click next.
Testing the Camera Plug and Play Ready Features
.png)
.png)
.png)
.png)
.png)
.png)
.png)
.png)
.png)
.png)
.png)
.png)
.png)
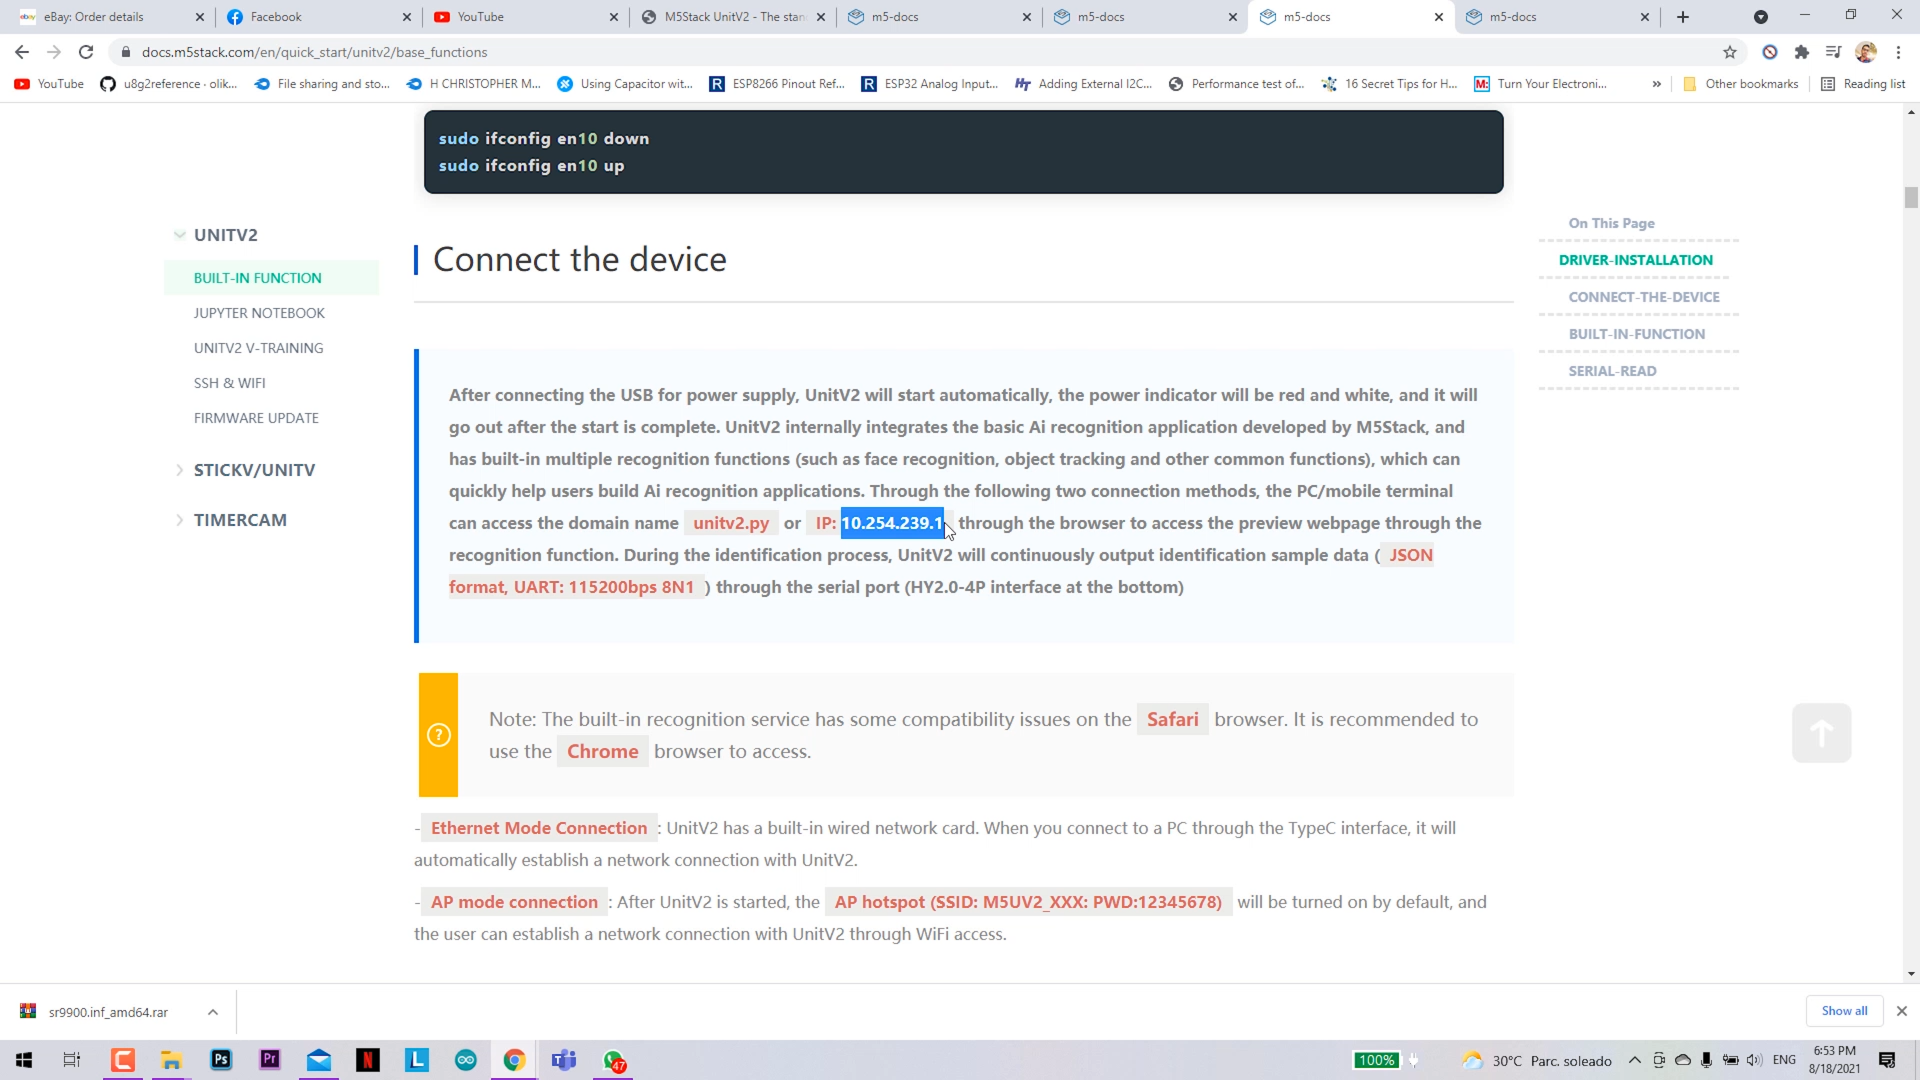
Once we connect the camera to our PC and install it drivers, it should be ready for work.
Browse for: unitv2.py or IP: 10.254.239.1
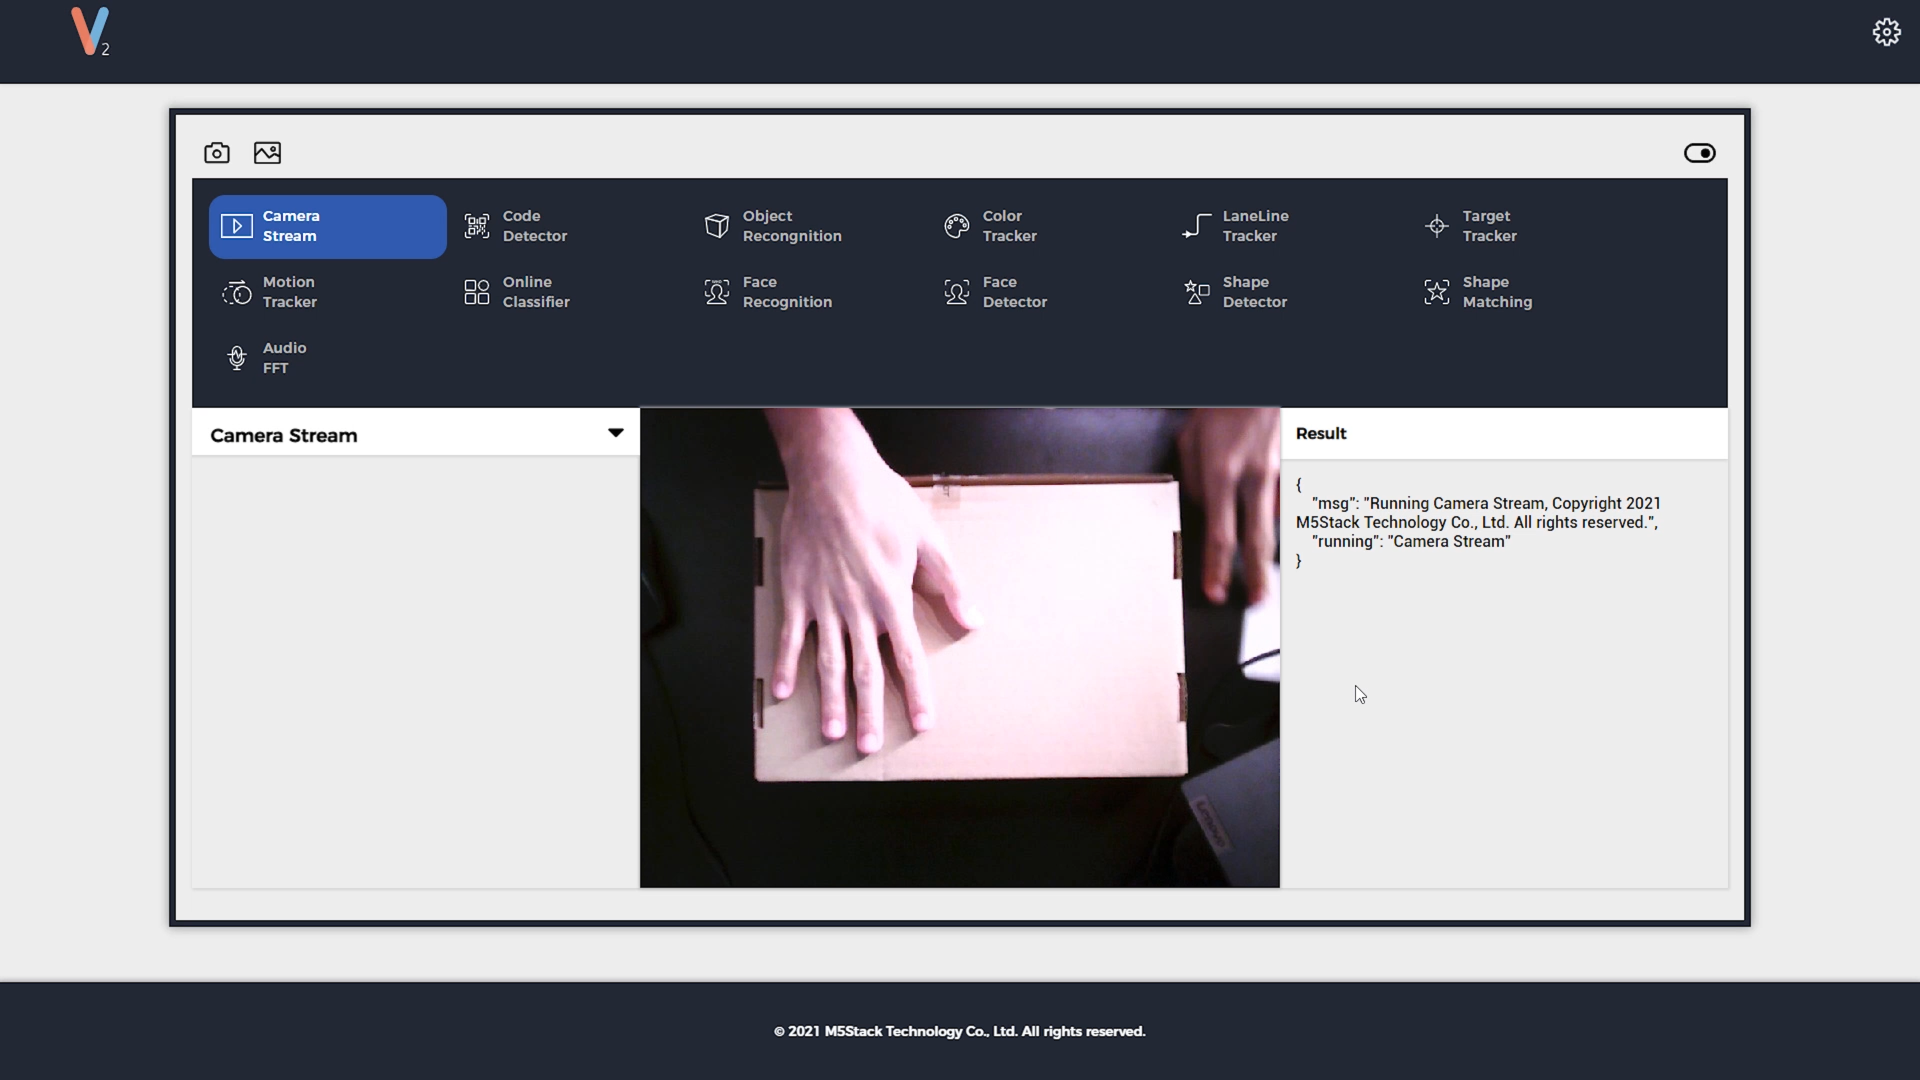
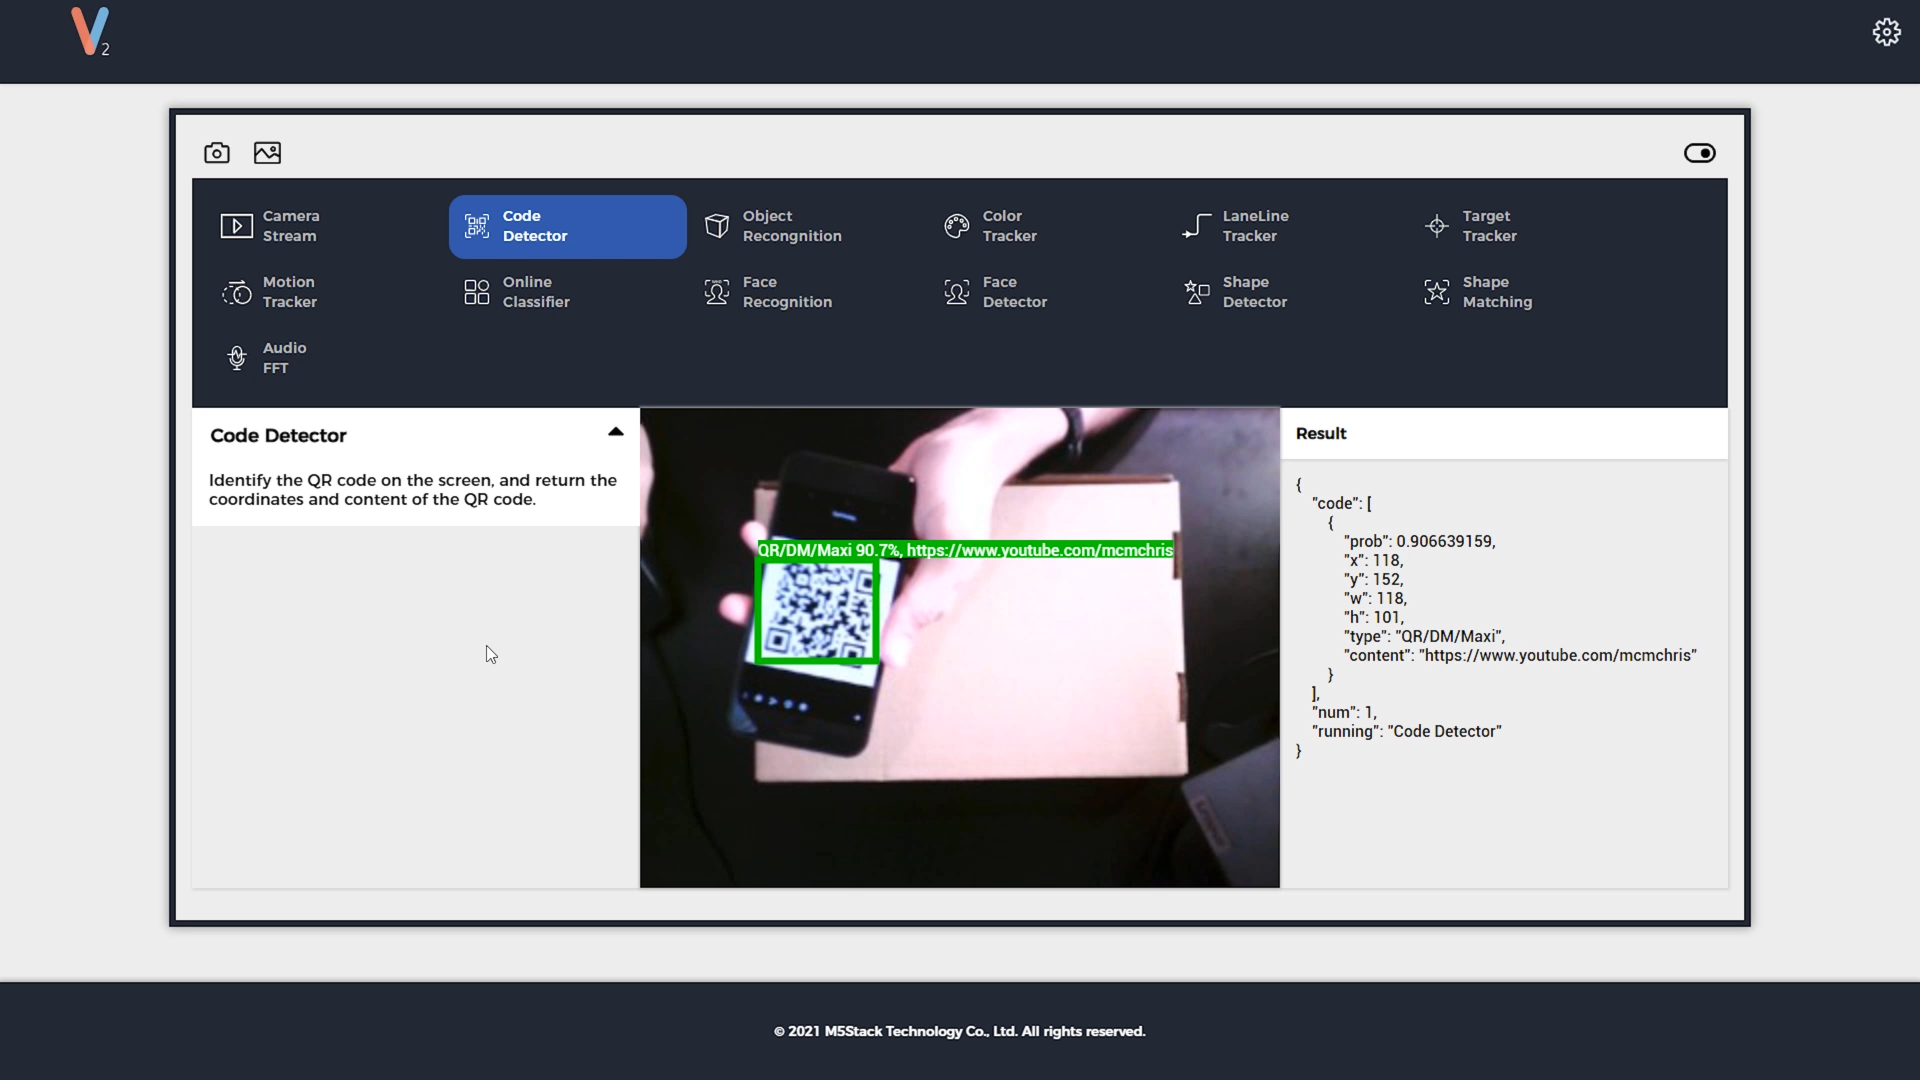
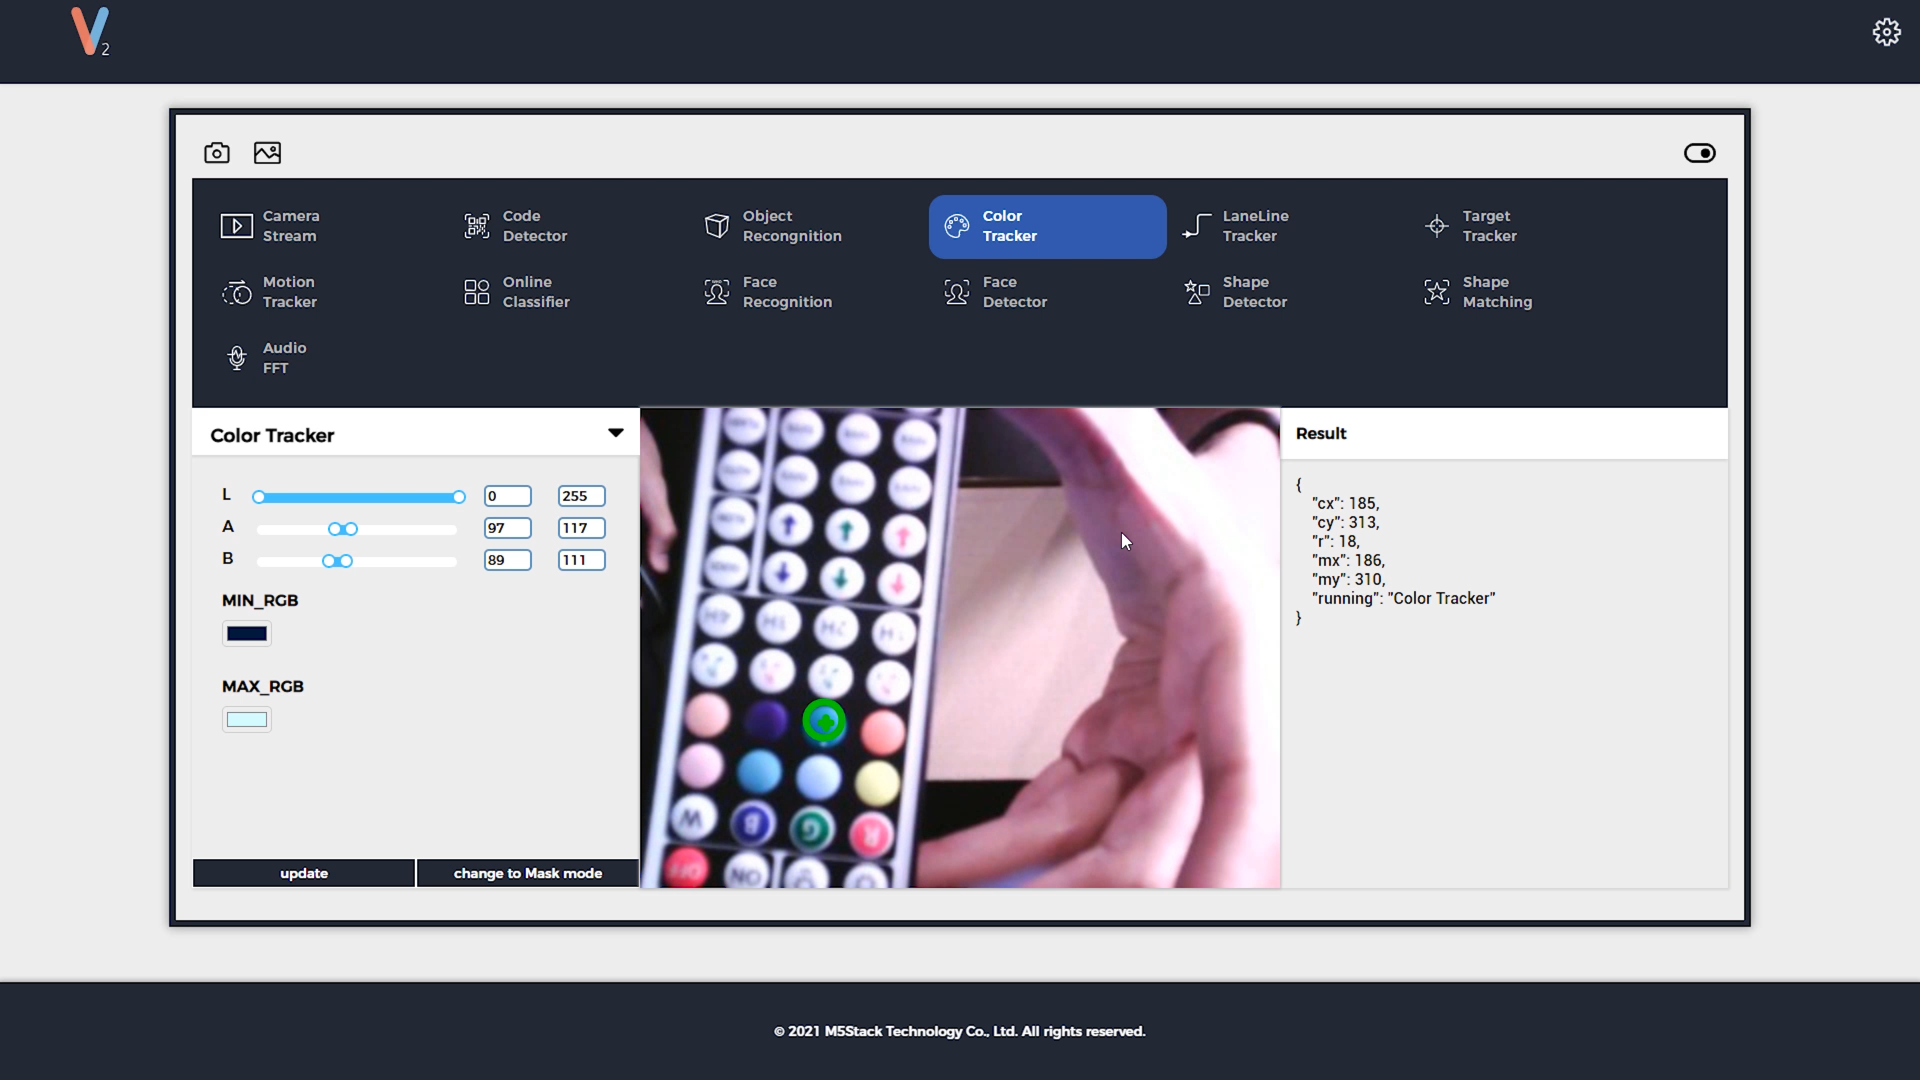
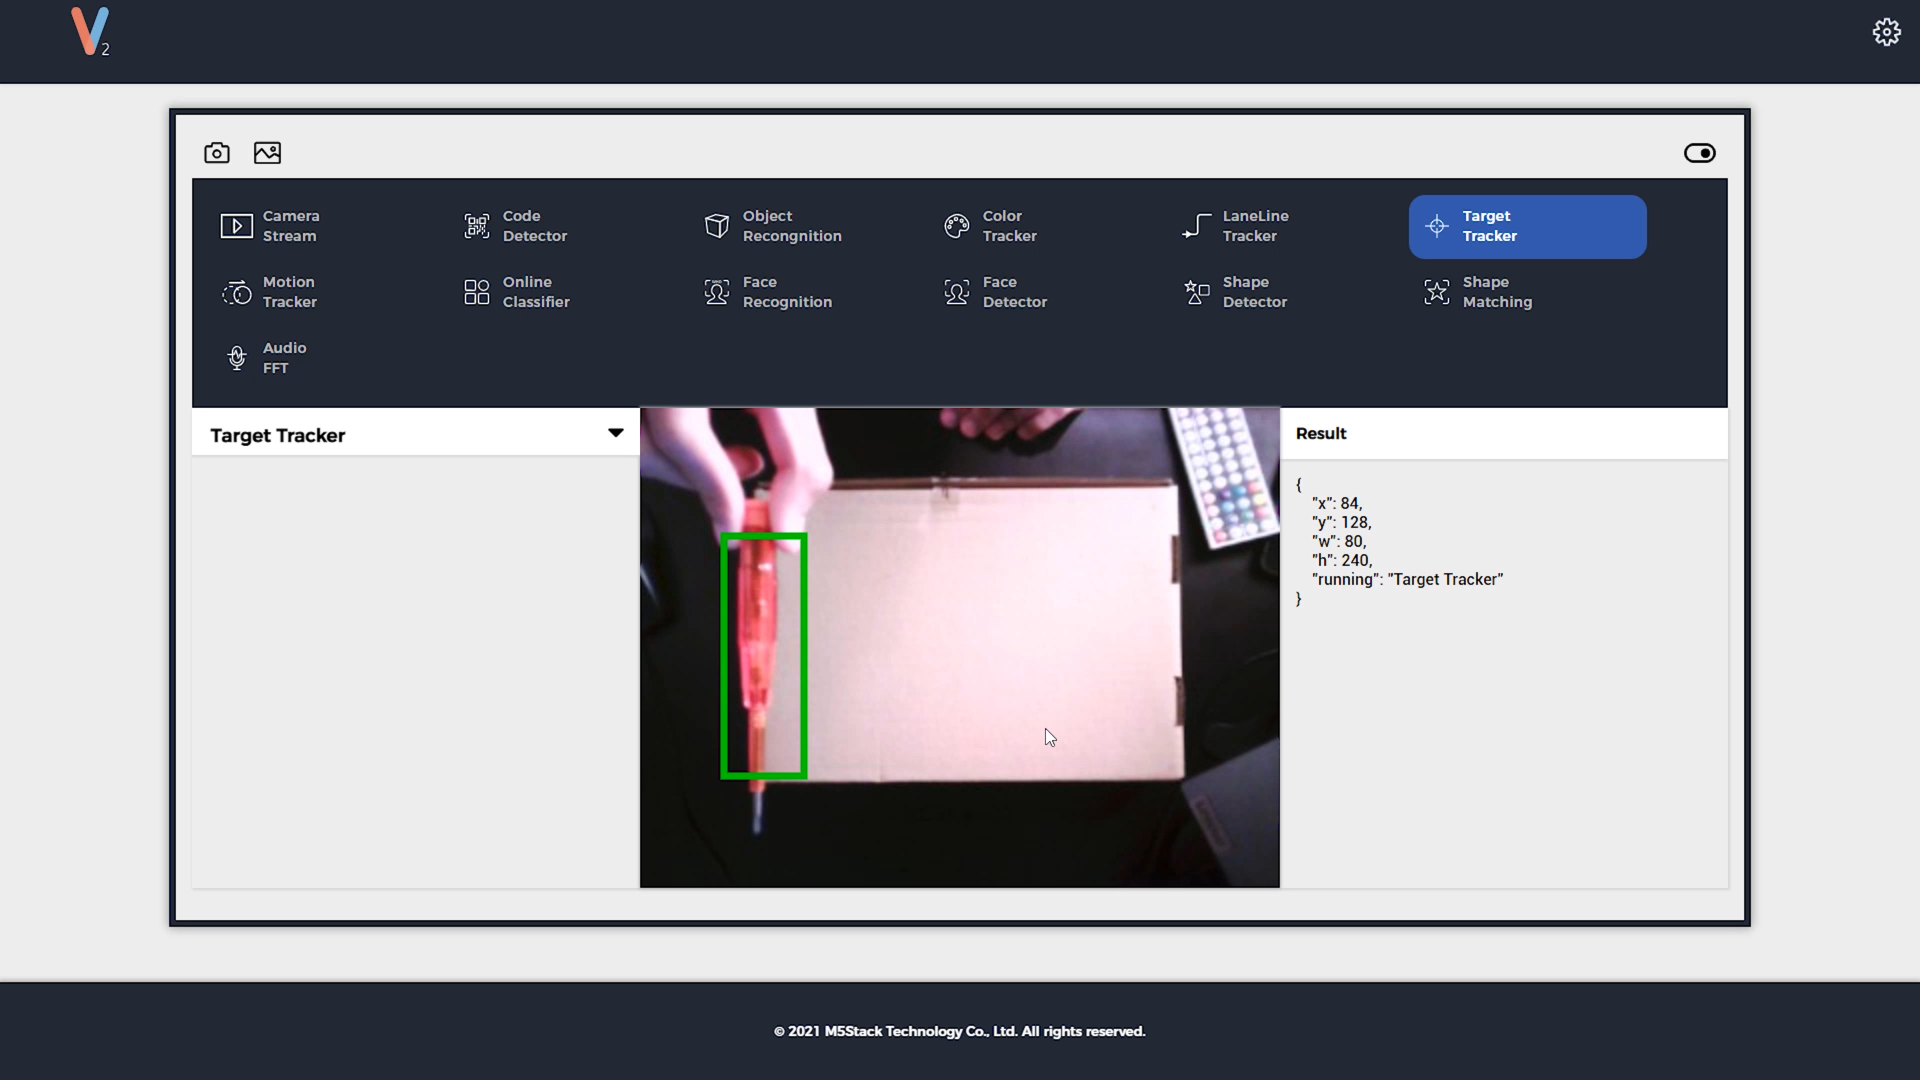
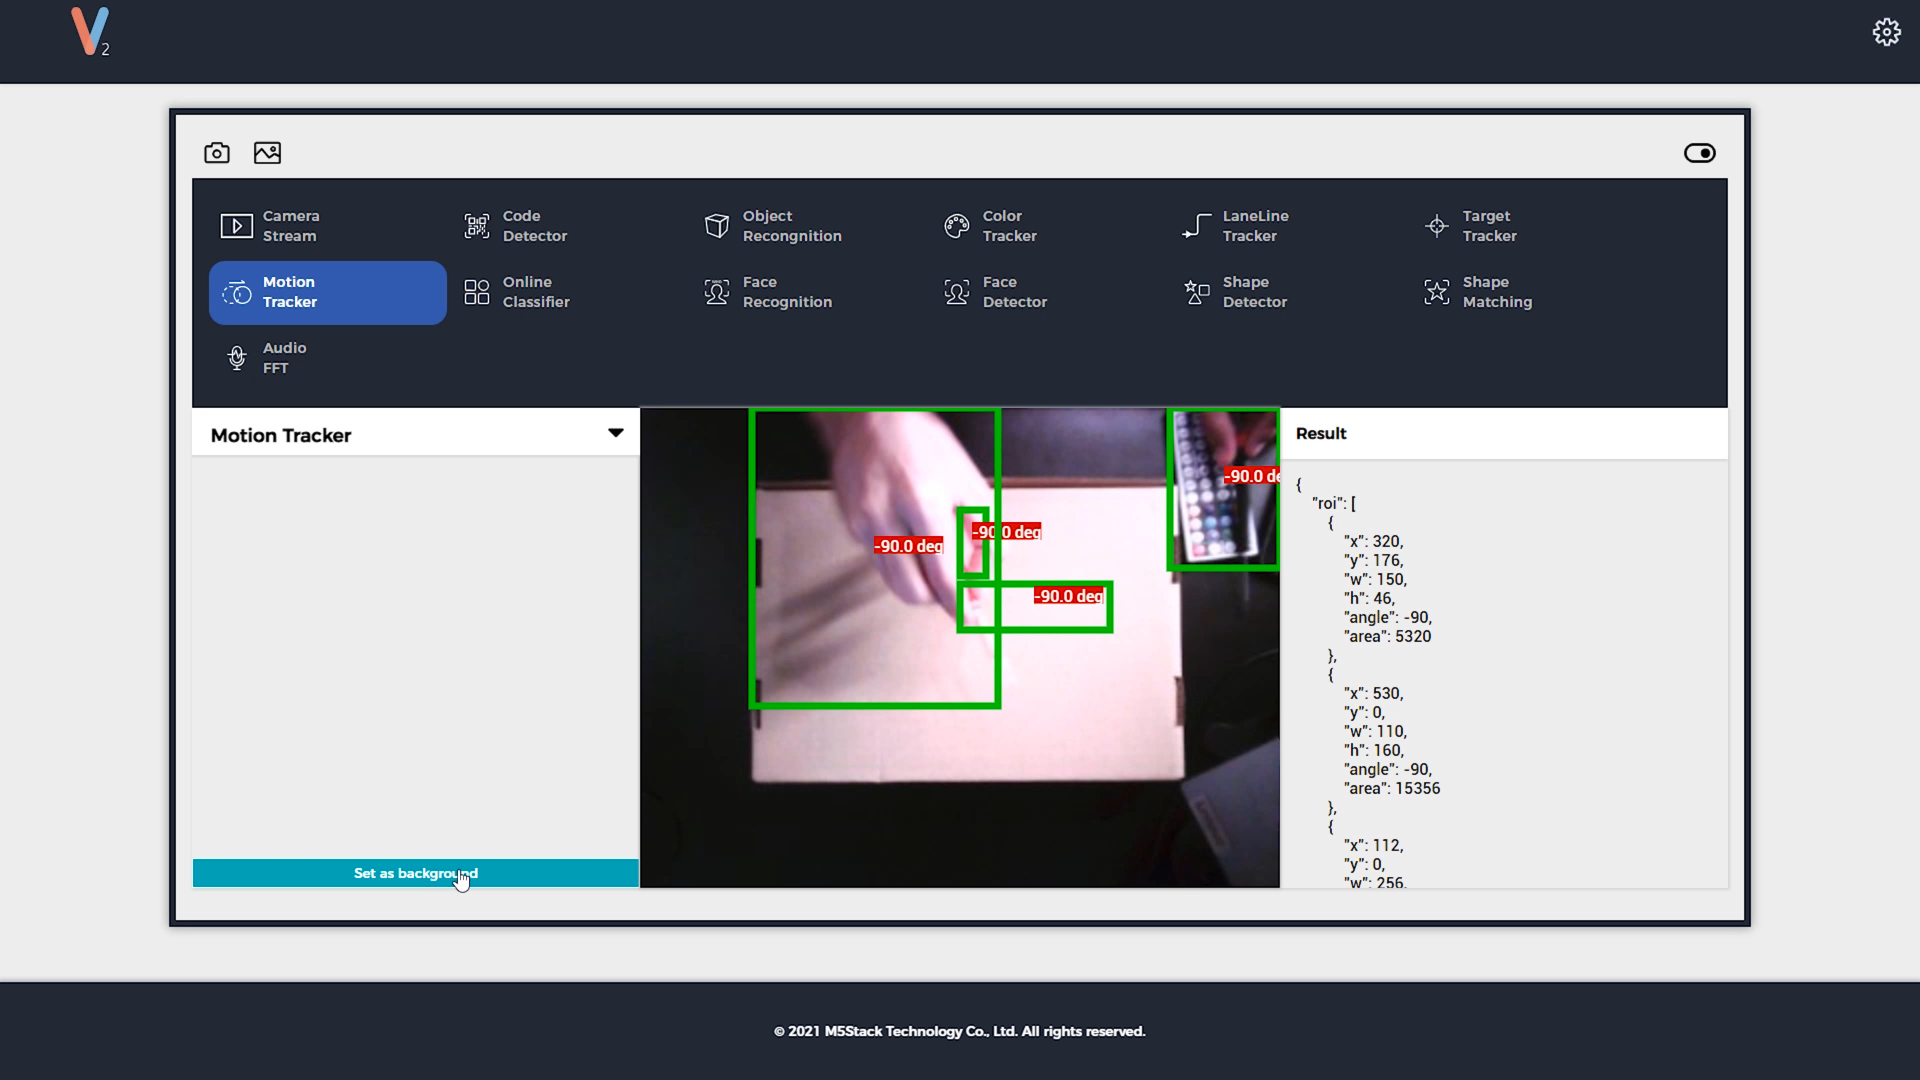
Then you should see a web based app with the different options ready to be tested:
- Video streaming, a 480p video live view.
- QR code reading and recognition, deploy the content of codes.
- Color tracking, select a color from the scene and it will follow it.
- Target tracking, select an object of the scene and it will follow it.
- Movement detection, it will react to every scene change.
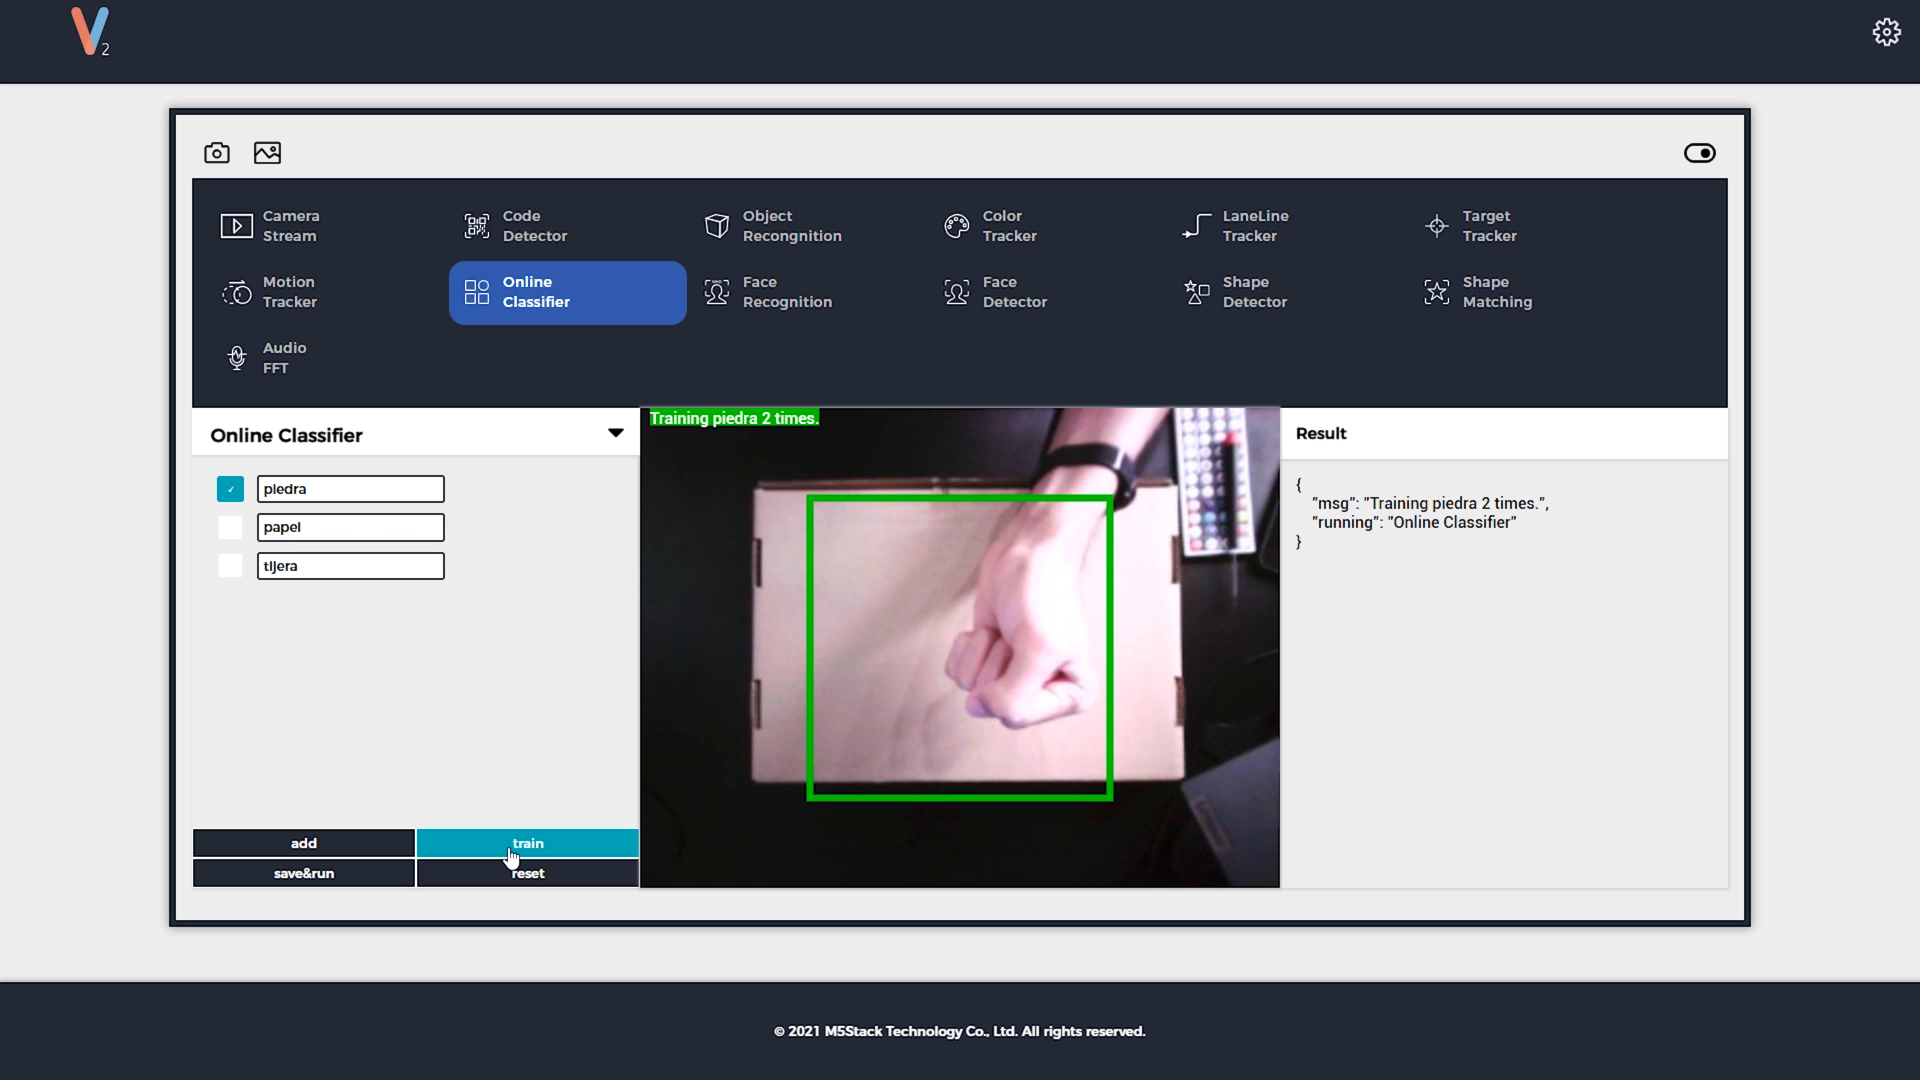
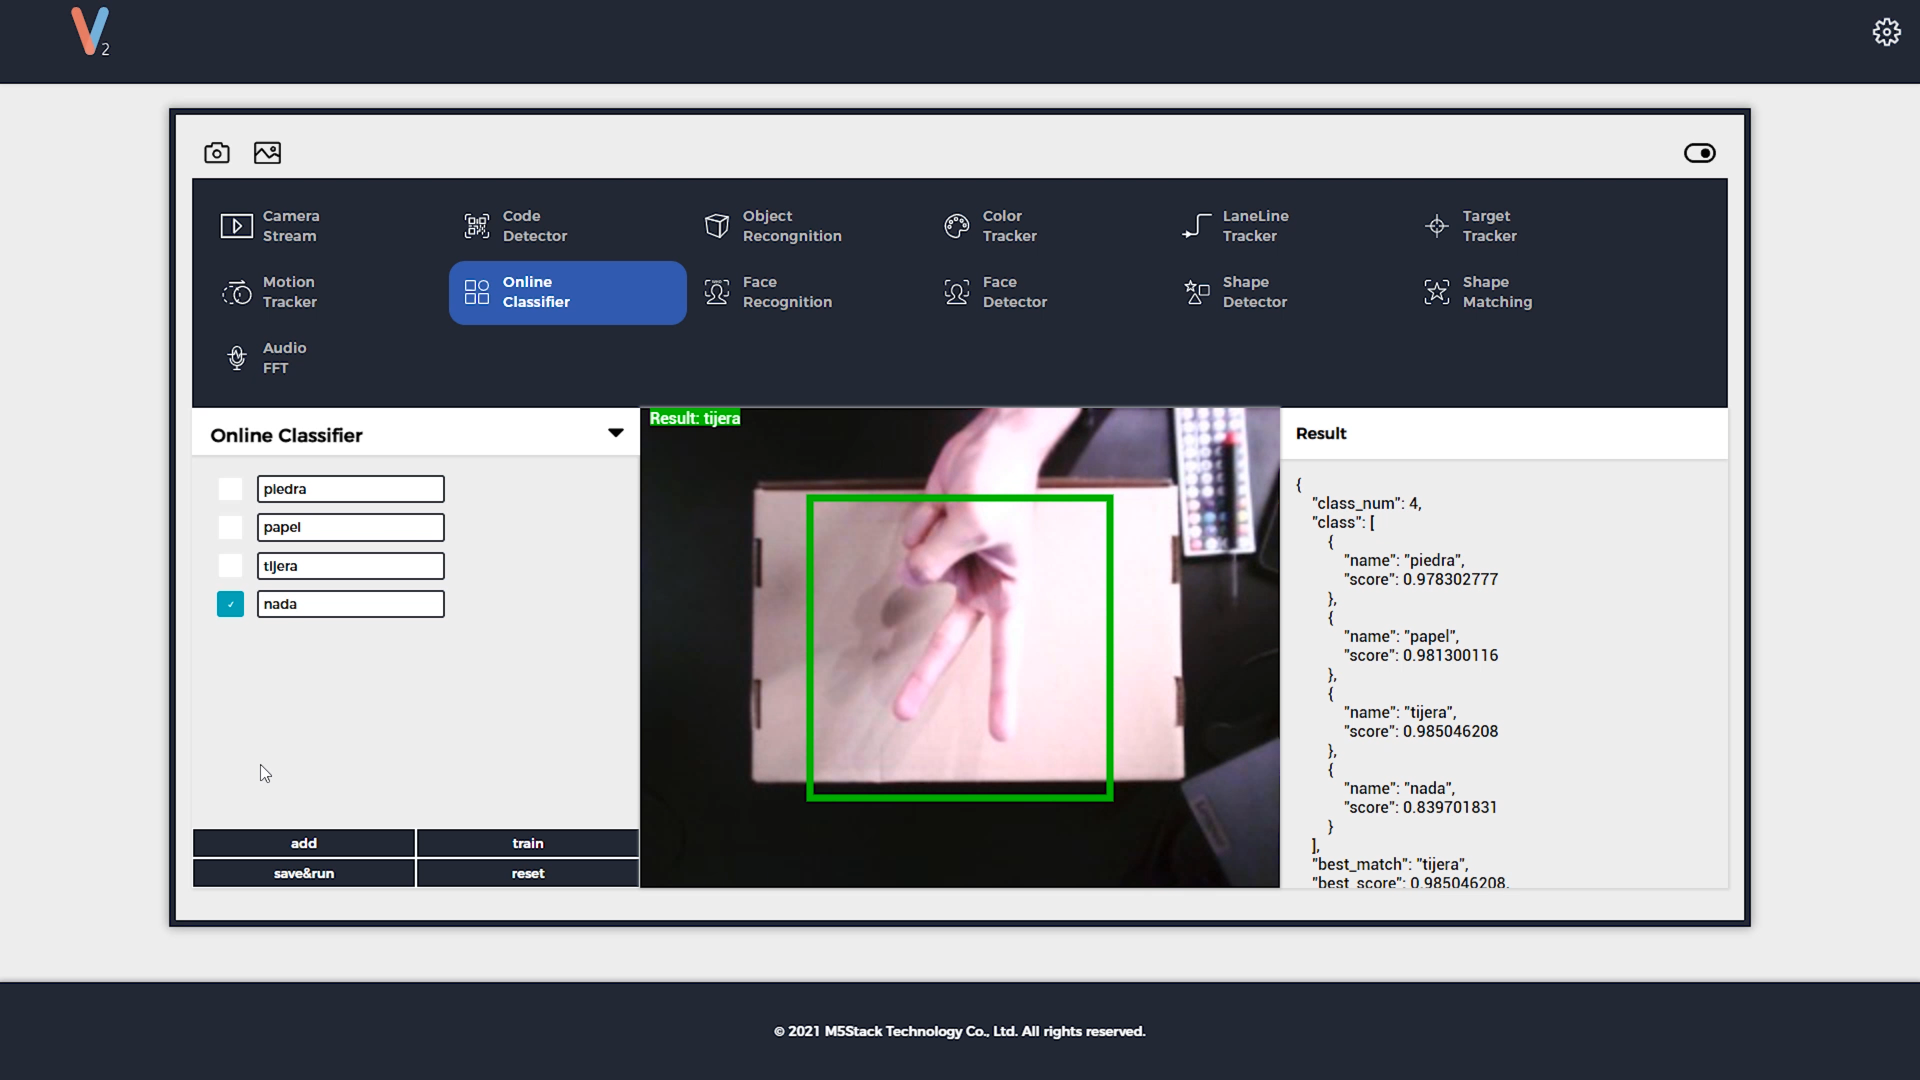
- Online classifier, train, teach and deploy neural network models.
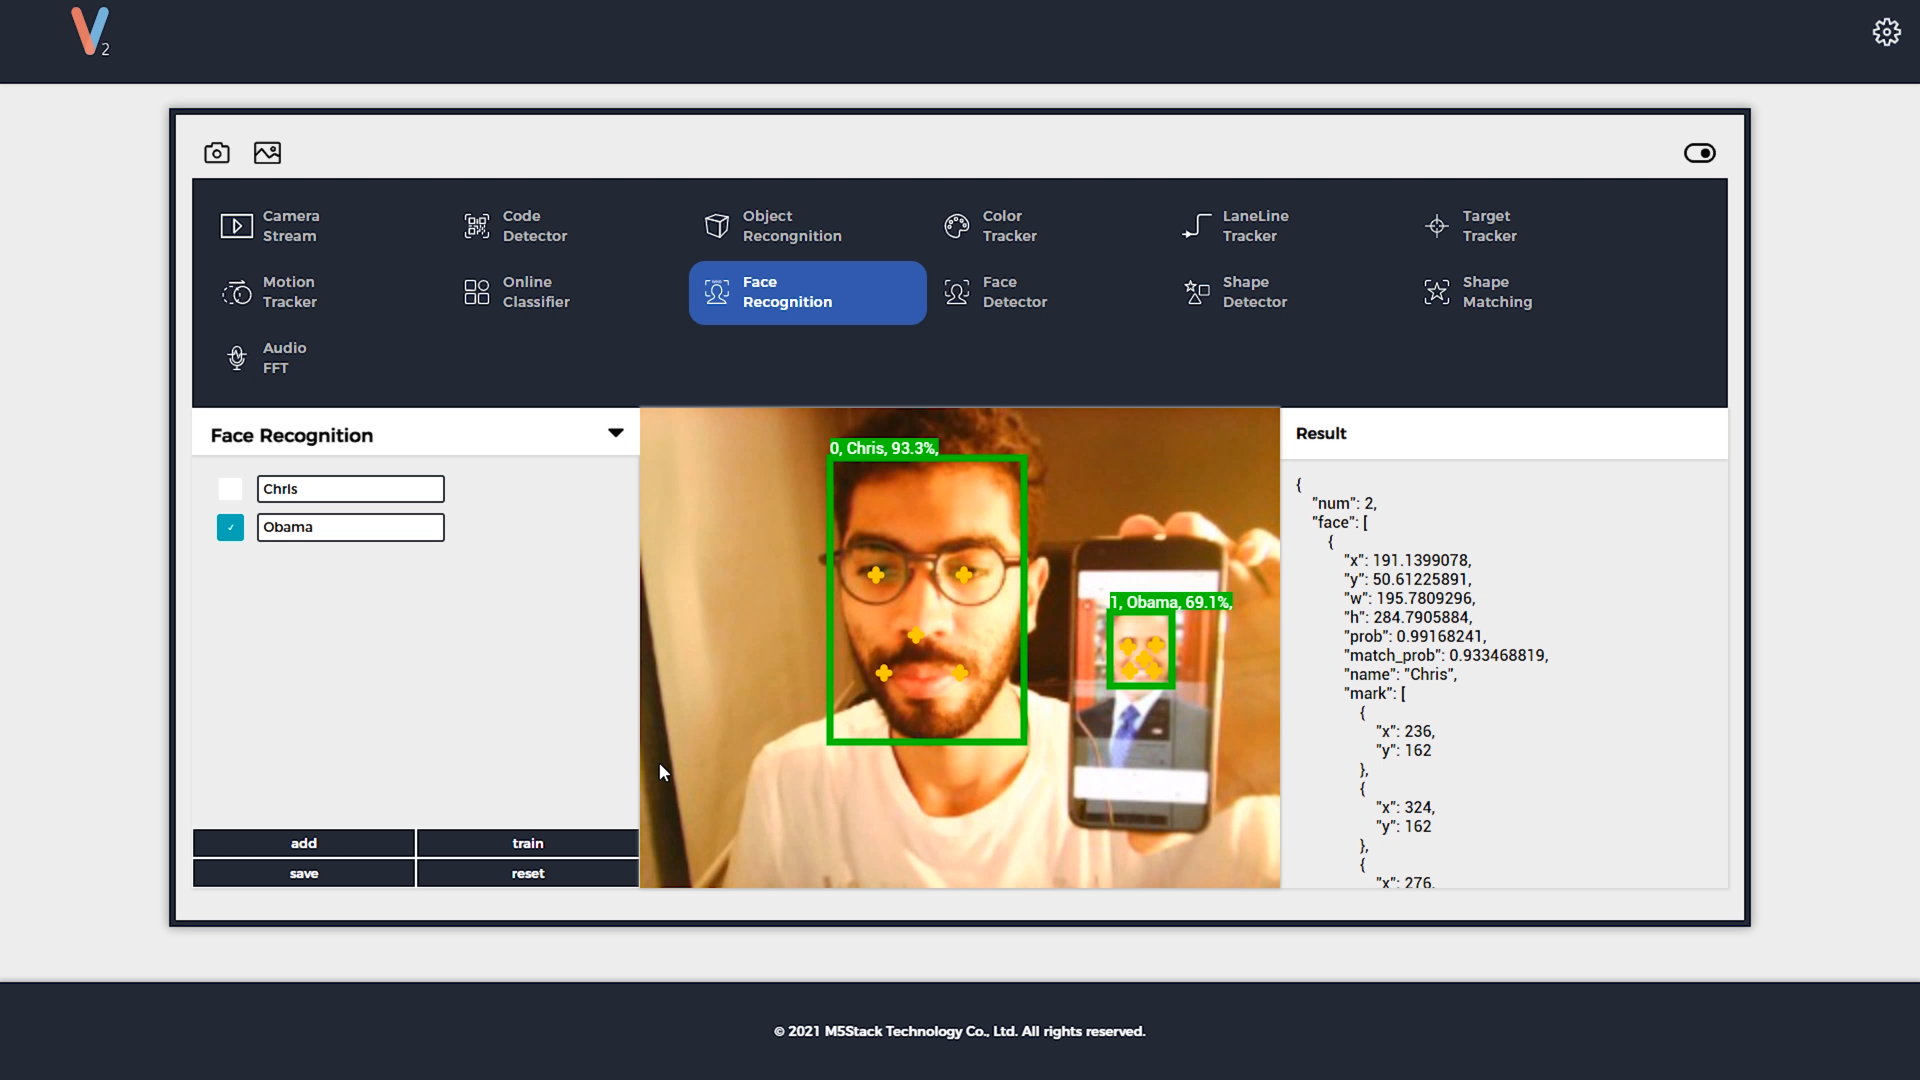
- Face recognition, train known faces and detect them later.
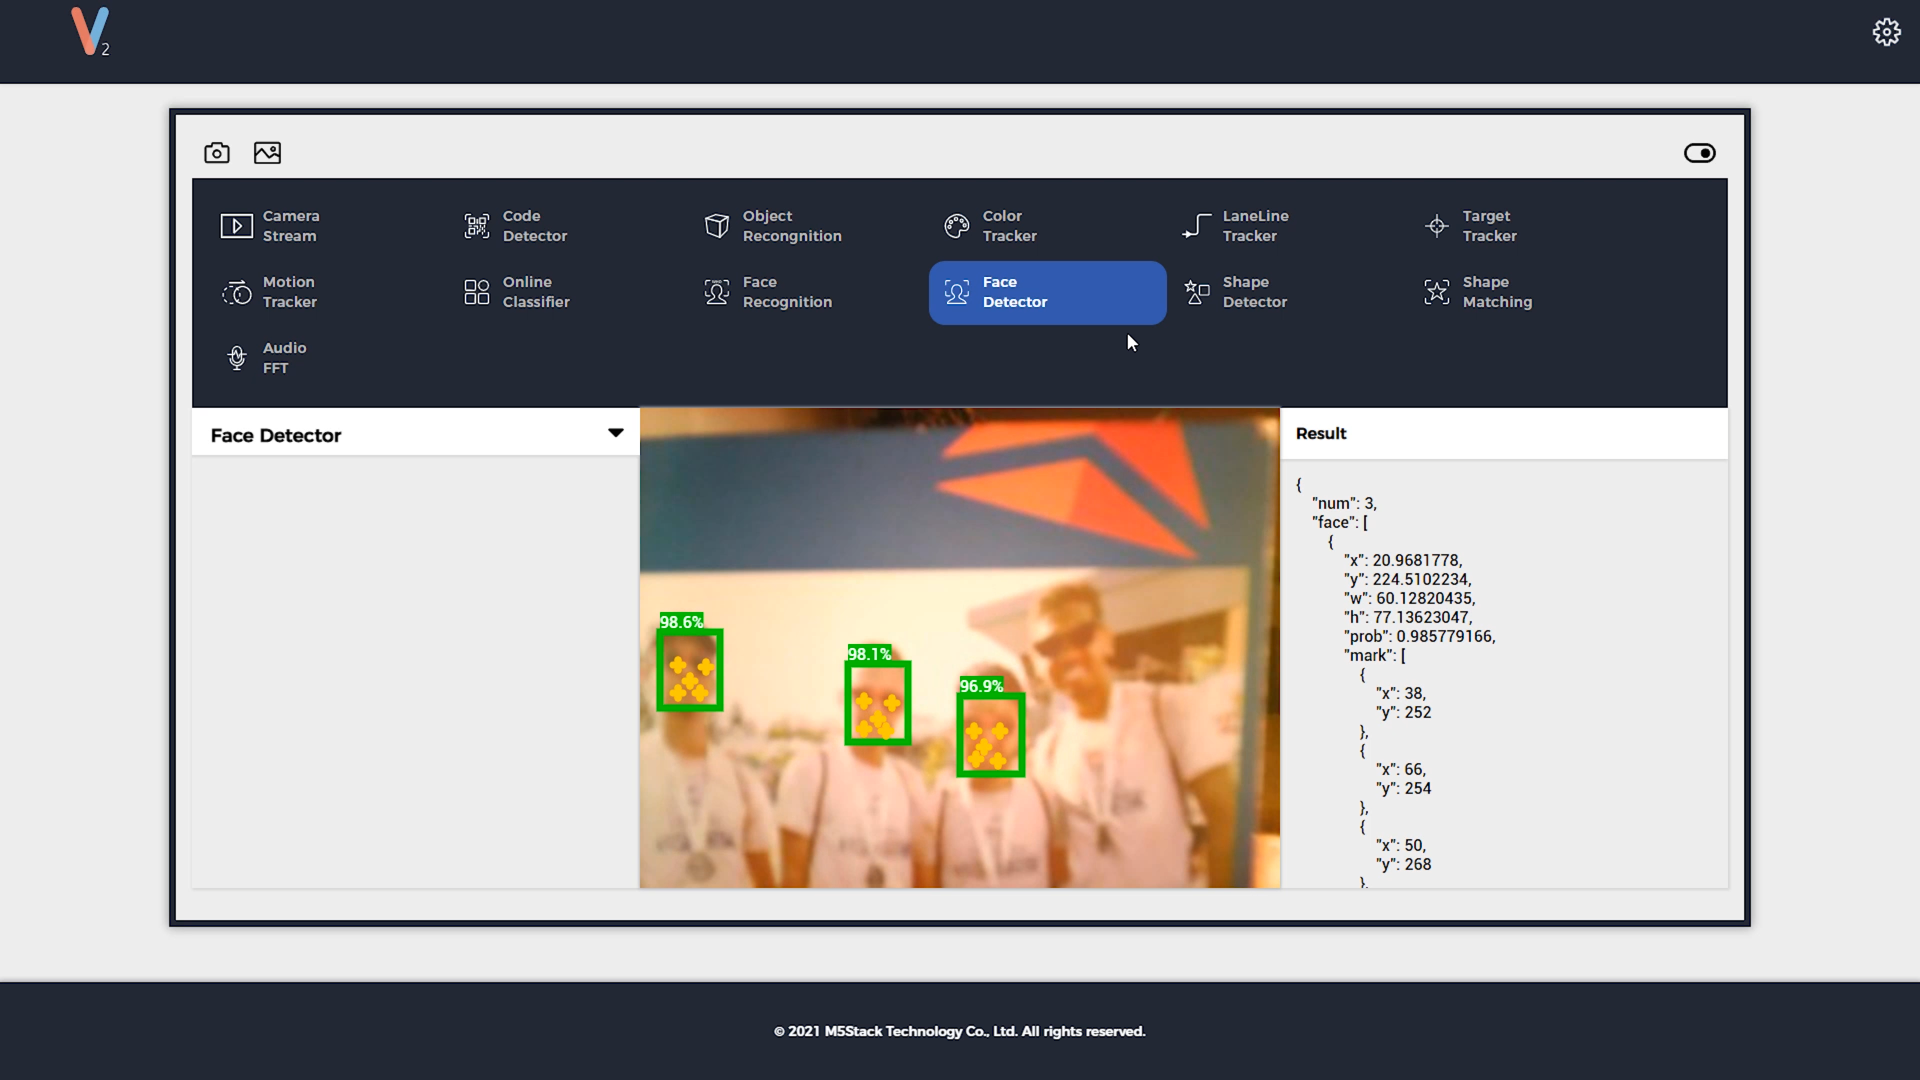
- Face detection, detect faces without training them.
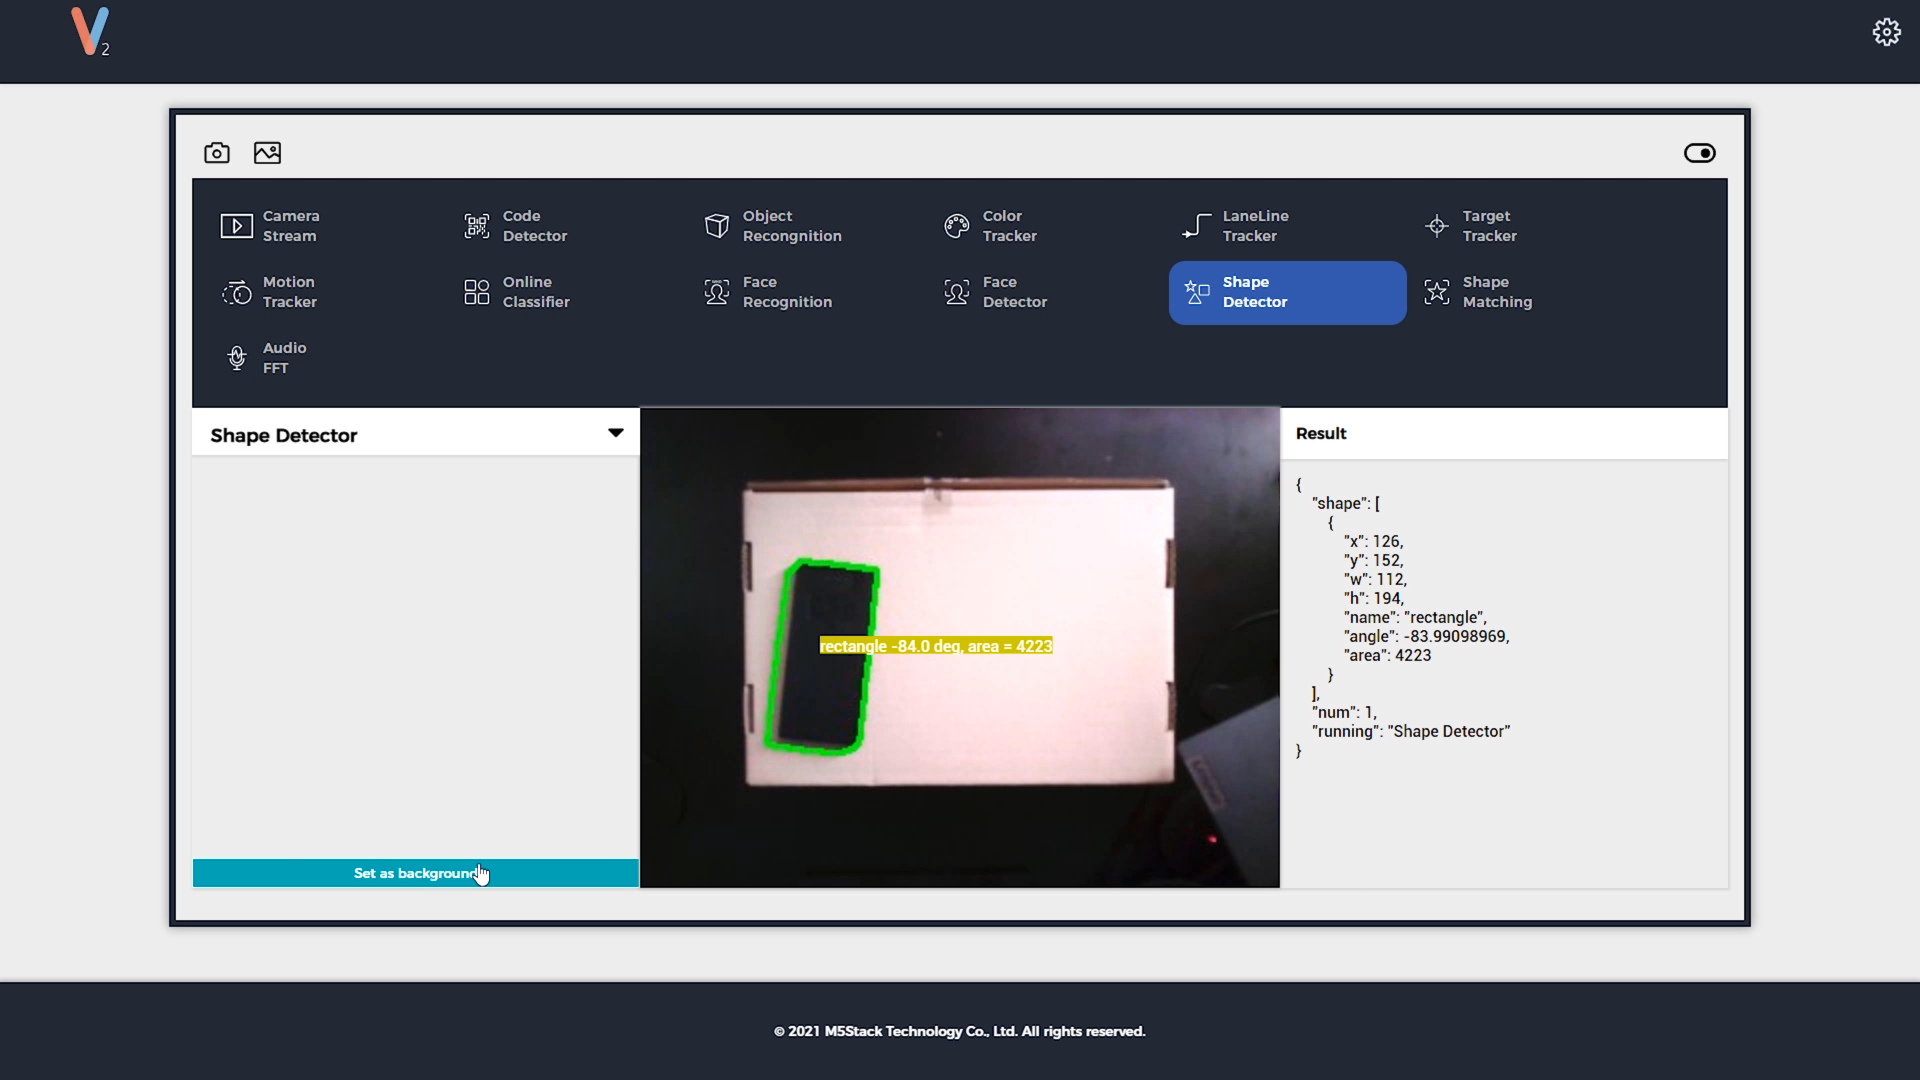
- Shape detection, detect known shapes.
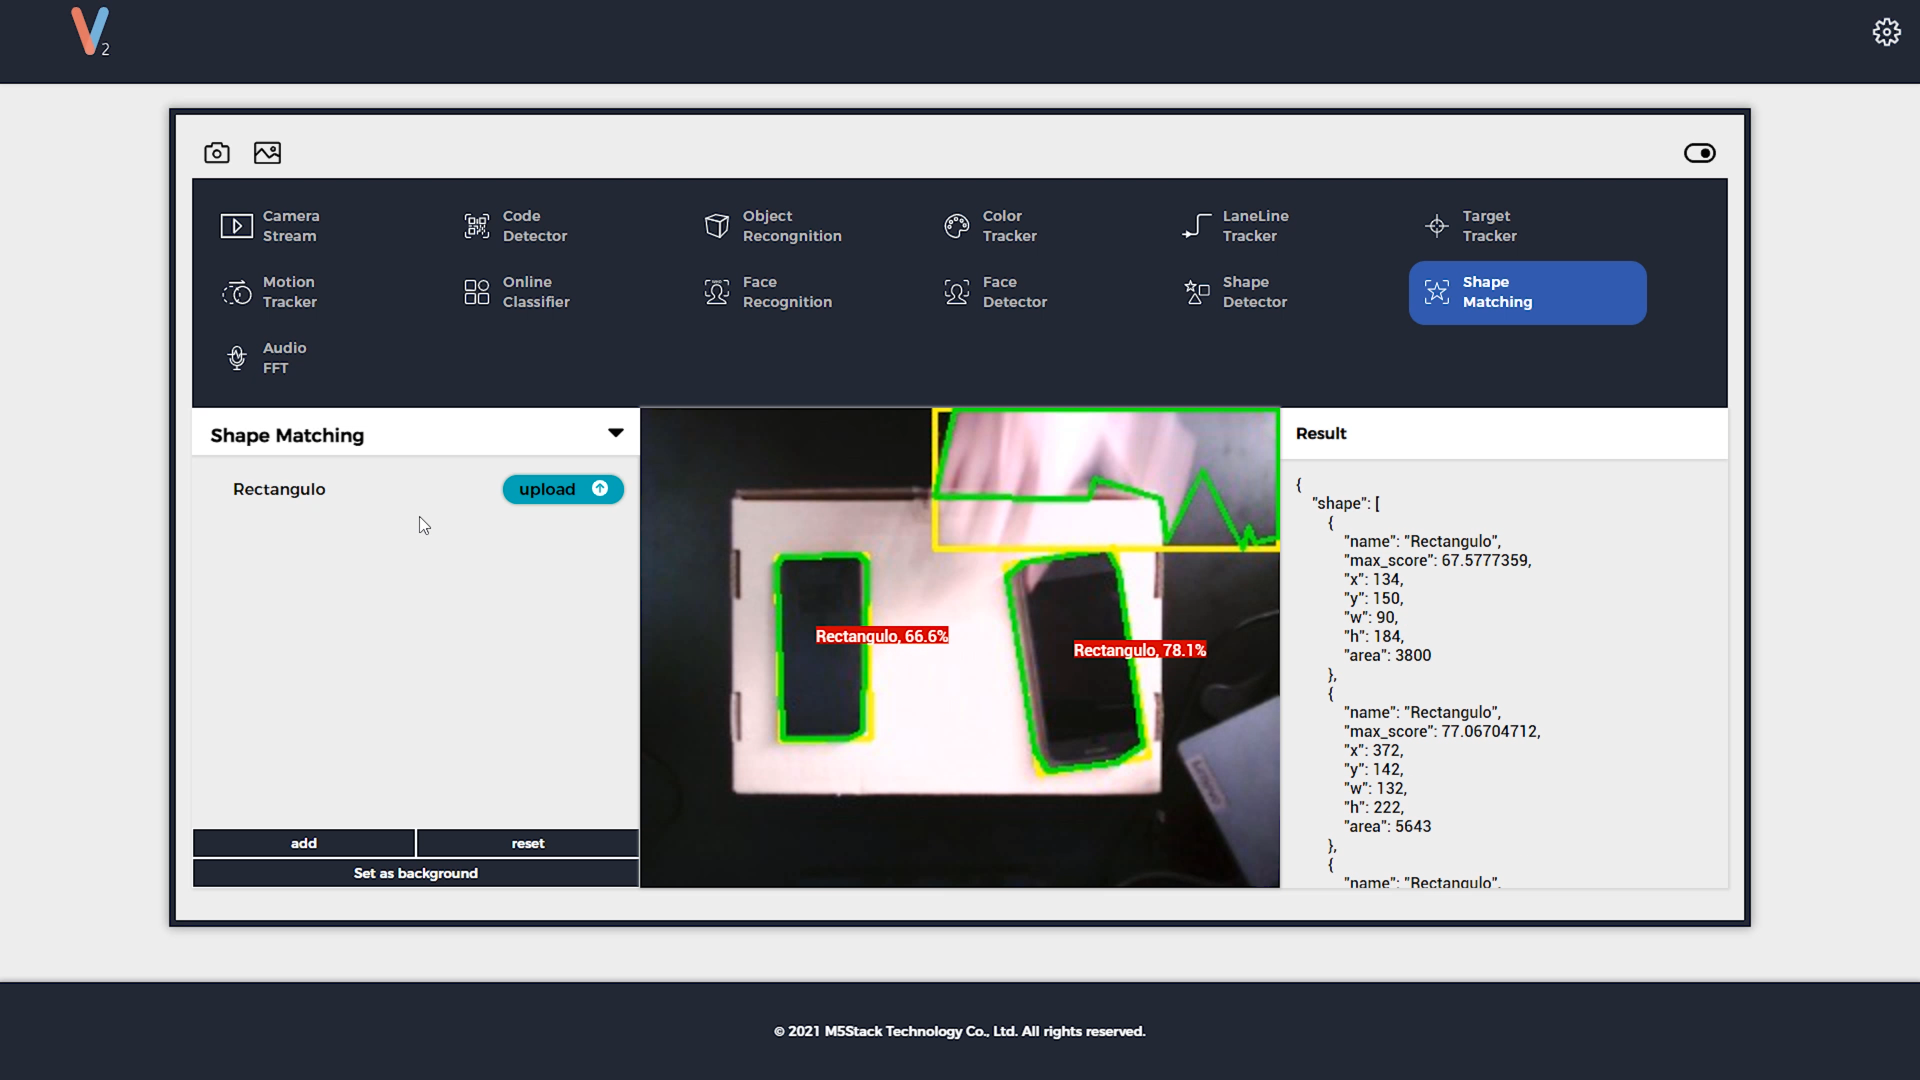
- Shape matching, upload a shape and detects forms that match.
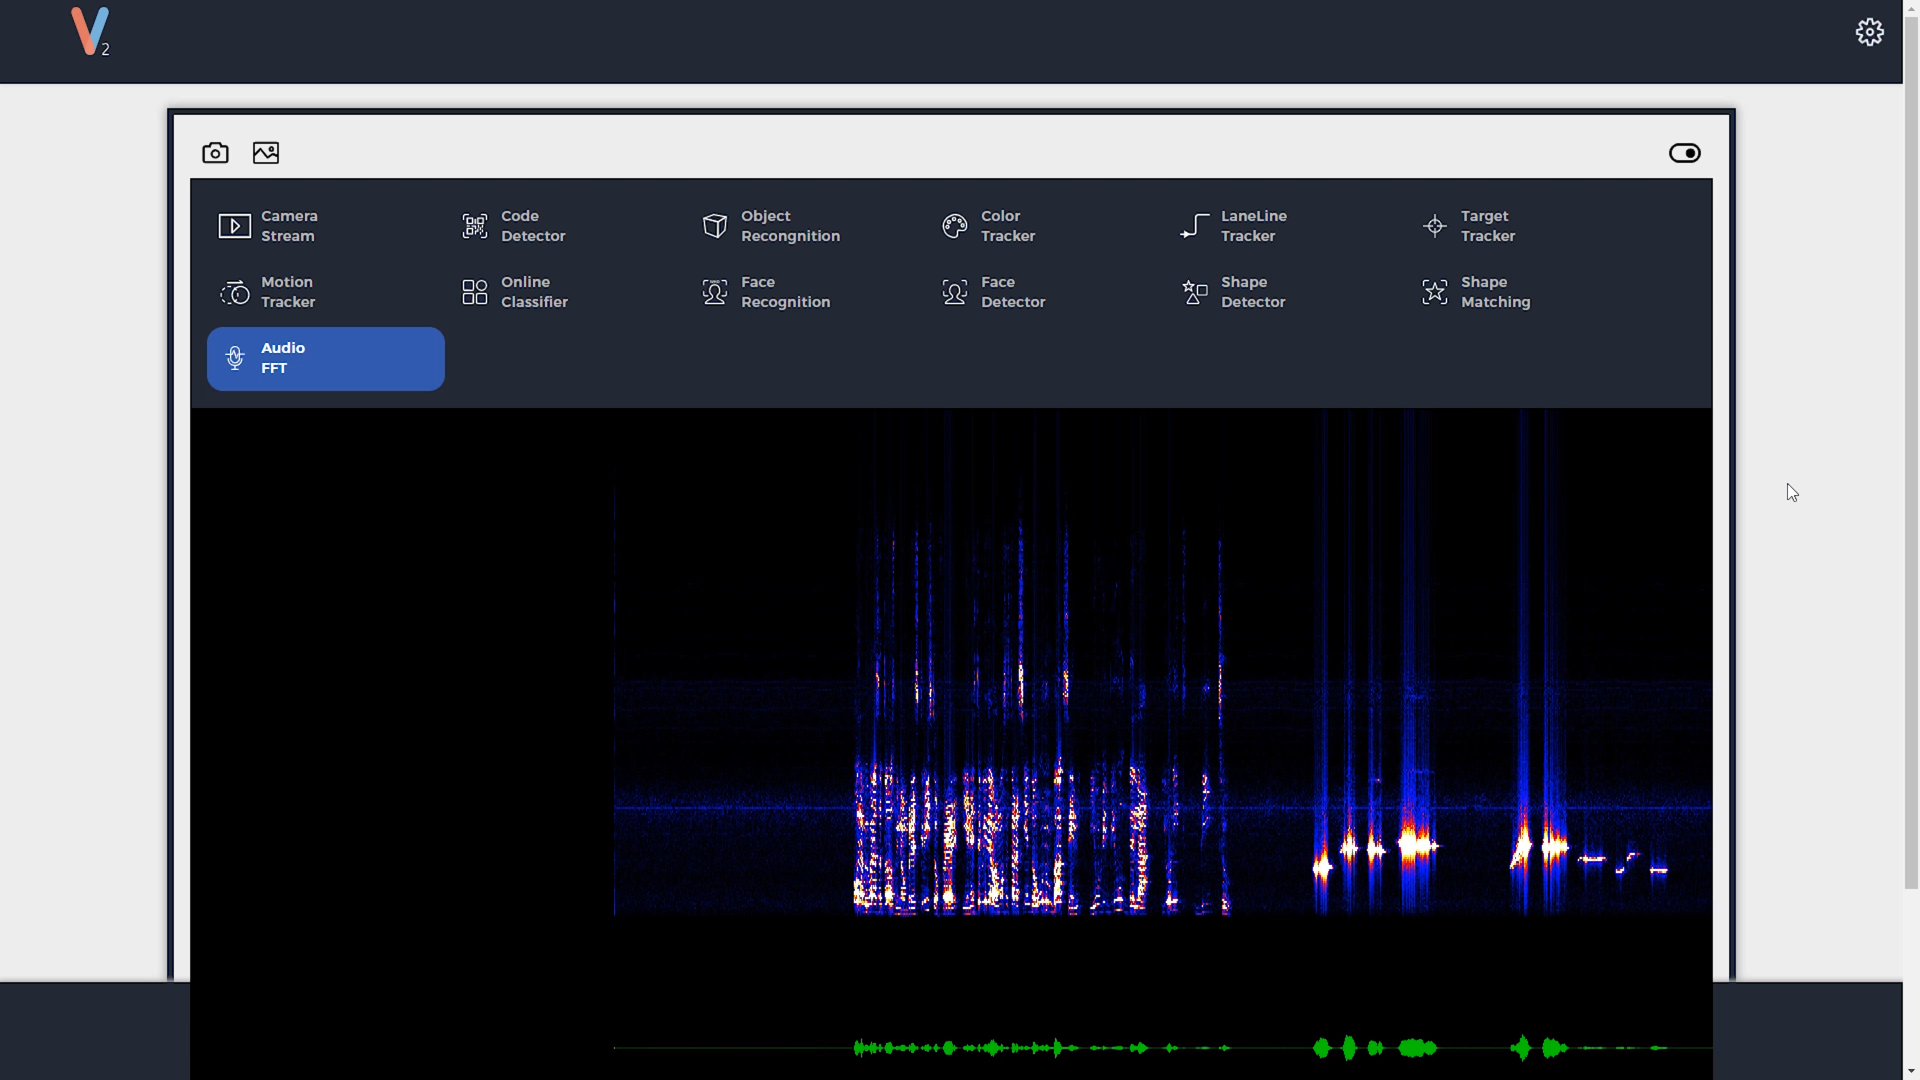
- Audio FFT, analyze audio inputs.
- And more.
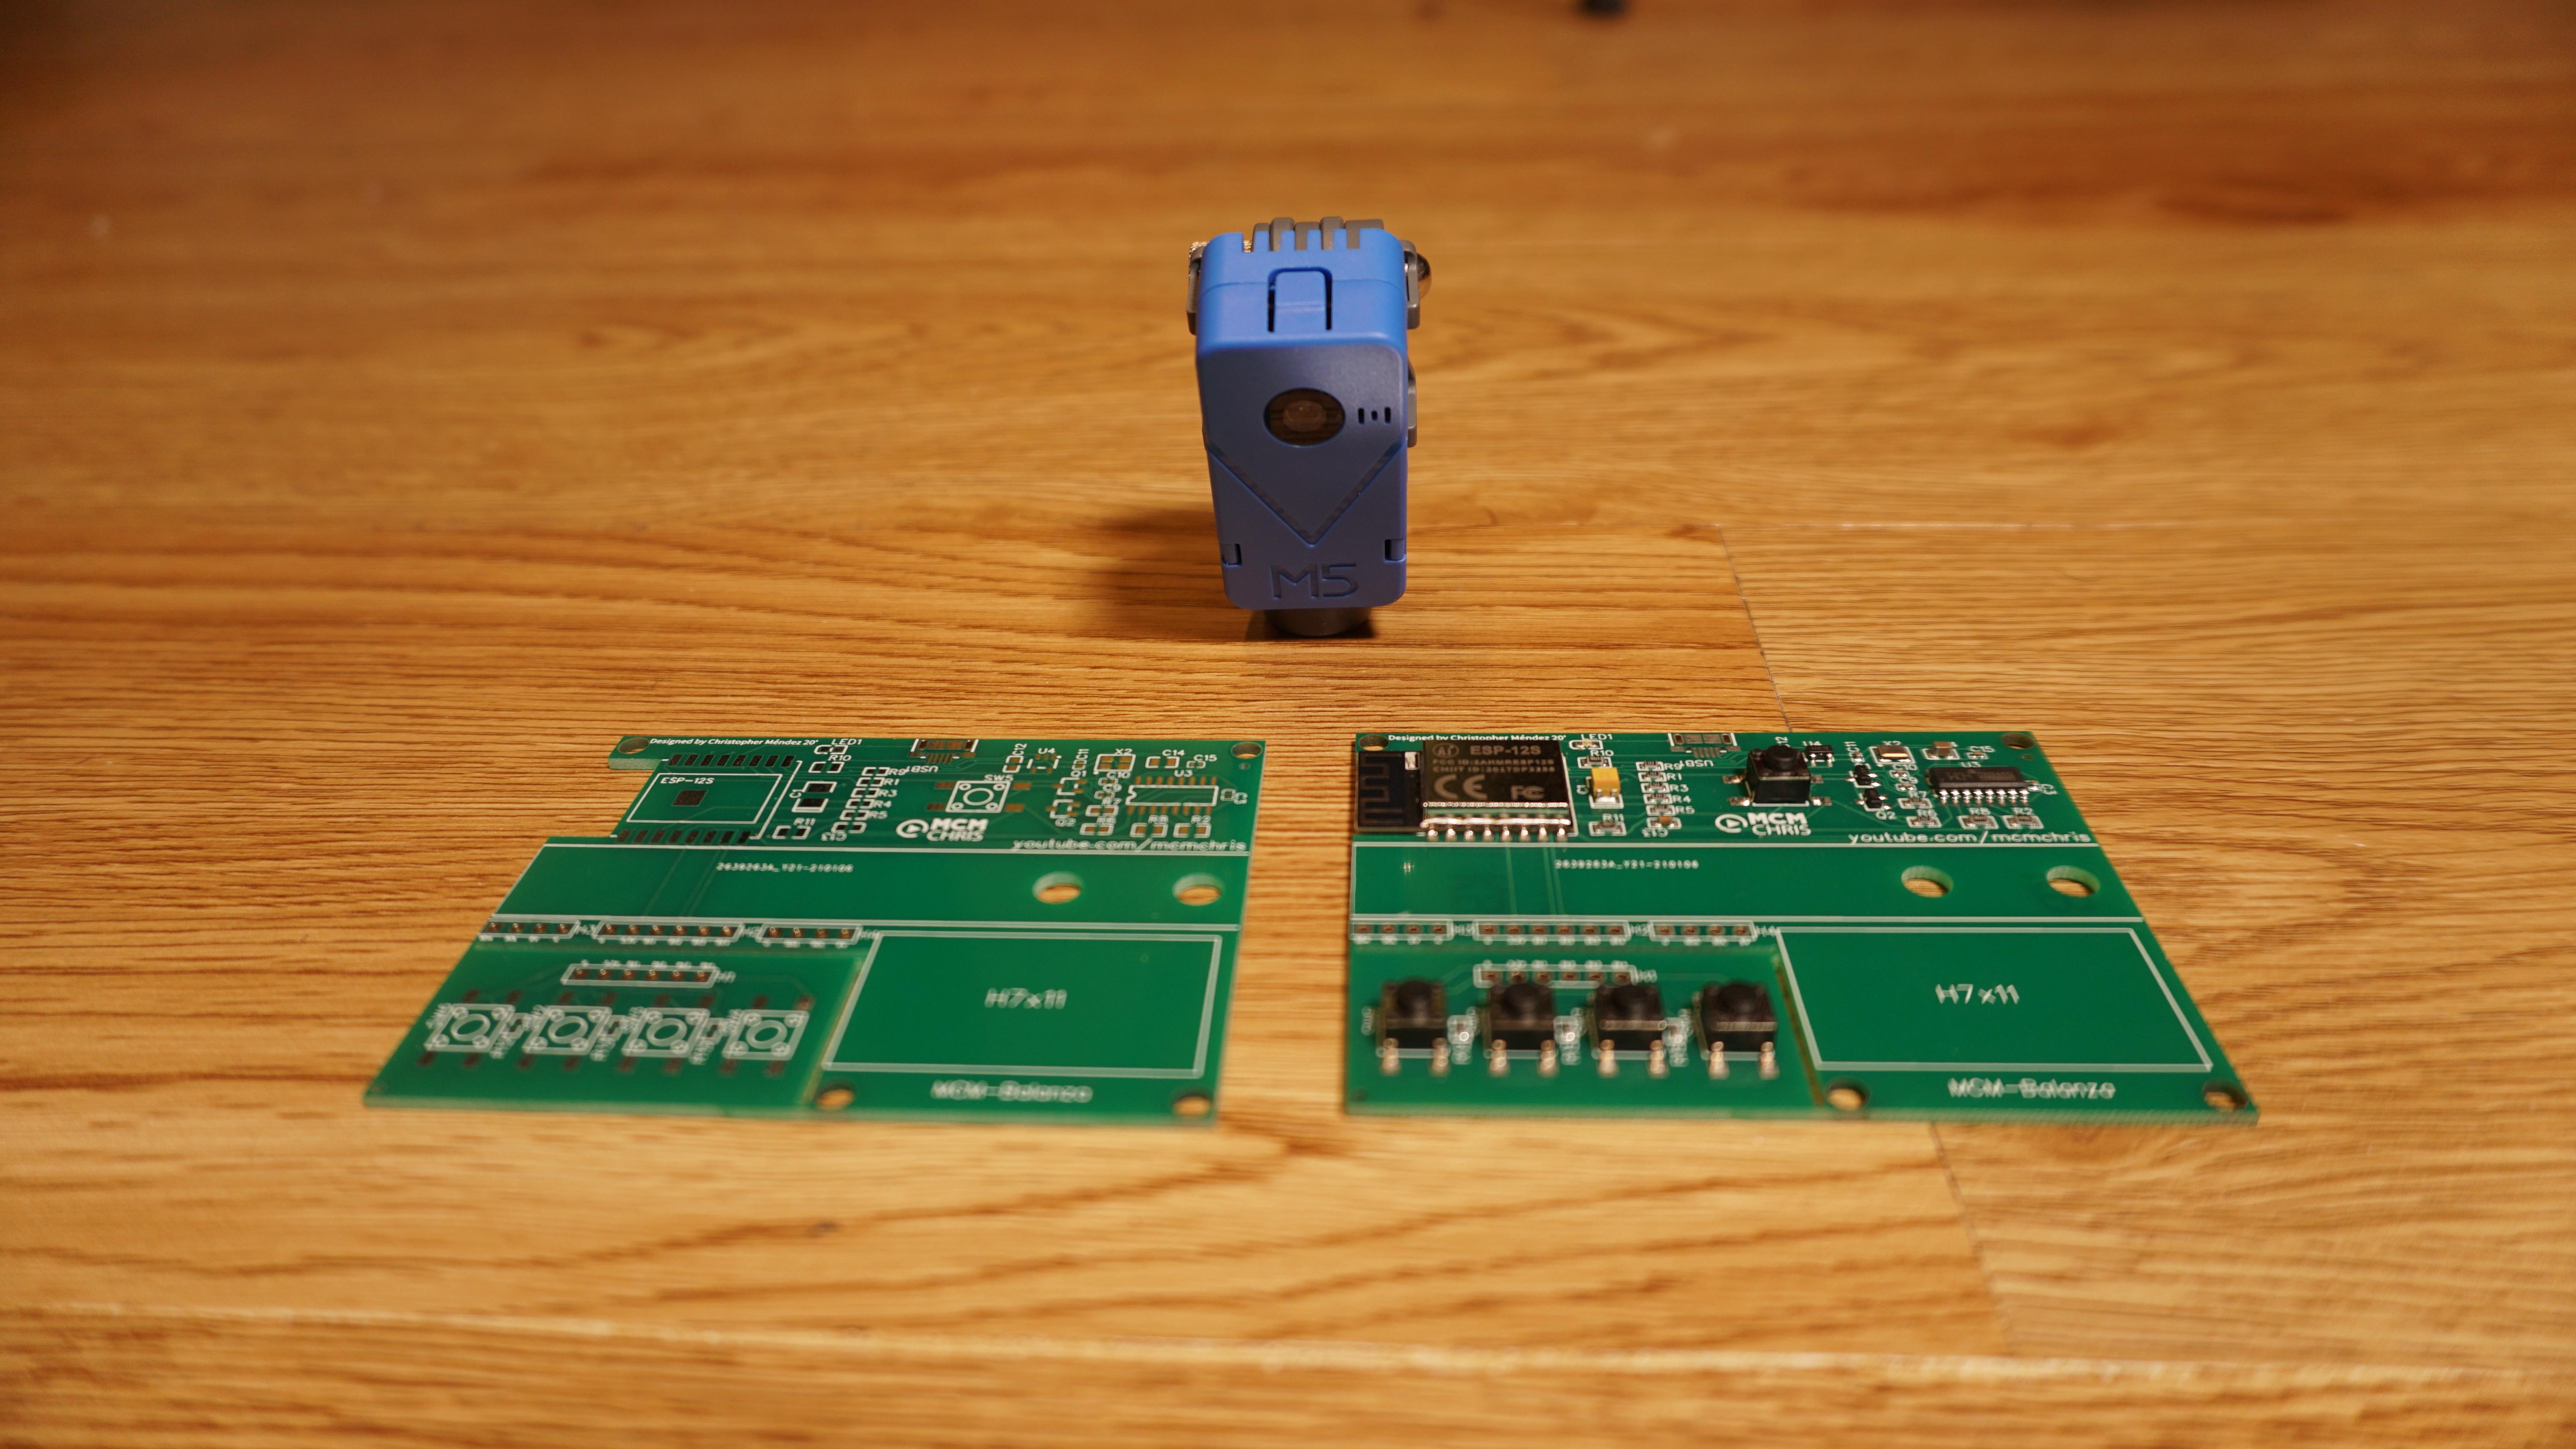
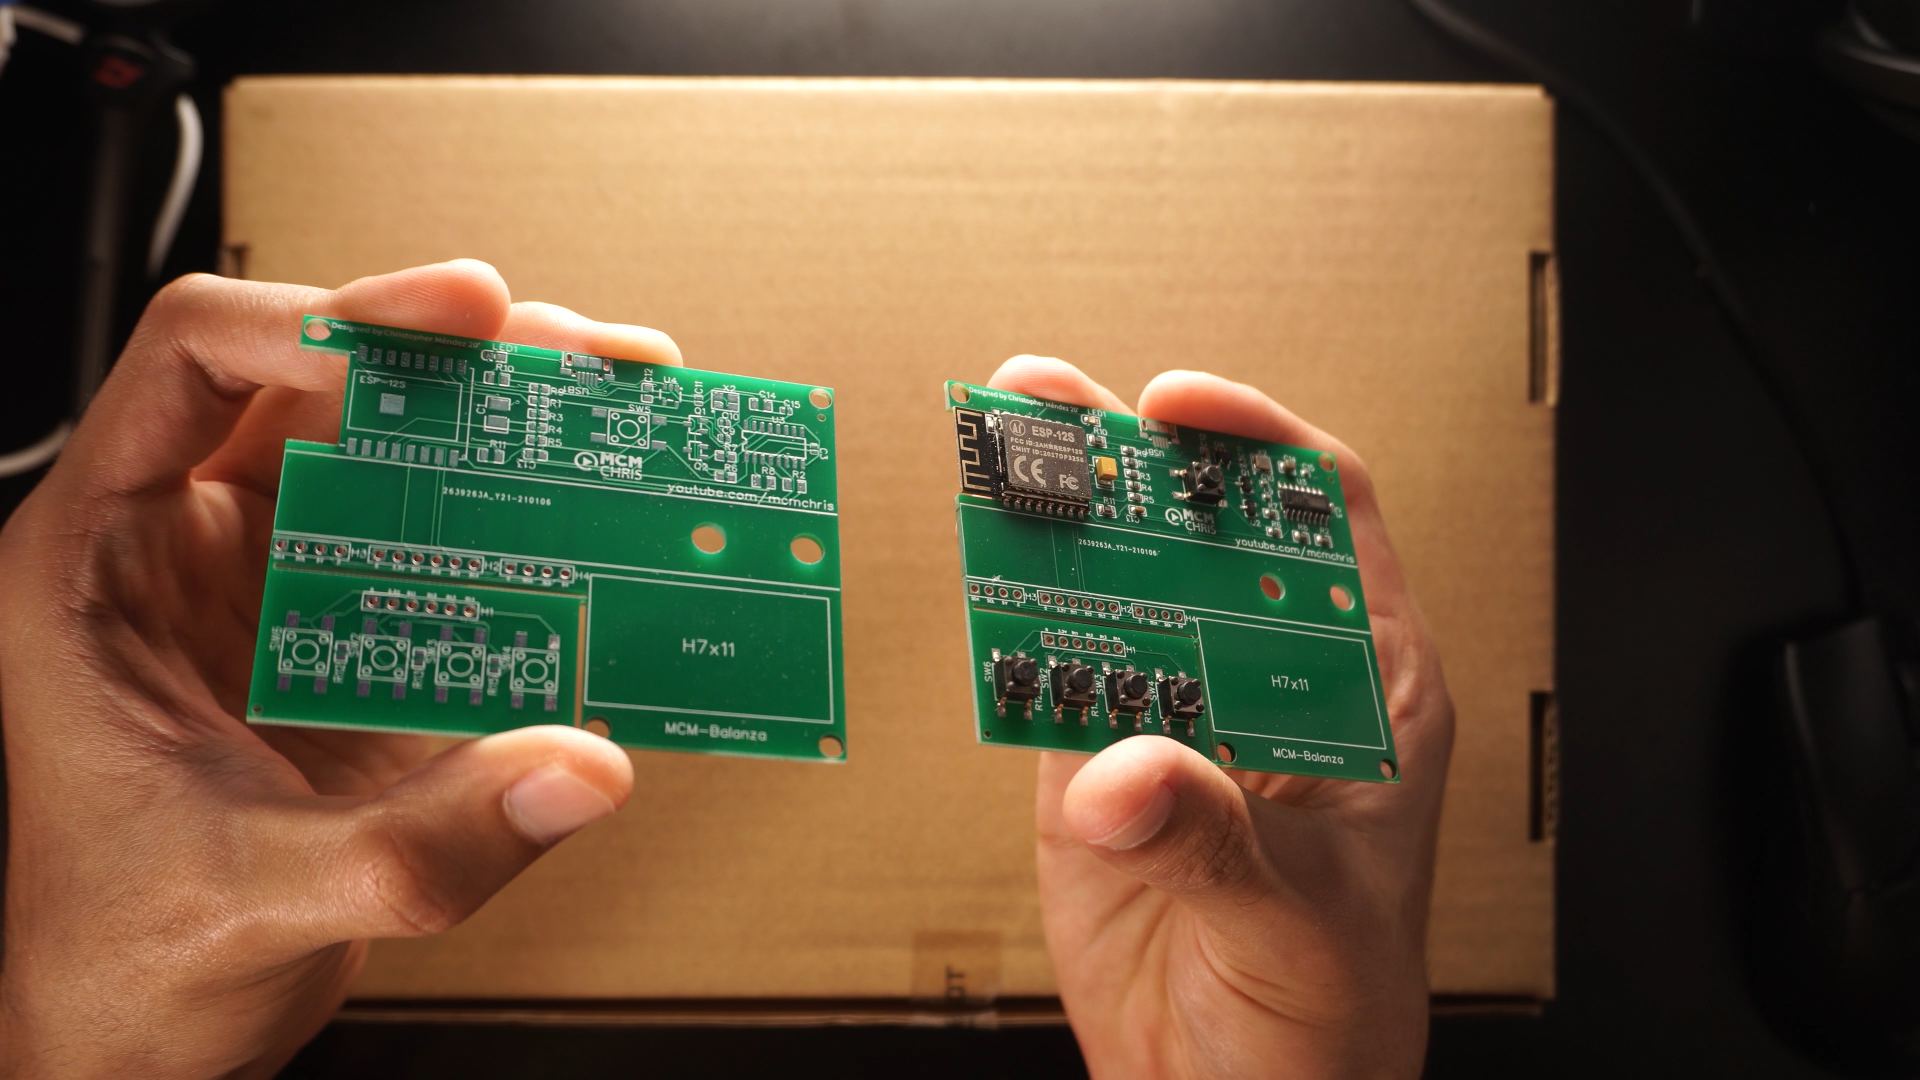
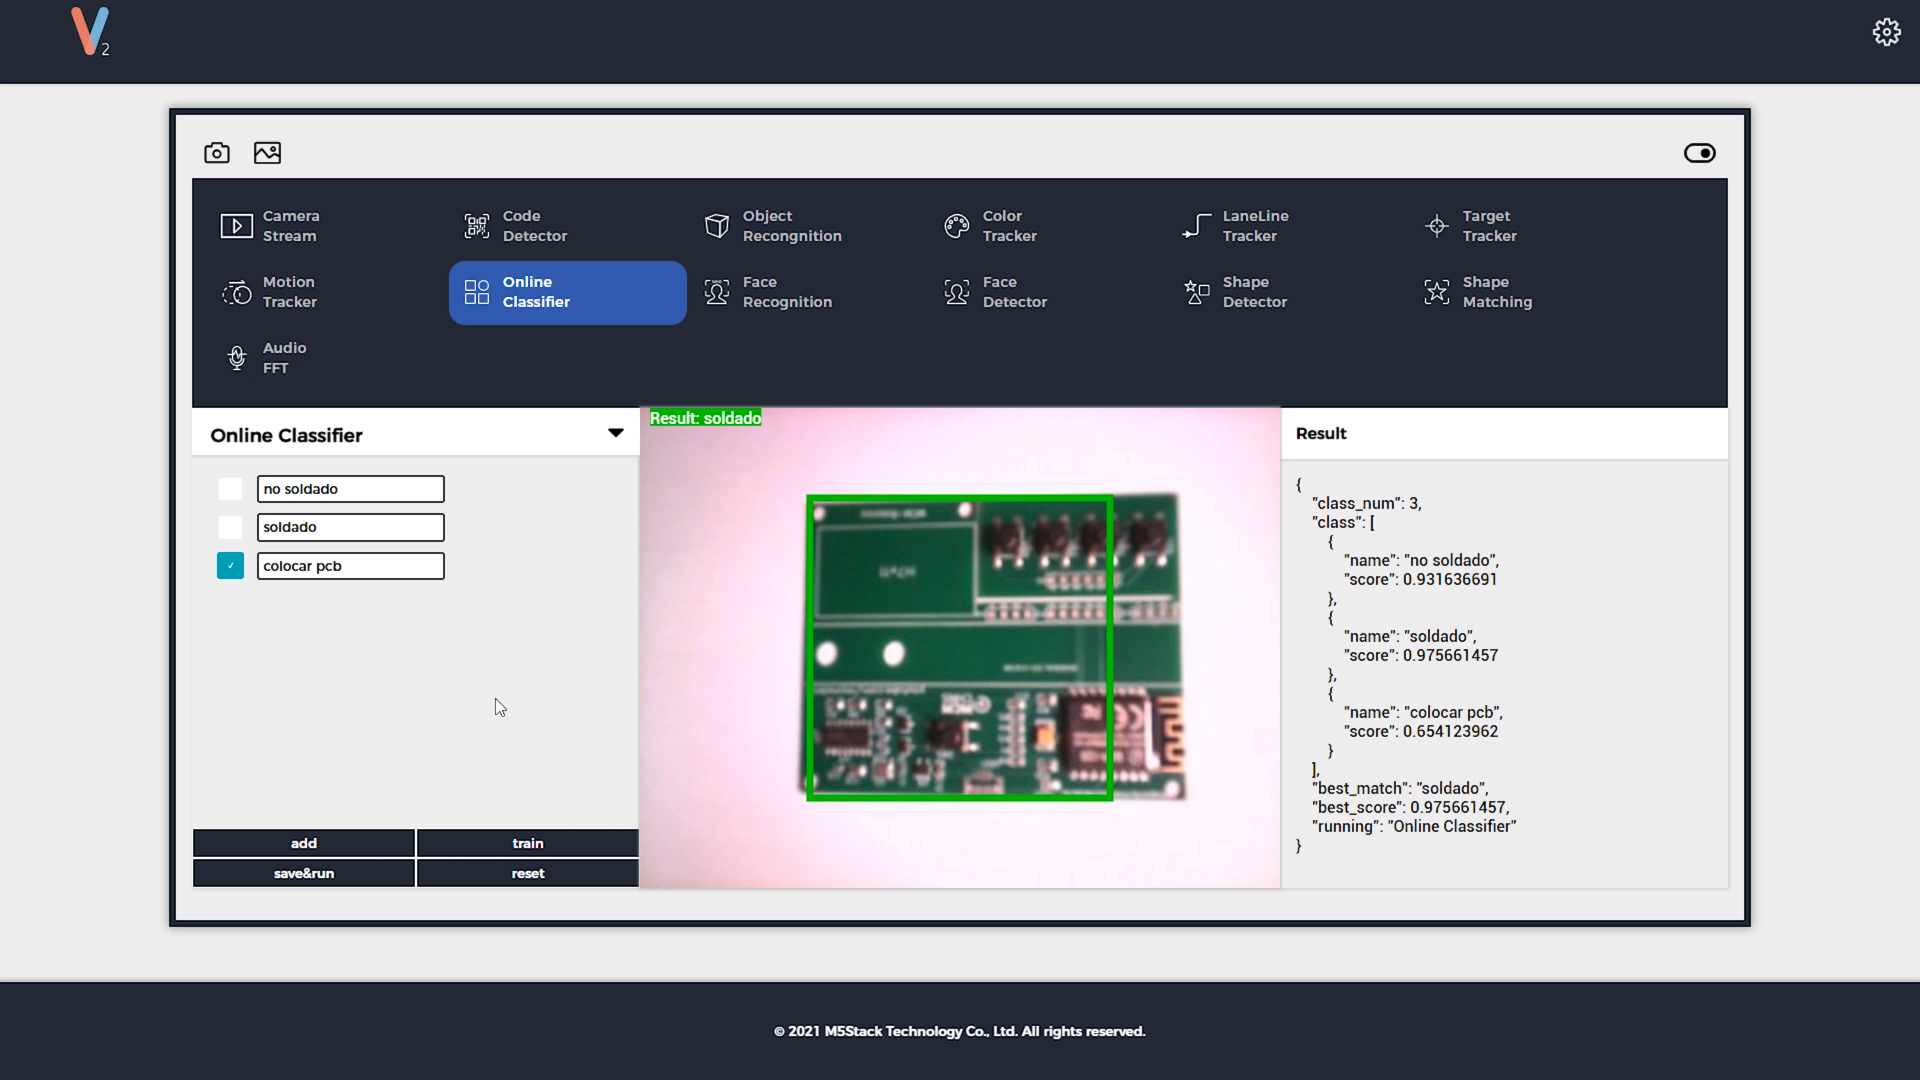
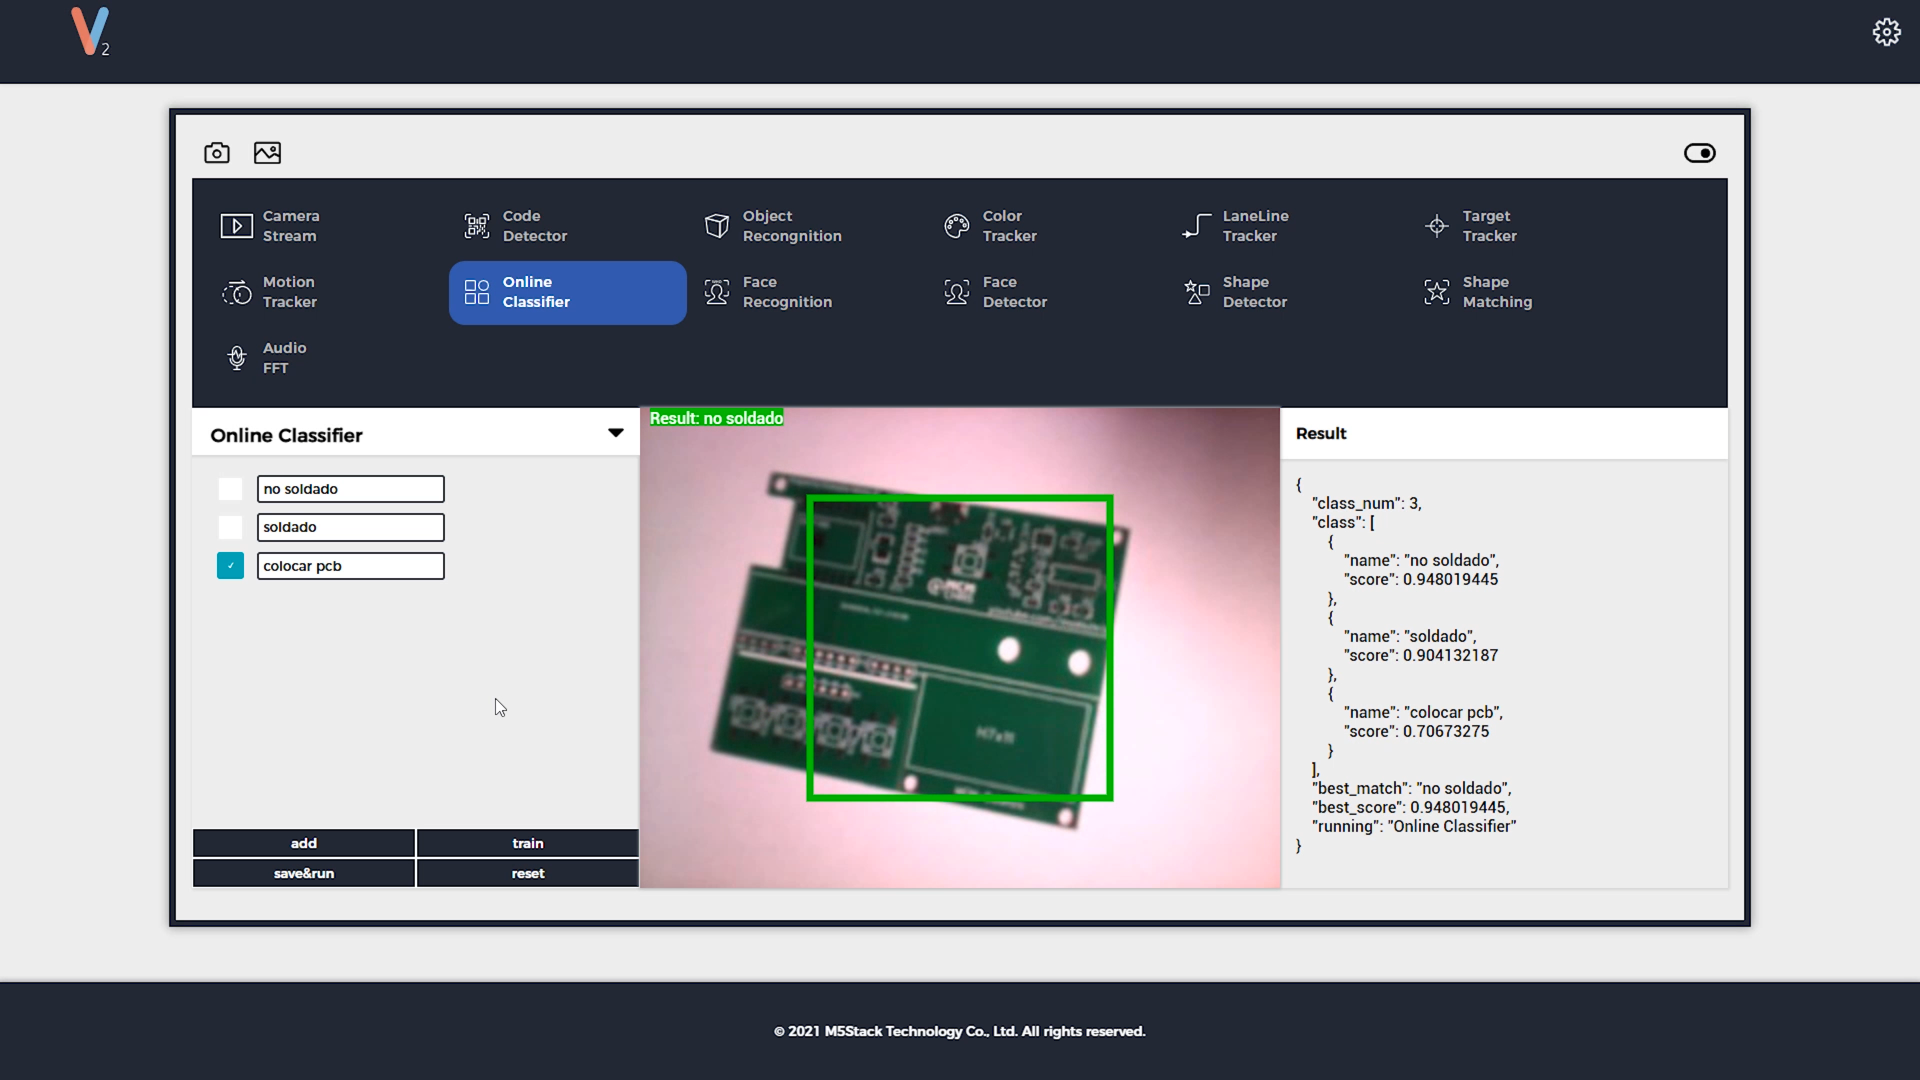
Soldered and Unsoldered PCB Detection Training
.png)
.png)
.png)
.png)
.png)
.png)
For this educative implementation that can be used on production lines, door entry systems detecting facemasks, or uniforms, safety wear etc.
We will make an example with PCB's.
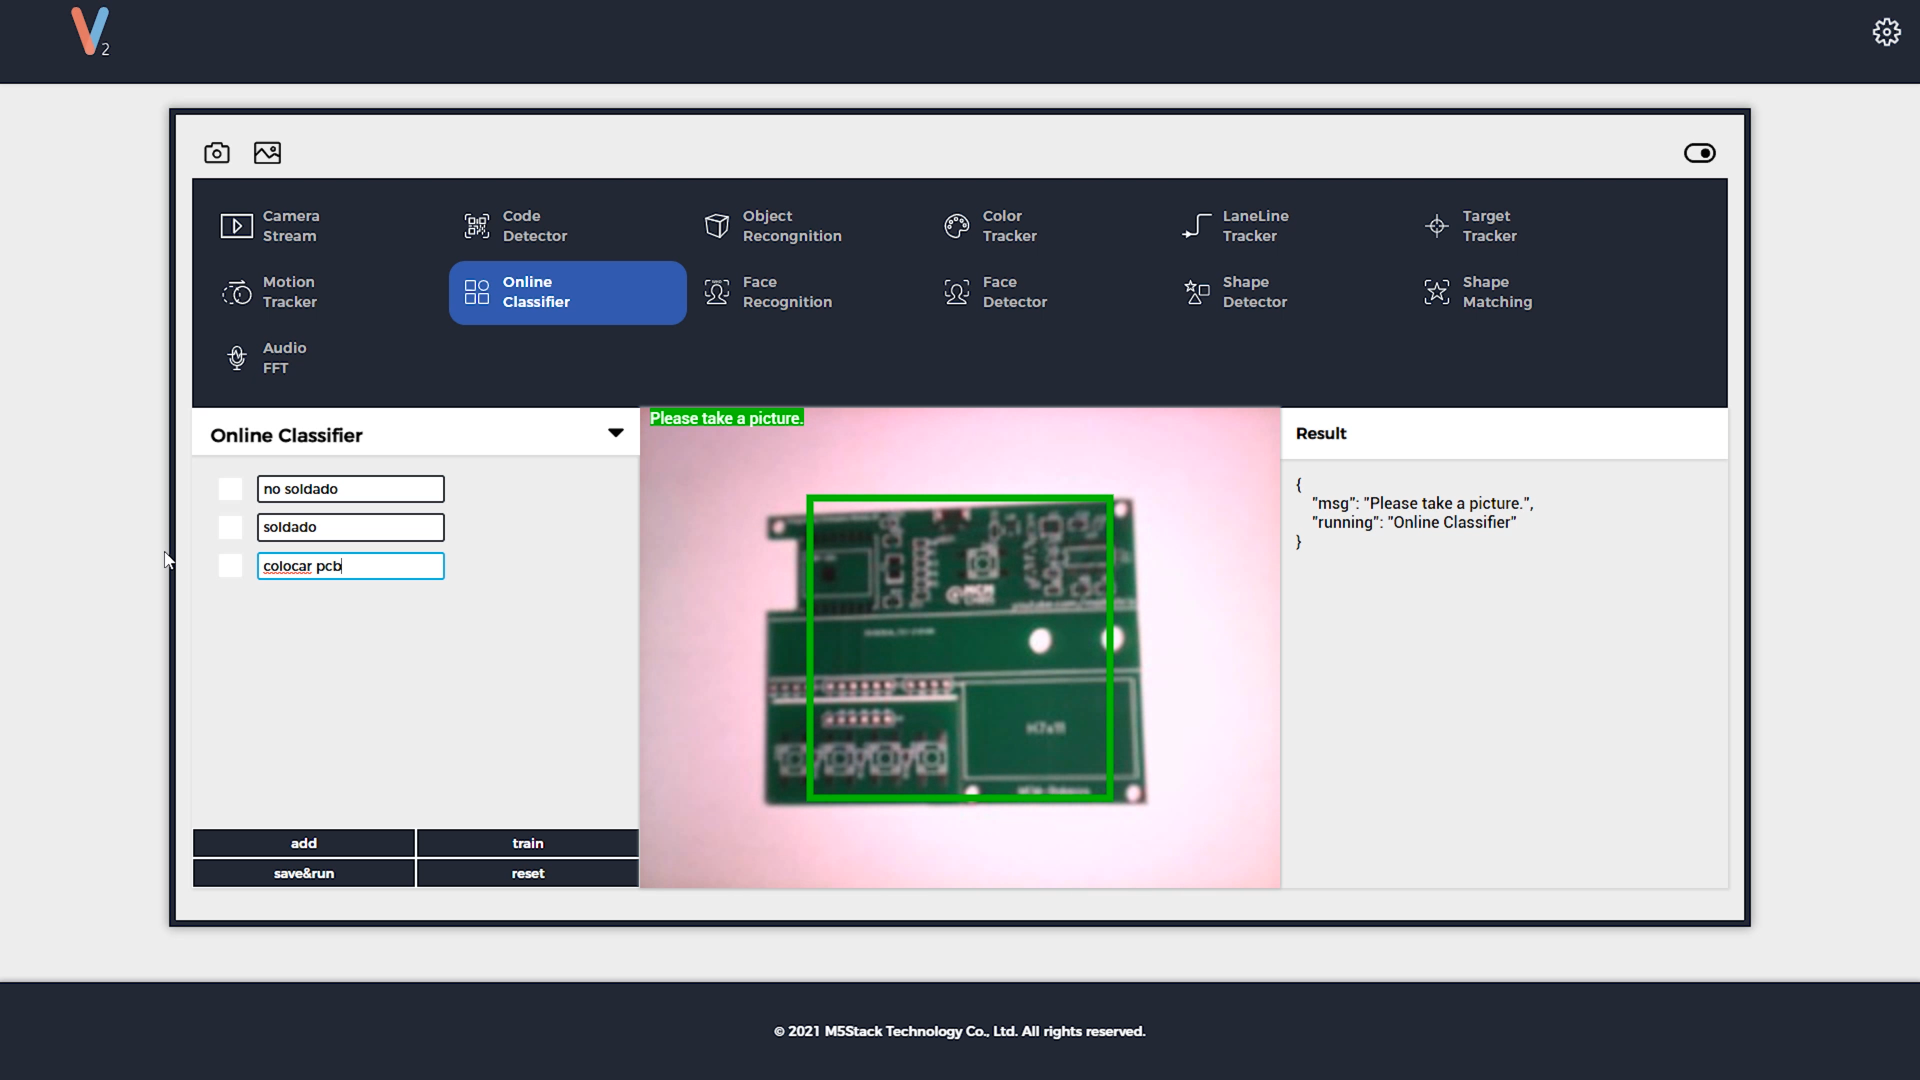
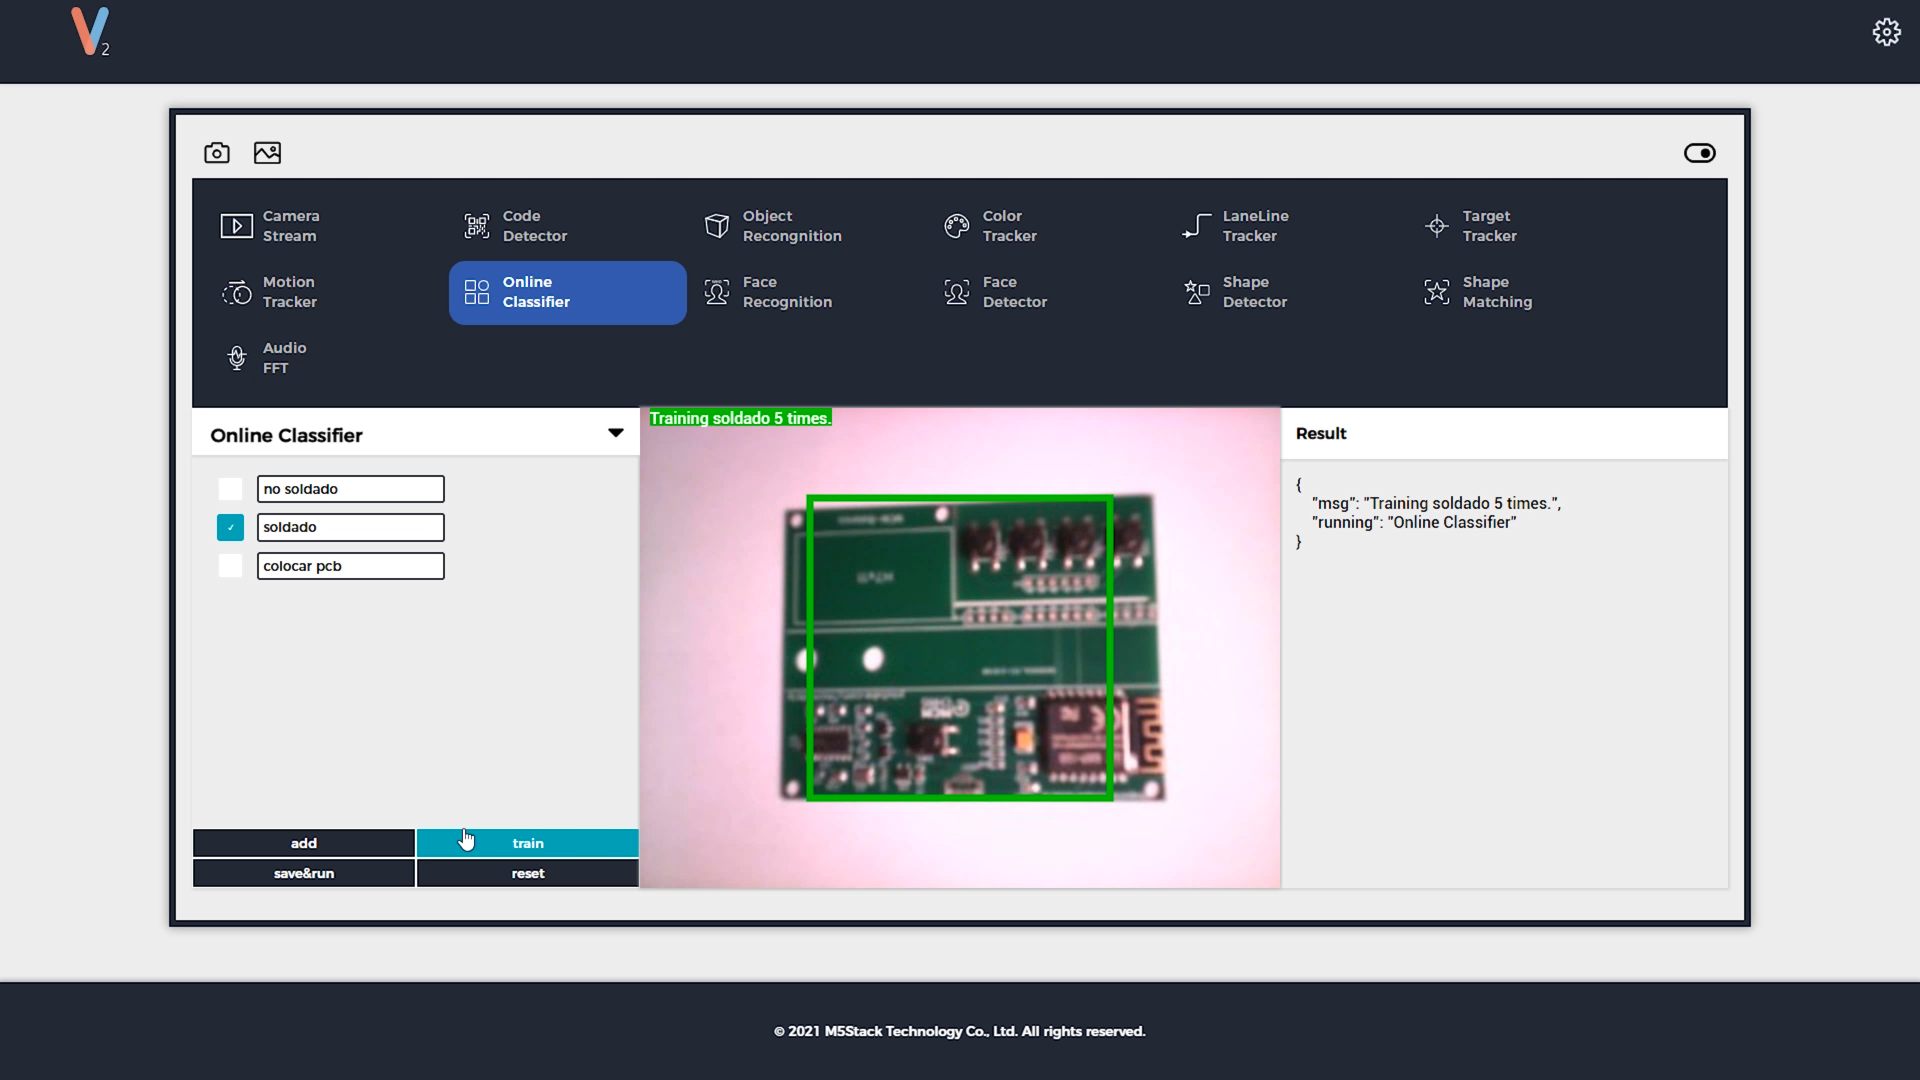
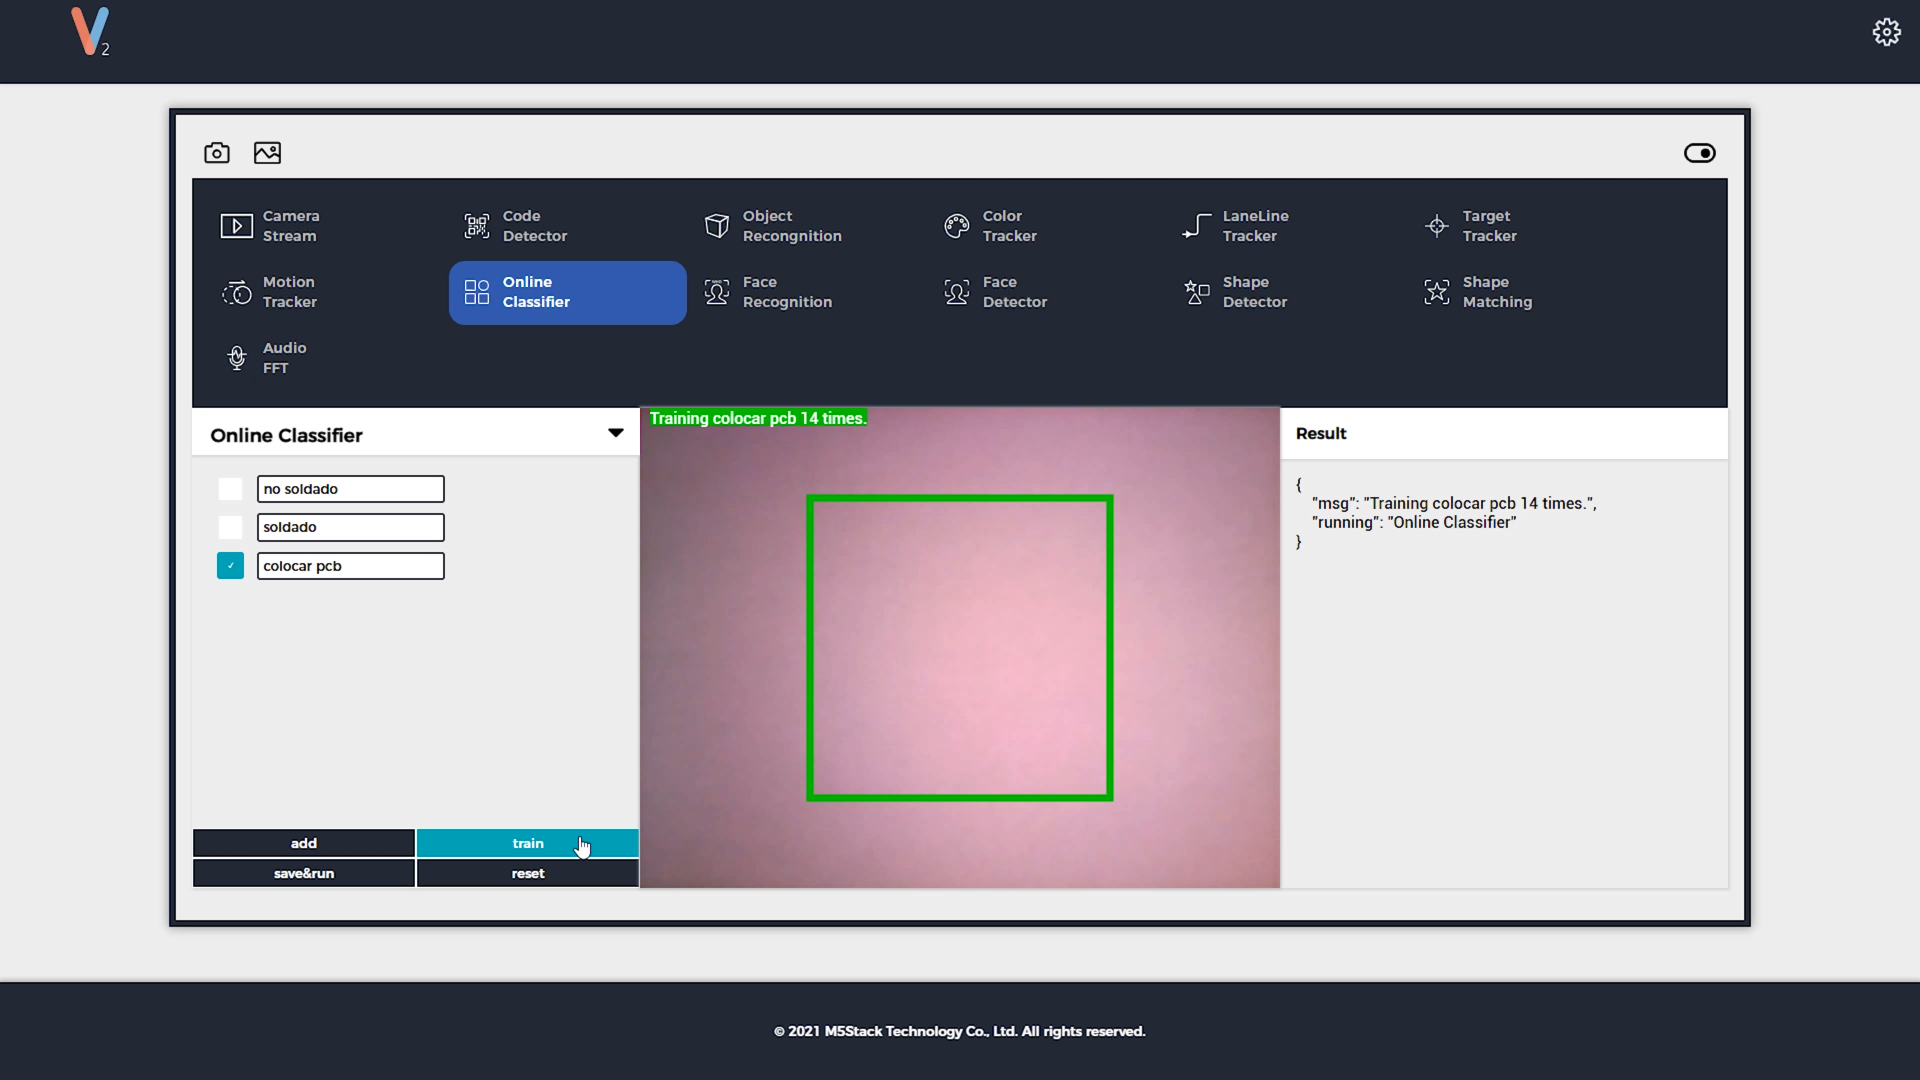
- Go to Online classifier.
- Create 3 classes: unsoldered, soldered, place PCB.
- Select a clase and place a corresponding PCB and take pictures.
- Repeat it with the other states.
- Run and save.
Now you are able to place the PCB's and it will tell you if they are soldered or not.