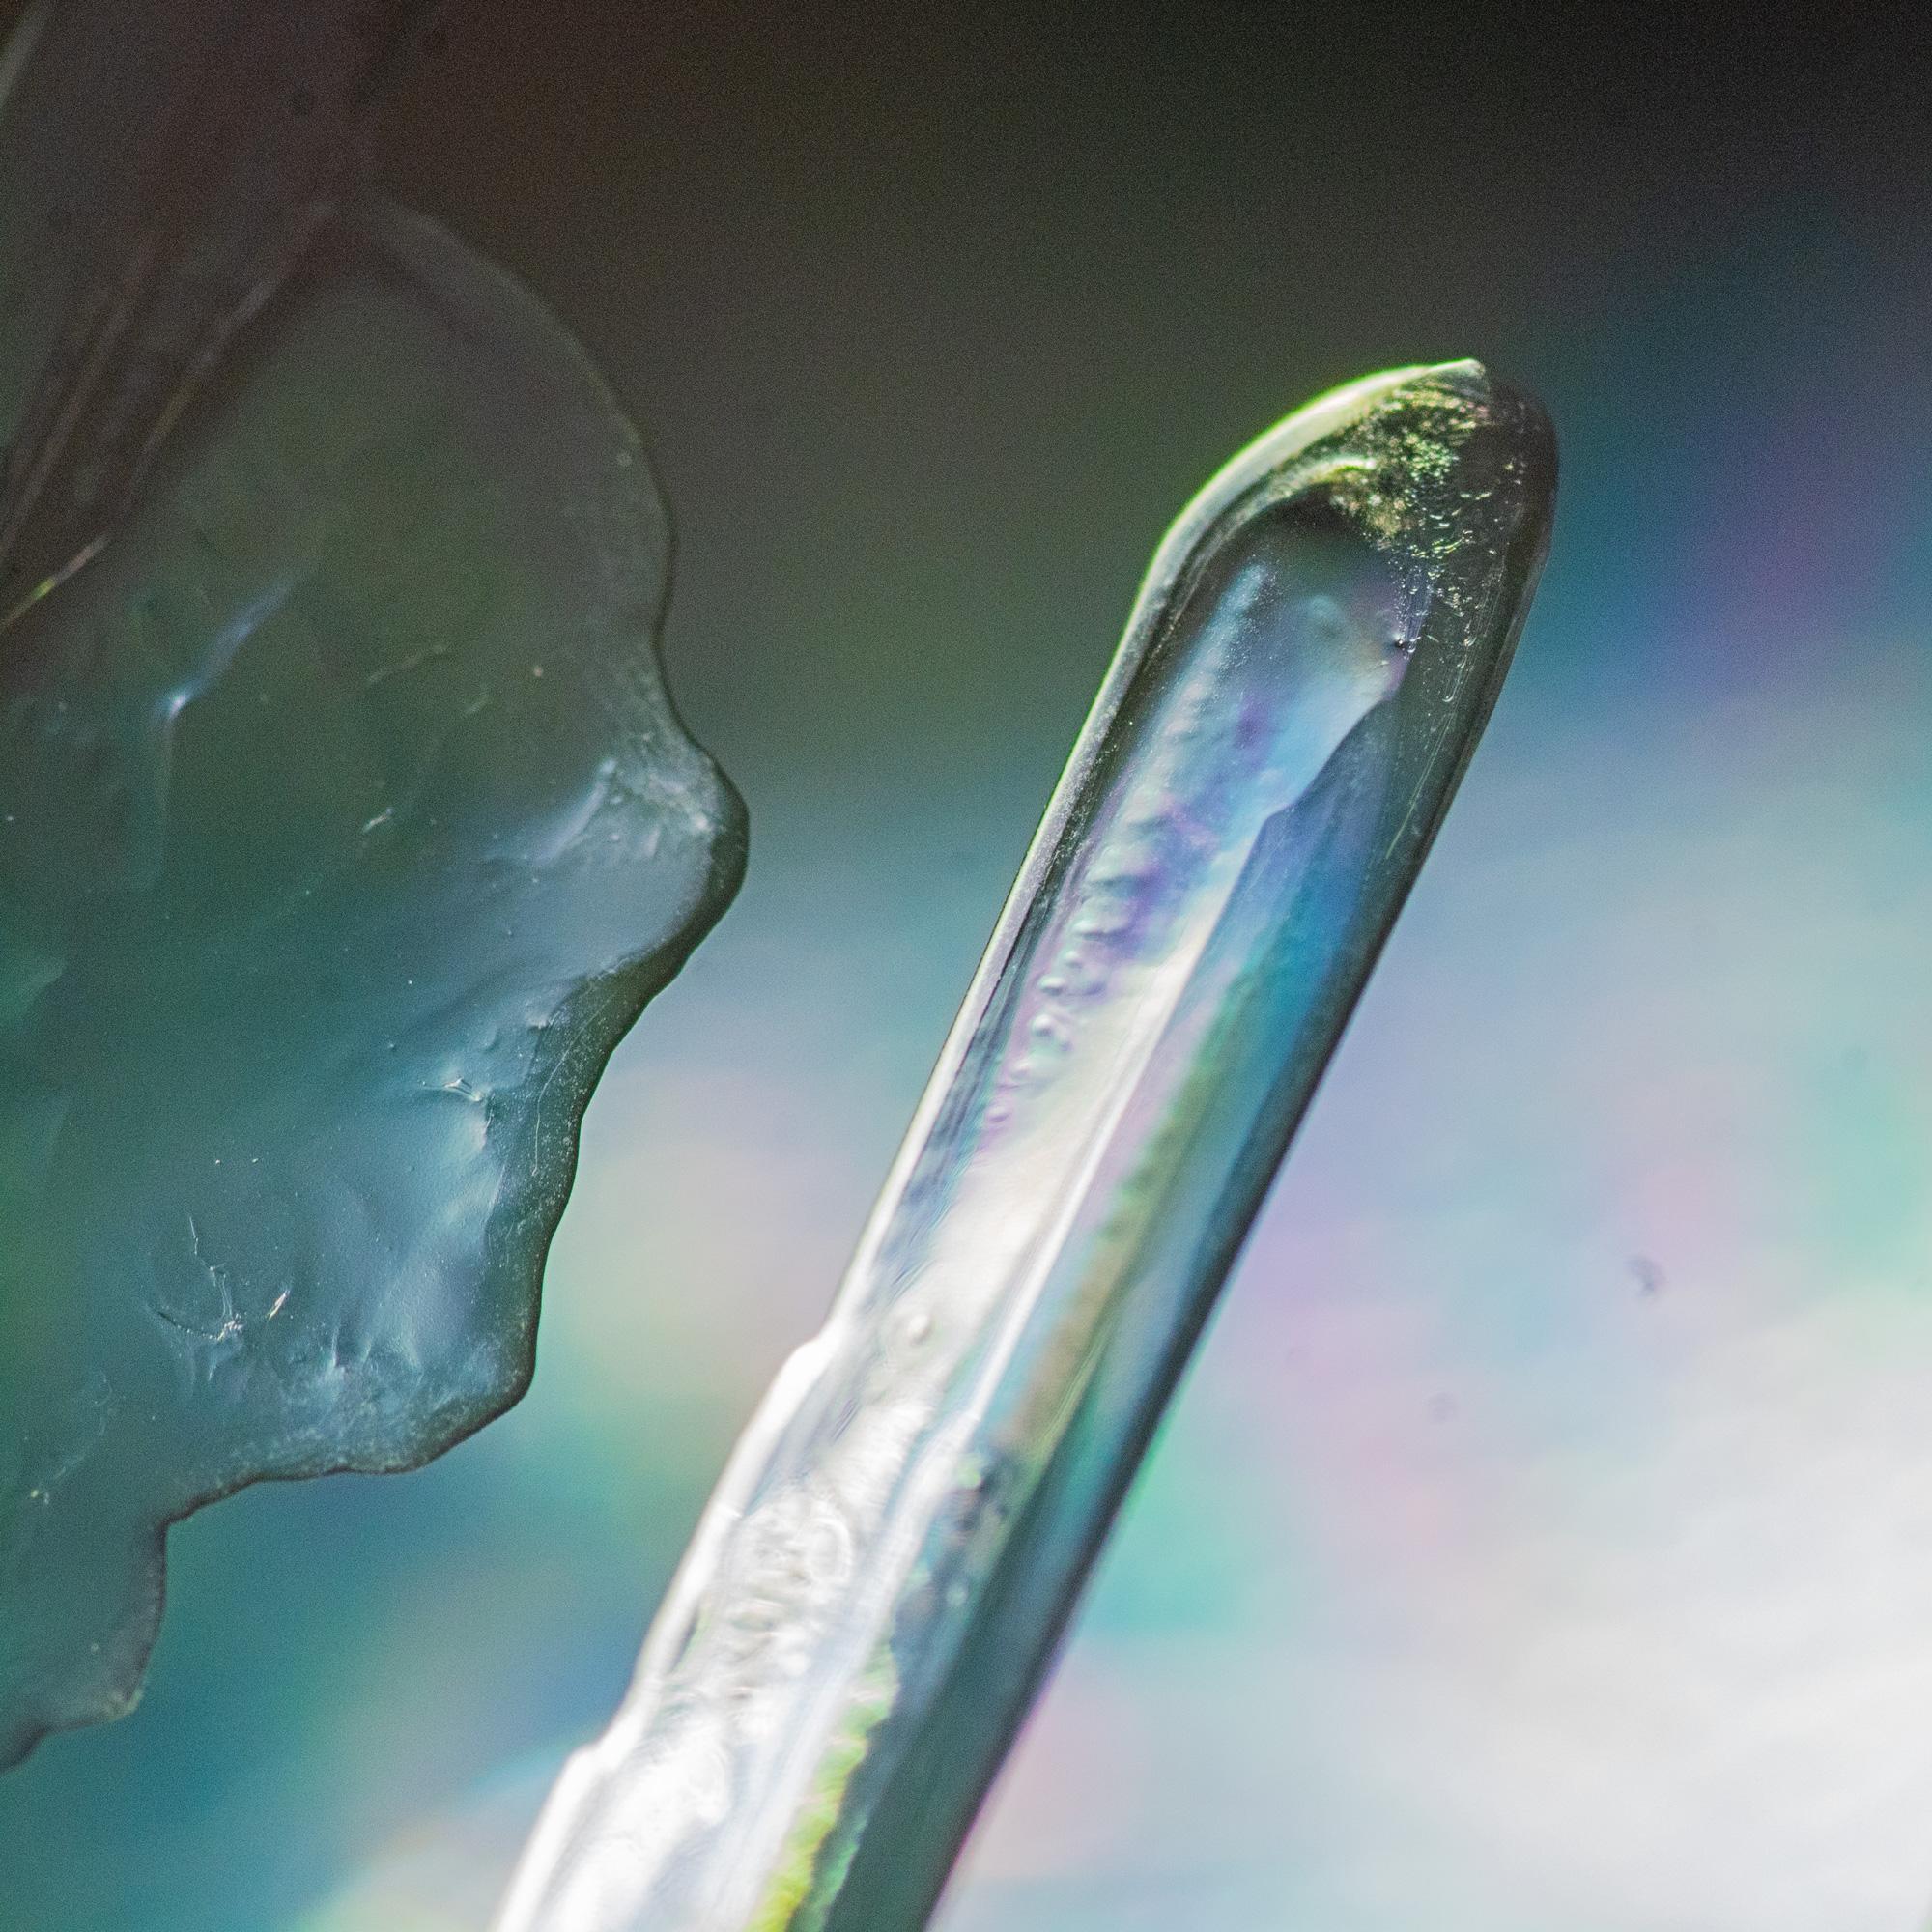
Ice Photography: Mind-blowing Macro
by chinooktype in Design > Photography
41734 Views, 157 Favorites, 0 Comments
Ice Photography: Mind-blowing Macro


(You can click "More Images" above to see them all while reading this section, but you'll be happier if you click an image and view them larger.)
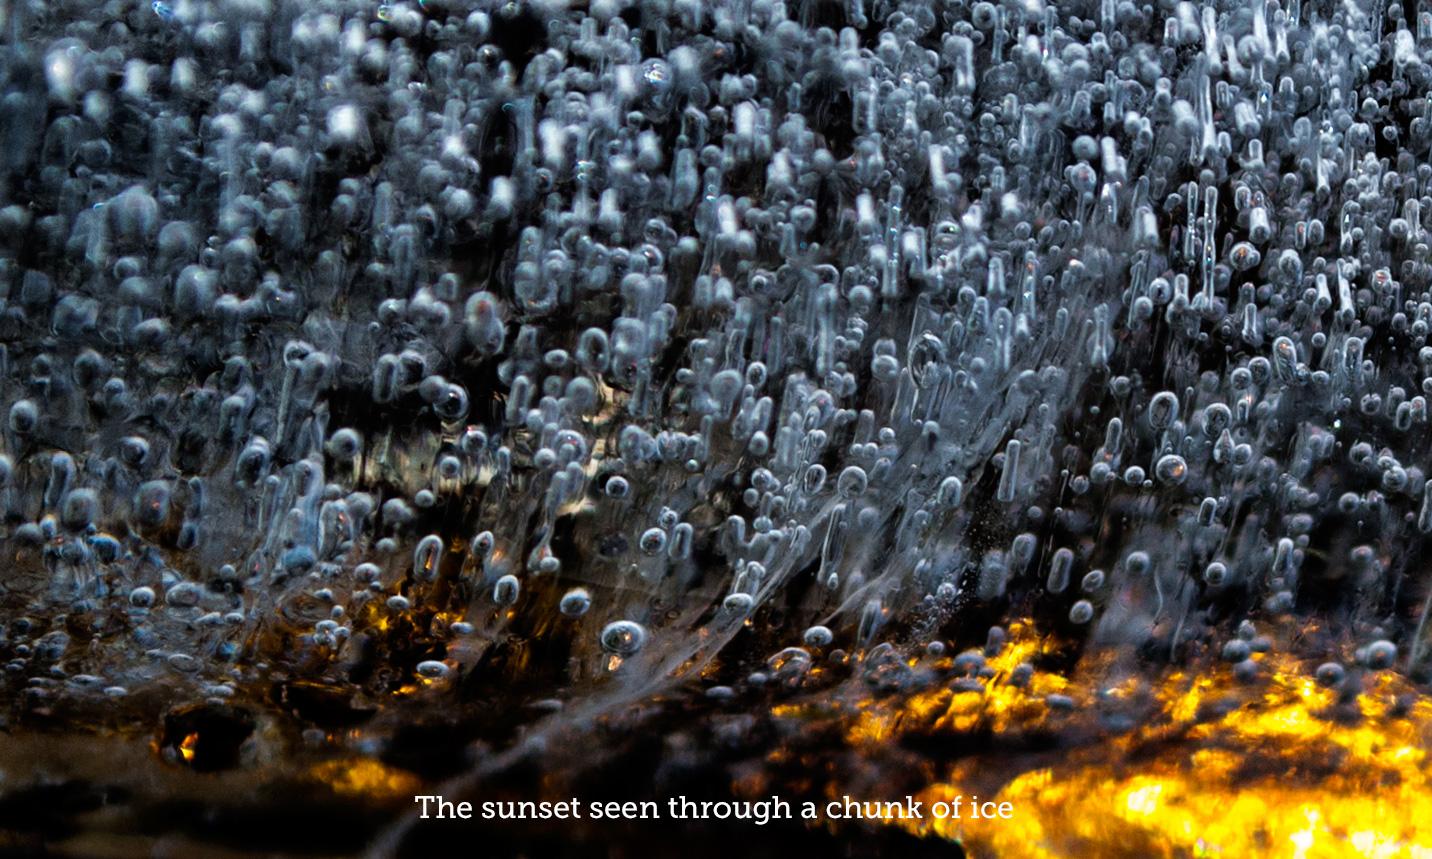
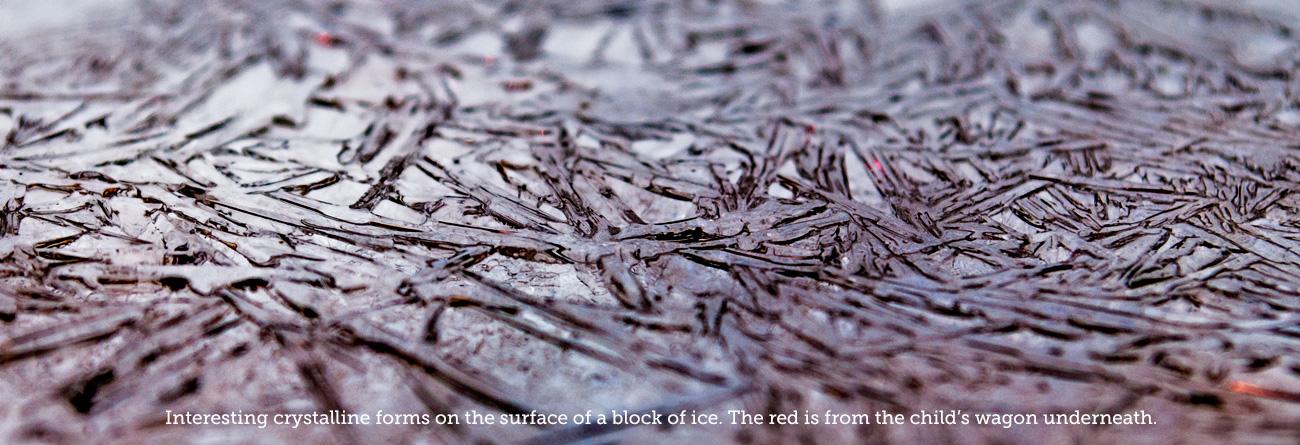
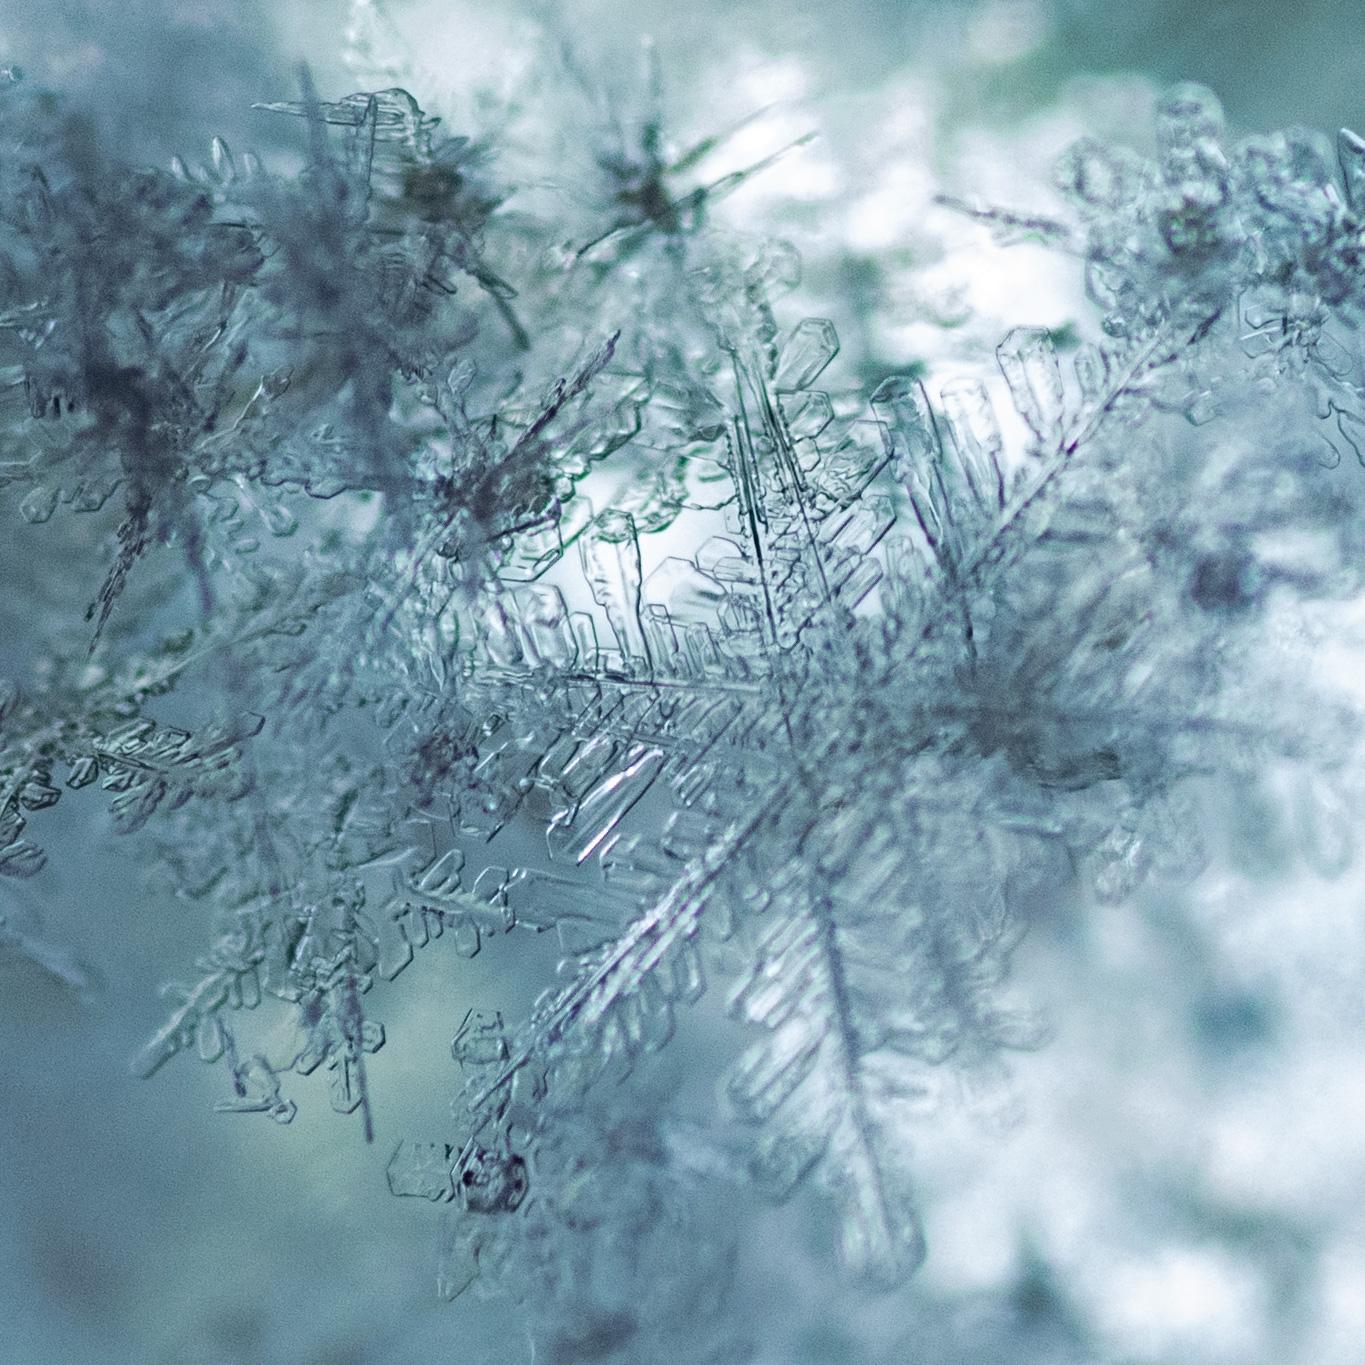
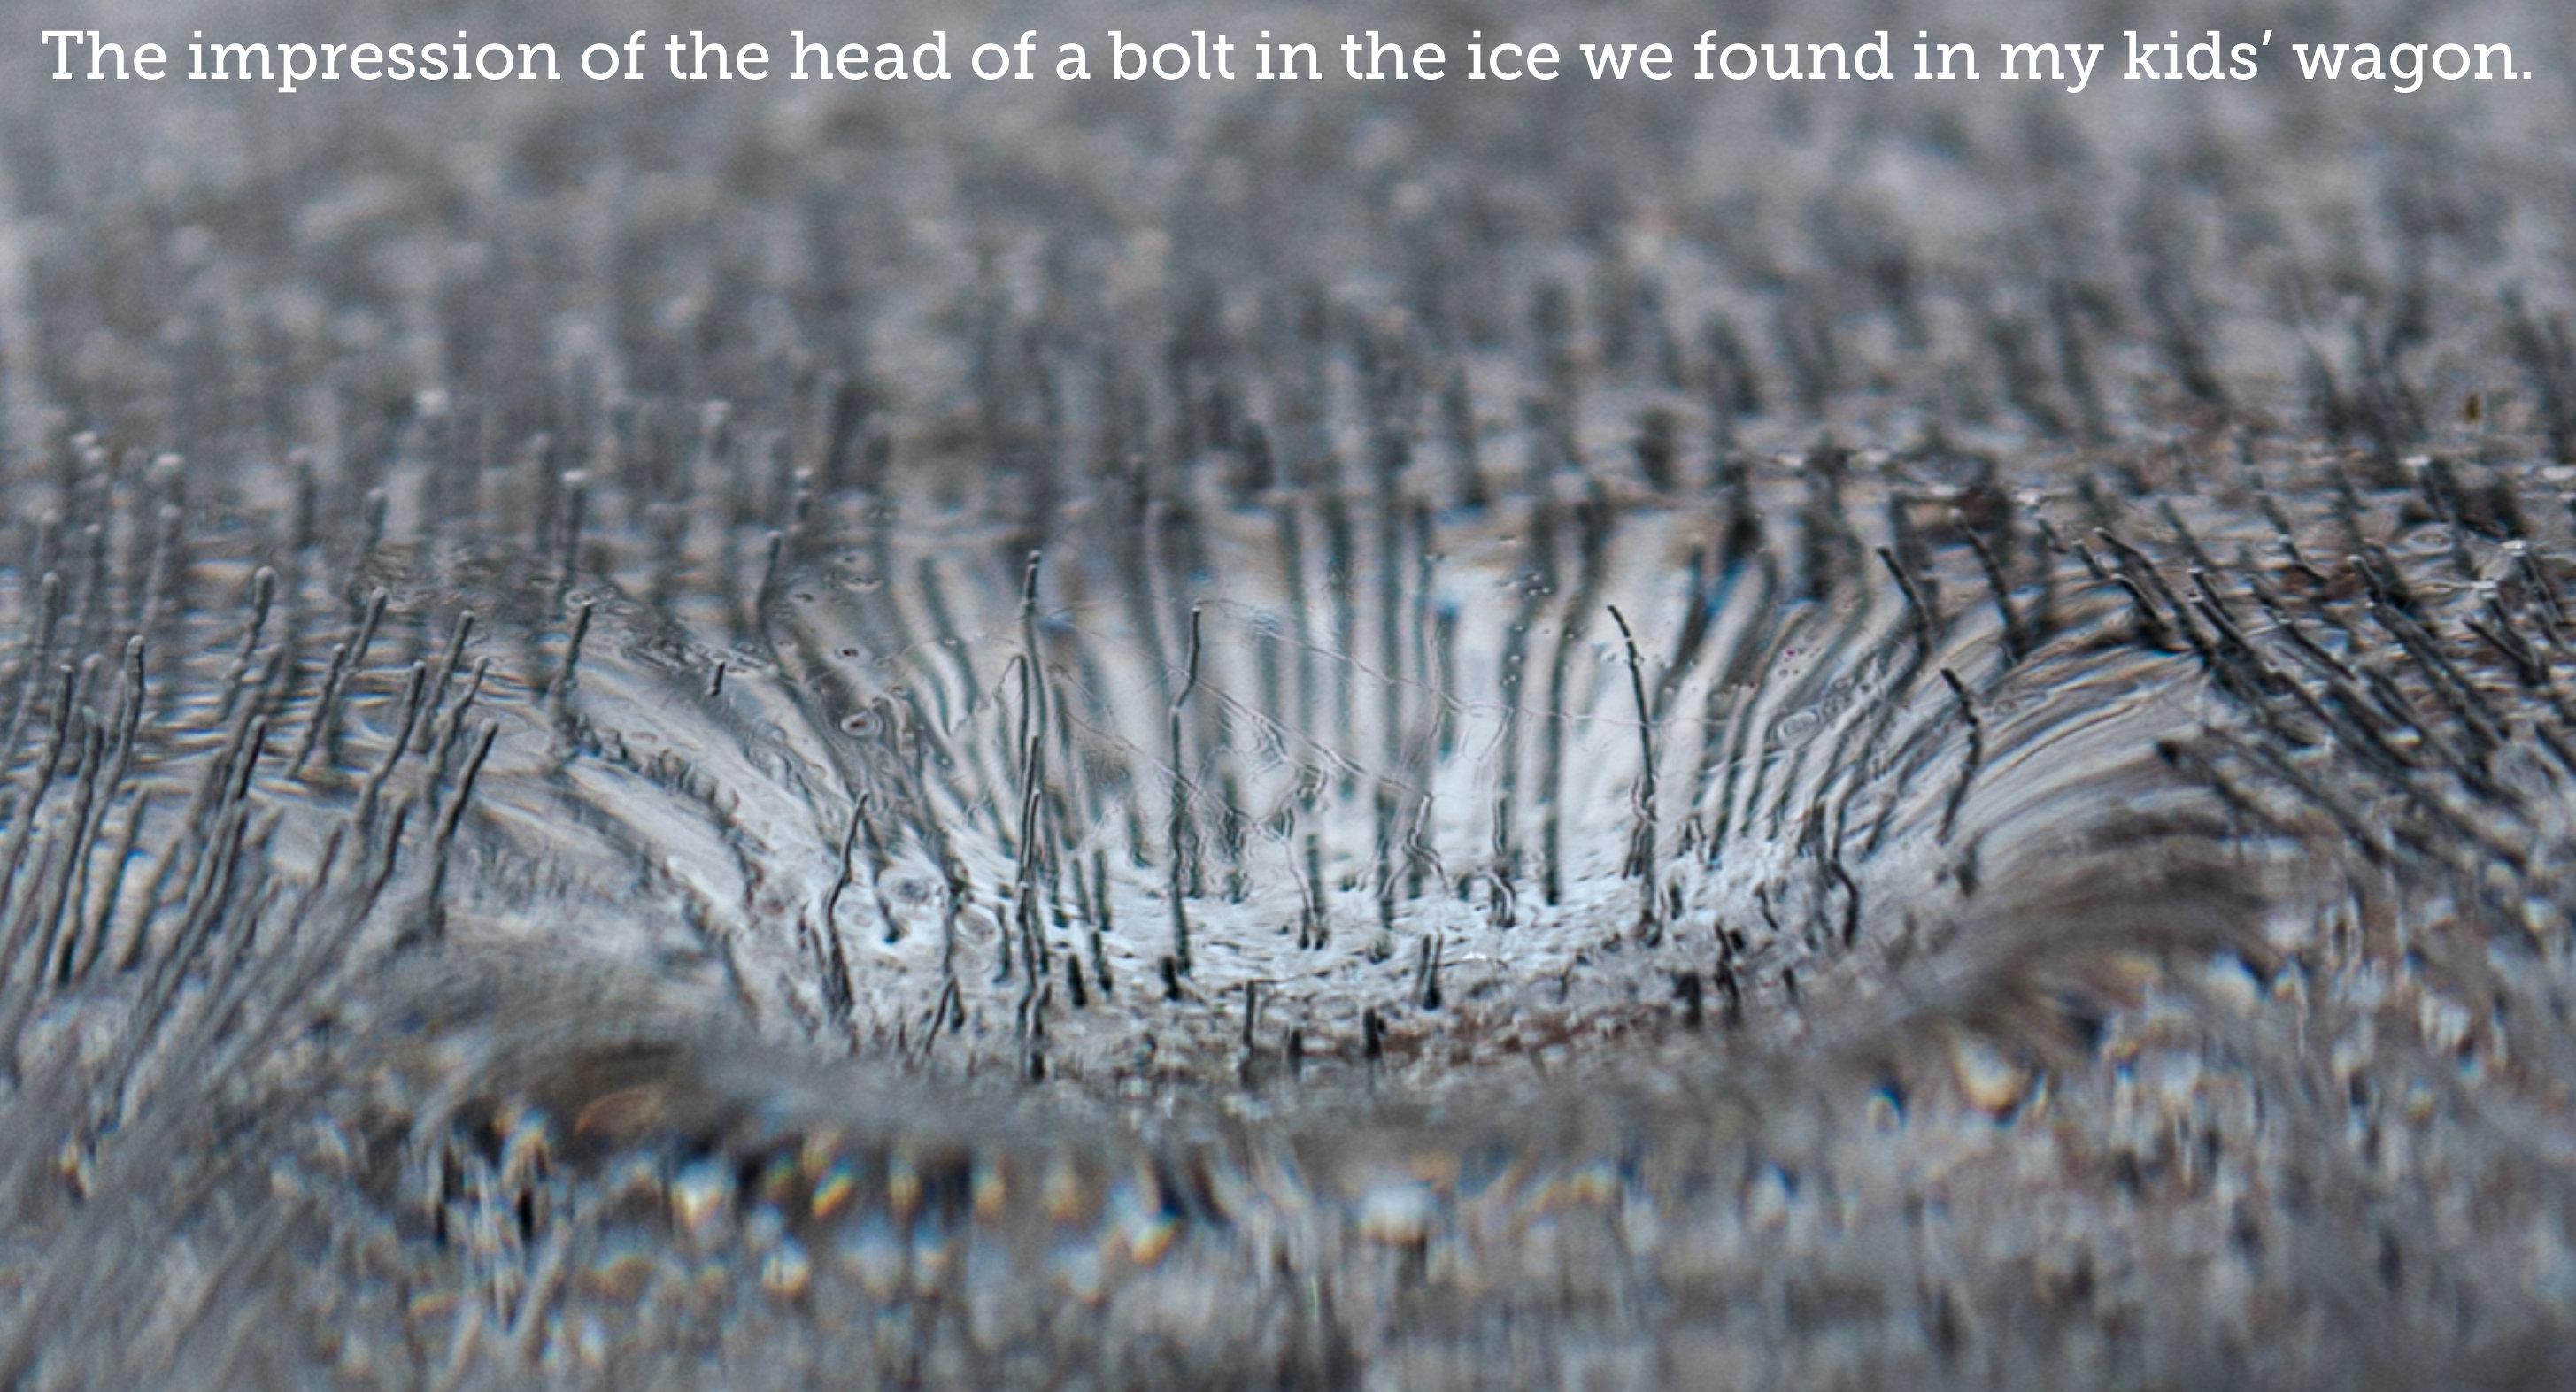
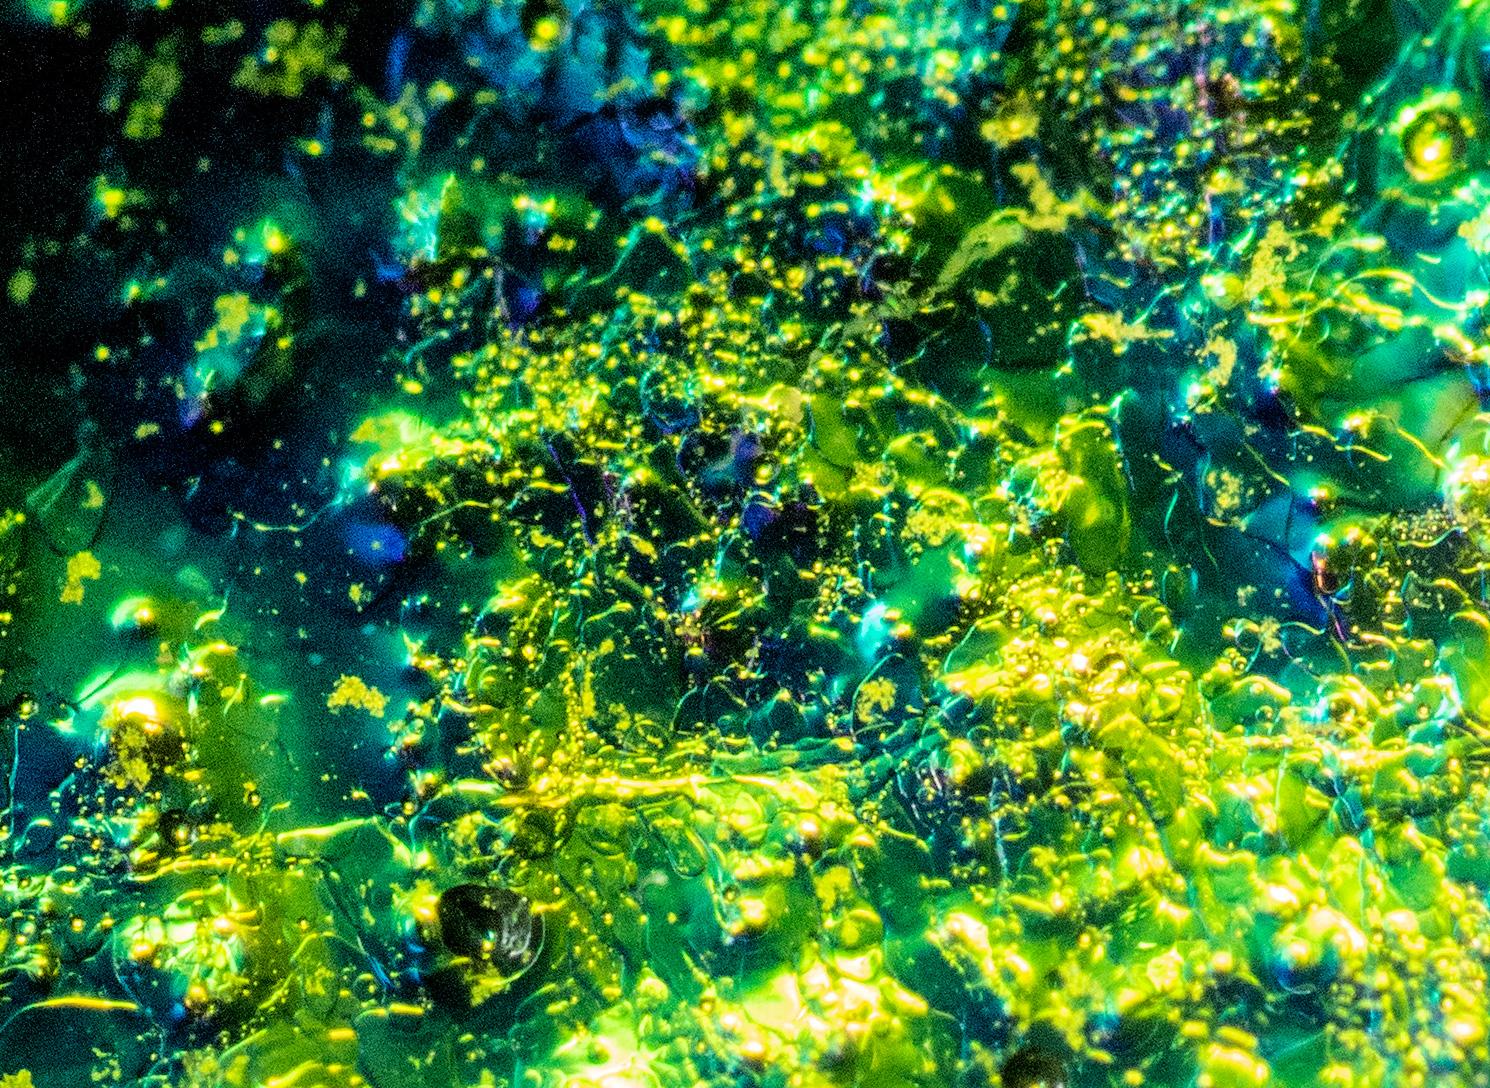
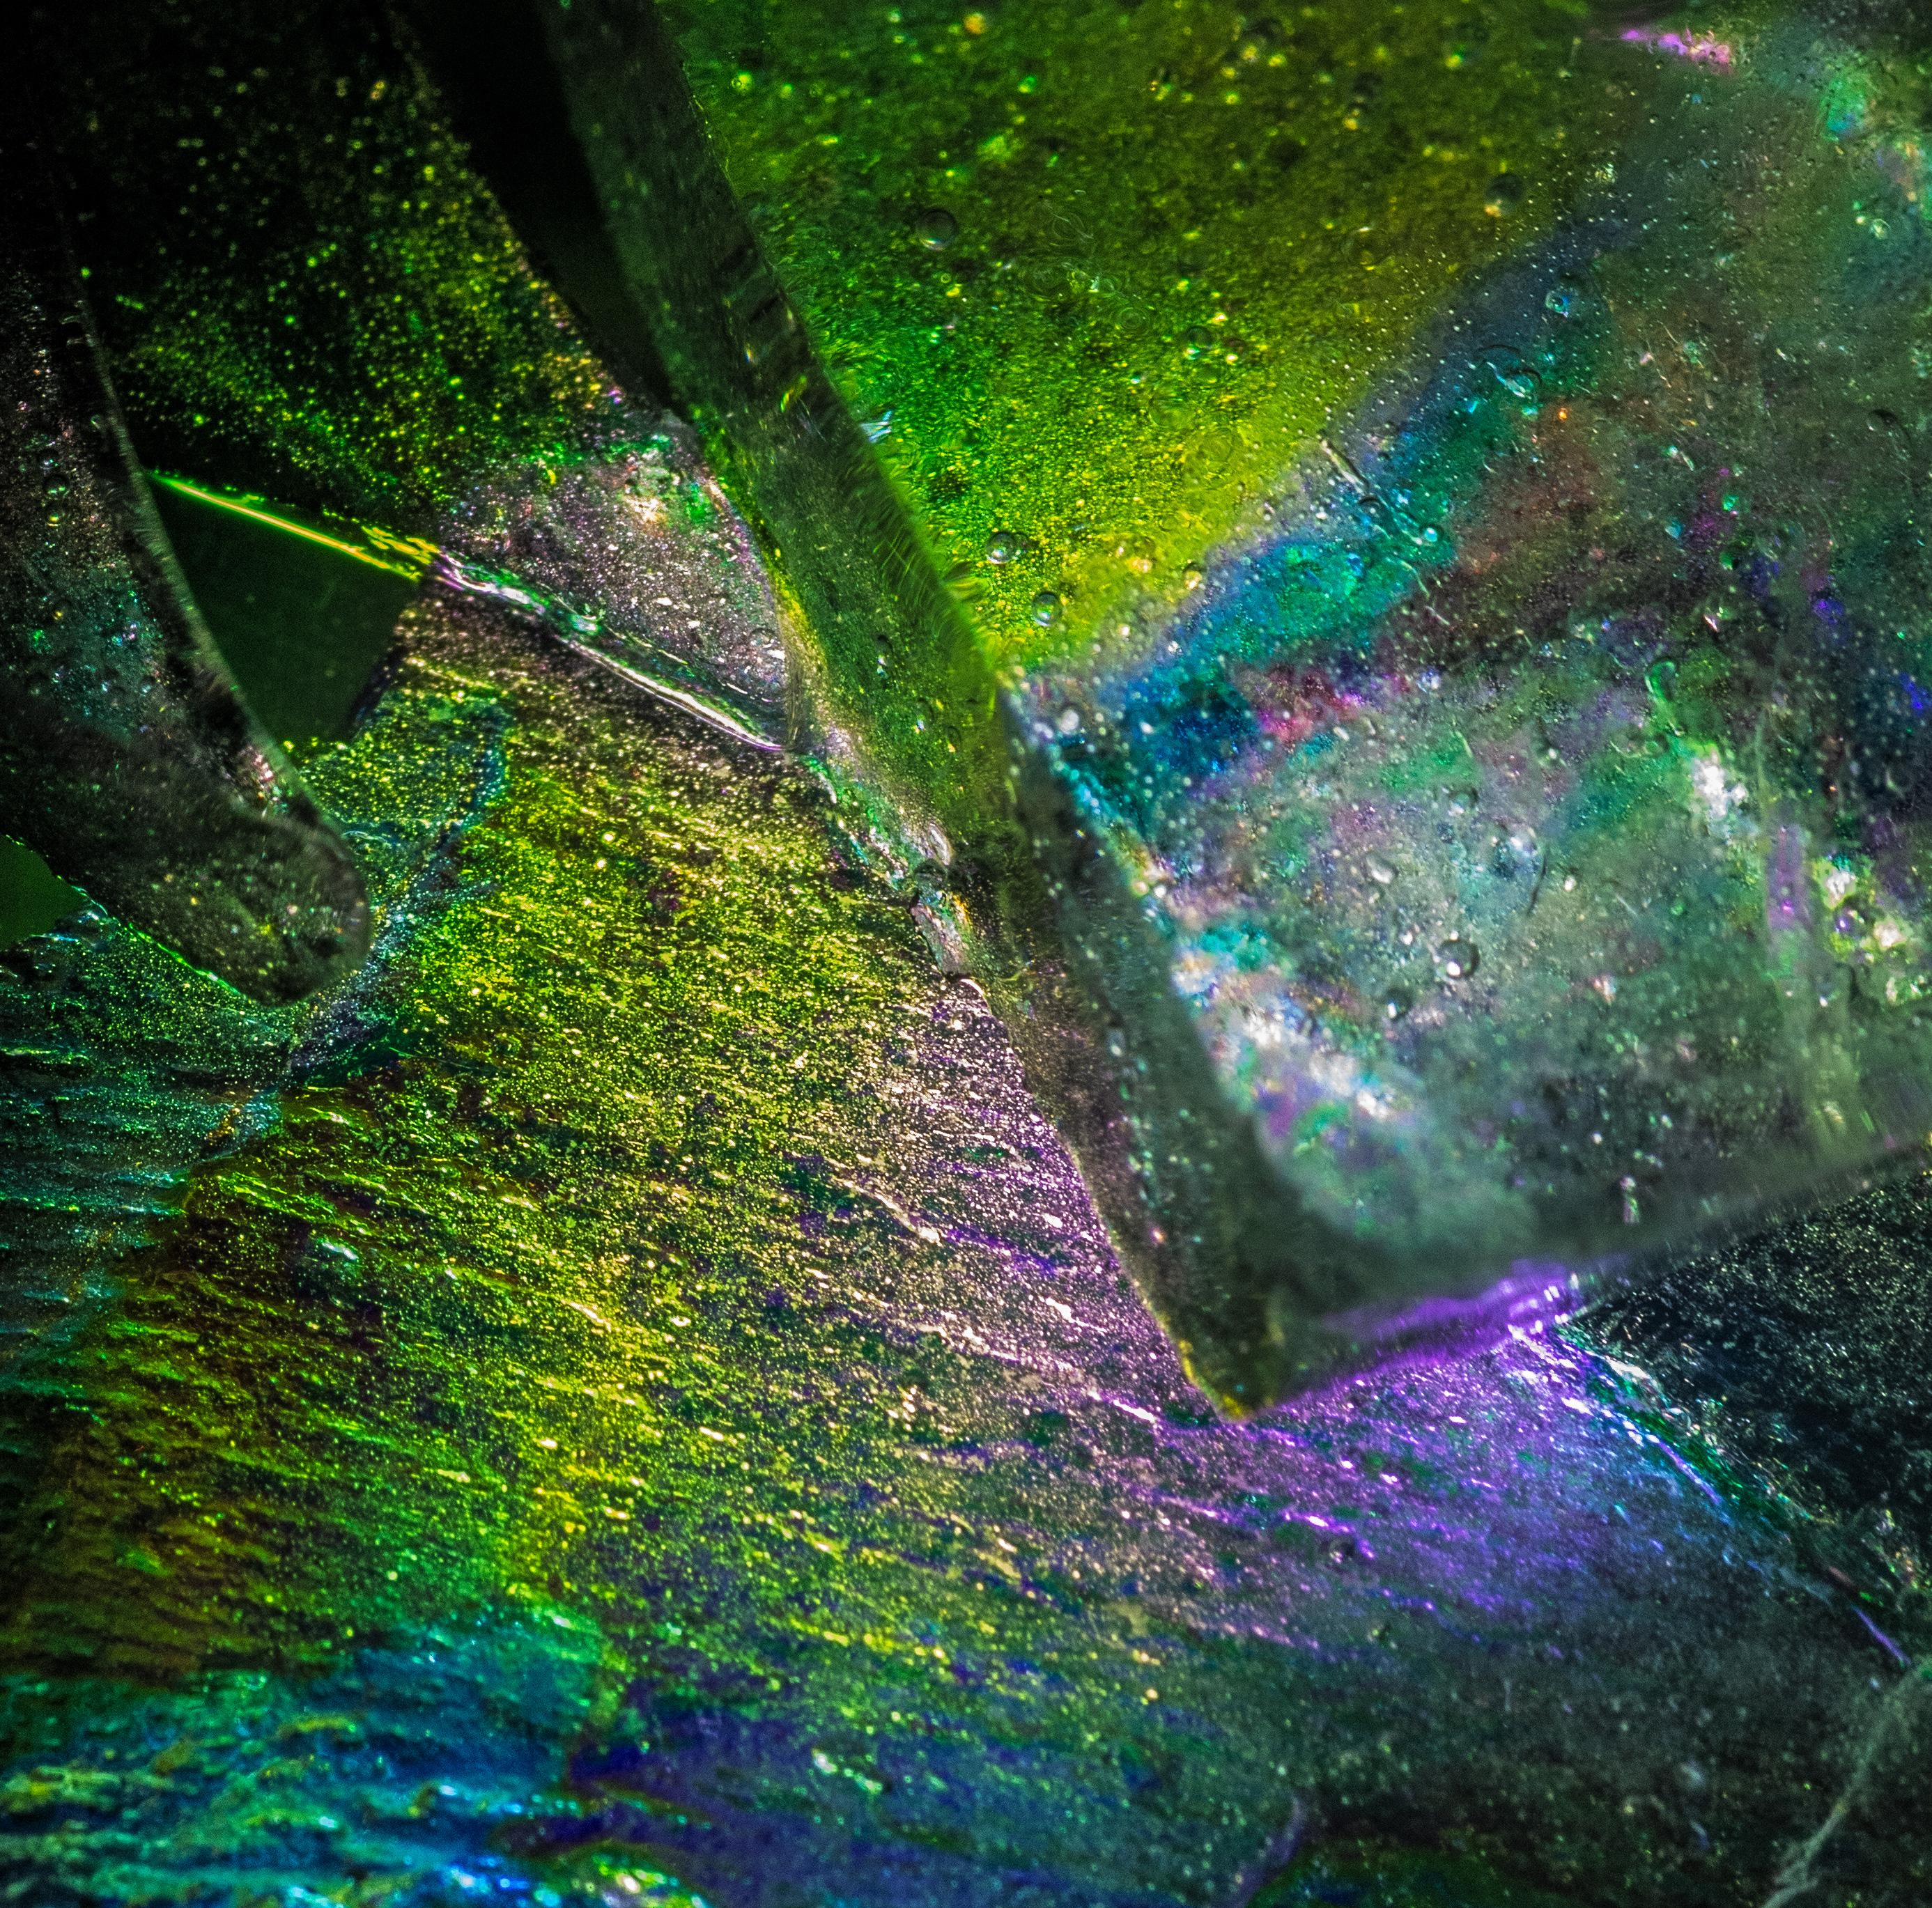
Years ago, inspired by reading my kids a book about Snowflake Bentley (see further reading section below), and by an accidental ice find (the kids’ wagon full of frozen rain), I became obsessed with photographing the tiny abstract universe of crystals, bubbles, refractions and reflections inside frozen water.
It has taught me a ton.
I am very much an amateur photographer, but I take a lot of photos and the majority of them are macro. Bugs, small fish, plants, random tiny things. No matter how many minuscule fruit flies I shoot, though, I've learned more about macro photography from ice than from anything else. It even helped me re-solidify everything about the actual mechanics and physics of photography that I'd been gradually forgetting since the invention of digital cameras.
The main thing, though, is that it's fun.
I'm writing this in the hope that others will enjoy it, and that maybe, just maybe, someone who is inspired to try it will turn out to be truly great. I hope it's you. I can't wait to see your pictures.
I should warn you: it has the potential to be pretty addictive.
Assuming you’re OK with that, I invite you to...
Free(ze) your mind and your ice will follow!
This is abstract photography. Many of your best results will be unplanned. Accidents are the goal. There's this idea out there that a photographer's job is to catch and reproduce reality as accurately as possible, but I was sent here with a message for the people,* and that message is that there are no rules you have to follow! Even if there were, you wouldn't have to do it all the time.
Embrace the random, the accident, the surprise.
You're using a digital camera, right? Then go wild! Take 100 (or 1000) shots of a piece of ice. Later, when you look at them on a bigger screen, throw out 99 (or 999).
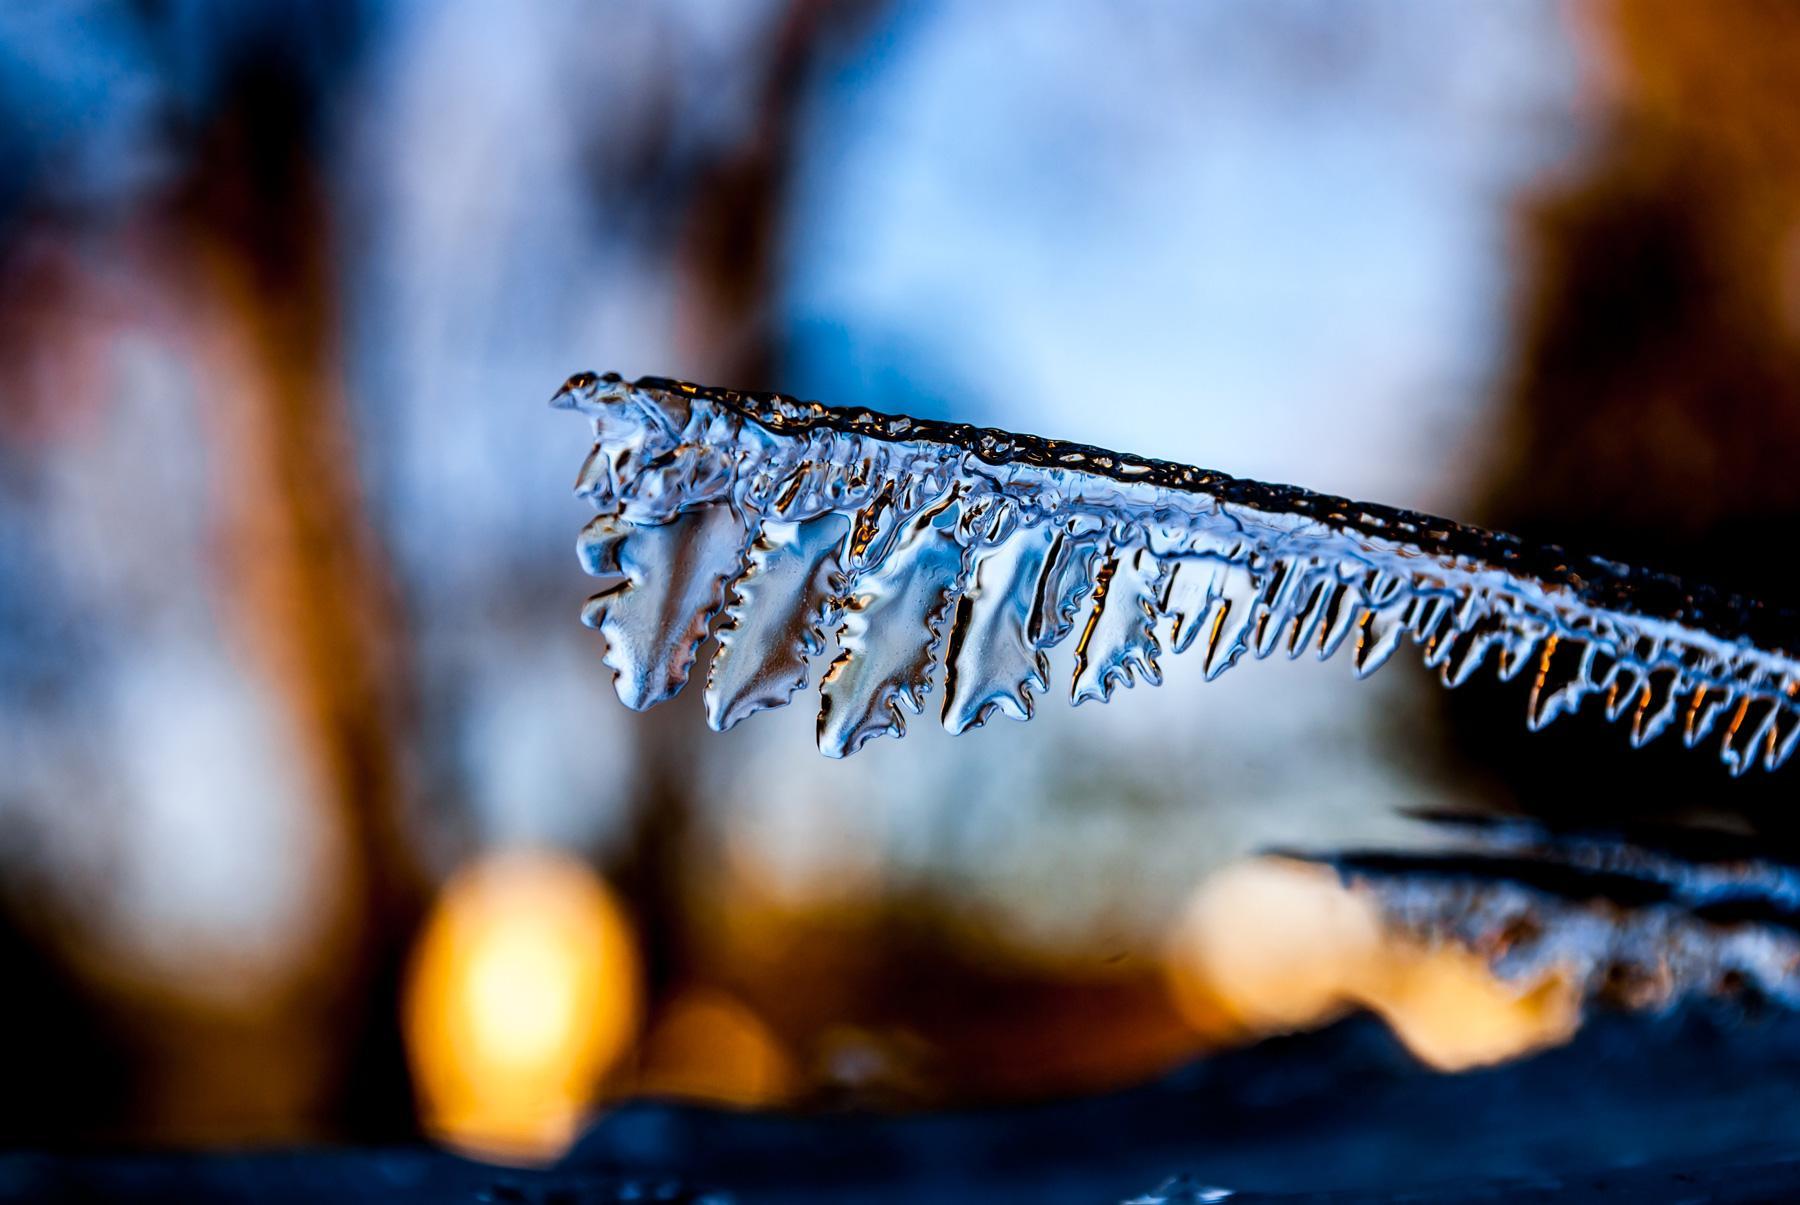
Staring through your camera into that bowl of frozen dog water or the icicle that fell off the porch and almost pierced your foot, don't worry about exactly which tiny bubble or fracture is in focus in any given shot. There are probably cool looking things at various distances, starting with the surface and going all the way through to the other side, so just relax and trust that some shots will have something that's sharp, and a few of those shots will be pretty awesome.
This ice-tructable is about having fun
It assumes you're not using the sort of really hardcore macro gear that would allow you to focus accurately on one particularly gorgeous bubble. If you are, great. I want to see your shots. But speaking as your doctor,** it wouldn't hurt to loosen up a bit, simplify your setup and just see what happens.
This is not about fancy equipment (though it's nice to have), technical photography knowledge (though it'll help), or advanced Photoshop (or whatever) skills (though it will help a lot).
Photos in this instructable were taken with phones, several point-and-shoot cameras, an old entry-level DSLR (with various non-macro lenses and later with extension tubes added to those lenses), and a better DSLR with a dedicated macro lens (though it's an old one with some limitations).
Regardless of the equipment involved, I've usually managed to get at least some interesting shots. Often, I've ended up with hundreds of potential keepers from an hour or two's shooting. Among them have been some images of exceptional beauty (in my totally biased—but possibly accurate—opinion).
Use what you have
If you don’t have the space, time or desire to make your own ice or control the photo setup, but your climate is right, take a walk and find icy beauty to photograph. If your climate is wrong but you have a freezer, try making ice and learning to control how it looks. Hold it up to your eyes and see what the world looks like. Bored by water? Try adding things to the ice. See the Other ways to play sections below for more on this.
All the way at the bottom of this page is a further reading section with links to information about ice, Snowflake Bentley, macro photography and more.
*I was not actually sent here.
**I am not actually a doctor—yours or anyone else's.
Supplies
Water. You're definitely going to need water.
You are going to need a ton of camera gear. Or hardly any at all.
And a ton of containers. Or maybe just a bucket.
Probably a computer.
I'll go into all of it in the steps below.
WARNINGS!
Do not freeze water in glass, ceramic or other breakable containers—water expands as it freezes and will deform or break containers that don't allow for this. Ever seen an aluminum drink can that froze and exploded?
Do not use anything that your roommate/spouse/partner/grandparent/boss/children or other authority figure would be sad to lose.
Beware of letting your camera, tablet, phone or other electronics get too cold. I don't know if screens or other components can be damaged by the cold, and I'd rather not find out.
Beware of frostbite—hands, face, ears, or anywhere. Handle ice with gloves or rags, keep your head covered, dress appropriately for the conditions.
Do not lick frozen things. Seriously. (Also, don't touch freezing metal containers, doorknobs, etc. with wet hands.)
The Iceperson Cometh Part 1: Containers/molds
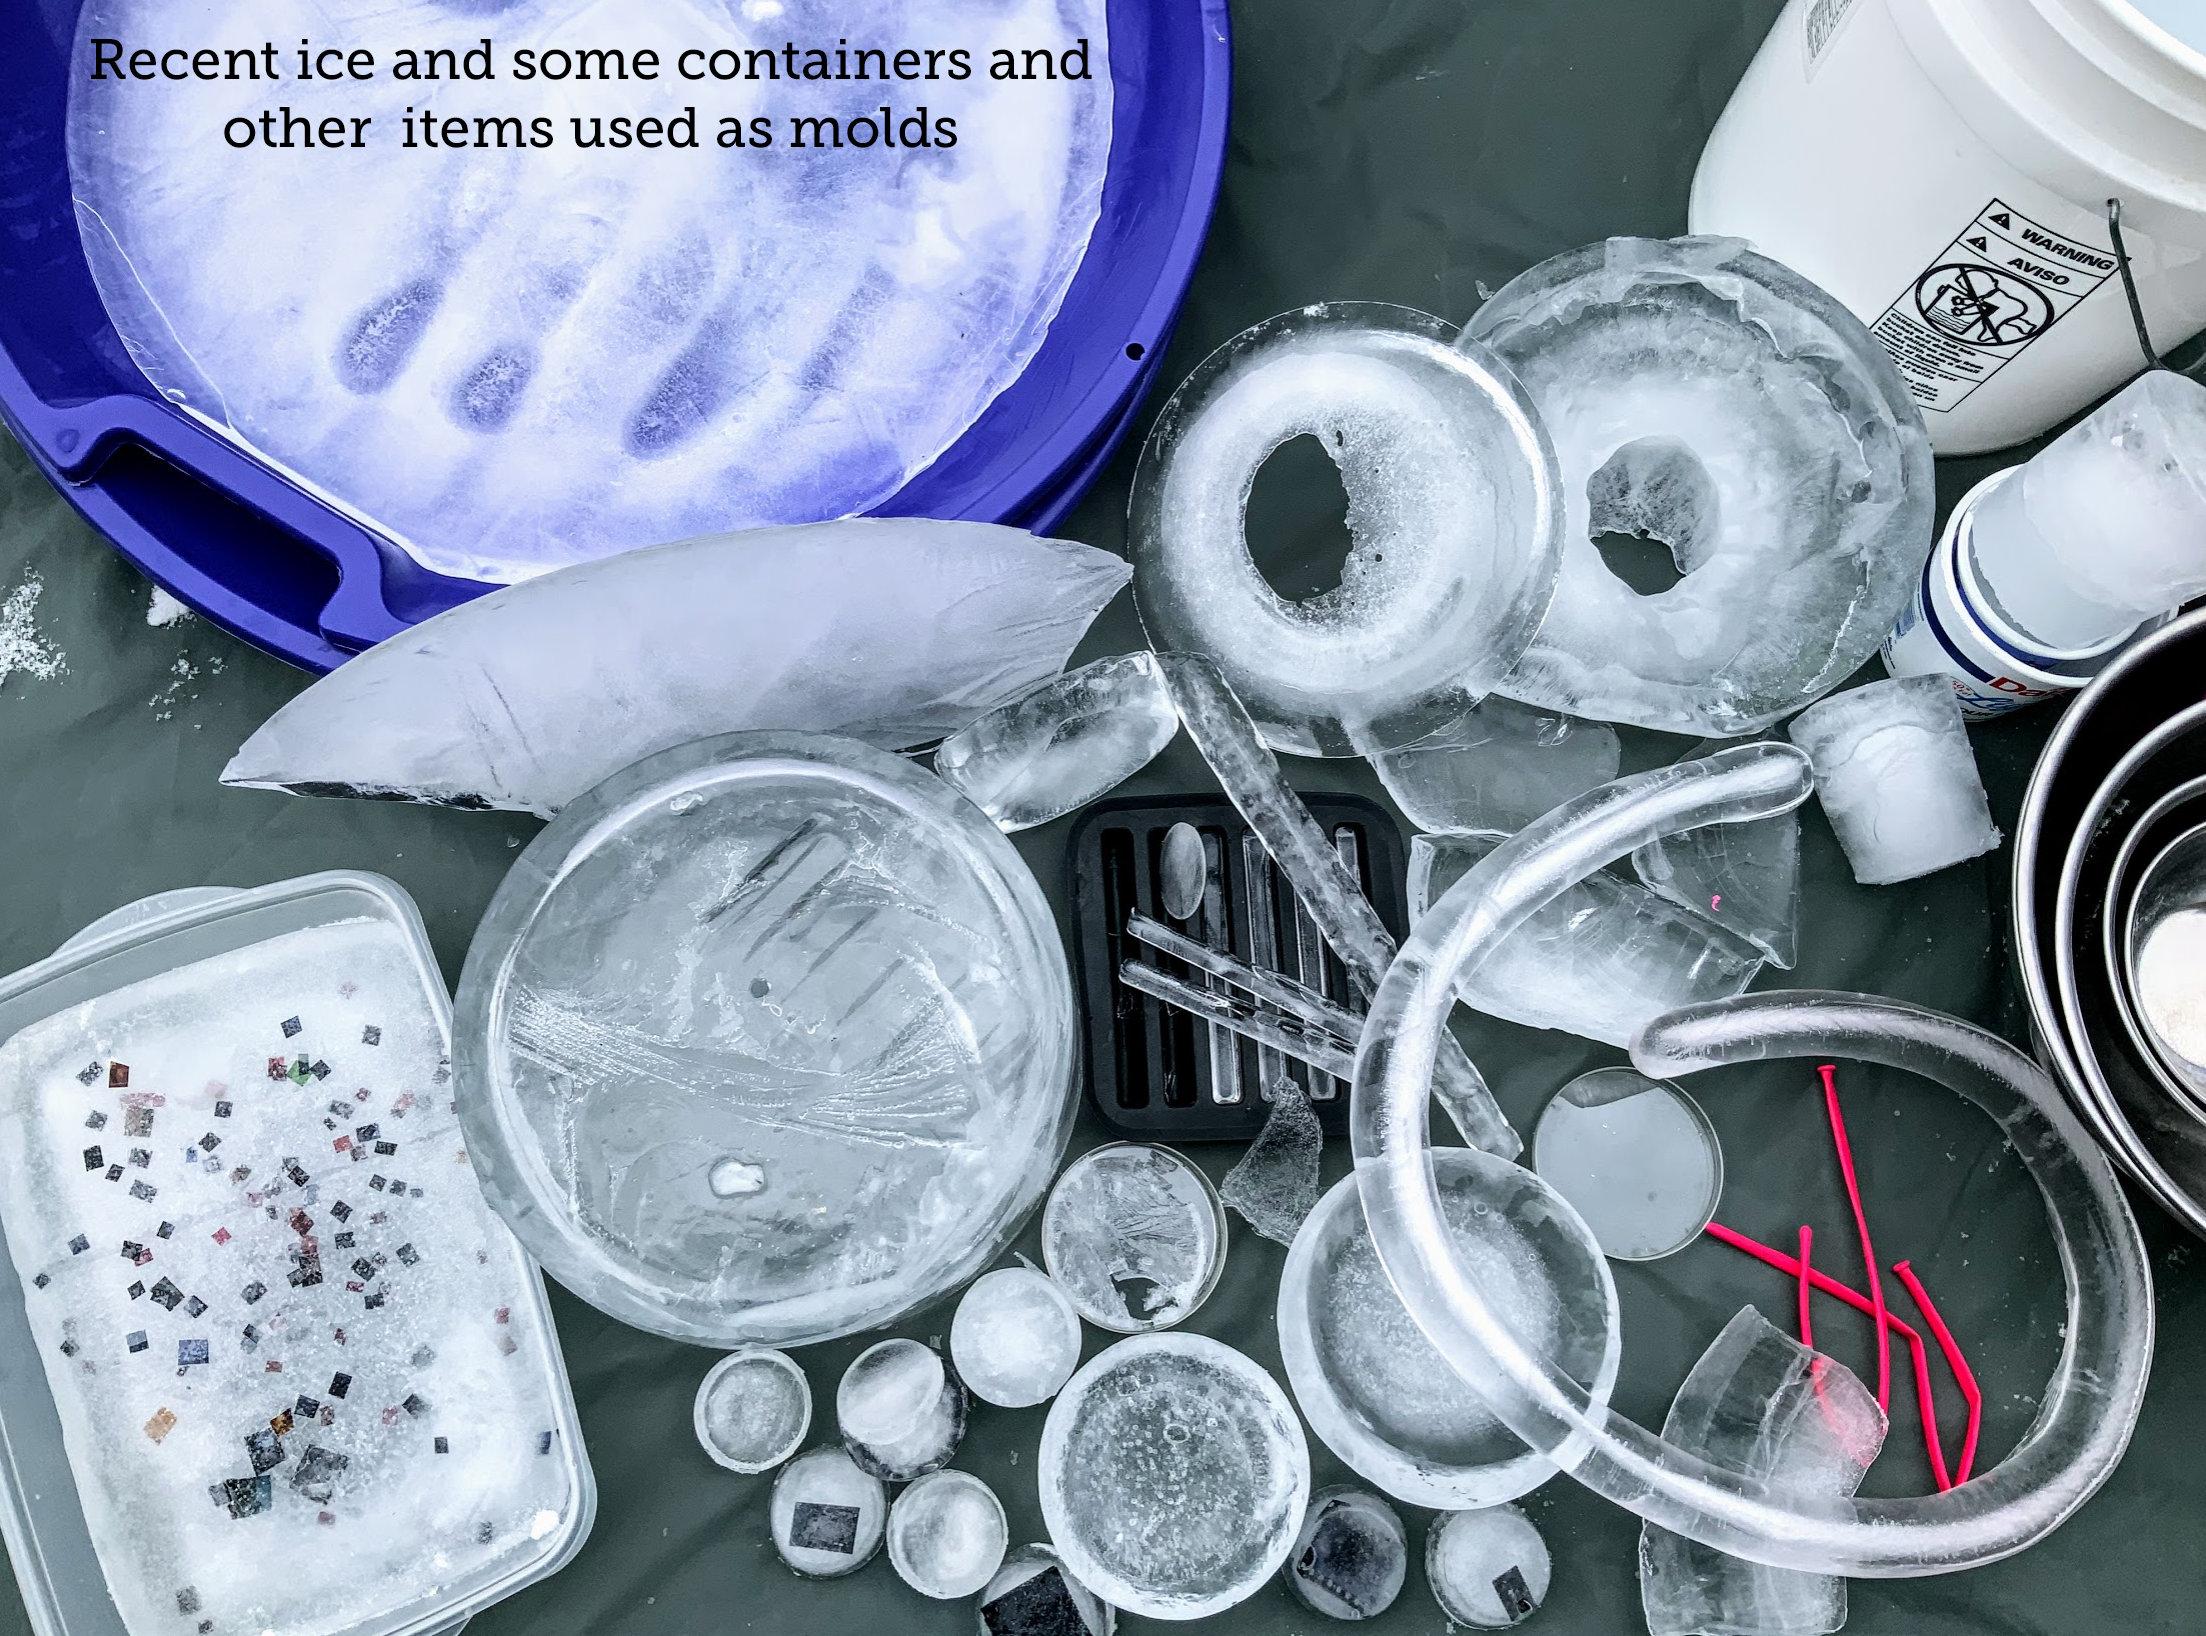
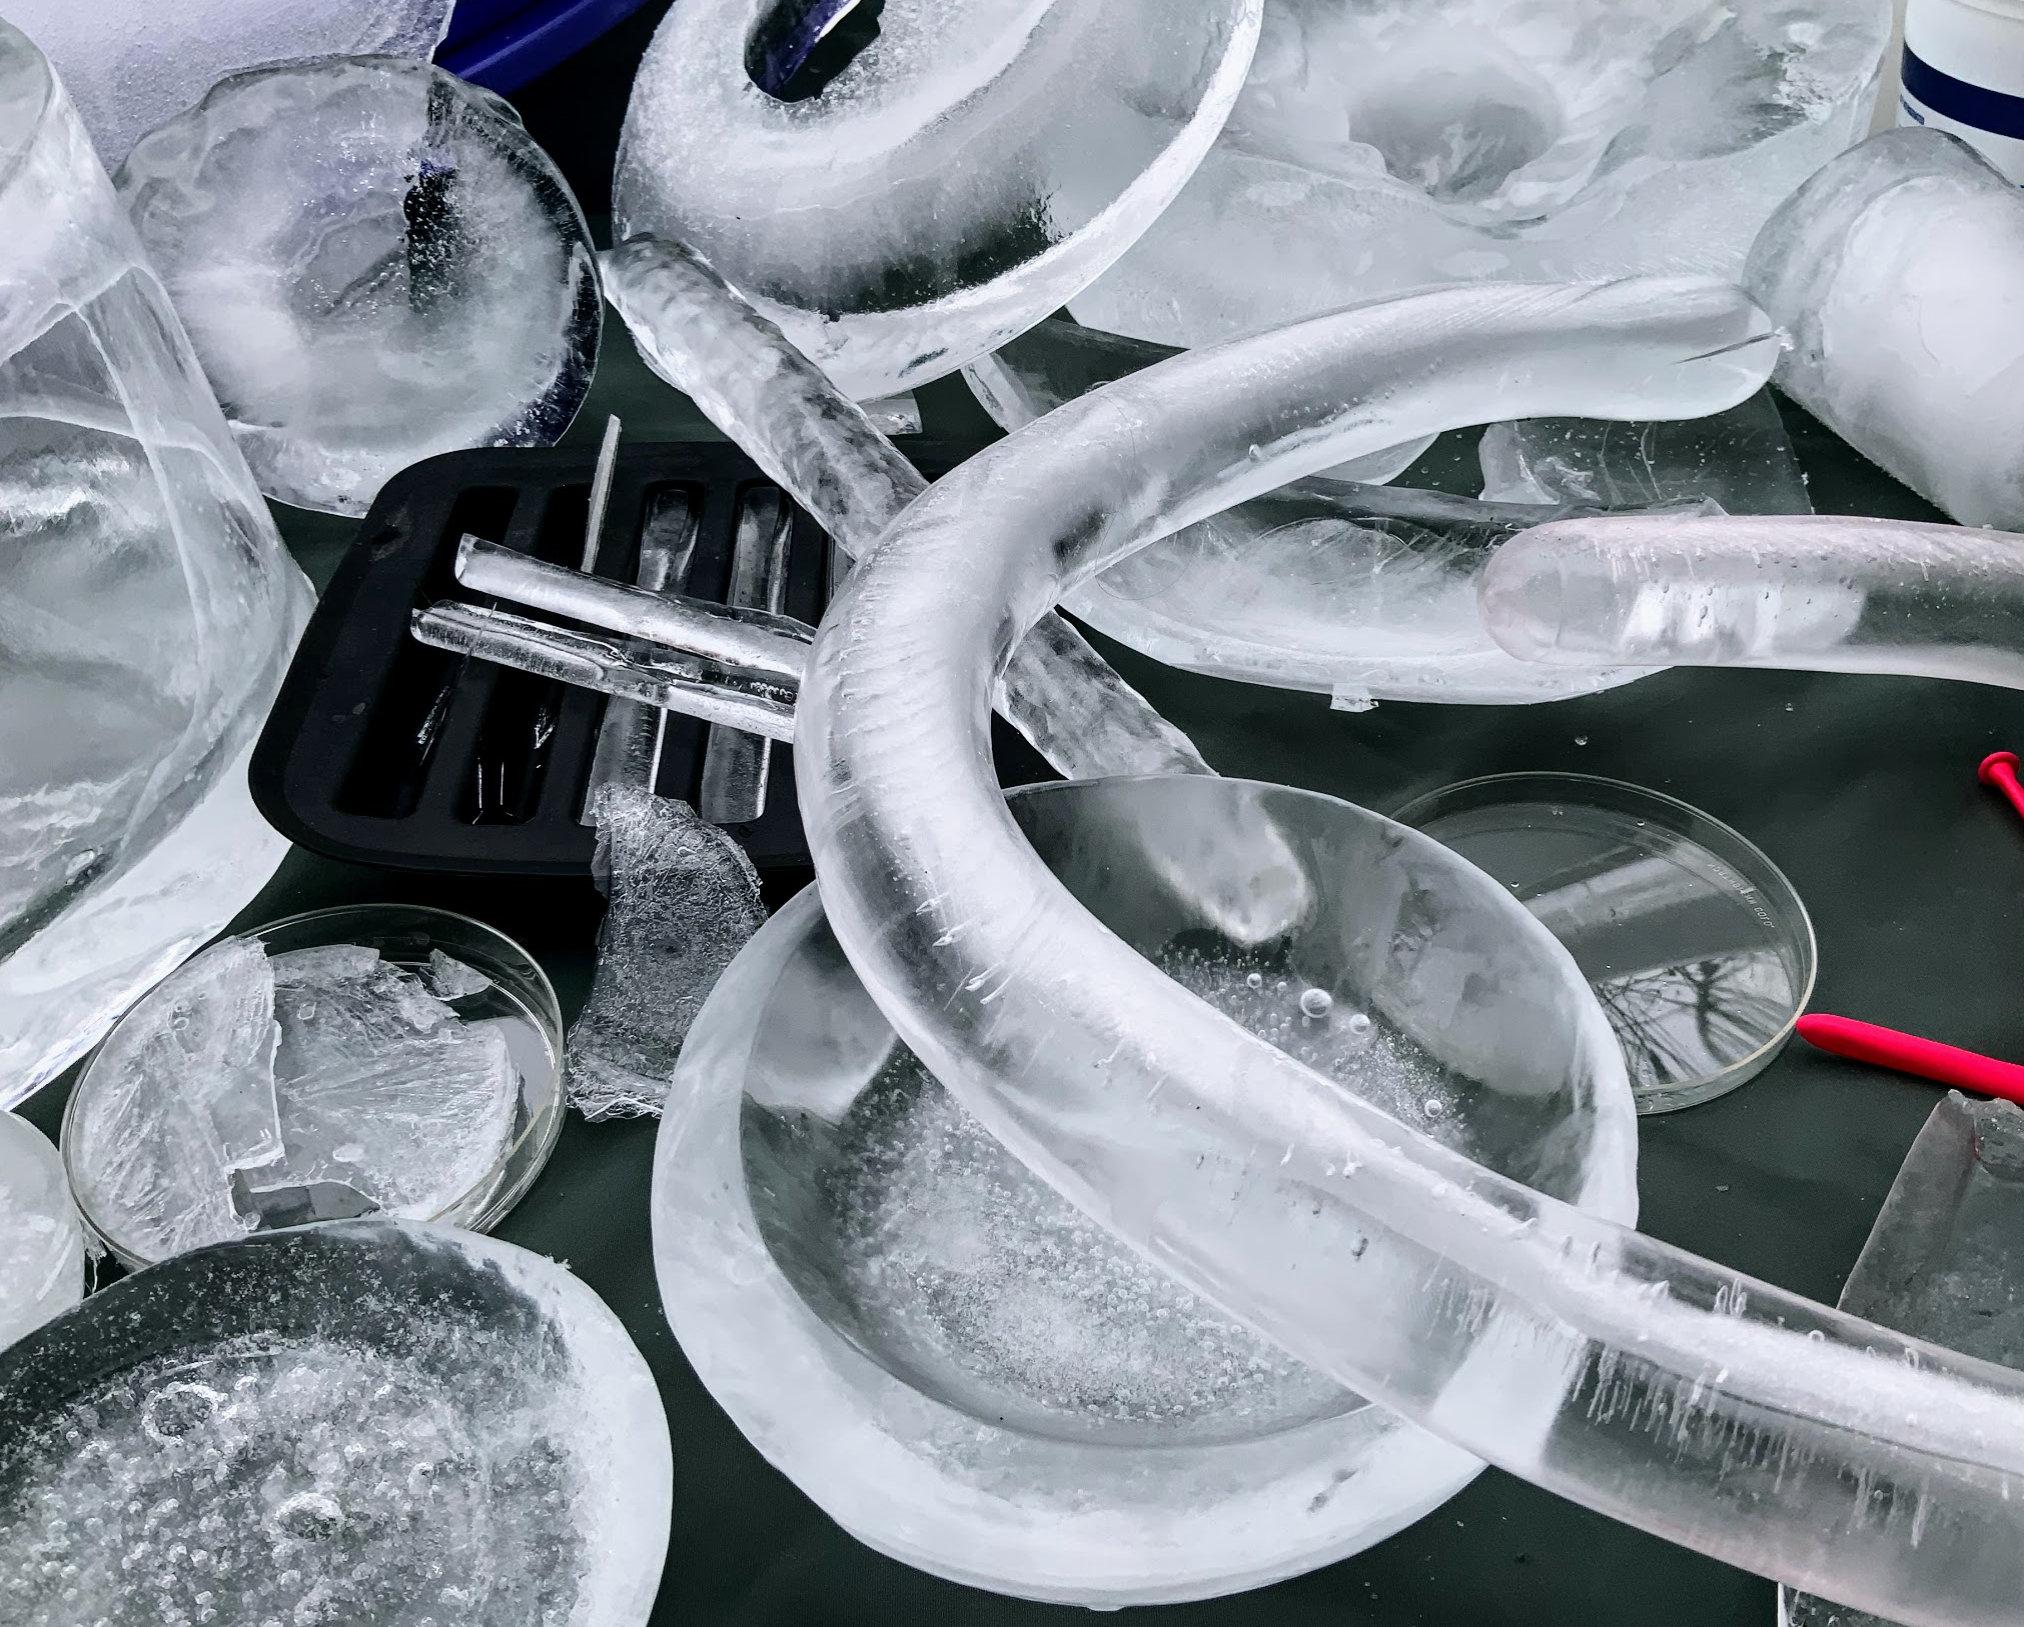

(Click "More Images" above to see them all while reading this section.)
Remember what I said about there being no rules? Accidents being the goal? That applies to the ice, too.
The short version: Take anything watertight, fill it with water, freeze it.
The version that says the same thing with more words:
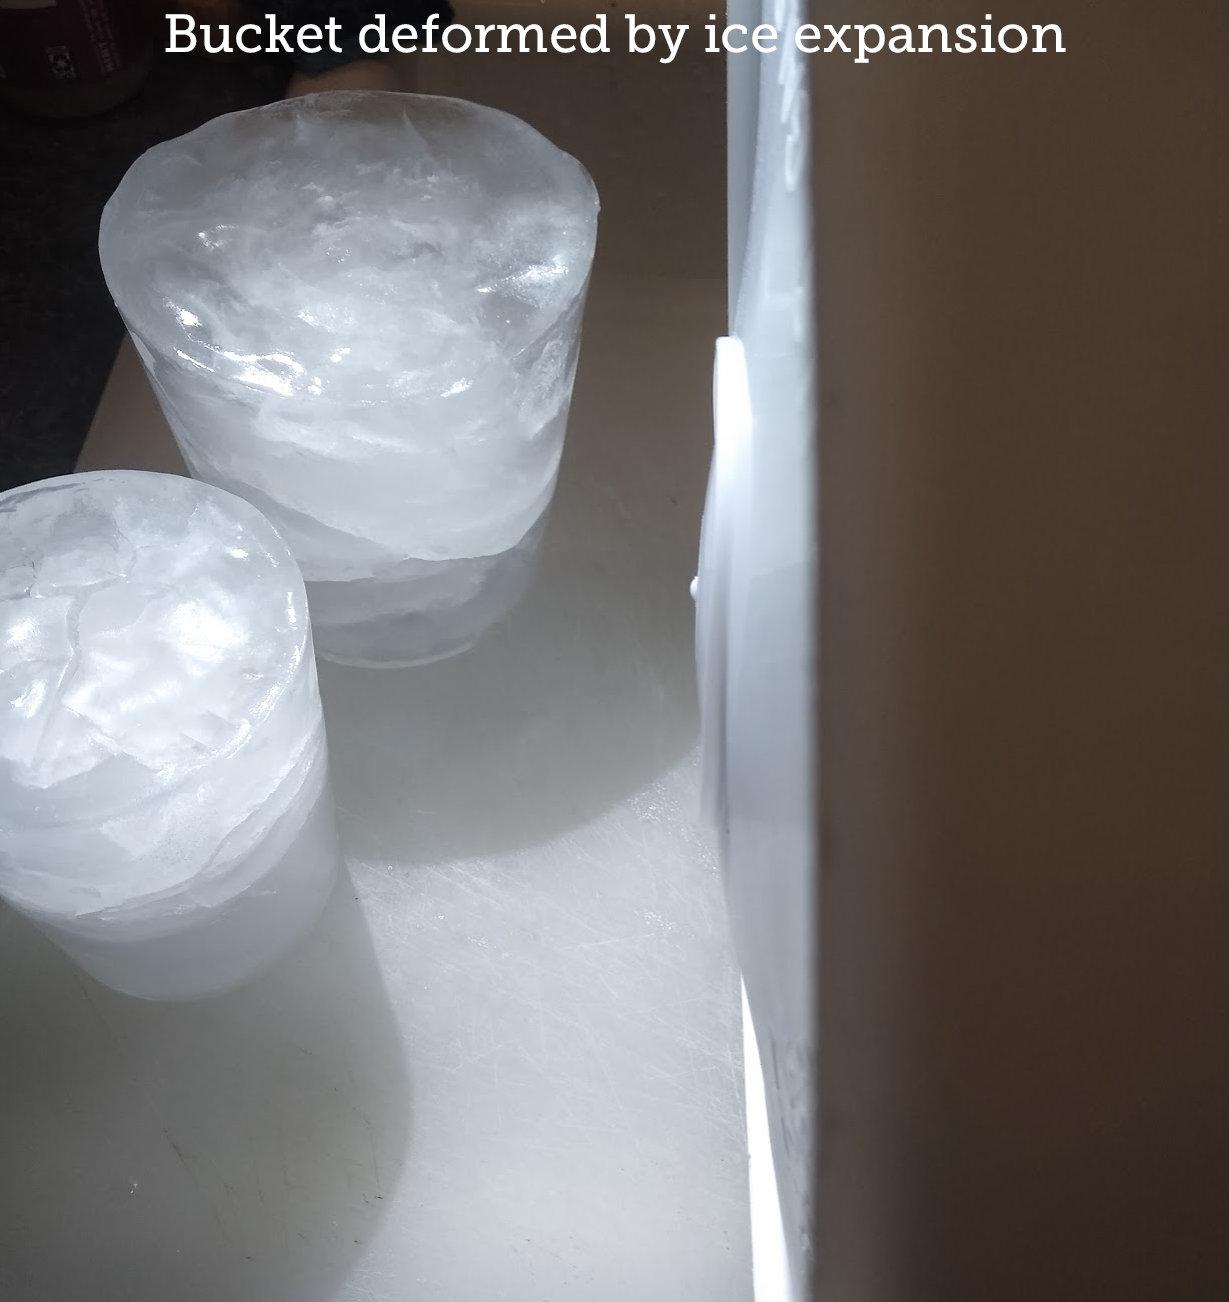
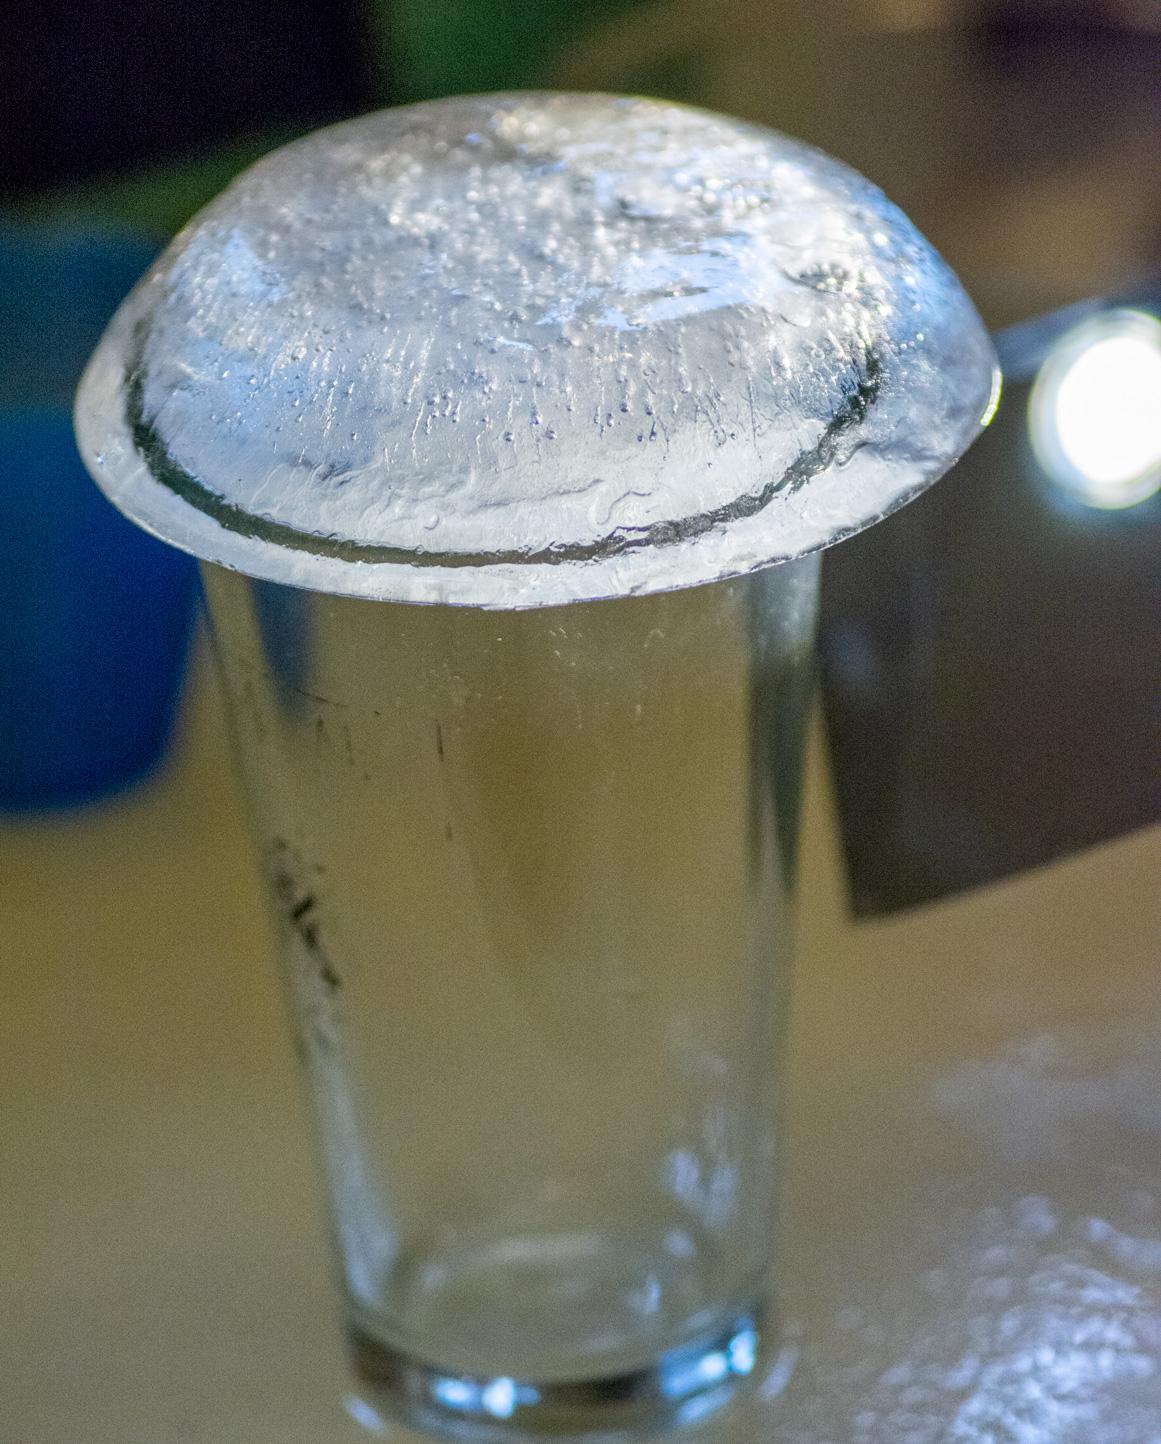
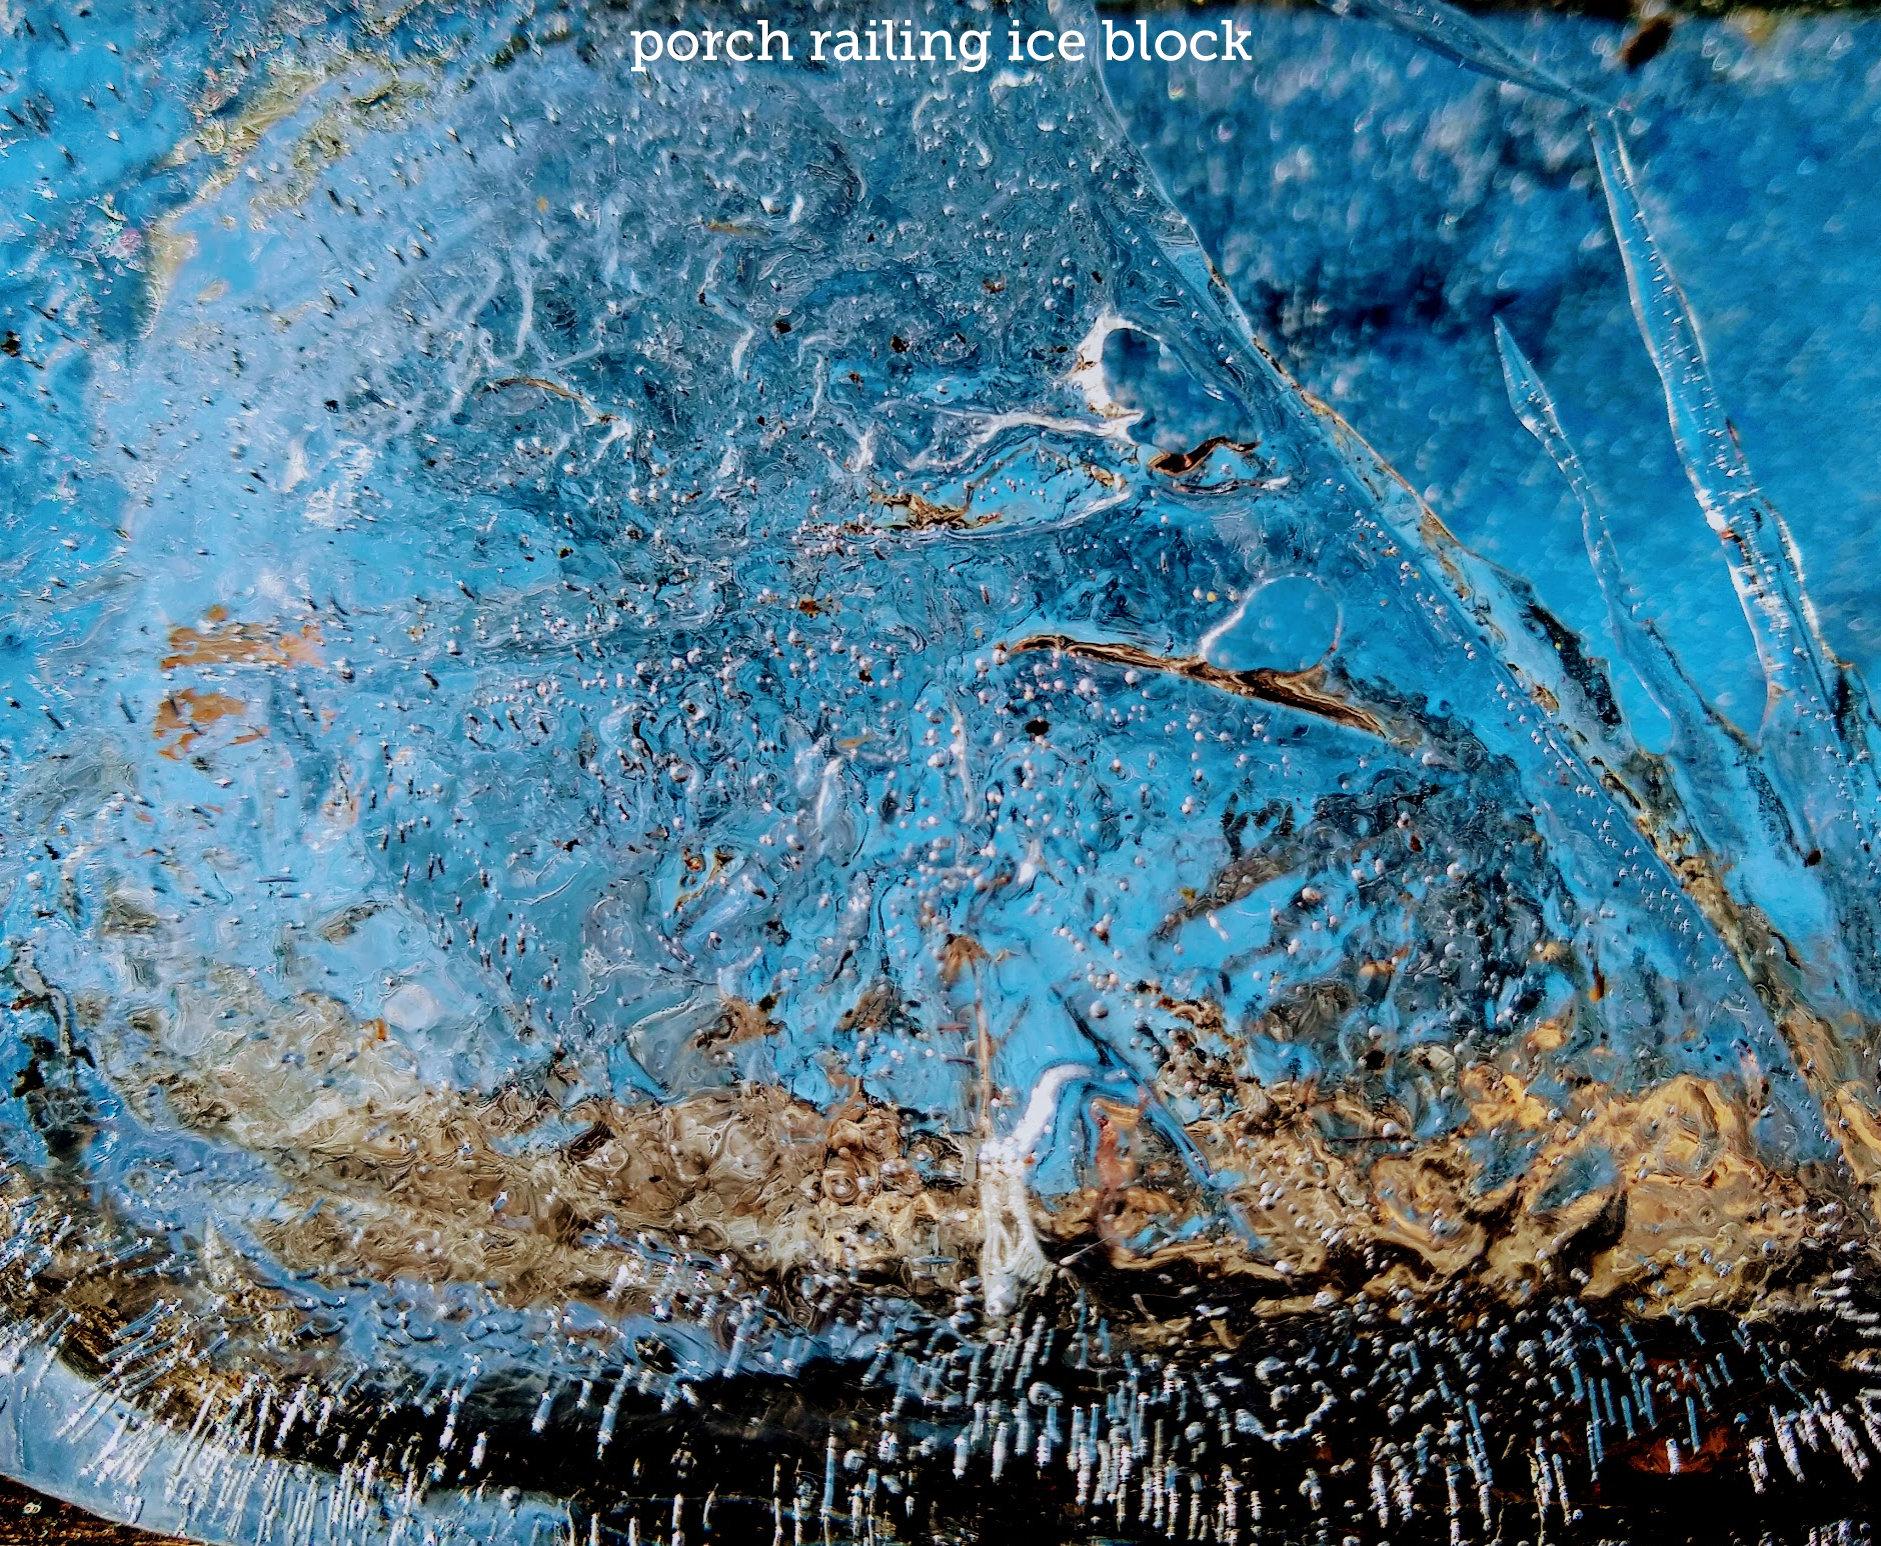
My first ice was rainwater that froze in my kids' wagon year ago (many of the photos in this instructable are of that very first ice). Any container that is not glass or ceramic will work. Water expands when it freezes, and it does not care what's in the way. It will break glass, tear plastic, deform metal. If you've ever forgotten a canned drink you put in the freezer to chill more quickly, you know. (See the photo of a distended bucket, above, for example.)
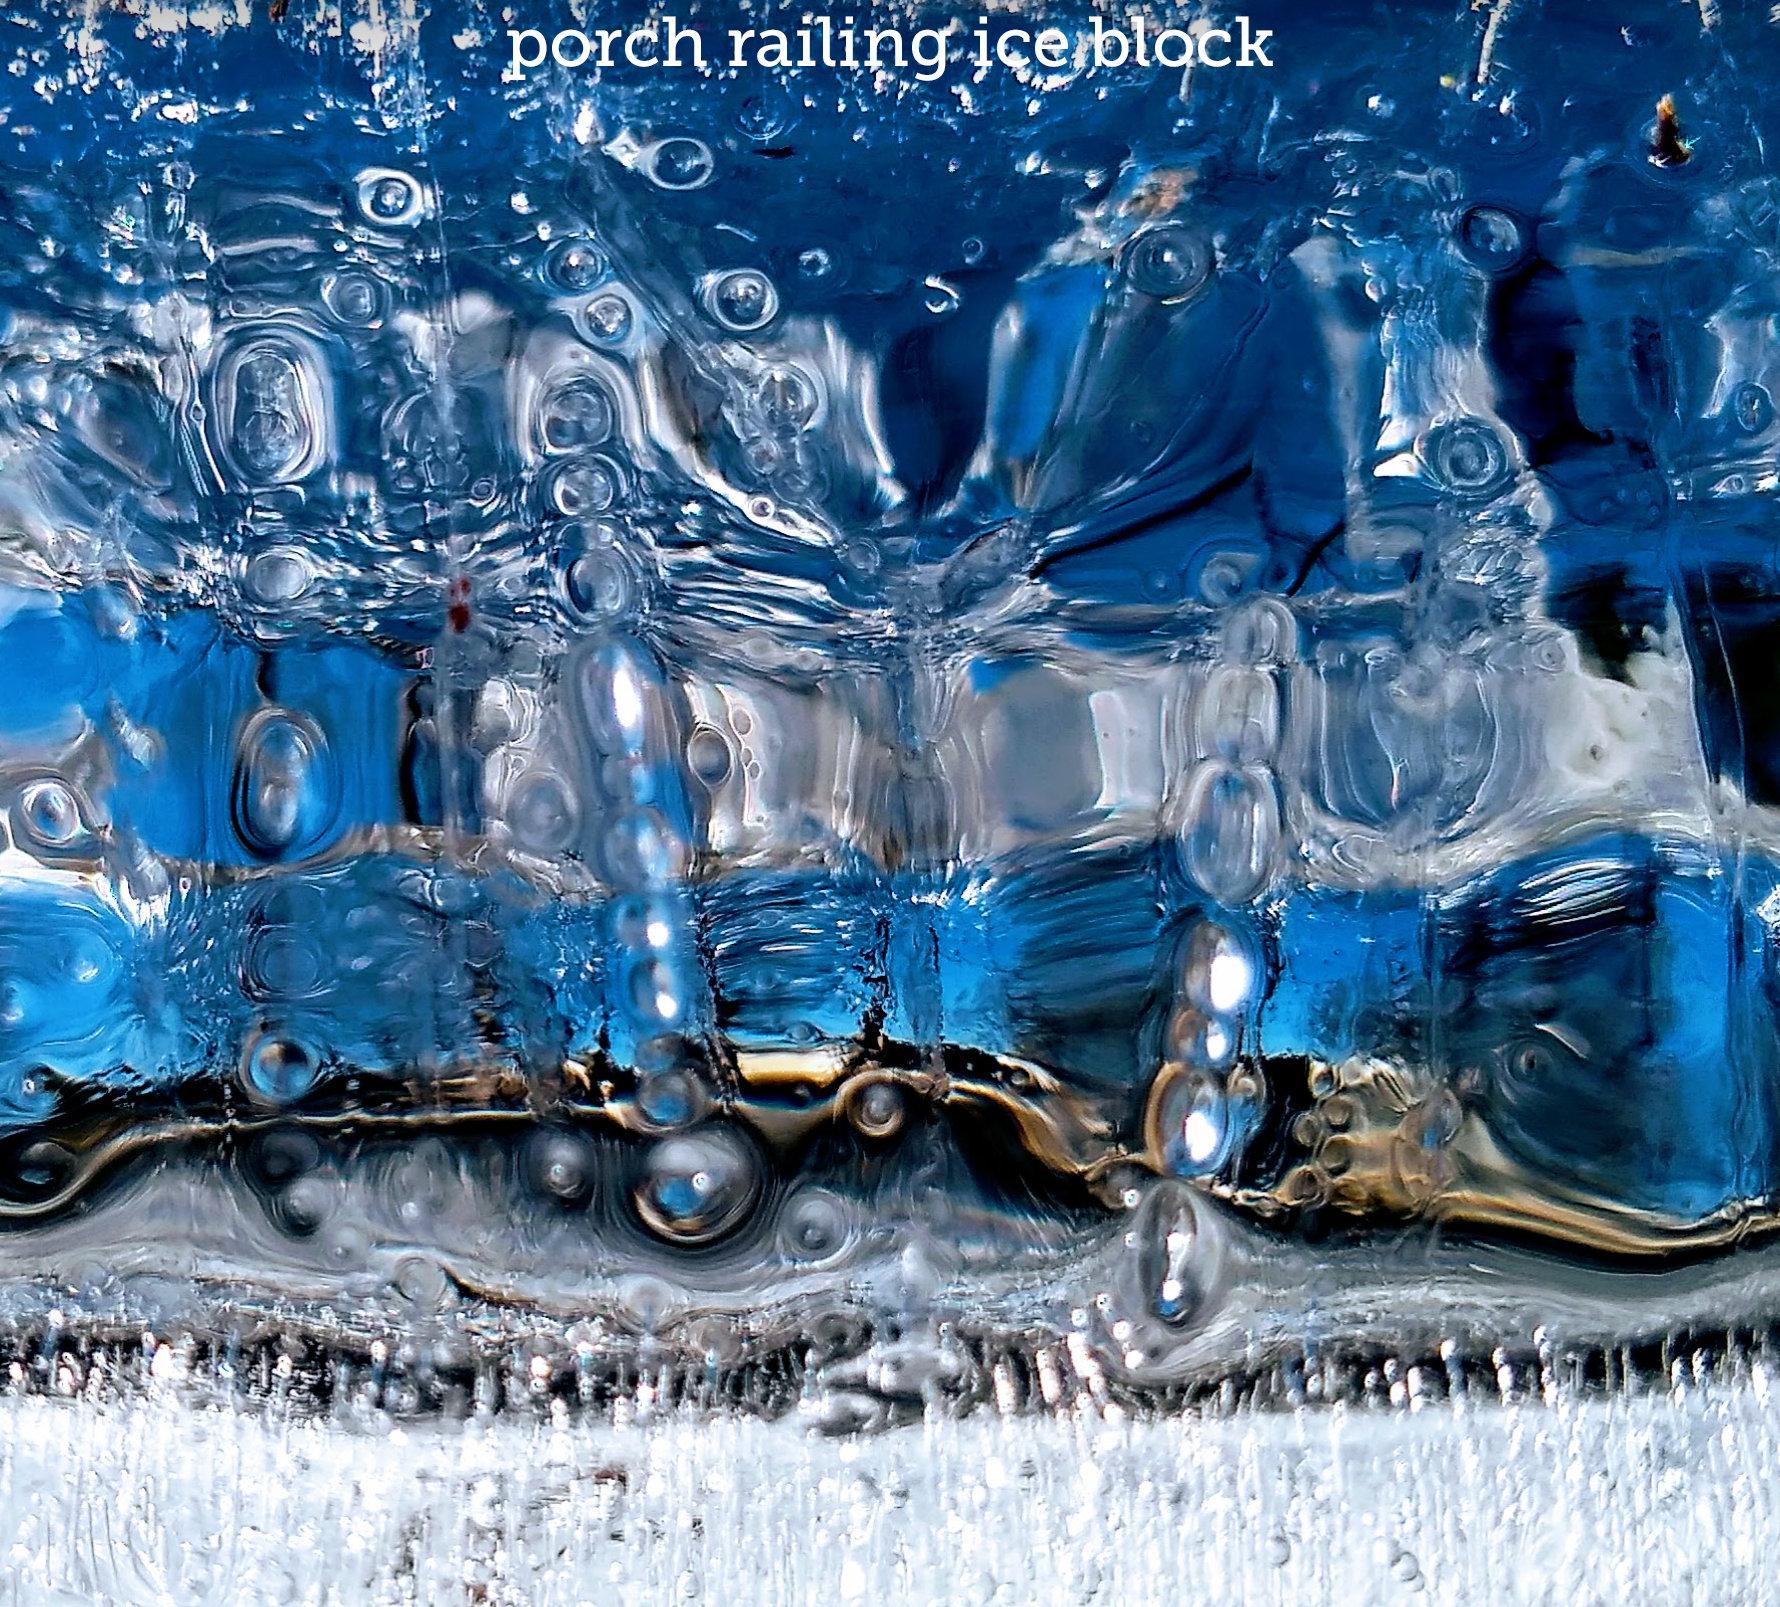
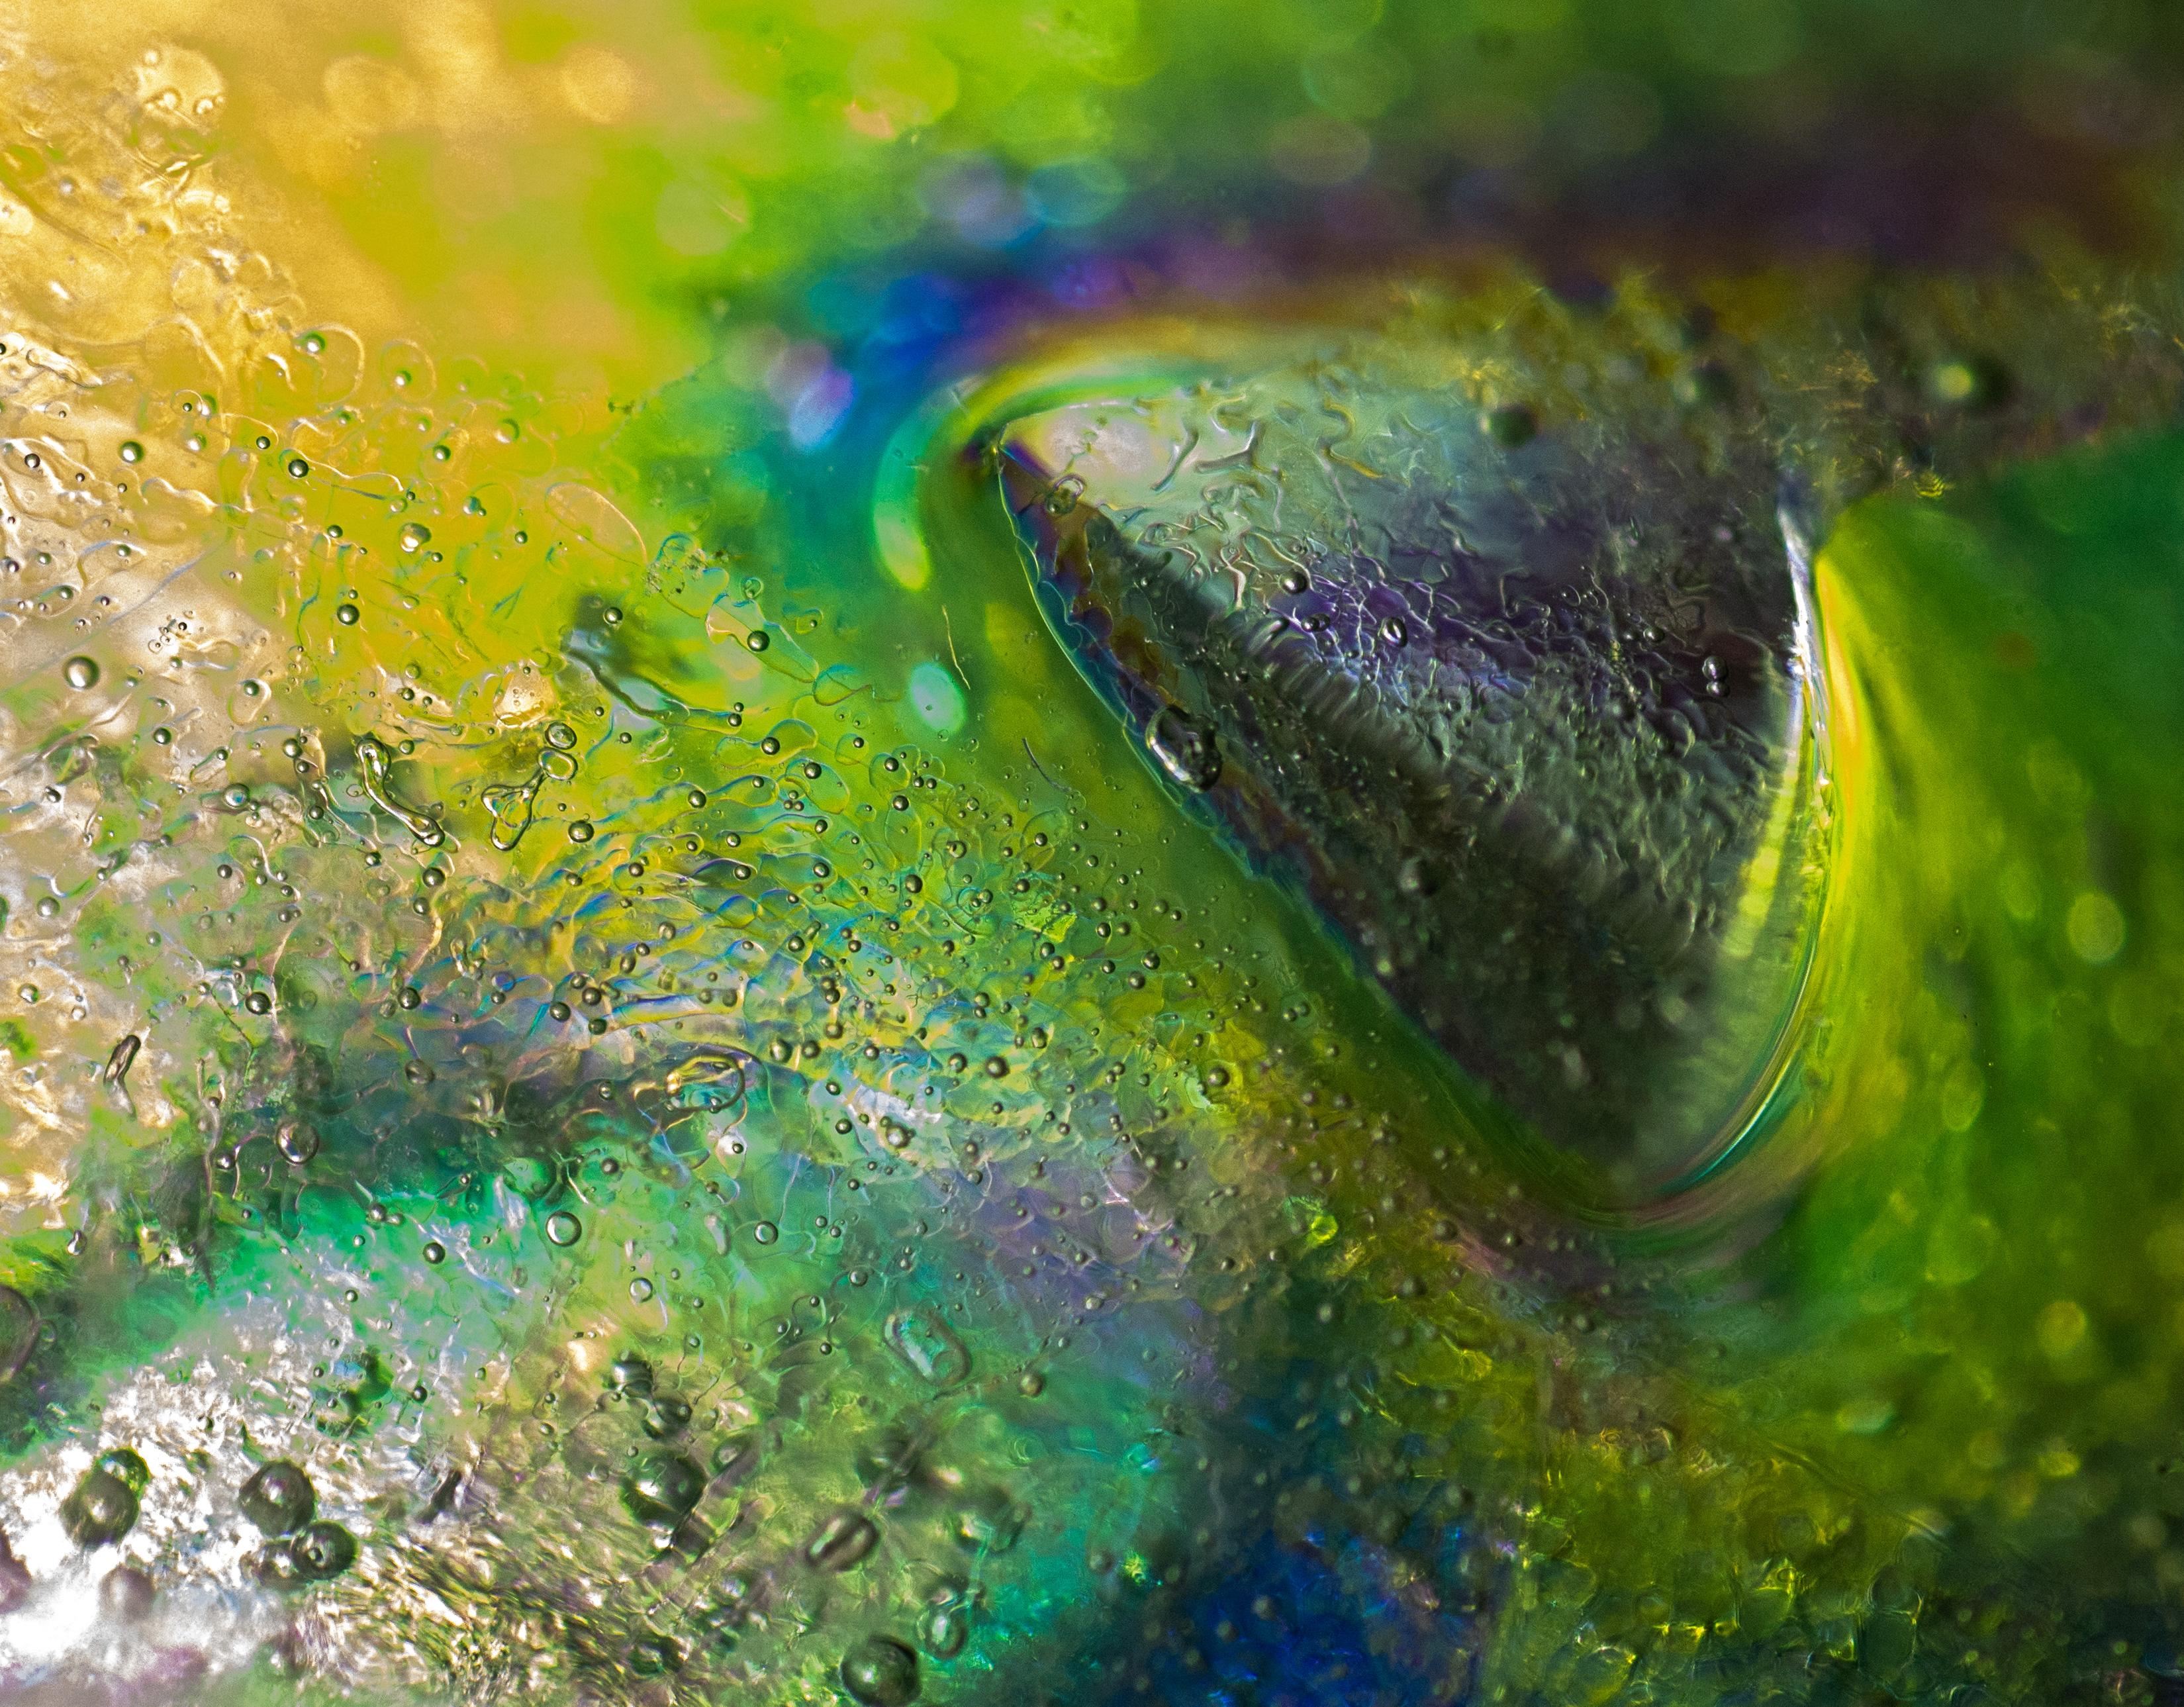
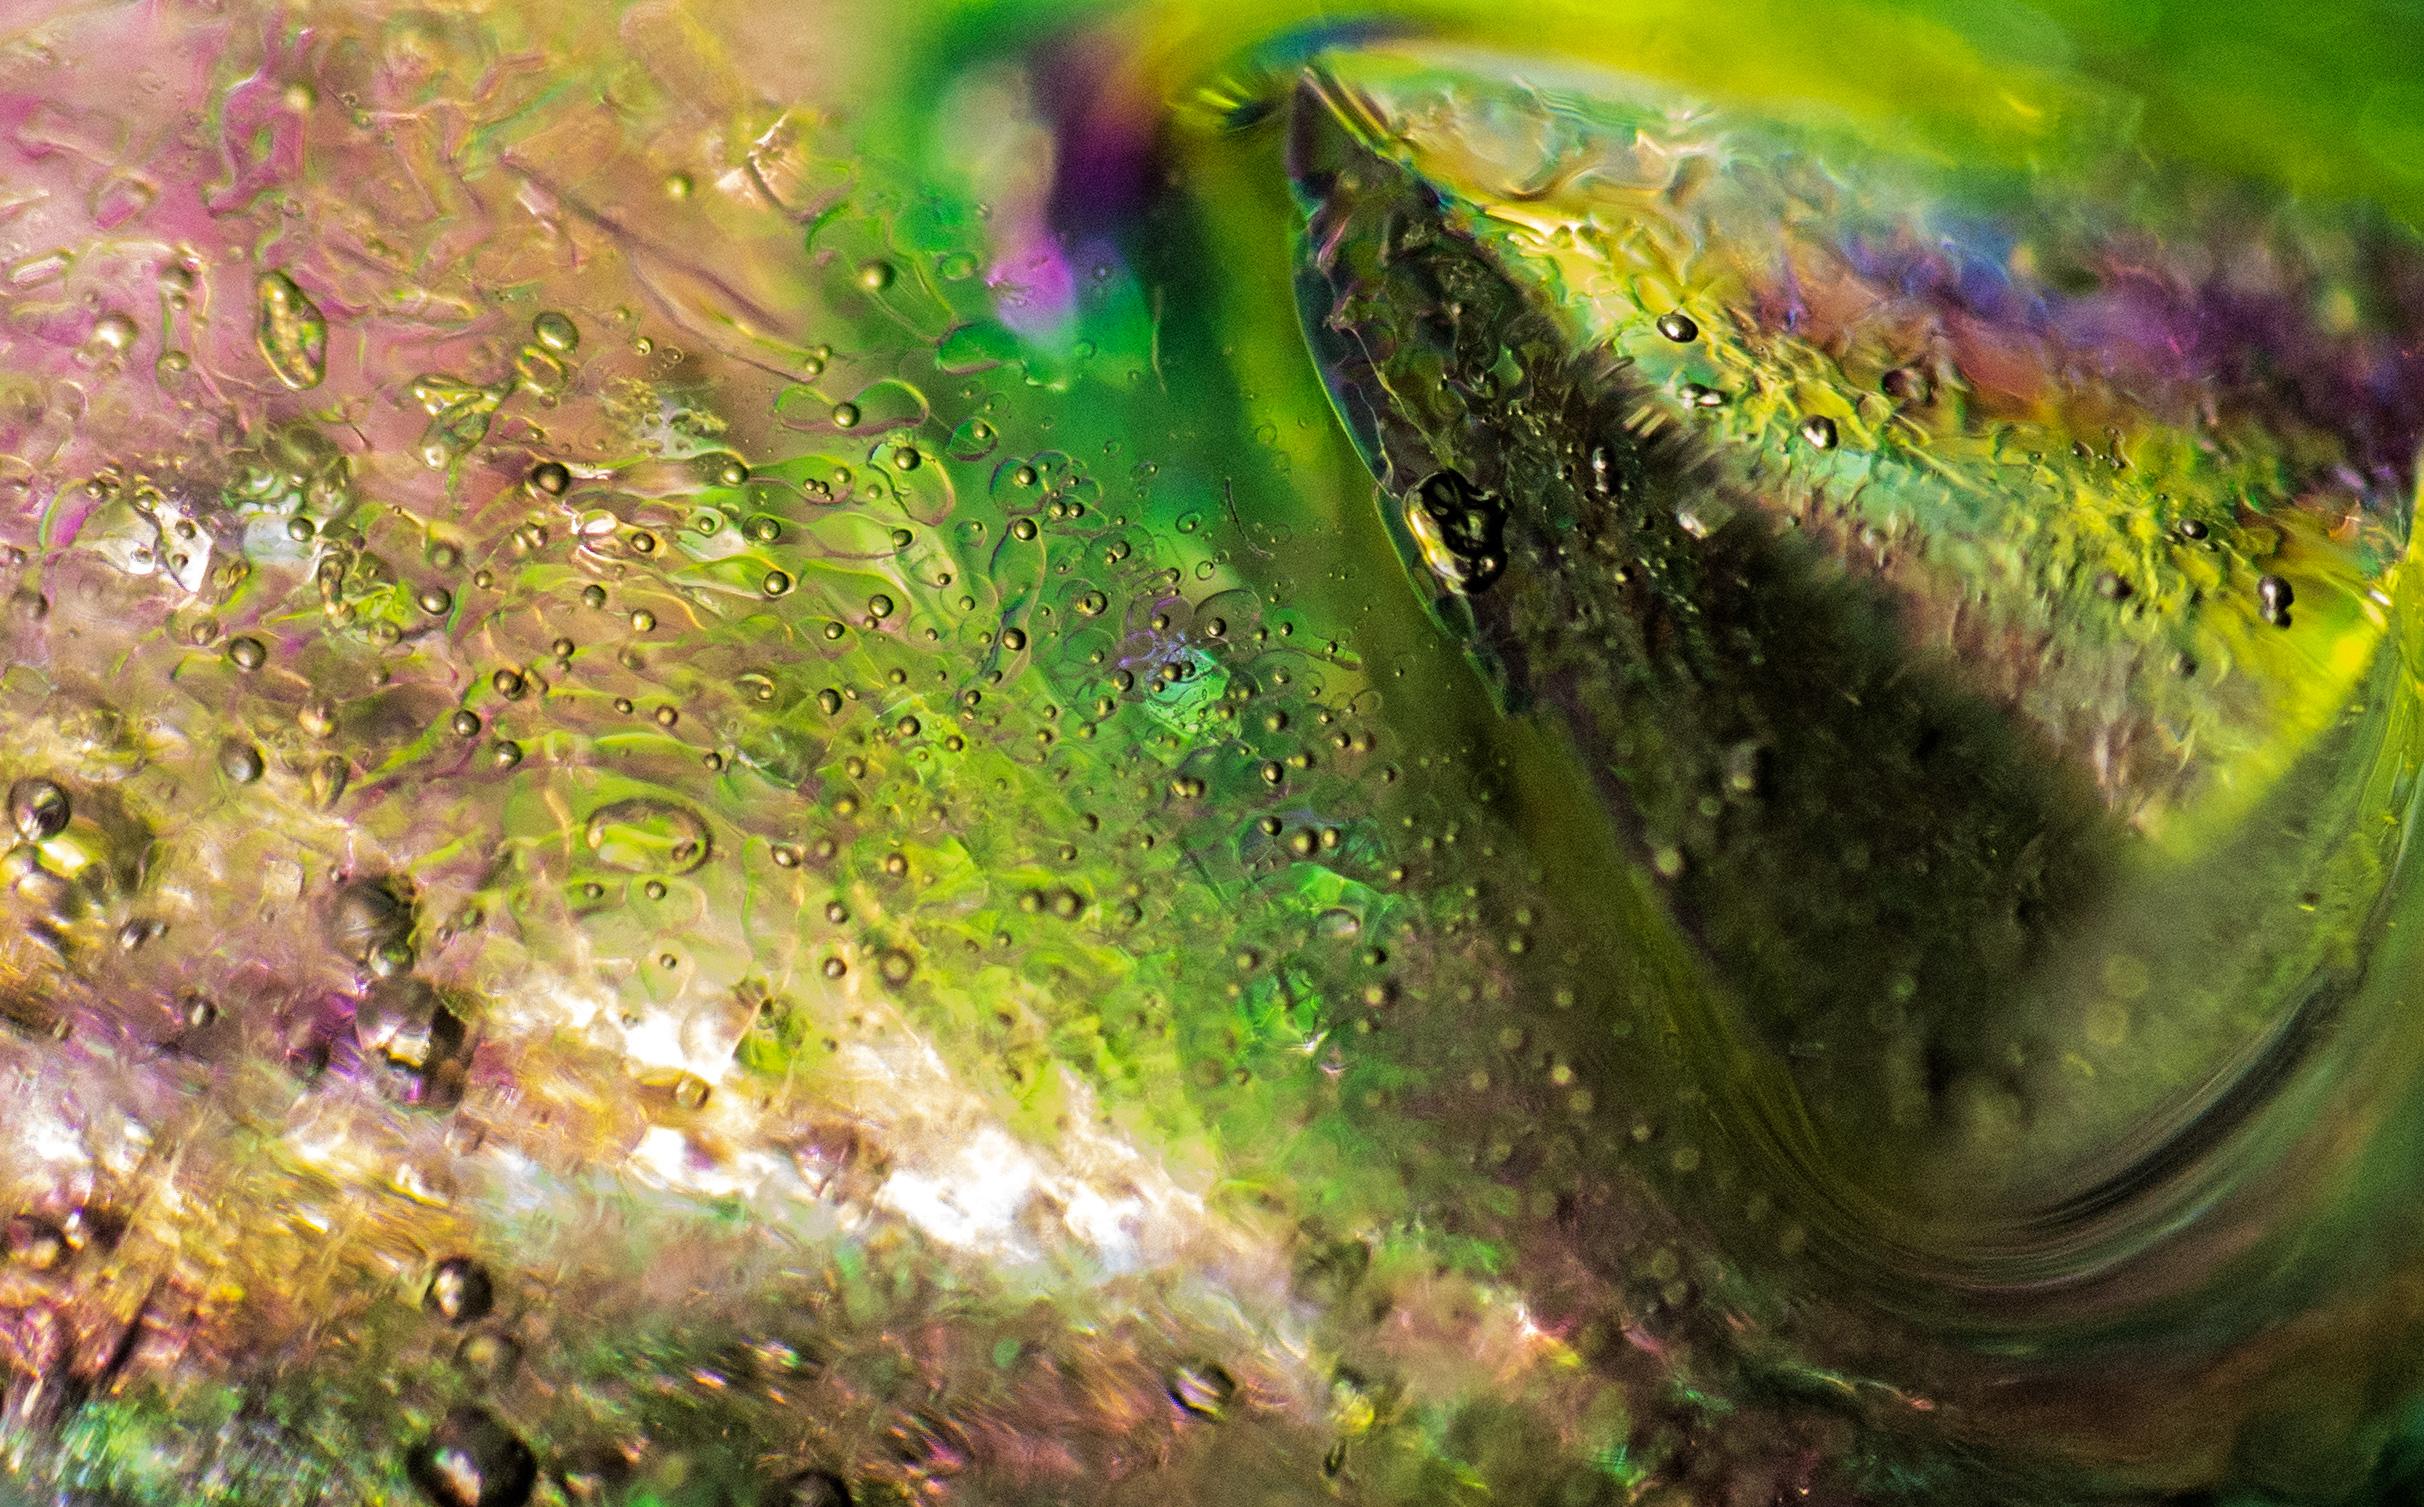
Ice can act as a lens, just like glass, and that's part of what makes this interesting. Different shapes of ice bend light differently and produce different optical effects and photographic options. You get to apply these effects to what's in the ice (whether naturally or put there on purpose) and what's on the other side of the ice.
Some ideas:
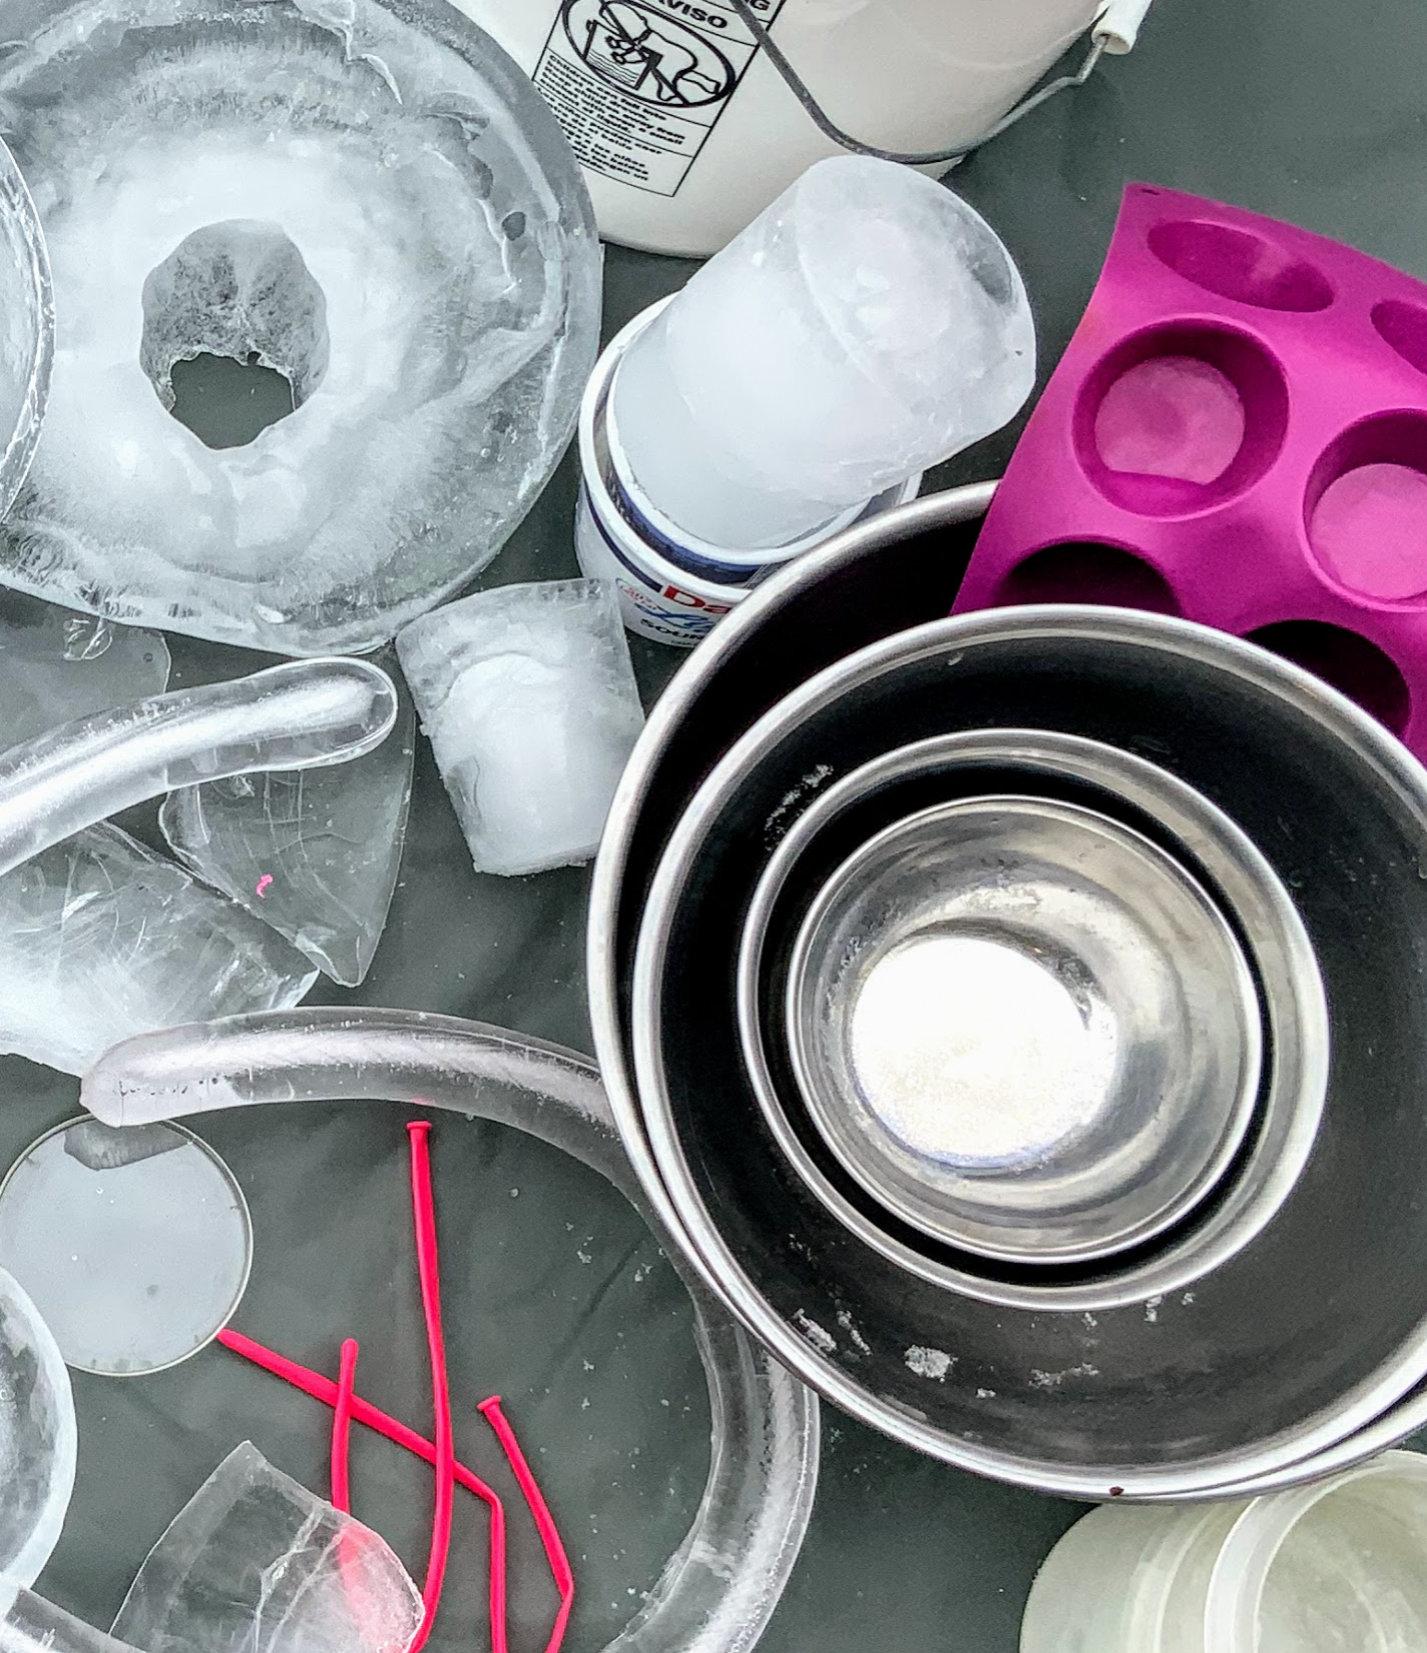
- Tubes for ice cylinders, bowls for ice domes/lenses, trays for ice sheets, boxes for ice cubes
- Plastic buckets (various sizes)
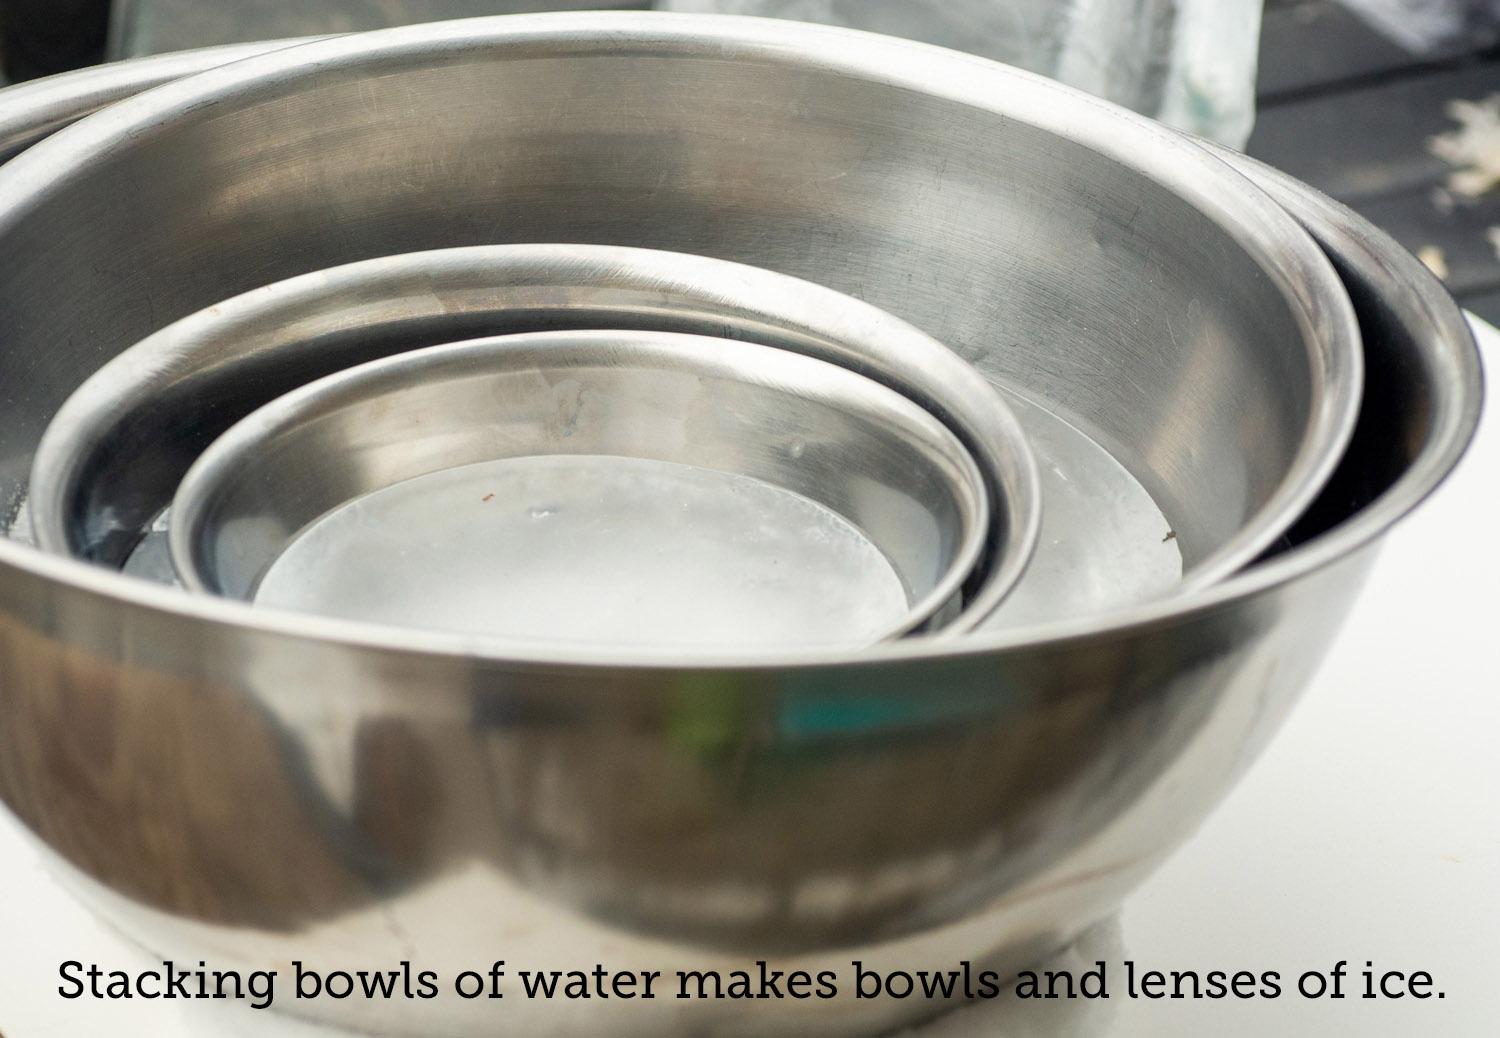
- Metal mixing (or other) bowls in various sizes
- Plastic food containers—both the kind you buy and try not to lose the lids and the kind that come from the grocery store with sour cream in them.
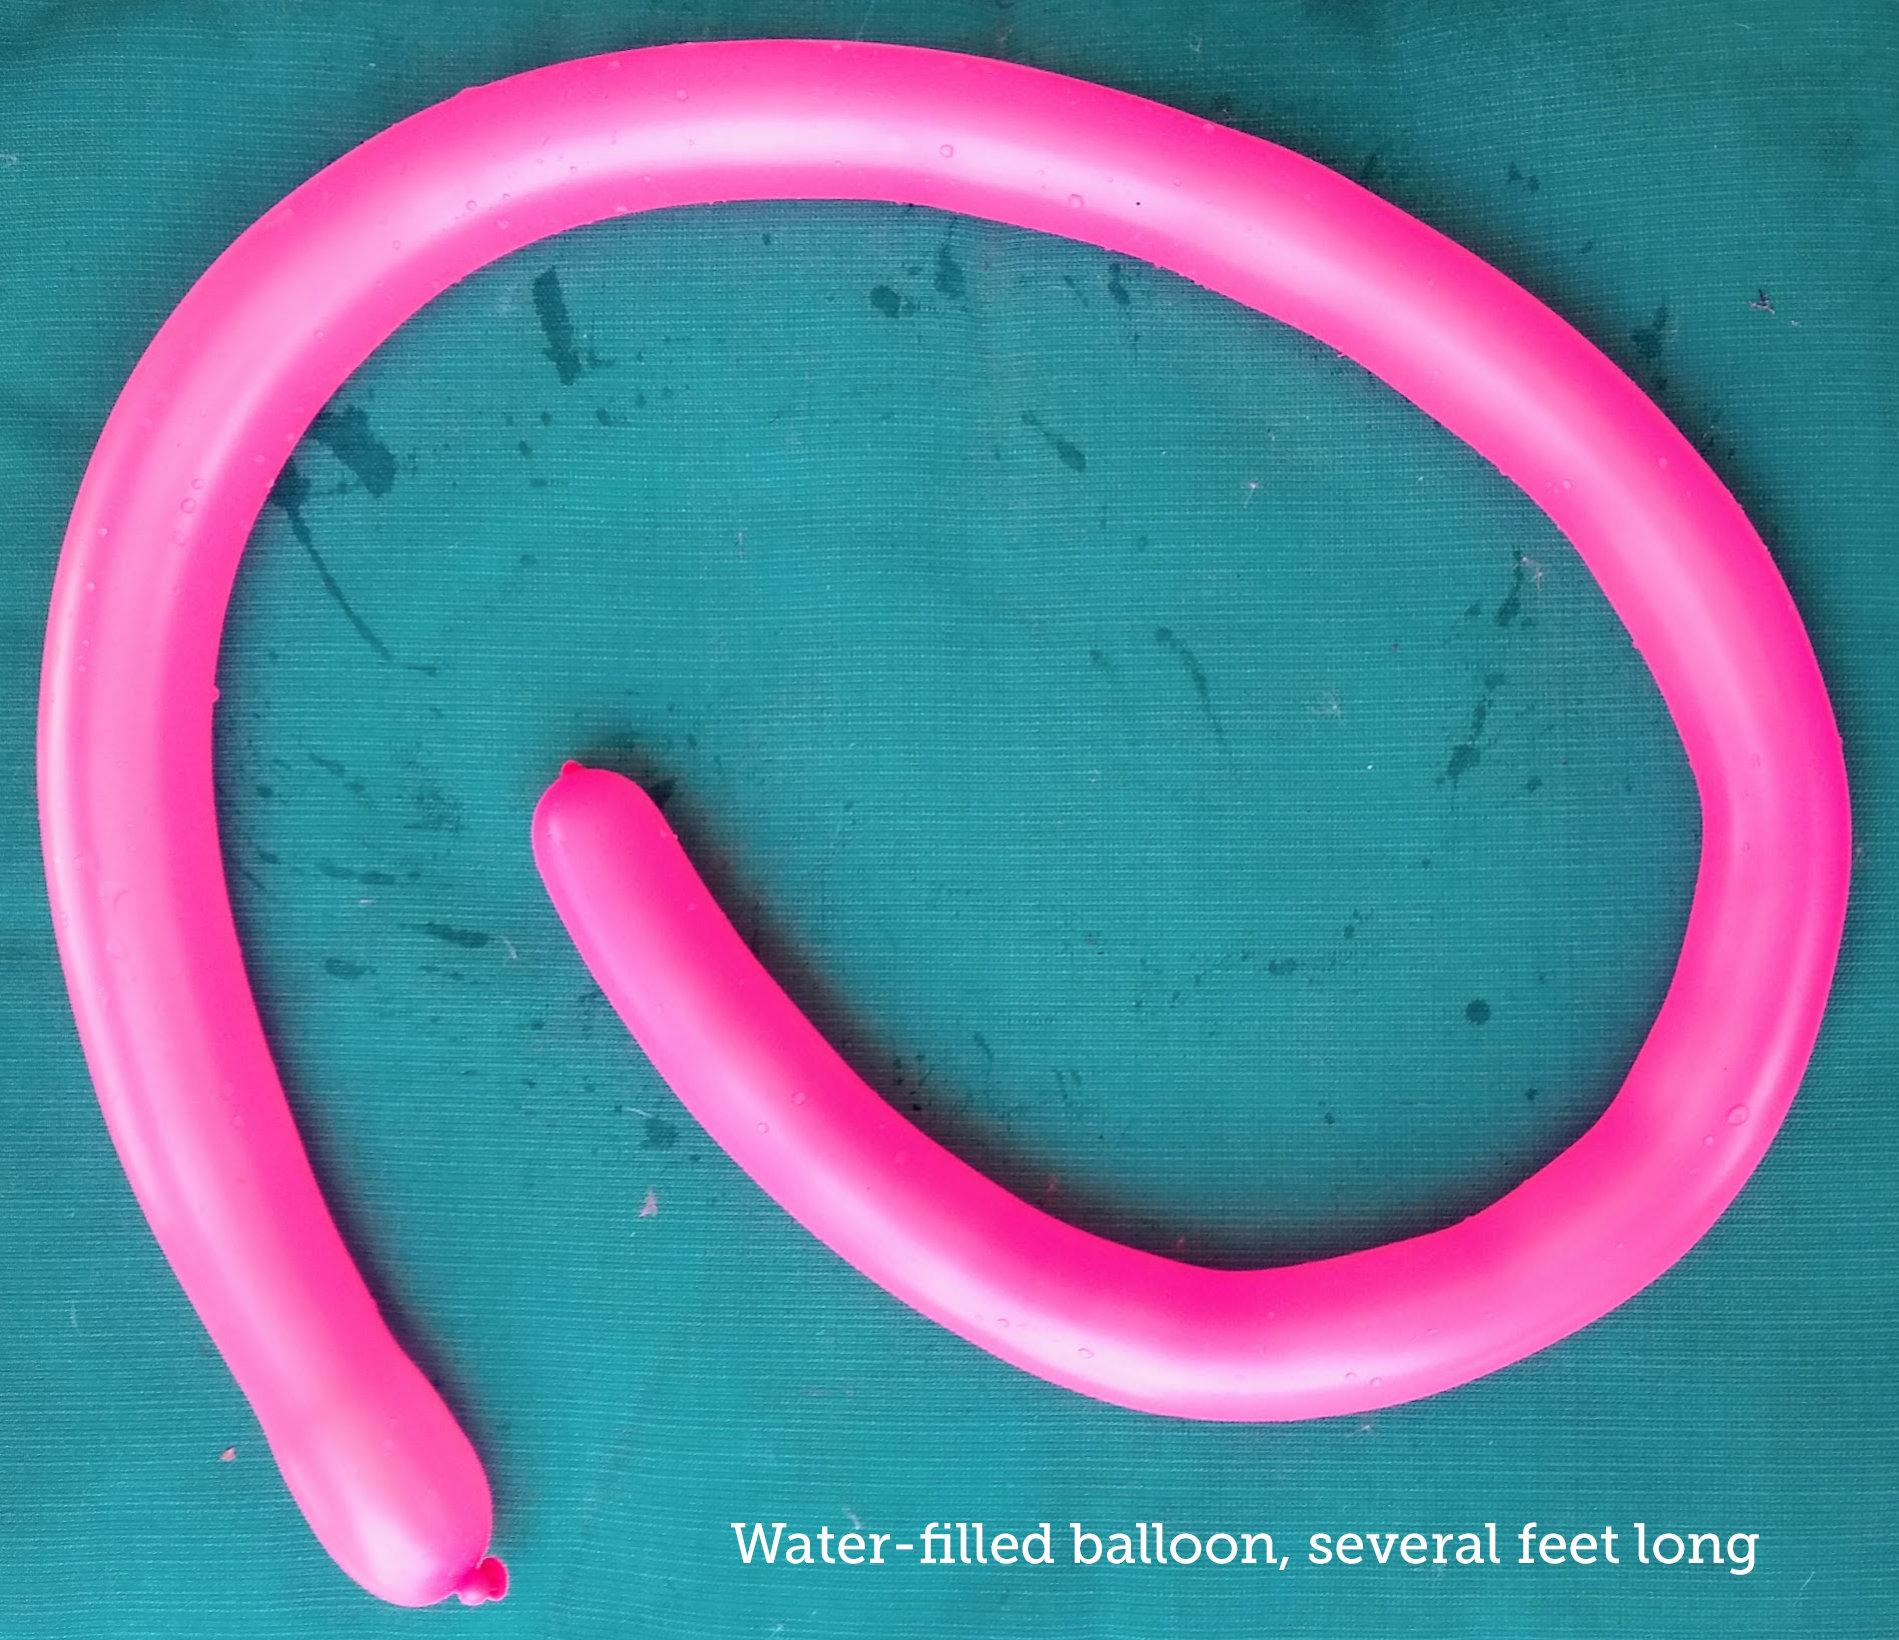
- Balloons, spherical or cylindrical
- Baking sheets, cake pans, pie plates, cupcake pans
- Ice cube trays (crazy, right?)
- Fancy ice molds, like the ones that make fancy spheres of ice for fancy people to put in their fancy drinks
- Petri dishes (plastic)
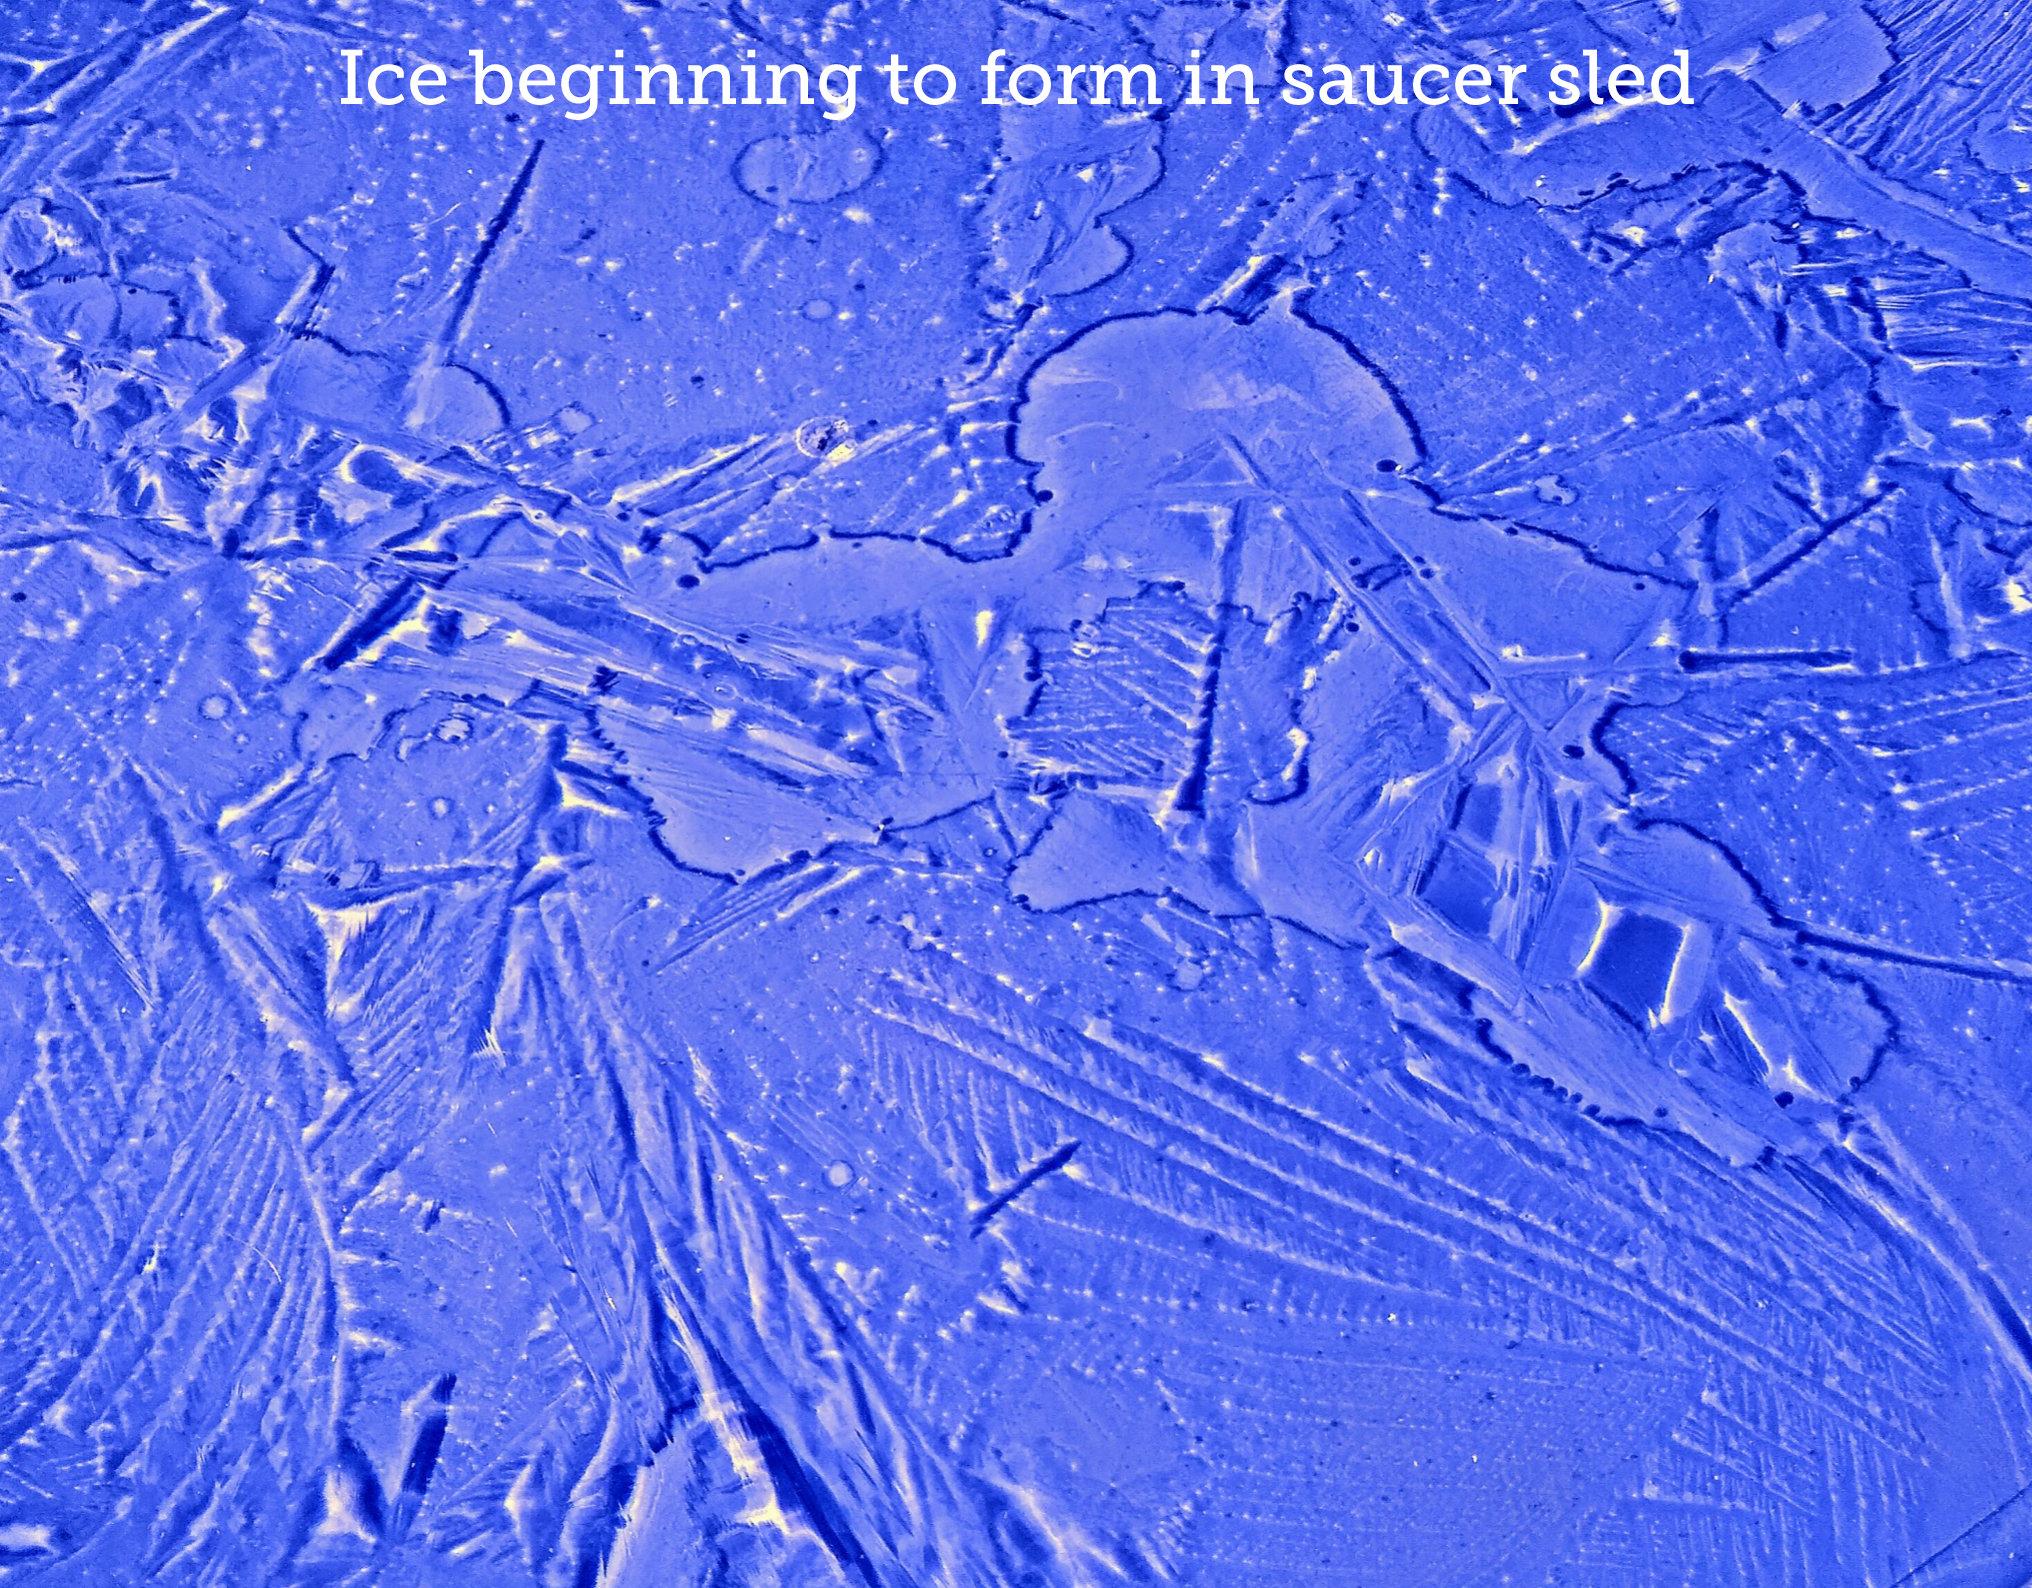
- Use a large wok or saucer sled to get a wide, shallow piece of ice with different thicknesses
- Basically, anything unbreakable that holds water.
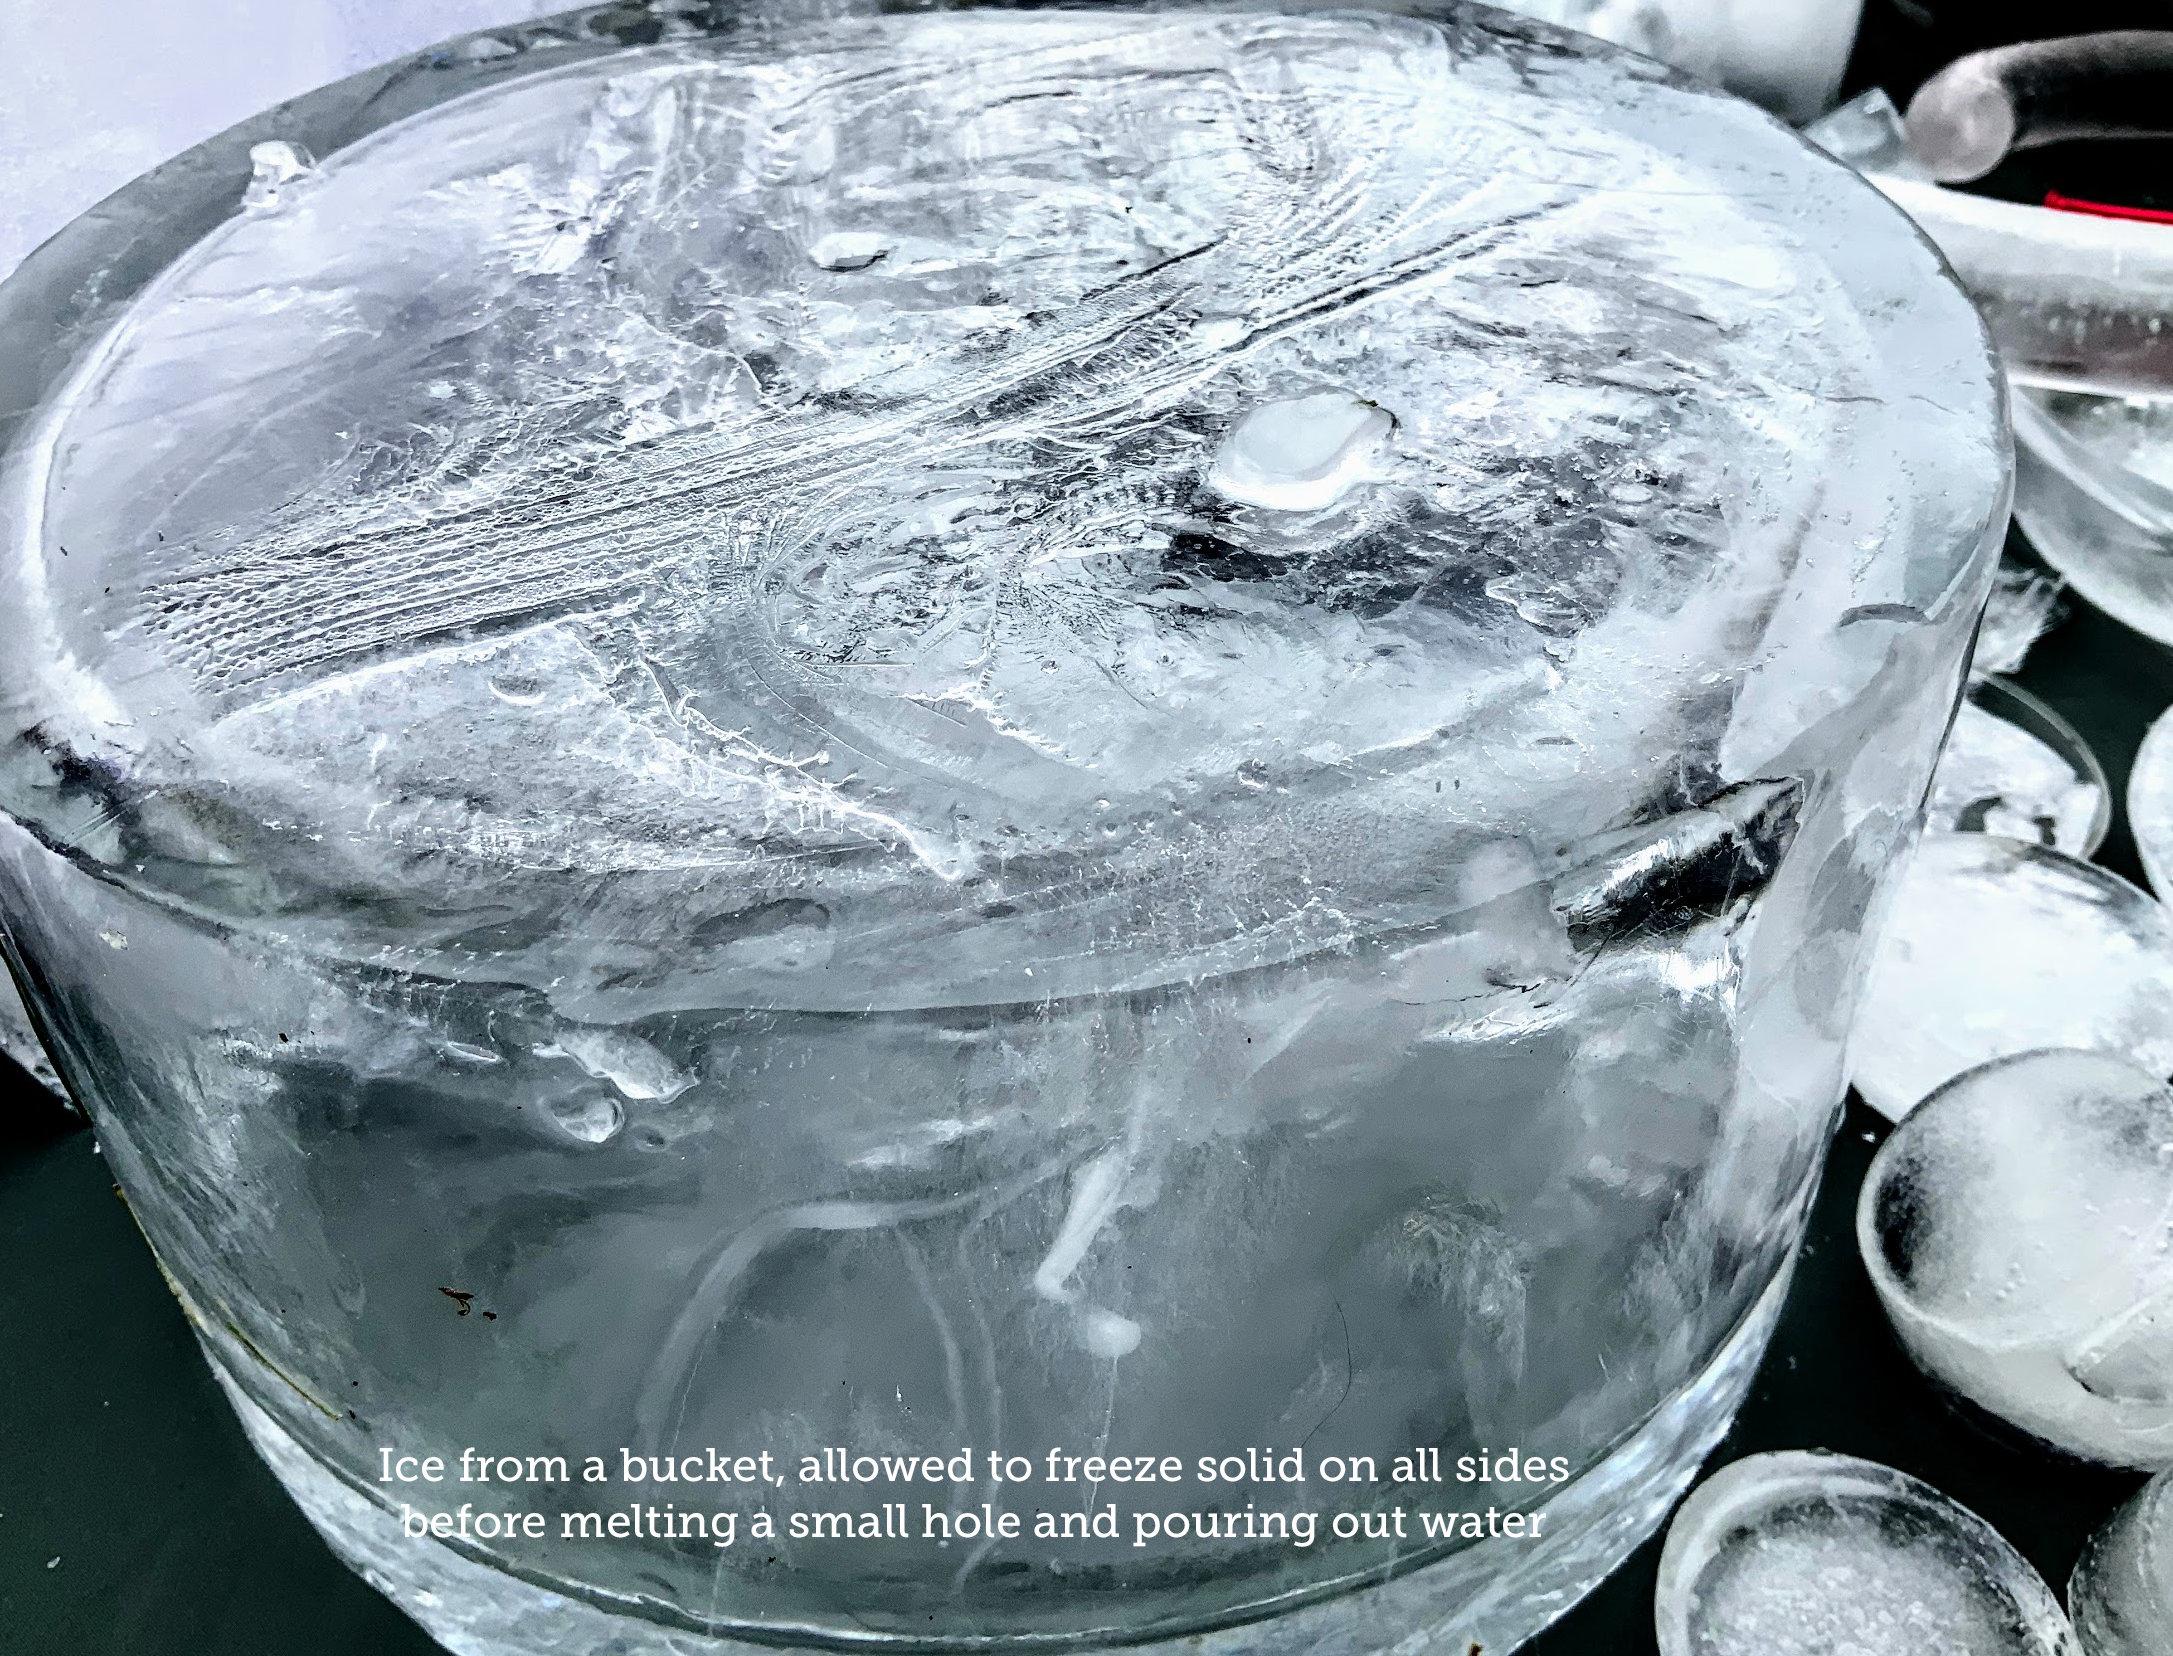
One more thing about what ice can do to containers: even if you leave lots of room above the water, you're not safe. The surface tends to freeze first because it is exposed directly to the cold air while the sides are insulated at least a little by the bucket itself and the bottom is insulated by the plastic and the surface it's sitting on. Because it has a head start, the top ice is also going to be thicker. This means the rest of the water is trapped but will still need to expand. That's a heavy-duty 5-gallon bucket with the deformed bottom in the last photo. It held just 8-10 inches of water and I stopped it before all the water froze,but the expanding water still found it easier to push out the plastic beneath it than the ice above it.
Now imagine that's glass, thin or brittle plastic (and plastics get more brittle when cold), or something soft like aluminum.
The Iceperson Cometh Part 2: Liquids


(Click "More Images" above to see them all while reading this section.)
What you freeze has a big effect on how it freezes and how it affects light traveling through it.
Some ideas:
- Plain old tap water
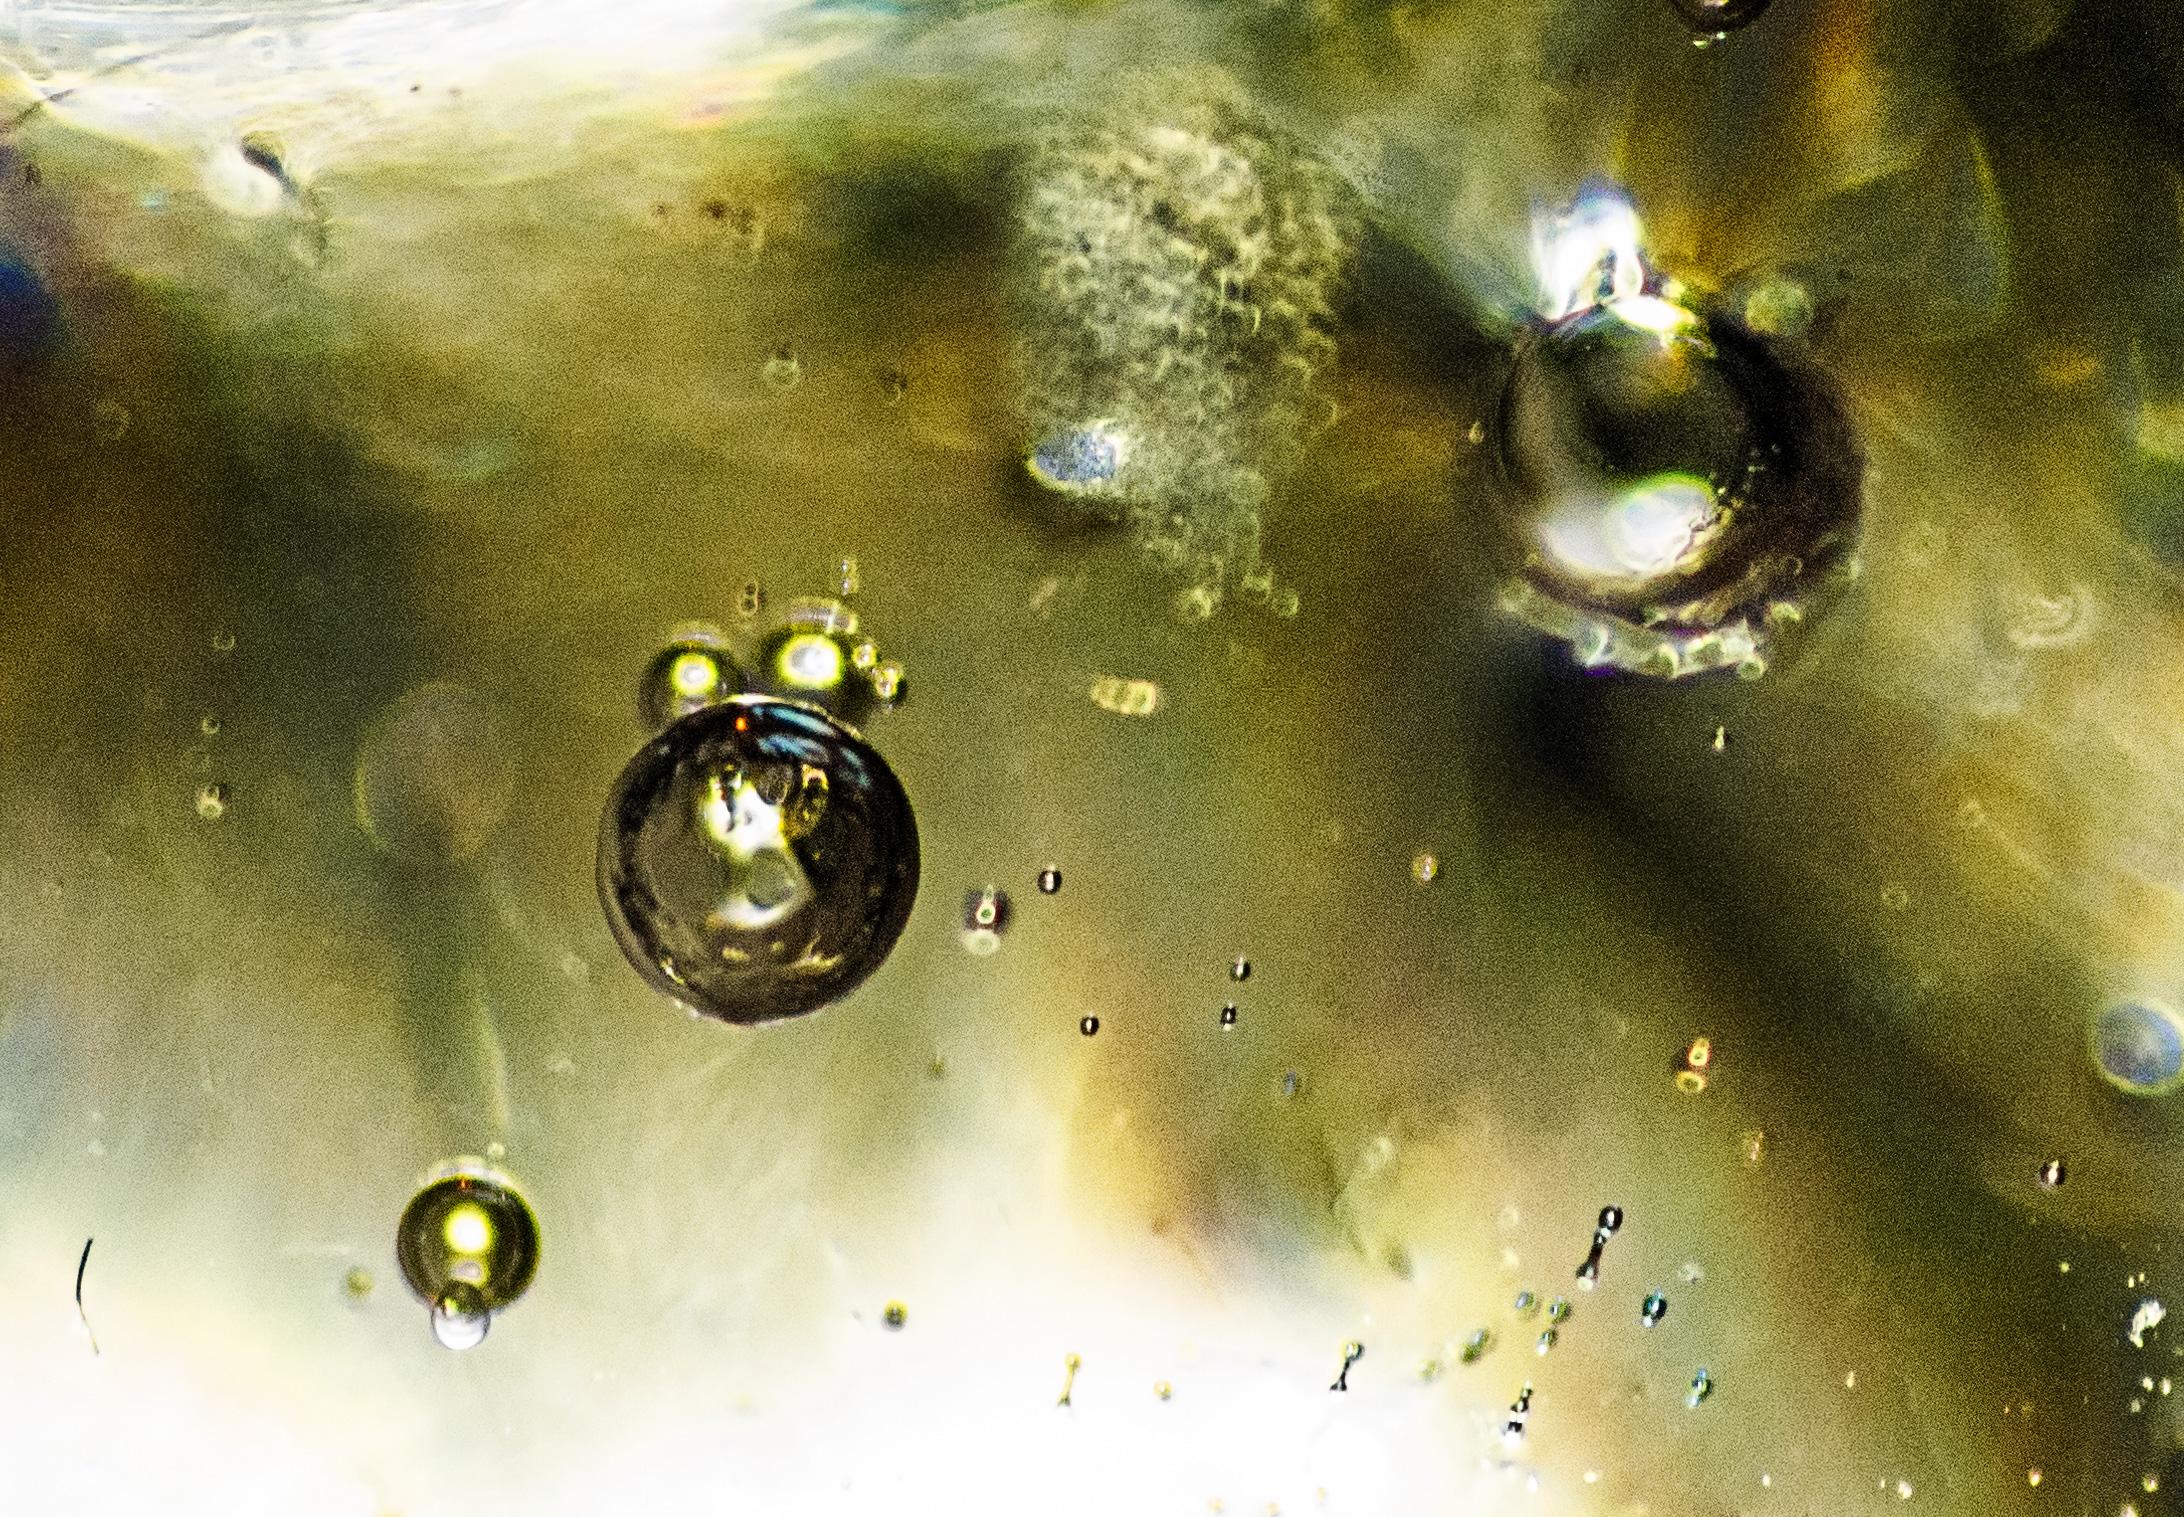
- Water from a local creek or pond (Bonus: maybe it'll have some cool microorganisms in it!)
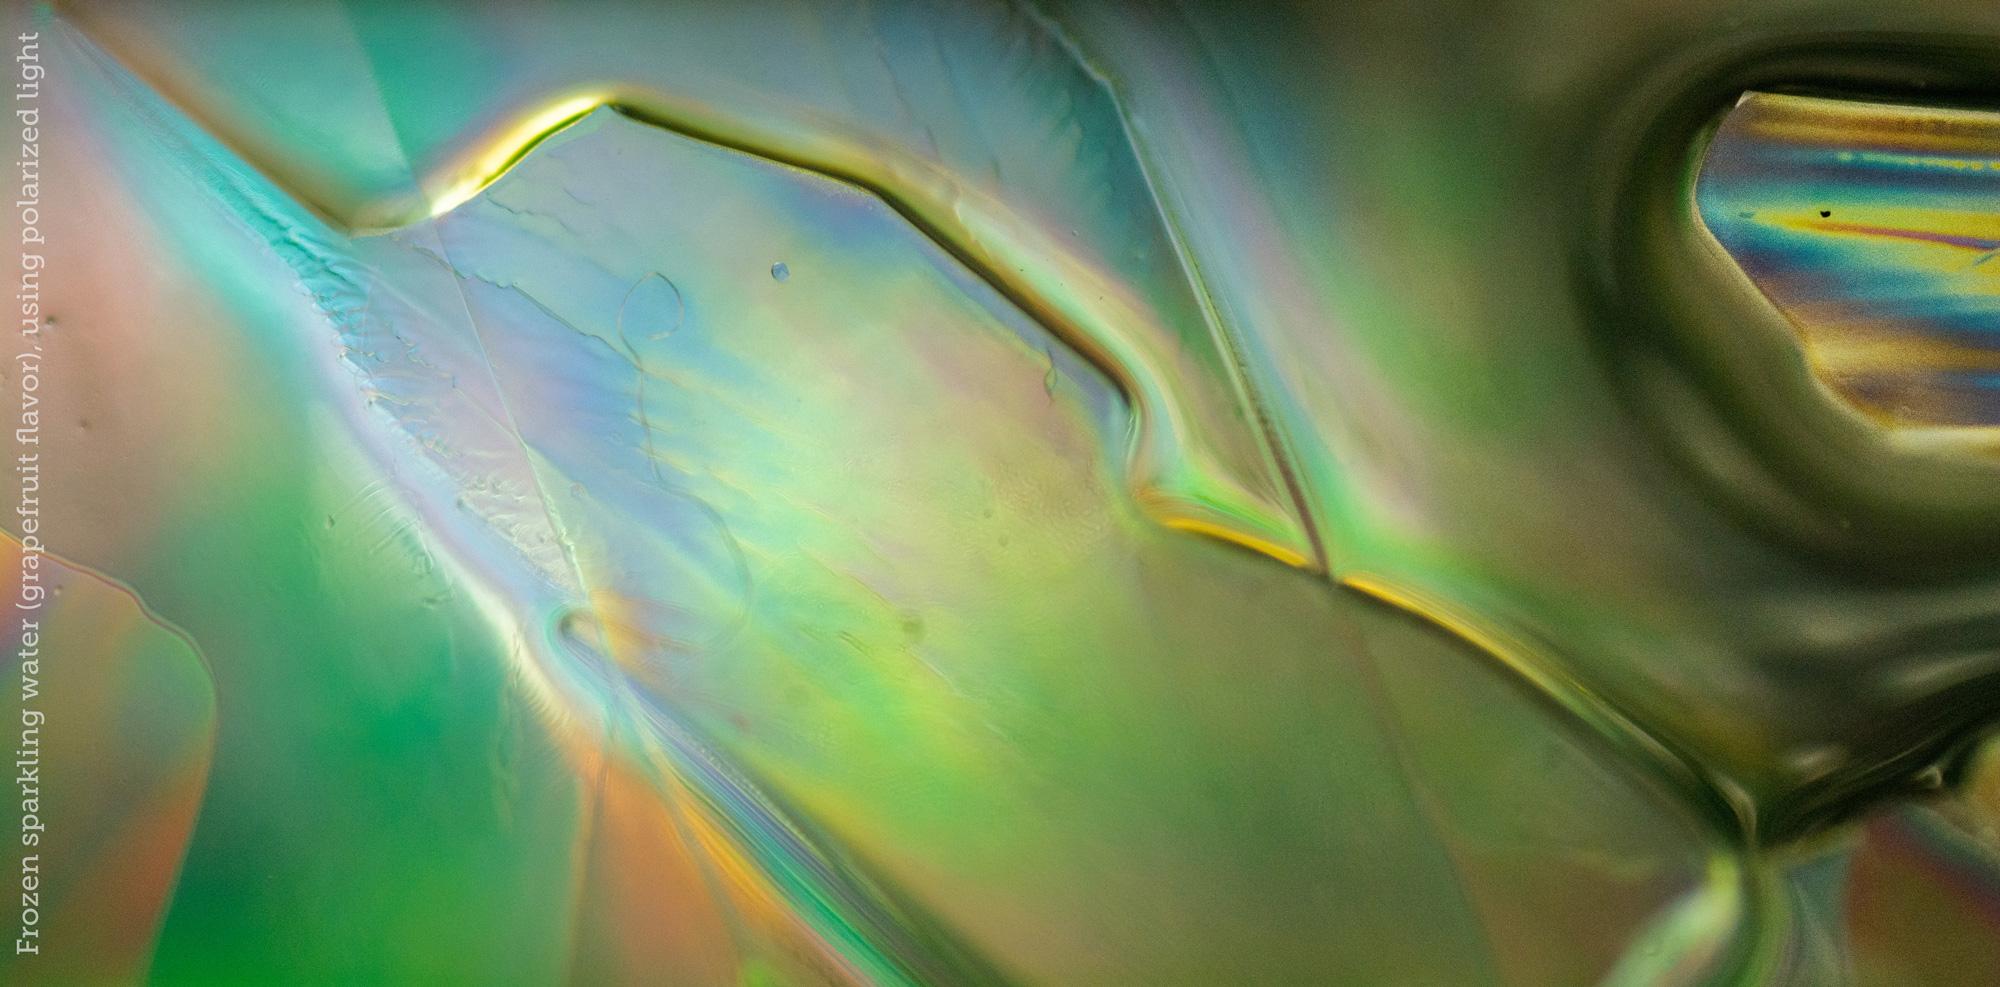
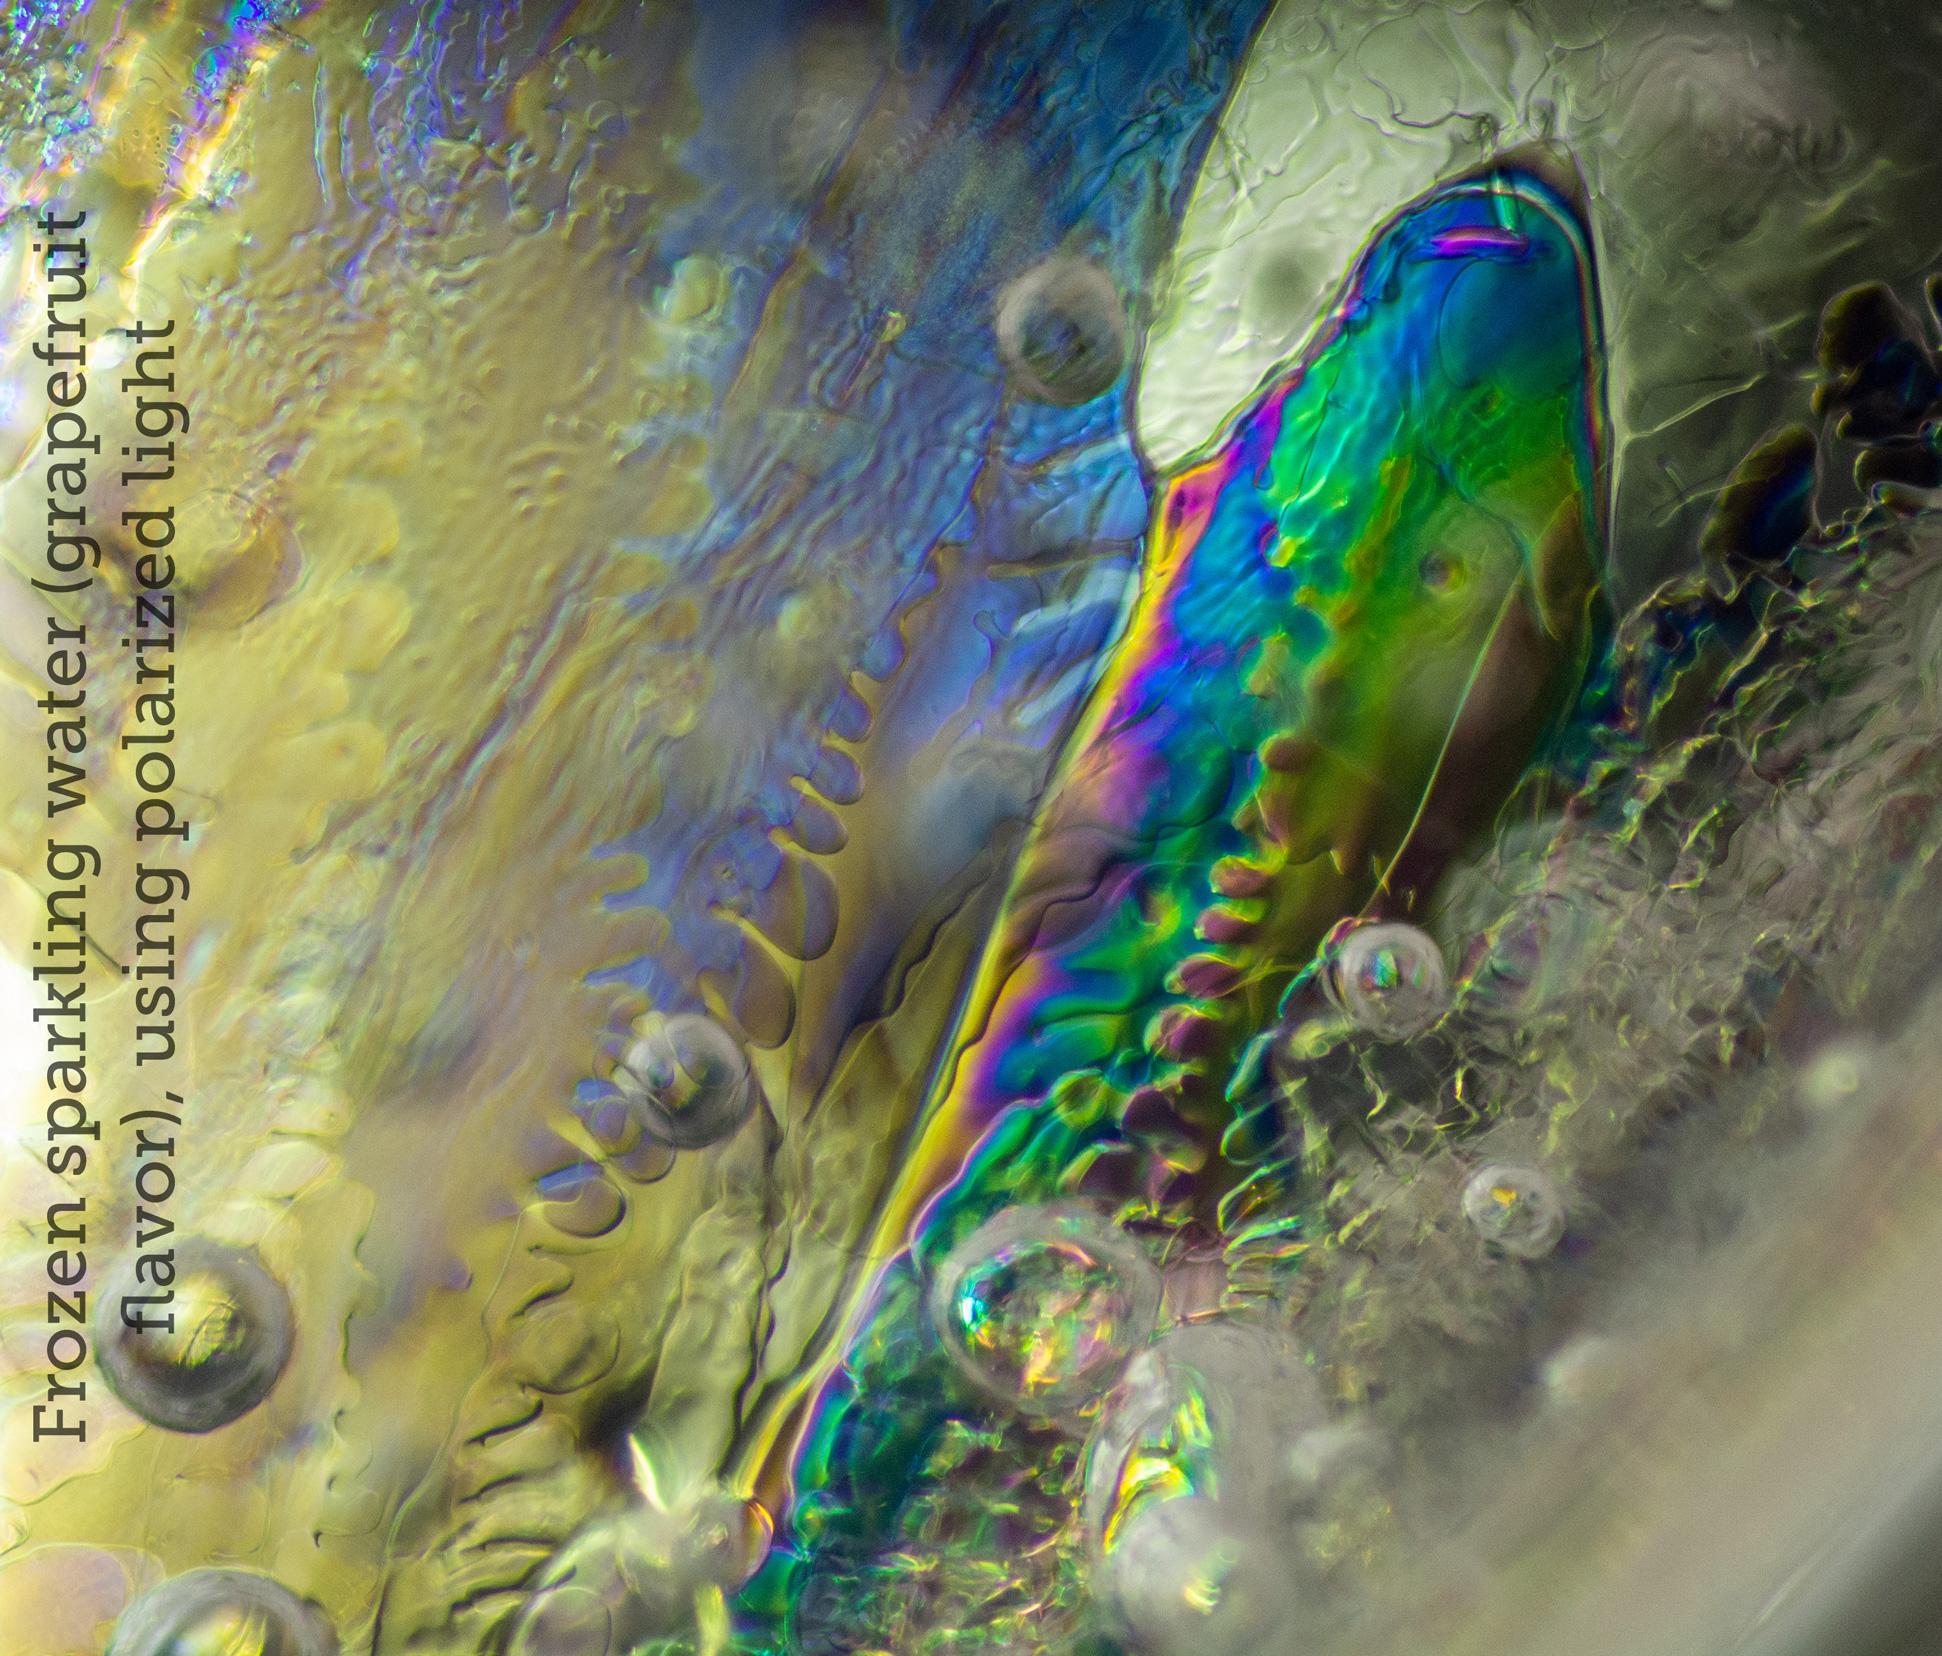
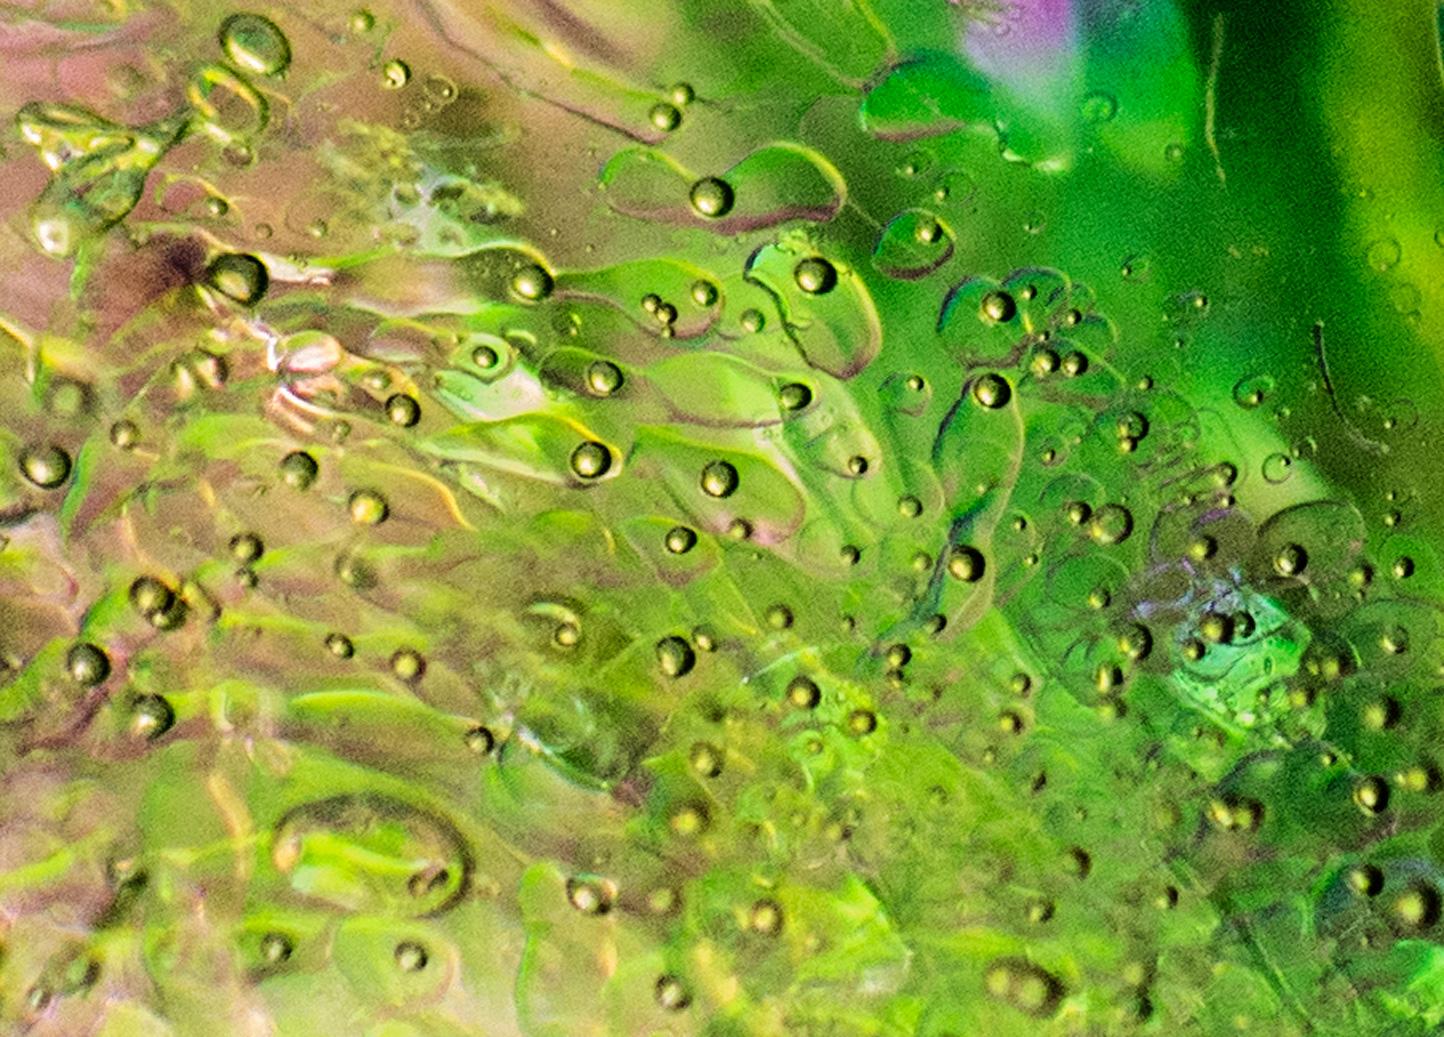
- Sparkling/seltzer/carbonated water (see the polarization section below)
- Rain or melted snow
- Distilled water or spring water might freeze differently than tap water (I haven't tried them)
- Water with food coloring or dissolved paint
- Different colored layers frozen one at a time on top of each other
- Different temperatures of water in identical containers frozen simultaneously to see how their ices differ
- Boiled water (be careful) supposedly freezes clearer
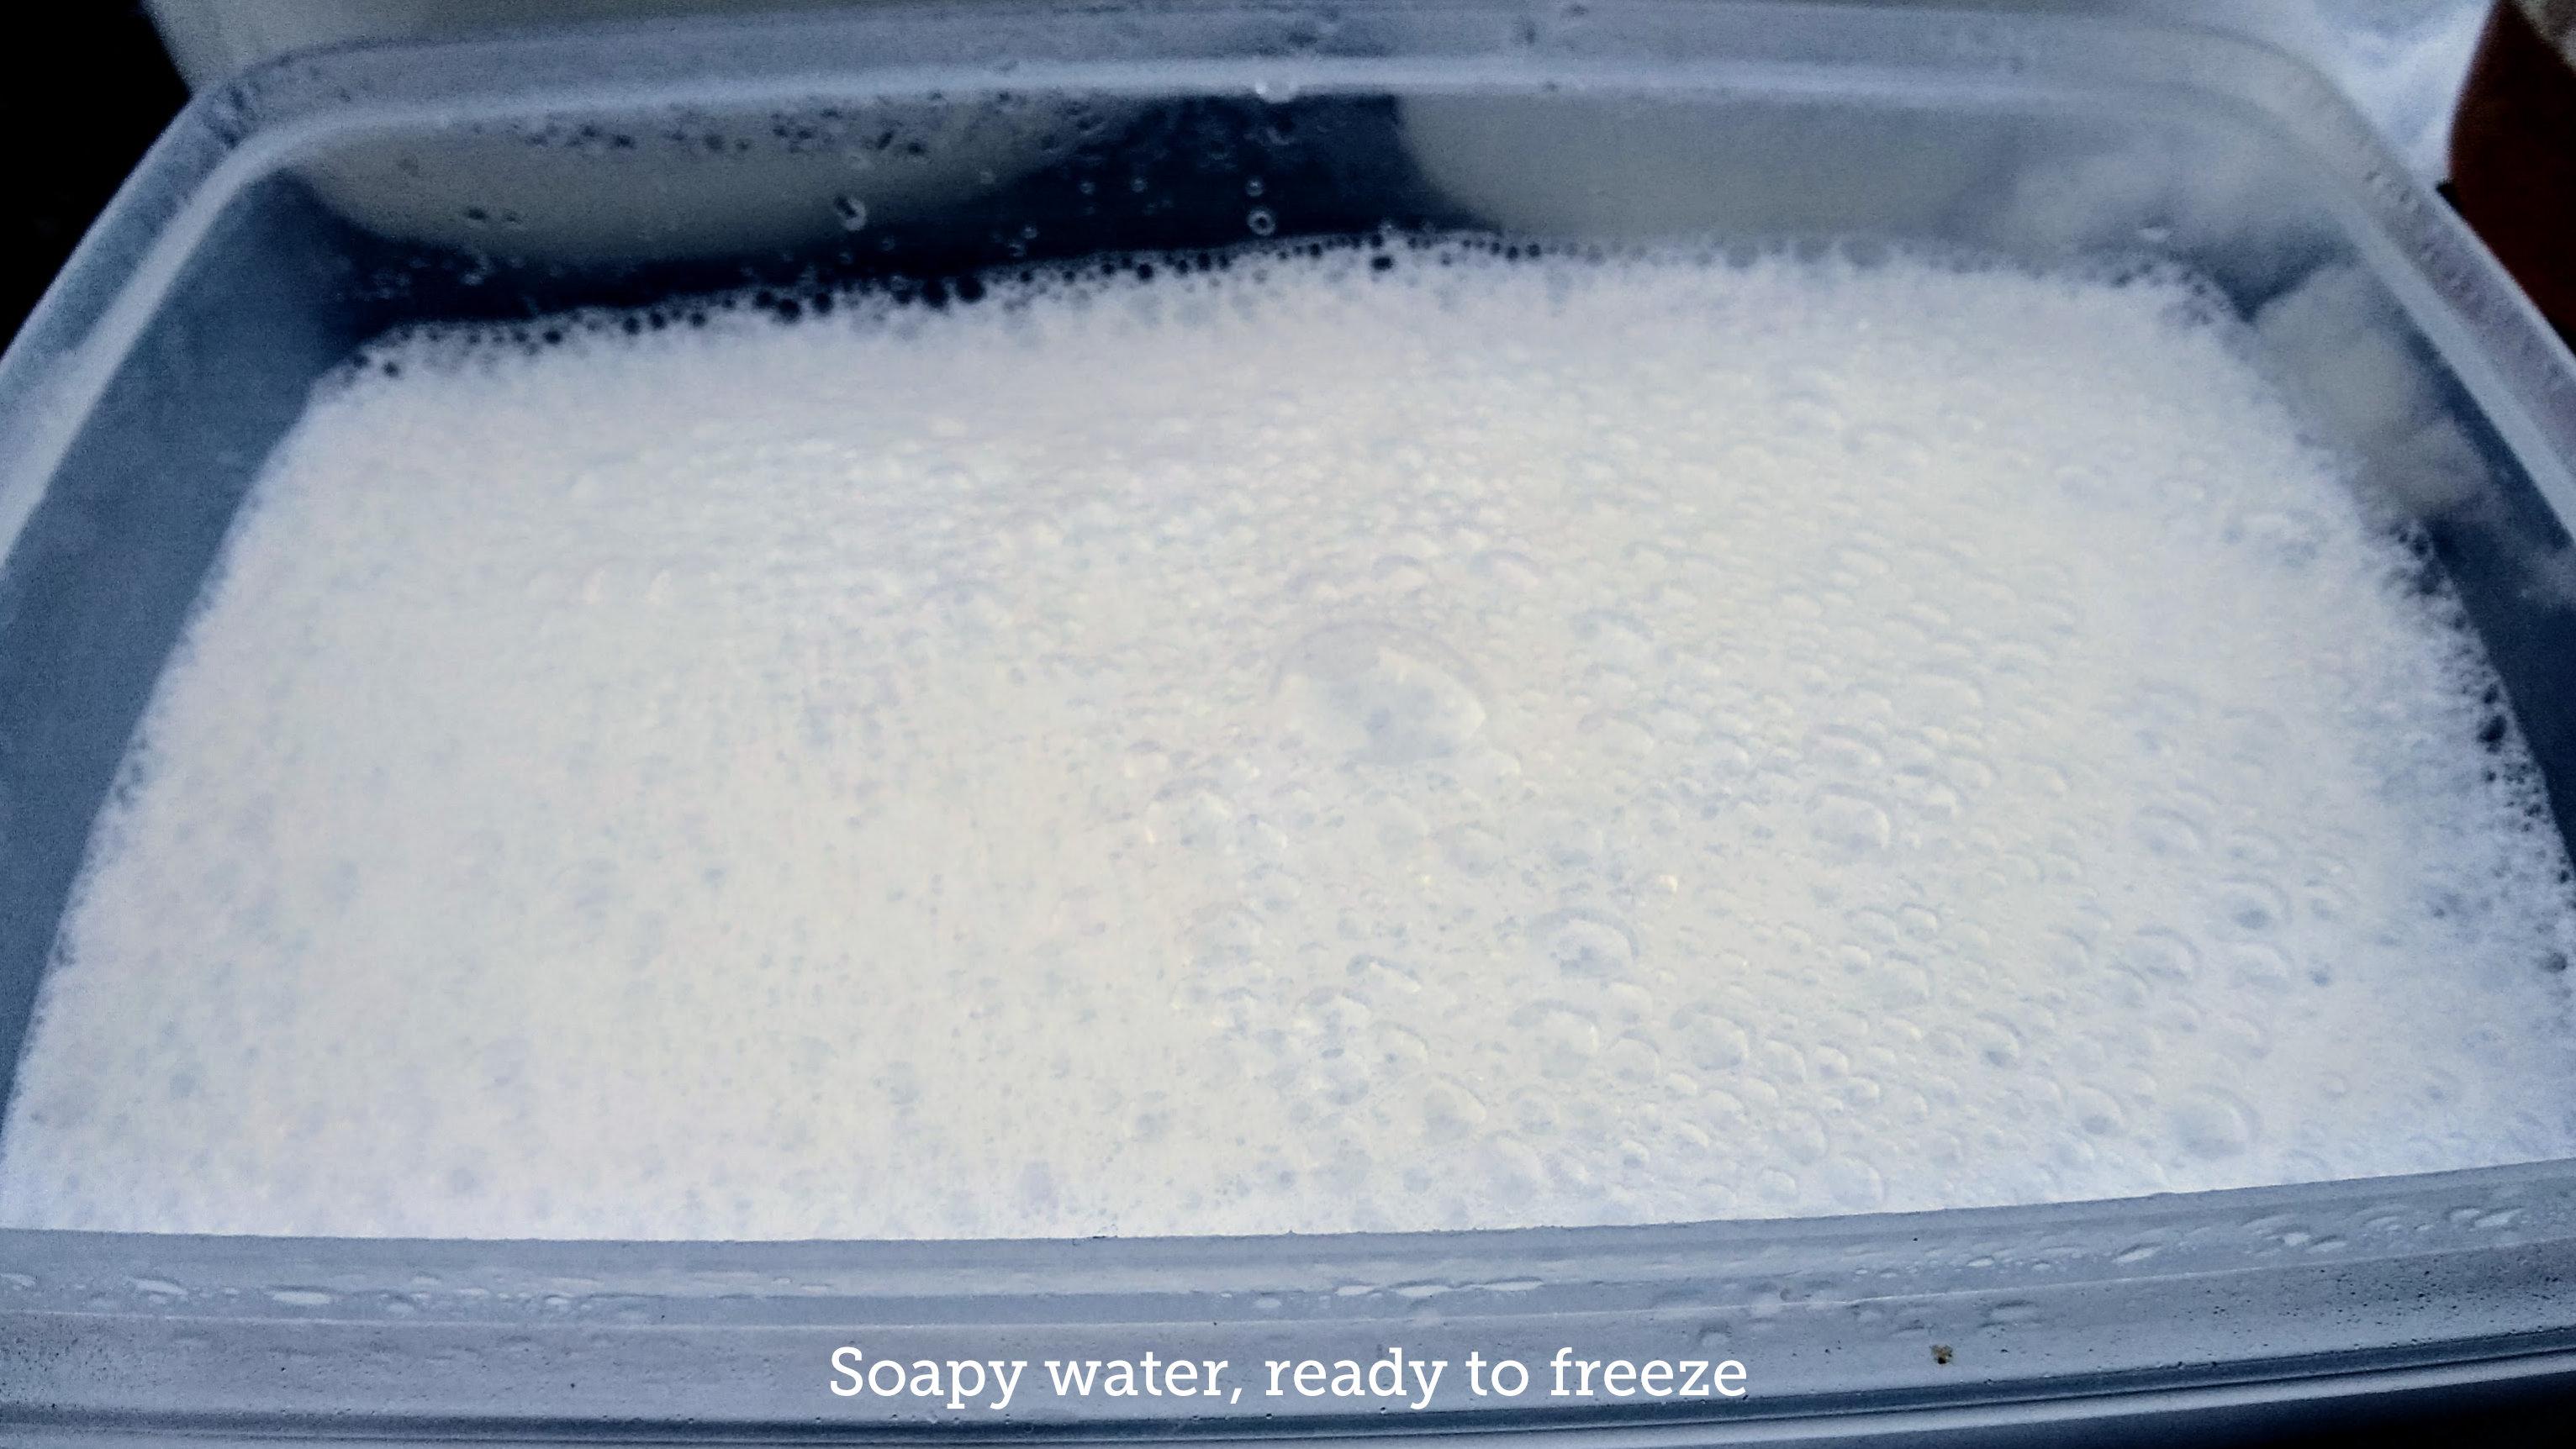
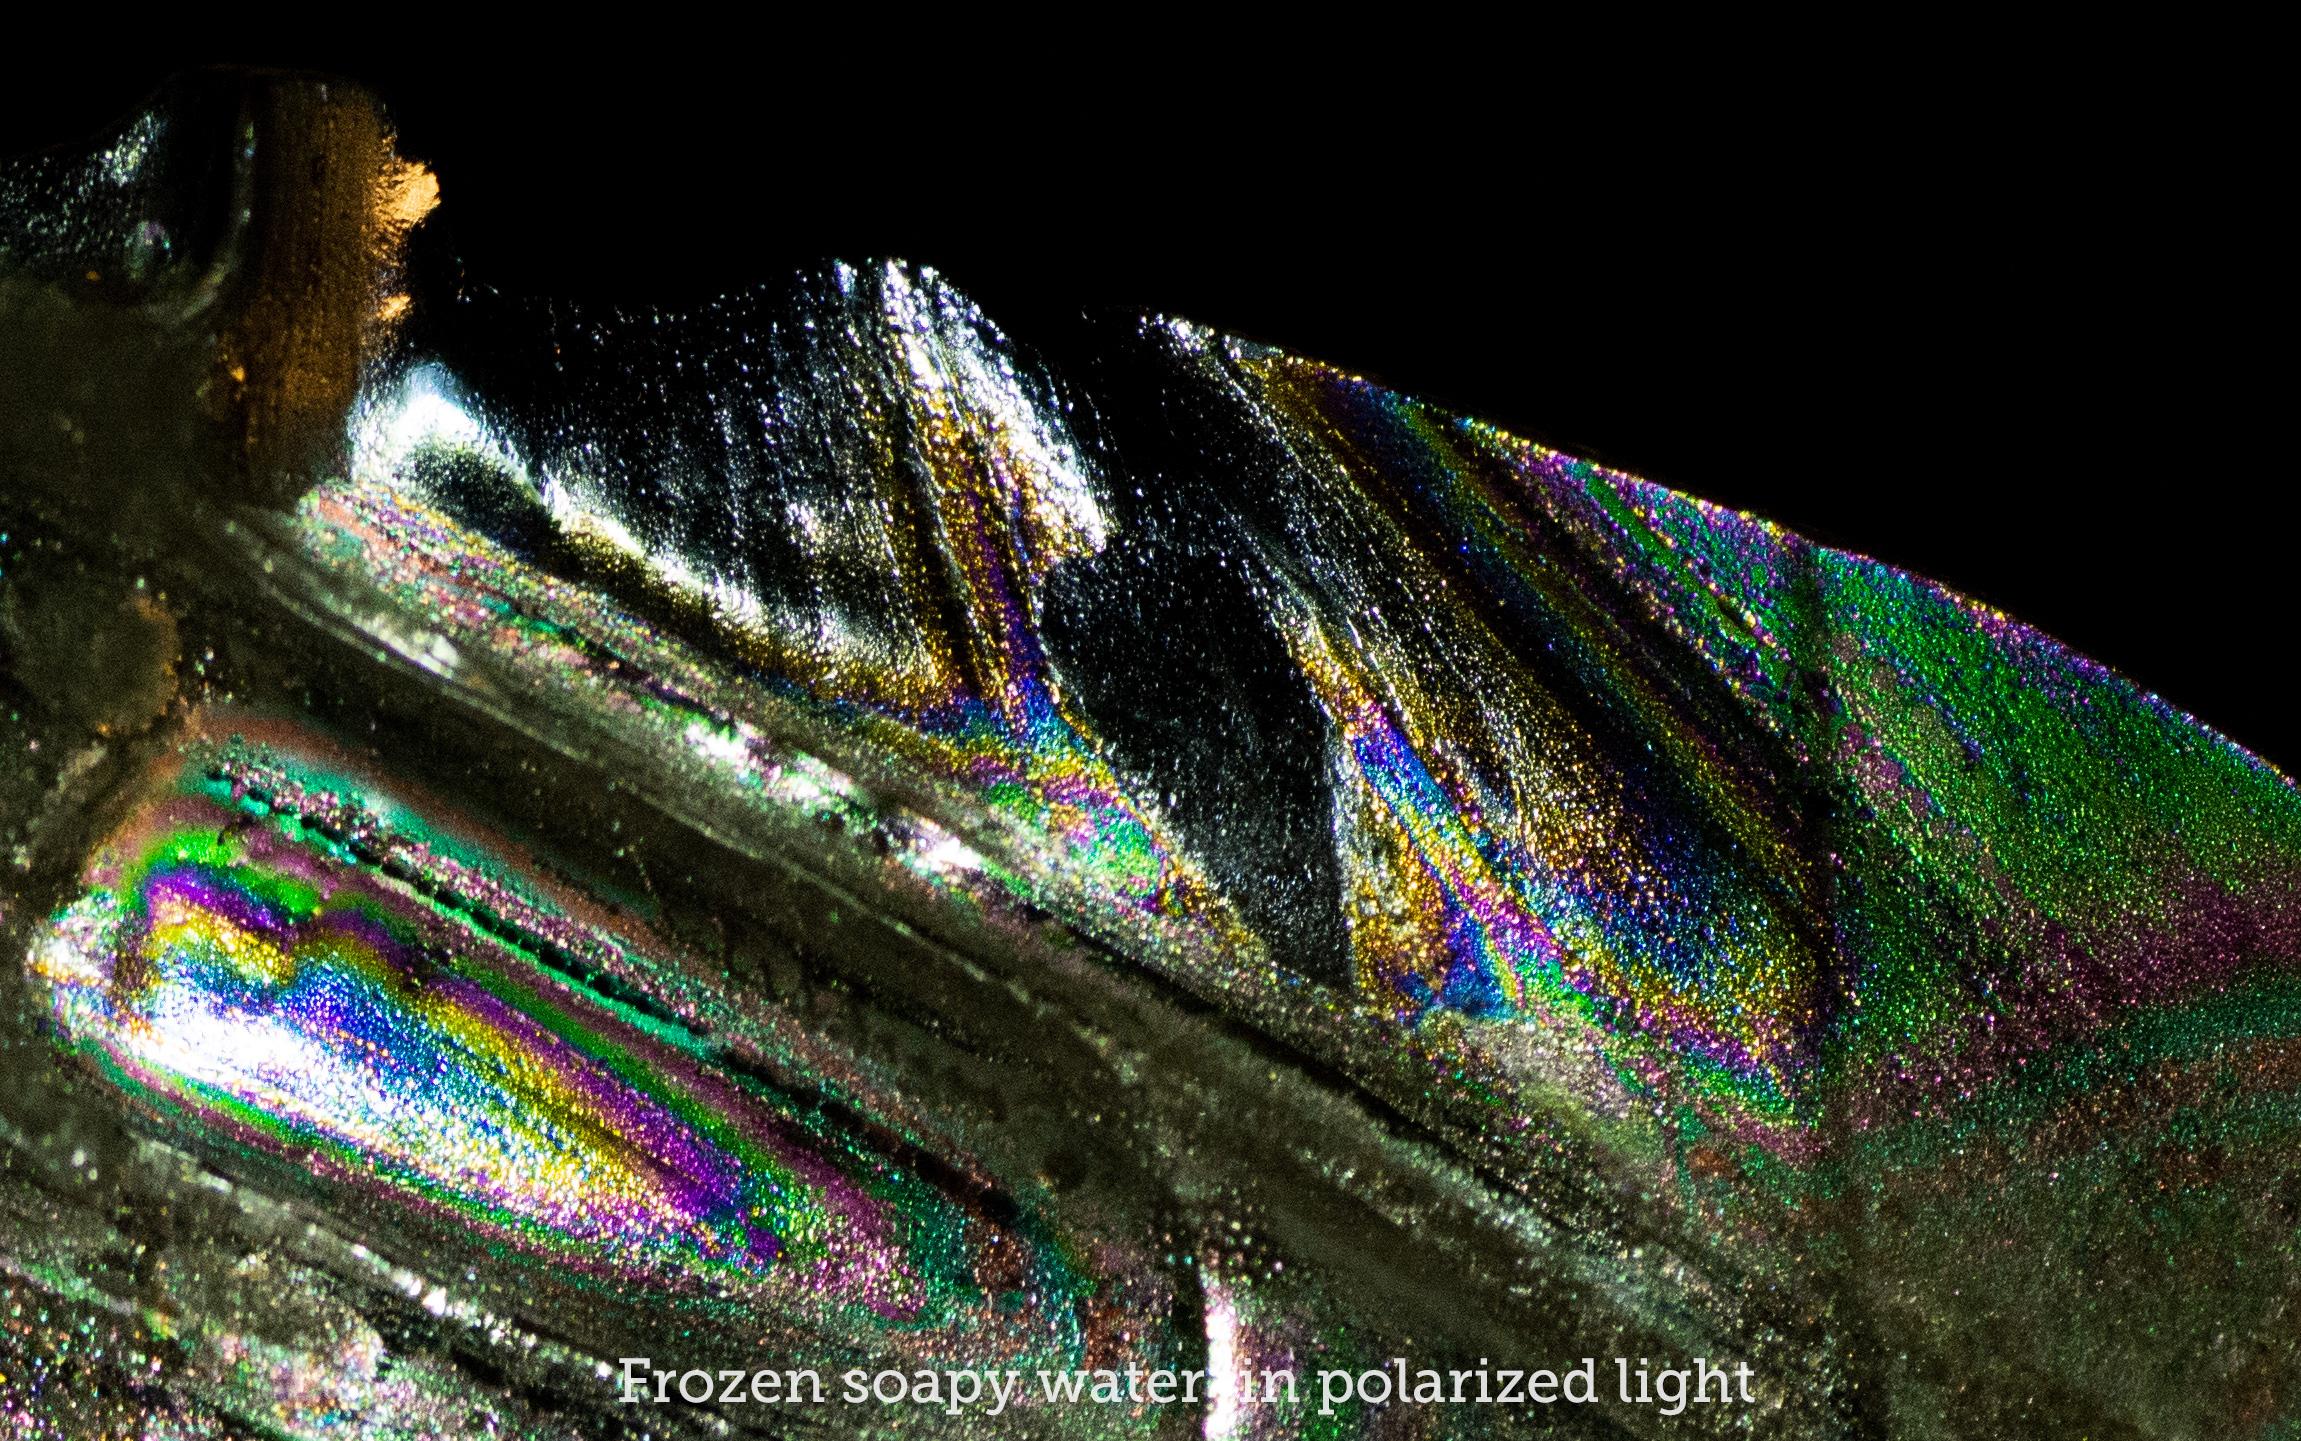
- Soapy water
- Do some experiments: Mix in various amounts of things like gelatin (clear or colored), sugar, salt, small amounts of alcohol, glue, shampoo, mouthwash, vinegar, baking soda, or whatever else you can think of (BE SAFE!)
- I've been meaning to try mixing a little vinegar into some water, letting it start to freeze, then stirring in a little baking soda to make extra bubbly ice. (Maybe you can experiment with different ratios and report back in the comments. Please. Thanks.)
- Anything that freezes! Maybe you just ate the last pickle and now you've got brine that lacks a mission. You know what to do.
Hot vs cold water:
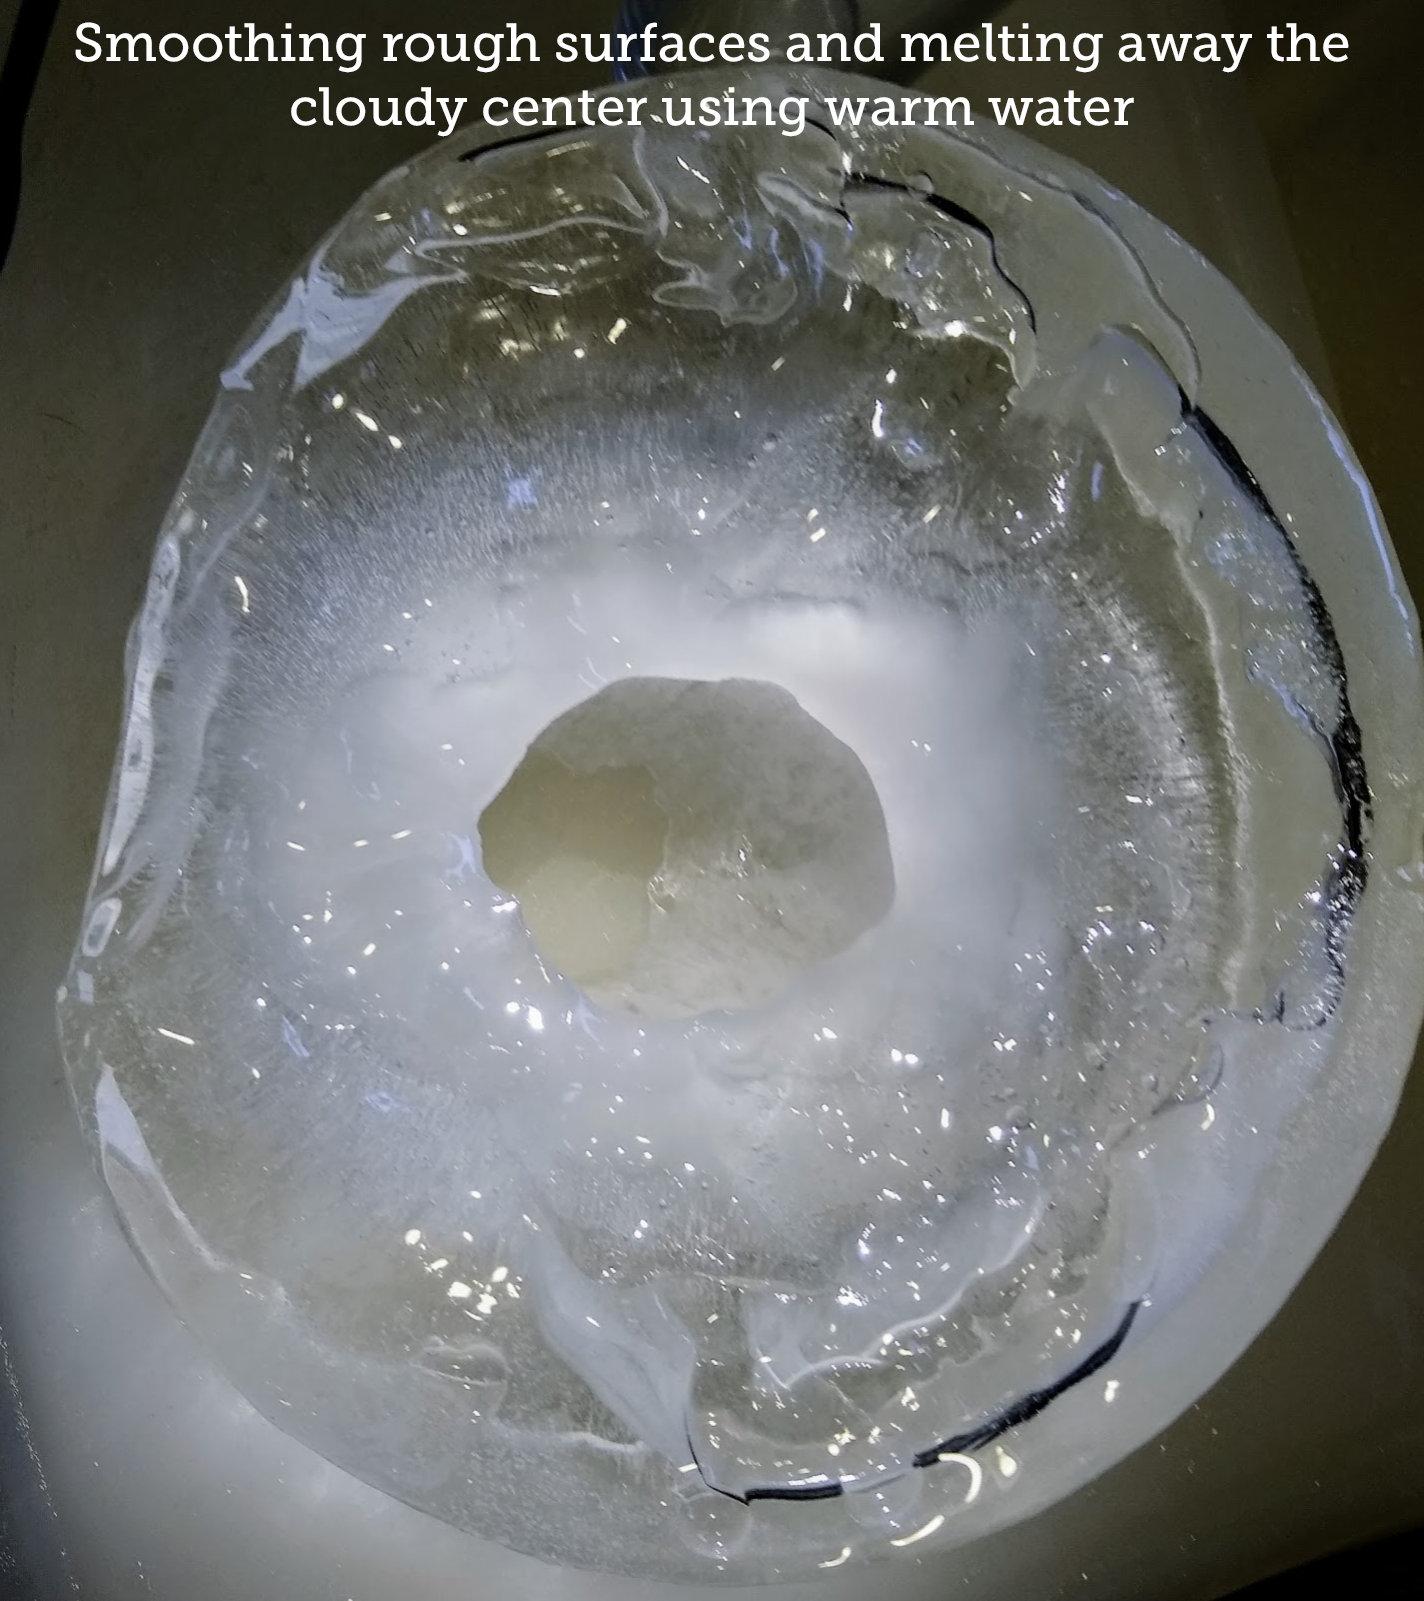
Hot water holds less dissolved gasses, meaning there are fewer bubbles trapped inside when it freezes, and the ice is clearer—at least on the outside of the cube/block/berg. You'll still likely get bubbles or an opaque cloud in the middle. I suspect it has a lot to do not just with how hot it is when it goes into the cold (I've only experimented with the hottest water I get from my kitchen faucet) but also with how cold the cold is. My non-systematic experiments were outdoors at 0° to 5° F/-17° to -15° C and I got fairly clear ice in large containers.
I'm sure there are sweet spots where it's warm enough for increased clarity and cool enough for decent bubble formation without being cloudy.
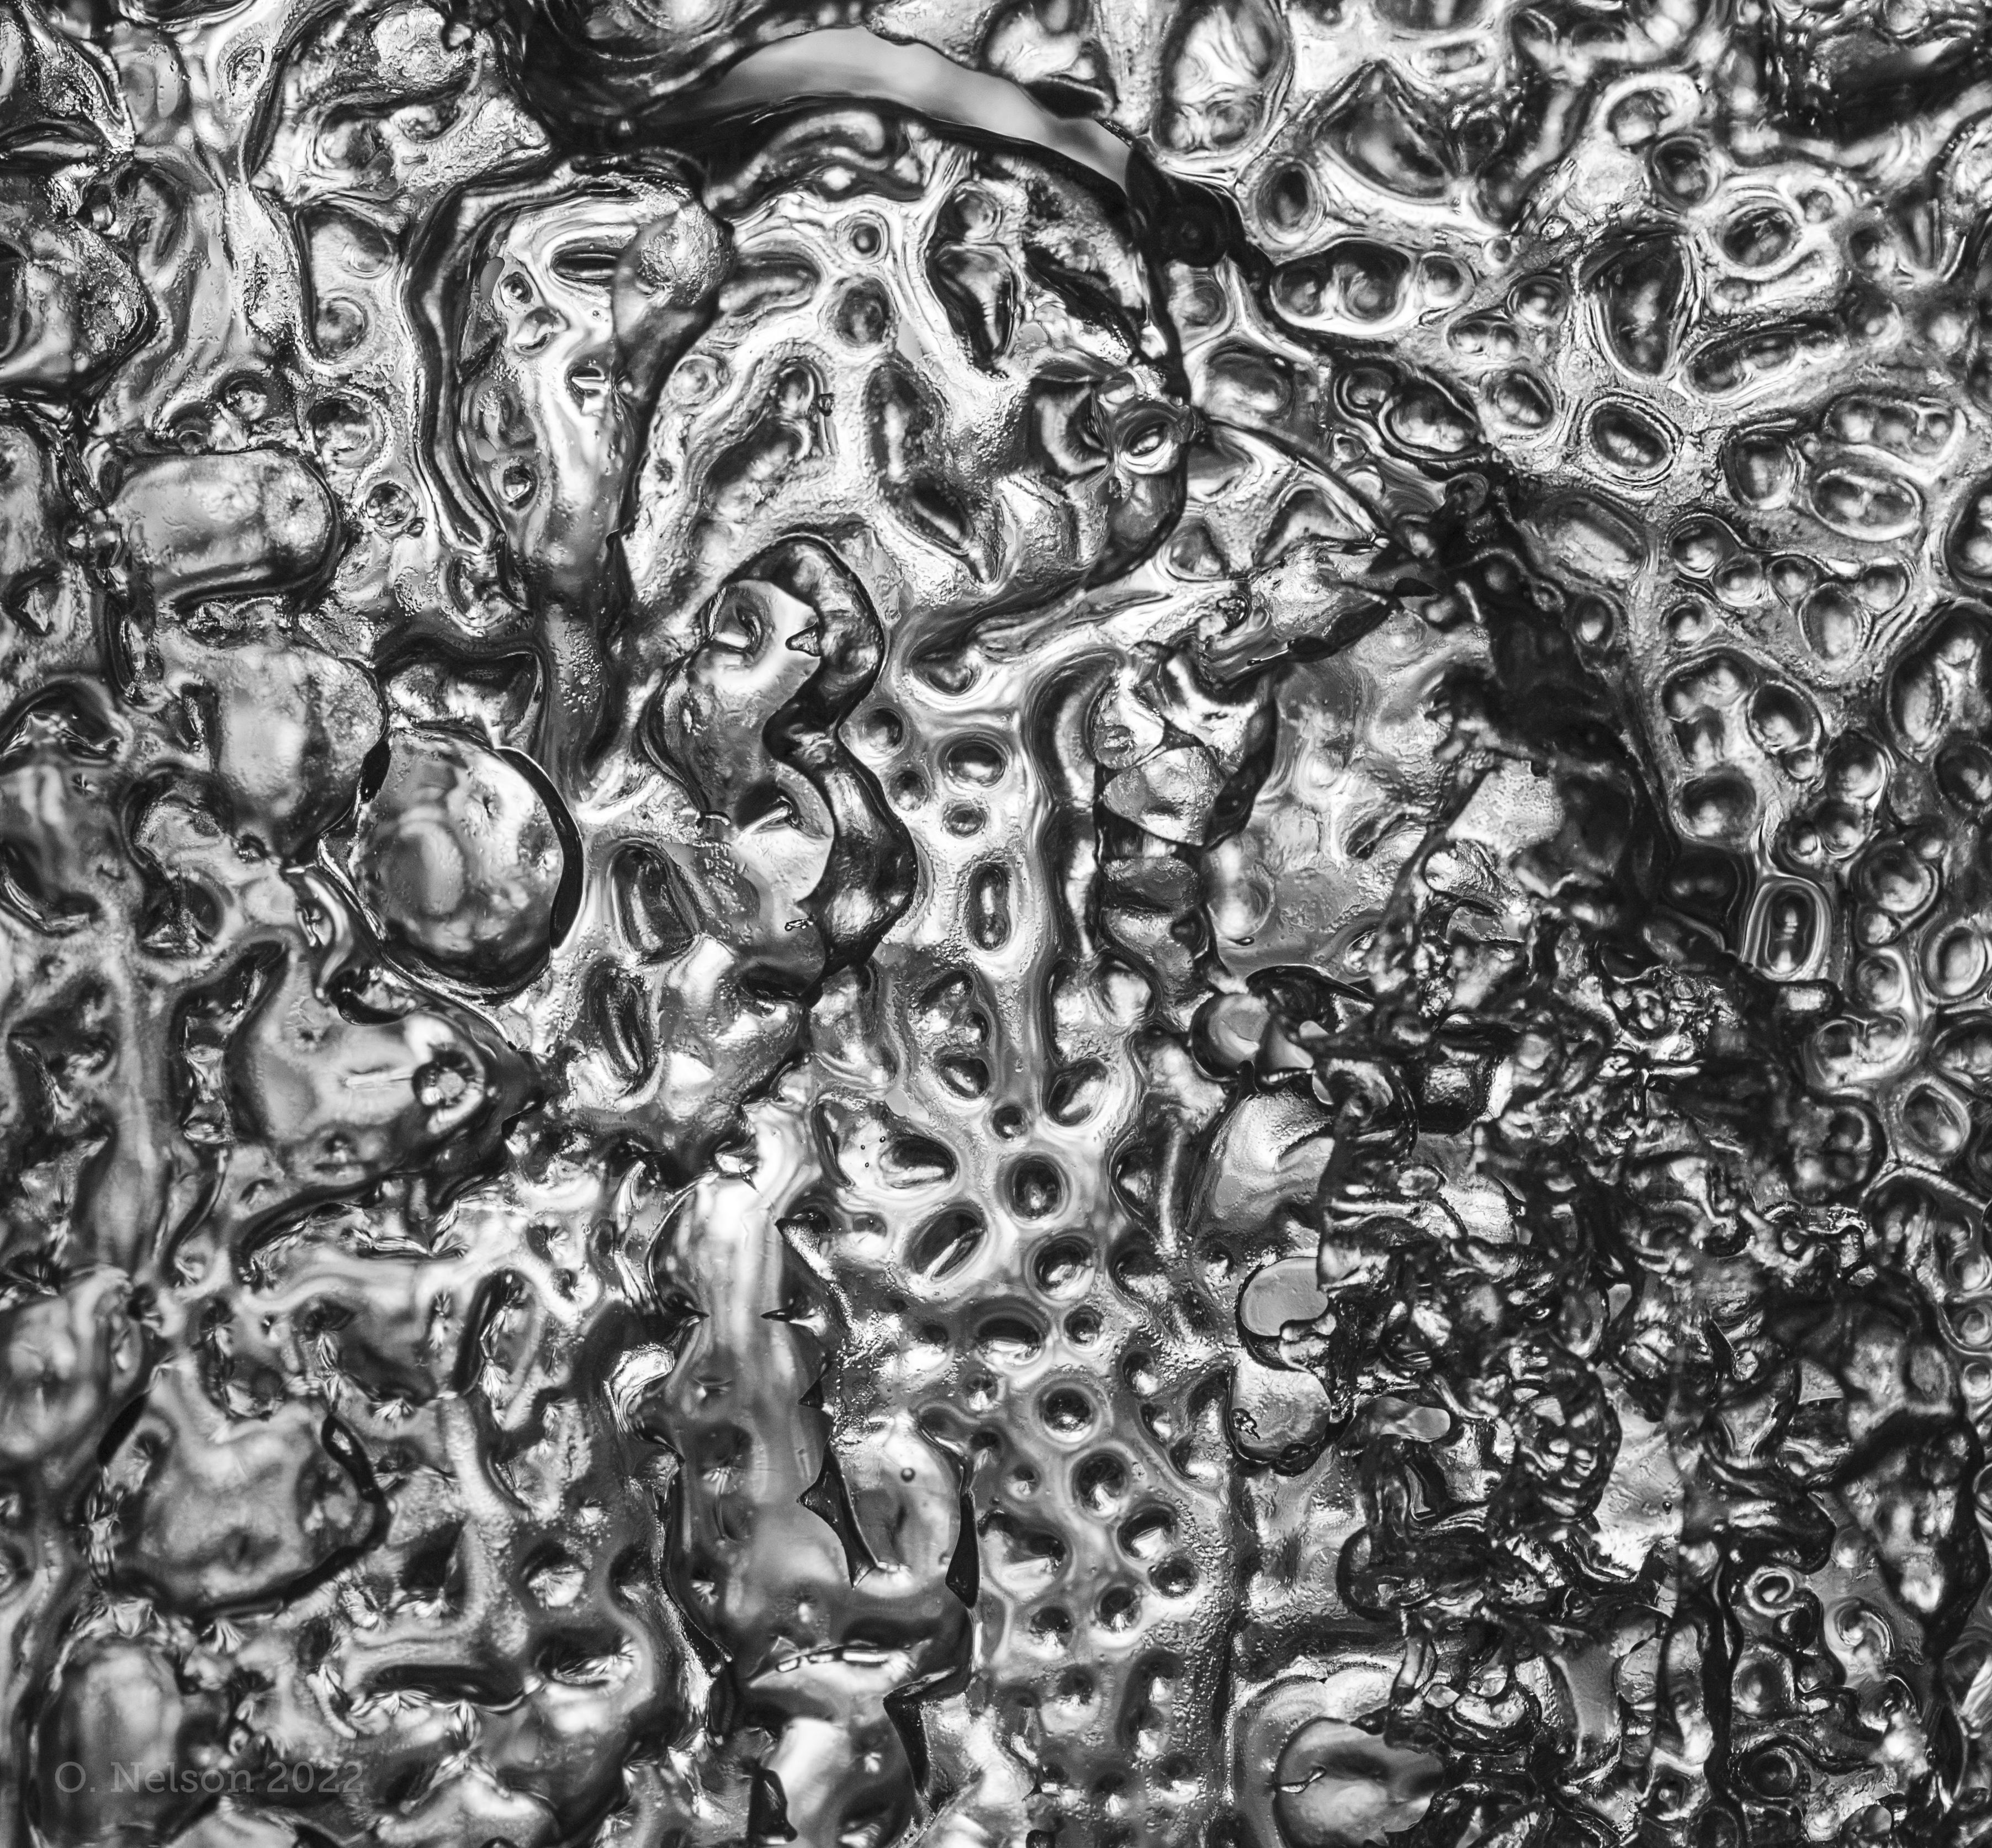
Soapy water:
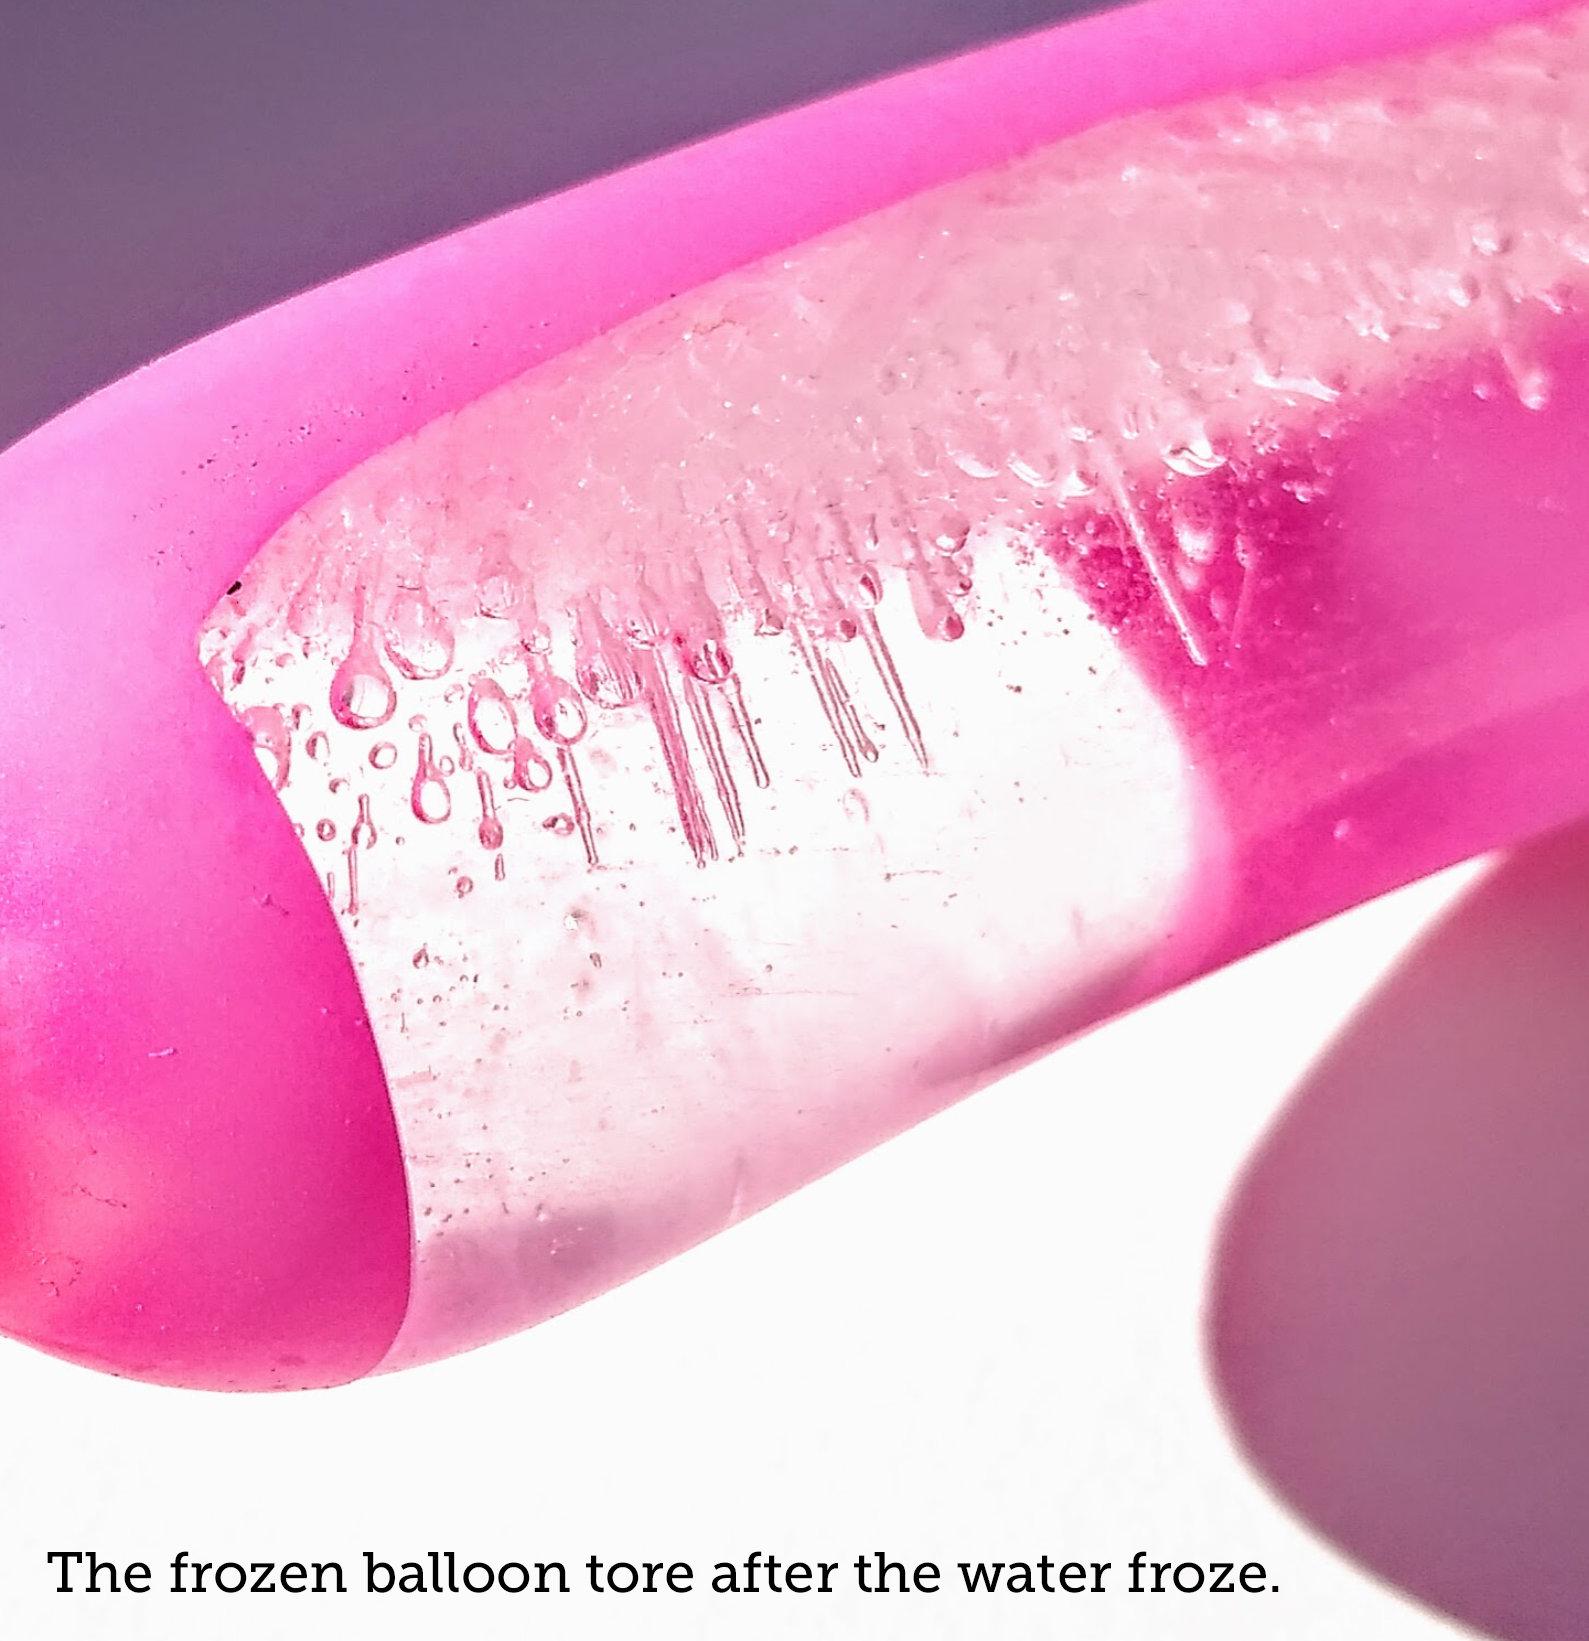
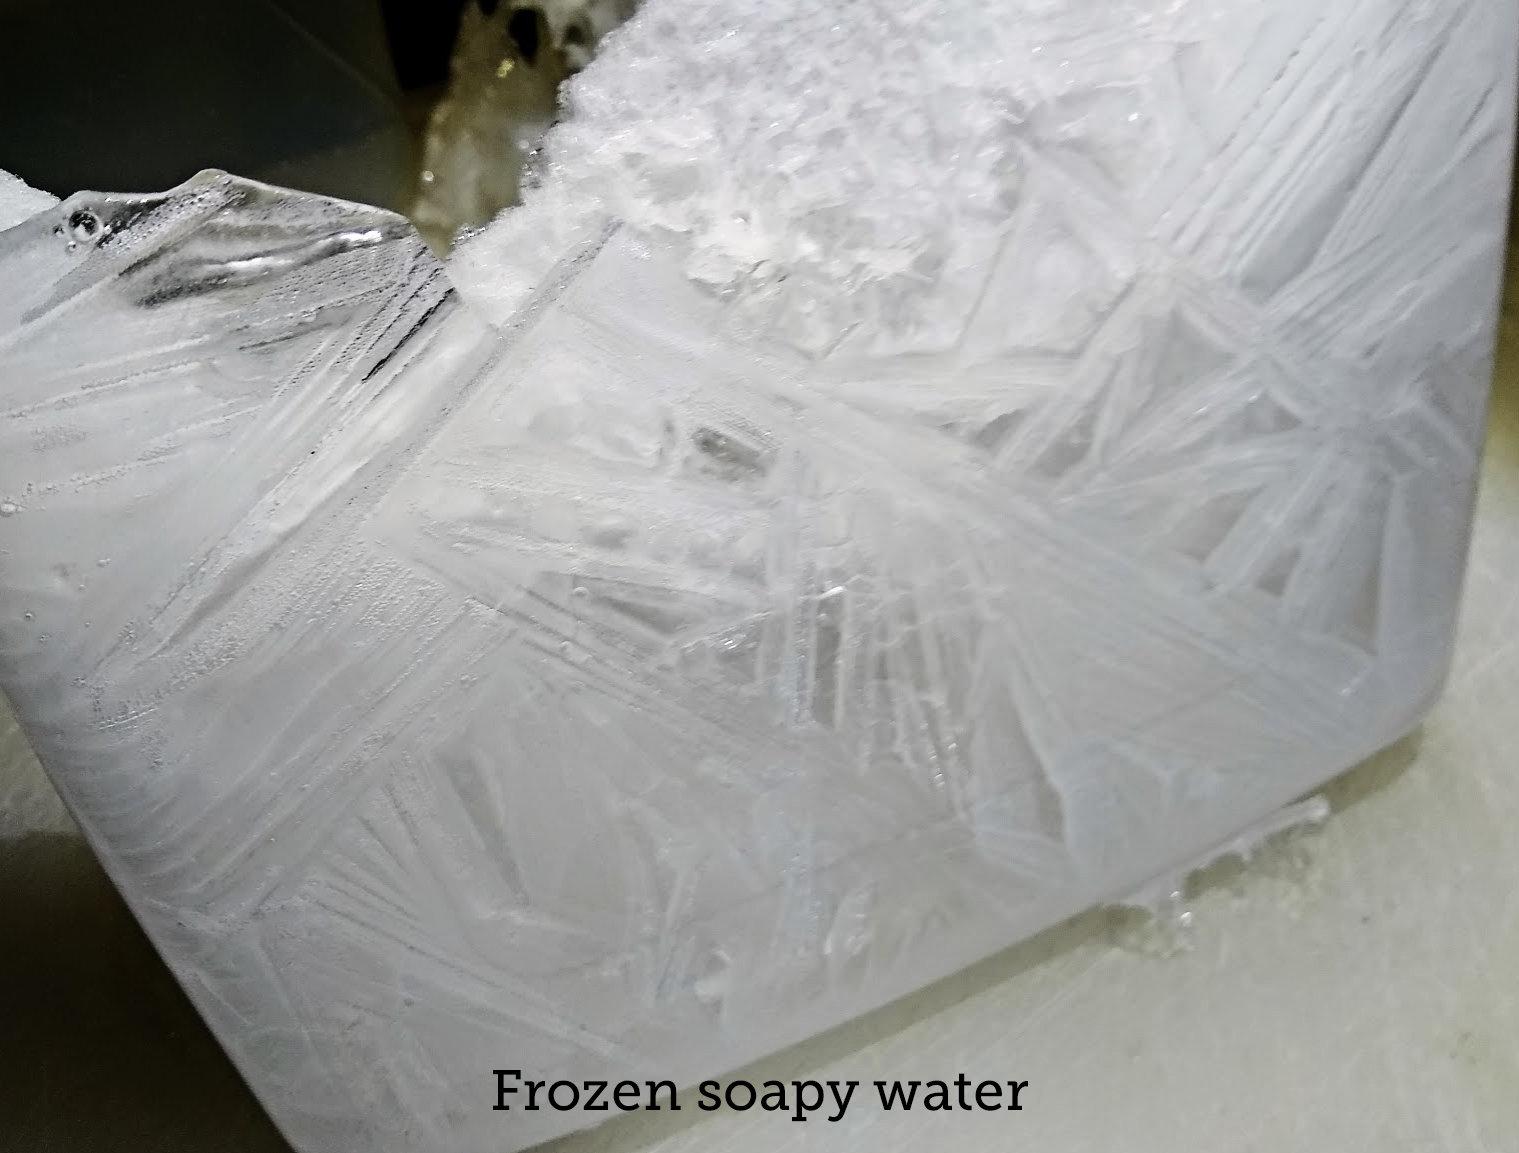
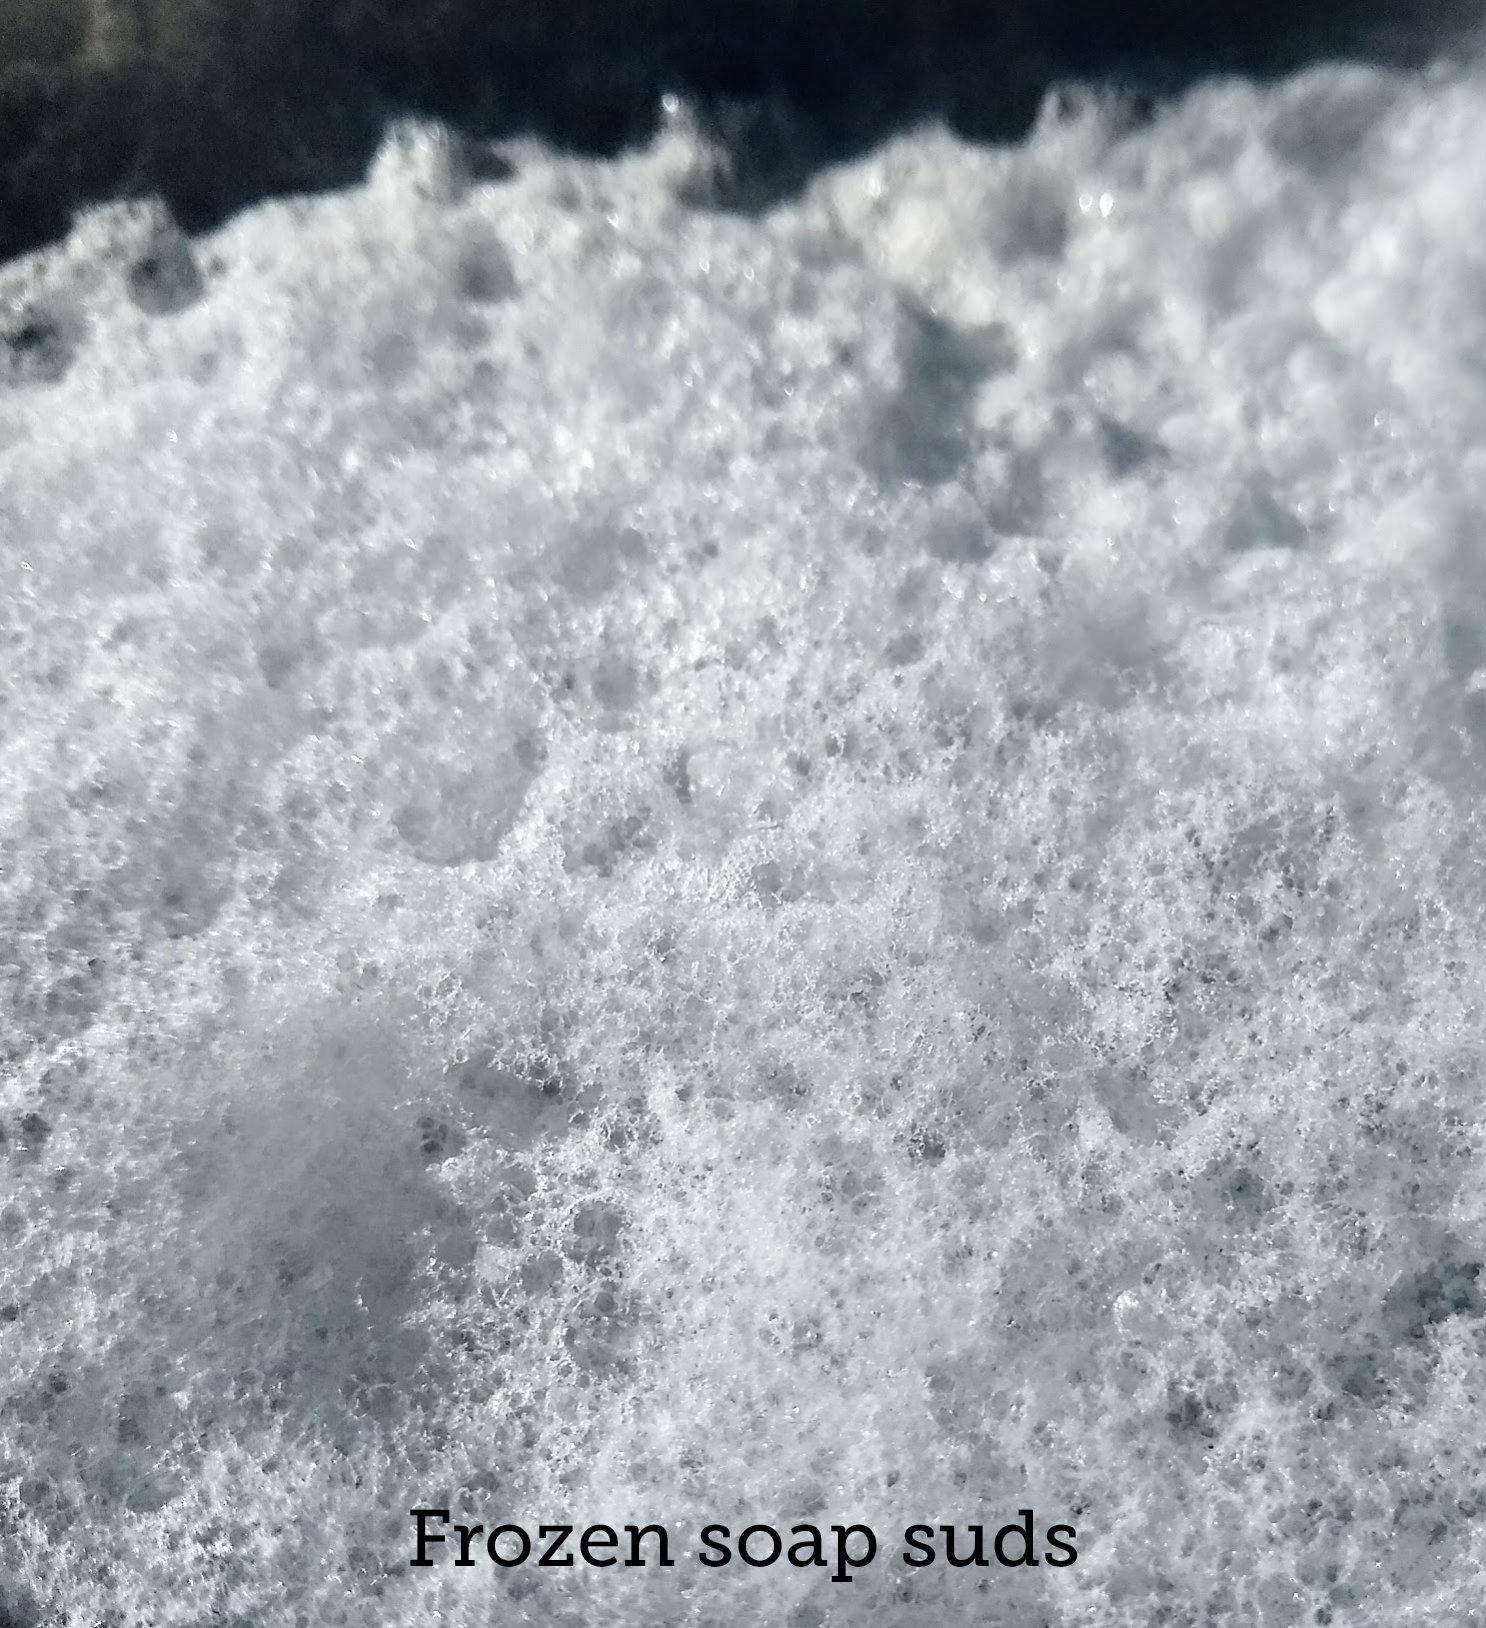
The suds on top of water with dish soap froze into what looked like rough snow that did not photograph well. The water, however, did freeze into fairly nice crystals. See images above. I let it freeze until I could see that a decent layer of ice had formed on the bottom of the container but there was still liquid inside, then I poked a hole in the top ice (under the suds) and drained the water. This left a hollow block with ice crystals on one side and frozen suds on the other. The ice looked normal but was much weaker than ice made of just water. I may experiment with different concentrations and/or types of soap or other sudsy substances, but since dish soap itself doesn't freeze solid (due to its non-water ingredients) and since it lowers the freezing point of water, it might be more trouble than it's worth.
Beer:
I knew the alcohol would not freeze, but I tried it anyway. What I got (at about 5° F/-15° C) was a golden slush (made up of crystals that might have been interesting up close) that was not solid enough to photograph. It went down the drain. I may experiment with various water to alcohol ratios (and/or different types of alcohol—beer, vodka, wine, isopropyl...) to see if there are intersections where interesting things happen.
Variations:
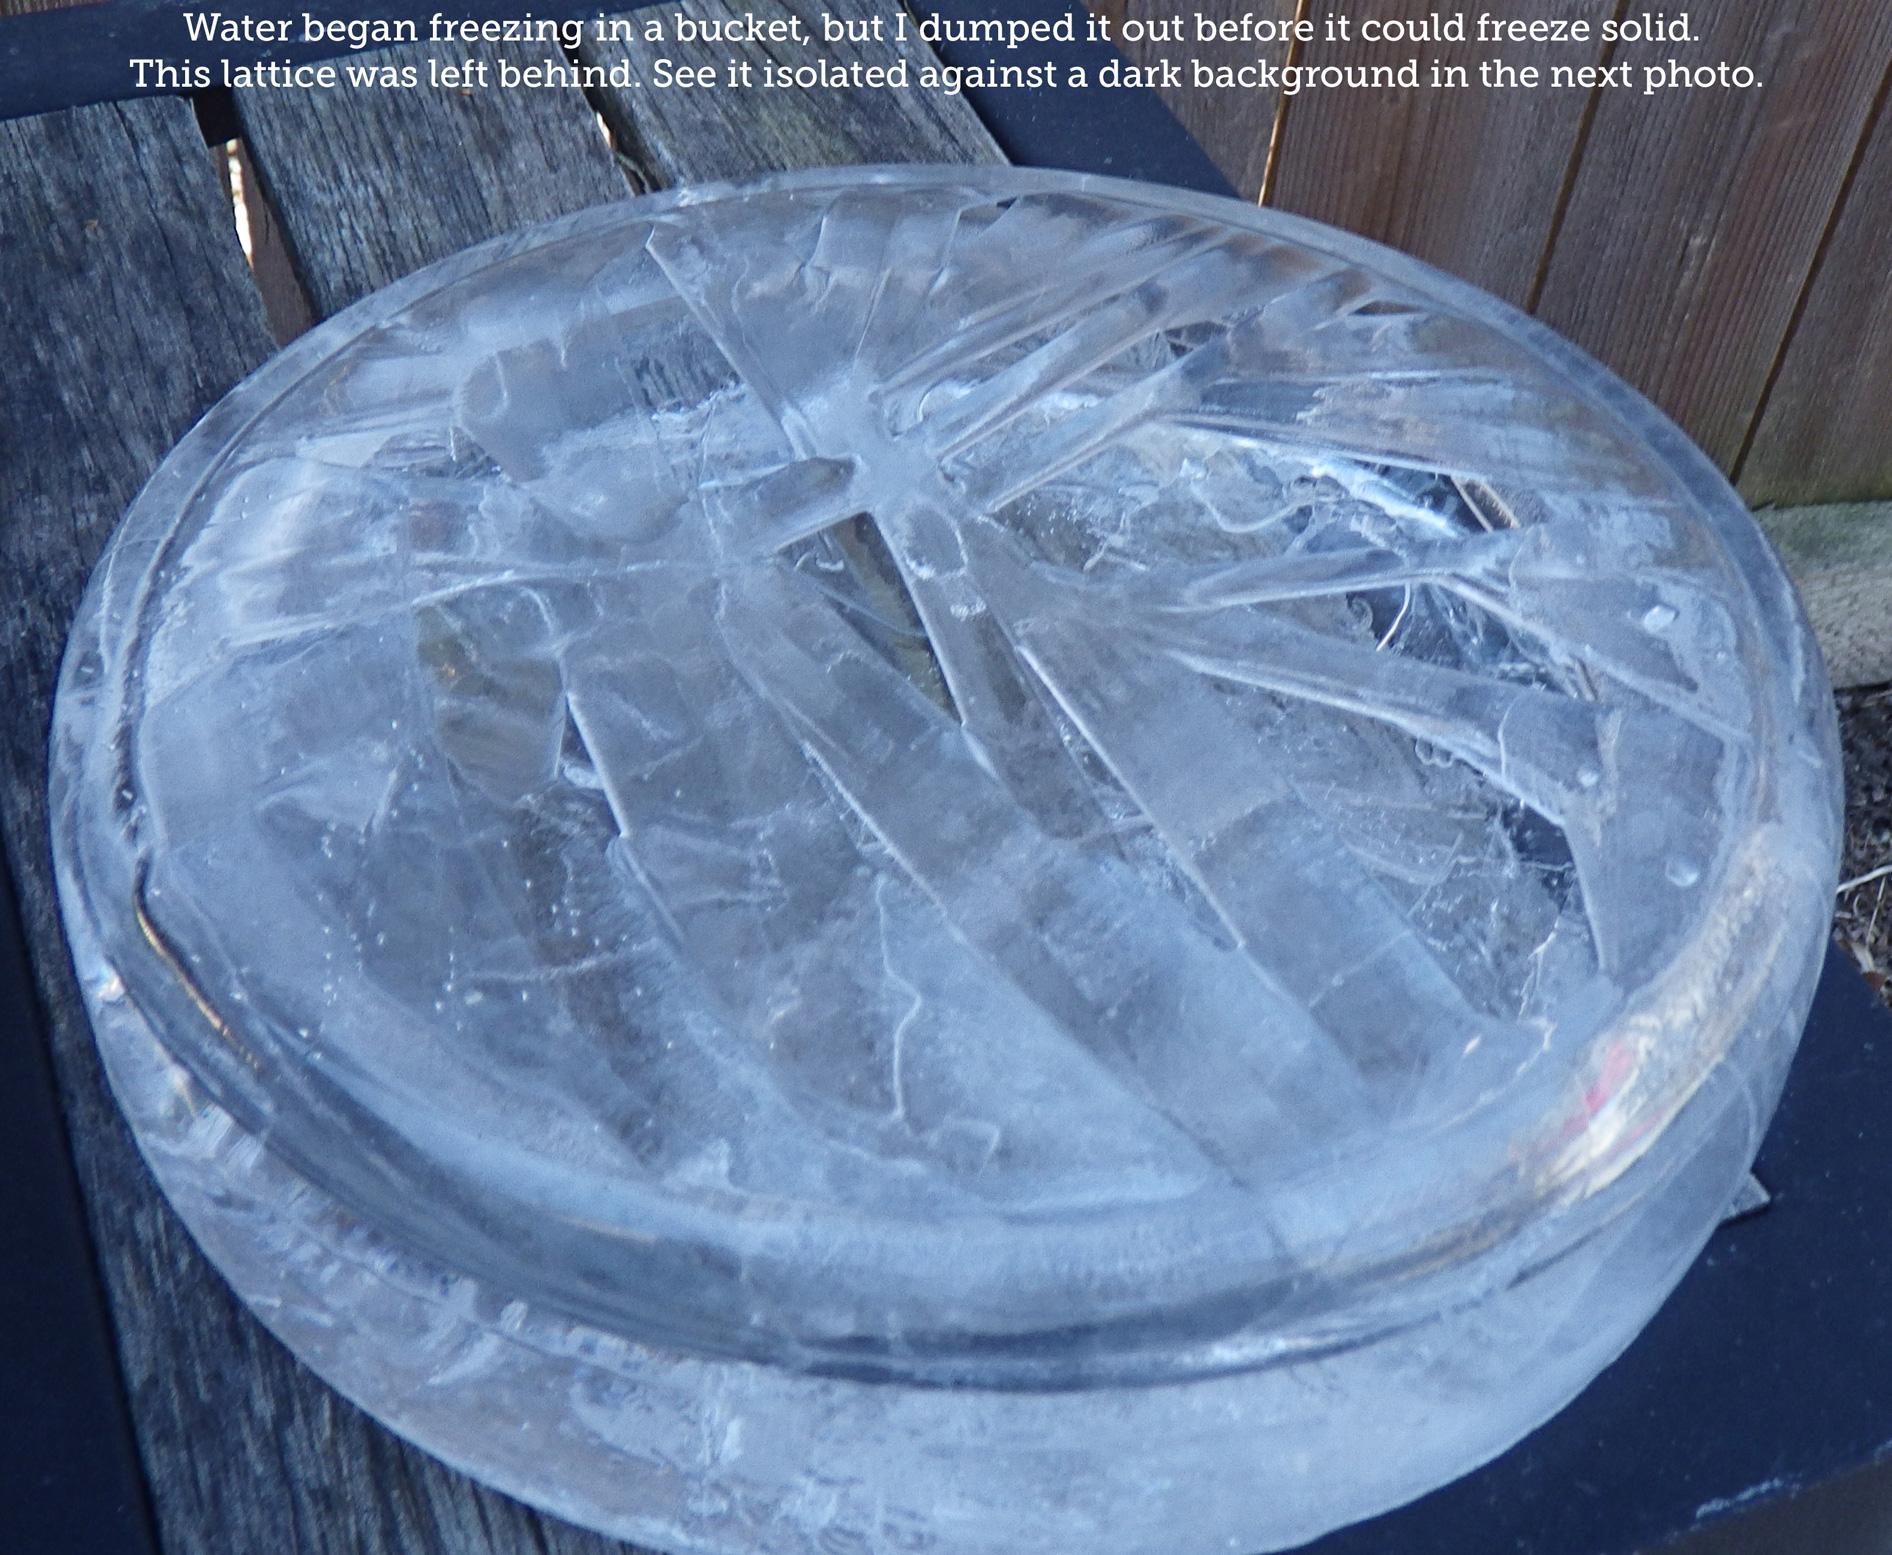
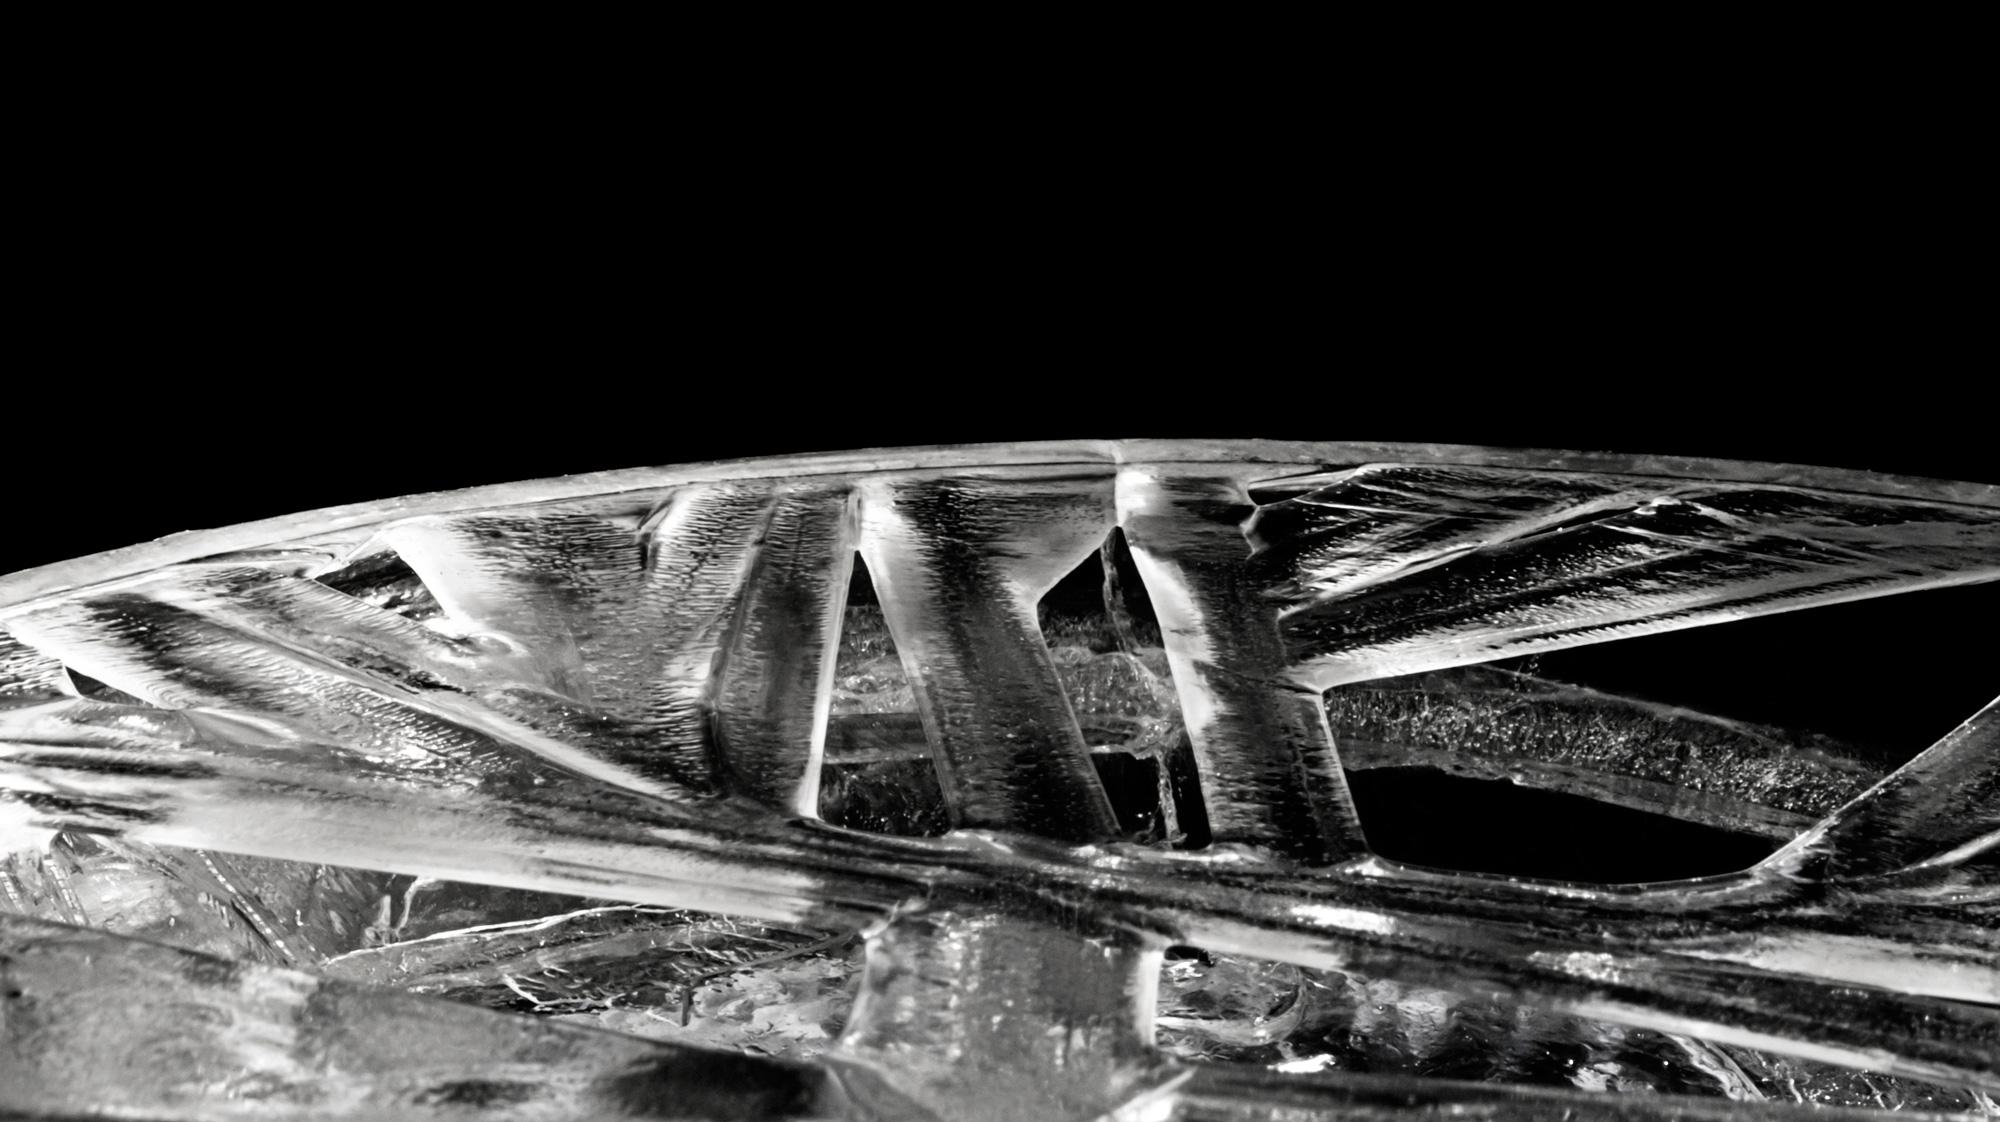
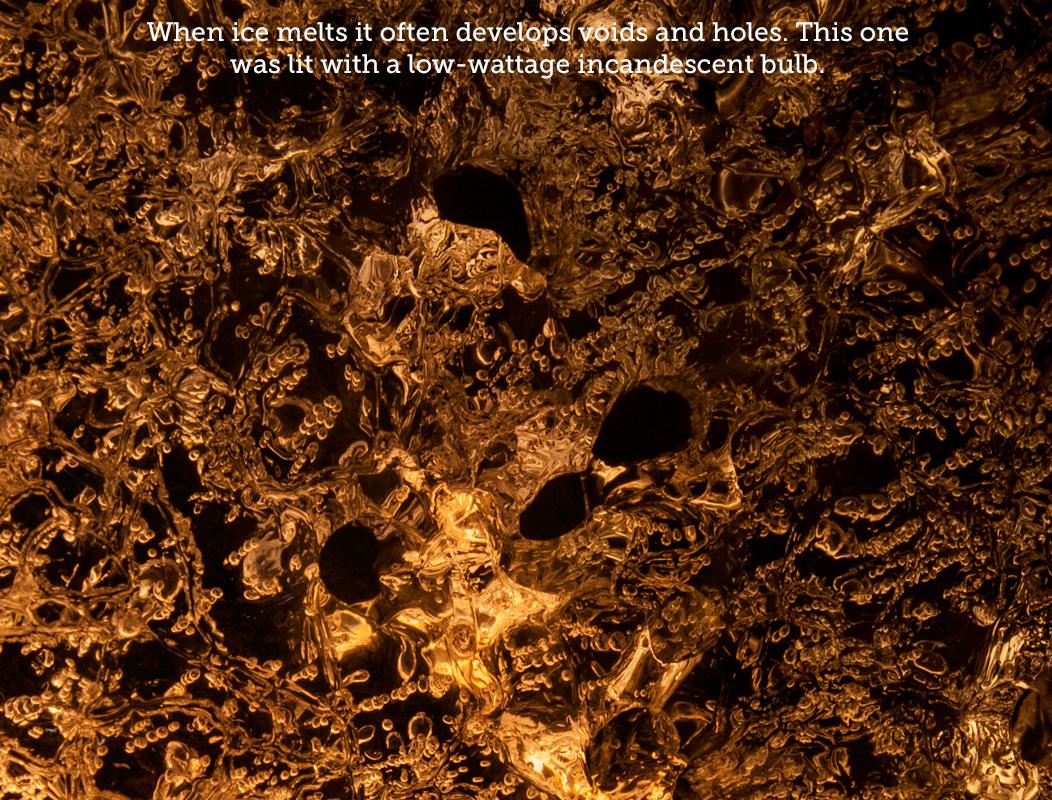
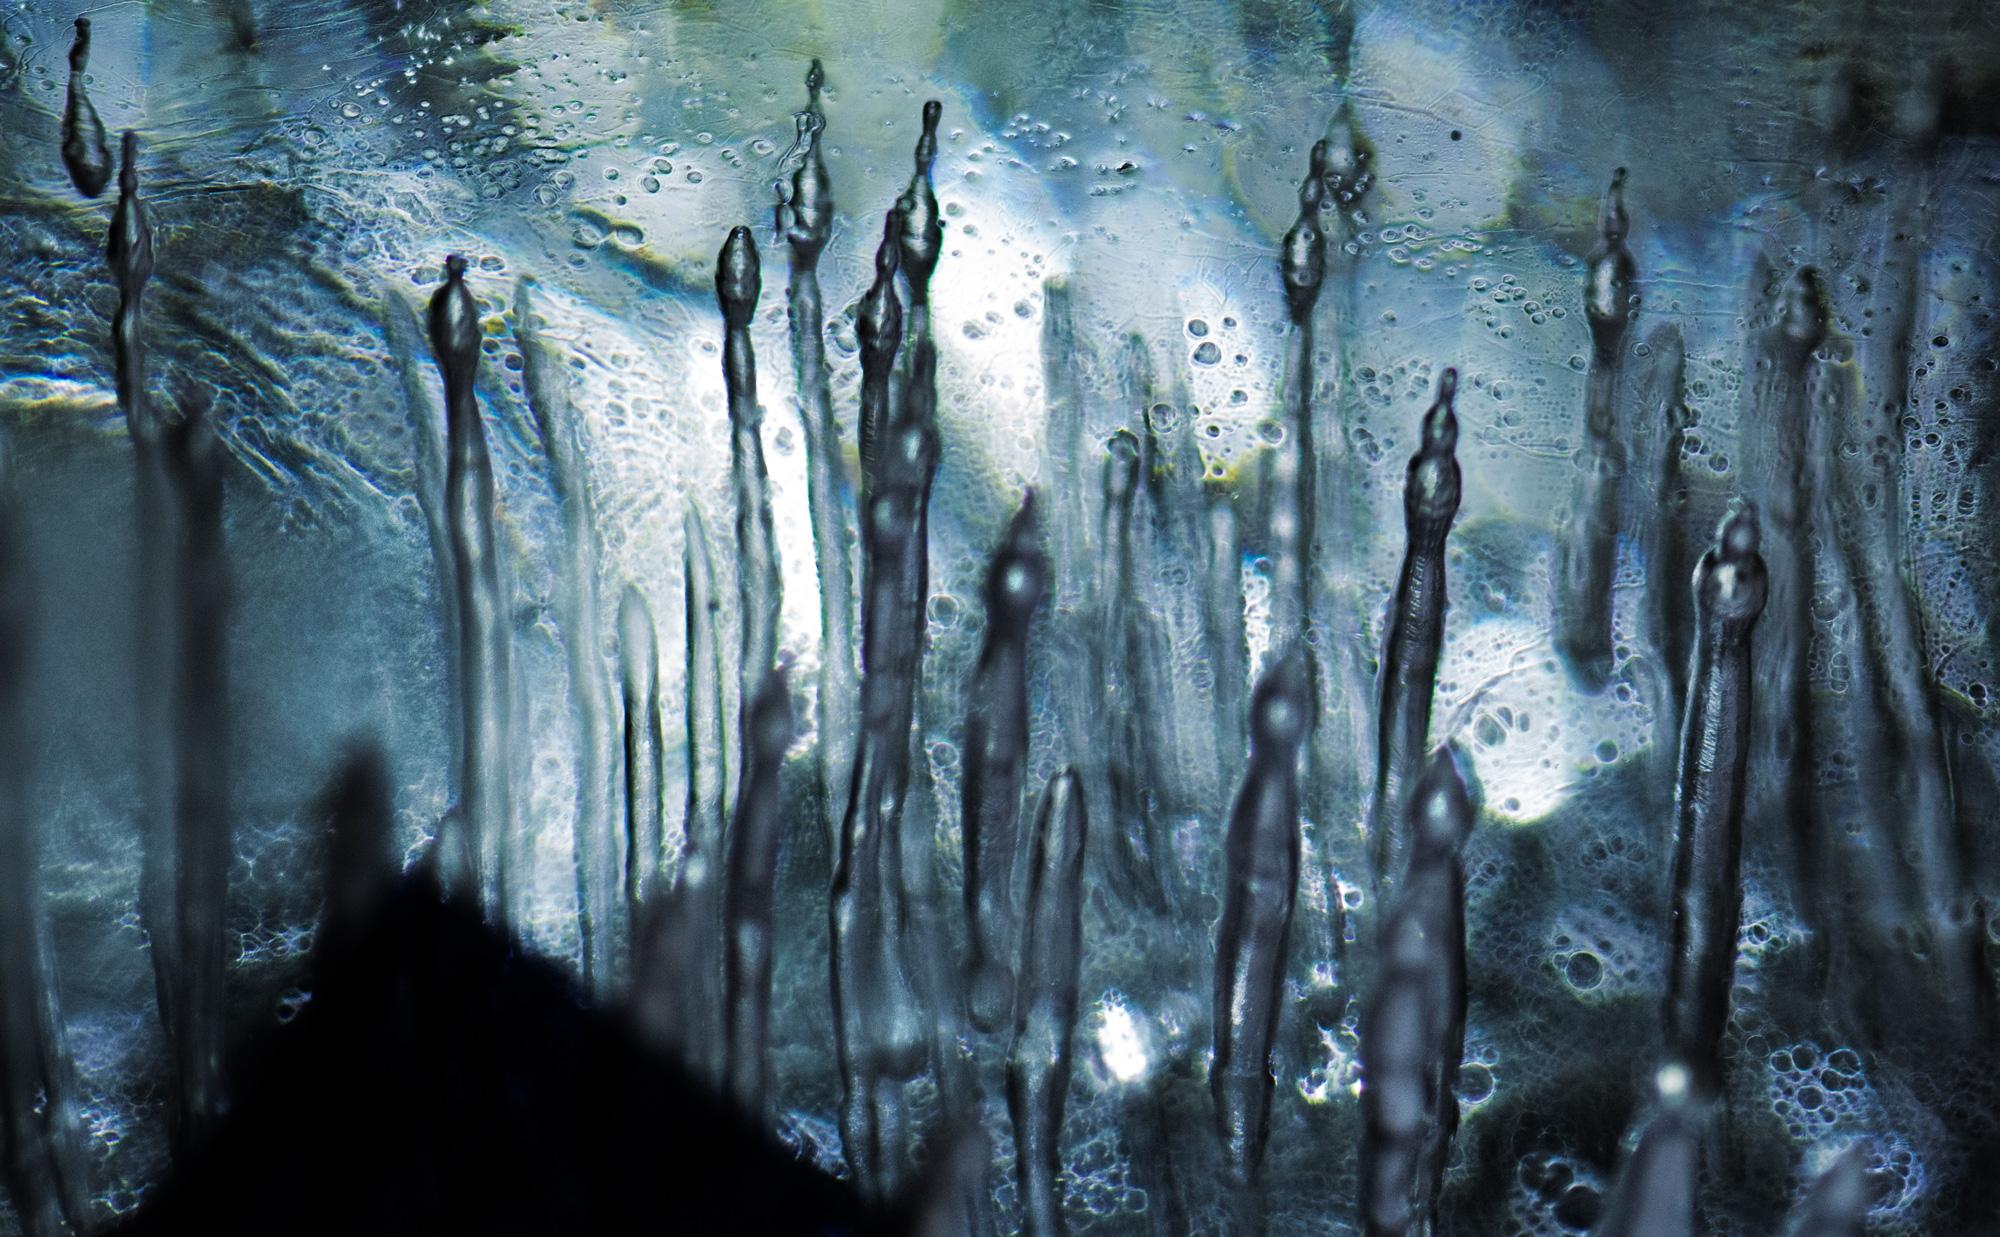
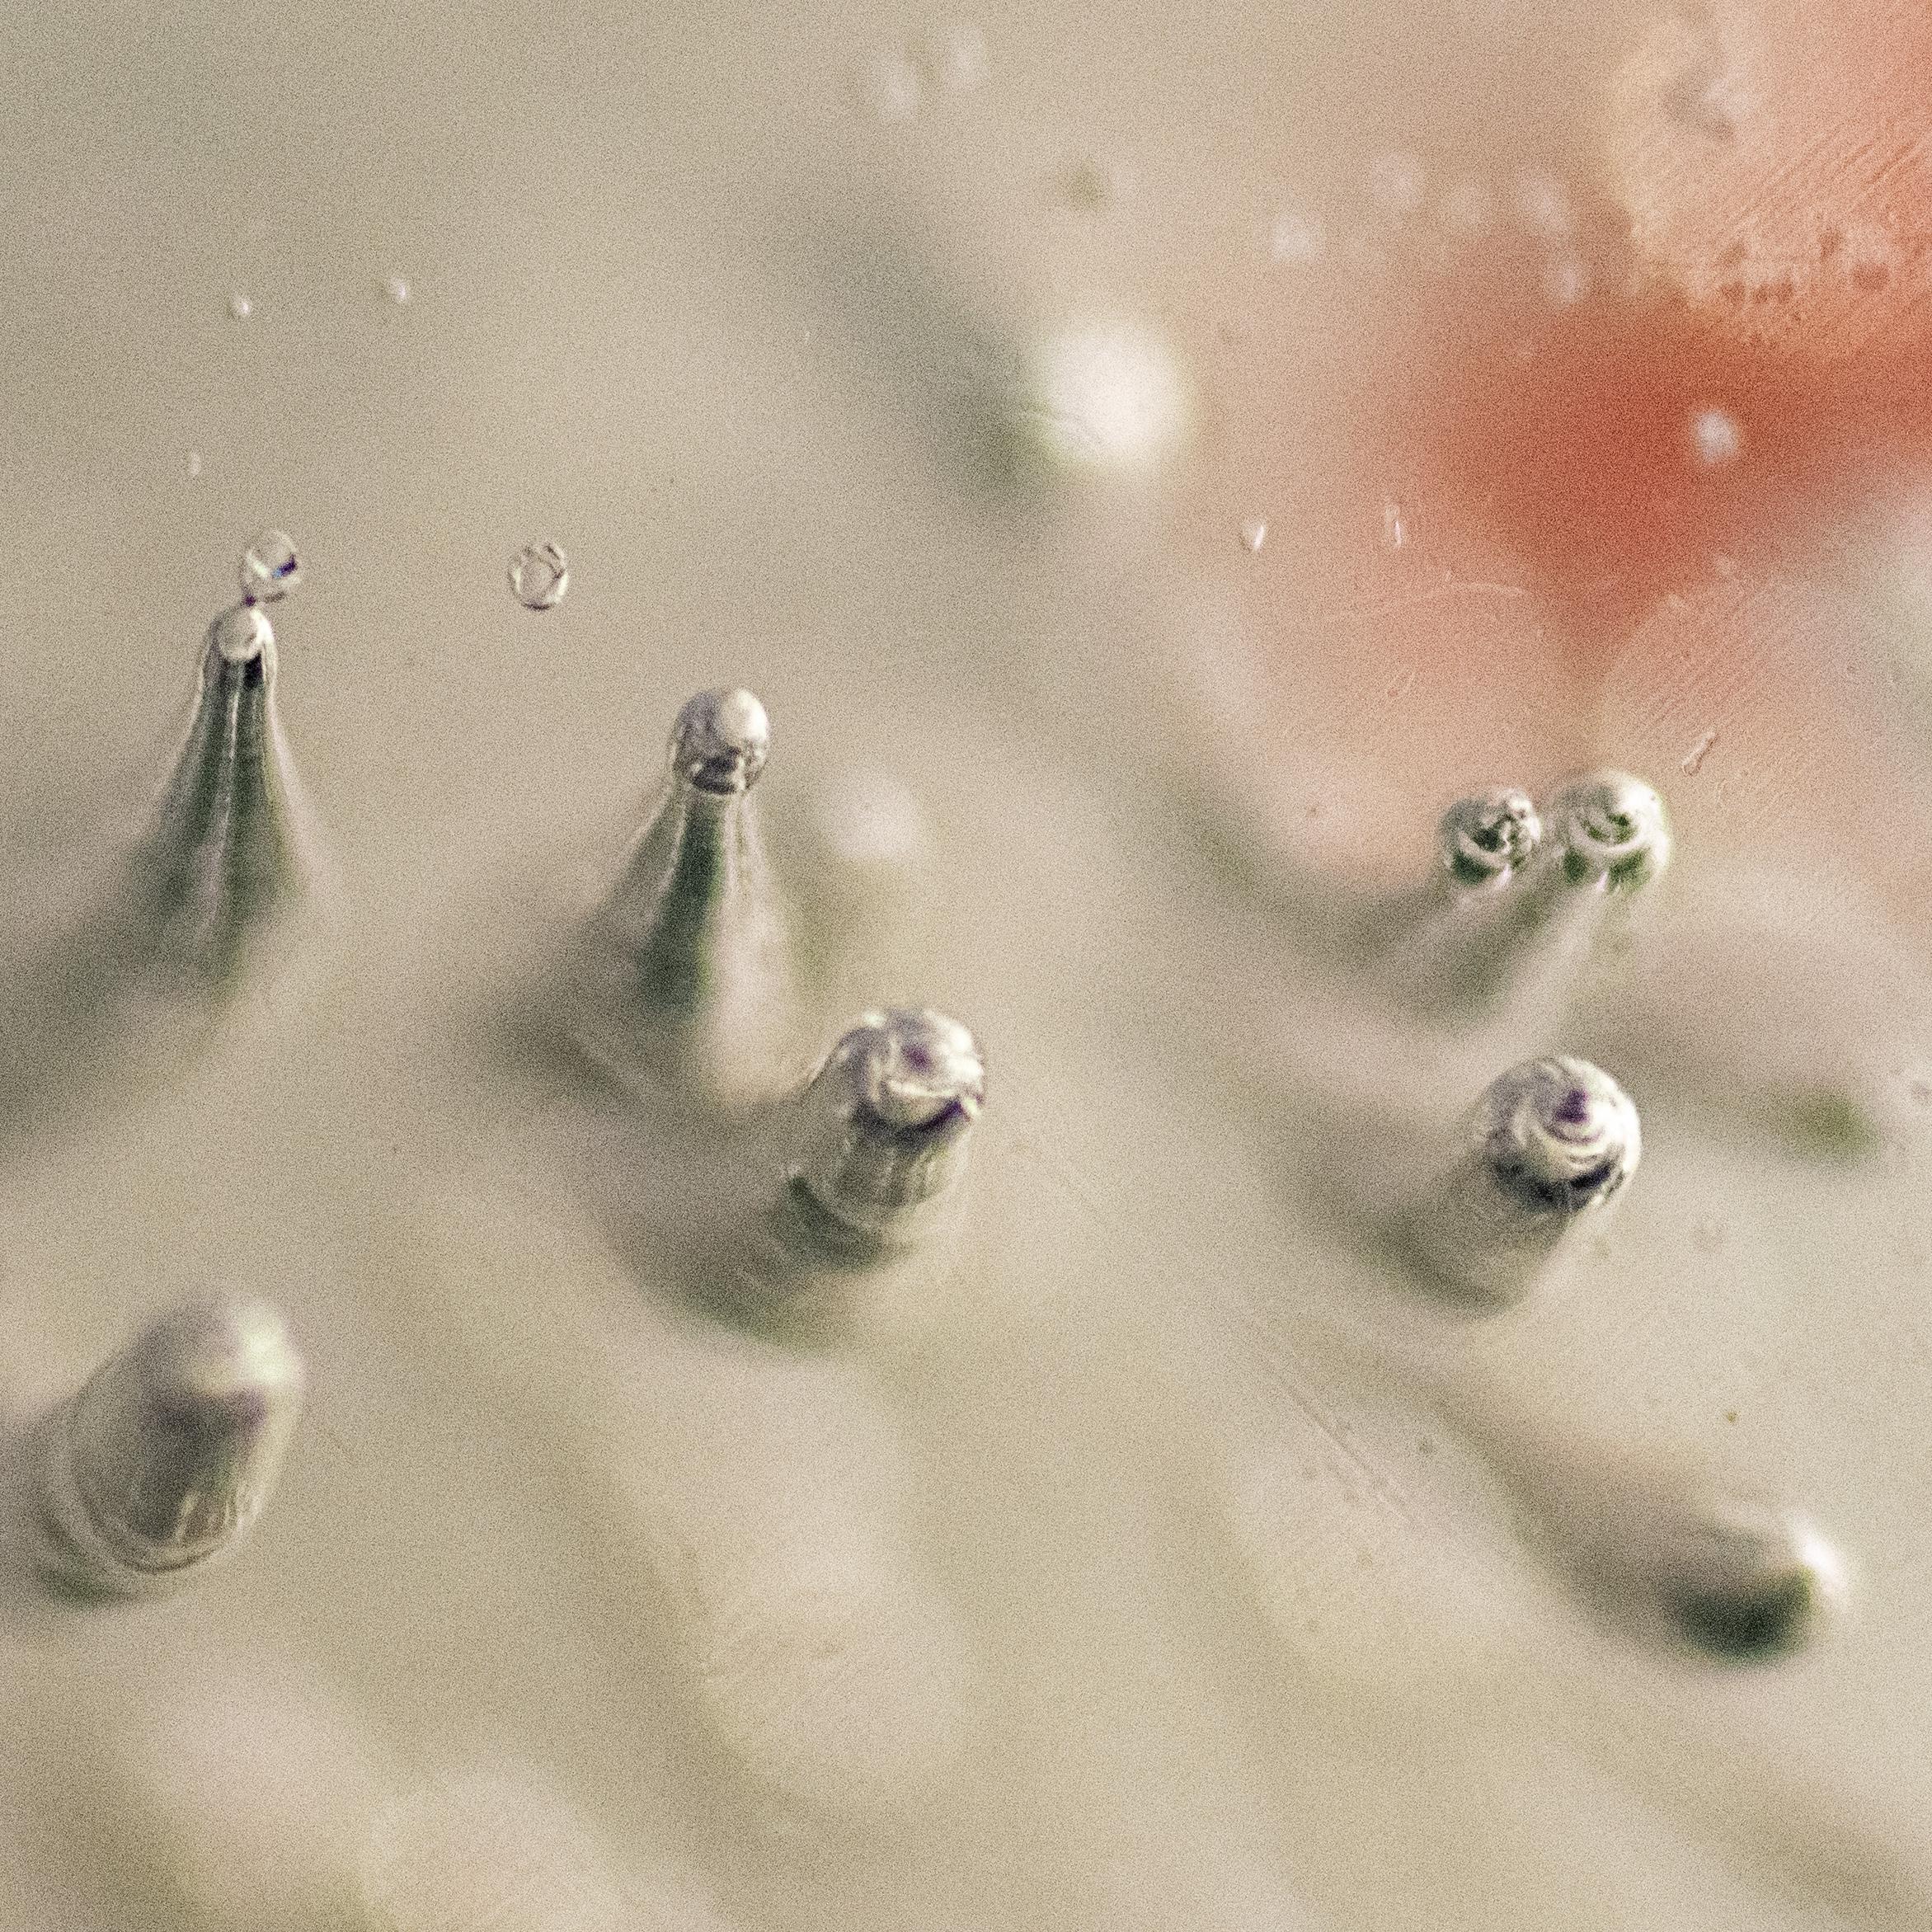
To get more crystals instead of a block of ice, try not letting it freeze completely solid. Larger vessels work better for this because it takes longer for the water in the center to get cold. If you interrupt the freezing when the outside has solidified but the core is liquid, you generally get crystals. Drain the water from the central area and handle with care as the crystals are very thin and fragile. Handle them above a dark towel so they have something soft to land on if they fall and so you can see them when they do.
Cameras and Other Equipment


(Click "More Images" above to see them all while reading this step.)
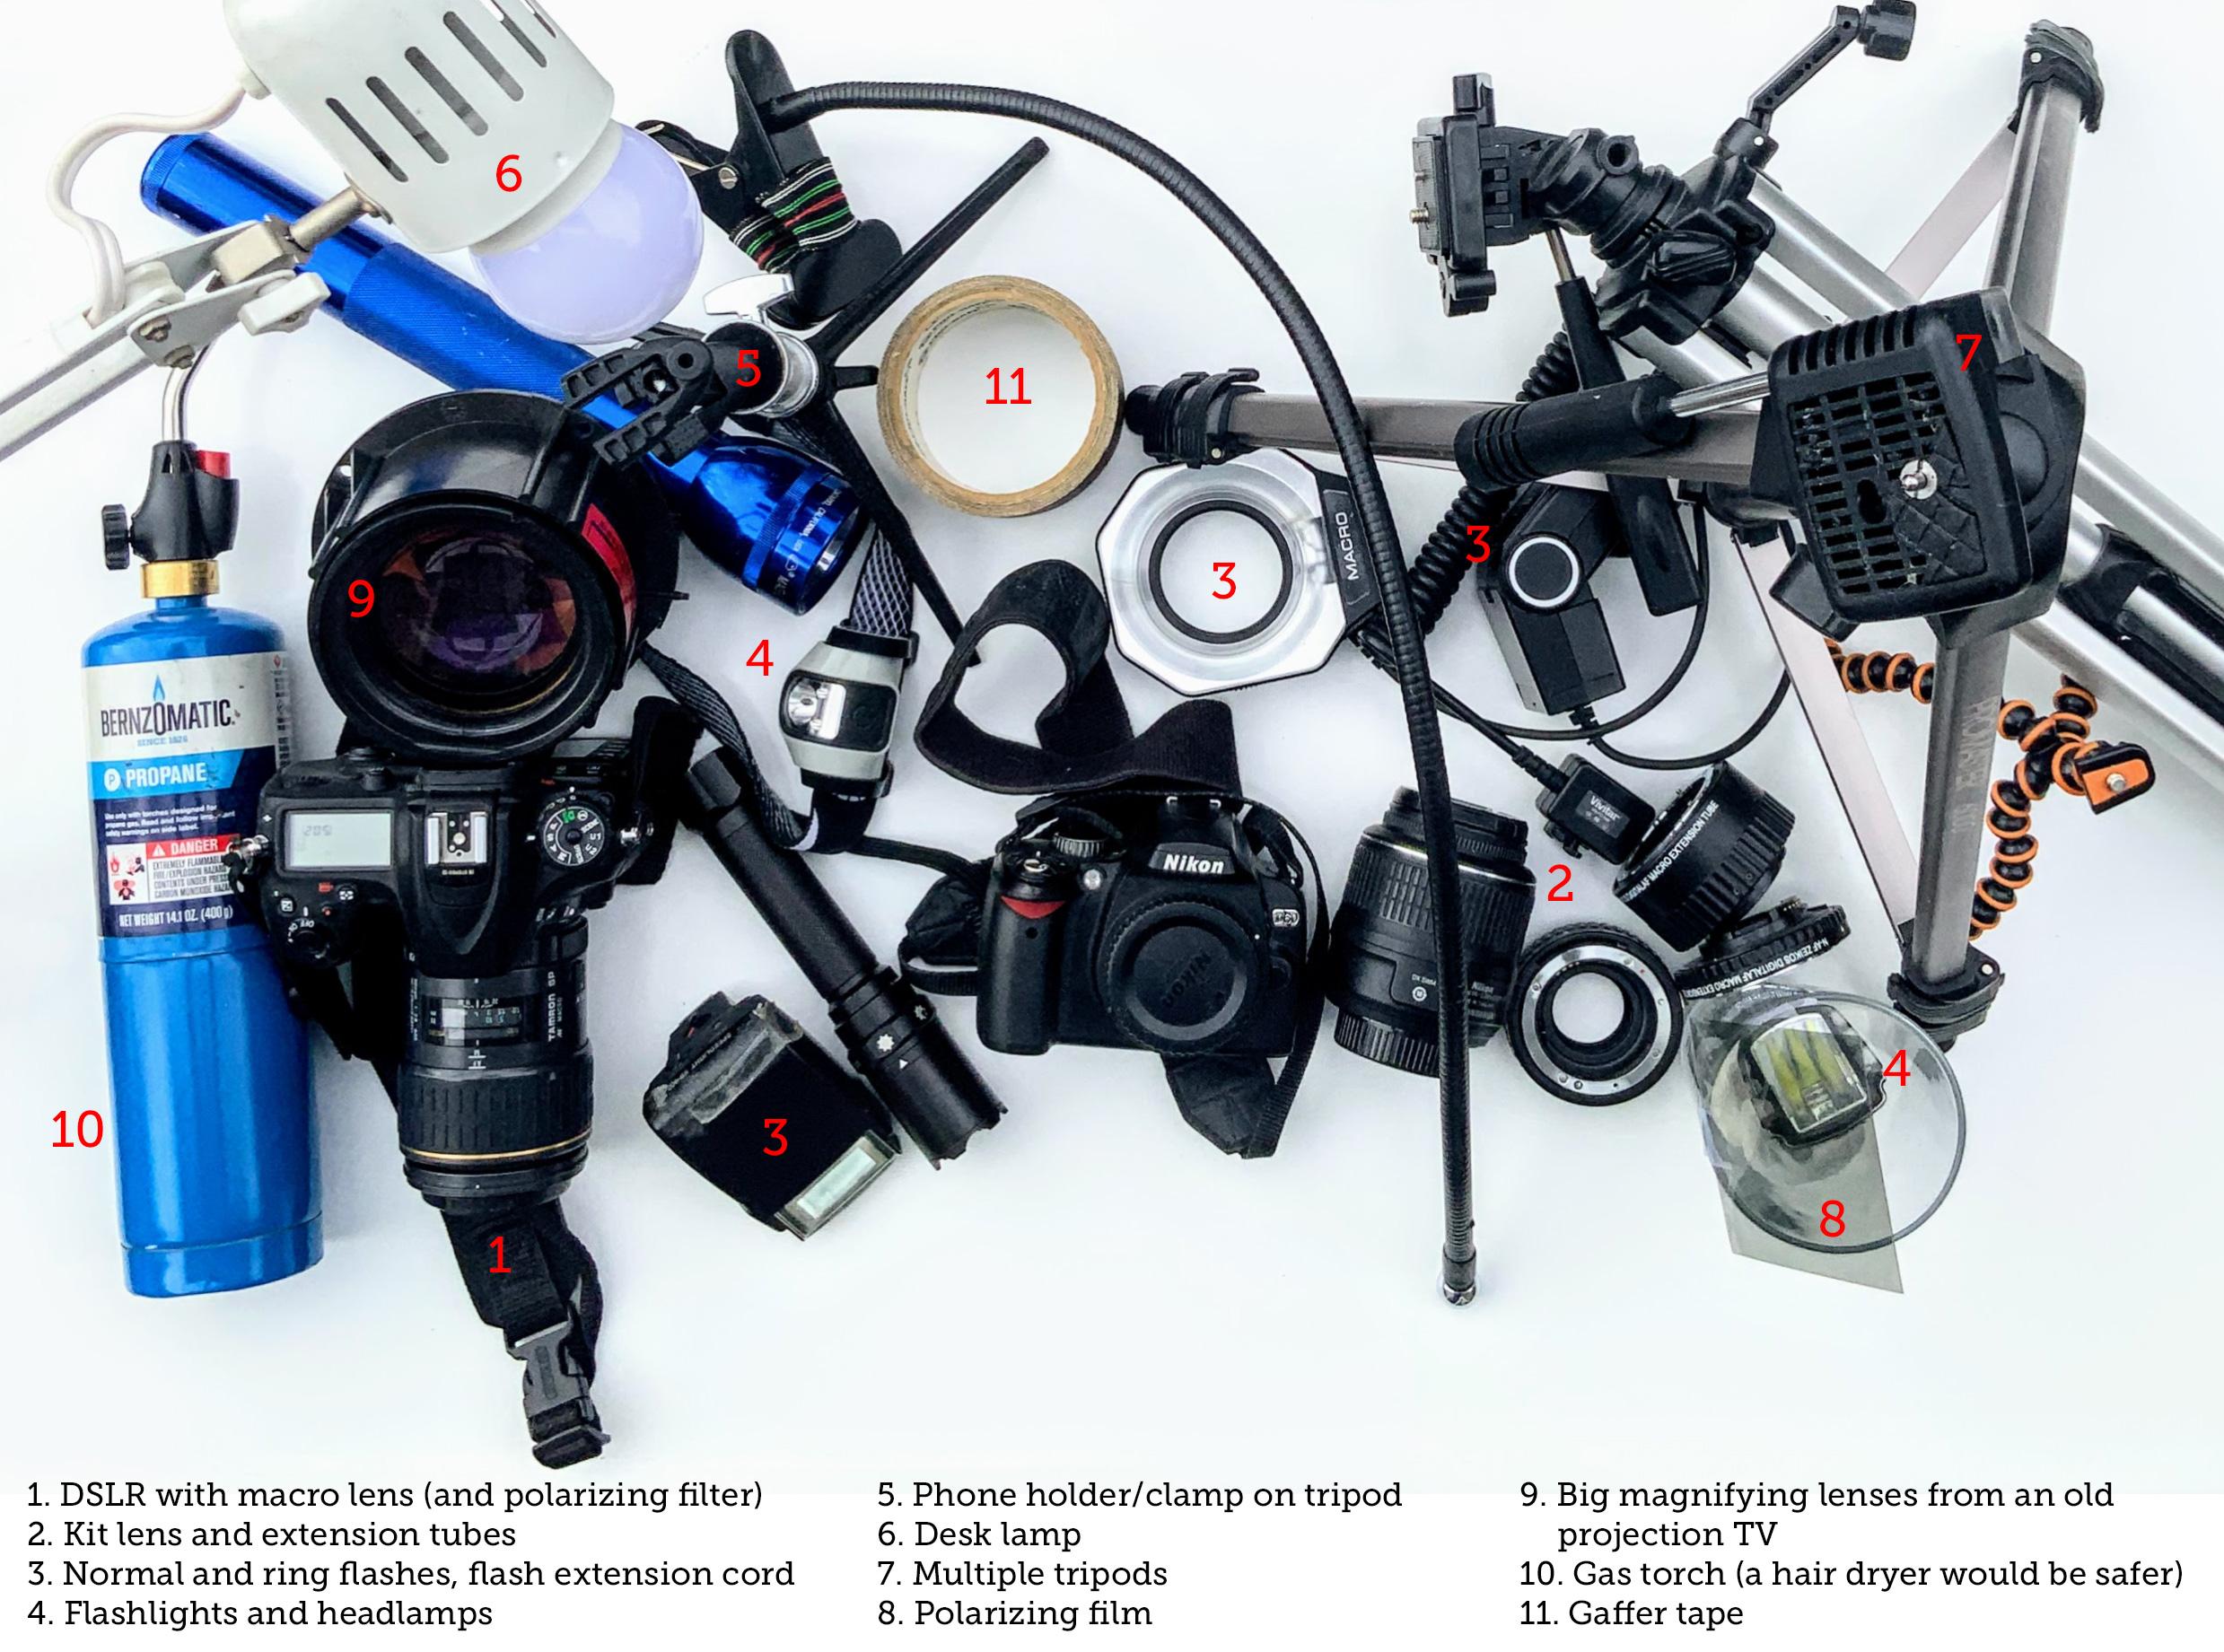
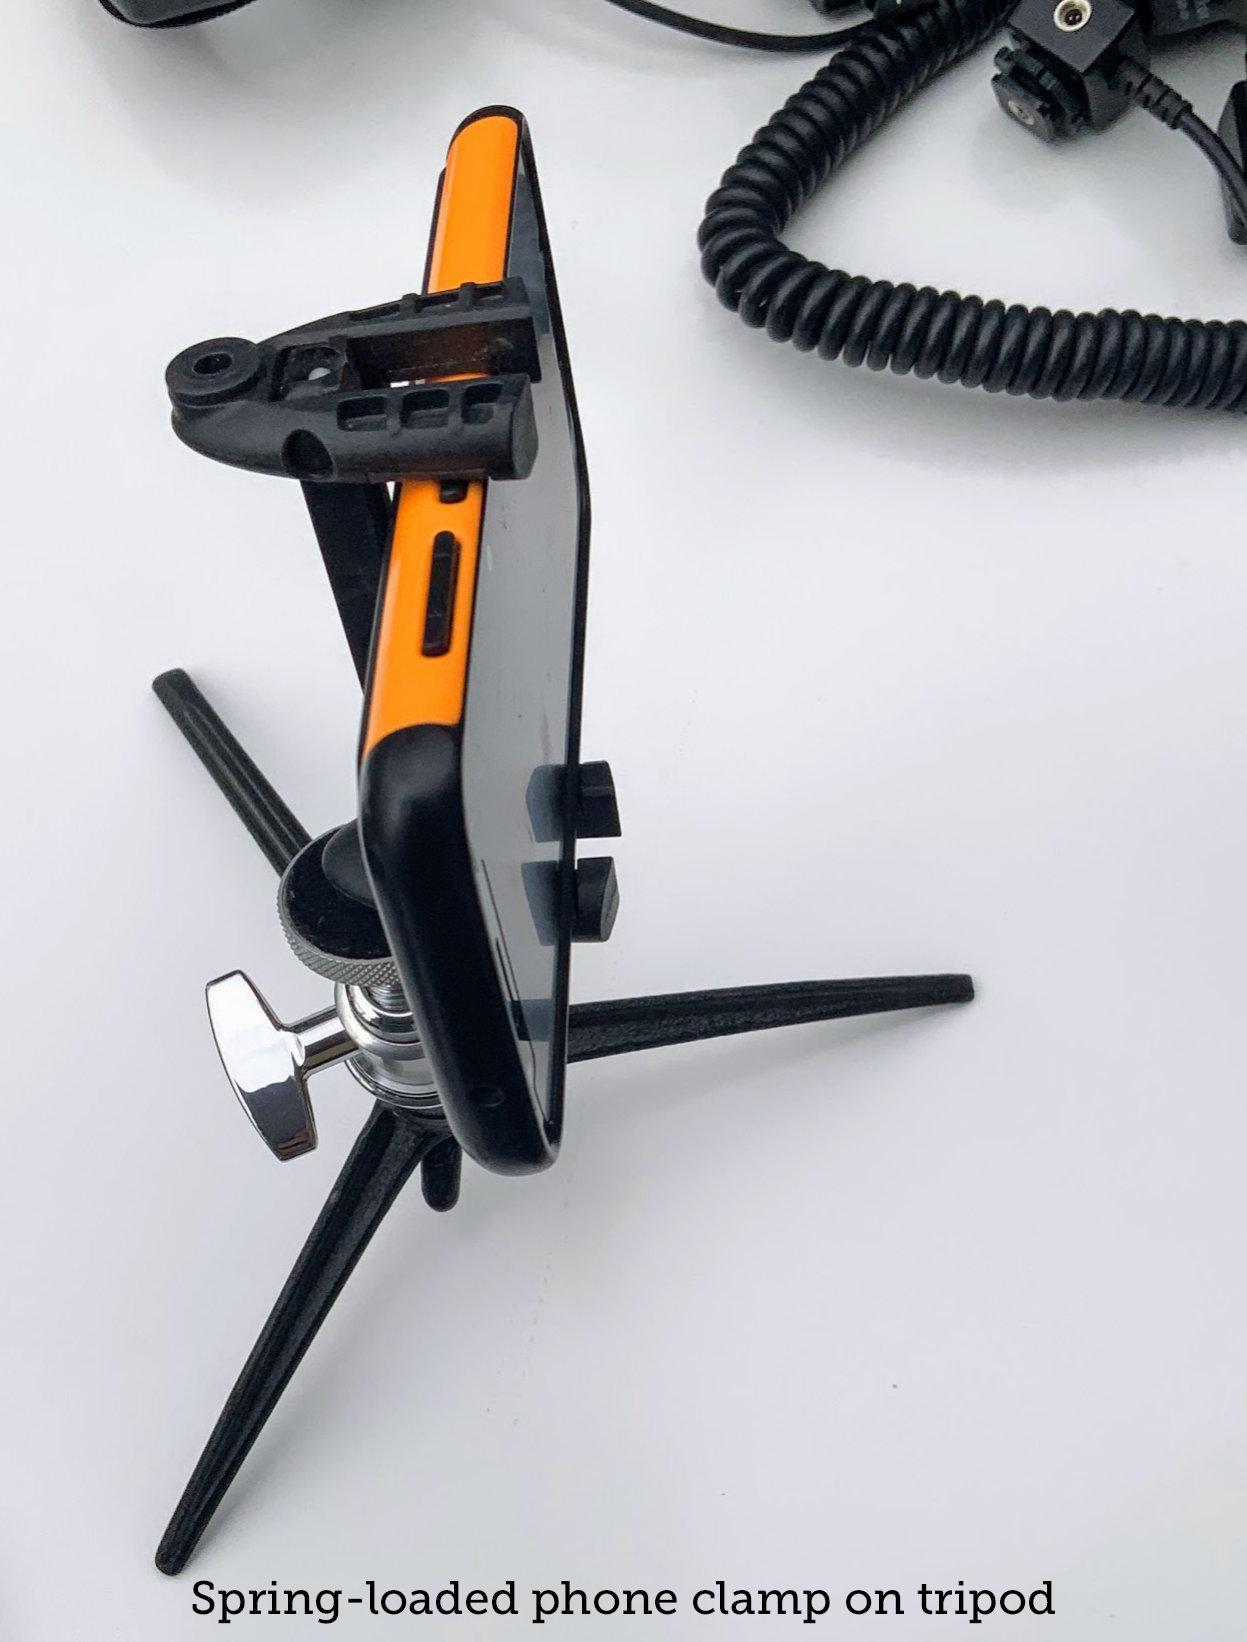
- Tripod(s) The more the merrier—you can use them to hold lights, reflectors, remote flashes, etc., as well as your camera.
- Lights: lamps of all sorts, shop/work lights, flashlights*
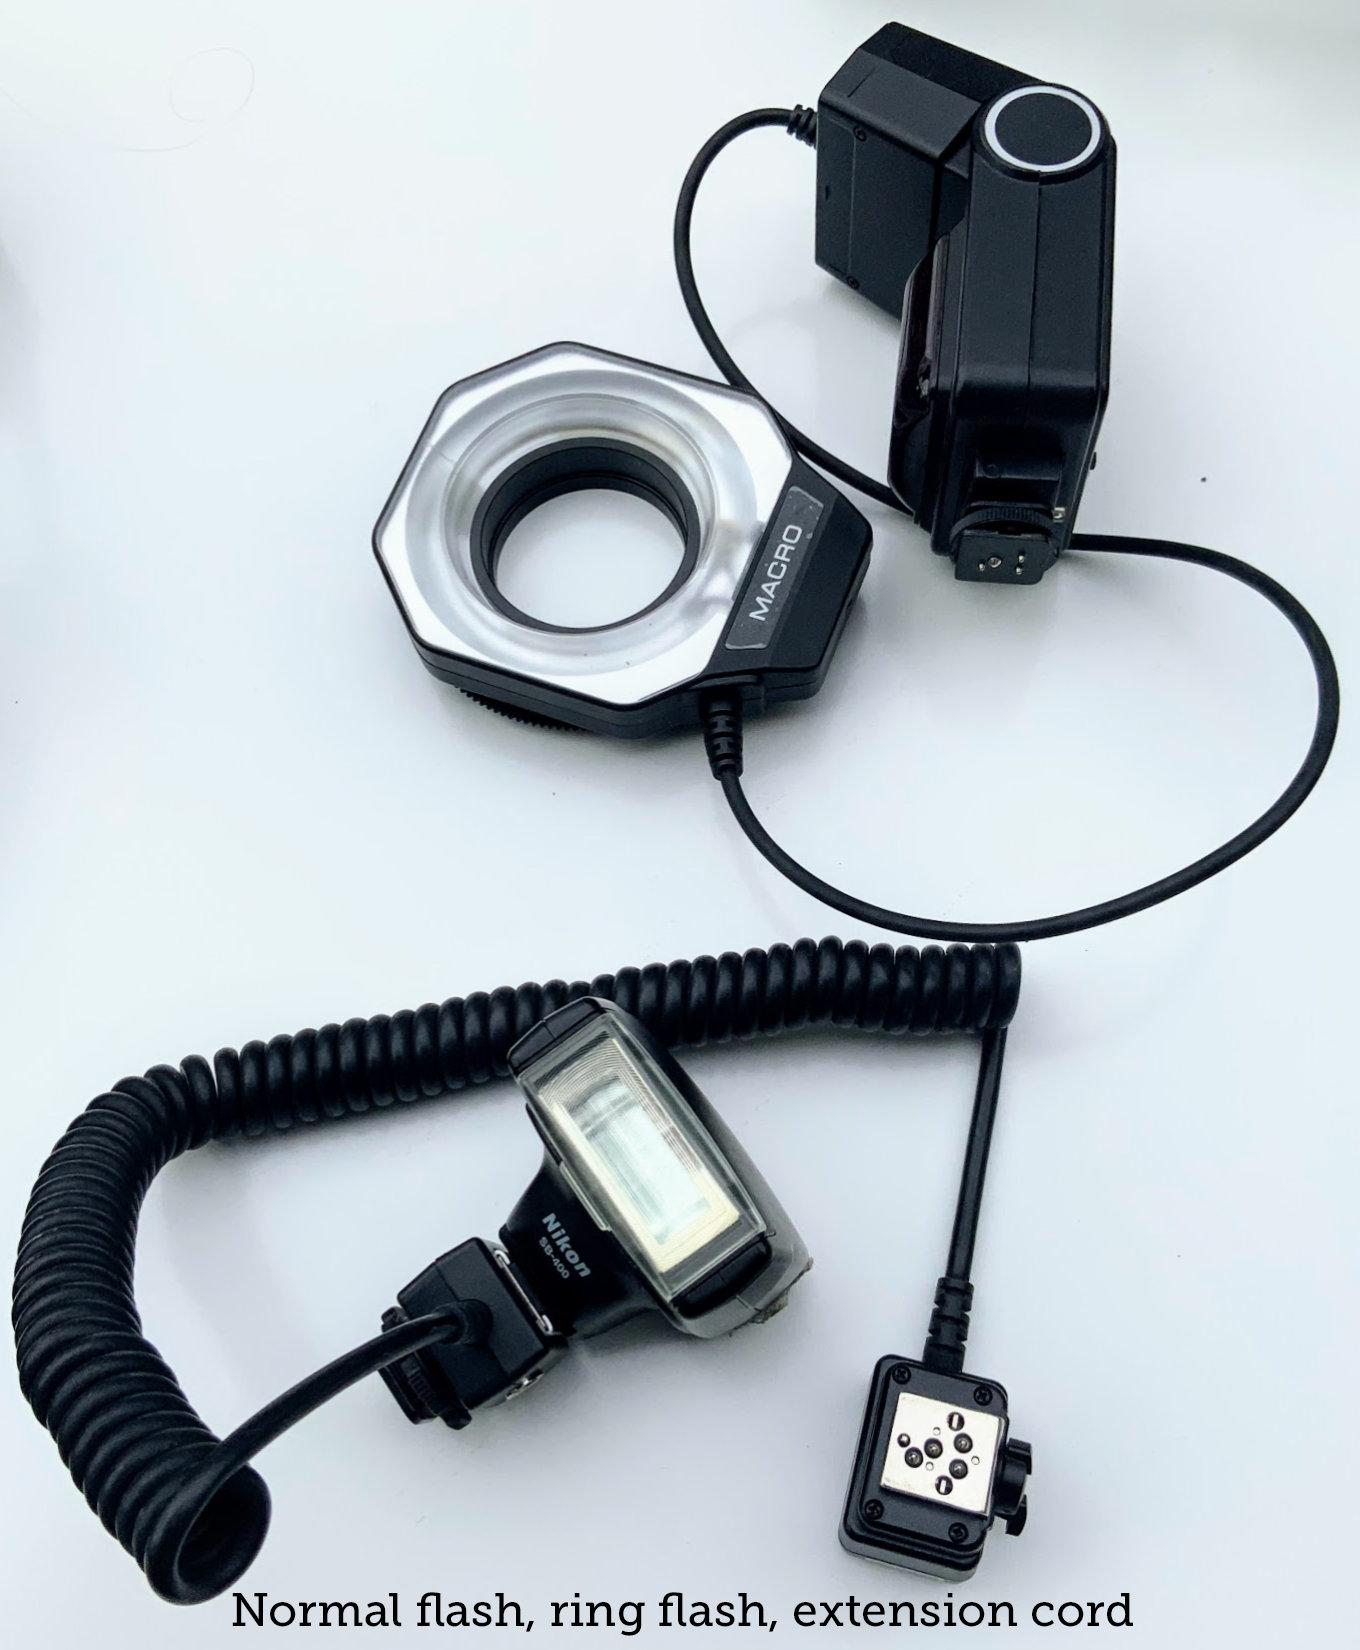
- Flash(es): ring flash, regular flash with extension flash cord if you've got it
- Camera (See above: use what you've got.) I prefer a DSLR
- Macro lens if you have one
- Extension tubes if you don't have a macro (or in addition to it)
- A remote for your camera is great to have for long exposures with no shake
- Fingerless gloves are useful for working outside when it's cold.
- Towels. Useful for keeping things dry if you're working indoors and ice is melting, drying wet, cold hands, or being a non-slip surface to put slippery ice on. Dark or light towels will help tame or reflect light. Instead of towels, you can also use old t-shirts or sweatshirts, colorful fabric, or anything else that makes it hard for ice to move on its own. If the cloth has a pattern, it will show through in various ways and could give you interesting effects.
*Warning: Modern LED flashlights provide bright (sometimes painfully so) white light, are often rechargeable with USB instead of having to buy batteries, and are small and light for easier positioning compared to older flashlights full of heavy batteries. They do have a problem, though: flickering. Your eyes usually can't see that an LED is turning on and off—it's happening much too quickly—but your camera can, especially at higher shutter speeds. (You also see it when taking video lit by LED and some other types of light sources or of some screens.) This can mean photos that are all or partly dark, despite being shot just a fraction of a second before and after other shots that look fine. When I started using LEDs for nighttime insect photography I missed a lot of shots. Now I try to shoot bursts of several shots so I'm more likely to get at least one that's fully lit. The same applies to ice photos.
Frigid Photo Shoot

(Click "More Images" above to see them all while reading this section.)
This is where the ice and the equipment come together. This is the fun part. The part where you have no idea what is about to happen or what you'll find.
Camera and Lens Tips
- Use the fastest shutter speed possible when shooting in good light and/or handheld. The smaller the aperture the better the depth of field (DOF),, but smaller aperture means less light and less light means slower shutter speed. So take a look at your ISO. The higher it is, the quicker the sensor catches light, meaning you can get away with a faster shutter speed and smaller aperture. But noise also increases with ISO, so don't just crank it all the way up. You won't like the results. In other words, you have to find the best combination of shutter speed, aperture and ISO. Experiment. Have fun. Let it happen.
- Focal plane and depth of field can mess you up if you are attached to getting a particular detail in focus, but if you're open to happy accidents you'll find that many shots have an area in focus. It might not be the area you intended, but there might be something excellent there. Ice is a very 3-dimensional subject, so if you're shooting internal features there's probably something at the right distance. And if you're shooting the surface at an angle, the plane will intersect with it somewhere. Fire a LOT of shots and delete the duds later.
- Shoot raw images if possible
- Always use the highest resolution you can
- Avoid camera shake (even minuscule vibrations) for clearest possible photos.
- If shooting in bright sun, you can use fast shutter speeds and not worry much.
- If using longer exposures, use a tripod, a remote, and, if you can, your camera's mirror lock function. (Not going to explain this here, but google it with your camera model to see how it's done. Basically, it lets you focus and compose the shot, then waits a bit between the time you hit the shutter release and when it actually exposes the shot. The movement of the mirror inside the camera is small but kind of violent, and it causes things to vibrate.
- No remote or mirror lock up? Work in a very dark place (see the next section). Completely dark is ideal.
Tips for during the photo shoot:
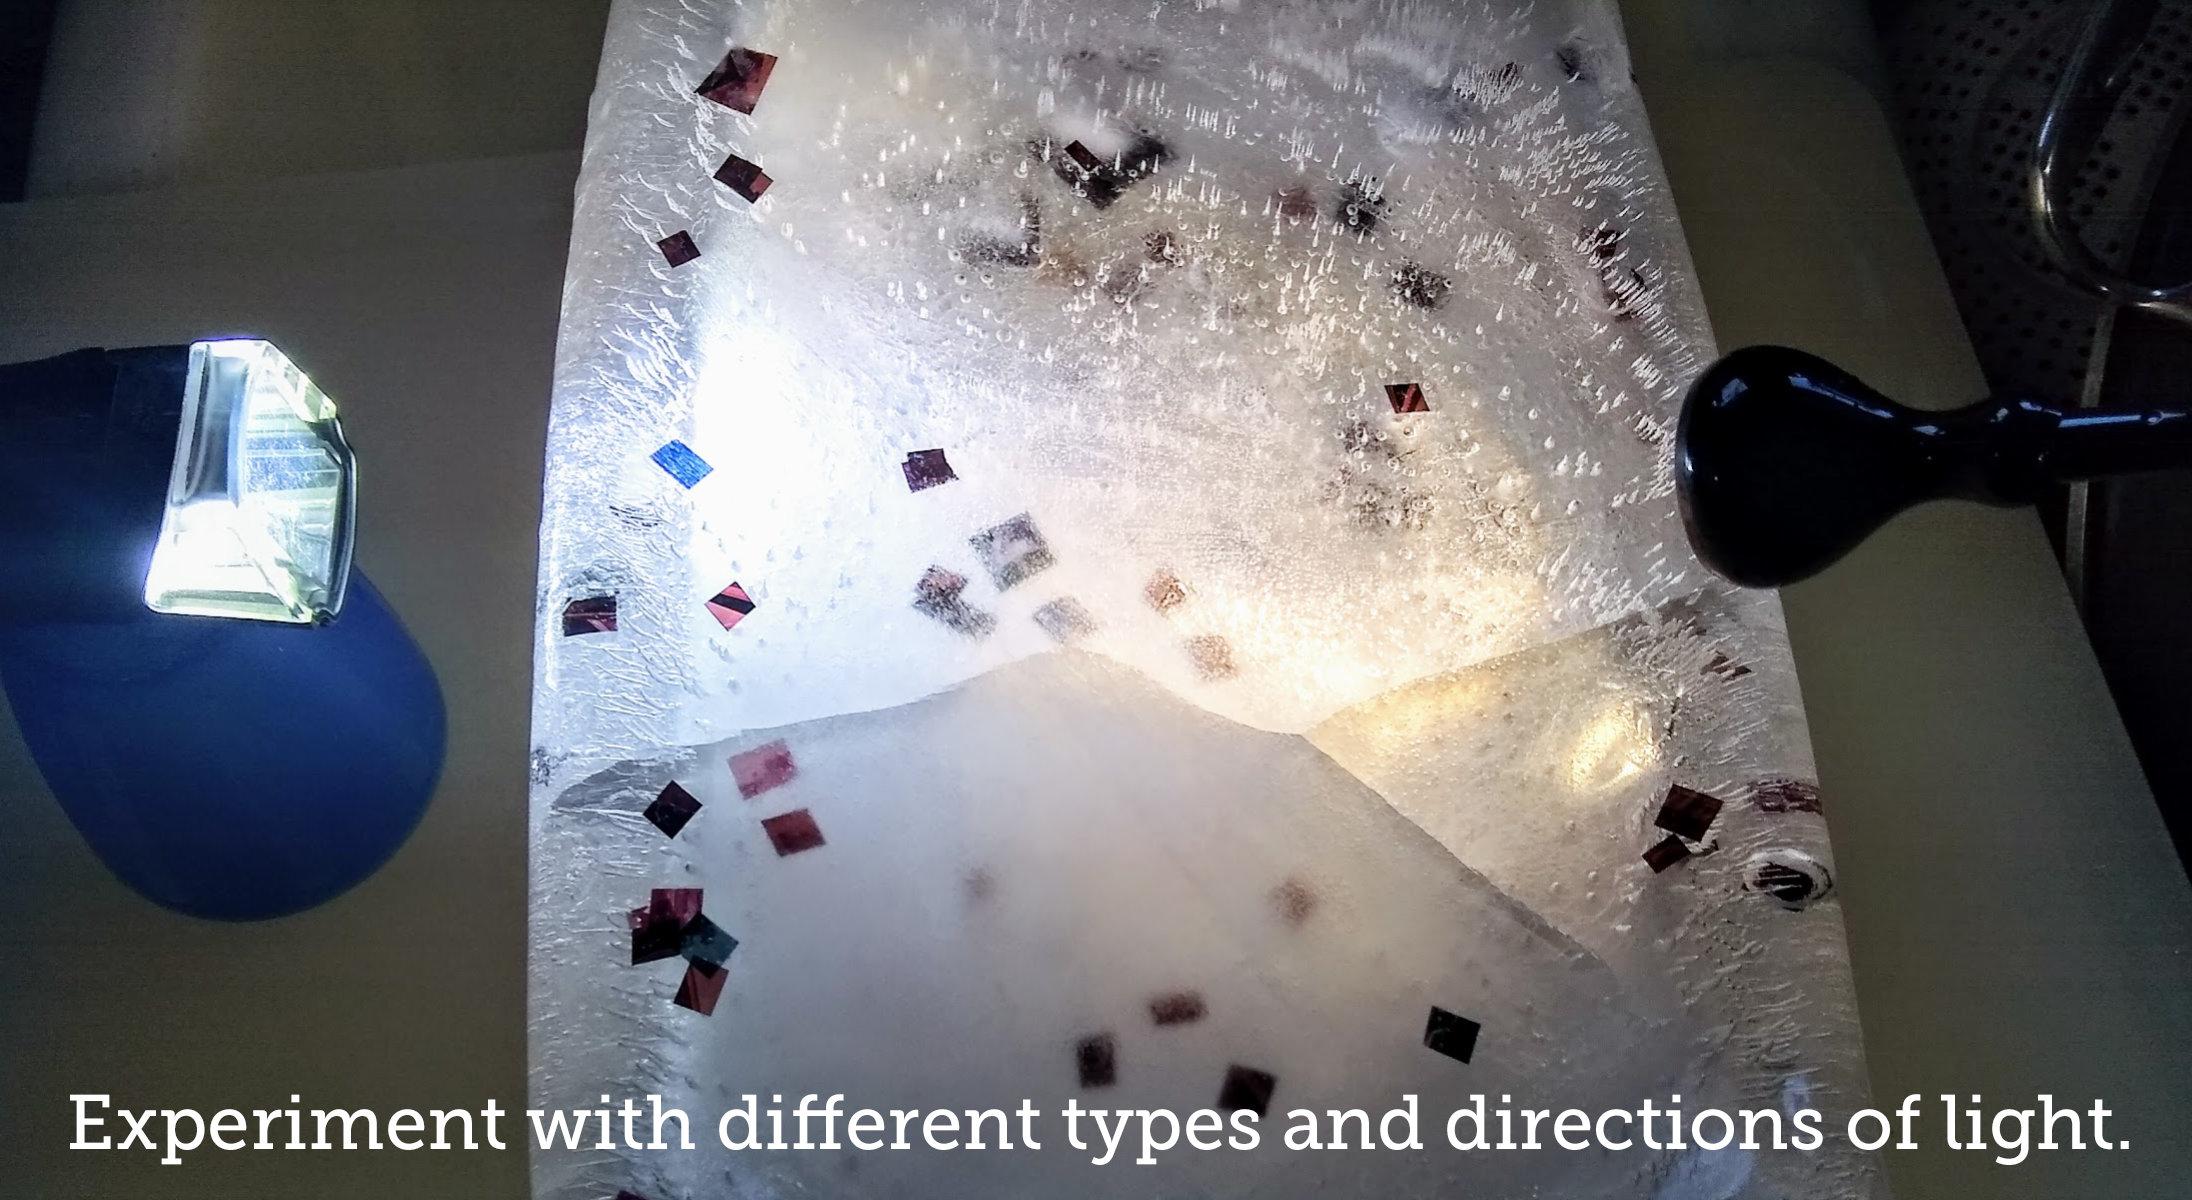
- Experiment with light directions, temperatures (as in cool white vs. warm white bulbs, not the heat of the bulb), and colors. The same piece of ice lit from different directions can give many different looks.
- Shallow, clear, flat things like petri dishes are good for holding bits of ice without interfering with lighting or adding color.
- Experiment with bouncing light instead of shining it directly into/onto the ice.
- Multiple identically composed images with different lighting can be combined later as layers in Photoshop (or other editing programs). (See focus stacking in the next section.)
- Use water to smooth and/or clarify the ice's surface. It doesn't have to be warm—just warmer than the ice. Warm or hot water will often cause the ice to crack or shatter.
- If you're using the outdoors as your freezer, sometimes you'll get little bits of leaves, random dirt, animal hair, etc., in your ice. It's usually not a big deal, but if it's in the way of the ultimate shot and it's near the surface, you can rub the ice with a warm fingertip to slowly melt down to the offending item.
- Or you can very carefully drip slightly warm water on the spot (but beware cracking the ice).
- Or get aggressive with a hair dryer, butane/propane torch, heated metal (heating by dipping into hot water is sufficient—you don't need it red hot), etc. Don't burn yourself.
- Pay attention around melting ice: keep cameras and other equipment dry.
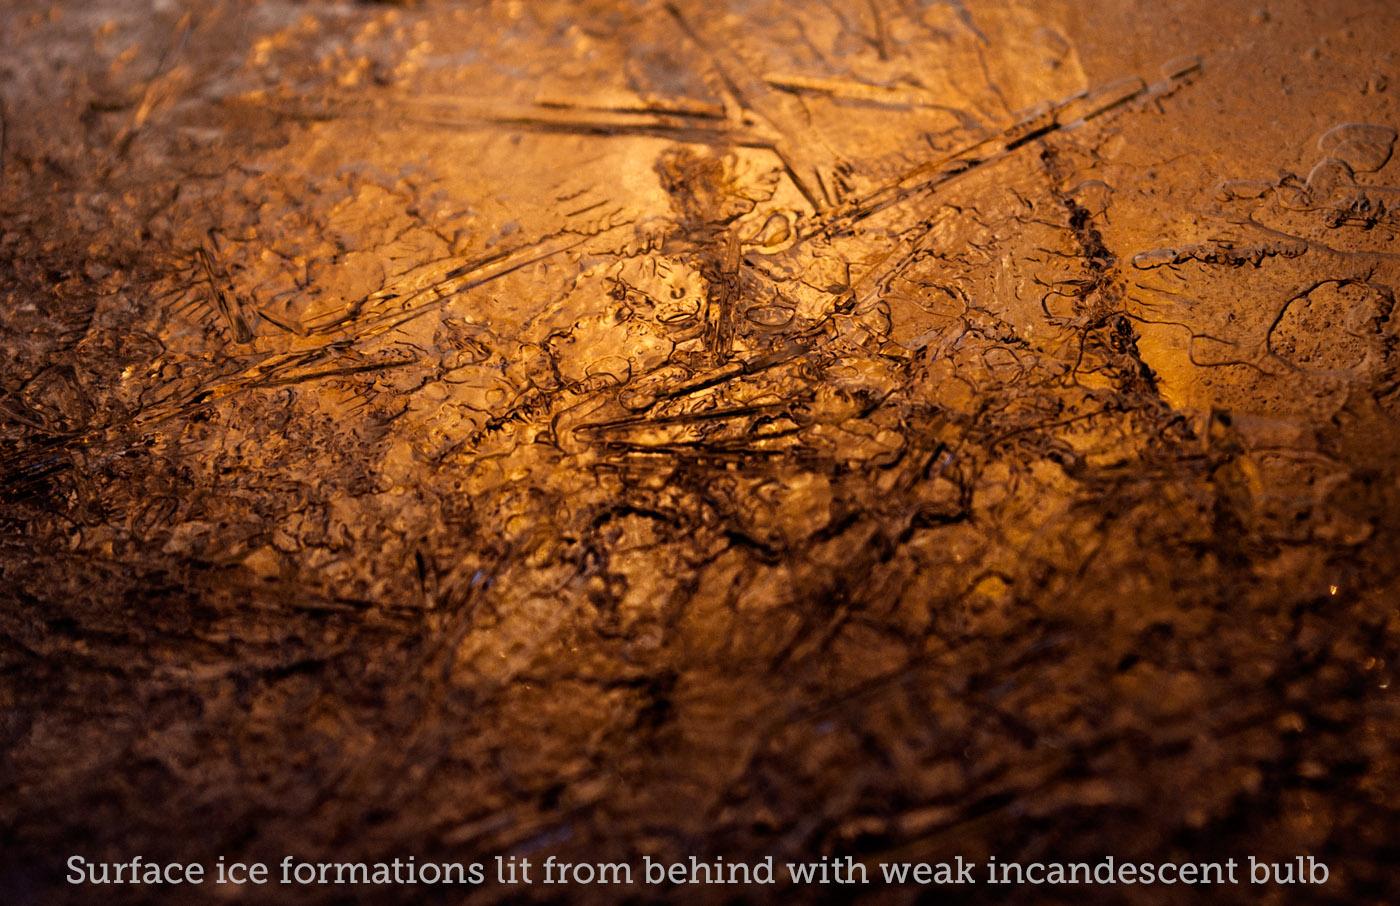
- Interesting patterns often form on the surface of ice, so don't forget to try focusing on it before you smooth it or skip straight to the things inside. Sometimes they're not apparent to the naked eye.
- When the background is well lit and the ice is not, you get to choose whether you want that background in or out of focus. Use a wider aperture (lower f-stop number) to have the ice in focus and the background a blurry source of colors and light. Use a smaller aperture (higher f-stop number) to have greater depth of field so the ice and the background can be in focus. Experiment with different combos to see what you like.
- If not using a tripod, shoot a bunch of the same shot so you have a better chance of getting one in focus.
- A tripod (and remote, ideally) also allows you to get multiple shots of the exact same scene but with different light, camera settings or focus. (If you can change these without moving camera.) These can later be combined as layers.
- With a tripod you can make sure the subject and the camera are parallel so you have more control over what's in focus. This is particularly useful for flat surfaces (see night photos in next section).
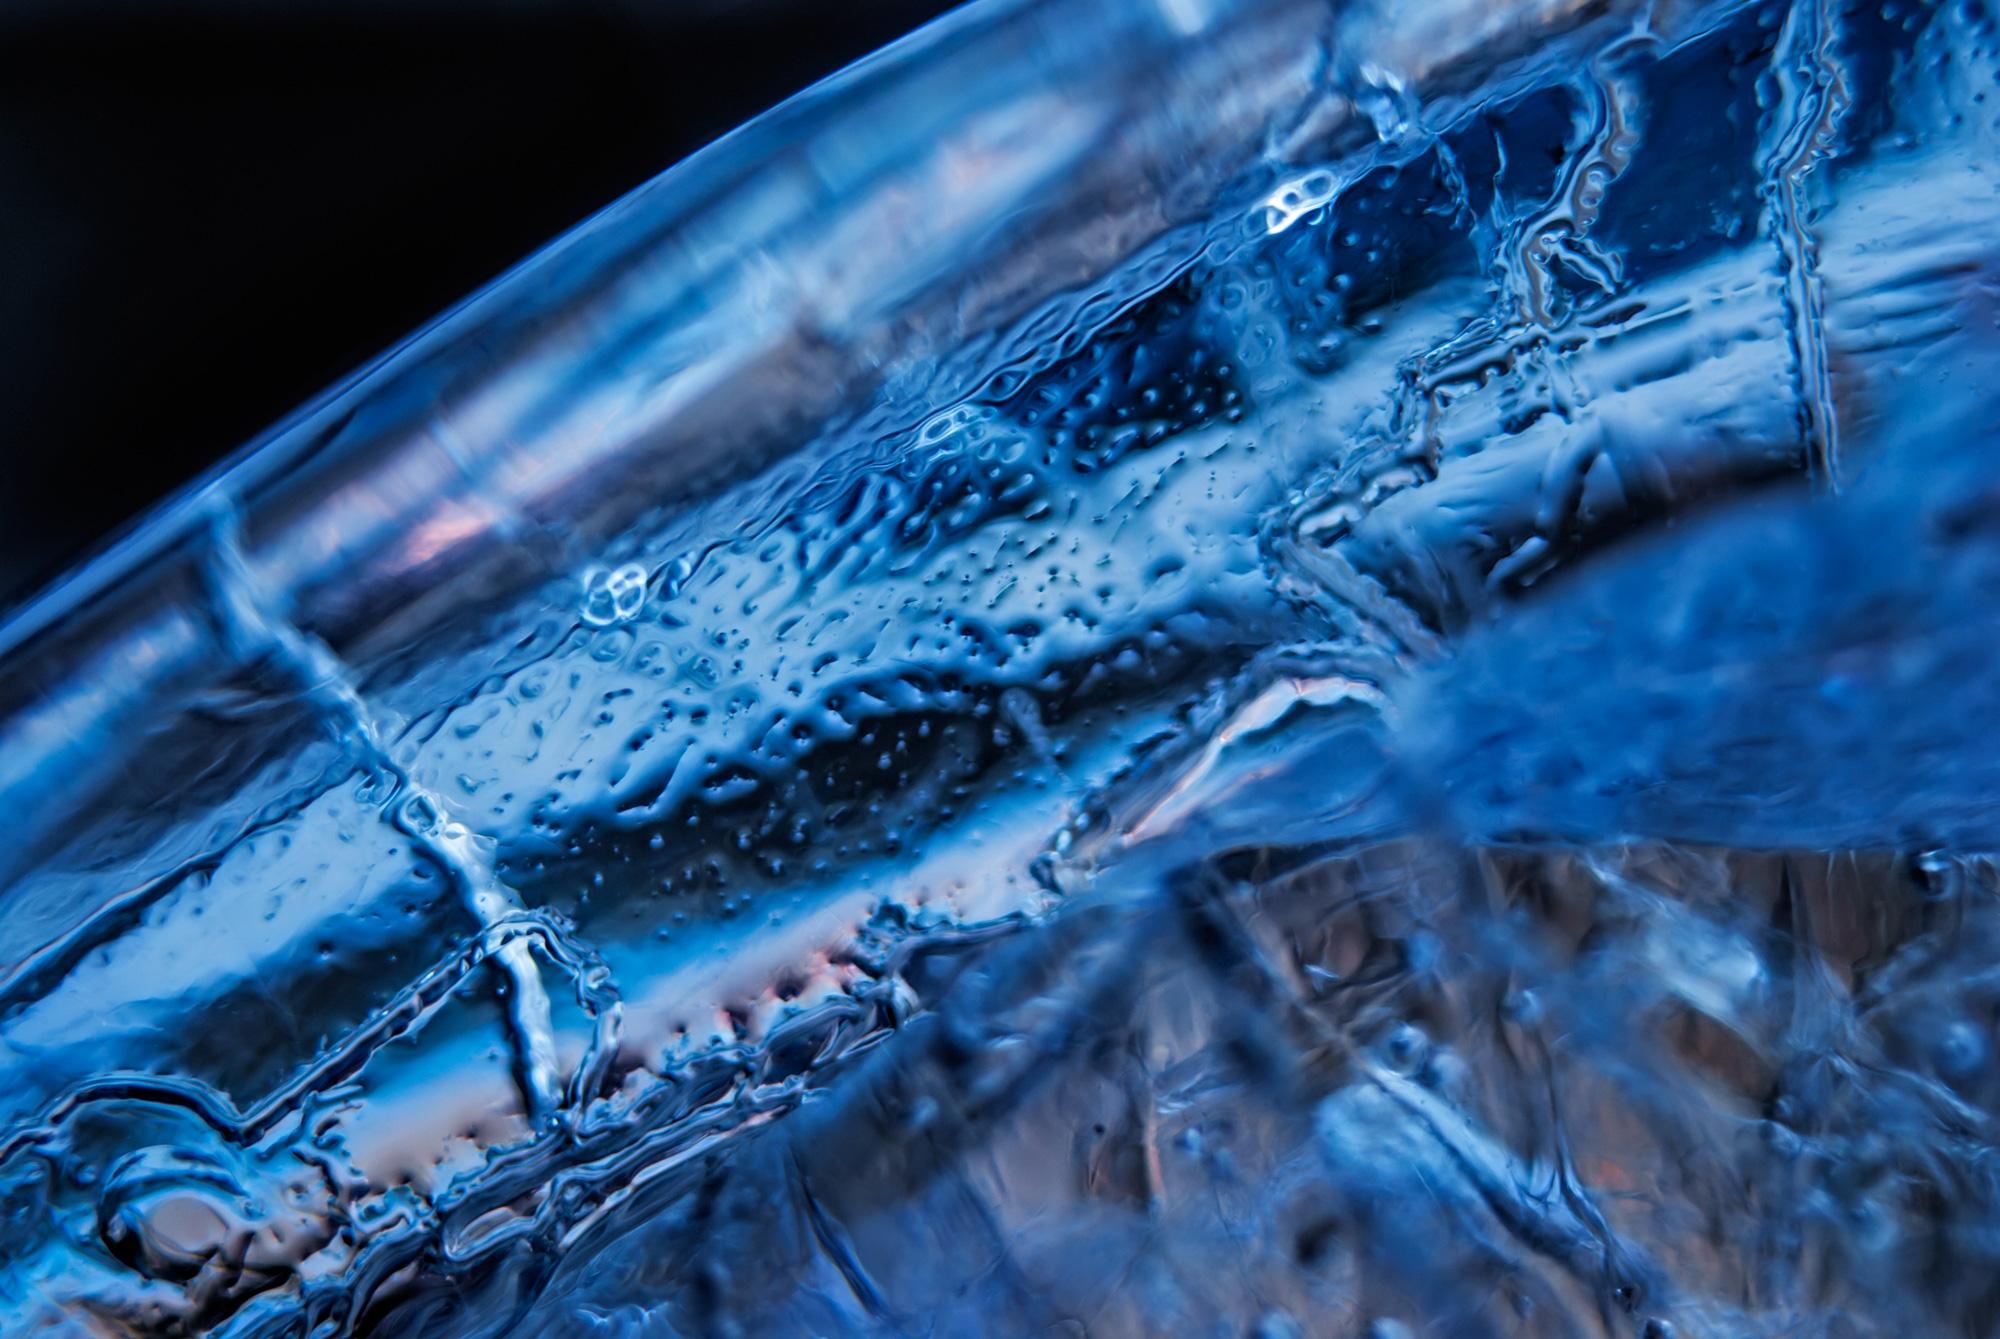
Shooting Ice in the Dark


(Click "More Images" above to see them all while reading this section.)
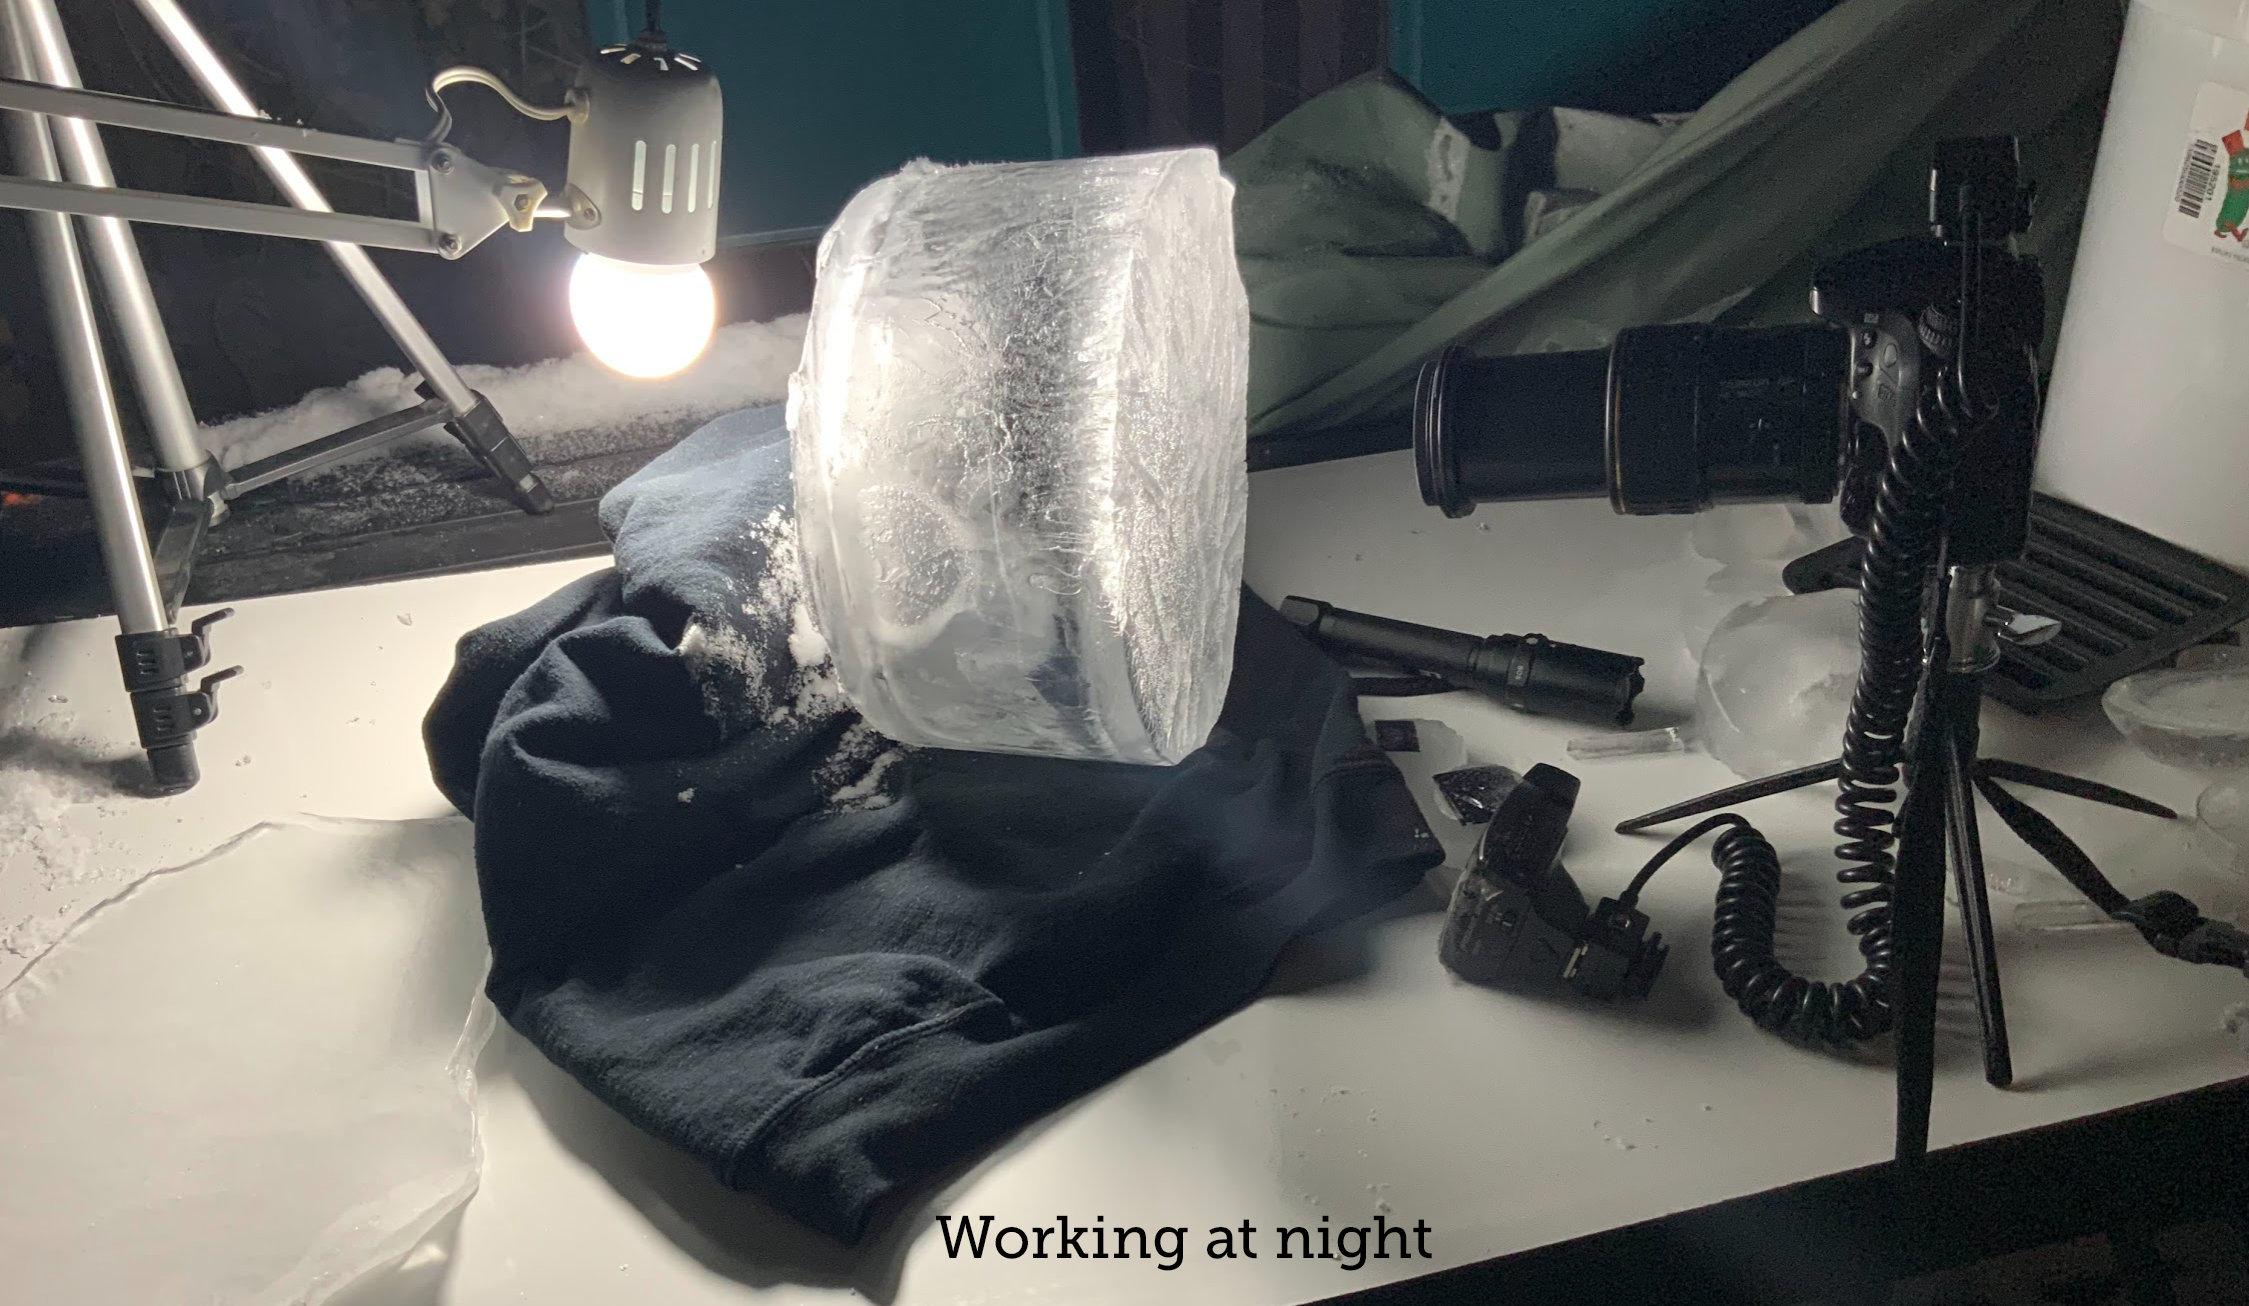
Unfortunately, this was a hard one to get process shots of: it was dark, my fingers were numb from the cold, and I was way too focused on getting the actual ice shots before all my devices and or body parts froze.
The key point is this: you can get levels of detail in the dark that you'll never get in daylight. Low light plus low ISO speeds and small apertures mean it takes the camera a long time to capture the image (in other words, long exposures). Low ISO means very little noise (grain) and small aperture means greater depth of field so more details are in focus, even if you don't get the lens focused perfectly.
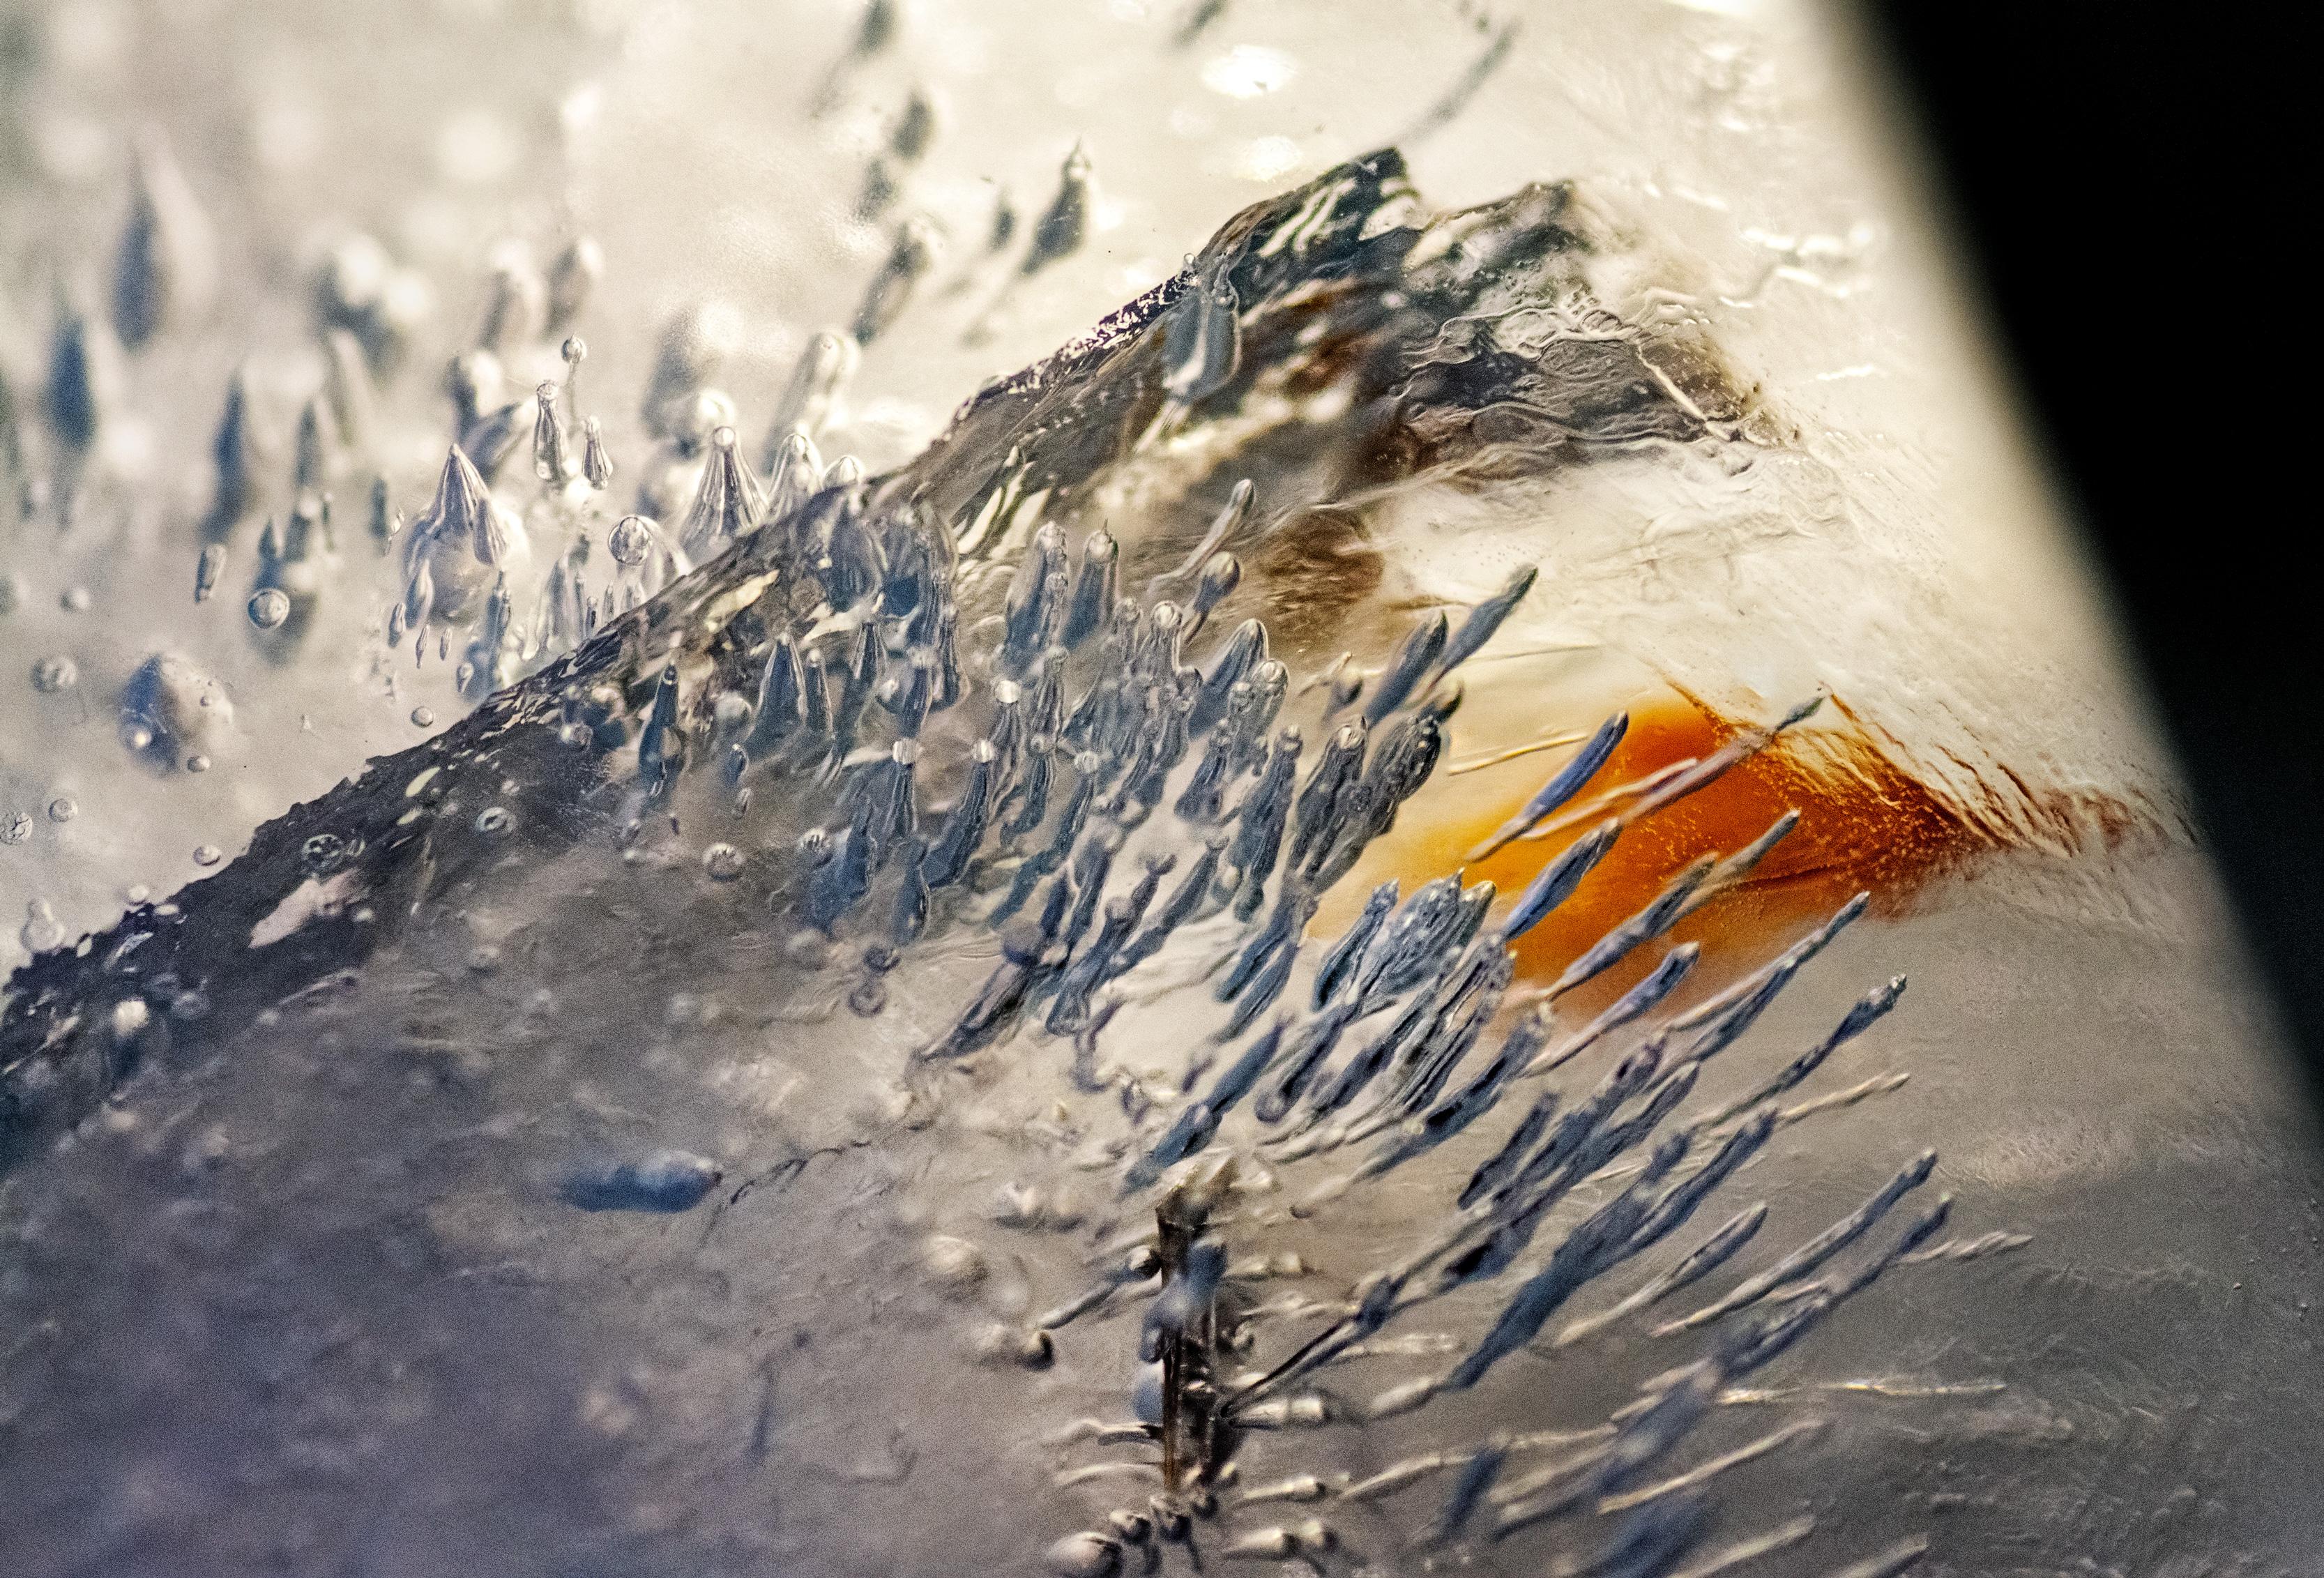
Shooting at night or under some kind of shade (under a deck, tarp or trees, inside a dark tent, in an unheated shed or garage, or even under a blanket or towel*) allows you to control light completely. No pesky sun getting in your business. Light from all directions decreases details/contrast, but in the dark you can use directional light, like a bright flashlight, a lamp, or a flash. You can combine a less bright overall source (a lamp above or a flashlight further away) with a bright point source (a flashlight close to the side). If one is warm light and one is cool, you get different colors on different parts of the crystals or bubbles.
Try hitting the ice with different kinds of lights from different directions, so bubbles are one color on one side and another on the other, plus the weird and unpredictable combinations you'll get from reflections and refraction on the inside of the bubbles.
Move lights frequently. Move ice frequently. Move camera frequently. Remember: this is a game of randomness and there's no perfect shot.Don't use an on-camera flash unless you want to see glare on the surface. (You probably don't want that.)
Here's the basic night ice procedure I use:
- Set the camera to some combination of a low ISO, a small aperture (higher f-stop number), and a very slow shutter speed (multiple seconds).
- Position the subject, light the scene, compose the shot, focus the camera.
- Turn off or cover the lights.
- Hit the shutter release. The camera is now taking a photo of darkness.
- Turn on/uncover the lights. Now it's taking the picture you composed.
- When the shutter clicks closed again, look at the camera's screen and see what you got.
- If it's overexposed, lower the ISO further and/or go for a smaller aperture and/or decrease the exposure time and/or adjust the lights to be less bright.
- Shoot again.
- Continue to experiment until you find a combination that looks right.
- Remember: you can delete photos you don't like but you will never see the ones you never took.
*Keep in mind that your body heat and breath, plus lights, can warm the space and start melting the ice
Processing and Focus Stacking


(Click the images above to see them larger. Three of them are animated, but GIFs on this site don't work as I'd like them to on all systems. They're different on my computer, tablet and phone. If you're lucky, you can hover over each of them and click the full-screen icon. On some devices, that will be perfect. On others it goes too large for the screen. Therefore I've also added the images that they're made of so you can scroll through them and see what I'm trying to show.)
Clear subjects are tricky, so there's a good chance that later you'll want to adjust contrast, brightness, colors, etc. And you'll probably want to crop out blurry or uninteresting areas.
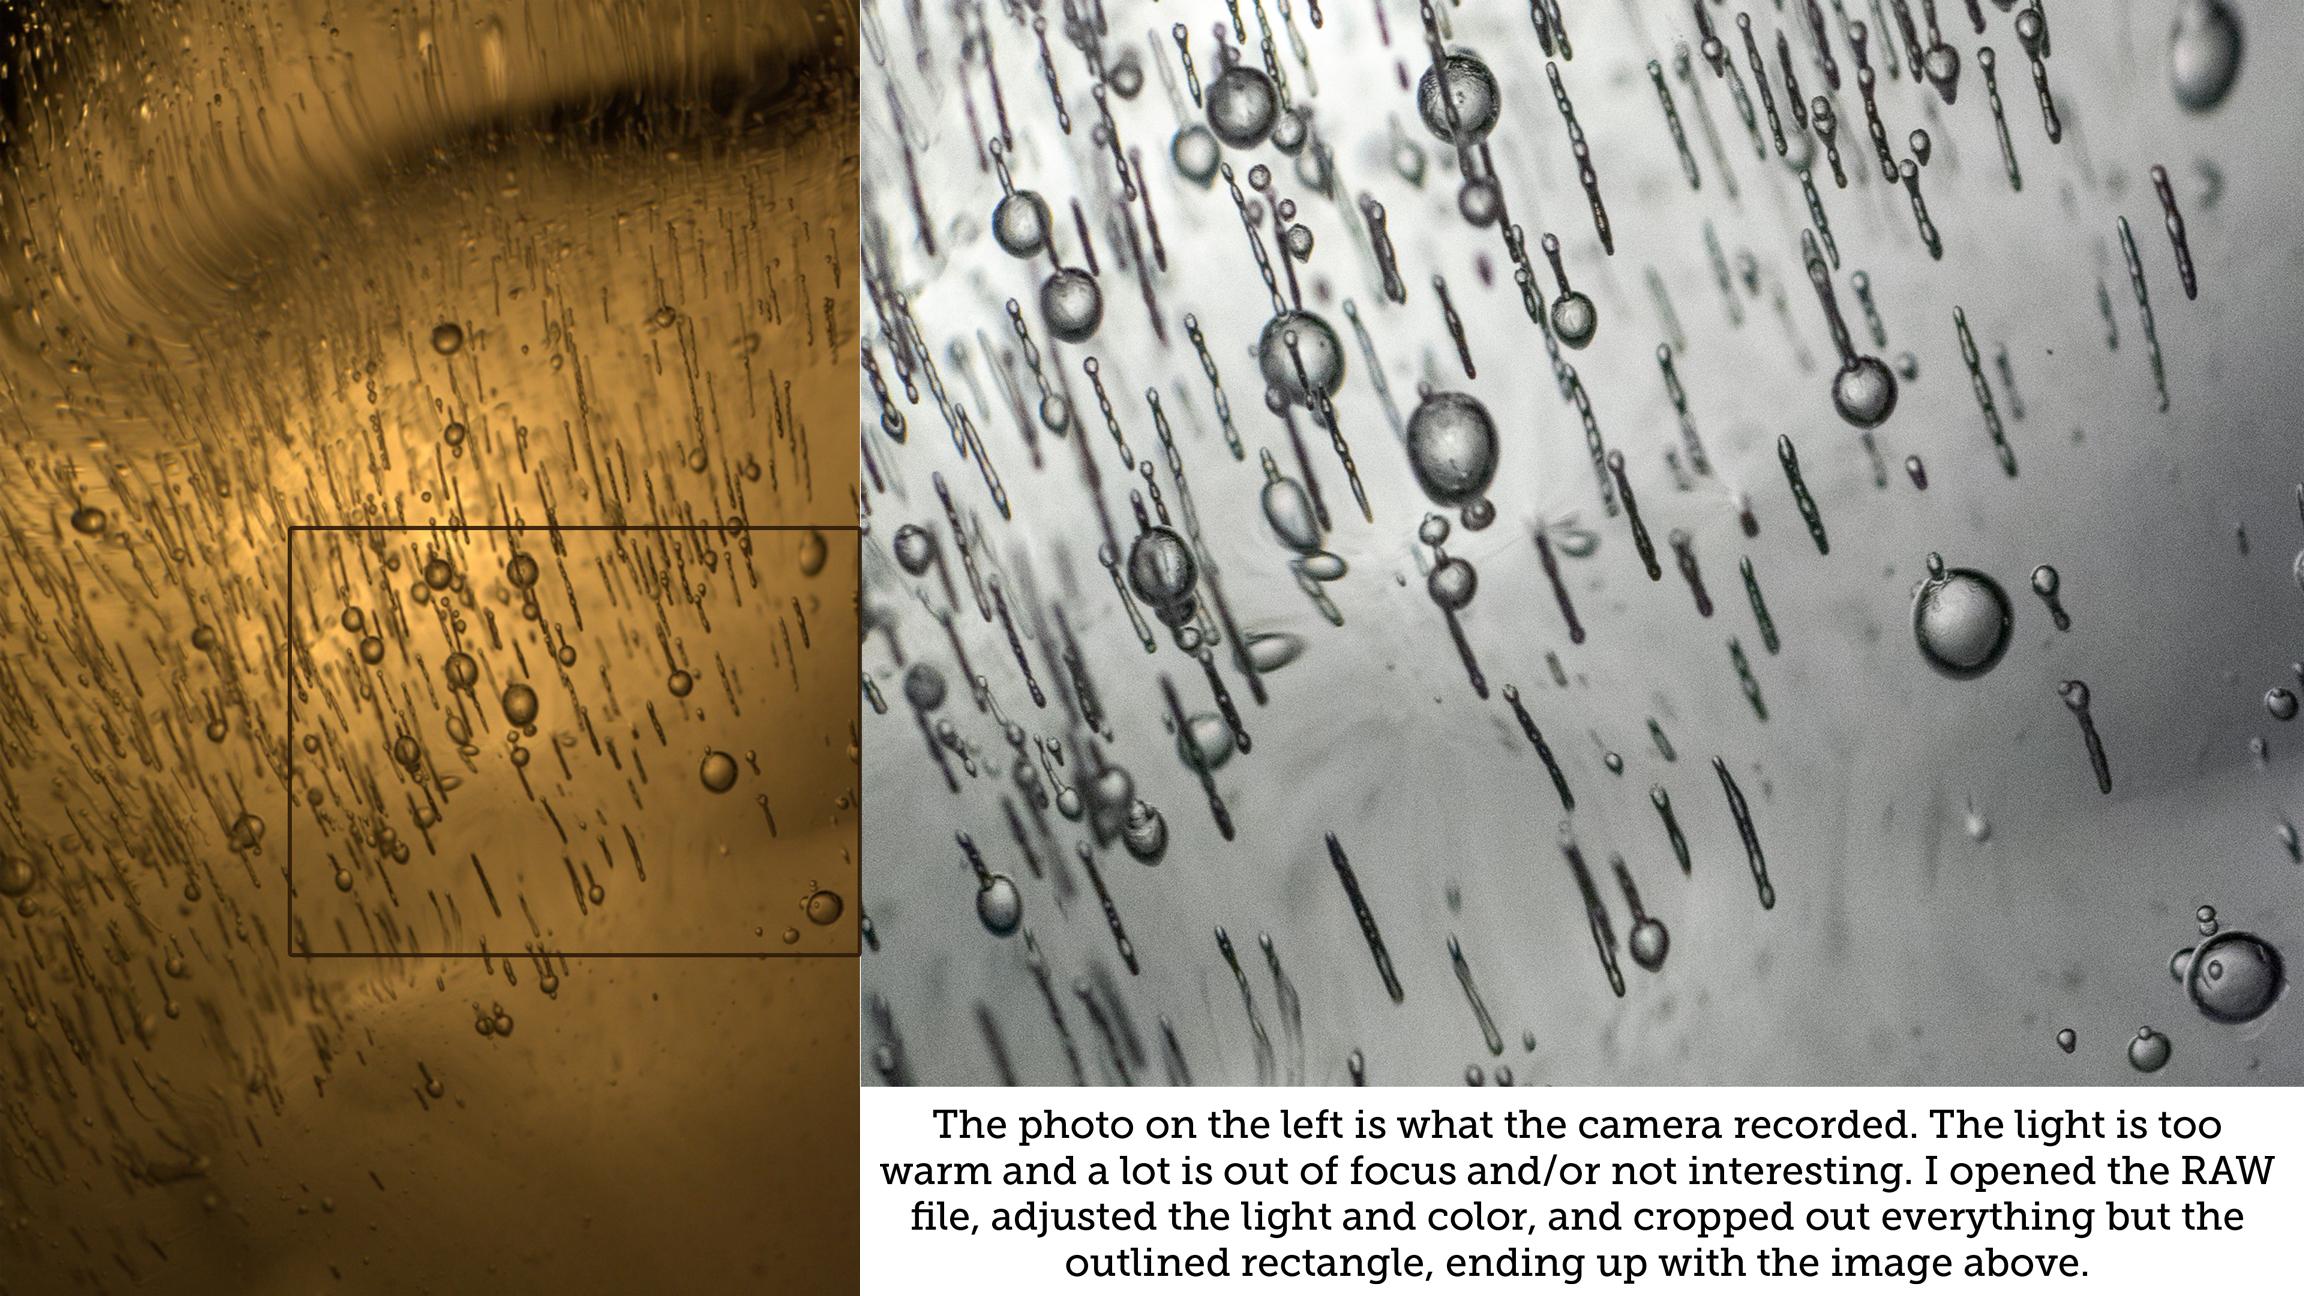
If you shoot RAW, remember that shots that look like duds might actually be amazing when you adjust the light a little.
Also remember that if you take 500 shots in an hour, you don't have to save every single one that has something interesting in it. Practice detachment. If there are a bunch of almost identical shots and you don't see a need to focus-stack them, save a couple and feel the freedom of deleting the rest.
RAW
RAW files are digital negatives. They contain all the information your camera captured, meaning you have all that information to play with. See https://www.instructables.com/A-Complete-Beginner... or https://www.instructables.com/A-Complete-Beginner... for more information.
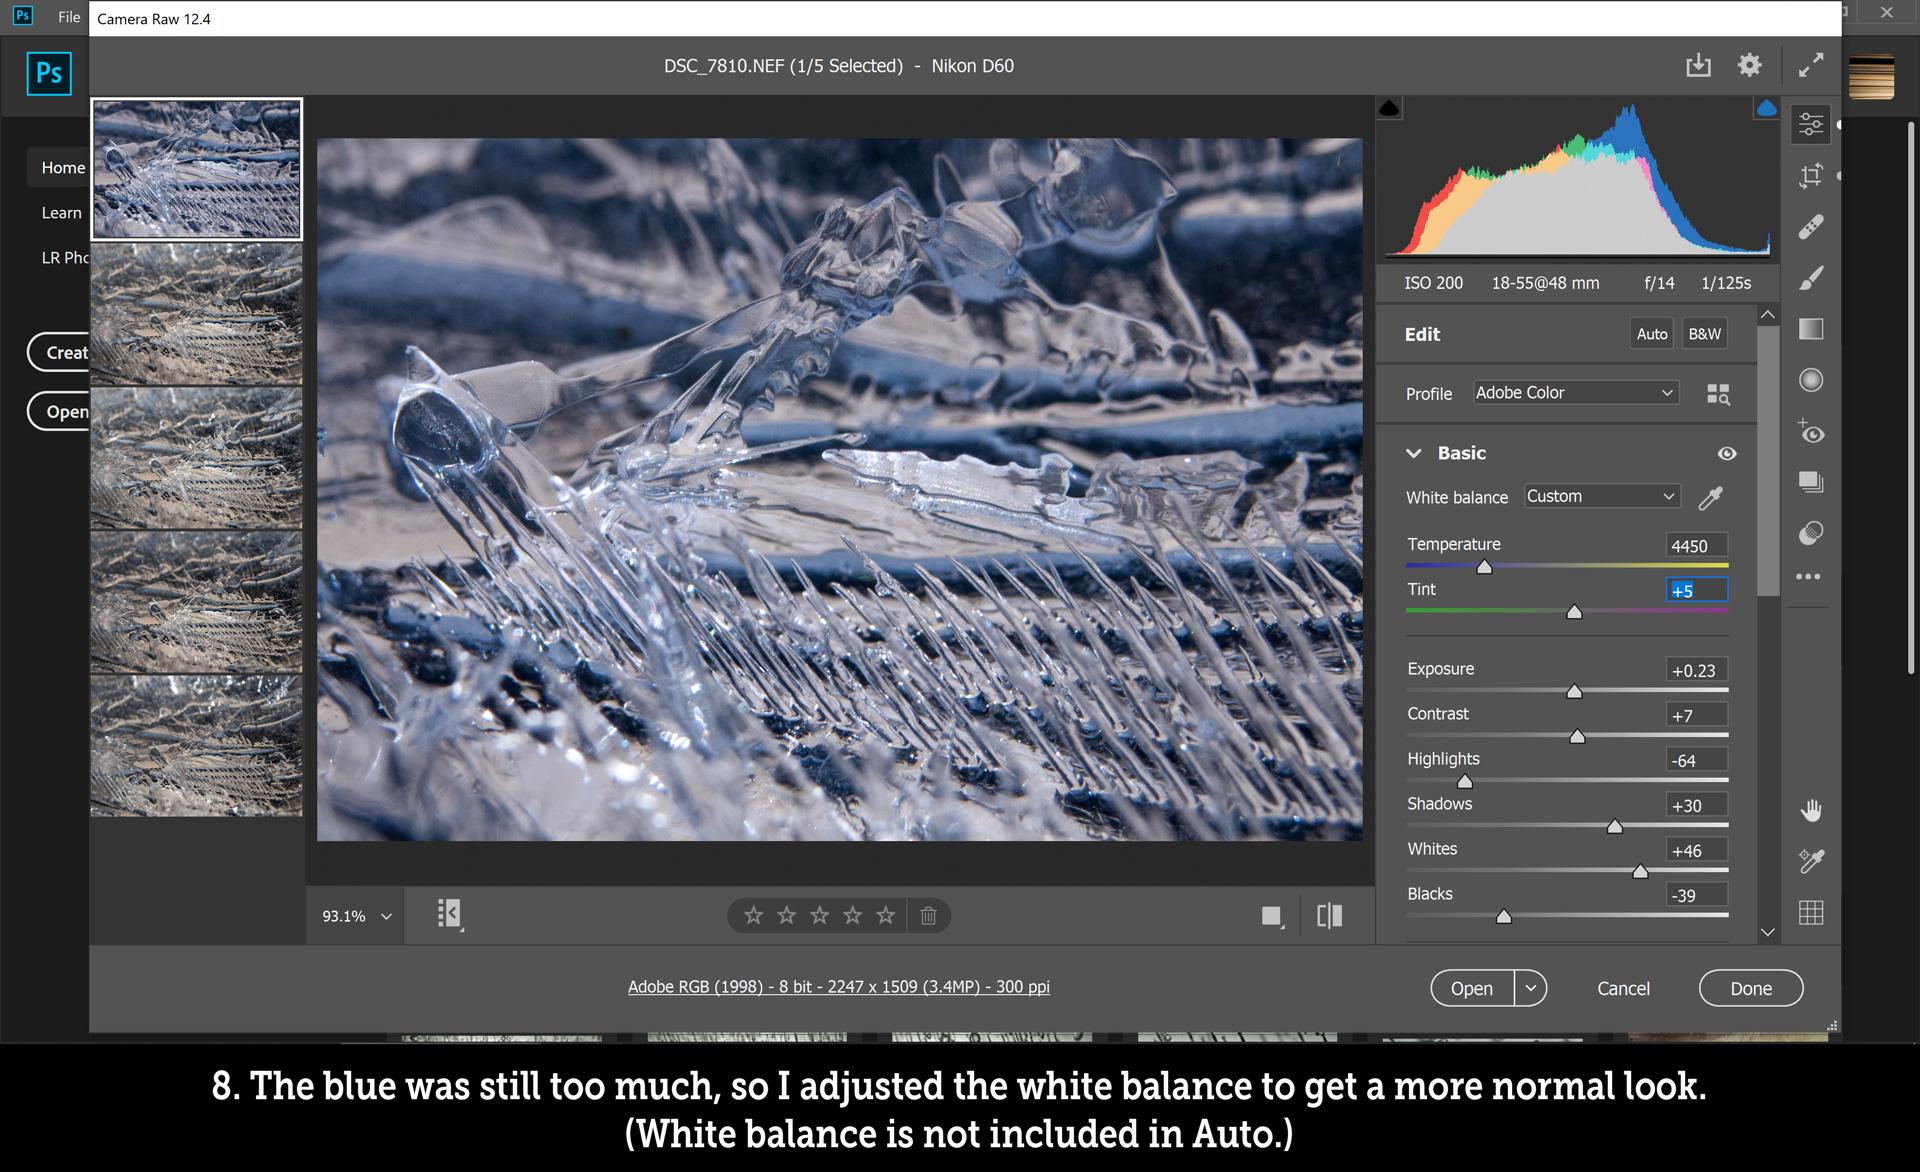
RAW files often look terrible. They will be too bright, with contrast that's too flat and colors too dull. But that's just the true photo's natural camouflage. Hiding underneath is all the data your camera's sensor picked up, un- (or at least minimally) processed. That means YOU get to decide what the image should look like rather than trusting the choices of the programmers behind your camera. YOU get to develop the photo to look like what YOU saw. Or what you WANT to see. Don't like green? You can choose to turn it down. Want more contrast? No problem. Less contrast? Equally no problem.
My RAW Processing Flow
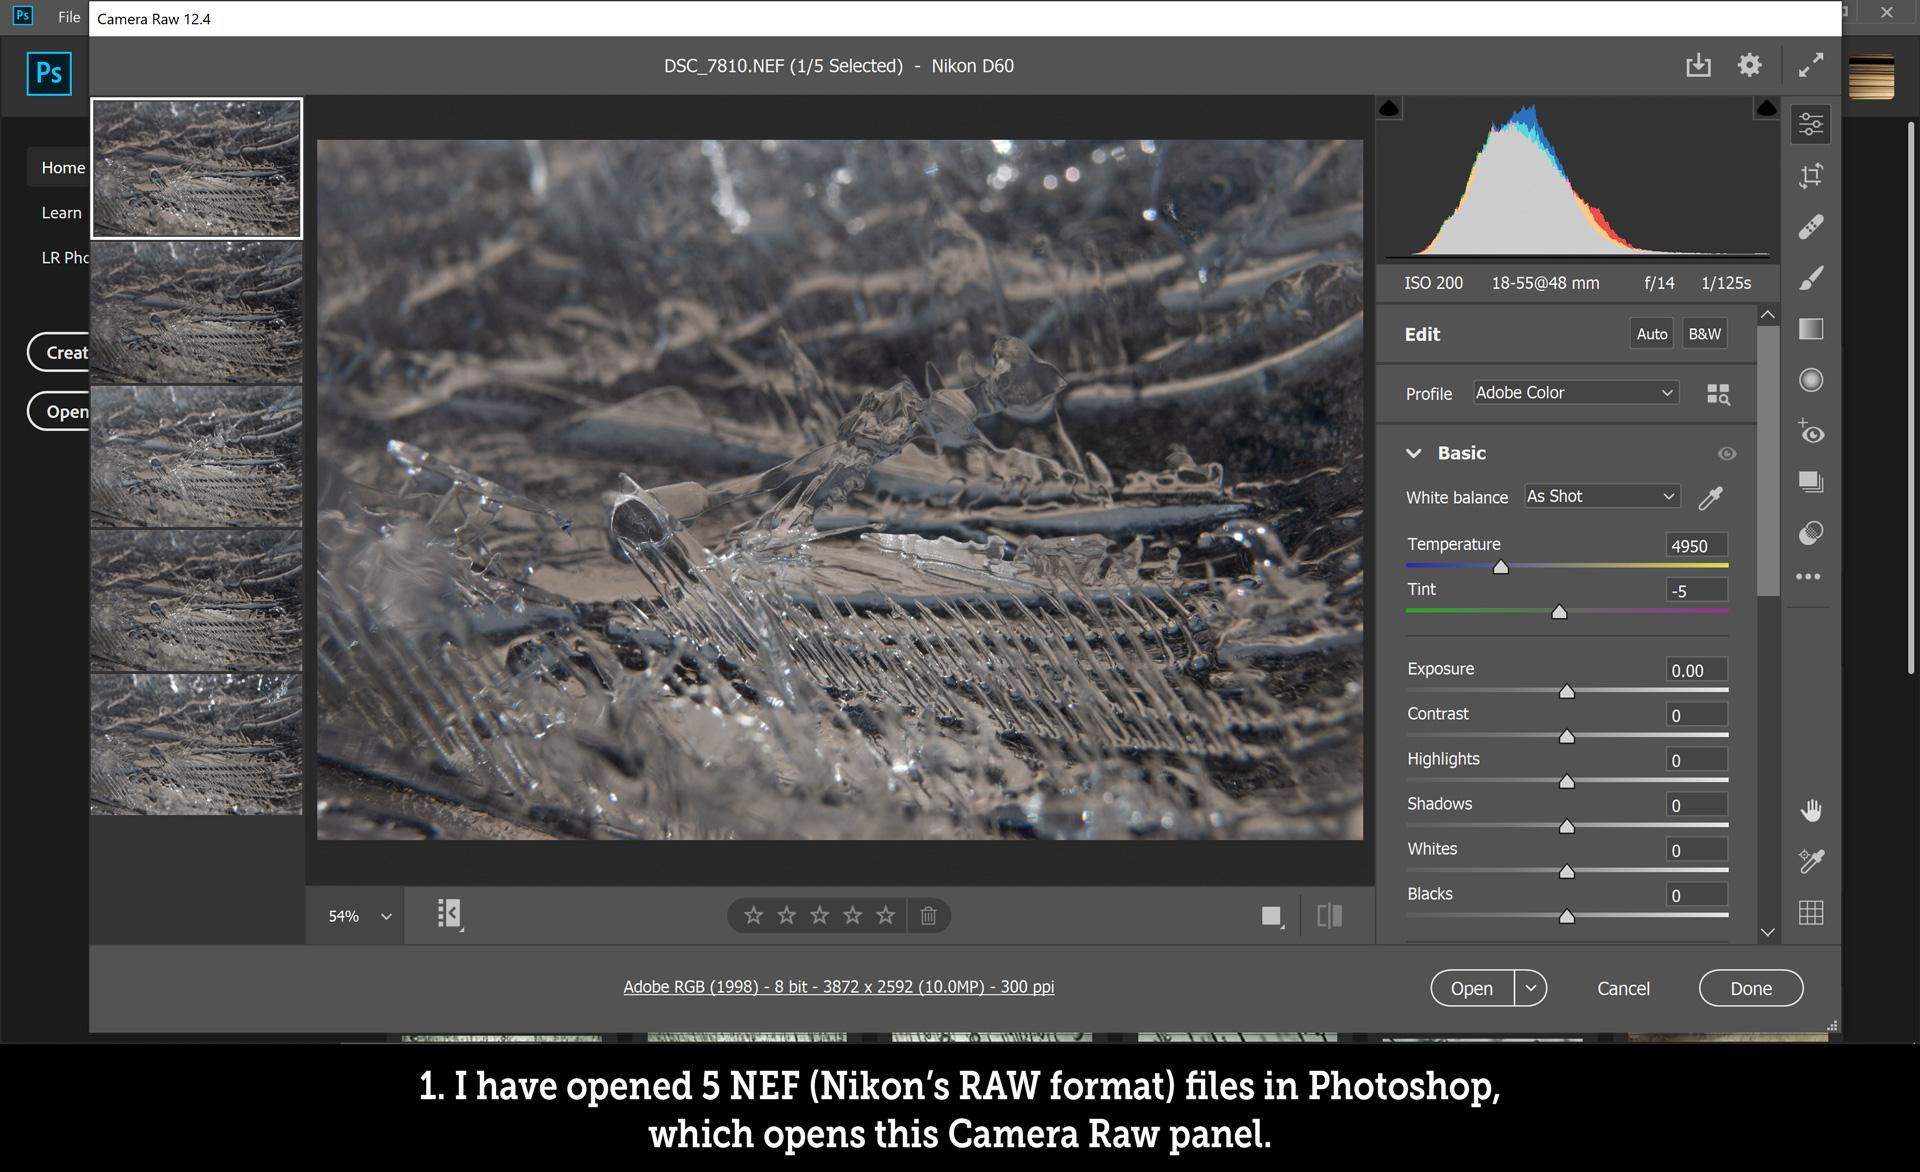
This might be long, but it also might be worth it. You can look at the GIF above to see what the process looks like, either while reading this or instead of it. (I encourage you to see the note at the top of this section about GIFS, then watch the once that shows the Camera RAW process.) (The step numbers in this list do not correspond to the step numbers in that GIF.)
- Transfer all the files from the camera's card to a folder on my computer (I name the folder with the date in year-month-date format plus some info about what's in it [something like 2022-01-31-polarized-ice]), then go through the photos in some sort of previewer. You can use the built-in viewer on your computer or tablet, Adobe Bridge, or whatever works. It's important to use the biggest screen available so you can see details. Plus, the screens on cameras are often lower resolution than necessary to accurately display the images the camera takes. (Remember that RAW files will look bad, even if the image is good, so look at the jpgs if your camera provides both.
- I like to use Google's Picasa, a dead program that still works in Windows and remains a great way to go through photos, zoom/rotate/crop, do quick adjustments just to see whether an image has potential, delete the duds, and tag the keepers for organization. (The tags are real metadata and stay with jpgs outside Picasa, but they only exist within Picasa when applied to files with formats that don't support tags, such as RAW, psd, png, etc.). Picasa can display most image formats, including RAW files, making the process of culling photos much quicker.
- Sometimes it is useful to rotate a photo if it's got good clarity, color or contrast, but nothing interesting is jumping out at you. You might find cool shapes or compositions that were not apparent in the photo as shot.
- Next I open the RAW files (in batches of similar images to avoid overloading my computer's memory) in Adobe Camera Raw (within Photoshop) and hit the Auto button for each one to see what I'm working with.
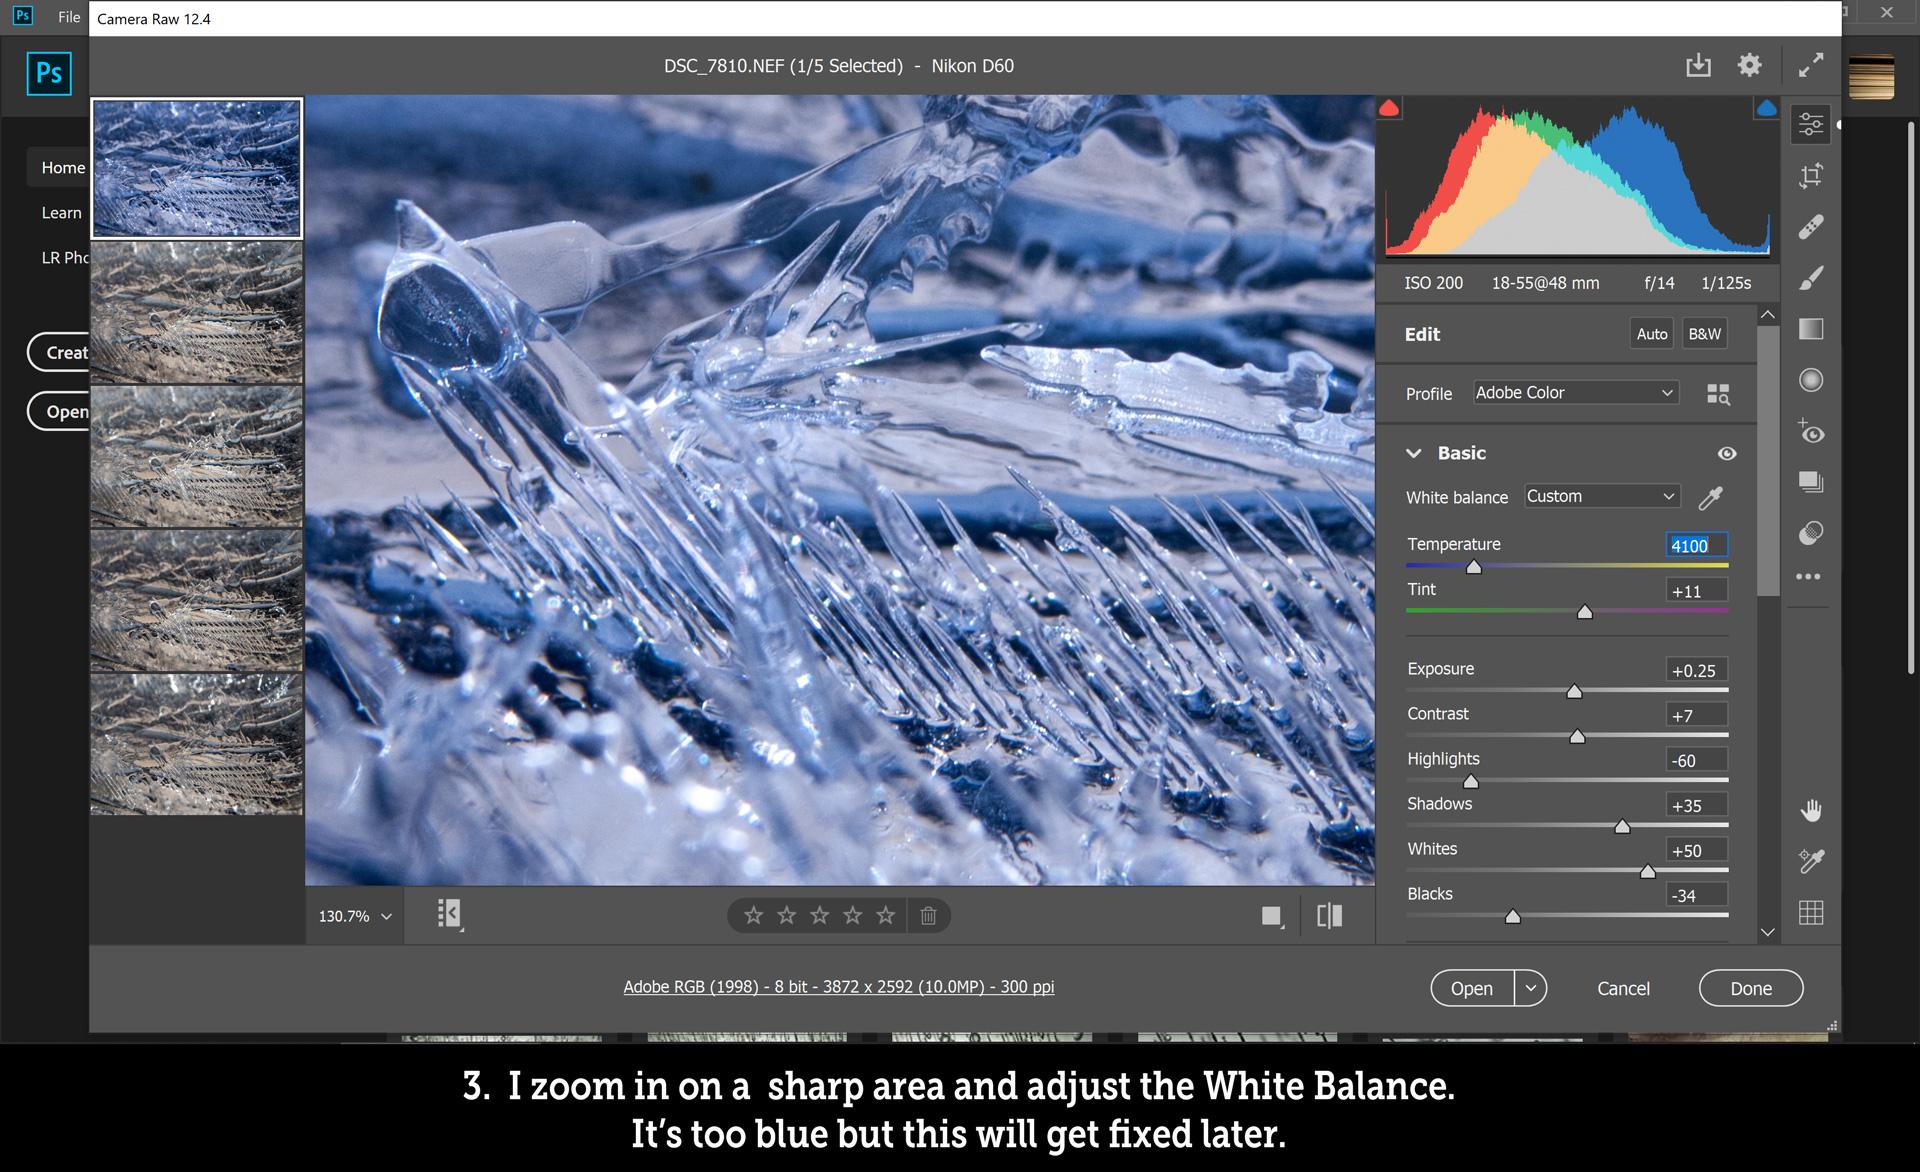
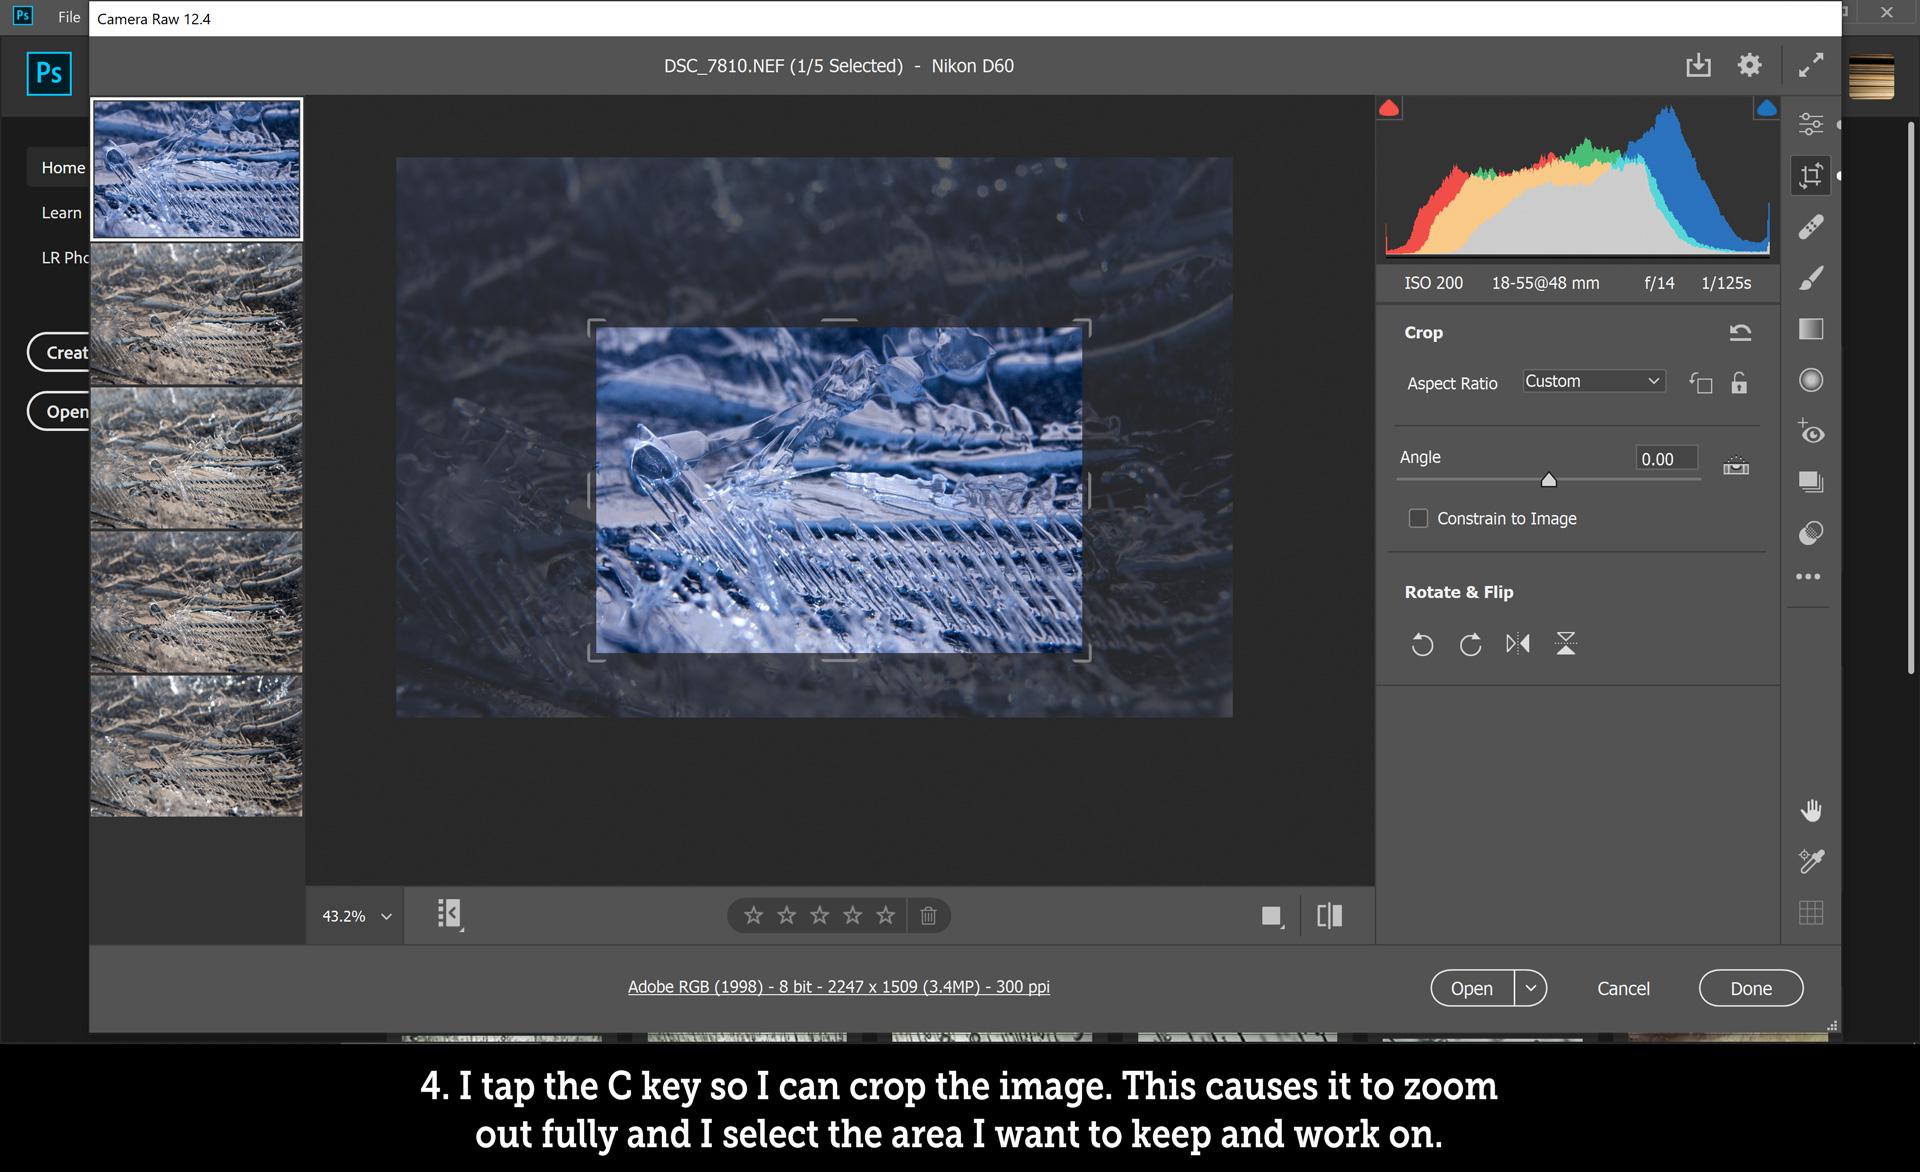
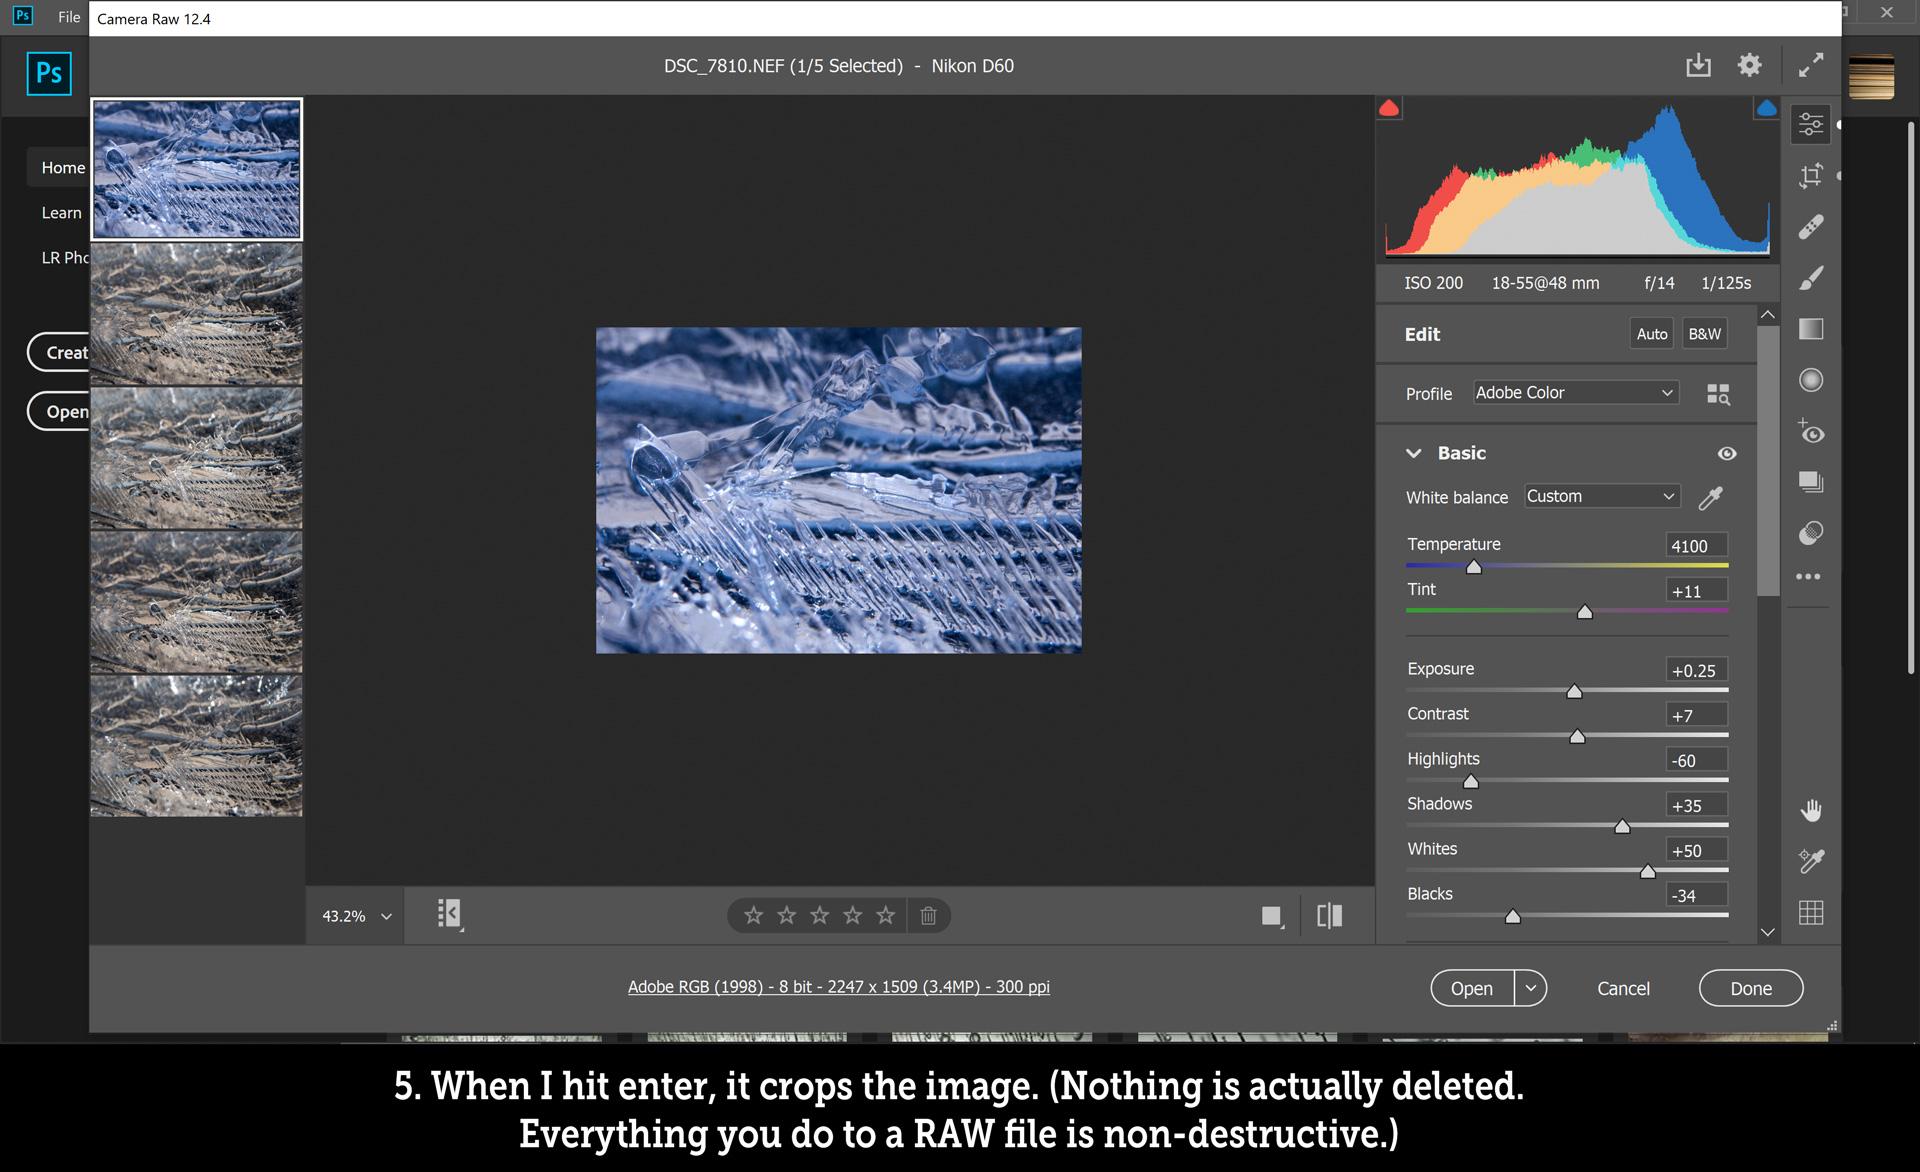
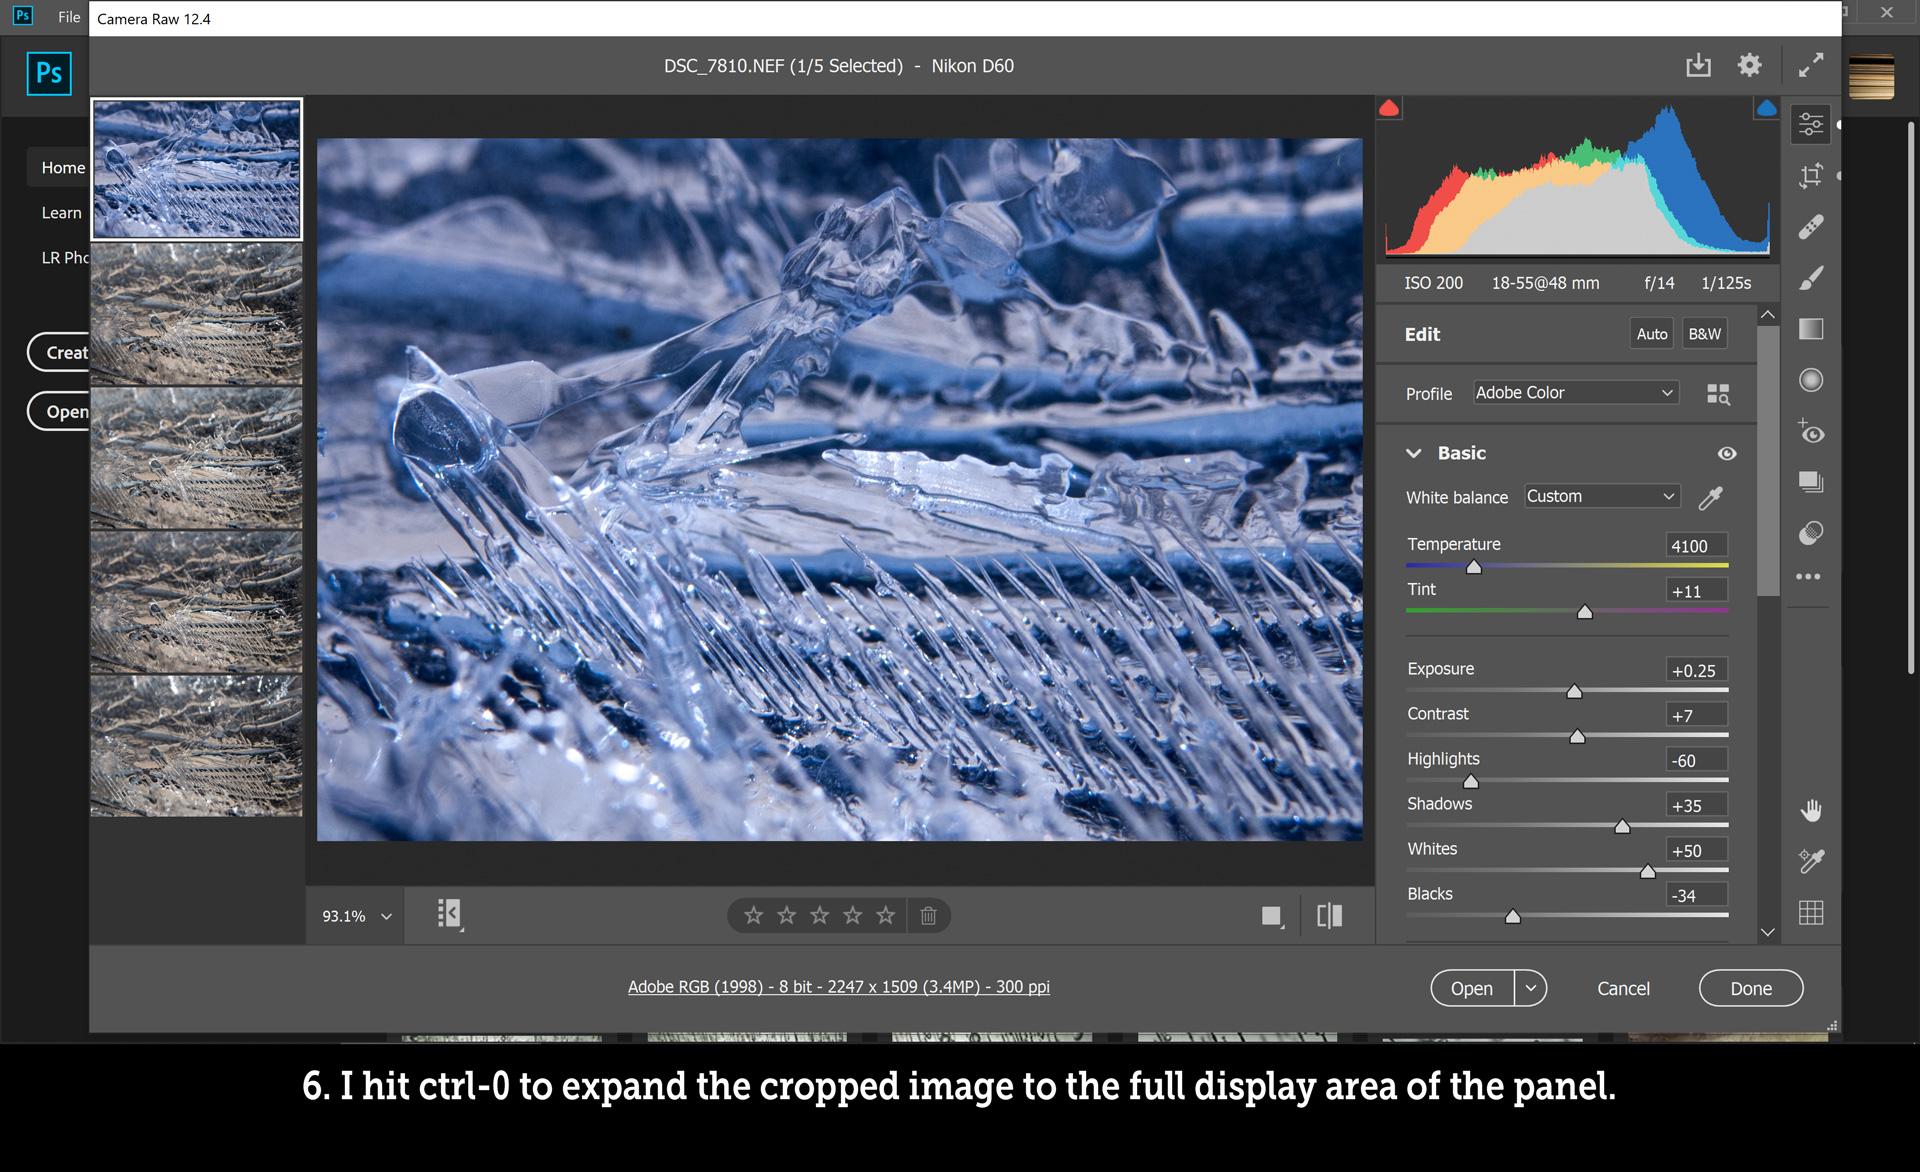
- I zoom in and move around to find the best portion of each image, then crop the ones that seem worthwhile.
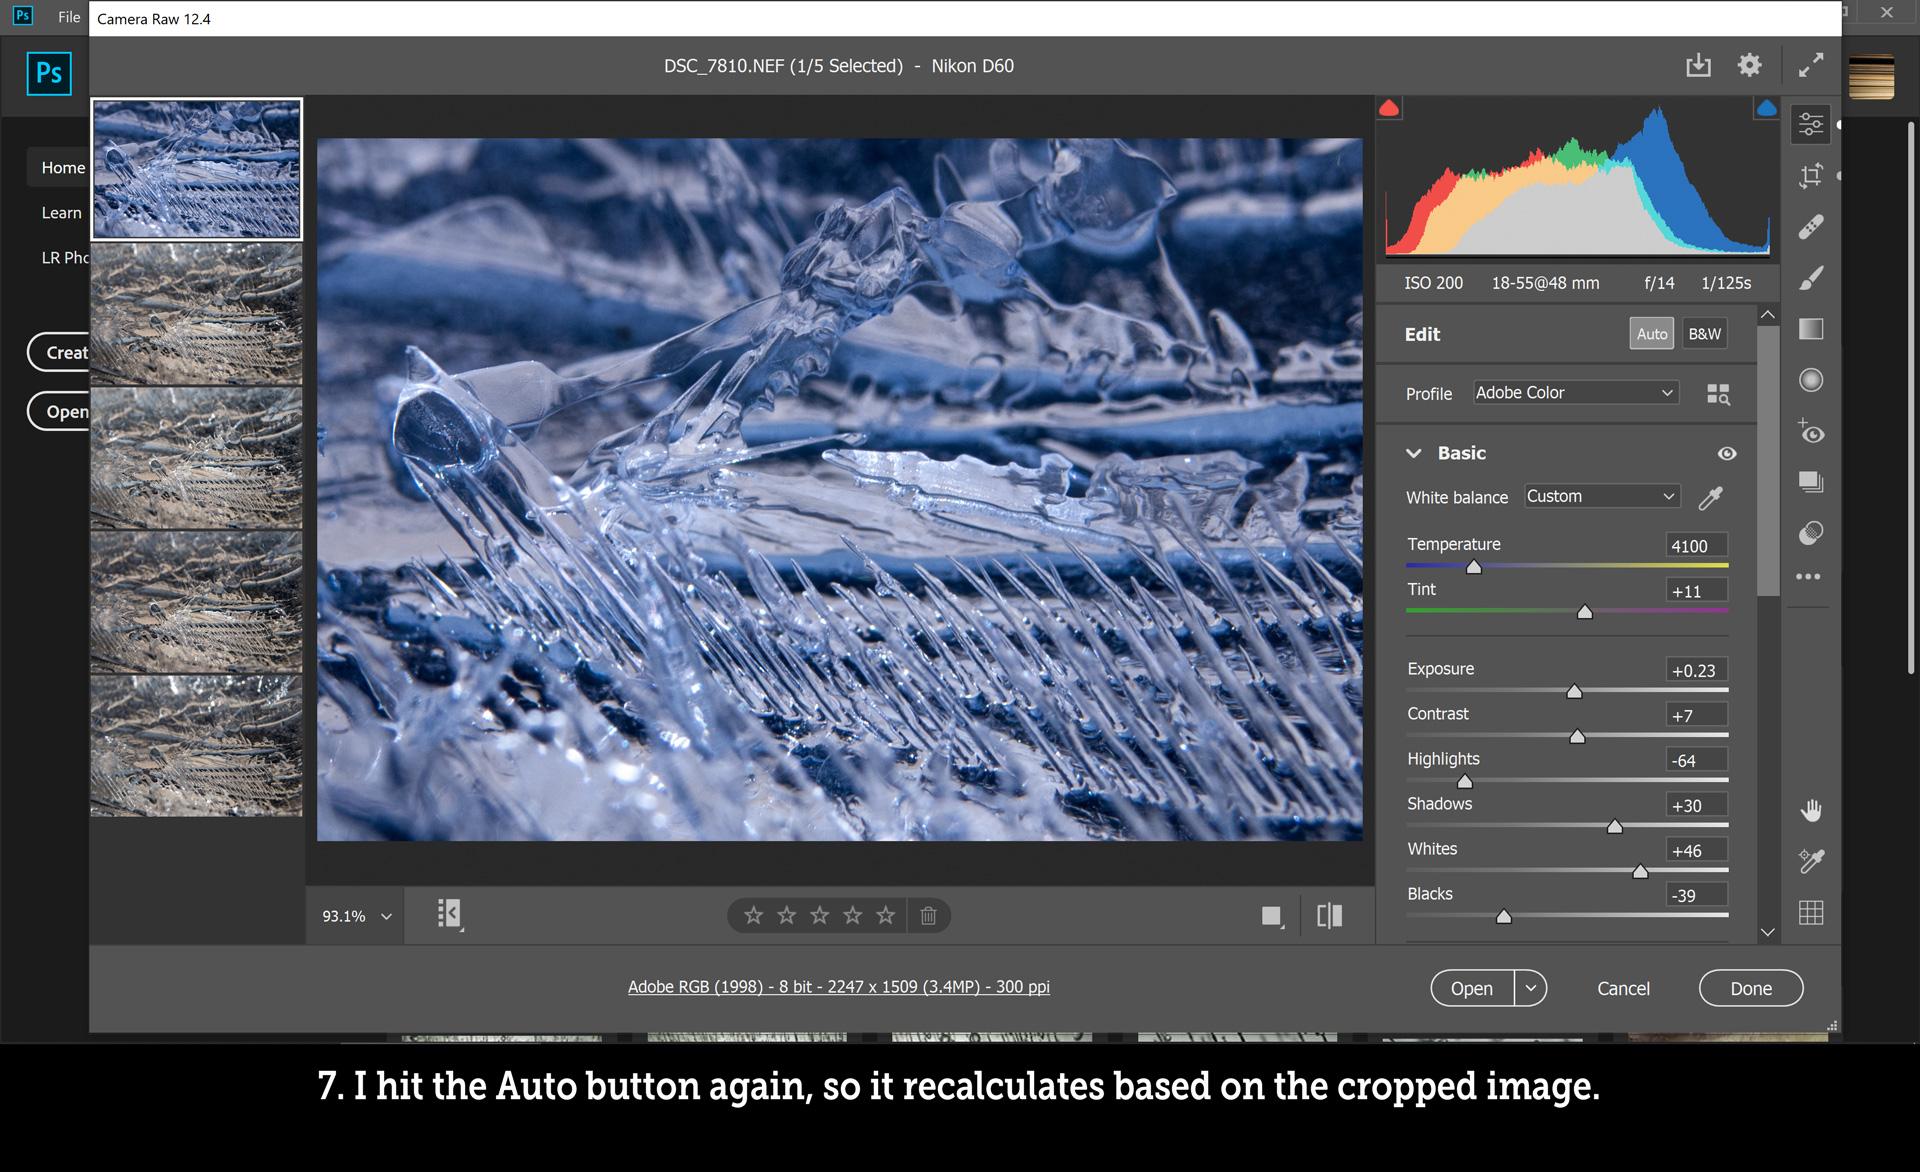
- IMPORTANT: the Auto adjustment is calculated based on the whole image. That means the result is different—and potentially much better—on a cropped image, so hit Auto again after cropping.
- Sometimes it's fun to really push the colors or contrast just to see what happens.
- Cranking contrast, saturation or other sliders may reveal details you couldn't see otherwise, and then you can dial things back and try different combinations of settings to keep the revelations visible without the image looking overdone.
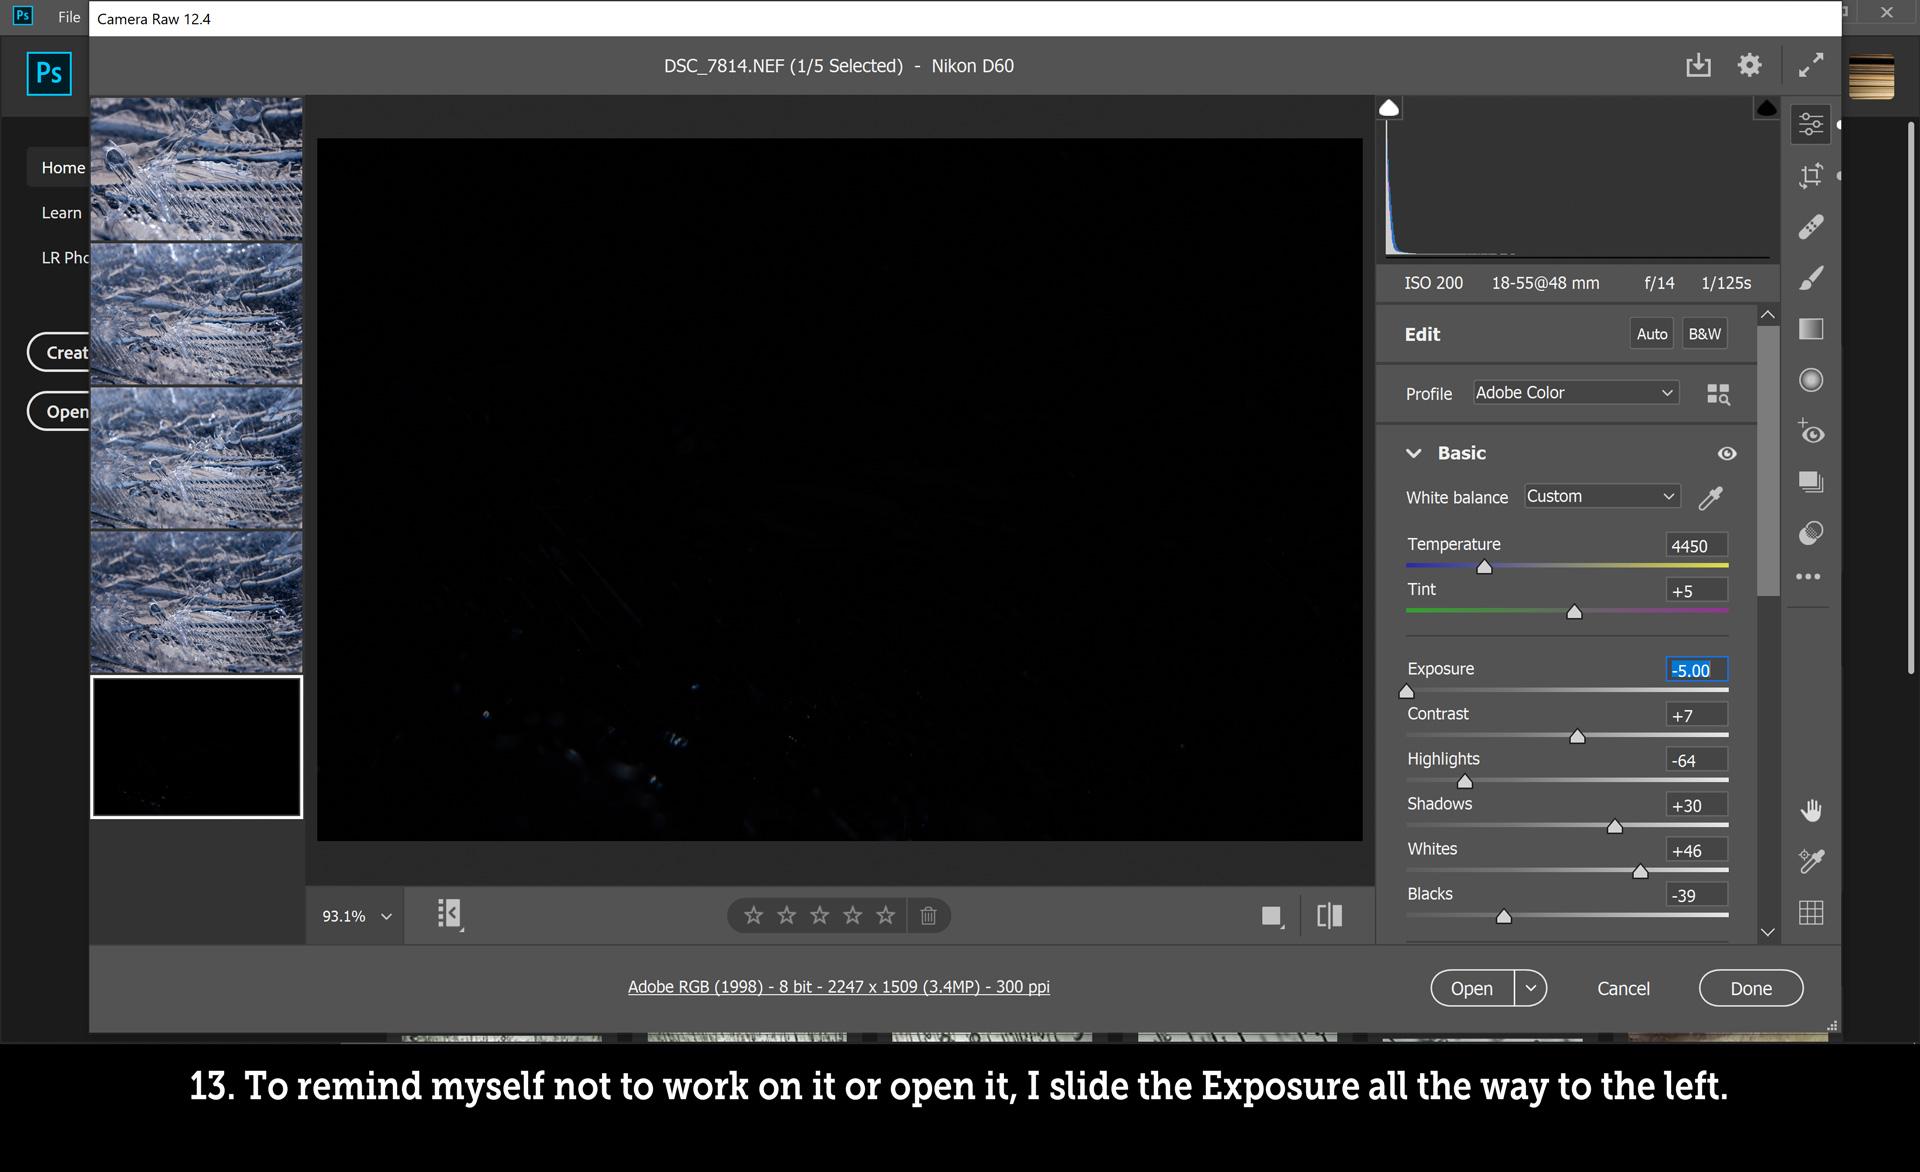
- When an image just doesn't seem worth the effort or isn't as clear as I thought it was, I move the exposure slider all the way to the left to make the image black so I know not to bother to open it.
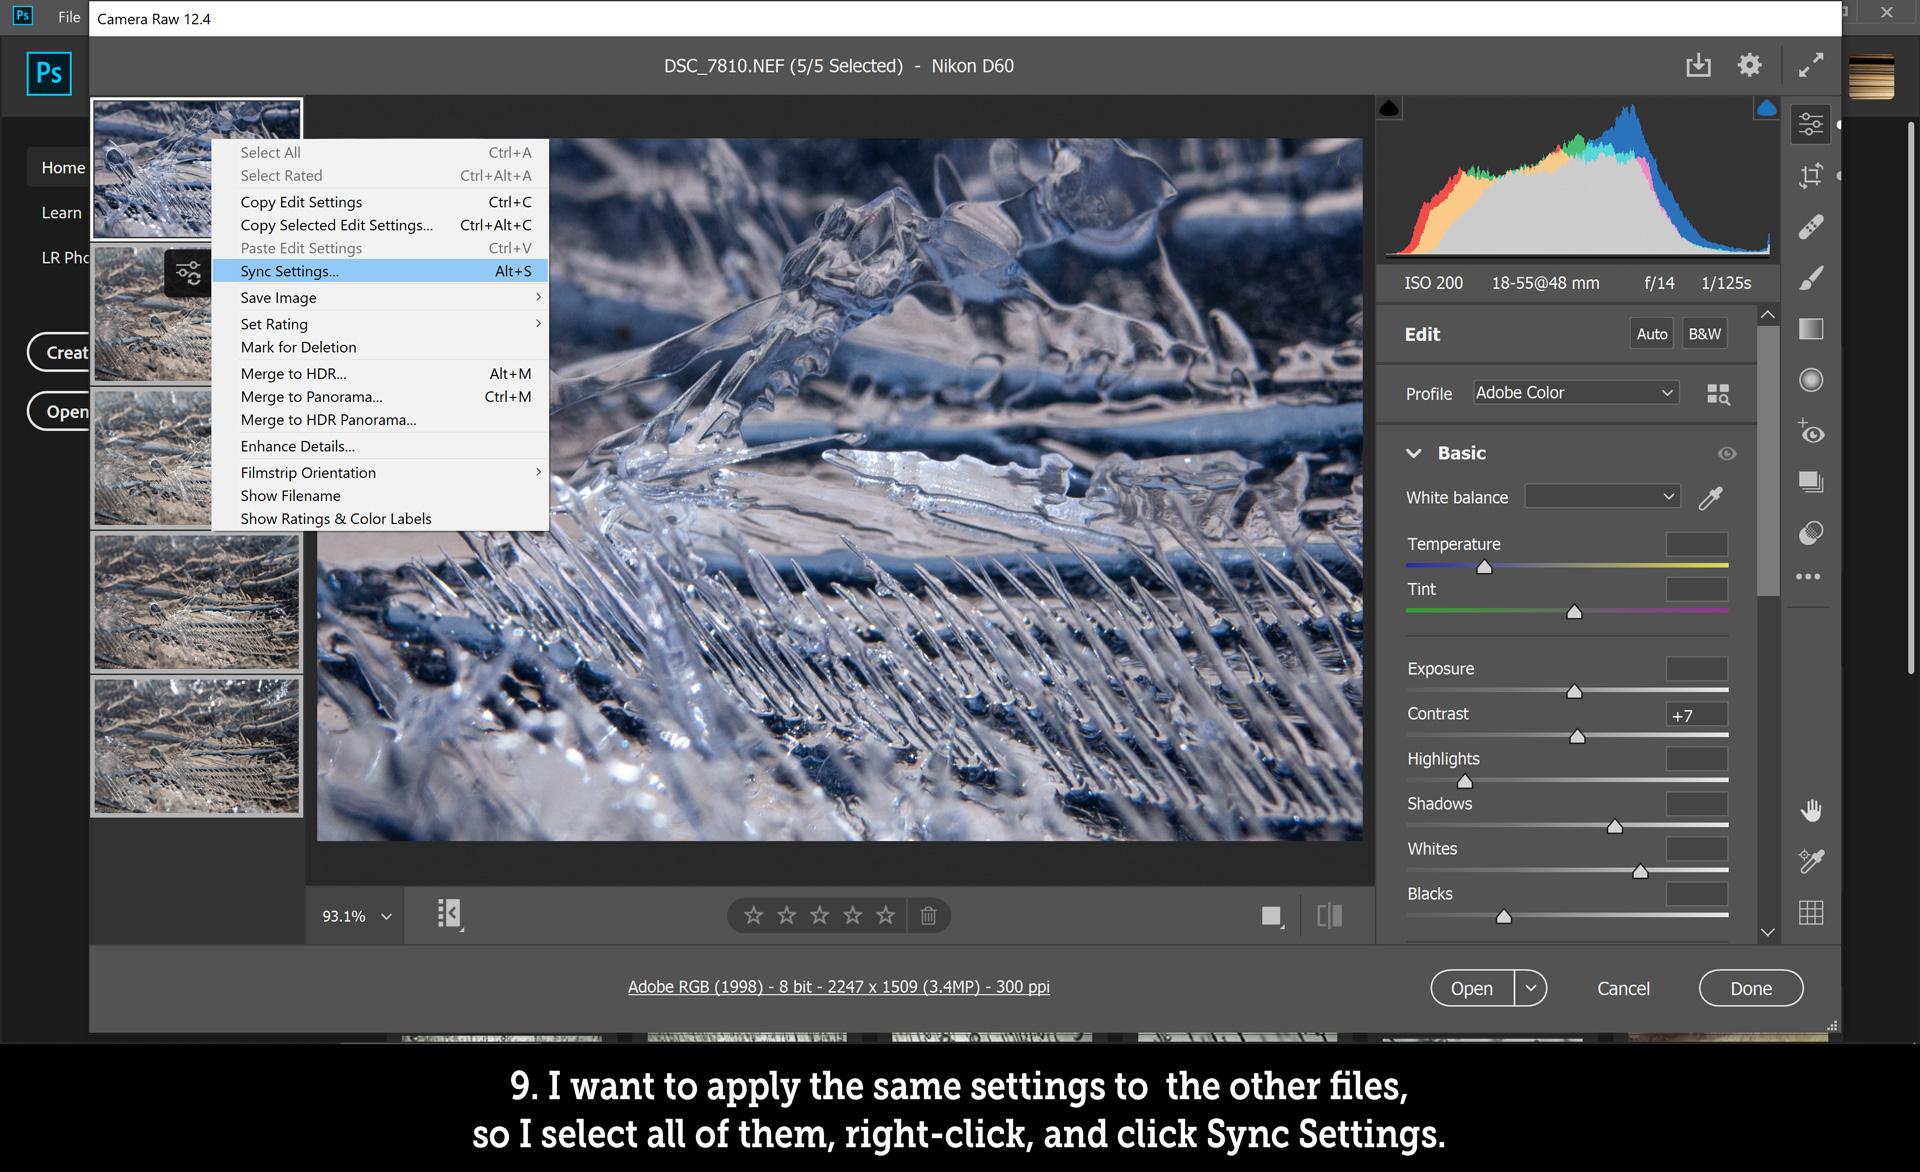
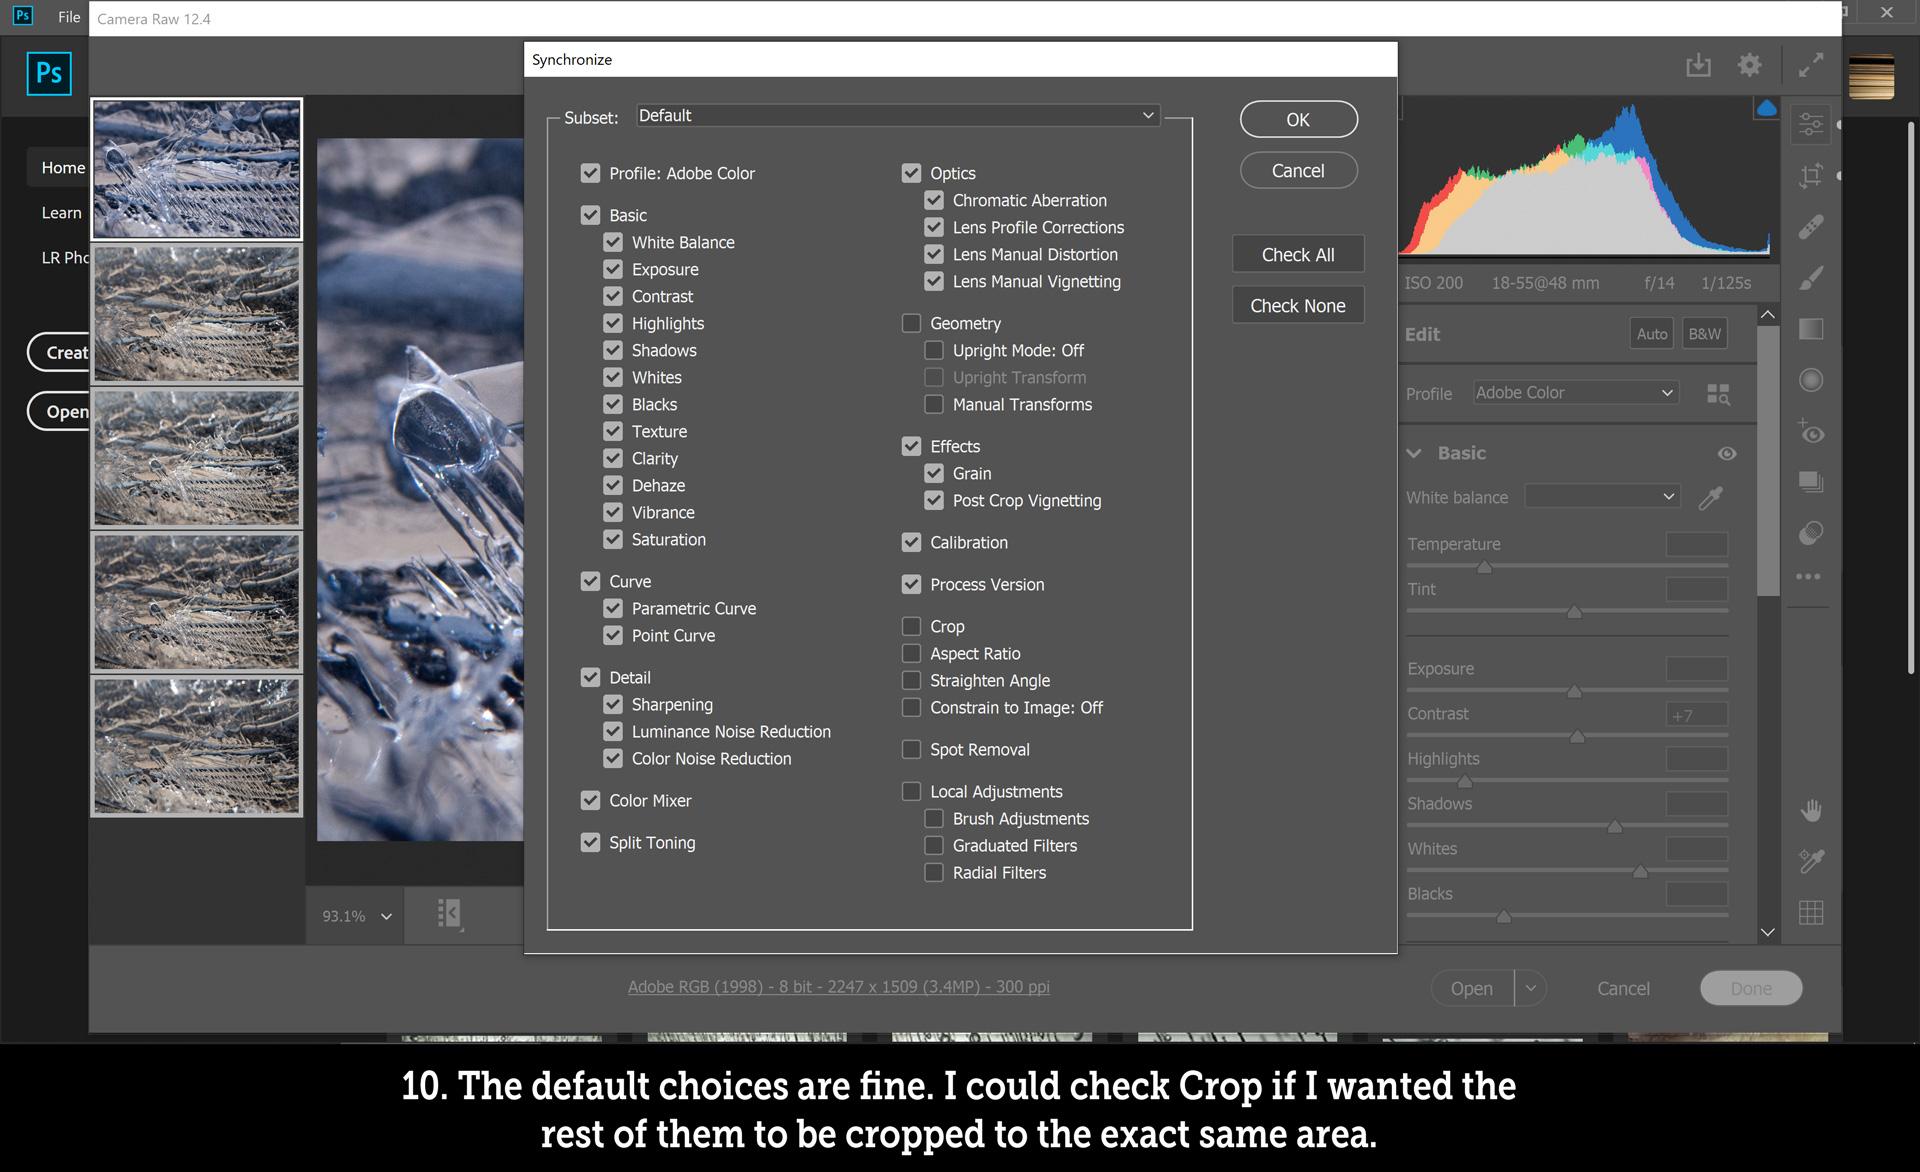
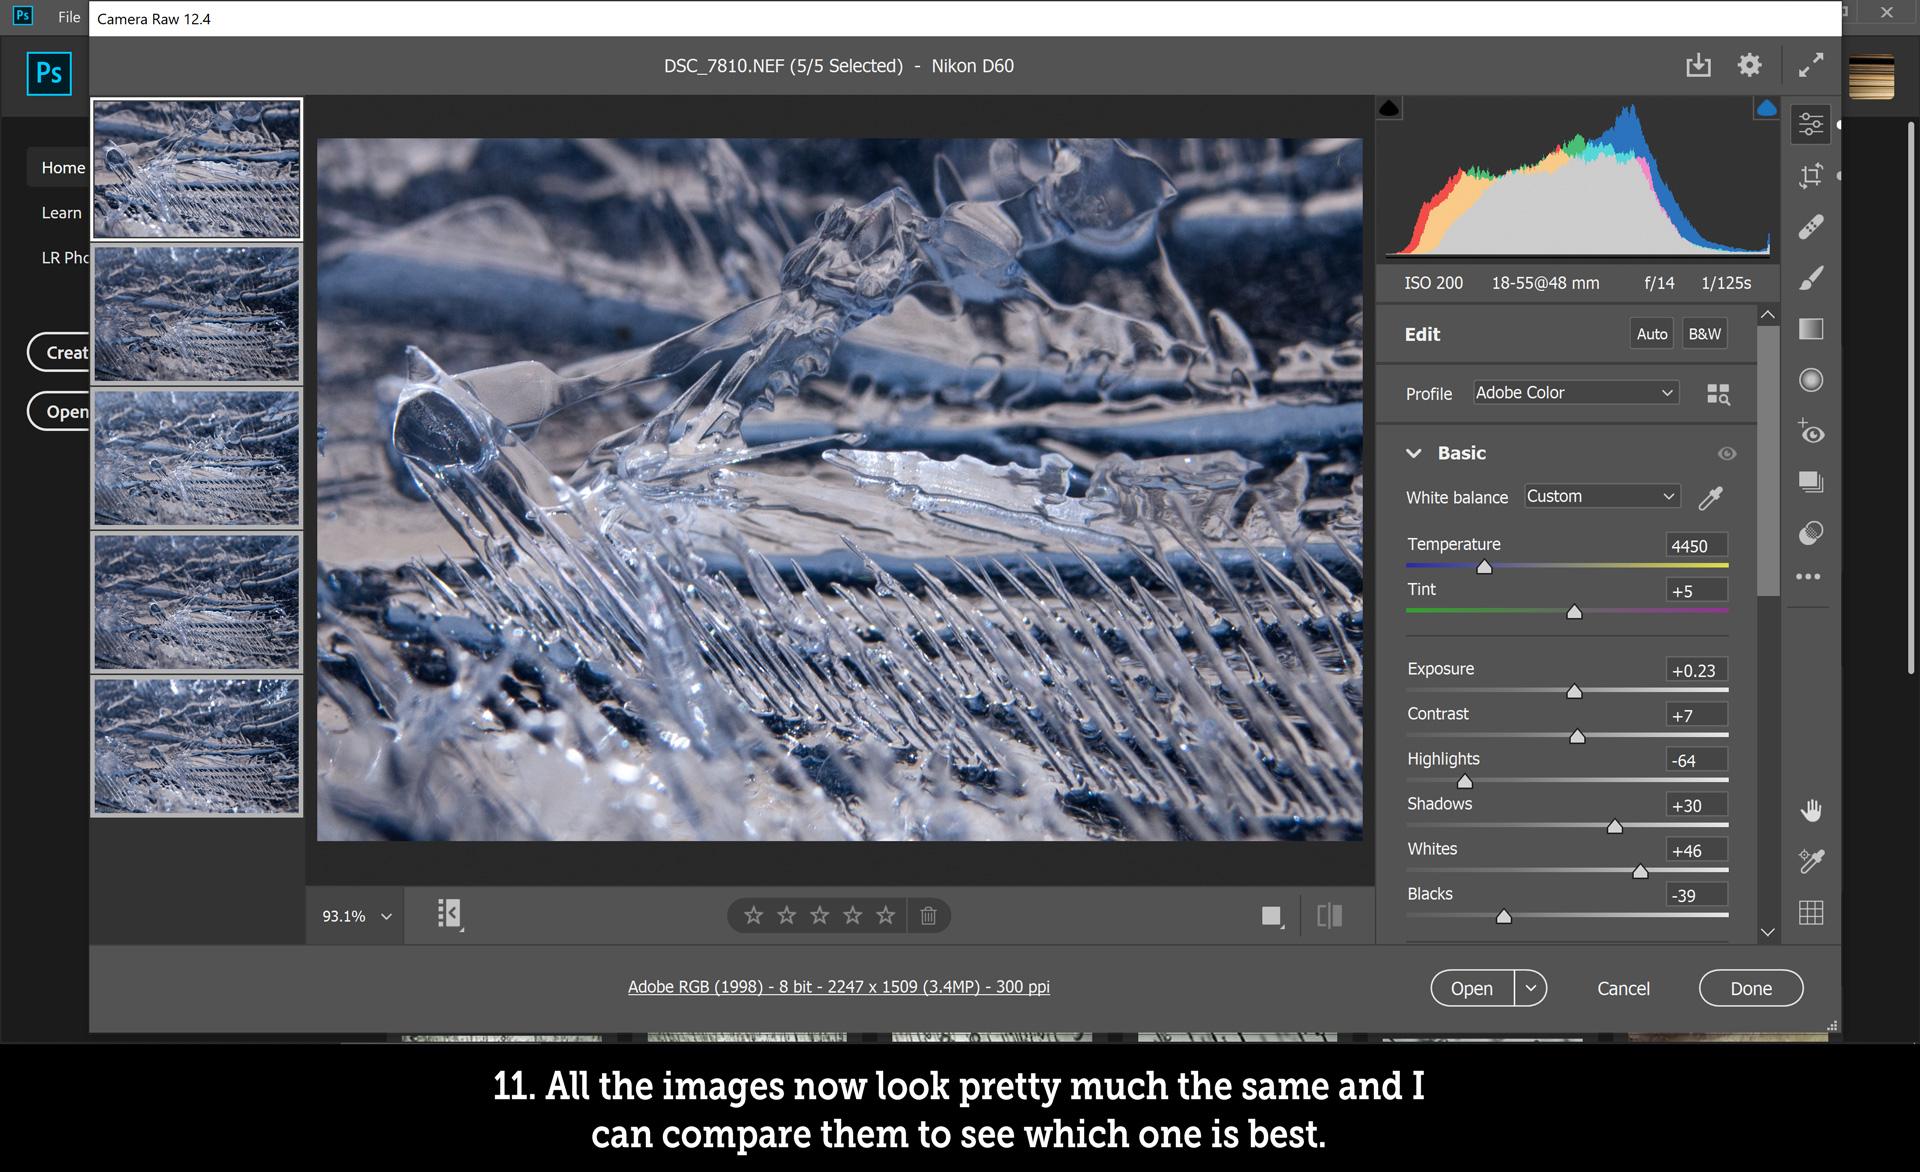
- If you have several shots with the same color or lighting issues, get one of them adjusted just the way you want, then, while it's still the selected image, use shift-click or ctrl-click to select the others that would benefit from the same settings. Right click on any selected photo and choose Sync Settings. The default choices are fine unless you want to exclude or add some. Crop is unselected by default, but sometimes you want multiple images to be cropped identically and this is where you'd make that happen.
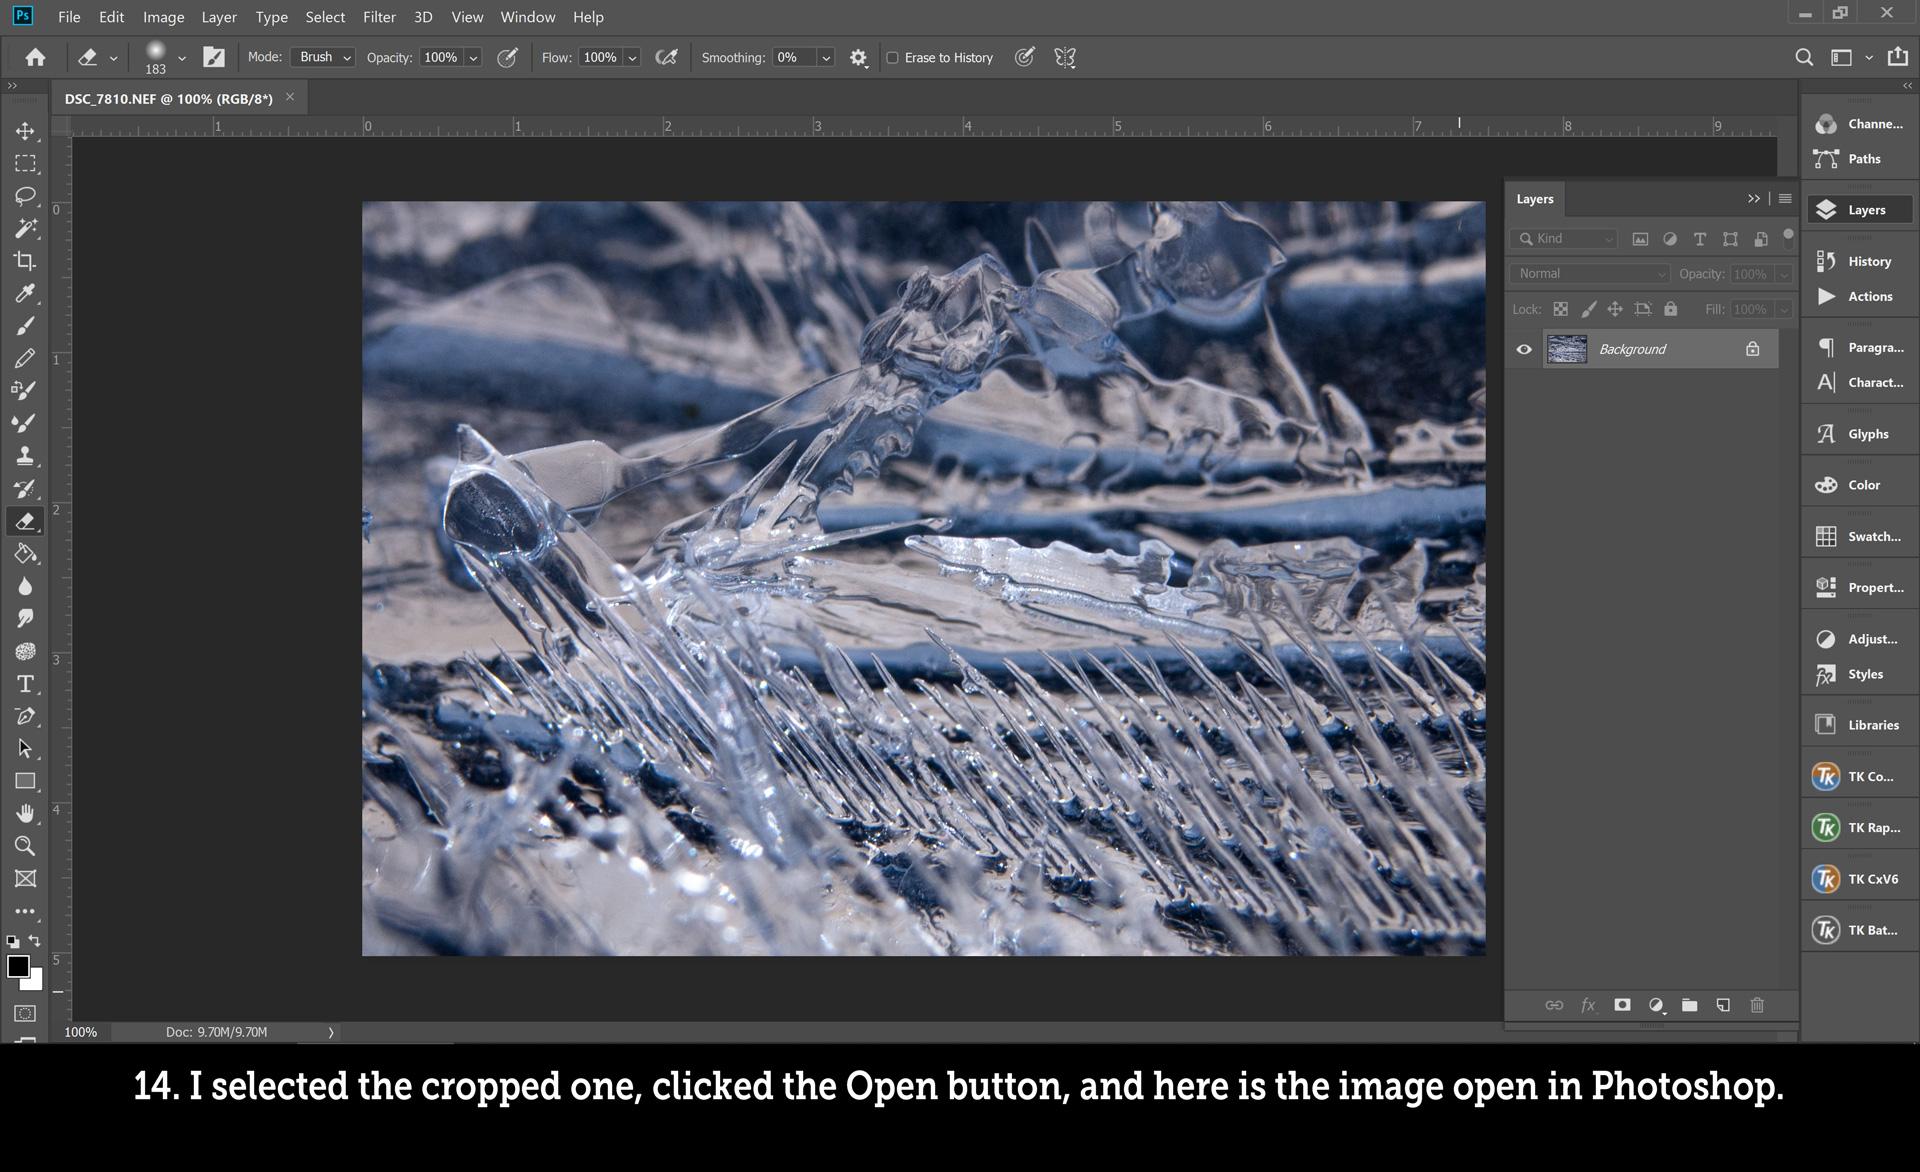
- Once I've finished adjusting, I select the ones I like and open them in Photoshop. (Hint: it's the Open button.)
- At this point I do further cropping if necessary, apply filters or actions if I feel like it, sometimes even play with warp/perspective/mirroring, blending modes and layers, etc.
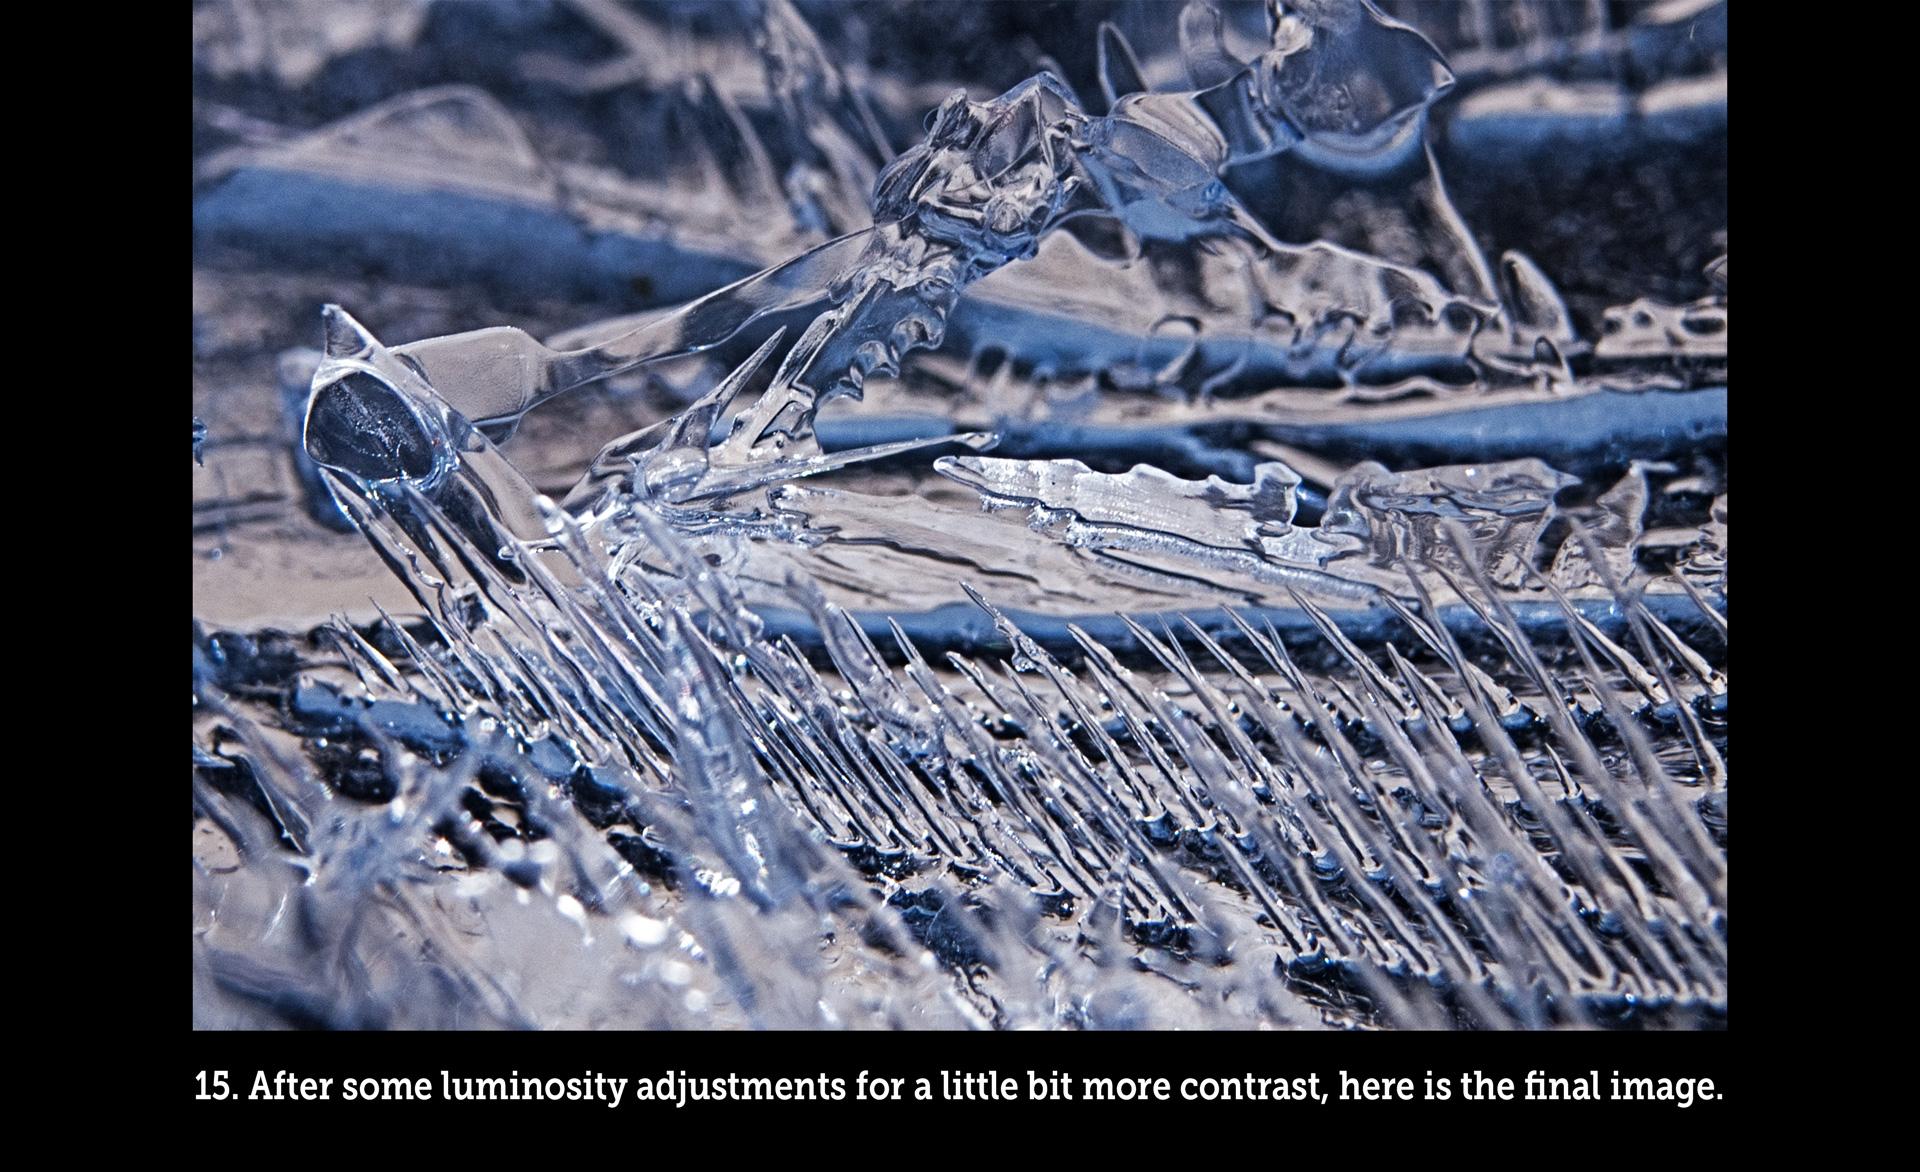
- I almost always experiment with luminosity masks.* It's too complicated to go into here, but if you're into this stuff it's worth your time to learn.
- A fun trick is to open the same RAW file multiple times and process it differently each time (but with the same crop, if any), then combine the results as layers in a single Photoshop (or whatever program). Changing the opacity and/or blending modes of the layers will lead to some great stuff. You can also use masks so only some parts of some layers are visible. Or you can use Photoshop's built in alignment and focus stacking tools (Auto-Align and Auto-Blend under the Edit menu).
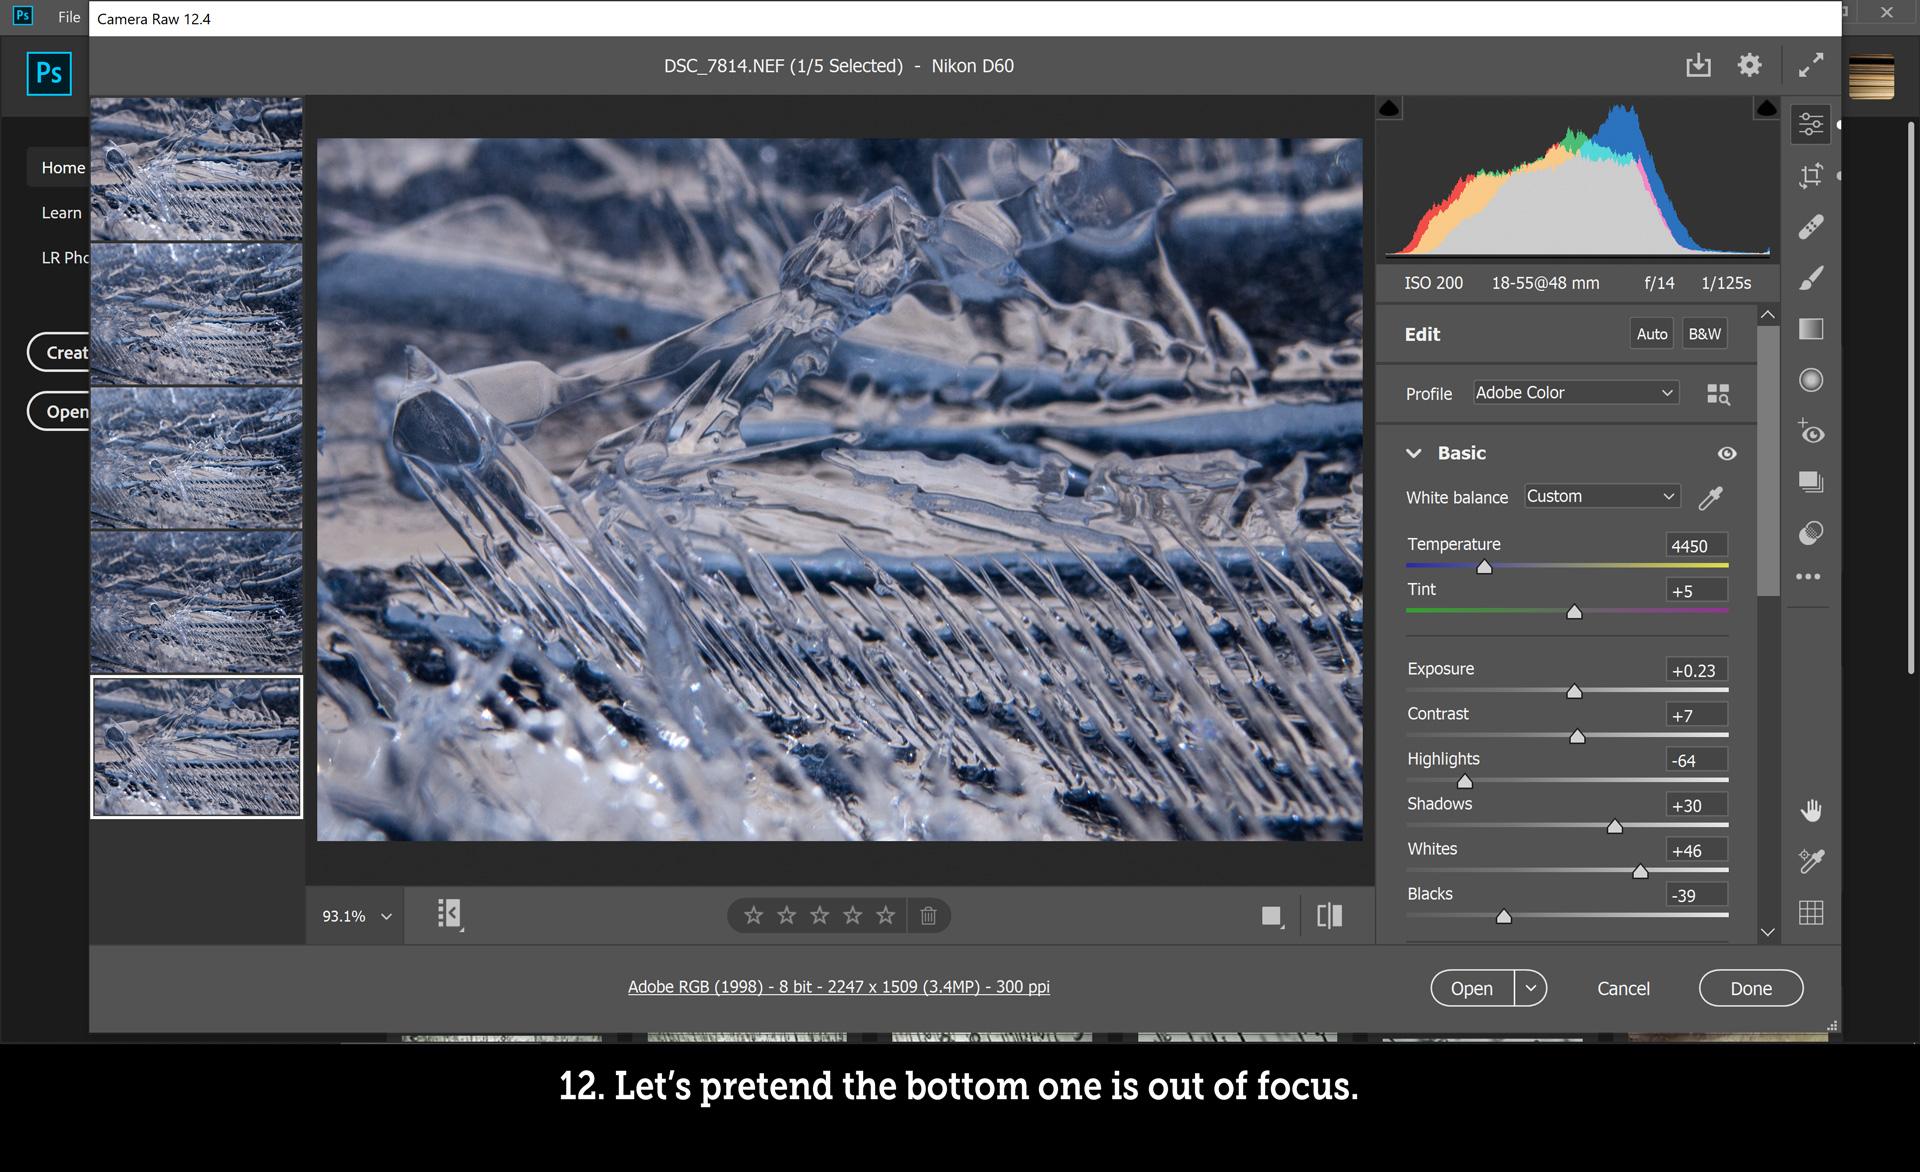
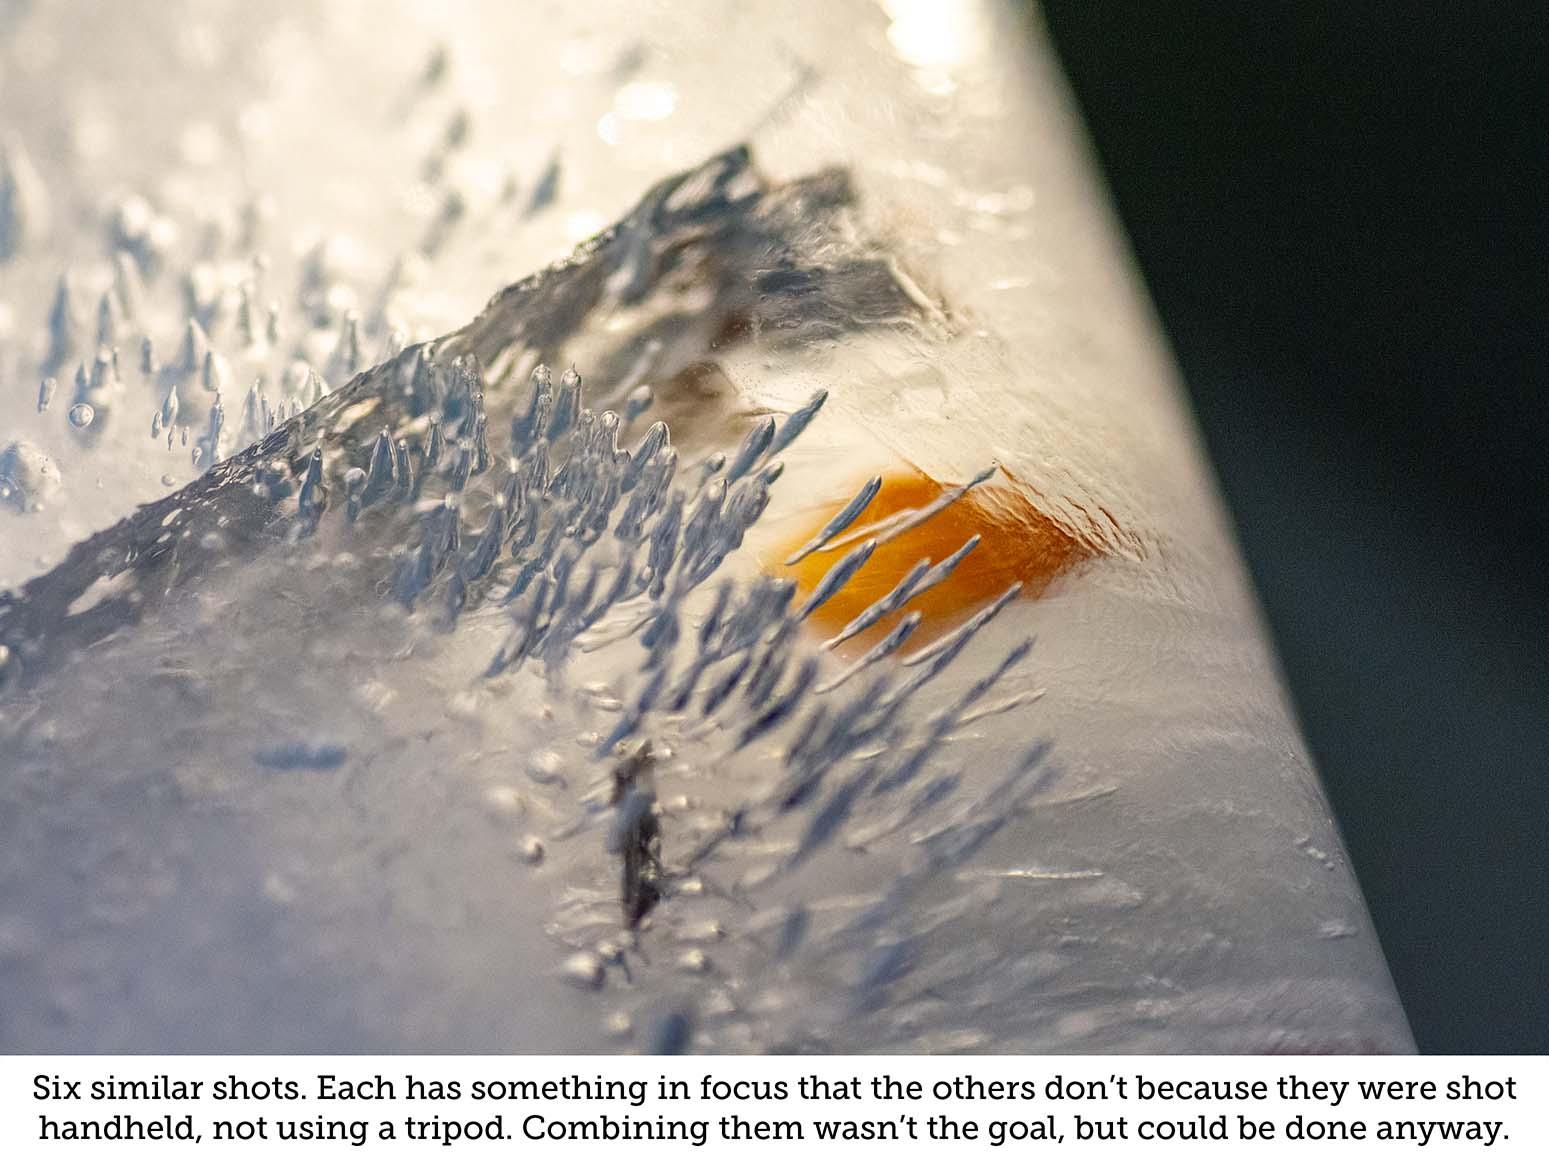
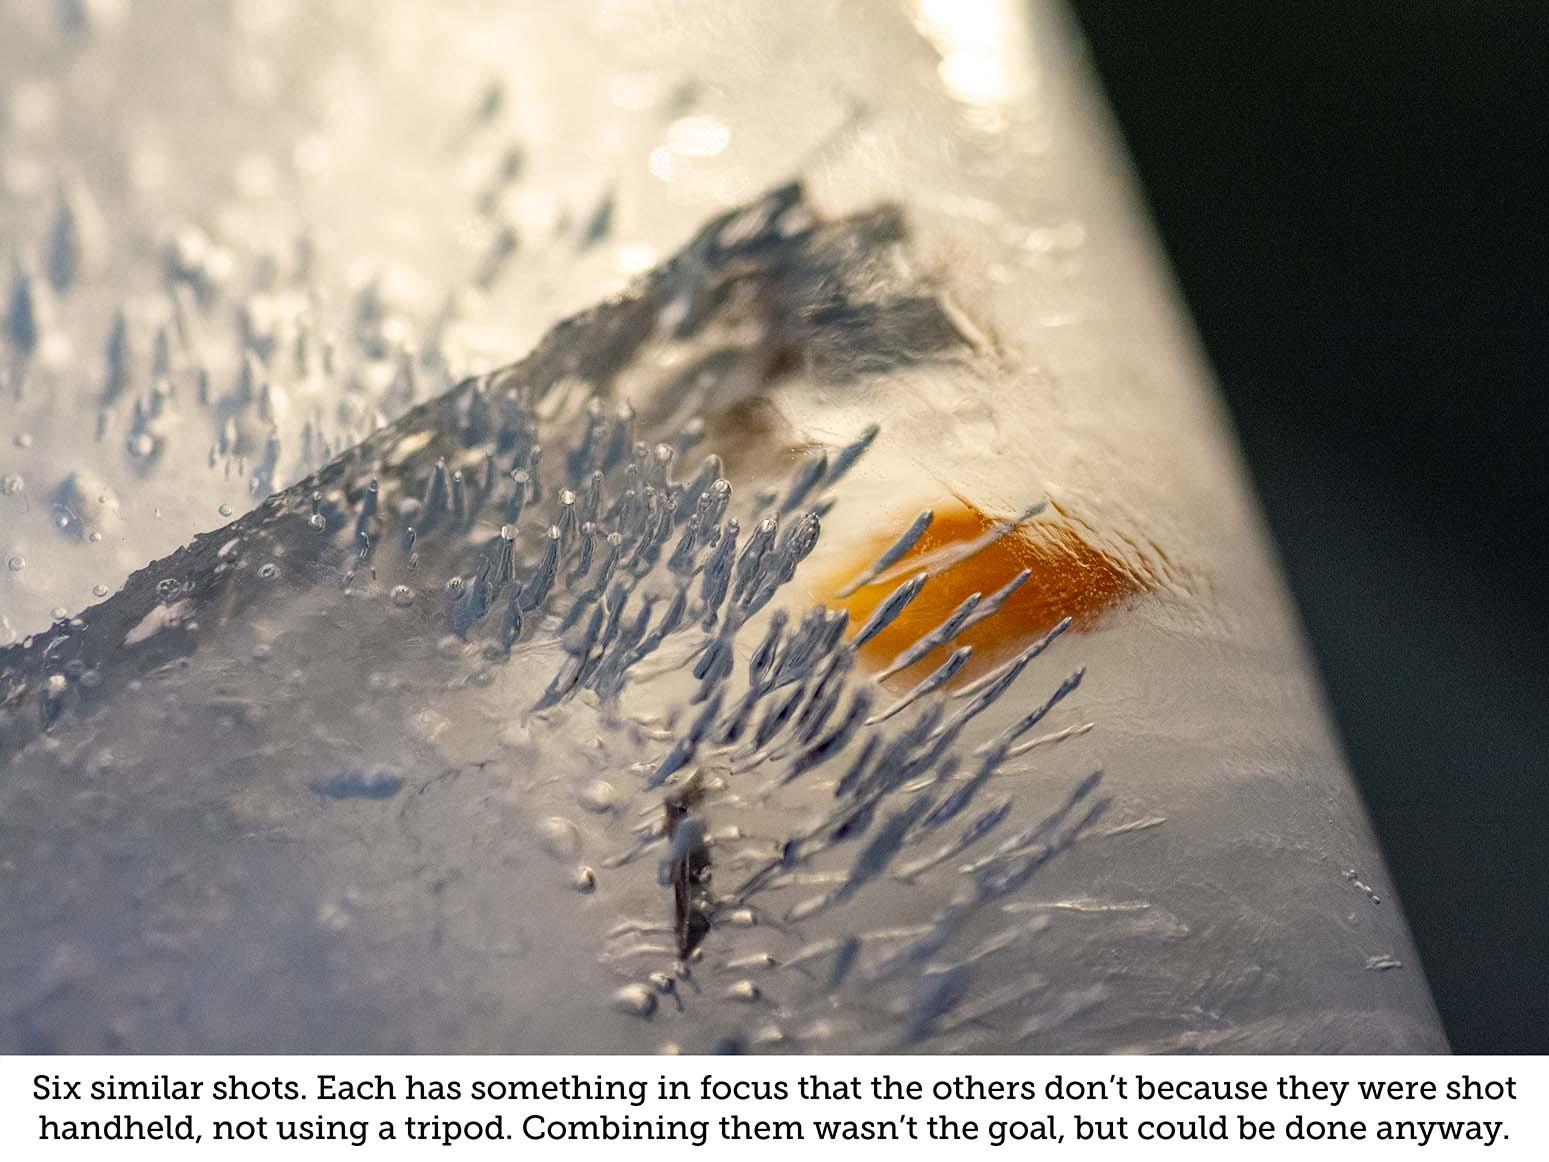
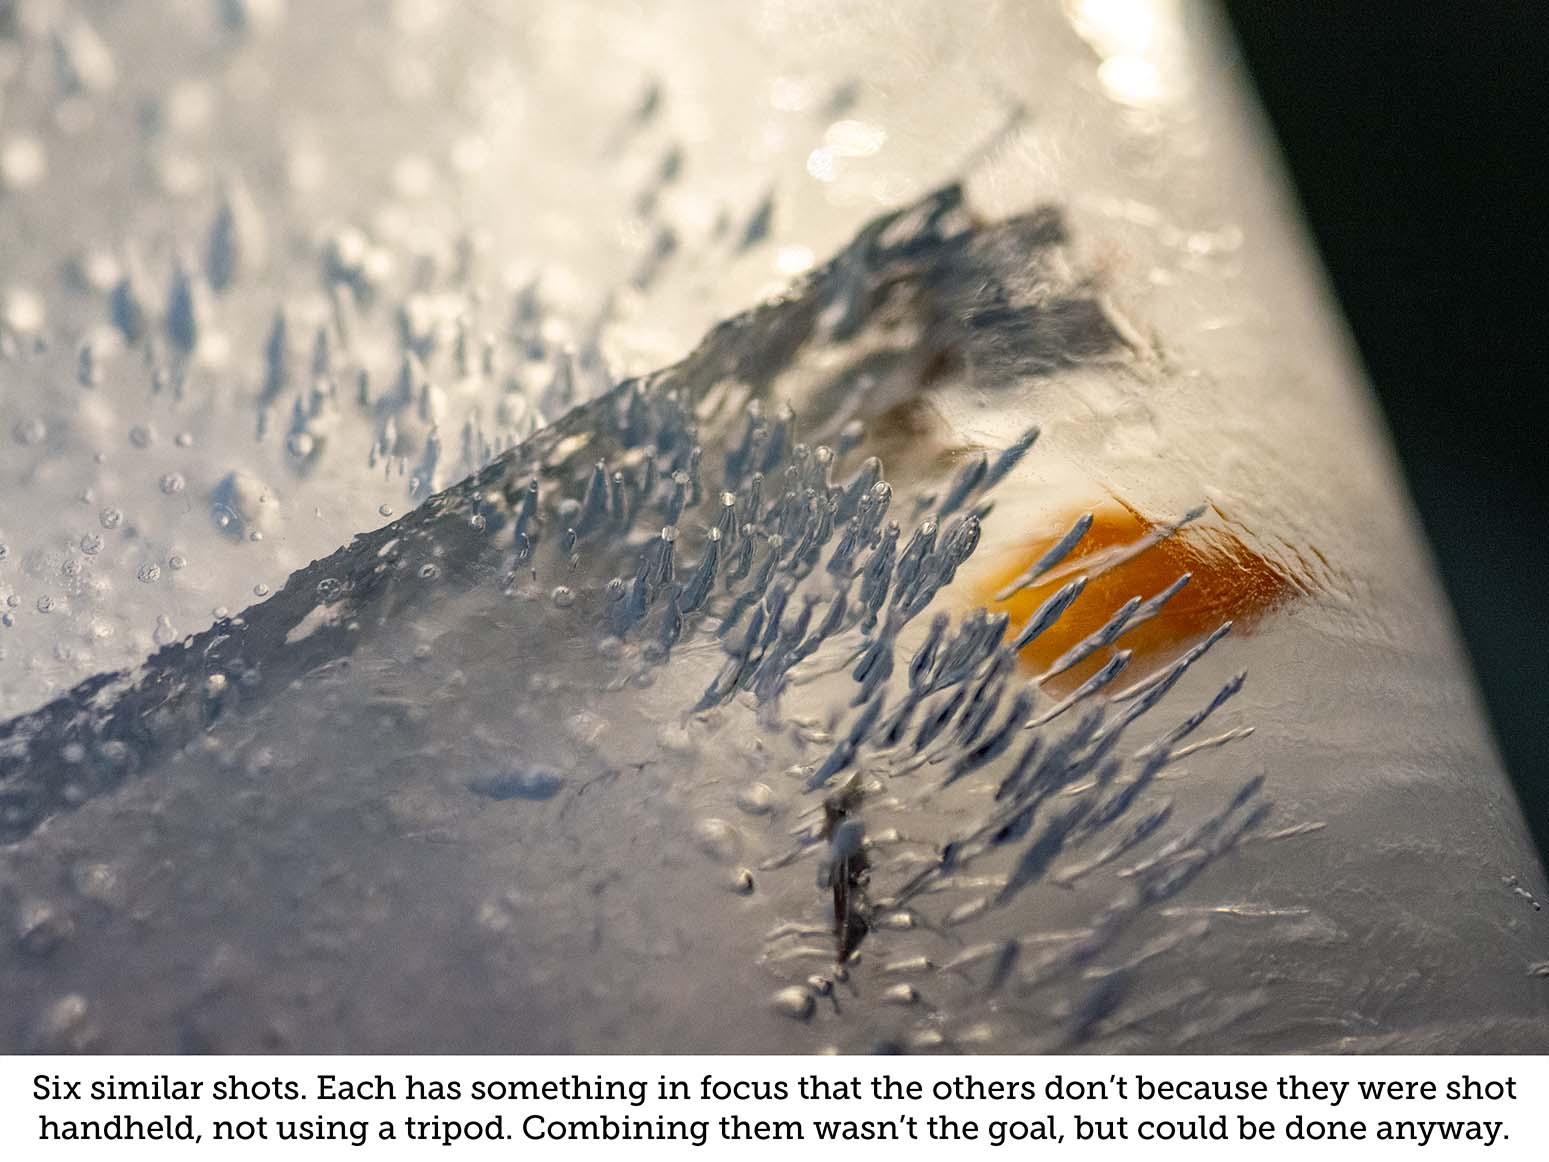
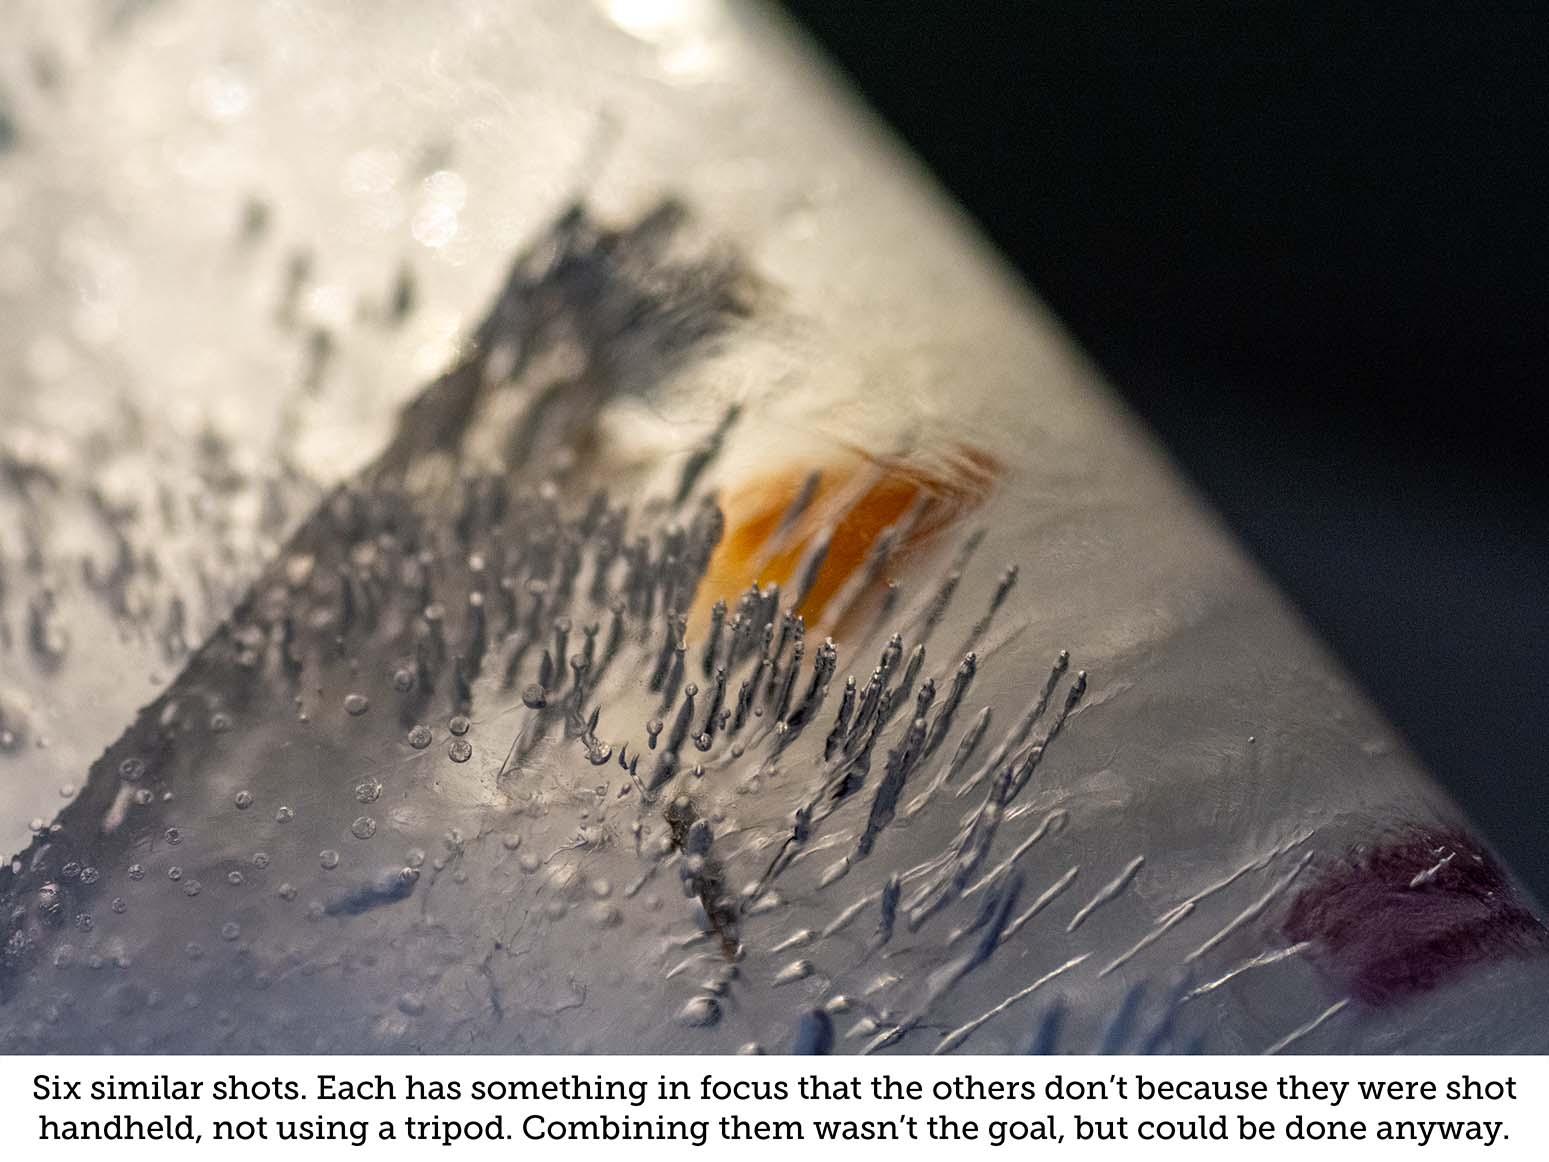
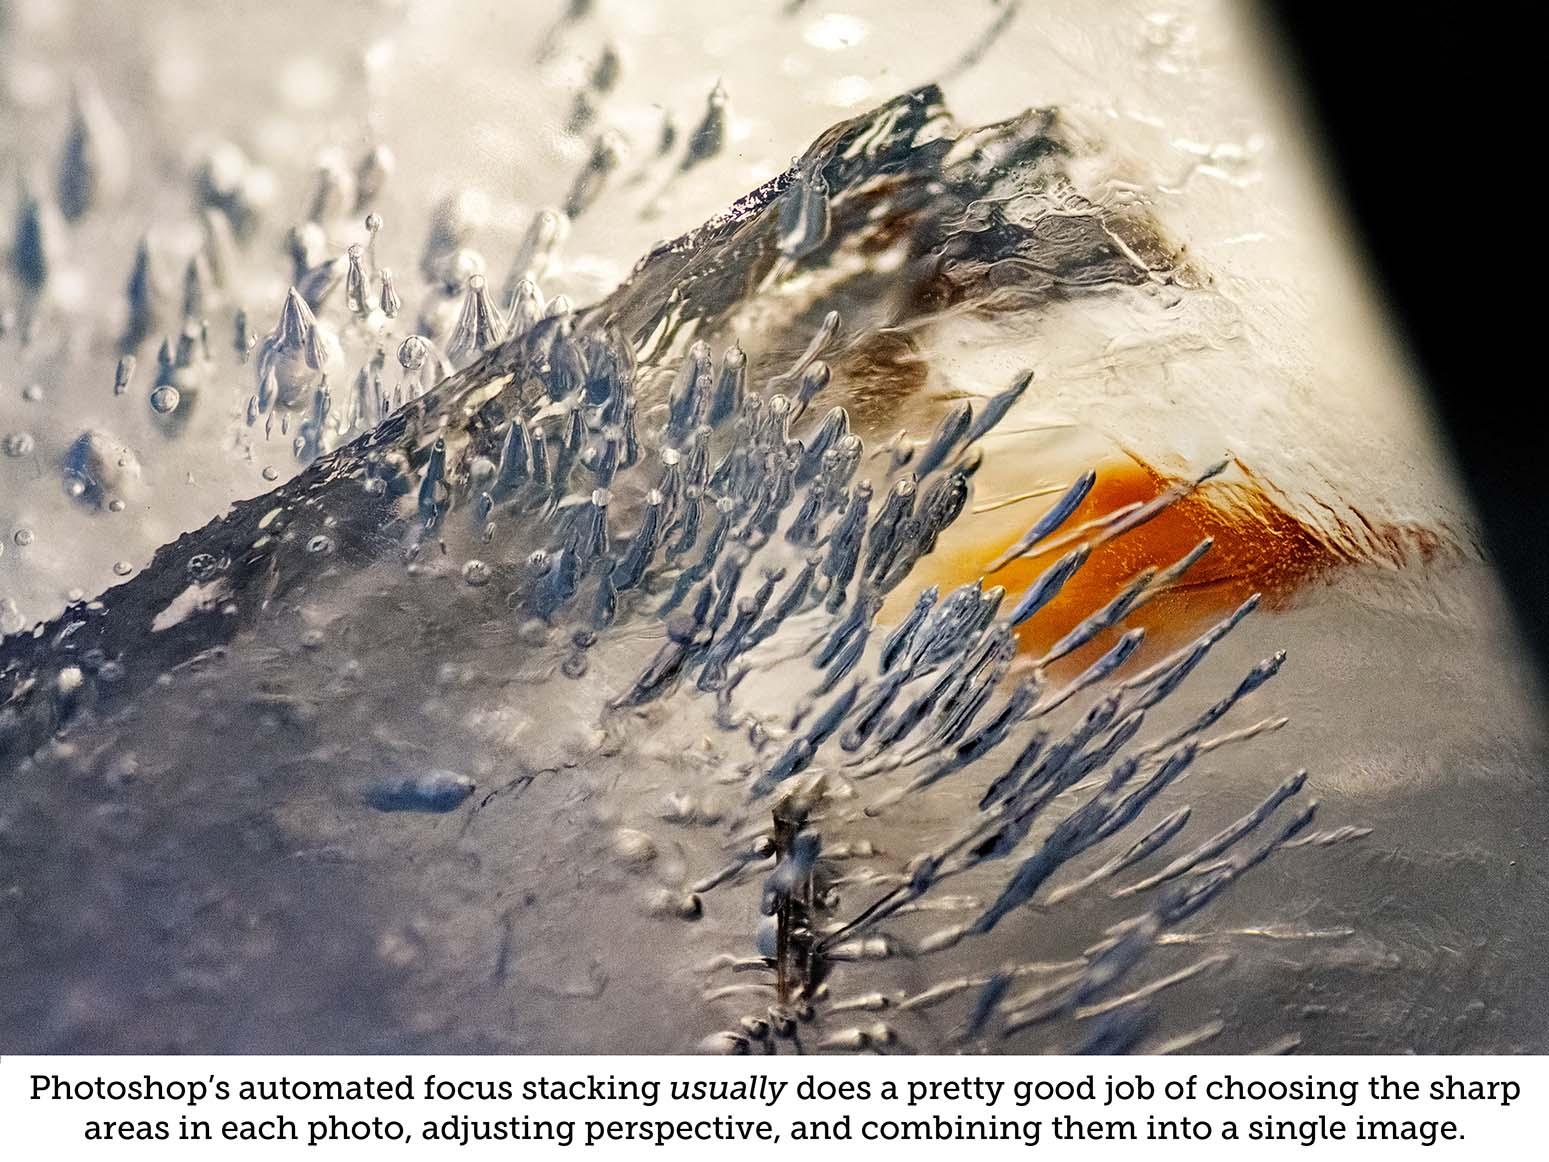
- Focus stacking: If there are several photos that cover the same area of the subject, but each has a slightly different part of it in focus, process them identically, stack them as layers, and use Auto-Align and Auto-Blend to combine their in-focus regions into a single, seamless image.
- I save from Photoshop back to the same folder, keeping the same name and file format as the original file (so the processed photo replaces the camera's jpg), at full resolution. You can always make smaller versions to post online or whatever, but it's good to have the resolution for future uses.
- If you've done a lot of work to get the photo just right, especially if there are lots of layers or complicated manipulations, you might want to save a Photoshop (or whatever) file for future adjustments or ideas.
- I keep the RAW files just in case of some future need, but I rarely use them again and they're big files. If space is tight and you're able to let go,** you can delete them.
*Luminosity masking can do some pretty incredible things, but getting your head around it can be overwhelming at first. I use Tony Kuyper's actions and panels (https://goodlight.us/index.html). There are others out there, but it is what I started with many years ago. You could also learn to make your own masks if you have lots of patience, but it won't be fast or fun.
**Letting go is an important part of this process, at least for me. It's difficult when there are hundreds of cool looking photos, but I have to remind myself that they're just pictures, and I'll probably never sit down and look at all of them. Sometimes there are several equally good and very similar shots and I just have to pick one to keep and delete the rest. I shot over 800 photos of ice in two days this week (that's 1600+ files, since my camera saves a RAW and a jpg of every shot), and I've whittled it down to about 100 images (so 200 files). I deleted many that were pretty good. And I'm not done. I'd like to get it closer to 50 shots.
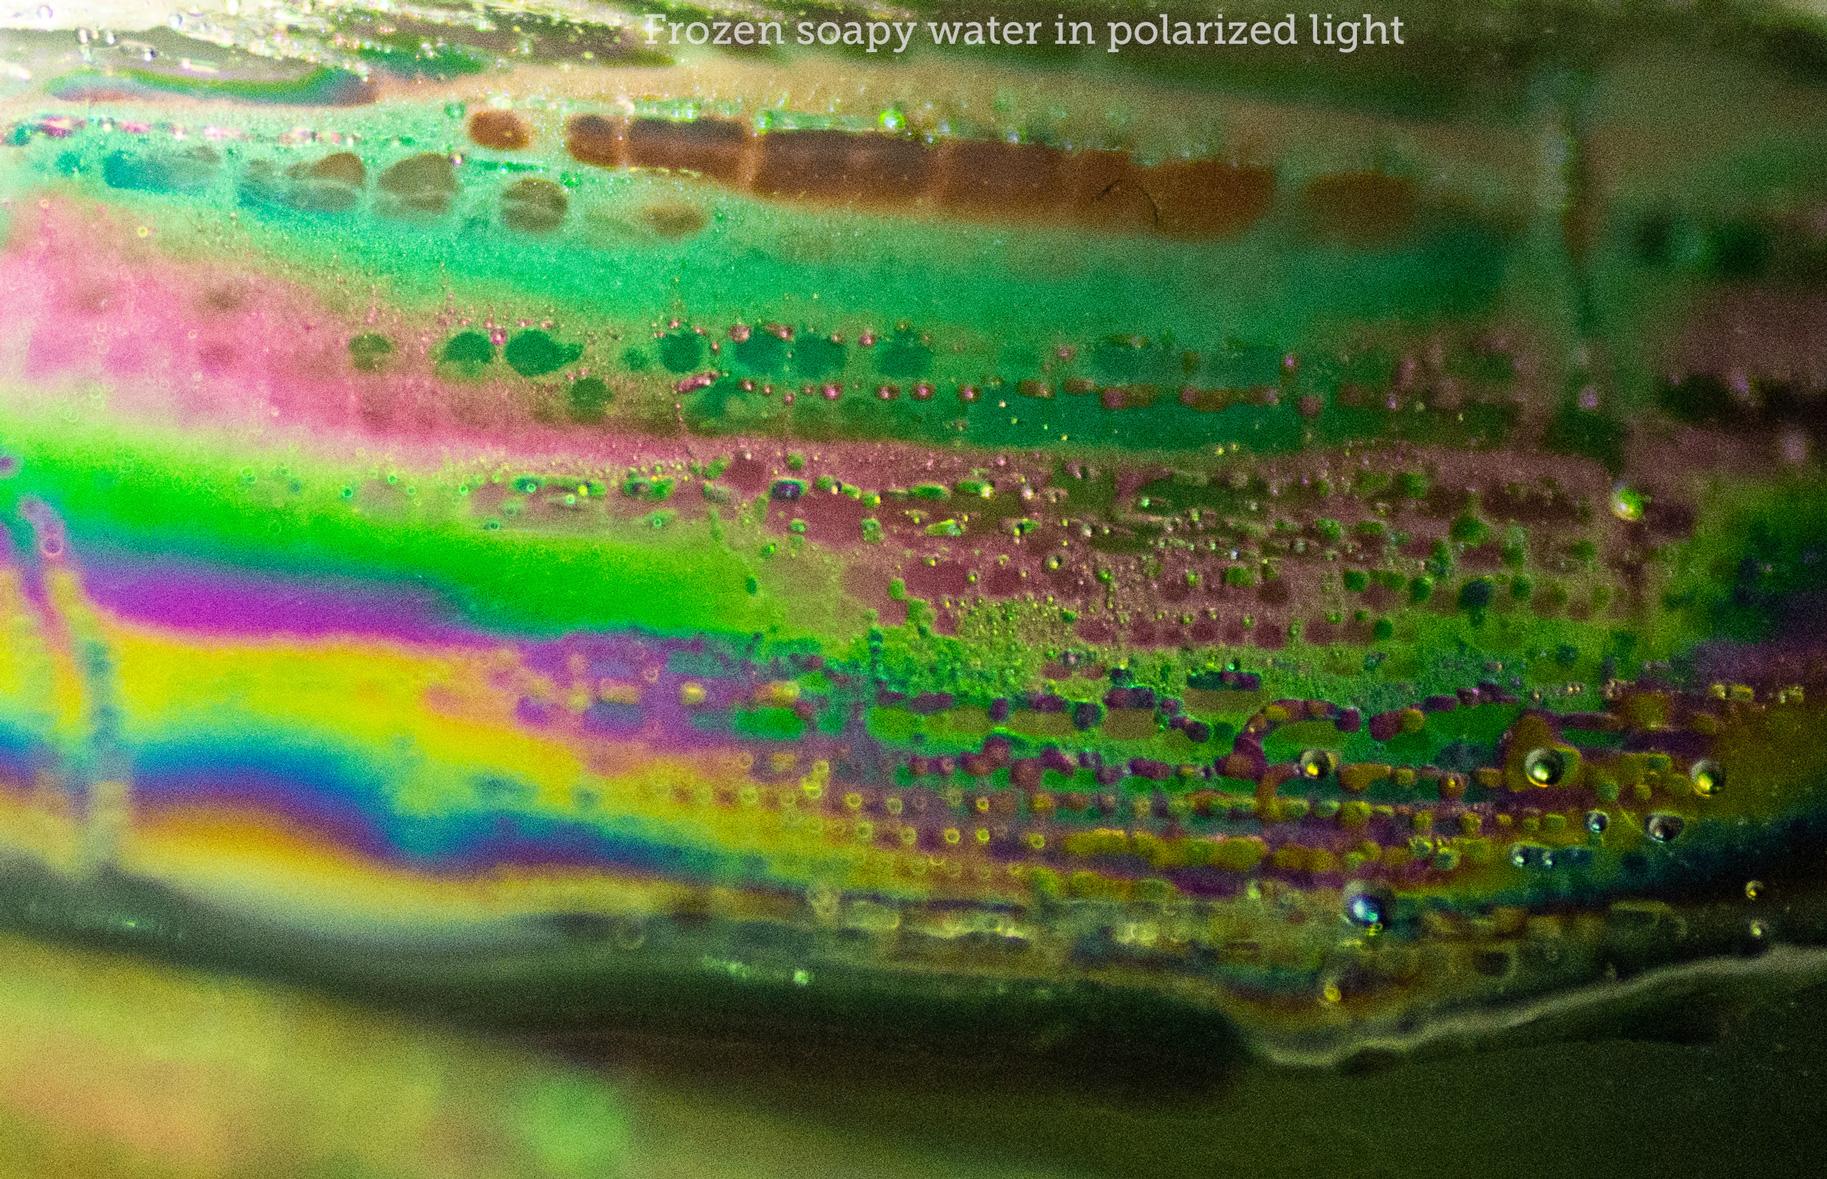
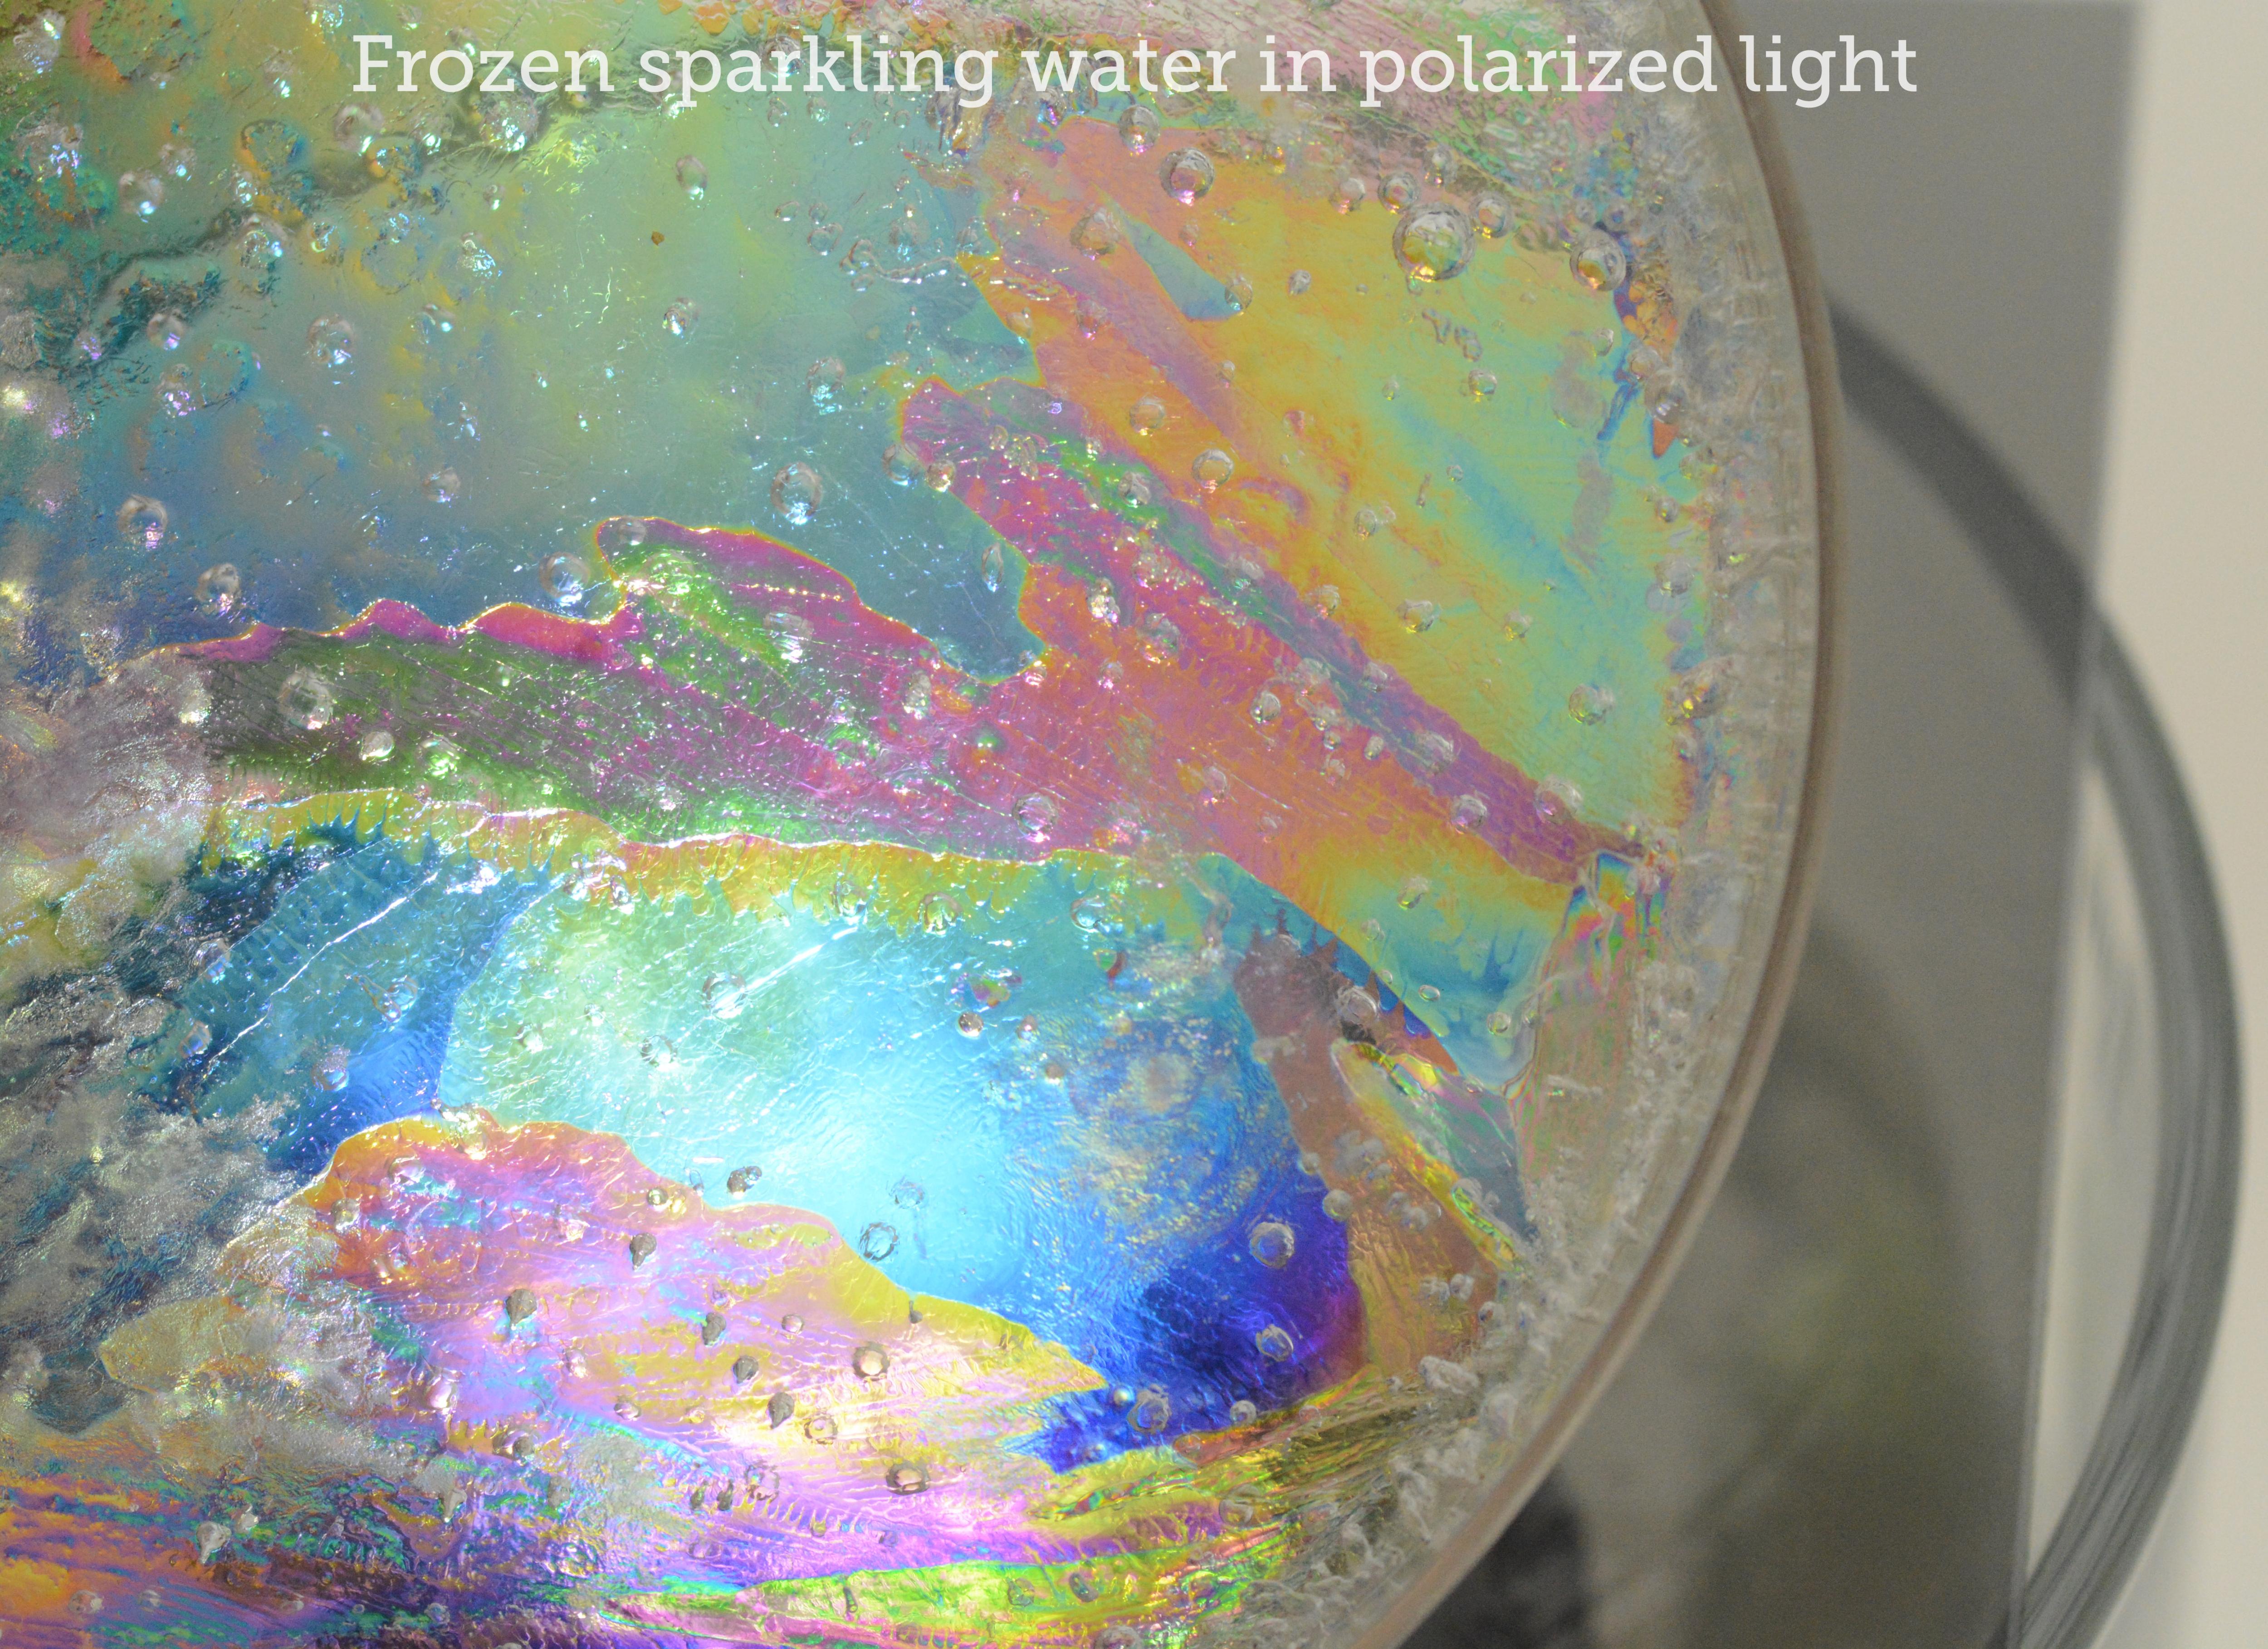
Polarize It! Revealing Hidden Colors in Clear Ice

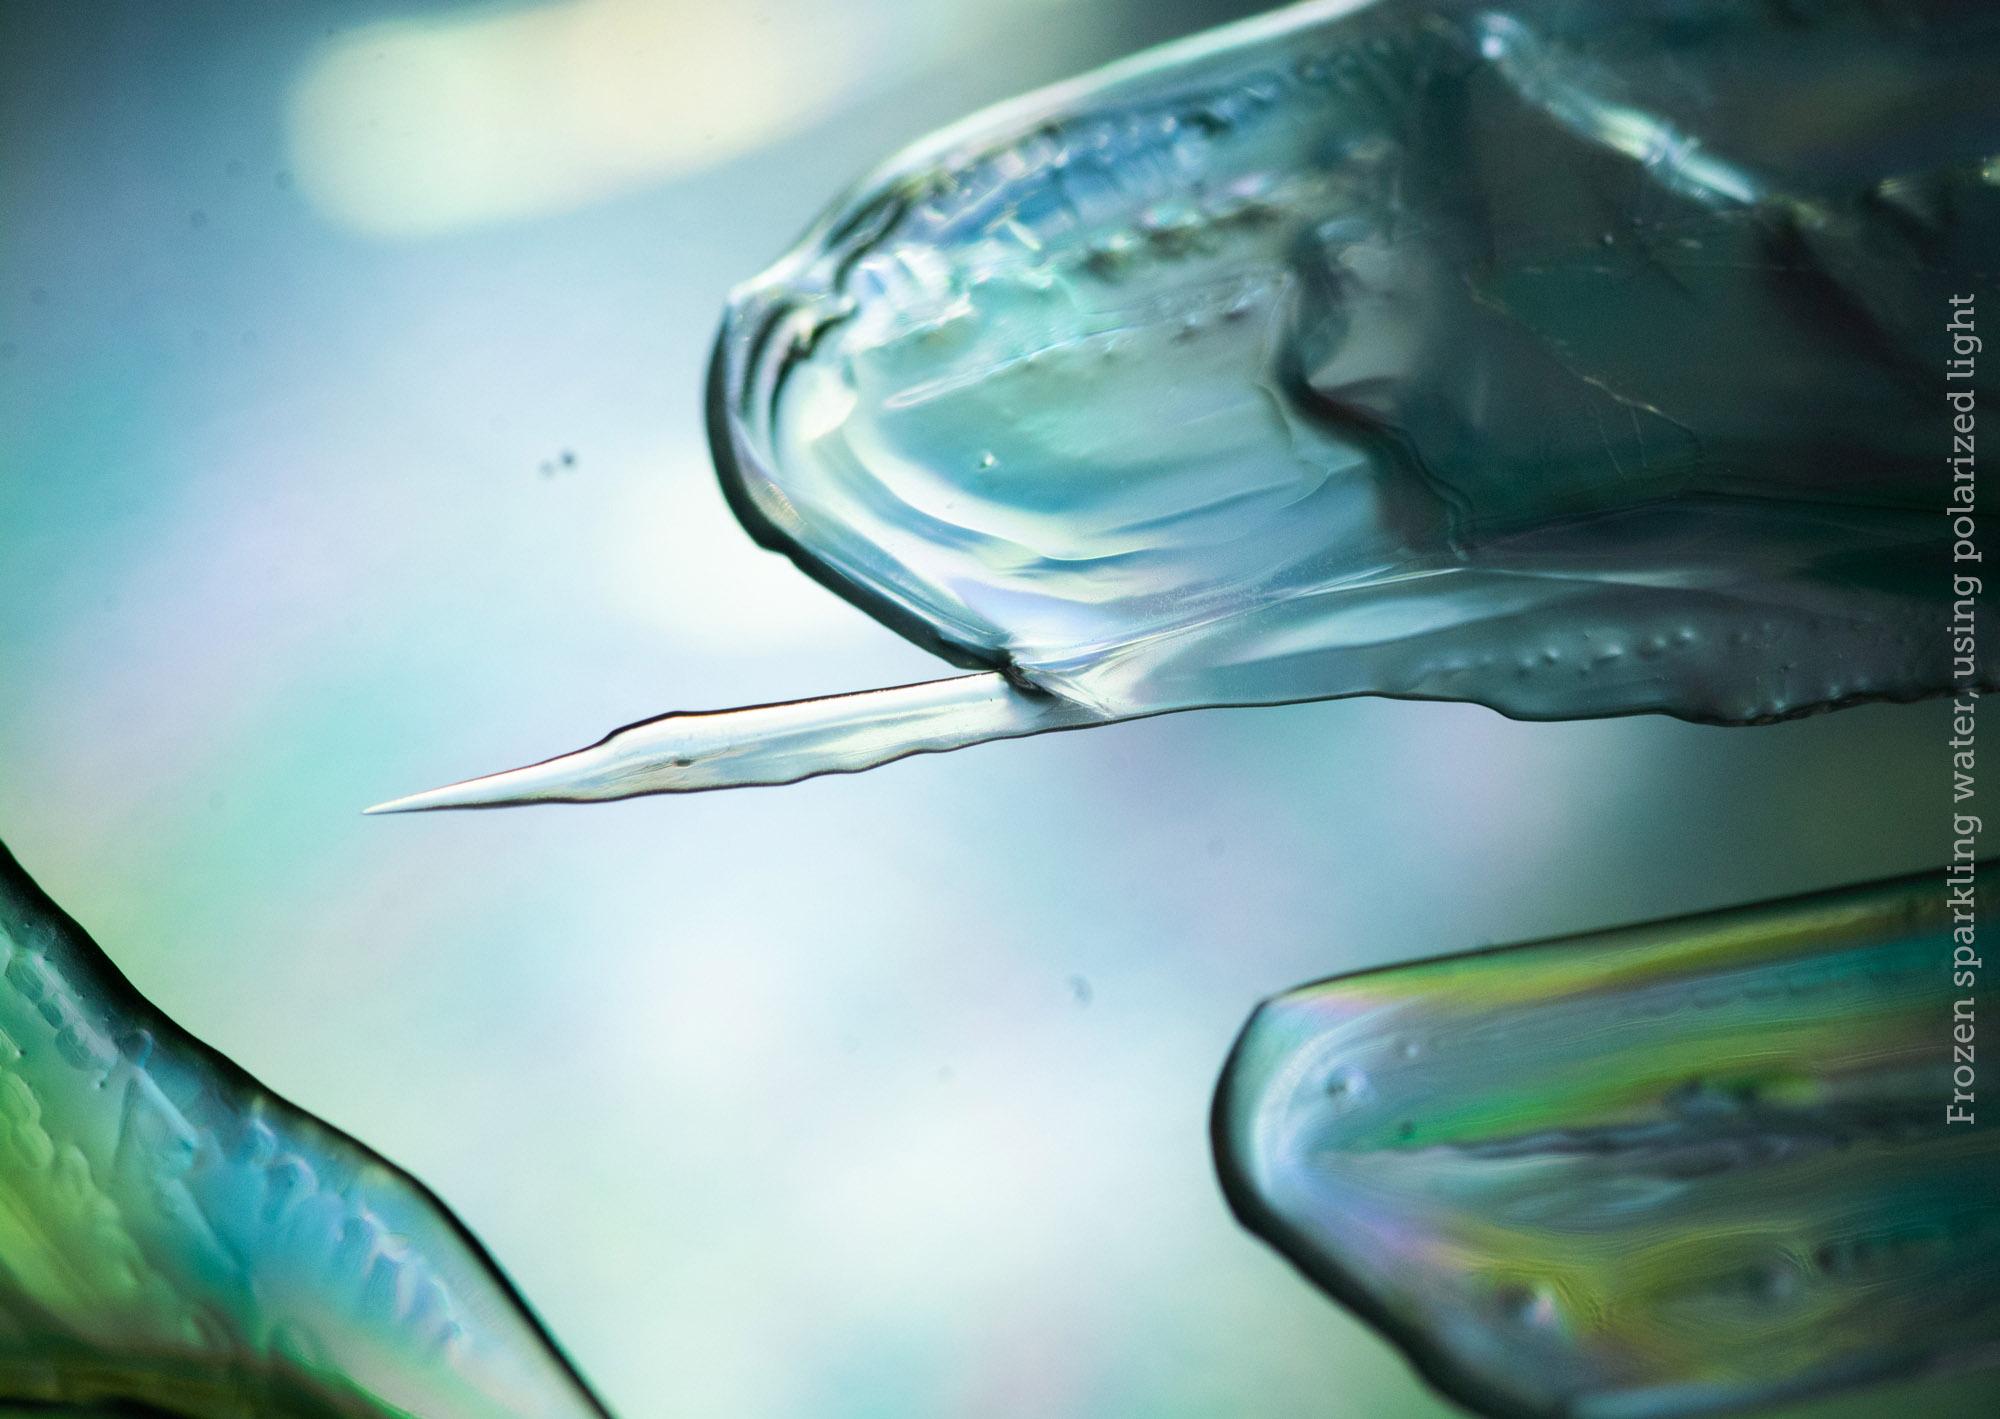
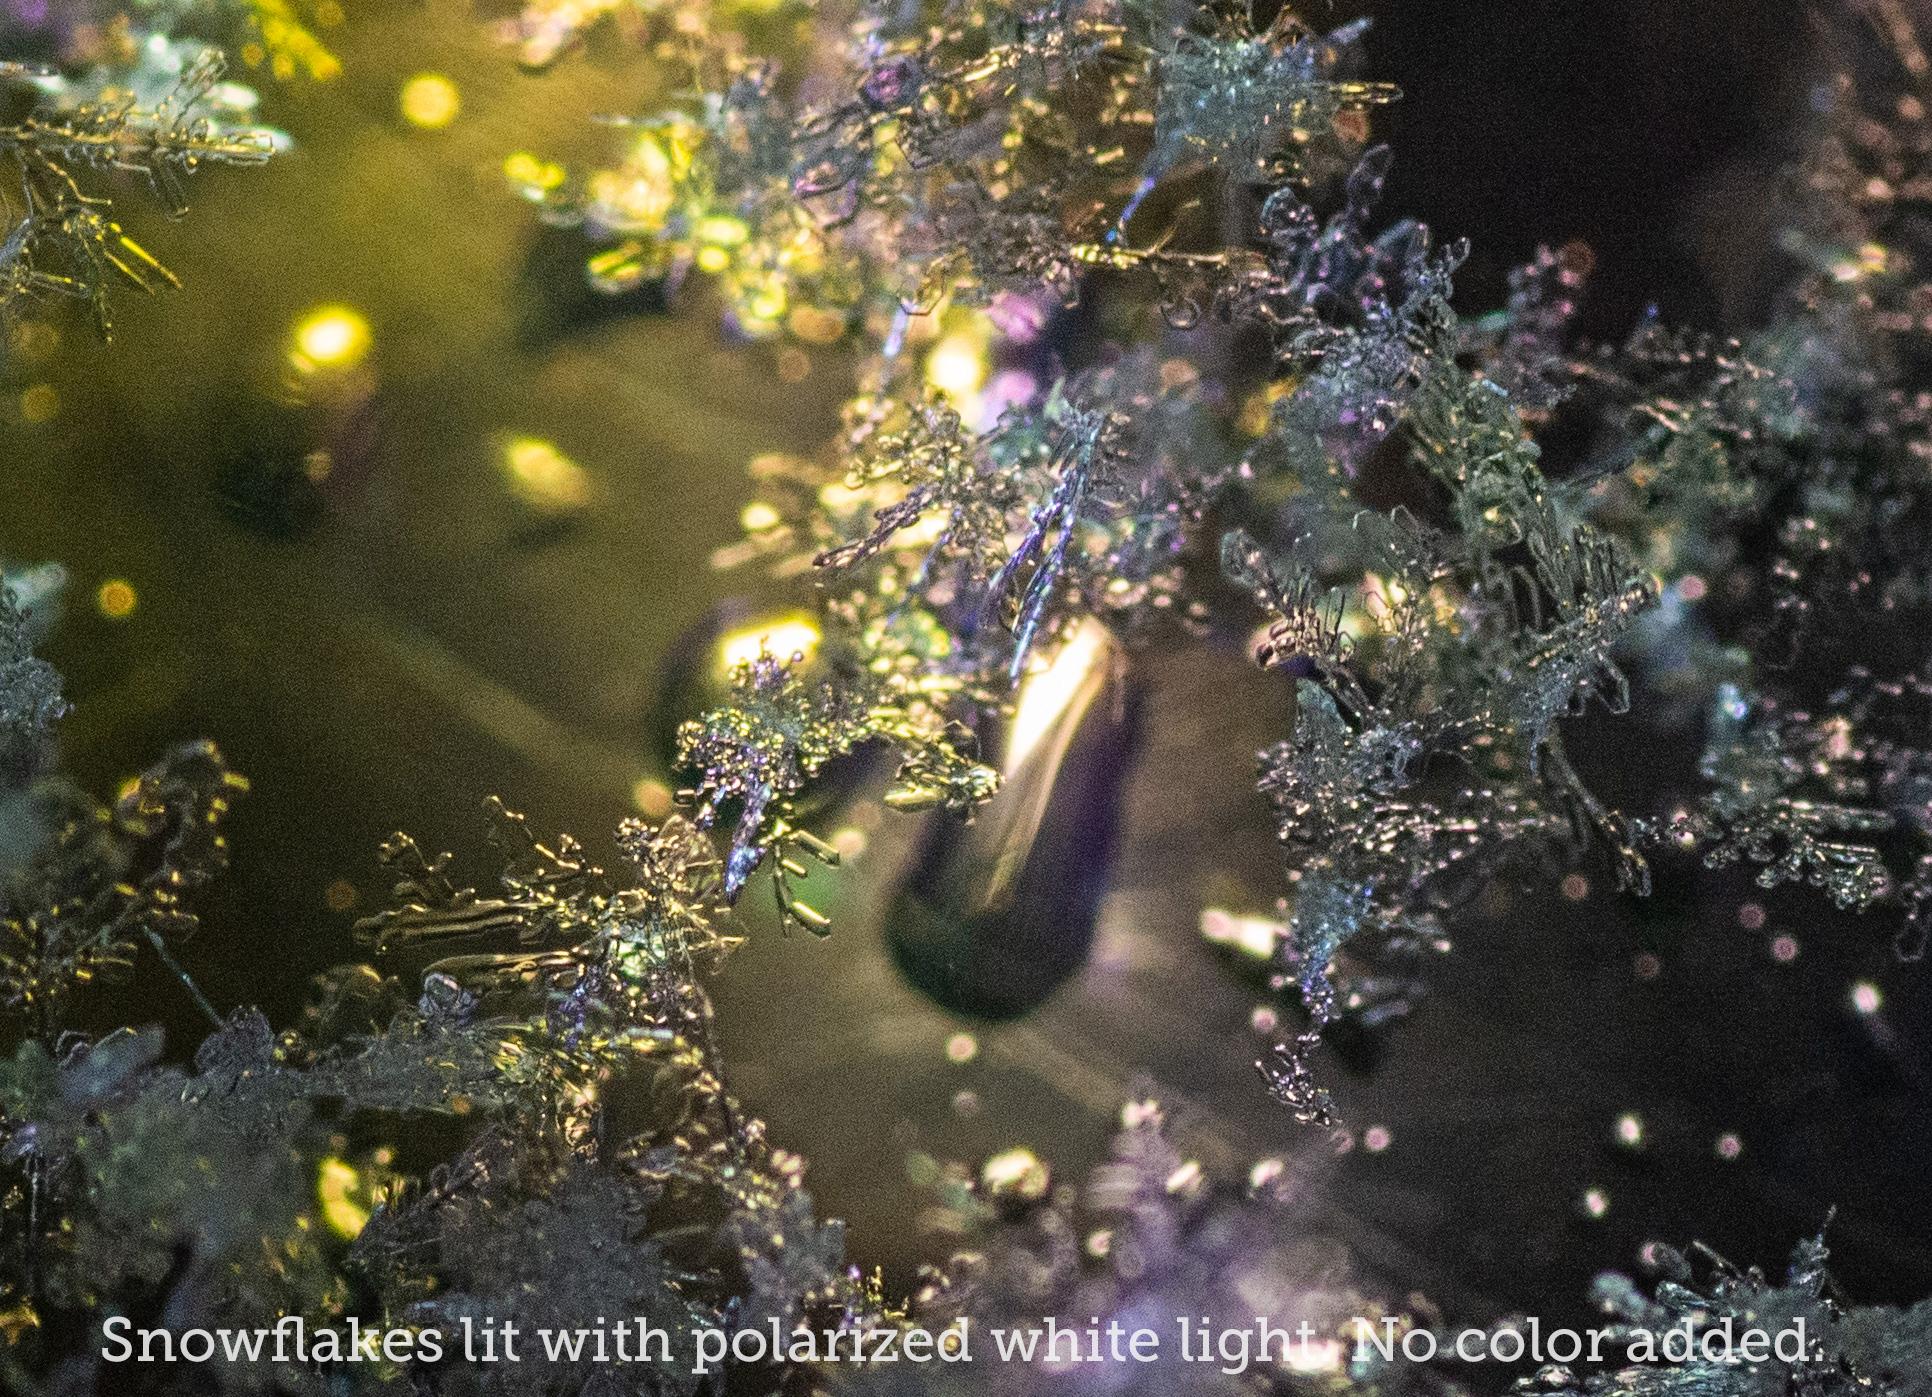
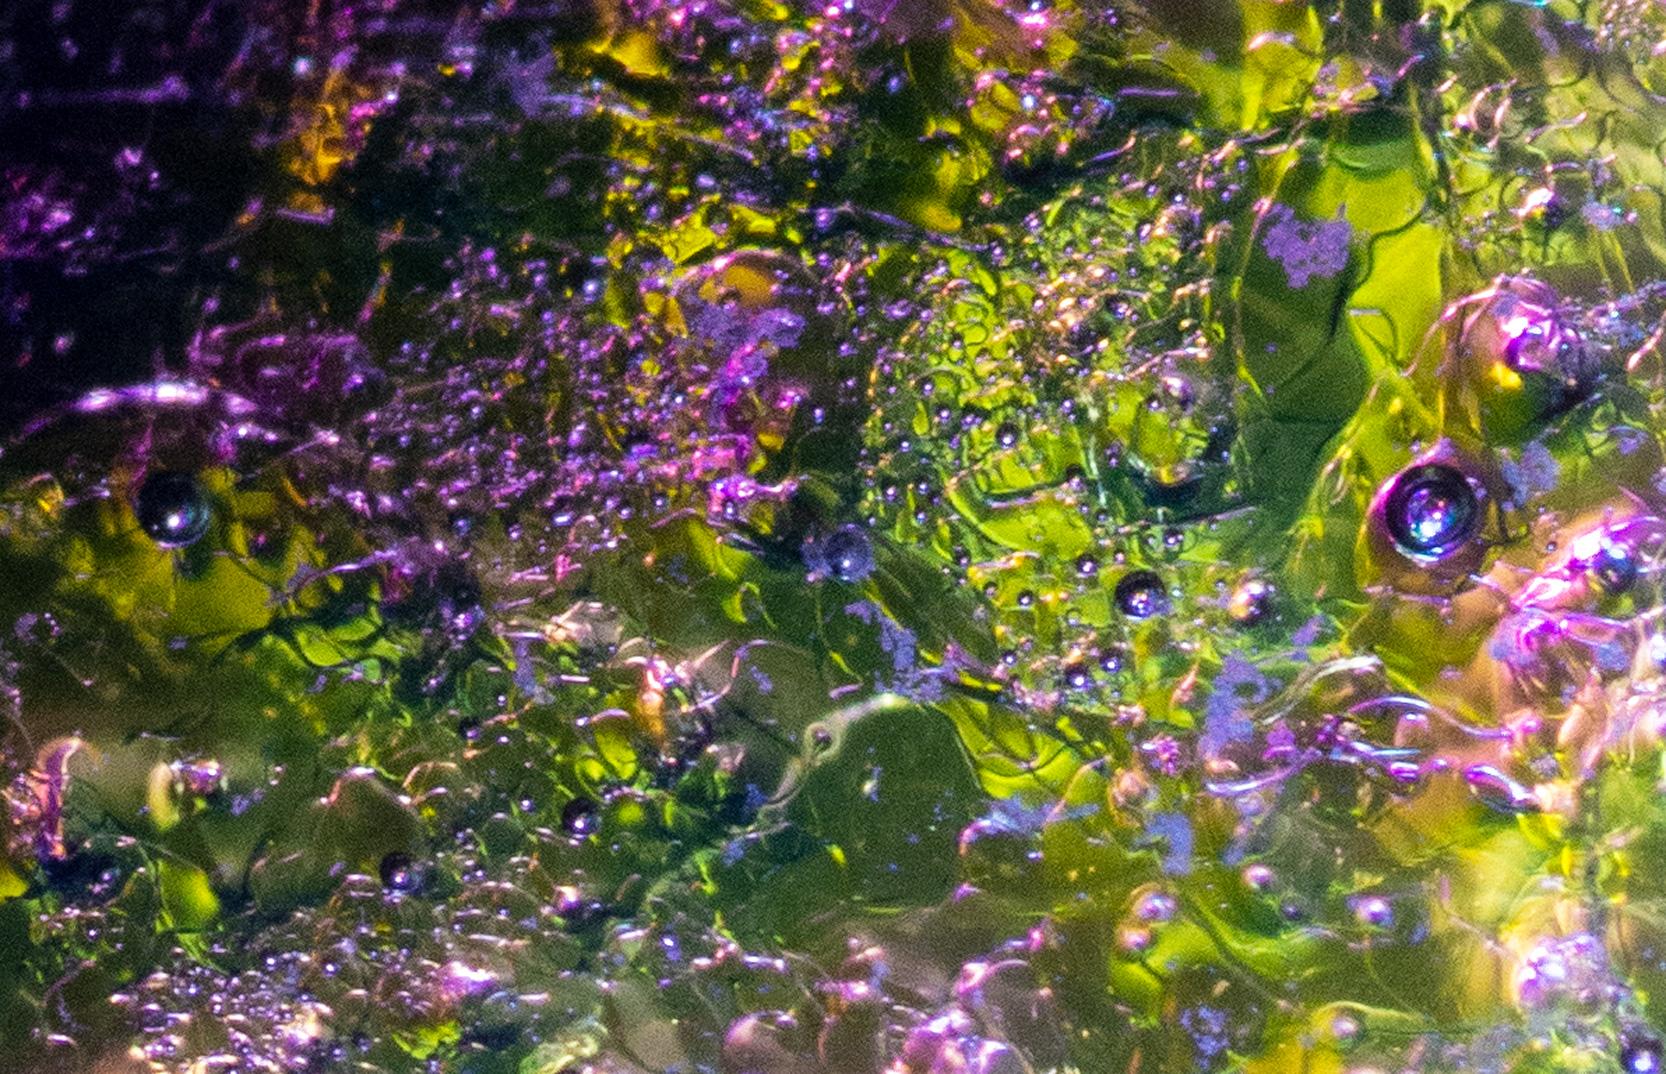
(Click "More Images" above to see them all while reading this section.)
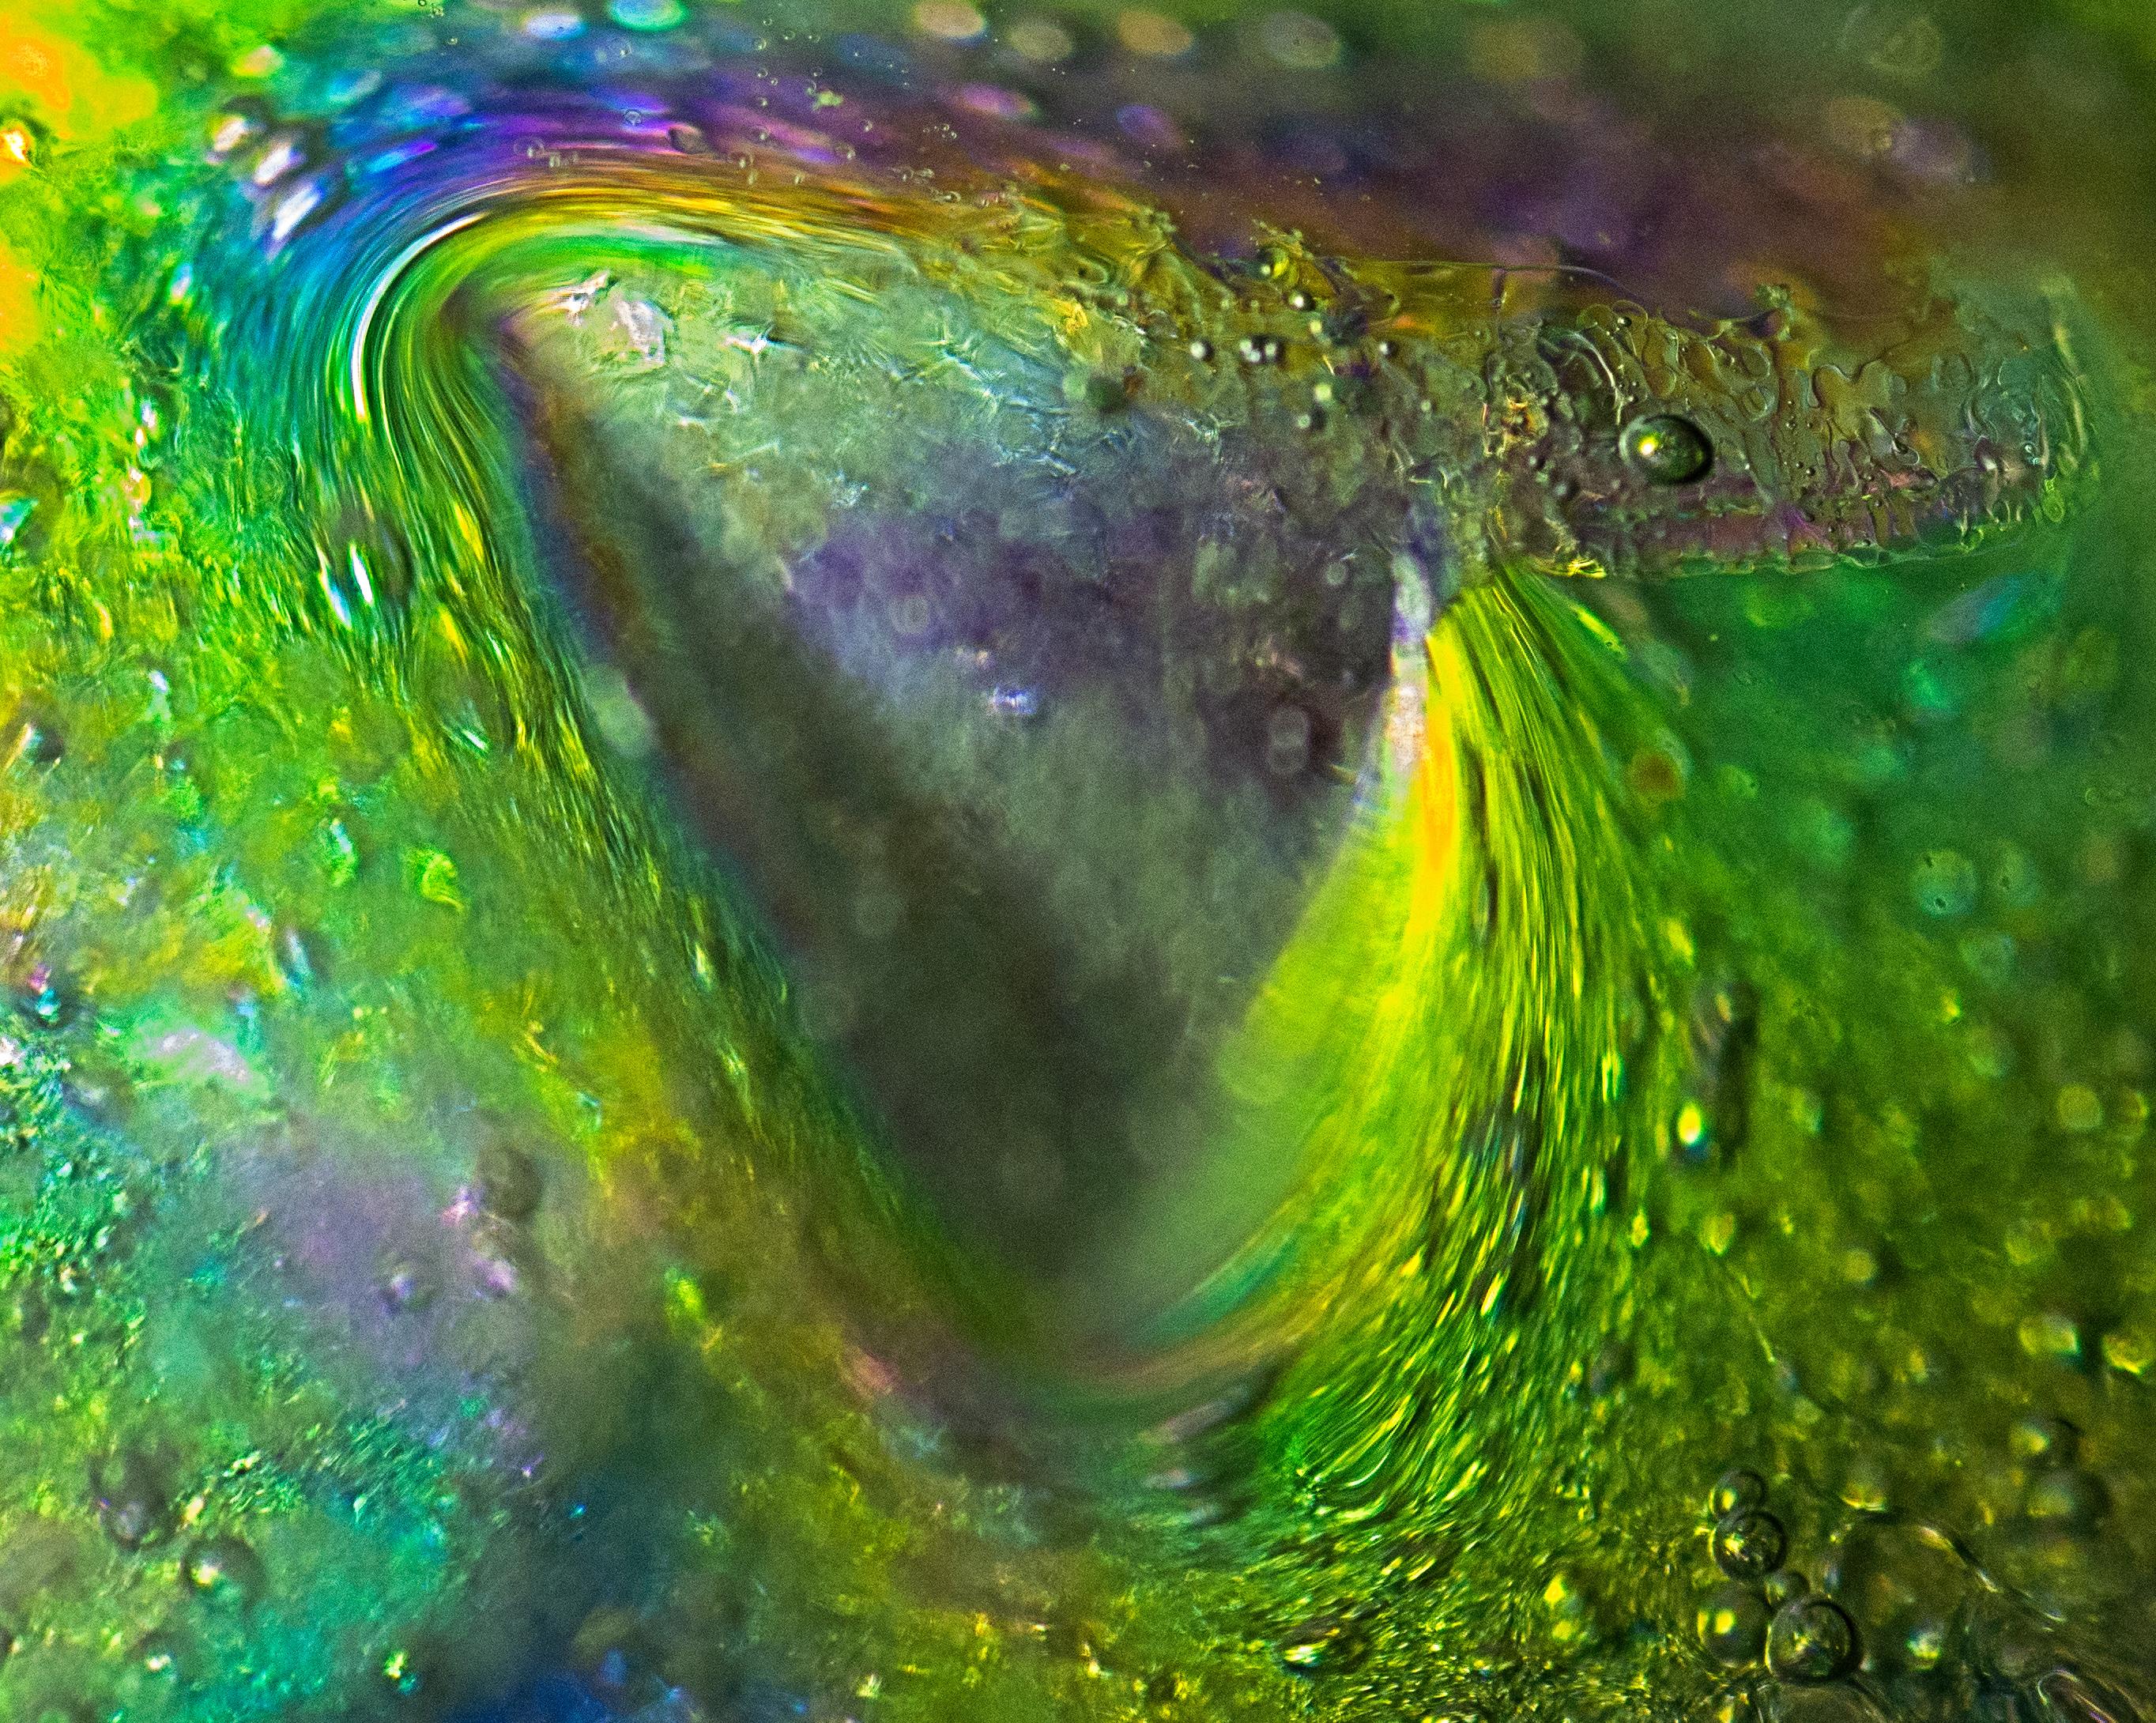
Though these are processed and color-adjusted, I did not add color or saturation to the photos. Those crazy colors were put there by physics!
(I should have made sure to get shots of the same things but without the polarizing filter, just to prove that the ice was clear and the light was white, but I was having too much fun.)
Polarized light going through ice crystals makes colors due to birefringence, or double refraction, which I'm not going to explain here. Suffice it to say that if you put a polarizer under something birefringent and another on your camera, you get wild explosions of color. Read more about it here: https://petapixel.com/2017/03/10/use-polarized-lighting-techniques-capture-cool-color-effects/ or here: https://www.diyphotography.net/how-to-take-colorful-macro-photos-of-crystals-without-a-microscope/ (with videos!)
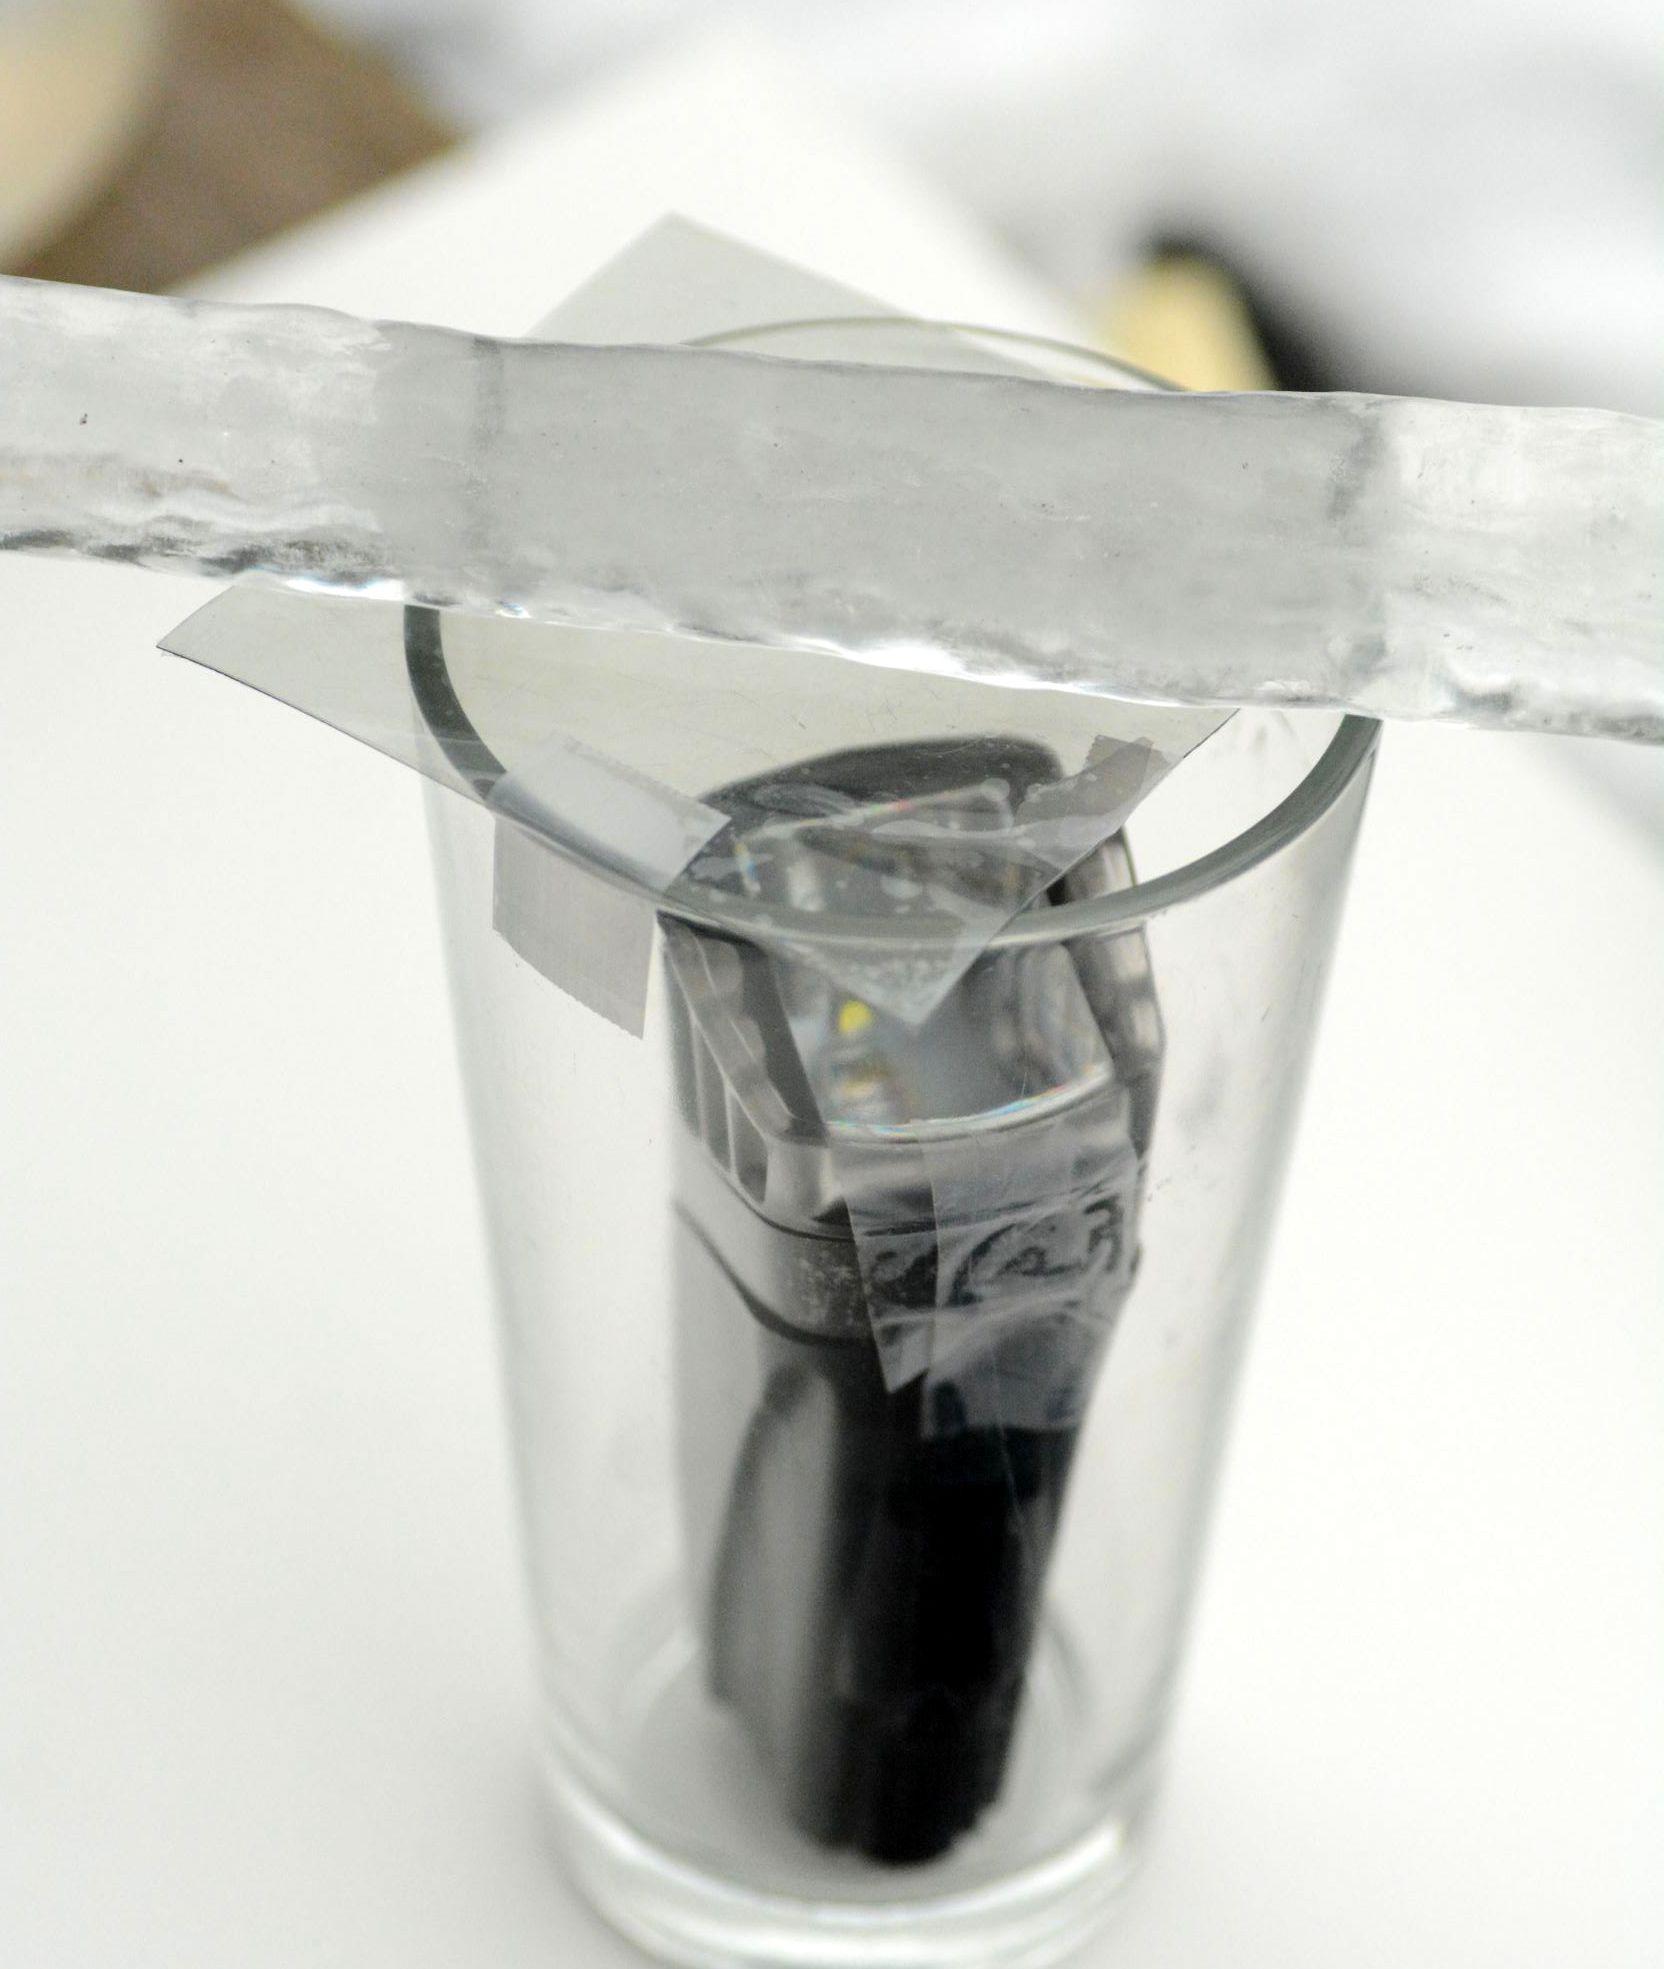
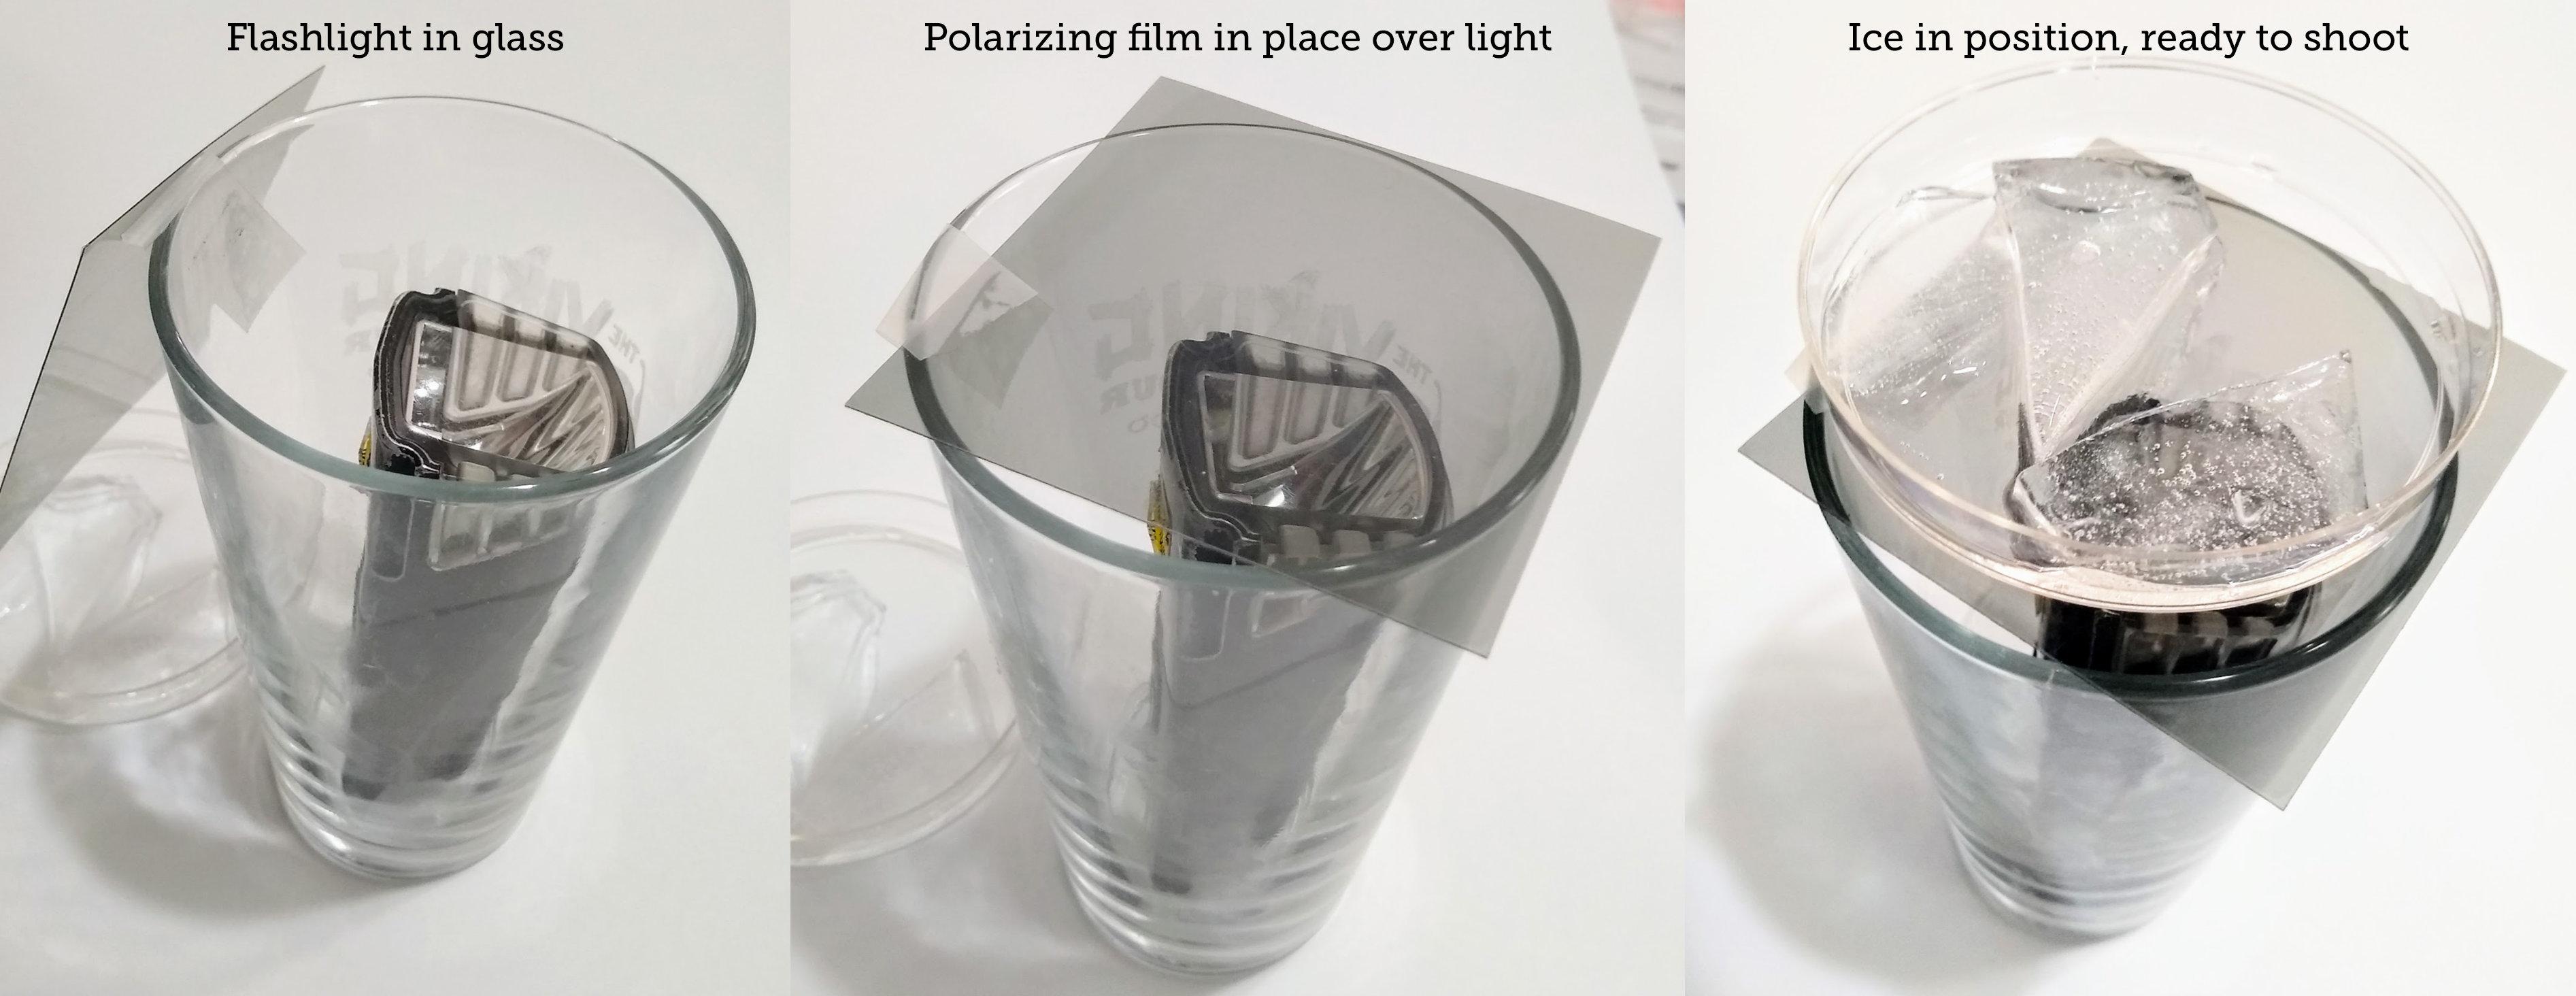
I used a beer glass to hold a flashlight under the polarizing film and a petri dish on top of the film to hold the ice. To get different views of the ice I can rotate the petri dish. To get different colors I can rotate the whole thing so the polarizing film's angle changes OR I can rotate the circular polarizing filter on my camera OR I can move myself and the camera.
You can buy squares of linear polarizing film (like the one on the glass in the first photo) online. They're usually about 3-4 inches wide.
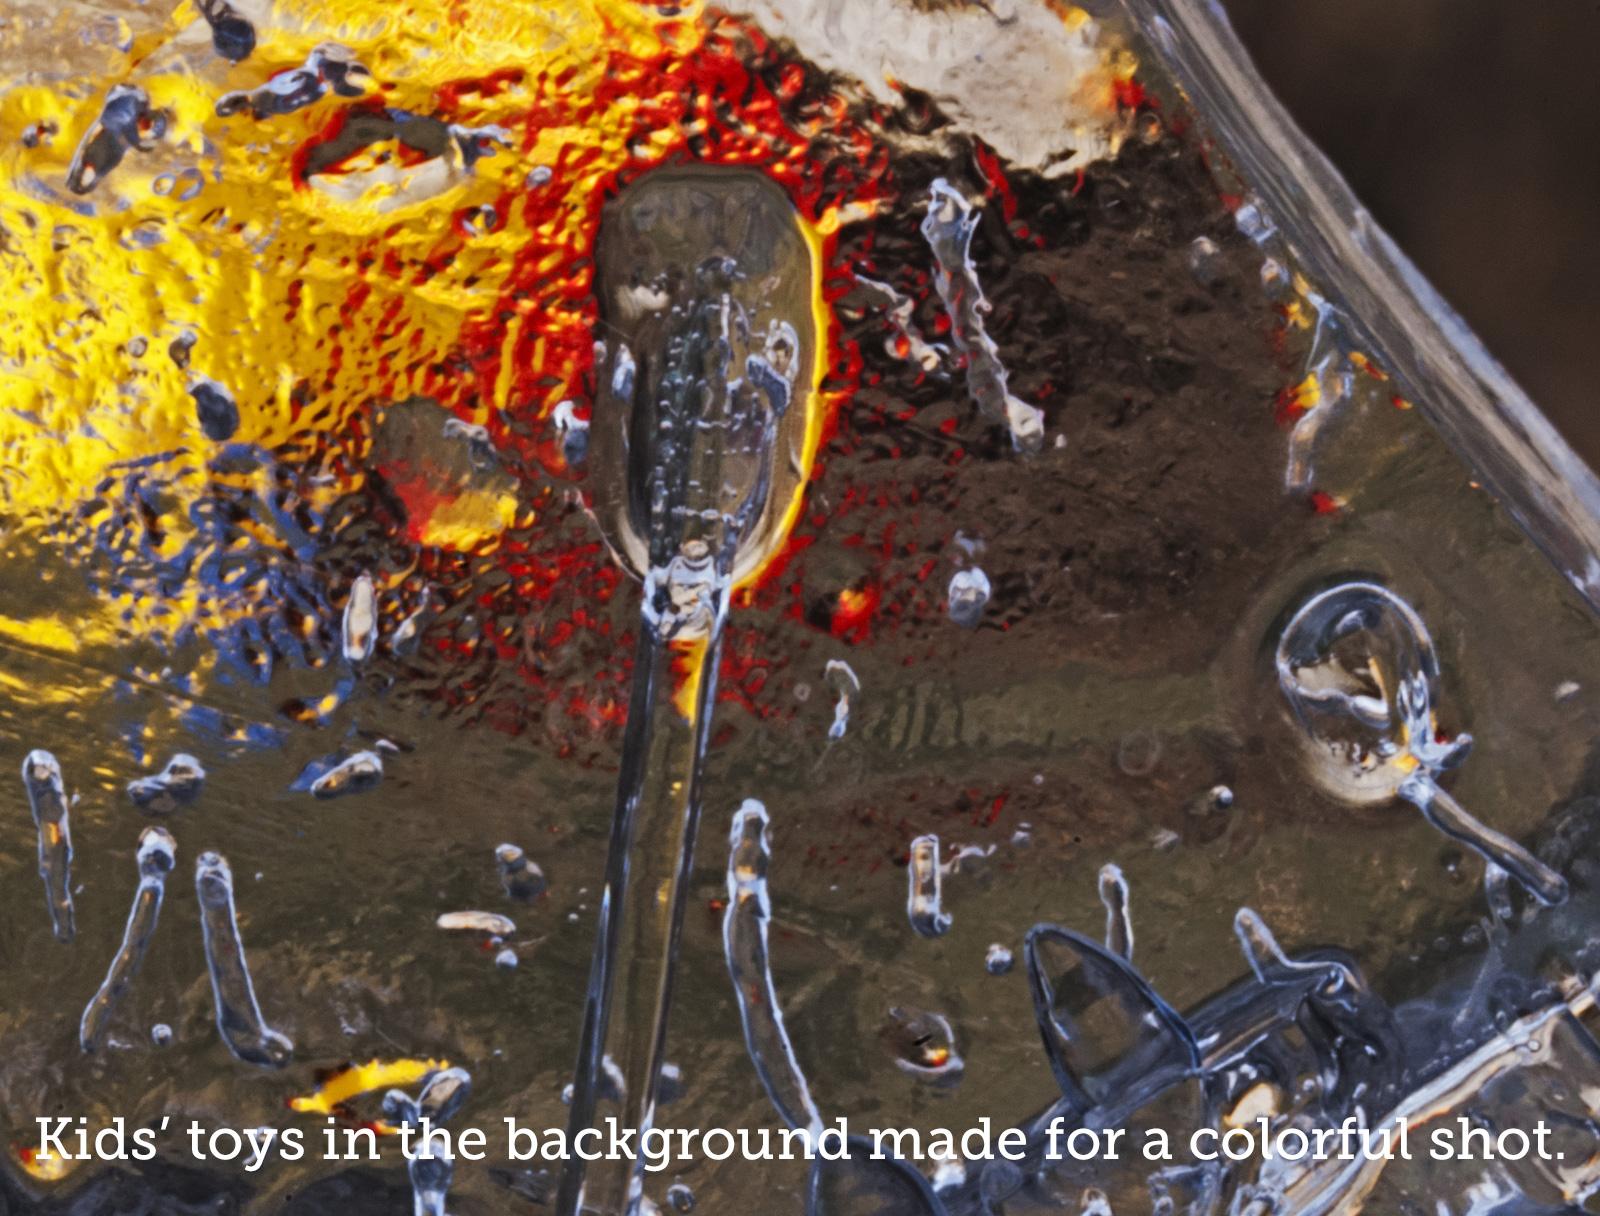
Other Ways to Play Part 1: Inclusions and Distortions

(Click "More Images" above to see them all while reading this section.)
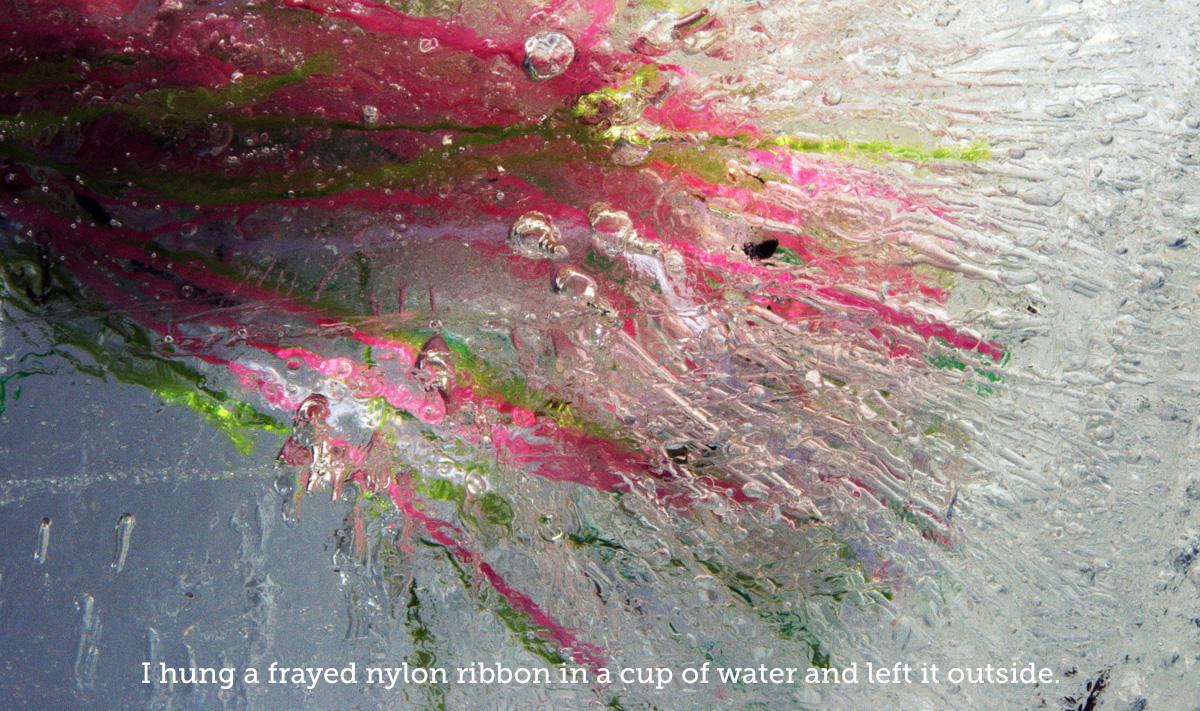
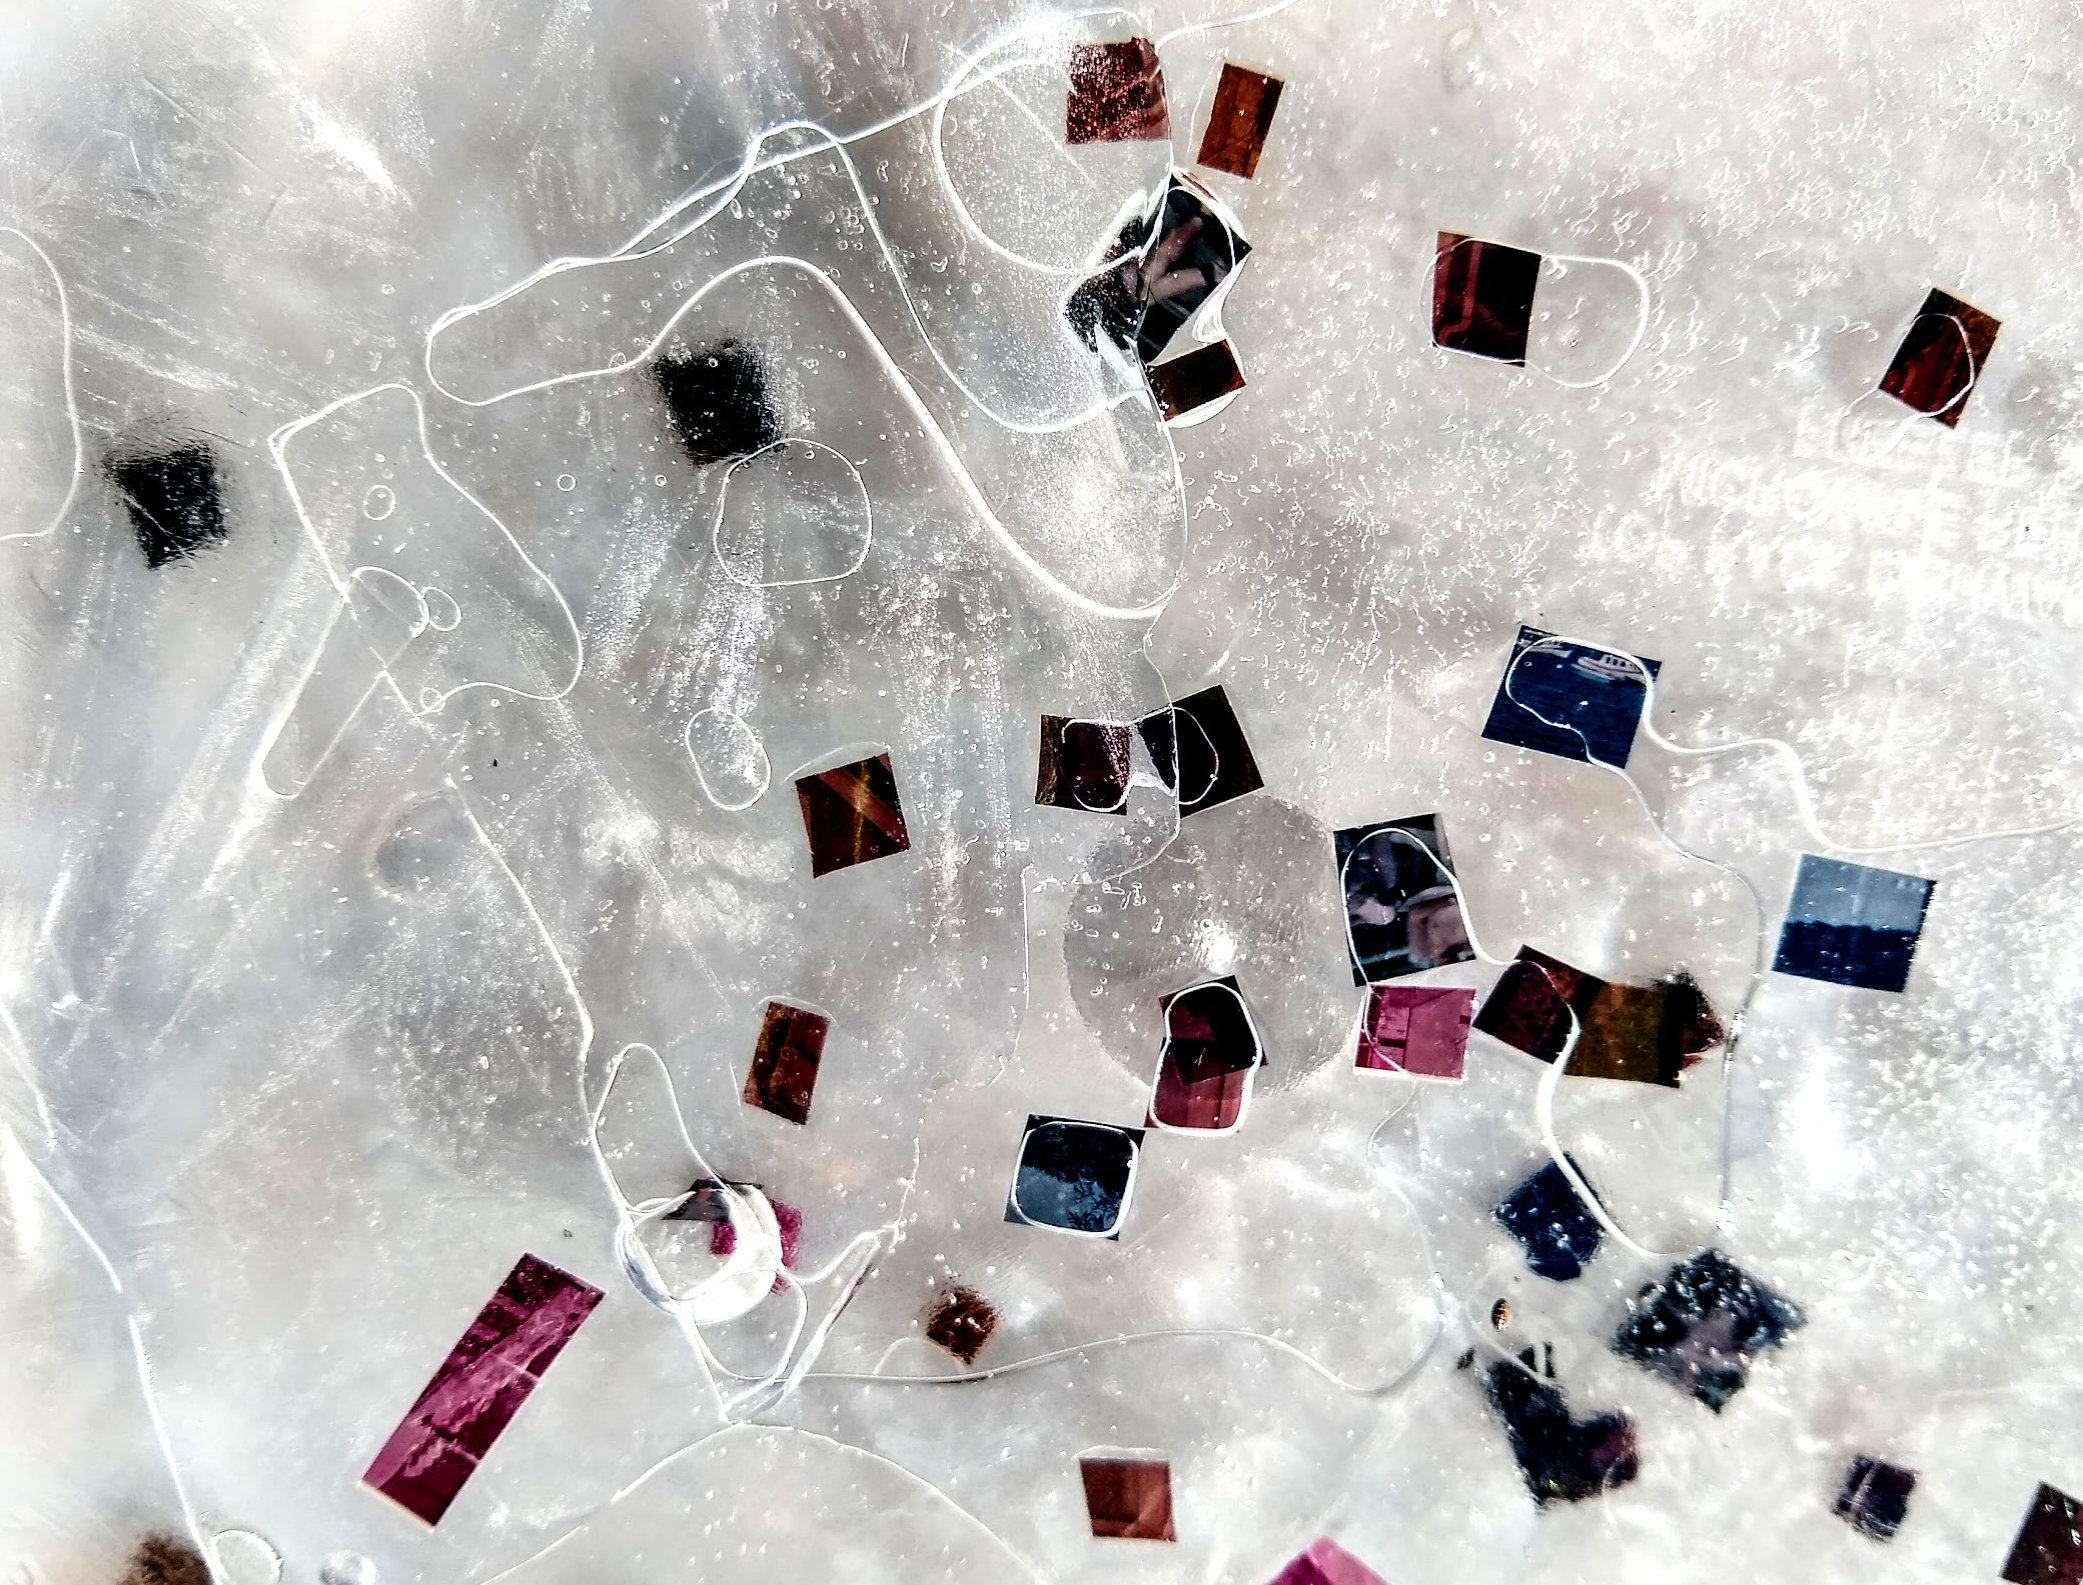
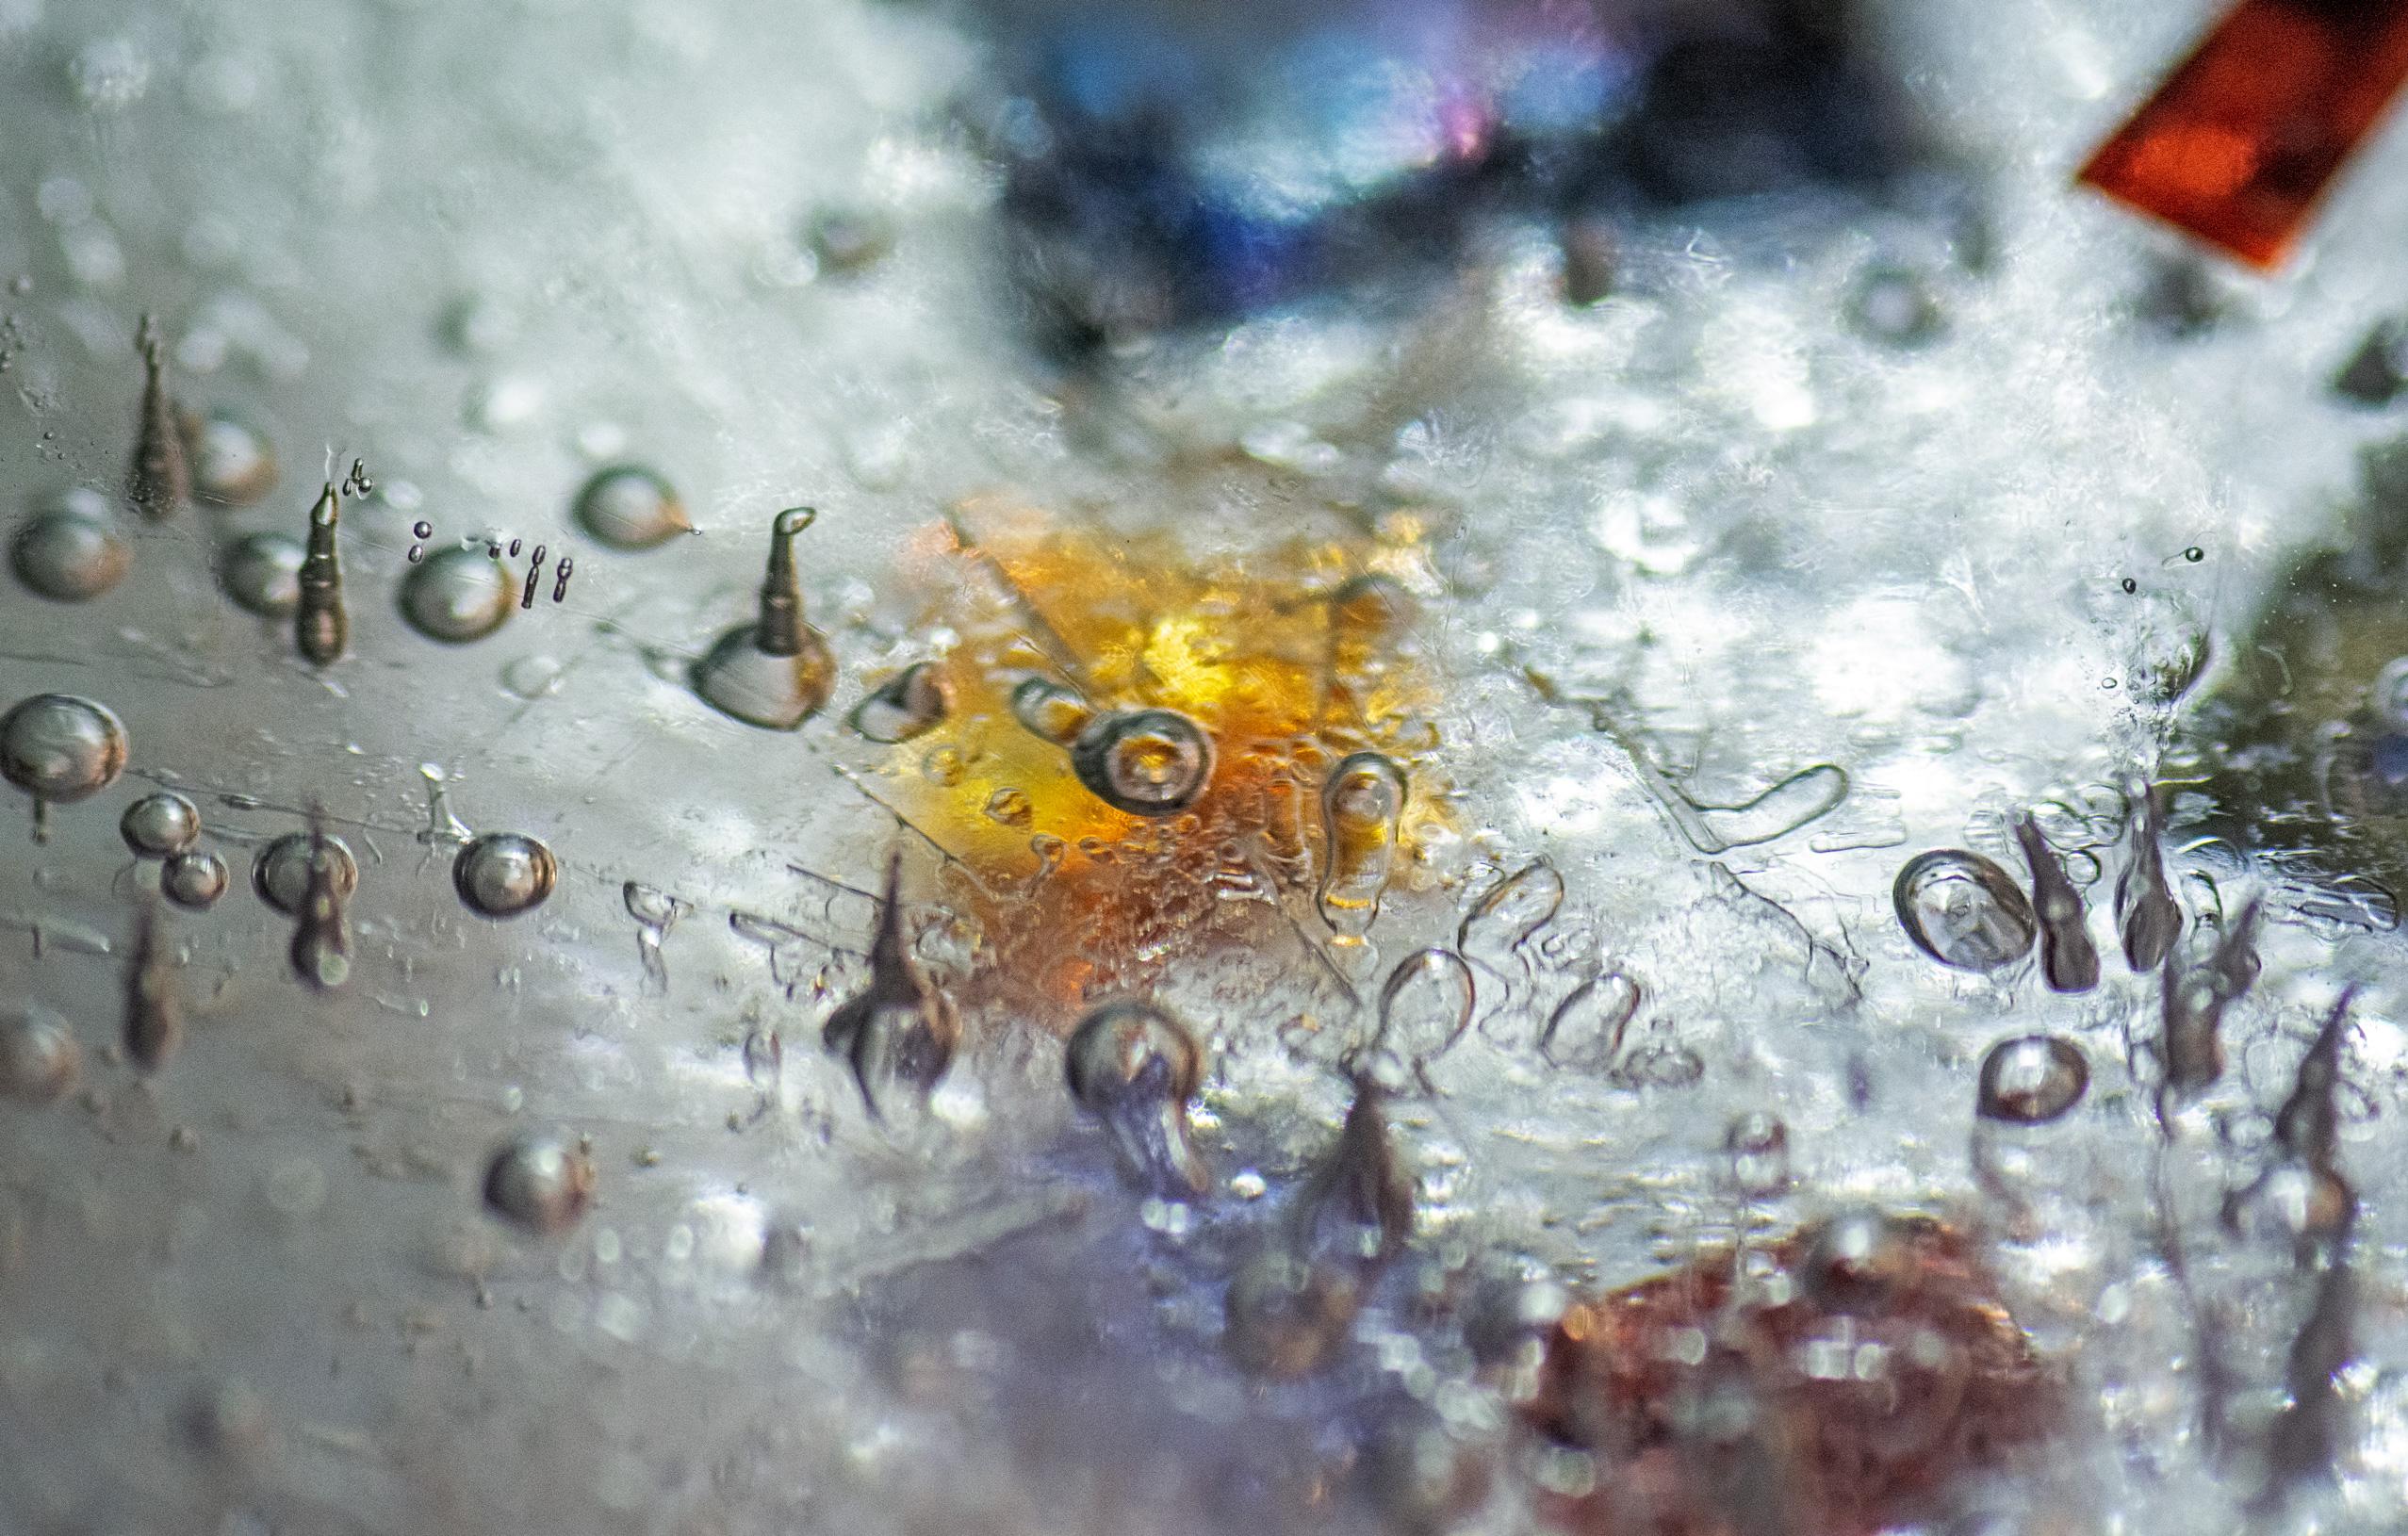
It's the craze that's sweeping the nation: freezing things in water for the sake of photography. Some things I've tried include photos, 35mm slides, frayed ribbons, marbles, magnifying glasses, and more. Most recently I cut up a bunch of slides and sprinkled them on ice as it froze, adding more water and slide fragments after the previous layer was solid. This way they were suspended at different depths in the ice. I think it's a pretty cool effect and I'll be working with it further.
It doesn't have to be slides, of course. Pick anything, freeze a layer of water, add the thing and another layer of water, freeze it, and repeat.
Combine this with the next step and you'll get your inclusions superimposed over your abstract photos of the real world.
The blue GIF above is from a day I put ice over a photo of a statue of the Buddha. The camera was on a tripod, so I was able to focus it slightly further into the ice with each exposure. (It seems that this site doesn't allow clicking on GIFs to expand them, so you may have to hover over it and click the full-screen icon.)
Other Ways to Play Part 2: See the World Through Ice


(Click "More Images" above to see them all while reading this section, but it'd be better to click on the images to see them larger. Two of them are animated. It seems that this site doesn't allow clicking on GIFs to expand them, so you may be able to hover over each one and click the full-screen icon. That might work, depending on your device. Or click "X More Images" and the two GIFs should be shown among the other photos, but with motion.)
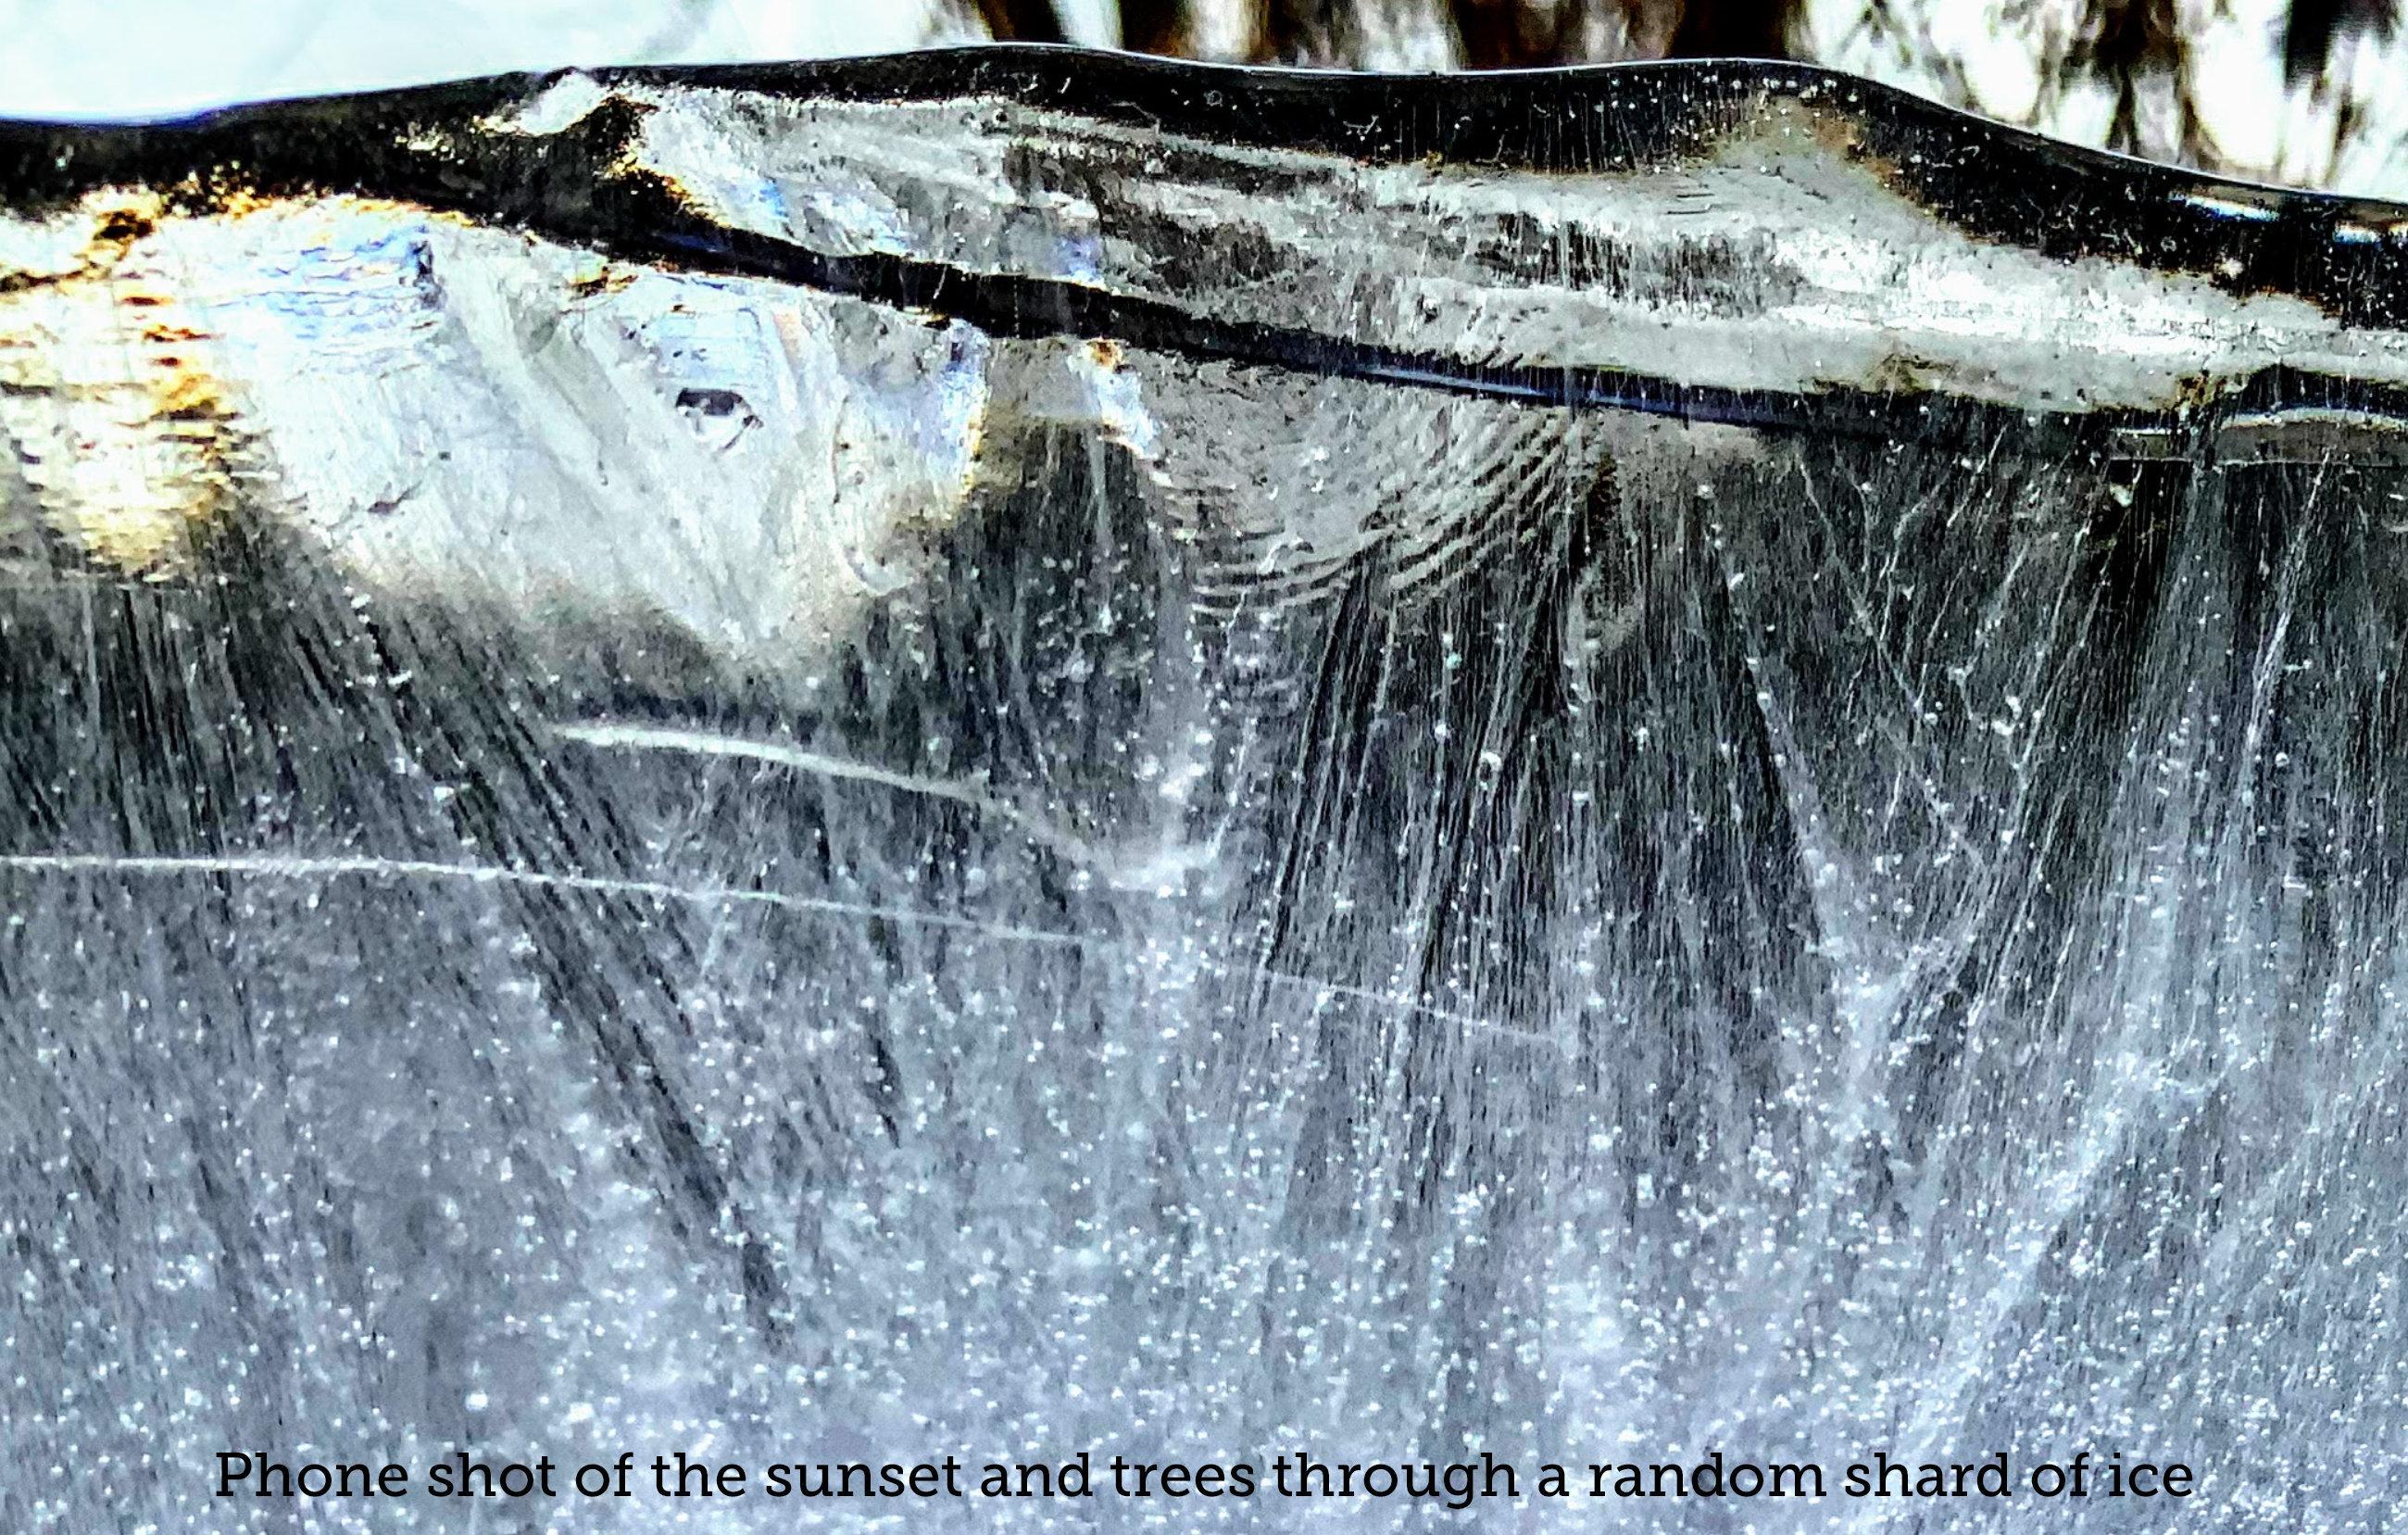
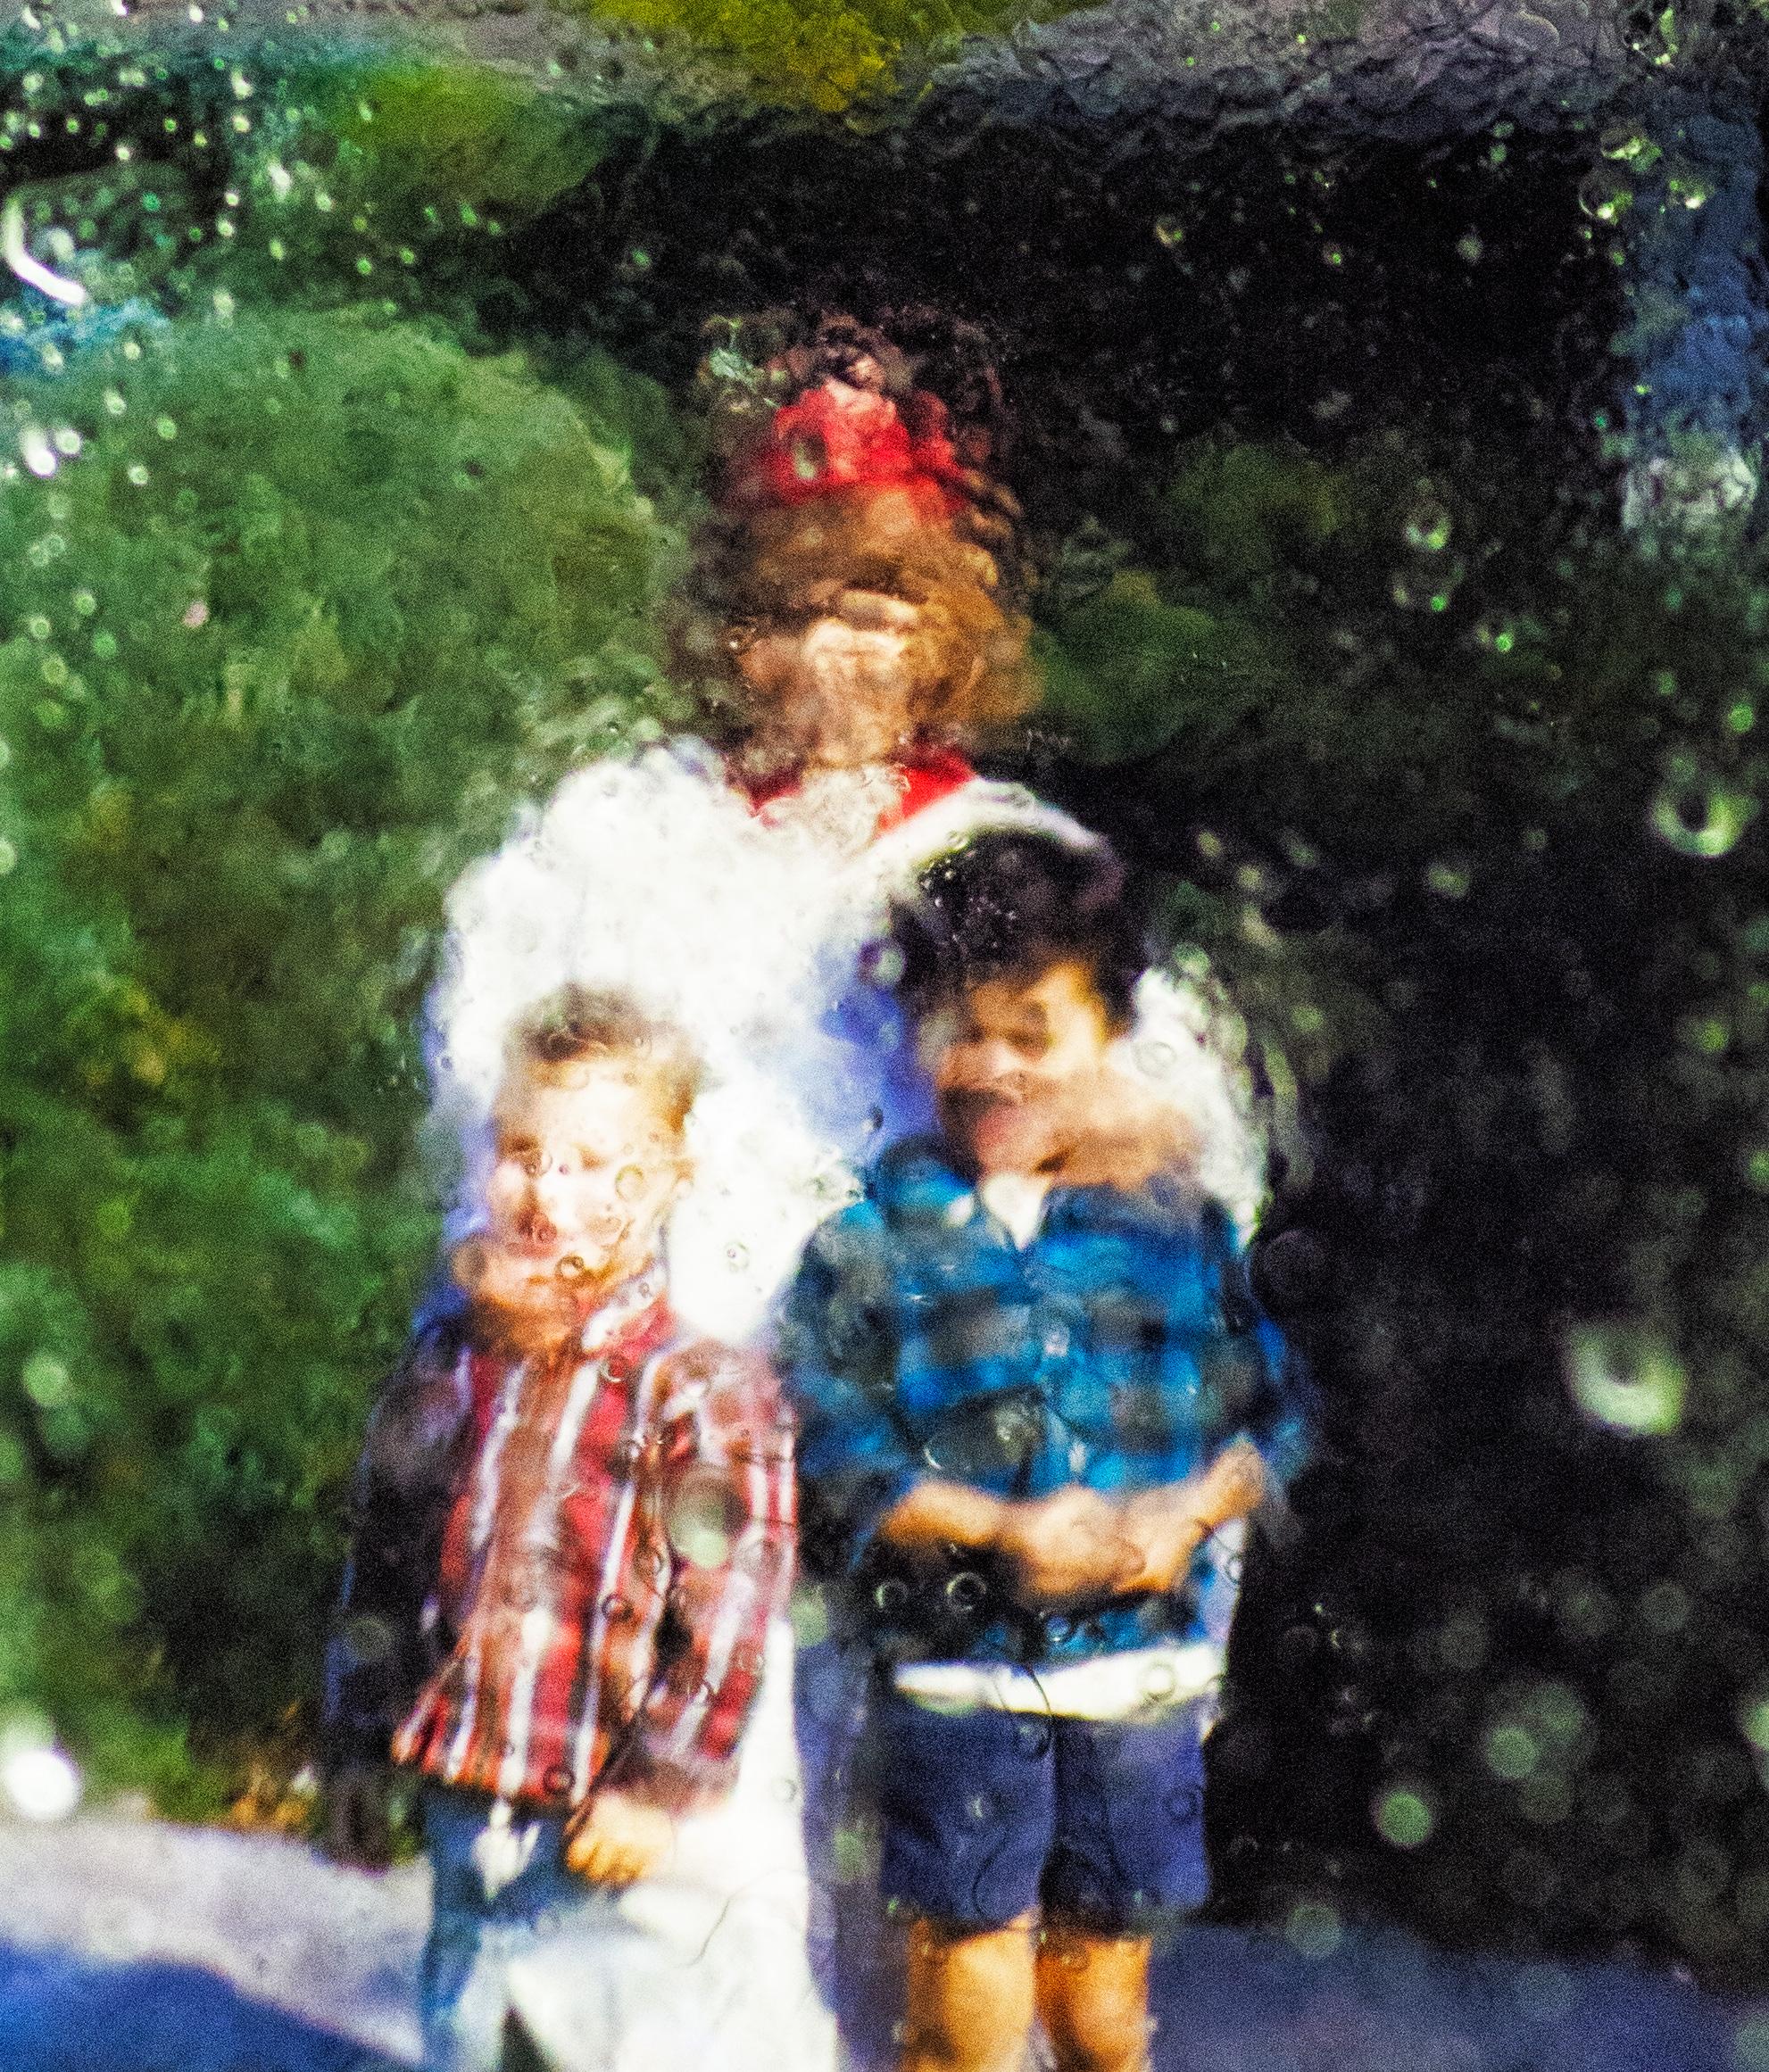
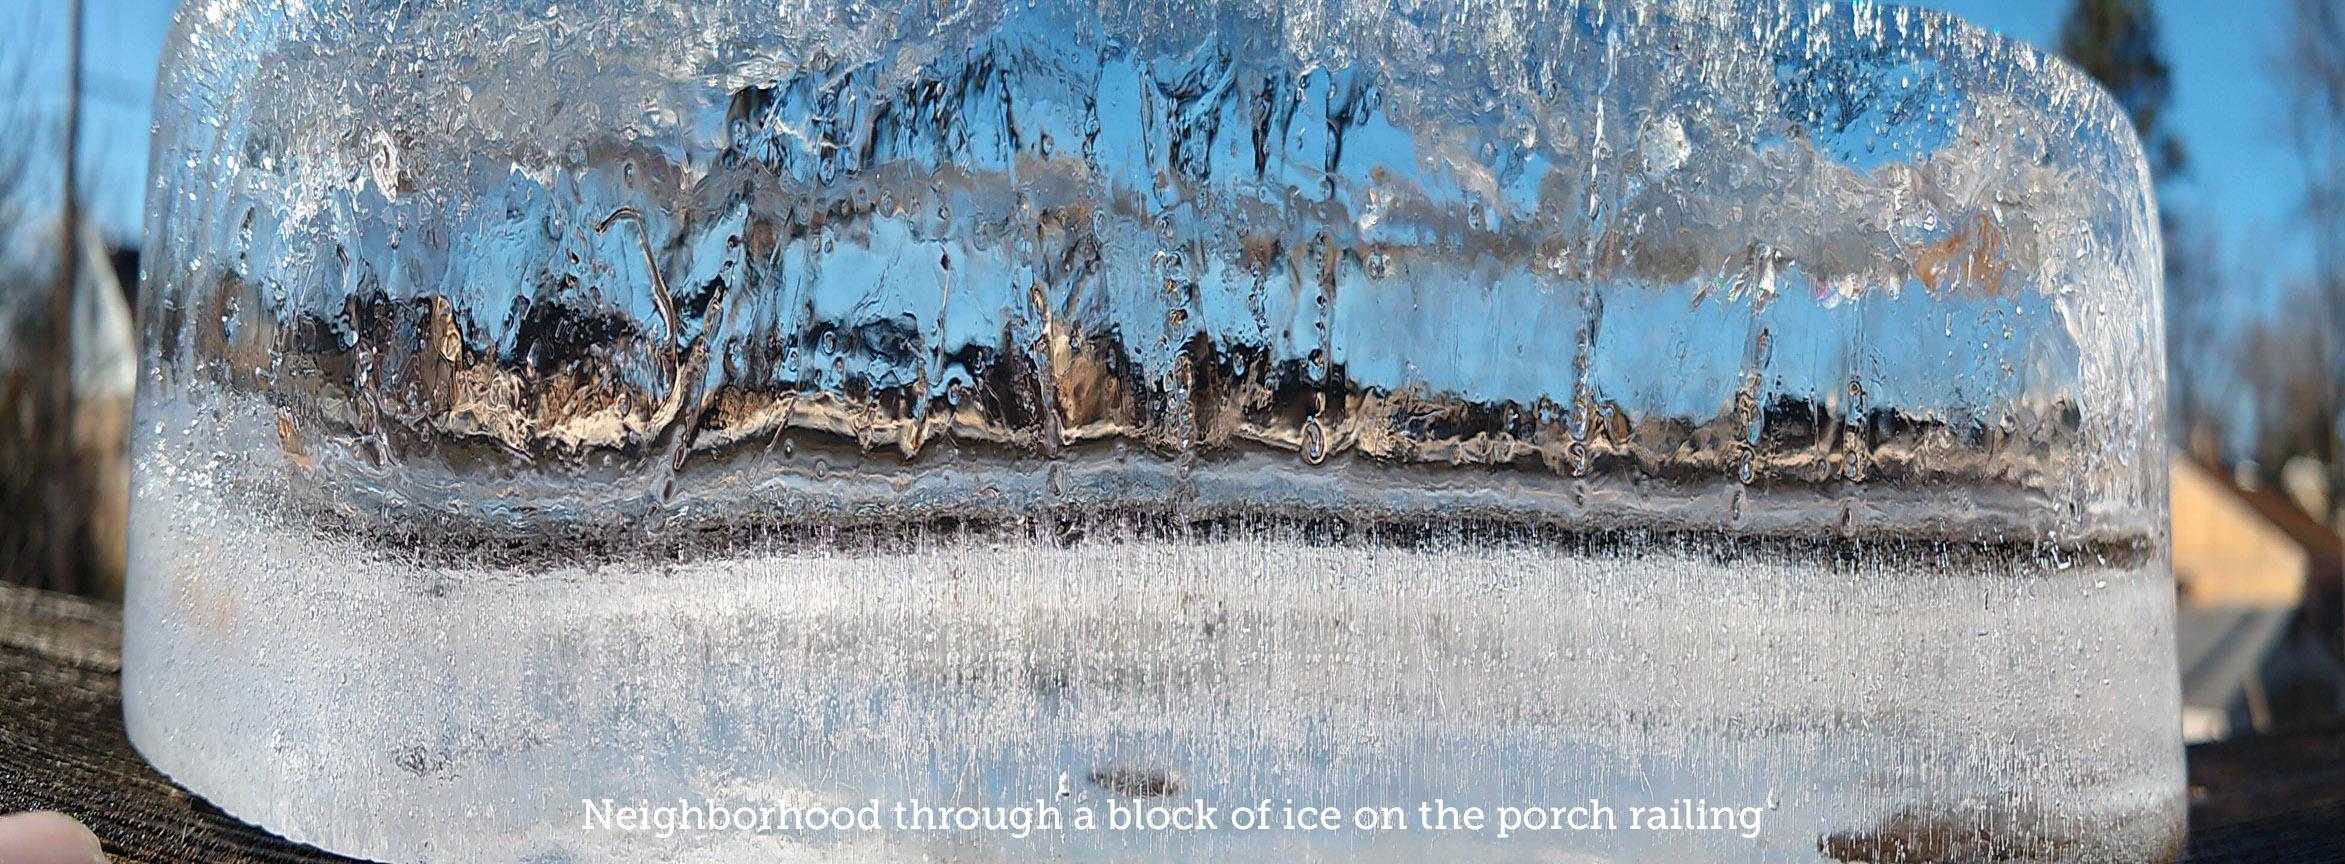
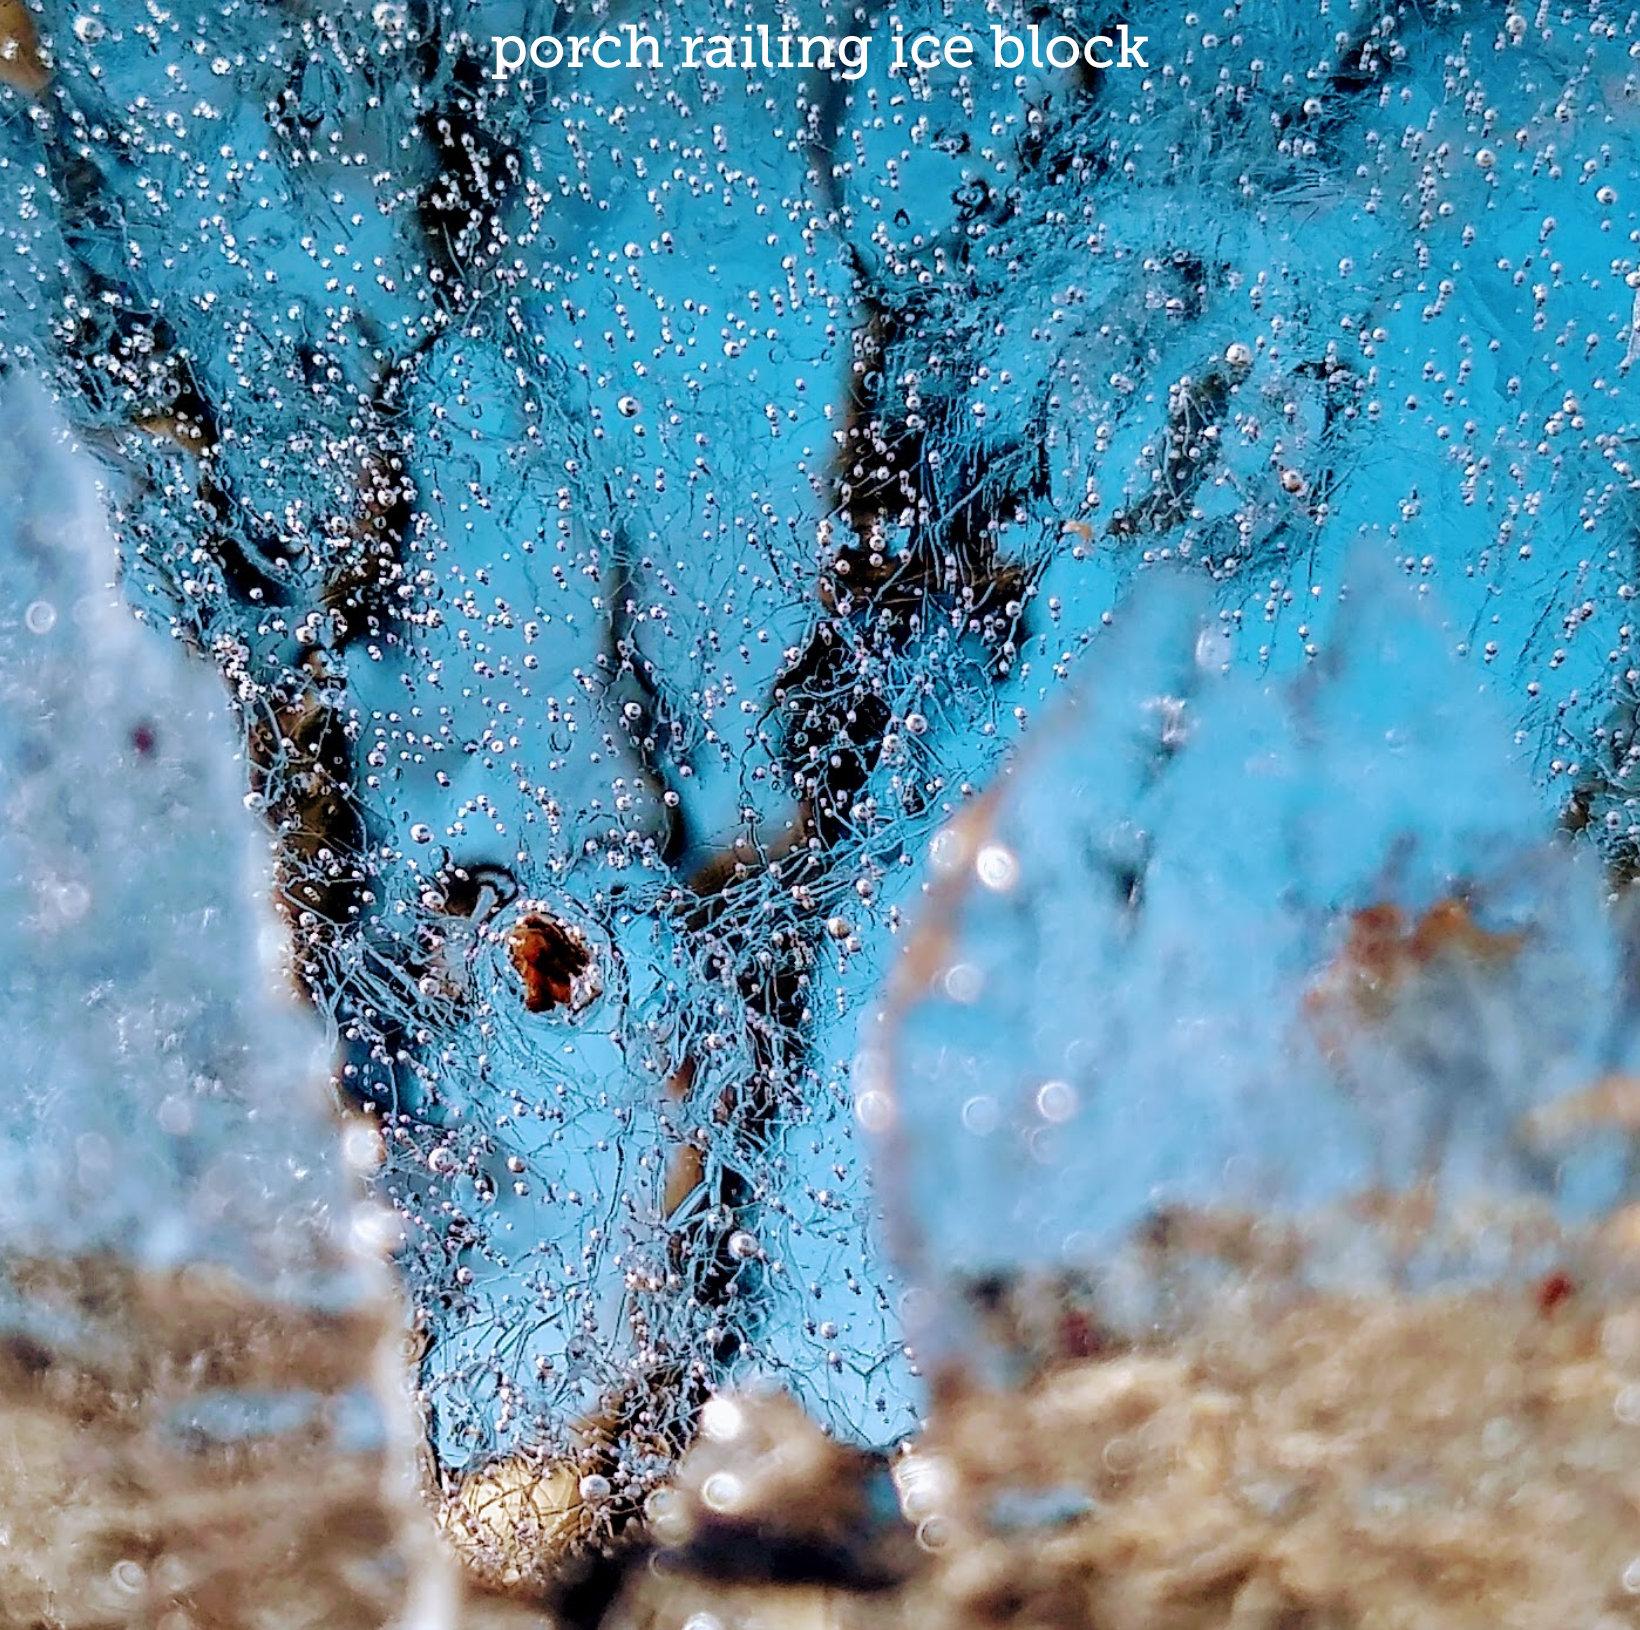
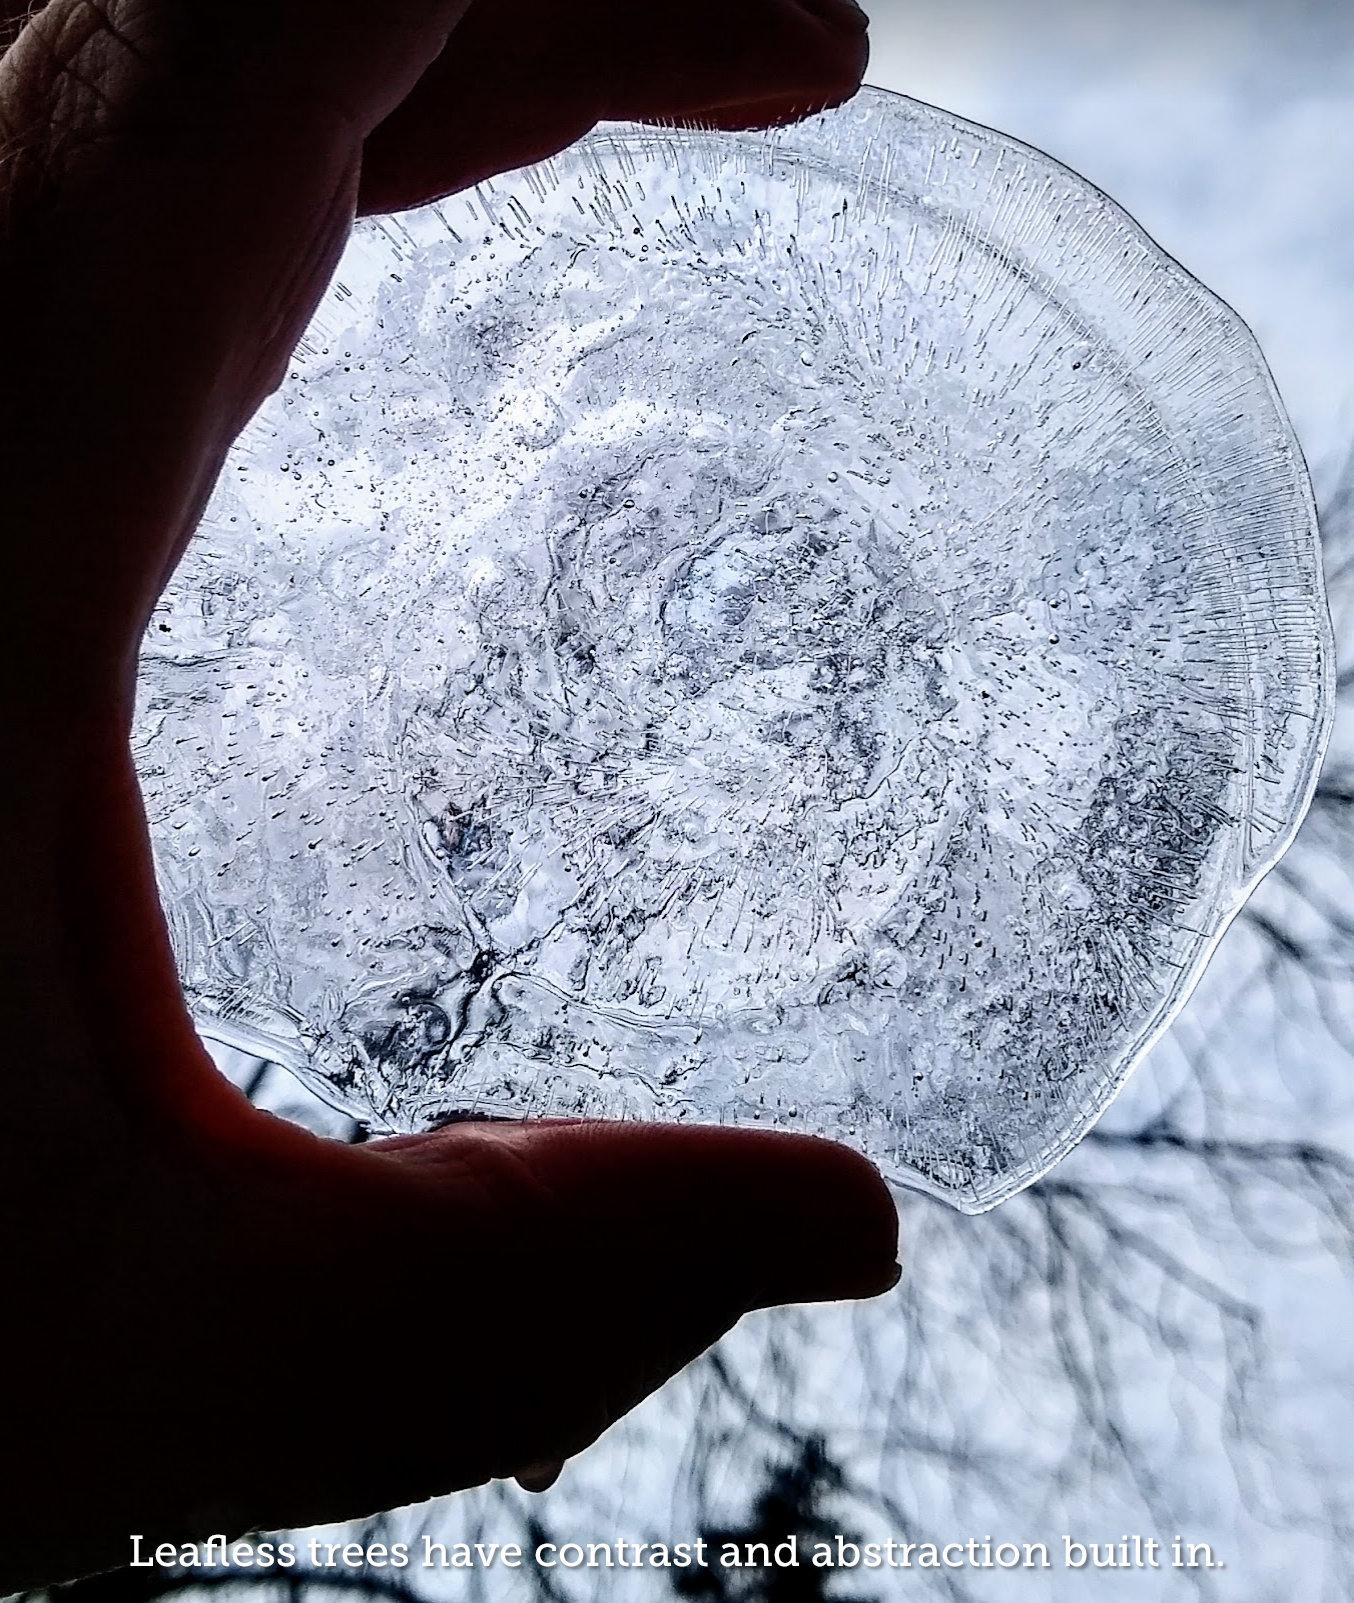
Pretty simple: You make or find some ice. Maybe it's in a bucket you left outside with a little water at the bottom. Maybe it's an icicle that was hanging off your garbage can handle. It doesn't really matter where the ice comes from if light can get through it.
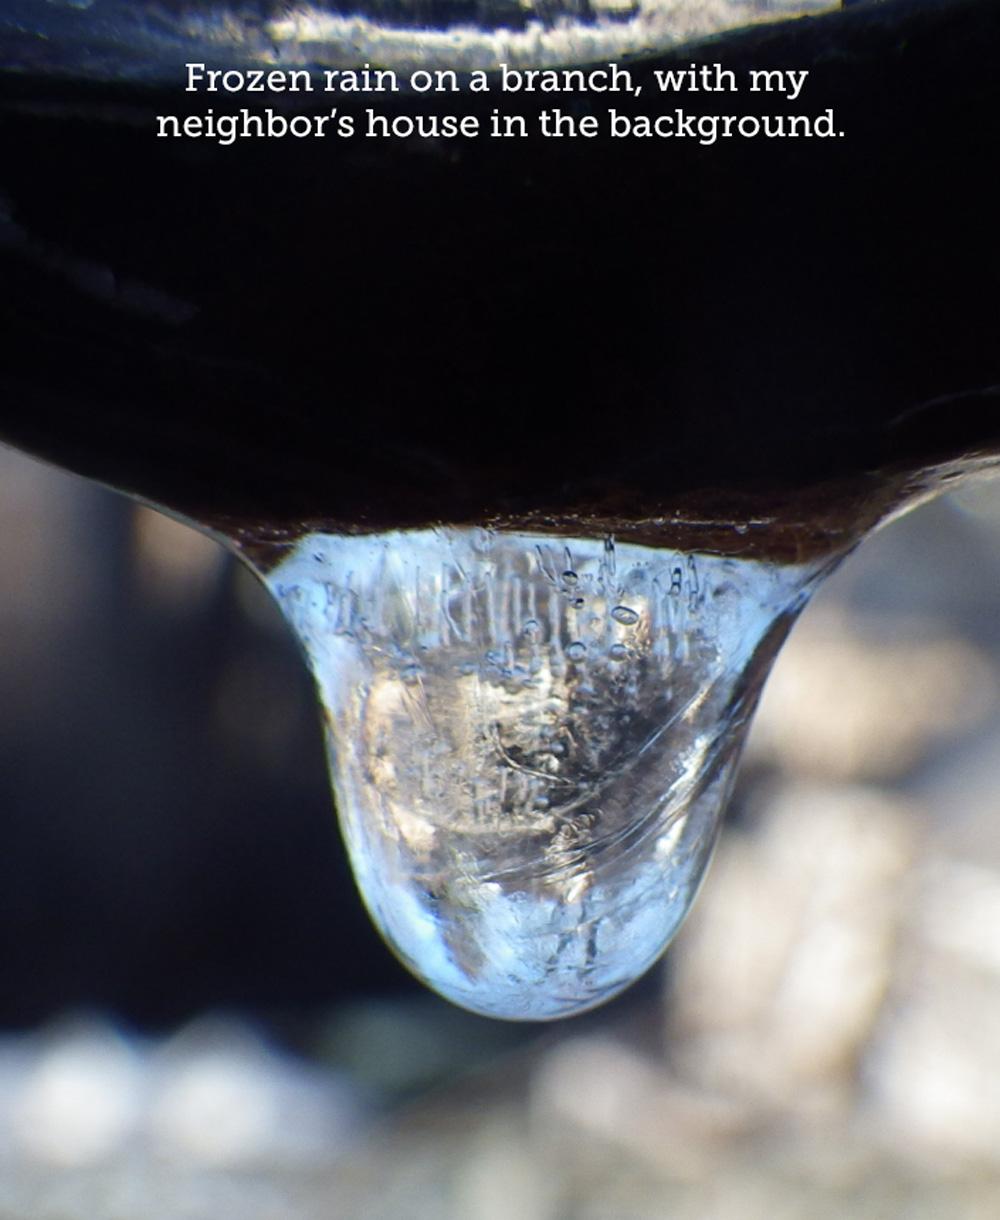
I like to use my phone to take photos through relatively thin pieces of ice. I'm not shooting the ice as much as I'm shooting what's on the other side of the ice. If the ice is good, it will be difficult to tell exactly what is there, so here's a hint: often it's the trees that belong to the Reynolds family, my neighbors. In fact, every single shot in this section is facing their house.
The same technique applies to putting a sheet (or any shape if it's clear enough) of ice over a photo, drawing or other visually interesting background and taking a picture. See the Buddha GIF elsewhere on this page.
Other Ways to Play Part 3: Nature's Ice Is Out There

.jpg)
(Click "More Images" above to see them all on the screen while reading this section.)
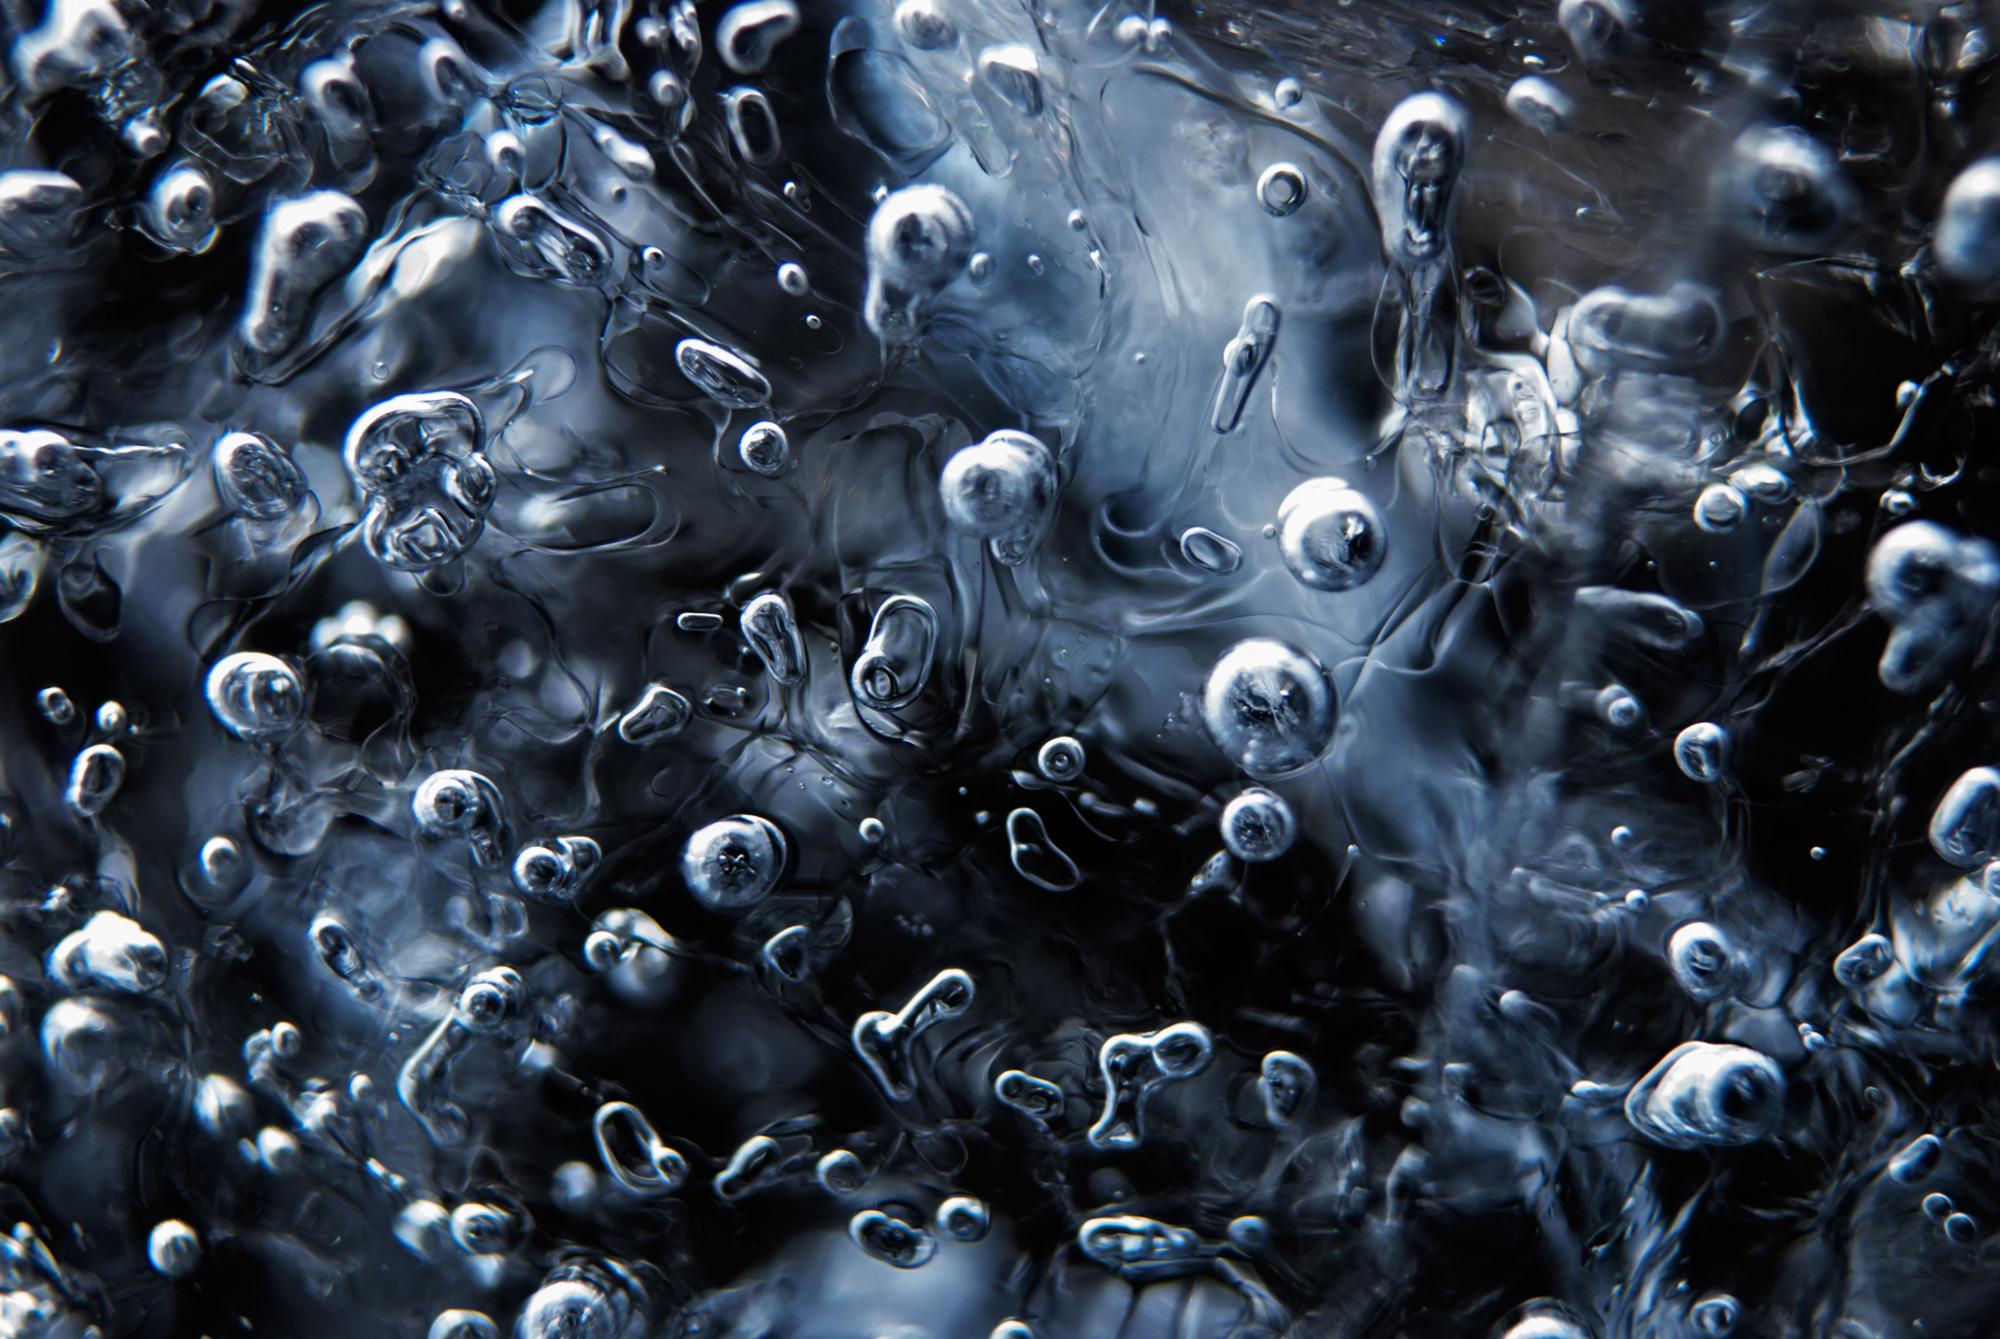
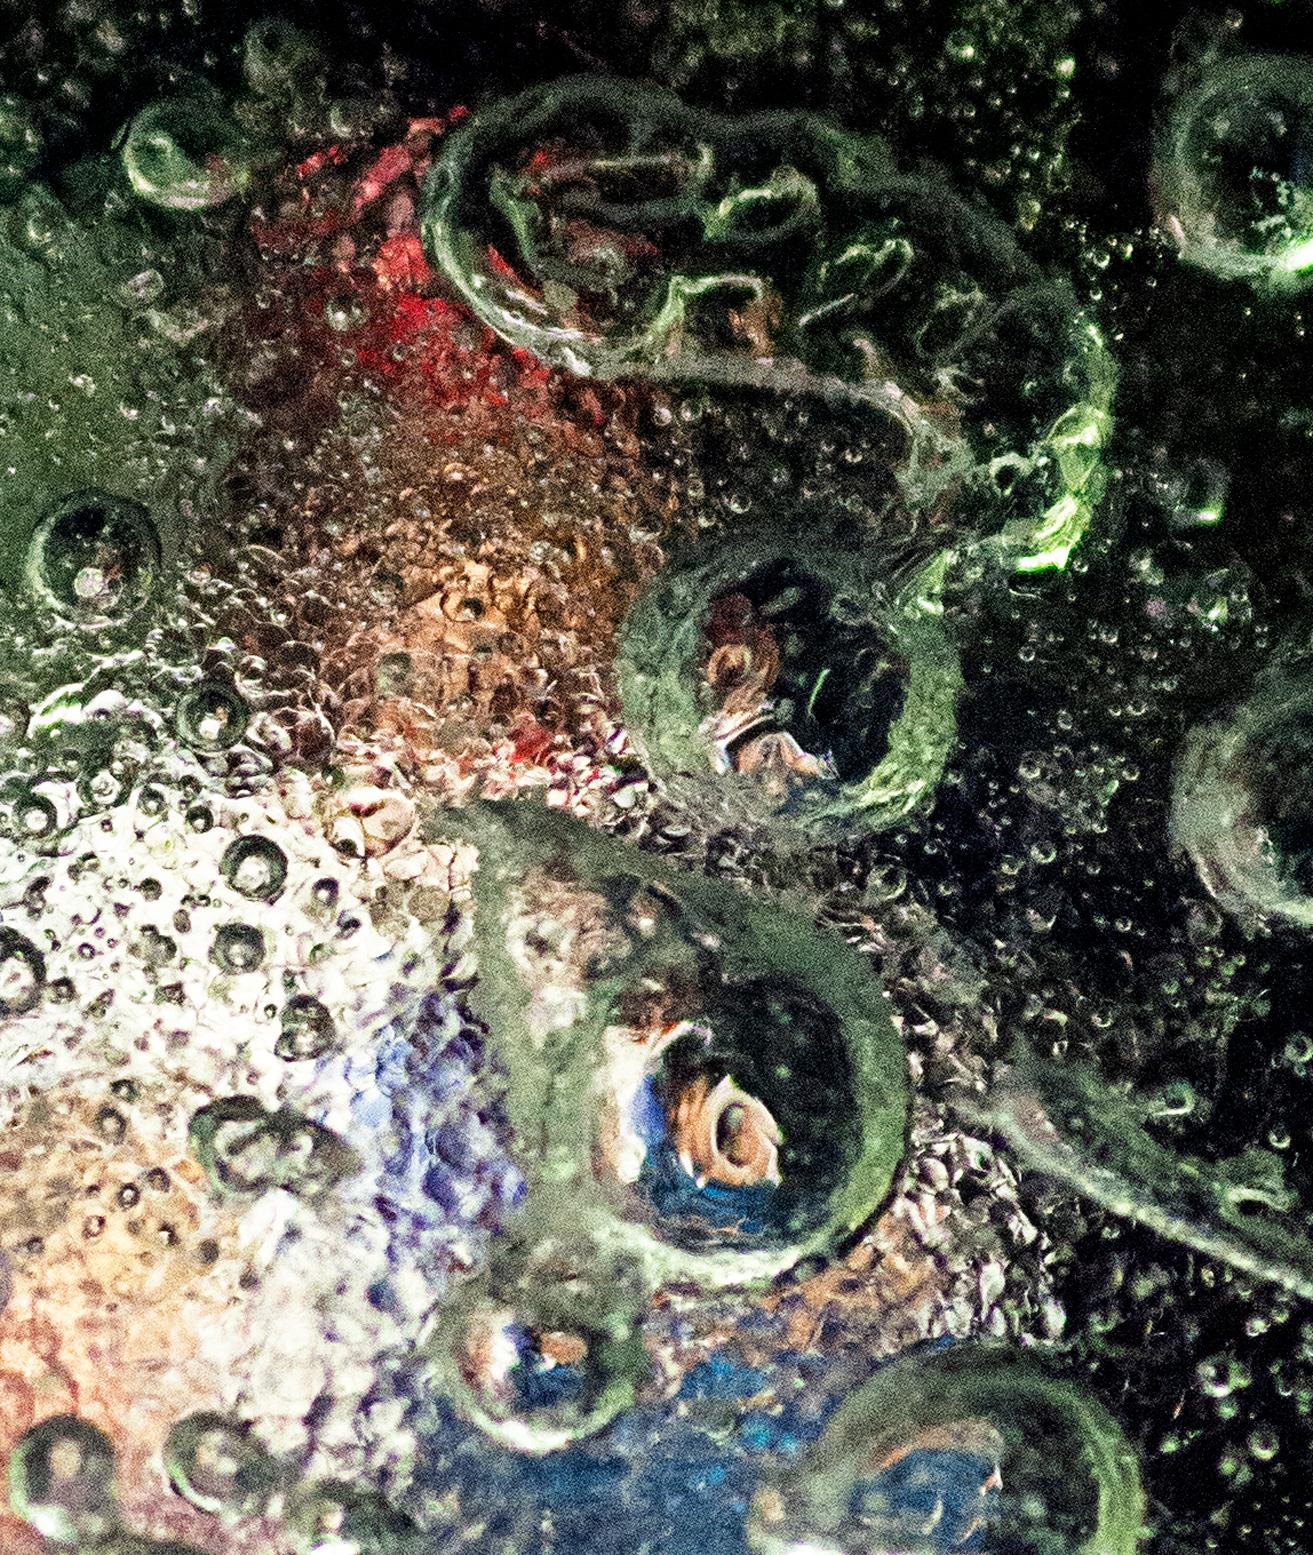
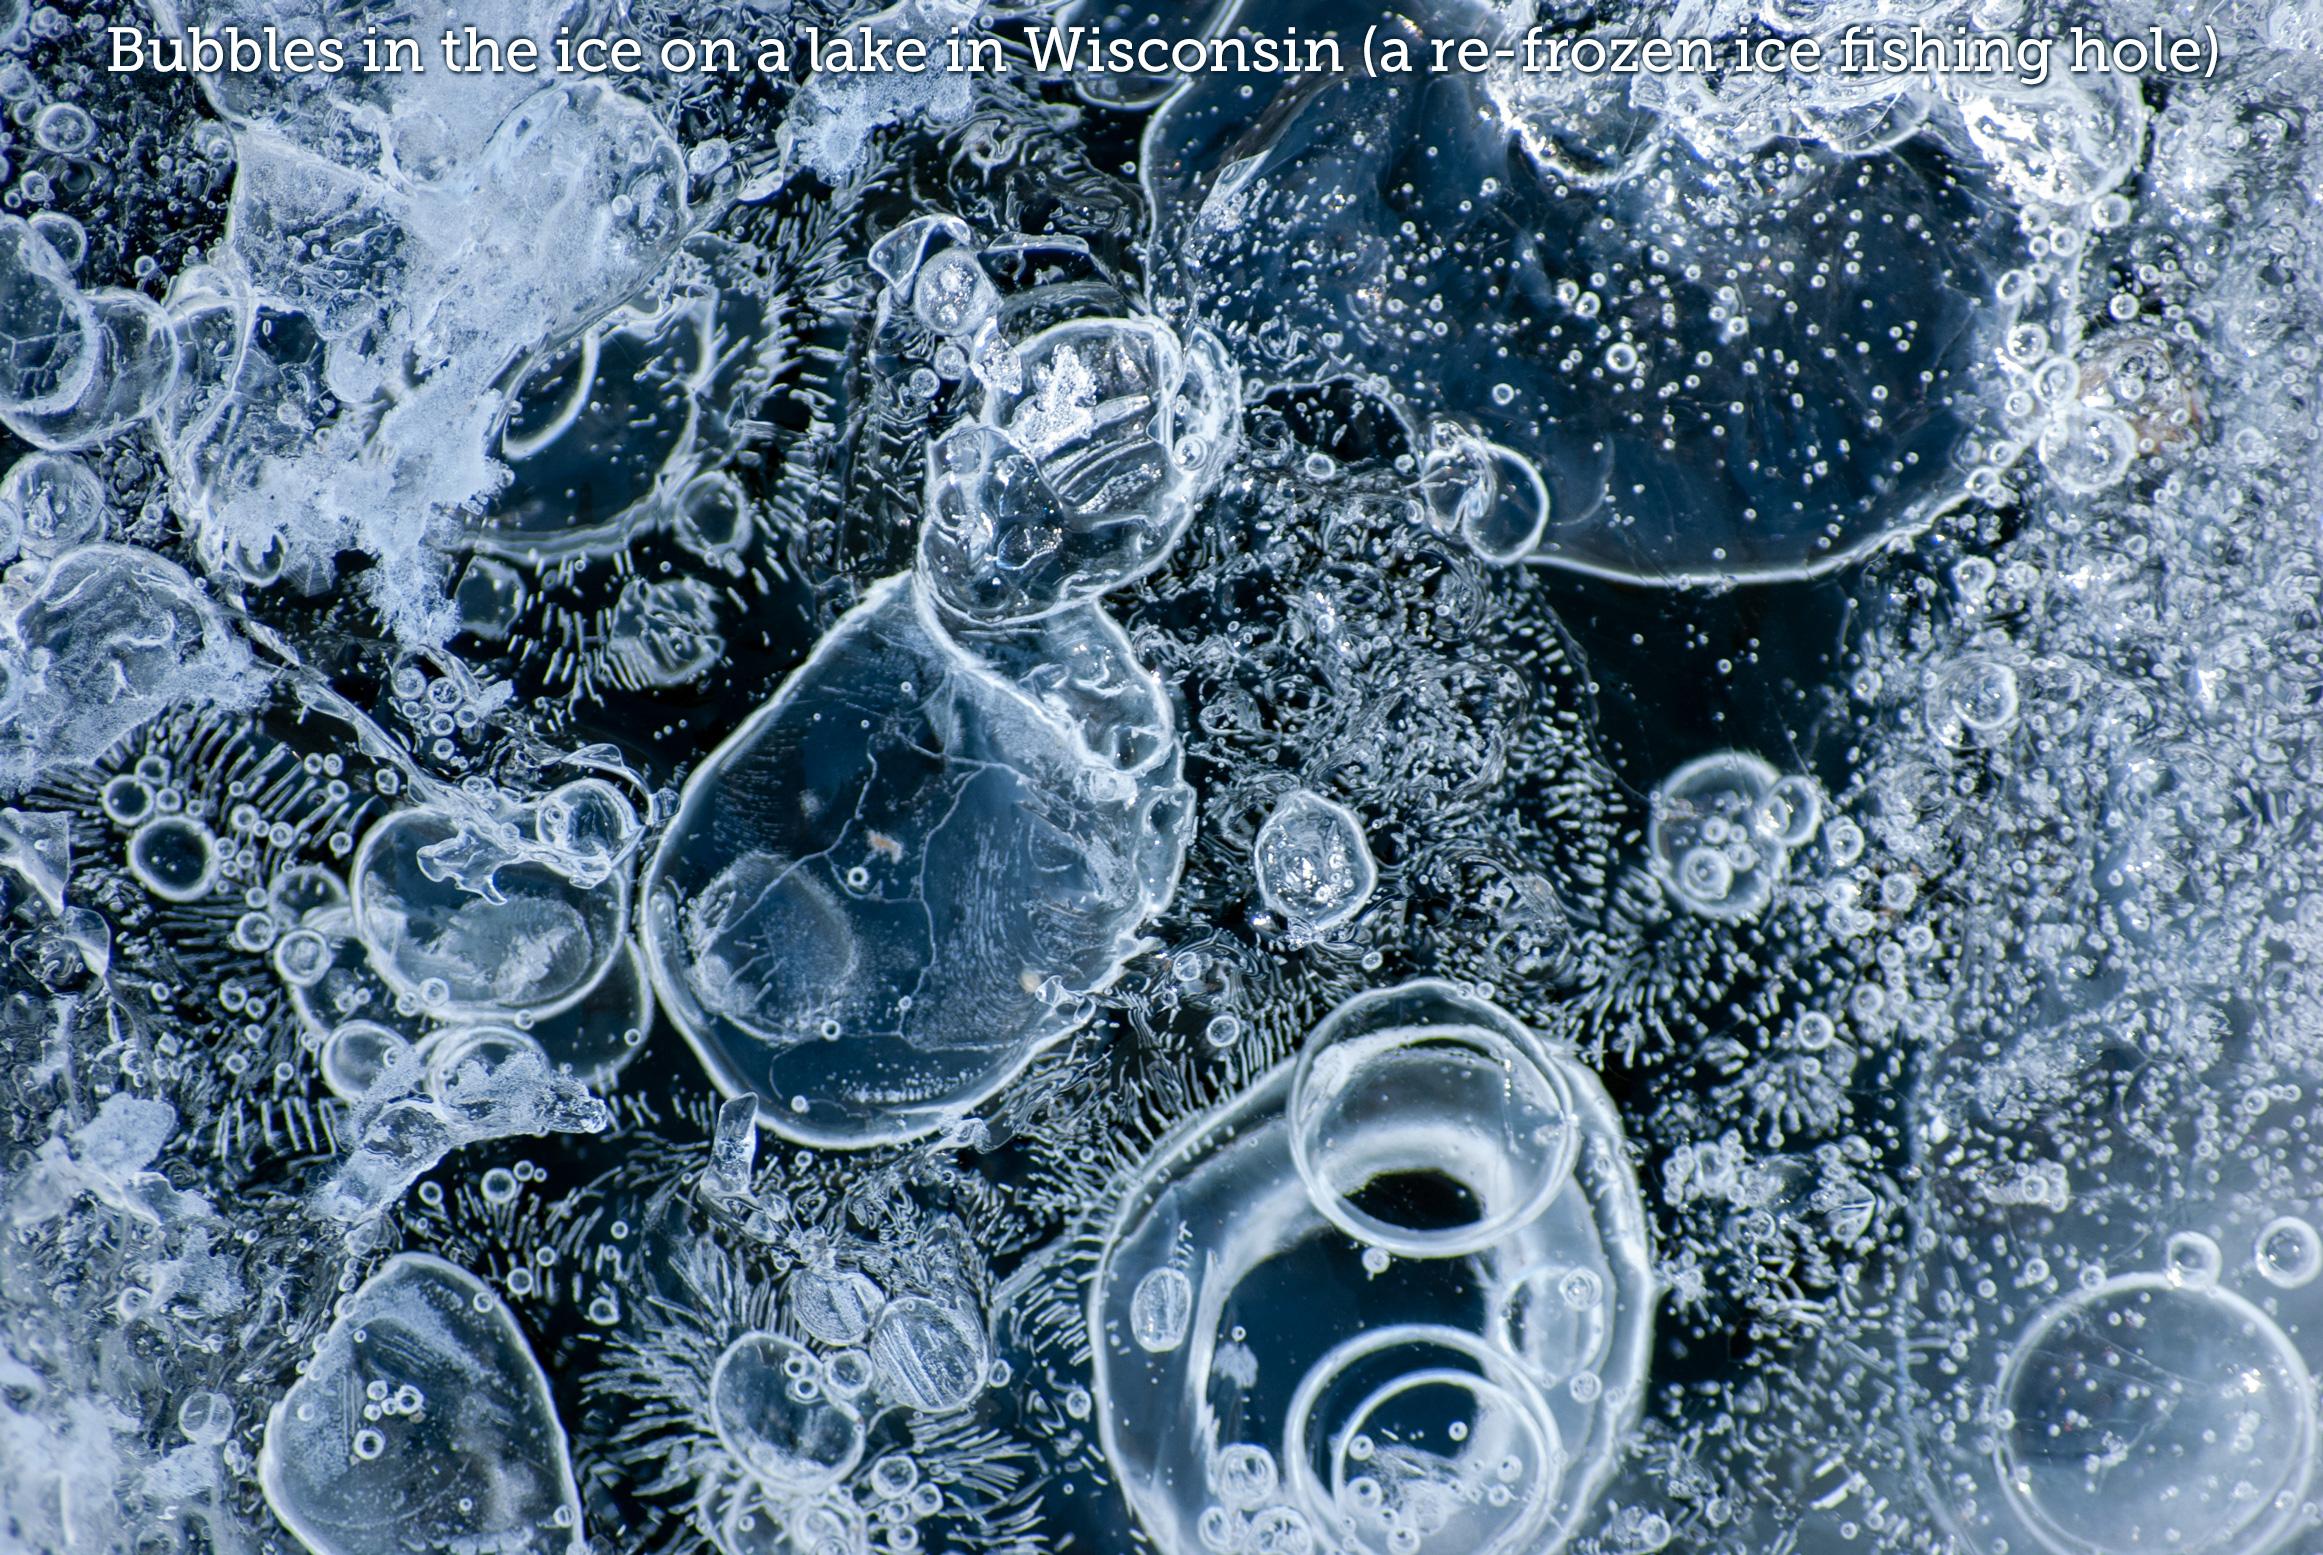
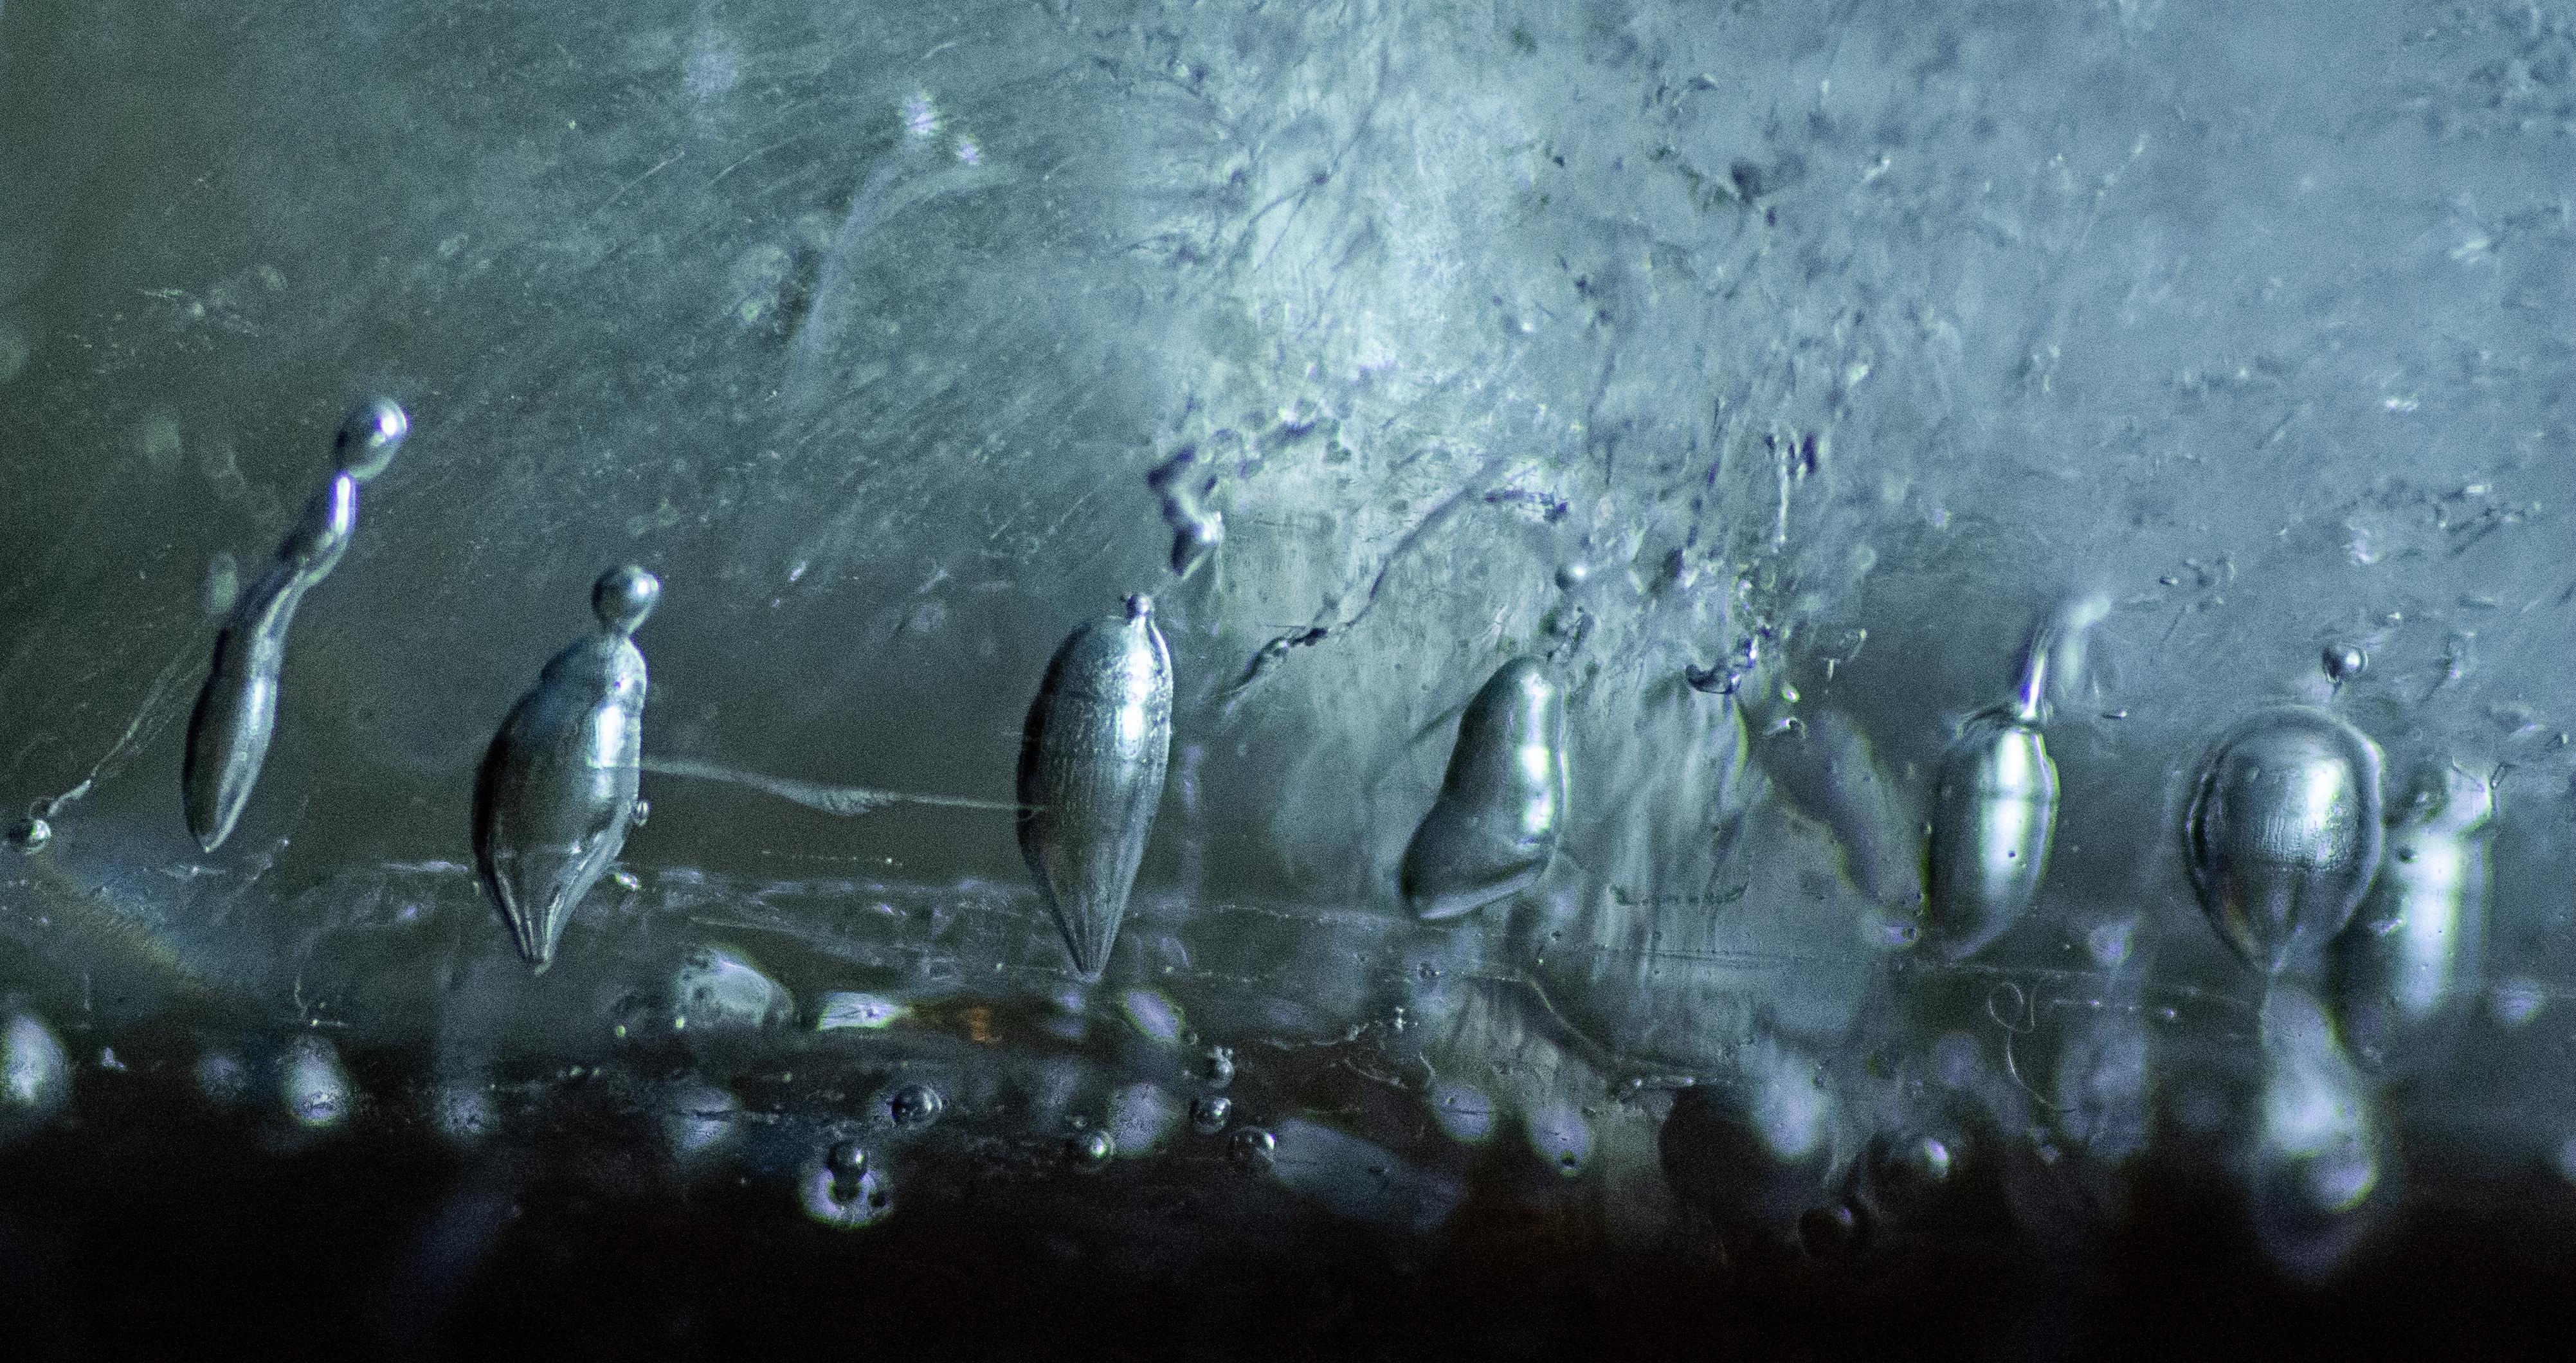
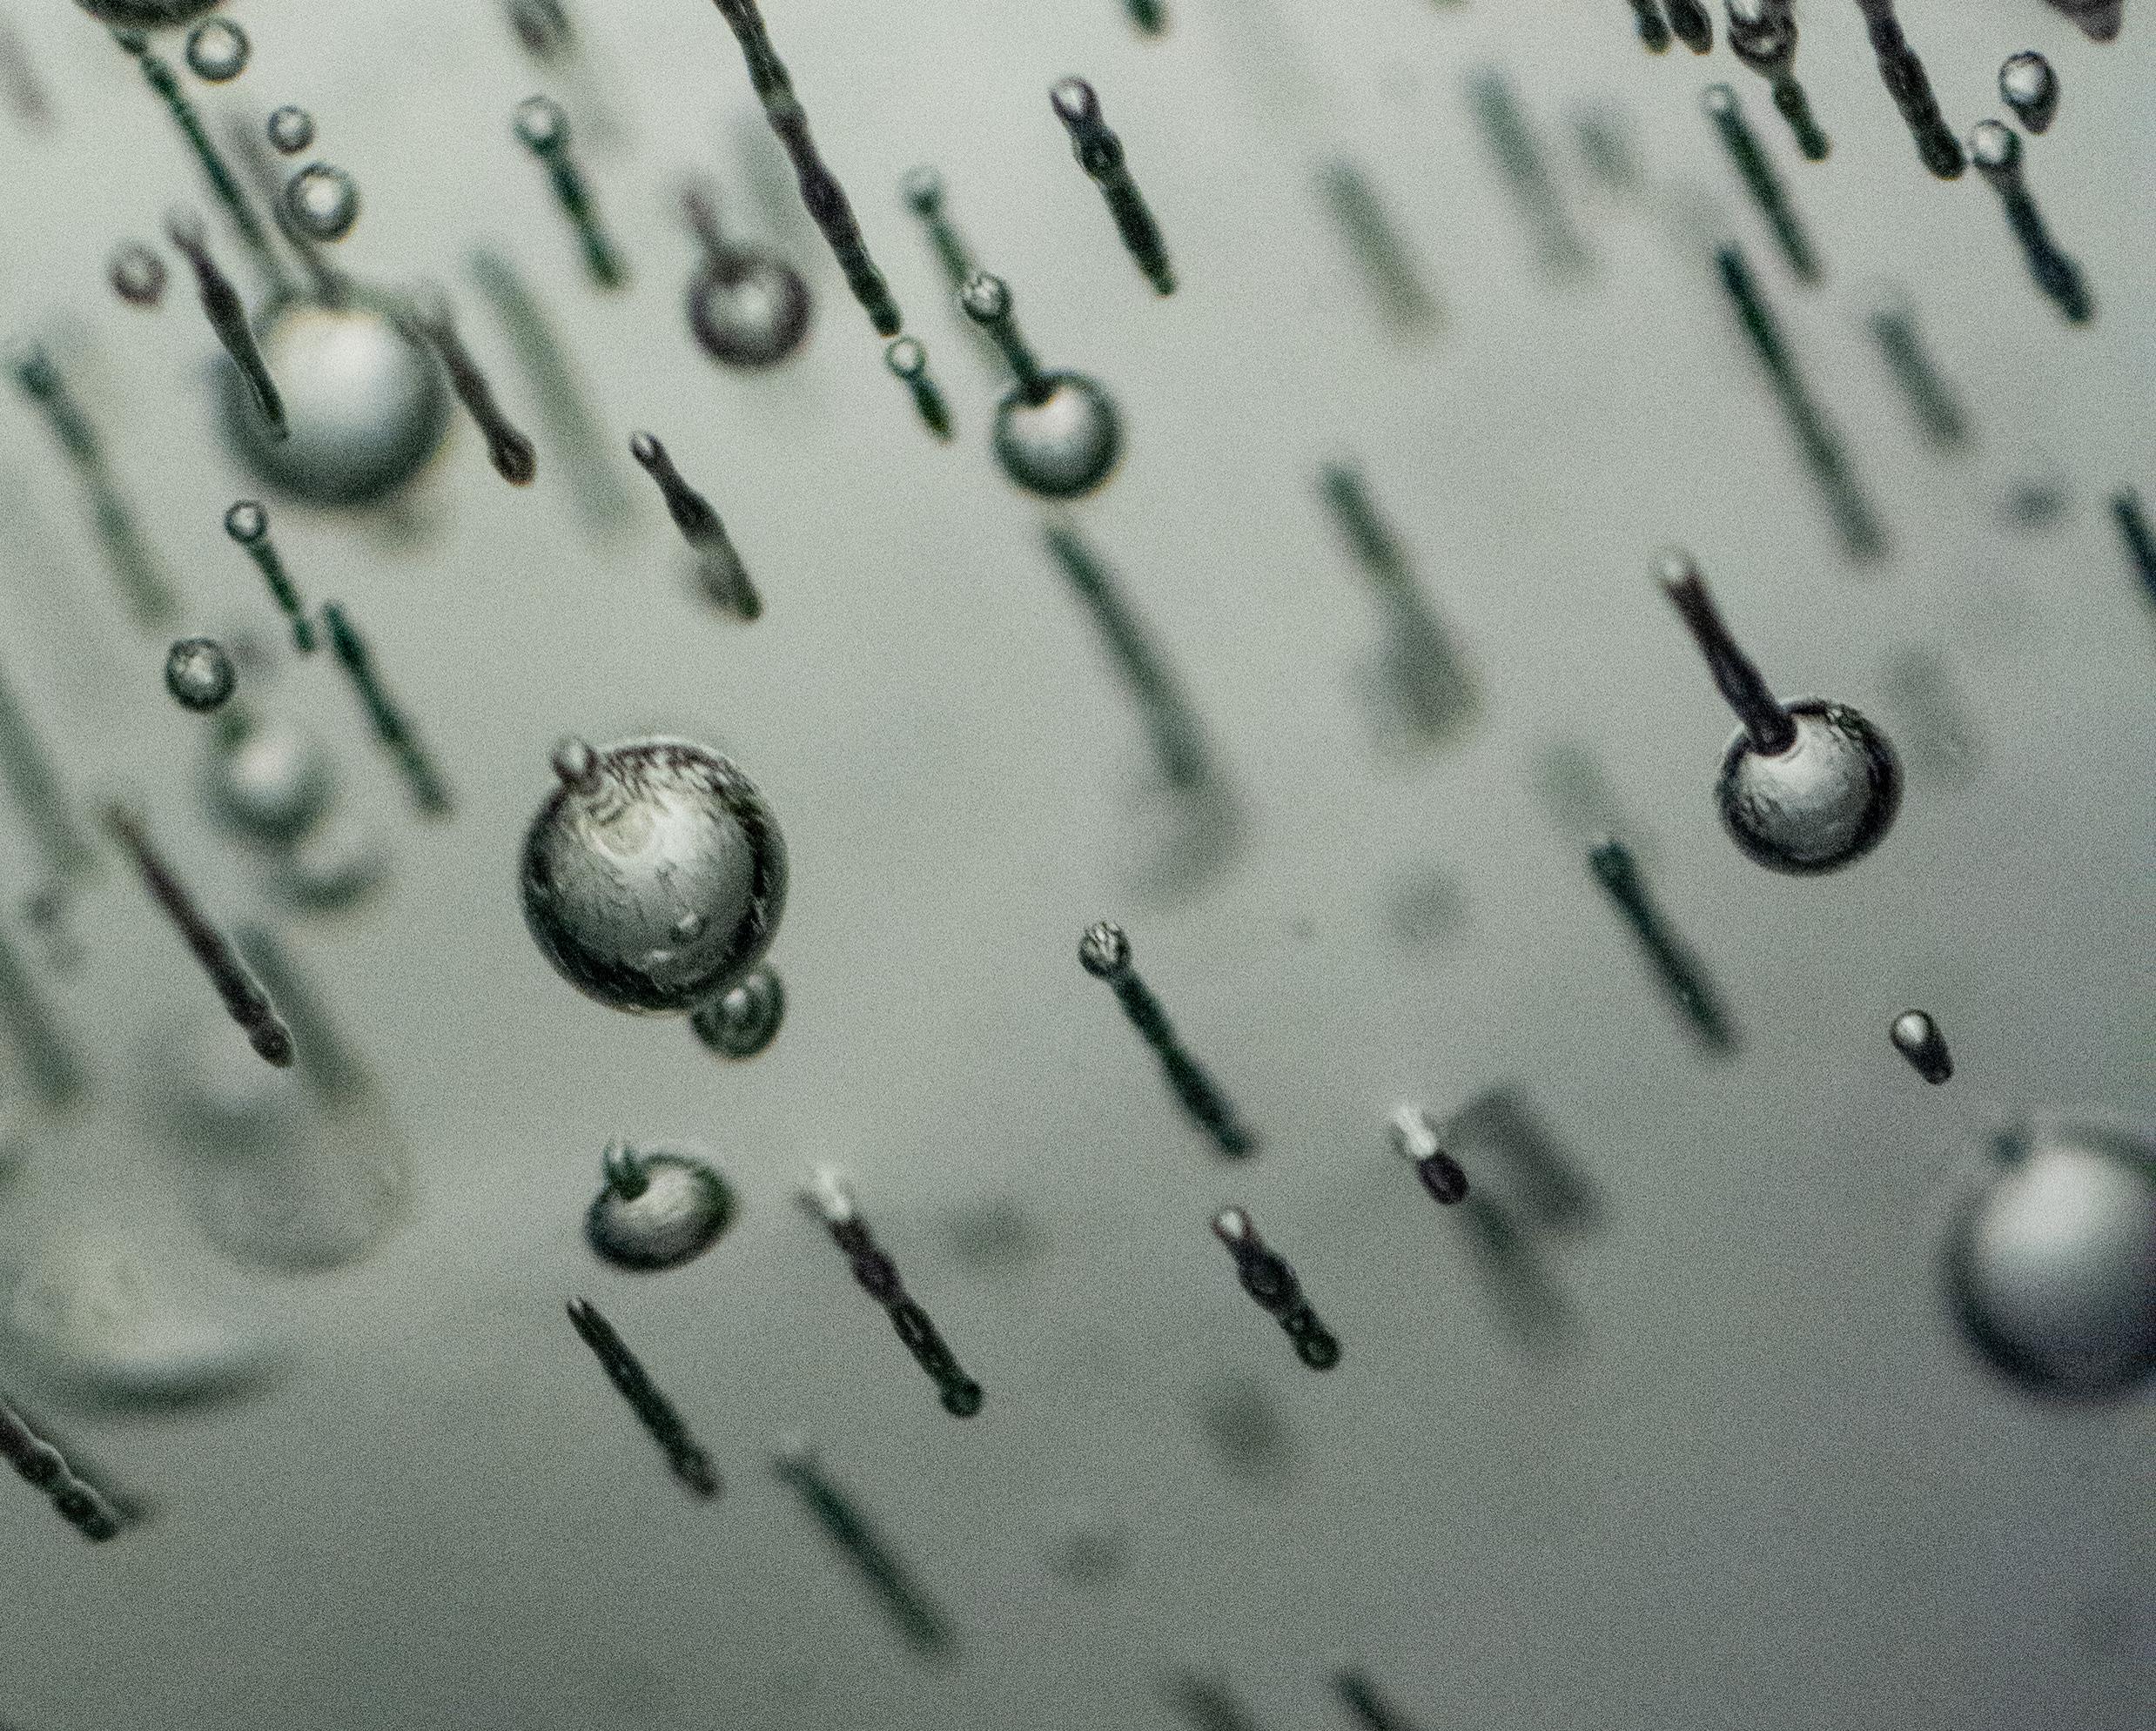
It's also a good idea to explore streams or lakes and look for nature's ice surprises. If you have access to a lake where people fish through the ice, you can find amazing bubbles in re-frozen ice holes (the example above is just a small taste, but there's amazing variety).
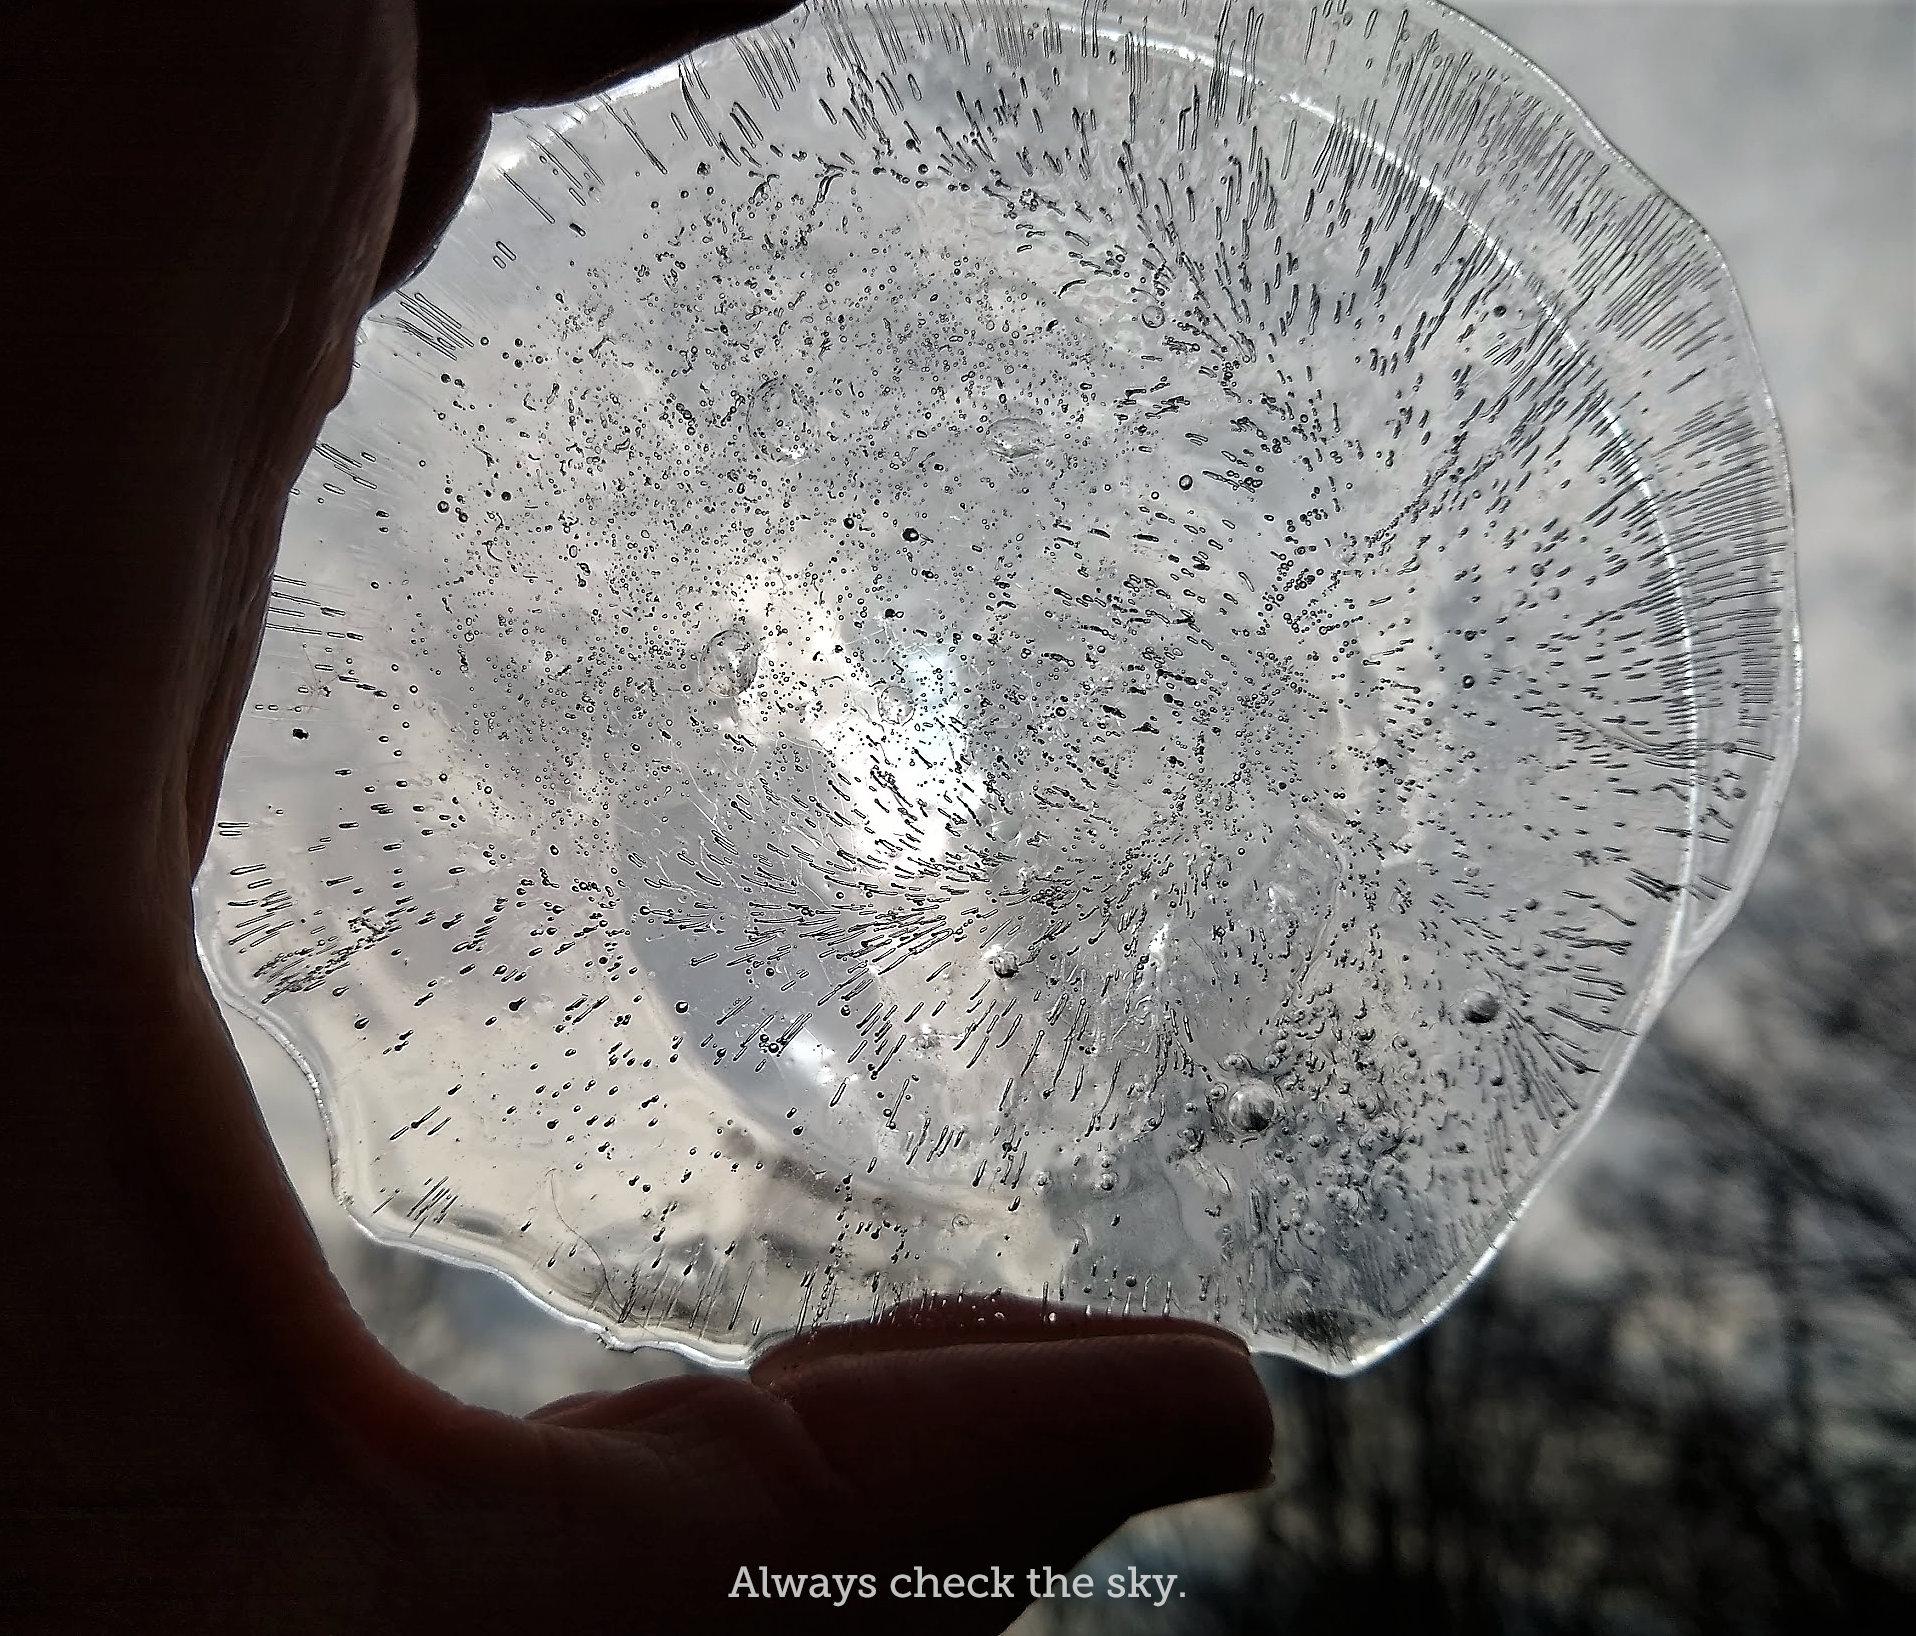
If you get really lucky you can find lakes that freeze clear enough that you can lay right down on the ice and shoot.
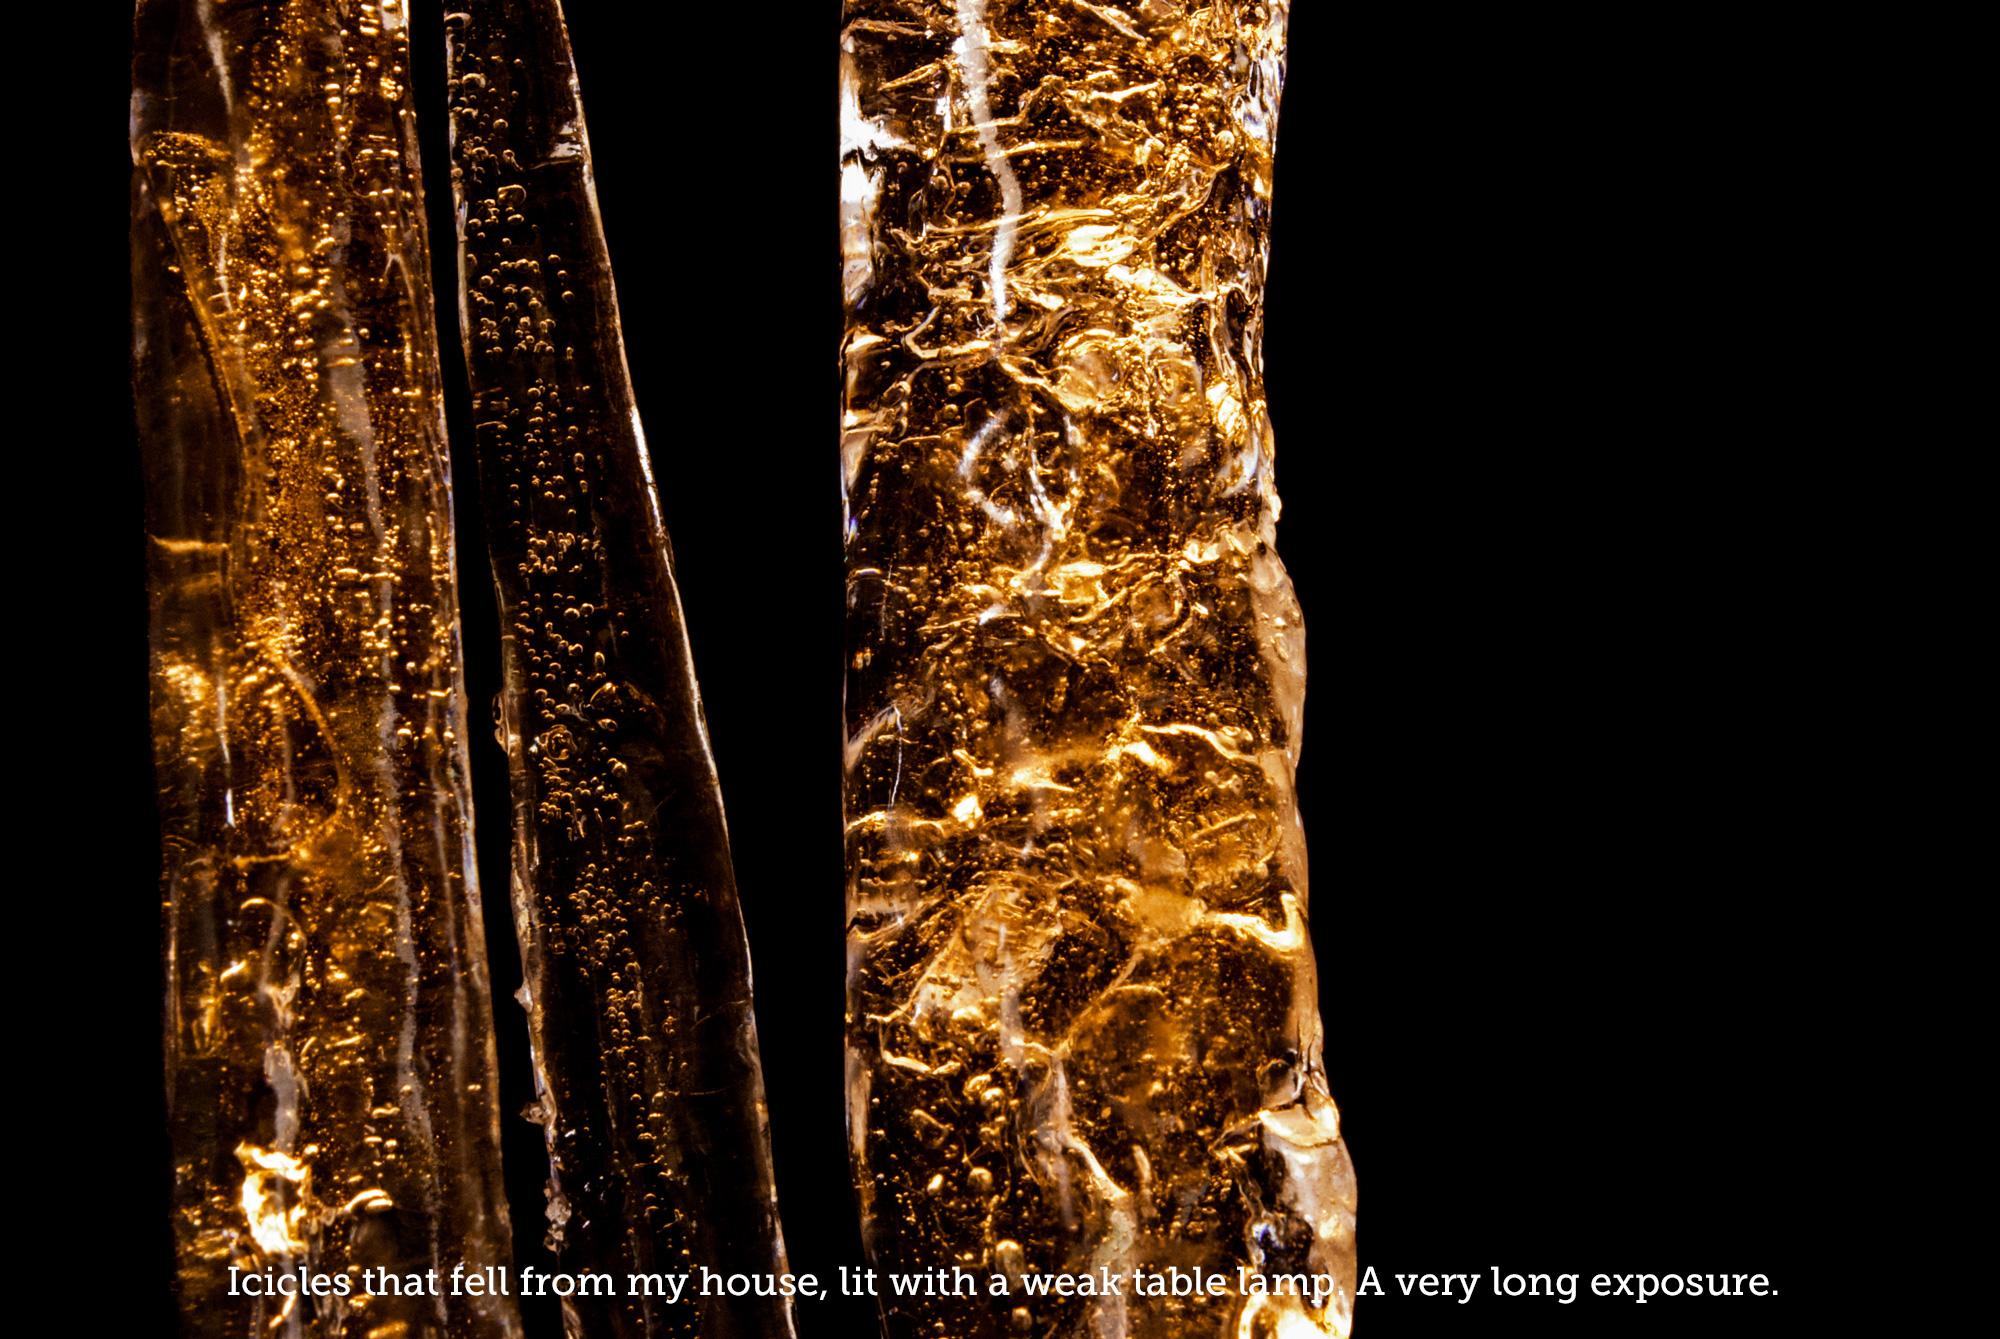
Watch for icicles. First, because you don't want them to fall on your head. Second, because they're clear ice with interesting shapes to refract light and often have bubbles inside.
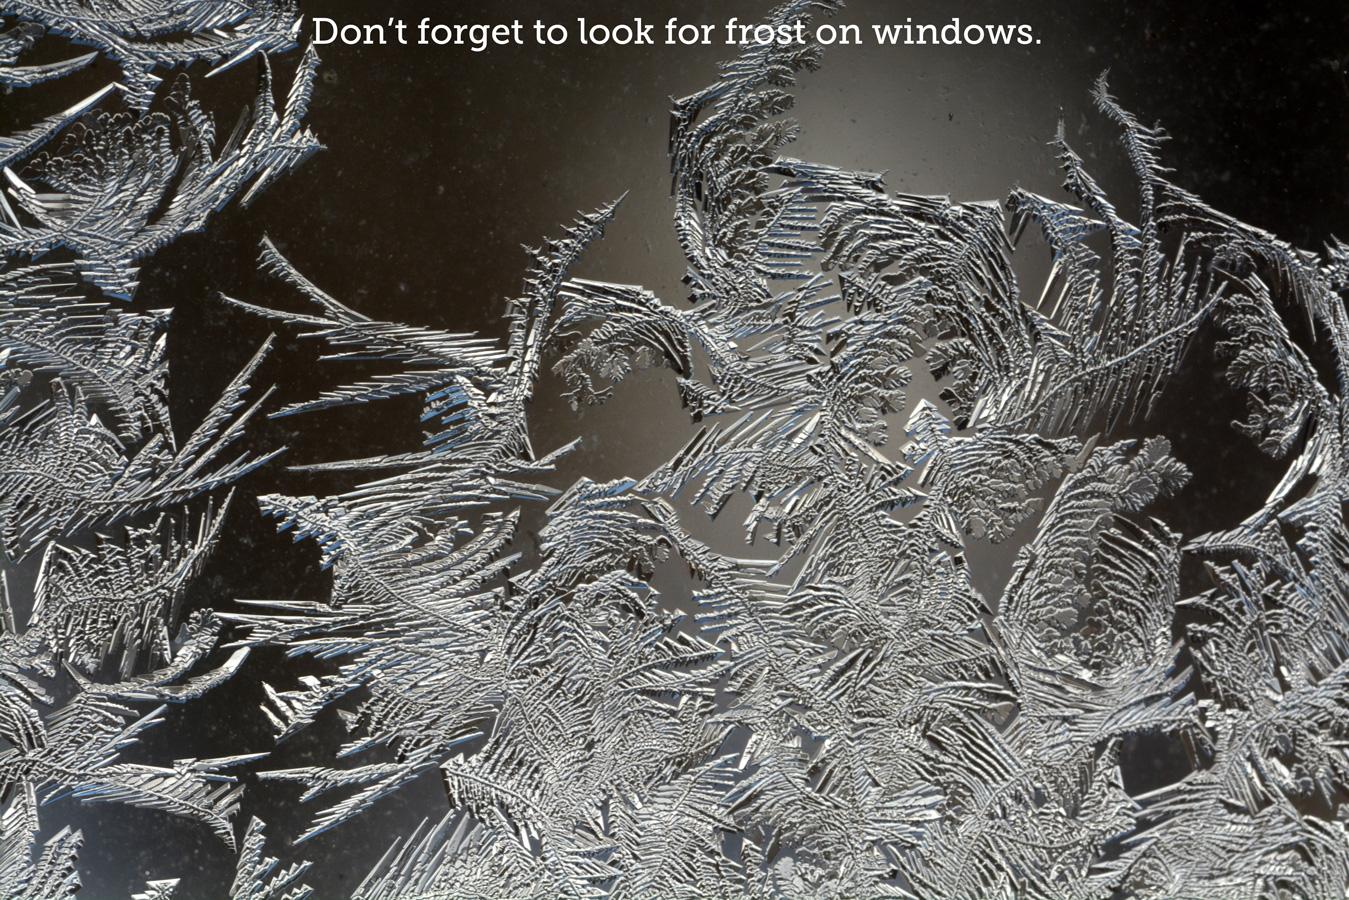
Don't forget about frost on windows. It's beautiful stuff. Take its picture.
Be careful: don't slip and fall, don't fall into cold water, dress appropriately for conditions, protect your gear, don't drop a camera down an ice fishing hole.
Look at Some More Pretty Pictures Before It's Over
(You could click "More Images" above to see them all on the same screen, but it'd be better for everyone involved to click the first one and look at them all larger.)
Thanks for Reading: Now Go Take Some Pictures!
I know it's long. I couldn't stop.
Right now you're thinking "What's wrong with this guy? Why does he think about this so much?"
I've got news for you: if you give this a try it won't be long until you're just as far gone as I am. Welcome!
Further Reading
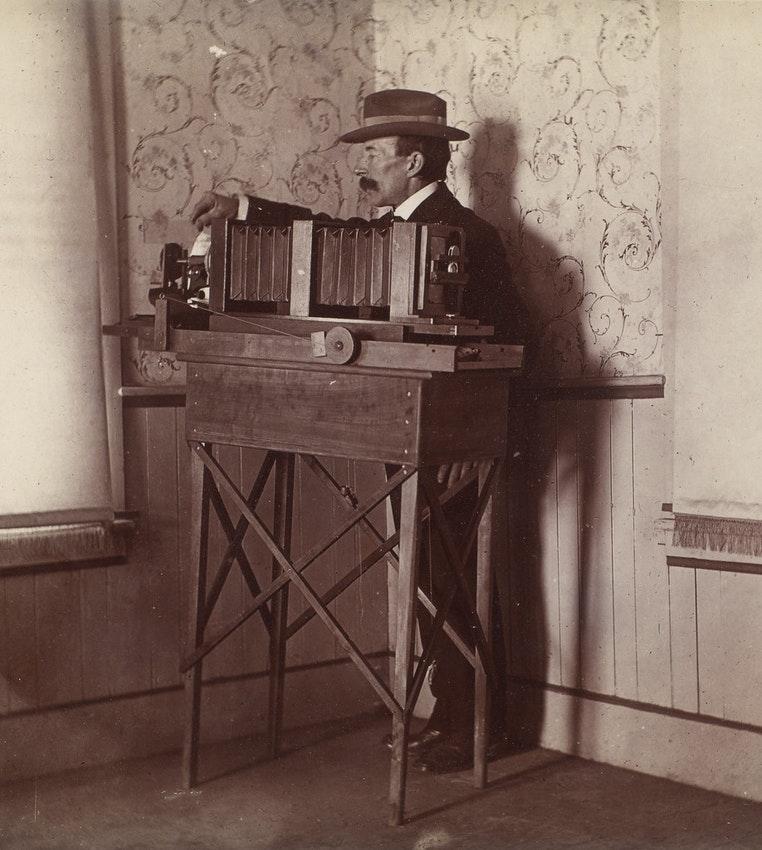
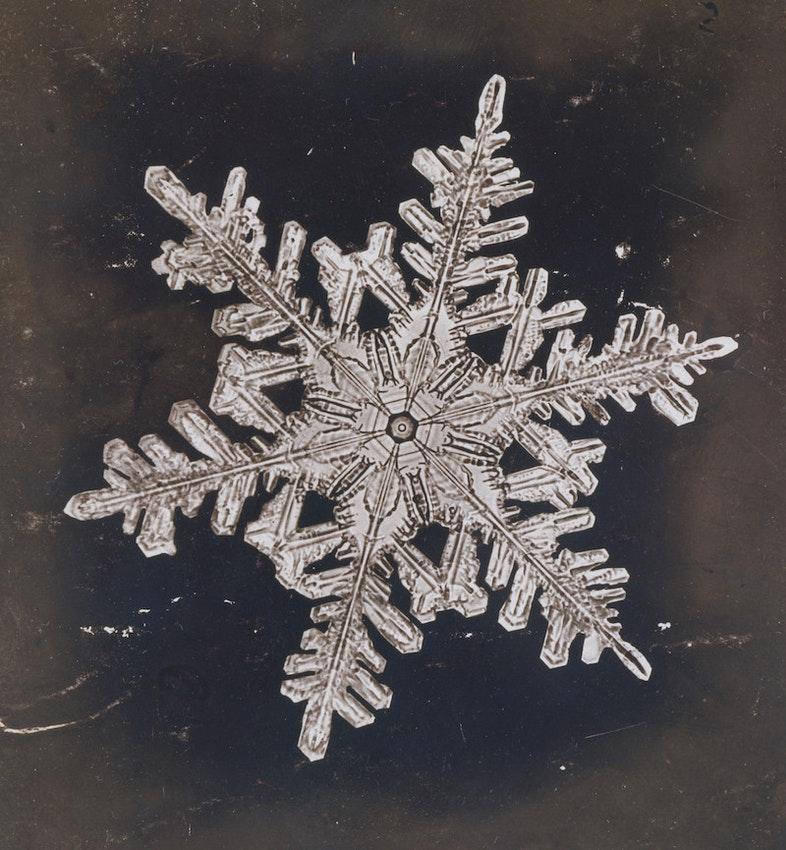
(The photos above are in the public domain.)
See that cool guy with the camera? That could be you!
You're a smart and curious person, right? Here you go!
- A great introduction to Snowflake Bentley, with images: https://publicdomainreview.org/essay/the-snowflake-man-of-vermont
- Why do bubbles appear in ice? https://engineering.purdue.edu/MSE/aboutus/gotmaterials/Other/yoder.html
There are various instructables about icemaking:
- This one shows how to make ice bowls: https://www.instructables.com/How-to-Make-Easy-Ice-Bowls/
- This one, on making clear ice, talks about what happens as water freezes: https://www.instructables.com/Lets-Make-Clear-Ice/ "The slower the water freezes, the larger the crystal. The larger the crystal the more transparent it is.... As the water freezes on the surface it expands. Ice is less dense than water so the slower it freezes, the less stress occurs and again aids in the clarity. This will force all those nasties to the center of our cube as mentioned earlier."
- Reading instructables on making clear ice will help you learn to manage your efforts to make ice that's not totally clear, but is clear enough to see the internal features.
Macro Photography:
- For macro photography information, check out this excellent instructable: https://www.instructables.com/Macro-Photography-and-Photomicroscopy/ It's more advanced than needed for this project, but the explanations are great. His advice on snowflakes and soap bubbles is particularly relevant.