IOT Door System
by legenddemonslayer in Circuits > Raspberry Pi
2503 Views, 12 Favorites, 0 Comments
IOT Door System
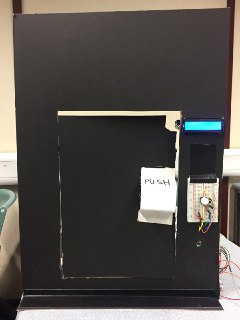
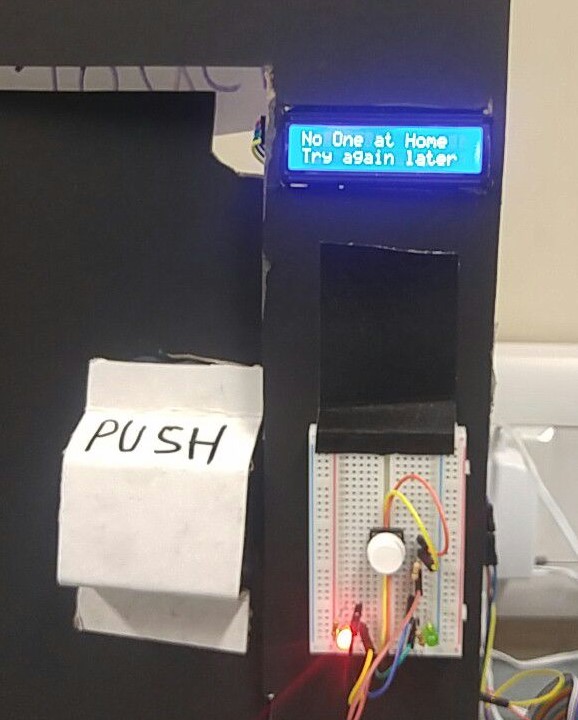
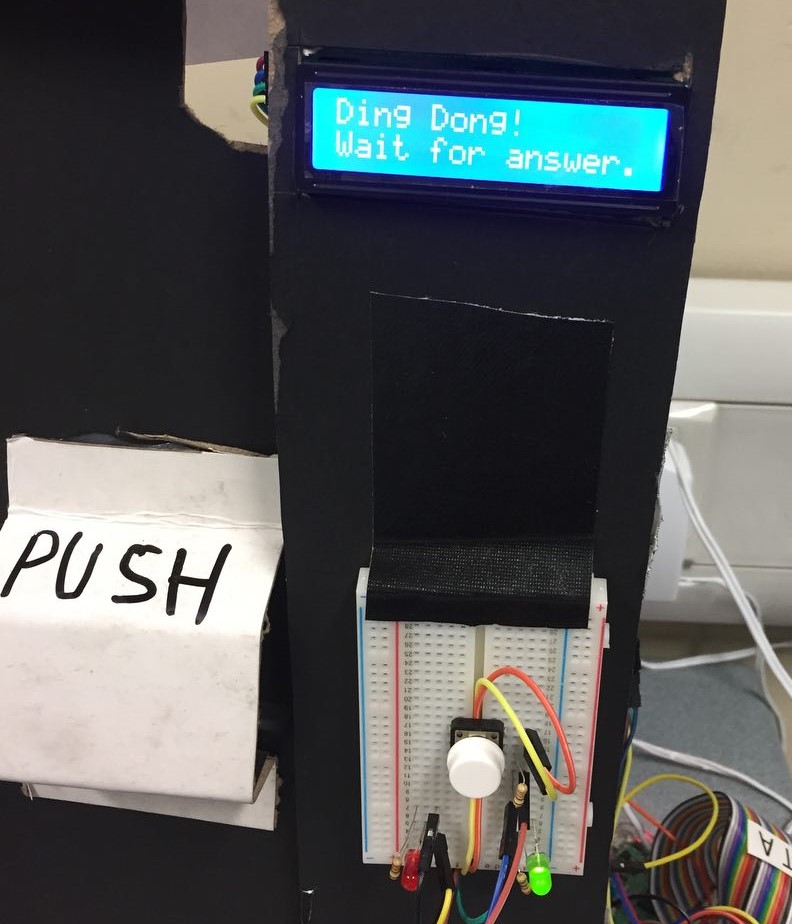
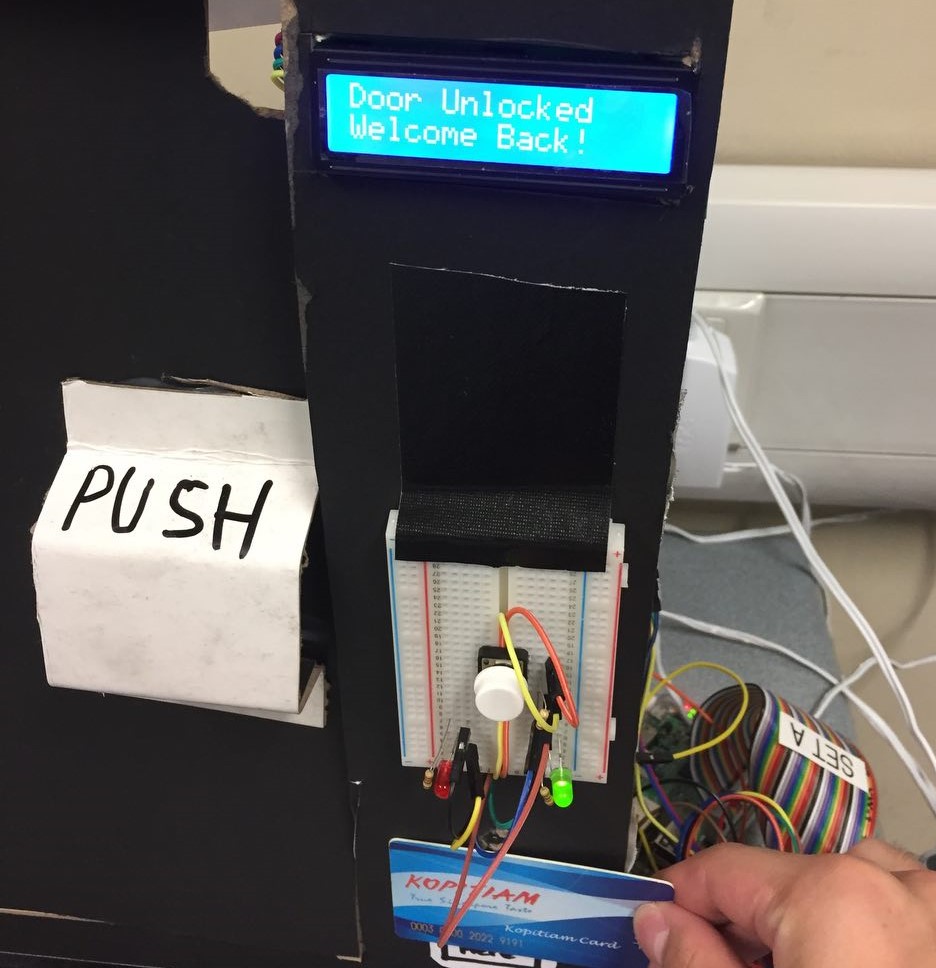
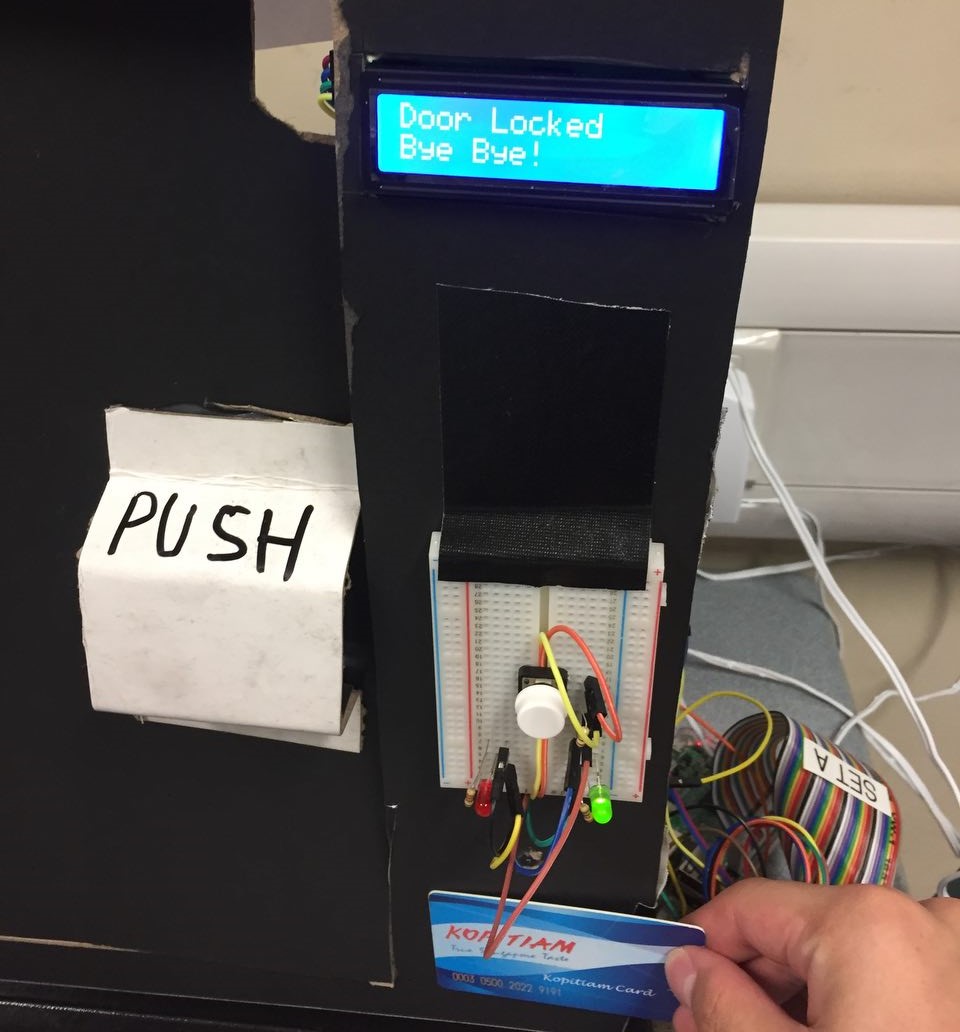
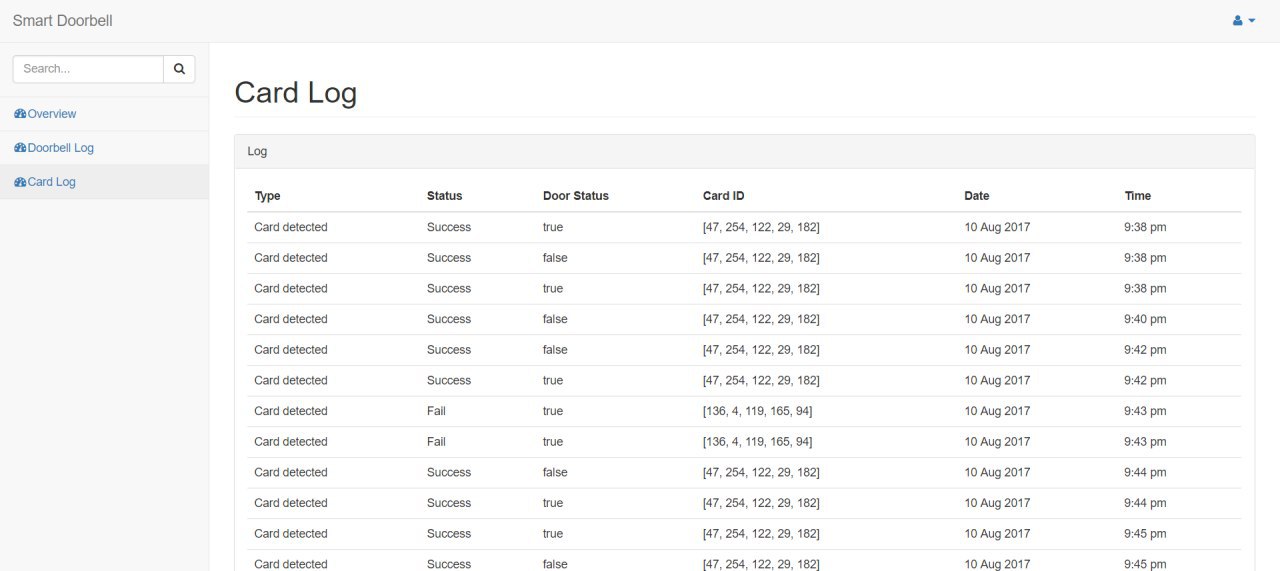
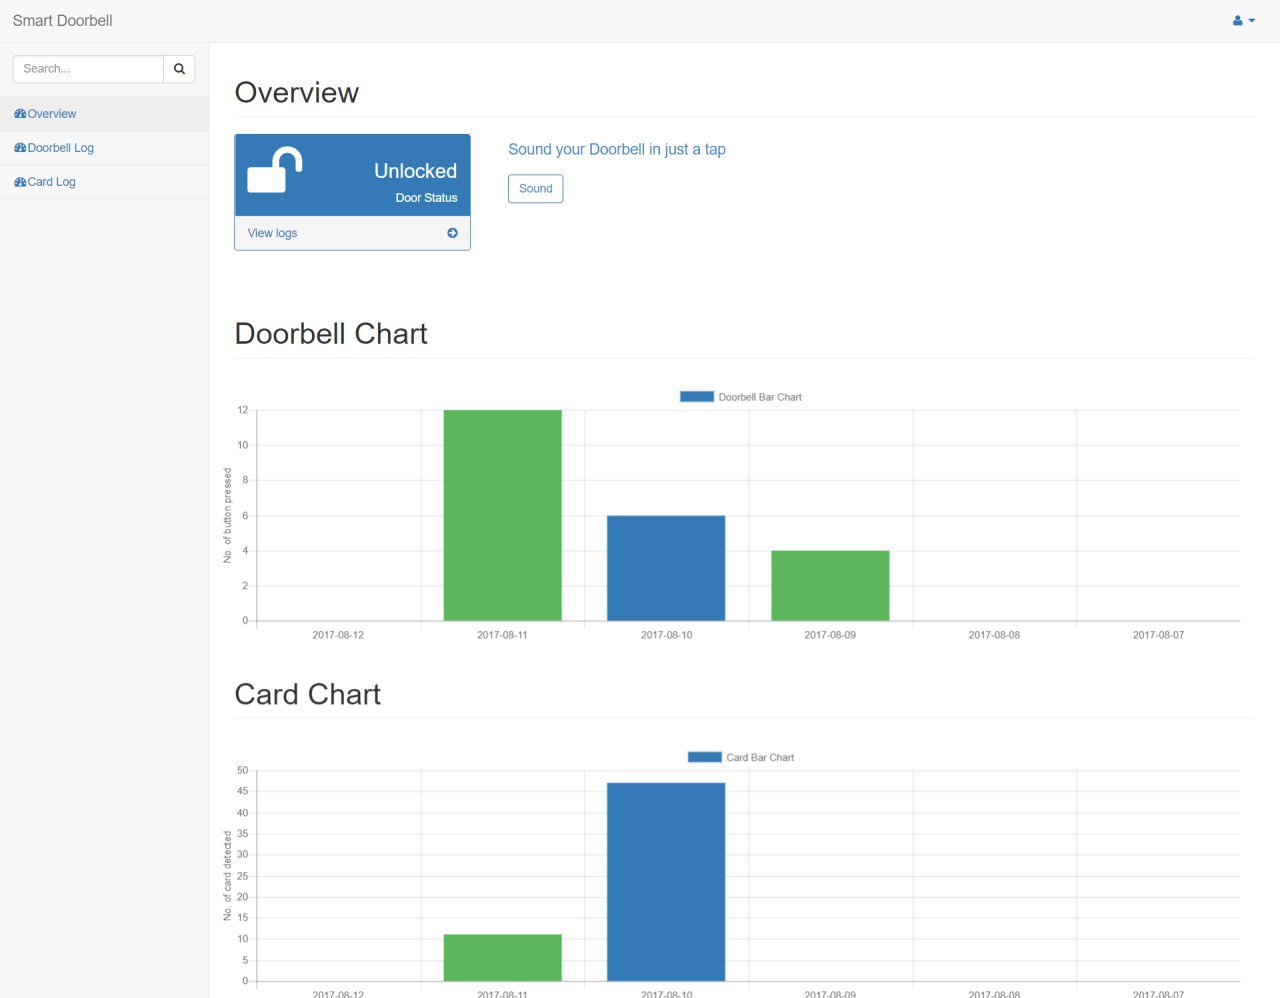
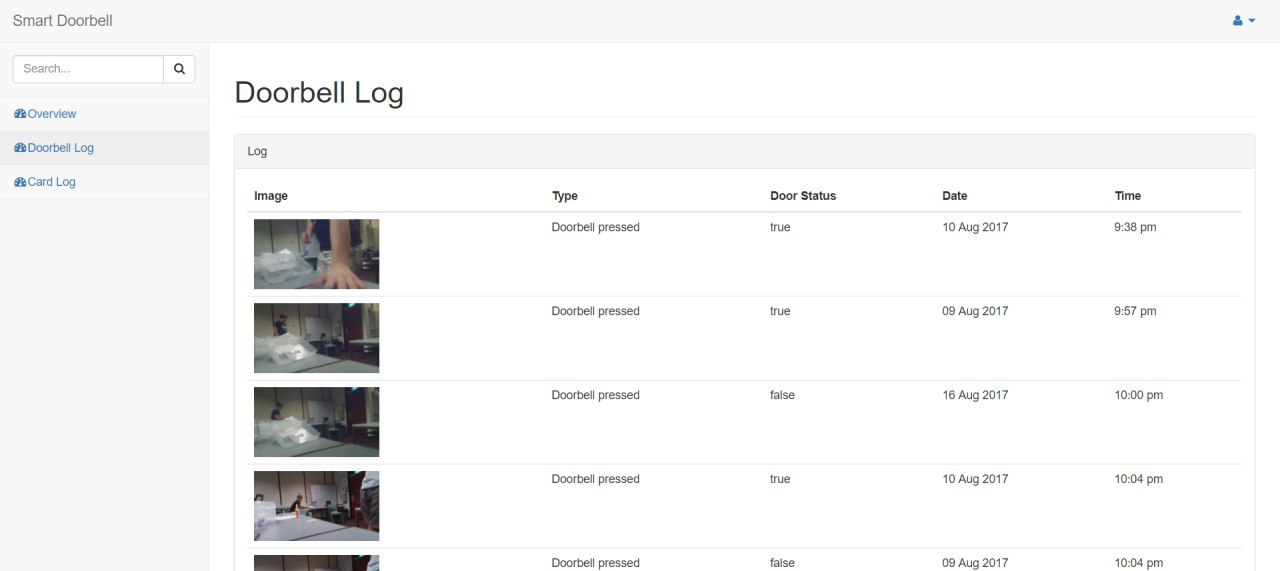
The Iot-Door System is an application whereby it helps both strangers on the Door to notify the user that someone is at the door and at the same time notify the stranger if someone is at home. Basically how this application works is that if the user is at home and someone is outside the door pressing the door bell, the door bell will ring to notify the user. Then the system will notify the user to wait for the user to check the door. If a situation like when if the stranger pressed the bell and no one is present at home. The door bell will not ring, but the stranger will be notified by the Displaying of message that no one is at home. Whenever the door bell is pressed a picture and the necessary details will be recorded down every time someone presed the doorbell and will be stored in the database for reference and allows the user to check who was at the door previously. Also a telegram message will also be sent to the user to to notify who came and what time they came, if no one is at home. The user will need to tap in/tap out the card on the NFC/RFID reader to tell the system if somone is at home or not.
Setting Up Your Sensors and Actuators
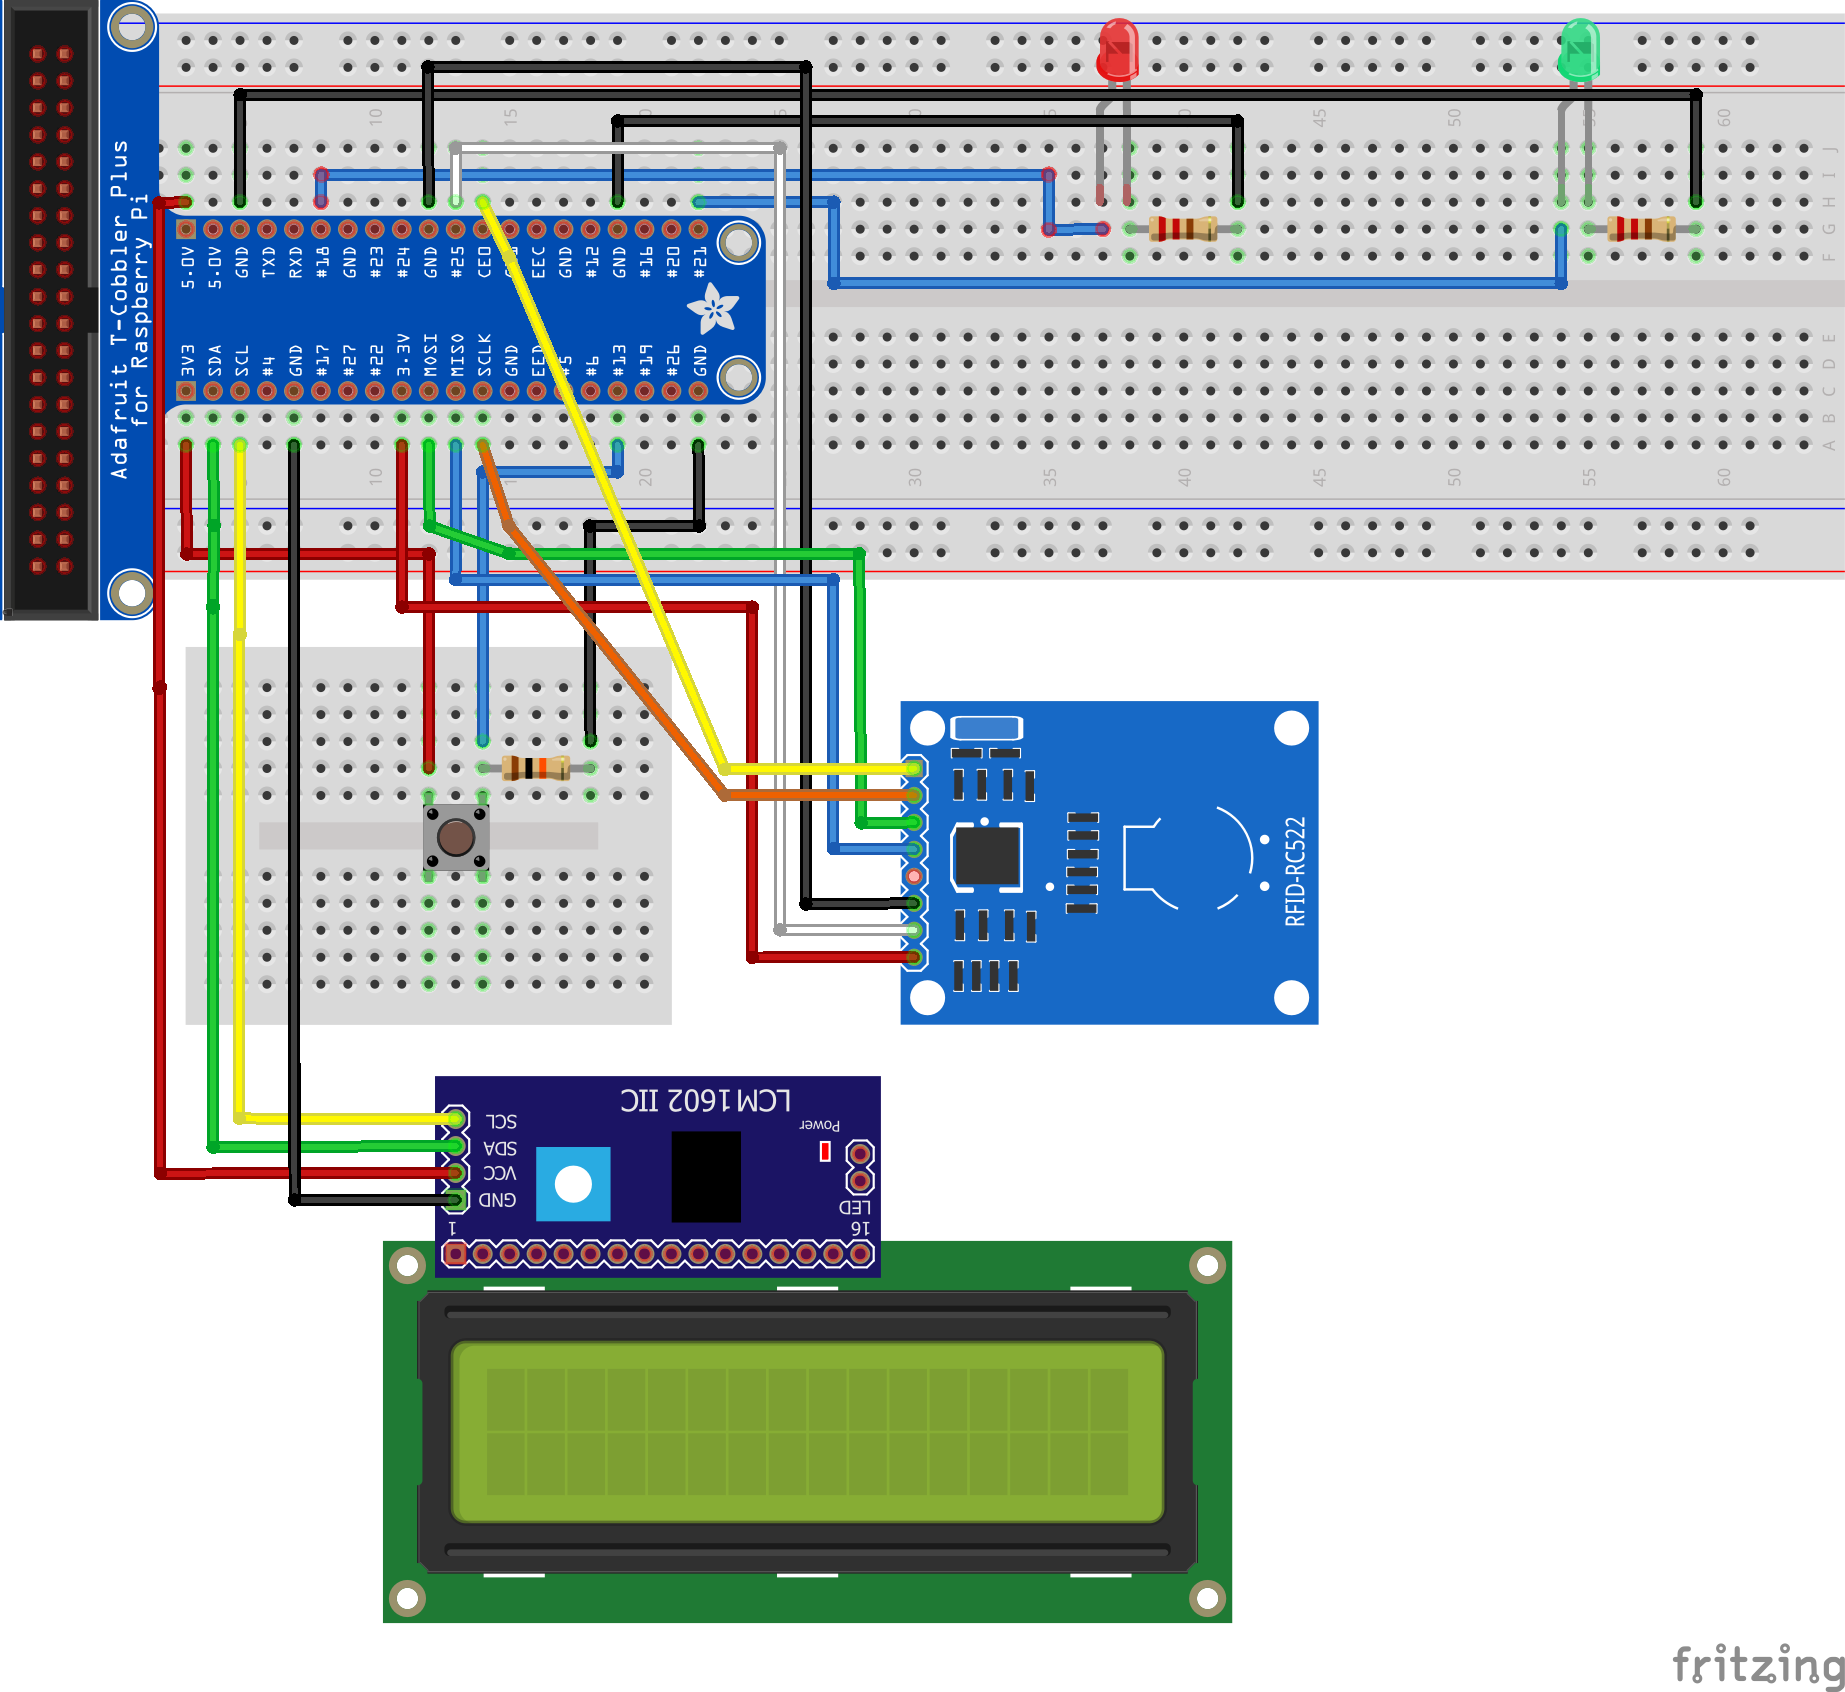
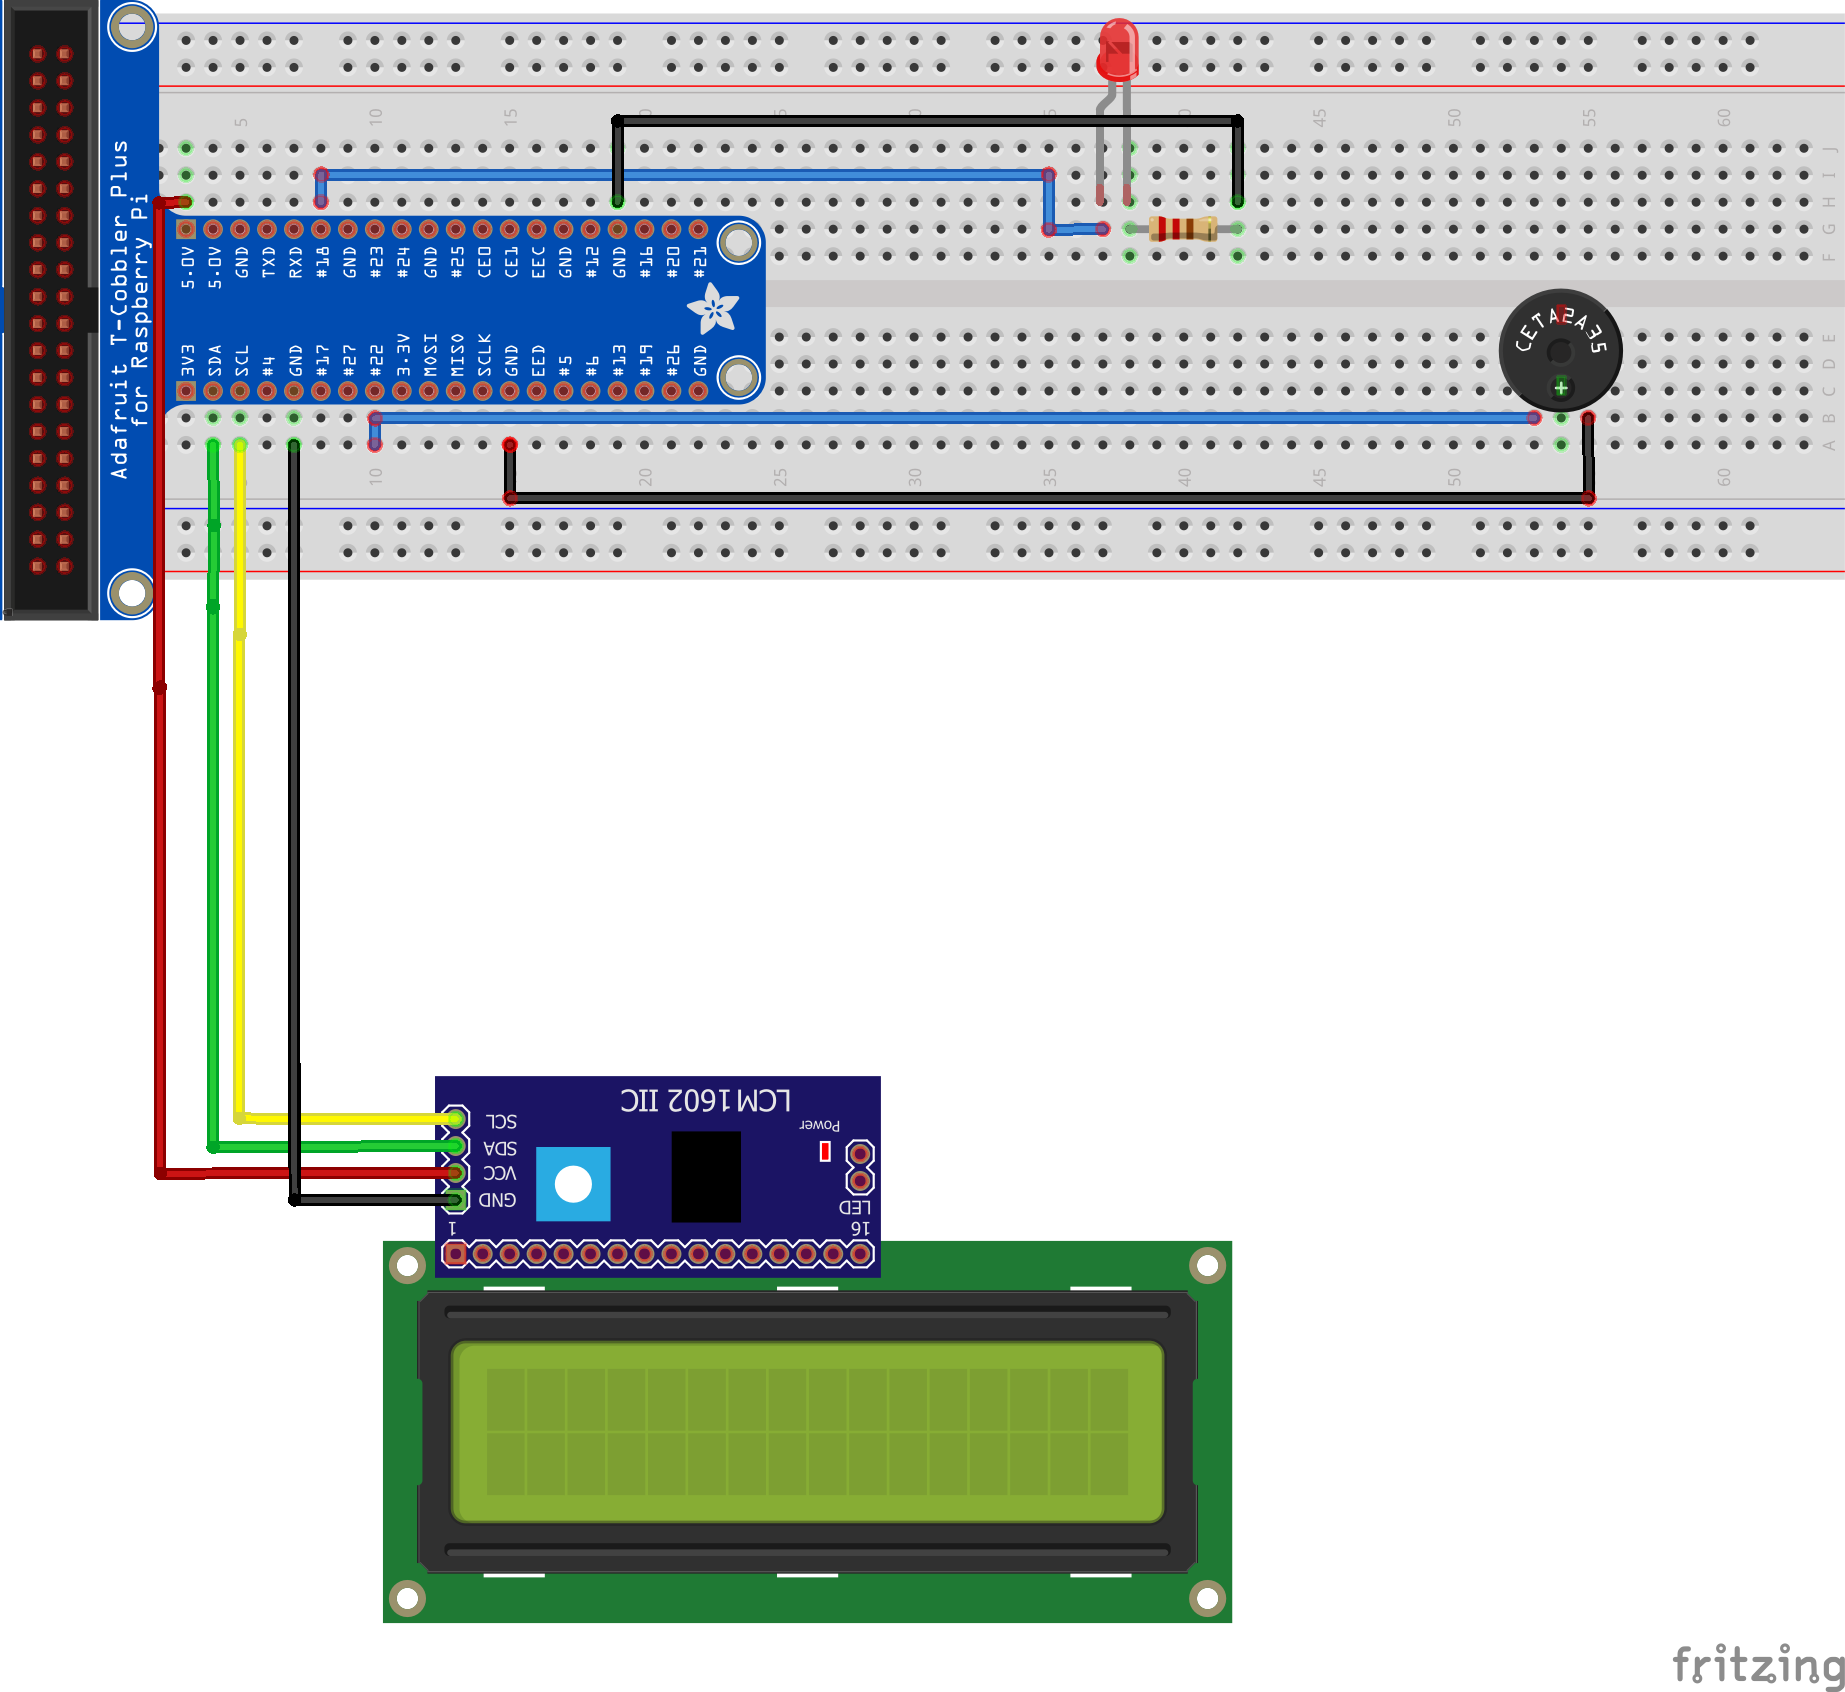
In this project you will need
1. 2 Raspberry Pi with Raspberry Pi Camera, 2 Main GPIO BreadBoard and 1 Mini BreadBoard
2. A lot of Jumper Wires(refer to Fritzing Diagram)
3. 2 Red LED light and 1 Green LED Light
4. 1 Buzzer
5. 1 Button
6. 4 Resistors (3 220K and 1 10K Resistors will be used)
7. 1 NFC/RFID Card Reader
8. 2 of 12C LCD Display
Installing Libraries
To start off please make sure you have the following items installed and enabled.
For Telegram Bot
sudo pip install telepot
For 12C LCD Display Library
sudo pip install rpi-lcd
For SPI-Py Library
git clone https://github.com/lthiery/SPI-Py.git
cd /home/pi/SPI-Py
sudo python setup.py install
For Python Dev Libraries
sudo apt-get install python-dev
For AWS SDK
sudo pip install AWSIoTPythonSDK
For AWS s3 image uploader
pip install tinys3
Note: If you encounter an error saying errno13 Permission Denined, please run this code:
chmod 777 /path/of/directory/error/is/saying
For MQTT Subscribing and Publishing
sudo pip install paho‐mqtt
Make sure you have also enabled Device Tree in config.txt sudo nano /boot/config.txt Ensure these lines are included in config.txt
device_tree_param=spi=on
dtoverlay=spi-bcm2835
Make sure you have also enabled SPI and also Camera in sudo raspi-config
Firebase Setup
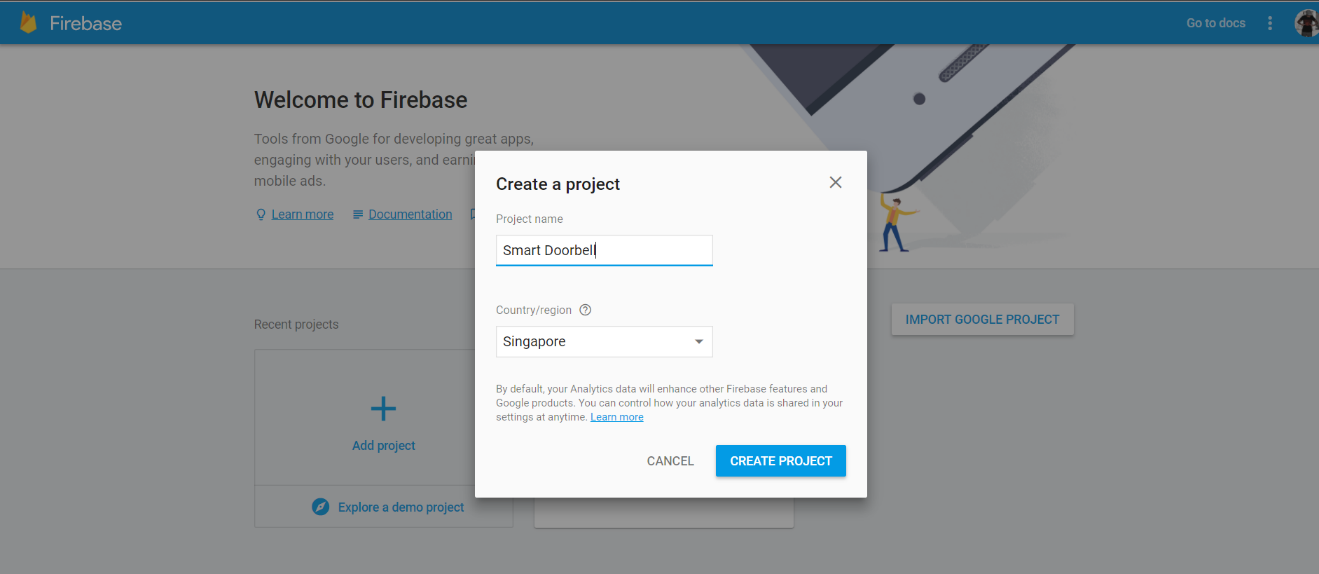
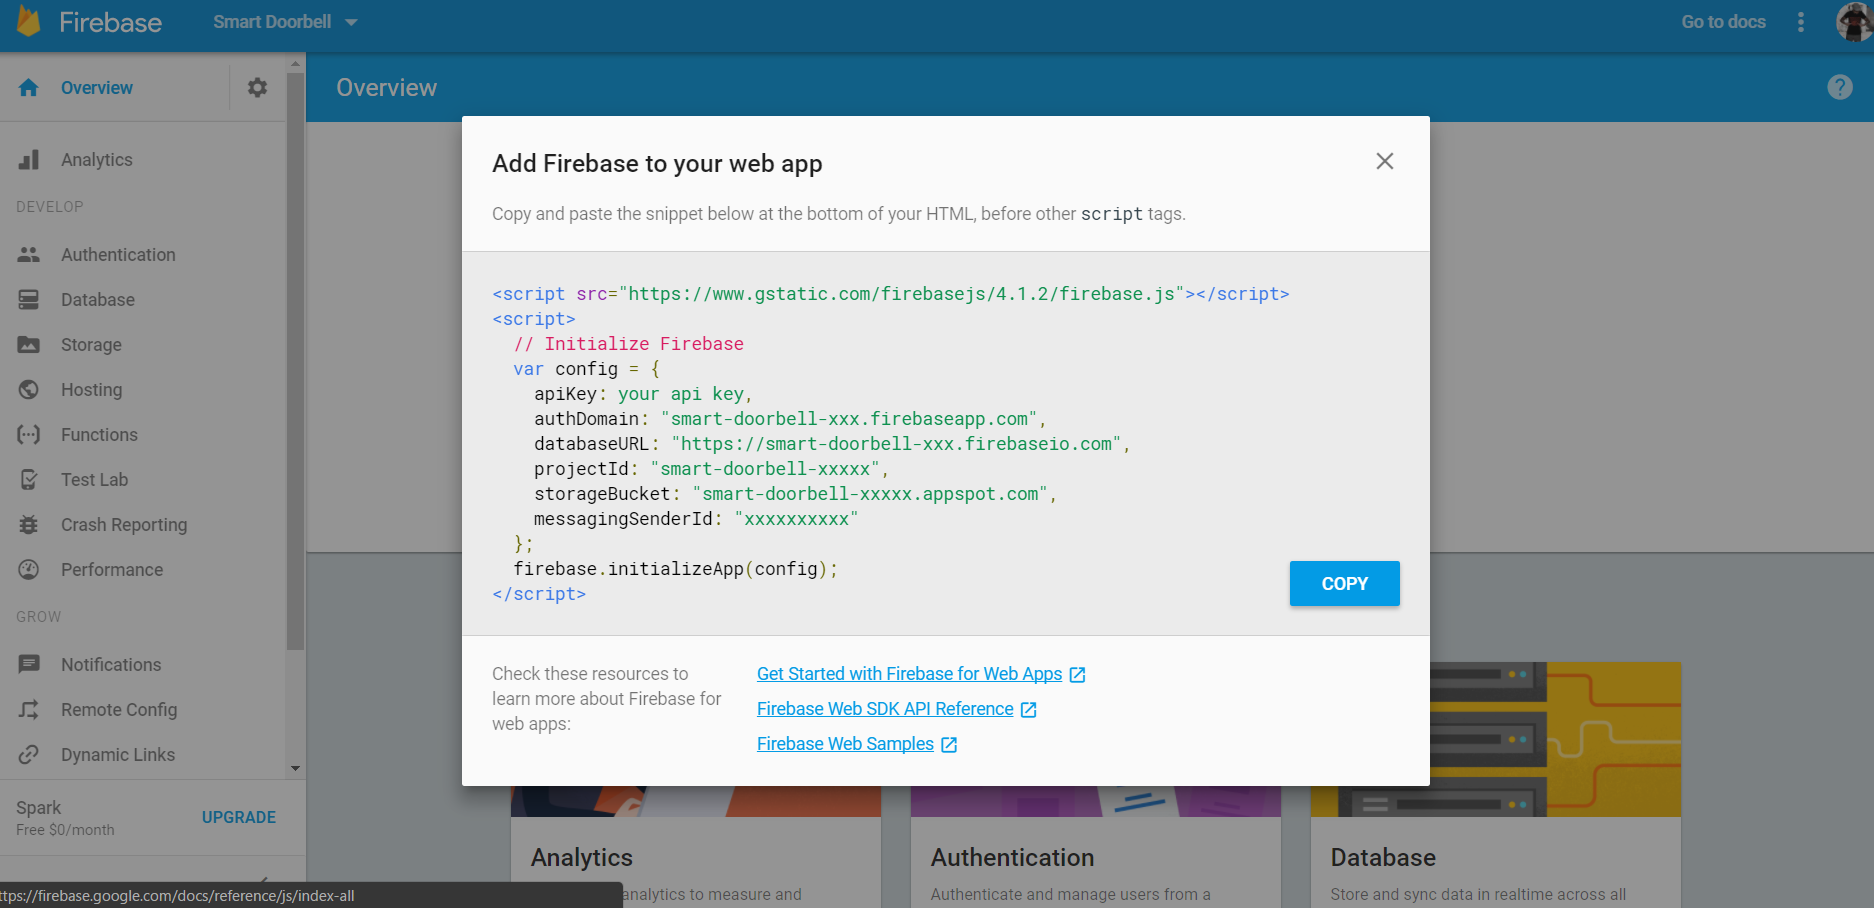
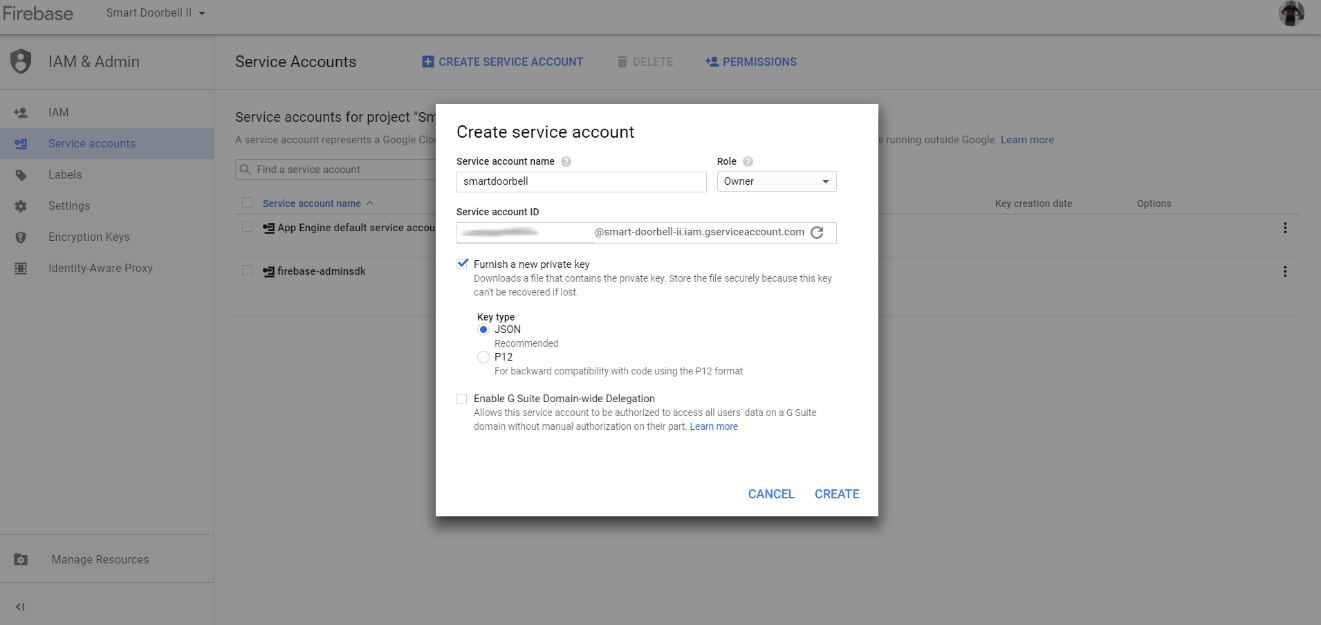
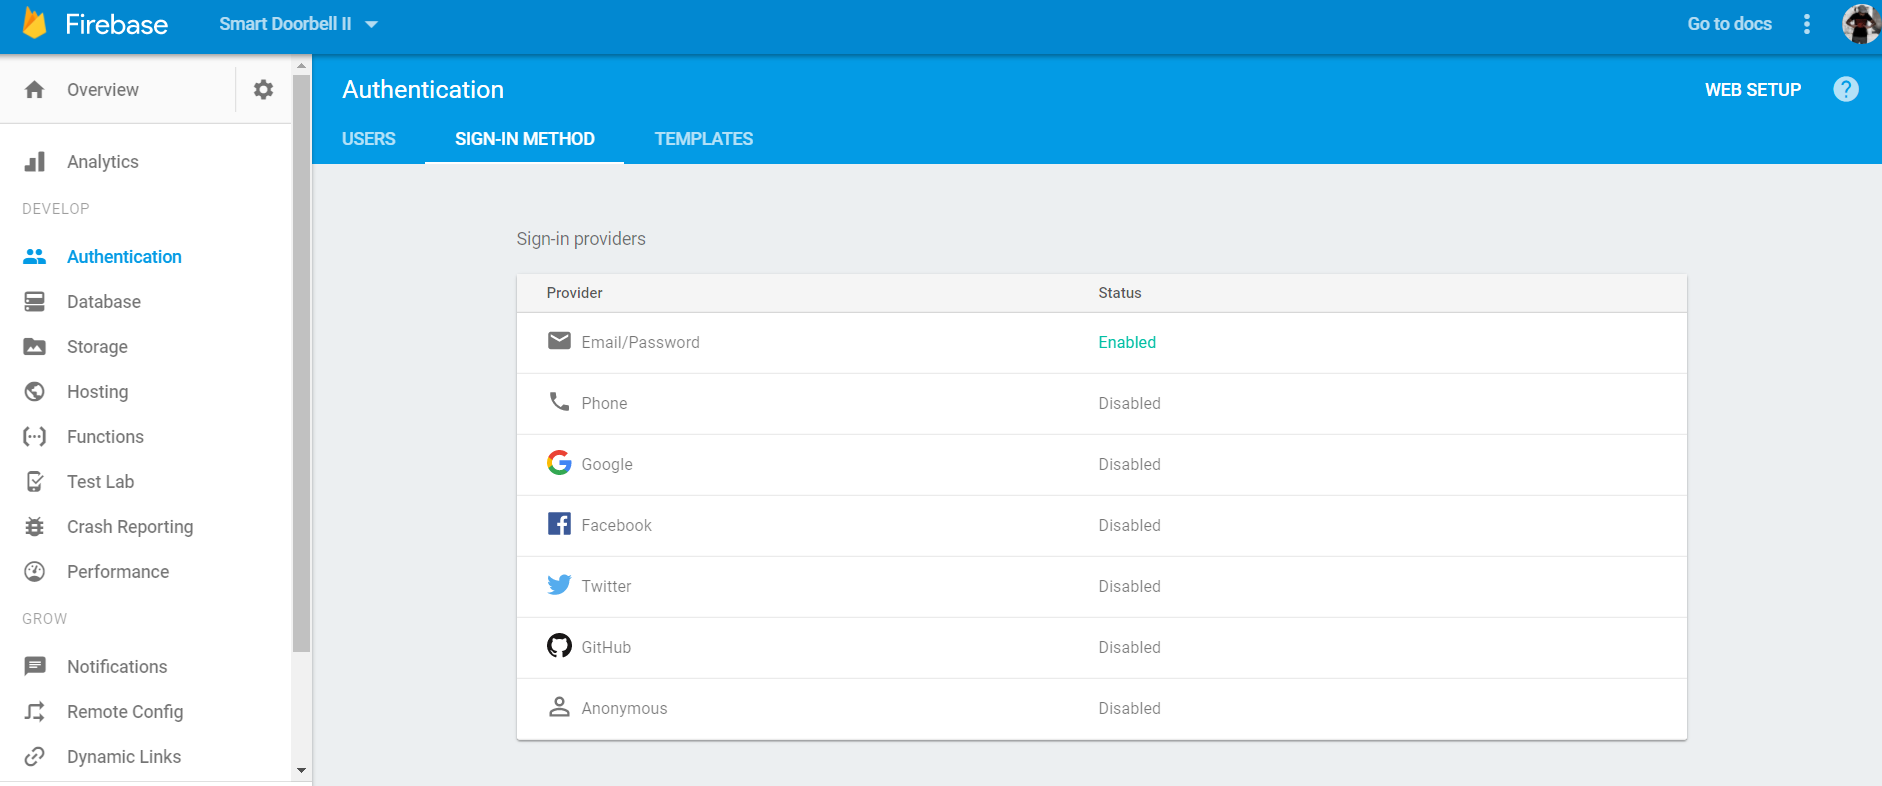
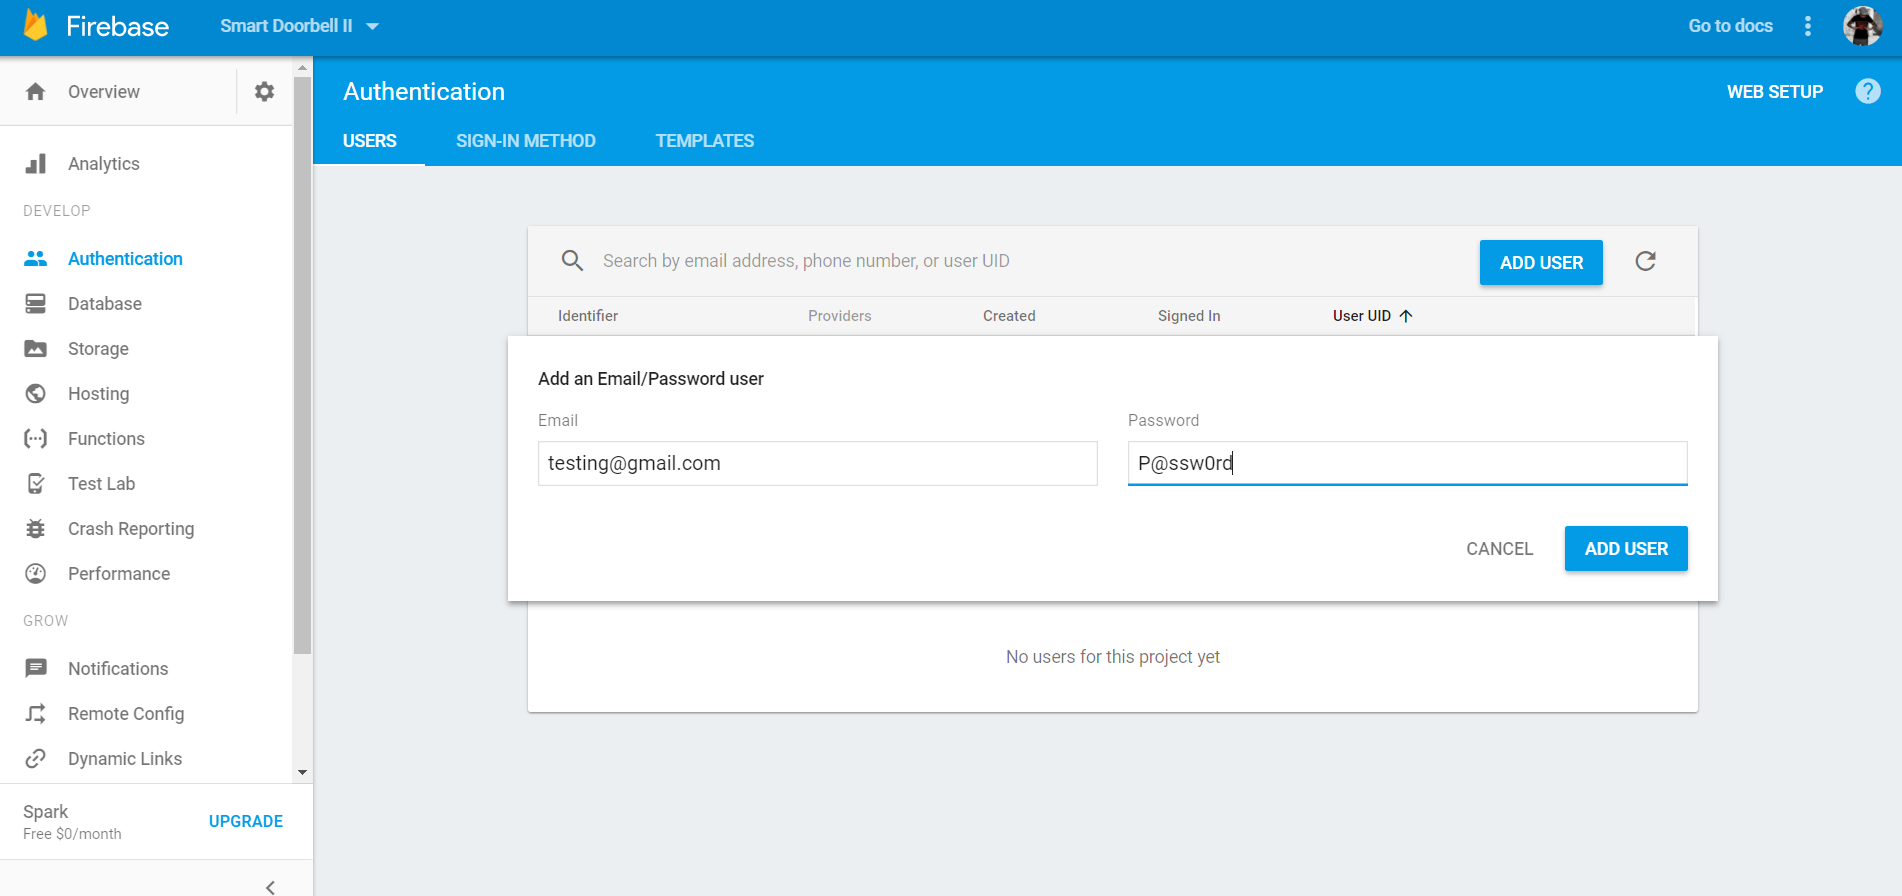
Create a Firebase account Creating a Firebase account is simple. You can register using an existing Google account at https://firebase.google.com/. Add project. Go to https://console.firebase.google.com/, add a new project and named it “Smart Doorbell”. Copy config script On the console, click on “Add Firebase to your web app” and take note of the scripts, you will need it later. Create service account Go to Project Settings, click on the Service Account tab > Manage all service accounts (top right), you will be directed to the page shown below, click Create Service Account. The project service account json file will be downloaded. (You will have to place this file next to the python file which we will be coding later) Authentication On the console, go to Authentication>Sign-in Method, enable Email/Password. Go to User>Add user, add a user, this will be used for self-authentication purposes later in the code.
AWS IOT Setup







Sign in with your AWS console at https://aws.amazon.com
In the AWS dashboard, type “AWS IoT” to access the AWS IoT service.
On the Welcome page, choose Get started
Now register your Raspberry PI as a Thing In the left navigation pane, click “Registry” to expand it, then choose “Things”
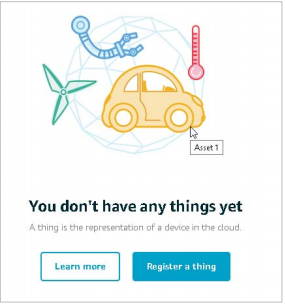
On the page that says “You don’t have any things yet”, choose “Register a thing” If you have created a thing before, choose Create.
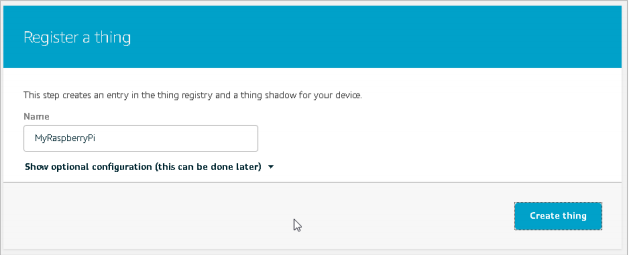
A thing represents a device whose status or data is stored in the AWS cloud. The Thing Shadows is the state of the device, e.g. is it “on” or “off”, is it “red” or “green” etc. Our “thing” here is our RPi, so let’s type “MyRaspberryPi” for the name Click “Create thing”
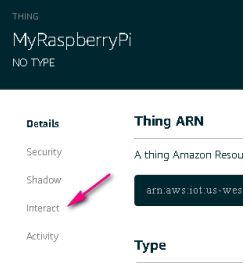
On the Details page, choose Interact
Copy and paste the REST API endpoint into a Notepad. You will need this value later.
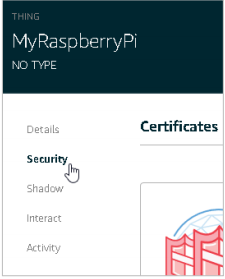
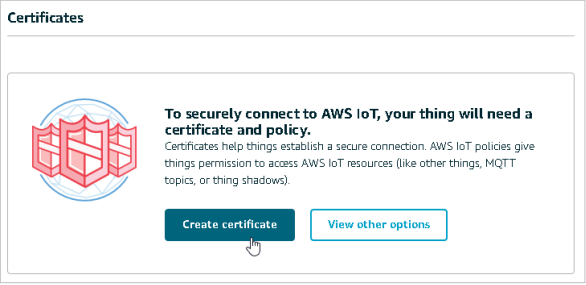
Next we are going to Create Certificates Choose Security
Choose “Create certificate” to generate an X.509 certificate and key pair
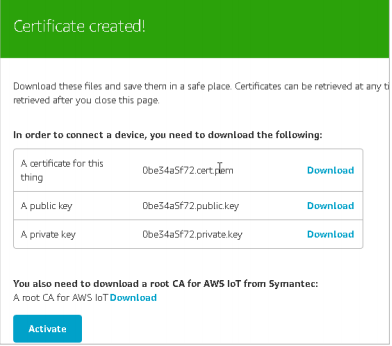
After a while, you should see the following screen, where there are a total of four download links
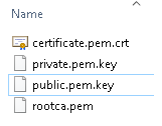
Create a working directory called deviceSDK and download all the 4 files above in this deviceSDK directory, renaming them with friendly names like what I have done.
Next, click the “Activate” button. Almost immediately, you should see “Successfully activated certificate” and the Activate button changes to “Deactivate”
Next choose Security Policy for your RPI Click on the “Attach a policy” button that is near the bottom right-hand corner of the page.
On the next page, choose “Create new policy”
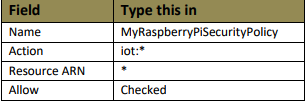
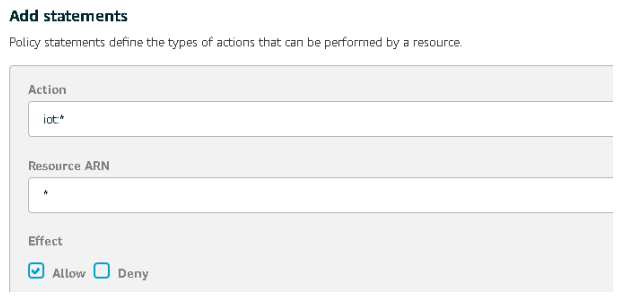
On the Create a policy page, key in the following configuration and then click “Create”
You will see a page similar to that below, move ahead to click the “Back” arrow to return to the previous page and contibue with the instructions in next section.
You will see a page similar to that below, move ahead to click the “Back” arrow to return to the previous page and contibue with the instructions in next section.
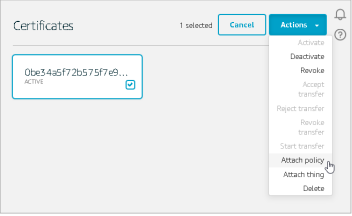
The X.509 certificate you created earlier is shown. Click the checkboc beside it, then click “Actions” button and choose “Attach Policy”
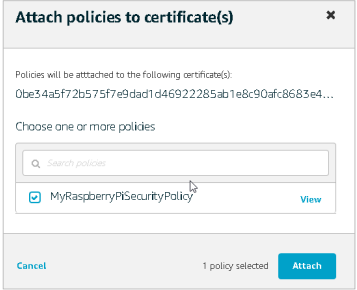
Check the “MyRaspberryPiSecurityPolicy” you created earlier and click “Attch” button.
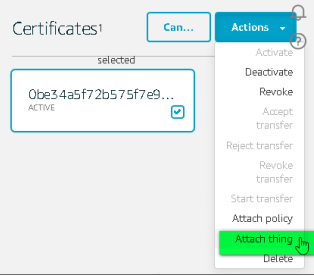
Let’s attach the “Thing” to this certificate Click “Actions” button and choose “Attach Thing”
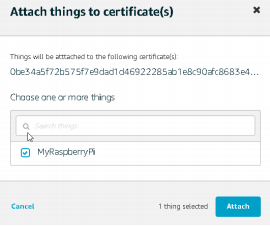
In the Attach things to certificates(s) dialog box, select the check box next to the thing you created to represent your Raspberry Pi, and then choose Attach
AWS S3 Setup
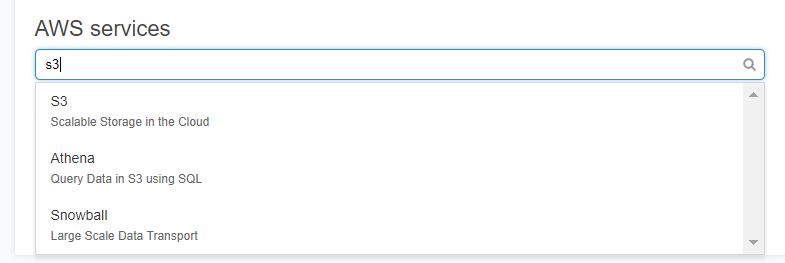

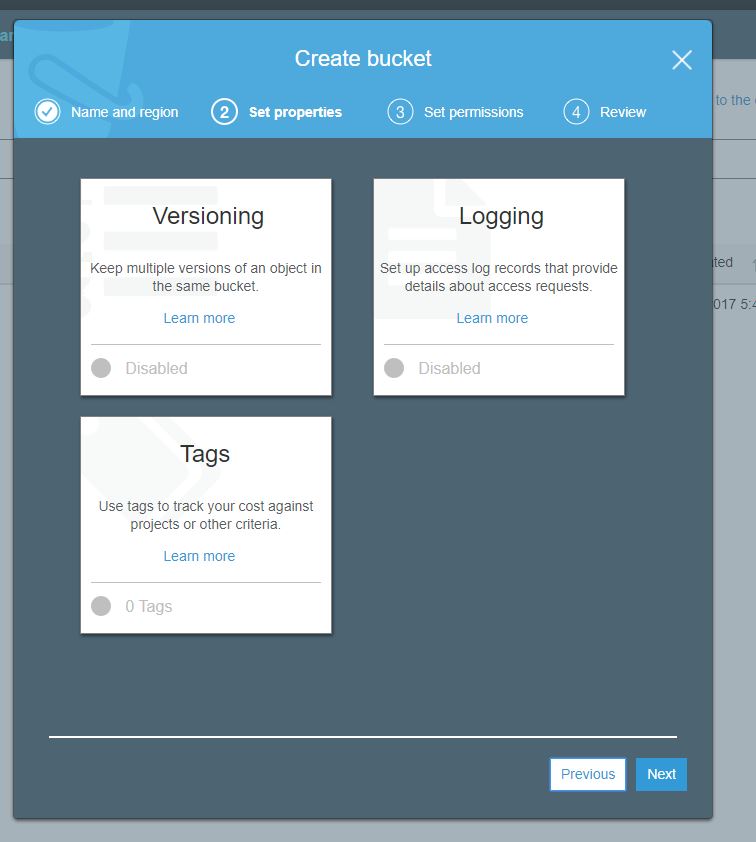

On the AWS Console, search for 's3' Click on the first one you see
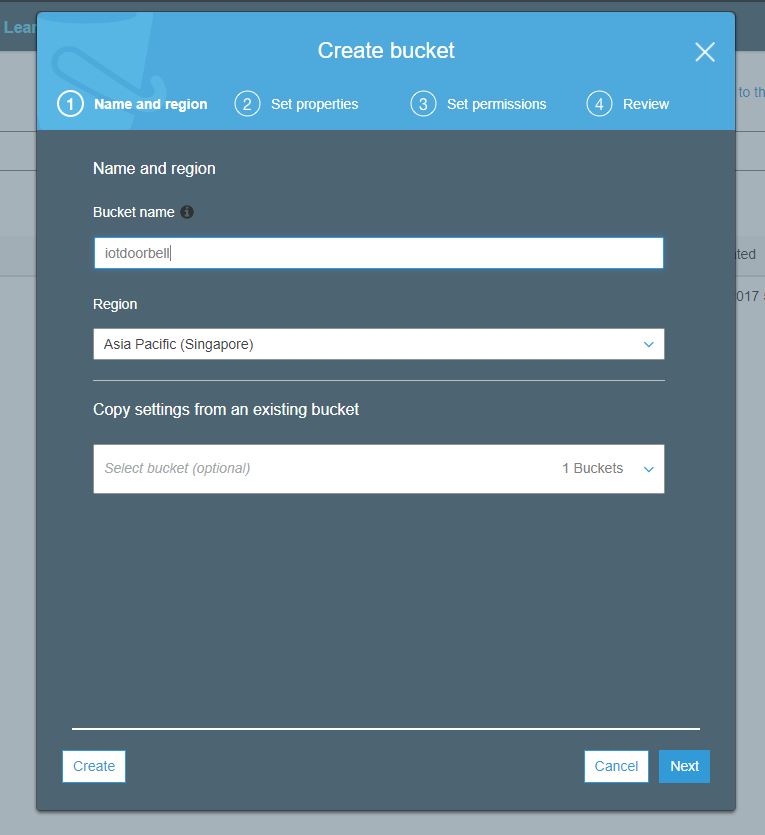
Once done, click on Create a Bucket on the left side.
Give a name for your bucket. I gave it as 'iotdoorbell', then click on next
Click on next again
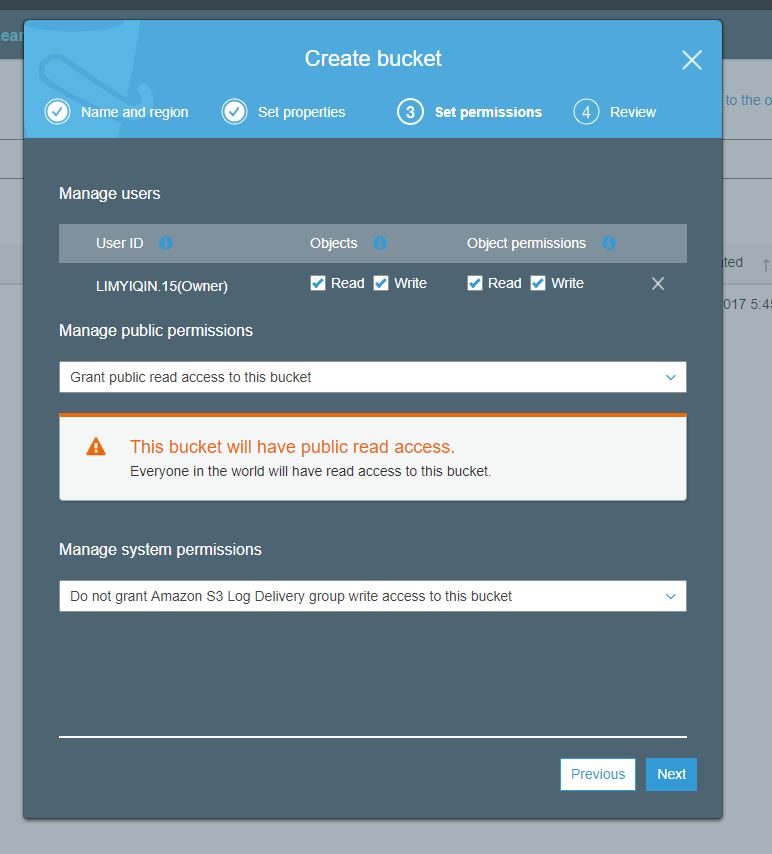
On the permission page, change the 'Manage Read Permission' to 'Grant public read access to this bucket', then click on next and then finish.
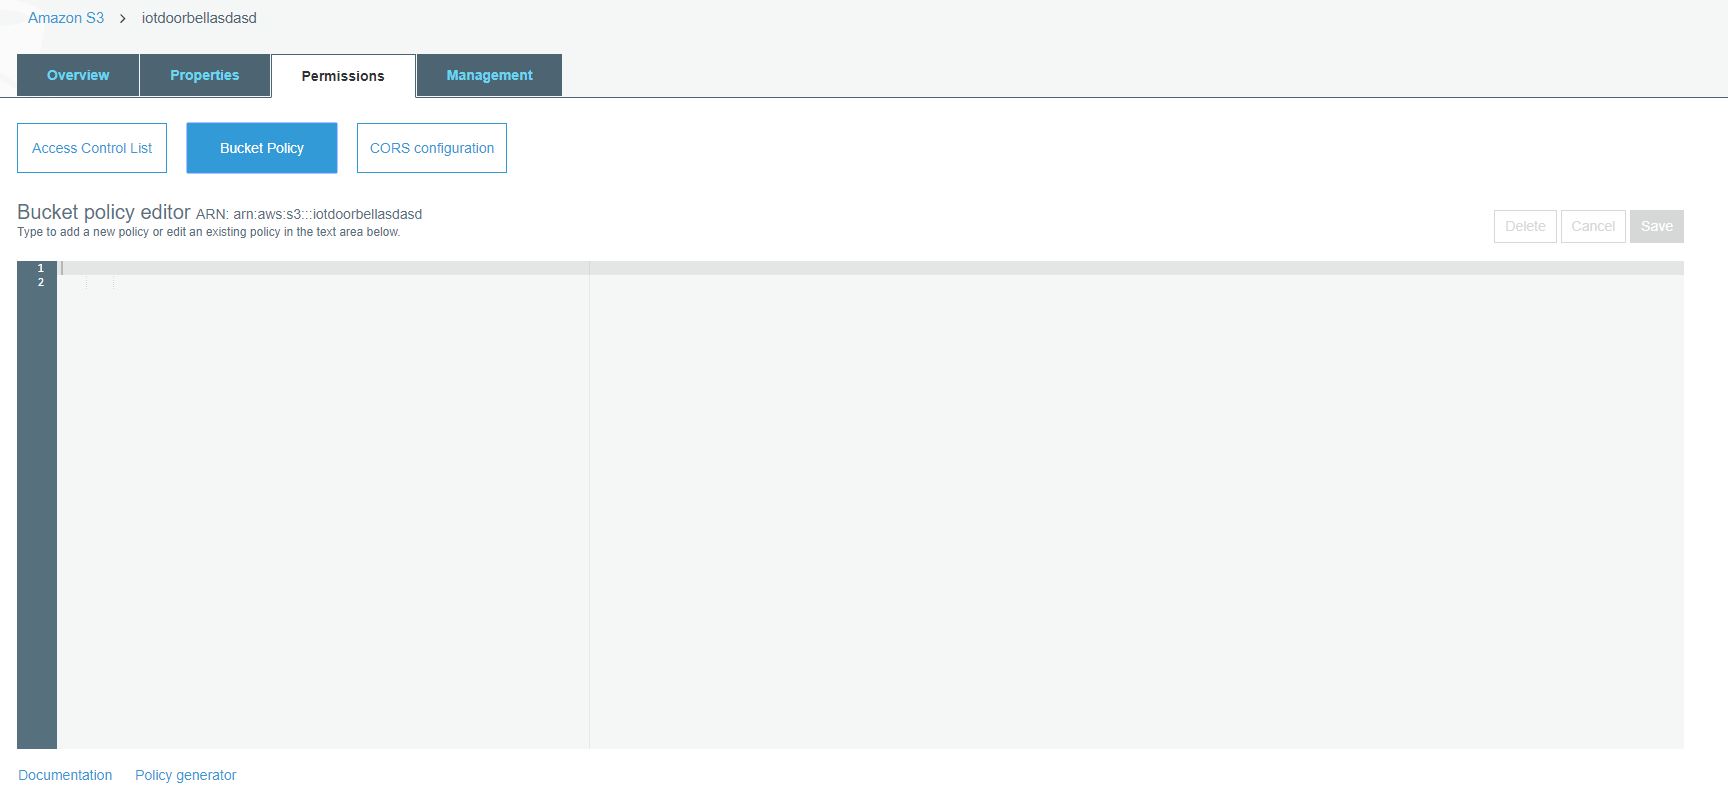
On that bucket, click on Permission Tab, then Bucket Policy.
Paste the following json
{ "Version": "2008-10-17", "Statement": [ { "Sid": "AllowPublicRead", "Effect": "Allow", "Principal": { "AWS": "*" }, "Action": "s3:GetObject", "Resource": "arn:aws:s3:::iotdoorbell/*" } ] }
Note on the Resource, i put mine as 'iotdoorbell'. Change the name to the bucket of your name Once done, you can create a folder called 'CapturedPics' to save all the images taken by the RPi Camera
Getting Private Key
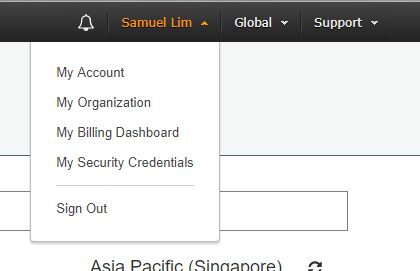
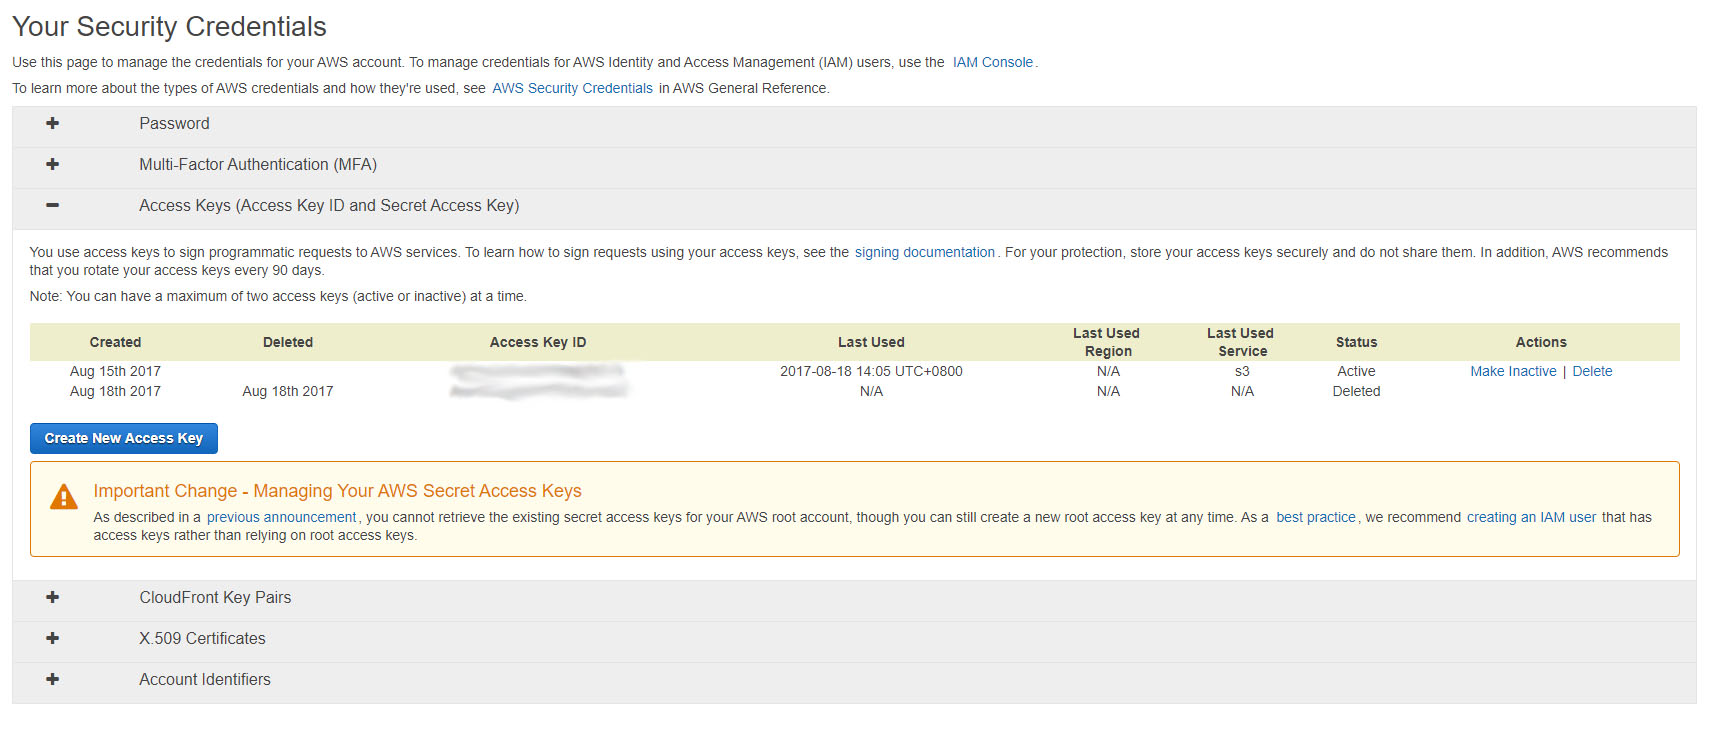
On the top, click on your account name, follow by My Security Credentials.
On your Security Credentials Page, click on ➕ next to Access Key. Once done, click on Create New Access Key. This will prompt you to download a .csv file. You must download it to get your secret key. Store the Access Key and Secret Key carefully
Preparing Telegram Bot
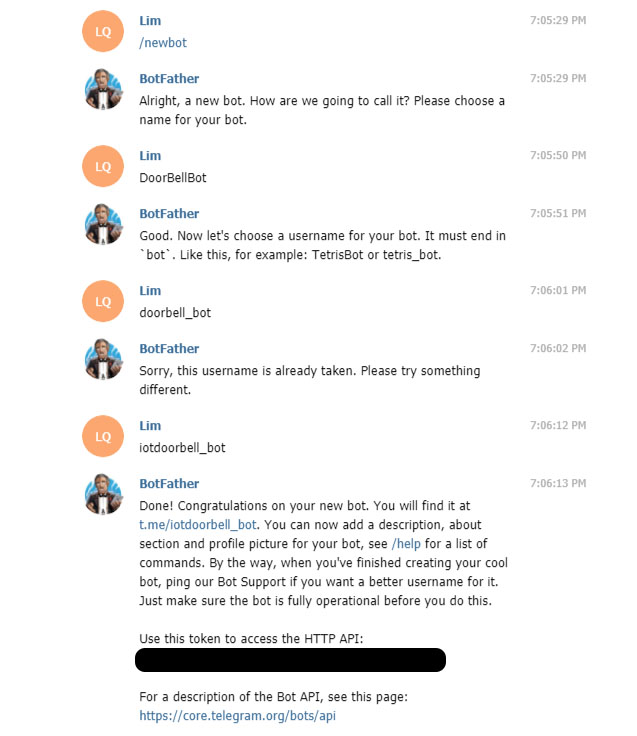
Create a Telegram Bot using BotFather. Give it a name and a username. For mine I name it iotdoorbell_bot. Follow the steps i did on the screenshot of the botfather chat.
Once done save the API Key in a notepad. The key will be used in the main python Start talking to your new bot by saying /start.
Program Codes
download the codes in the github repository:
https://github.com/limyiqin/IoTDoorSystem
Remember to replace the following Access Key/Token:
telegram Bot token
AWS Access Key
Firebase Access Key
Expected Results
