IClips

Instructables
Jason Arendt, Ria Parab, Maddi Wethall
Background
Simplicity is the hallmark of design. When designing a consumer product, you should aim to fix as many problems as possible with as simple a design as possible. Business like Apple and 3M have taken this lesson to heart and have become industry leaders due to the range of functions and simplicity of technology they develop. To imitate these highly successful firms, you need the same maker mindset they use. A maker mindset requires novel thinking, patience, and perseverance. For Team Synergy, entering the maker mindset meant that we needed to identify a problem, try to find a simple solution, and then make a lot of edits to increase appeal to the customer.
One of our group members stumbled upon a ubiquitous problem while working out at the gym. She could not use the treadmill without her new Apple Air Pods falling out of her ears. As such, we decided that if solved, our group could create a profitable business with a fully integrated customer experience. We quickly found that marketing your simple and novel fixes are just as important as creating them. Without a viable business model to support your product, funds will soon run out and no progress will be made.
Purpose
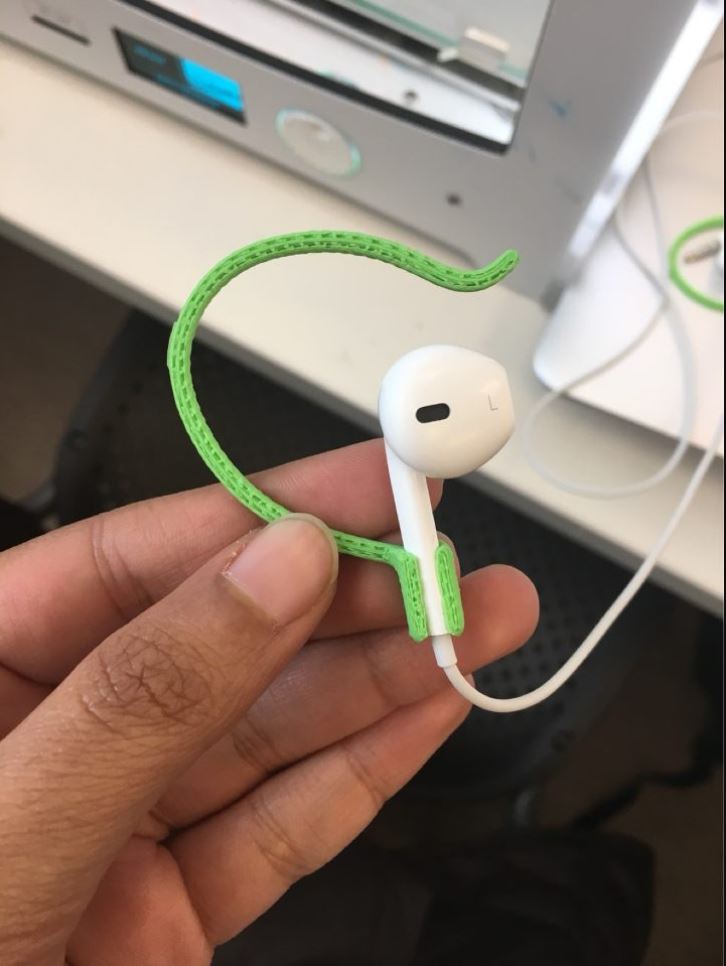
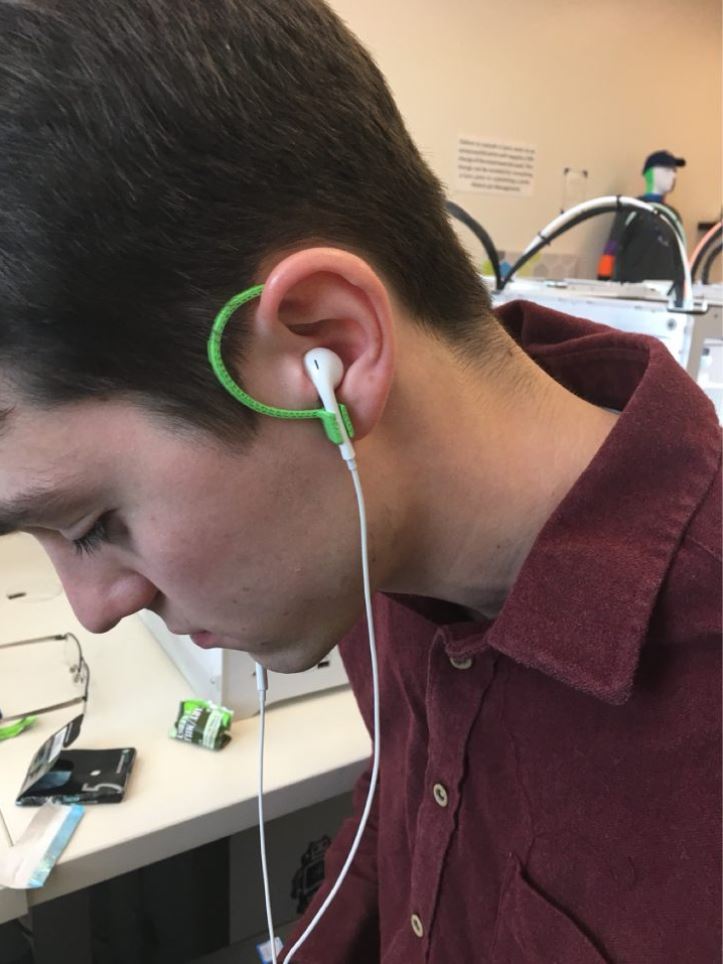
In this Instructable, we will be exploring the making process behind our final project, the Apple Air Pod iClips. We will first discuss the relevant materials, then the necessary steps to create the project, and finally, discuss how to finish your project.
Materials
Apple Air Pods or Apple Wired Earphones (you can use a different type of earphone, you’ll just need to do extra measurements)
PLA or ABS plastic
Fusion AutoDesk 360
Cura Ultimaker
3D printer
SD Card
Steps

Steps
Step 1. Measure twice, cut once – This is one of the most important steps. If you’re using Apple AirPods or Apple Wired Earphones, use the following measurements for the base of the build (attaches to the AirPod): 9.5 mm W x 9.5 mm D x 12 mm H. Use the following measurements for the hole in the base: 6.4 mm W x 6.4 mm D x 12 mm H. If you’re using your own pair of headphones, make diligent measurements of the base of the earphone for the next steps.
Step 2. Start with the base – This can be difficult to perfect but has big payoffs in the end. In Fusion Autodesk 360, use the draw tool to create a rectangle with dimensions 9.5 mm x 9.5 mm if you’re using Airpods. Then, use the extrude tool to make the rectangle into a rectangular prism with height 12 mm. Still in the Create menu of Fusion, click on Hole and create a rectangular hole in the base with dimensions 6.4 mm W x 6.4 mm D x 12 mm H. Finally, use the Fillet tool to smooth out all the edges of the new base. This will allow the AirPods to slide right into the base.
Step 2.5. (Optional) If you are using Apple Wired Earphones, create another hole of size 3 mm x 3 mm on one of the edges of the base. Once again, use the fillet tool to smooth out the edges you have created.
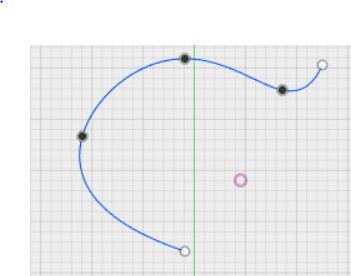
Step 3. Perfecting the spline – This is a highly iterative process. Using the sketch menu, choose the spline tool to create a smooth curve. We started by drawing the first part of the curve 26 mm away from the original point in the X direction and 26 mm away in the Y direction. The next point should be 0 mm away from the original point the X direction and 40 mm above the original point in the Y direction. The next point should be 10 mm below the previous point and 15 mm away from the previous point in the X direction. The last point is optional, except if you have a large ear. The last point should be 5 mm away from the last point in the X direction and 2 mm above in the Y direction. When finished your spline should look like the picture provided above.
Step 4. Creating the sweep – Finishing up the design, you’ll need to sweep your spline to bring it to three dimensions. First, create a circle with diameter 1.5 mm. Then, use the sweep tool to make the spline into your ear support. Once again, feel free to use the fillet tool as needed to create a consumer-friendly product.
Step 5. Combining your two shapes – This will complete your project in Autodesk. Highlight both the swept spline and the base and use the combine tool to merge the two designs. If you’re using wired headphones, be sure not to attach the spline to a face adjacent to the face with the extra hole in it, else the build will not function properly.
Step 6. Print! Save your project, open it in Cura Ultimaker, save it to an SD Card, insert into your 3D printer, and watch your project come to life before your eyes.
Finalizing Your Project

Upon completion, use your project regularly to try to find possible areas of improvement. Once you’ve found problems with your build, go back into Autodesk and create a new iteration of the design. Once you’ve got a product you’re proud of, show it off to friends, family, and your superiors. They will give you great feedback that can influence future designs. Start exploring ways to monetize the problem-solving process. With a maker mindset, anything is possible.