How to Use the Camera in Your IOS Program
by A-Nony-Mus in Circuits > Apple
63528 Views, 15 Favorites, 0 Comments
How to Use the Camera in Your IOS Program
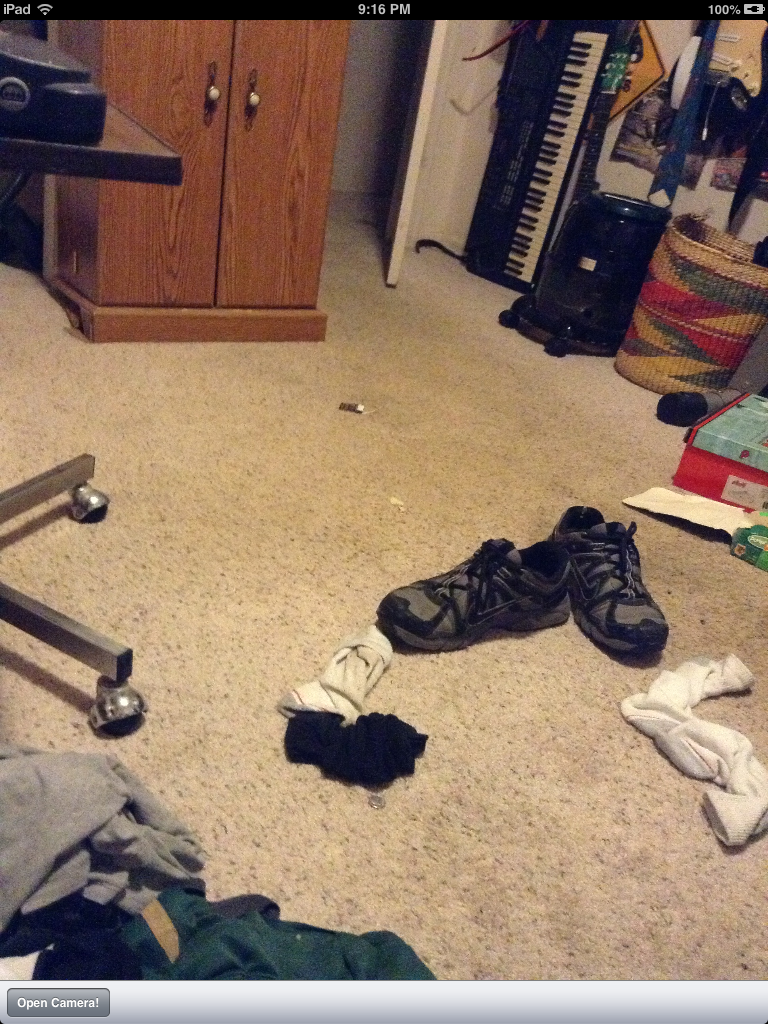
Ever wondered how to use the camera in your apps you create for iOS?
Wonder no longer! The purpose of this 'ible is to educate you on one one of the ways to access and use the camera in your iOS app. This is by far the most simplistic solution and does not include all the bells and whistles other approaches offer (such as controlling the quality).
In this 'ible we will make an application that:
- gives us access to all cameras on a device
- allows us to save pictures and videos we take
- allows us to see the last picture taken
Create New Project
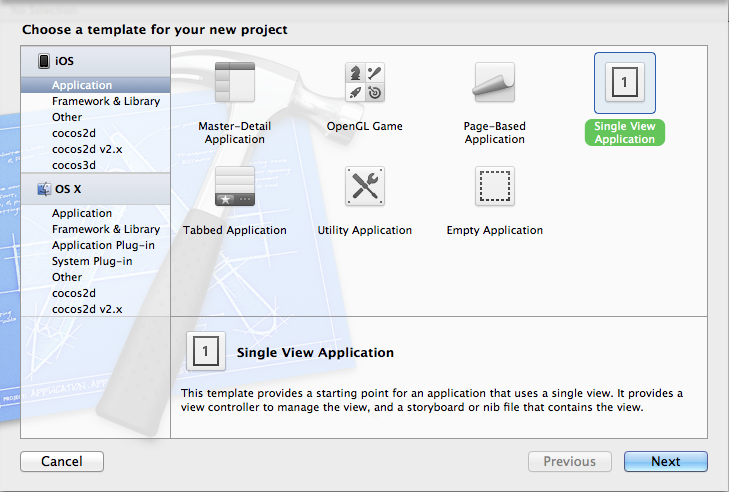
I went over how to get Xcode in my previous 'ible: Creating your first iOS app, check it out if you don't have Xcode.
- Open up Xcode. Go to File>New>Project (or press SHIFT+COMMAND+N)
- Select "Single View Application" then Next
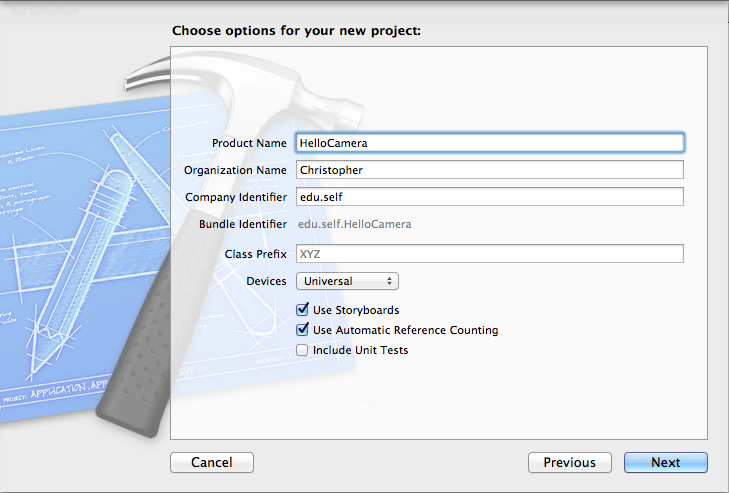
- Name it what you want, I am naming it HelloCamera
- Decide what devices you want it to run on.
- Make sure "Use Automatic Reference Counting" and "Use Storyboards" are checked then click Next
- Navigate to where you want to save it then click Create
Make the UI
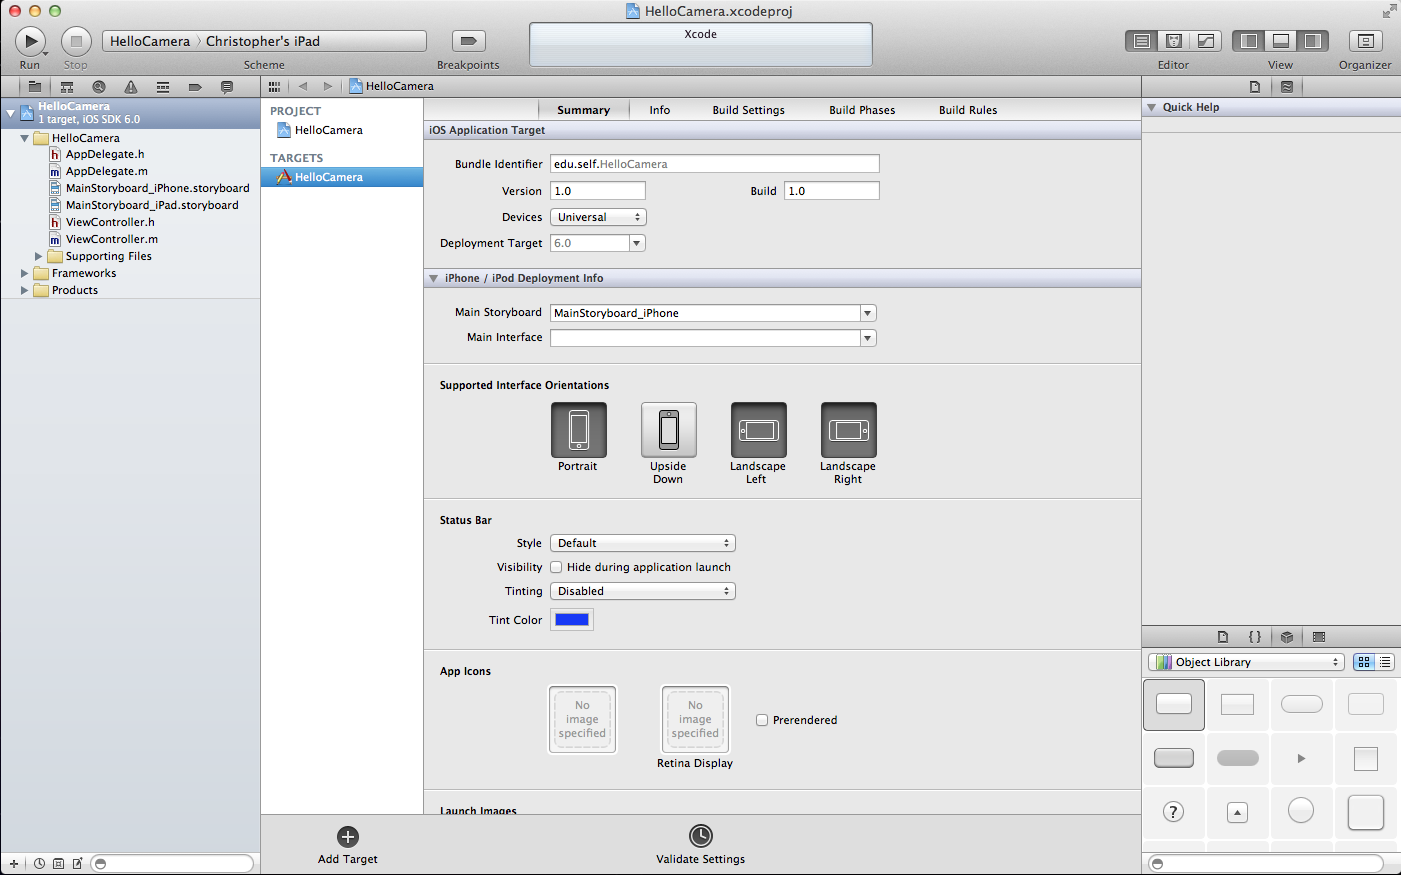

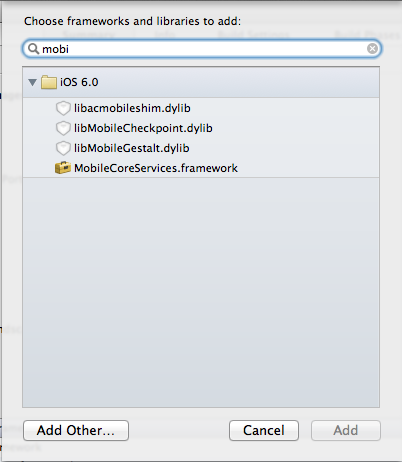

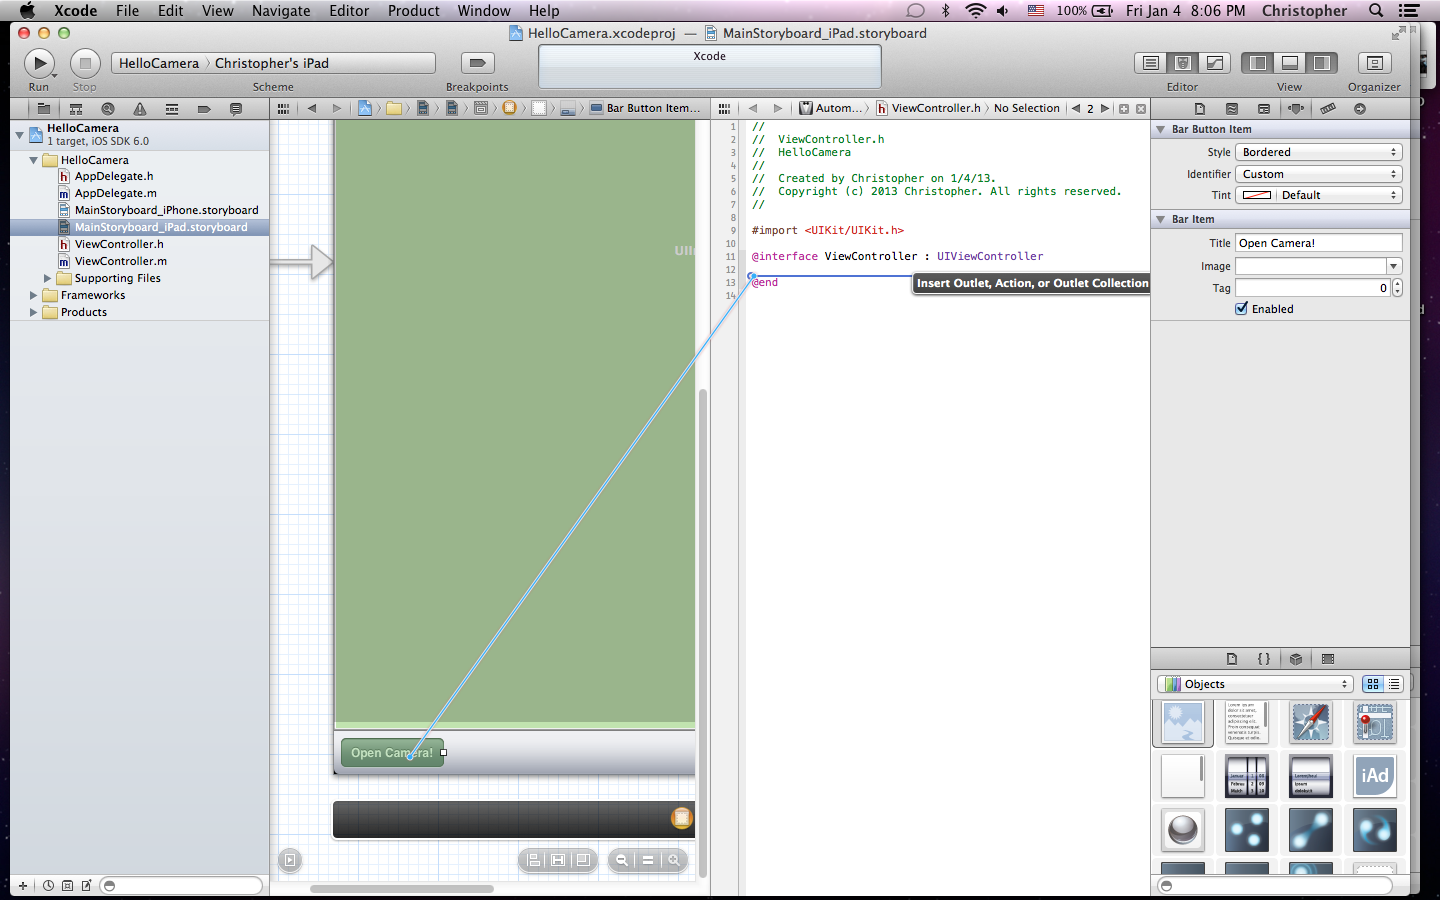
In the HelloCamera target, scroll down untill you reach Linked Frameworks and Libraries. click the plus button, search for MobileCoreServices, then add the framework
Let's get the UI out of the way.
Let's get the UI out of the way.
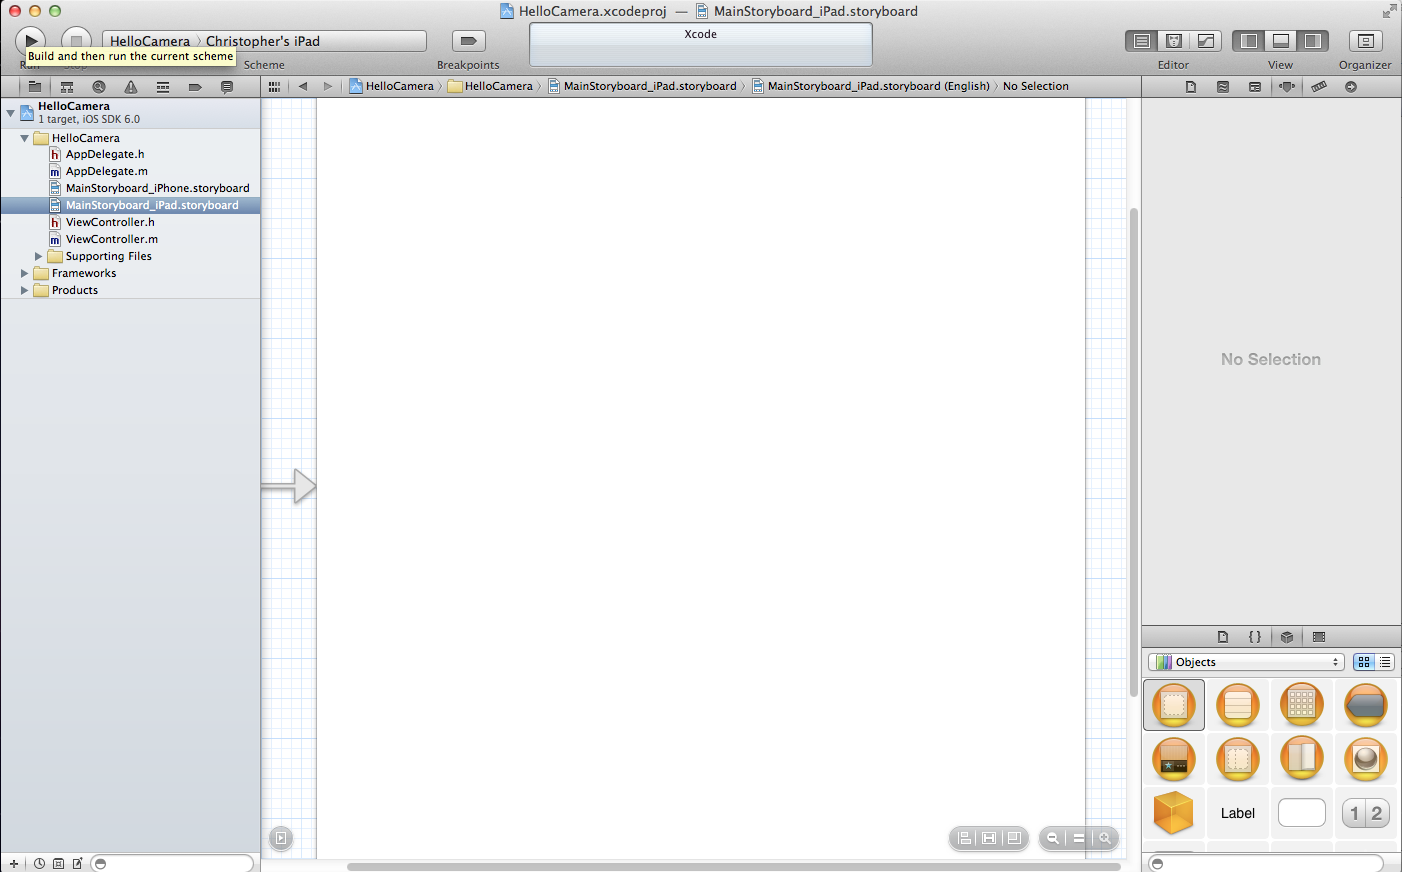
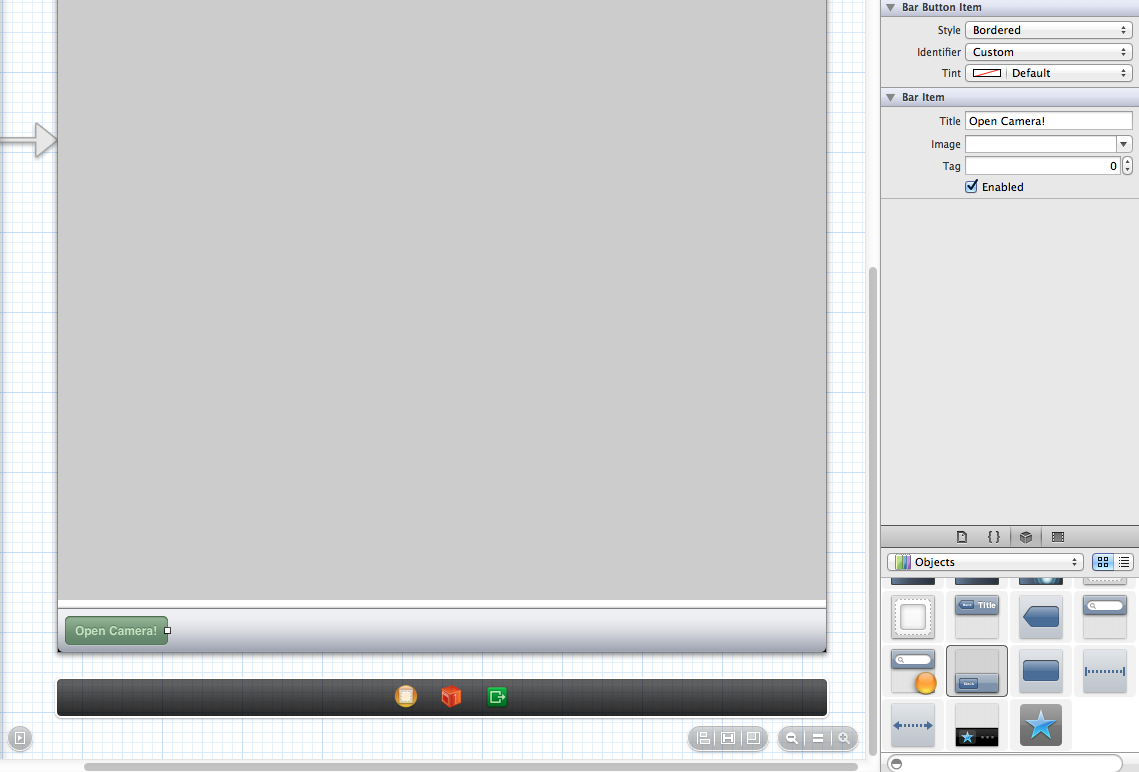
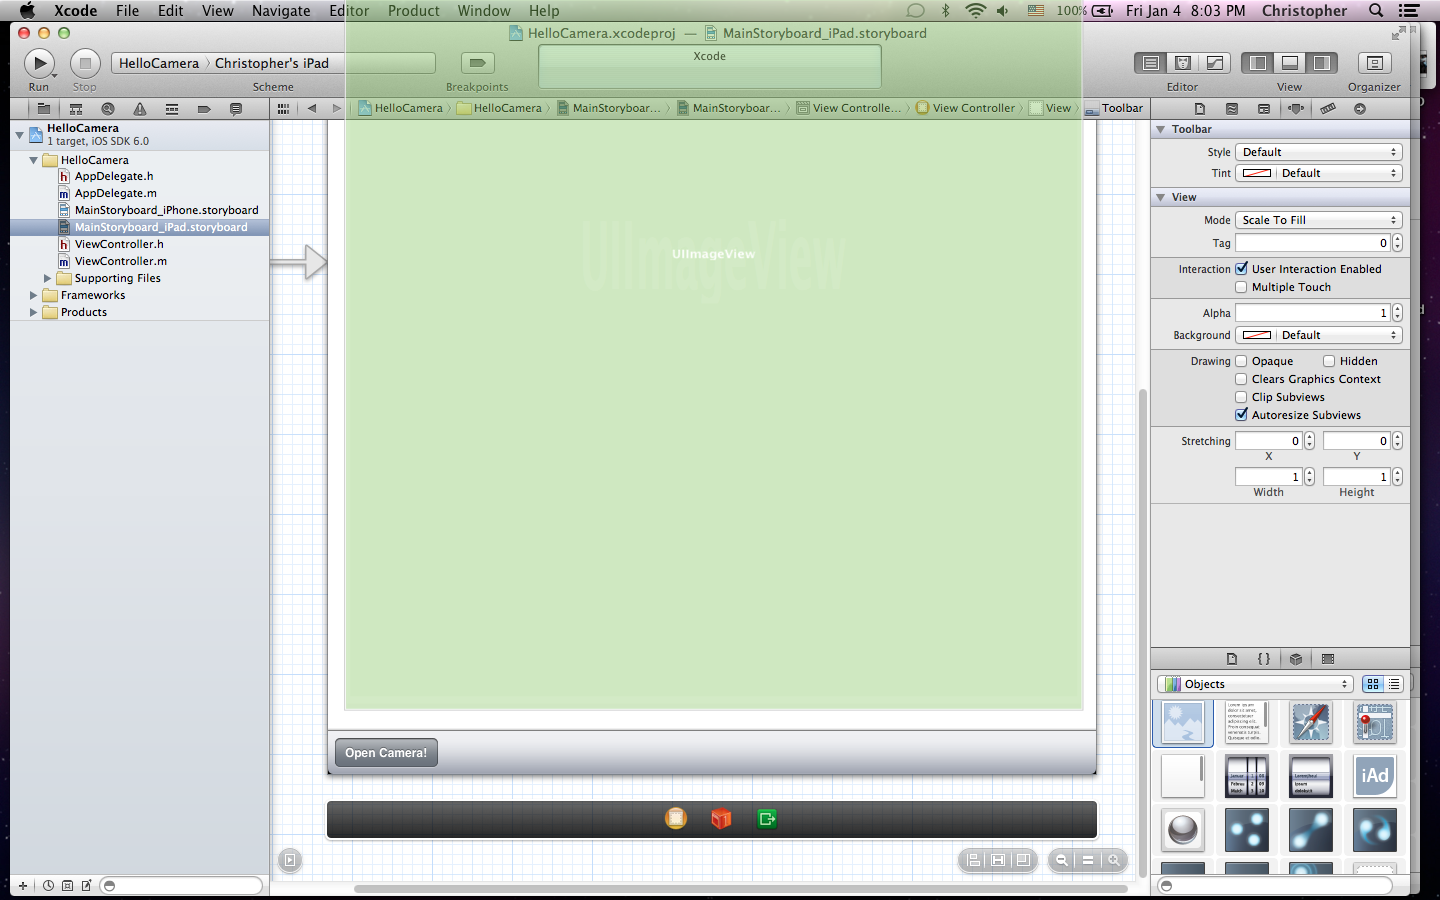
- Click on your .storyboard file (if you chose universal for your devices, you'll have two, you'll be doing the same thing in each)
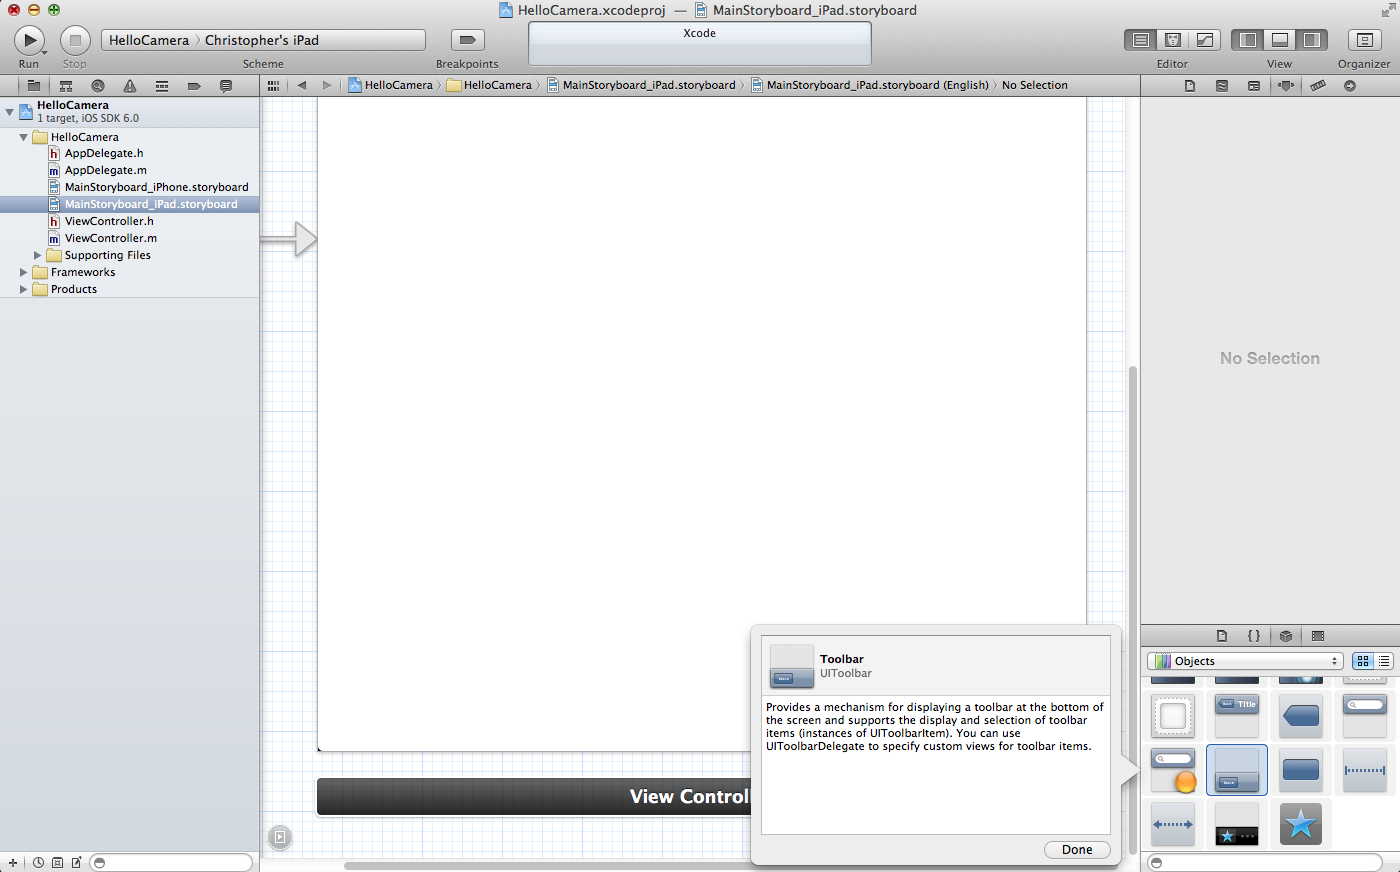
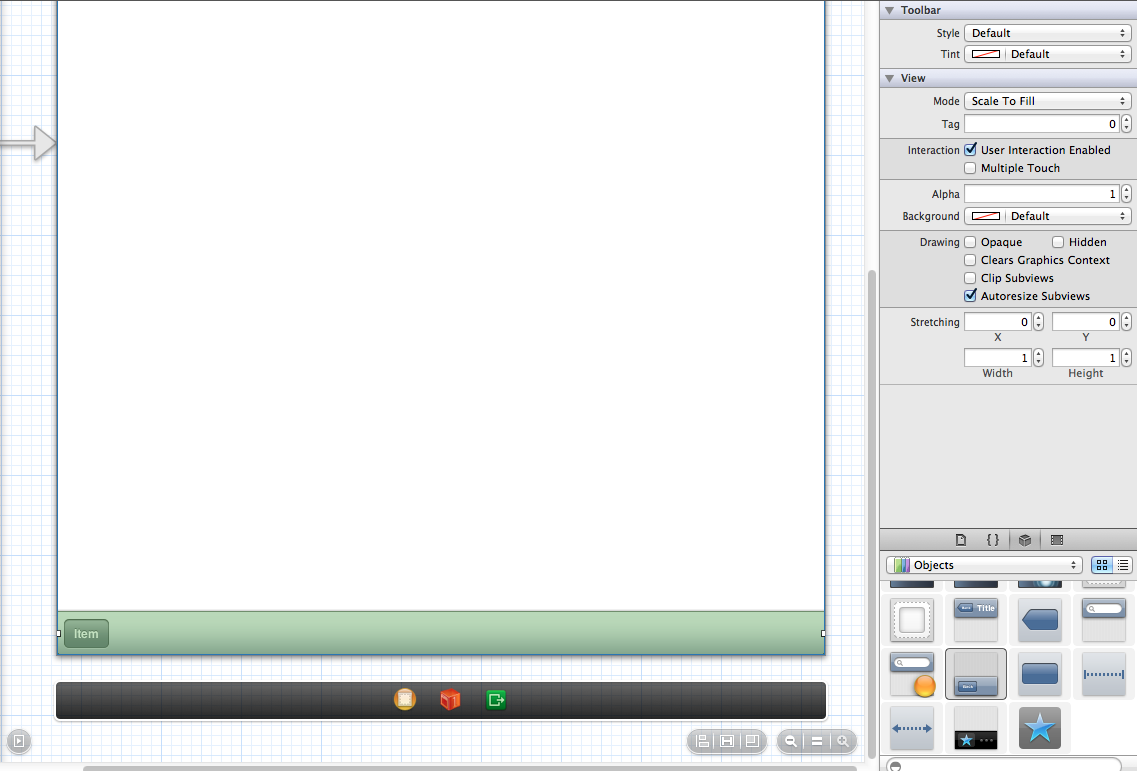
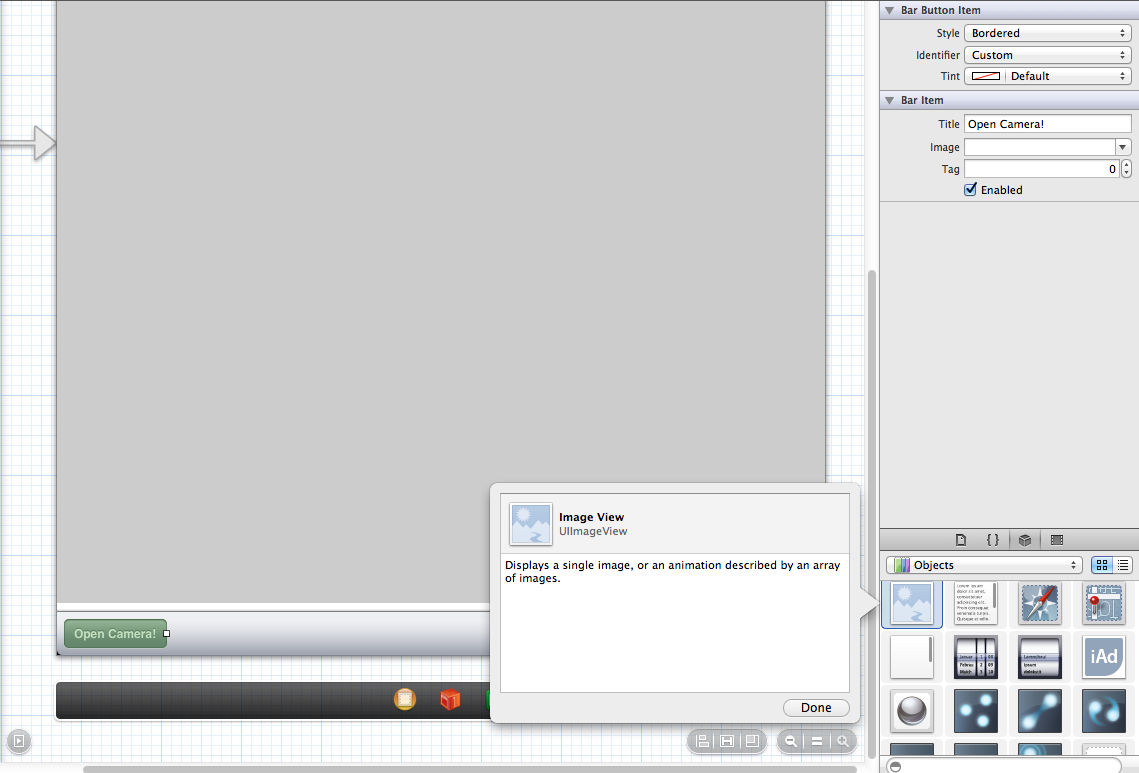
- In your object library (bottom right) locate a toolbar and drag it to the bottom of the view (consult the pictures).
- Double click on the button and rename it "Open Camera!"
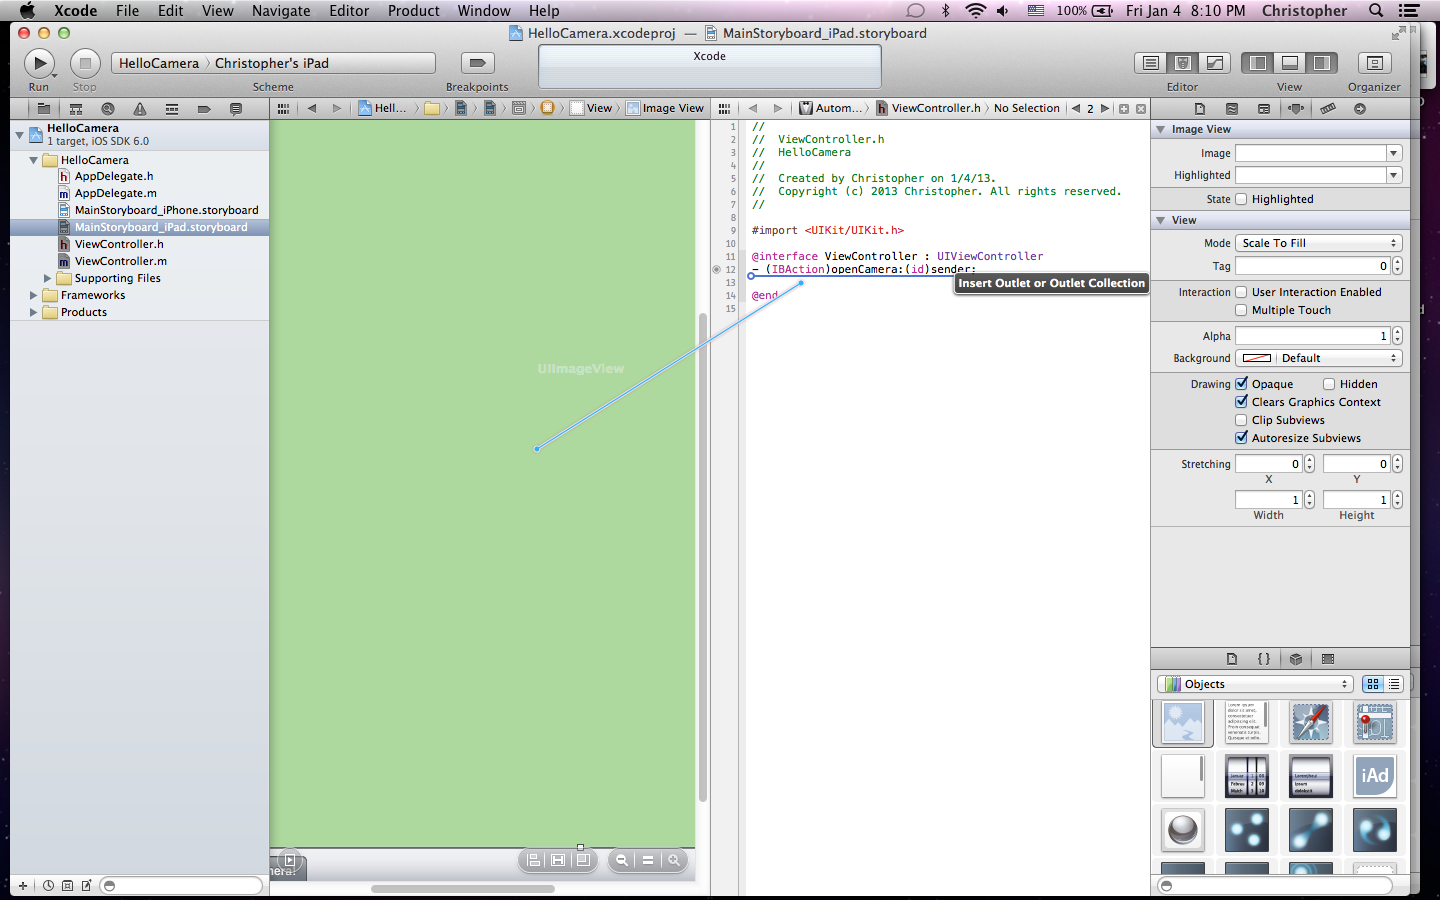
- Next locate an Image View and drag it to the view, above the toolbar
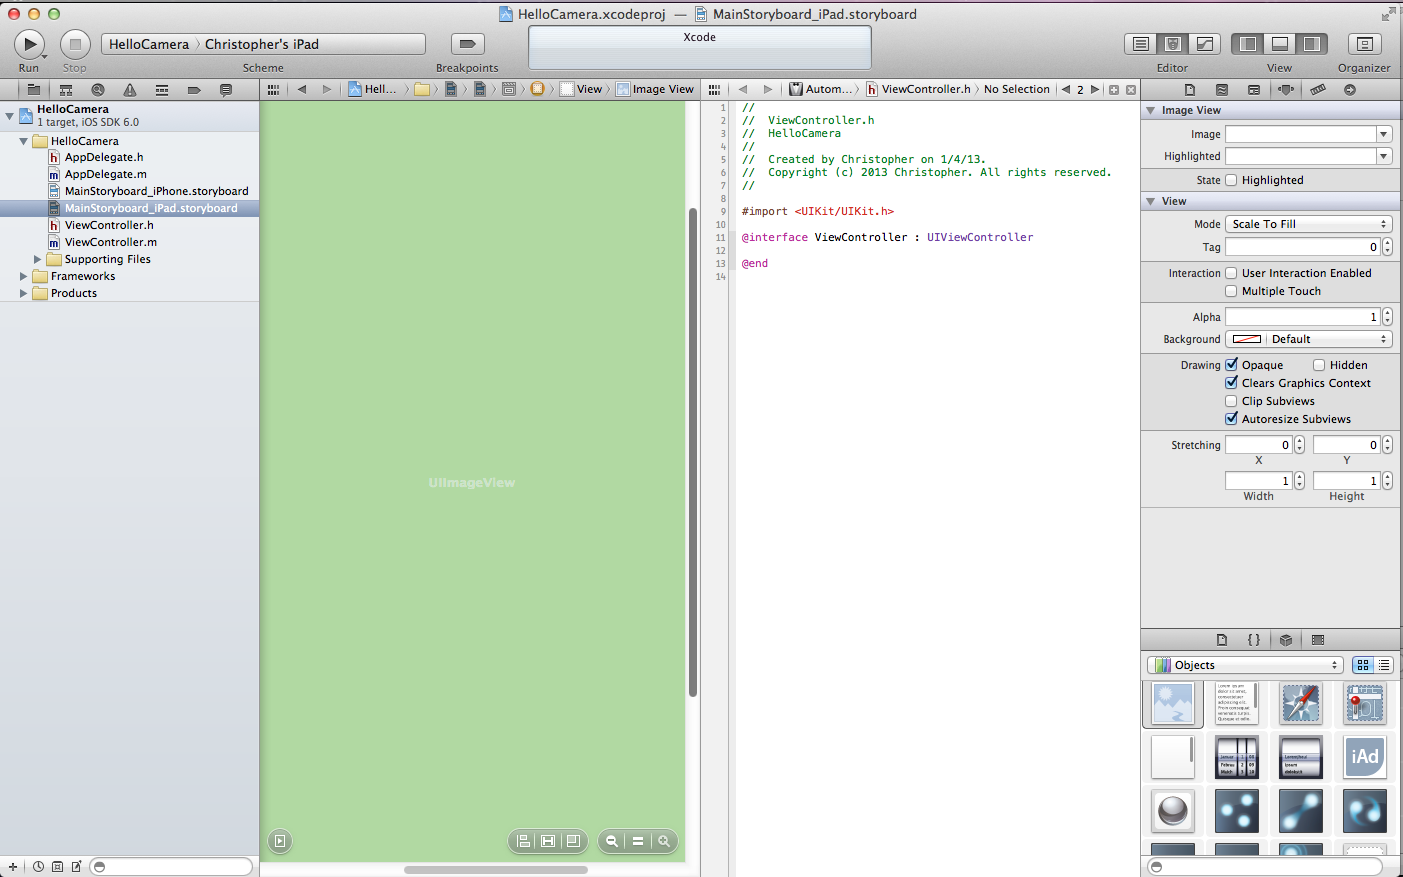
- Now click on the Assistant Editor button
- Make sure it is ViewController.h
- Single click on the "Open Camera!" button
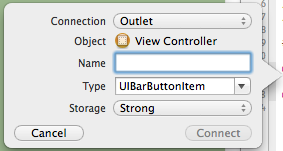
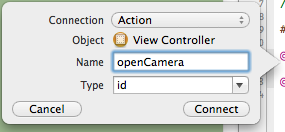
- Right click and drag from the button to some space between @interface and @end on ViewController.h
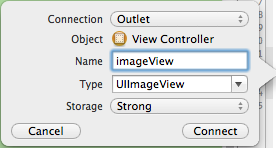
- You should get a little popup, set connection to Action and name it openCamera. click connect
- Do the same with the image view, but keep it as outlet and name it imageView
LaunchCameraController
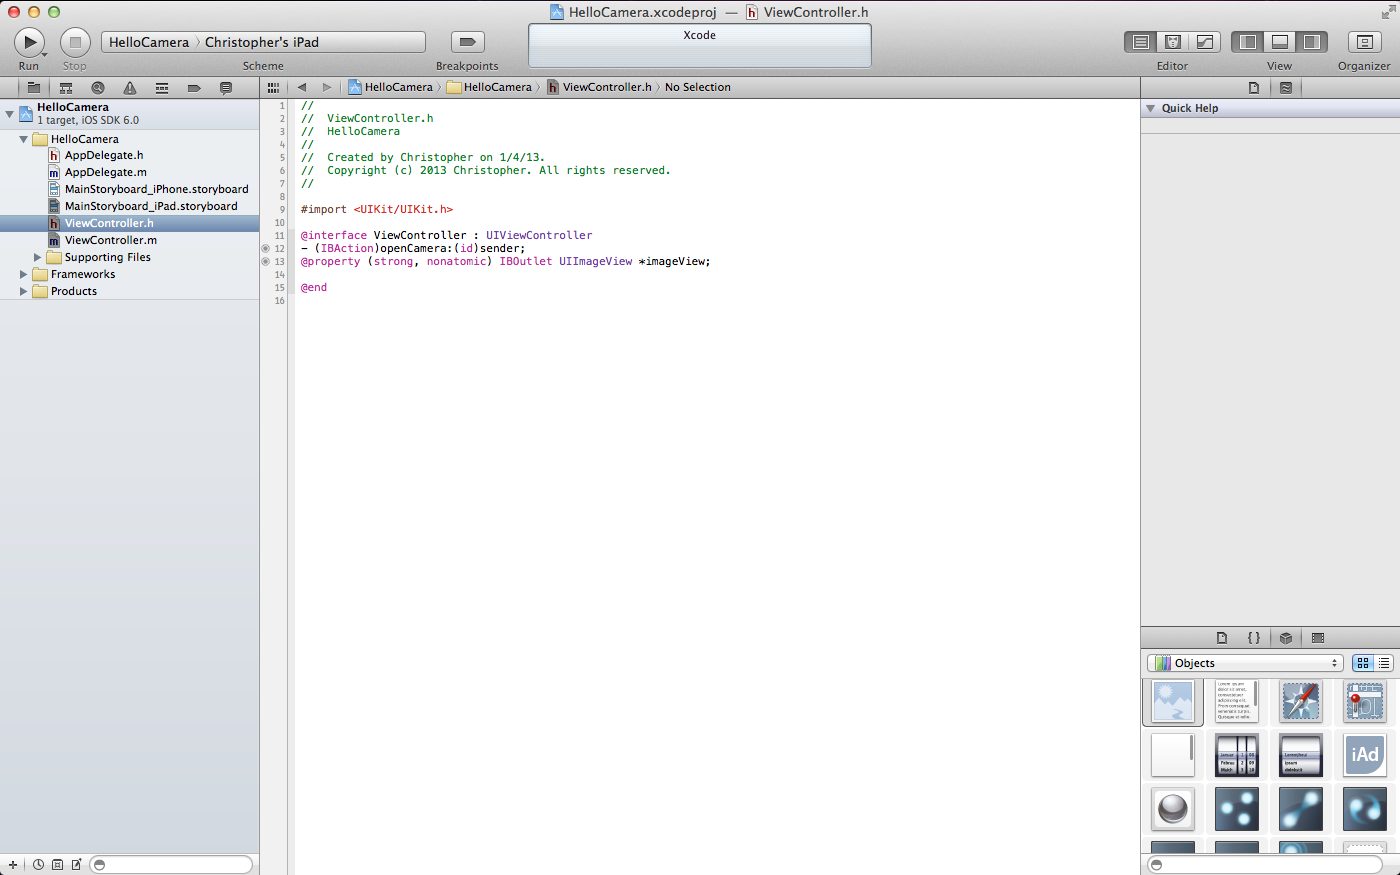
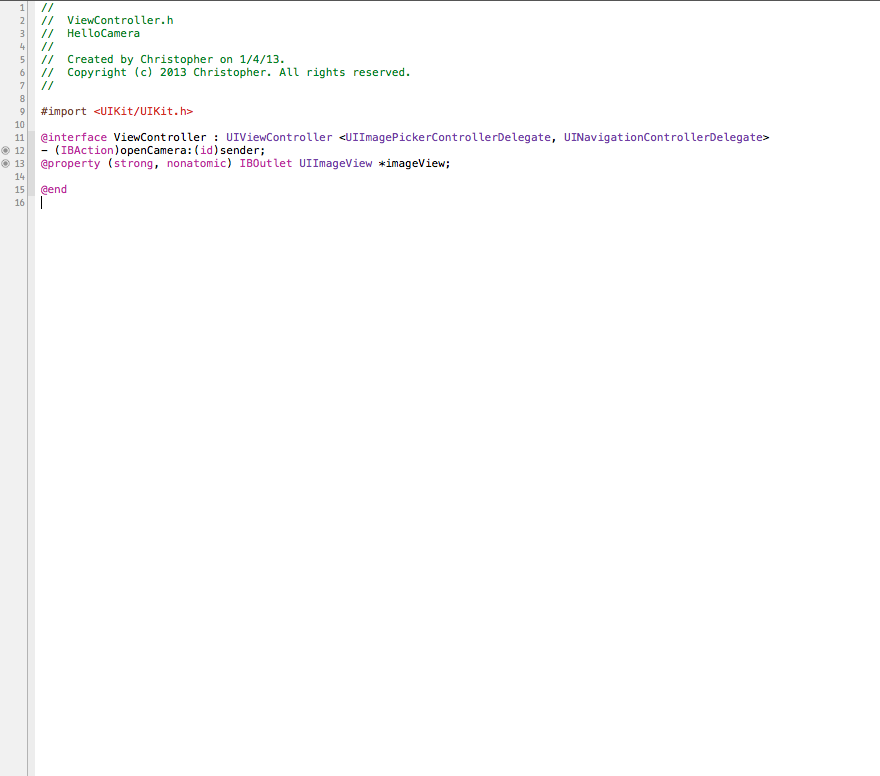
Open up ViewController.h
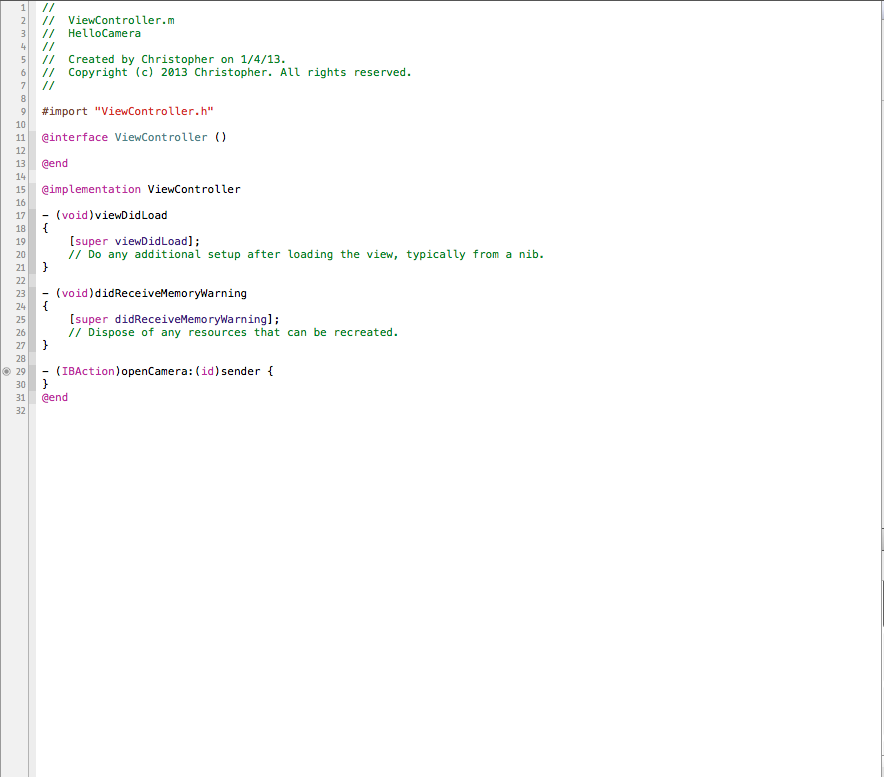
Open ViewController.m
//if there is a camera, the delegate passed exists, and the controller passed exists, proceed on, otherwise don't go any further
if (!truefalse || (delegate == nil) || (controller == nil)) {
NSLog(@"no can do, delegate/camera/view controller doesn't exist!");
return NO;
}
Now that we've verified that there is a camera, we can proceed launching the camera controller
cameraController.sourceType = UIImagePickerControllerSourceTypeCamera;
cameraController.mediaTypes = [UIImagePickerController availableMediaTypesForSourceType:UIImagePickerControllerSourceTypeCamera];
cameraController.allowsEditing = NO;
cameraController.delegate = delegate;
- under #import <UIKit/UIKit.h> add the line #import <MobileCoreServices/MobileCoreServices.h>
- After @interface ViewController : UIViewController add <UIImagePickerControllerDelegate, UINavigationControllerDelegate>
Open ViewController.m
- In between the parentheses in @interface ViewController () add CameraDelegateMethods
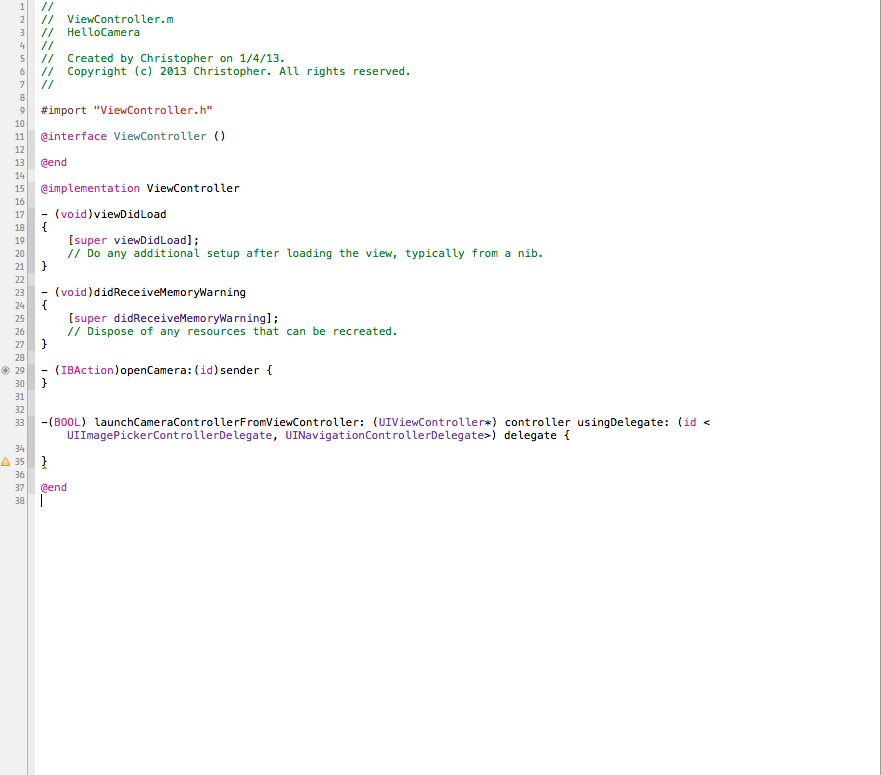
- Between the openCamera method and @end, add -(BOOL) launchCameraControllerFromViewController: (UIViewController*) controller usingDelegate: (id <UIImagePickerControllerDelegate, UINavigationControllerDelegate>) delegate {}
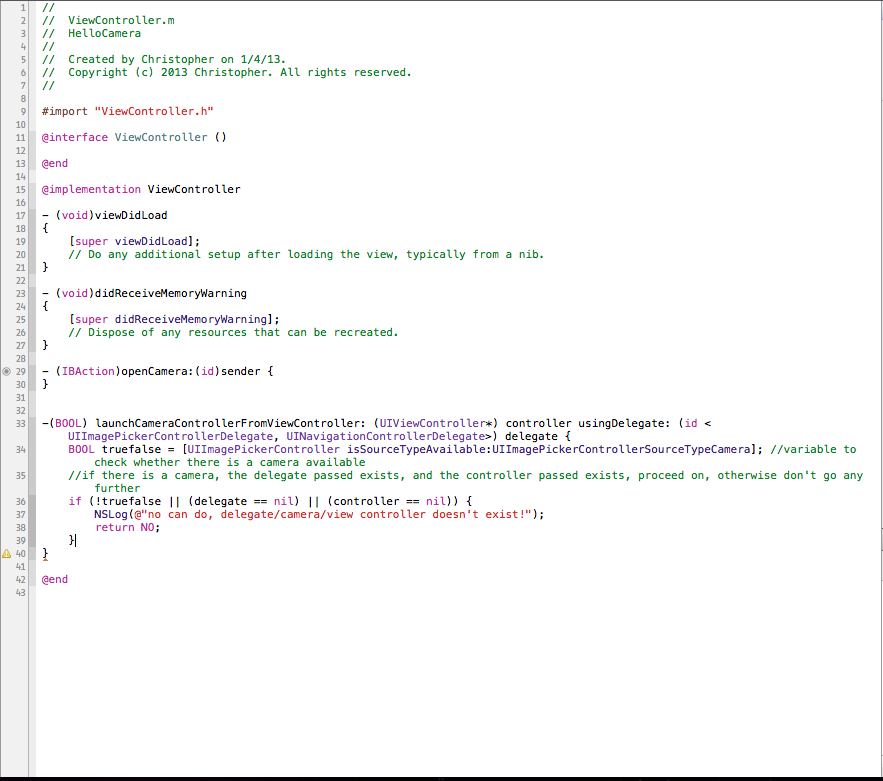
- In the launchCameraController method, we need to check if there is a camera available for use first, so we add the following lines:
//if there is a camera, the delegate passed exists, and the controller passed exists, proceed on, otherwise don't go any further
if (!truefalse || (delegate == nil) || (controller == nil)) {
NSLog(@"no can do, delegate/camera/view controller doesn't exist!");
return NO;
}
Now that we've verified that there is a camera, we can proceed launching the camera controller
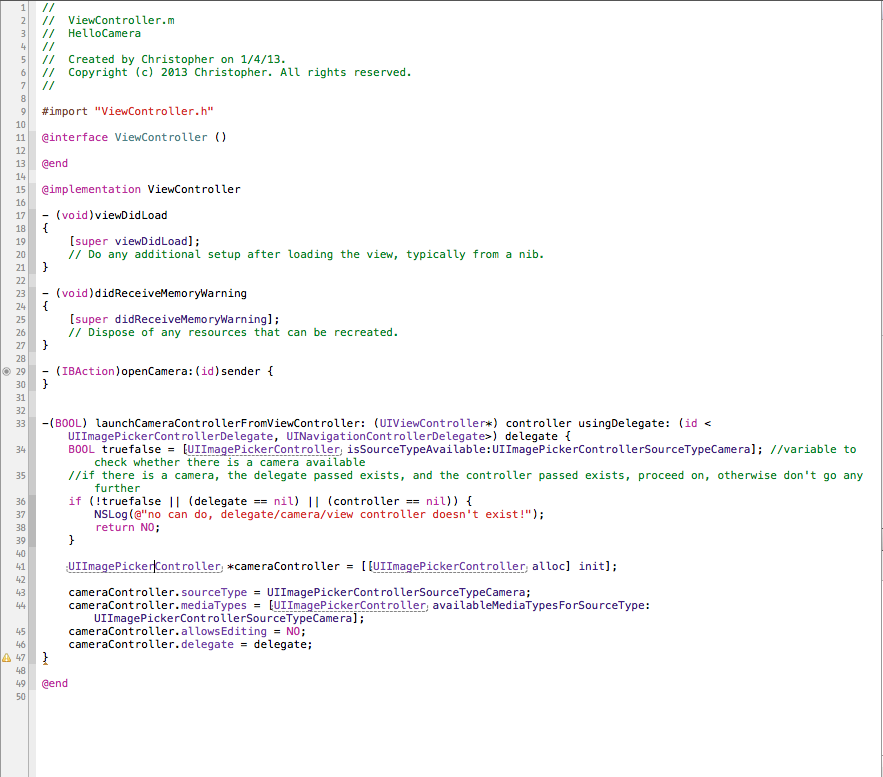
- We declare a UIimagePickerController variable and initialize it (UIImagePickerController *cameraController = [[UIImagePickerController alloc] init];)
- Then we set its sourceType to UIImagePickerControllerSourceTypeCamera
- set its media types to [UIImagePickerController availableMediaTypesForSourceType:UIImagePickerControllerSourceTypeCamera]
- set allowsEditing to NO
- then set the delegate to delegate
cameraController.sourceType = UIImagePickerControllerSourceTypeCamera;
cameraController.mediaTypes = [UIImagePickerController availableMediaTypesForSourceType:UIImagePickerControllerSourceTypeCamera];
cameraController.allowsEditing = NO;
cameraController.delegate = delegate;
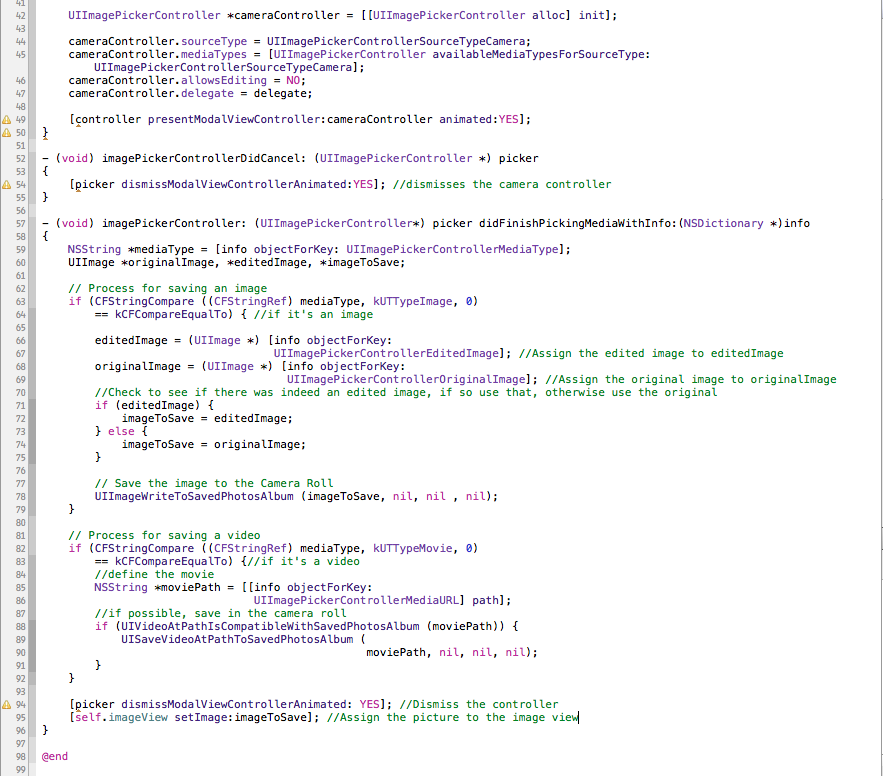
- after all that, we launch it by calling [controller presentModalViewController:cameraController animated:YES];
- now, go back to the openCamera method and add [self launchCameraControllerFromViewController:self usingDelegate:self]; //lauch the camera controller
Delegate Methods
Now that we've launched the camera controller and declared ViewController as its delegate, we need to use our delegate methods.
First is to handle the user hitting the cancel button.
Second is to handle saving of pictures and videos
UIImage *originalImage, *editedImage, *imageToSave;
if (CFStringCompare ((CFStringRef) mediaType, kUTTypeImage, 0)
== kCFCompareEqualTo) {//if it's an image
editedImage = (UIImage *) [info objectForKey:
UIImagePickerControllerEditedImage]; //Assign the edited image to editedImage
originalImage = (UIImage *) [info objectForKey:
UIImagePickerControllerOriginalImage]; //Assign the original image to originalImage
//Check to see if there was indeed an edited image, if so use that, otherwise use the original
if (editedImage) {
imageToSave = editedImage;
} else {
imageToSave = originalImage;
}
// Save the image to the Camera Roll
UIImageWriteToSavedPhotosAlbum (imageToSave, nil, nil , nil);
}
if (CFStringCompare ((CFStringRef) mediaType, kUTTypeMovie, 0)
== kCFCompareEqualTo) {//if it's a video
//define the movie
NSString *moviePath = [[info objectForKey:
UIImagePickerControllerMediaURL] path];
//if possible, save in the camera roll
if (UIVideoAtPathIsCompatibleWithSavedPhotosAlbum (moviePath)) {
UISaveVideoAtPathToSavedPhotosAlbum (
moviePath, nil, nil, nil);
}
}
[self.imageView setImage:imageToSave]; //Assign the picture to the image view
First is to handle the user hitting the cancel button.
- Add the method - (void) imagePickerControllerDidCancel: (UIImagePickerController *) picker {}
- The only line you need to add in this method is:
Second is to handle saving of pictures and videos
- Add the method - (void) imagePickerController: (UIImagePickerController*) picker didFinishPickingMediaWithInfo:(NSDictionary *)info
- first we declare our variables:
UIImage *originalImage, *editedImage, *imageToSave;
- Then we go to our process for saving an image
if (CFStringCompare ((CFStringRef) mediaType, kUTTypeImage, 0)
== kCFCompareEqualTo) {//if it's an image
editedImage = (UIImage *) [info objectForKey:
UIImagePickerControllerEditedImage]; //Assign the edited image to editedImage
originalImage = (UIImage *) [info objectForKey:
UIImagePickerControllerOriginalImage]; //Assign the original image to originalImage
//Check to see if there was indeed an edited image, if so use that, otherwise use the original
if (editedImage) {
imageToSave = editedImage;
} else {
imageToSave = originalImage;
}
// Save the image to the Camera Roll
UIImageWriteToSavedPhotosAlbum (imageToSave, nil, nil , nil);
}
- Then for video:
if (CFStringCompare ((CFStringRef) mediaType, kUTTypeMovie, 0)
== kCFCompareEqualTo) {//if it's a video
//define the movie
NSString *moviePath = [[info objectForKey:
UIImagePickerControllerMediaURL] path];
//if possible, save in the camera roll
if (UIVideoAtPathIsCompatibleWithSavedPhotosAlbum (moviePath)) {
UISaveVideoAtPathToSavedPhotosAlbum (
moviePath, nil, nil, nil);
}
}
- Then to clean up, we dismiss the controller and change the image view to the picture we just took (if it was a picture):
[self.imageView setImage:imageToSave]; //Assign the picture to the image view
Launch and Play

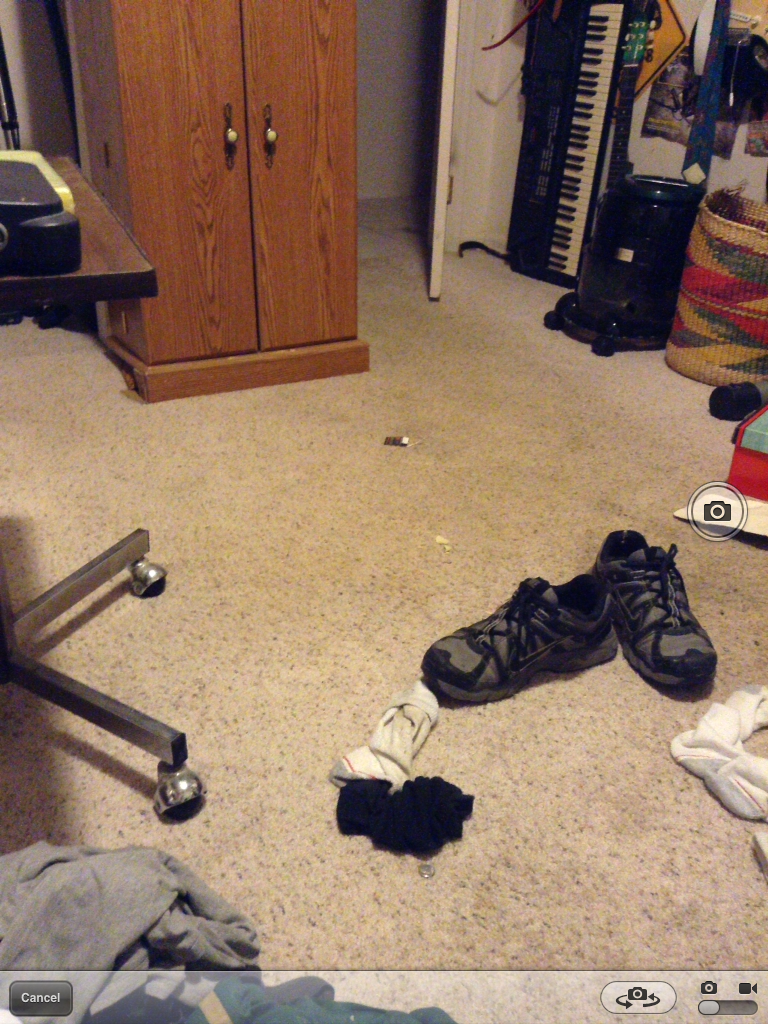
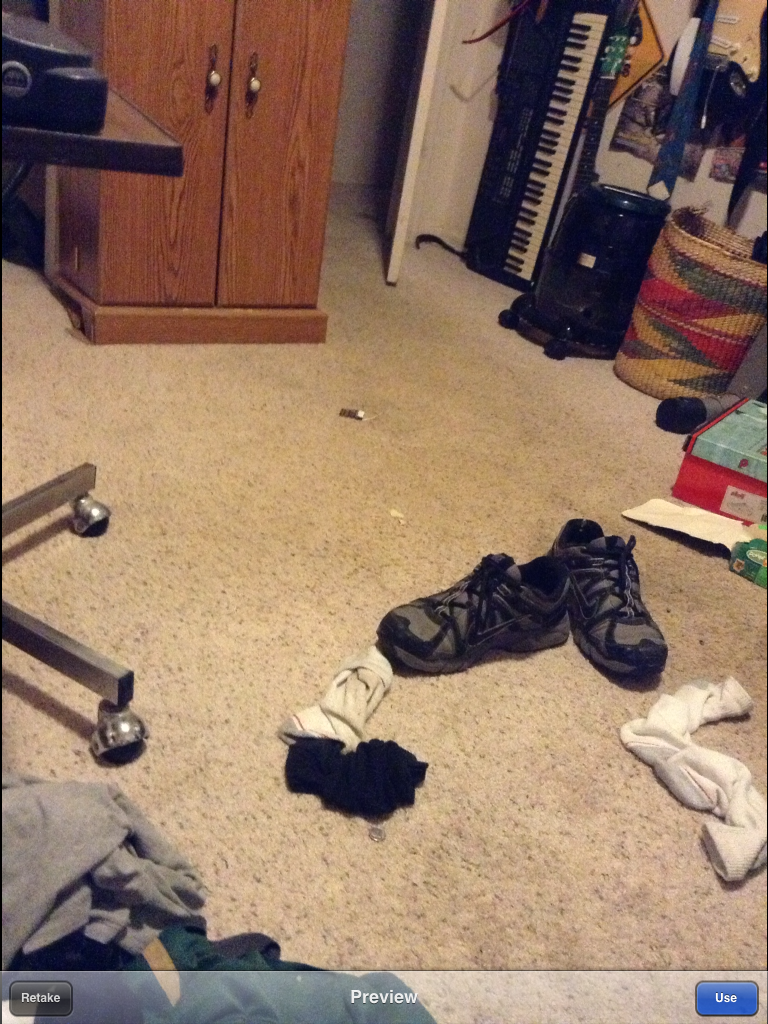

If you followed all the instructions, you should now have a fully functioning app.
- Plug in your device, upload the app, and take a picture.
- After you save it, note that the white background became that picture.
- Now go over to your camera roll and note that that picture was save there.