How to Use Gimp, Making Fire Text
by scott rox in Craft > Digital Graphics
4307 Views, 6 Favorites, 0 Comments
How to Use Gimp, Making Fire Text


First of all I have made an Instructable for much more real looking fire text, for that click apple's. In this tutorial I will show you how to use gimp to make a fire like text so that it looks like your text is on fire.
Opening Gimp.
First you will need to open Gimp. If you don't have it download it here. If you dont know Gimp is an editing tool that is in some ways better than Photoshop.
Getting Picture.
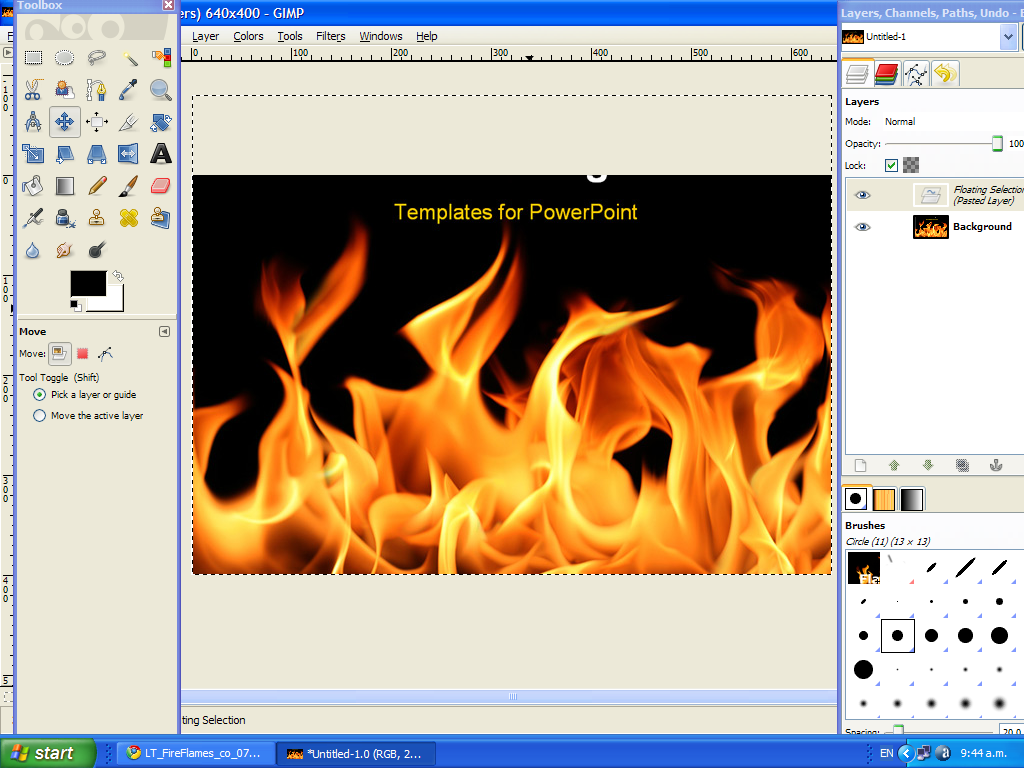
Ok go to Google images and search for some flames that you like once you have them, copy the image and paste into Gimp.
Inserting the Writing
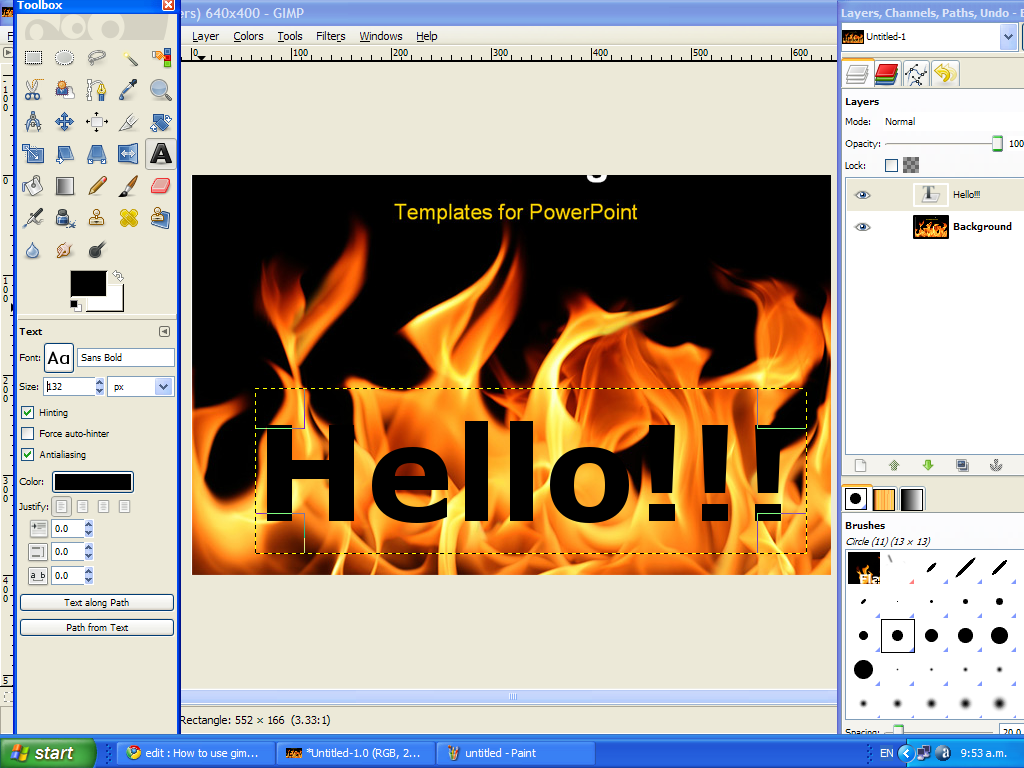
Now use the text tool(A) and insert some writing, make it quite big and so its kind of in the base of the fames.
Removeing Background.
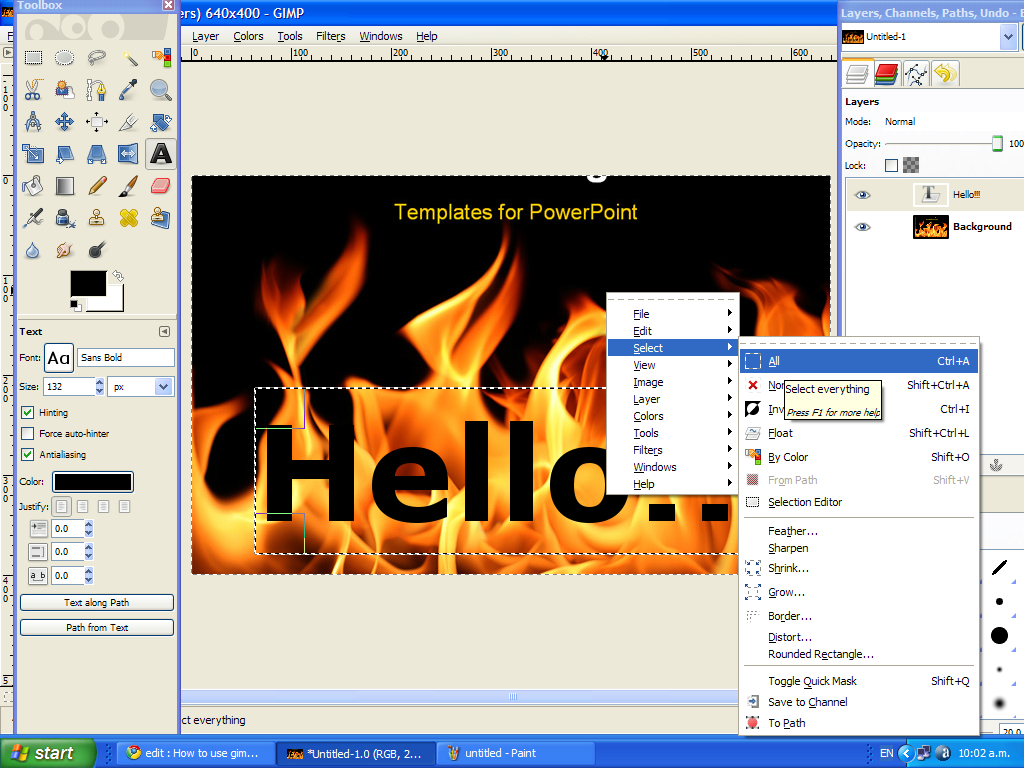
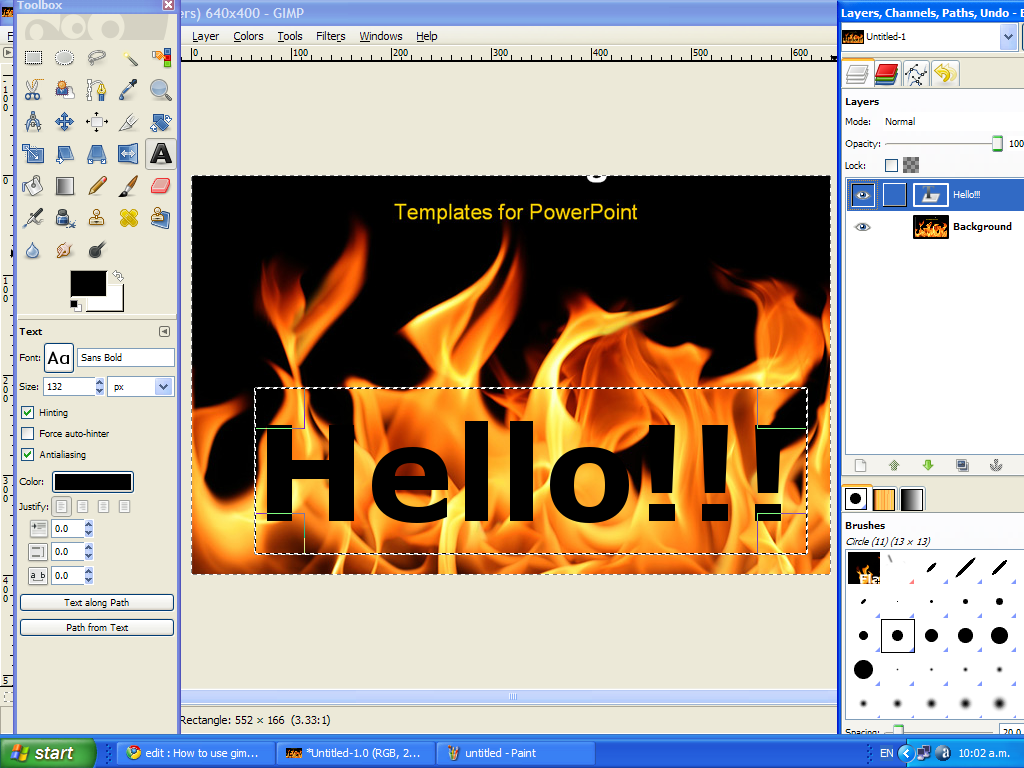
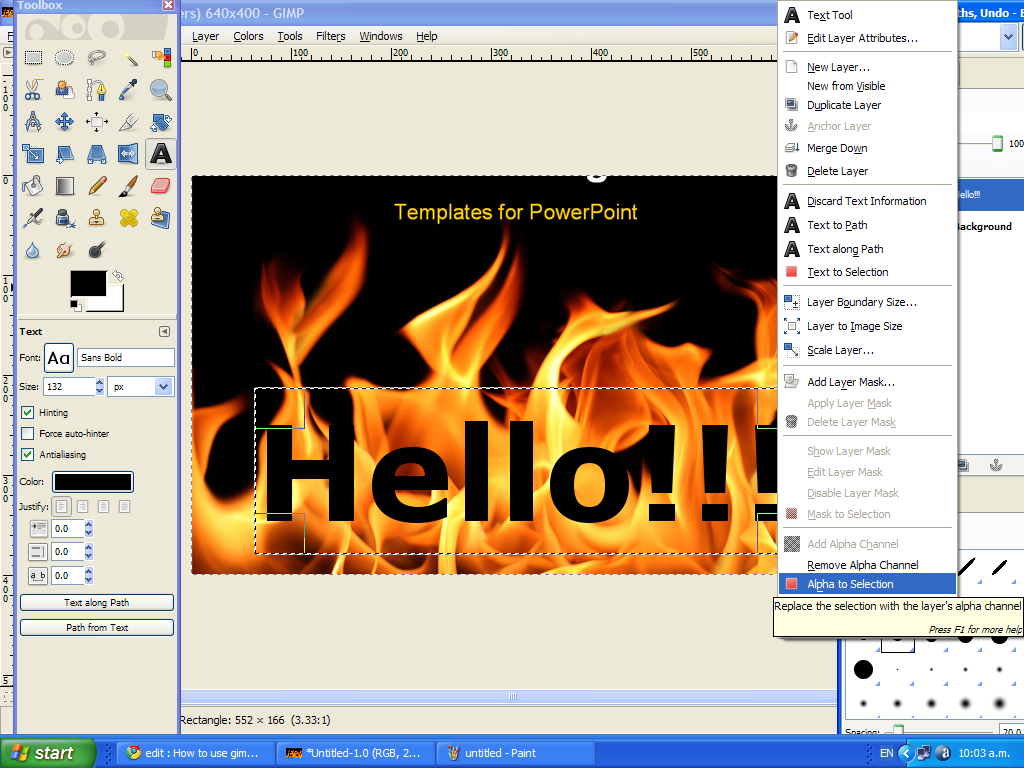
Ok so now we have to remove the background. This is the hardest step so sorry if I don't explain well.
1. Right click then click select then select all.
2. On the panel that I have on the right side of my screen, right click the layer that has what you have written(not the flames). After right clicking click Alpha to Selection.
3. Right click -> Select -> Invert.
4. Then right click, edit and cut.
1. Right click then click select then select all.
2. On the panel that I have on the right side of my screen, right click the layer that has what you have written(not the flames). After right clicking click Alpha to Selection.
3. Right click -> Select -> Invert.
4. Then right click, edit and cut.
And Finaly
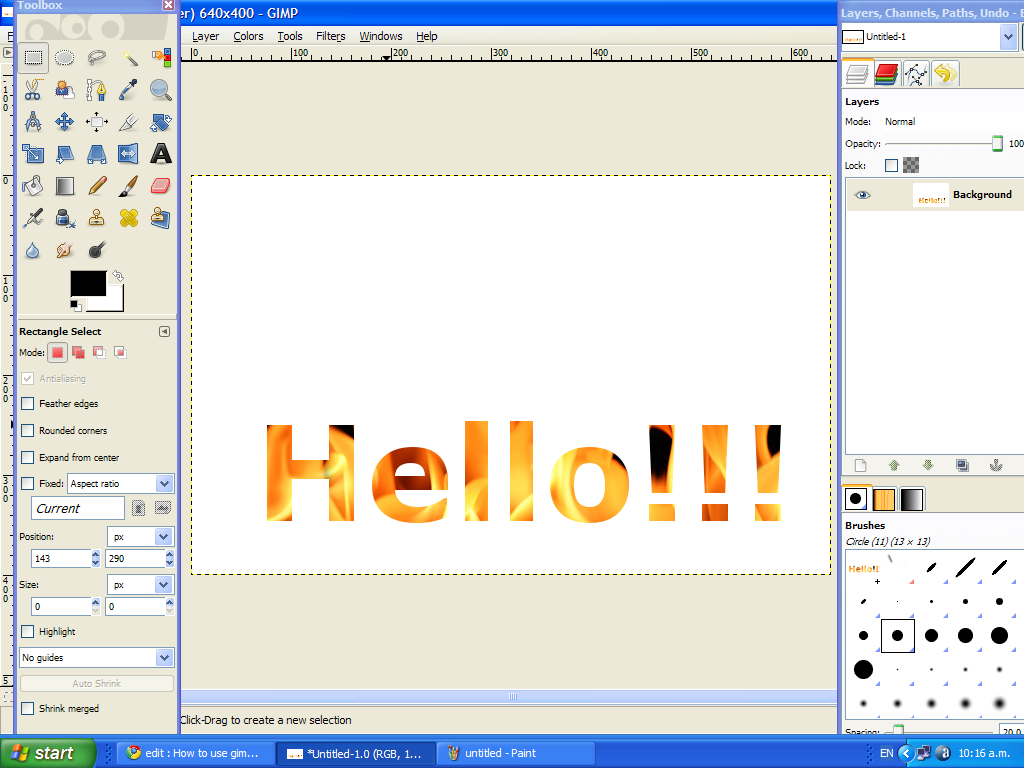
For the last step, on the layers box I mentioned earlier delete the text one(the one with your writing)